HOLIDAY DONATION DRIVE - SUPPORT MSW - DO YOUR PART TO KEEP THIS GREAT FORUM GOING! (Only 51 donations so far out of 49,000 members - C'mon guys!)
×


jablackwell
-
Posts
304 -
Joined
-
Last visited
Content Type
Profiles
Forums
Gallery
Events
Everything posted by jablackwell
-
 Mind if I pull up a chair a watch? Looking forward to following along with your build of the Syren. It is on my list. ~john
 -
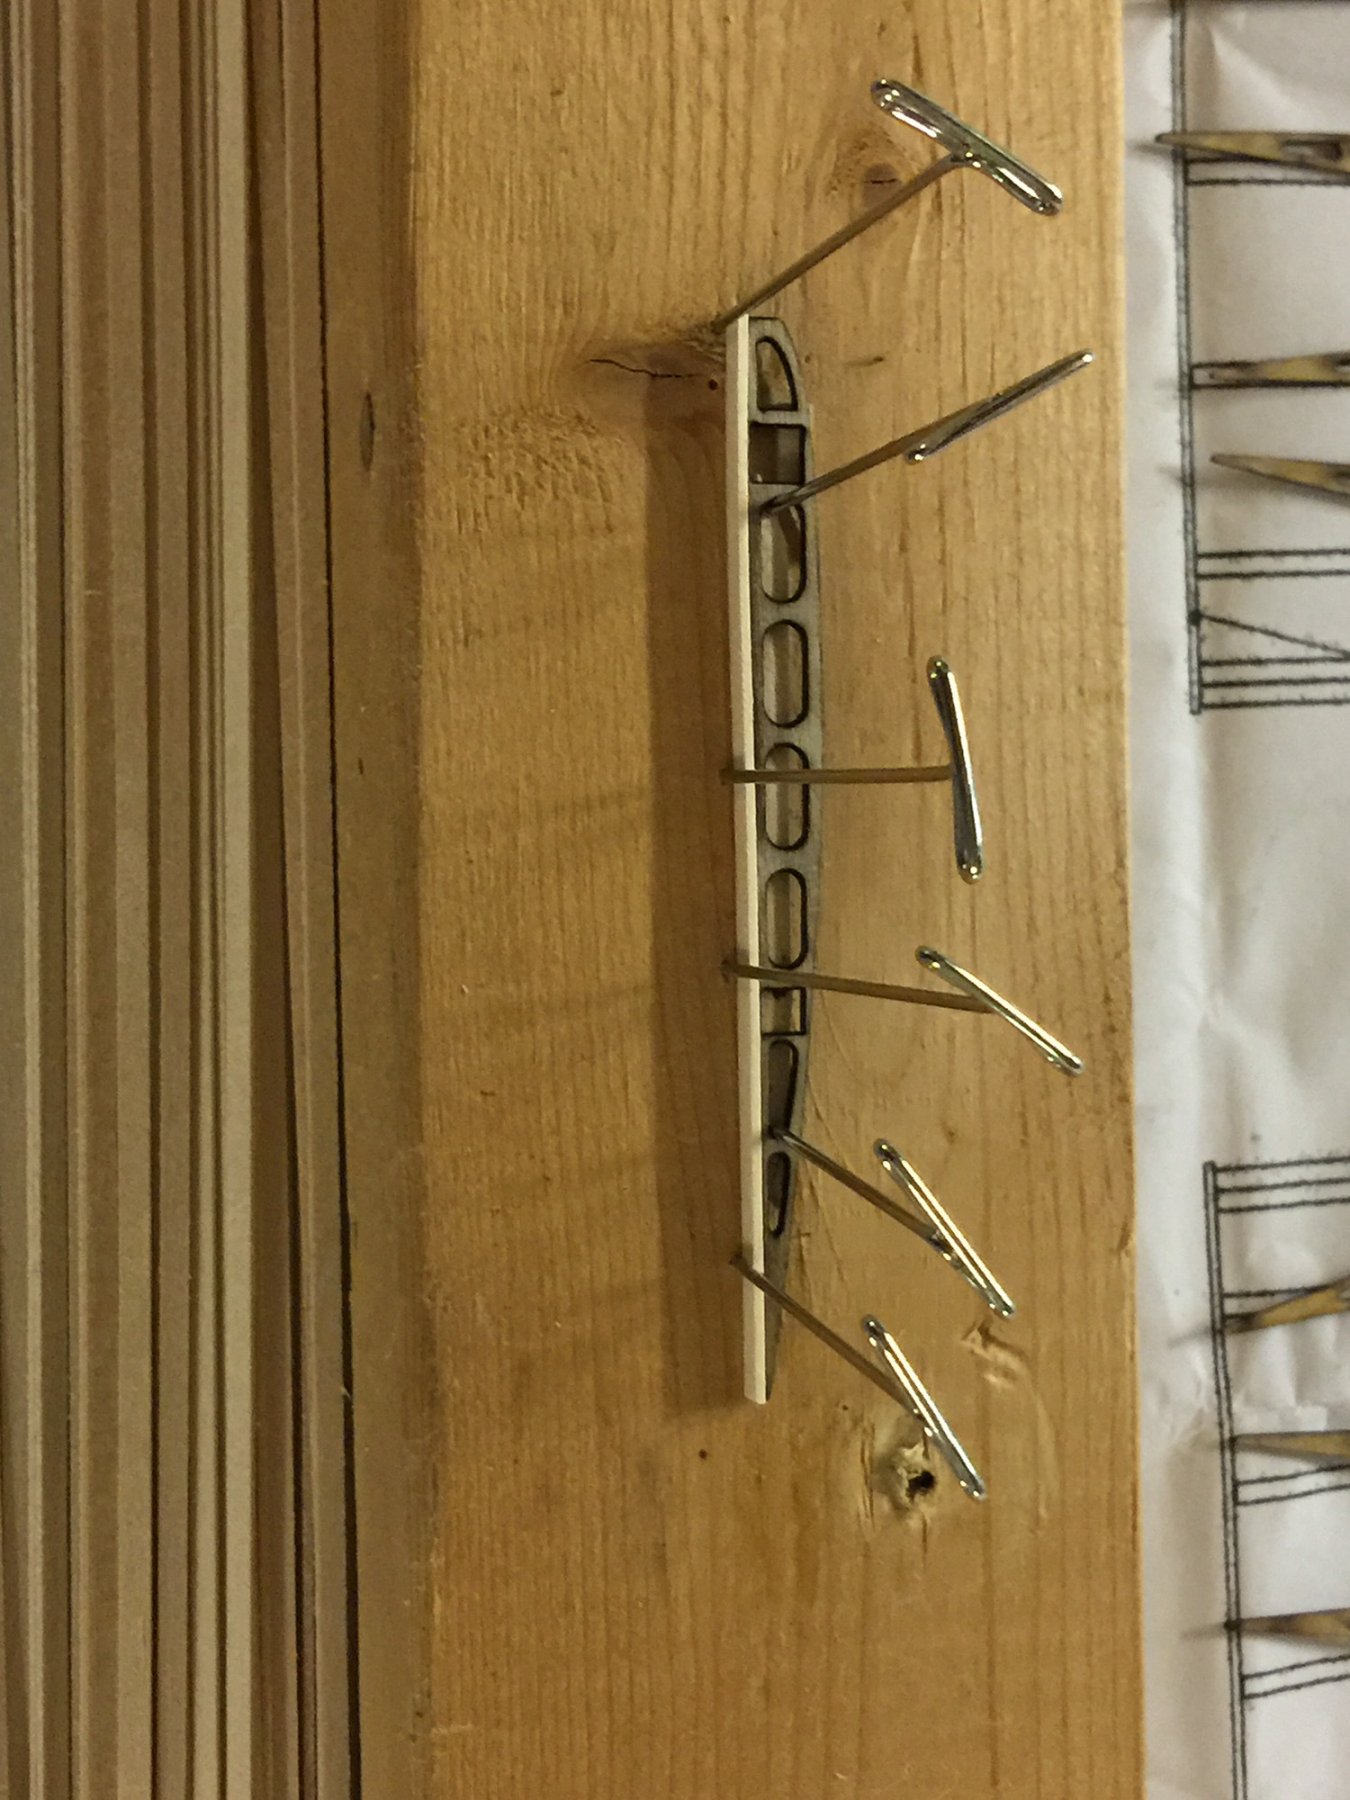
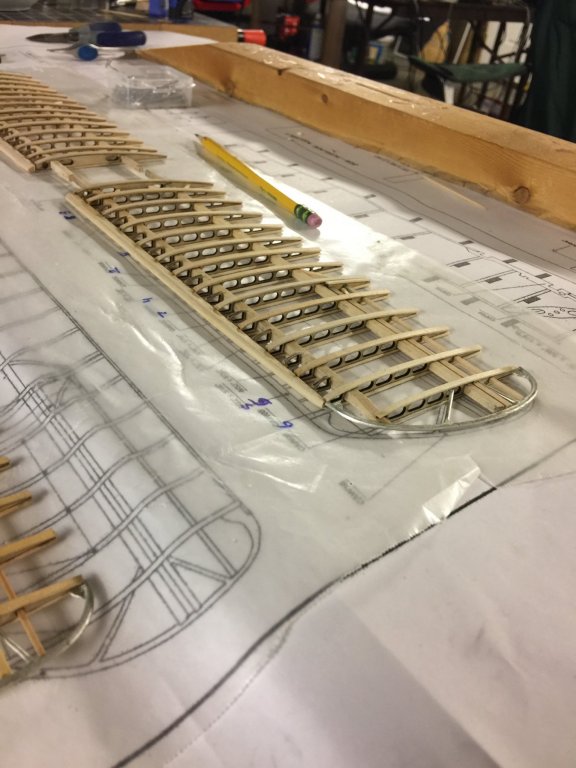
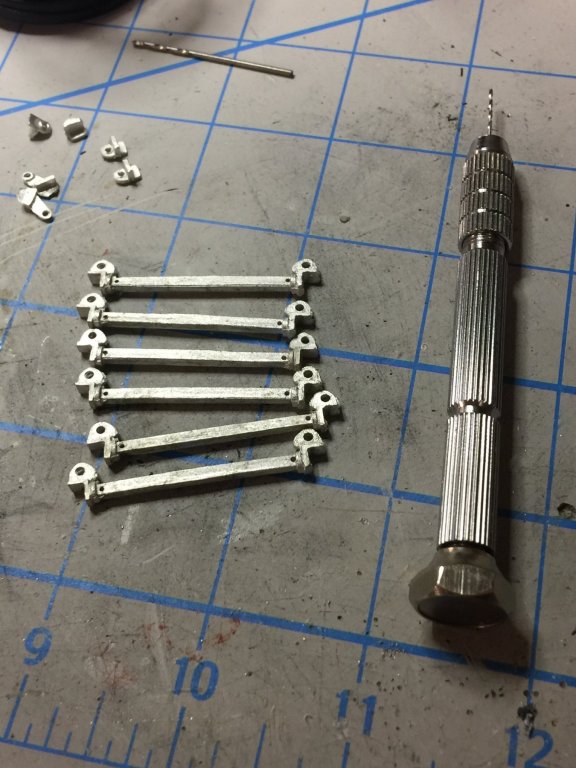
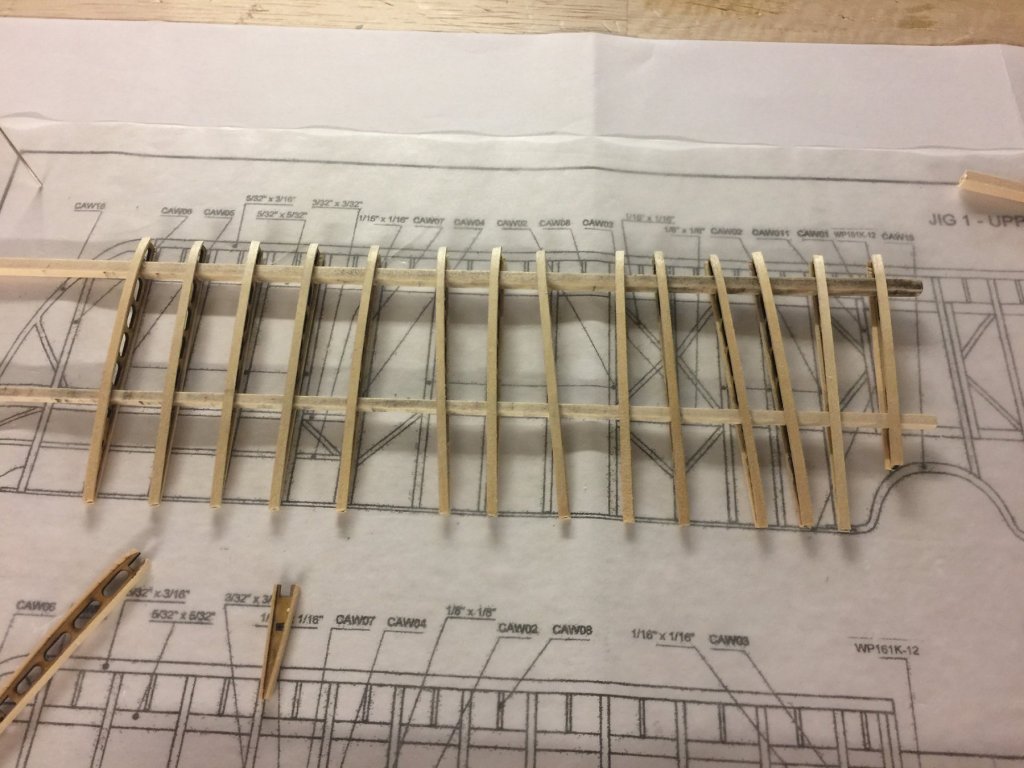
David: nice to have you on board! Ron: thank you for the review. I am happy that the MA kit is wood: I am enjoying that a lot. The wing ribs are about as accurate as laser cutting can make them without them getting too fragile. Seeing real Sopwith's in the shop, all their components are more fragile... they were pretty light weight with thin components. This week finished the wings' wooden components and am about to add their compression bars and tensioning wires. I am ...just... almost concerned about cutting free the ailerons. We'll see how that goes! ~john
- 114 replies
-
- 12
-

-
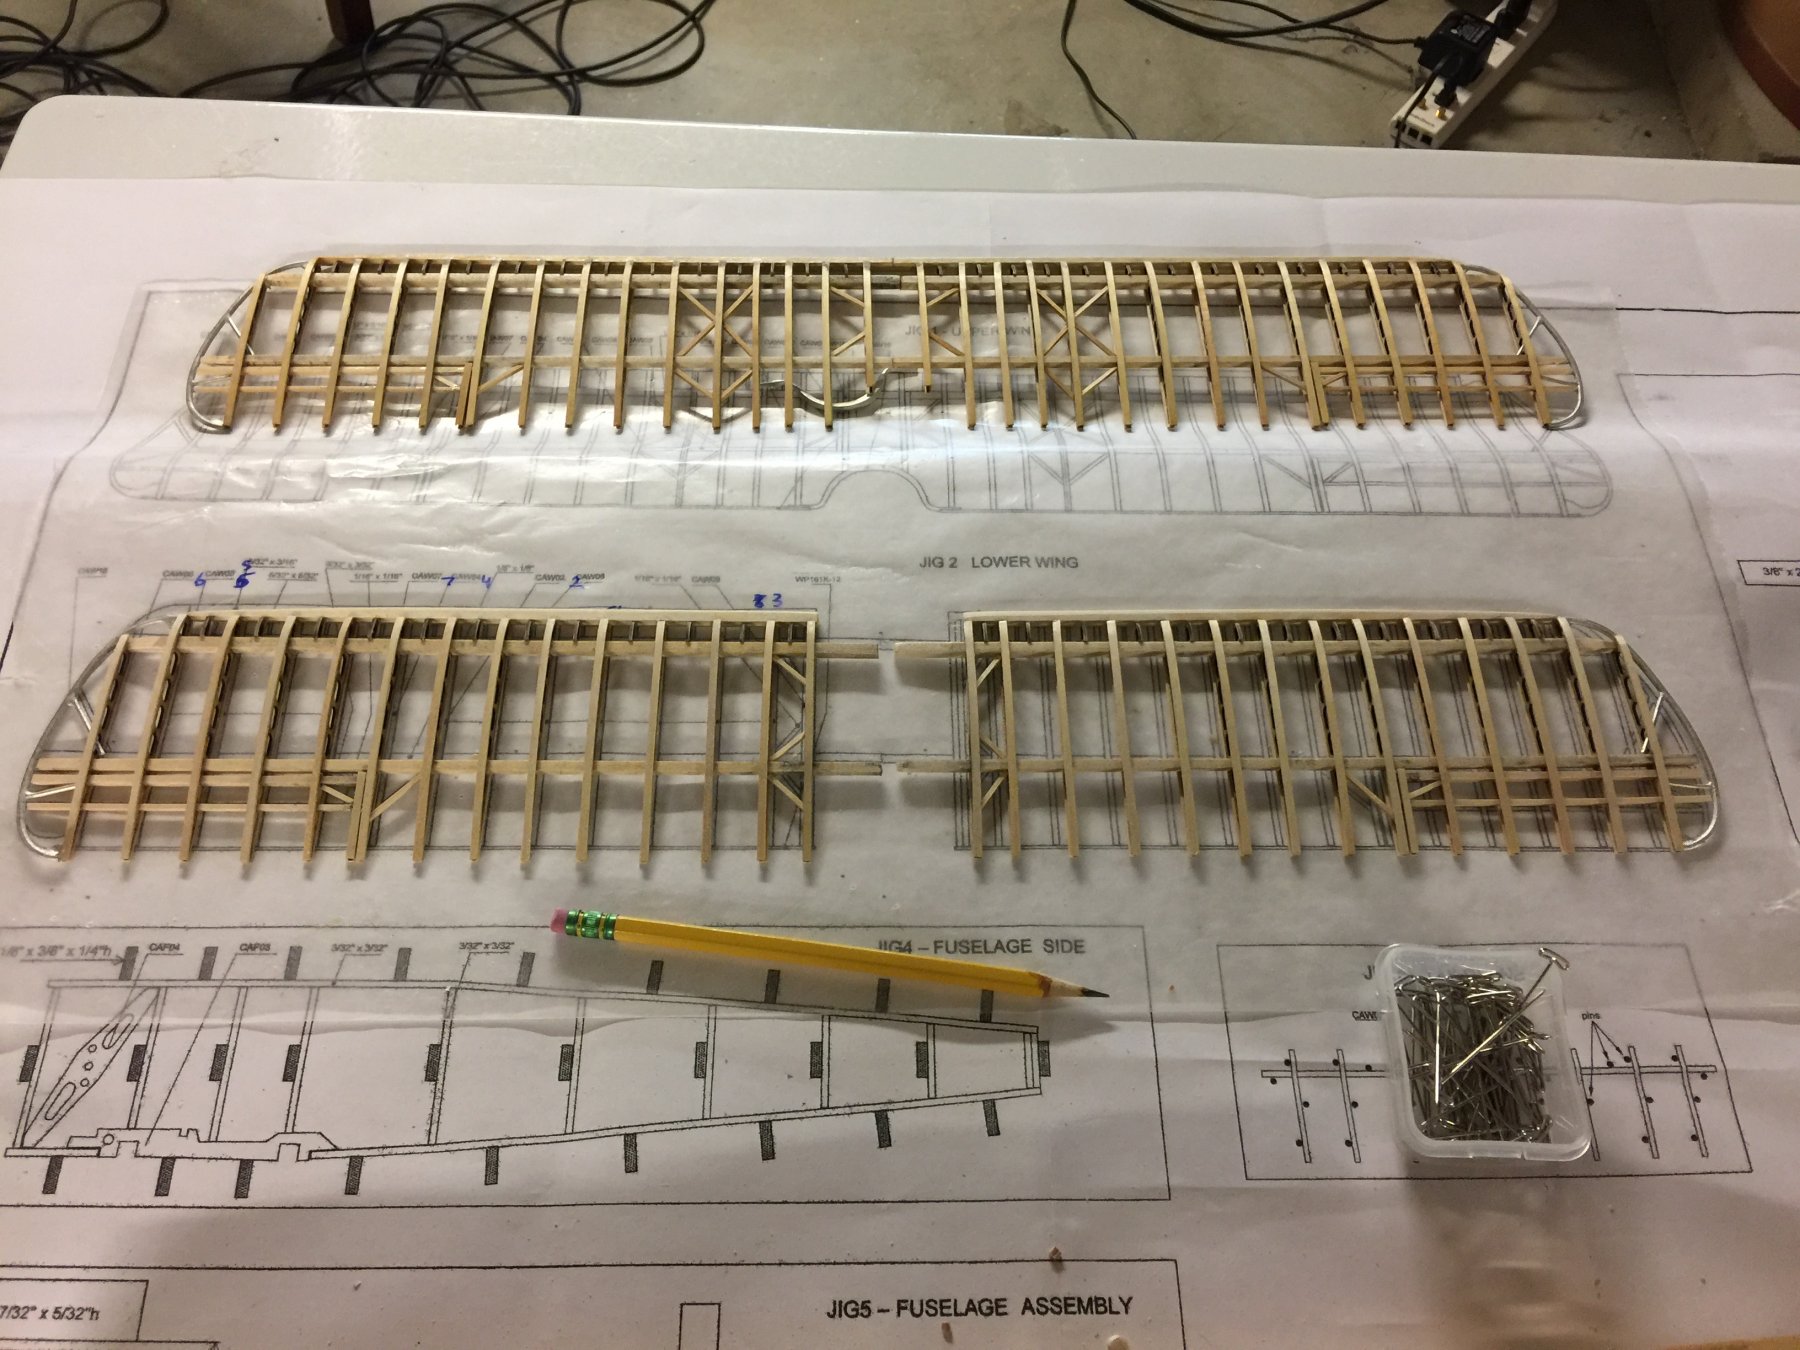
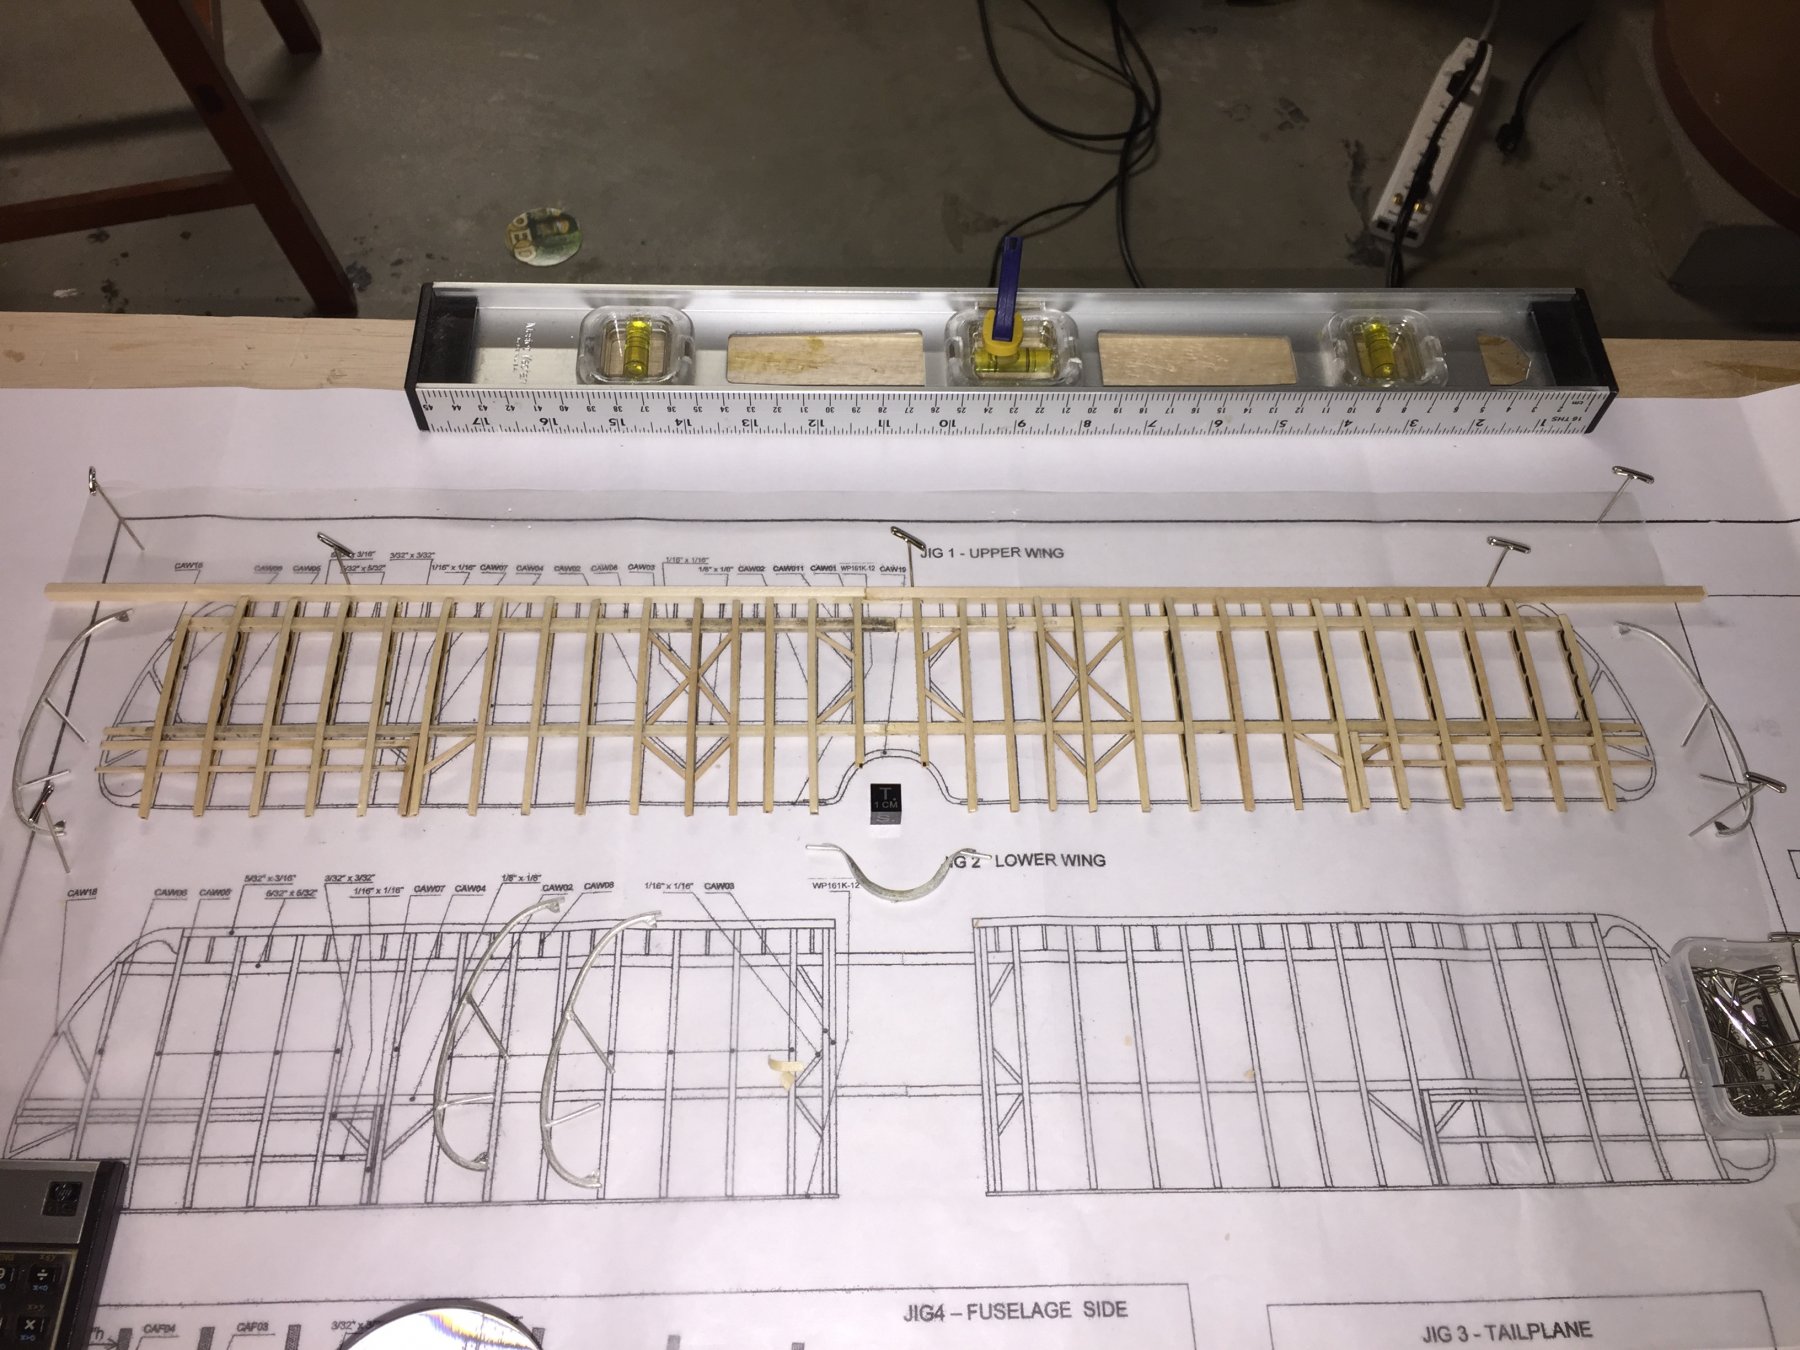
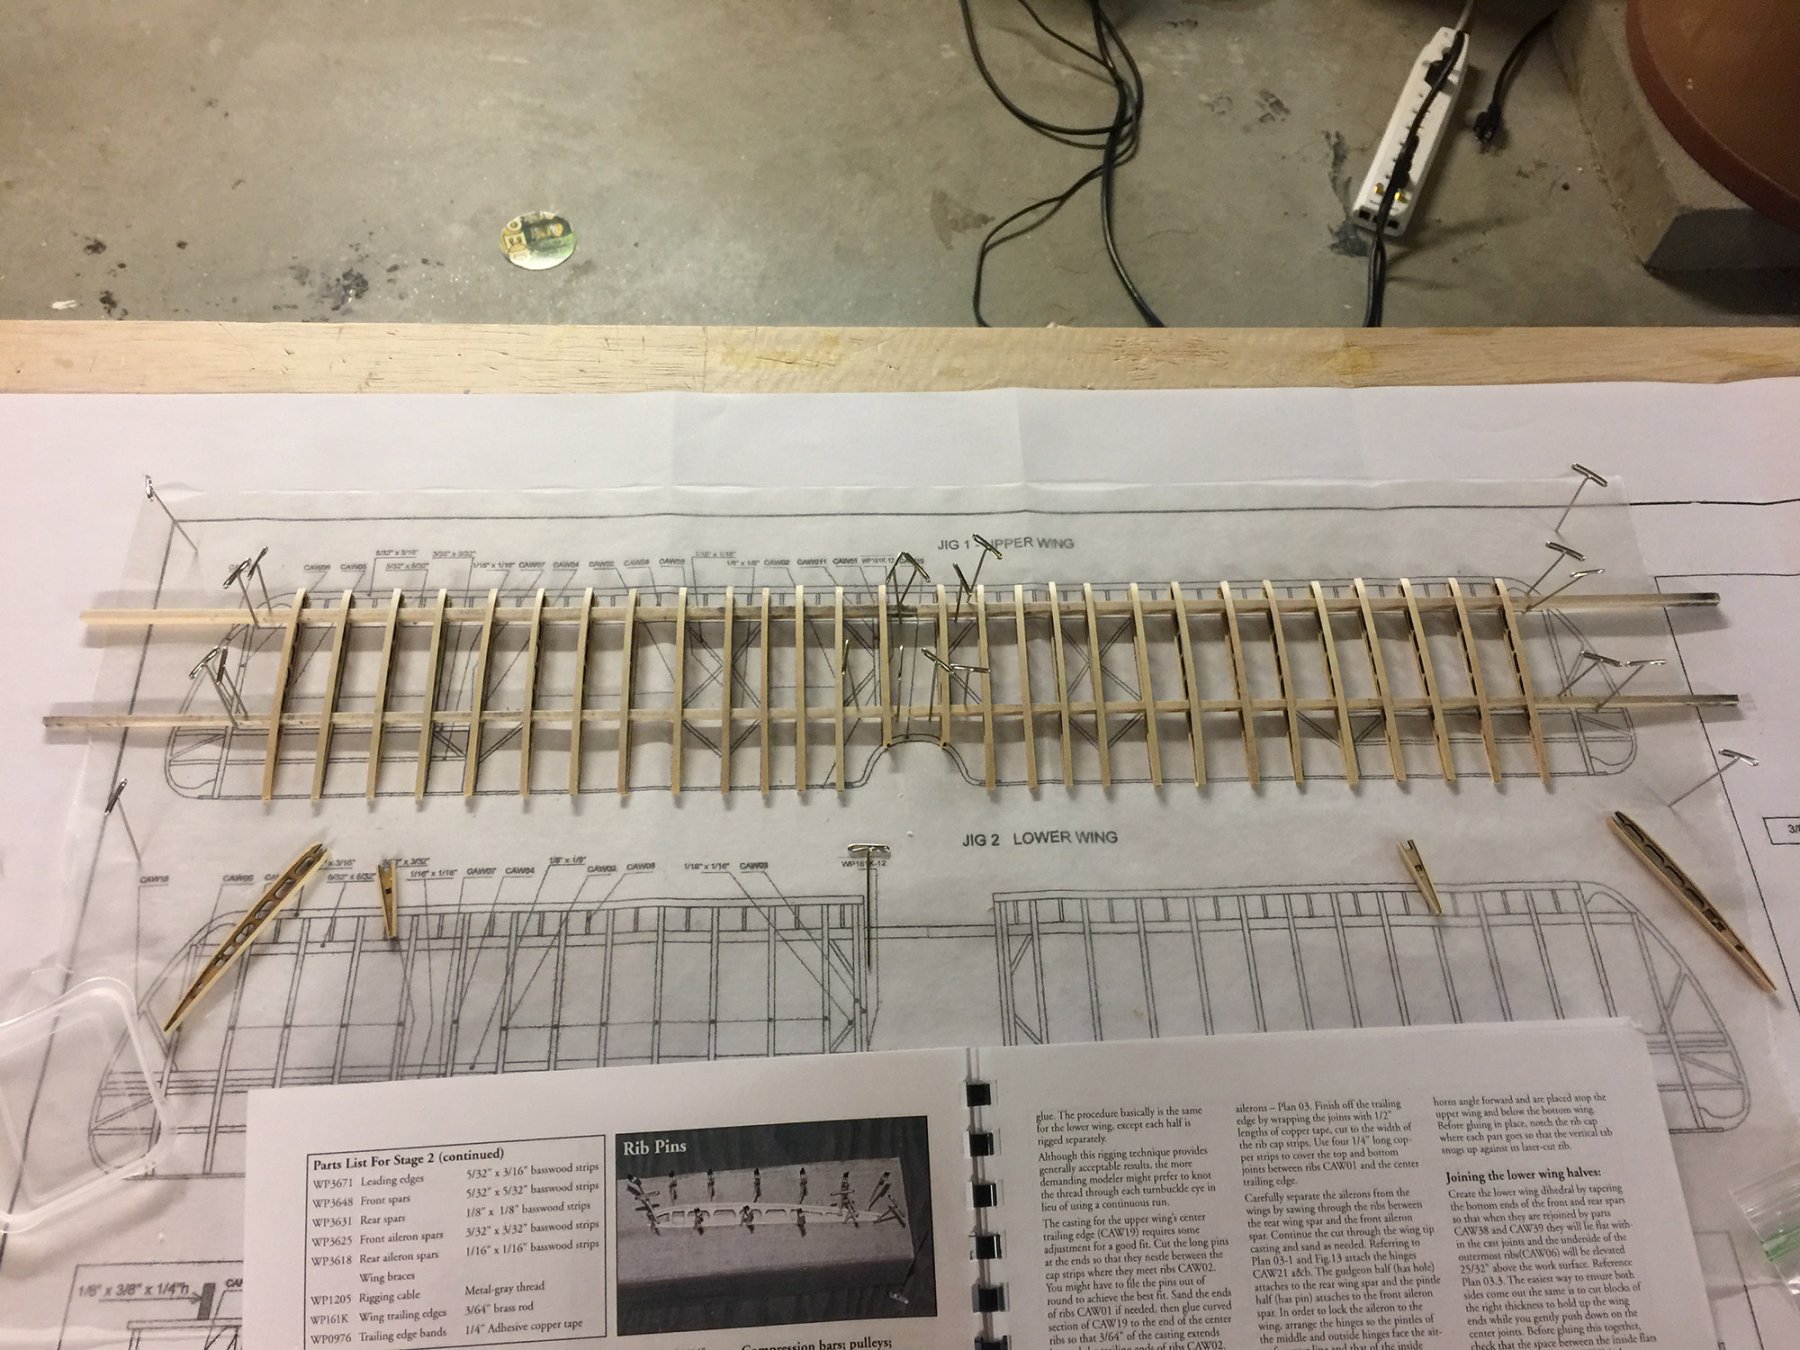
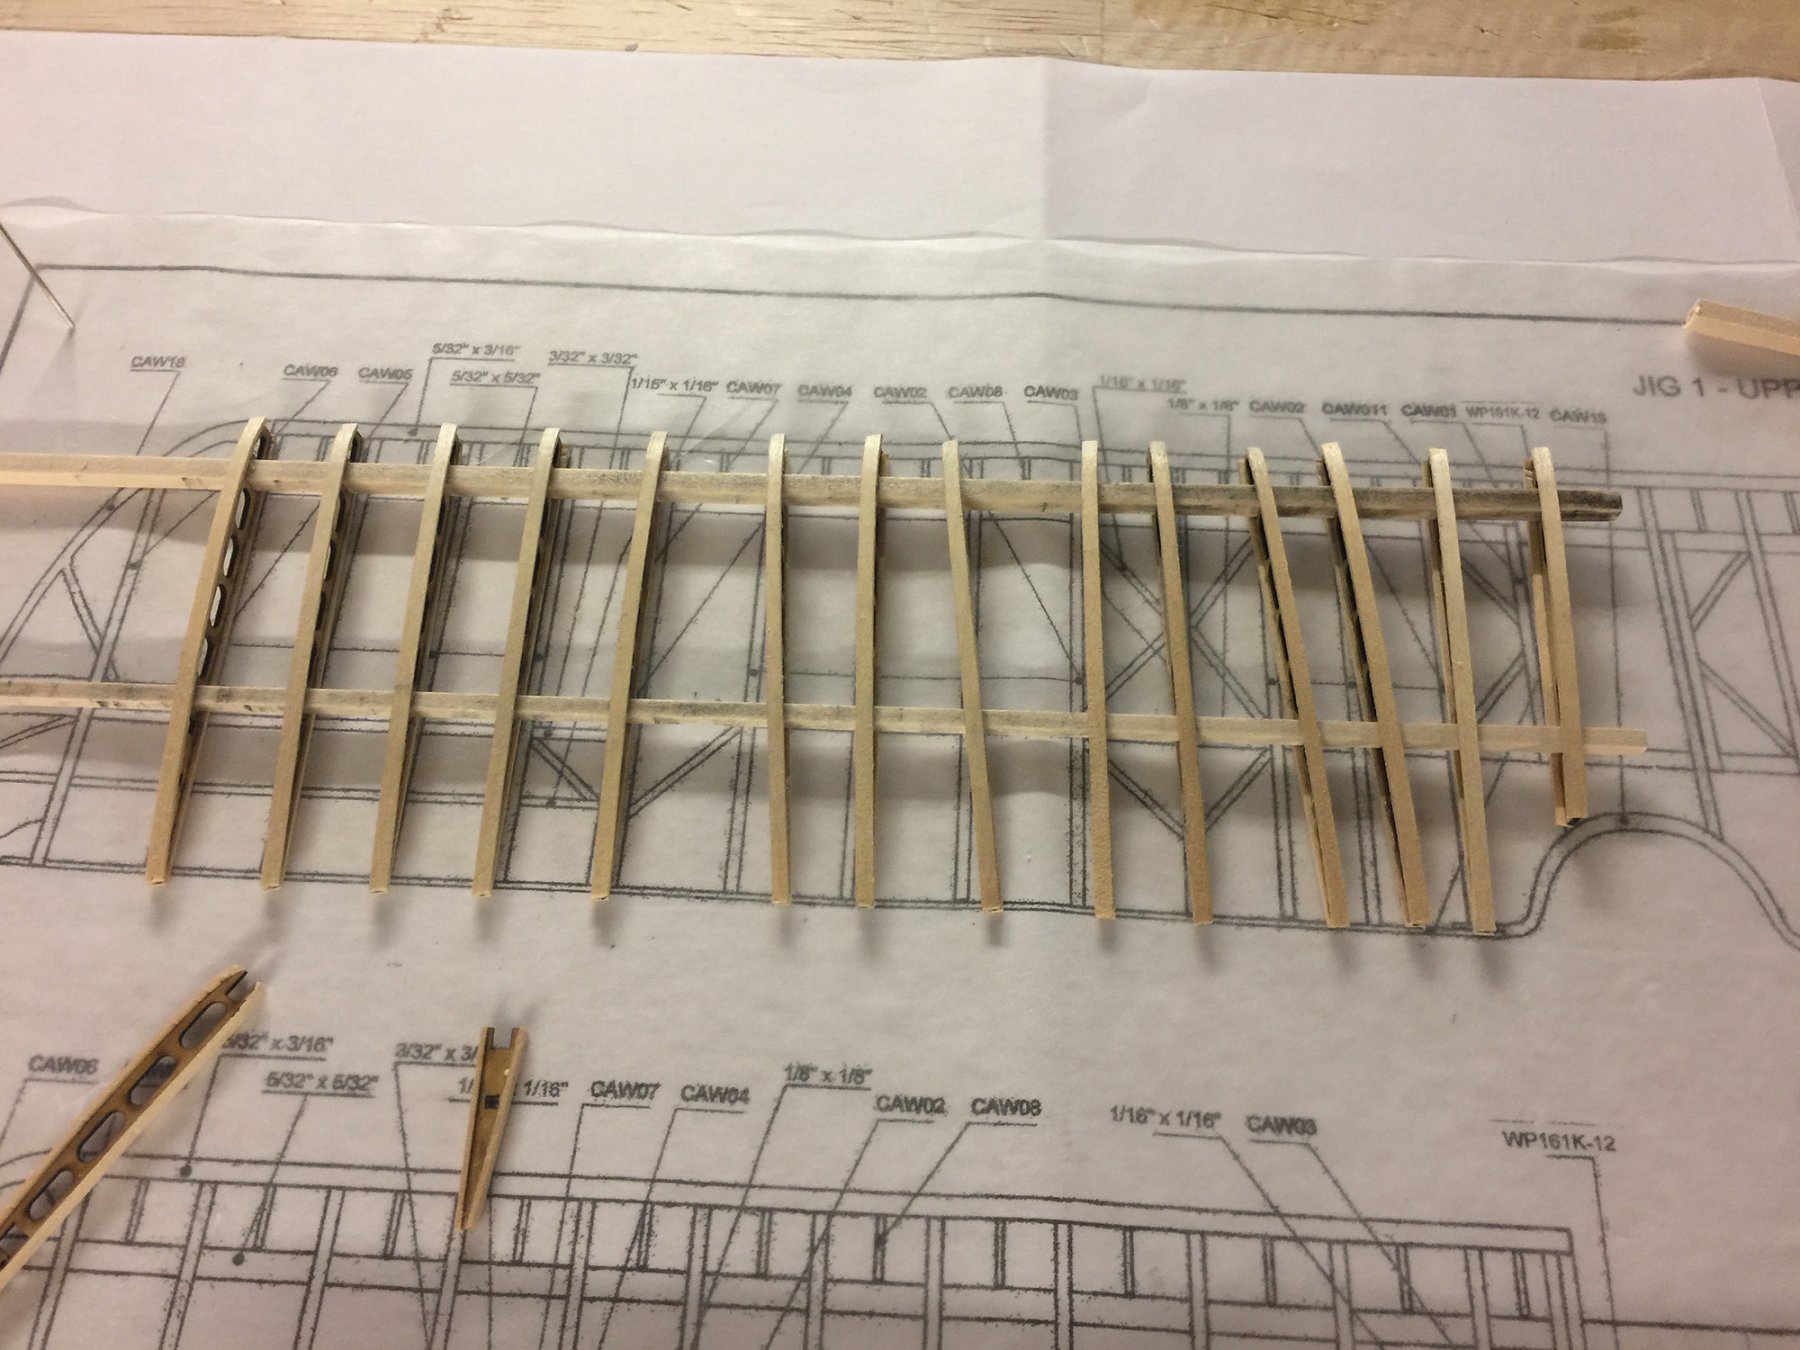
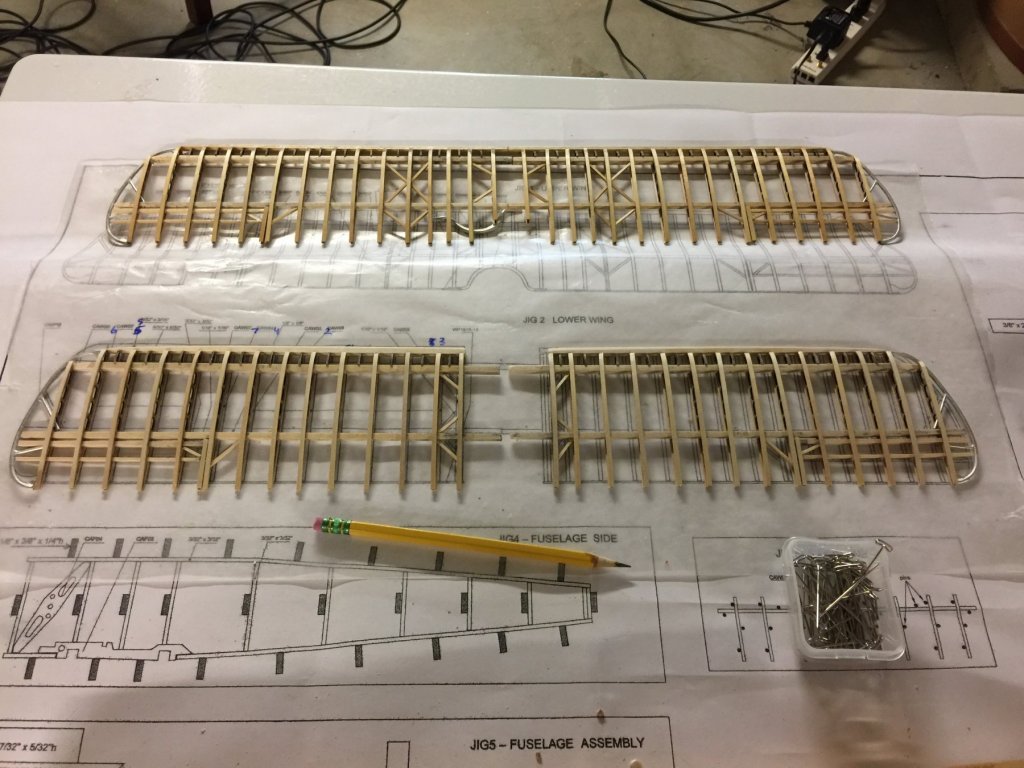
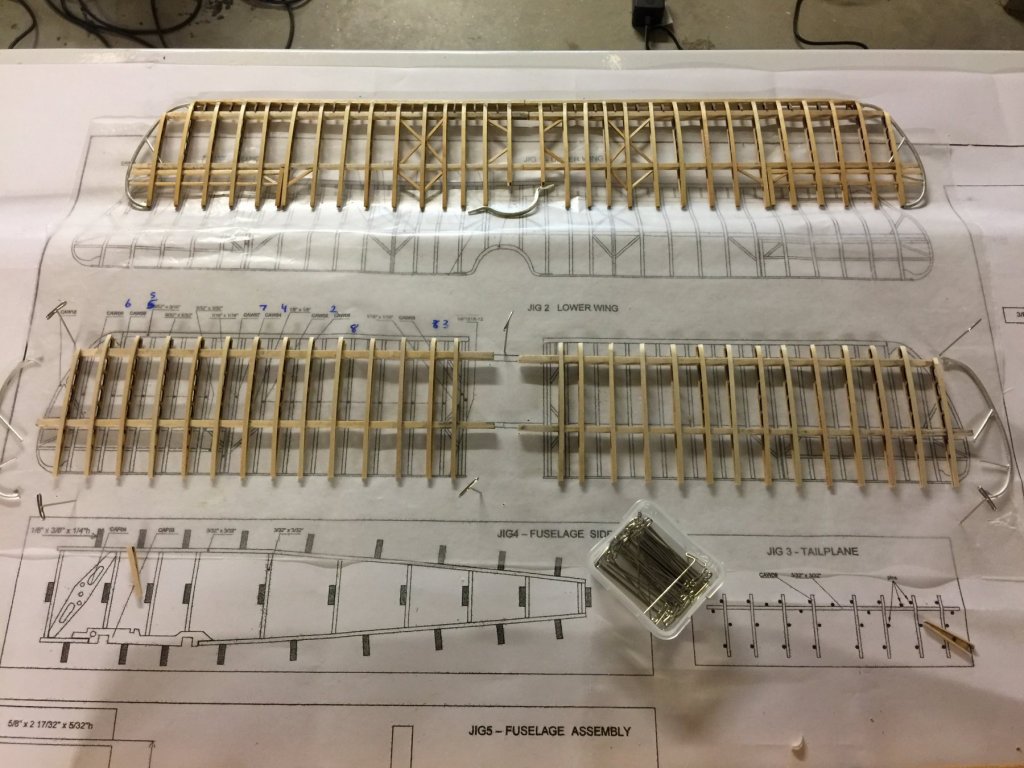
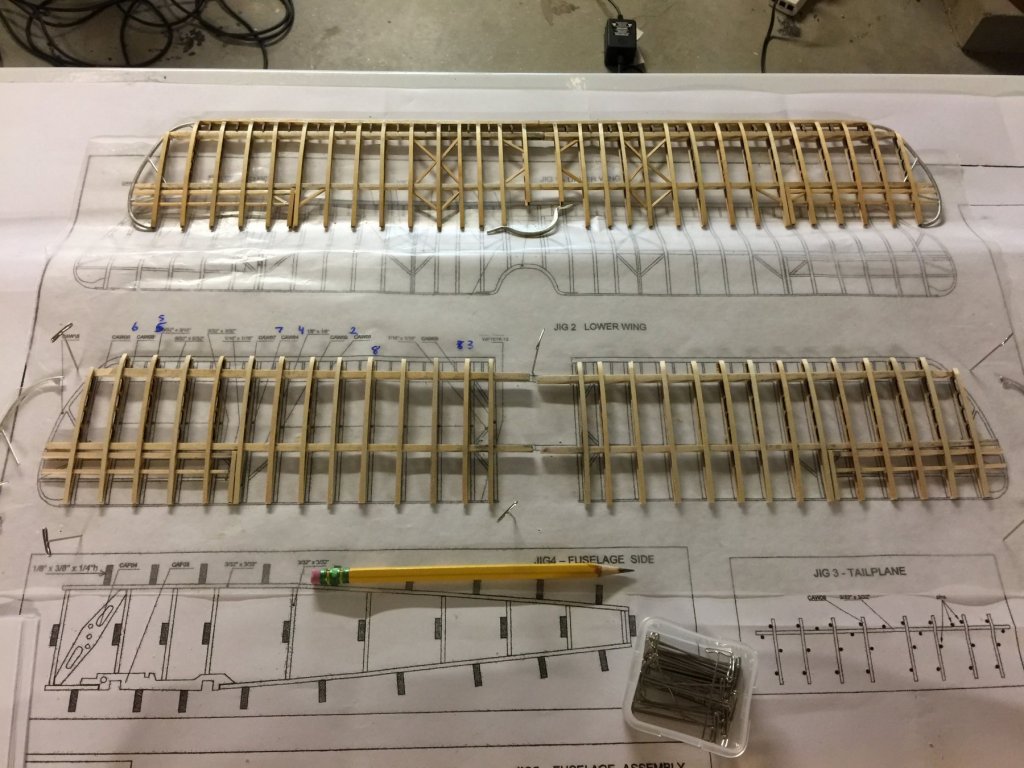
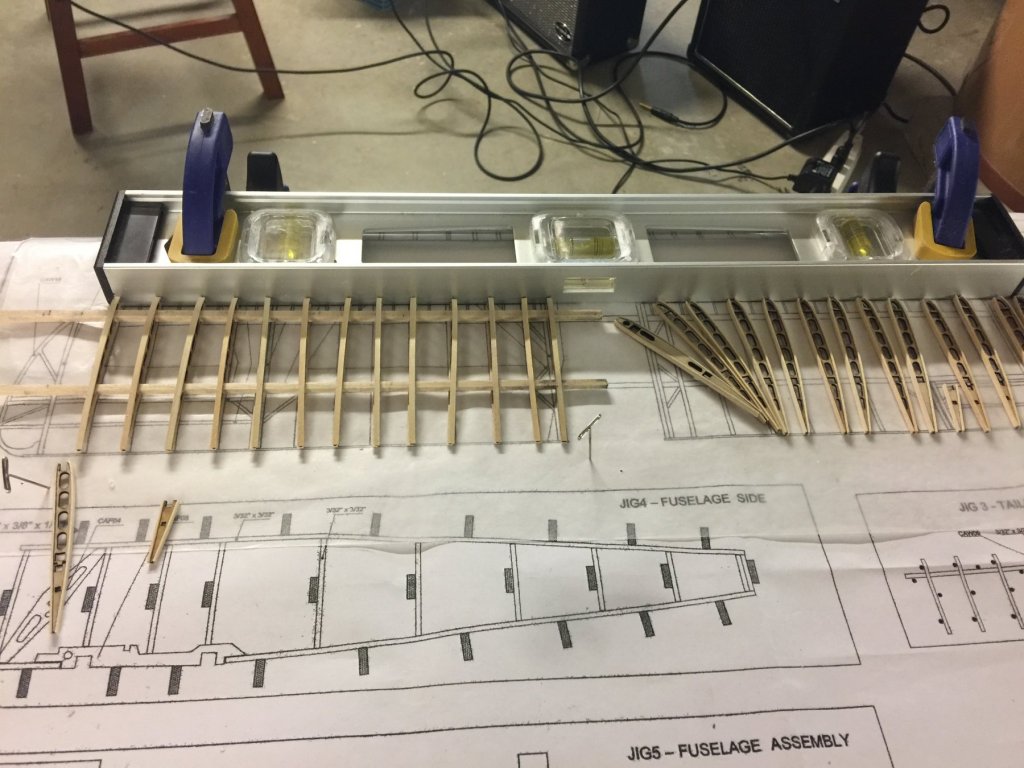
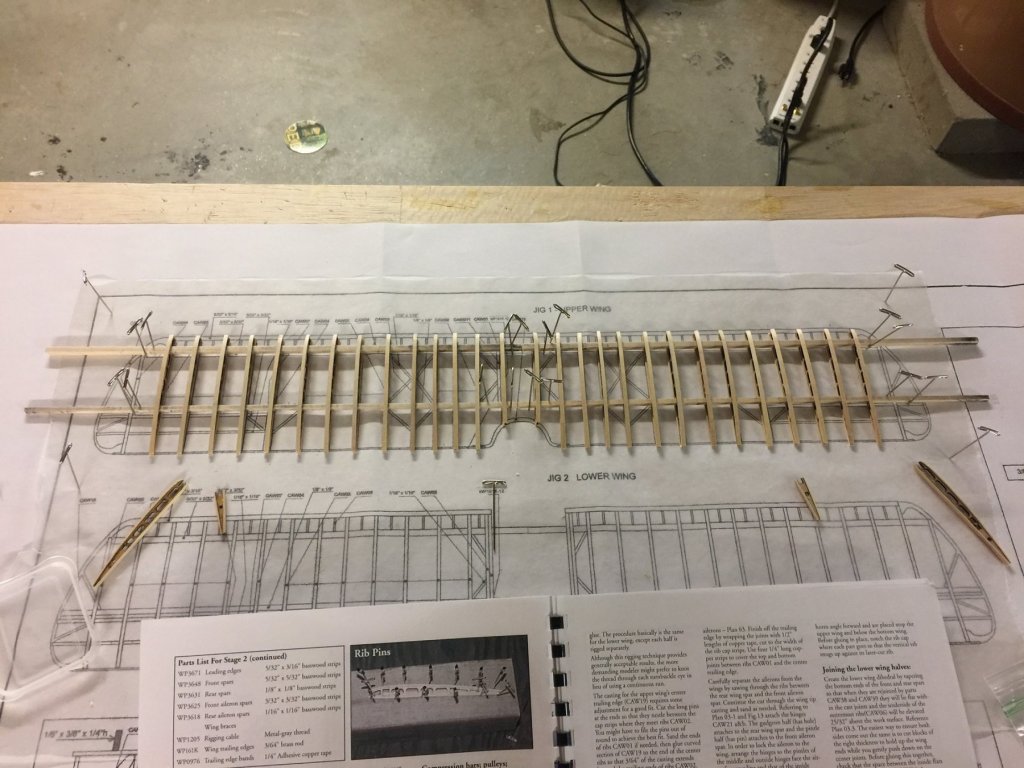
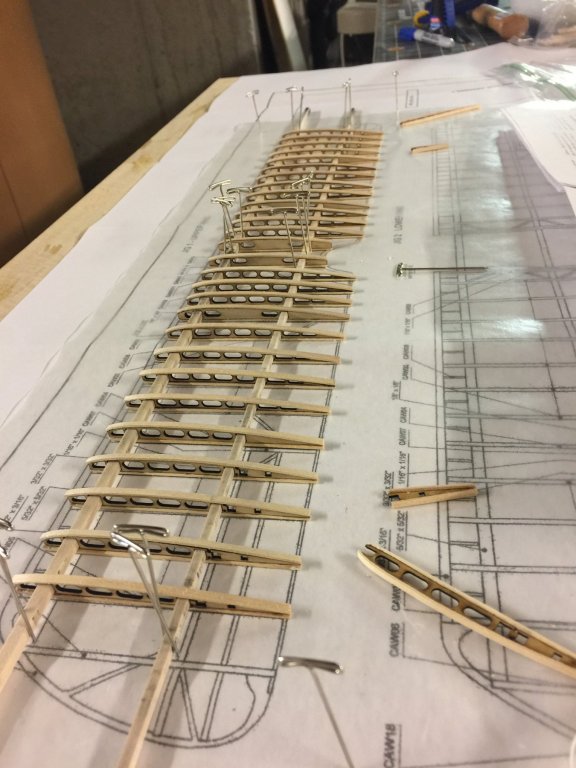
The method worked pretty well.... that is, keeping the straight edge in place while aligning the ribs. Status: the fore and aft spars are in place, the ribs glued and aileron spars also in place. The lower wing has been cut in half, ready for their re-joining with the correct dihedral. That will come after tension stringers have been added. More to do!

-
Ahh! Good! Another Syren build, and I am late to the party. Mind if I sit by and enjoy? This is also on my list of future builds. ~john
-
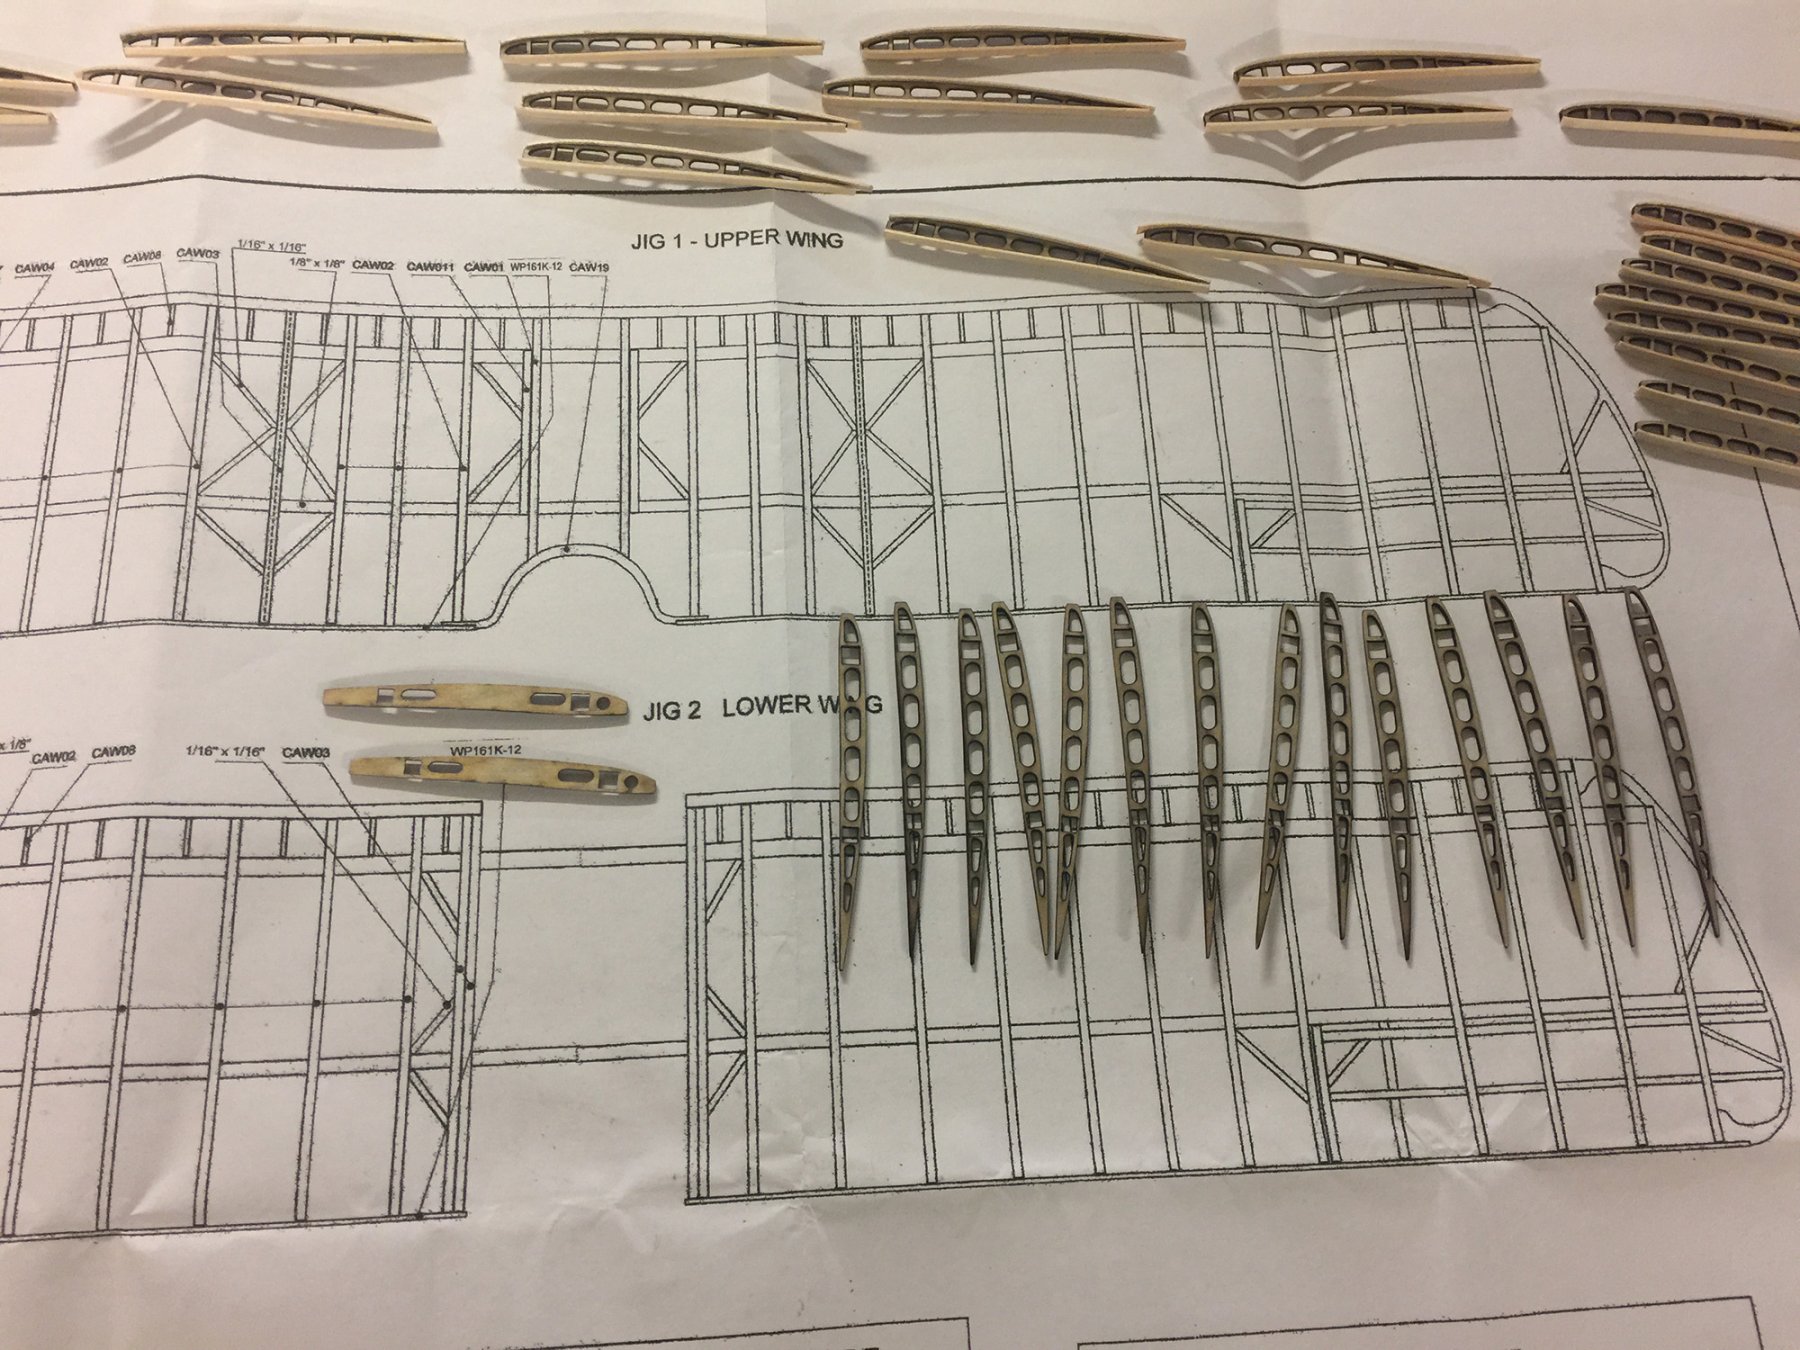
All, The wing ribs and caps are complete for the bottom wing now. Phew! That was a workout in patience. It is time to run the fore and aft wing spars through them (skewer time) and then fit the leading edge. Then for both wings it will be time to add small details: spreaders, wiring, pulleys and such for the ailerons. I decided to go with a straight edge clamped to the work surface to help with alignment. We'll see how that works out. The recommendation is to thread the spars in first, then sand the leading edge. If the cutting was done well enough, using a straight edge at the front should be doable. ~john
- 114 replies
-
- 12
-
-
Fokker Dr.I by Torbogdan - FINISHED - Model Airways
jablackwell replied to Torbogdan's topic in Non-ship/categorised builds
Hi Per, No worries! No worries. I really did not know what is right or wrong half the time when I am on forums.... so I had to ask. Thank you for your input. The LAST thing I want to see is this forum for ship building to end.... It has been tremendously helpful to me as a new ship modeler. I am just taking a rest from ships and taking on a plane for respite. I am intrigued that there are two of us here now working on planes... and they happen to be arch rivals in the aviation world. There is a delicious irony (or perhaps coincidence) here. ~john -
Fokker Dr.I by Torbogdan - FINISHED - Model Airways
jablackwell replied to Torbogdan's topic in Non-ship/categorised builds
All, Sorry that this post I am writing goes a little off-topic of the Fokker build log. This is in response to Nirvana, Per. Are you requesting that aircraft build logs not be posted here on this forum? My understanding is that this sub-group, called "Shore Leave" is for the following, and I quote: Follow 3 This is the area that many wanted, and perhaps didn't even know it. If your topic is nothing to do with the world of ships or ship modelling, then here is the place to post it. General chat, Birthday announces, non-ship models, etc. No politics. No religion. No inflammatory topics. It appears to me that this is the place to post such a log. Have I missed something? Thanks, ~john -
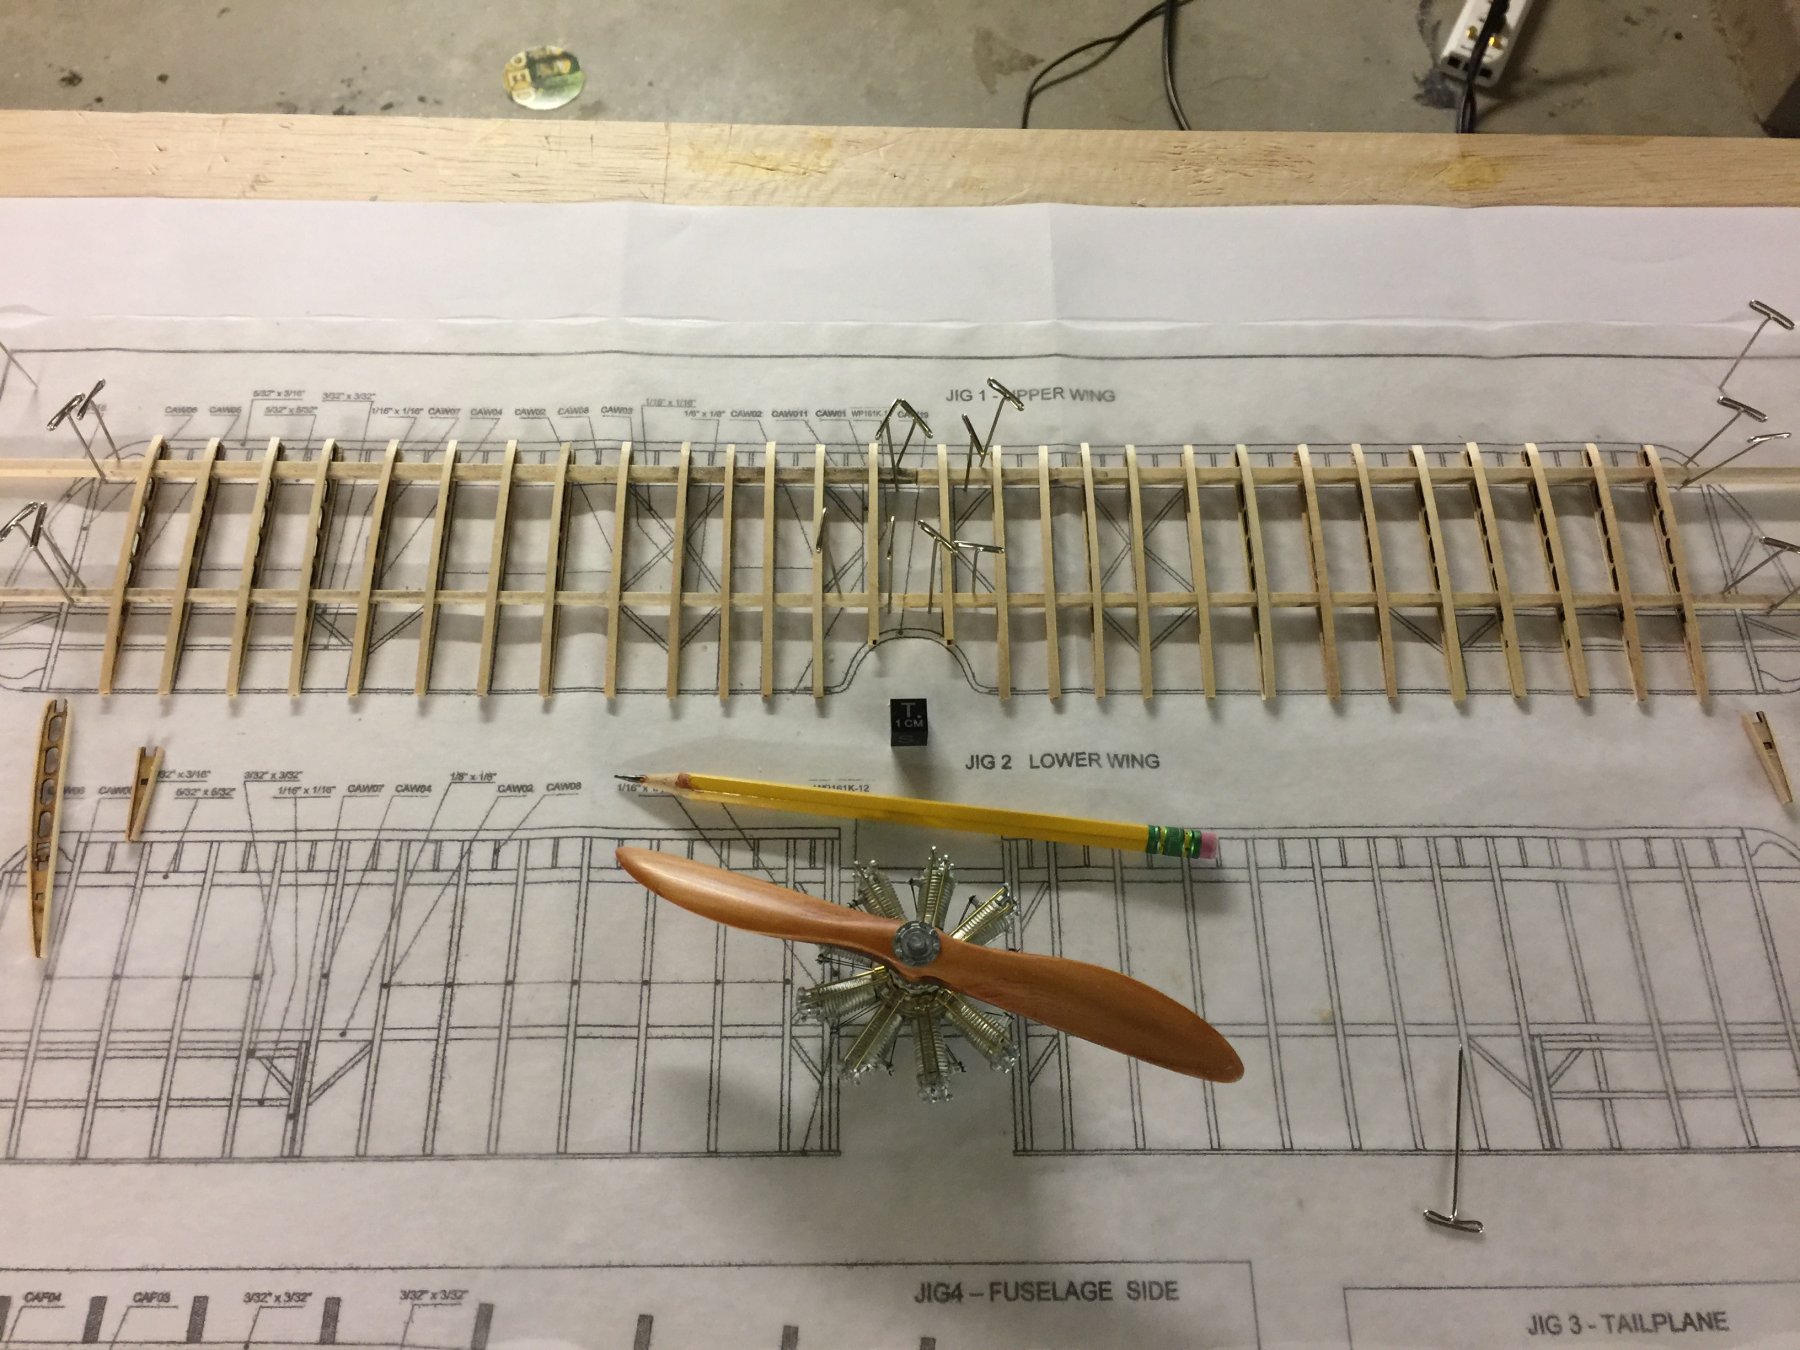
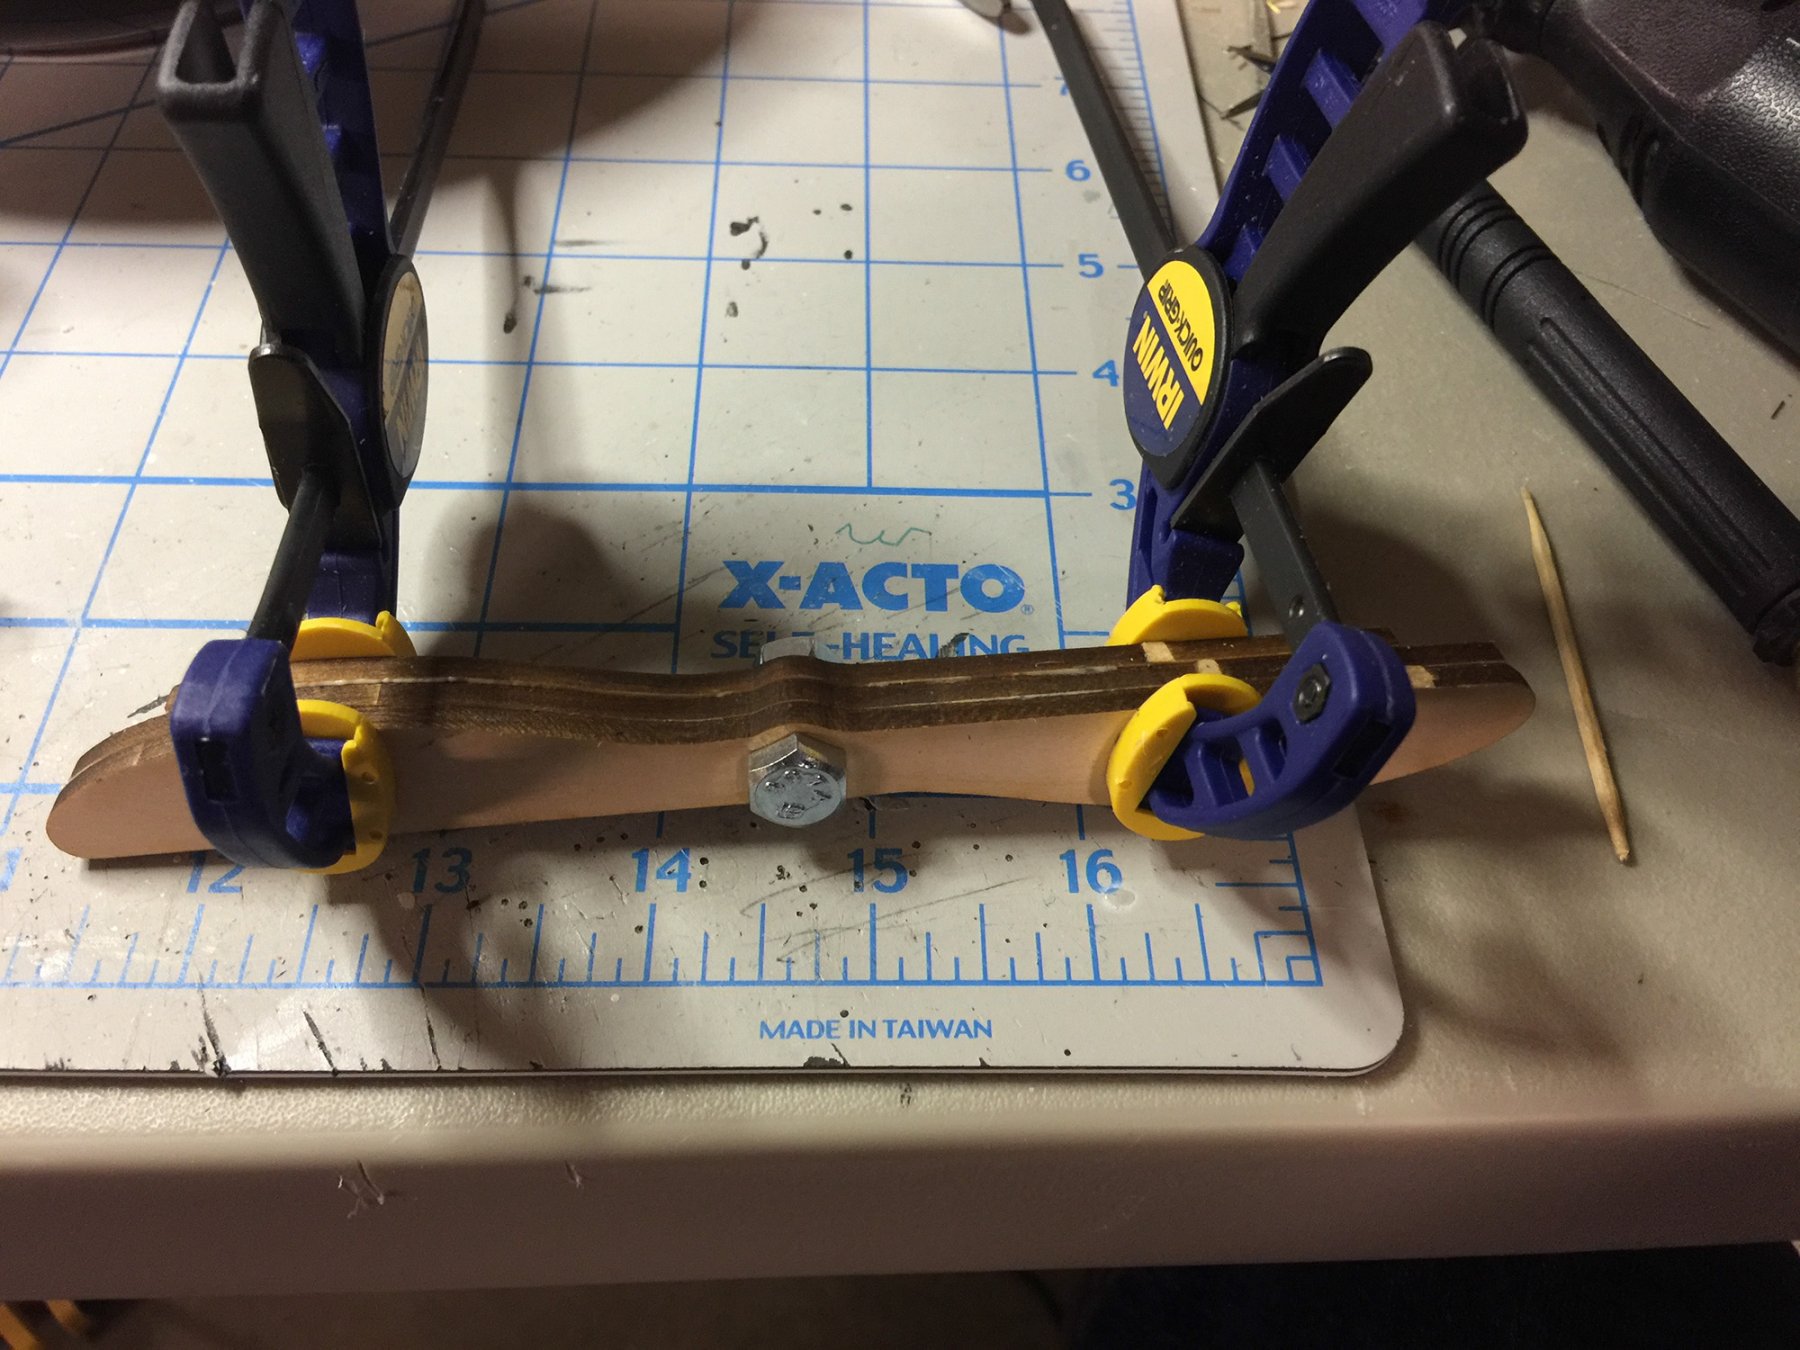
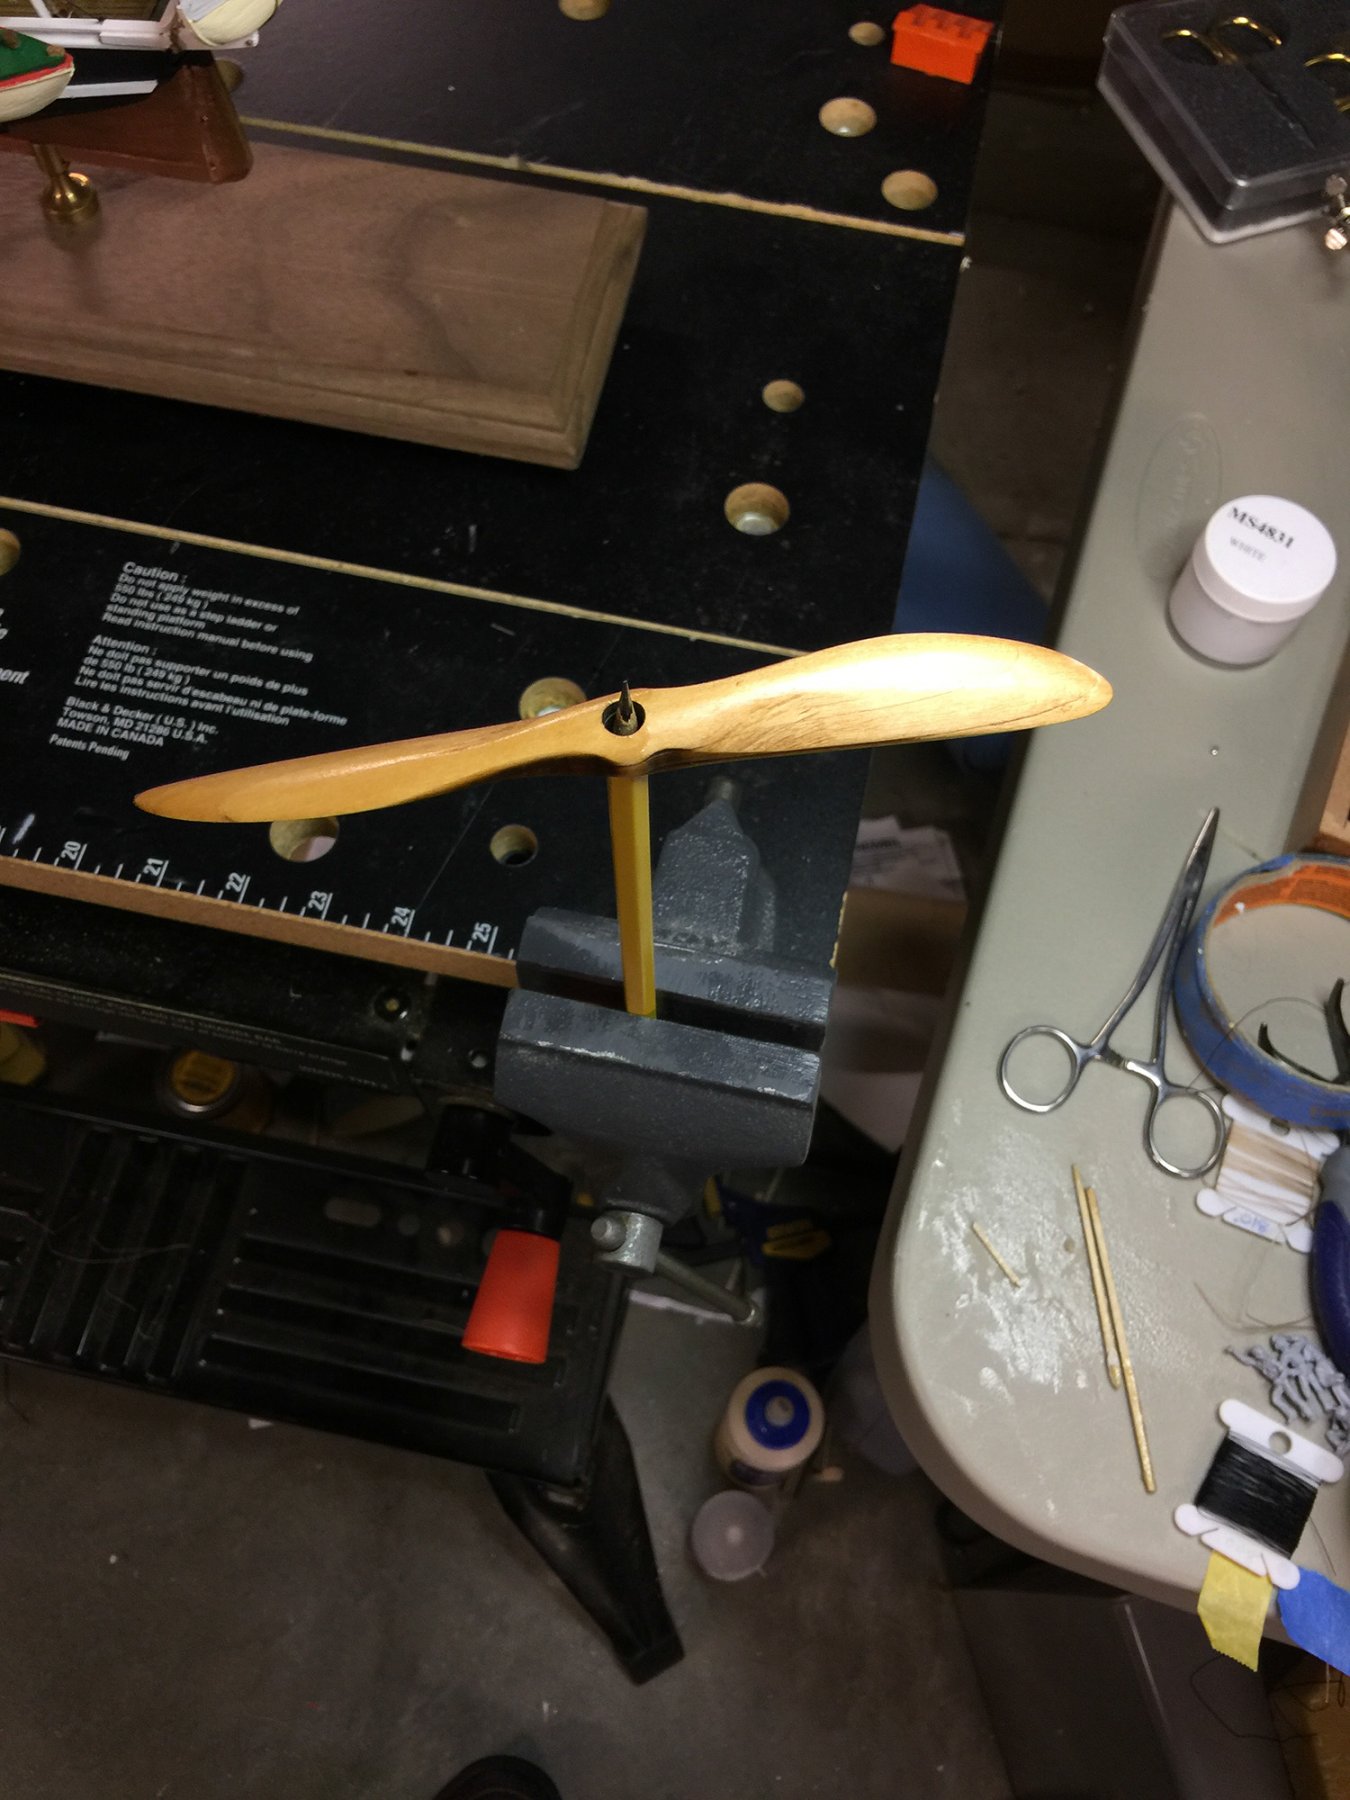
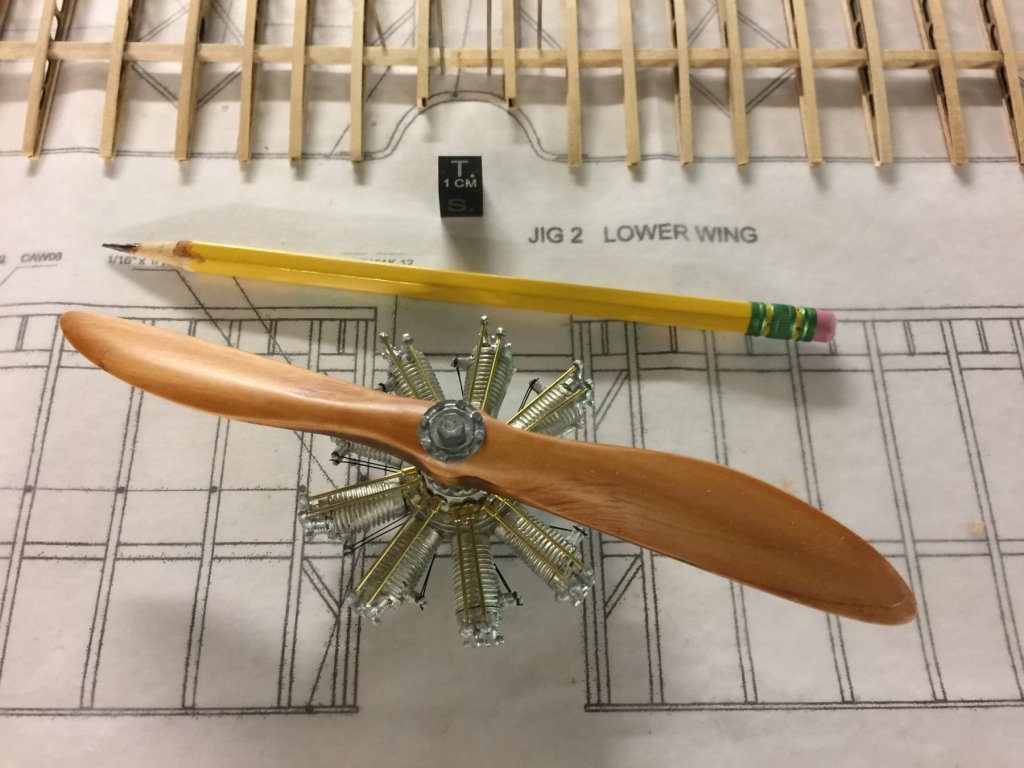
Thanks, John - yes, it does seem like there's more and more...and more detail to come! Will she ever fly!? ;-) gsdpic: thanks for joining in. The prop was a more interesting piece to build, it being in a laminate of wood sheets. I had built props from solid blocks before, also a challenge though not as initially scary to face down. I found that grinding the main shape, as seen from the side, using a Dremel tool, worked really well. Then I could face it from the front and back to get the angle of attack right. After that, a lot of fine sanding brought it to the final shape, followed by 4 to 5 layers of shaded poly. I am happy with it. I am considering a metal leading edge/tips. I am still thinking on that. ~john
-
Thank you for dropping by, Piet. Good to have you along for the ride. Building models has been in my blood for a long long time, be they planes, trains or boats. This is a respite from the ship building I have been doing and plan to do in the near future. Funny enough, the progress I am making on this Camel is considerably slower than that I would make on a ship! Still, it is a worthy build, detailed, slow, patience demanding, intriguing, and a learning experience. I'd like to say I have worked on old plane restorations, but I cannot. I fly planes, enjoy being around them, and love the history. The opportunity has not yet presented itself for me to get into restoration... yet ;-) All the best, ~john
-
The top wing has been polyurethaned (silk finish without color). I am now starting the arduous work of capping the wing ribs, lovingly, one by one. This will take some time. Please stand by ;-) ~john

- 114 replies
-
- 12
-
-
Sincere condolences to you, your spouse and family. ~john
- 1,306 replies
-
- 7
-
-
- syren
- model shipways
- (and 1 more)
-
Thanks, Eddie! I am having fun with it, as a nice break from ships for a small while. I am now working on the bottom wing ribs, so that will take a long time... you all might not see anything from me for the rest of the month, as there will be nothing much to report. In the meantime, I'll also be looking at some Sopwith history, and maybe reworking some of the engine parts to look better. ~john
-
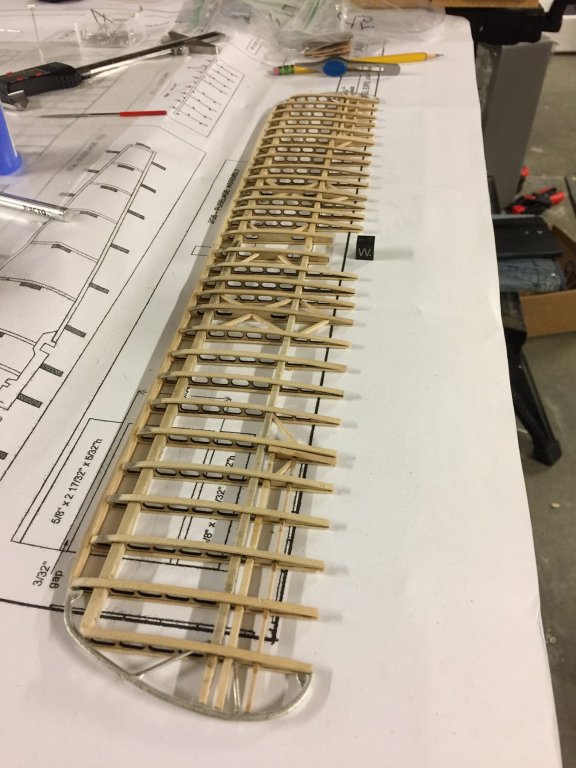
Continued work on the top wing with the tips and leading edge now added. Some detail work to complete. ~john

- 114 replies
-
- 12
-
-
Thanks, Torbogdan.... Not sure that I will finish soon or not. What you didn't see were the weeks and weeks of working on those wing rib caps. I am about to start work on those for the lower wing, and that will take me a month or more.... :-) ~john
-
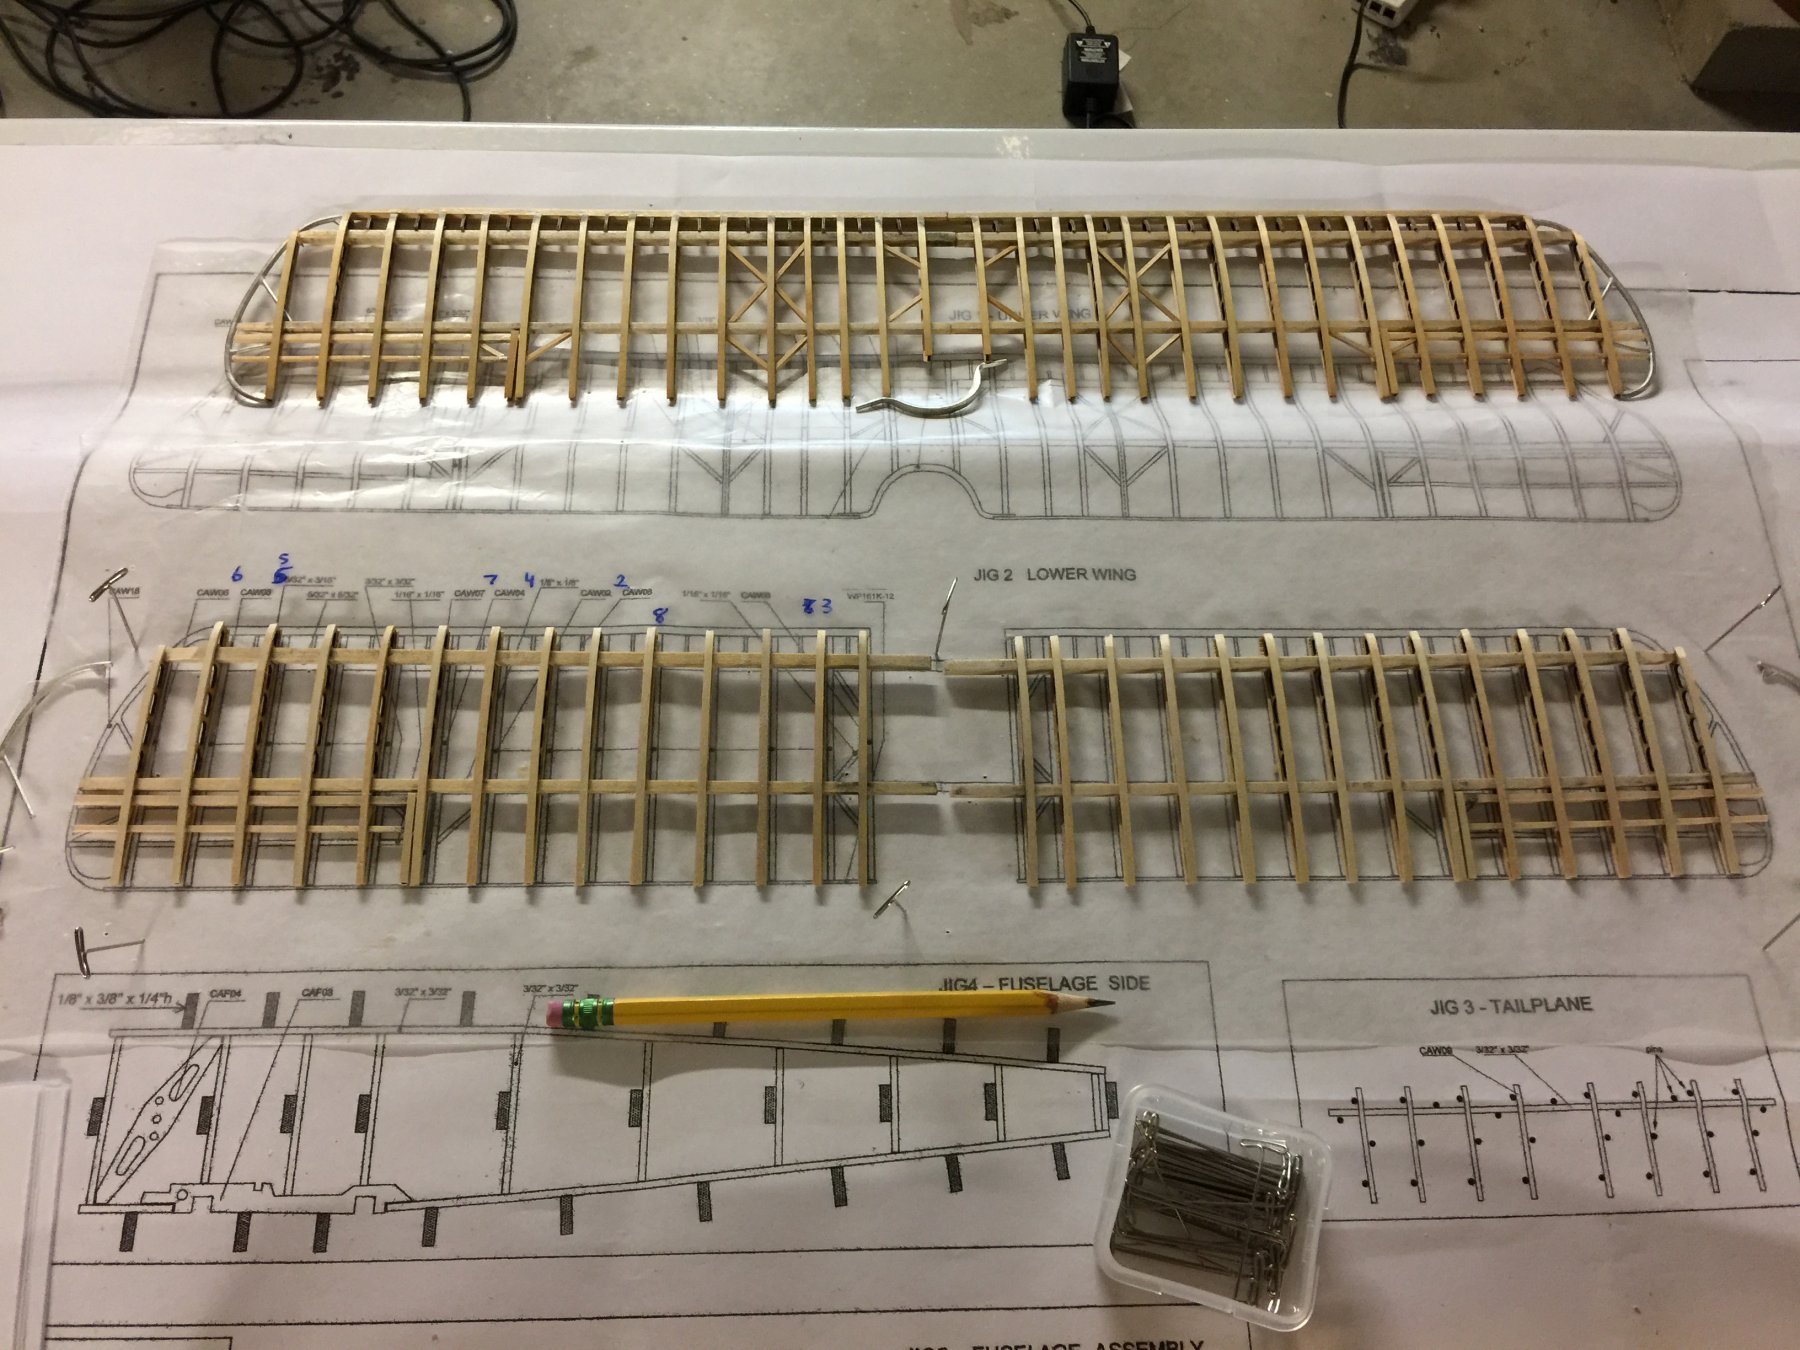
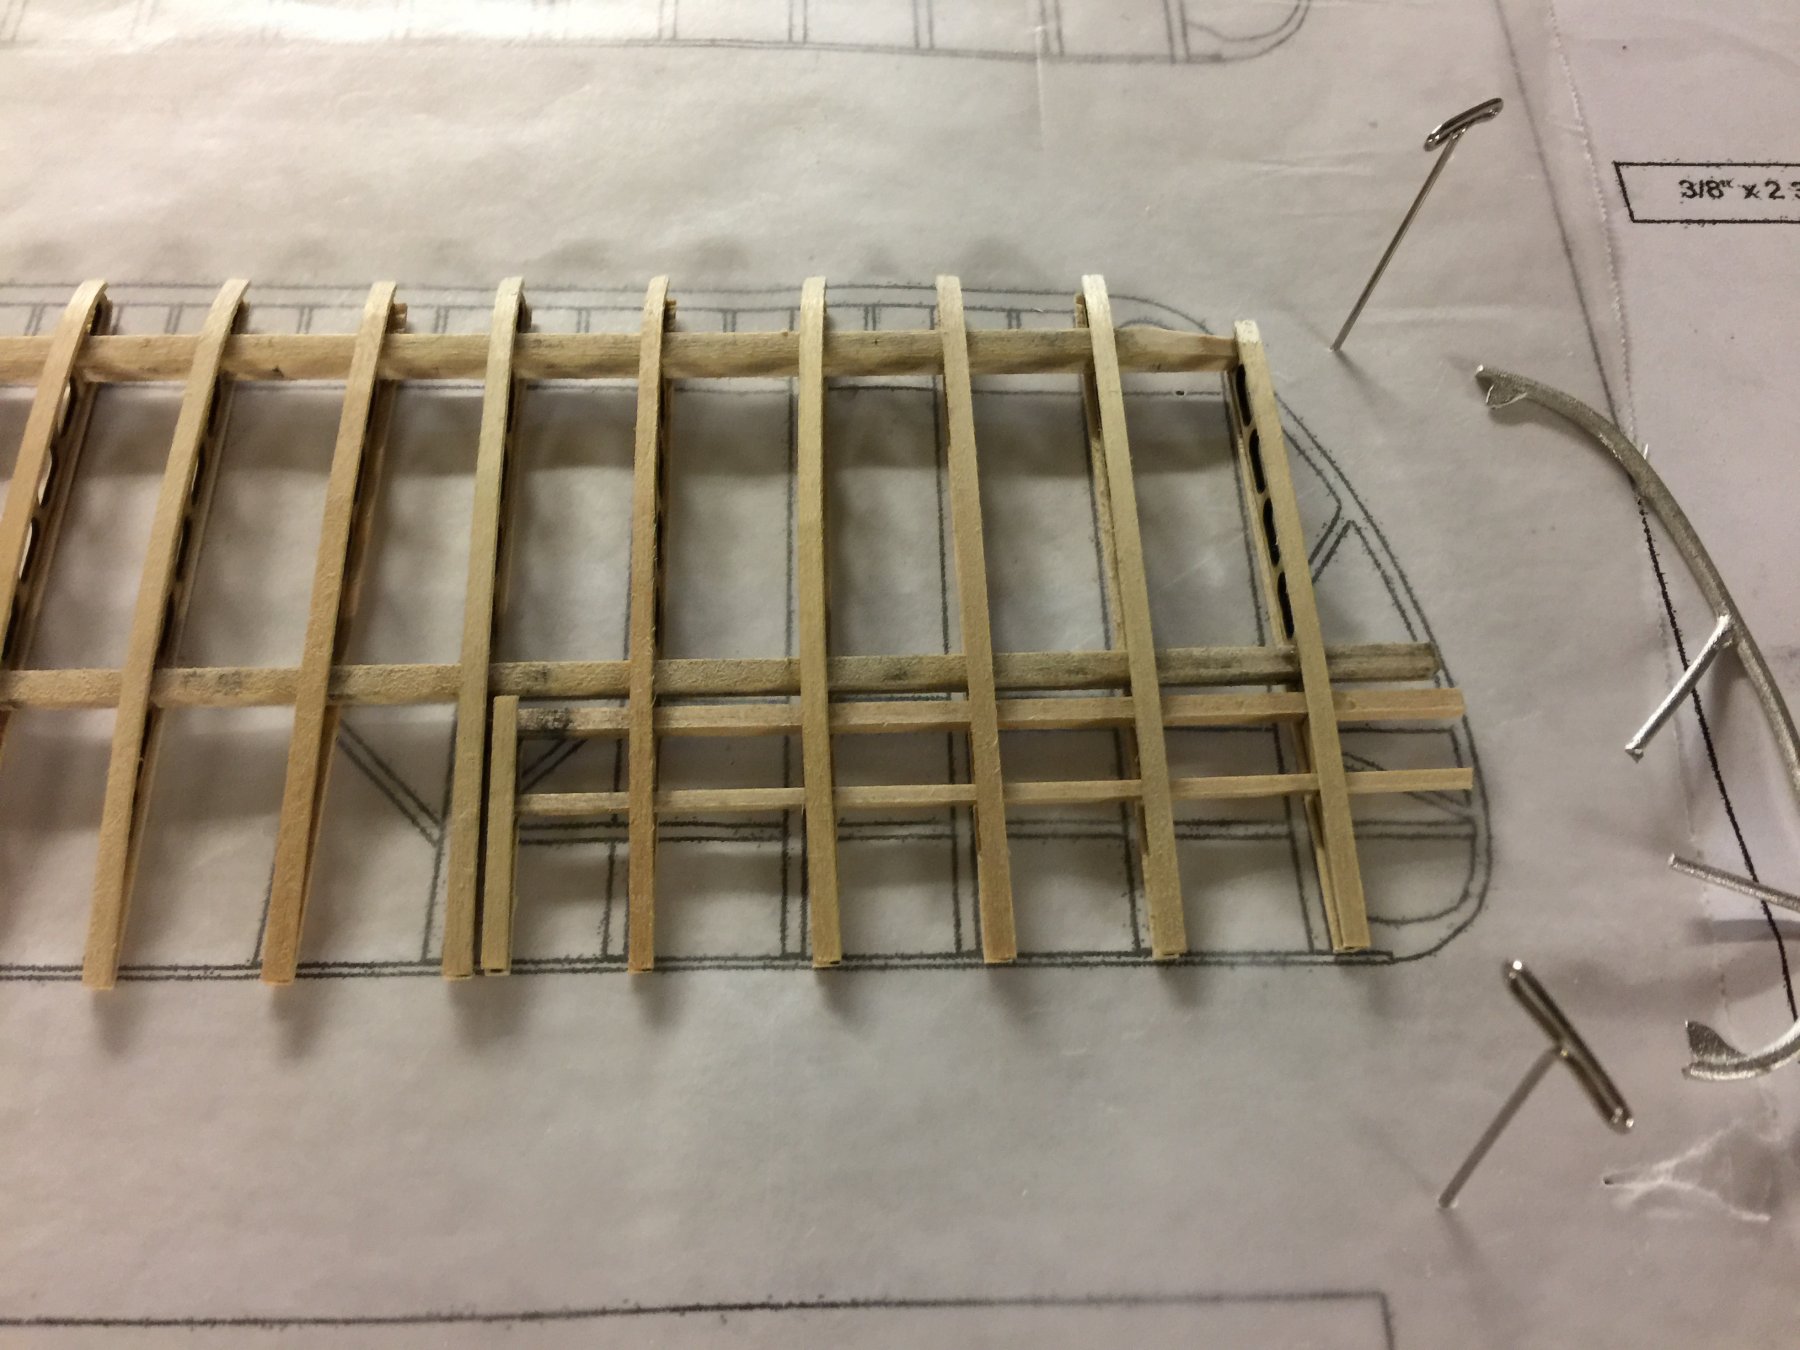
Working on the inner wing framing today. Placed the leading edge on the plans and worked on a joinery issue: the leading edge is in two pieces (as were the main and secondary spars). Got the leading edge joined and glued, and now testing the fit against the front of the ribs. A little sanding here and there will be needed to get the leading edge of the ribs flat, then it is glue time. Aileron spars done. Dry fitting the wing tips as well. They'll need a little bending. ~john

- 114 replies
-
- 14
-
-
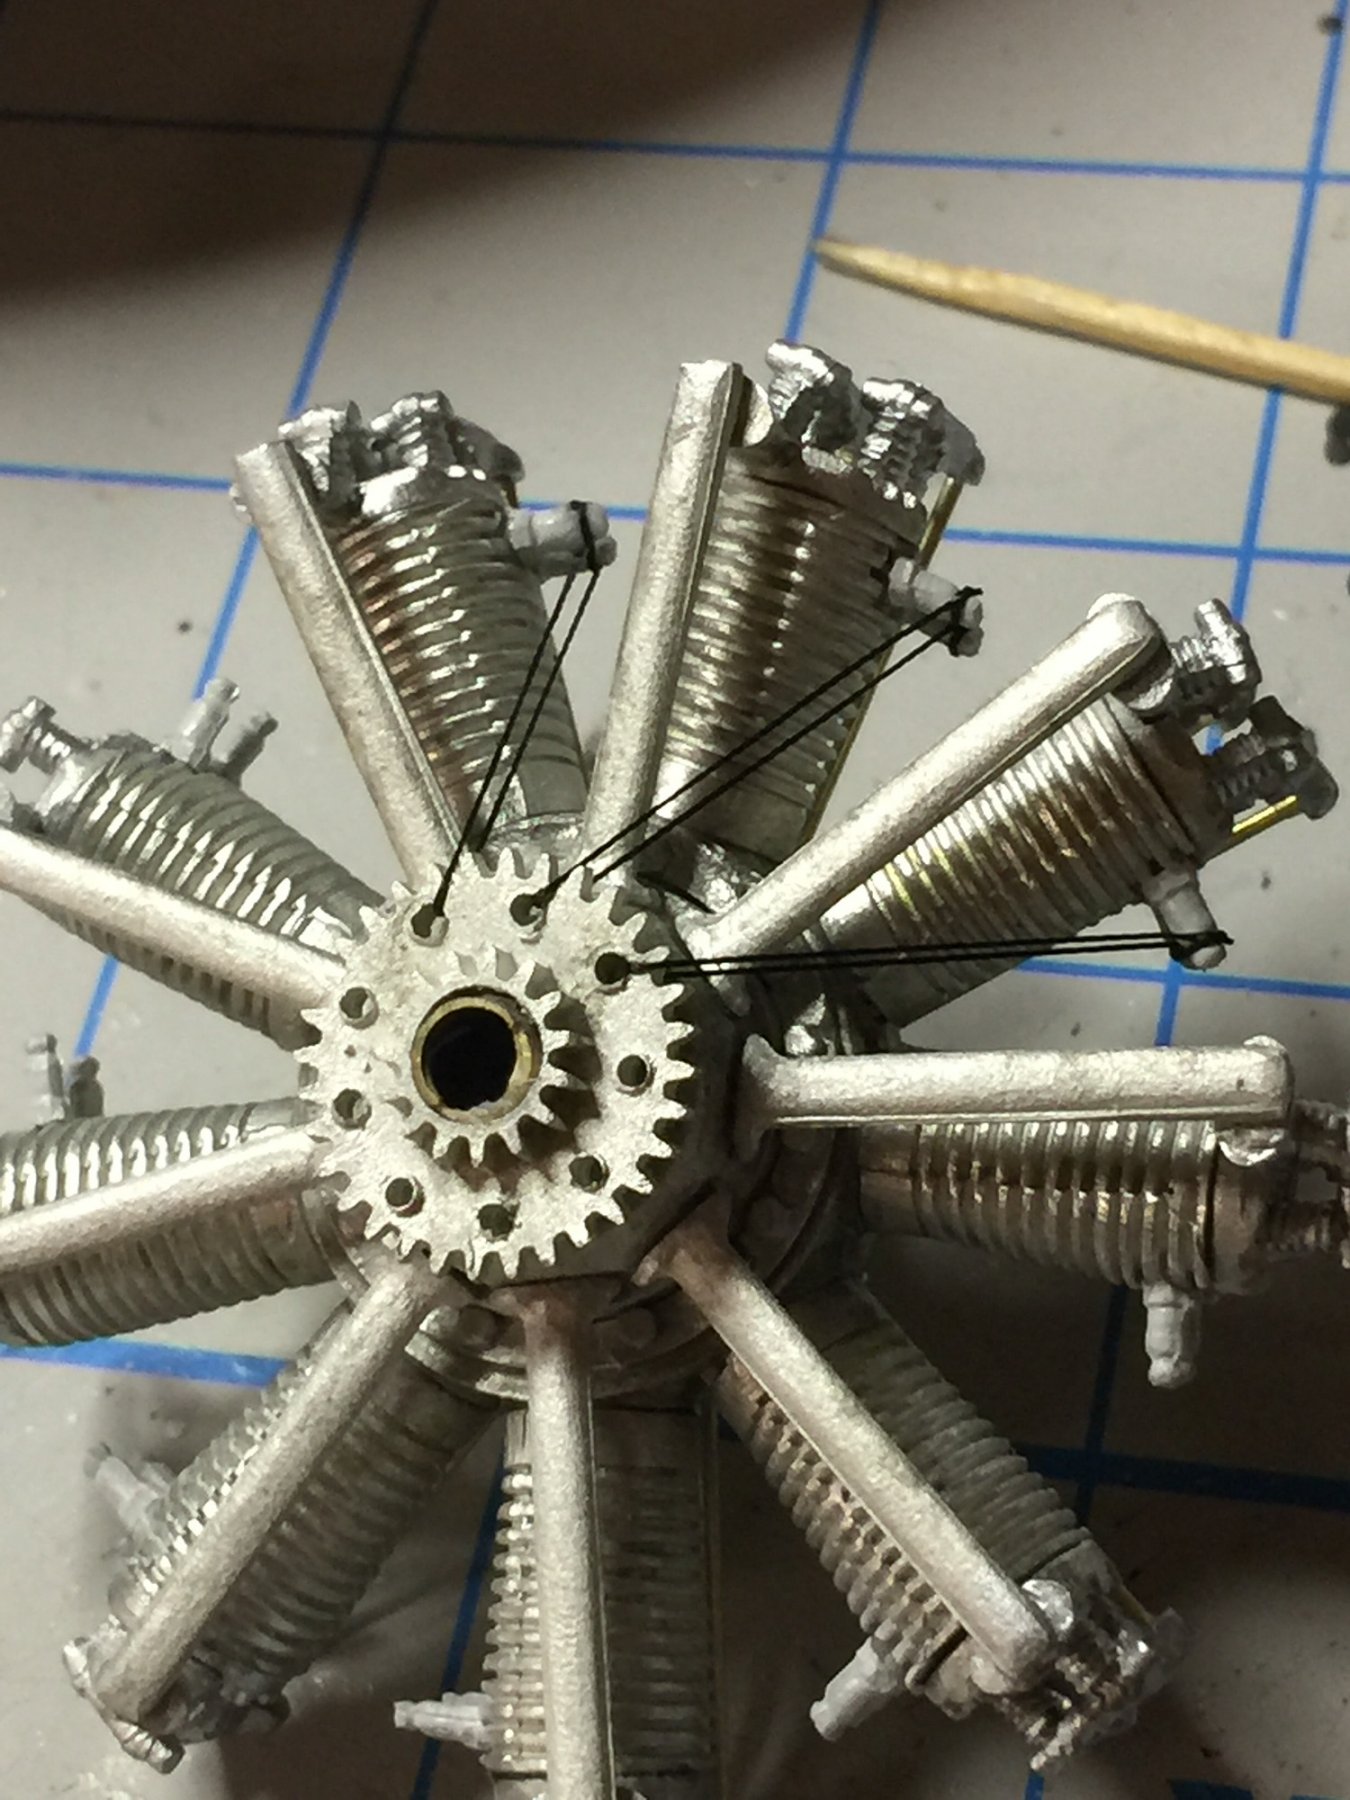
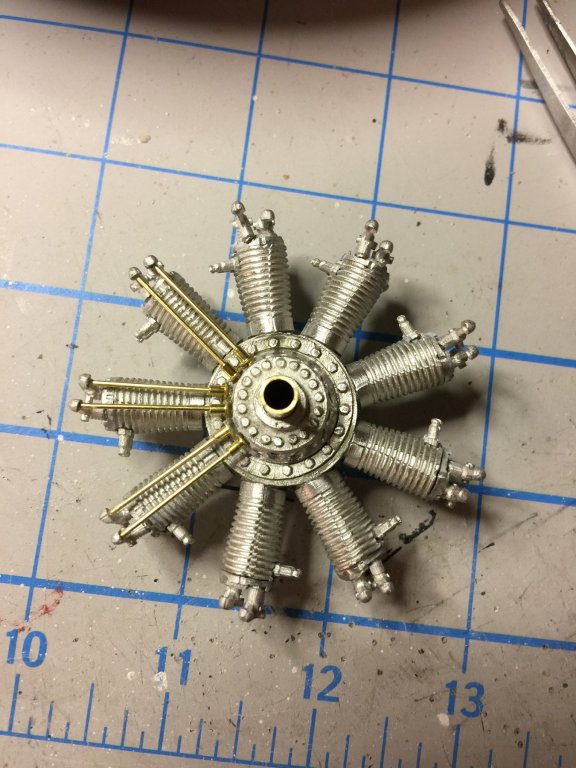
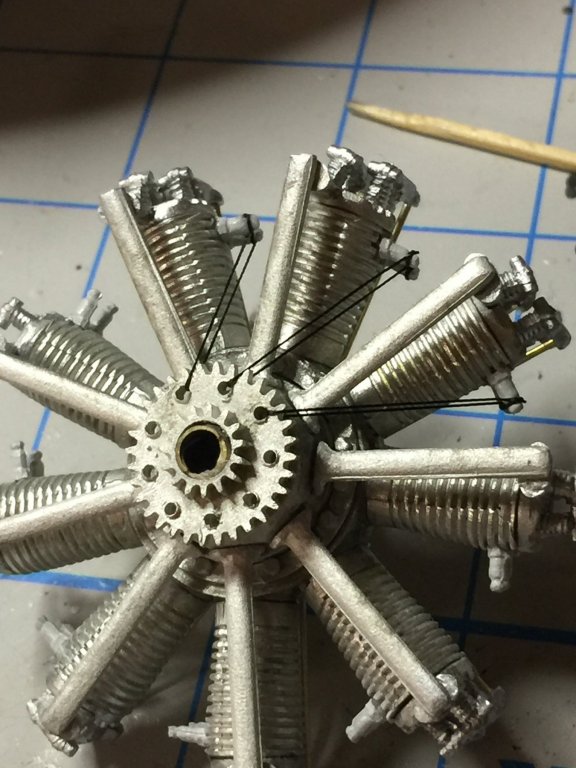
Hi Ron, Indeed - VERY true..... but they are totally invisible when the engine is mounted. I am thinking about using a thin wire as a replacement, anyway, as taught thread is not very accurate looking either. Yes? ~john
-
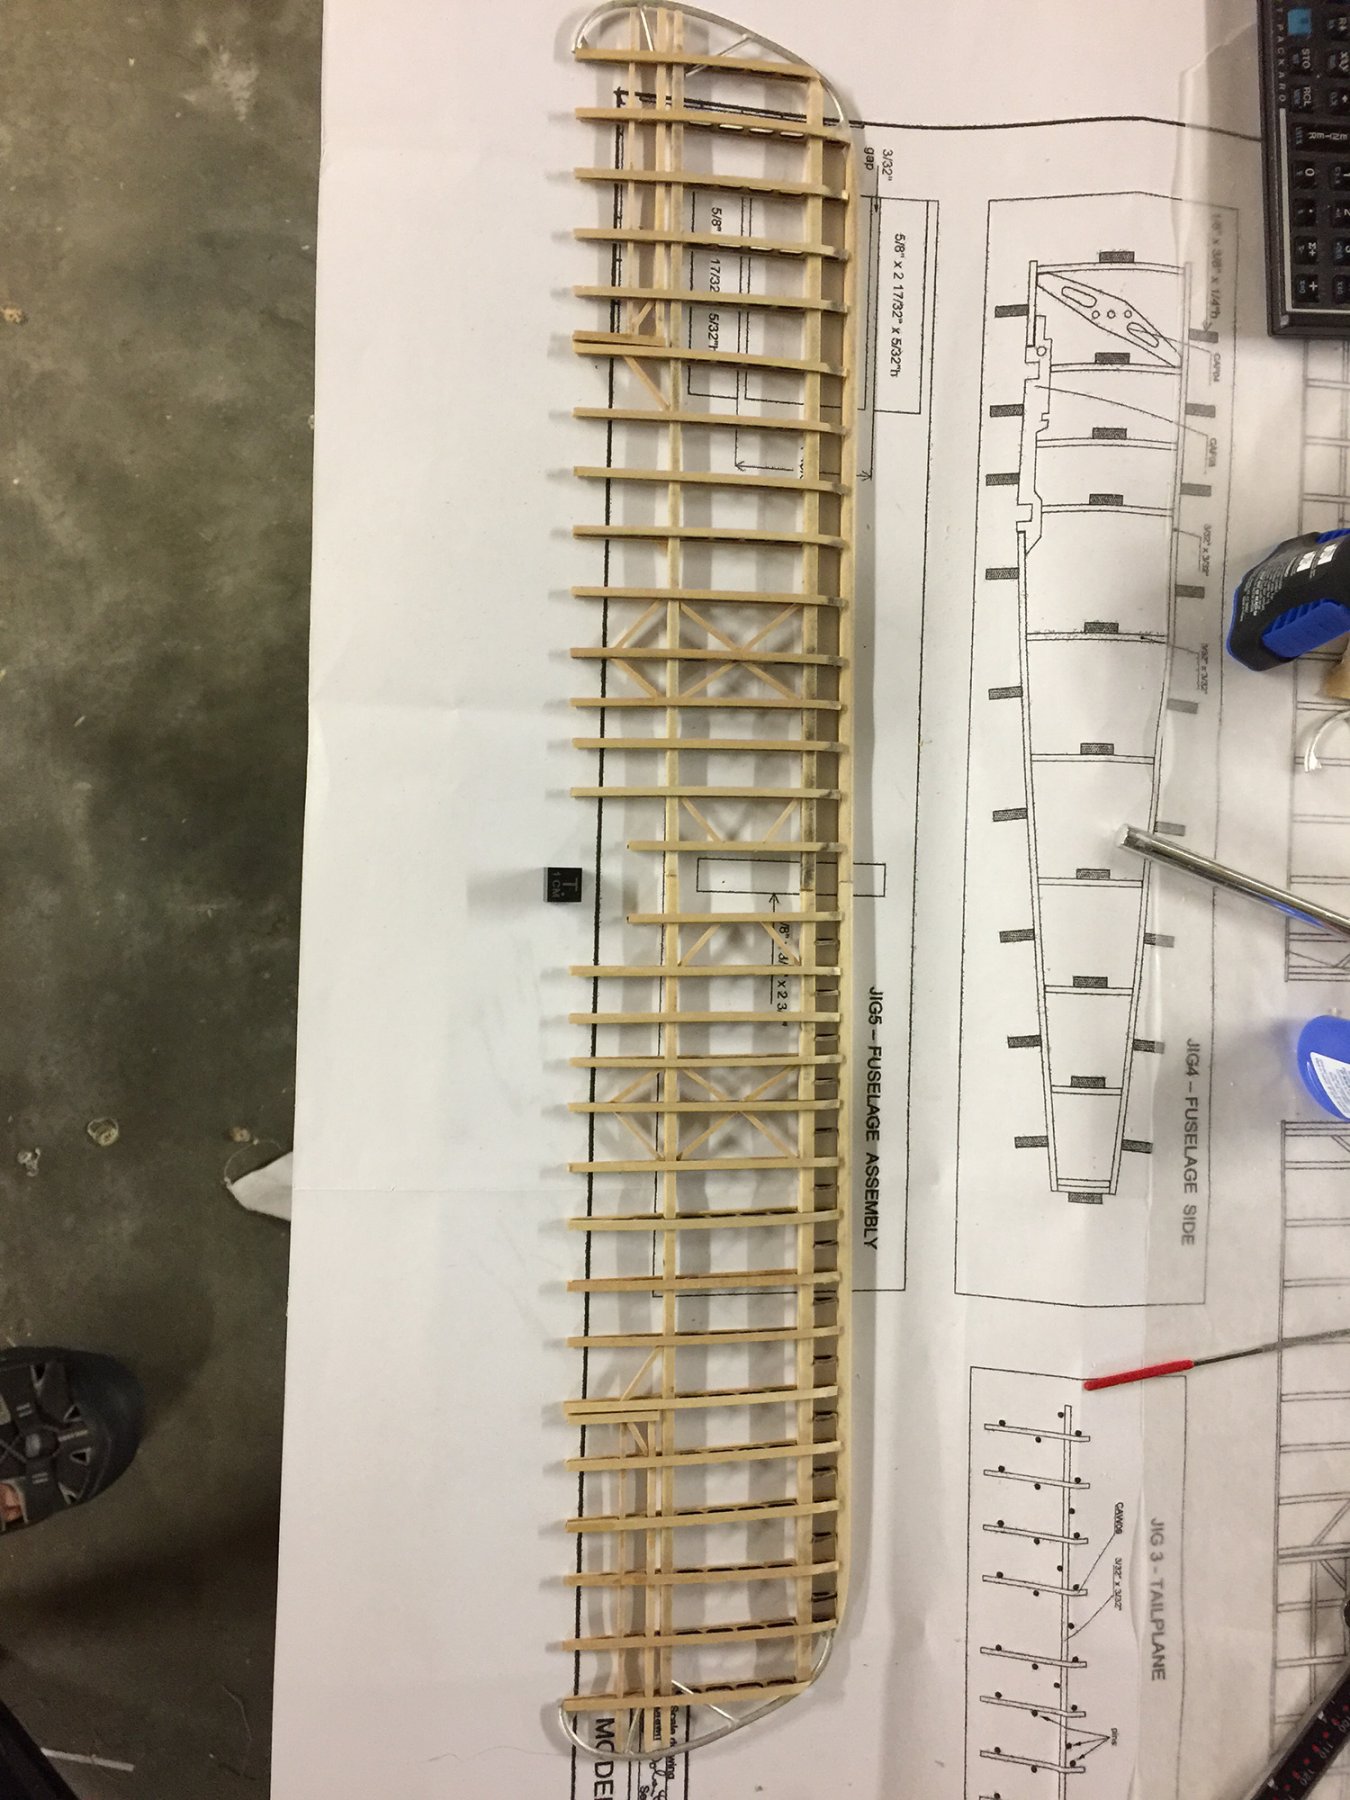
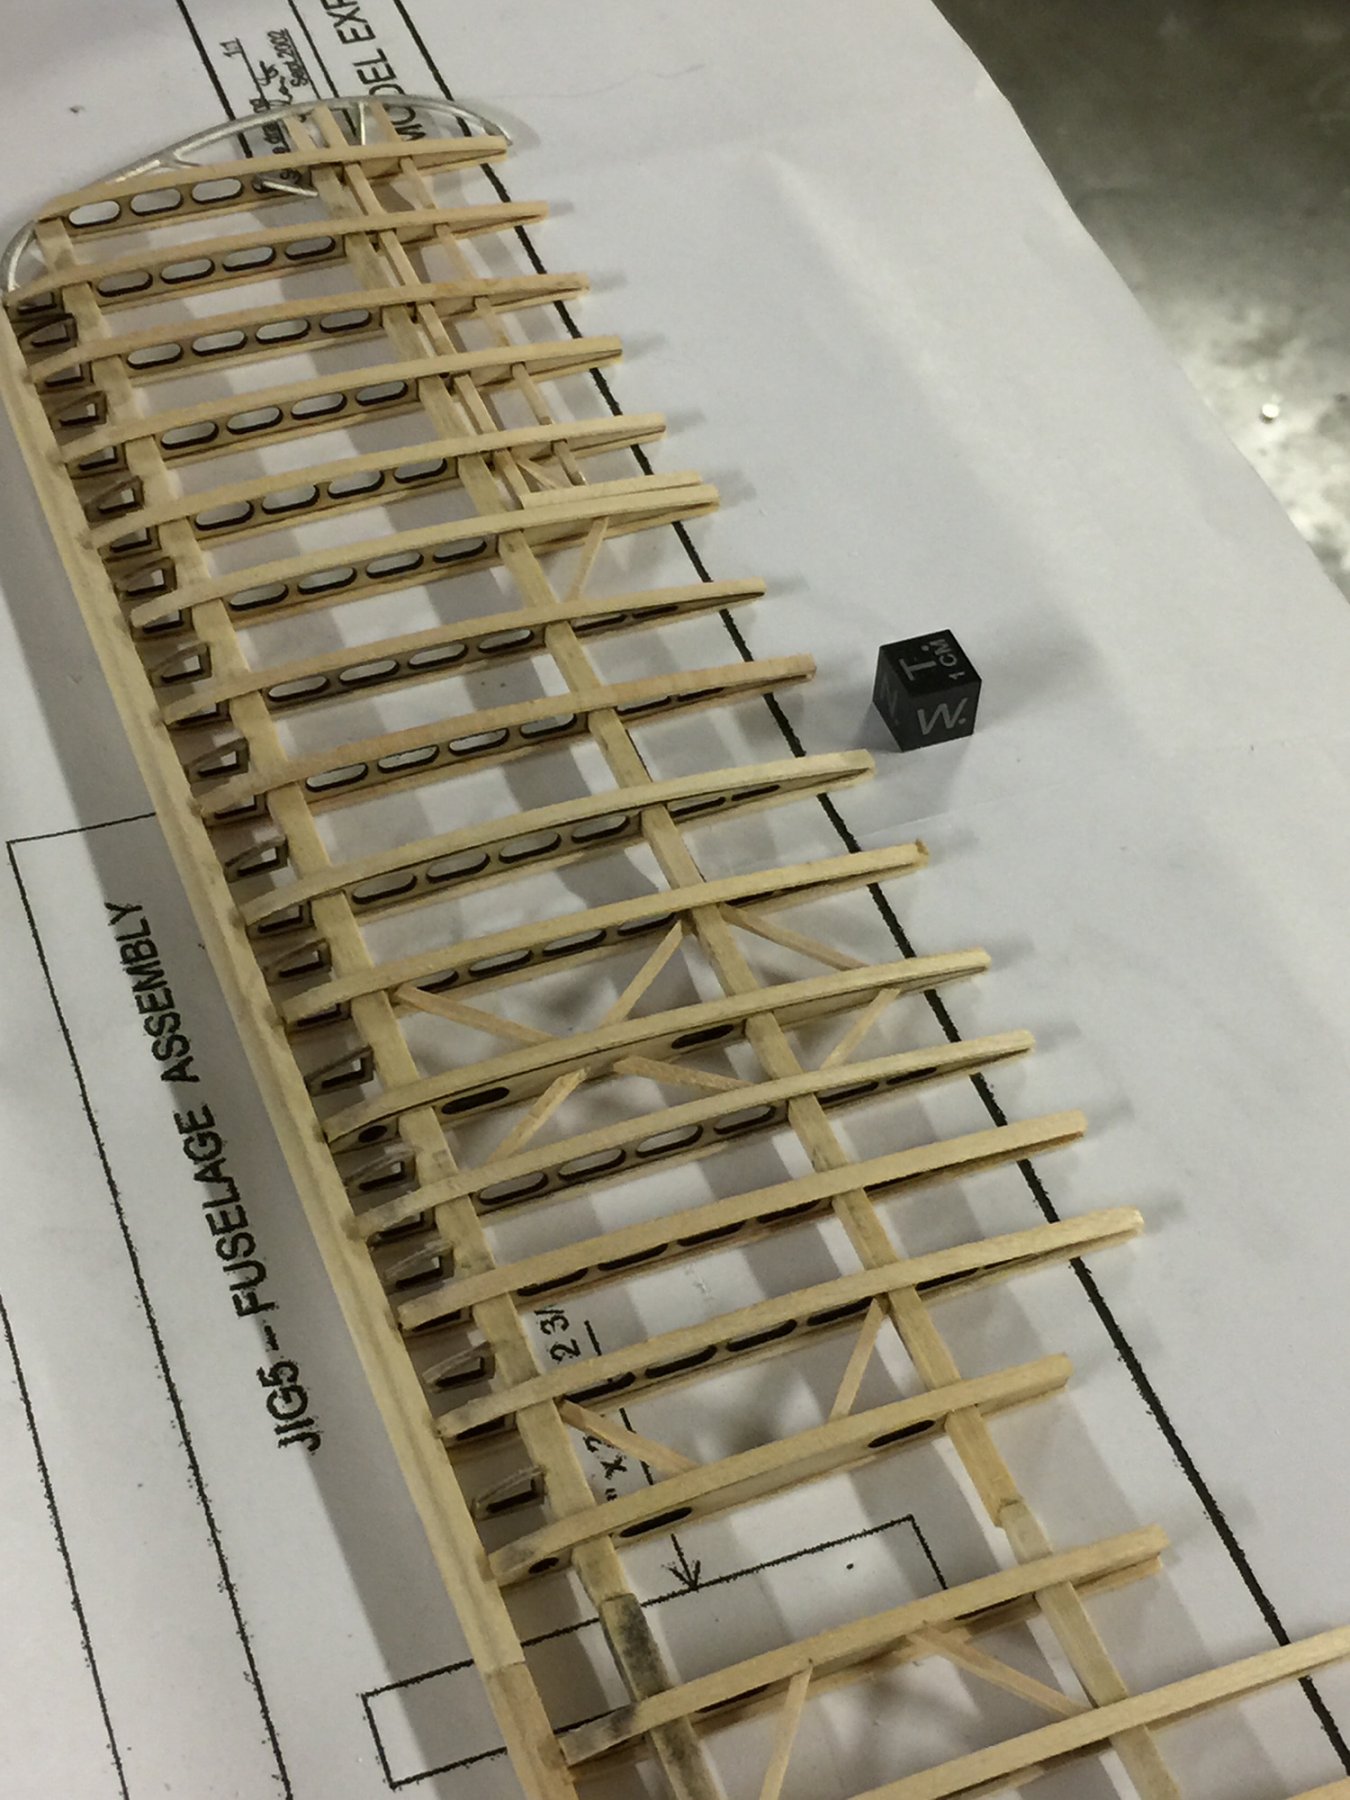
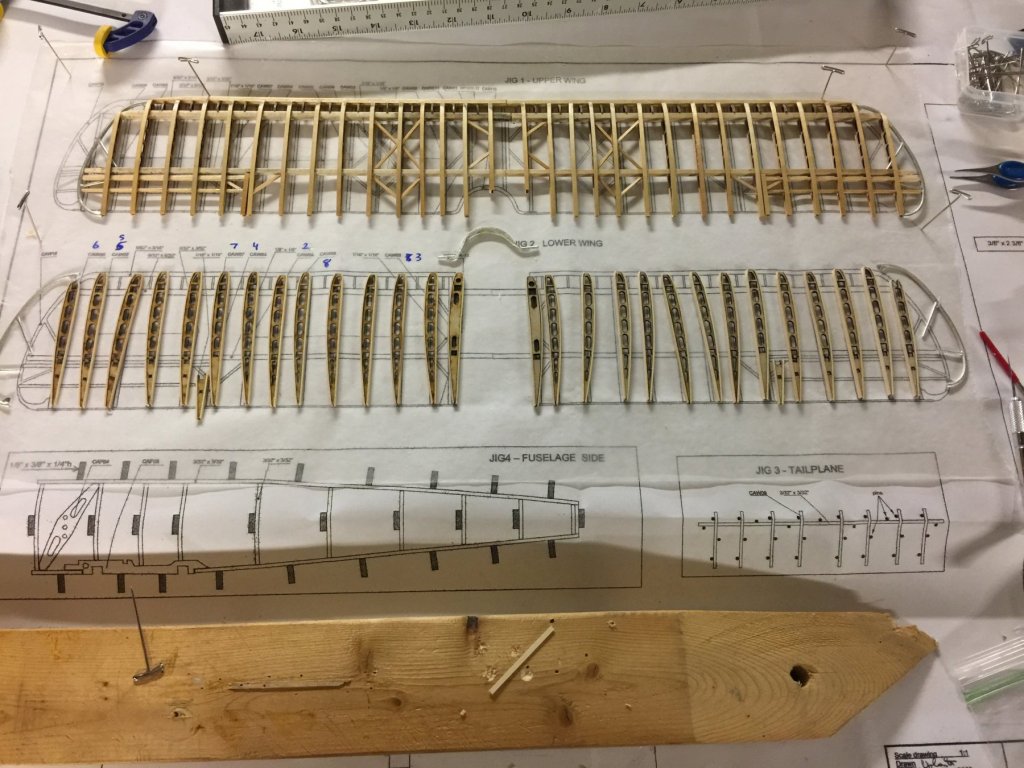
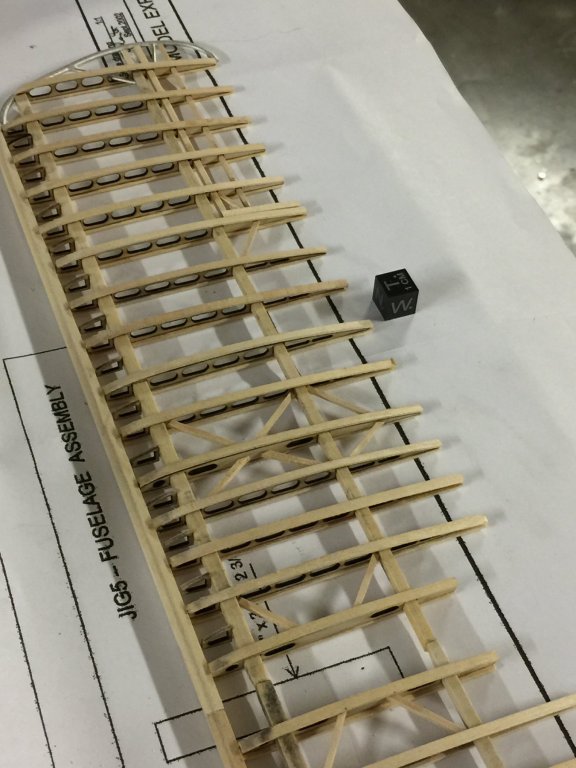
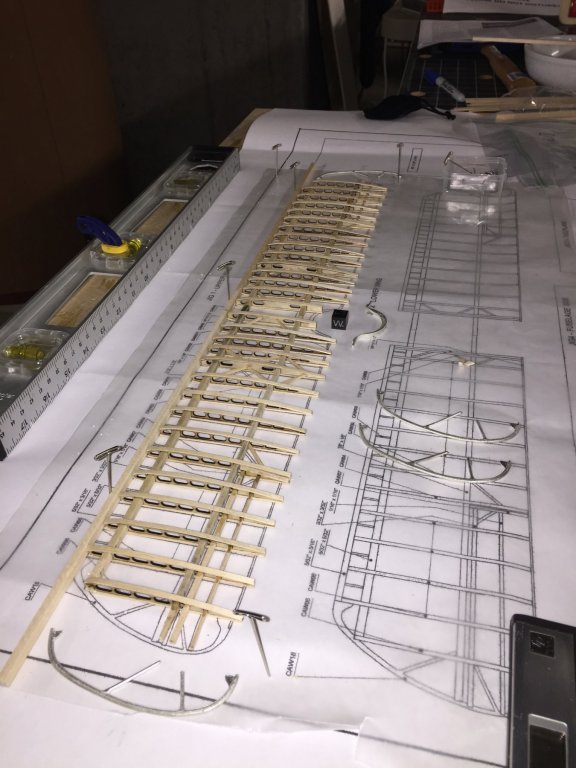
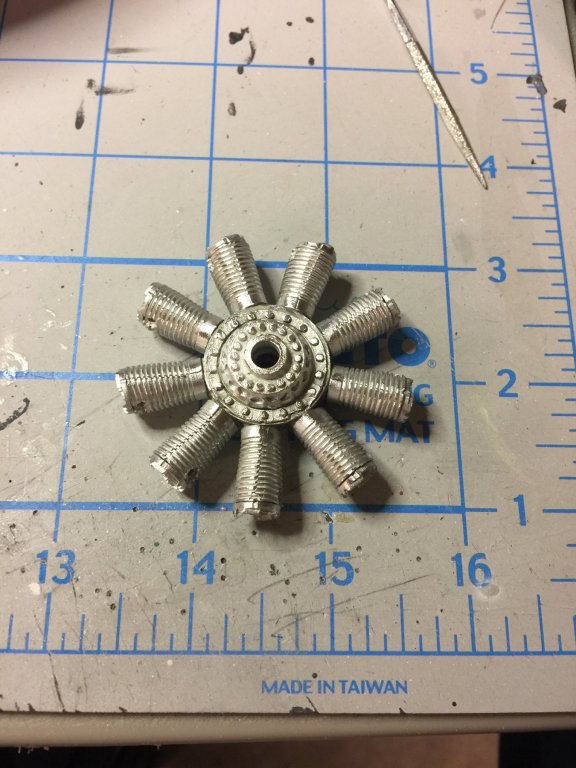
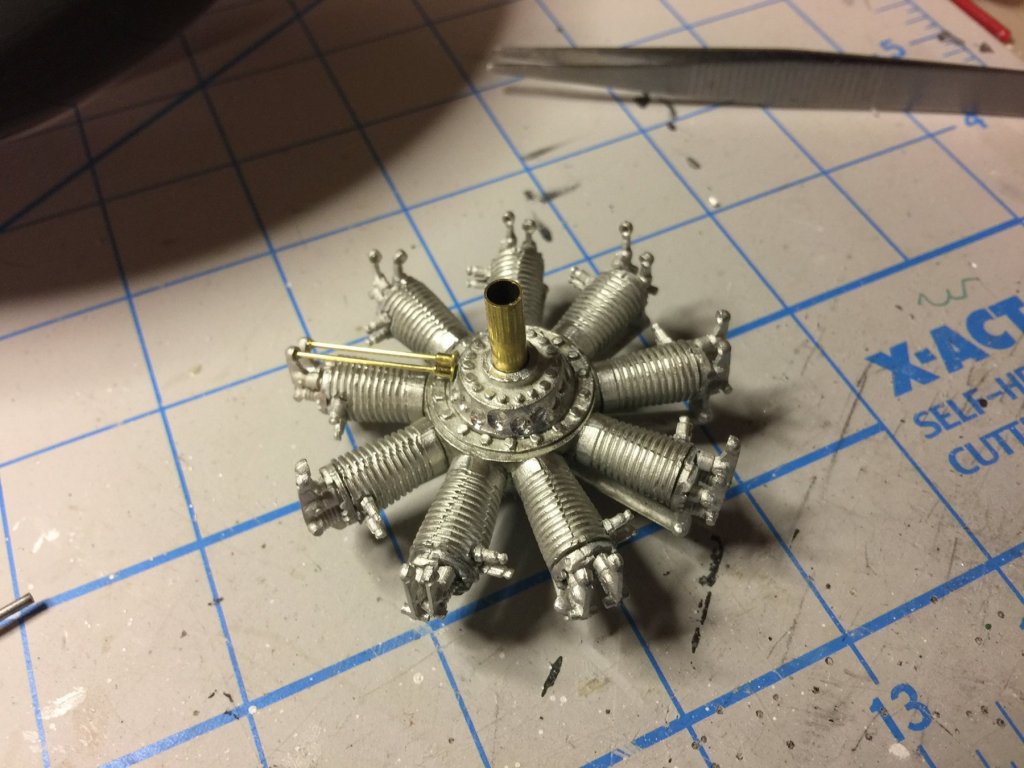
Thanks for joining the build, John and Grant. Good point about scale. I'll post a couple of images here for you to give an idea of the size-of-things. The little charcoal cube is 1cm. The model is 3/4" = 1' (1:16) scale of the F.1 Sopwith Camel. The wingspan will be 534mm (21") and the longitudinal length (prop to empennage) 584mm (about 14"). Construction materials: basswood, brass, Britannia metal, steel, rubber tubing, copper tape and tubing, thread.


- 114 replies
-
- 16
-
-
Hi Popeye! Thanks for checking in. The Spitfire is a glorious aircraft. The Dr1 is a good challenge. Going for the complete wrap, eh? Good for you! ~john
-
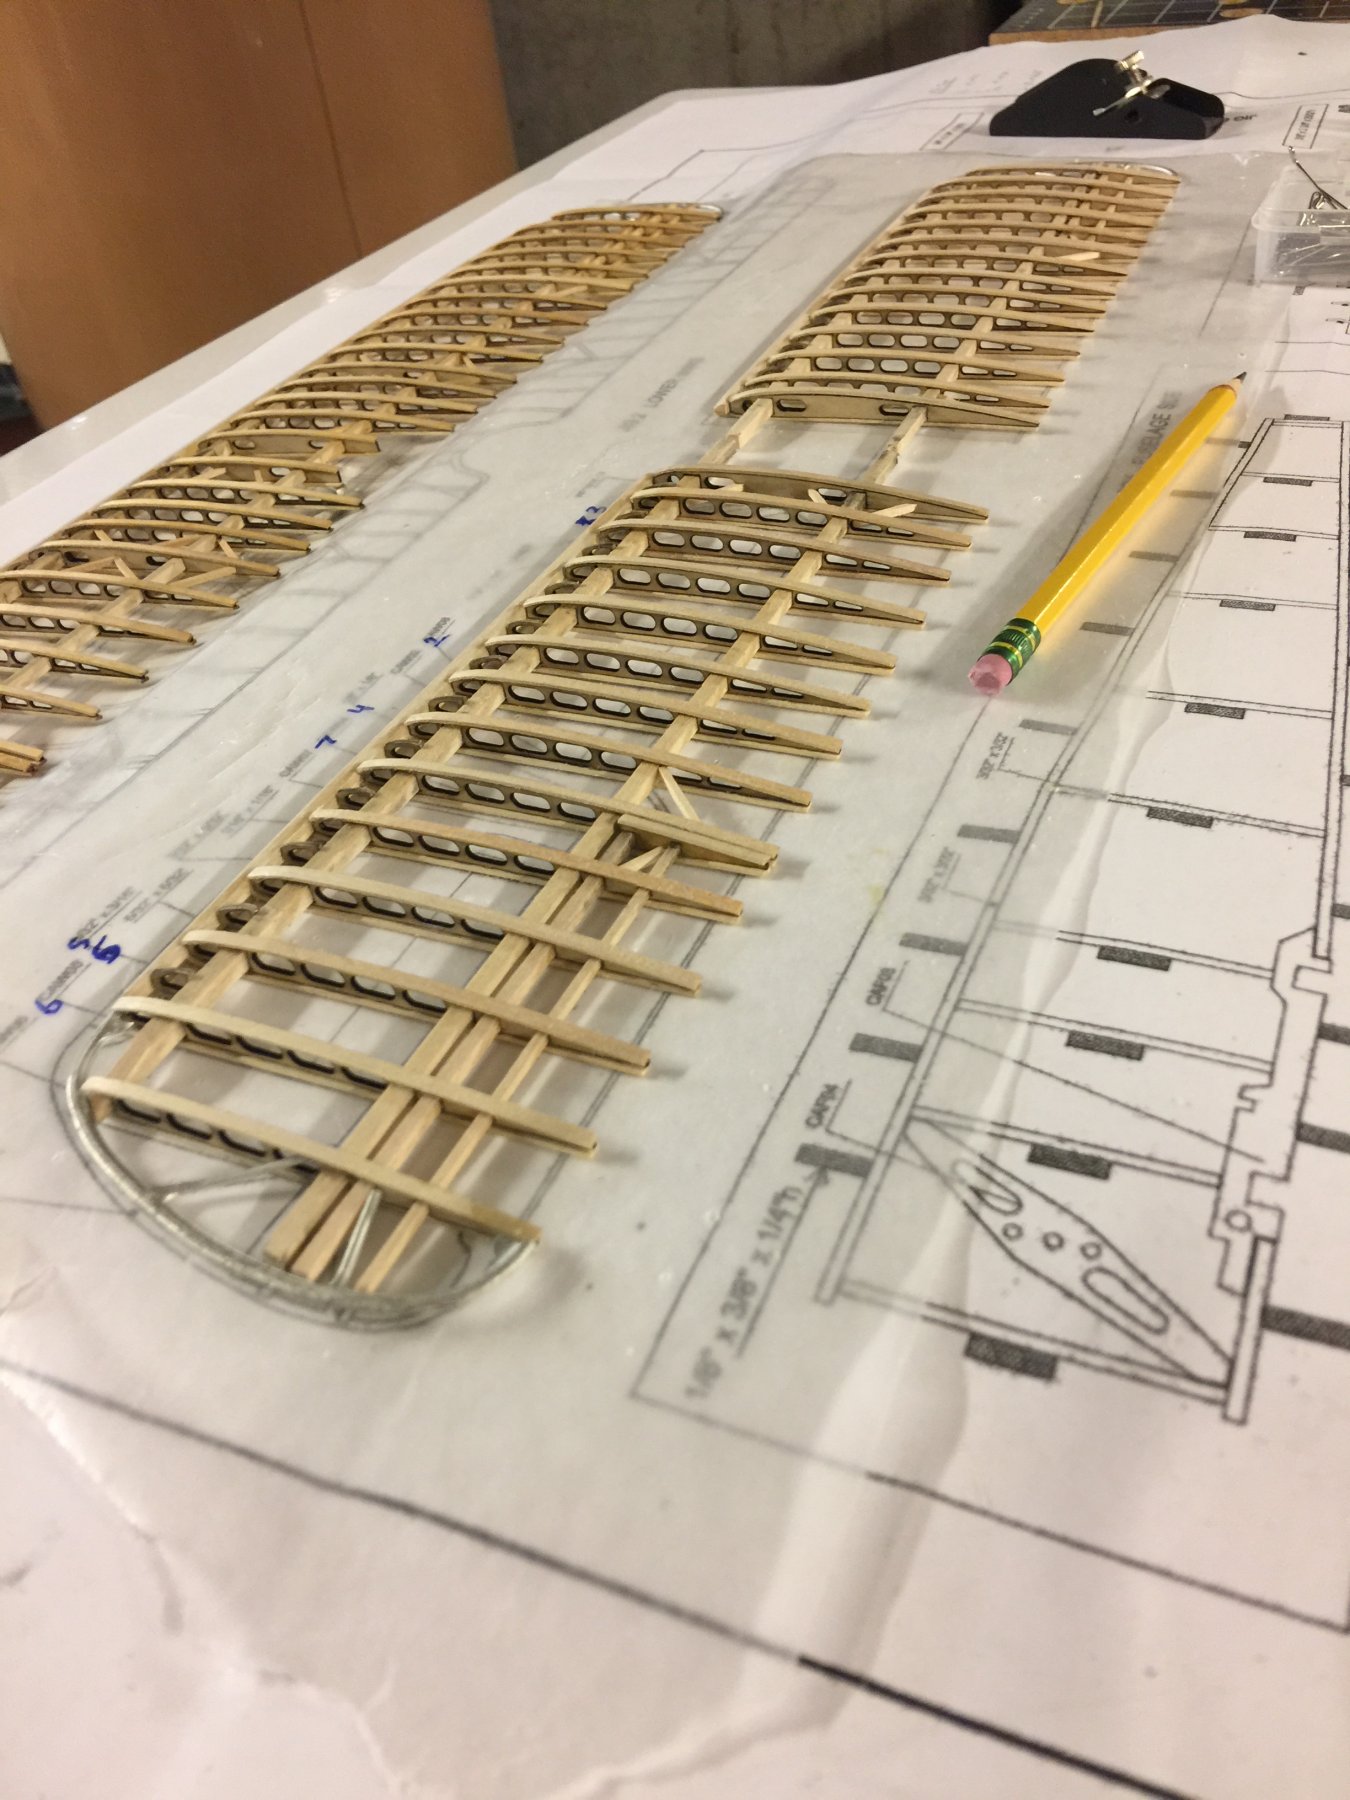
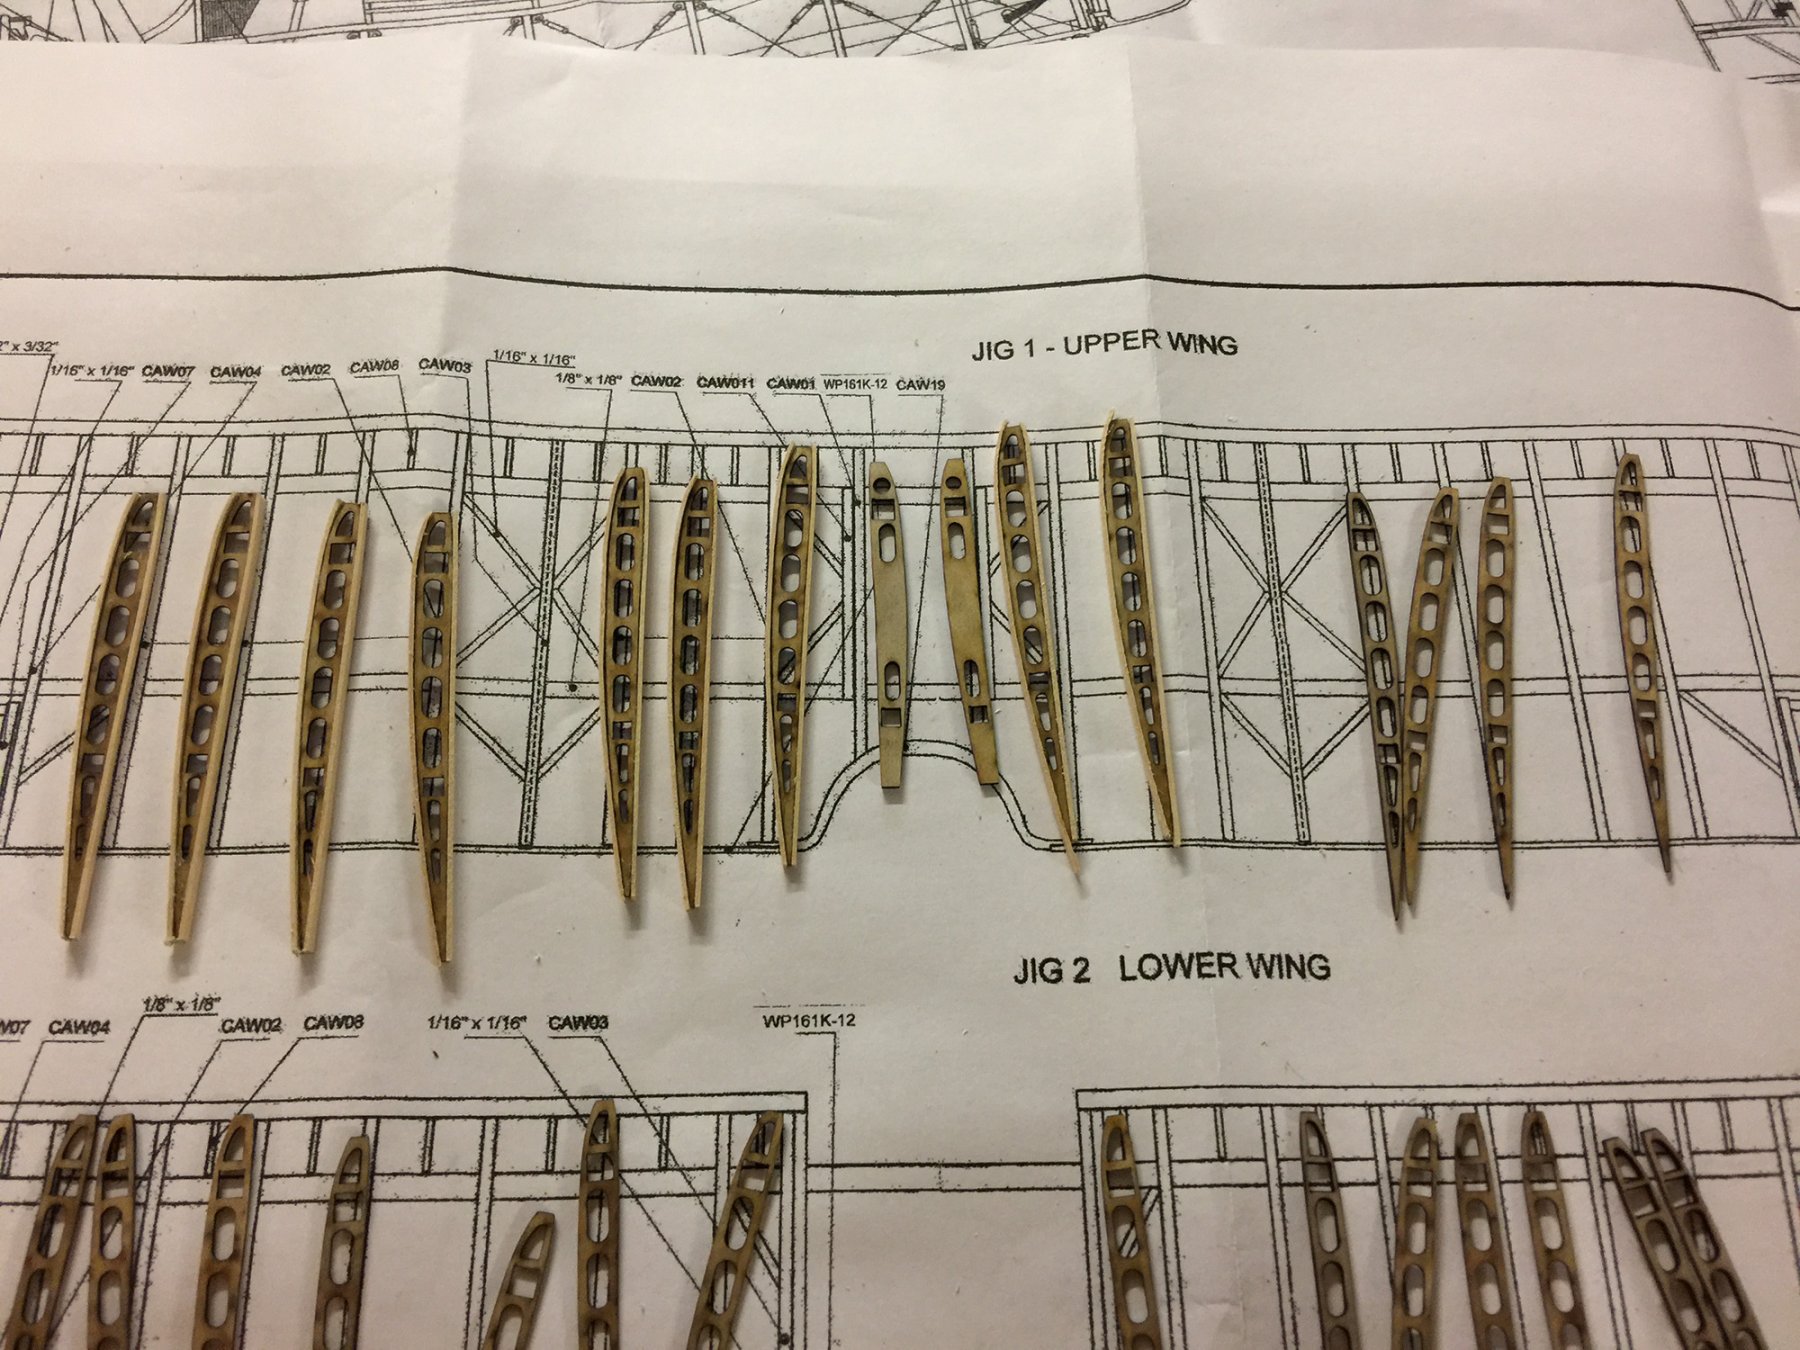
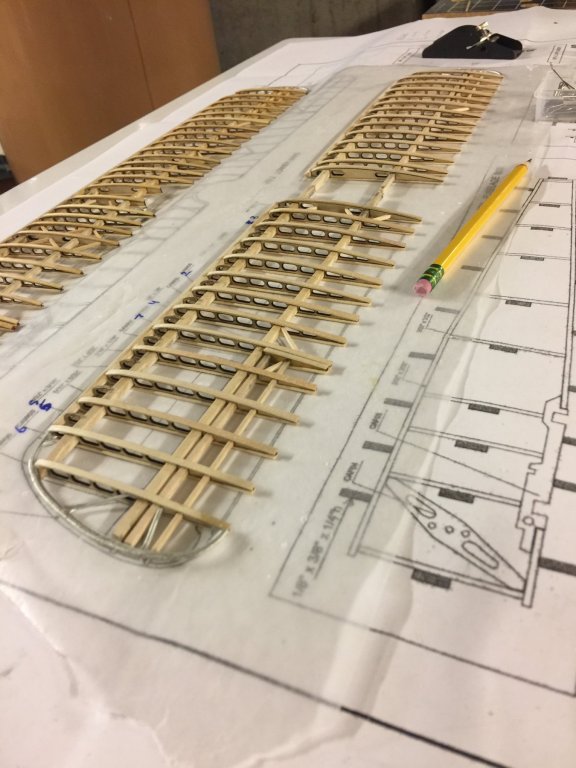
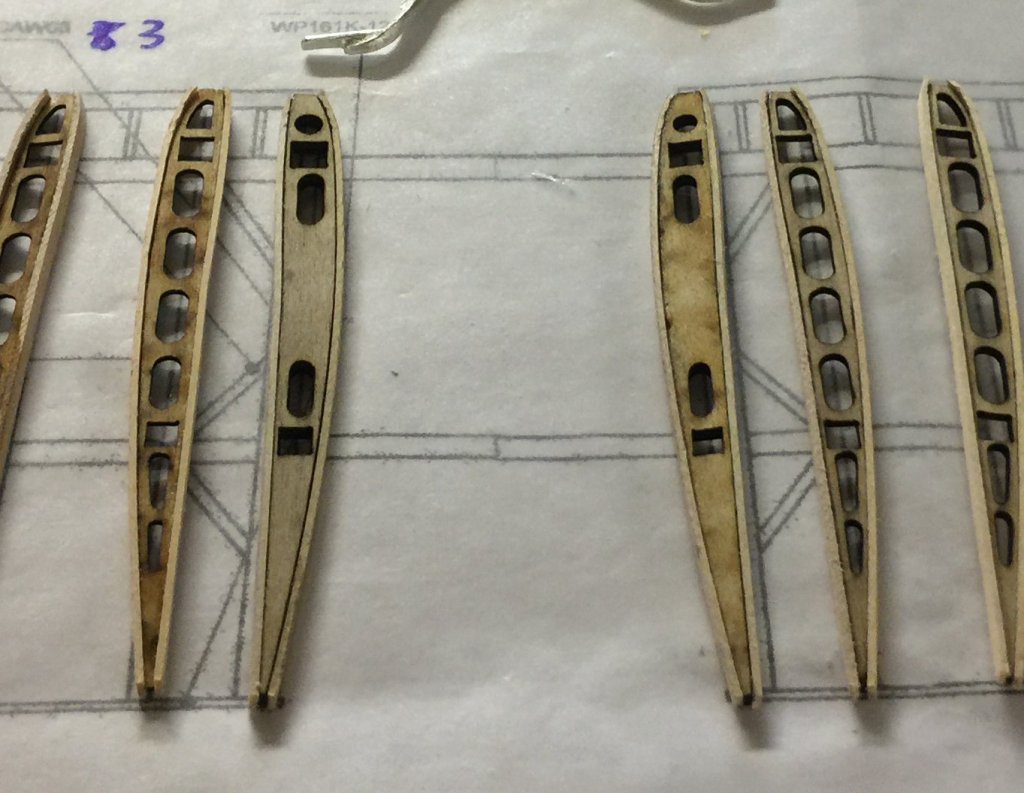
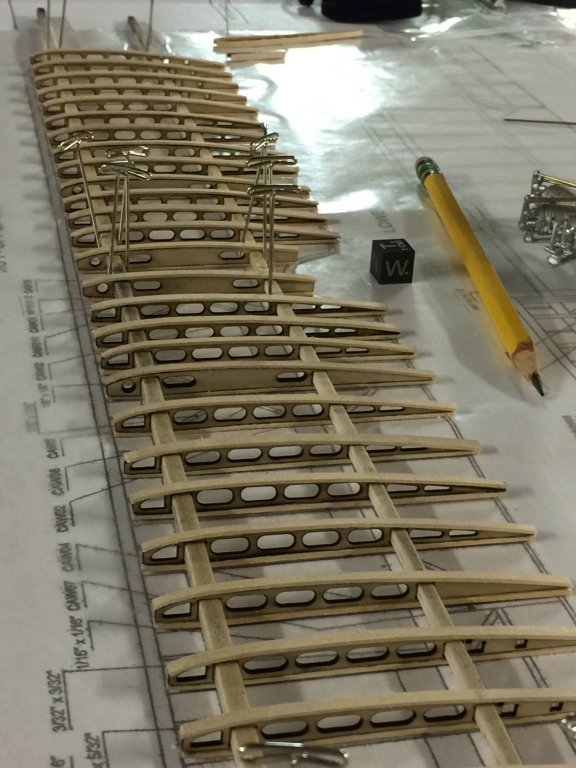
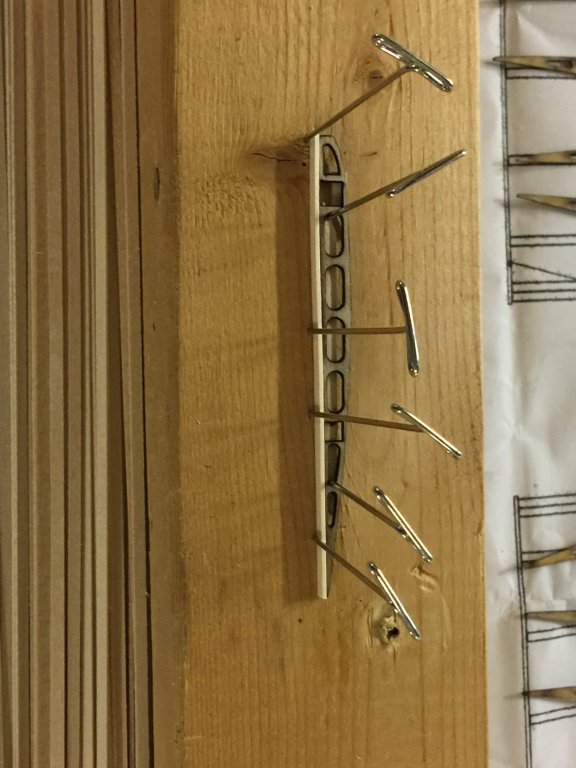
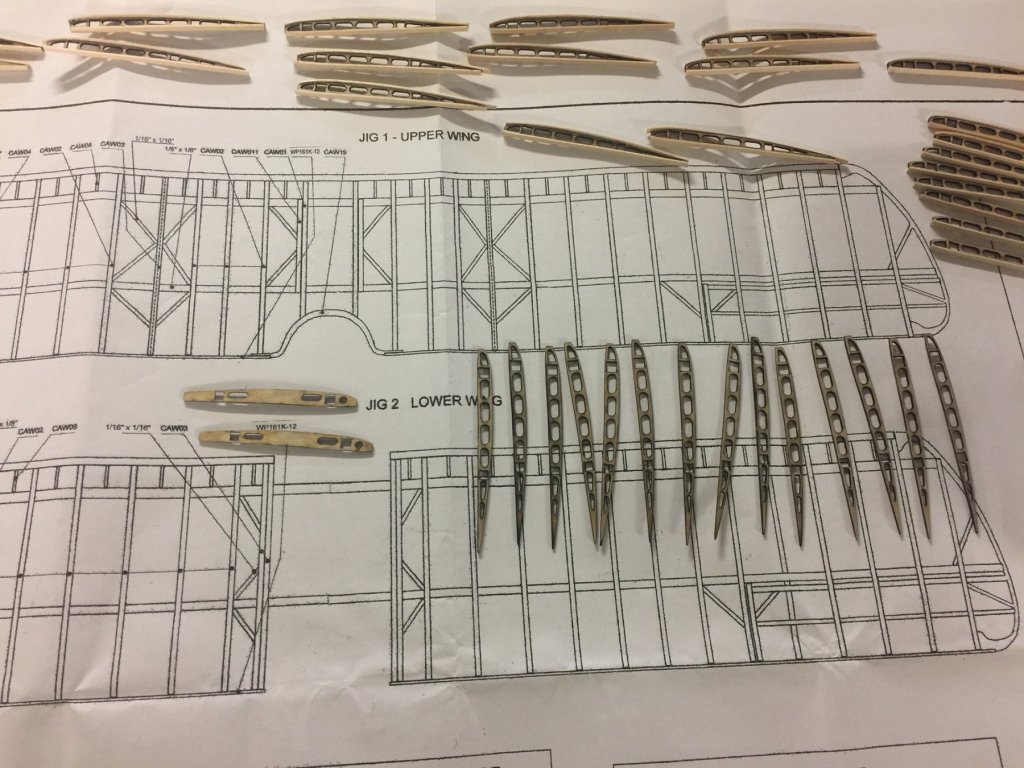
Top wing making more progress tonight: majority of ribs glued onto the two main spars. This will dry overnight before continuing with the leading edge, ailerons and other details. After this, the bottom wing,,,, The last image shows the rib details: they are laser cut and then capped with curved planking.... these were most time consuming to do well. The gluing was painless. The plans are covered in regular wax paper, parts held with pins as needed, and then glued using standard yellow wood glue that had been thinned 30% with water. This flowed into the remaining gaps well, and it is solidifying nicely. A remaining issue will be to clear coat this first, before any color/stain/varnish is applied, as simple one-step staining will not work where the glue has already sealed the wood. ~john

- 114 replies
-
- 13
-
-
Hi Ken, Glad you've stepped in to watch the build. I, too, enjoy planes: they are my first love. Your work is astounding - what joy to work on such a large scale. From the few images I have seen on your site, one can readily see the attention to detail. Good work! For this build I am not thinking about covering, though I might be tempted as I move along. My last aircraft, a 75 Stearman, I did cover, largely to show off the color scheme. The Stearman is also internally not to-scale, but rather was made to fly as an RC. This Sopwith is definitely not flying. I would cry to see her crash! Too much detail to show off. So, maybe it'll have some sort of large diorama.... we'll see. ~john
-
Thanks, Dave. Certainly more to come here. I was able to glue the top wing tonight - so it is drying now. The details on this are pretty amazing. Glad that you got into ship building! ~john
-
.... and where I am today: working on the upper wing. There are a LOT of laser cut wing ribs that need sanding and such. It is a messy bit of work with the char going all over the place. I have finished adding the rib caps to each rib, and am now working on getting them aligned into their spars. That's it! More as this progresses. ~john

- 114 replies
-
- 21
-
-
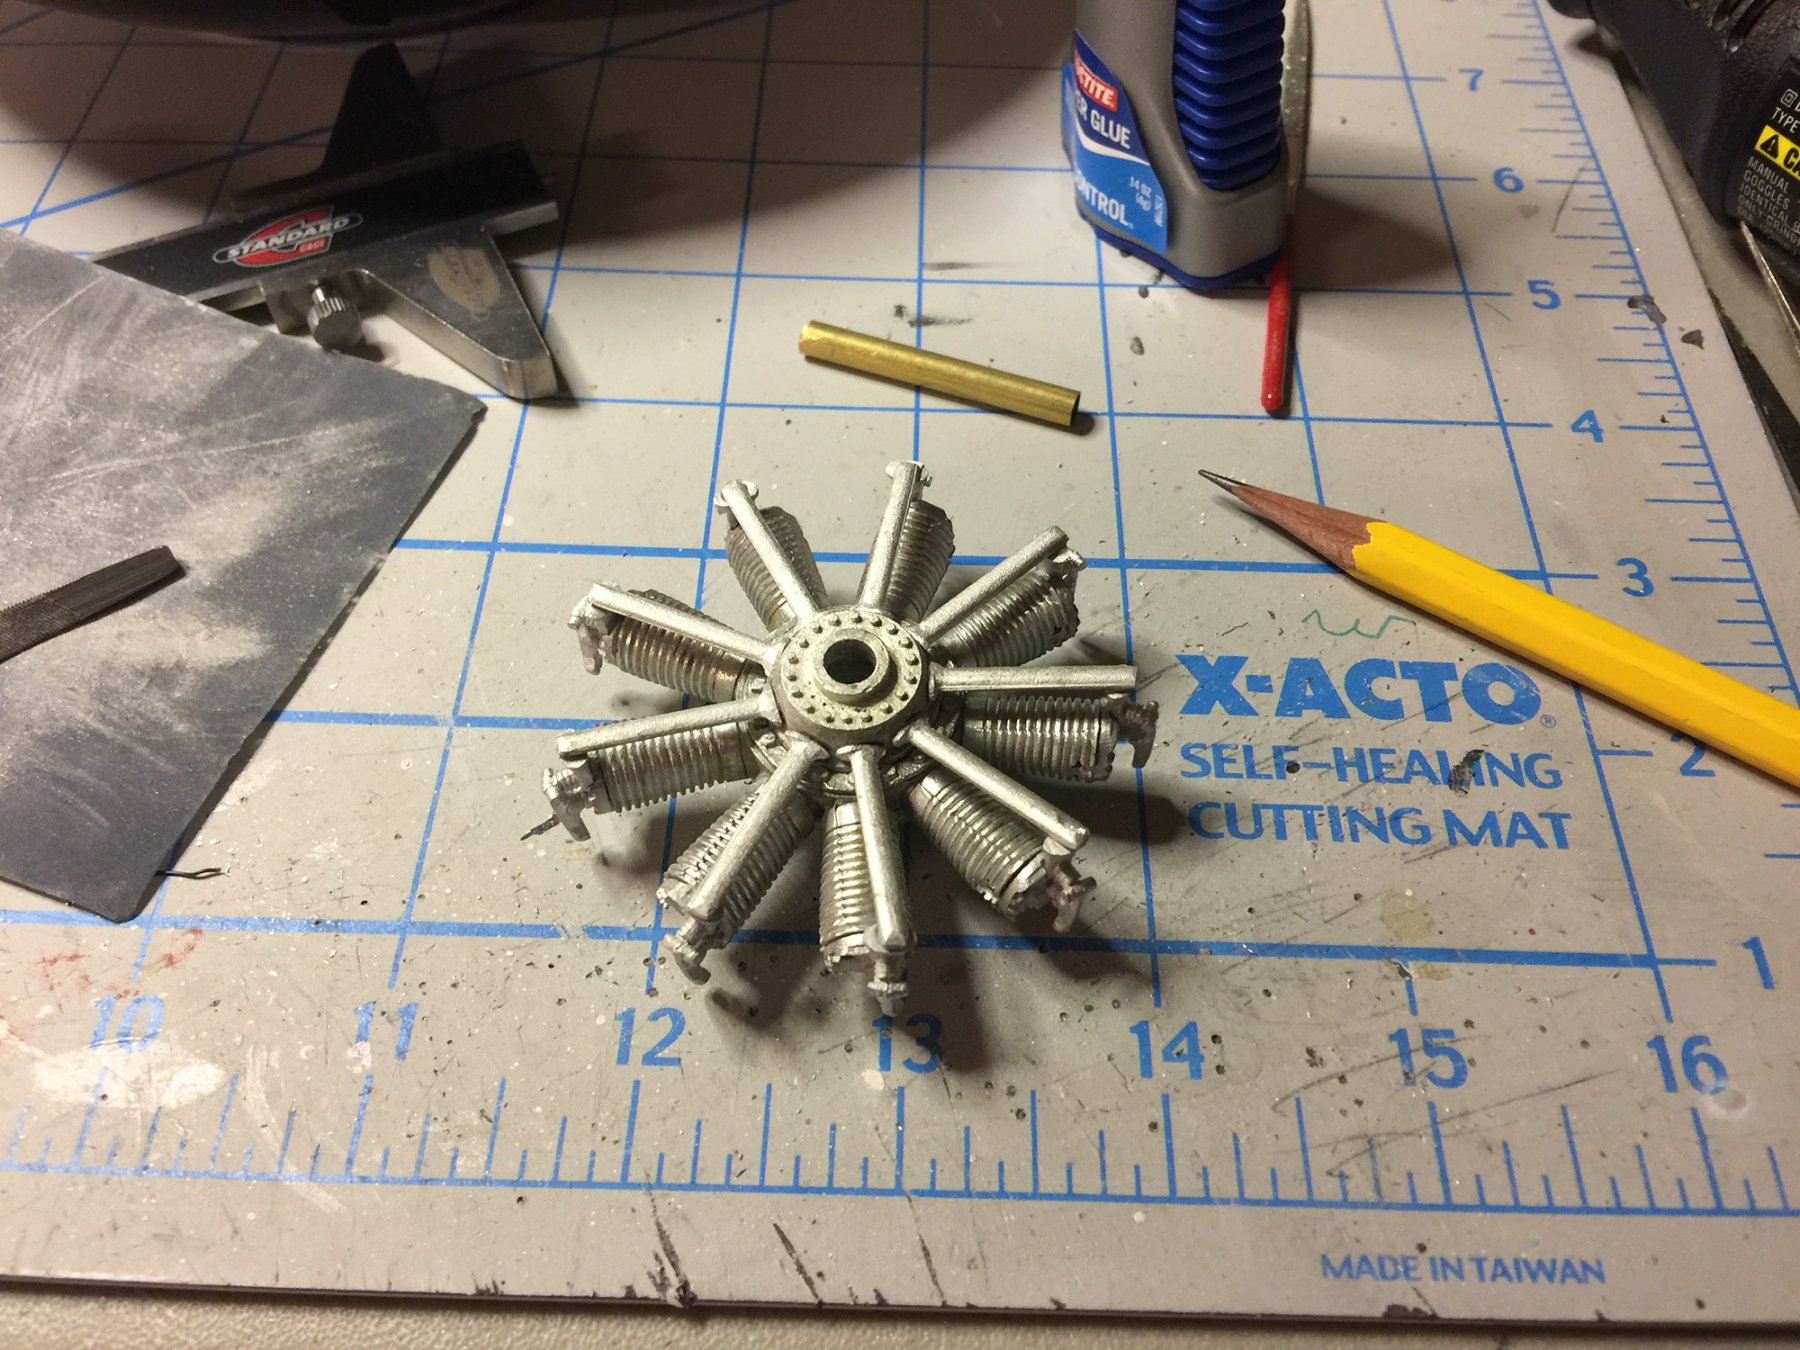
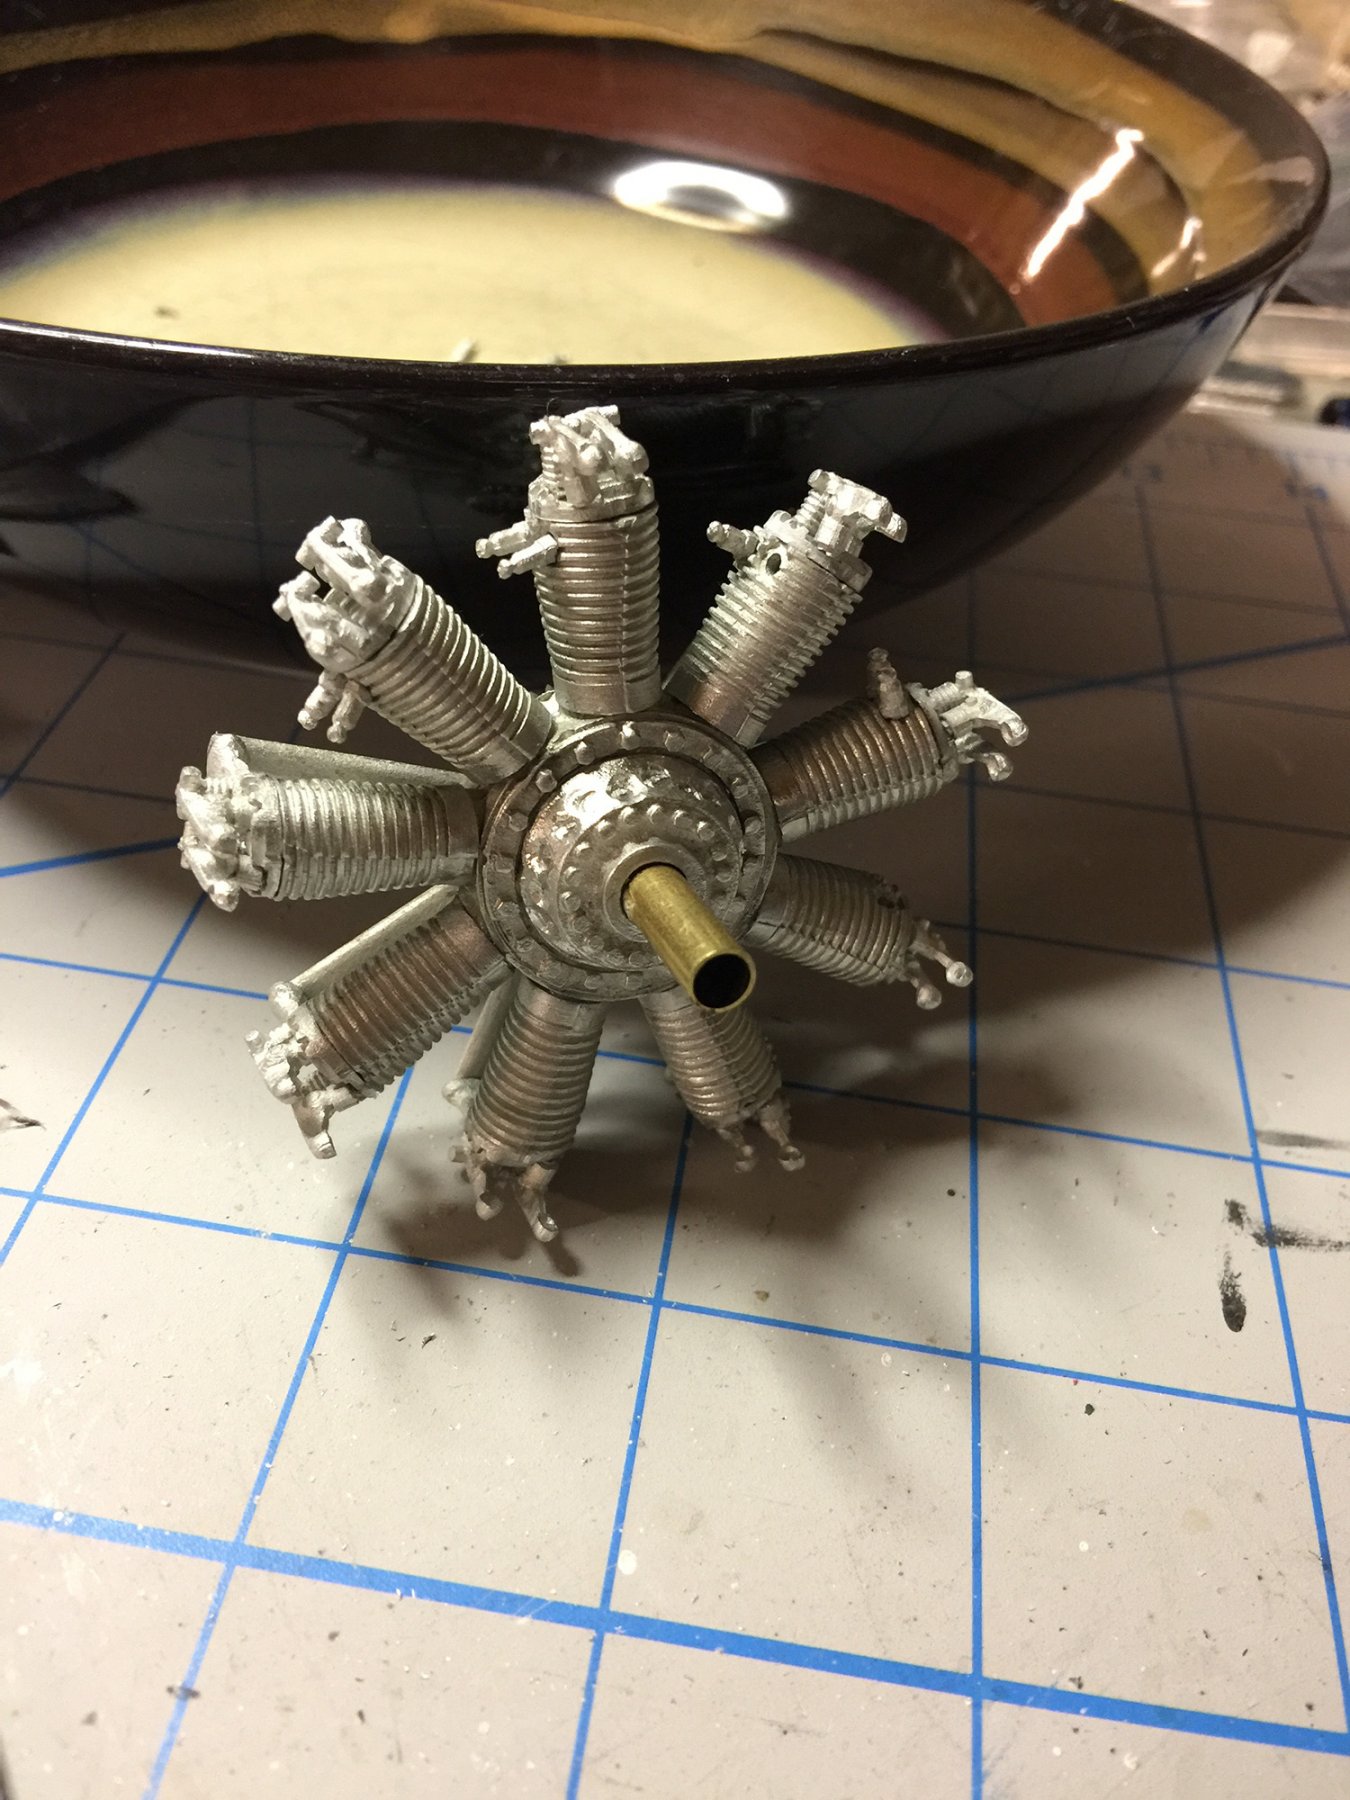
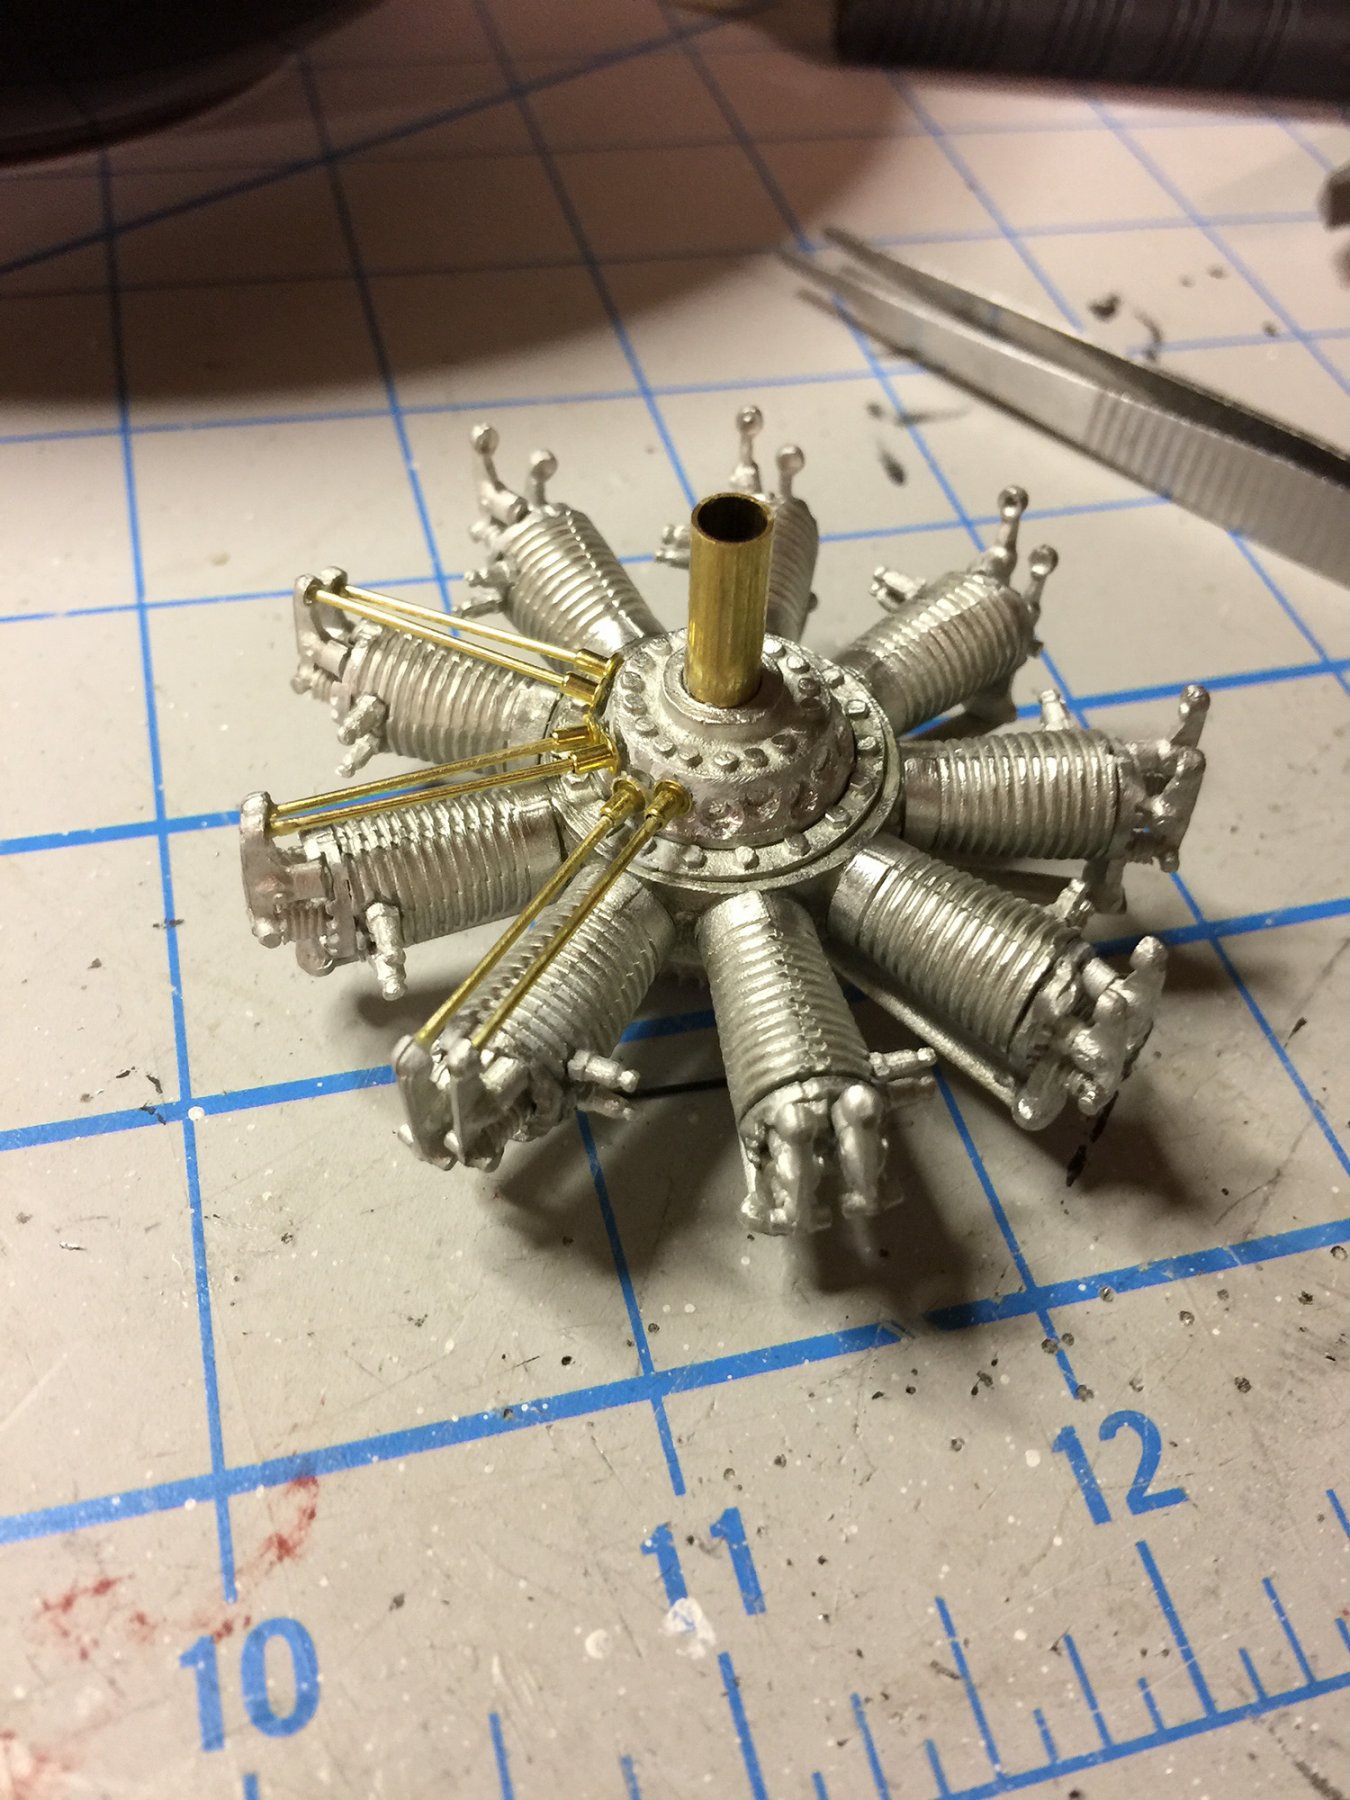
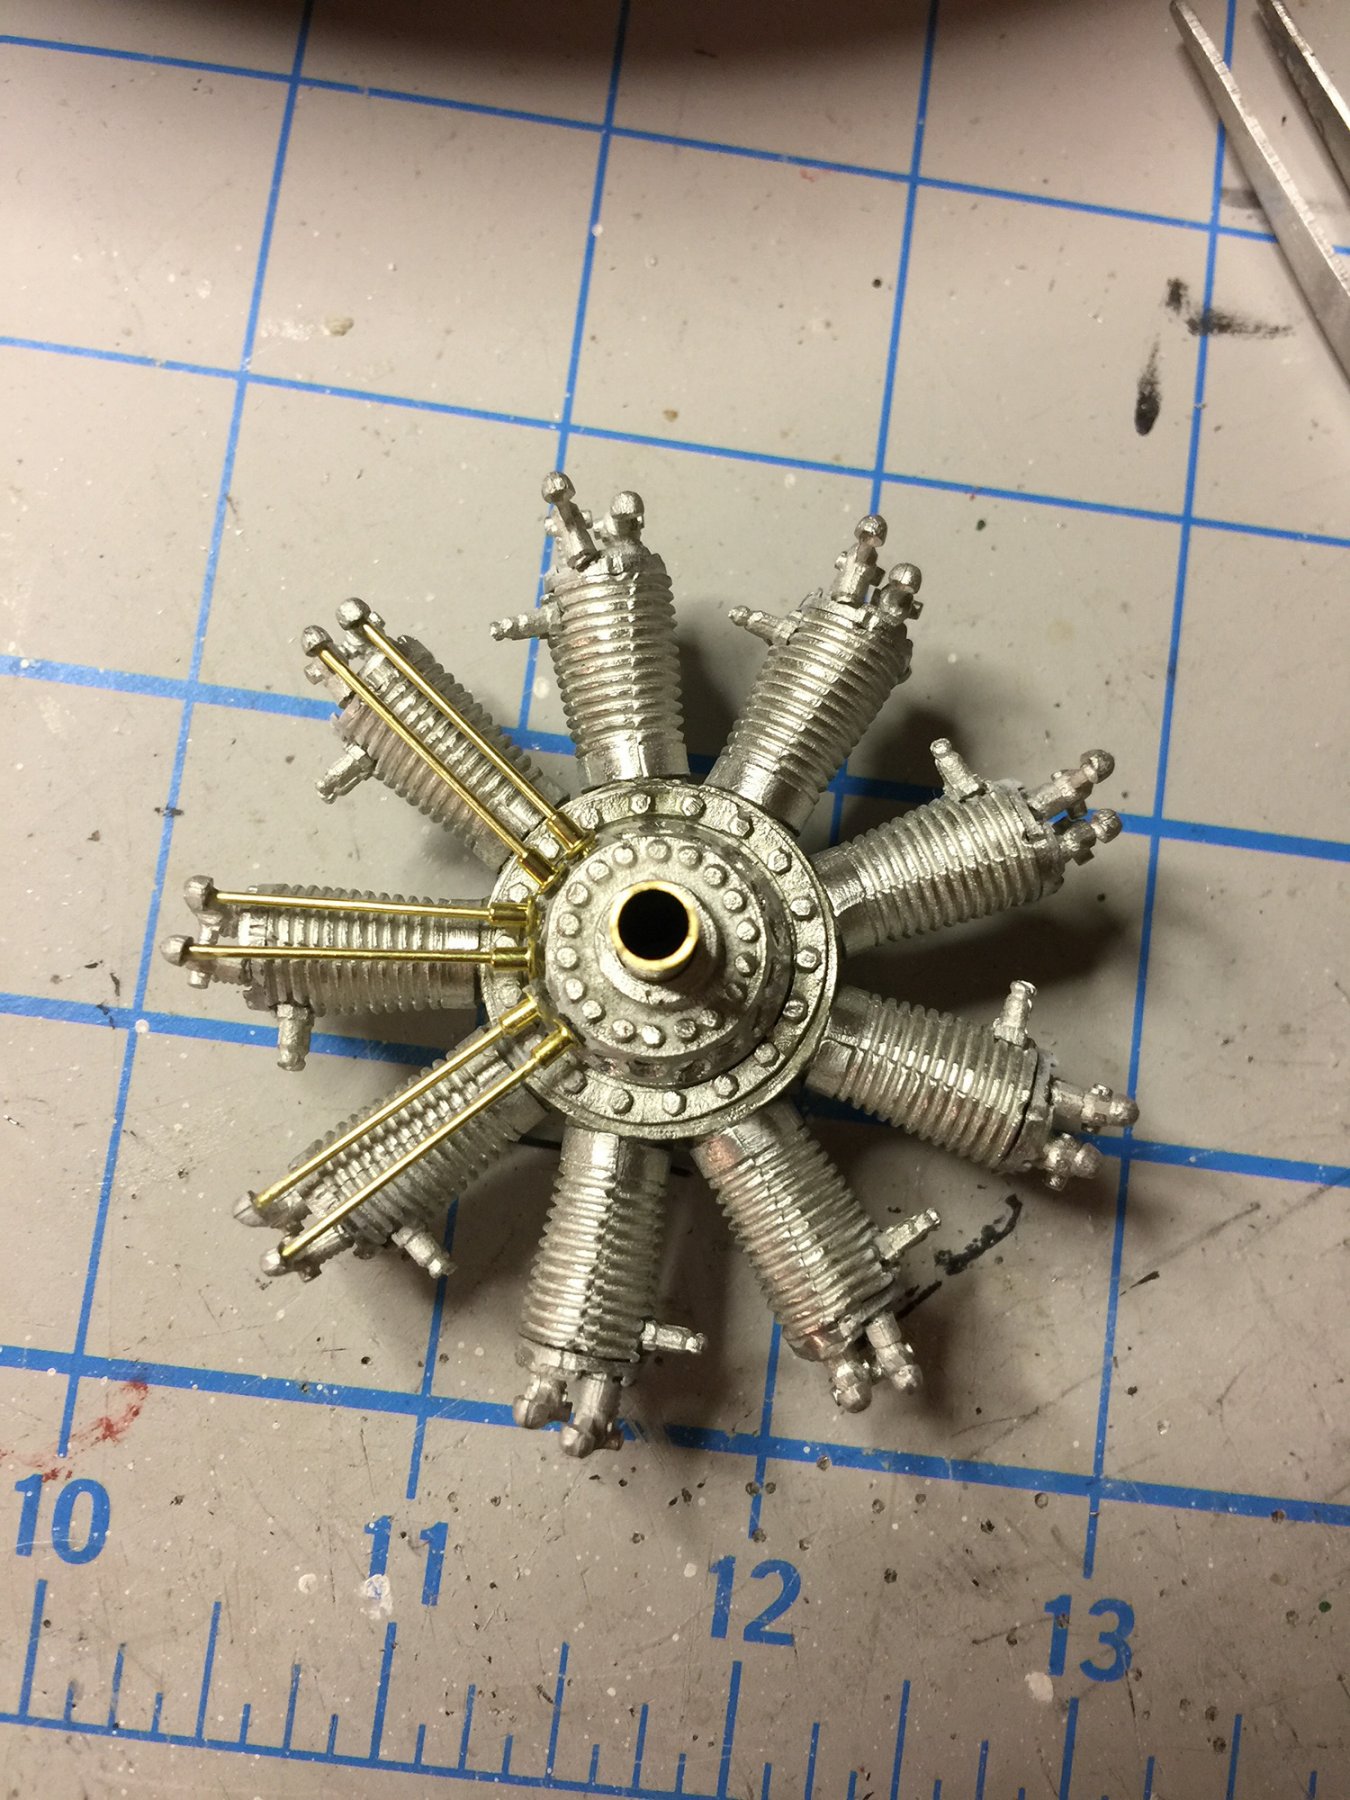
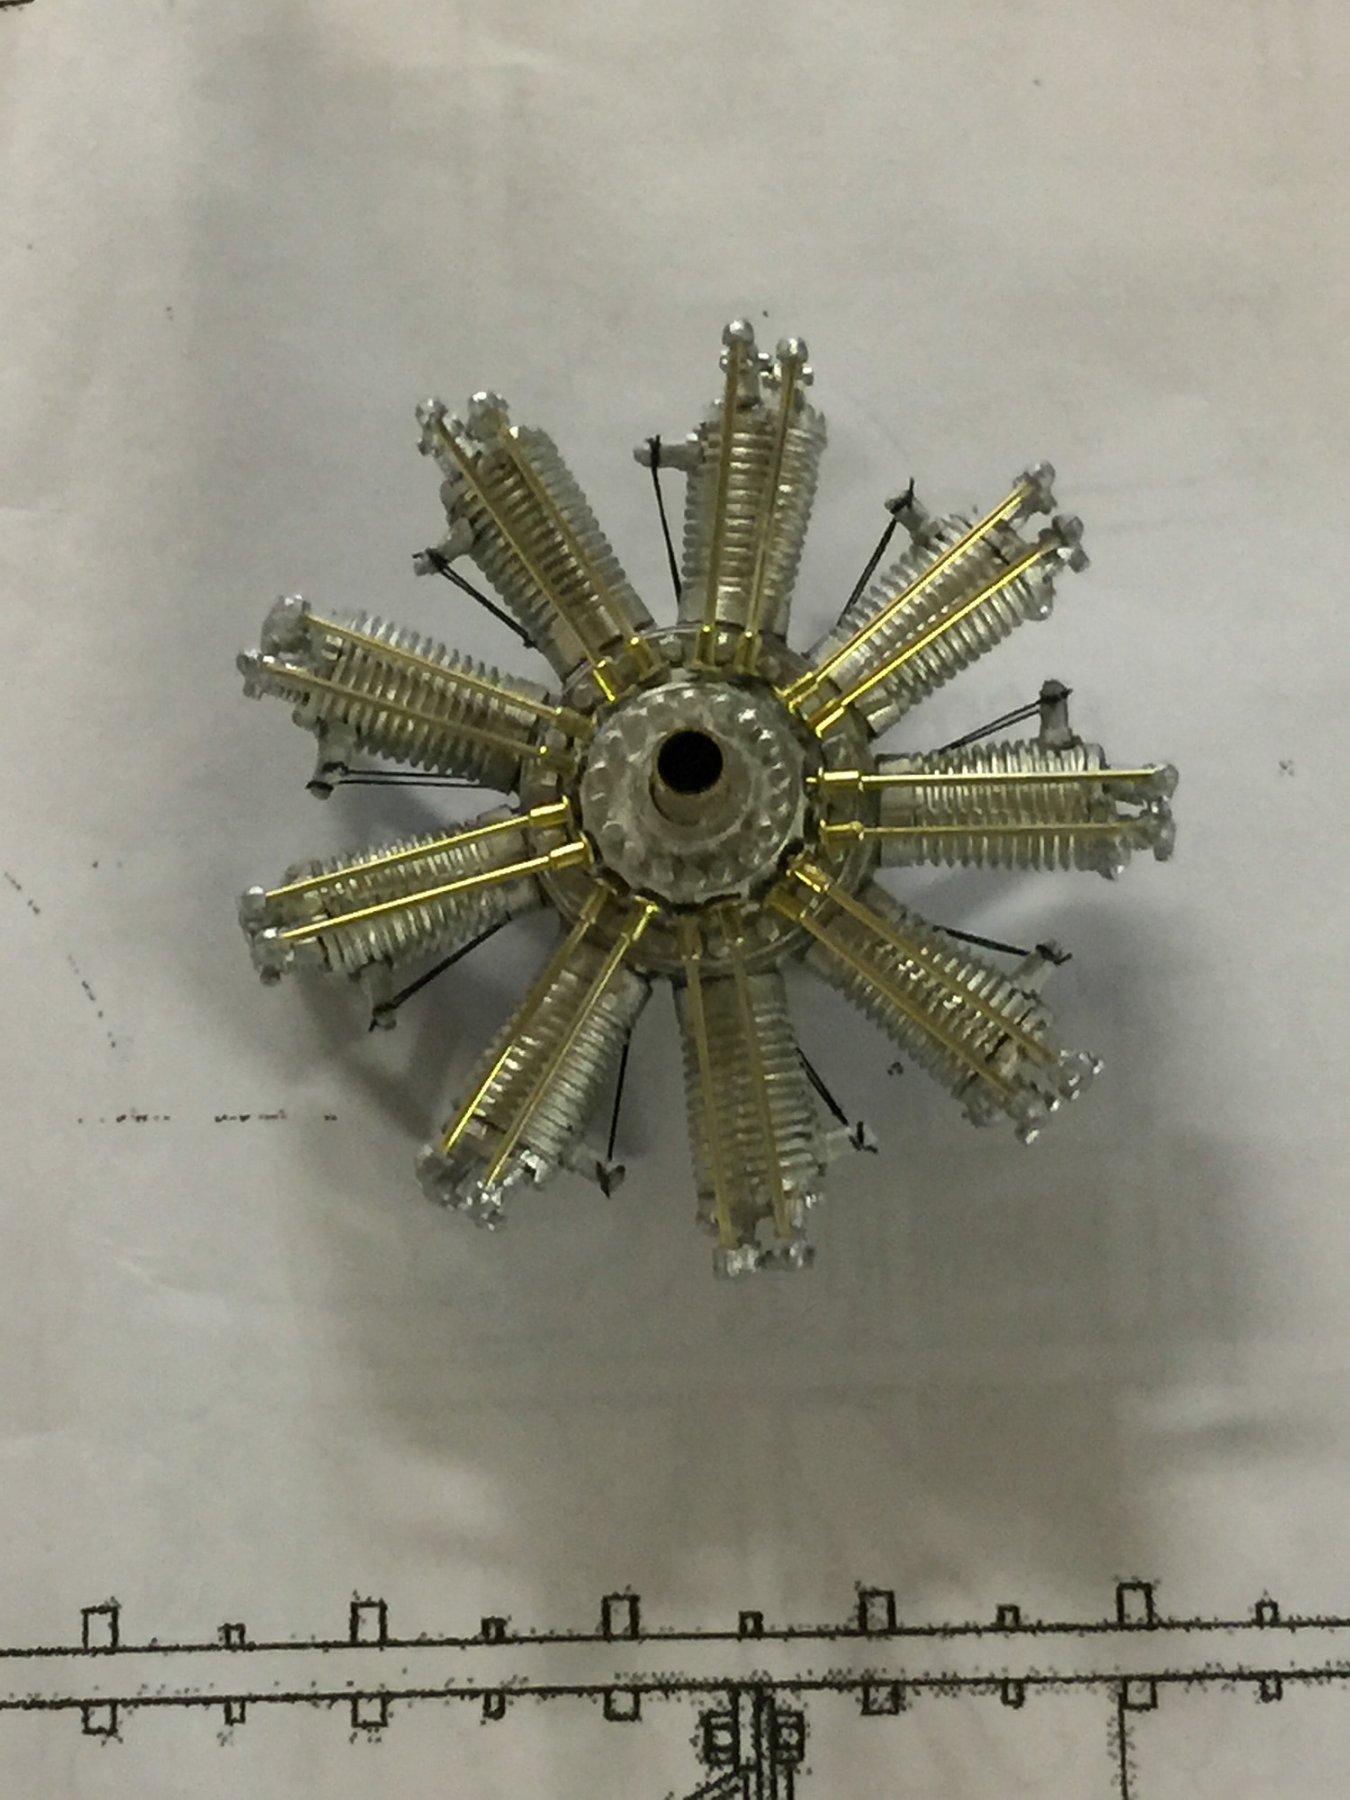
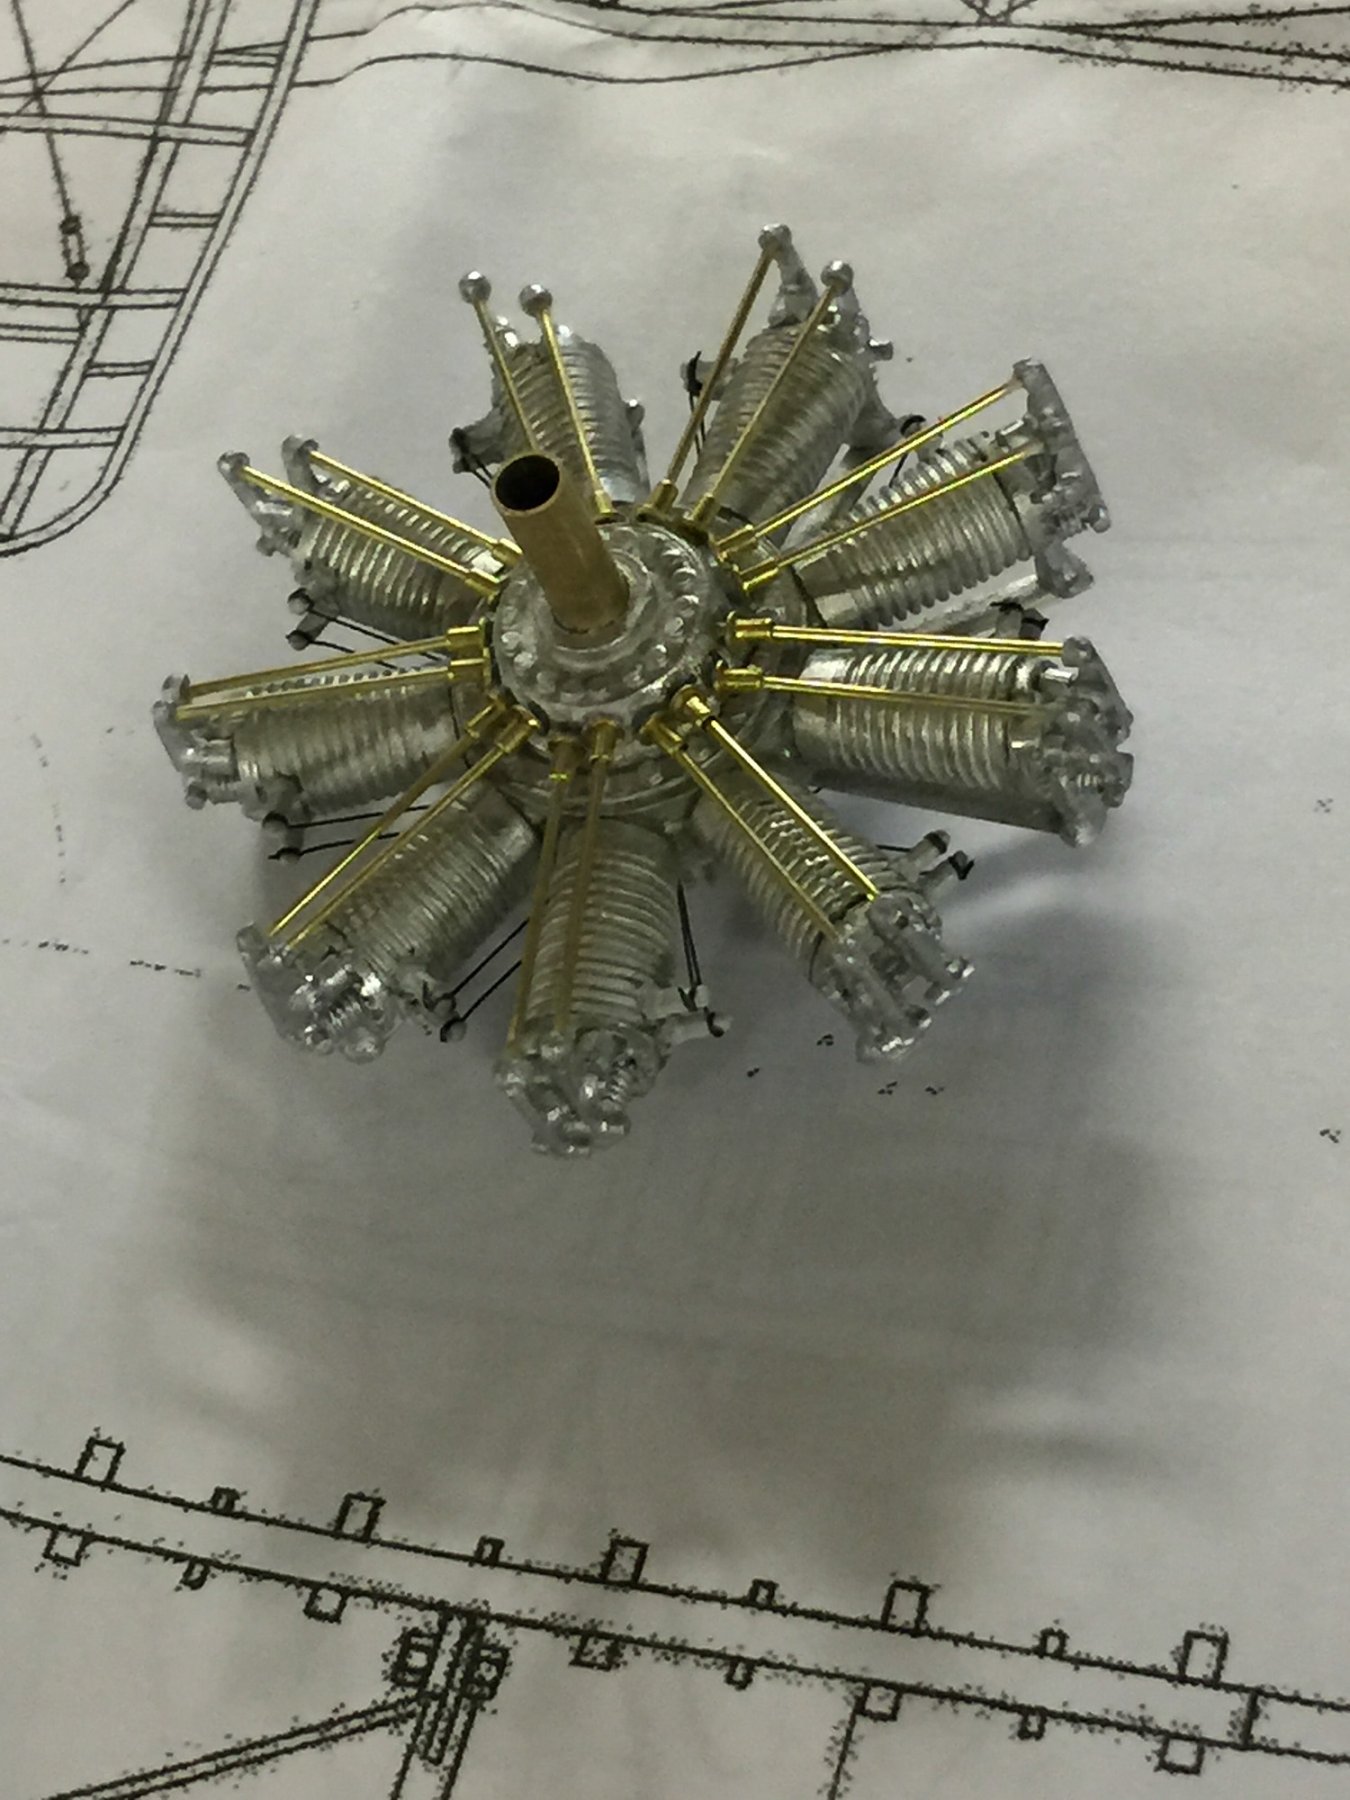
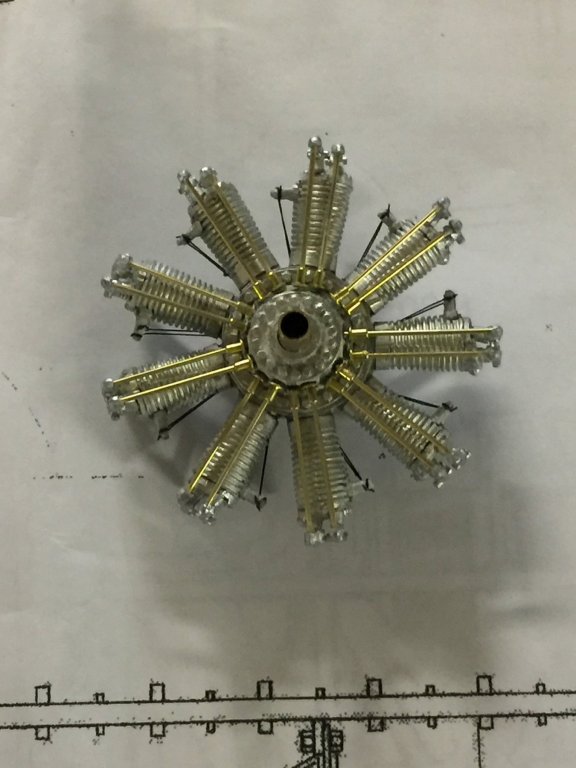
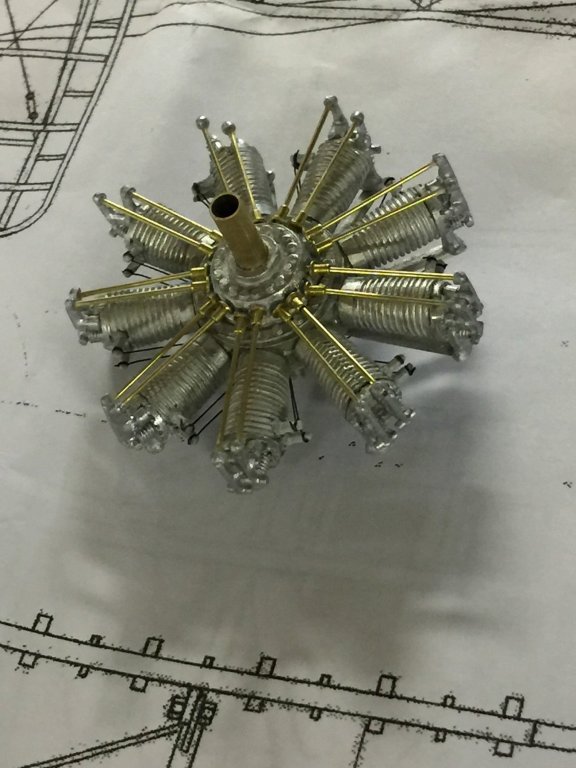
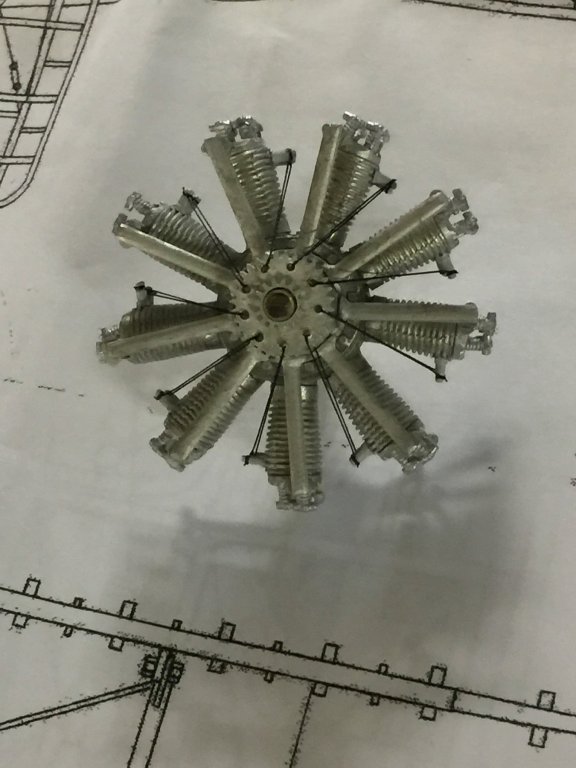
Taking a break on the ship builds for an airplane. I have the mighty decision to build the Syren or something else as the next ship, and I think I want to watch others complete theirs before I embark on that voyage. This is the Sopwith Camel F.1 from 1917 kit from Model Airways. I've always enjoyed aircraft, flying them (real ones and models) and building them (models), so this looked like an interesting and more accurate than regularly seen kit. So, some images. They build starts with the engine, a rendition of the Clerget rotary. The kit parts are cast Britannia and also some brass. I used epoxy and CA for this portion.


- 114 replies
-
- 15
-
-
Ah! Another Syren! This is on my list of builds, likely my next one, so I will pull up a crate to sit on and enjoy. Looking forward to your progress, Per. ~john