HOLIDAY DONATION DRIVE - SUPPORT MSW - DO YOUR PART TO KEEP THIS GREAT FORUM GOING! (Only 51 donations so far out of 49,000 members - C'mon guys!)
×


jablackwell
-
Posts
304 -
Joined
-
Last visited
Content Type
Profiles
Forums
Gallery
Events
Everything posted by jablackwell
-
 One thing is true about the transom: it take a lot of time. It's tempting to whip out the ole' rotary tool and grind away. Be careful with that should you head in that direction ;-)
 -
Looking really good! On sanding the back, that curve is a real challenge. I used a sanding block and a sort of jig arrangement. There is a description of it on this site in someone else's build log of the Sultana.... let me see if I can find it... http://modelshipworld.com/index.php/topic/1292-sultana-by-hopeful-msw-scale-164-bashed-kit/?hl=sultana there is also a good description on process in Chuck Passaro's practicum (Model Shipways available online). ~john
-
Making a slow and steady dent in the foremast details. I have decided to at least >>try<< to get furled sails onto this model. SilkSpan acquired and ready to go. Now I am learning a lot more about square rigged sails and sailing... quite a journey! ~john
-
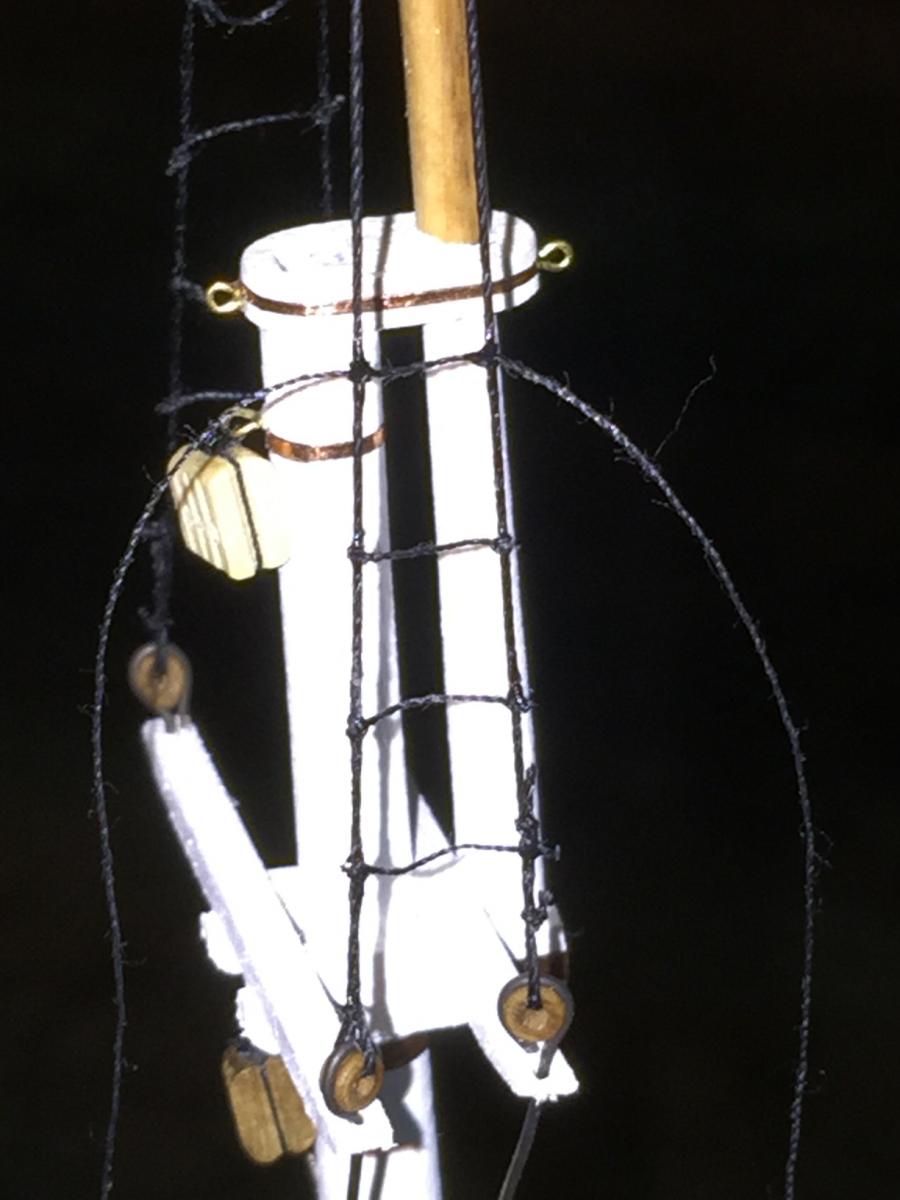
Now working on the foremast details. First all the rings and eyebolts then upper futtock shrouds and sheaves. I need to figure out a good way to attach the lower yard onto the front of the futtock band. It has made me think about bends in sheet brass to act as a catch for the little spindly metal piece (yard truss) that attaches to the yard. Going is slow, but the challenges excellent. ~john
-
Boy's Manual Of Seamanship And Gunnery
jablackwell replied to skipper1947's topic in Nautical/Naval History
Thank you for posting this. I am particularly interested in the section on sails. ~j -
Your best sail cloth and technique
jablackwell replied to steven sturgis's topic in Masting, rigging and sails
Those looking for SilkSpan can still find it at the Guillow model airplane homepage. It can be found under the spare parts section. Each model plane has a spare parts assortment, and the wing covering is an option for most. ~j -
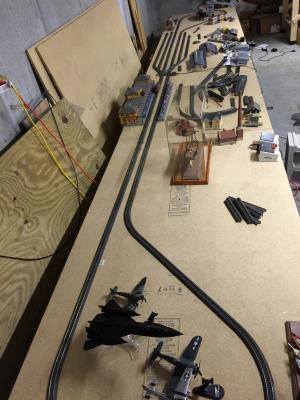
Been away for a while working on a re-build of the HO scenery in the basement. "Little Switzerland" is now a re-born project with about 24'x8' dimensions, thus saving me some 64 square feet of basement space... yeah, the old layout was large! This new one will run prototypically with electricity from overhead lines (catenary) and pantographs on the locos. While that was going on..... I found some Silkspan (Guillow airplane shop)! So, it looks like either furled, unfurled, or a little of both for the Kate Cory. This has opened a whole slew of new research and reading... and omg rigging, lots more rigging. I am little excited and terrified at the same time. In the meantime, I have been getting the upper shrouds installed with their appropriate ratlines. The masts are looking good. I am using a hint from someone else here on MSW: go through the plans meticulously all the way to the end, and keep a running build notebook with step-by-steps that can be readily changed when something new pops up later on in the plan scouring. This has made planning out the masts a LOT easier. As recommended, I am doing all that I can to the masts before they are stepped. In the meantime, here are some shots of the revisited Little Switzerland.... perhaps off topic, but it's better than no pics at all ;-) ~john
-
I haven't posted anything in a while: been busy with making the masts..... lots of lathe work and sanding... slow sanding. They are assembled now, and painted. Little parts and pieces have been added to the main mast. I still have work to do on the fore mast. I'll then finish up the tops and royals with their respective rigging and shrouds.... then step them in for their all-ship standing rigging. Now investigating sail material and seem to be running into serious issues finding a source of silkspan, what I used to use on model airplanes. Any ideas? ~john

-
Hi Jesse, I just caught this build in progress, too, and will be watching along with the others. The Syren is next on my build list when I finish off my current project (the Kate Cory). Your work is coming right along nicely. Enjoy, and thank you for posting! ~john
- 1,306 replies
-
- 1
-

-
- syren
- model shipways
- (and 1 more)
-
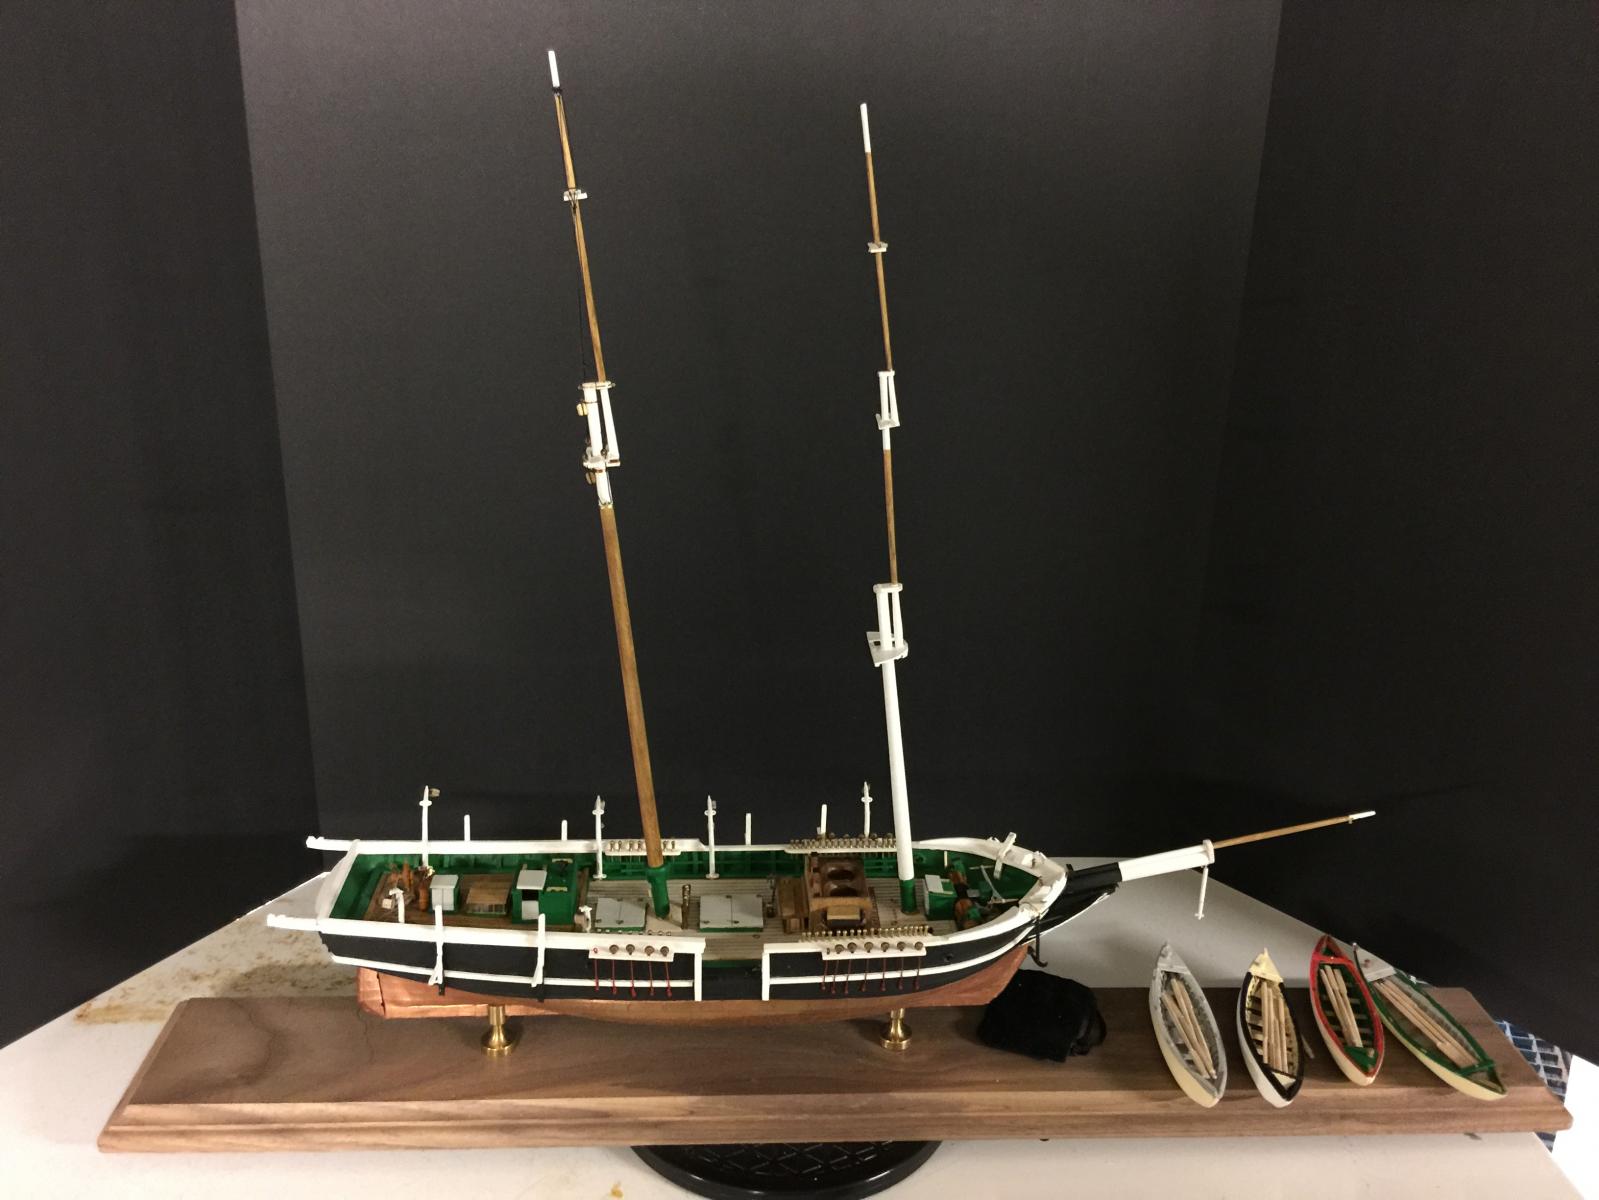
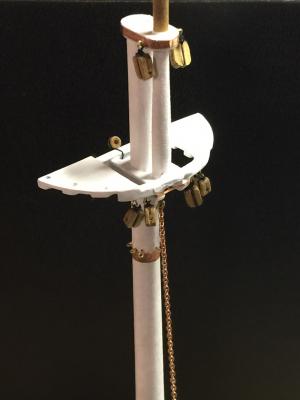
Finished lifts and cranes. Removed them when I discovered that they were at the incorrect height and whaleboats could not fit(!). Measure twice.... yep. Re-installed them. Tested. Phew. Got the bowsprit and jibboom completed along with the martingale. I am thinking now about masts. ~john

-
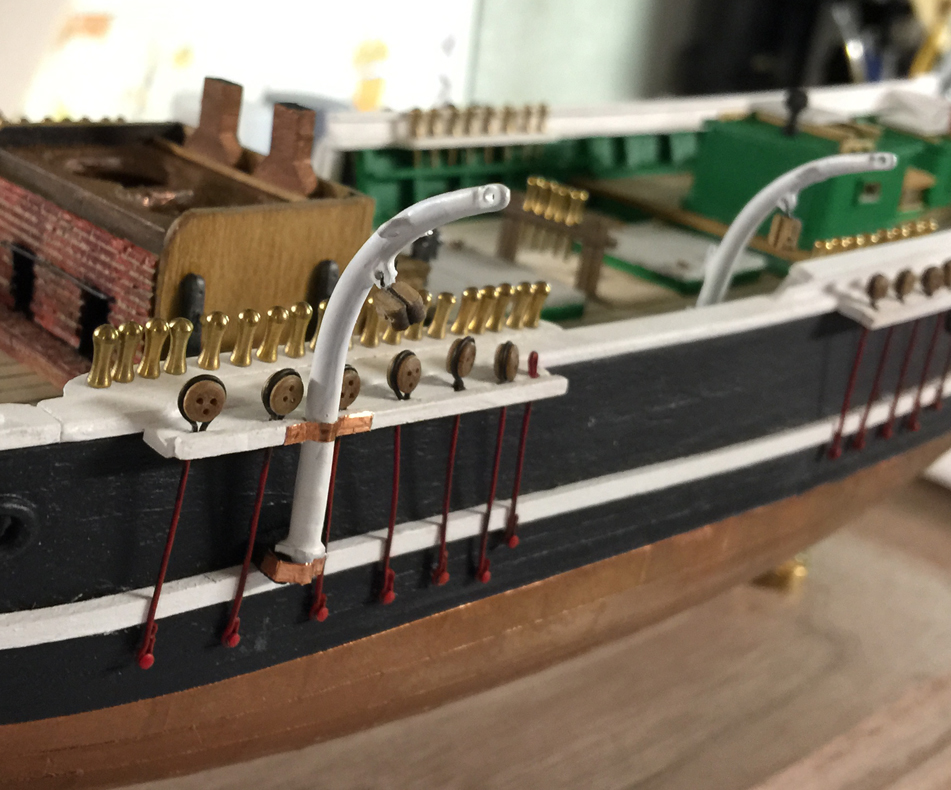
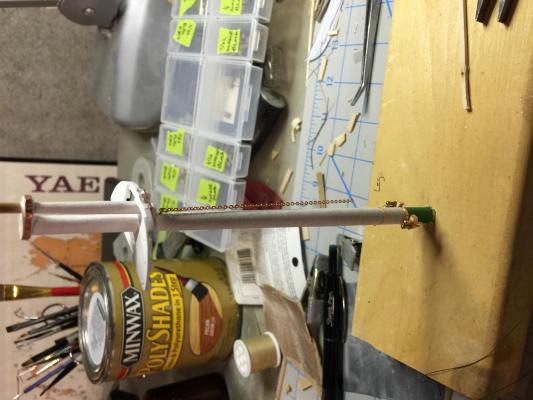
My solution to the davit.... I shaved off excess materials from the davit (the base and the cleats), added a small wooden "shelf" just above the outboard plankshear with a notch to accept the base of the davit, a notch in the caprail.... then strapped it in place. It will look better when the copper oxidizes a little. Ok - the irony: the plans from the Bedford Whaling Museum show the davit in both locations: outboard from the overhead deck view and then it is shown inboard on the bow facing vertical. Well..... I have decided it will be outboard. ~john

-
Agreed on the pinrail and associated interference with the shrouds/ratlines. It's right in there with the whole mess of rigging. Well, looks like some fun times on the outer bulwarks! Thanks for checking into that. That helps. :-) ~john
-
I think it was to allow the whaleboat to be lowered without rubbing into the hull. The bow curve begins right about that location forward, so the foremost davit would be inboard more and cause the lowering boat to scratch all the way down. If you have sketches, that would be really handy. Thanks. I really appreciate that. ~john
-
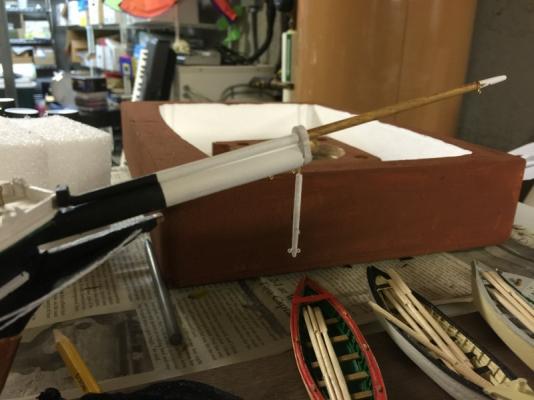
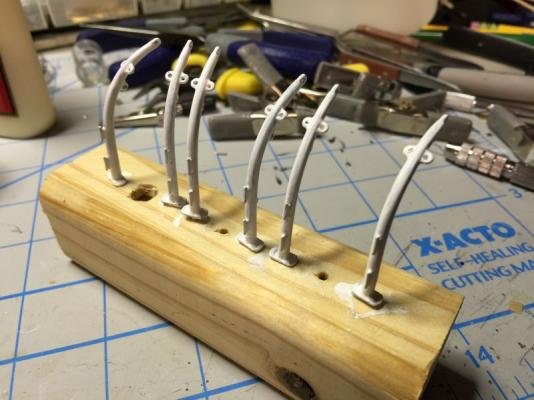
Hi GMO2 and thanks for the reference to Texxn5's website and work on the Morgan. He's doing a splendid job on that for sure. The interesting thing is the difference between the Morgan and the Kate Cory: the davits on the Morgan appear to be integrated into the woodwork of the vessel's hull. On the KC the davits are free standing iron(?) tubular structures. When they are on the inside of the bulwark, they are mounted onto the deck and then braced with a metal strip onto the inside of the bulwark. The one davit on the outside of the bulwark is the one I have no plans for. No one seems to know how this was attached, and some models that have that region of the hull visible in photographs show it mounted INSIDE the bulwark... directly in conflict with the ship's plans. I might have to "wing it" as they say and create some form of structure to hold onto the davit from the bottom and maybe at another point from near the caprail. To compare: here's an image of the KC's davits held in some scrap for painting and rigging: It looks like I will also have to file off the cleats on this one davit, which then begs the other question: where are the lines belayed? ;-) Ahhh the joys of these little mysteries. This is one reason why I love this hobby. ~john
-
All, I am posting this topic here as well as in my build log for the Kate Cory: A question all: The Kate Cory has a port-side fore whaleboat. As with all the whaleboats, there are two davits to hoist the boat up and out of the water or to lower it down. The stern davit for this whaleboat is inboard of the bulwark, like all the rest. The forward davit for this whaleboat is on the outside of the bulwark, actually in a location intermingled with the forward shrouds and between chainplates. I am ok with the location. What is not clear to me from the plans or instructions is the method by which this davit is attached to the outer hull of the ship. Ideas anyone? Images? I would imagine not only does it have to be attached firmly but also maybe to swivel? Maybe not? Maybe it's rigid? All help on this one greatly appreciated. Thanks, ~john
-
A question all: The Kate Cory has a port-side fore whaleboat. As with all the whaleboats, there are two davits to hoist the boat up and out of the water or to lower it down. The stern davit for this whaleboat is inboard of the bulwark, like all the rest. The forward davit for this whaleboat is on the outside of the bulwark, actually in a location intermingled with the forward shrouds and between chainplates. I am ok with the location. What is not clear to me from the plans or instructions is the method by which this davit is attached to the outer hull of the ship. Ideas anyone? Images? I would imagine not only does it have to be attached firmly but also maybe to swivel? Maybe not? Maybe it's rigid? All help on this one greatly appreciated. Thanks, ~john
-
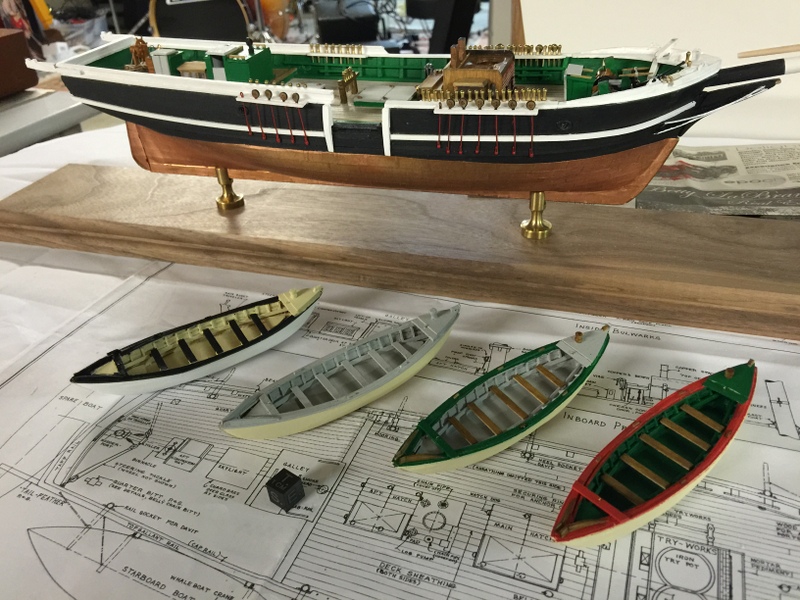
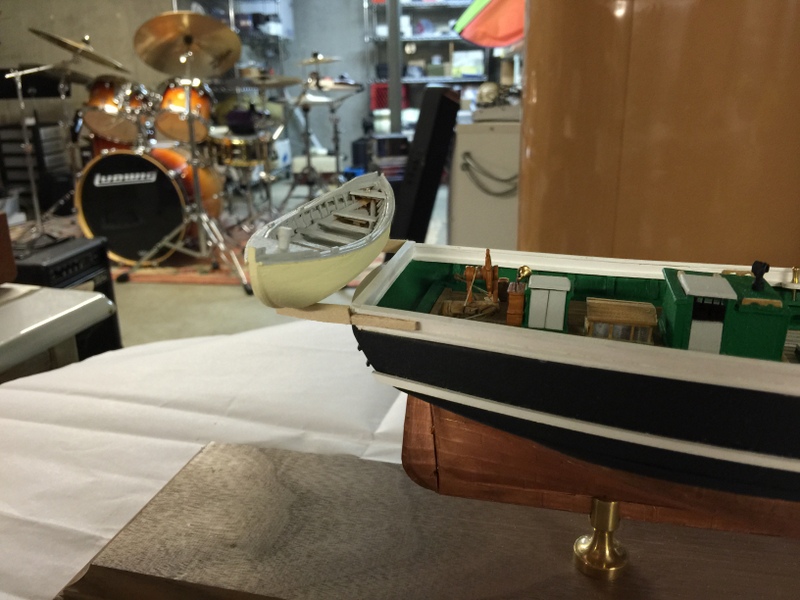
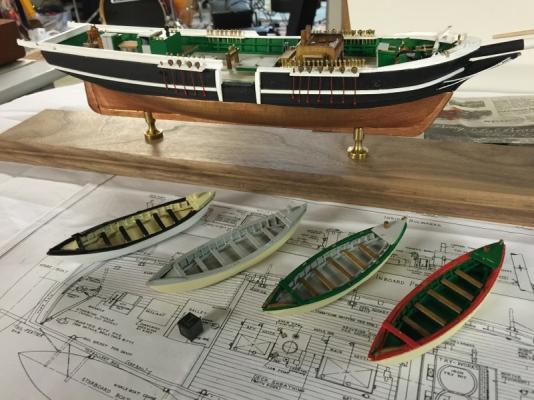
Whaleboats main structures completed. Now to work on details. I think I'll get a move onto the masts, spars and such. I'll come back to the whaleboats later. Must change it up a little bit for sanity ;-) Here's a shot of the current project. ~john
-
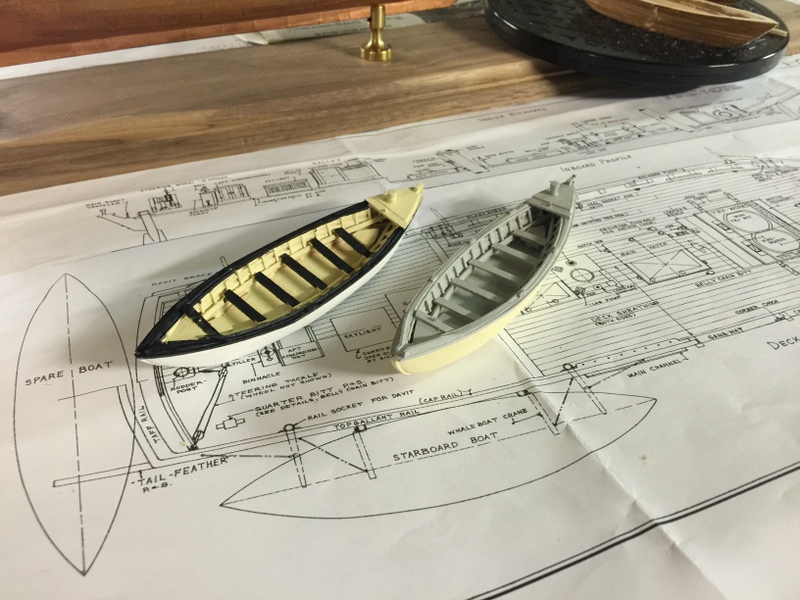
heheh<chuckles>.... here's a roll for you..... ratatatatatatataatatatatatatatatat..... I see you have noted the kit in the back of the basement there. I'm in a couple of bands, mostly classical and 60s rock. I also do jazz and some punk when feeling energetic. The color schemes: yes, that is interesting. All that I have read on the topic of whaleboats says that they each had their own unique color schemes for easy identification at long distances. Some were quite colorful apparently. The white/black/yellow schema is a modification of an existing boats colors at Mystic Seaport. Not many of the little craft exist (a dozen or so?) out of the tens of thousands that were made. Most were lost, scrapped, etc. This all said, there are very few examples of in-use whaleboat with full paint. I suppose this is where artistic license comes in? ~john
-
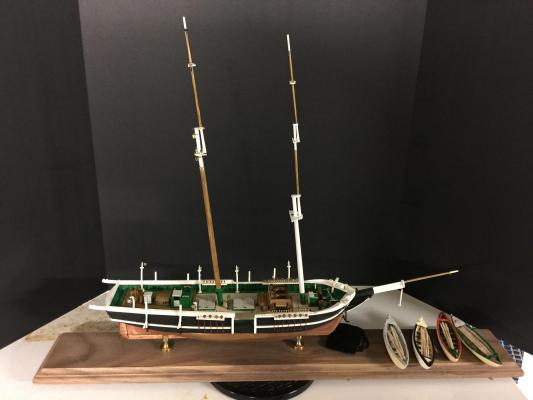
Two whaleboats completed and two to go. Finished them off with a colorful paint scheme for one (an active, in-use boat) and a dull grey and tallow for the stand-by, extra boat. Also got the tail feathers shaped and installed. I had some searching to do to figure out just how far forward the tail feathers' cantilever should go, but some plans from New Bedford got that solved.


-
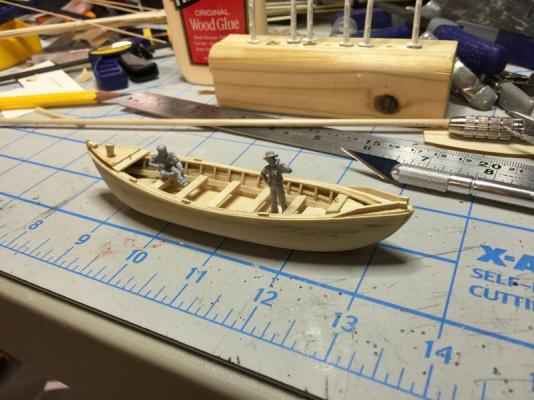
One whaleboat nearing completion (3 to go). It's amazing just how much detail one can pack into s small thing like this. I am looking forward to learning more each day. The figures are to-scale. ~john
-
Thank you for keeping your log: I am a relative newbie to the ship build process, and have the Syren in my sights for my next build. Looks like you're doing great! Keep the entries coming. I will be following. ~john
-
Hi David - thanks: I have thought about the Dremel, but am thinking it might be a little too much for this... well, at least when I get to the 1/16" thickness of the planks of the little things. Removing the interior wood near the center of the boats has been easy. Getting into the narrower portions by the bow and stern has been the real challenge. Sanding sticks, eh? I'll check that out for sure. Augie and I were thinking also the little cylidrical tool on the micro-vibrating sander. That's one thing this hobby is really good for: getting new and specialized tools I'll check in a few days to let y'all know the progress. ~john
-
Thanks, Augie. I happen to have one of those little sanders. I think I'll give that a whirl and see how it goes. Using a blade is too much for the task, I believe. The sander has a narrow cylinder attachment, that, with some rough grit, will get it. There is certainly more to do on the model - so when things get boring ;-) ~john
-
Hi Augie - thanks! I'm planning a long time on these little guys. I also thought, hmmmm.... maybe this is an opportunity to build a larger scale whaleboat as to learn all the details... then... that, would, be, what? six builds at once ;-) I need a bigger work area! Any advice on roughing out the interior? Carving seems quite unwieldy in that cramped space. A #11 blade is out. Suggested blades or tools? Thanks, ~john