DONATION DRIVE - SUPPORT MSW - DO YOUR PART TO KEEP THIS GREAT FORUM GOING!
×

Navis Factorem
-
Posts
240 -
Joined
-
Last visited
Content Type
Profiles
Forums
Gallery
Events
Everything posted by Navis Factorem
-
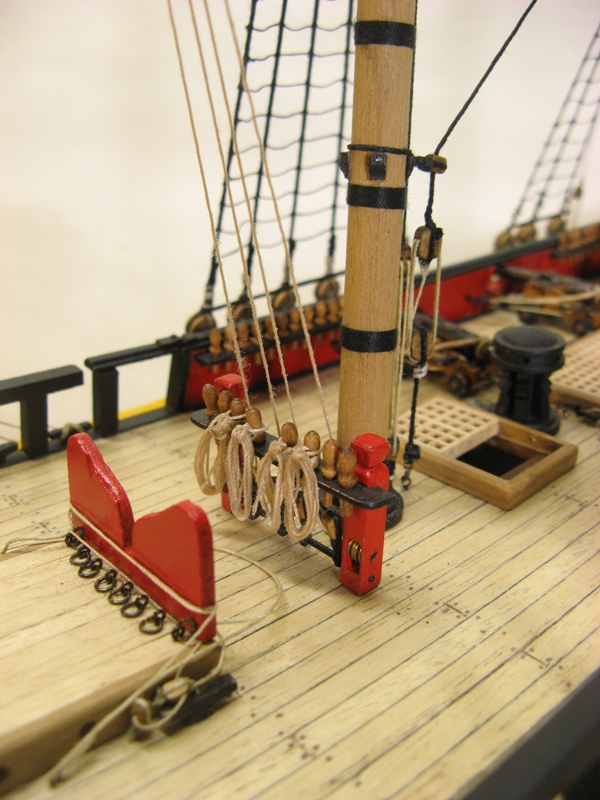
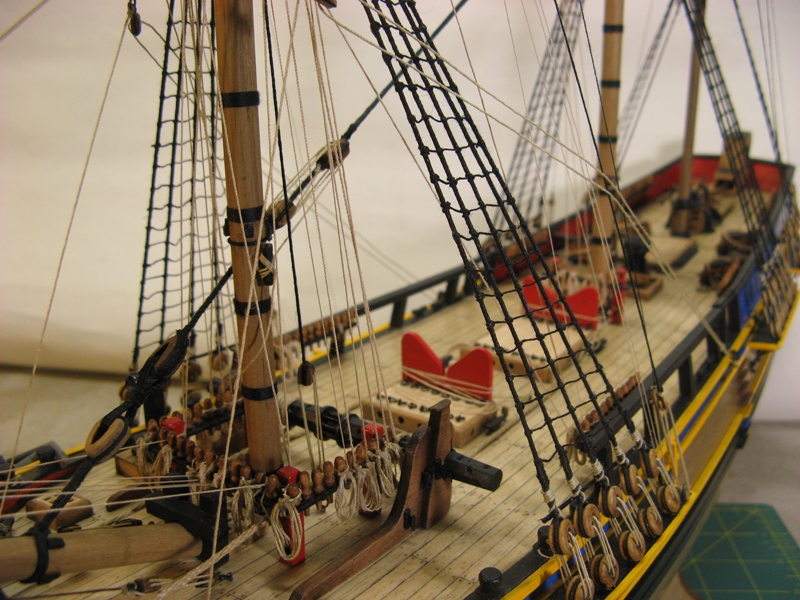
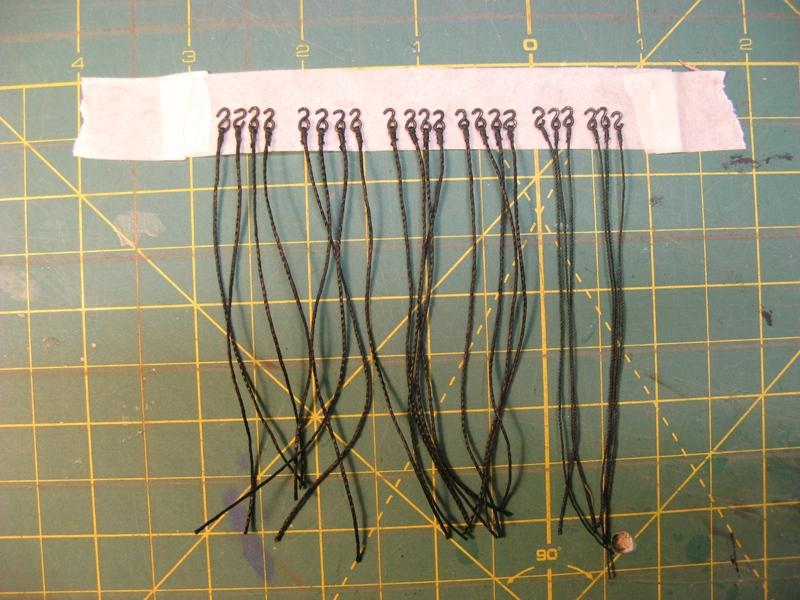
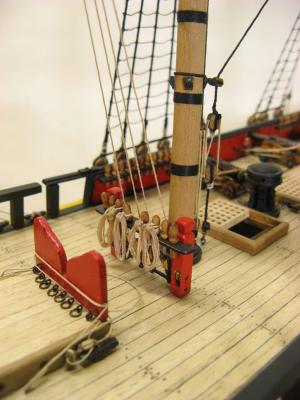
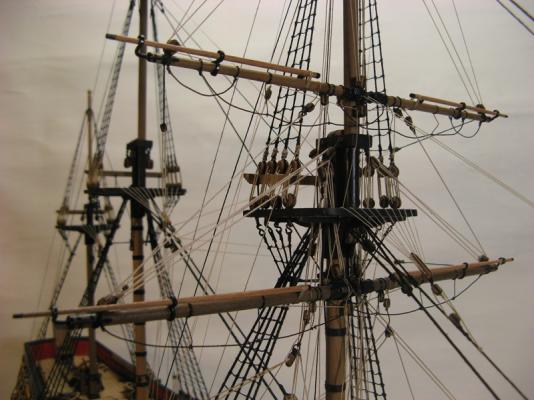
Rope coils. First try at making up and installing coils like those I saw on the James Craig. Those for the fore sail and fore topsail braces at the base of the main mast are the last to be done, I think they are looking more convincing the more I do. Like most things, by the time I've finished, I might be reasonably good at it! Cheers, David.
-
Still got the running rig for the main and mizzen masts to go then all sorts of little finishing details including the "hair curler" cornucopia carvings on either side of the transom. These are not even mentioned in the Amati kit so a little research and carving will be required. Whe I say doing the rope coils "progressively" I mean foremast now then mainmast when I have finished the main mast running rigging and so on. The thought of doing all the coils at the end is a bit mind numbing. And I have a fairly high "numb mind" tolerance for repetitive tasks. Cheers.
-
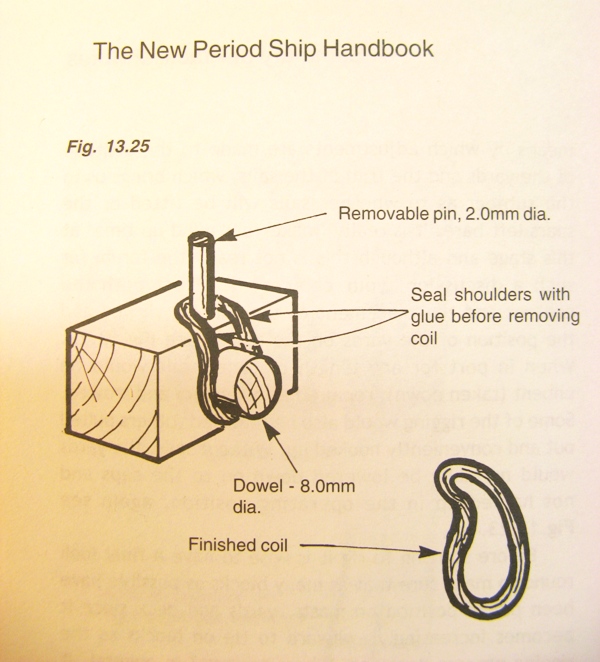
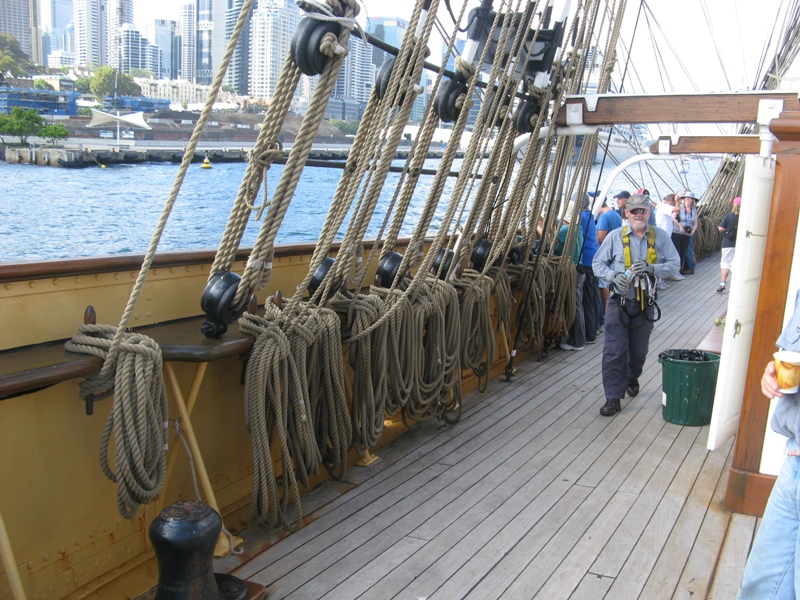
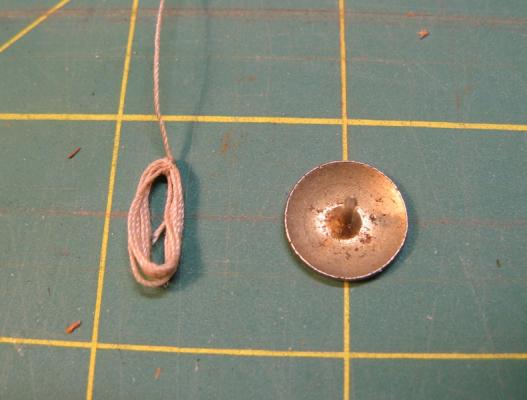
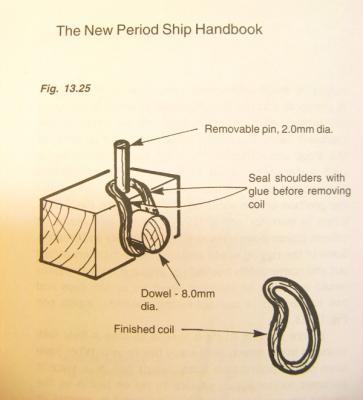
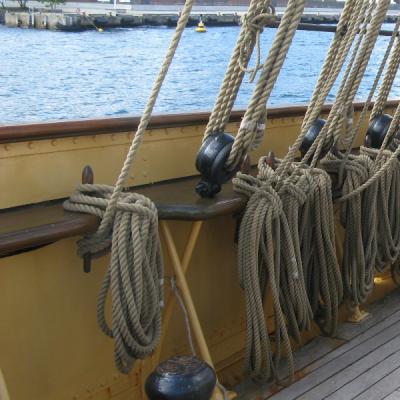
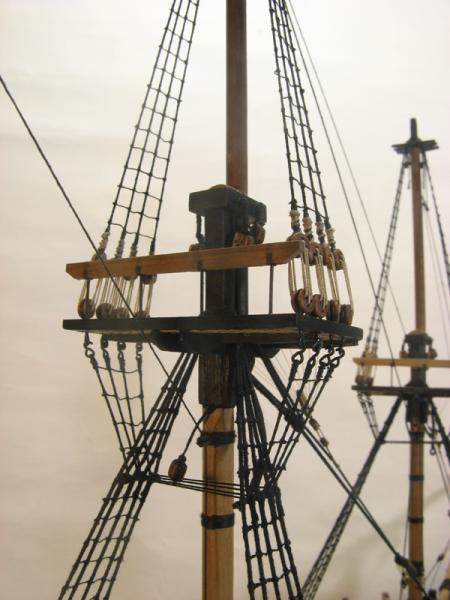
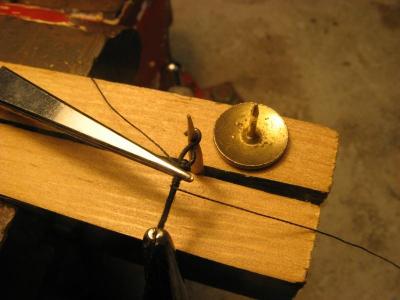
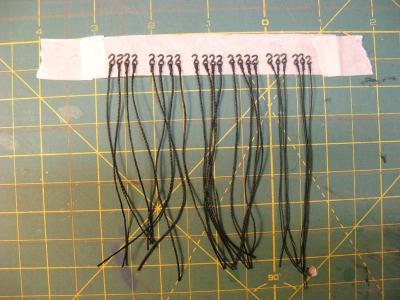
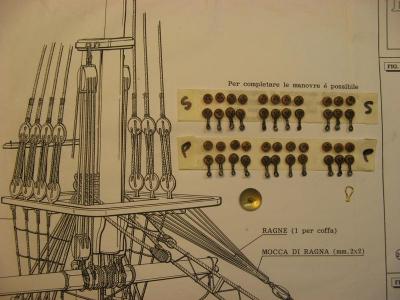
Rope Coils (Hanks?). Like the ratlines I think I will progressively attack the shaping and installation of the rope coils associated with the rigging falls rather than leaving them for a mammoth (tedious) effort towards the end. A common modelling method is to produce a coil (see Julier example pic) then hook it over the belaying pin. On my Bounty the belaying pins are quite close together. I worked out how many I needed on each rack then set up the spacing so that the pins were a reasonable distance apart and the racks were about the same length as shown in Mackay AoTS. The pins are really too close together for the Julier type method to work very well. The tops of the pins would be buried and the coils would be on top of each other. On my recent outing on the 1879 sailing ship James Craig I was very interested in how the large coils of ropes that had been worked into position were attached to the belaying pins. The pic shows how the crew handle rope coils. Rather than being hooked over the belaying pin they are hung in front of the pin and tied off to the top of the pin with a couple of loops. I am going to try this approach. We'll se how it goes. Cheers. Julier James Craig

-
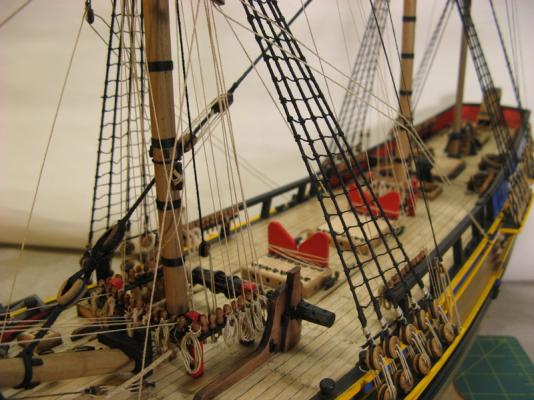
Running rigging update. The foremast is now complete, now for the mainmast. This should be a bit easier now that I more or less understand what all the ropes do! Cheers.

-
I visited the Mary Rose museum about 20 years ago, fascinating place. The hull itself is interesting but the museum housing the thousands of relics is an amazing and, I found, quite an emotionally moving place. All those dead young men! Cheers, DAvid.
-
Thanks for the comments so far, I would really appreciate any information that anyone has on available material to assist in working up the Mamoli Surprise. Cheers, David.
-
Hi Popeye, Thanks for the feedback, how's the Gothenborg going? last I saw you were well into the sticks, have you started on the strings yet? I have fitted the fore main yard and started on the running rig. I will post an update when the foremast is completed. Have you revived your build log, losing the lot was a bit of a tragedy wasn't it. Cheers, David.
-
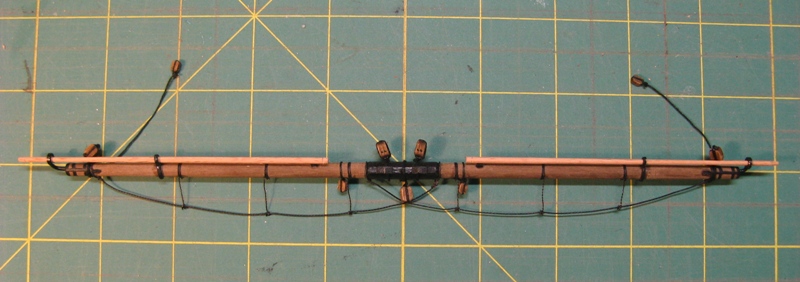
Fitting the blocks etc to the yards, this is the fore main yard. I haven't yet sorted out the best order to fit and rig the yards. At this stage I will start from the foremast main yard and work up the fore mast then onto the main mast and mizzen last. As I am rigging the fore mast I will see how much of the outer rigging I can do before fitting the next yard. Cheers, David.

-
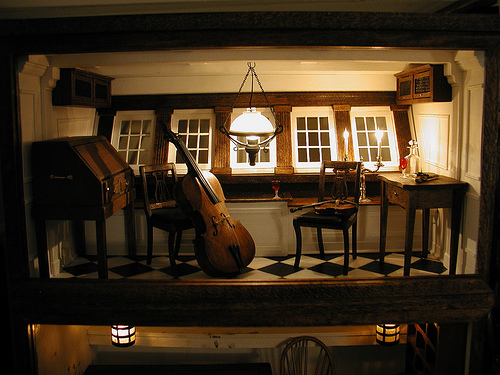
Thanks for the feedback so far, some interesting suggestions. The Mamoli Surprise with alterations and additions is looking attractive. I haven't done any serious research yet but I'm sure others have, can anyone advise on what books or other information is available to assist in upgrading the Mamoli Surprise kit to include the full gun deck and other details that may not be in this kit. One thing, several in fact, I would need to source are appropriate full length cannon barrels. Gun carriages should be easy enough to make up, but the barrels might present a bit of a challenge. I found this lovely pic of the inside of Jack Aubrey's cabin, recreating this would be fun. (Pic from http://www.thedearsurprise.com) Cheers, David.
-
I decided to take Russ's advice and install the backstays to complete the standing rig before I started on the running rig. Tensioning up the backstays certainly tightened everything up. I have started fixing the blocks to the yards. Now is the time to REALLY work out what all the ropes do! Cheers, David.


-
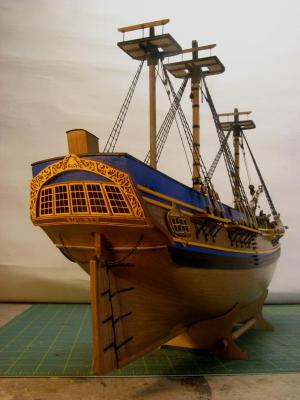
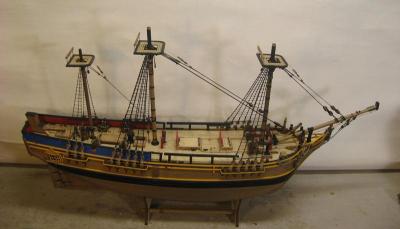
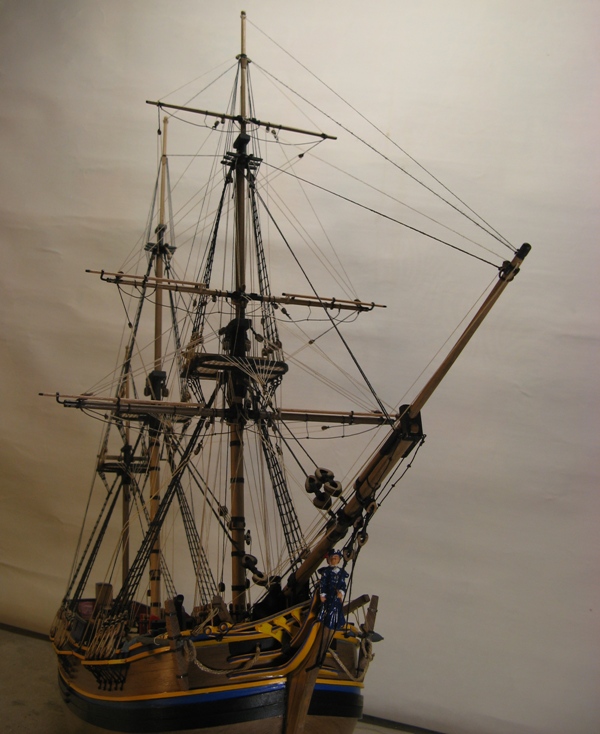
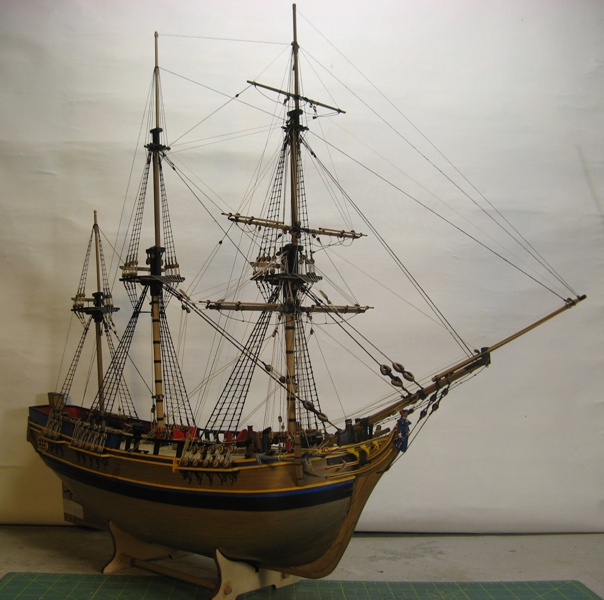
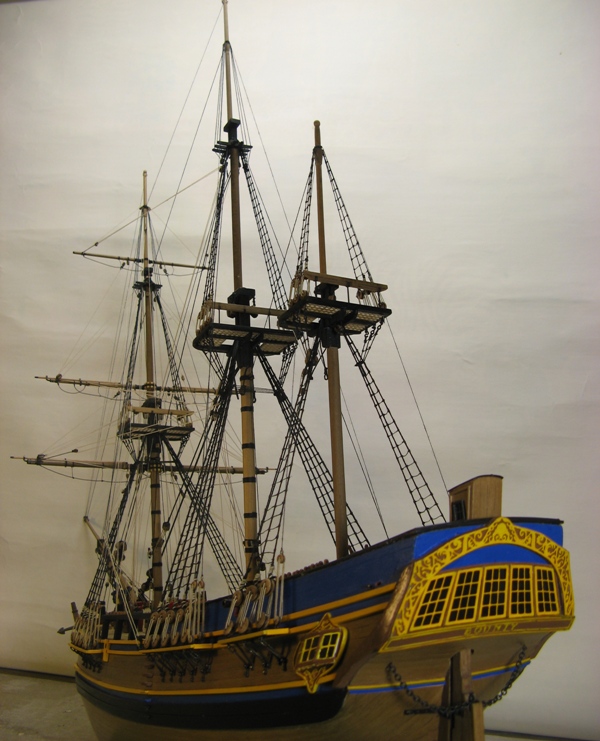
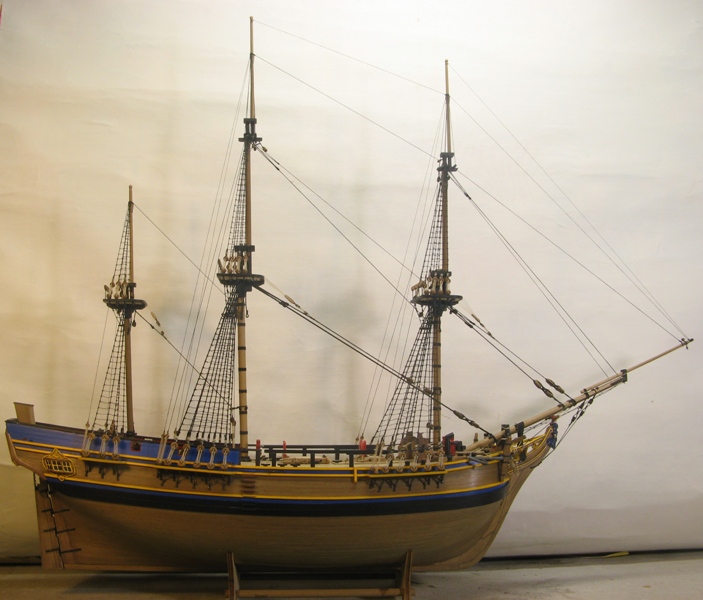
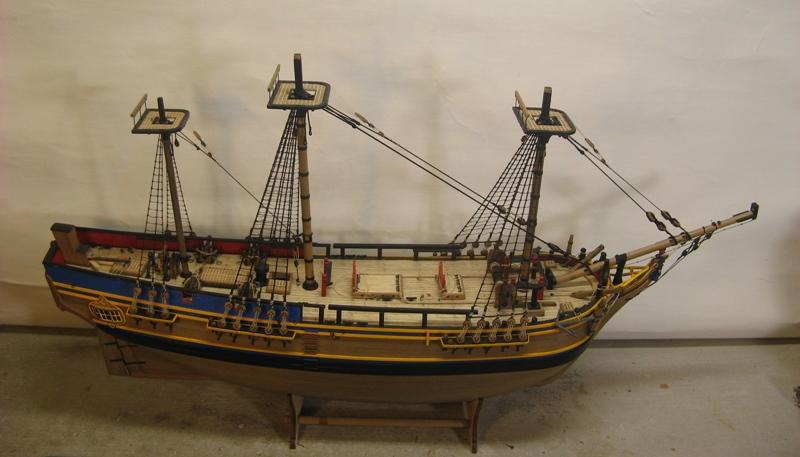
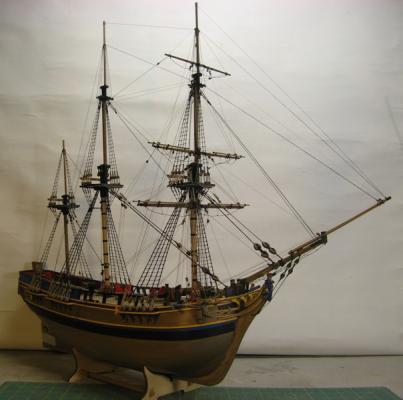
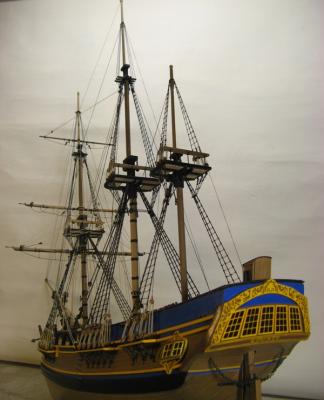
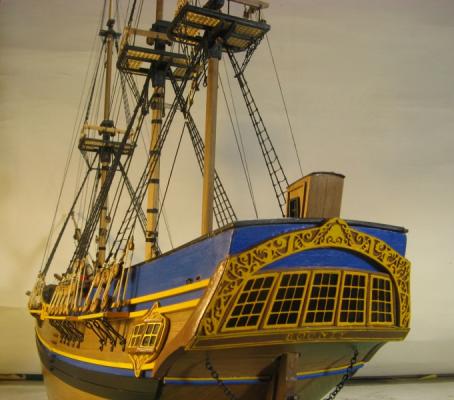
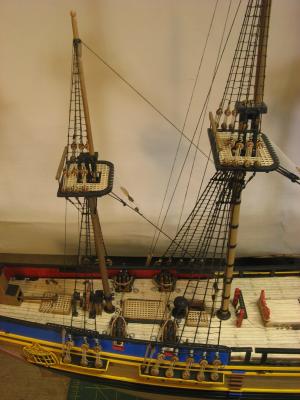
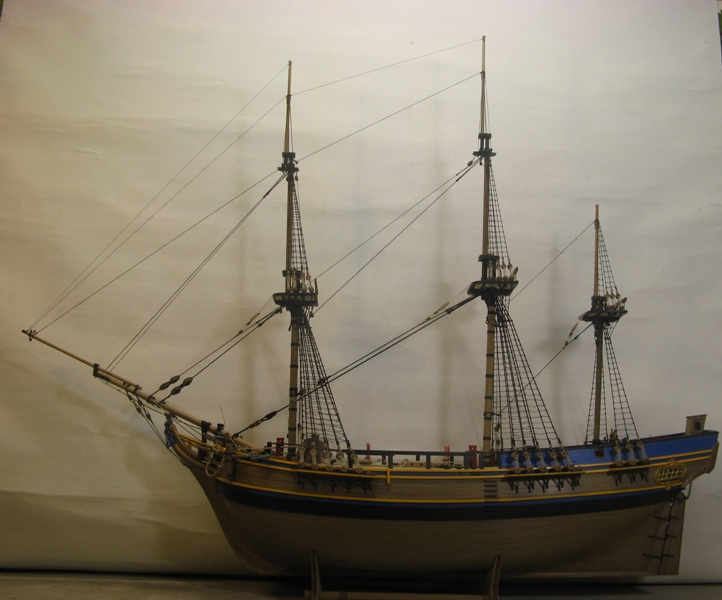
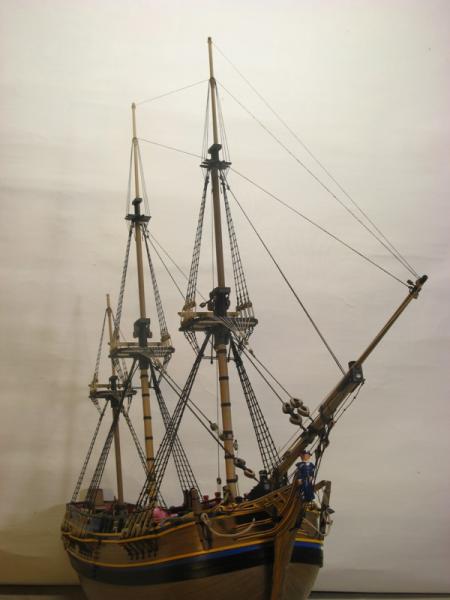
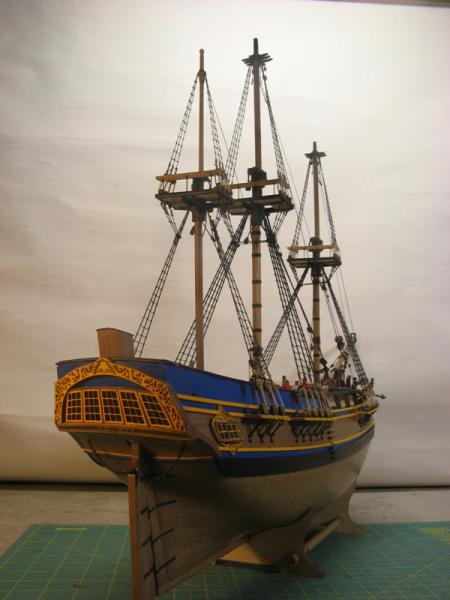
My Amati Bounty build is on the home straight, only the running rigging to go. Time to start thinking seriously about the next build. There has been lots of speculative thought about scratch building something, particularly after scratch building the Bounty's ship's boats, but the thought of having to schedule out and order all the timber and multitude of other bits and pieces required, source plans etc is a bit overwhelming so it looks like another kit is the go. I thoroughly enjoyed the hull construction of the Bounty, particularly significant modifications to bring the kit build more in line with the ship as described in Mackay's Anatomy of the Ship book. I would like a model with a more complex hull (the Bounty is flush decked) and, as I am currently reading the Hornblower series a Napoleonic era British man-o-war is very appealing. The size and scale of the model is of importance. The Bounty is 1:60, my previous build, the P J Schooner is 1:50 and i don't want to go too much smaller in scale than this. The size of the finished model is also significant, I don't live in a huge house and a model a metre or more in length would be a bit much. Looking through the various model manufacturers web sites there are plenty of options but the number reduces pretty quickly when I apply the above parameters. One option which sounds good is the hero ship of the Master and Commander book series, HMS Surprise. There seem to be 3 kits about, the AL version at 1:48 which at 1.340mm long is a bit big, the Mamoli version at 1:75 which ends up 845mm long, about right, and the mystery Jotika version which I can't find much information on. Does anyone know if this kit is available yet and if so, what scale it is? I have searched for any build logs for the Mamoli kit but they seem to be thin on the ground. does anyone know of a build log? I have examined the few pics I have been able to find of the kit online but they don't tell me very much. A major concern is that the main gun deck can't really be seen through the waist and I am guessing that the guns are muzzle ends stuck to a bulkhead. If this is the case, and any comments clarifying this would be greatly appreciated, a real challenge could be to kit bash to include much more internal detail. Interesting thought. Comments about choice of next build and which kit would be greatly appreciated. Cheers, David. (Update Bounty pics with completed standing rig)


-
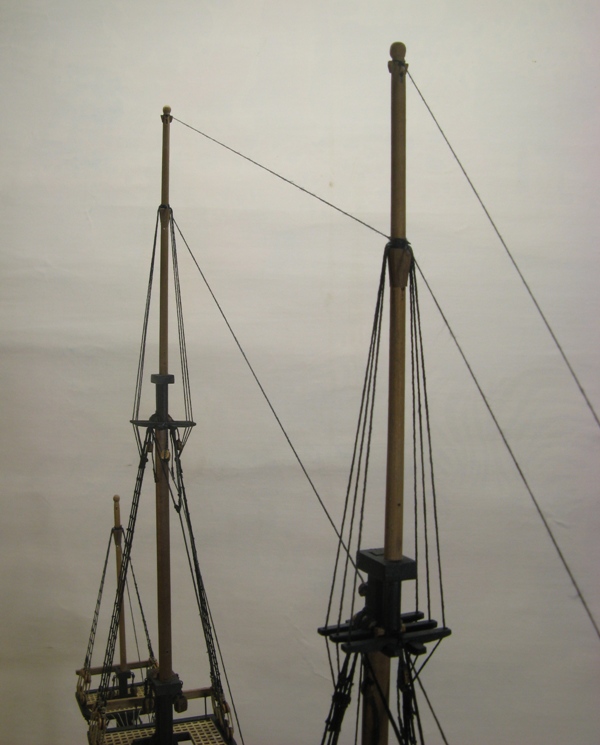
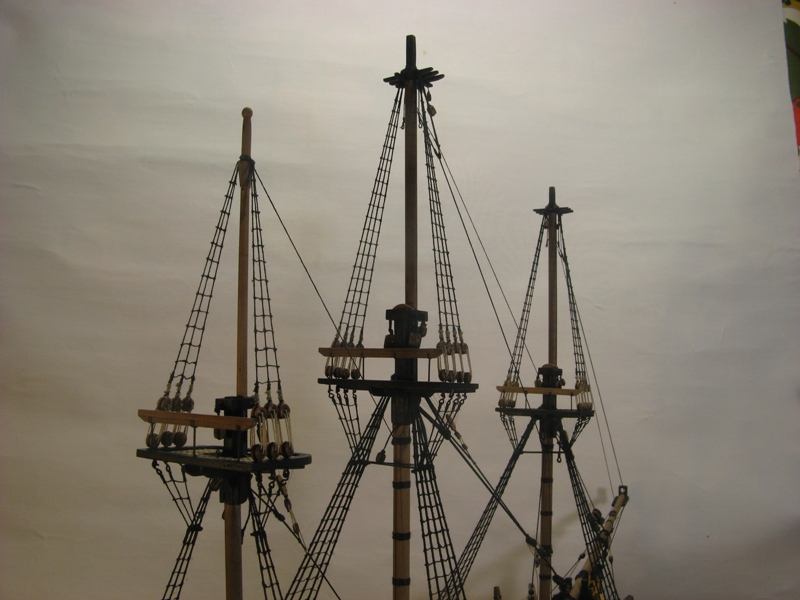
Part 3 standing rig. Fore and main topgallant masts and jib boom and associated stays. The Amati kit instructions don't show the topgallant mast shrouds at all and about half of the stays. I am not going to fit the backstays at this stage, I think they would really get in the way of the running rig which it must be about time to start.


-
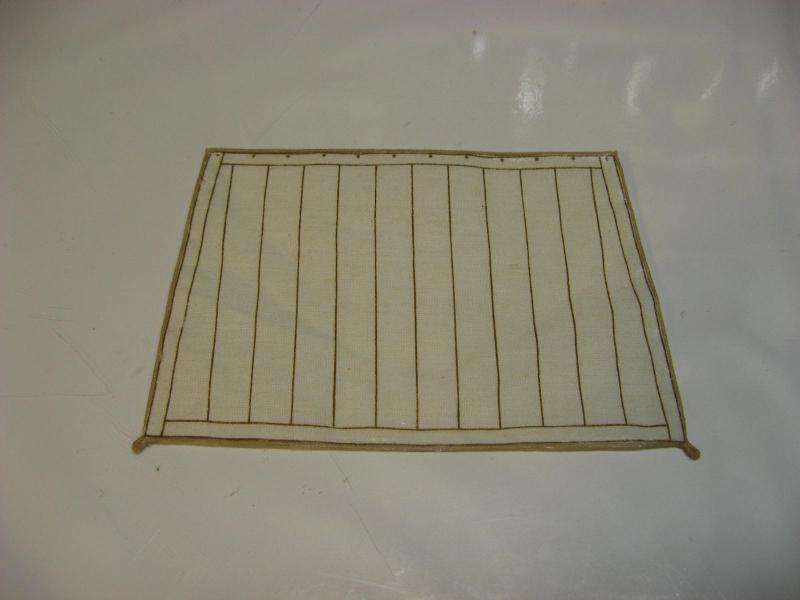
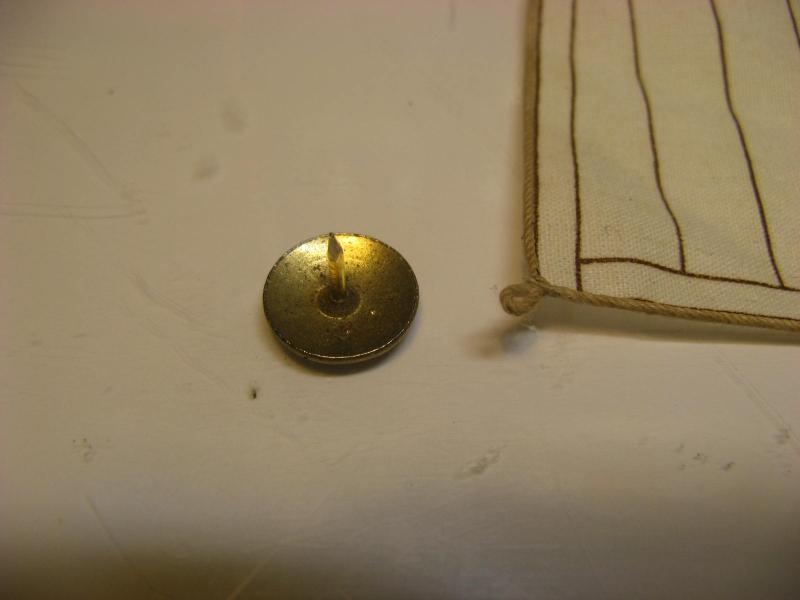
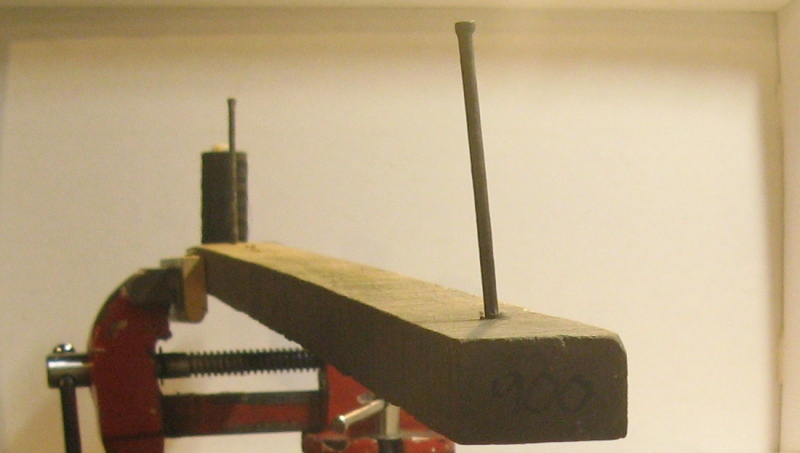
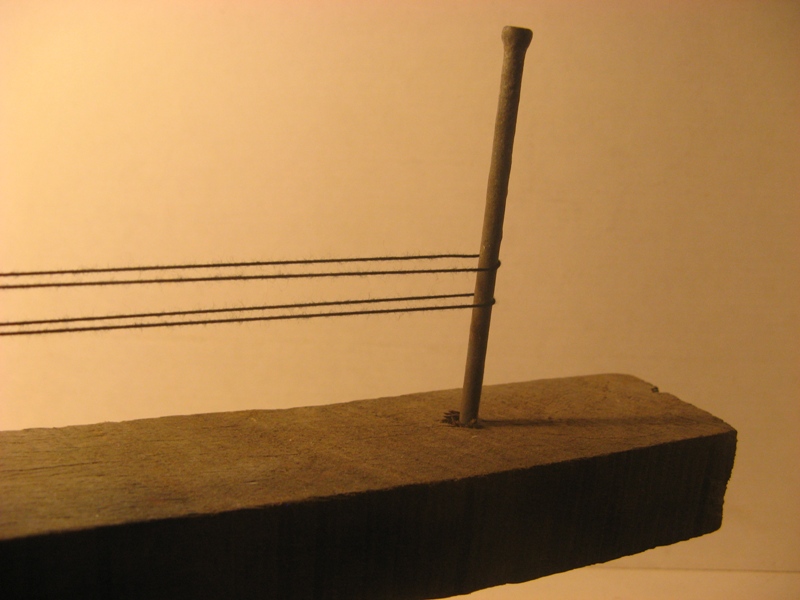
Hi Pavel, Thanks for your comment. The question of sails is now looming large, I will need to make the decision very shortly. The Amati kit came with a partial suit of sails and they don't look too bad. I made up one of the topgallants to see what it looked like. The rope edge was attached by gluing with PVA, it worked quite well. I don't like set billowing or limp sails on a static model, to my thinking they would hide too much of the rig and I think it is almost impossible to make them look good. I have tried various states of furl with a loose furl a possibility. At the end of the day I think I will go for the bare spars look, ships in harbour often looked like this, and the look has a simplicity that I like. I am an bulding architect by background so I prefer hull construction to rigging but, as I have got into the rig, I have come to enjoy it more. The final rig is going to be a bit of a hybrid. I have 3 different references, Amati instructions, Mackays Anatomy of the Ship, and the recently acquired Lennarth Petterson book which describes the rig on a frigate of the same era. I am using a bit of each but referring most often to Mackay and L. P. as the Amati digrams miss out on a lot of the detail and has quite wrong cord sizes. I am using 14 different cord sizes, 5 natural and 9 black. The largest black cord that I have used is for the 10" circumference main stay which at 1:60 scale is 1.4mm diameter. I spun this using 24 strands of sewing cotton initially wound into 4 separate strands then spun together. I think that getting the rope sizes as close to real as possible adds to the accuracy of the look of the finished model. The Amati kit only included a fraction of the sizes of rope that I am using. Cheers, David. Prototype topgallant with rope edge Clue detail Rope jig, makes about 700mm lengths 2 x 6 sewing cotton strands spun, doubled back ready for final winding into 1.4mm 24 strand main stay
-
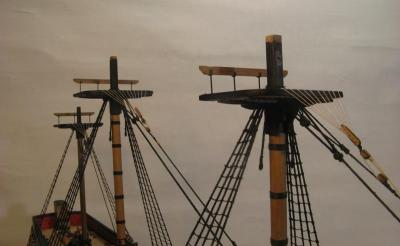
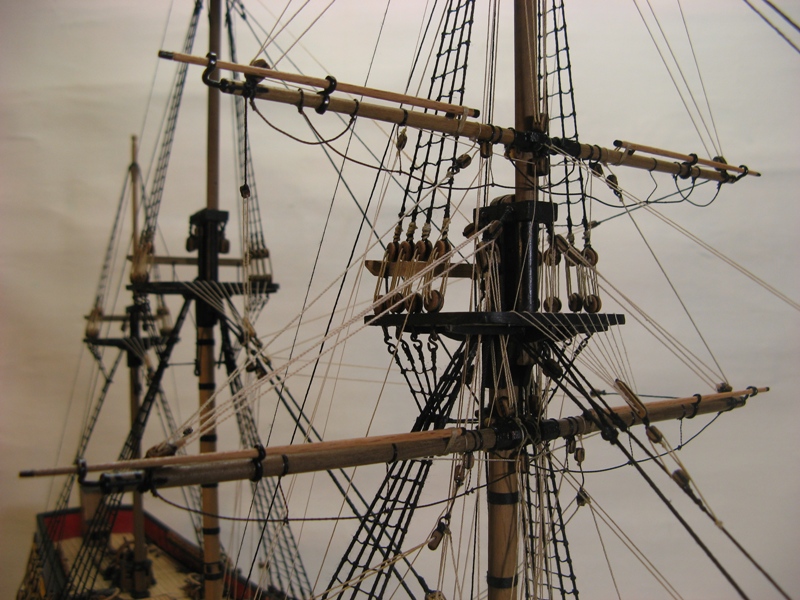
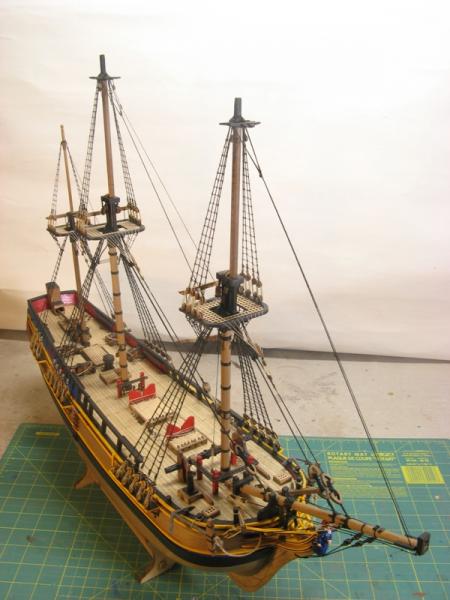
Part 2 standing rig, topmasts, shrouds, ratlines, futtock shrouds and stays done. Now for the topgallant masts and jib boom, no more ratlines.
-
Some preparations for the next phase of the standing rig, the futtock shrouds and connections to, and the topmast shrouds. Research seems to indicate the futtock shrouds are connected to the lower topmast deadeyes by hooks. There was no sign of these in the kit so it was out with the copper wire and hard at work in the foundry The kit drawing shows lanyards going nowhere so I will tie them off like the main shroud lanyard. The new deadeye connectors are much longer than the brass kit provided part. I paired up the deadeyes for best match. The fore and main topmast shrouds are 0.75mm with 0.2mm lashing. My version of a lashing jig. The hooks were then lashed to the precut futtock shrouds and these are now in the process of being installed.
-
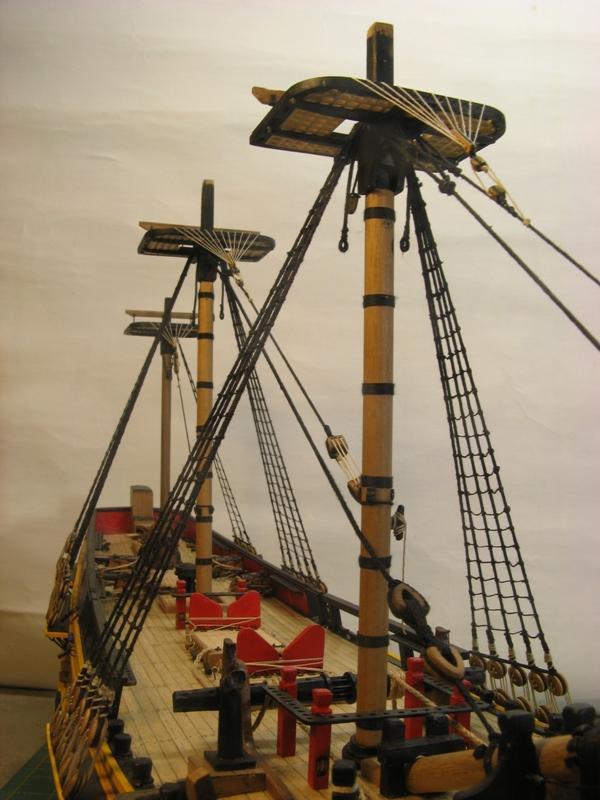
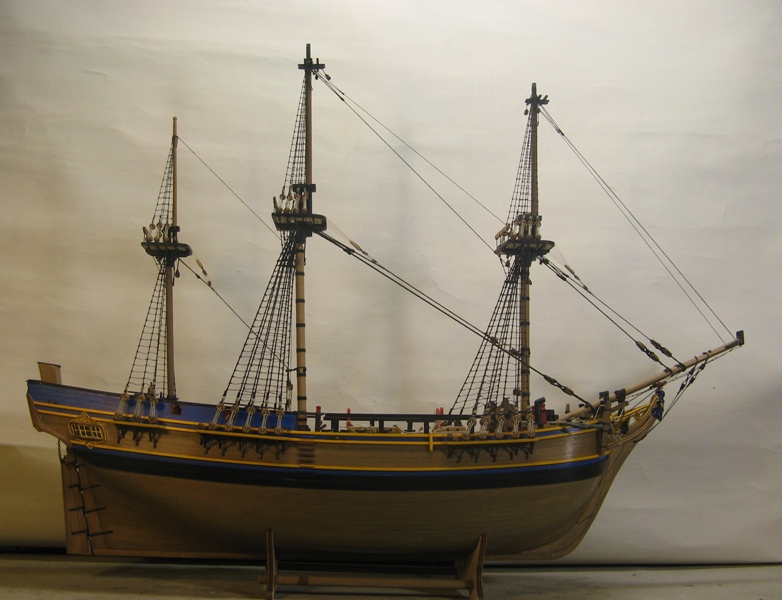
MSW 1, Part 1 of this log which ran for a bit over 2 years brought me up to completion of most of the hull and the beginning of the rig so this is where I will start again. The first stage of the rig is now done, bowsprit and lower mast sections including the tops and stays. Topmasts next. It's good to be back. Cheers, David.