DONATION DRIVE - SUPPORT MSW - DO YOUR PART TO KEEP THIS GREAT FORUM GOING!
×

Navis Factorem
-
Posts
240 -
Joined
-
Last visited
Content Type
Profiles
Forums
Gallery
Events
Everything posted by Navis Factorem
-
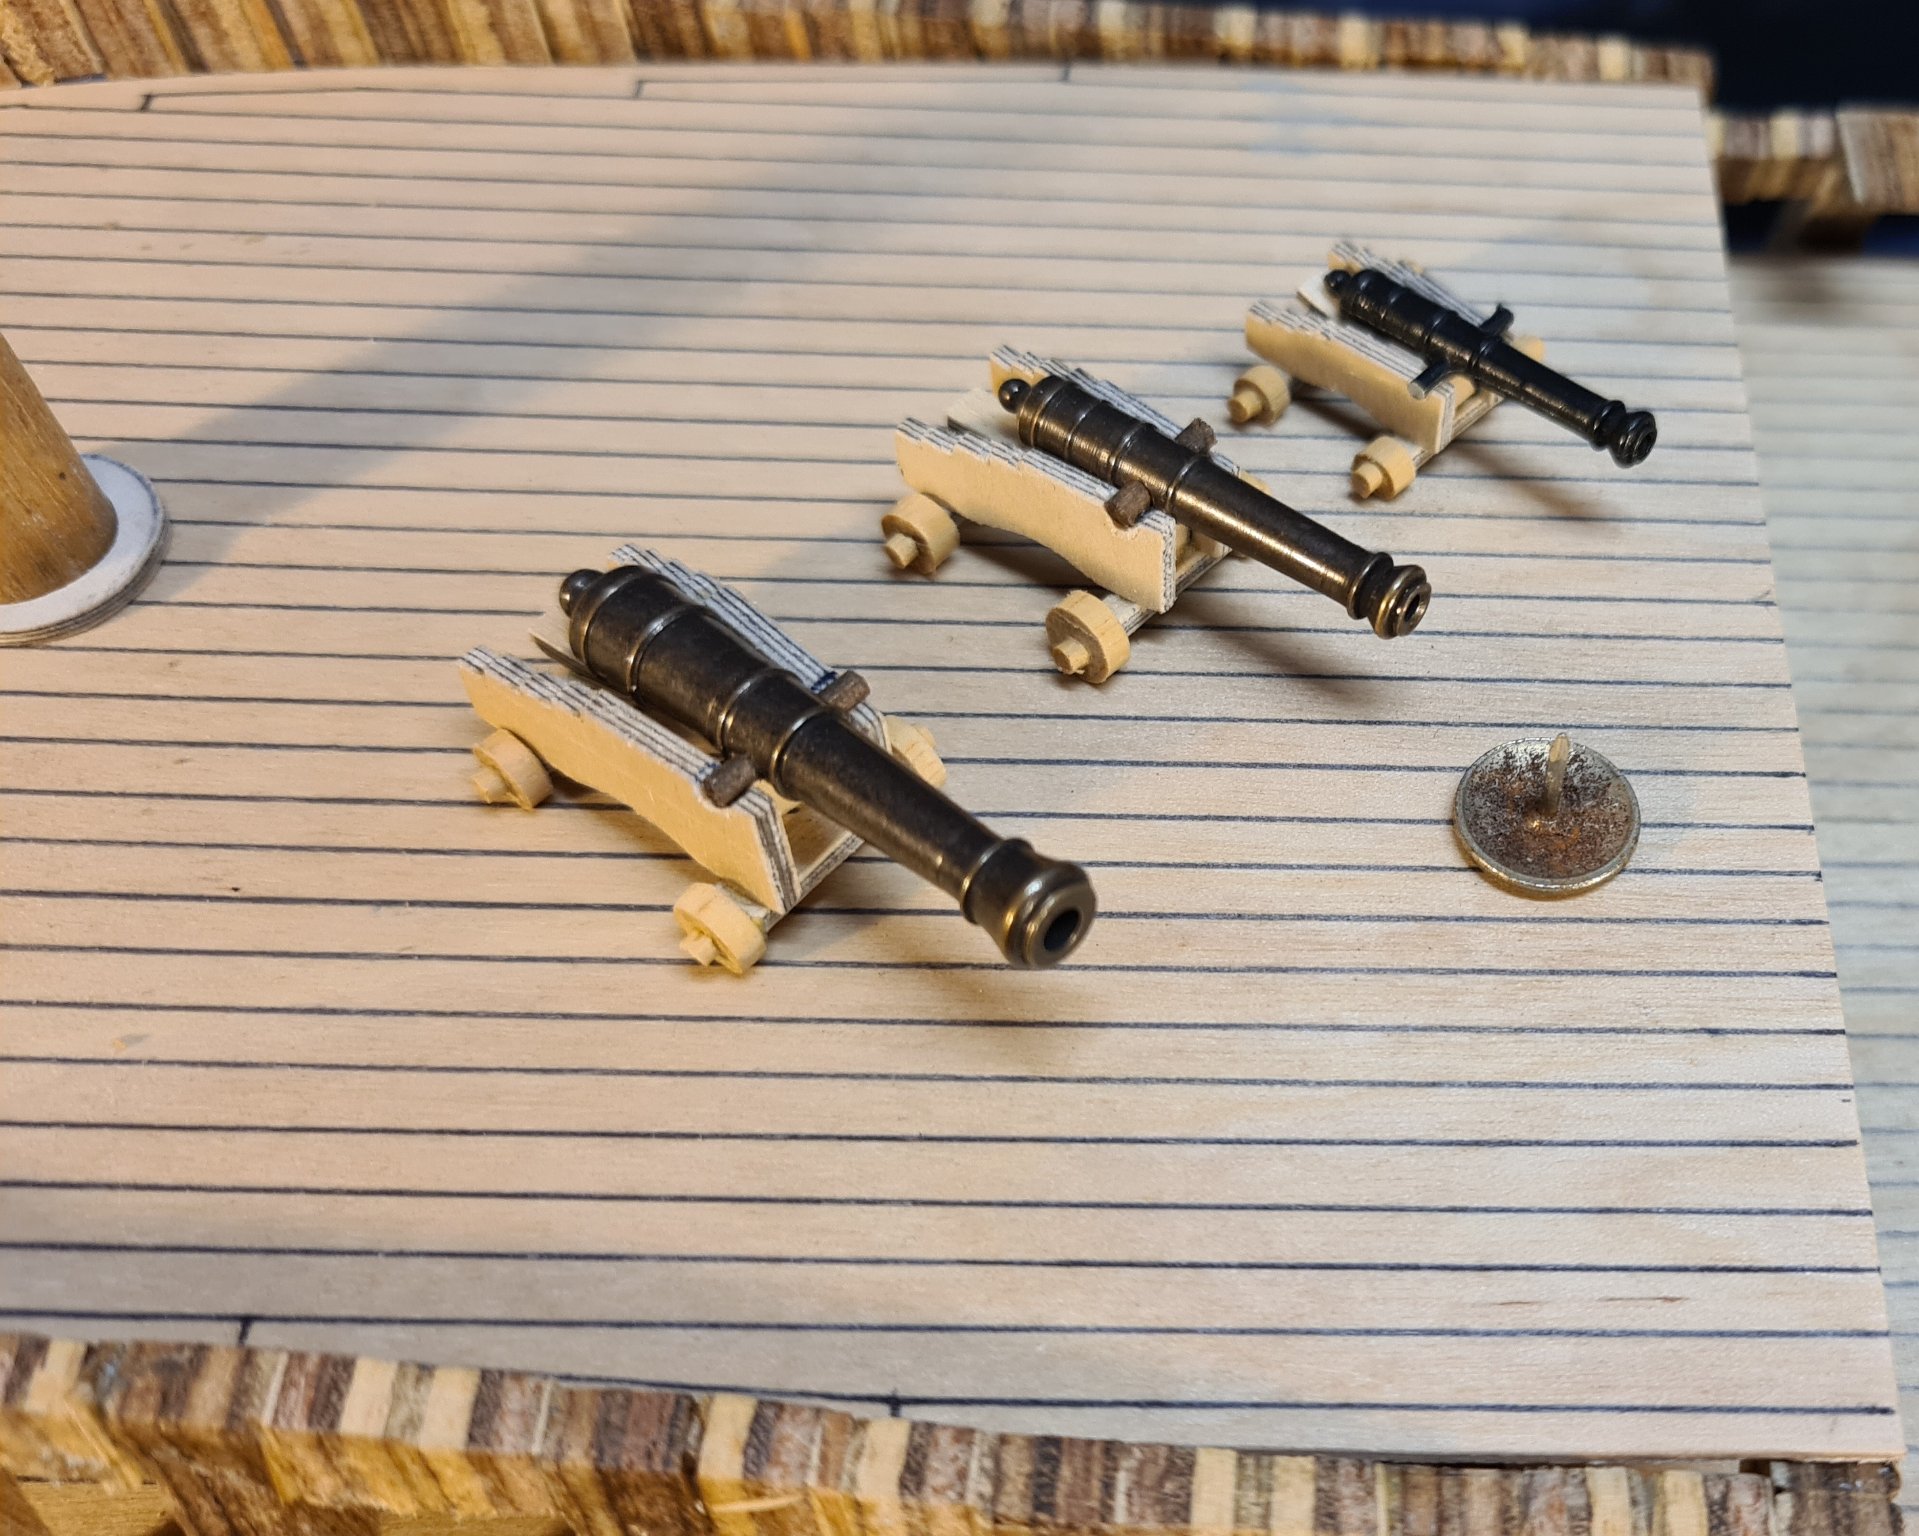
Construction of the decks is progressing with all decks shaped and, except the gun deck which is fixed in place, dry fitted. All the upper decks are removeable so I can continue to work on the fitouts including all guns to all decks. The lowest sections of the masts and bowsprit have been dry fitted. I have bought the the gun barrels from my local materials supplier, making gun barrels is way beyond my skill level. I have fabricated a set of prototype gun carriages, both to confirm they can be made reasonably accurately and easily, and so I can fit them to the decks where they will be installed so I can ensure the gun carriage design and gun port locations end up with the gun barrels centred in the ports when the barrels are horizontal. I bought some sheets of high quality plywood in 0.5, 1.0 and 2.0 mm thicknesses and the gun carriages are made from the 2 mm ply. This is lovely material to work with and my scroll saw cuts accurately enough to do the detail on the carriages. The next step will be to frame the gun ports before any hull planking starts. Fortunately most of the gun ports are located between the ribs so this process should not be too difficult. I have started to try and figure out how the stern structure works. On Bellona it is quite 3 dimensional with a recessed open gallery and lots of intricate carvings. I can only work on this area for a certain amount of time, too long focusing and I get brain fade and have revert to something a bit simpler. Cheers and happy new year to all and keep well. David.


-
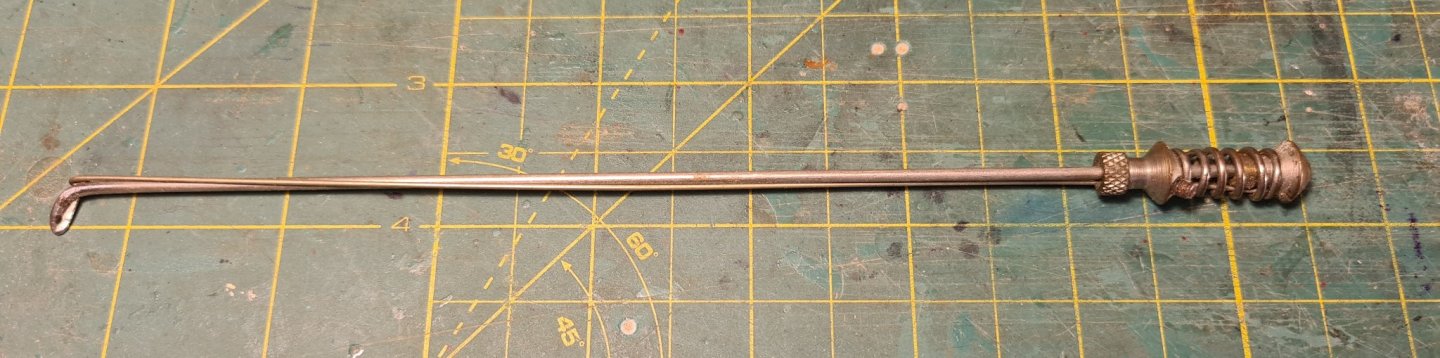
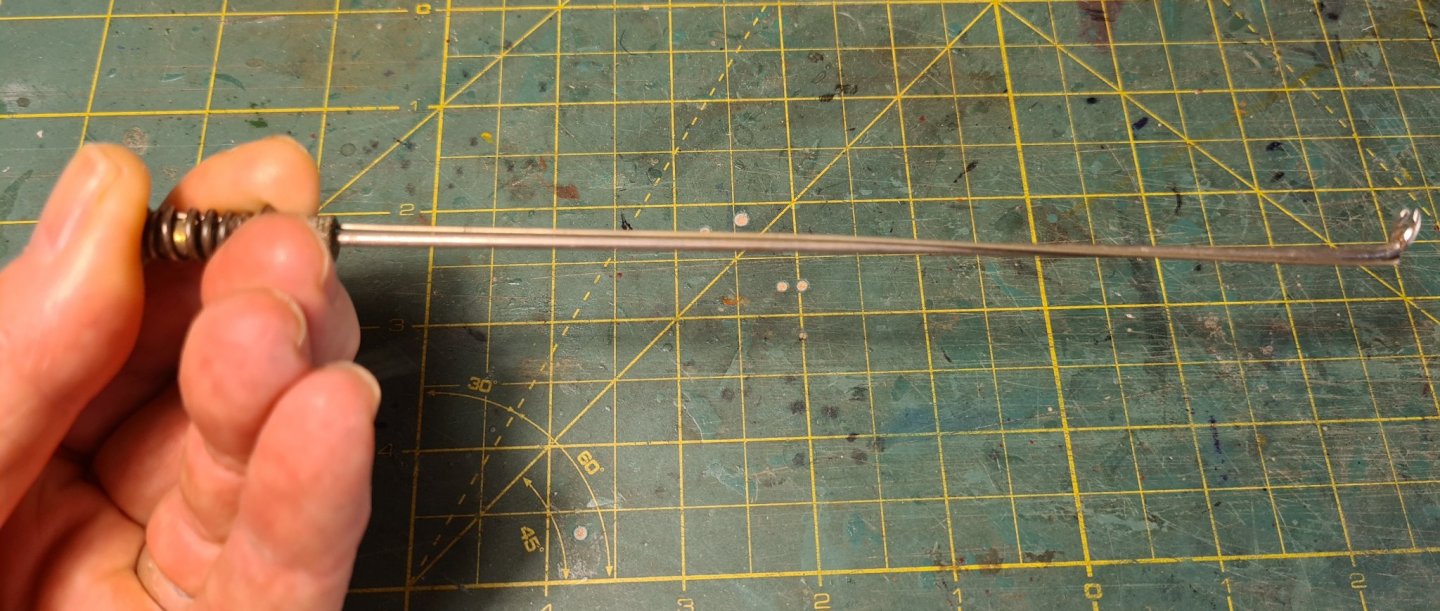
A friend gave me this wonderful little gripping tool that was made by her father when he was into model ship building many decades ago. She estimates it was probably made in the 1940s or 50s. I have used it a few times for getting into those hard to access corners and I expect I will find it very helpful.
-
- 10
-

-
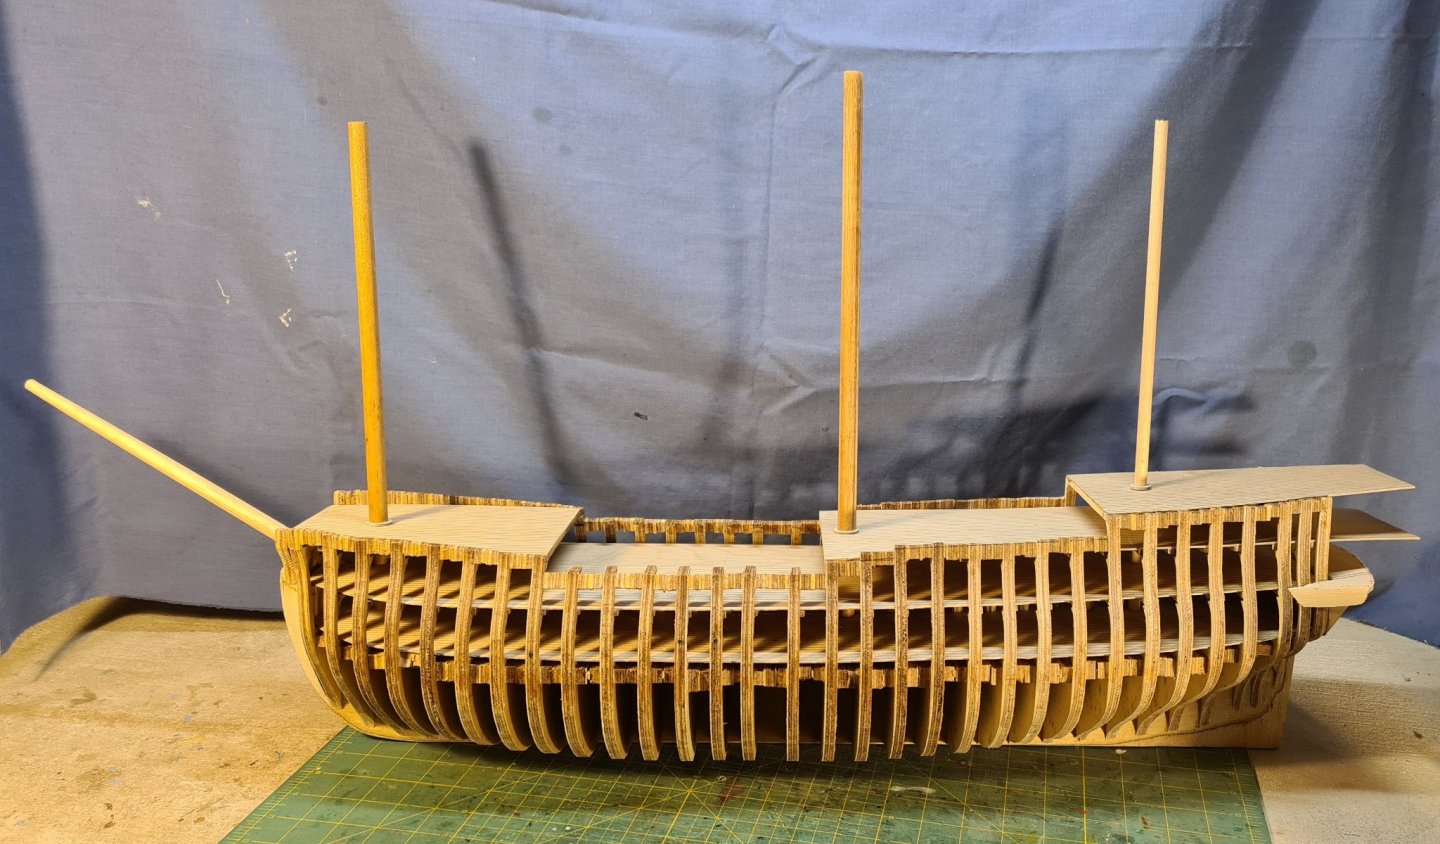
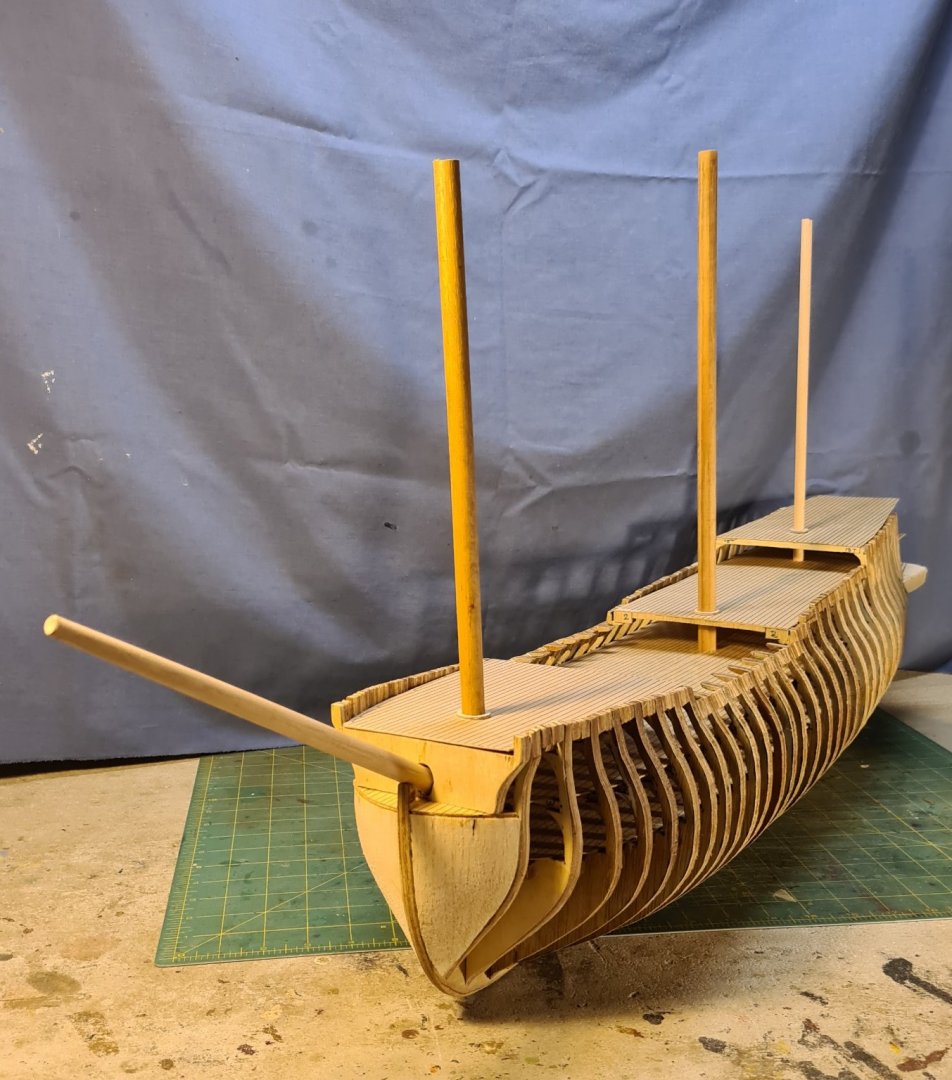
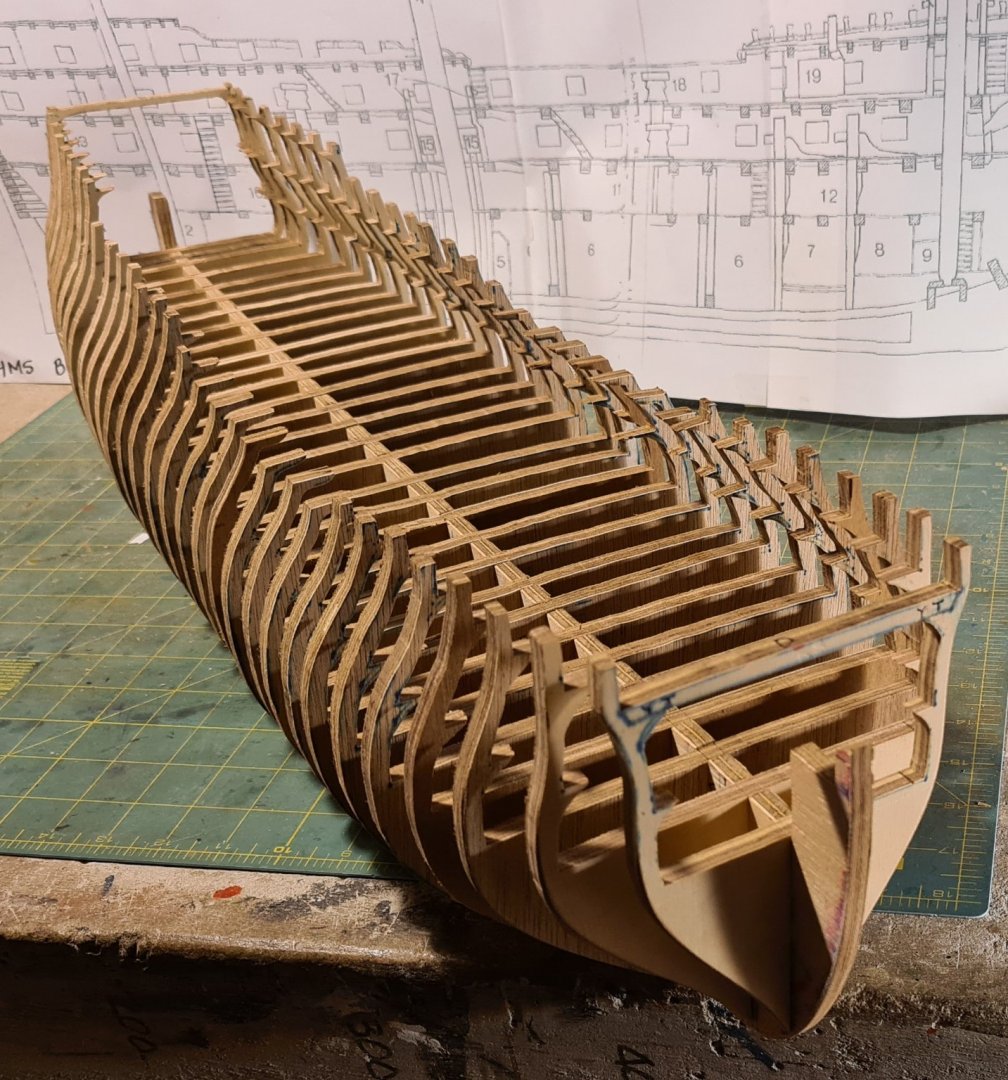
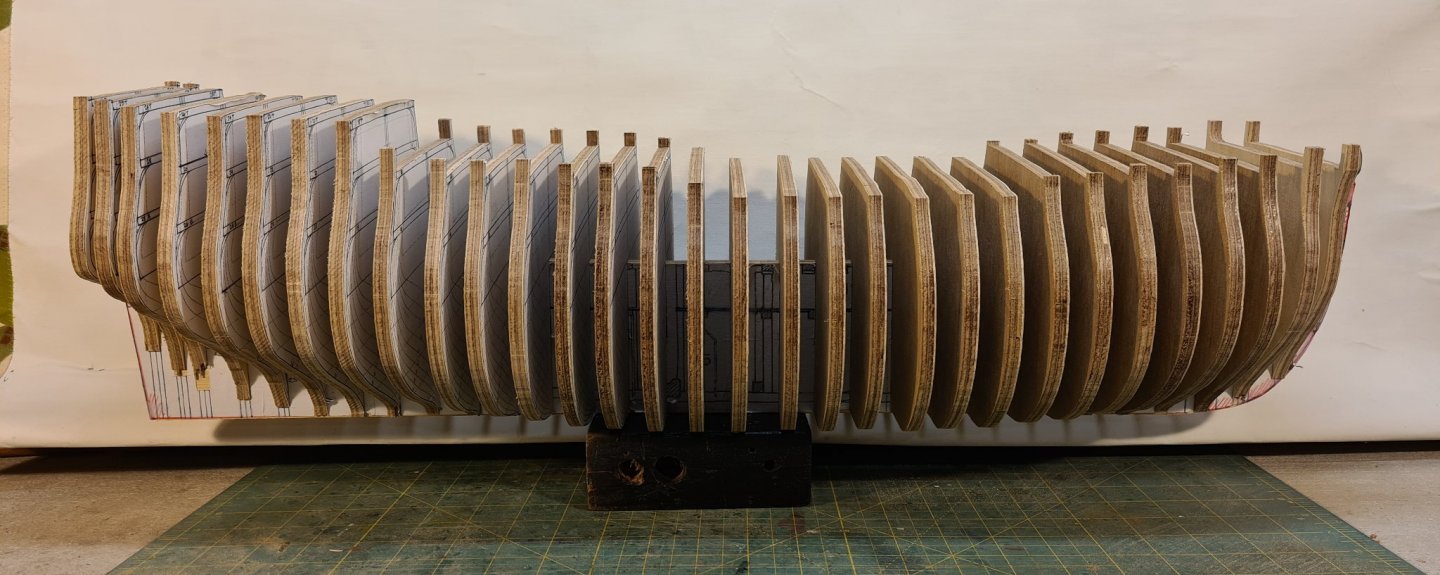
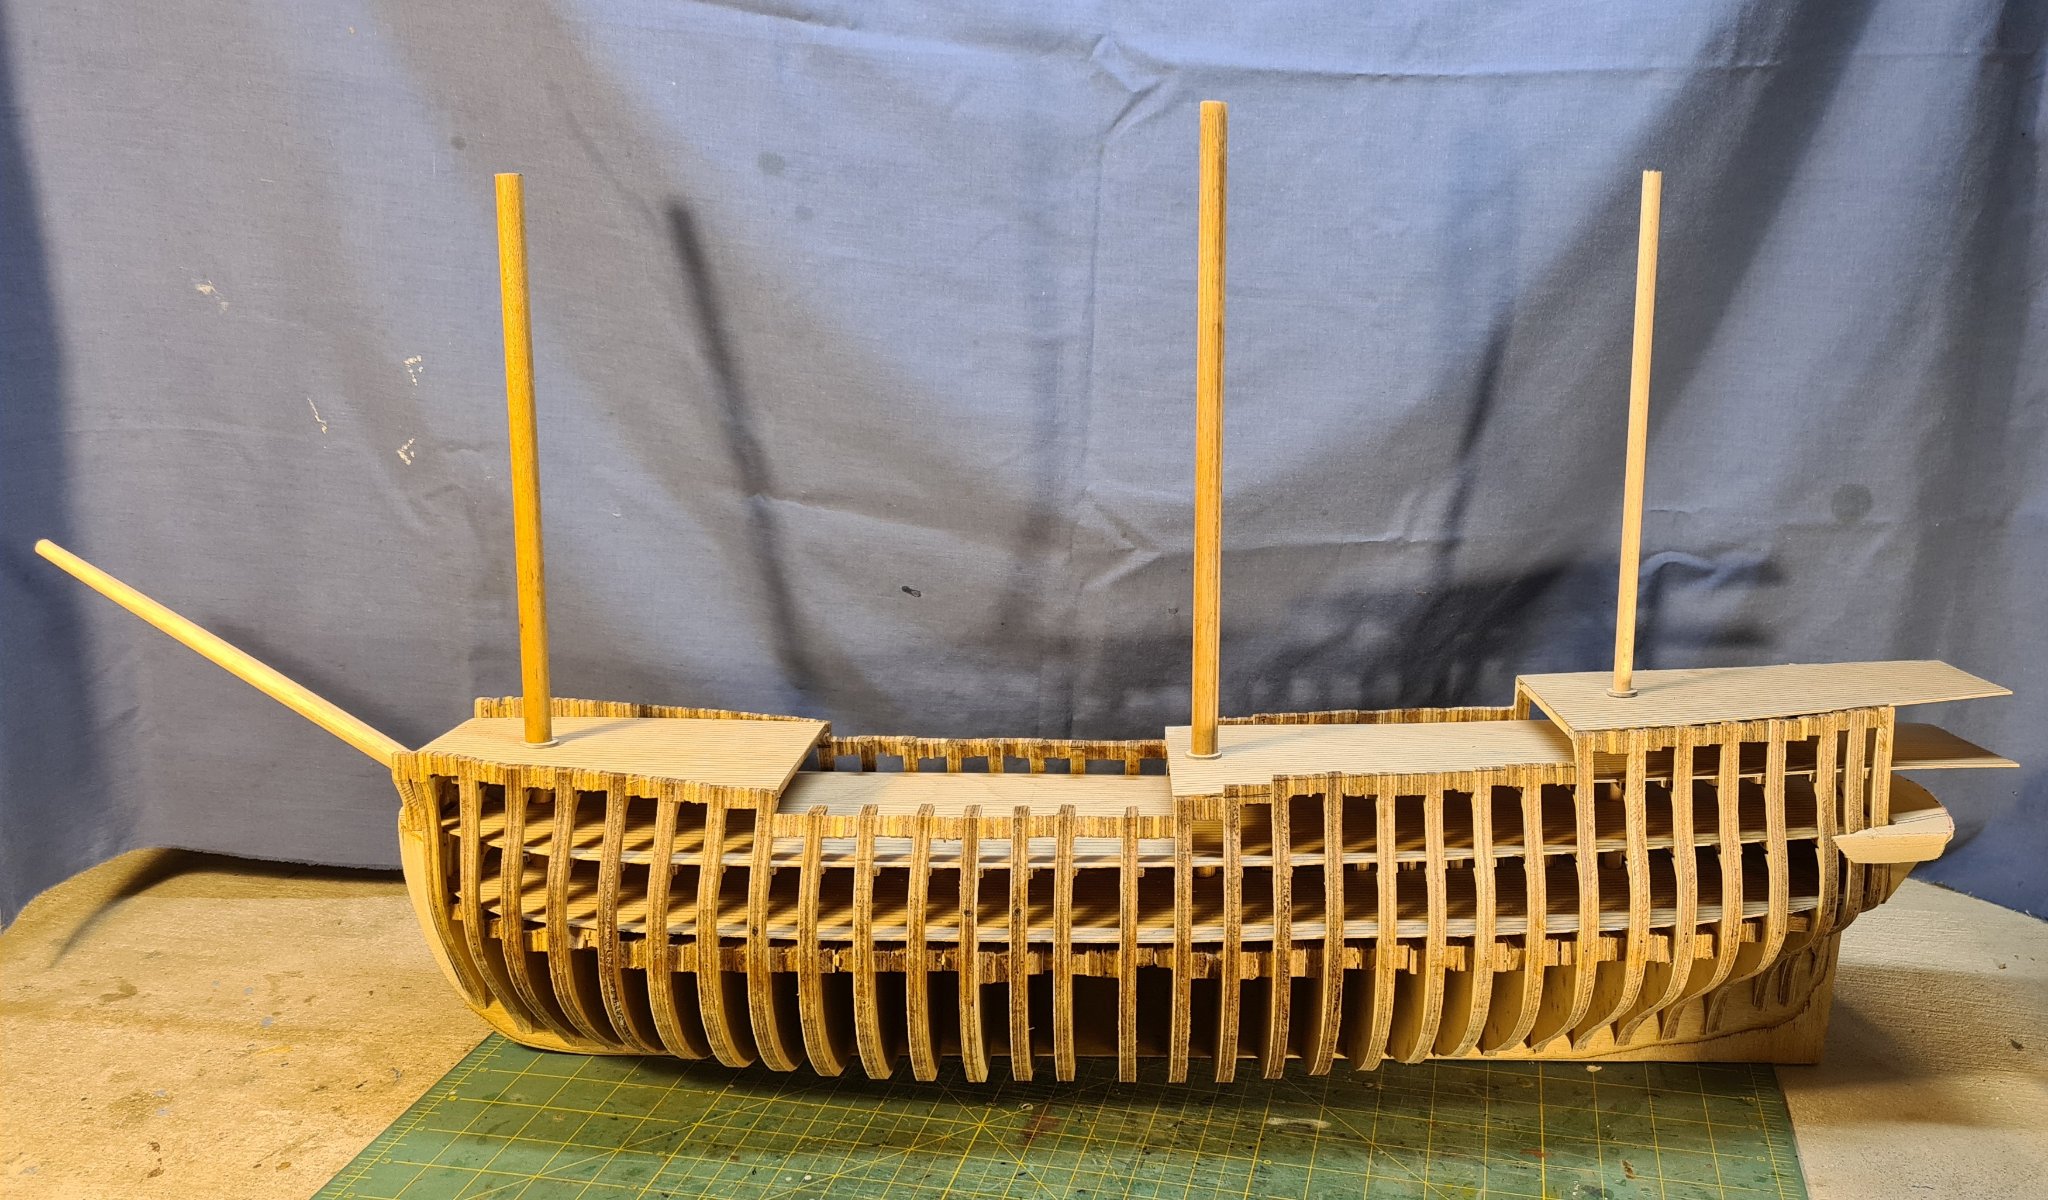
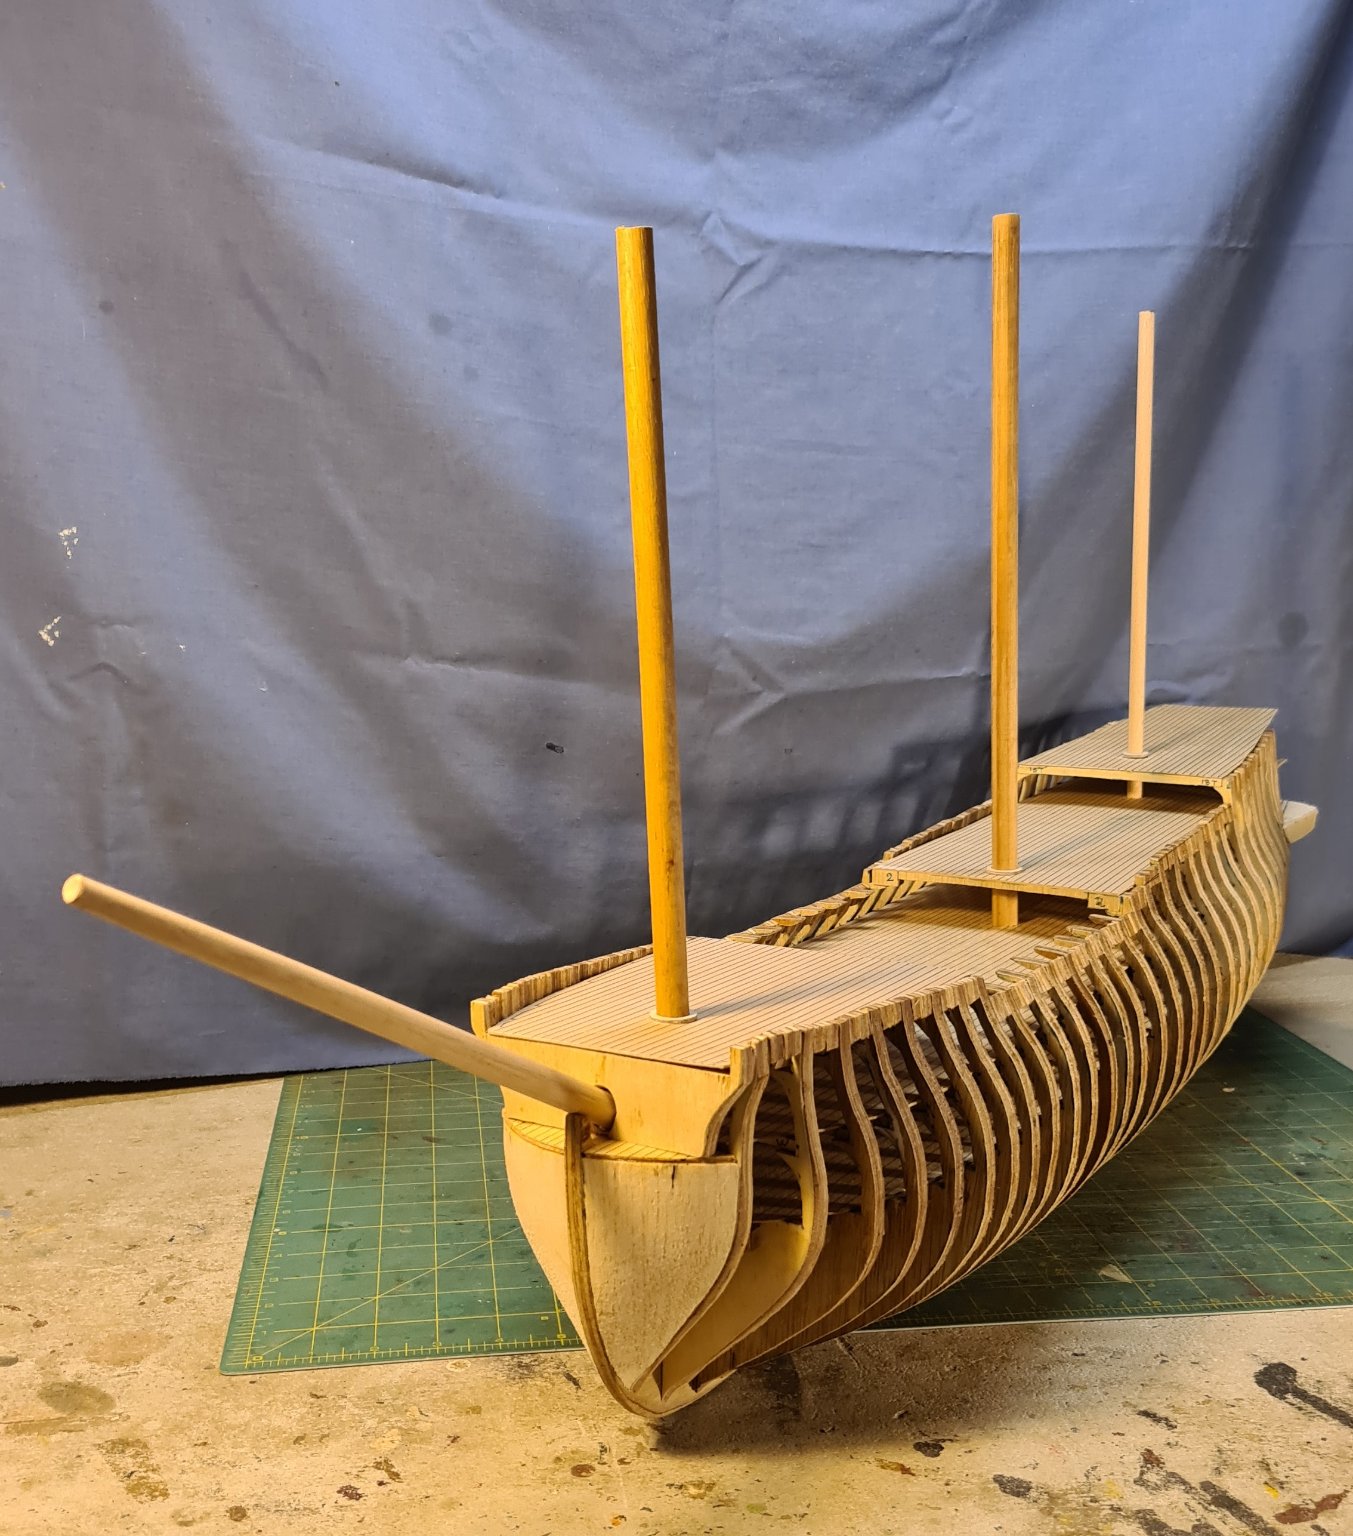
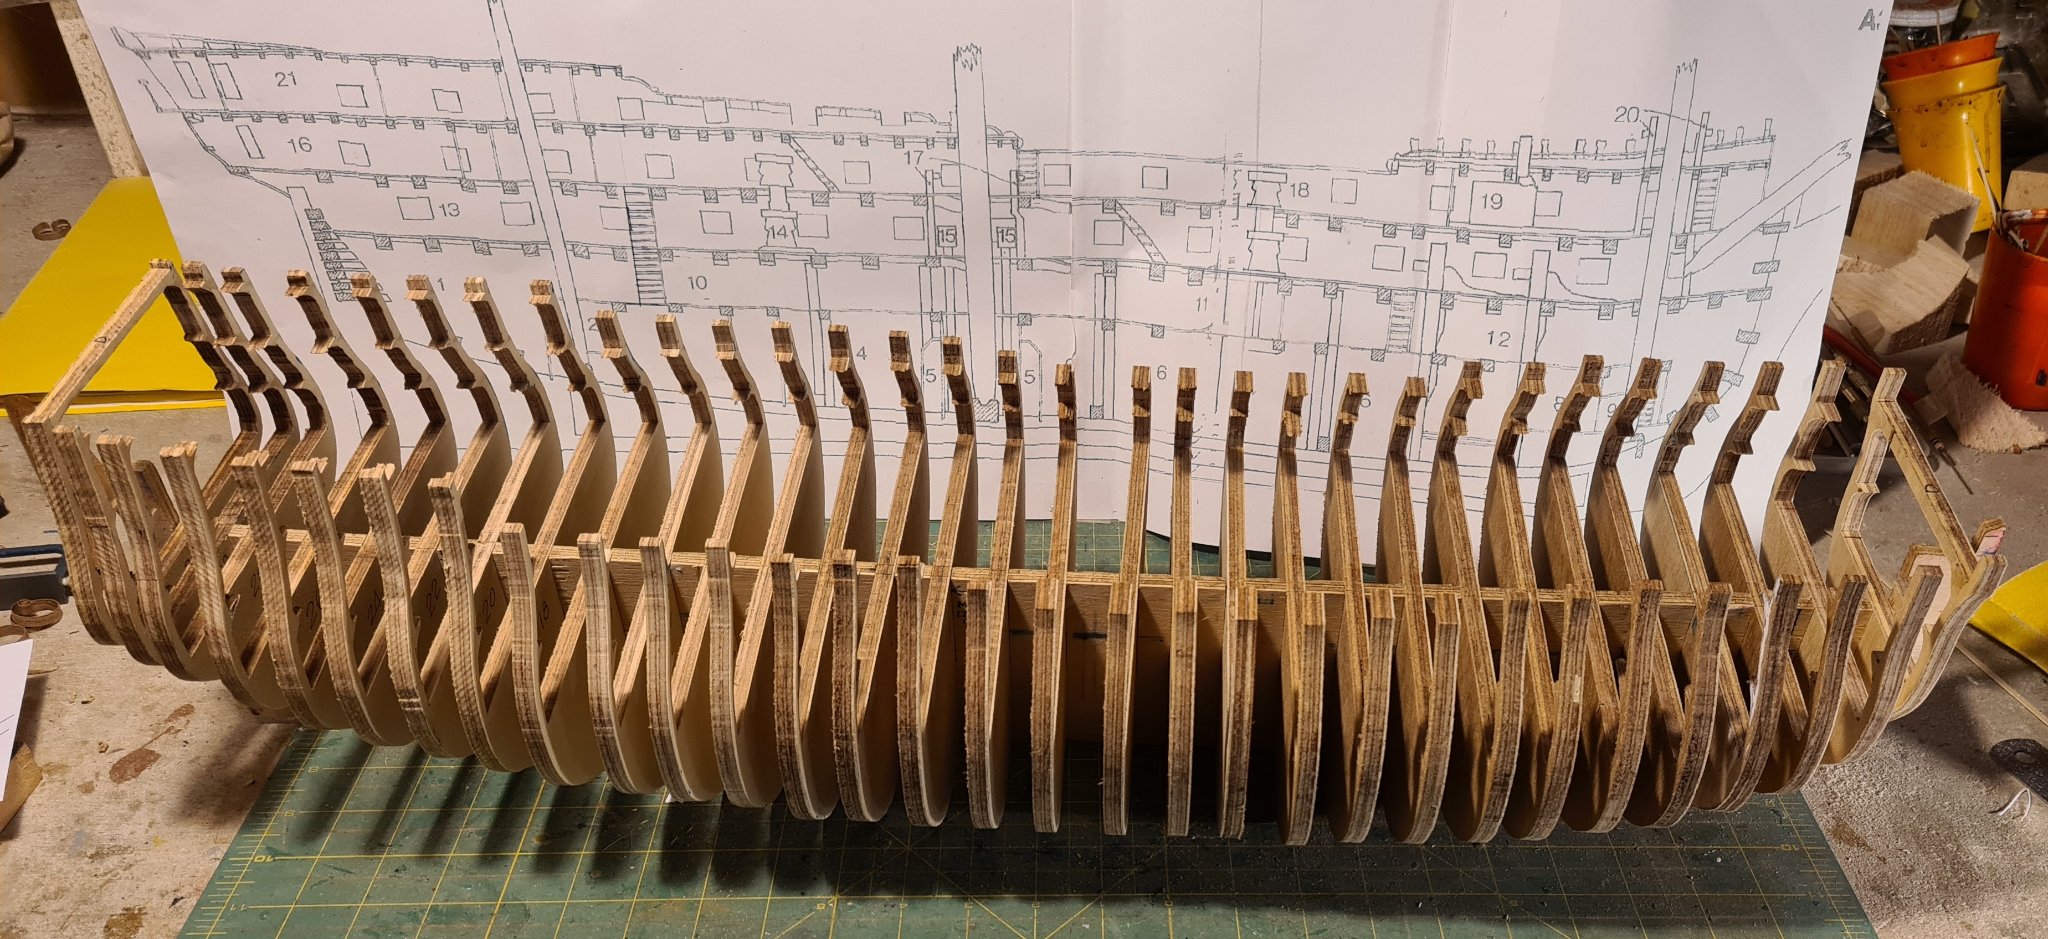
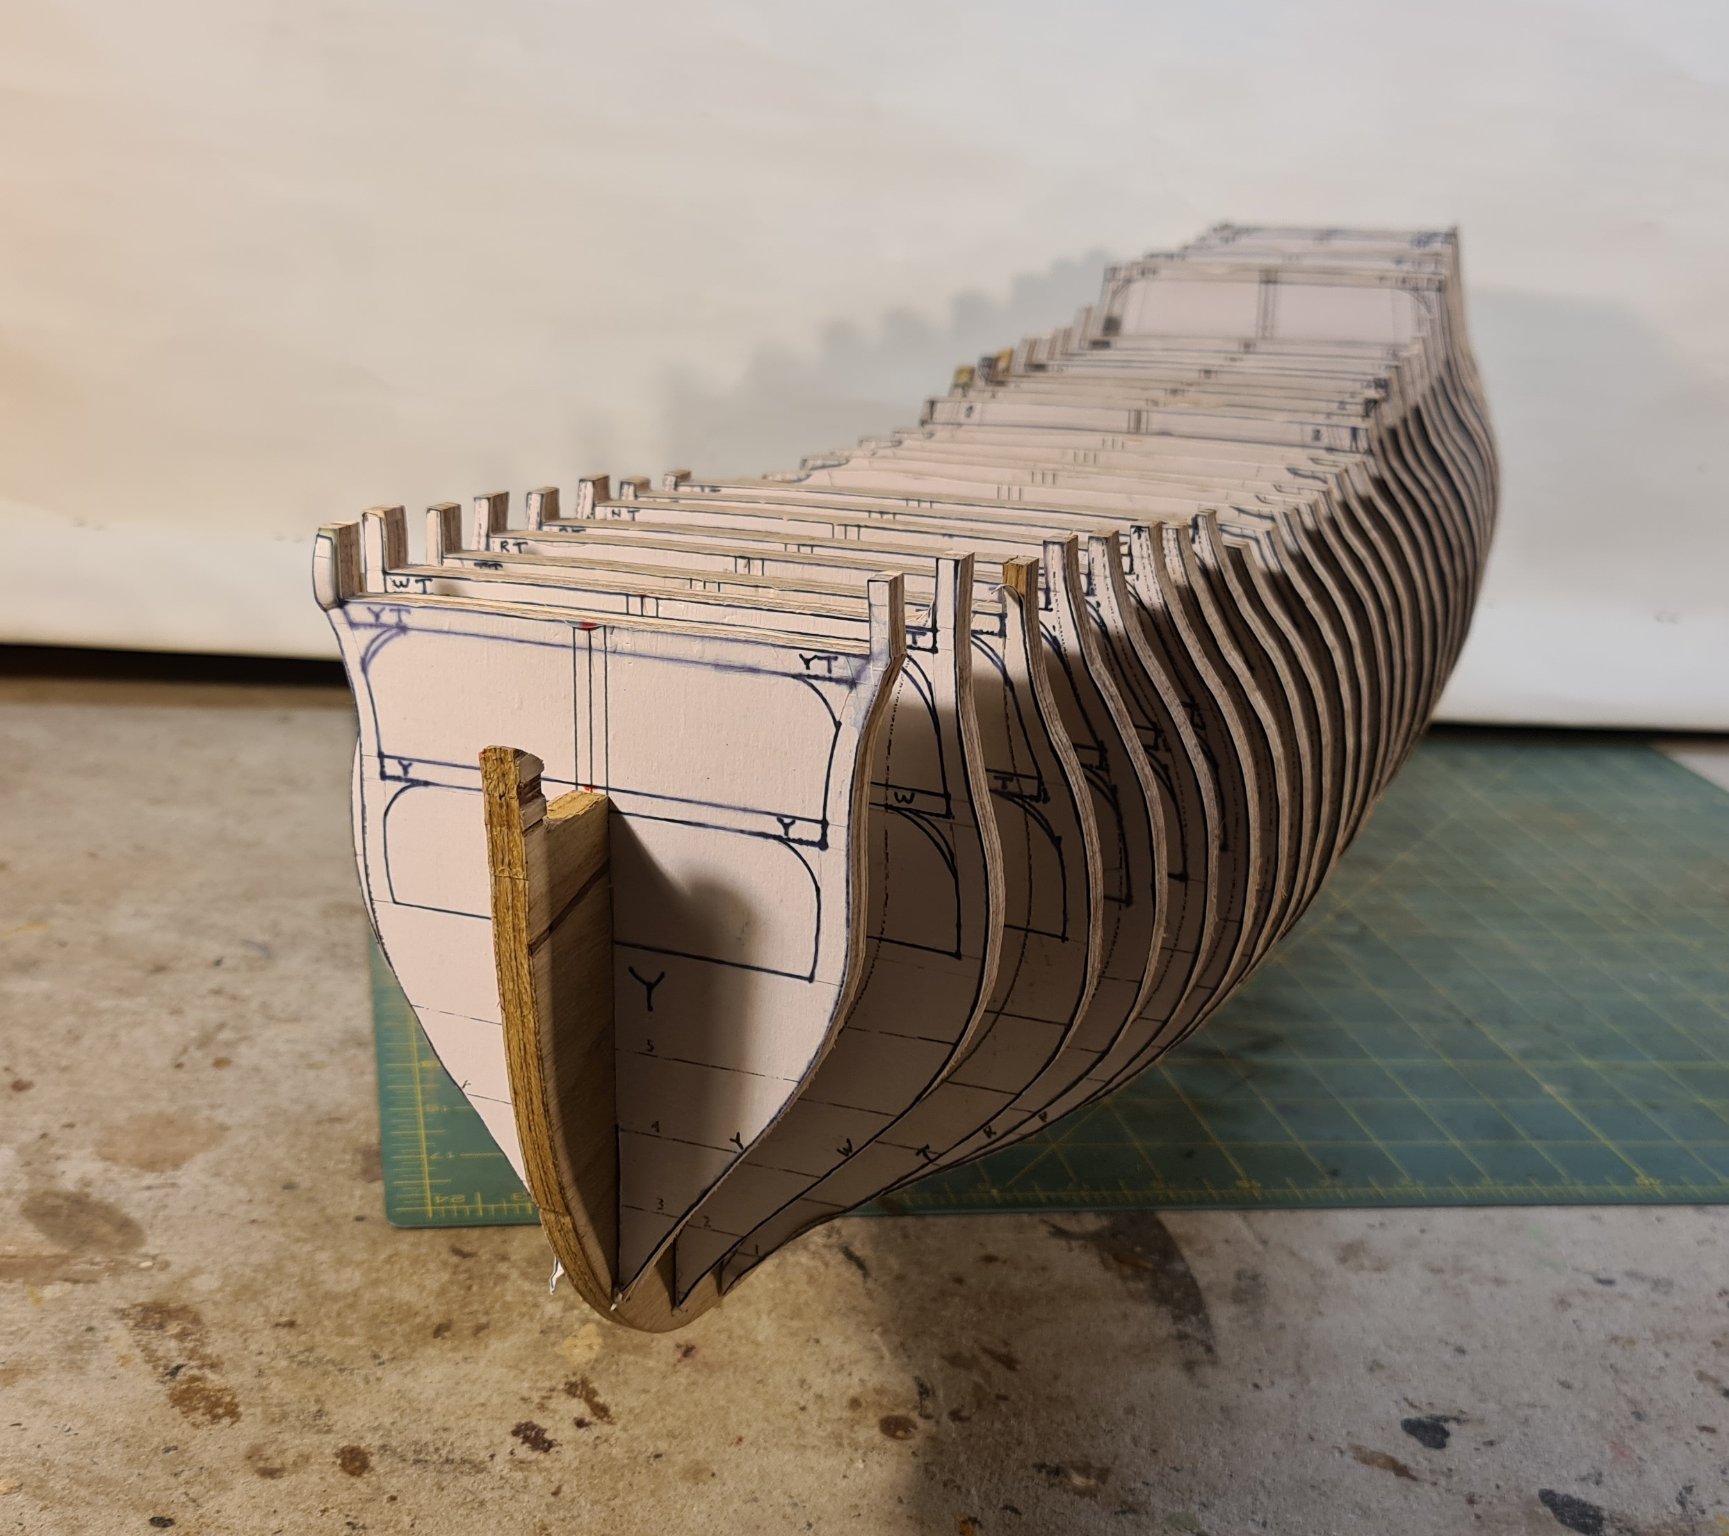
The next stage of the hull construction is complete. Spacers have been inserted between the ribs to increase rigidity and to take out the false keel misalignment. Bow and stern shaping has been started as has truing up and fairing the ribs and false keel. I am going to build the decks next before I start any hull planking as I think this will be easier as I can access the deck sides for clamping.


-
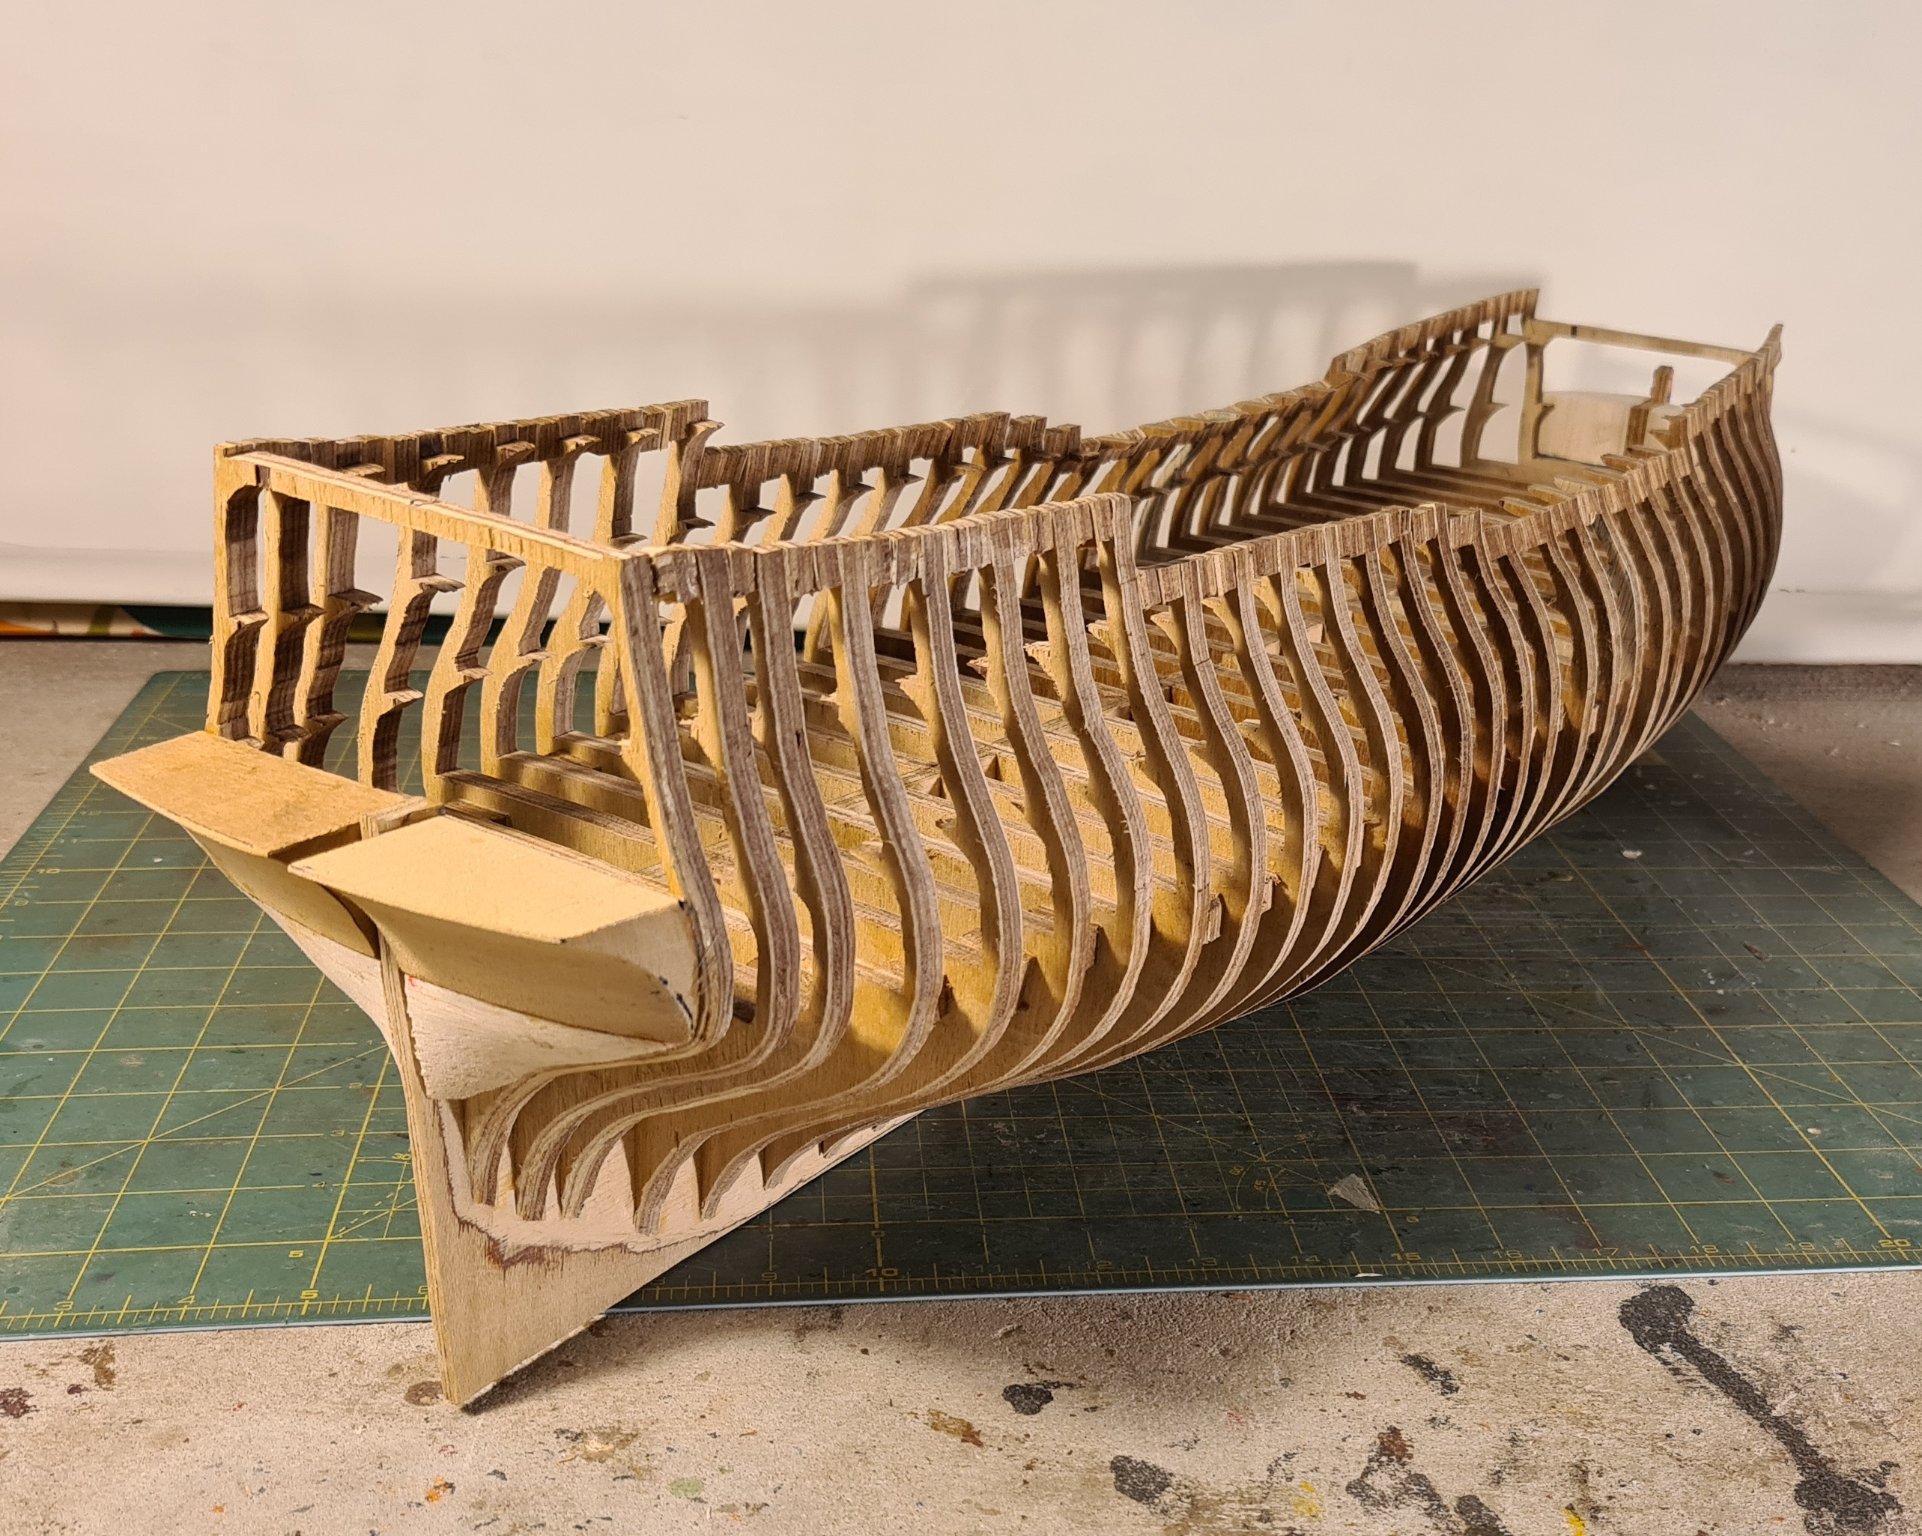
The scroll saw has been working overtime and the second stage of frame construction has been completed. The frames need spacers to improve rigidity and to take out the gentle curve in the false keel. Once that is done I will have a ribbed frame that I can start planking and a set of beams that I can build the decks on once I have done a bit of tidying up to improve the general alignment. I need to work out how to frame up the stern. I have left a central support on the deck beams as I will have to split the upper deck at least to get it into position. The forecastle, quarter deck and poop may go in in on piece, not sure. Cheers, David.


-
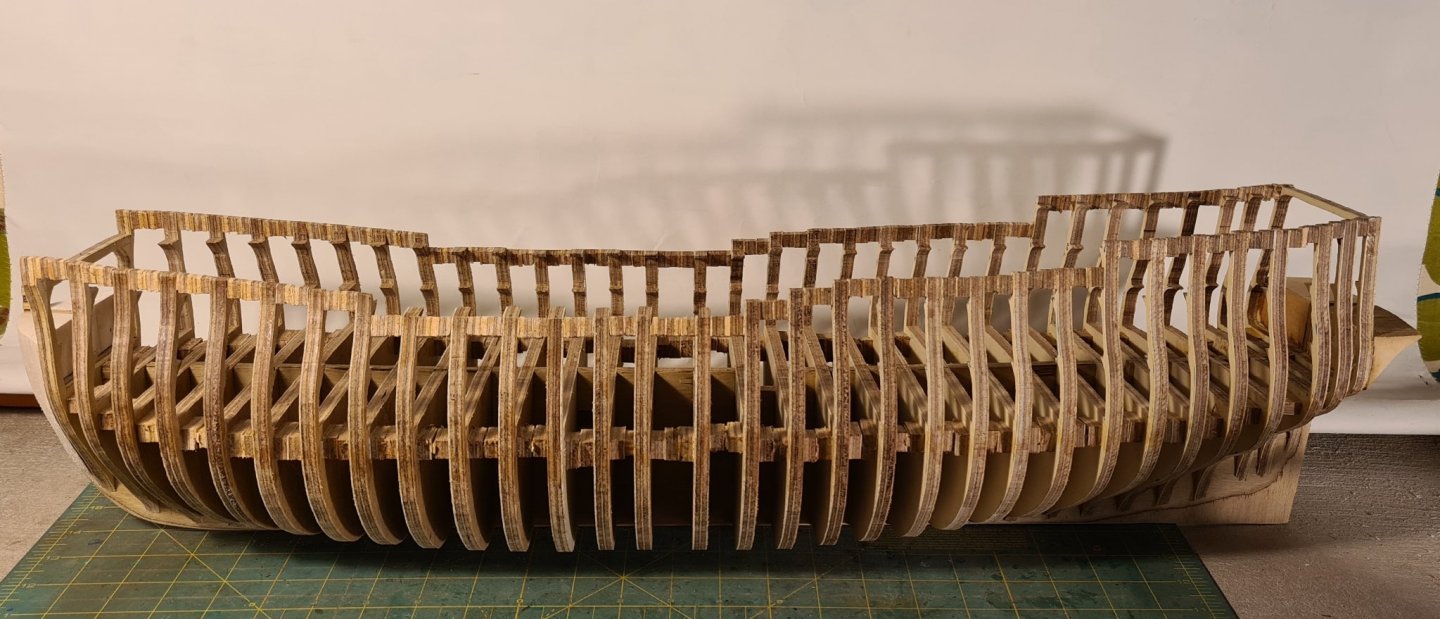
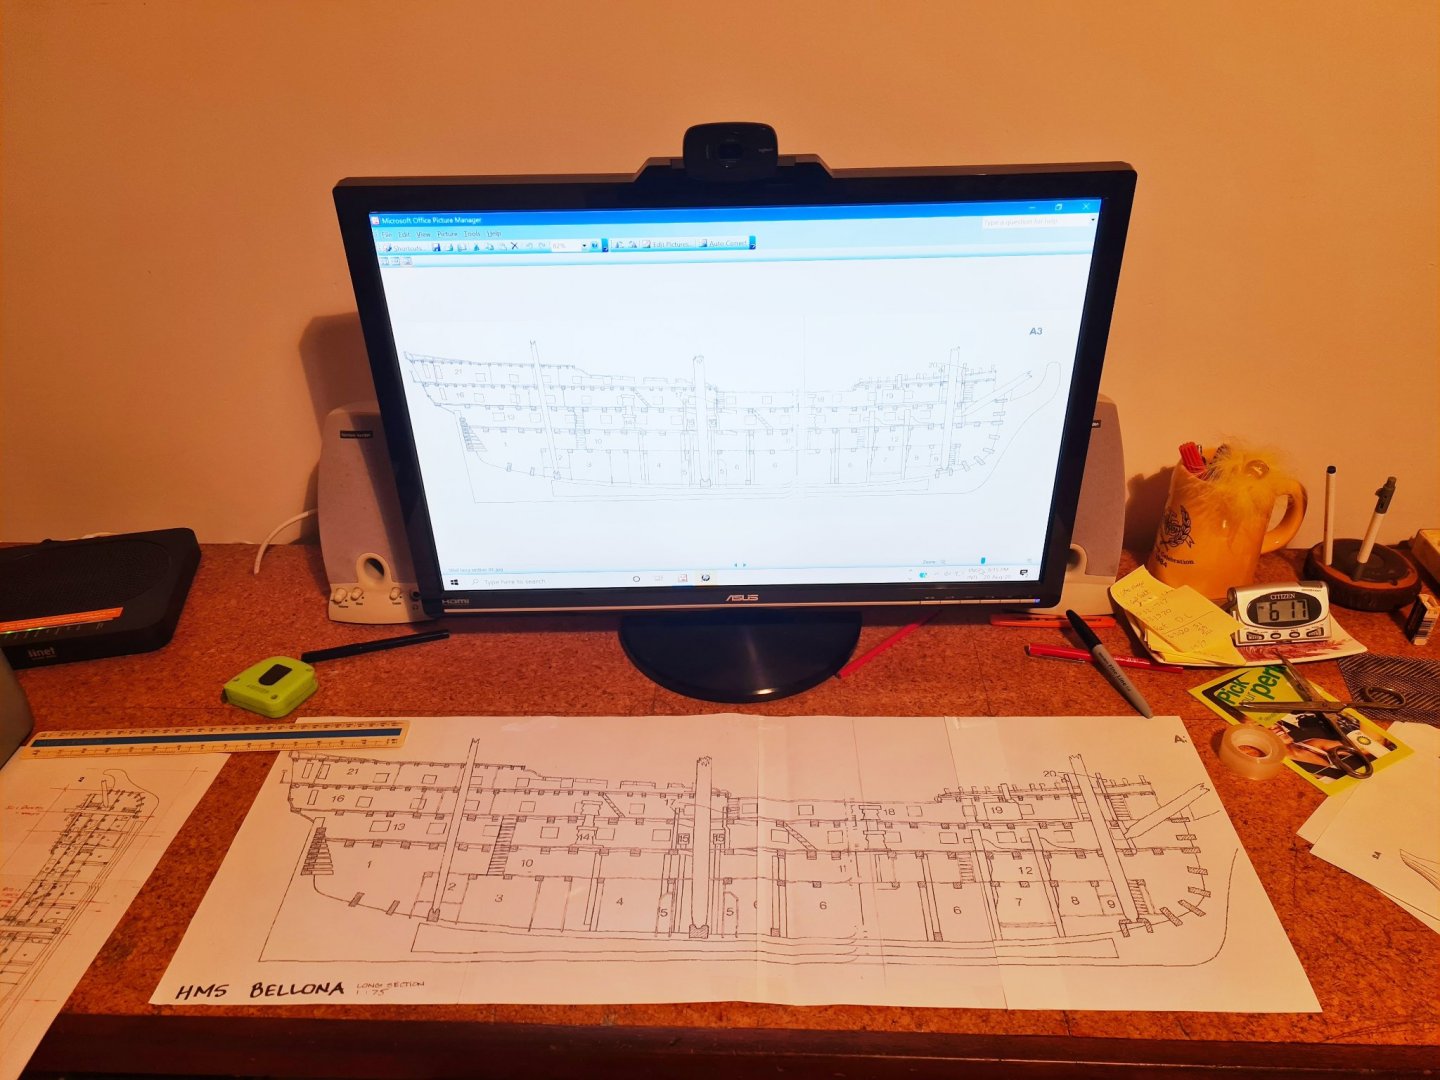
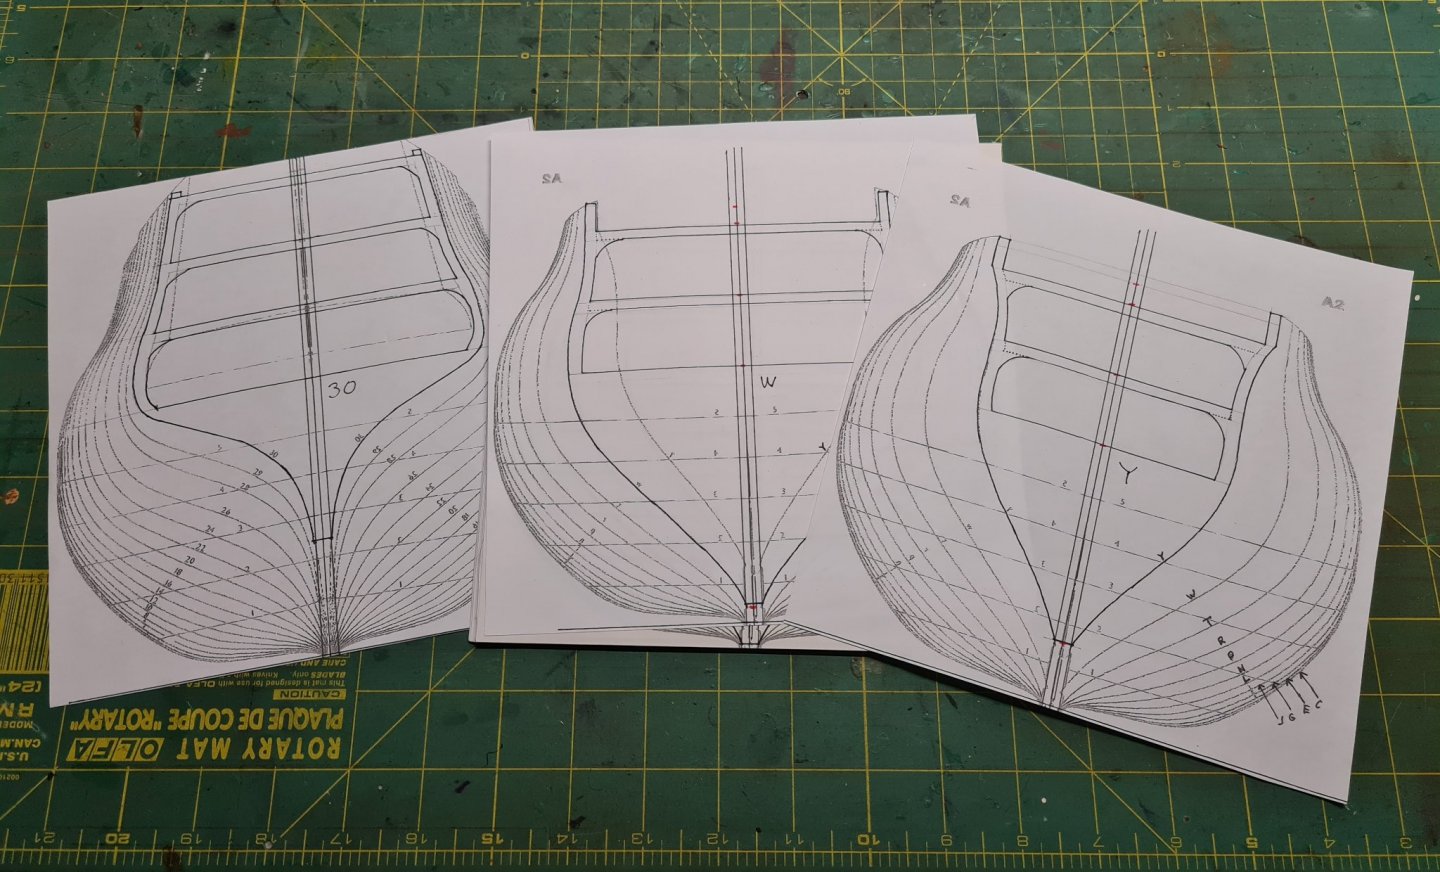
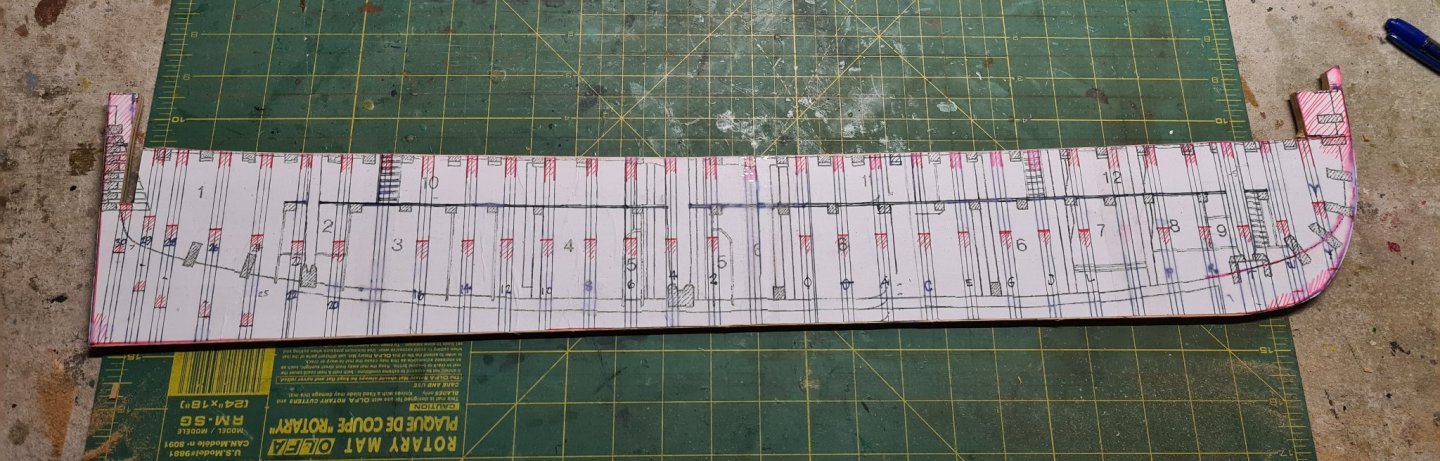
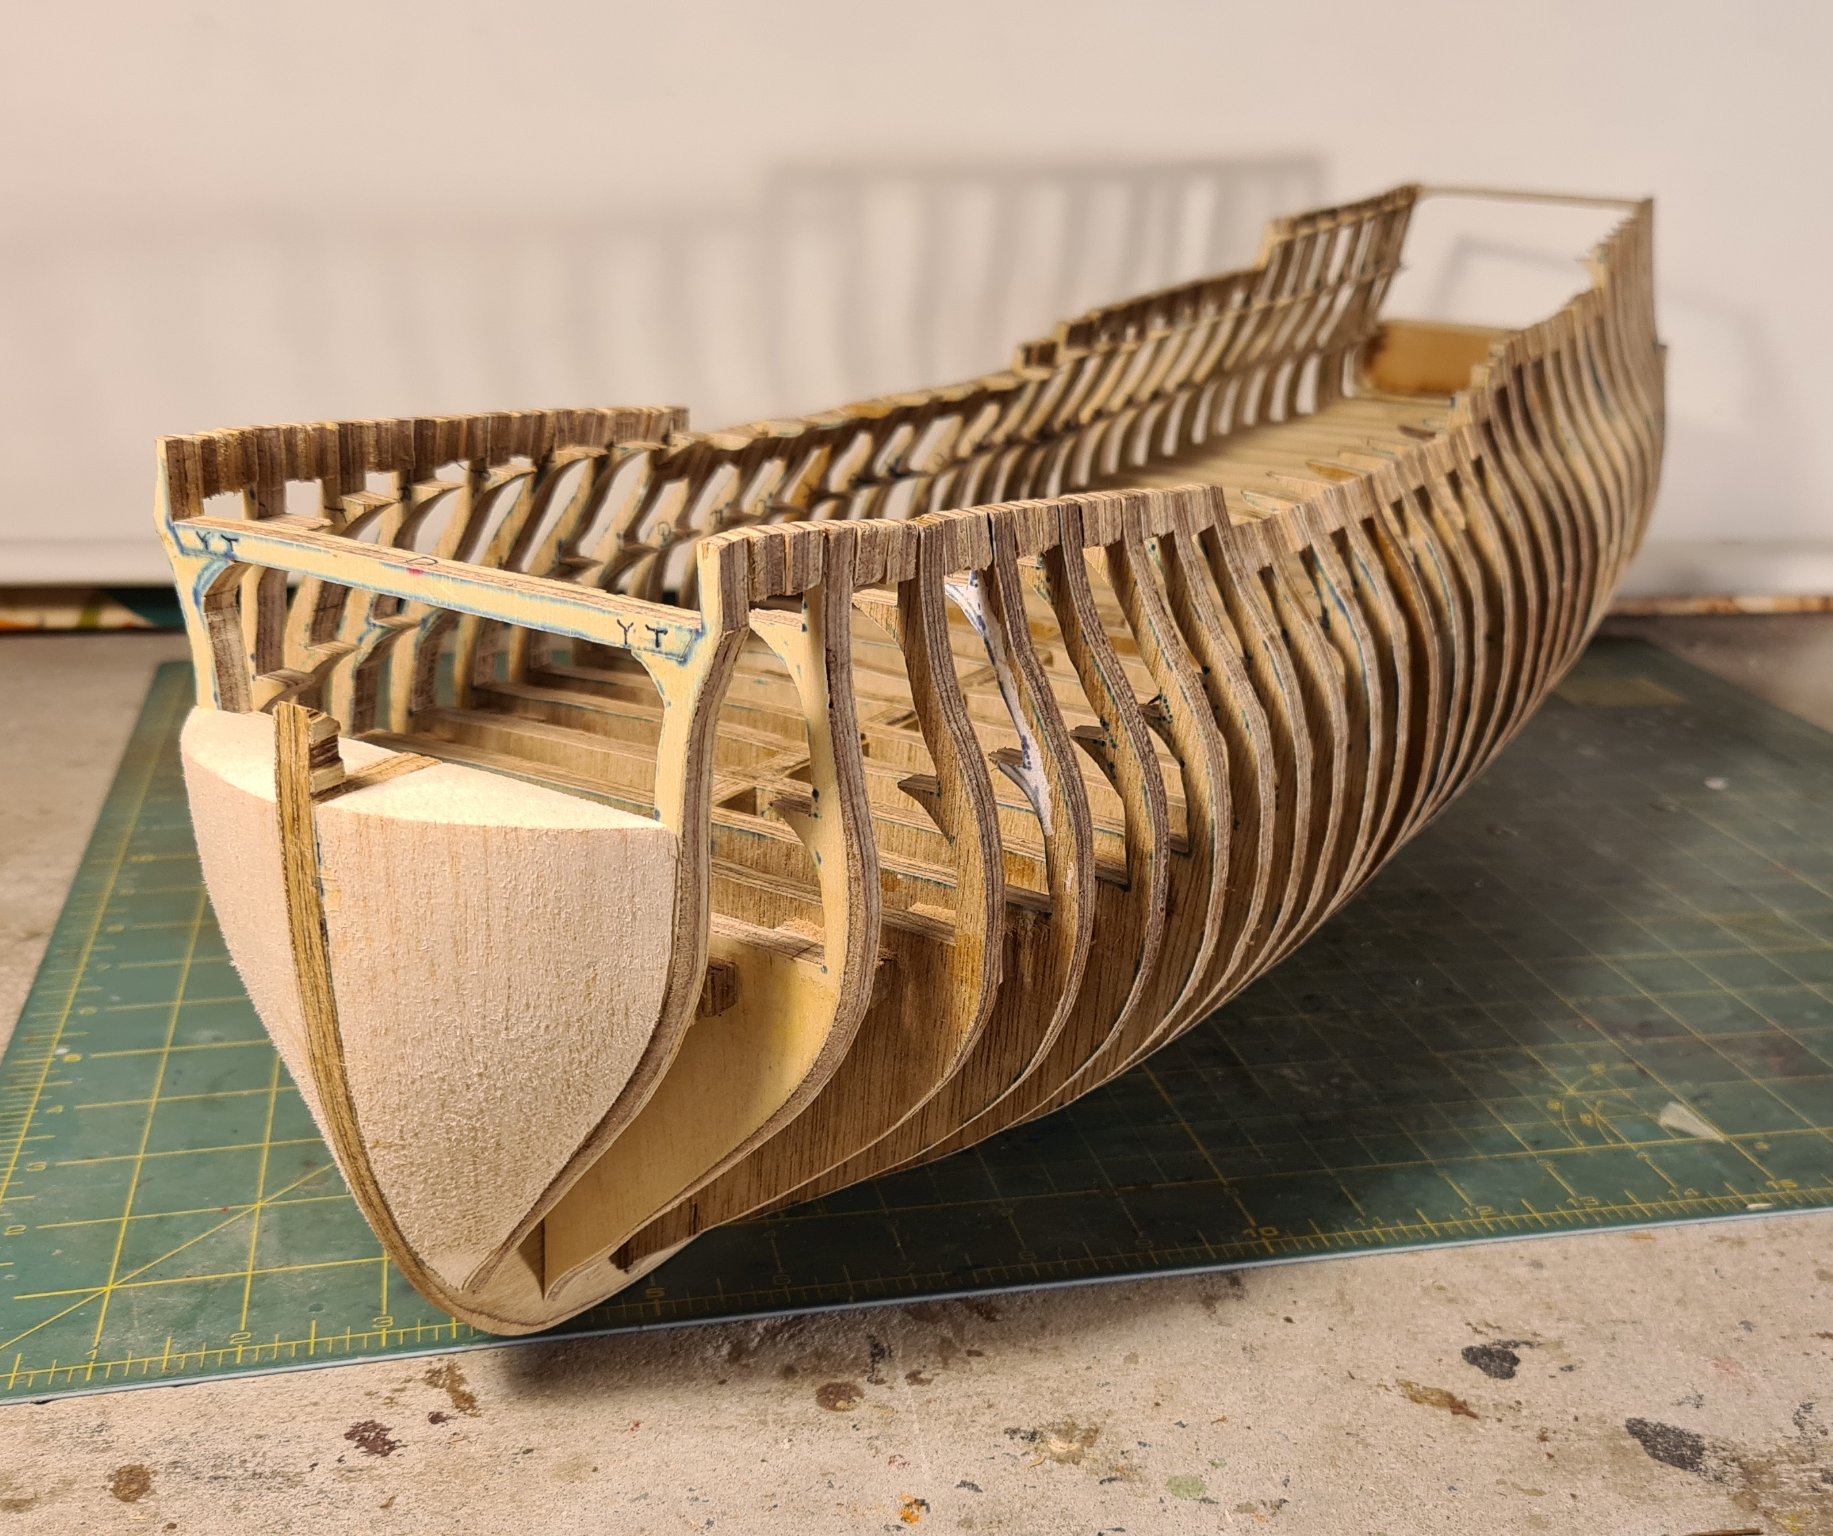
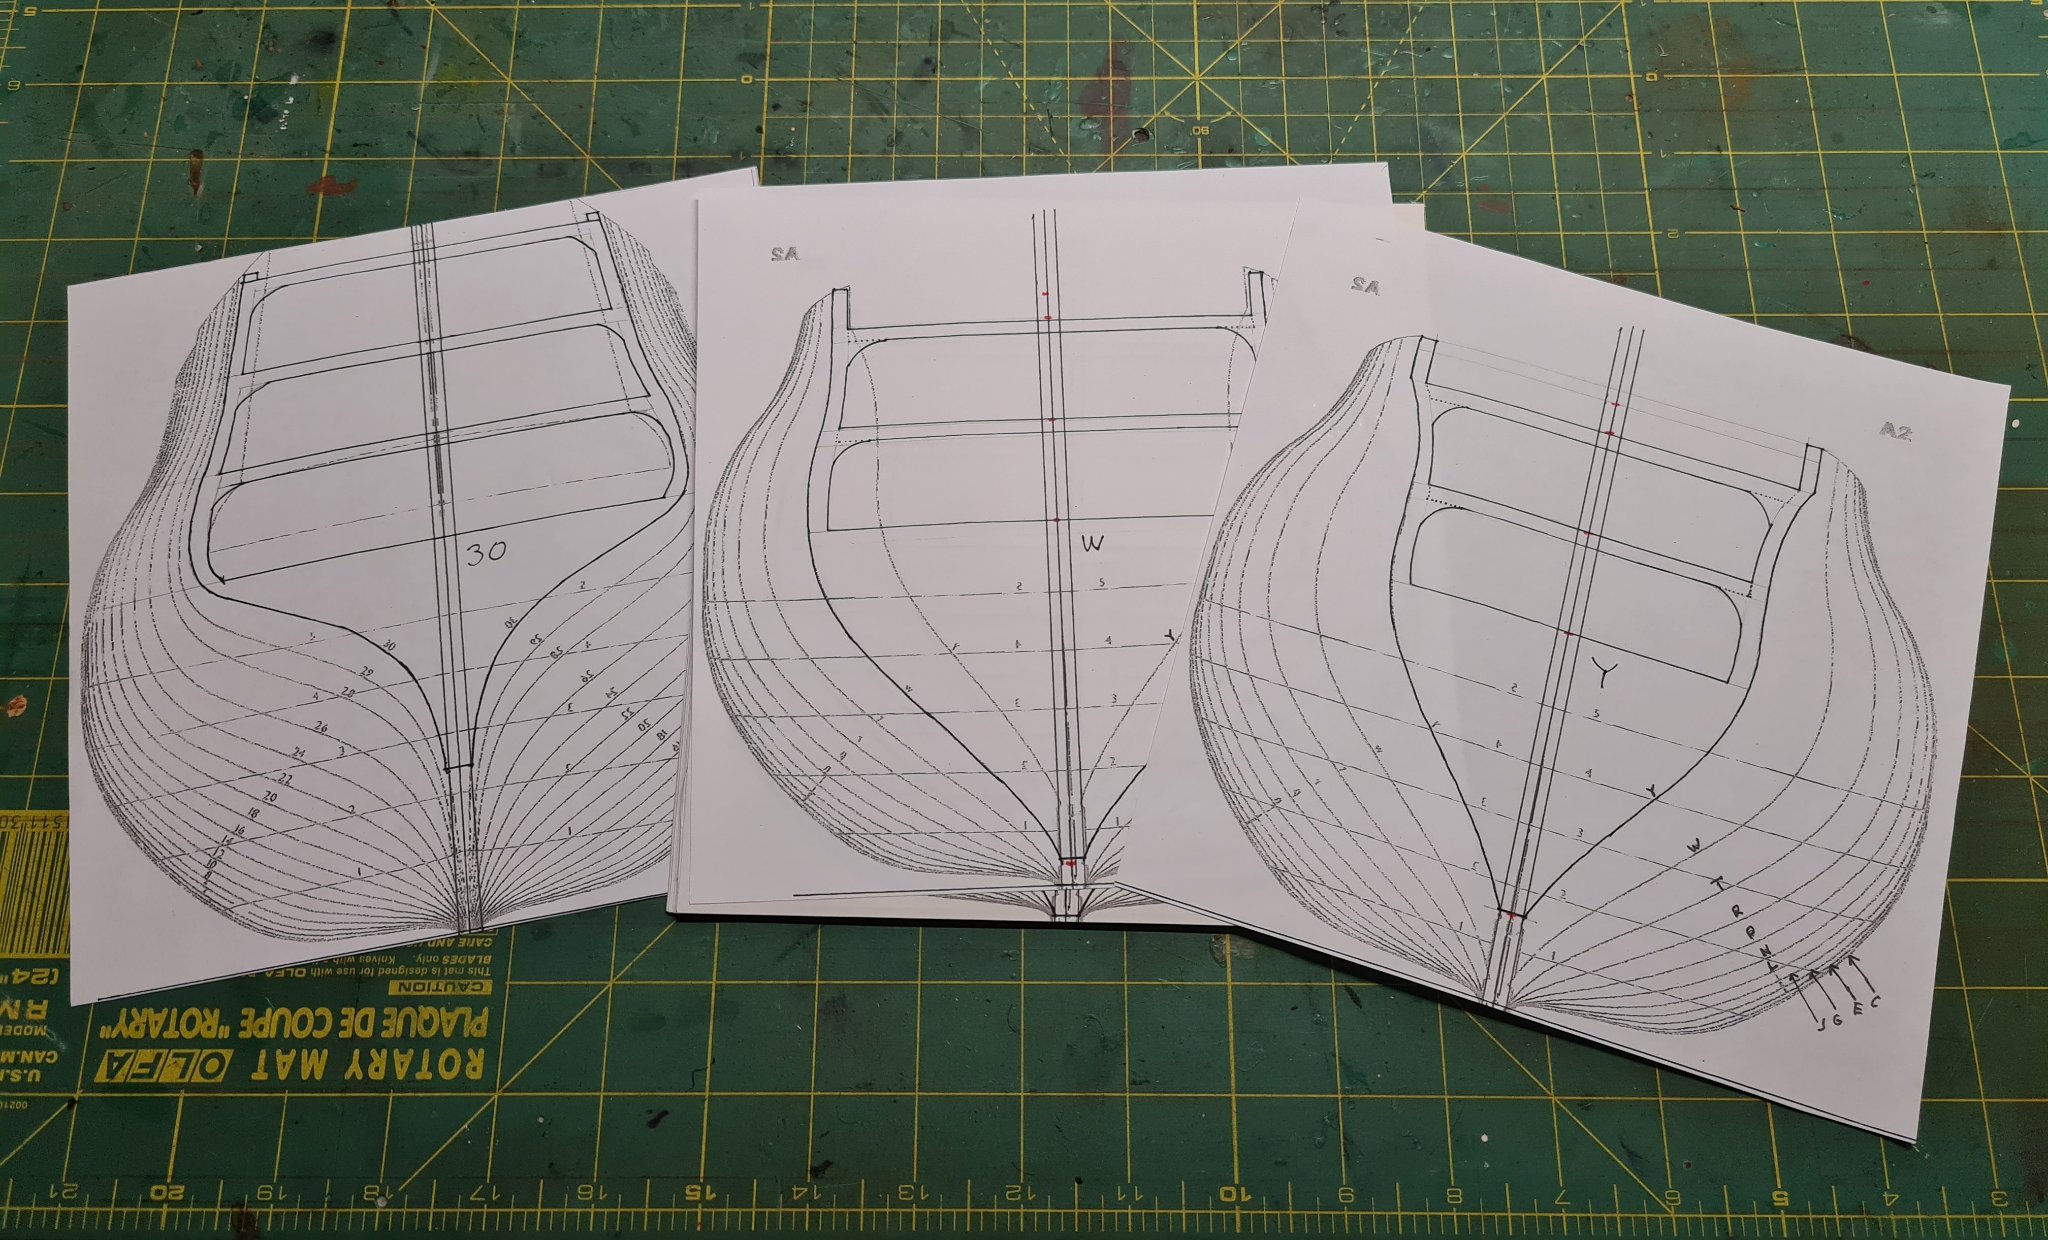
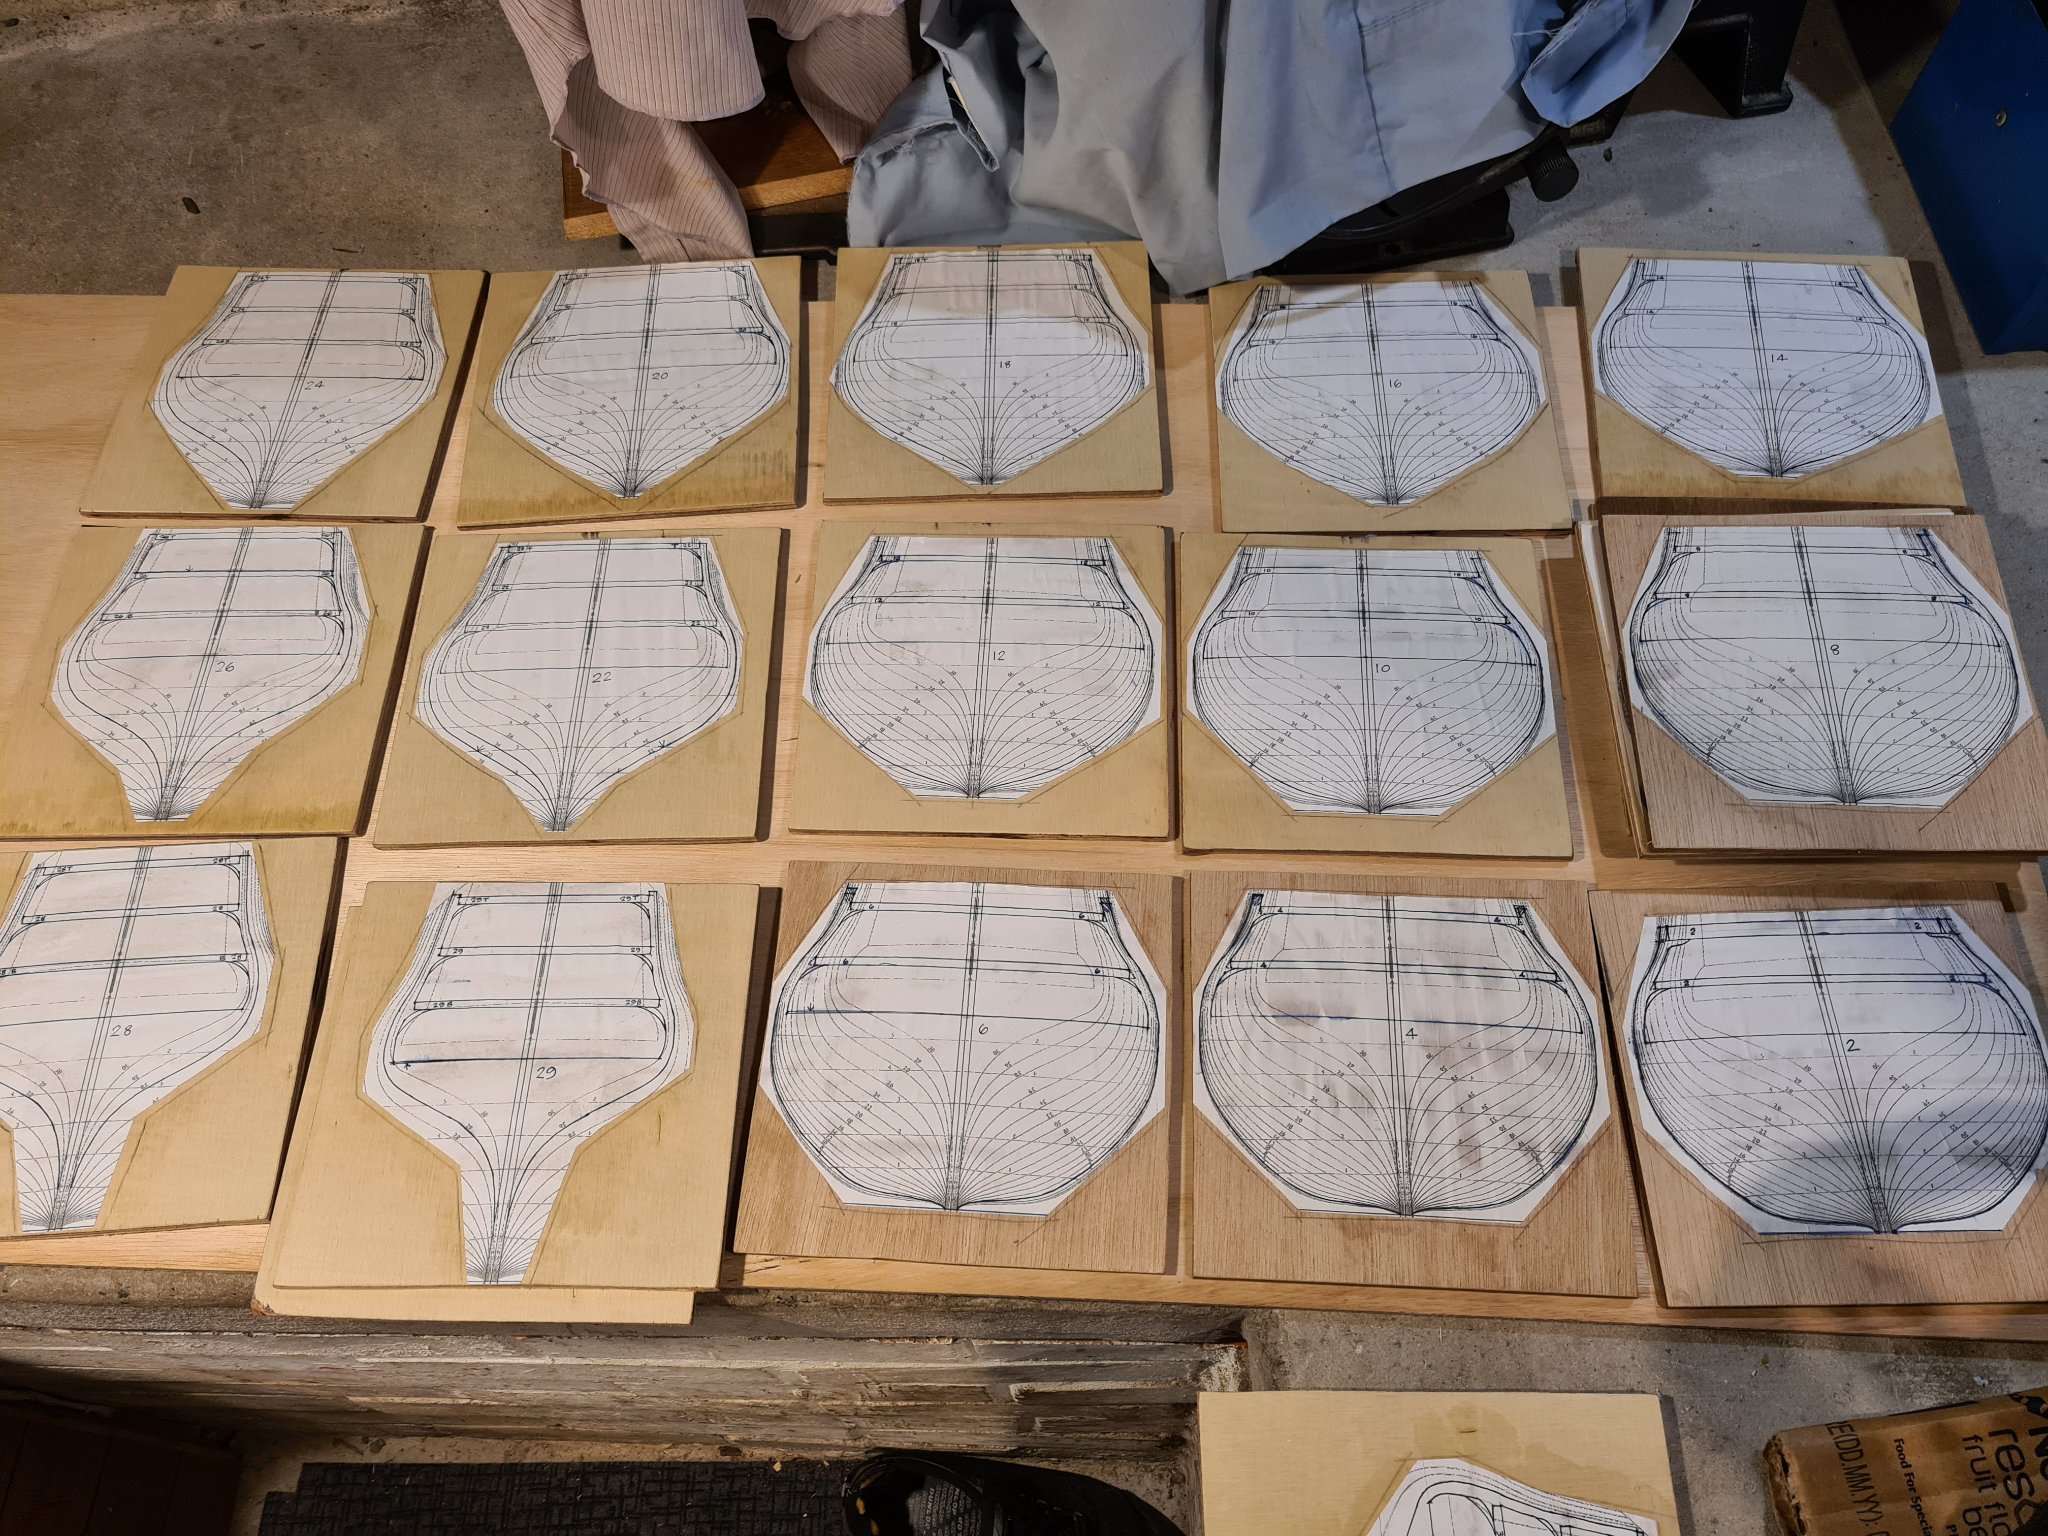
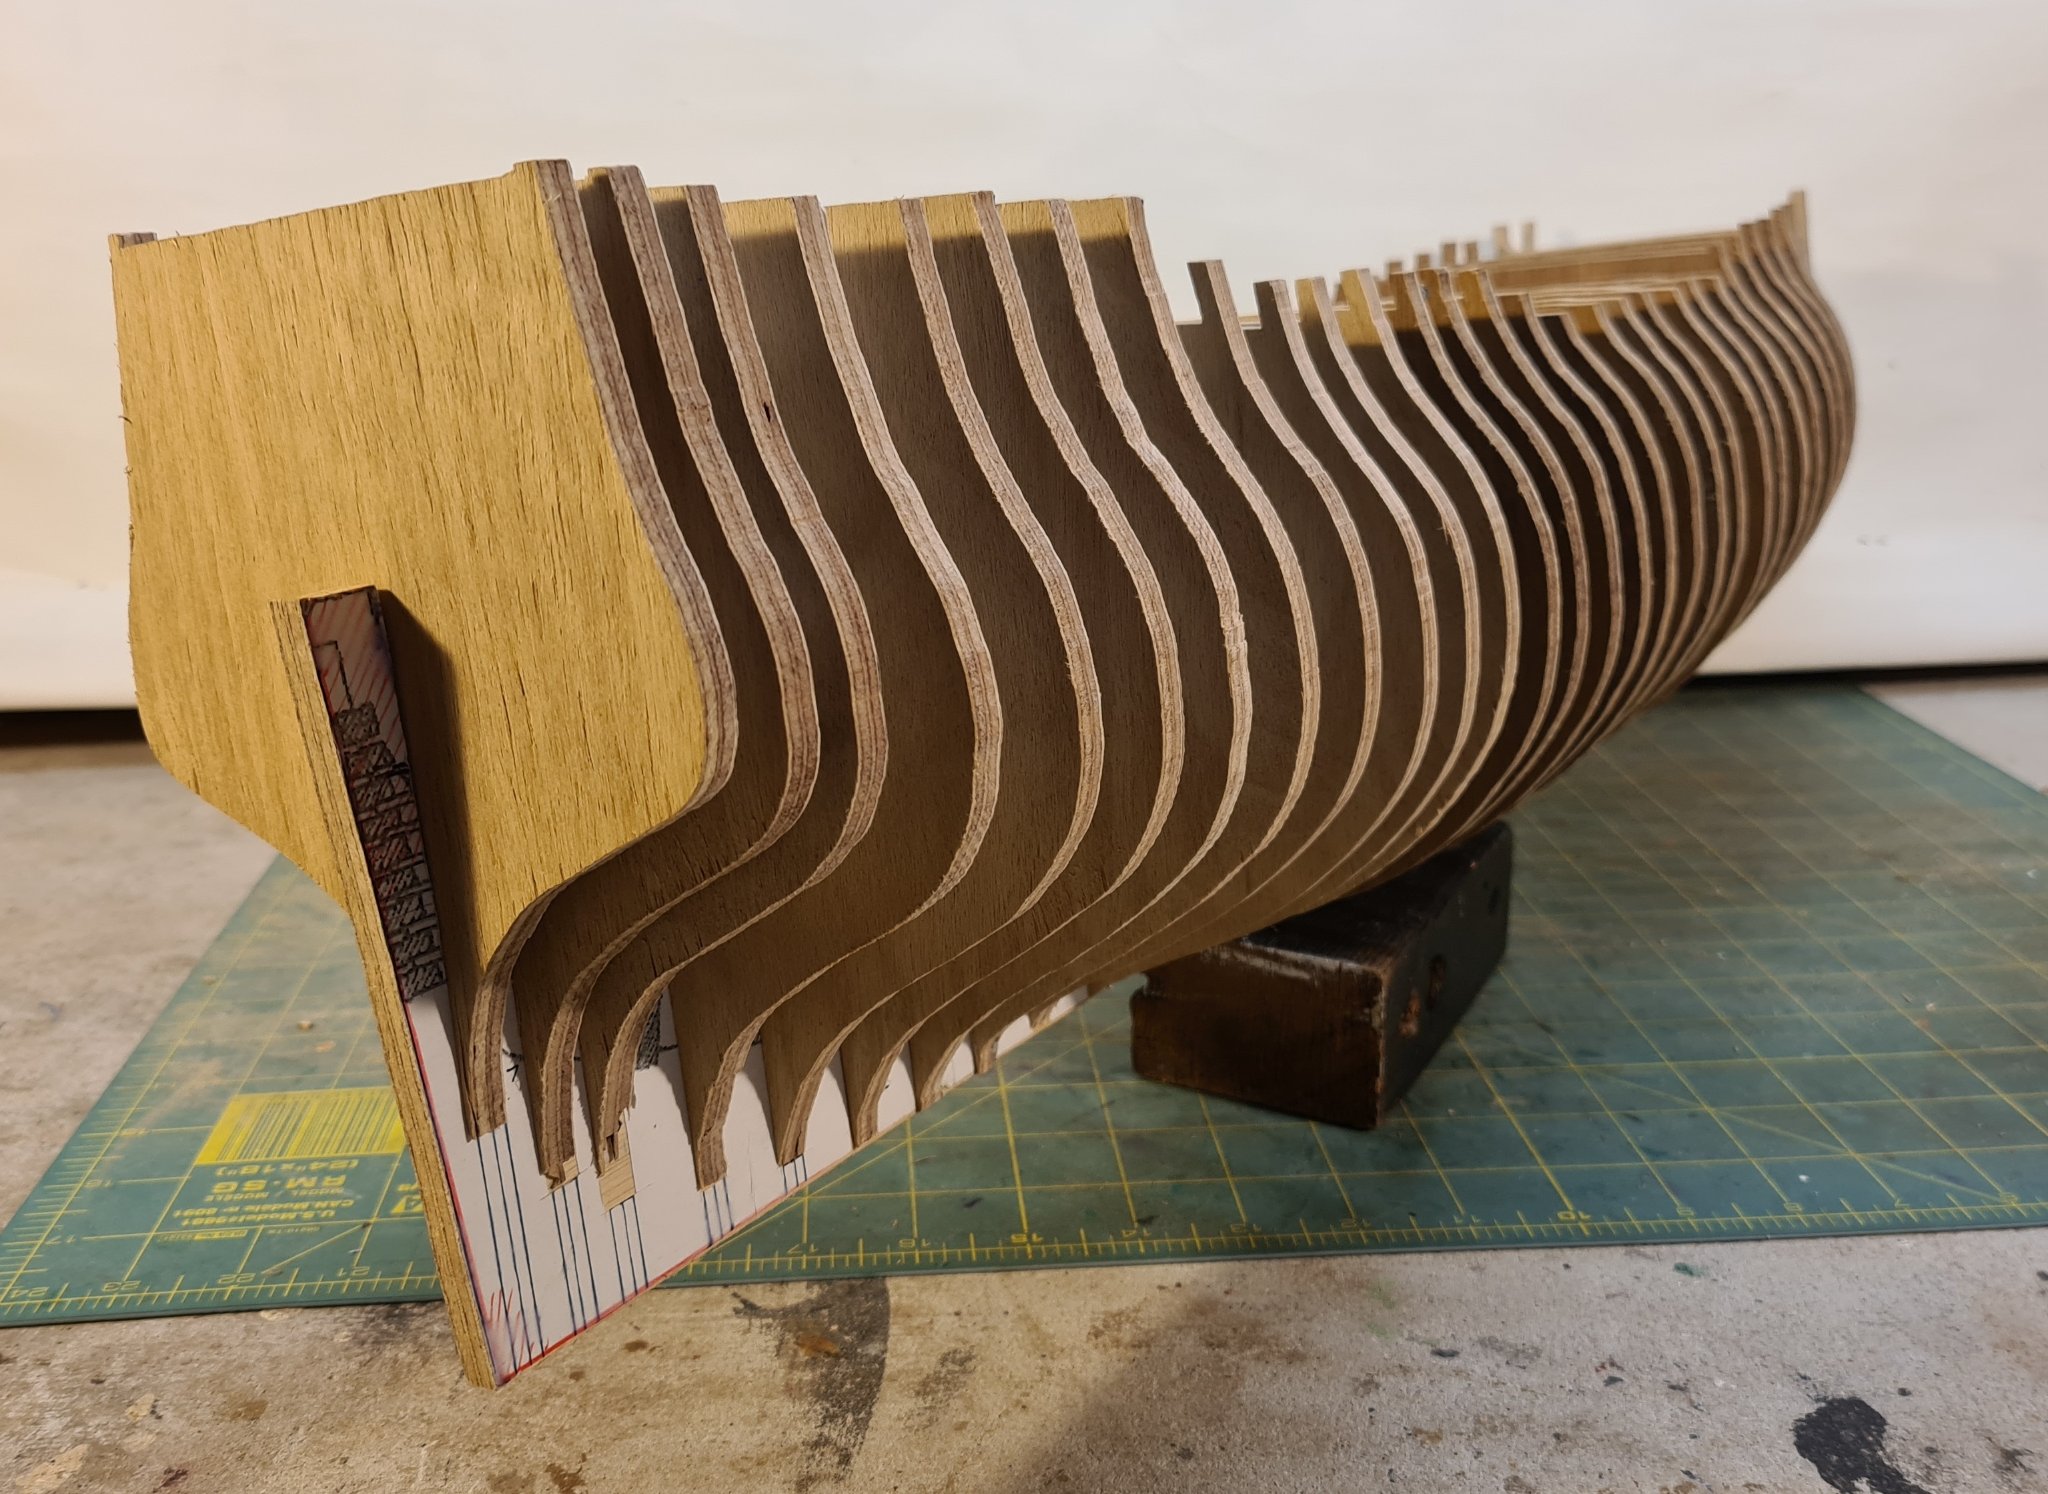
The scanner and printer have been working overtime and I have produced profile and a false keel drawings for fixing to 6mm marine ply to create the basic hull construction. There are 31 frames which means that the hull is about 1/3 solid which is a much greater density of frames when compared with commercial kits that use the same basic method. I will be infilling between the frames with the same ply so the hull will be fairly sturdy and able to withstand the rigours of fairing and planking. Just by chance the voids between the frames are mainly 2 thicknesses of ply wide so this process should not be hugely time consuming. Part of the cut outs to create the deck voids will be the beams that the decks are fixed to so I end up with the correct cross falls and bow to stern deck shape. The scroll saw has been very busy! The frames are a tight friction fit to the false keel so I can work on the overall structure without gluing the frames in position.


-
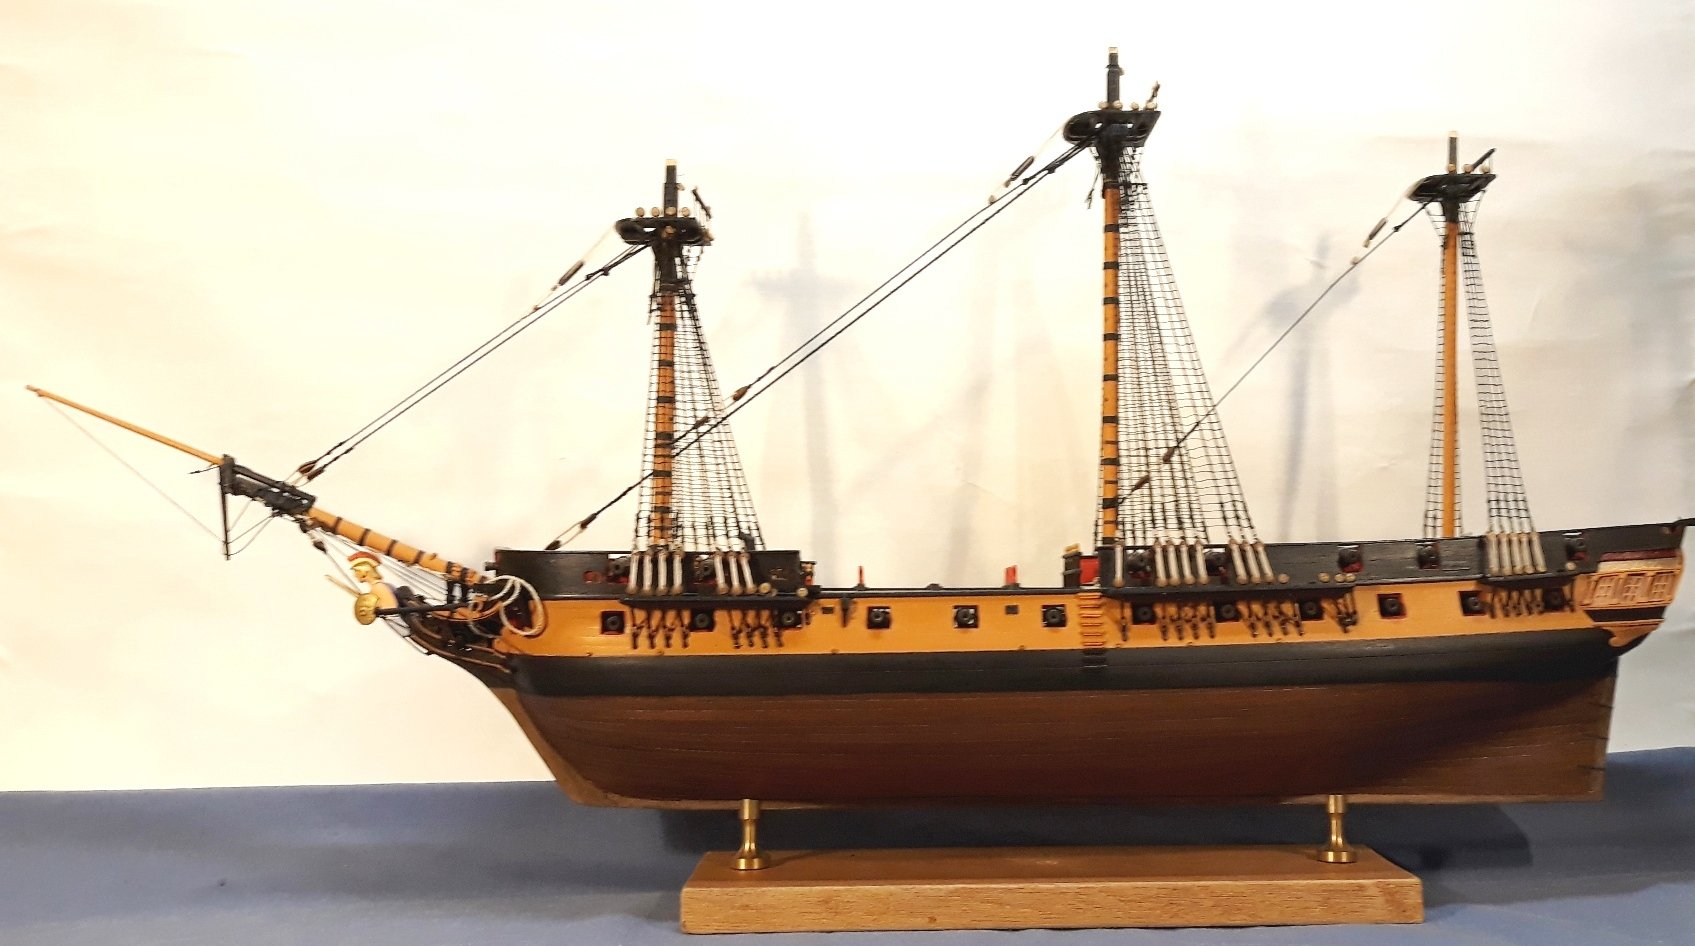
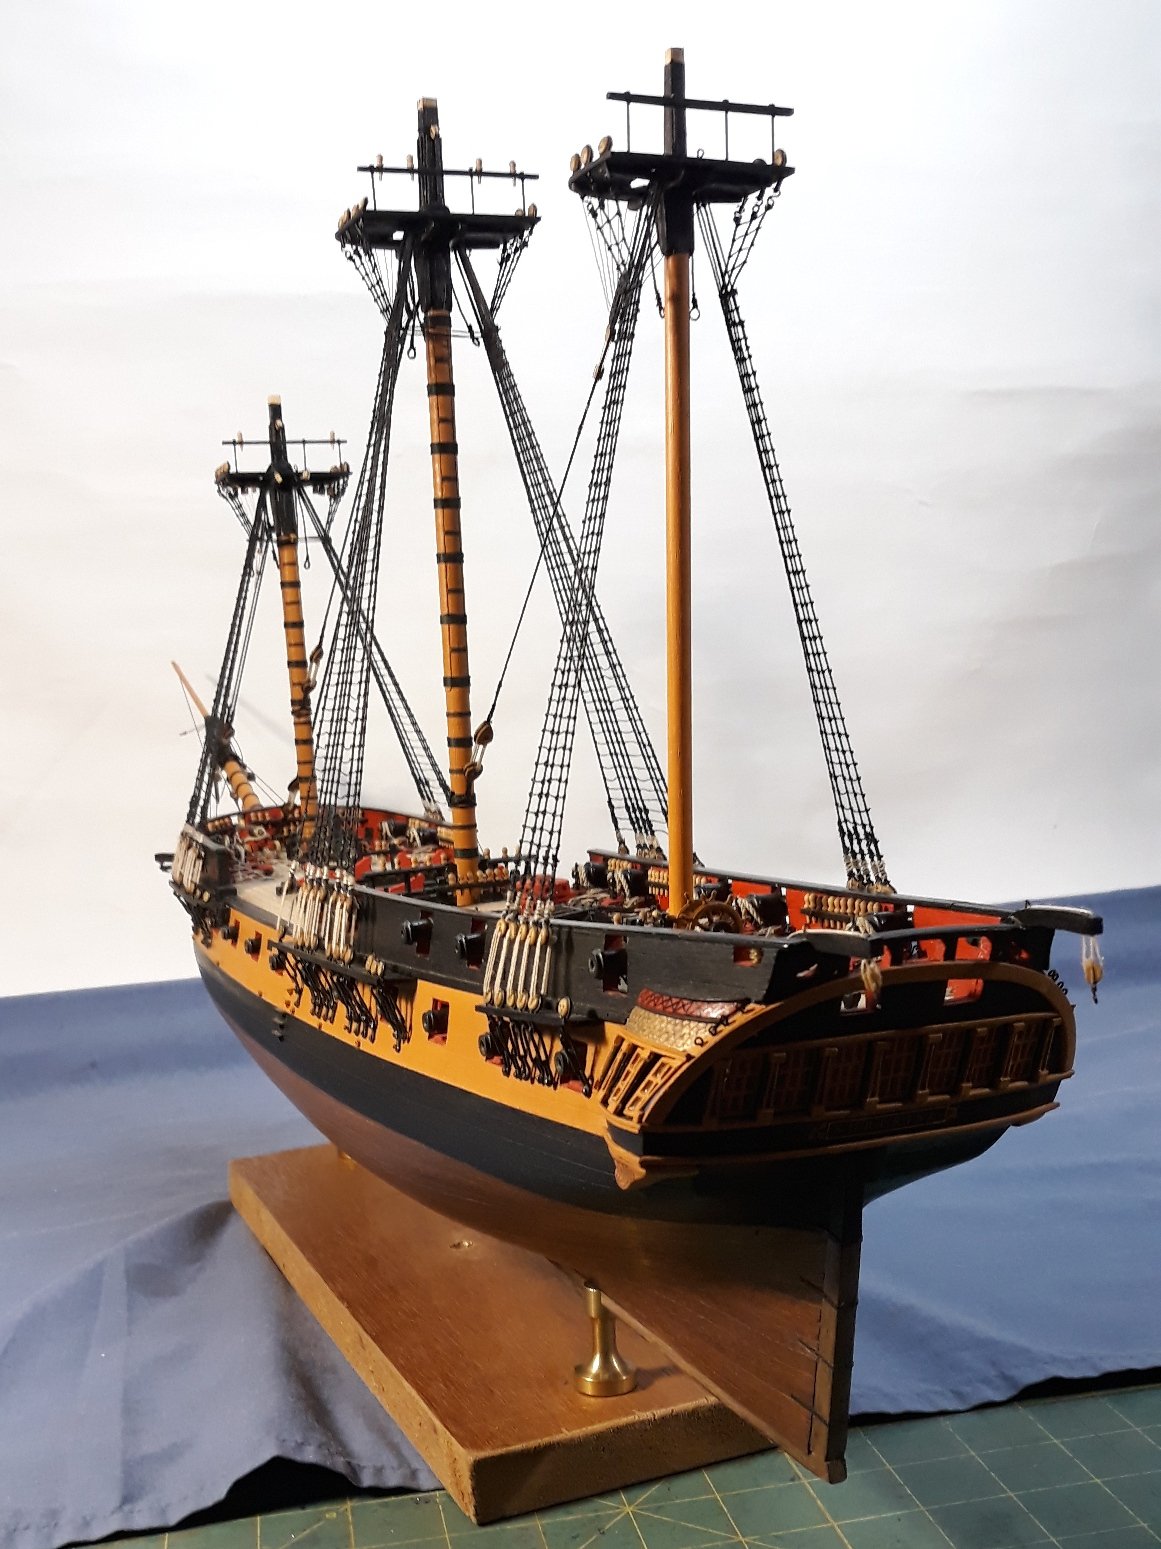
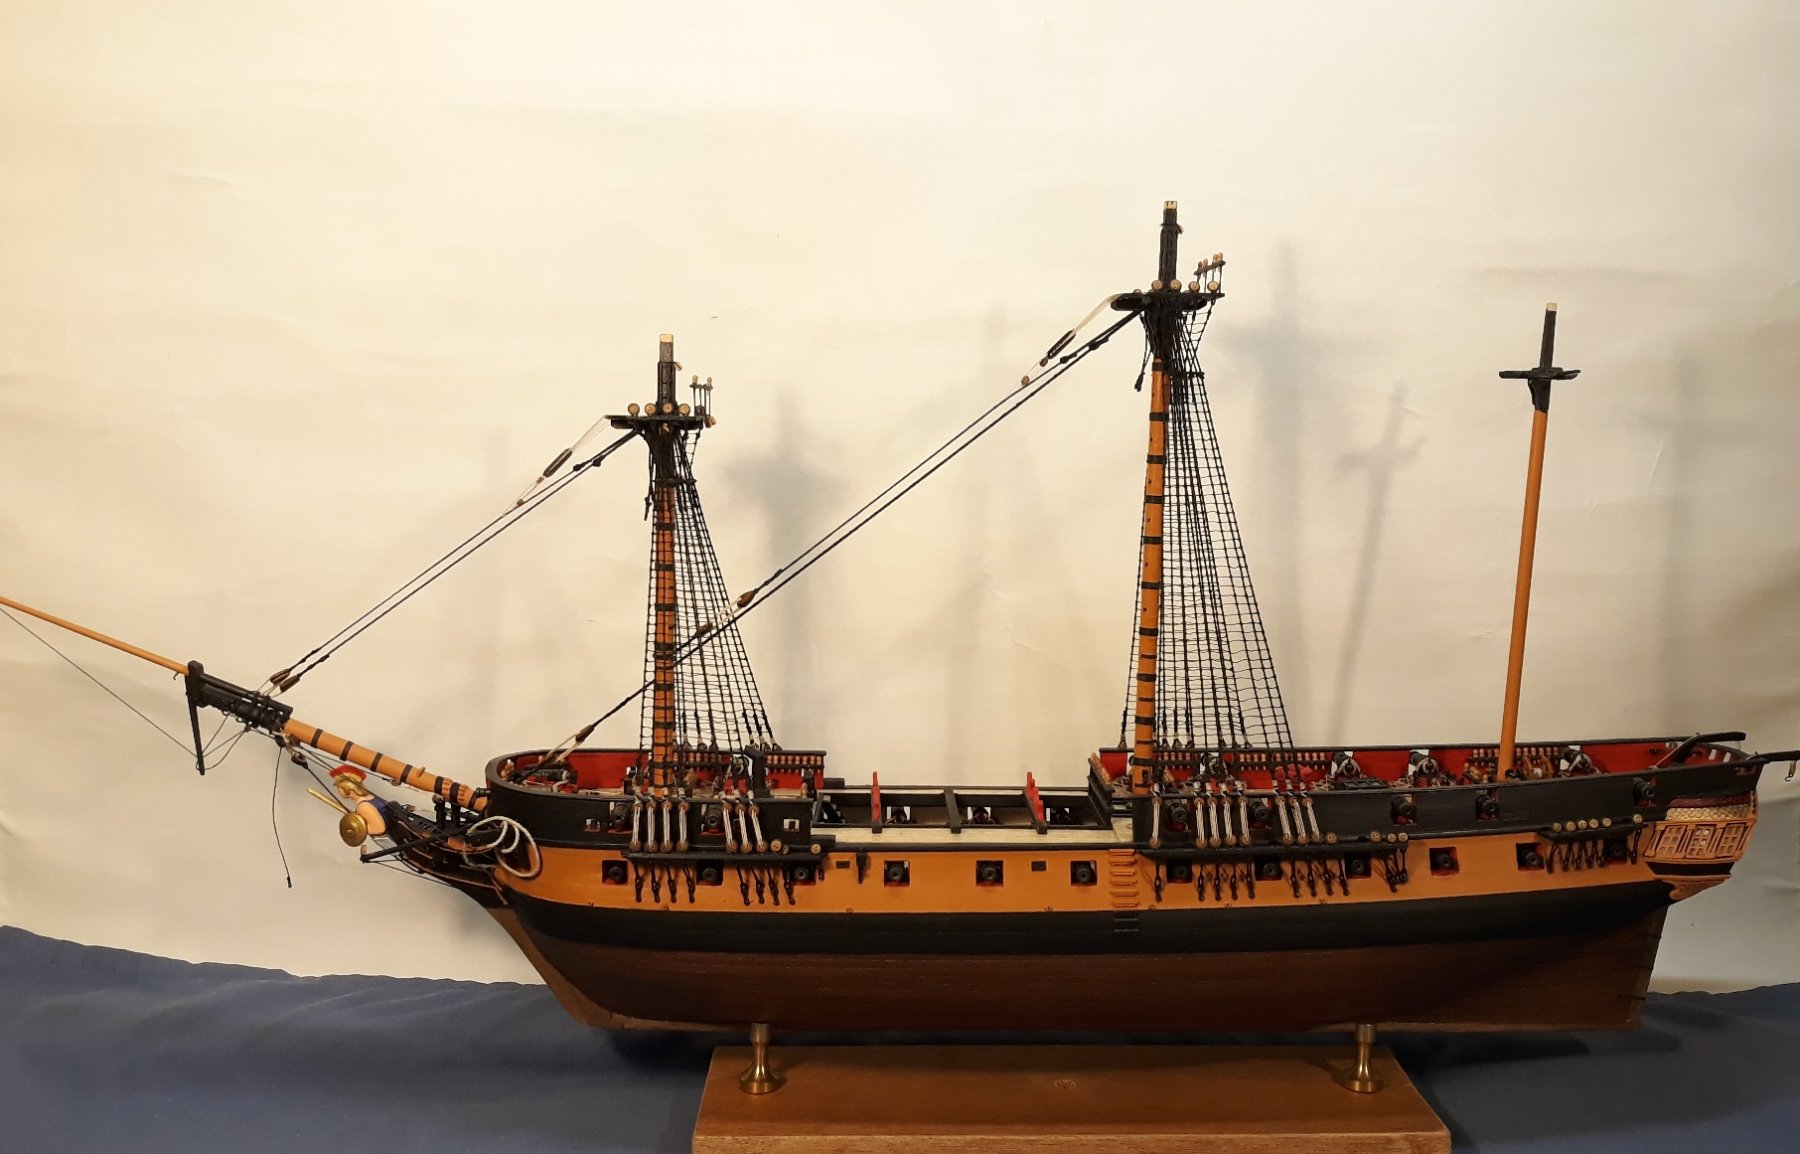
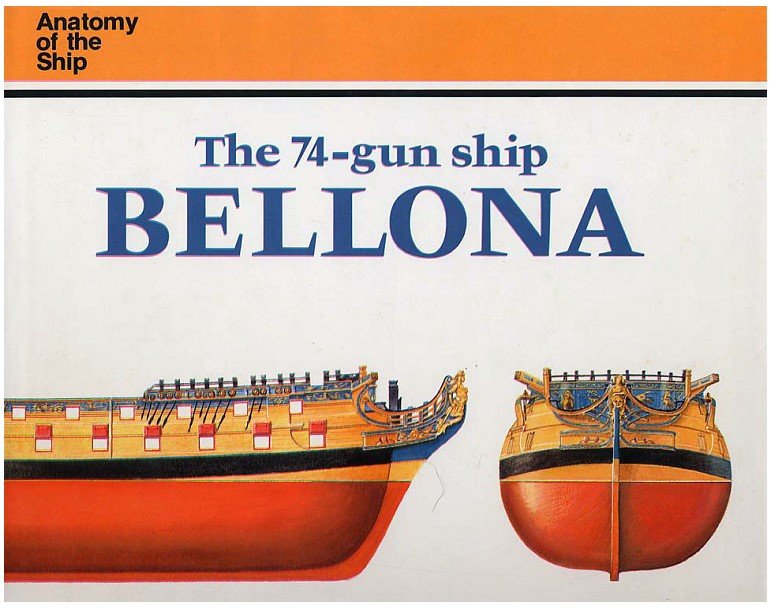
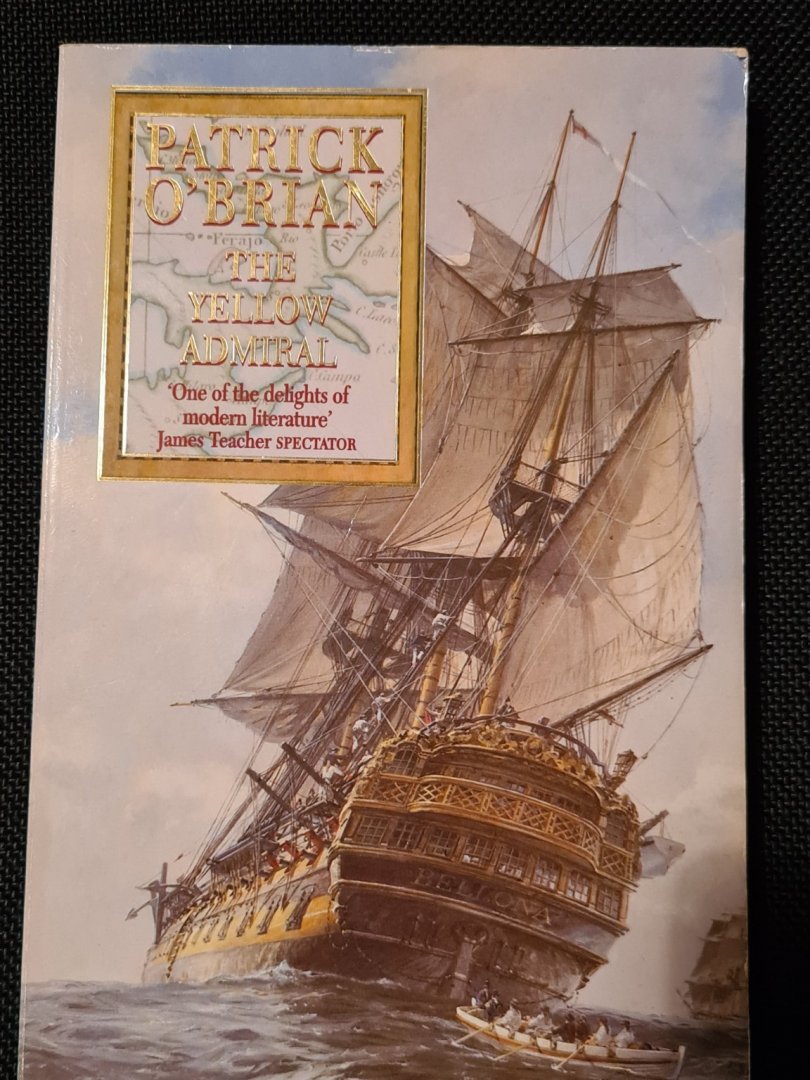
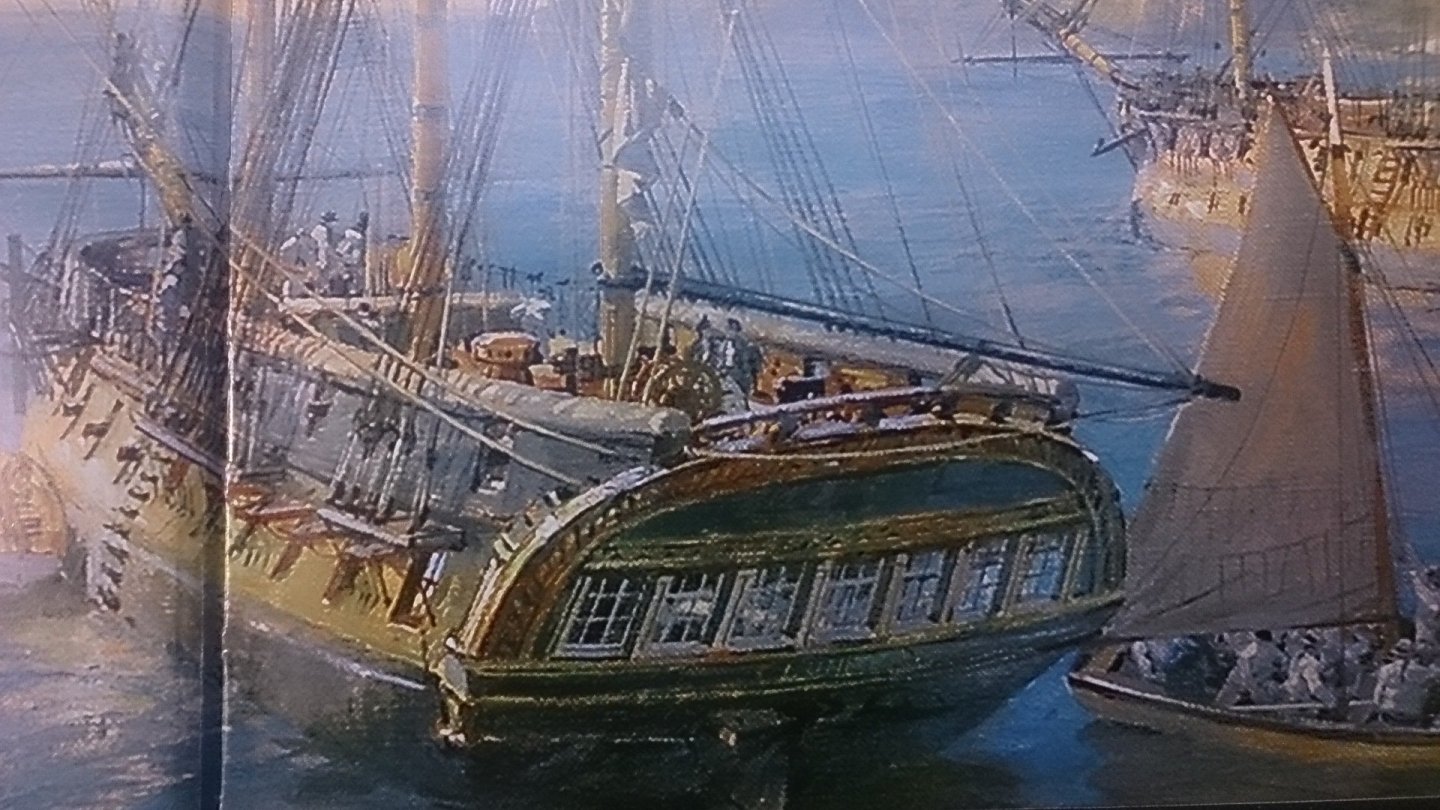
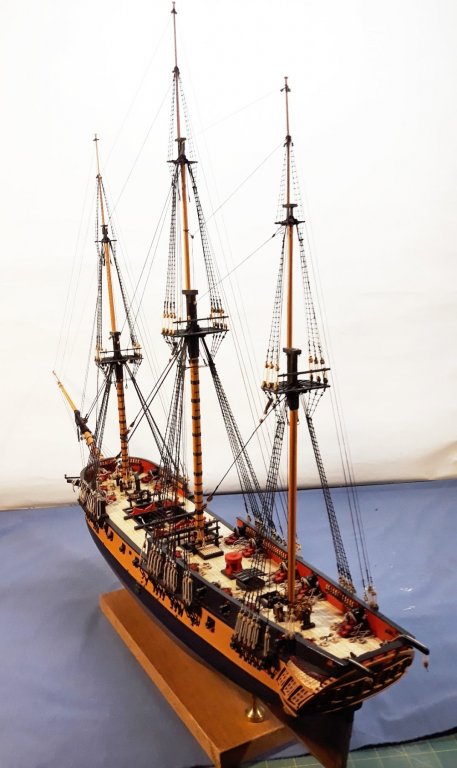
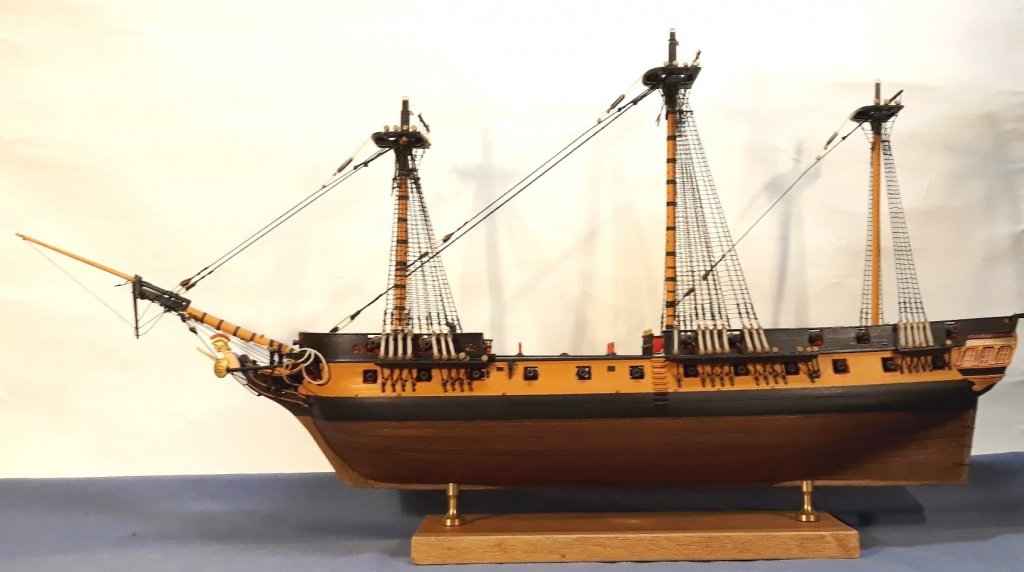
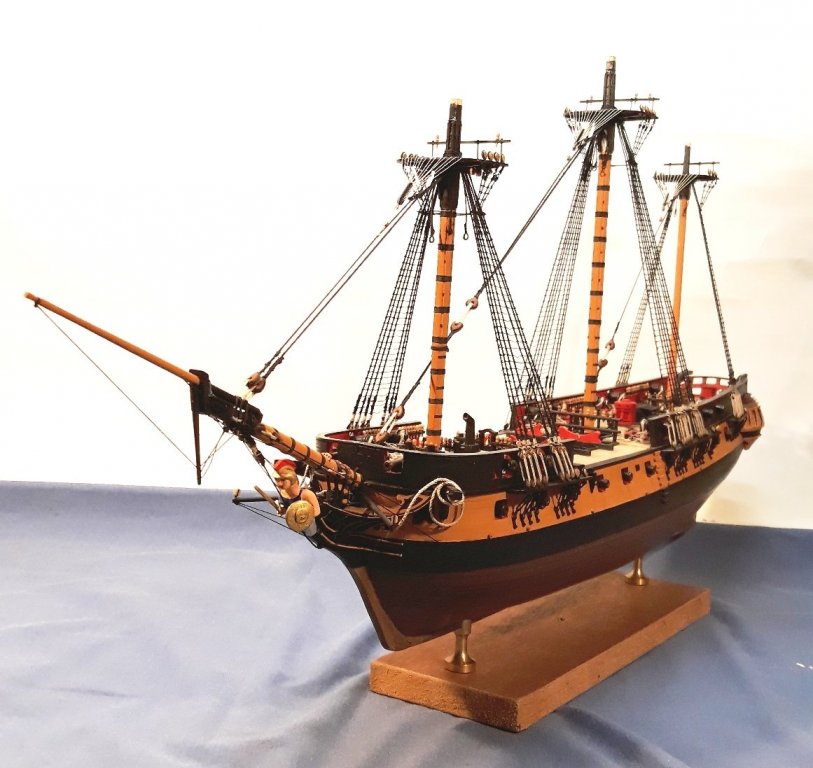
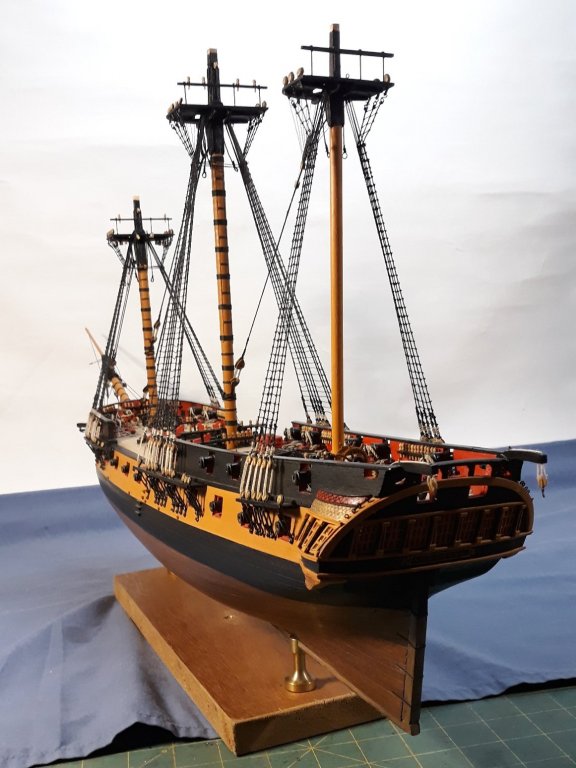
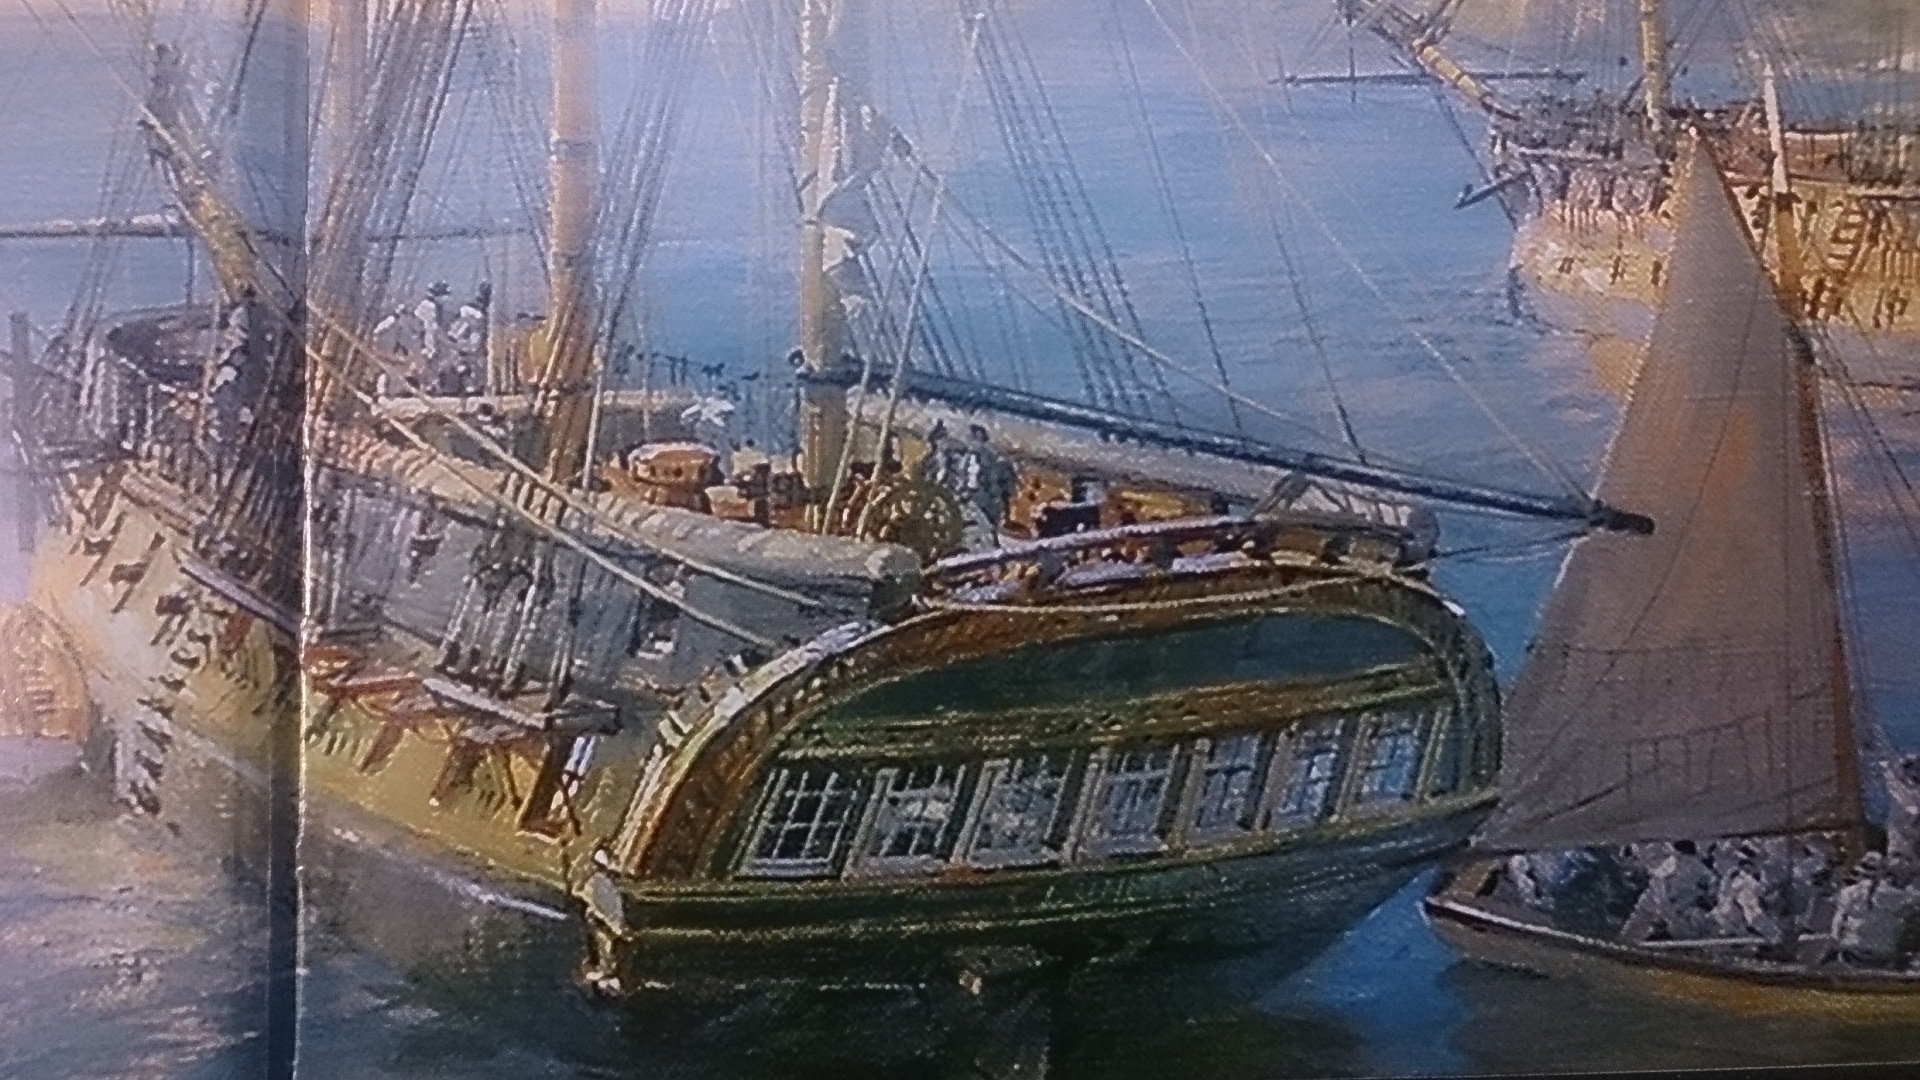
After completing HMS Surprise I have been contemplating what to build next. I am definitely hooked on Napoleonic War era ships and am a great fan of Patrick O'Brian's Aubrey Maturin book series so another ship from this source seemed like a good idea, so HMS Bellona it is. A bit more research revealed that, as Bellona was built in 1760, it is quite decorated and has a complex hull shape with defined forecastle, quarterdeck and poop, so a bit of a challenge there. The complexity of the stern decorations mean that I will definitely have to improve my wood carving skills. Here we go! I have acquired "The Anatomy of the Ship The 74 gun ship Bellona" by Brian Lavery in both hard copy and pdf so this will be the basic resource. The internet has also provided lots of images.
-
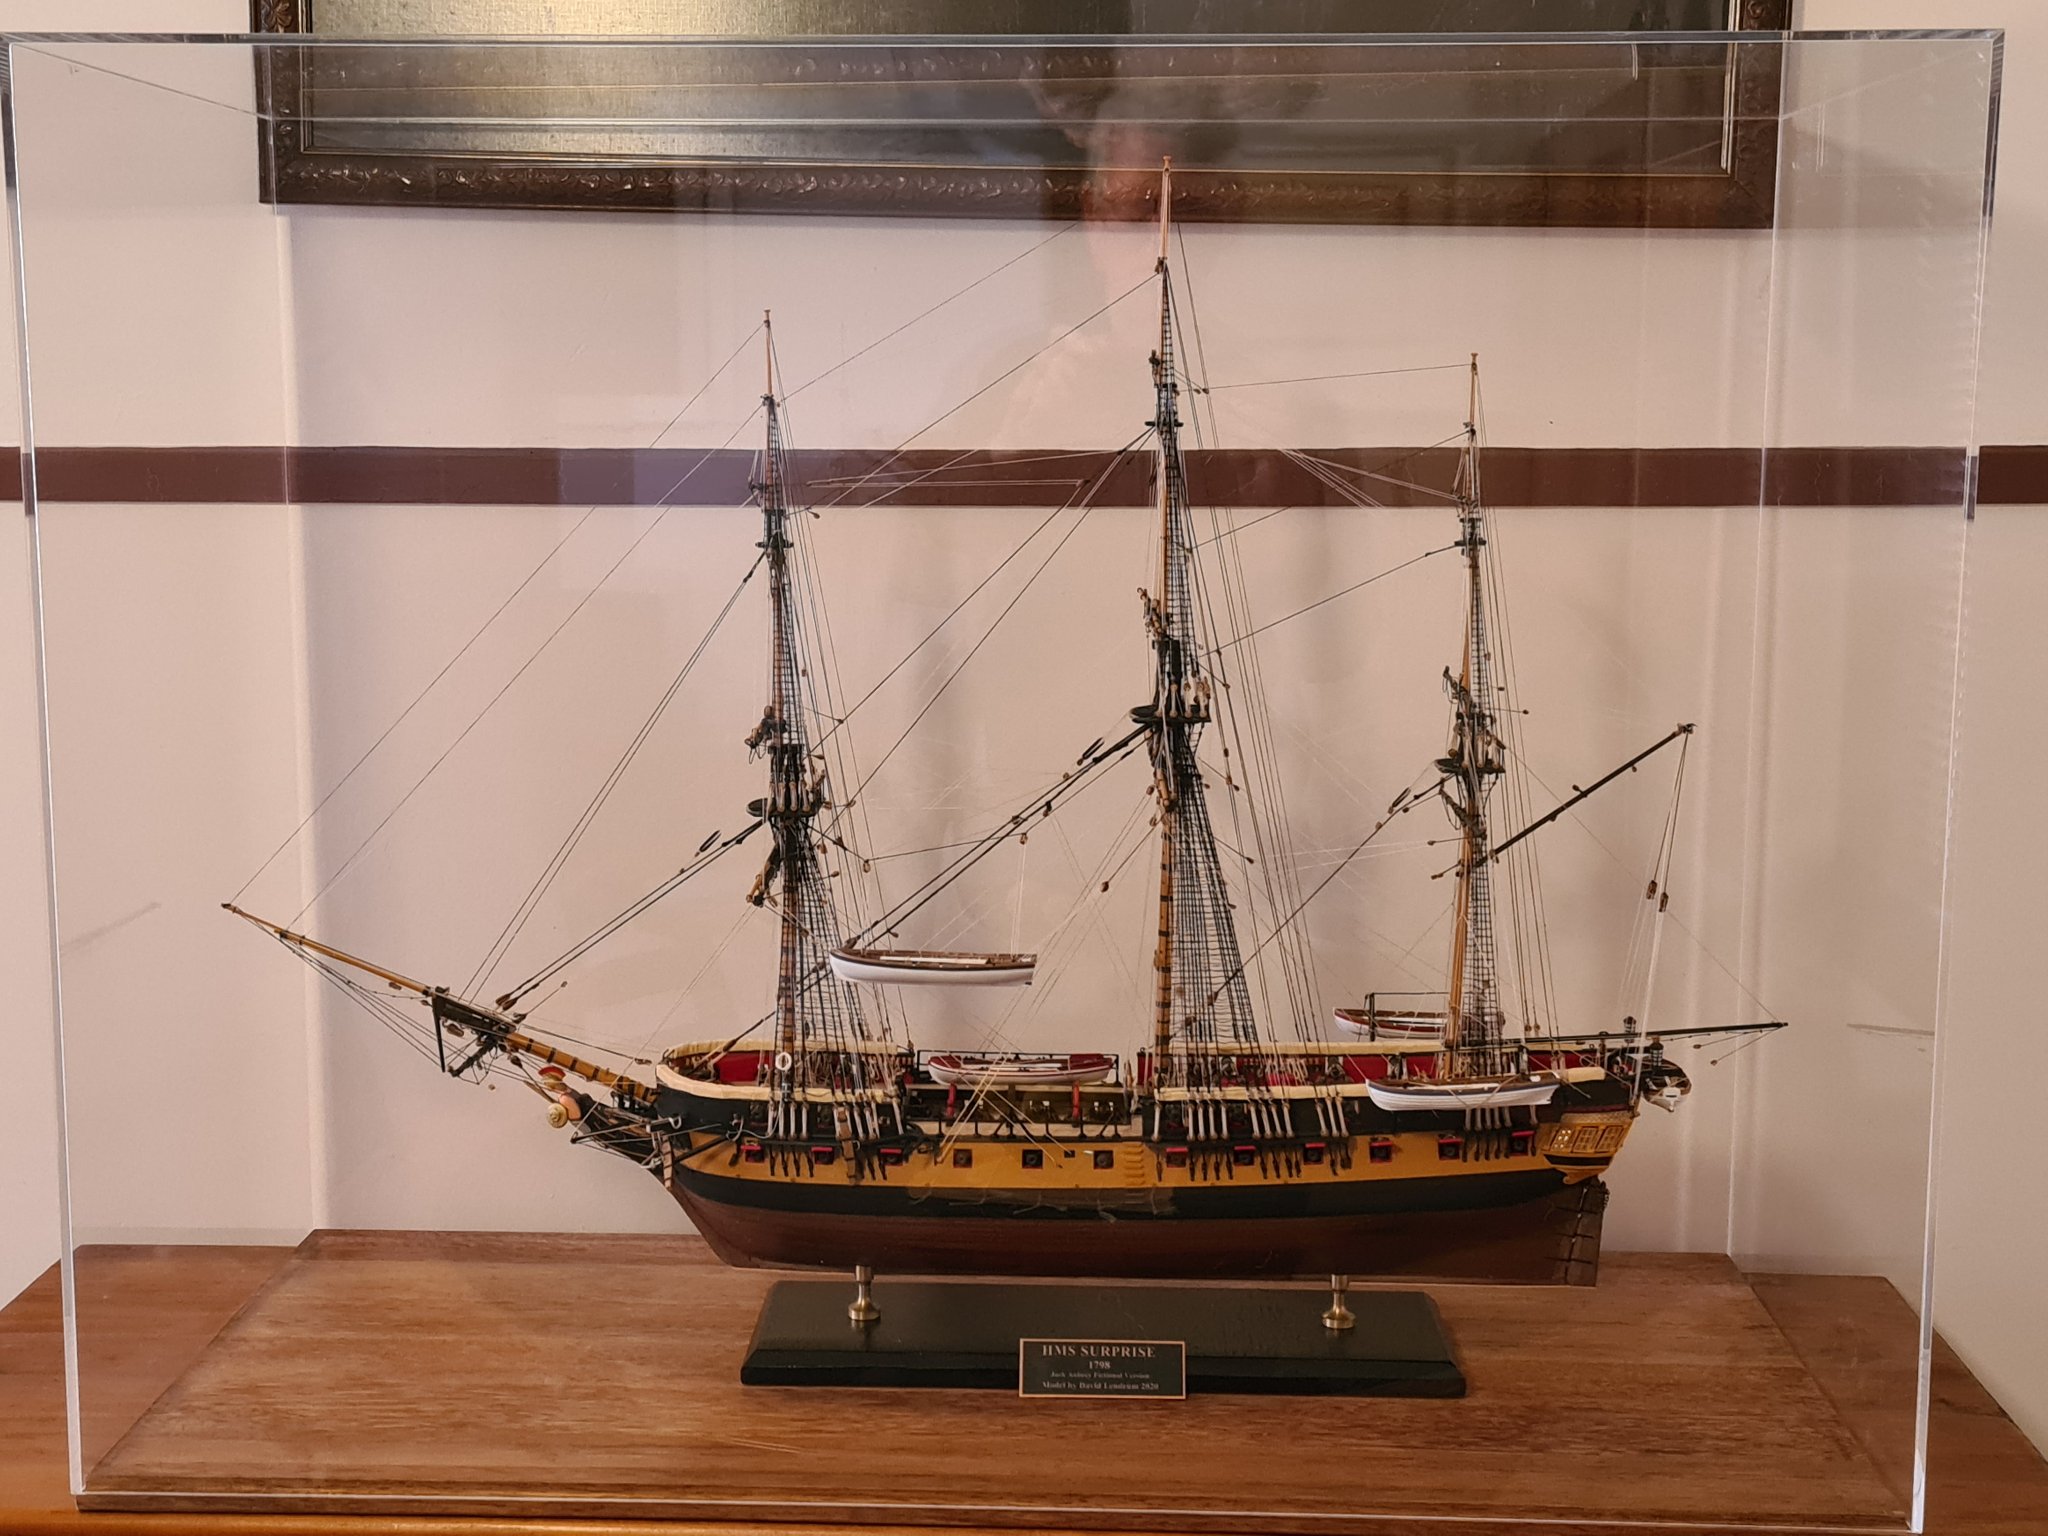
The final step for display has now started, a case. When I completed my first build, the Port Jackson Schooner, the ship was placed on a shelf. A few months later I noticed that some additional rigging had appeared, a small spide, which we in Australia call a daddy-long-legs, had set up residence and found the rig a perfect base for it's web! About time for a display case. I used a length of shelving as a base and I rebatted the edges to half depth and width to flush fit a 4mm perspex cover. The joints are mitred and clear adhesive makes them almost invisible. I think this is a much better solution than a glass case, lighter and much safer. My Bounty build was finished with a similar case and now Surprise will get the same treatment. Perspex cases aren't cheap but considering the time and effort put int the project I believe it is a good investment which results in dust free, and importantly, spider free models. Cheers, David.
-
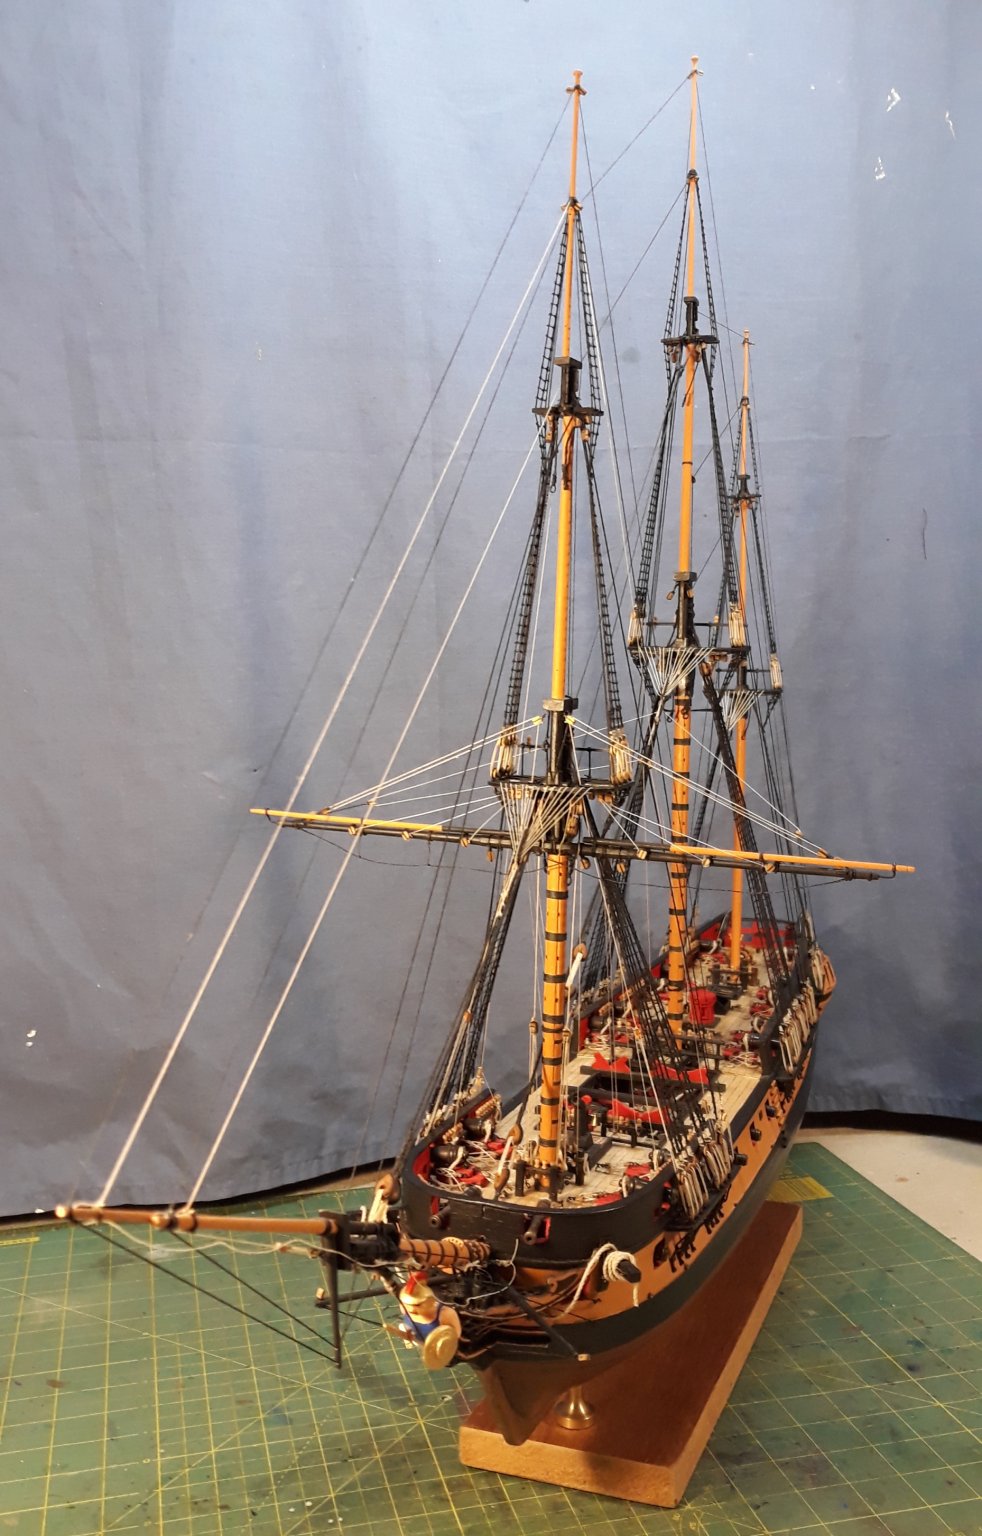
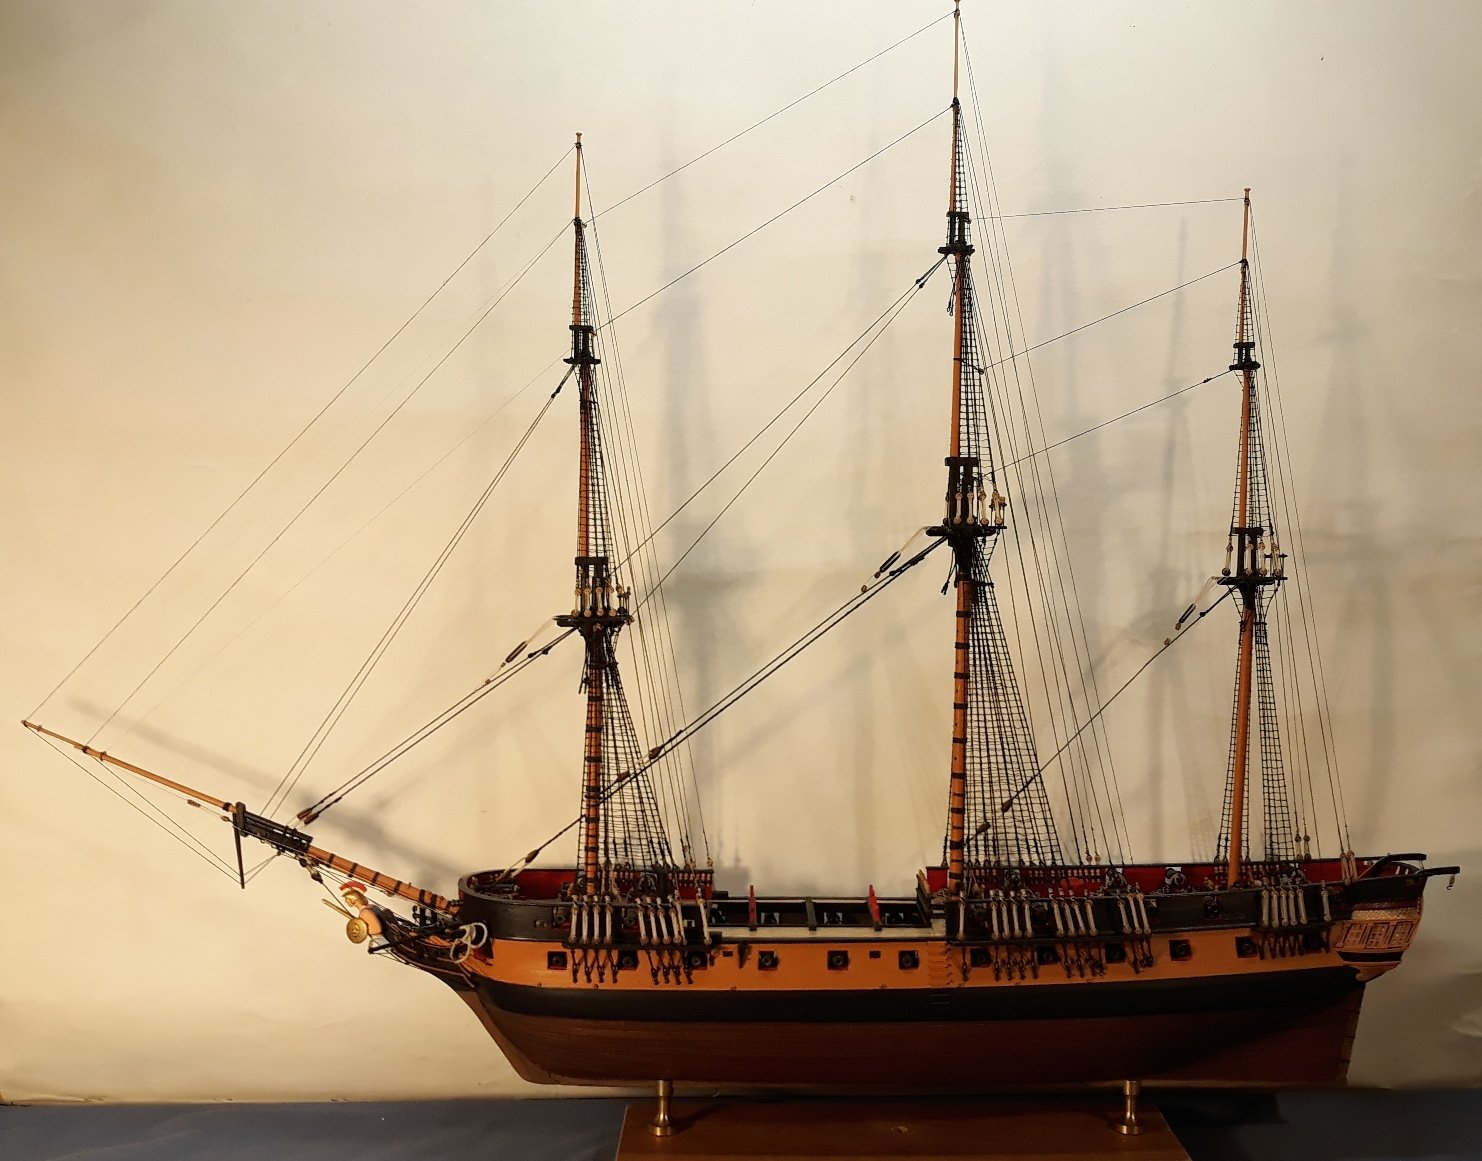
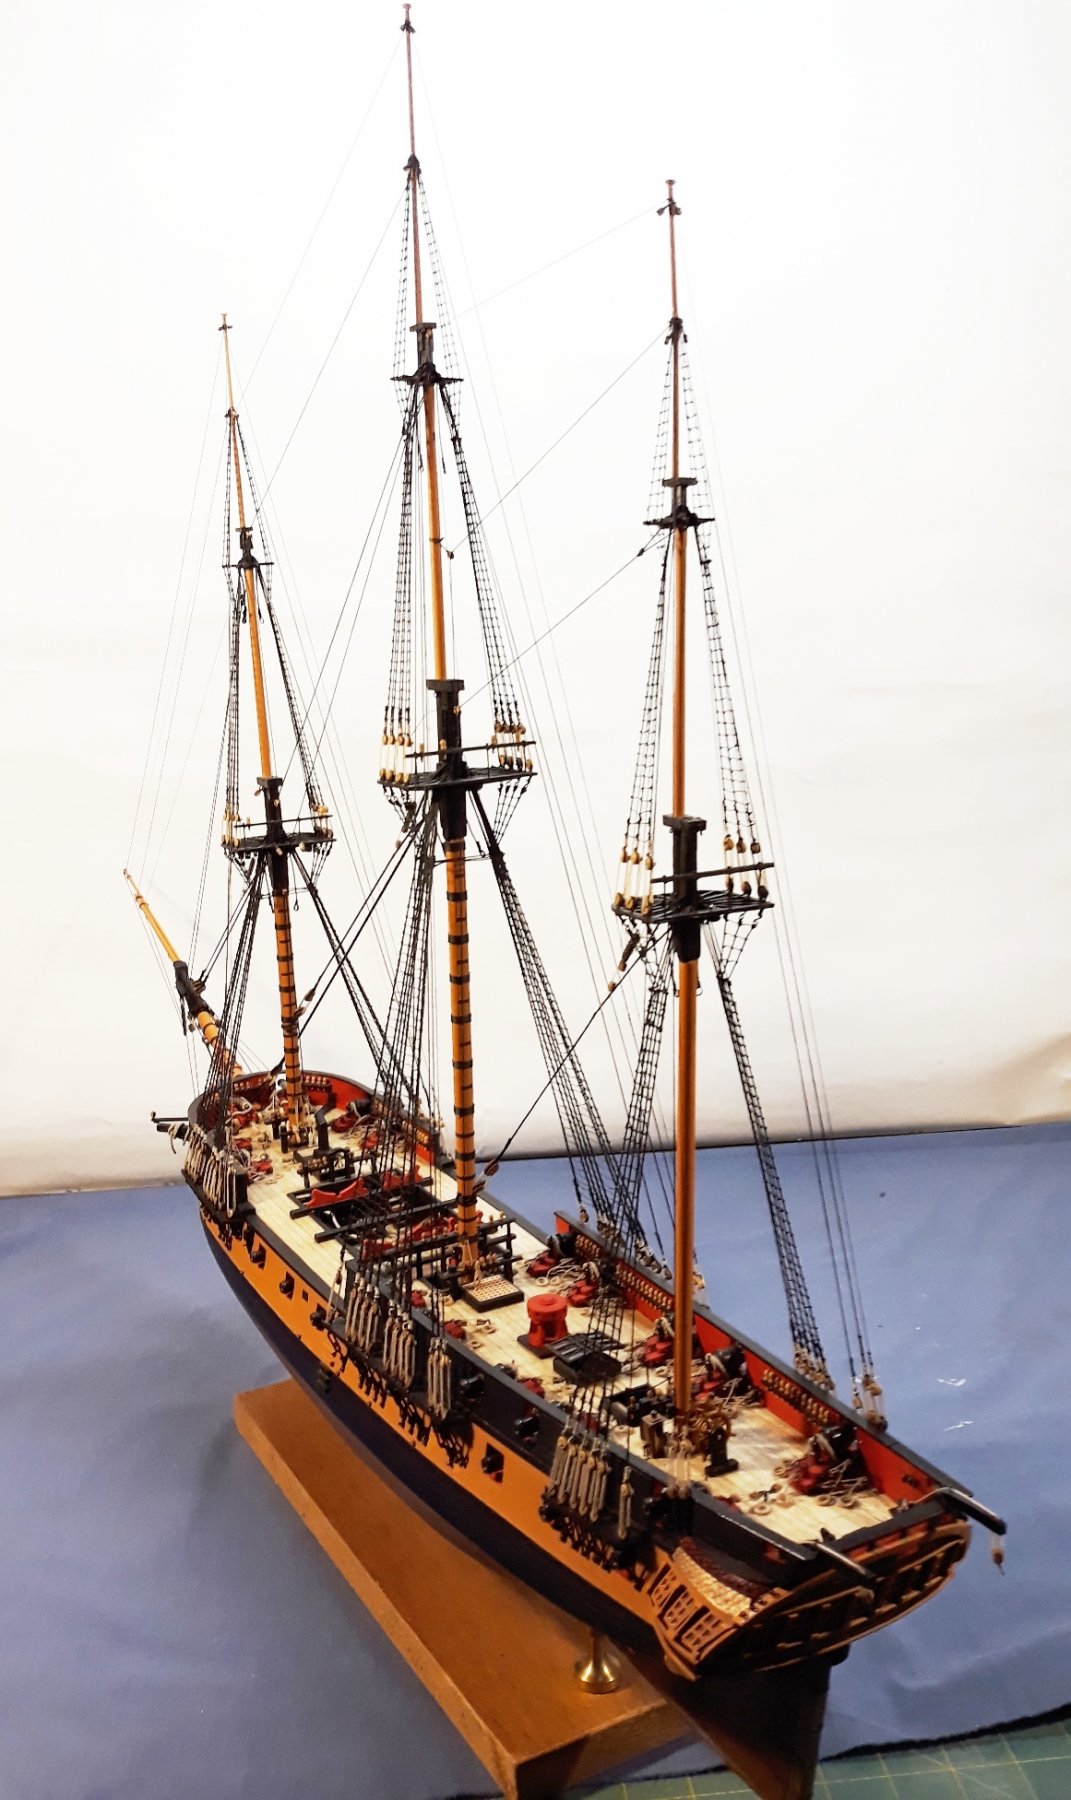
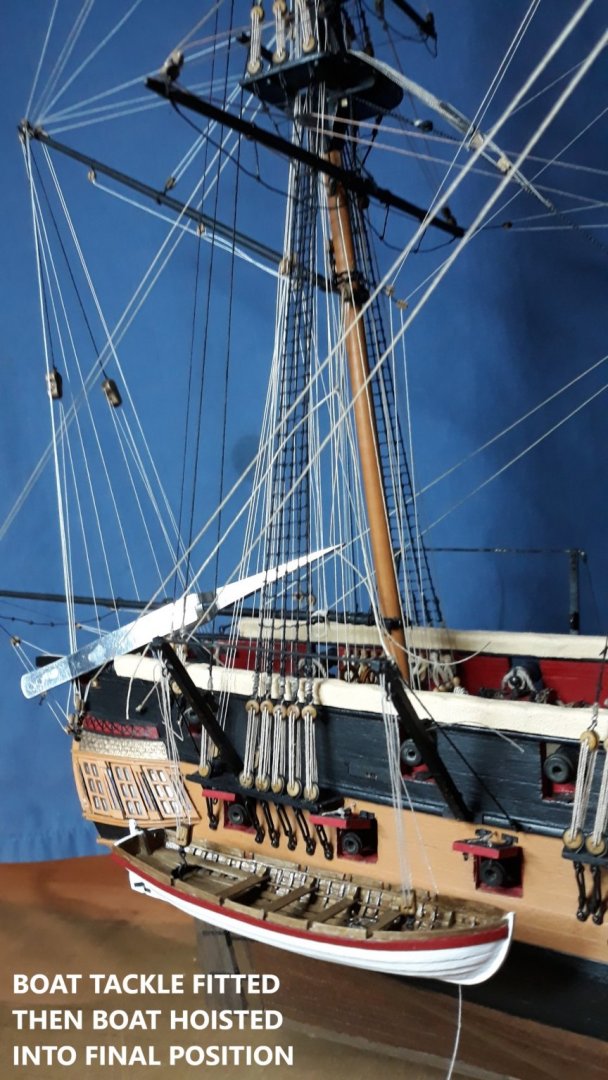
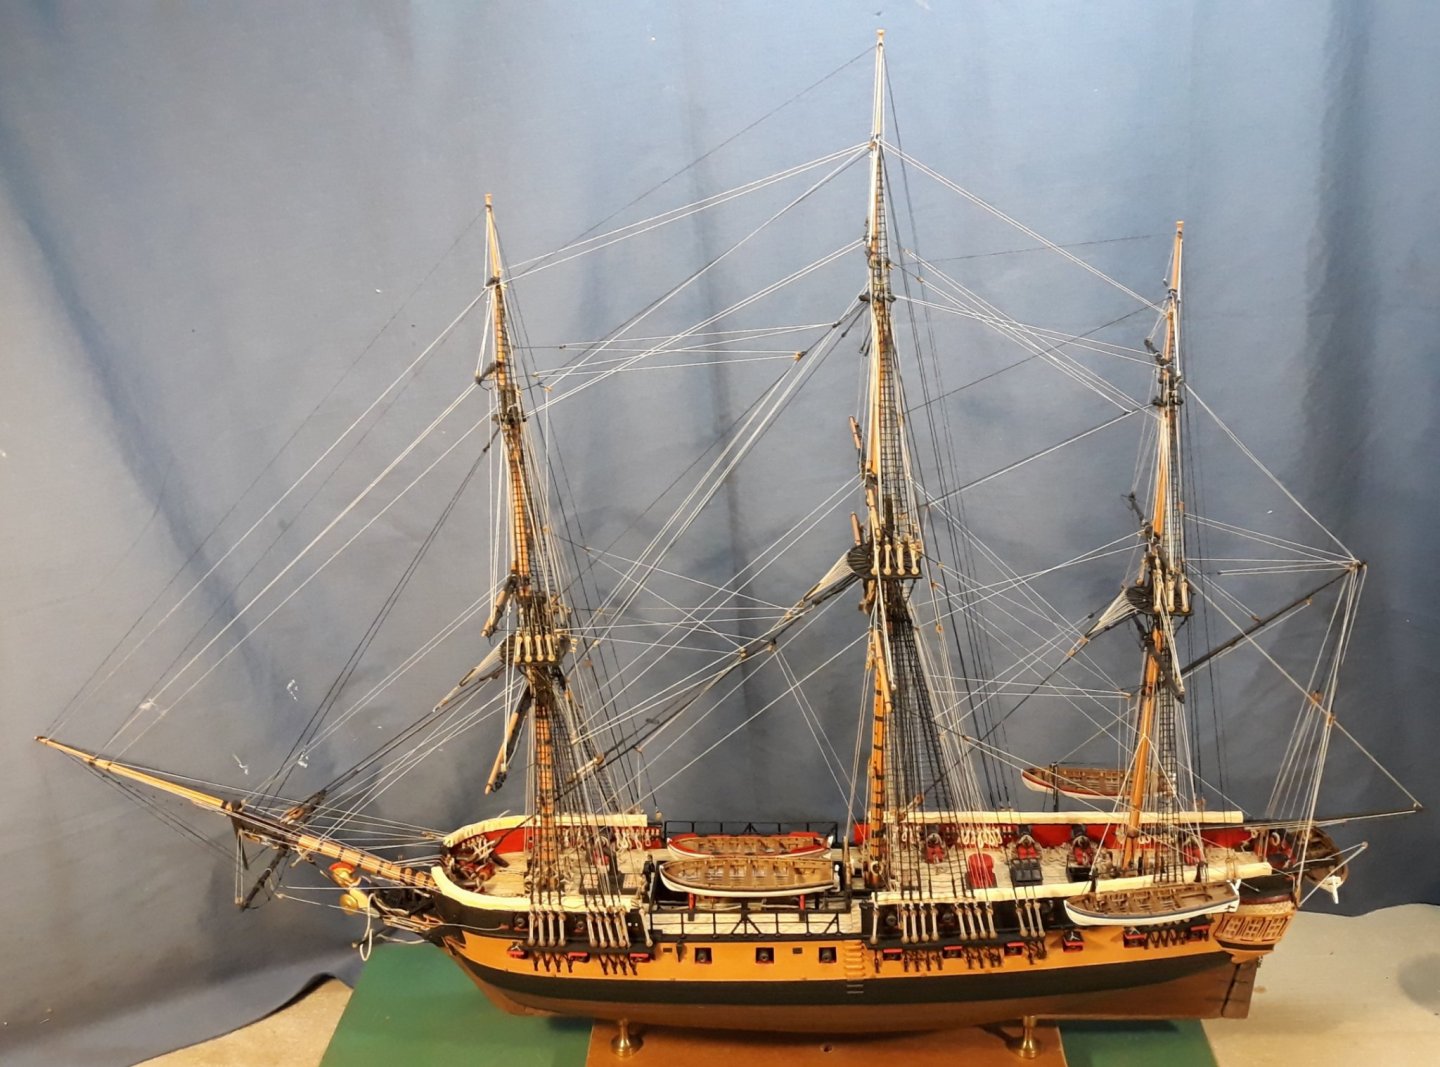
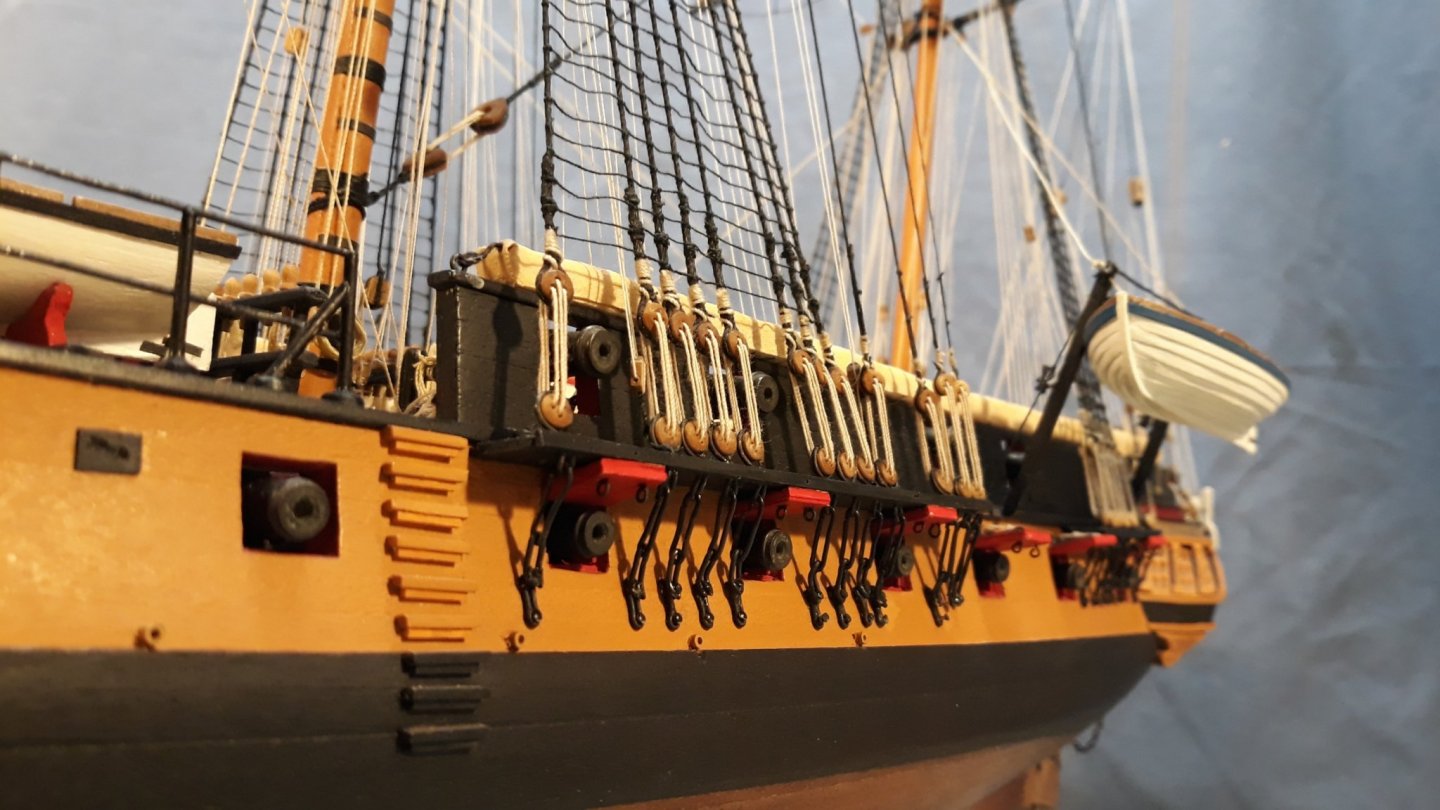
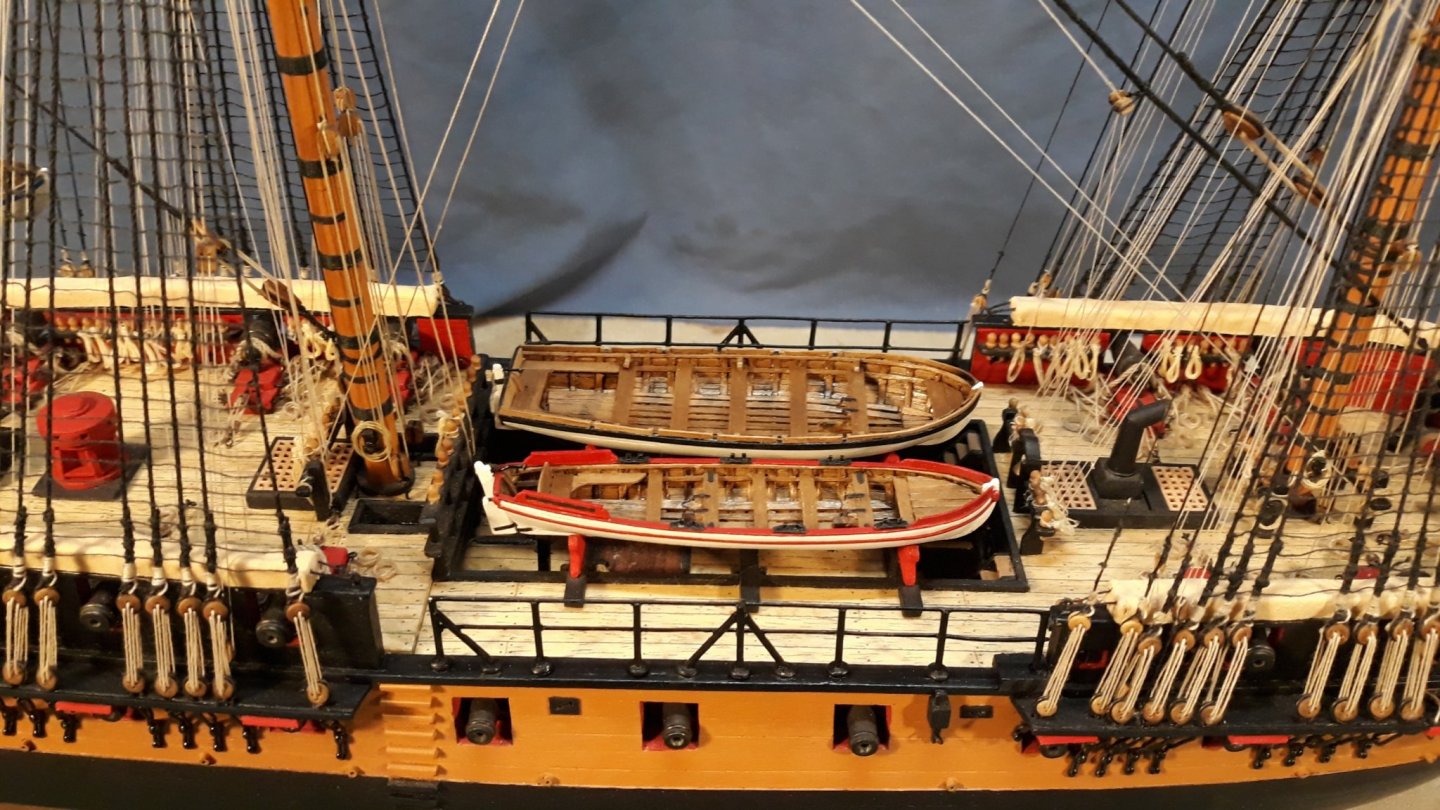
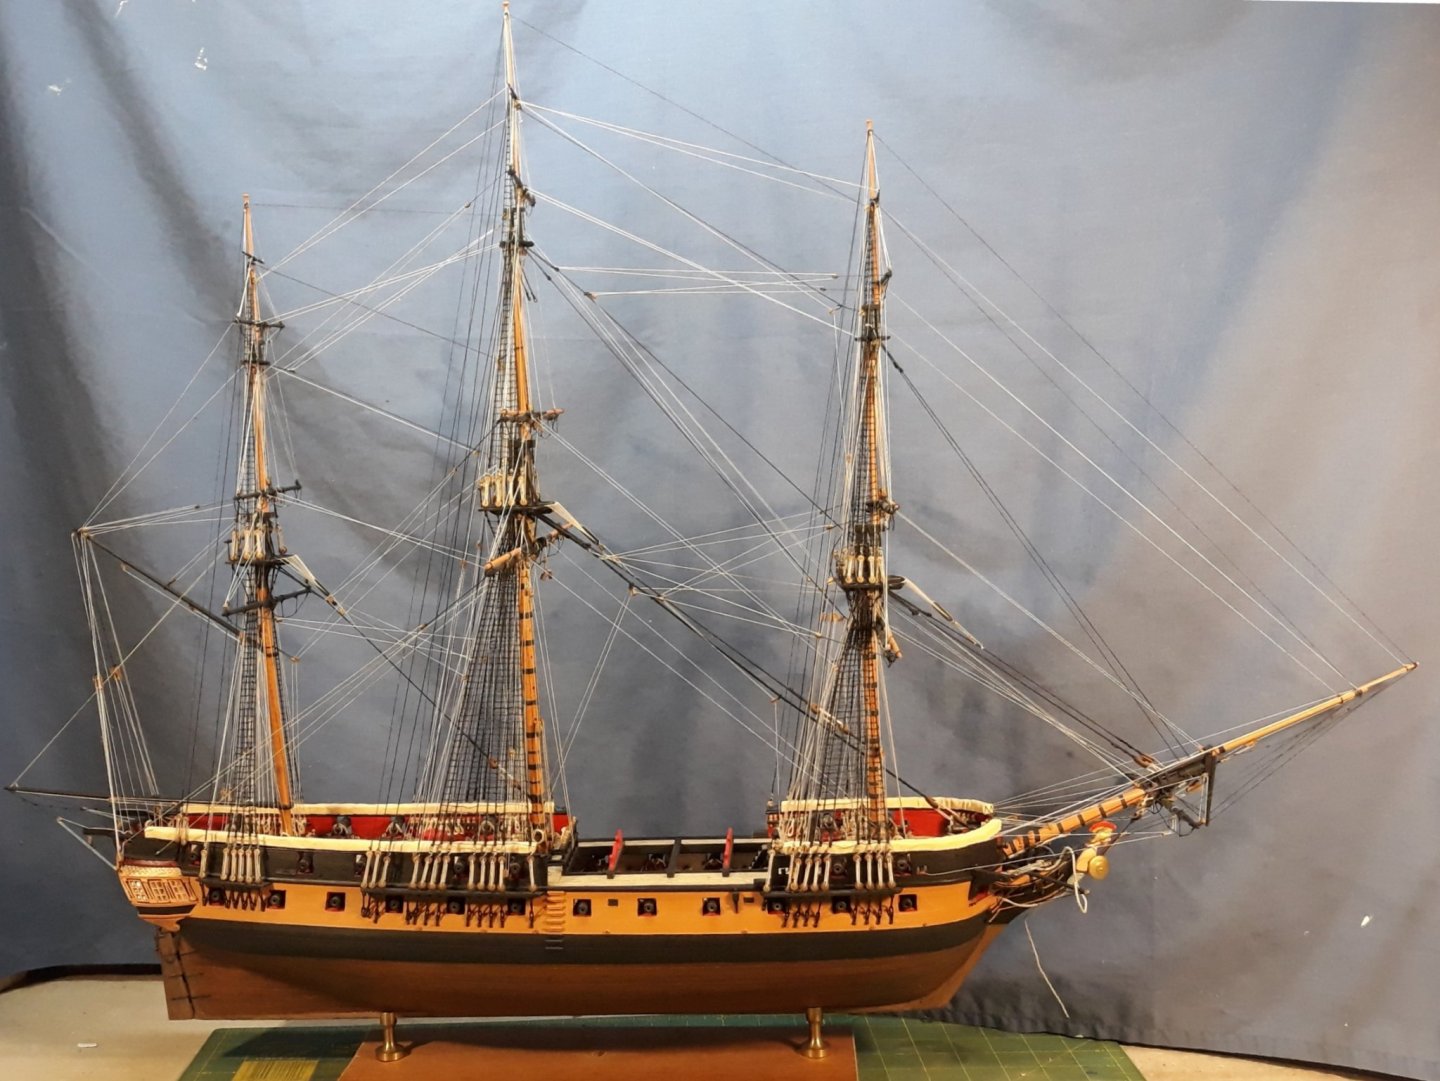
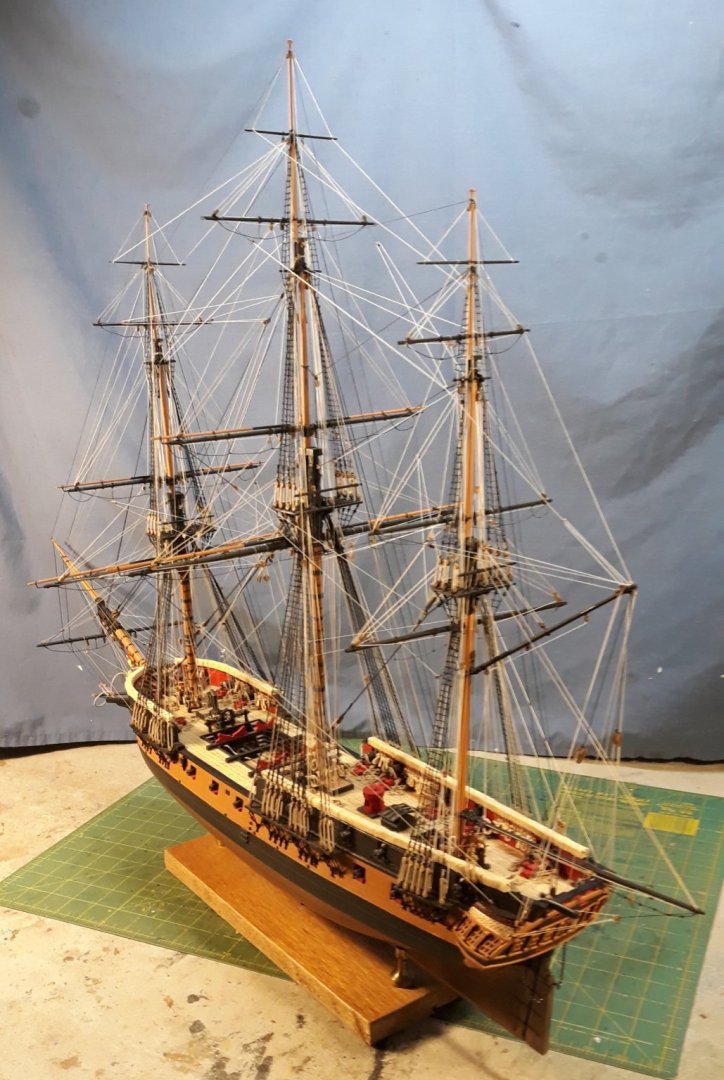
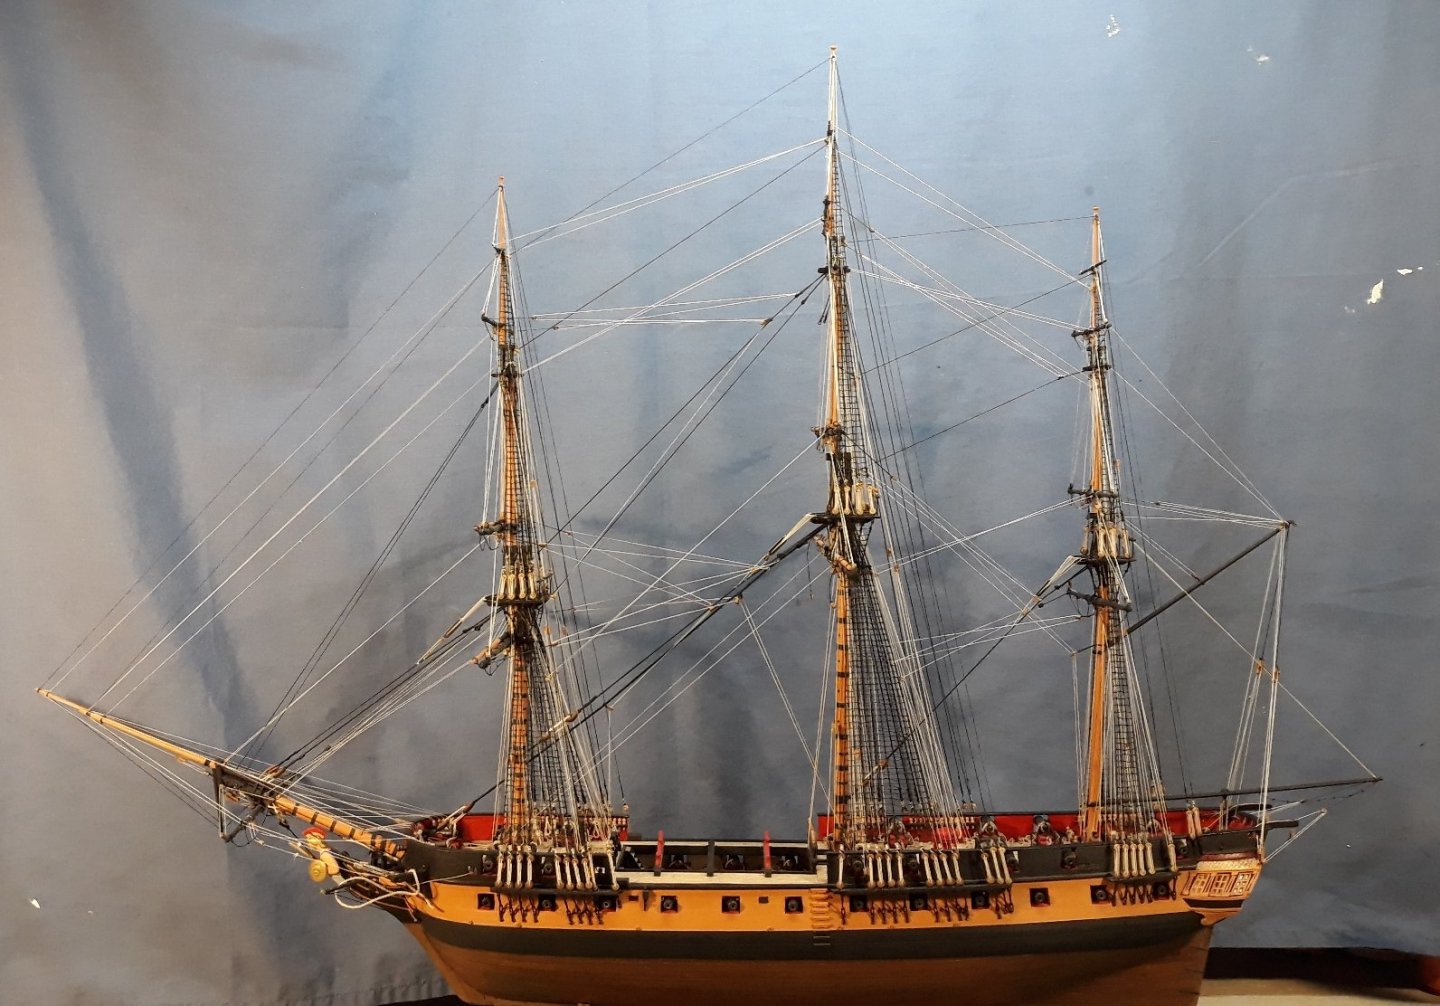
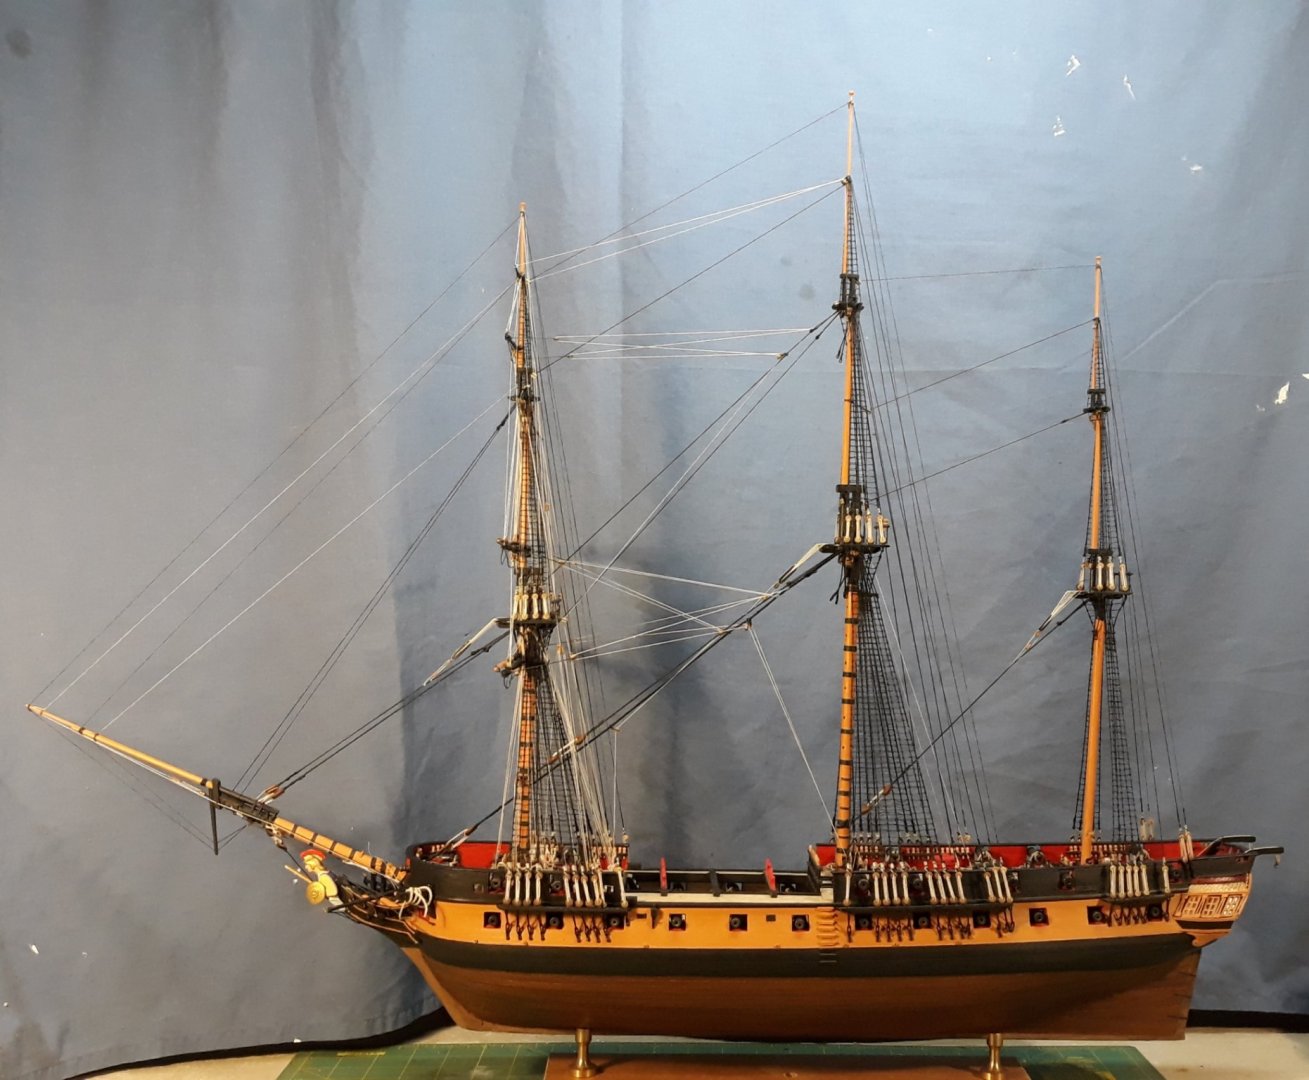
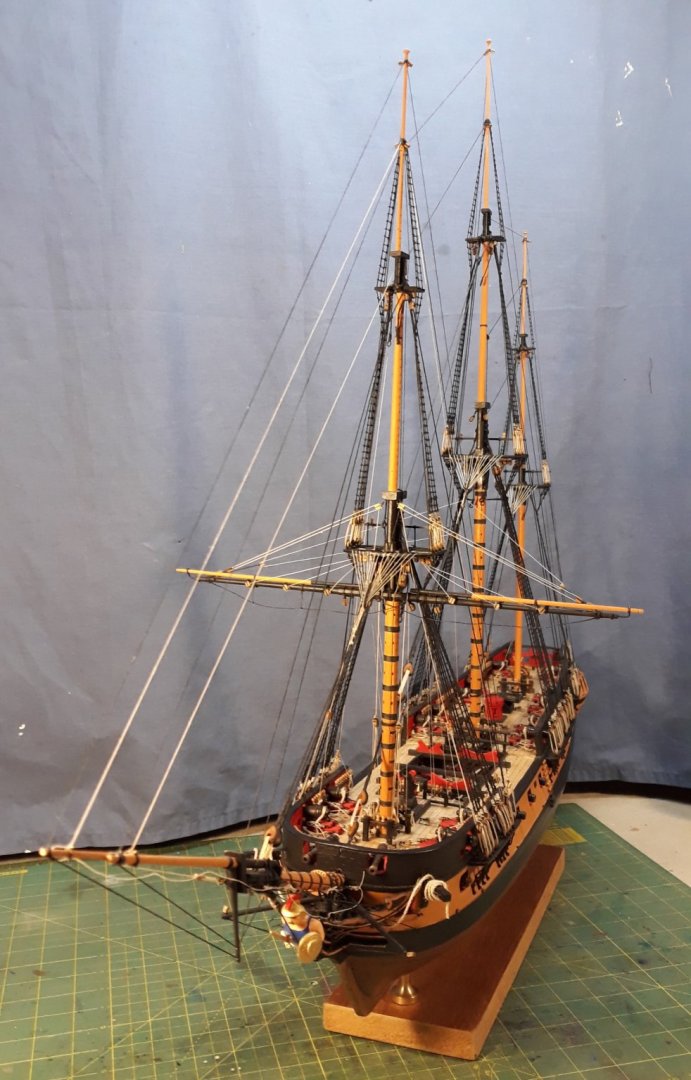
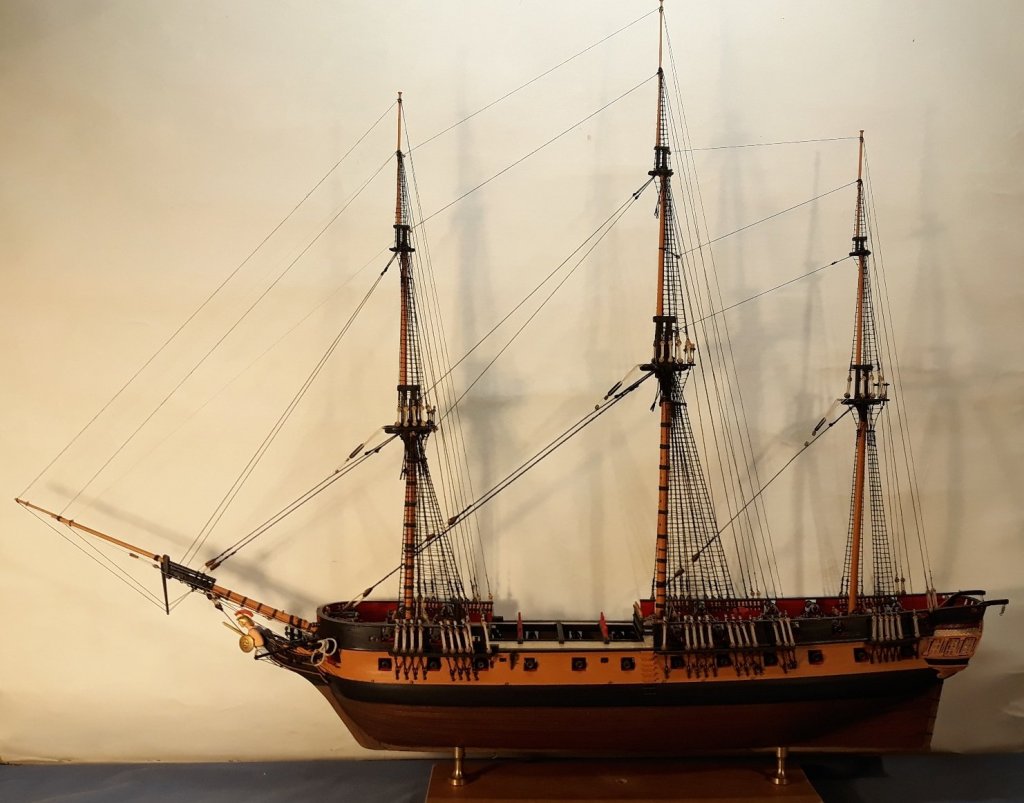
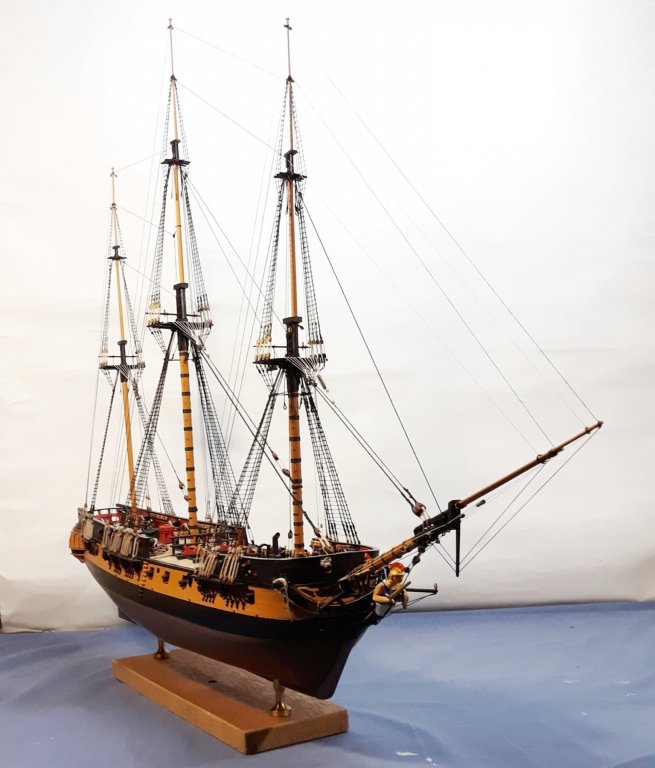
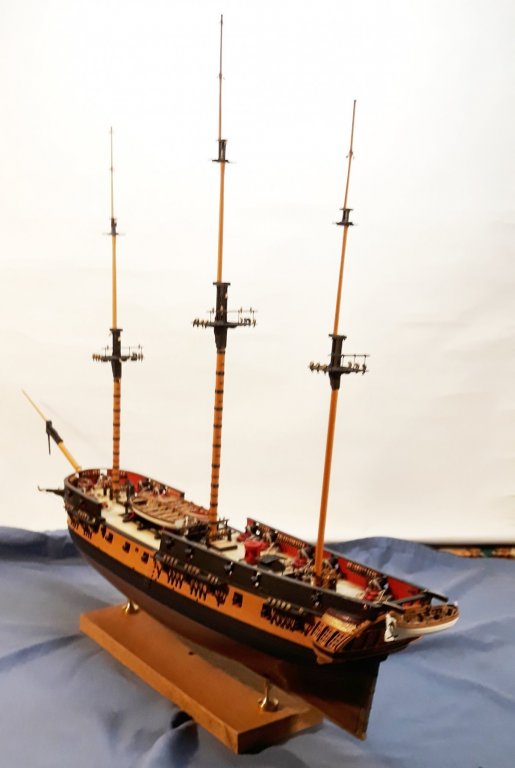
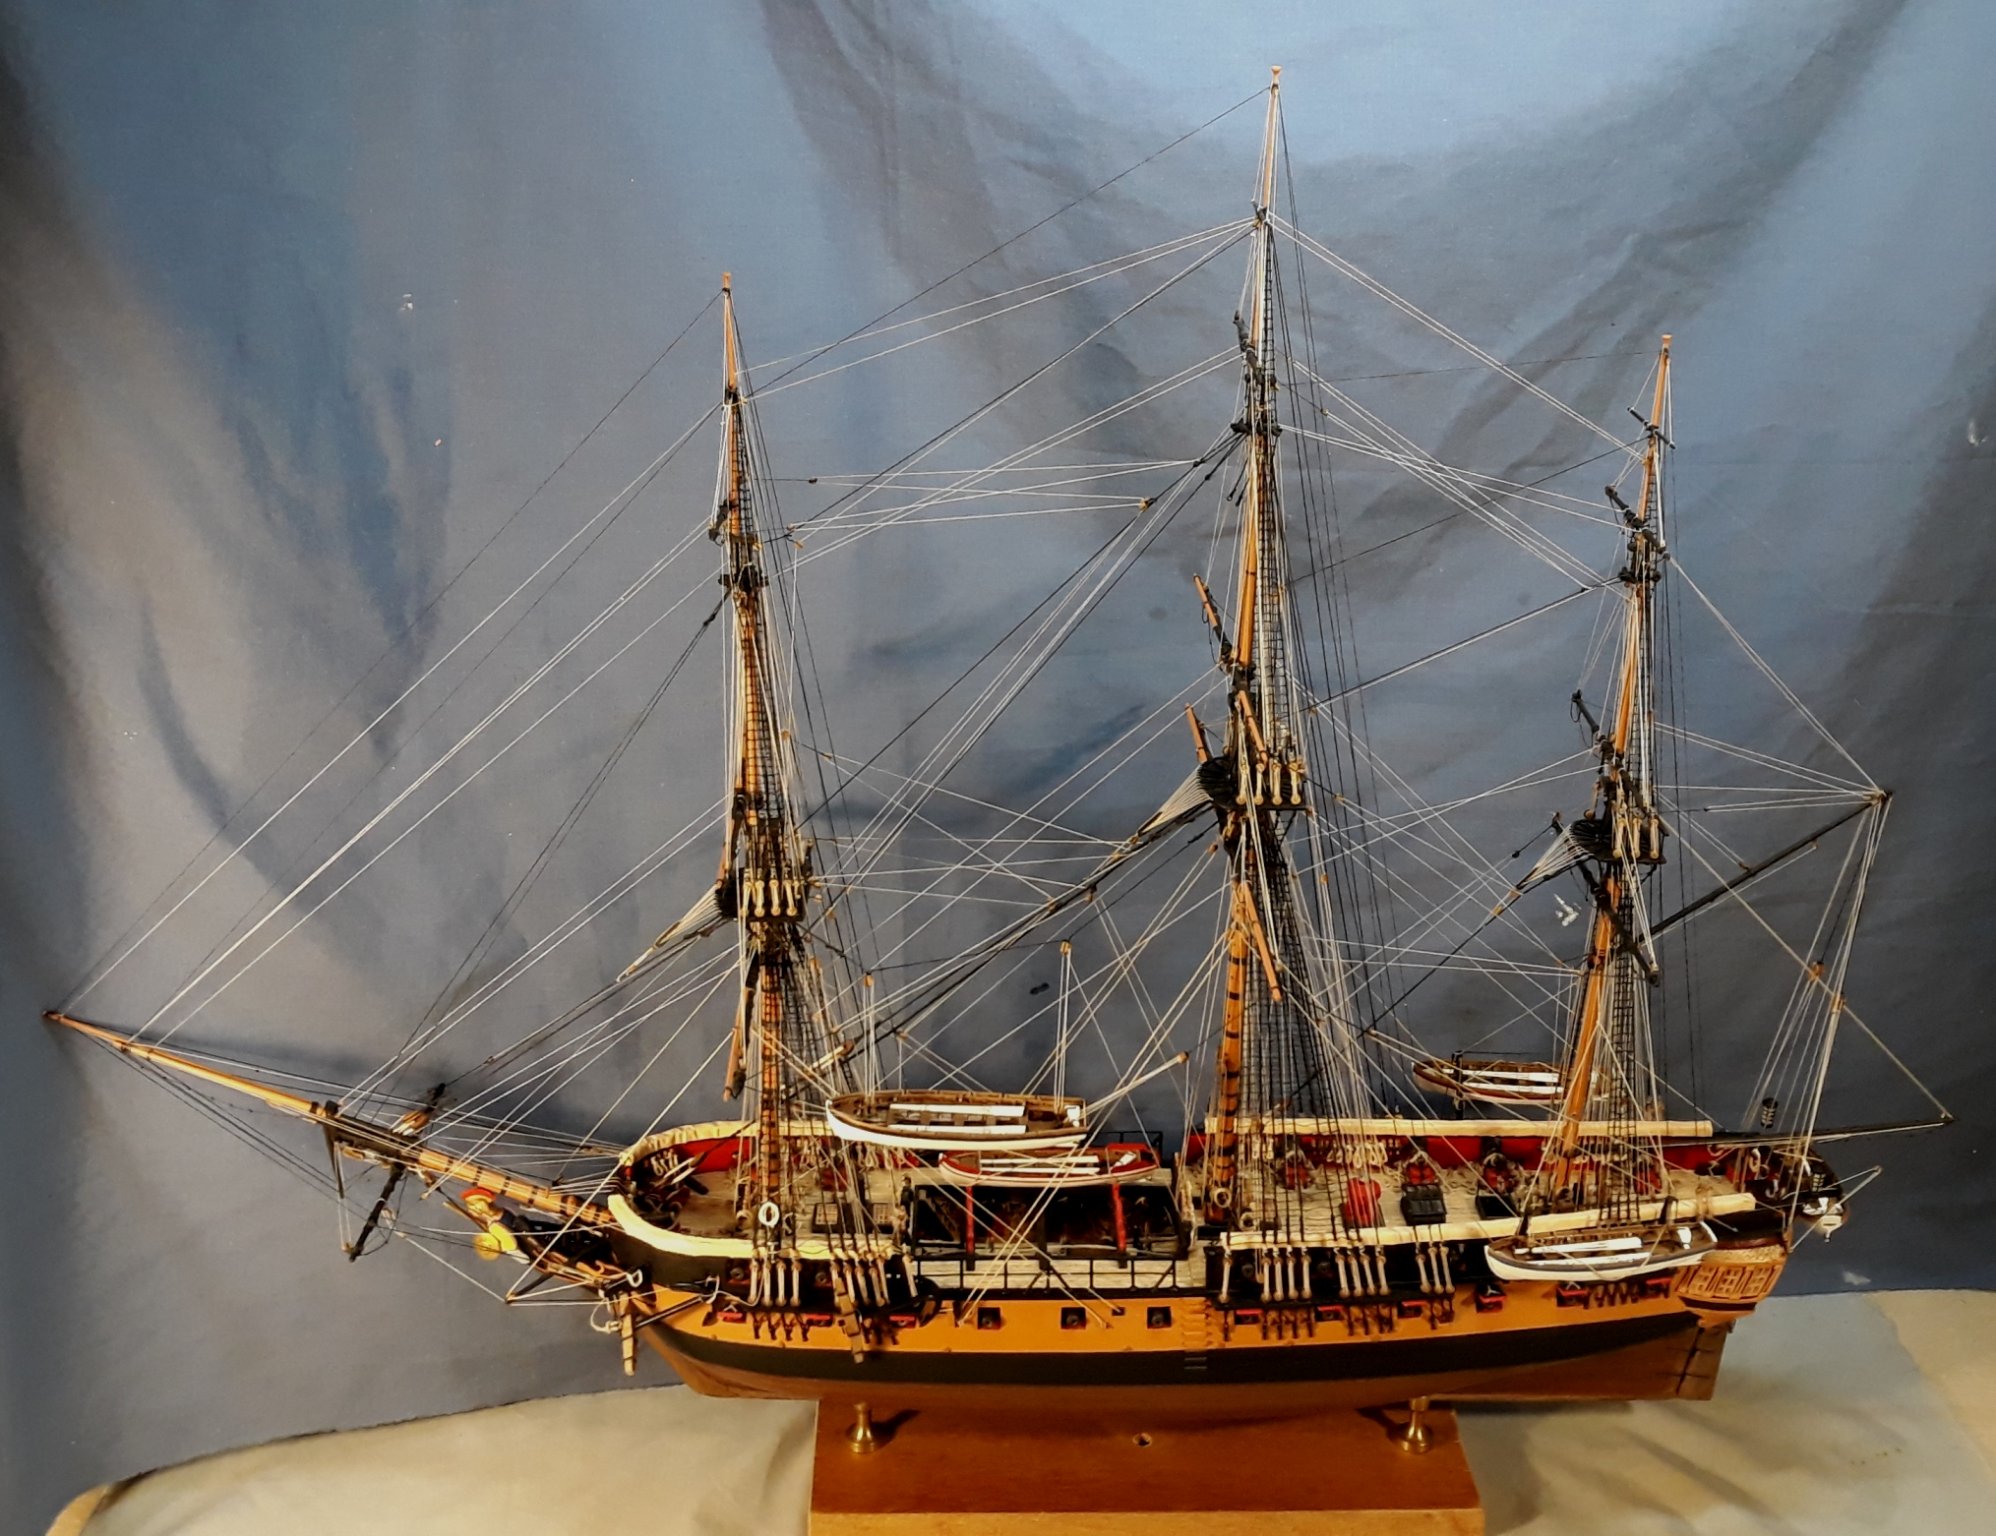
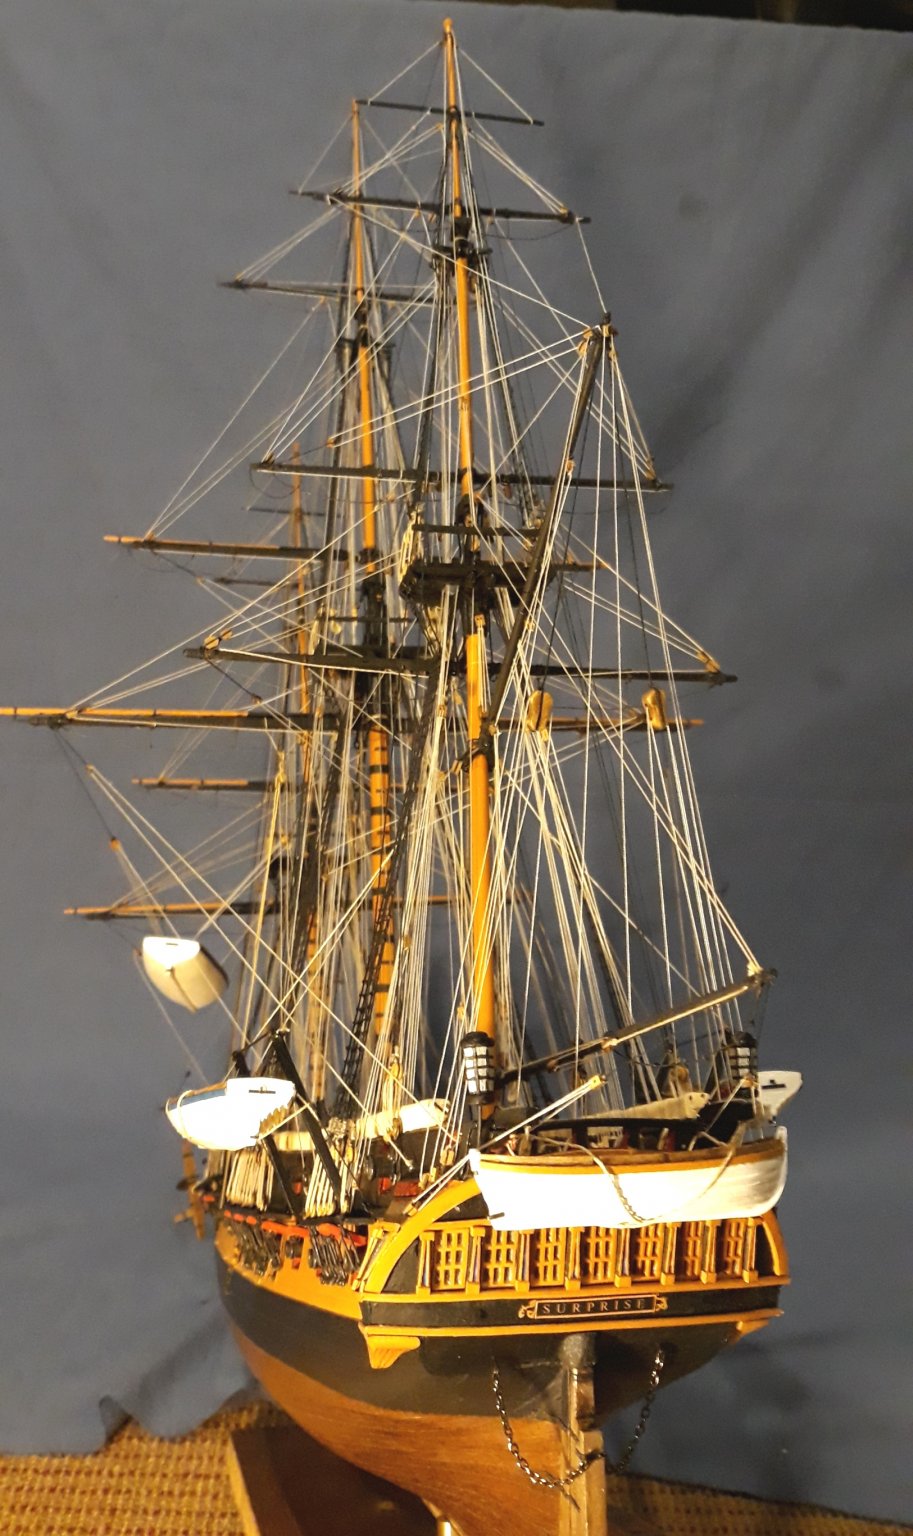
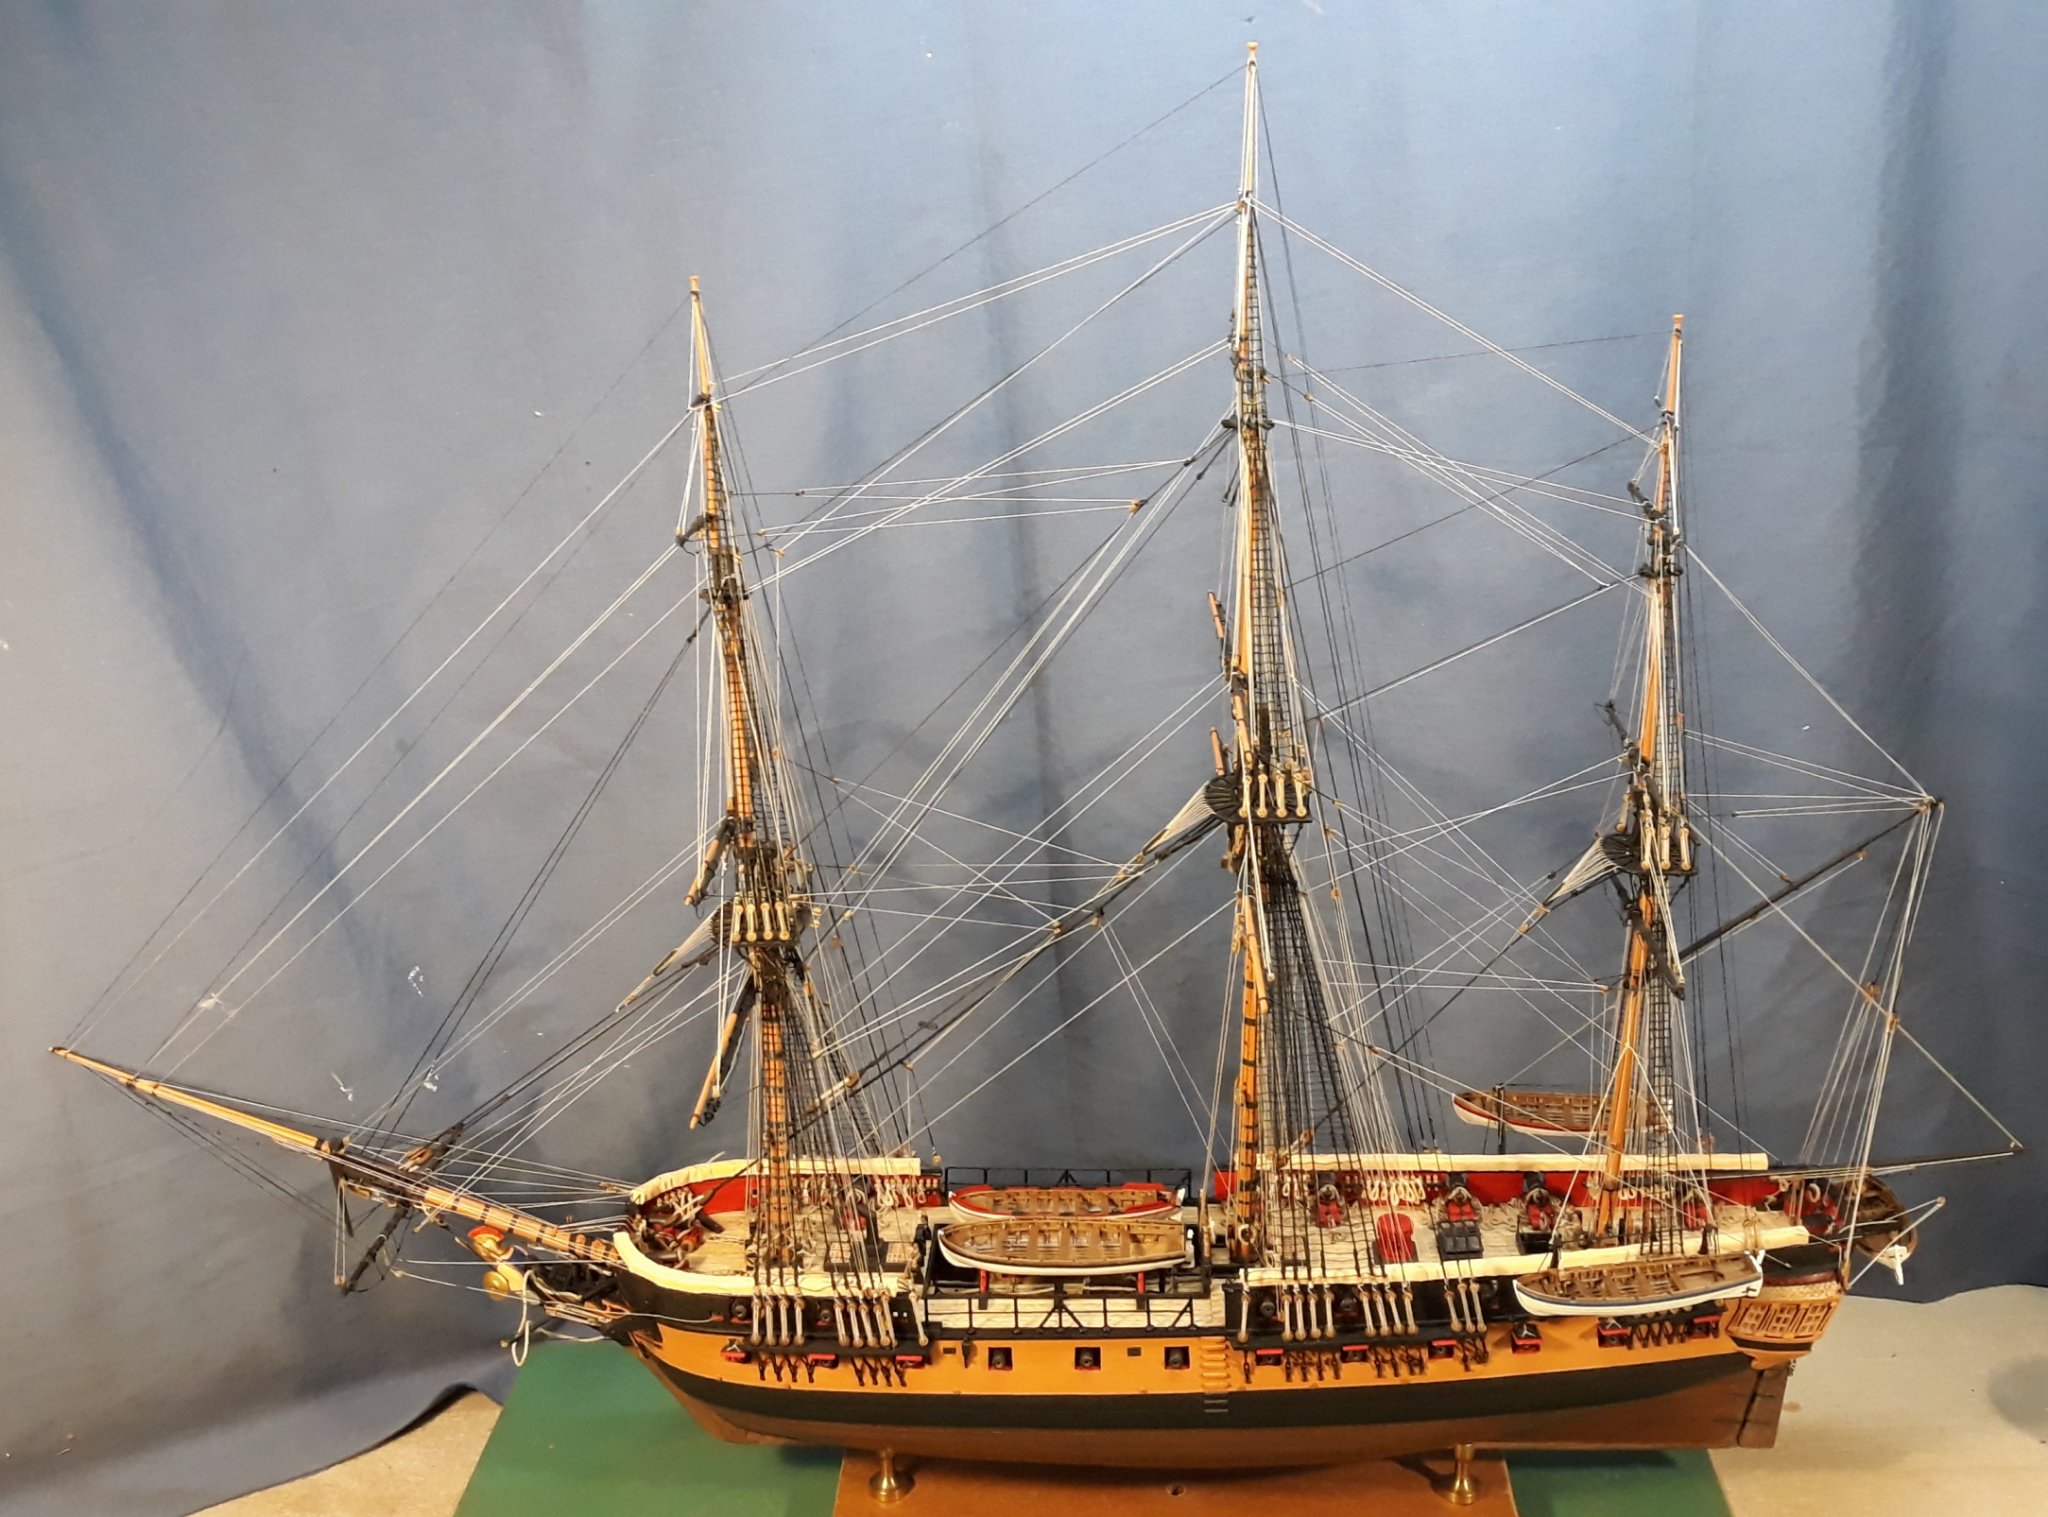
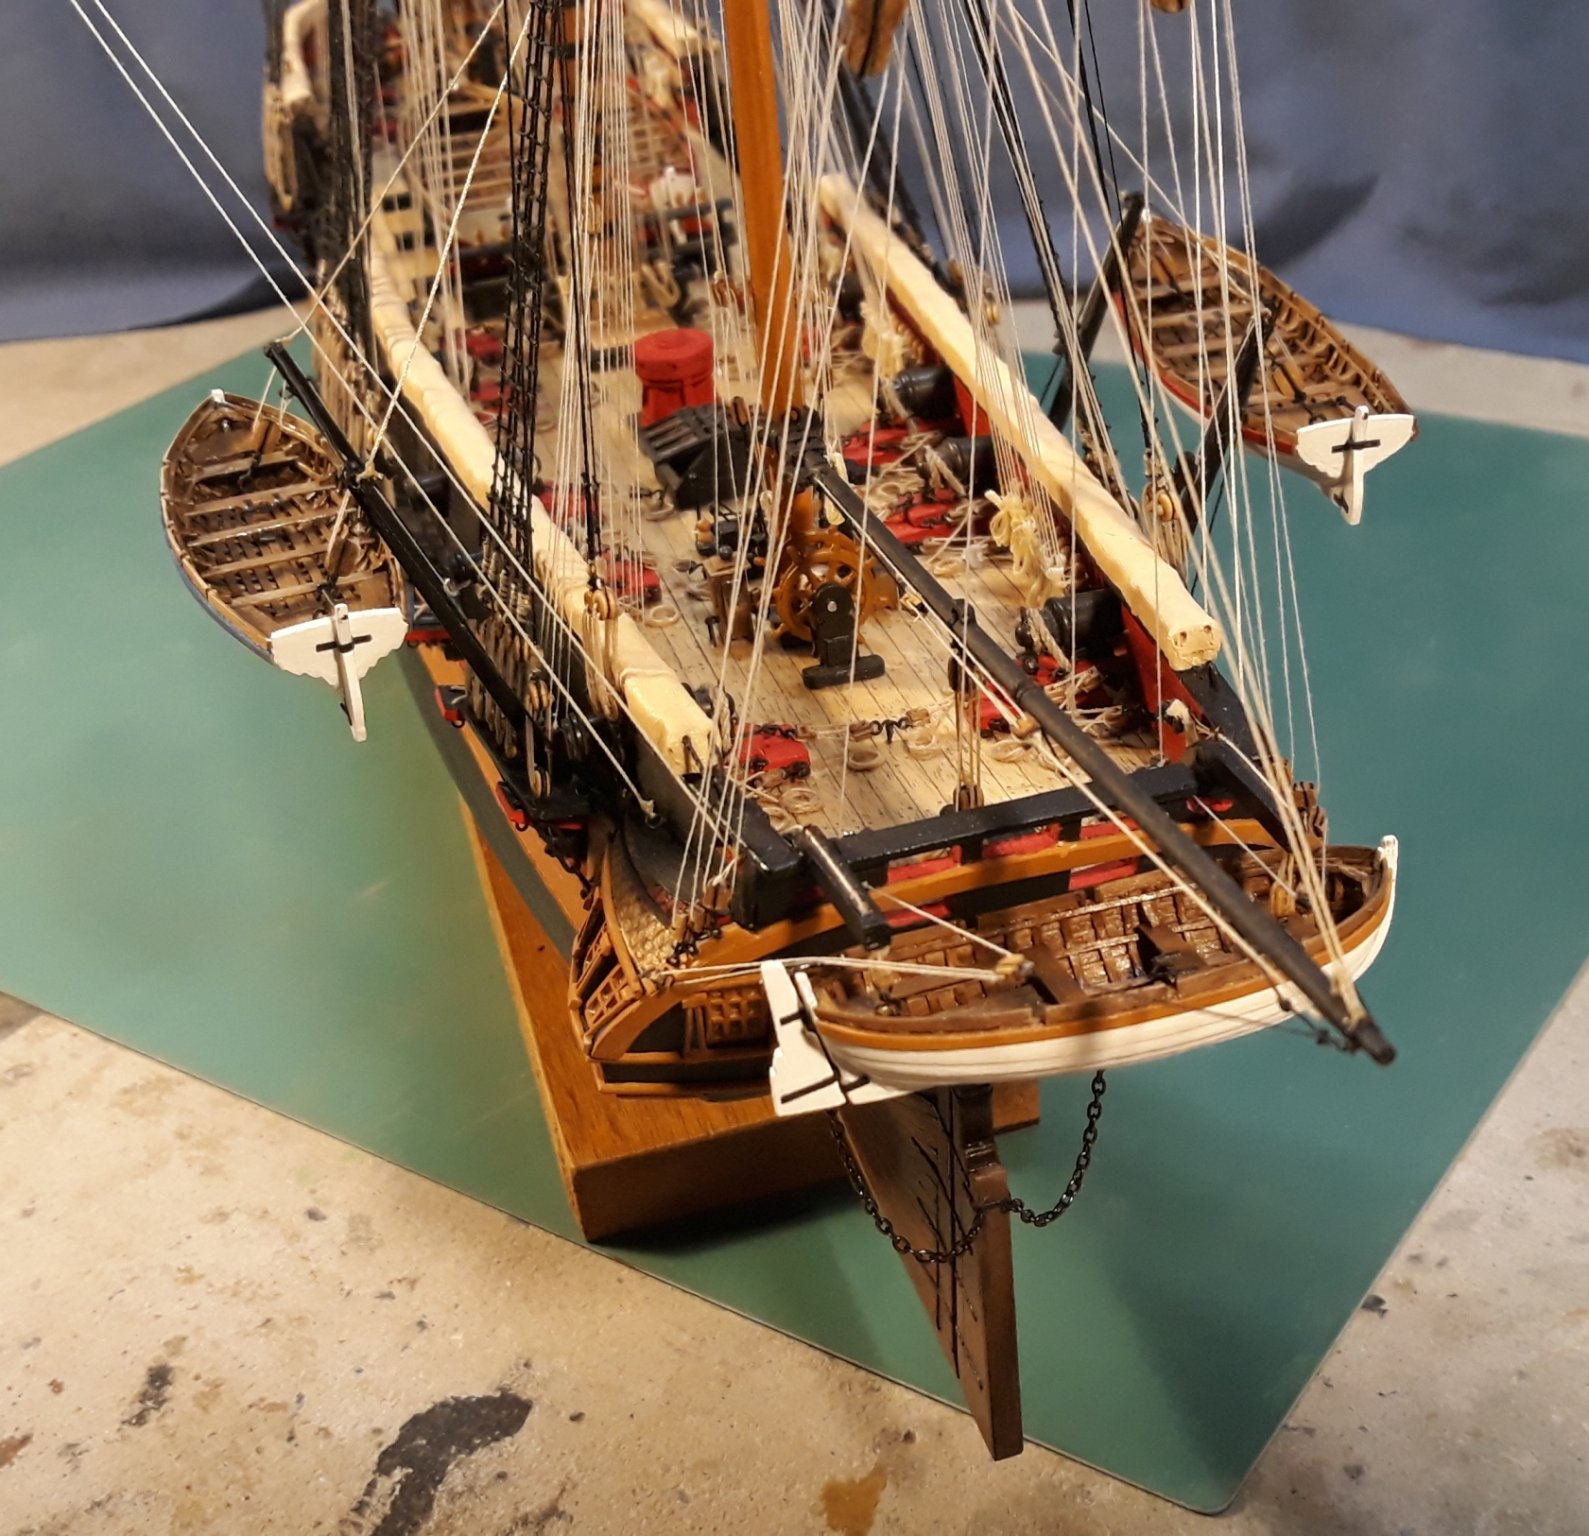
A real milestone this time, FINISHED! After I had placed the launch and pinnace at the waist I realised that the detail below could not be seen so I decided to show the launch in the process of being hoisted. Getting the tackle lengths and angles was pretty fiddly but I think the final solution looks good. I did make up 2 stern lanterns fitted to the sides. Cheers, David.


- 256 replies
-
- 21
-
-
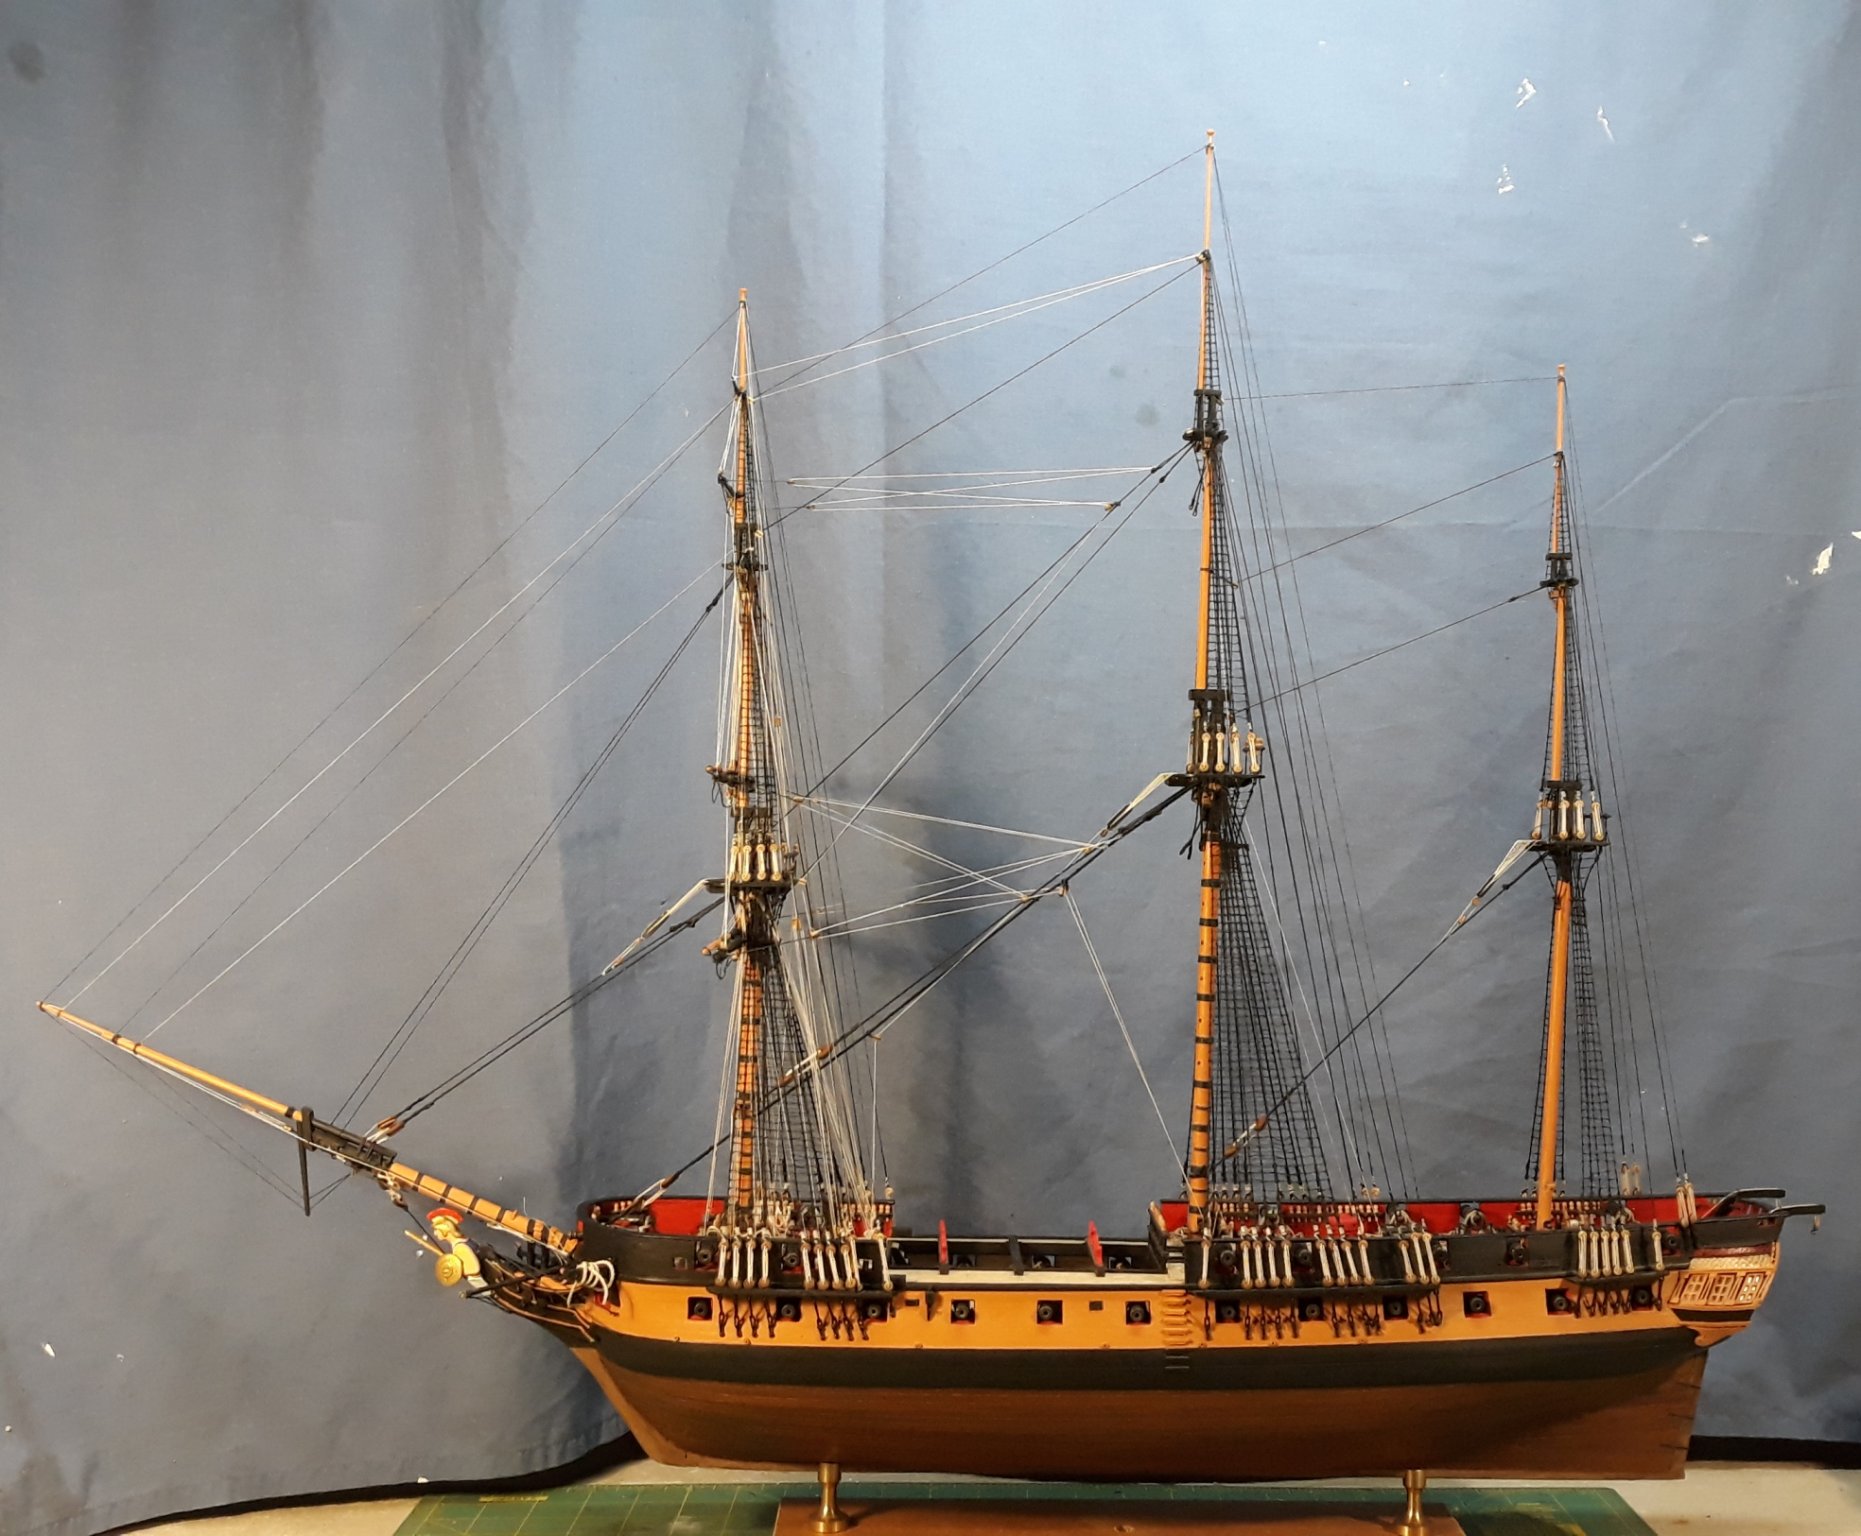
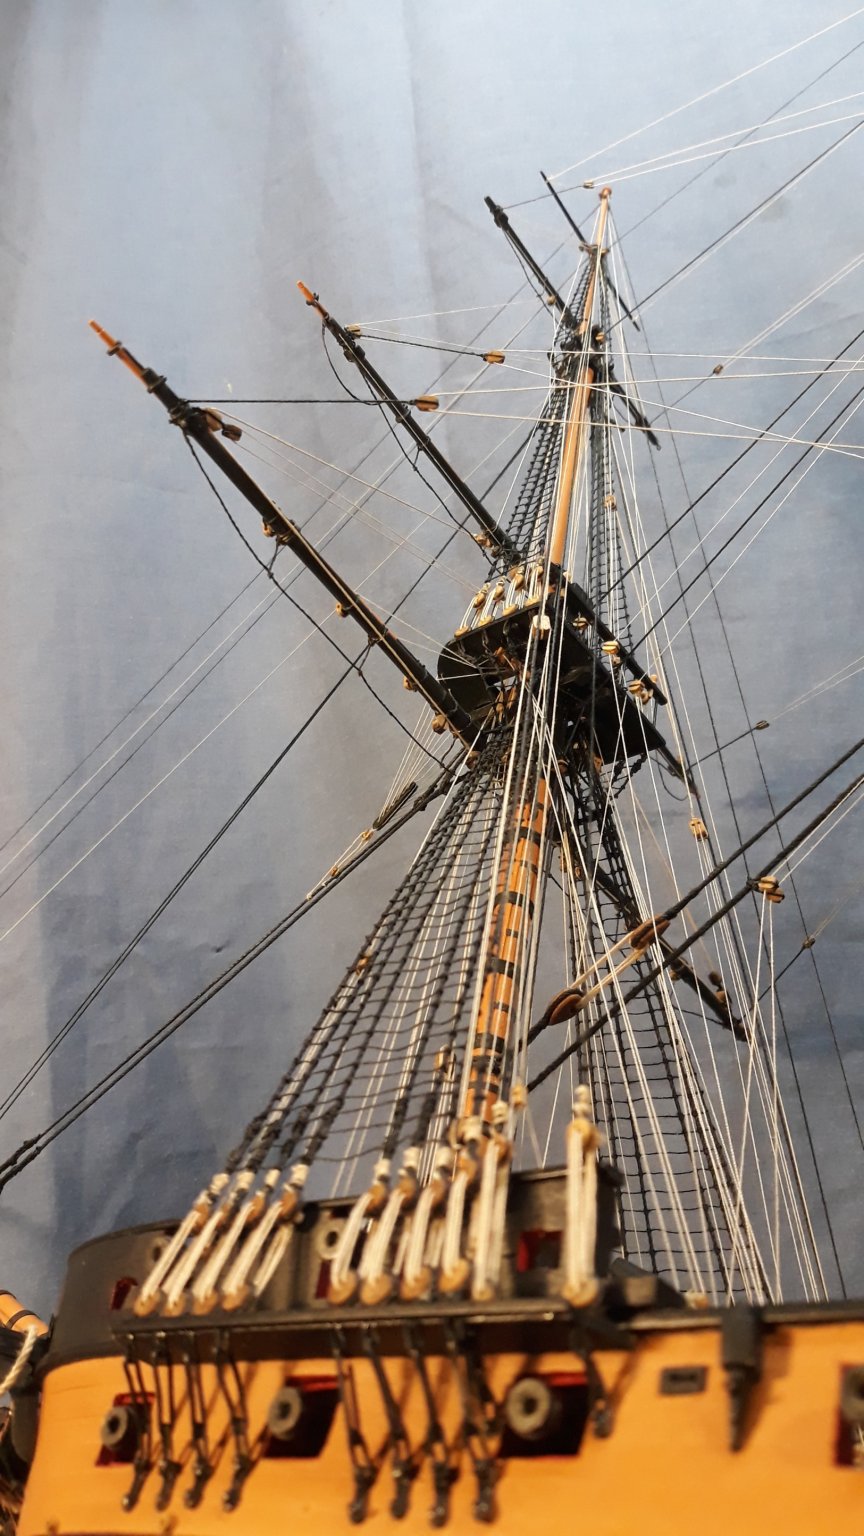
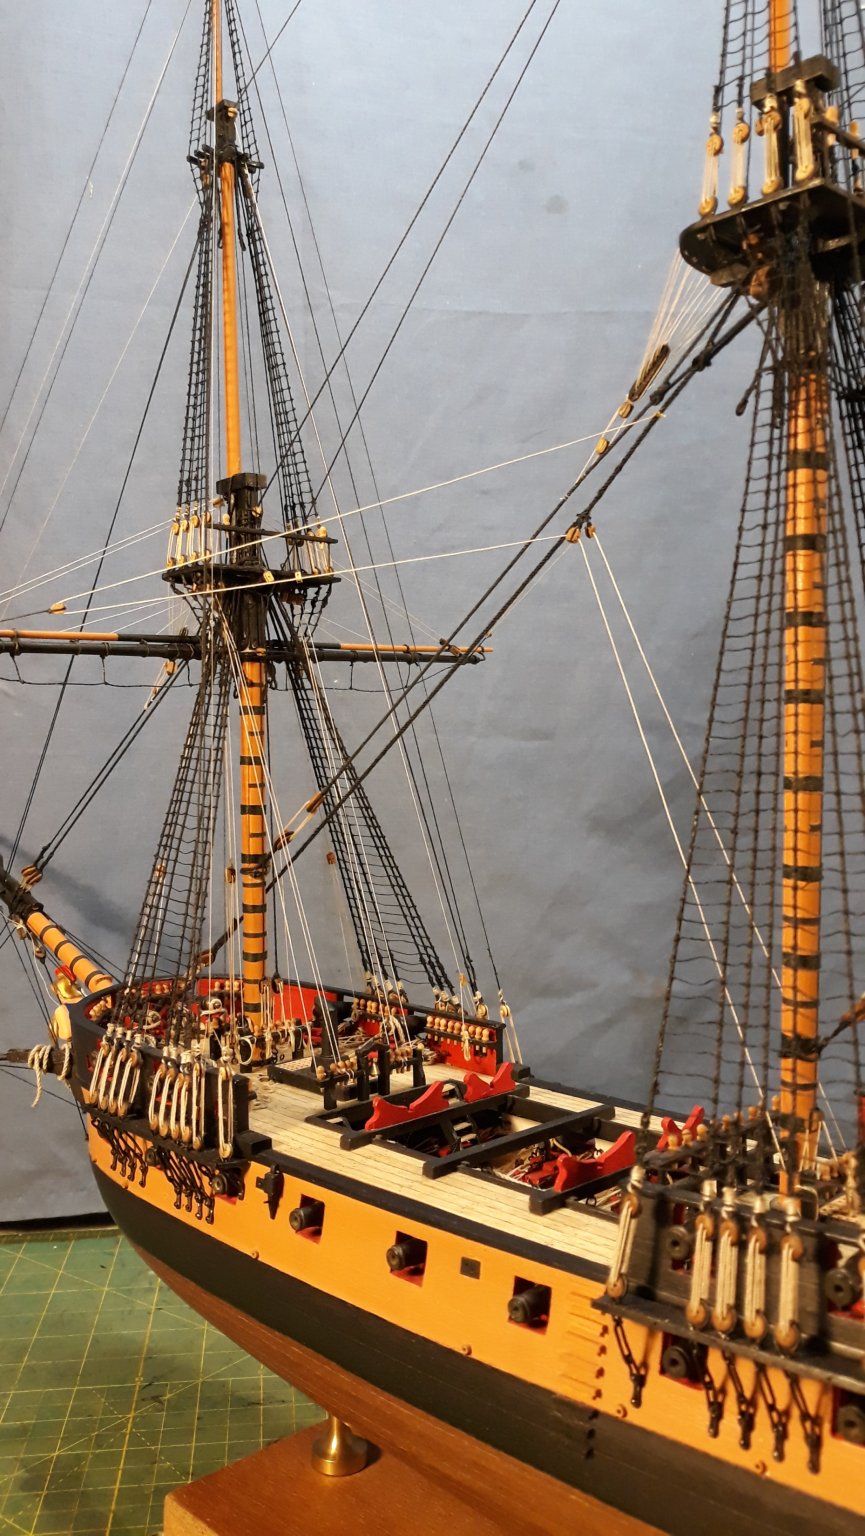
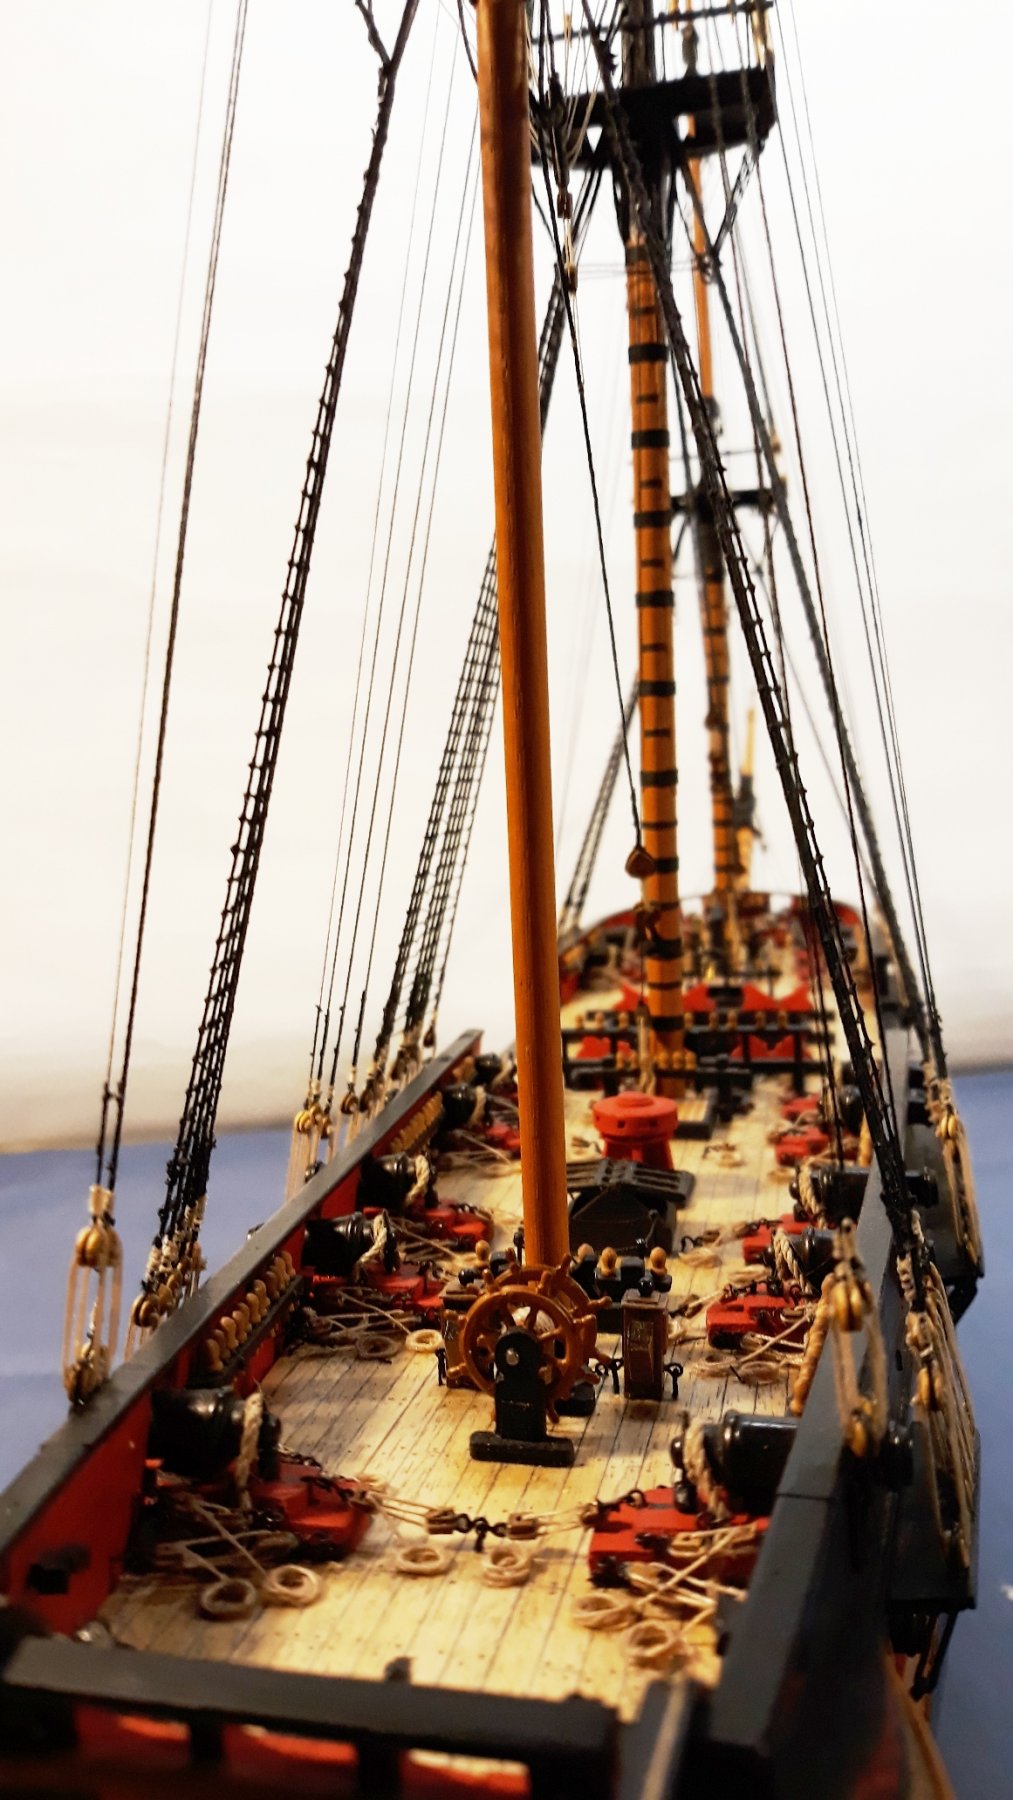
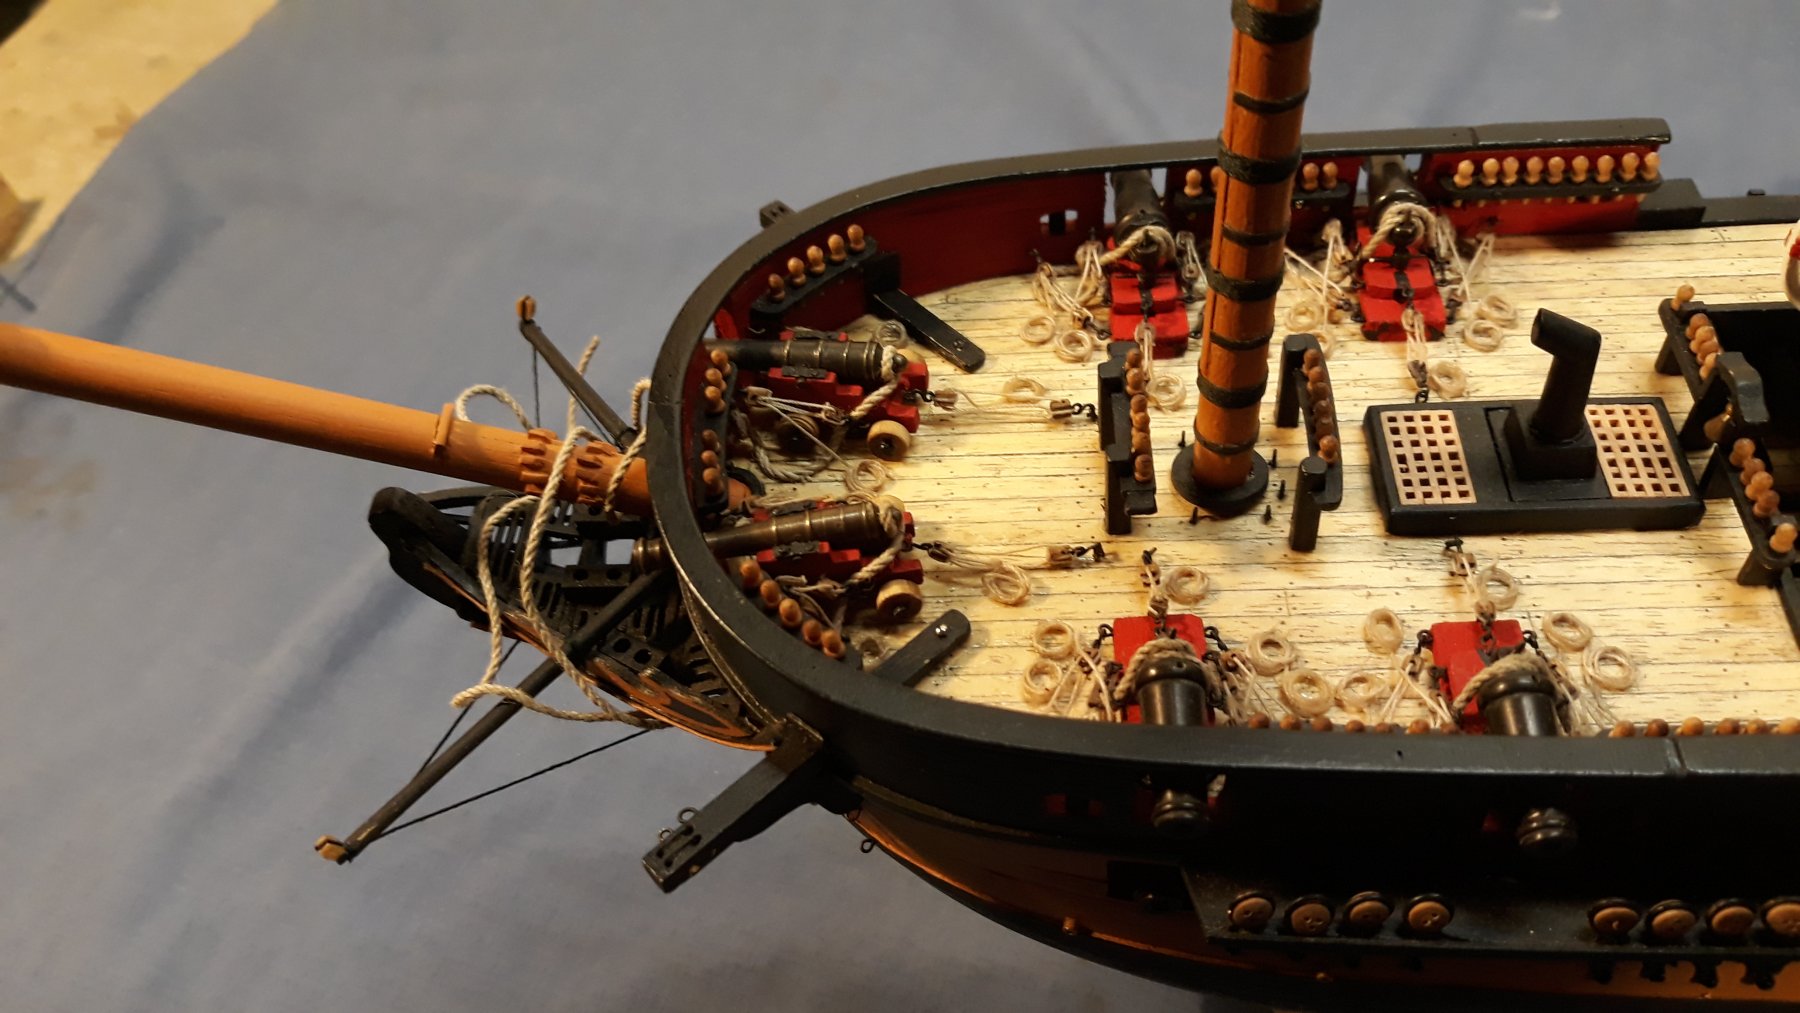
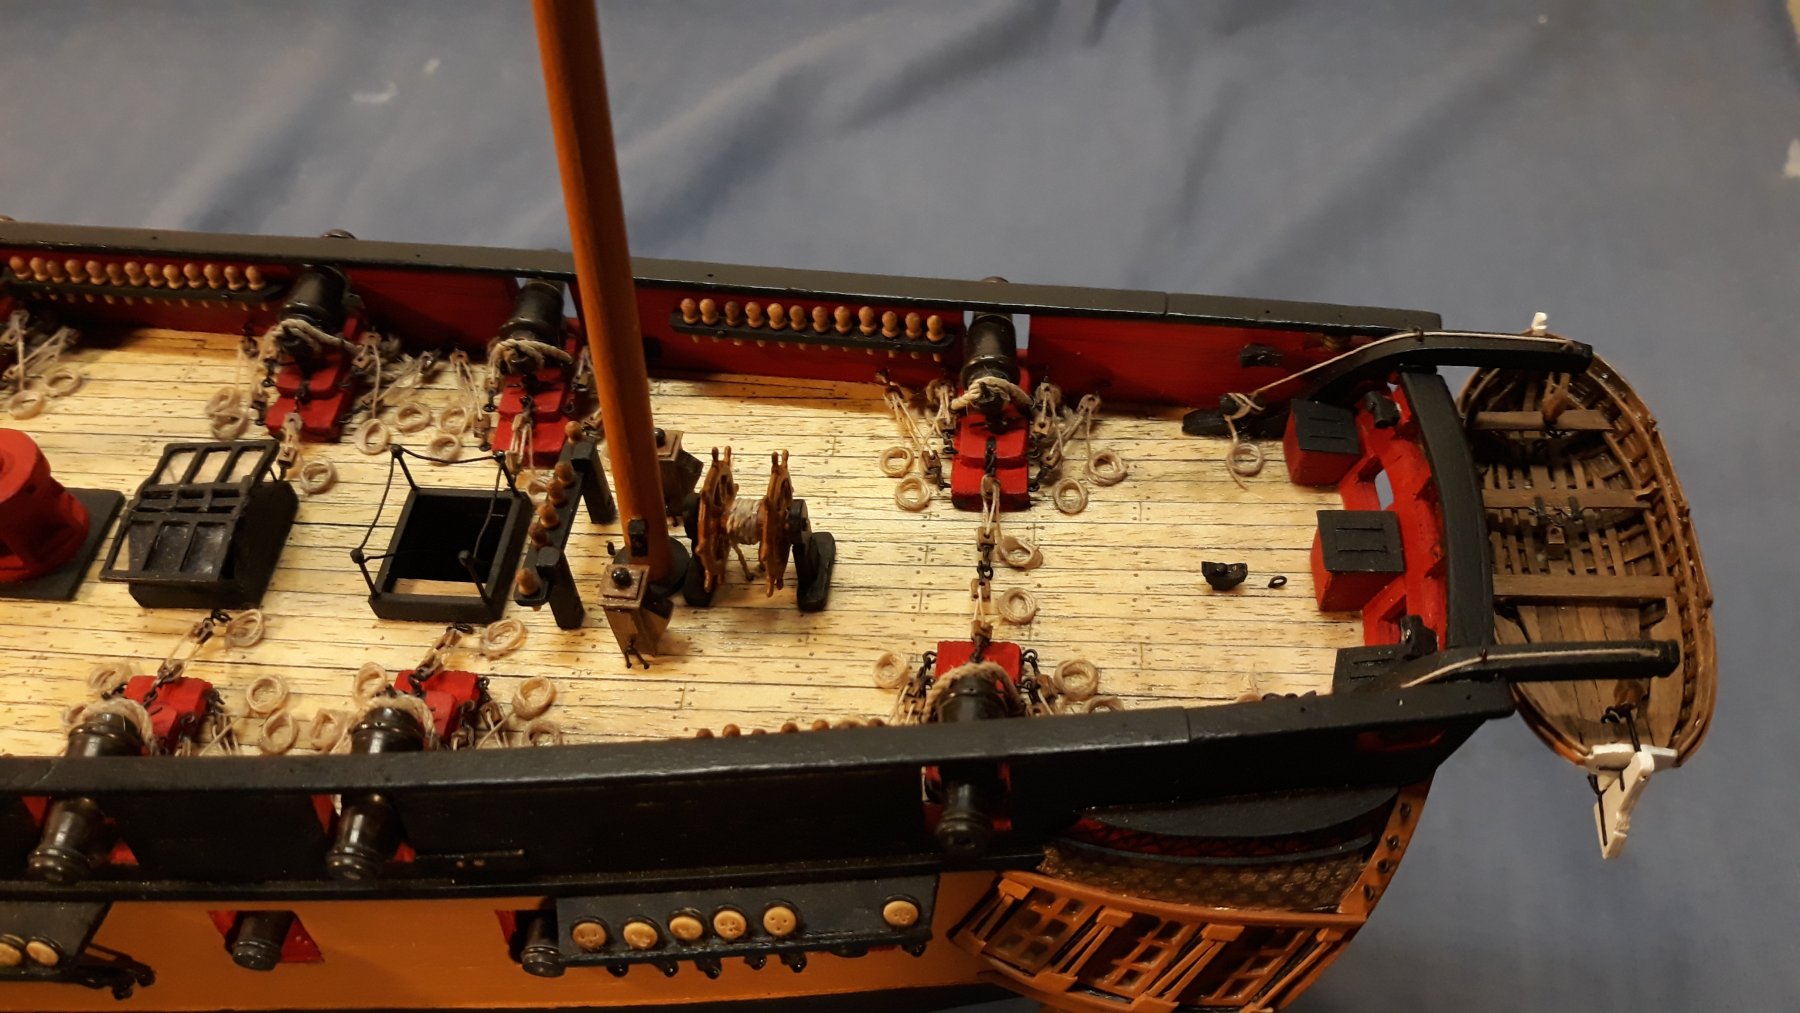
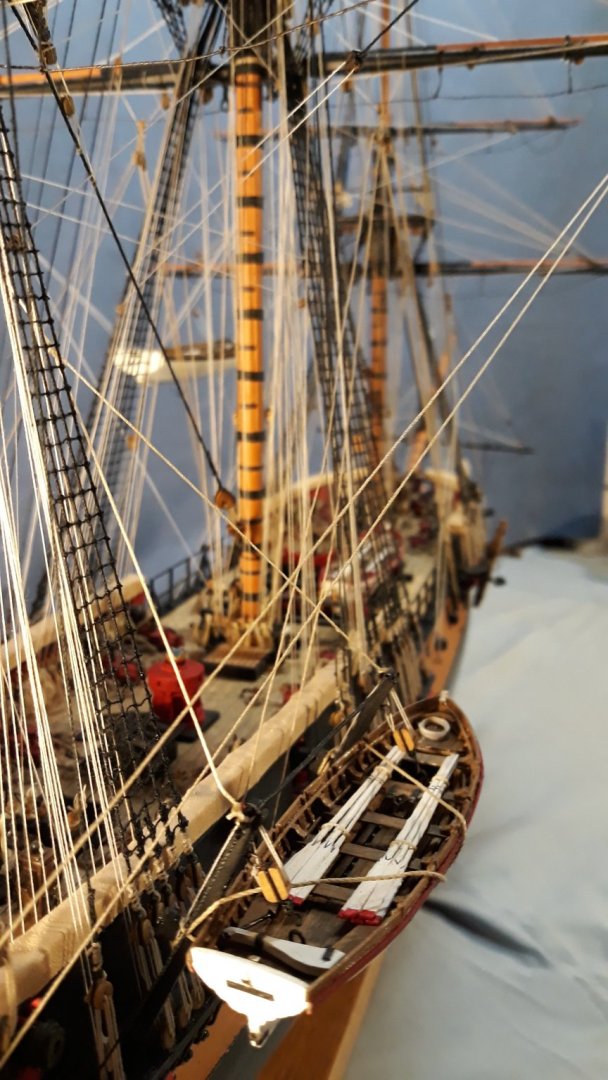
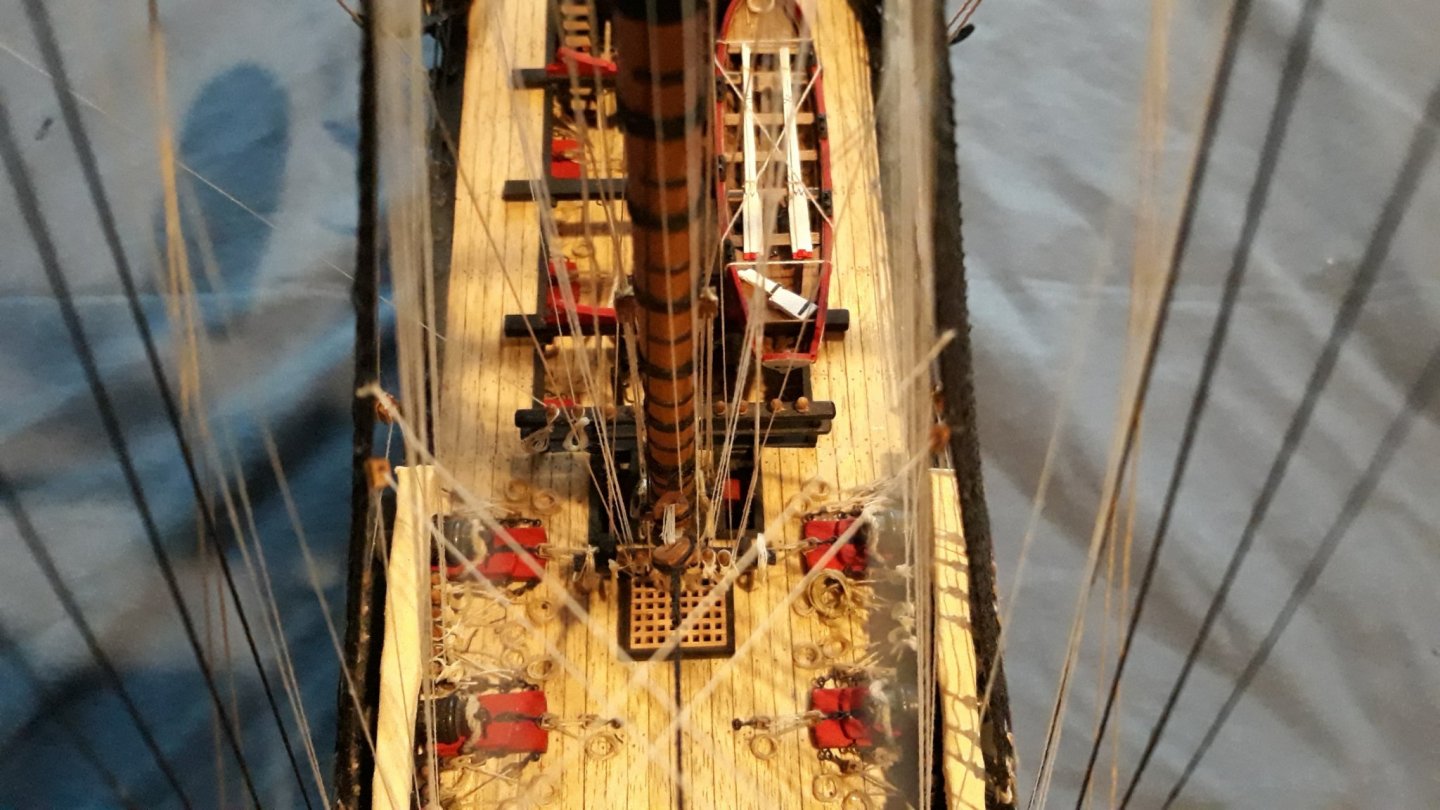
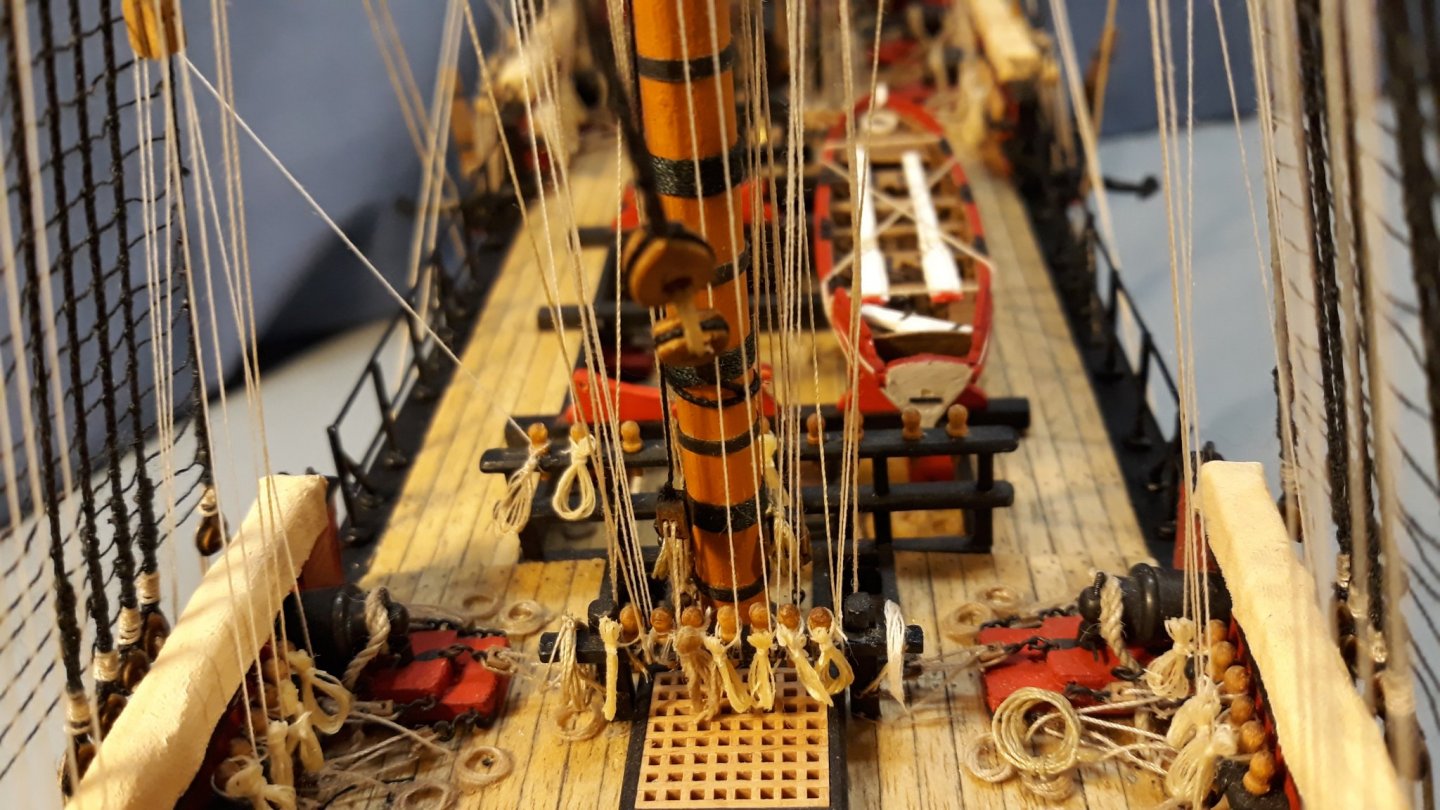
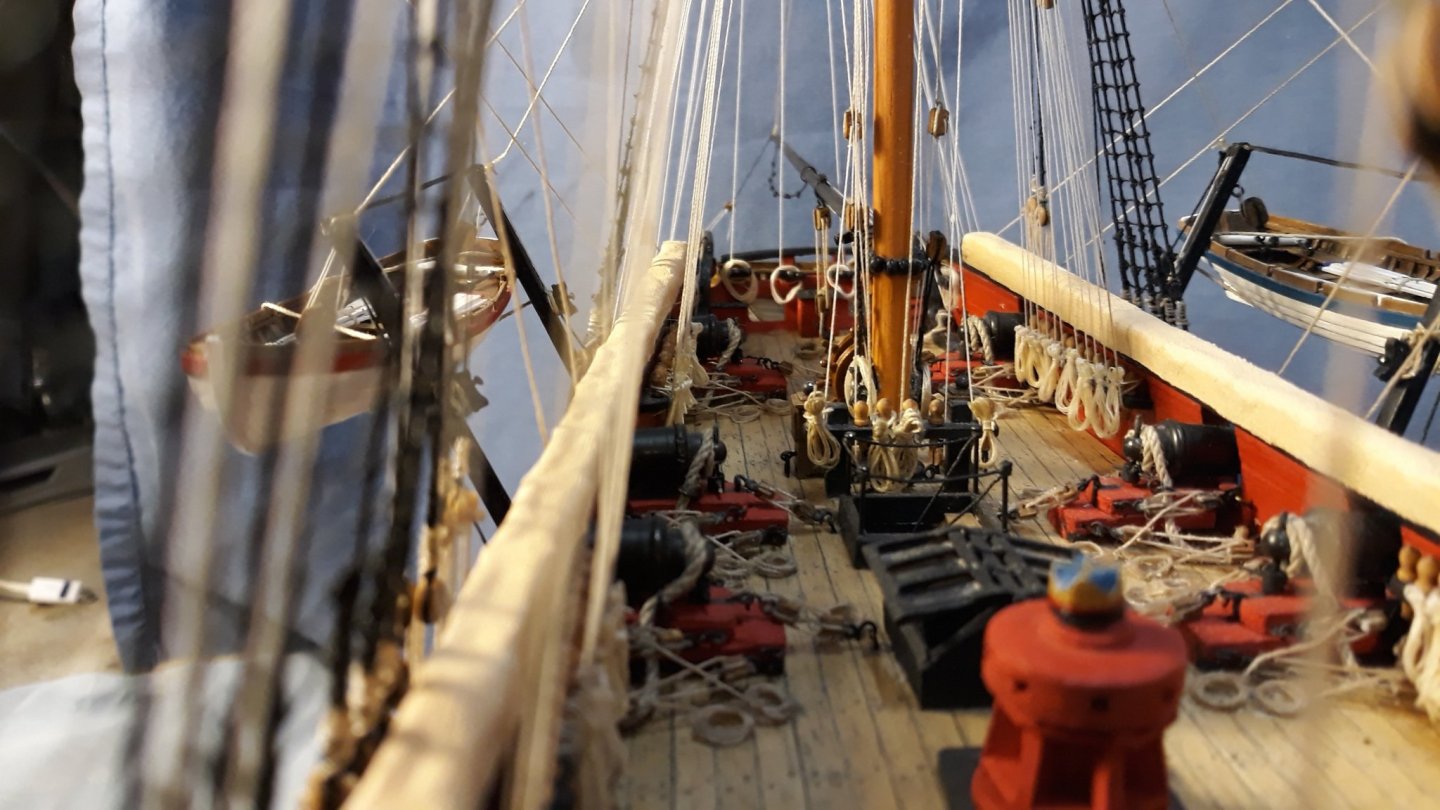
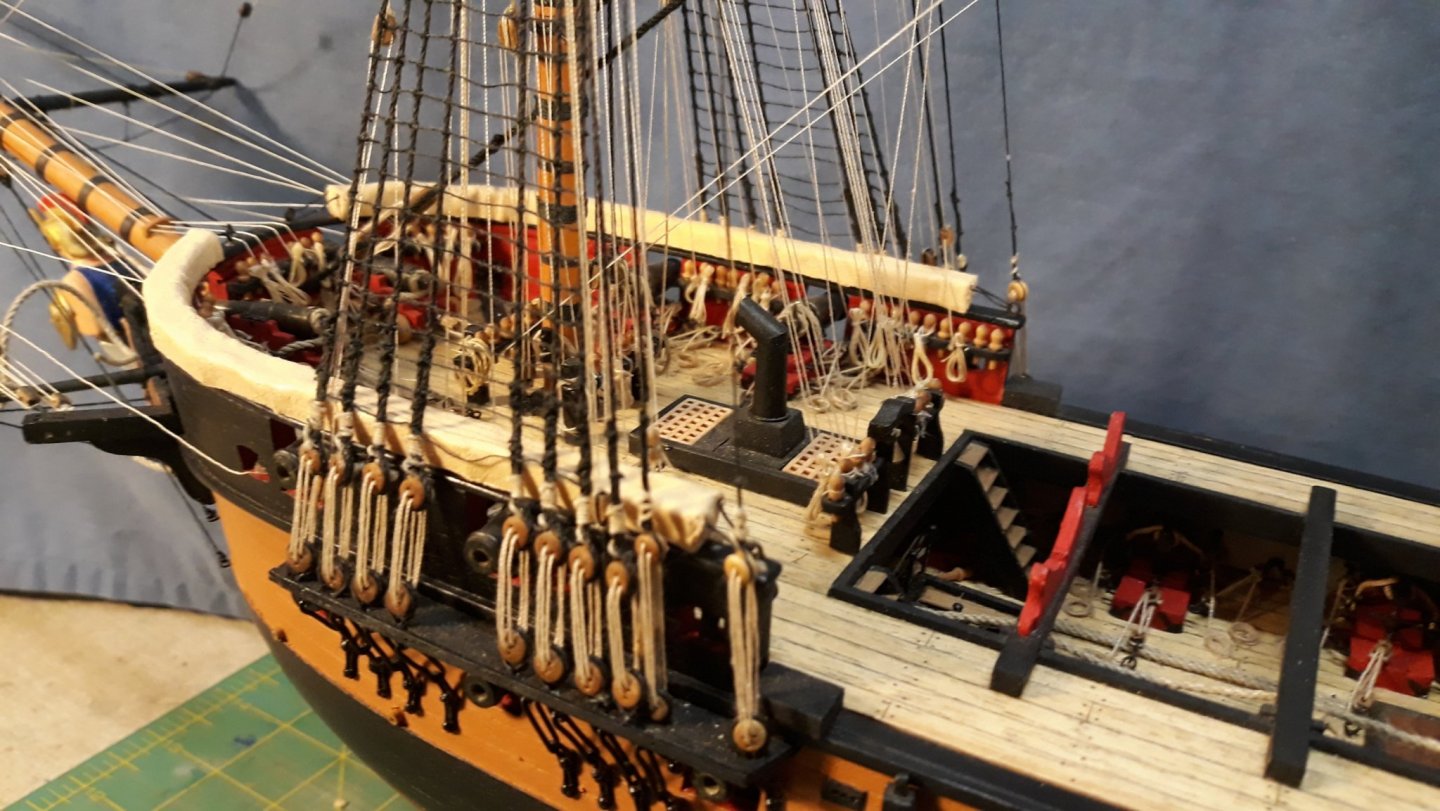
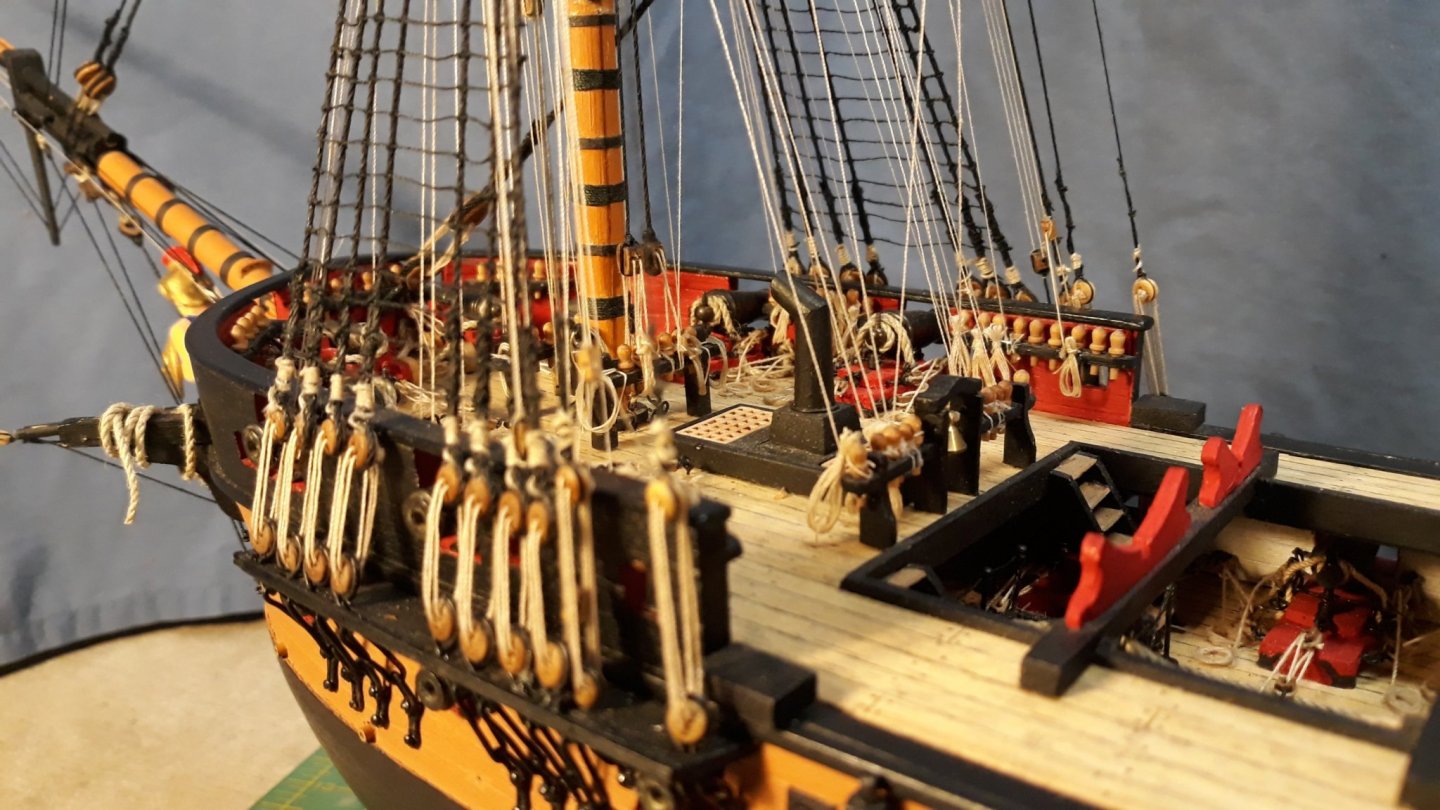
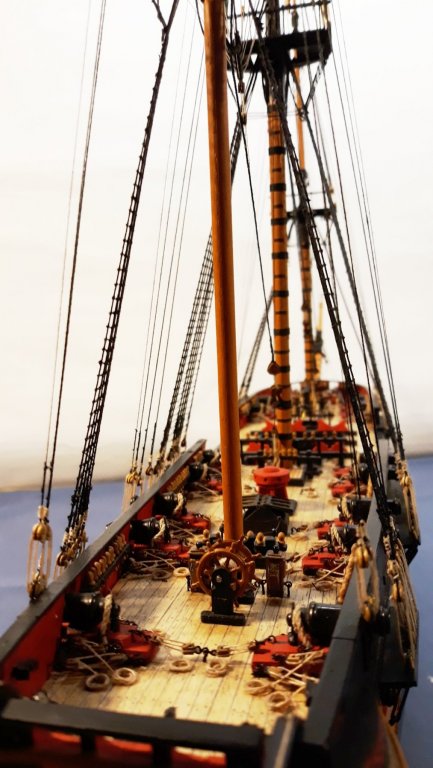
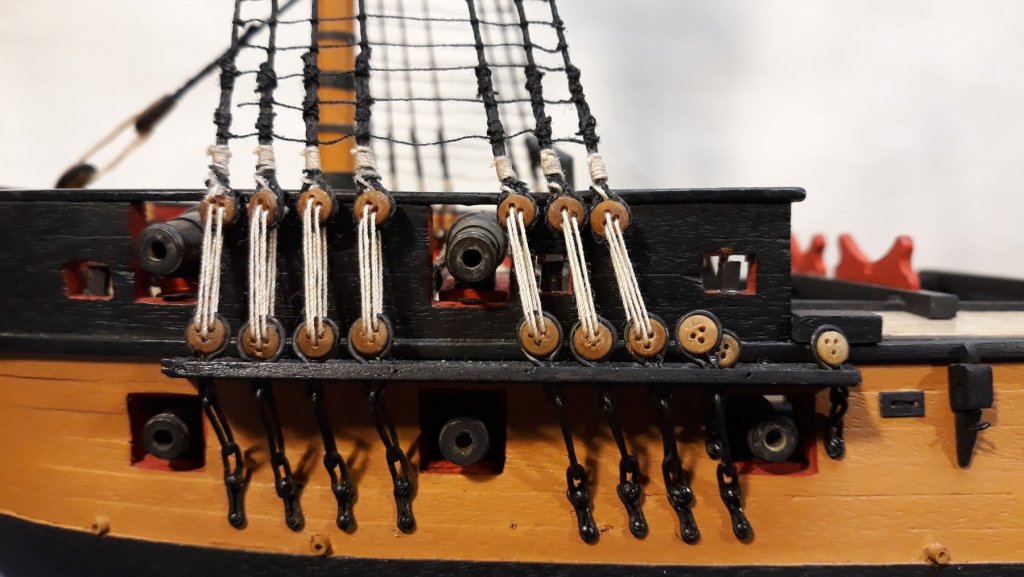
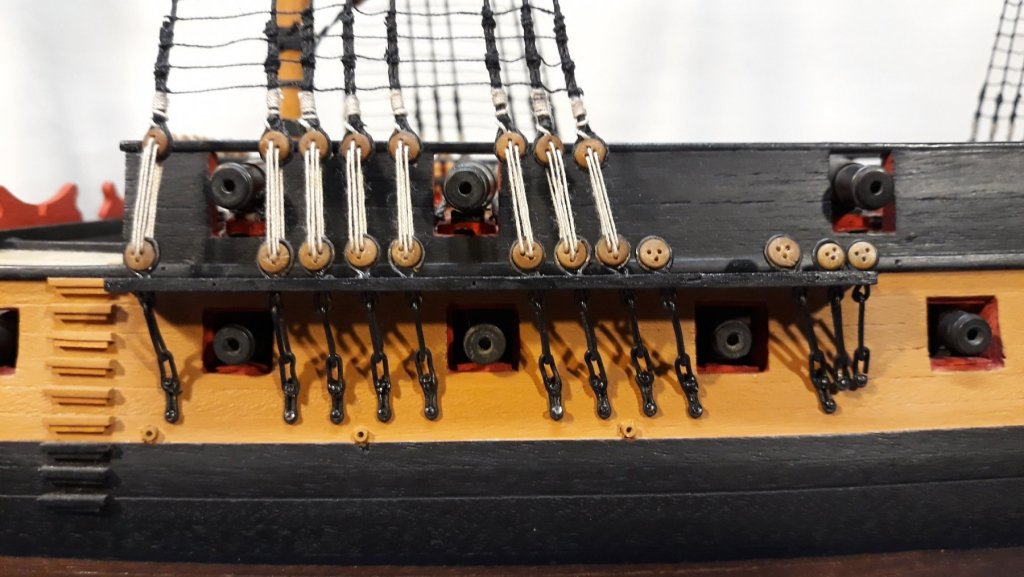
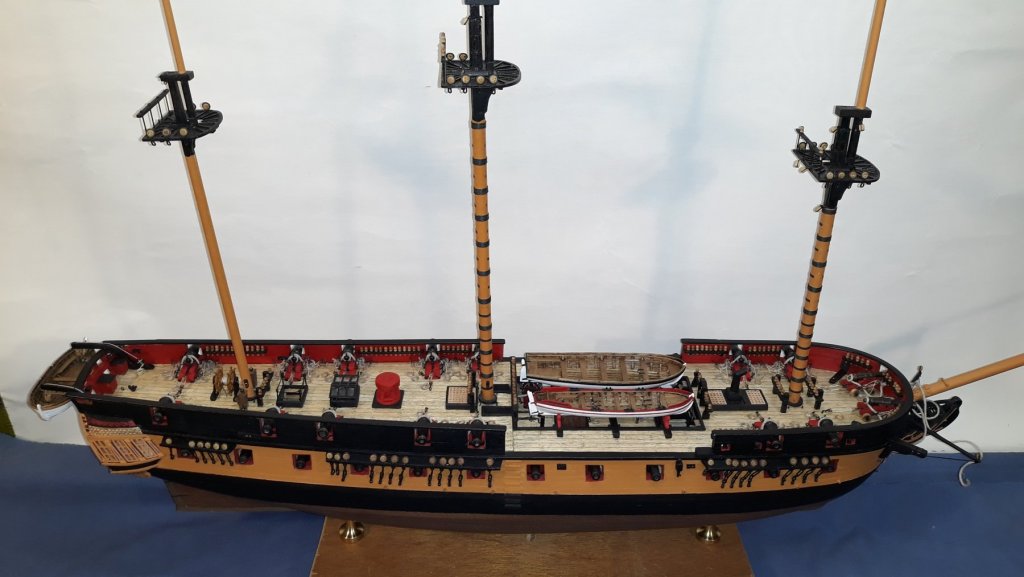
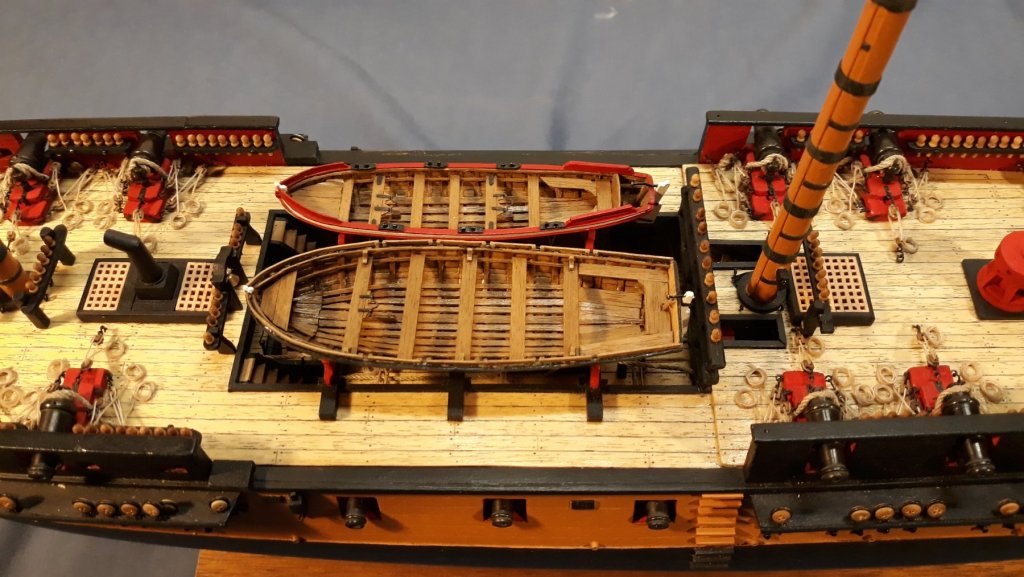
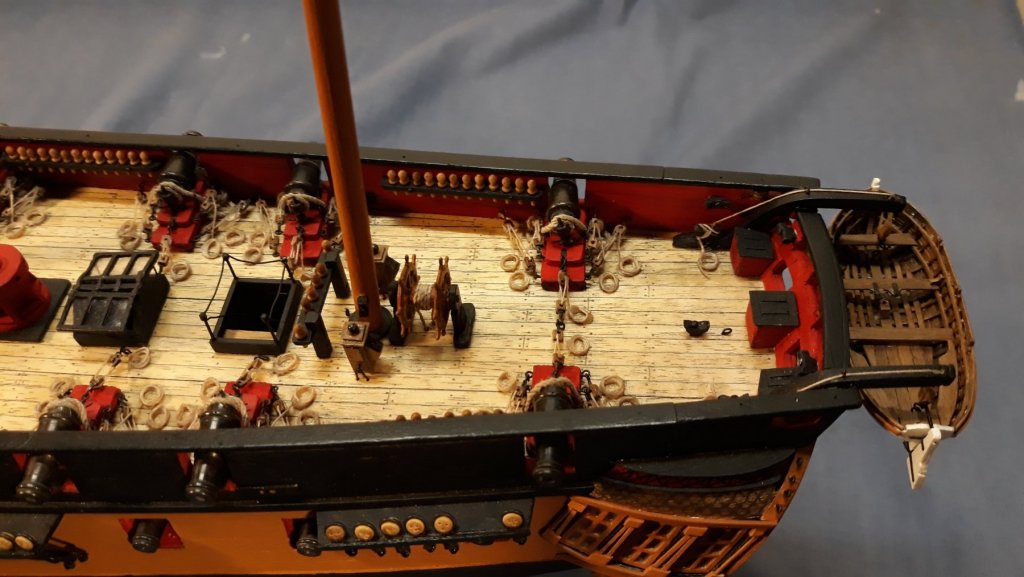
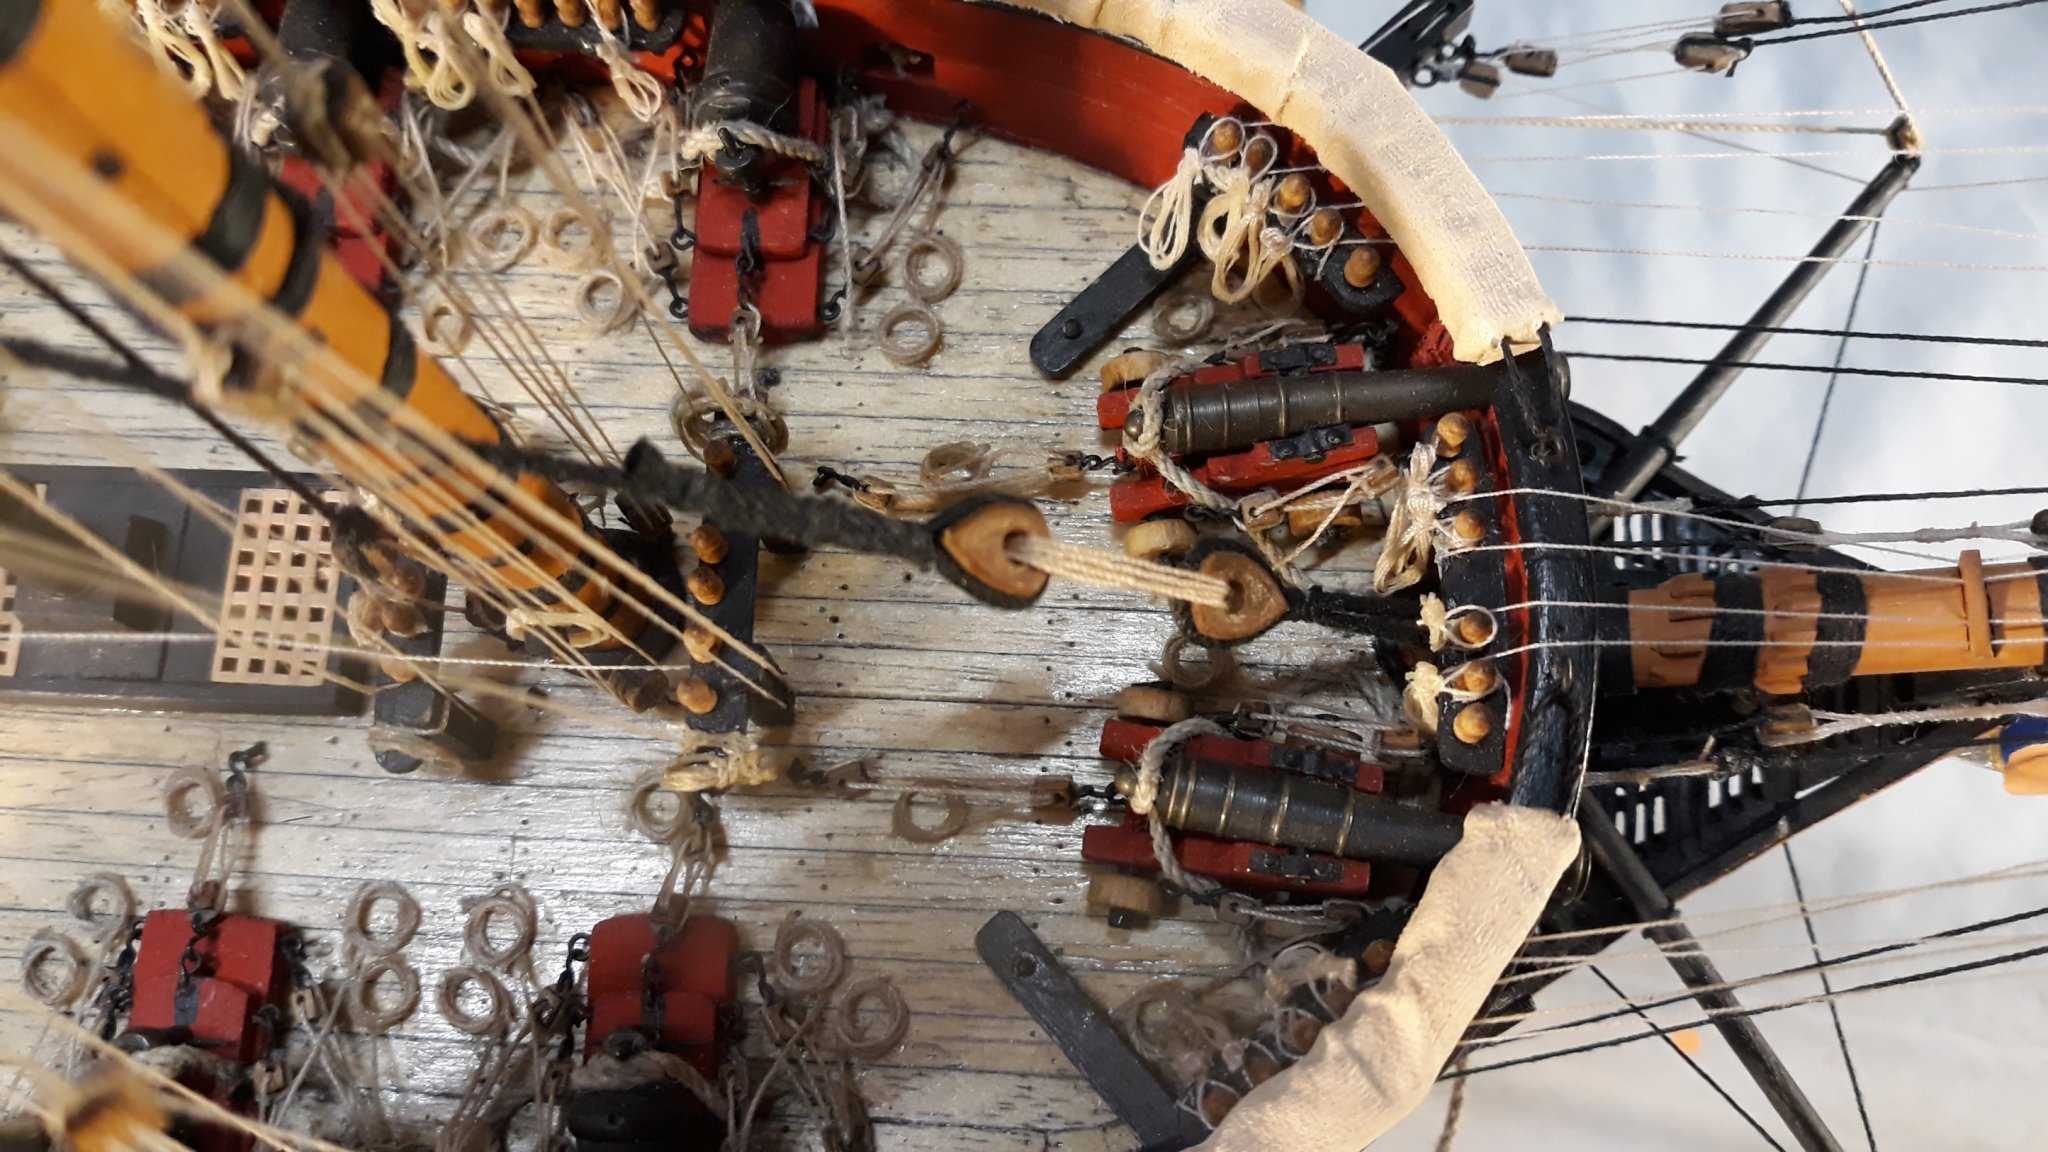
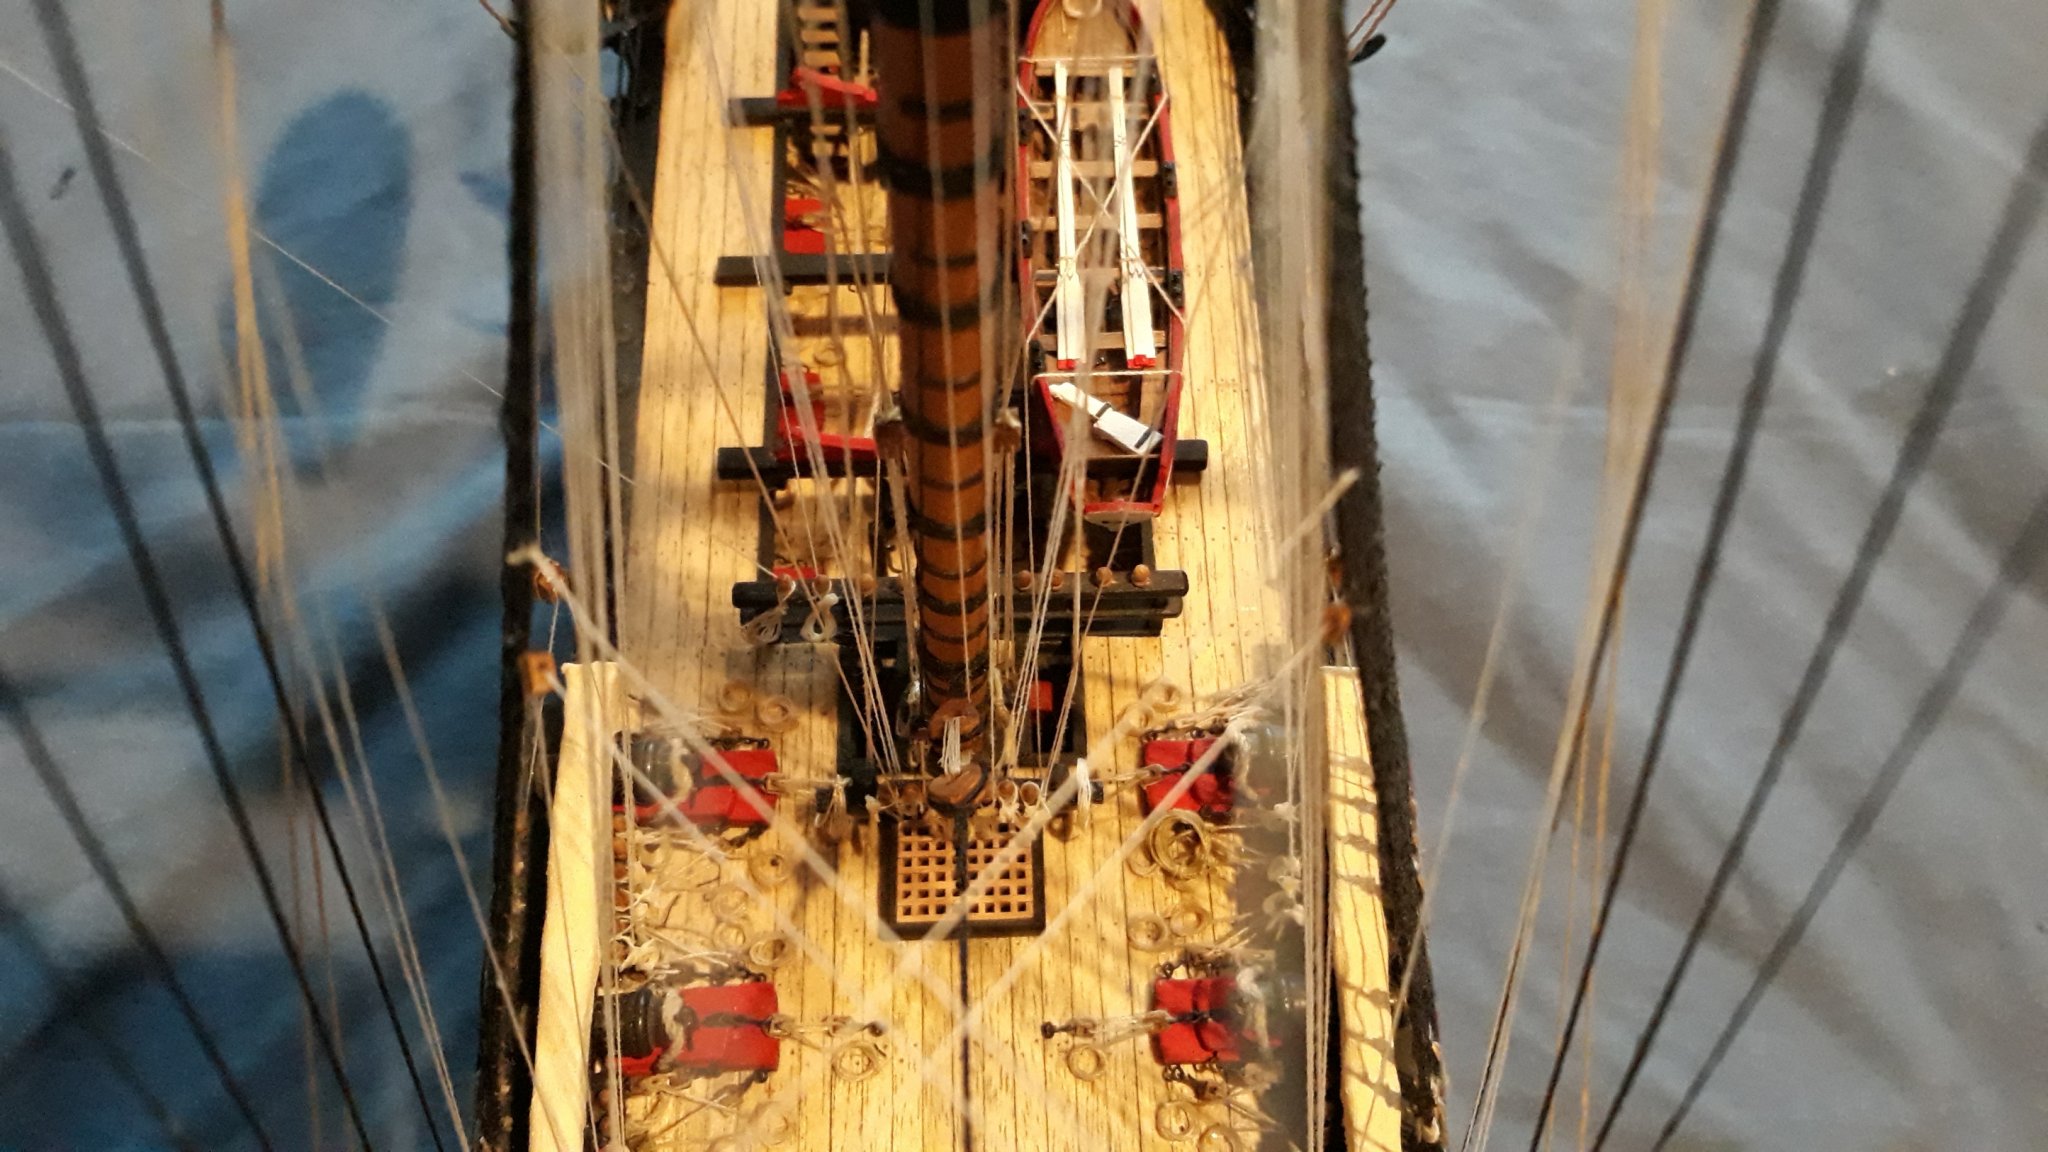
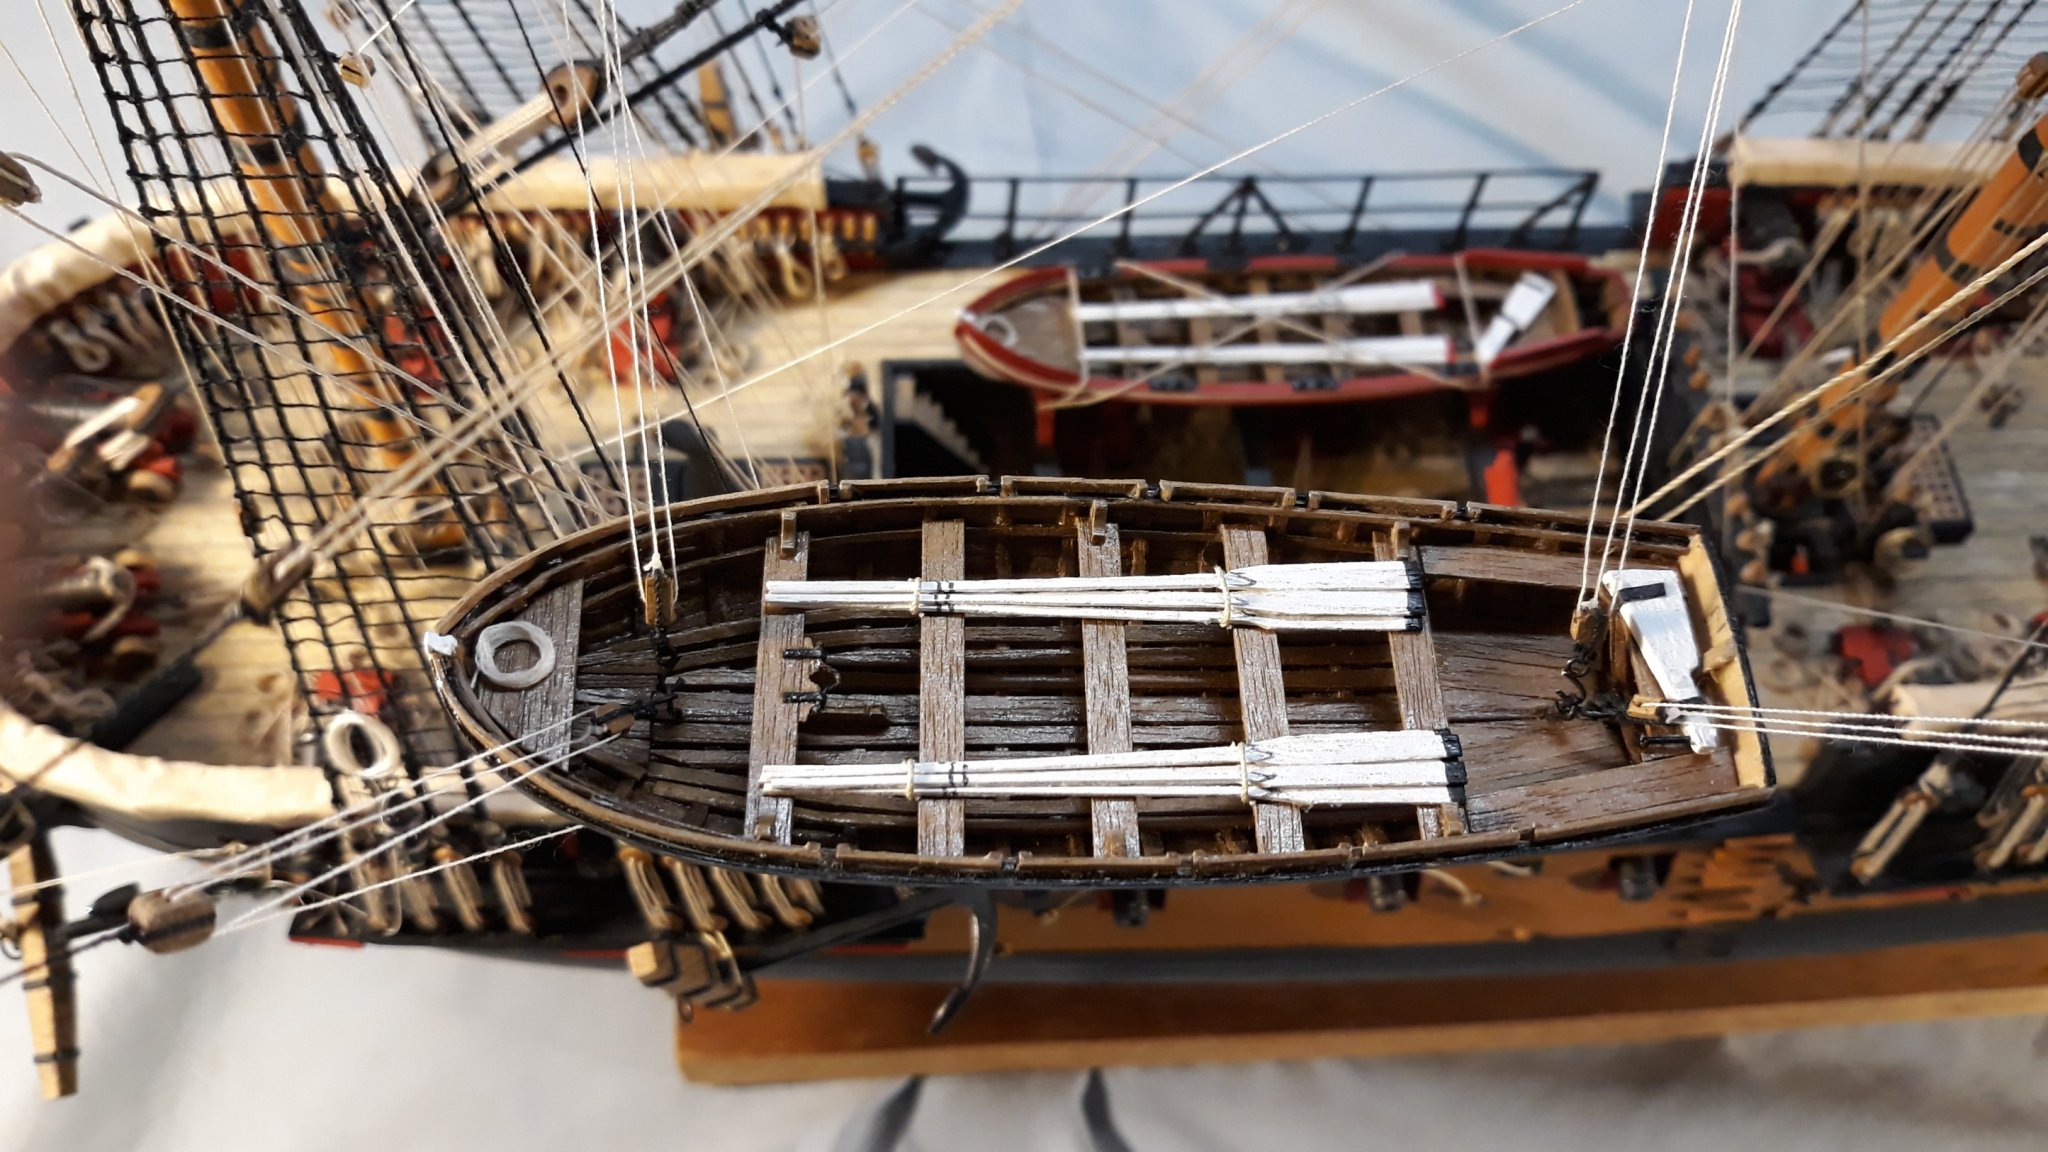
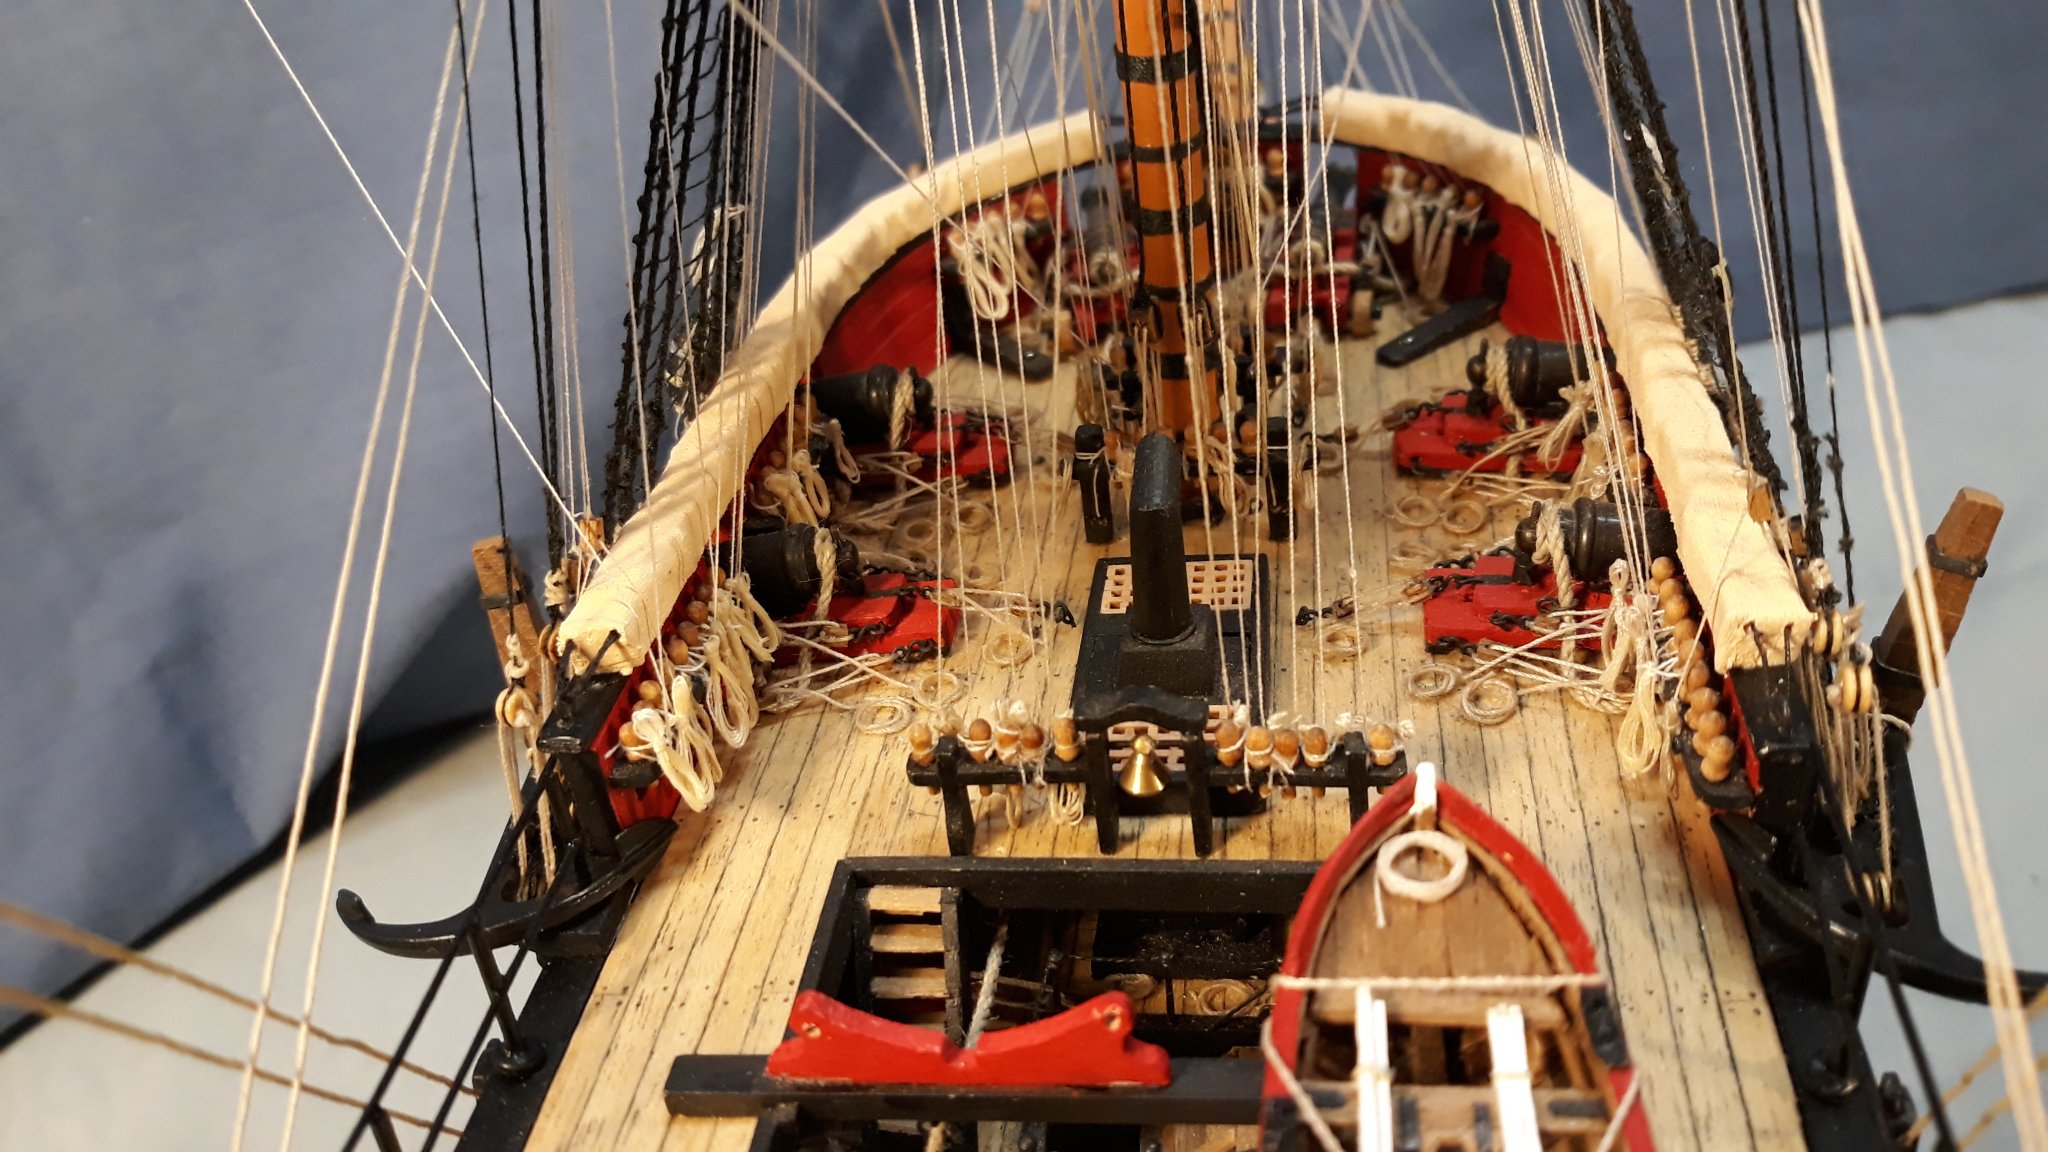
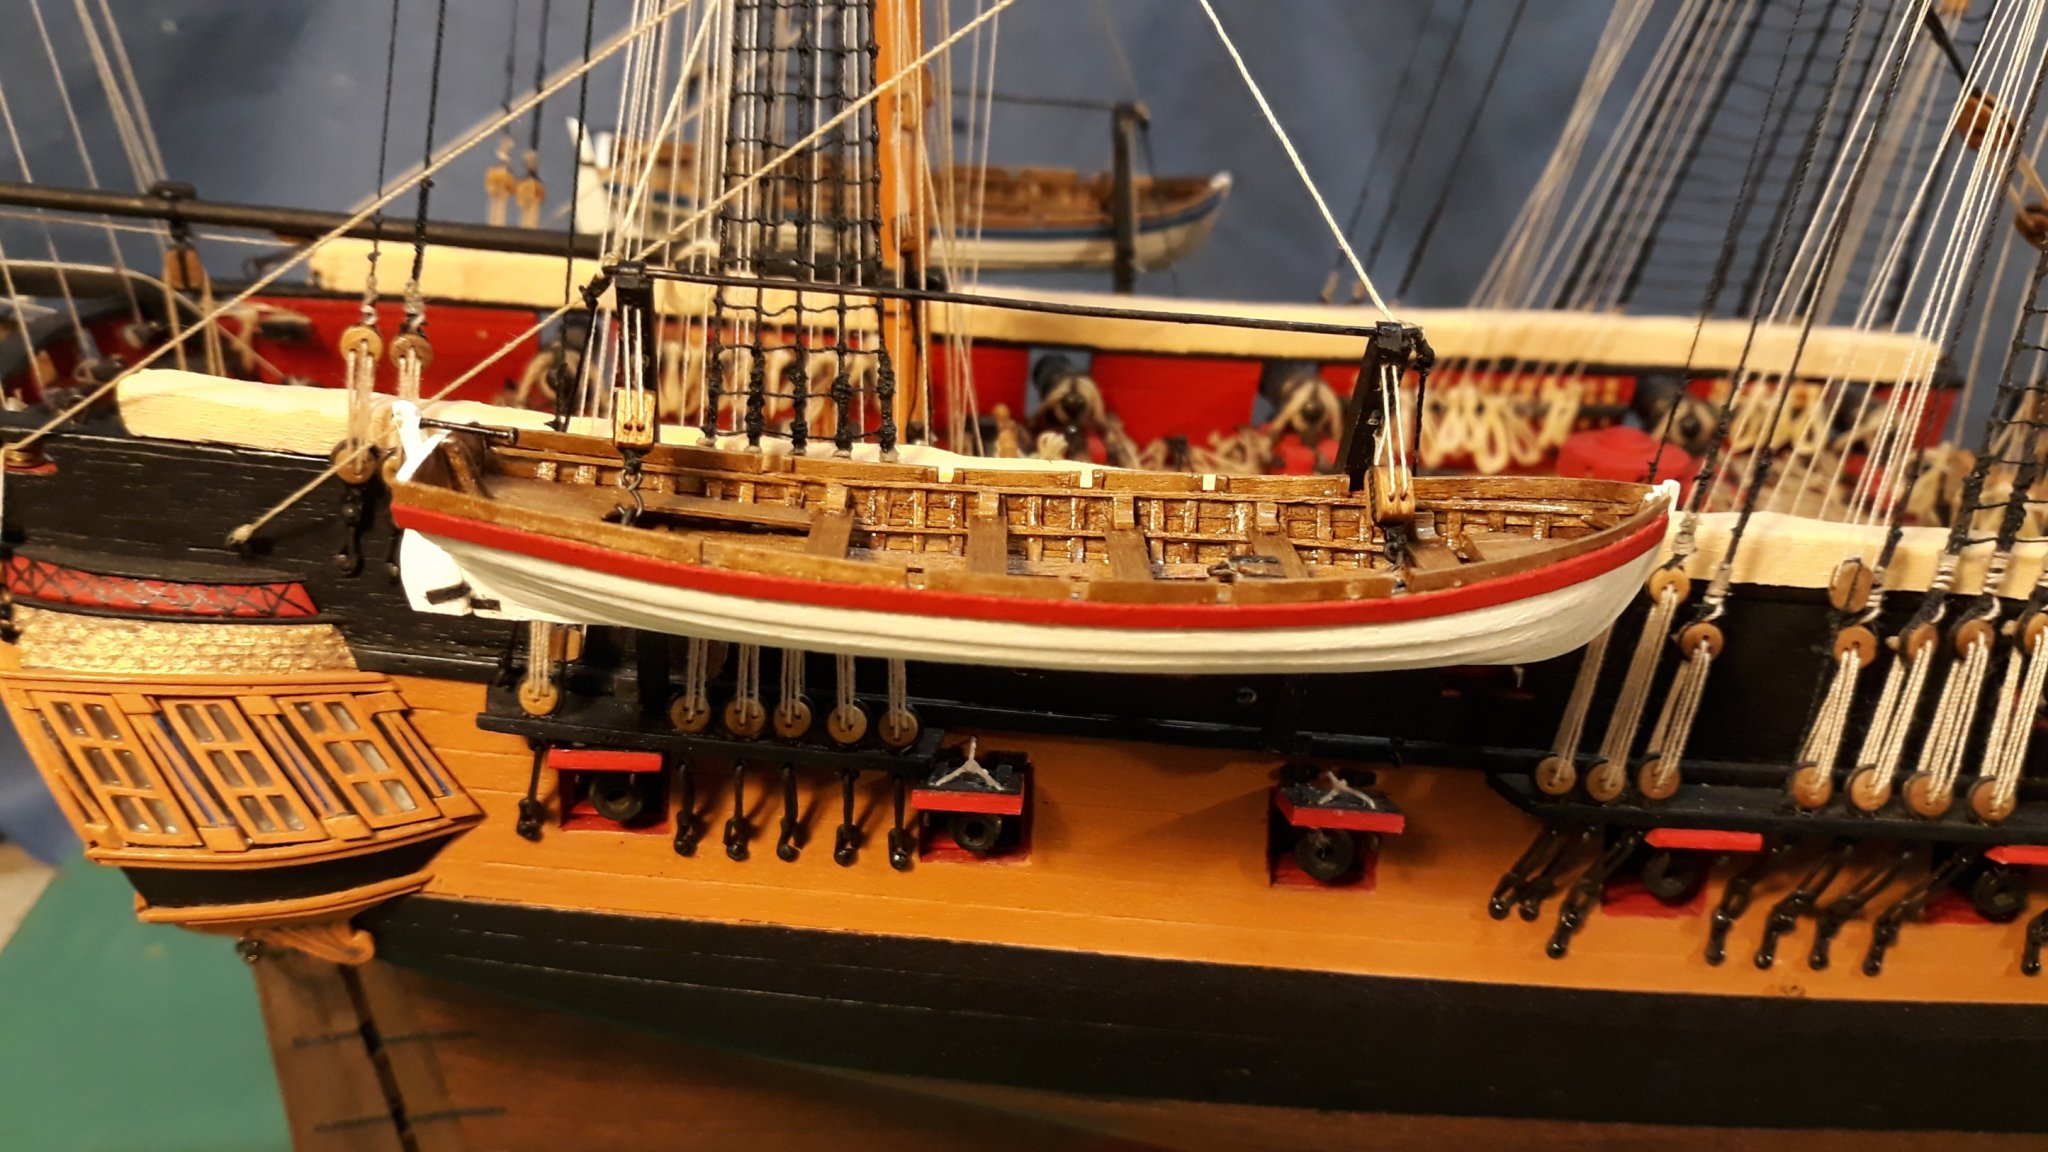
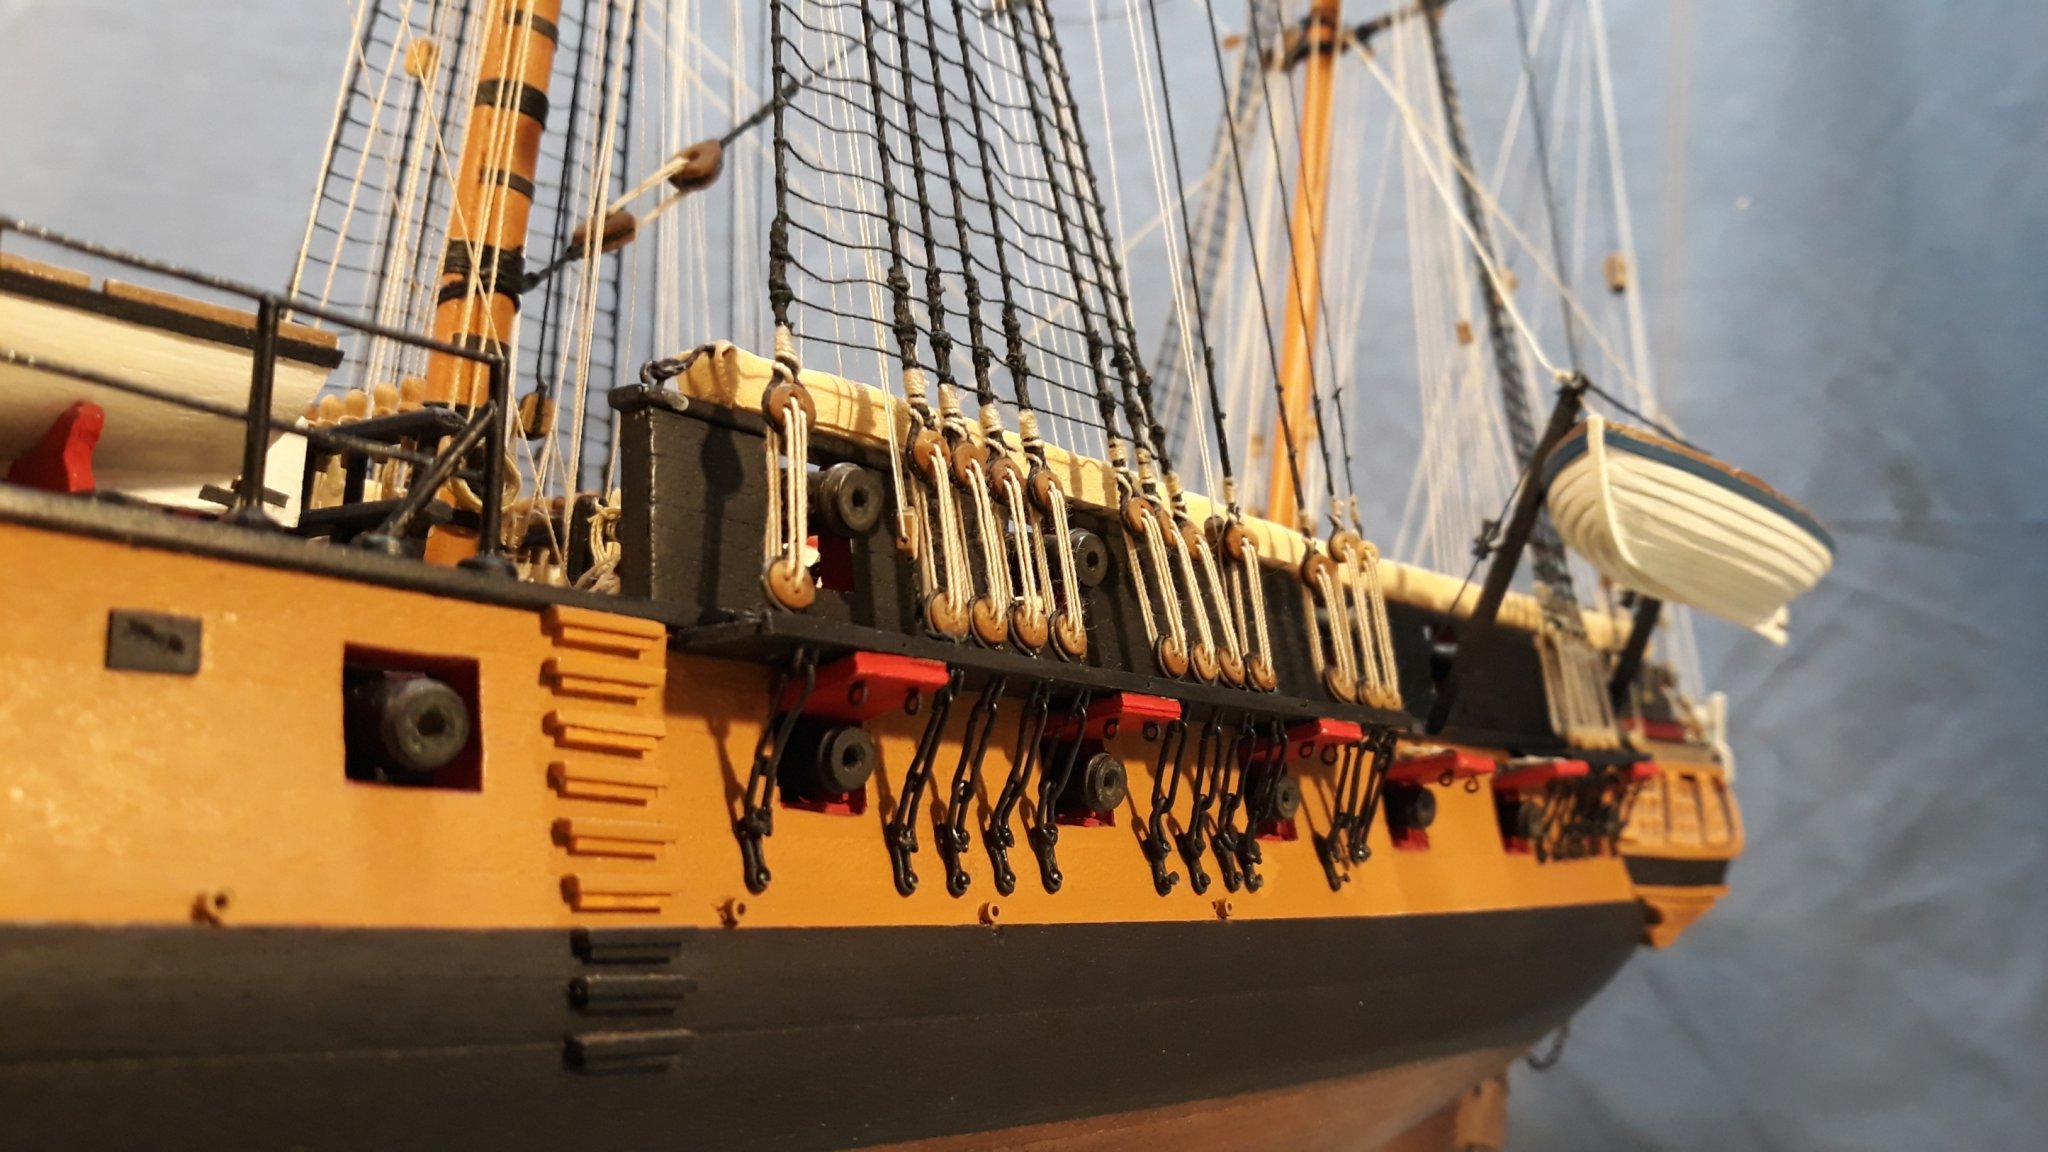
I have achieved a significant milestone in the fitout, I have installed the quarter davits so finally all the ship's boats can be put in place. Also, the gangway railings and gun port lids are complete. Again, there were plenty of alternatives for these details but they were clearly shown on the Admiralty drawings in Lavery and Hunt's great book so confusion was avoided. The only odd thing about this drawing is the two piece gun port lids. This is the only place I have seen this detail and I have installed single piece lids. To complete the ships boats the oars need to be made. The rudders will be removed and stored inside the boats and the boats will be lashed into position as one of the last things to do. Next the anchors and the parts of the running rig that I have left to last and some small items. I'm not too sure what to do about the stern lanterns, they seem to be fitted and removed as needed, sometimes a single central lantern, some time two or even three across the stern. I can't find any in premade kit form and they look very fiddly to make. Cheers, David.


- 256 replies
-
- 14
-
-
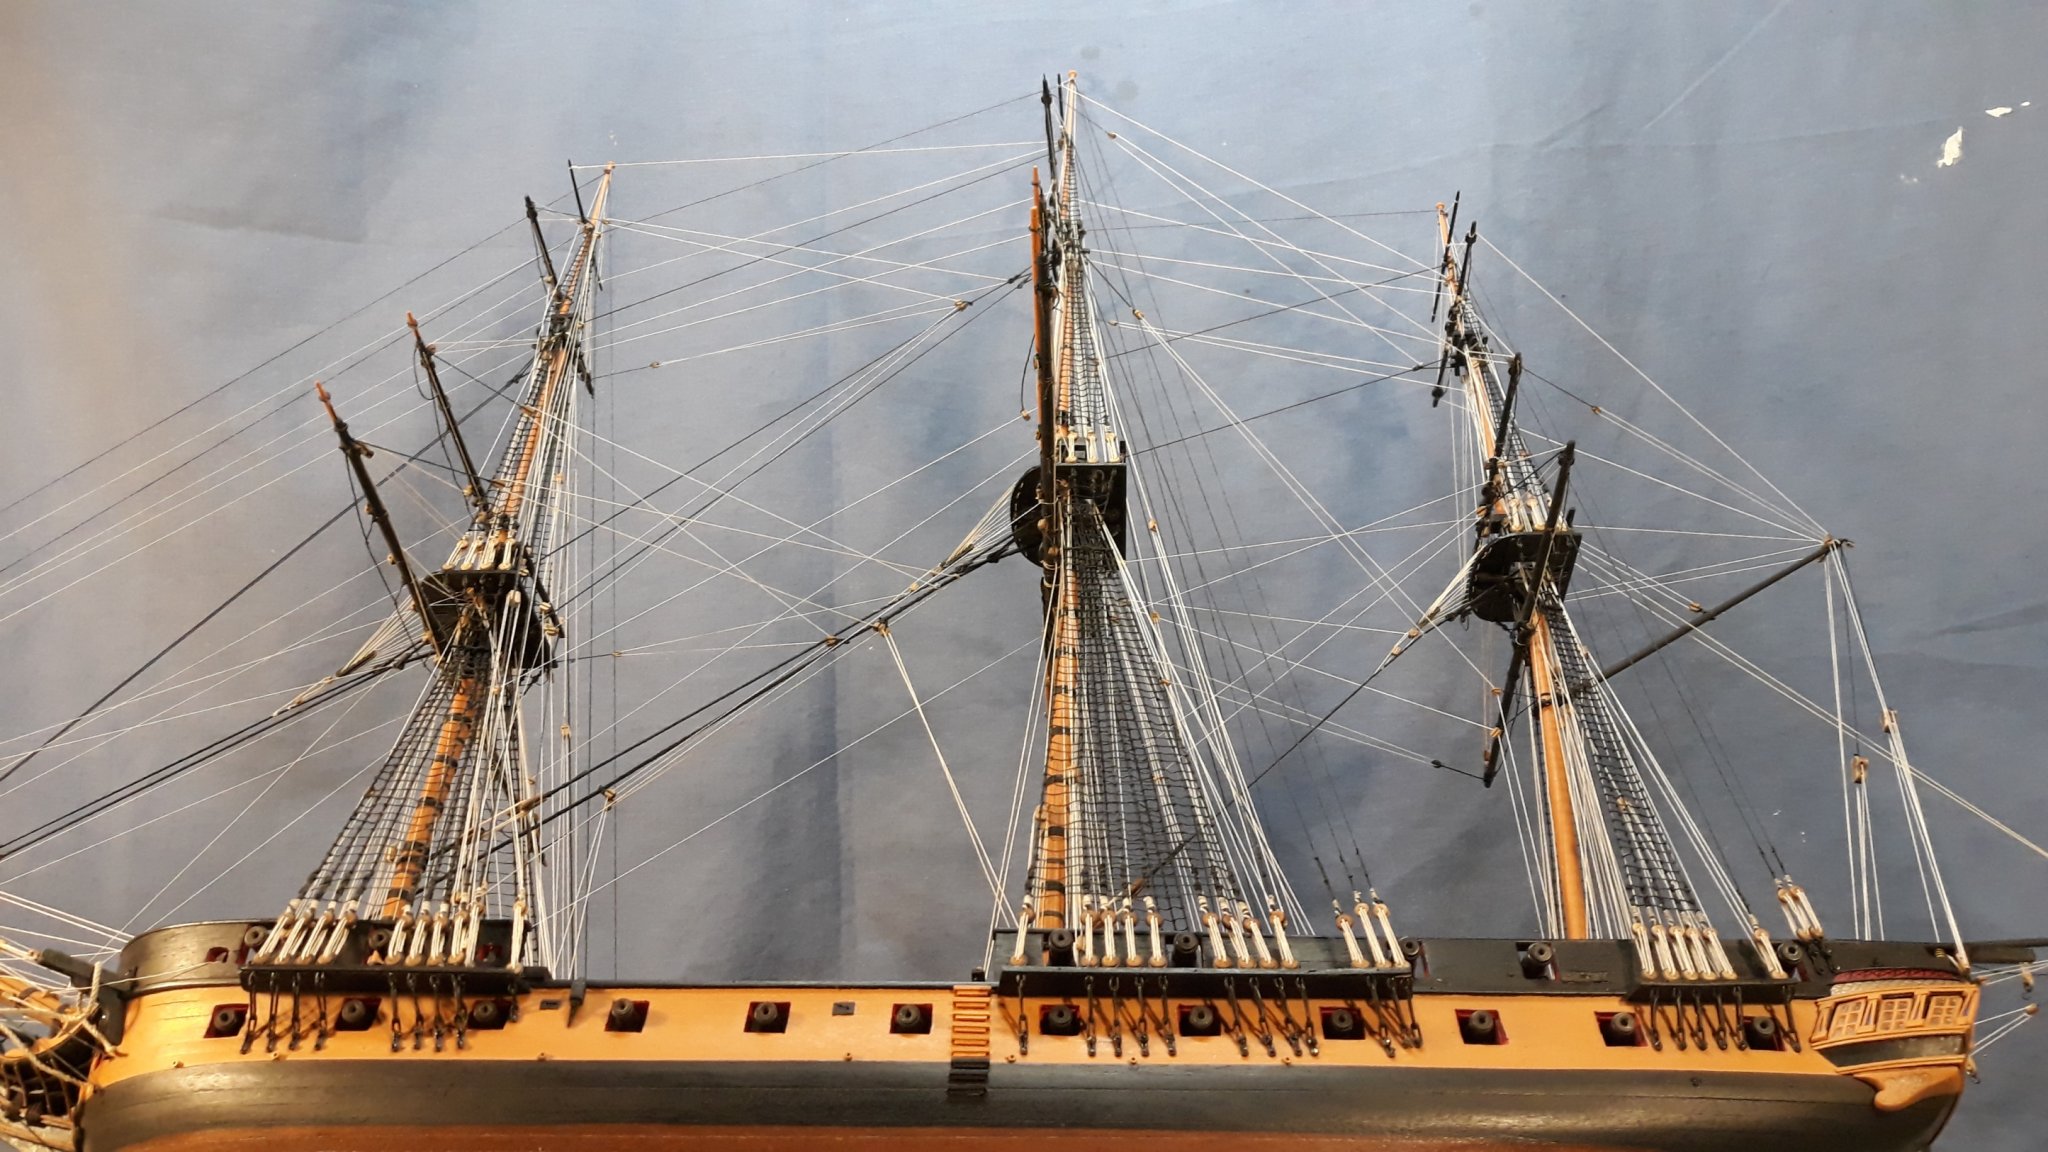
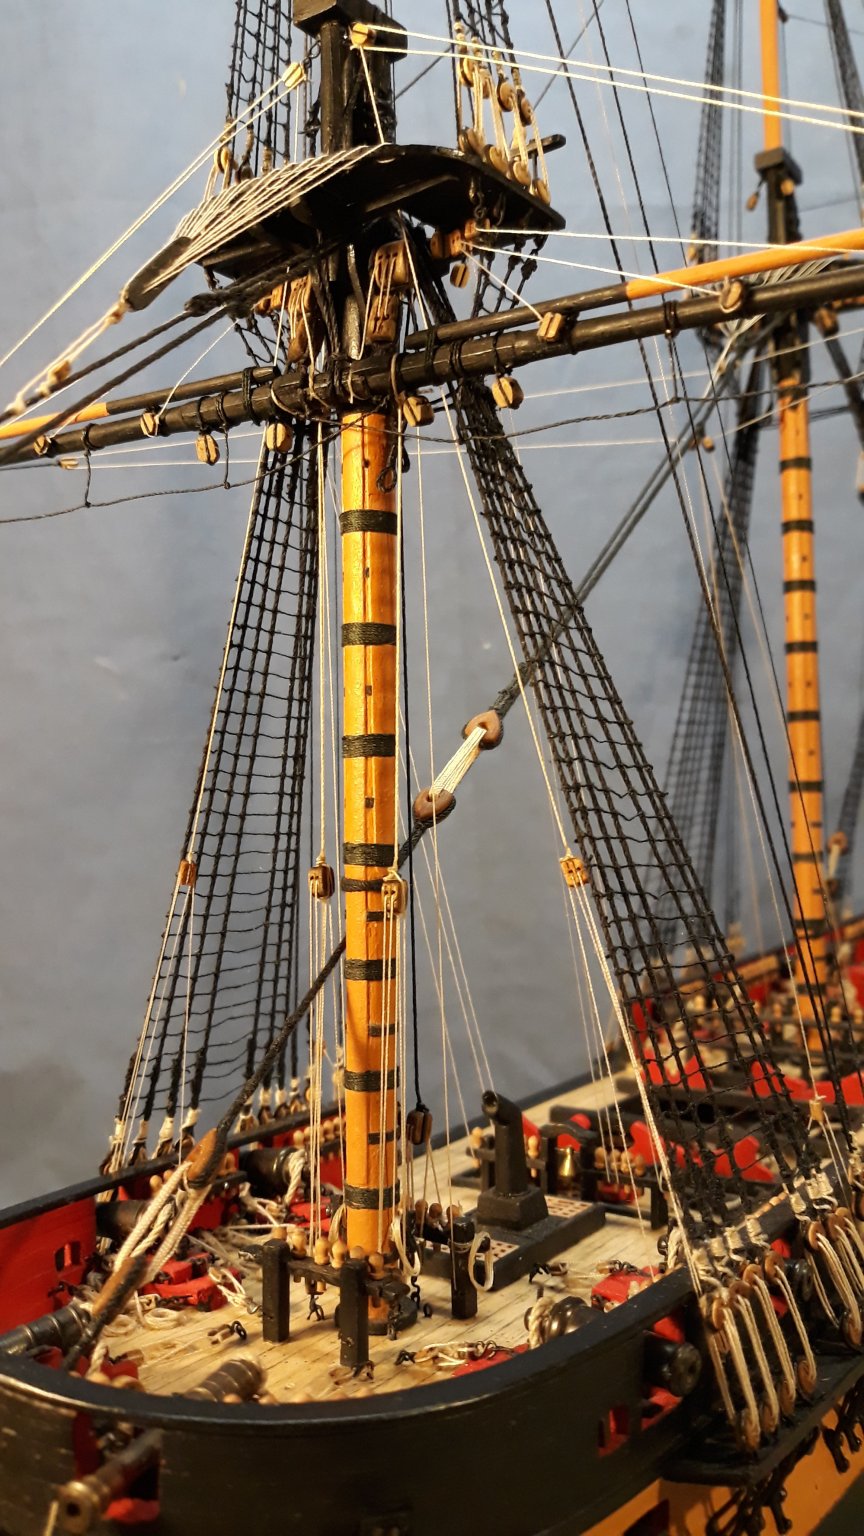
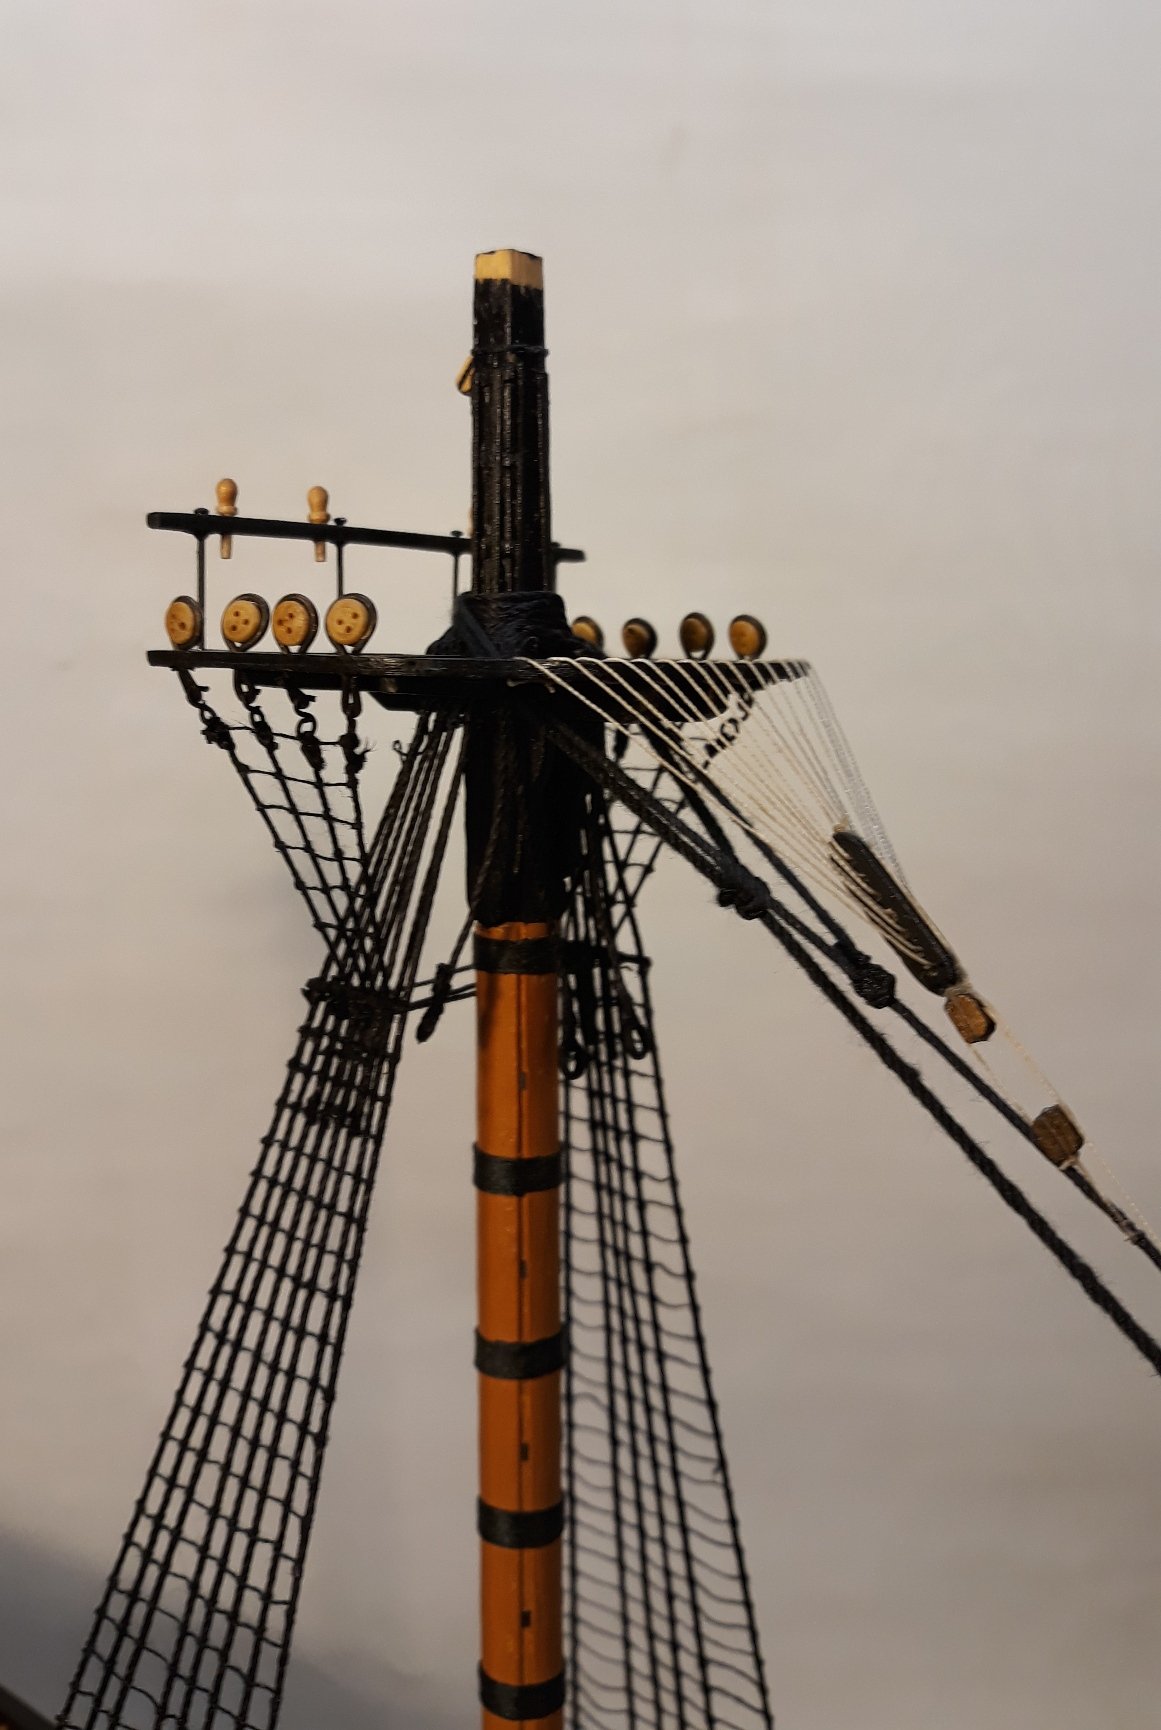
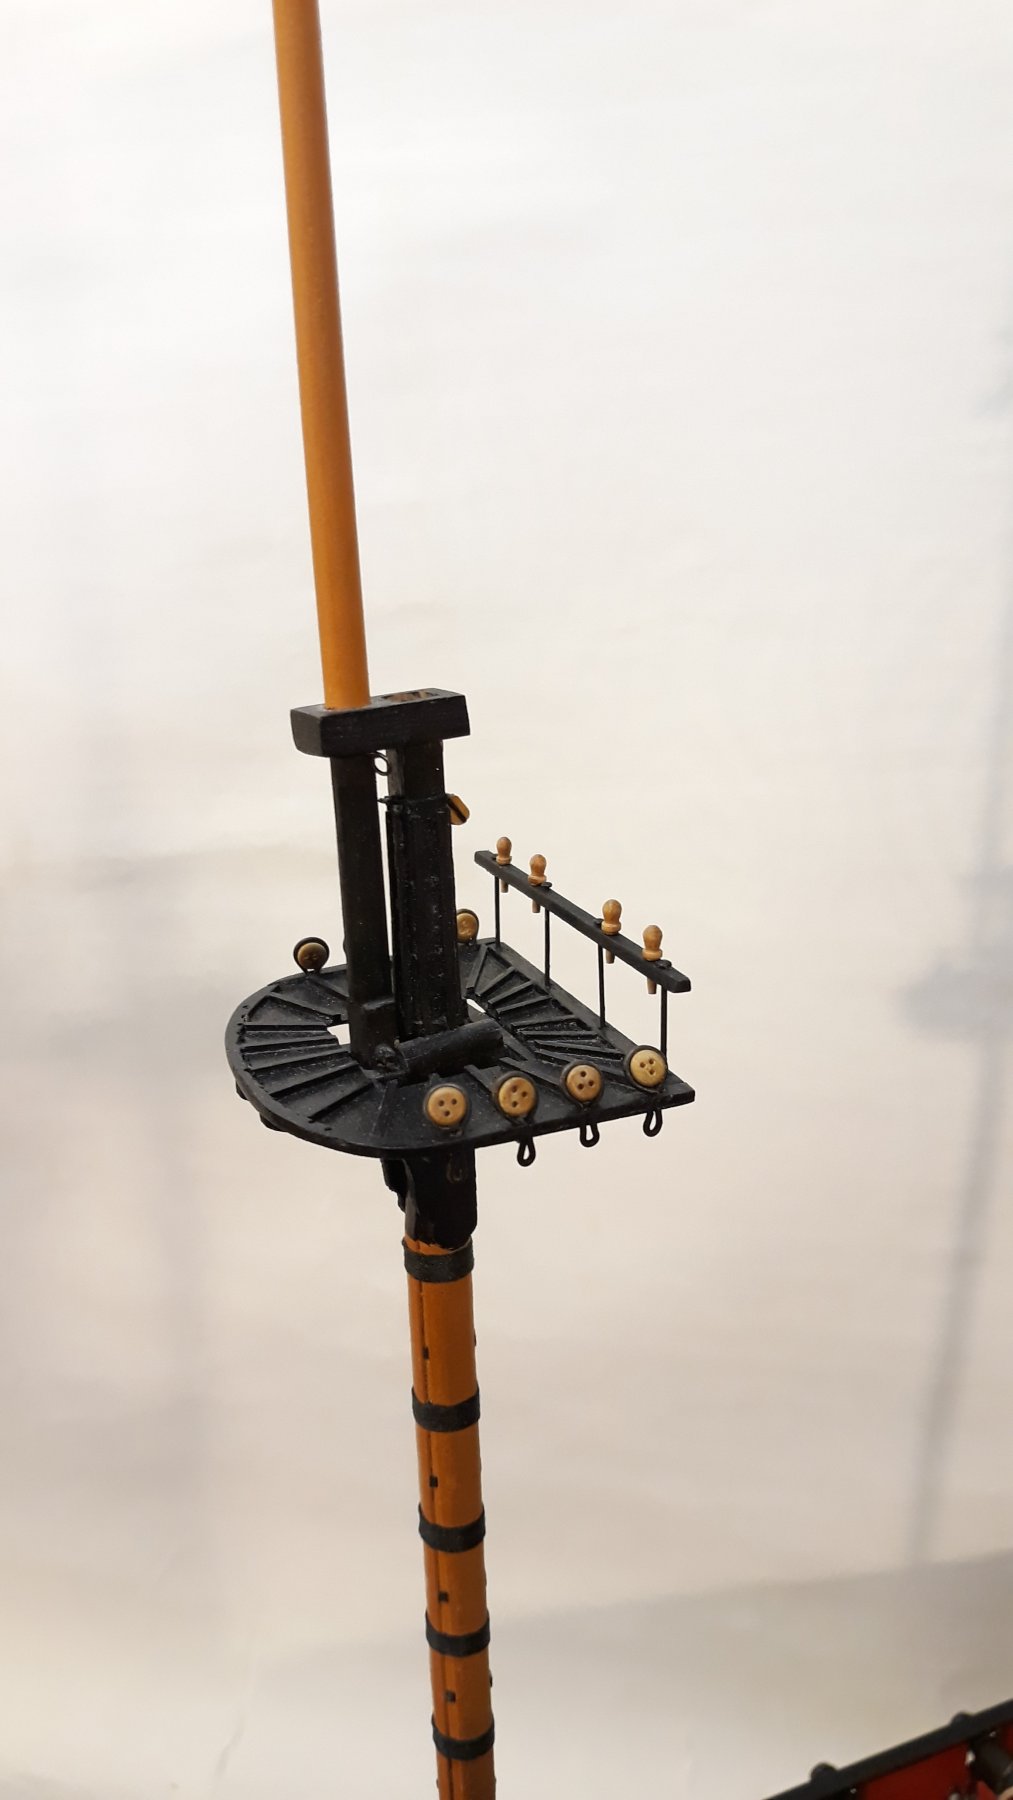
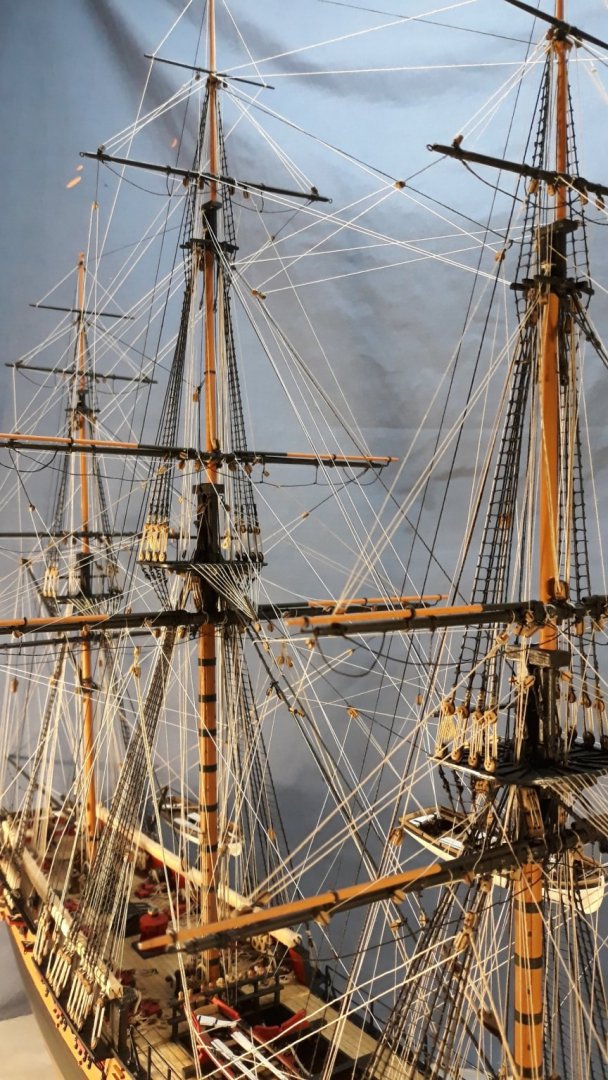
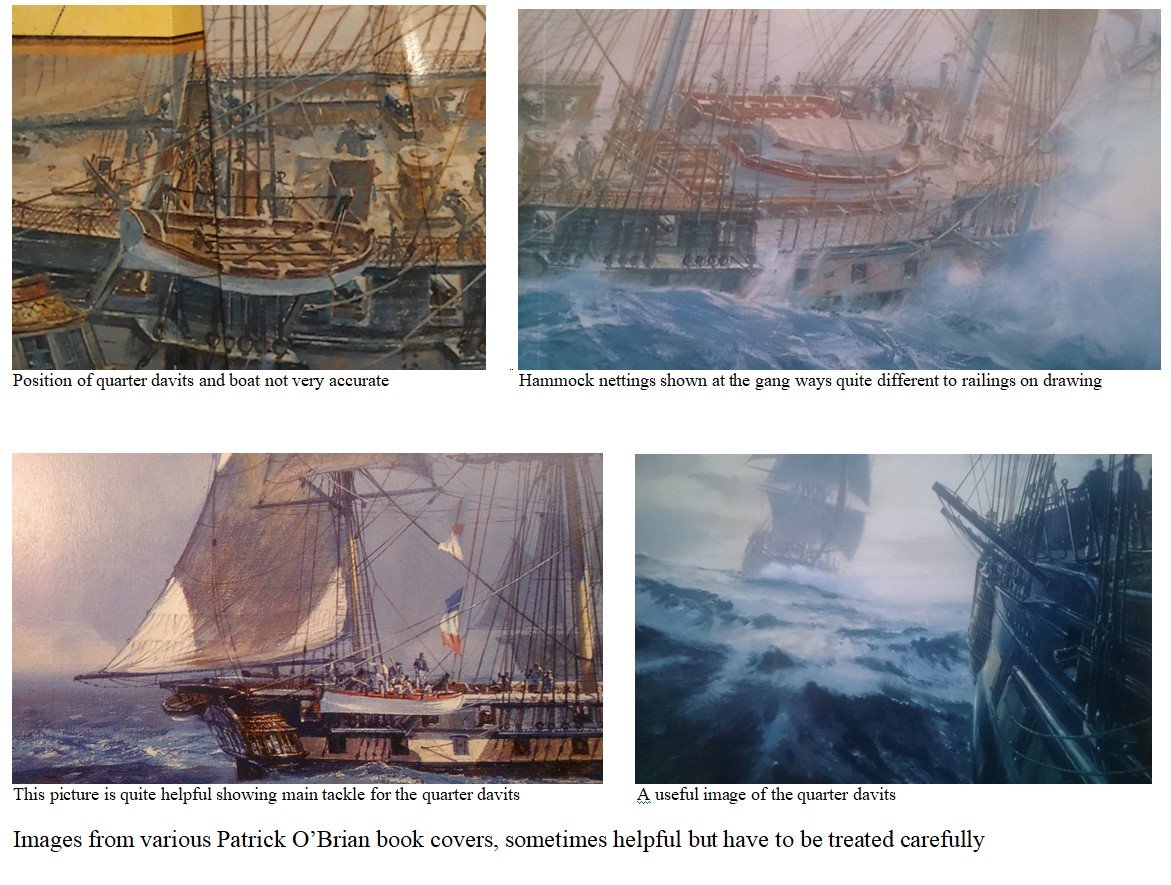
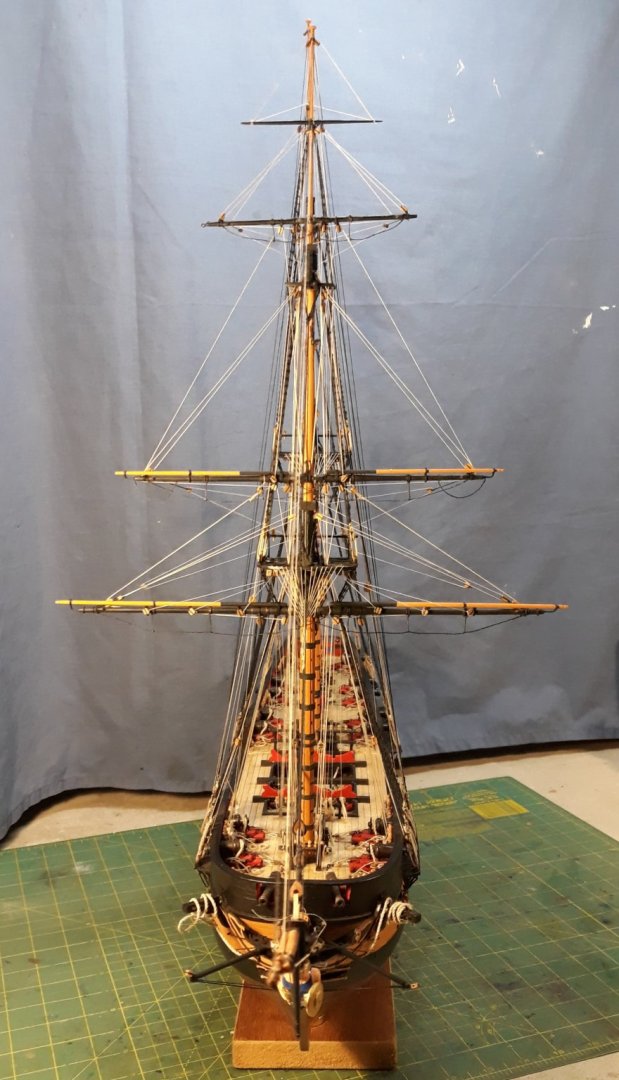
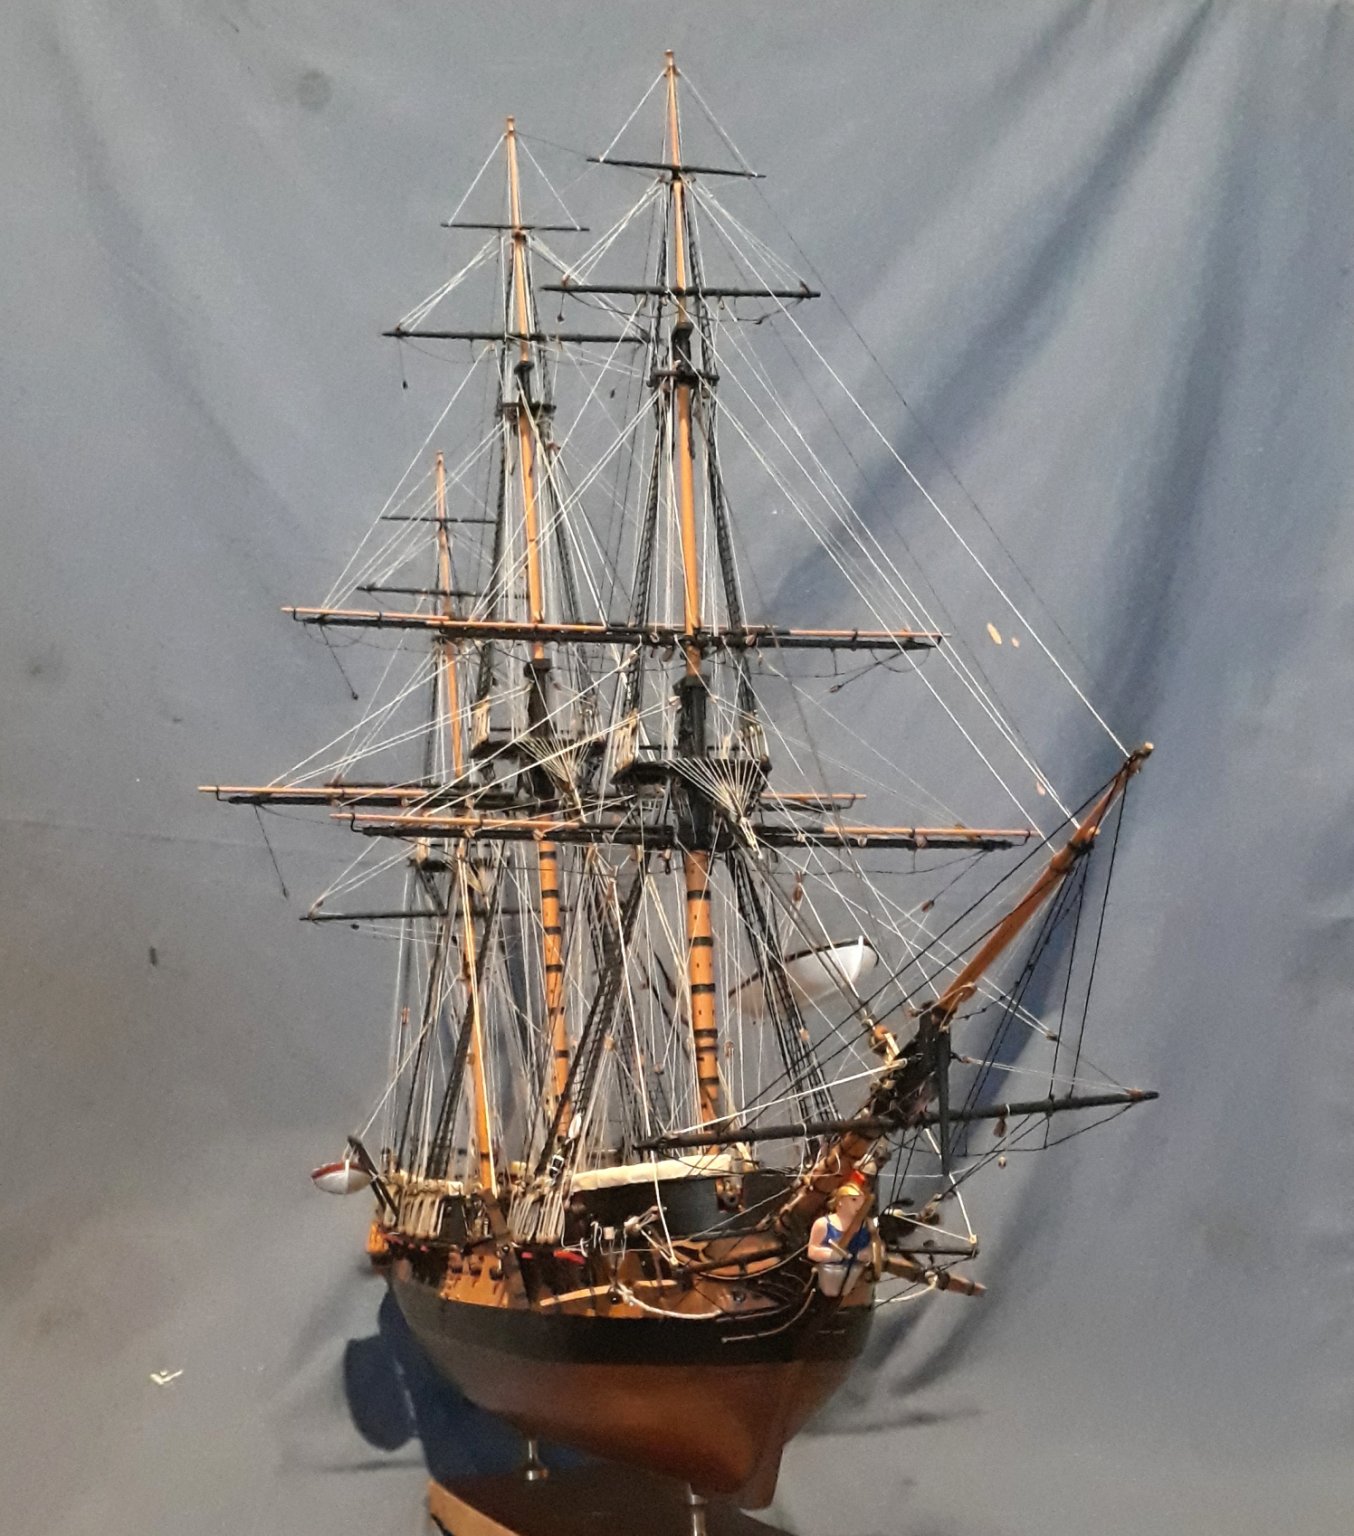
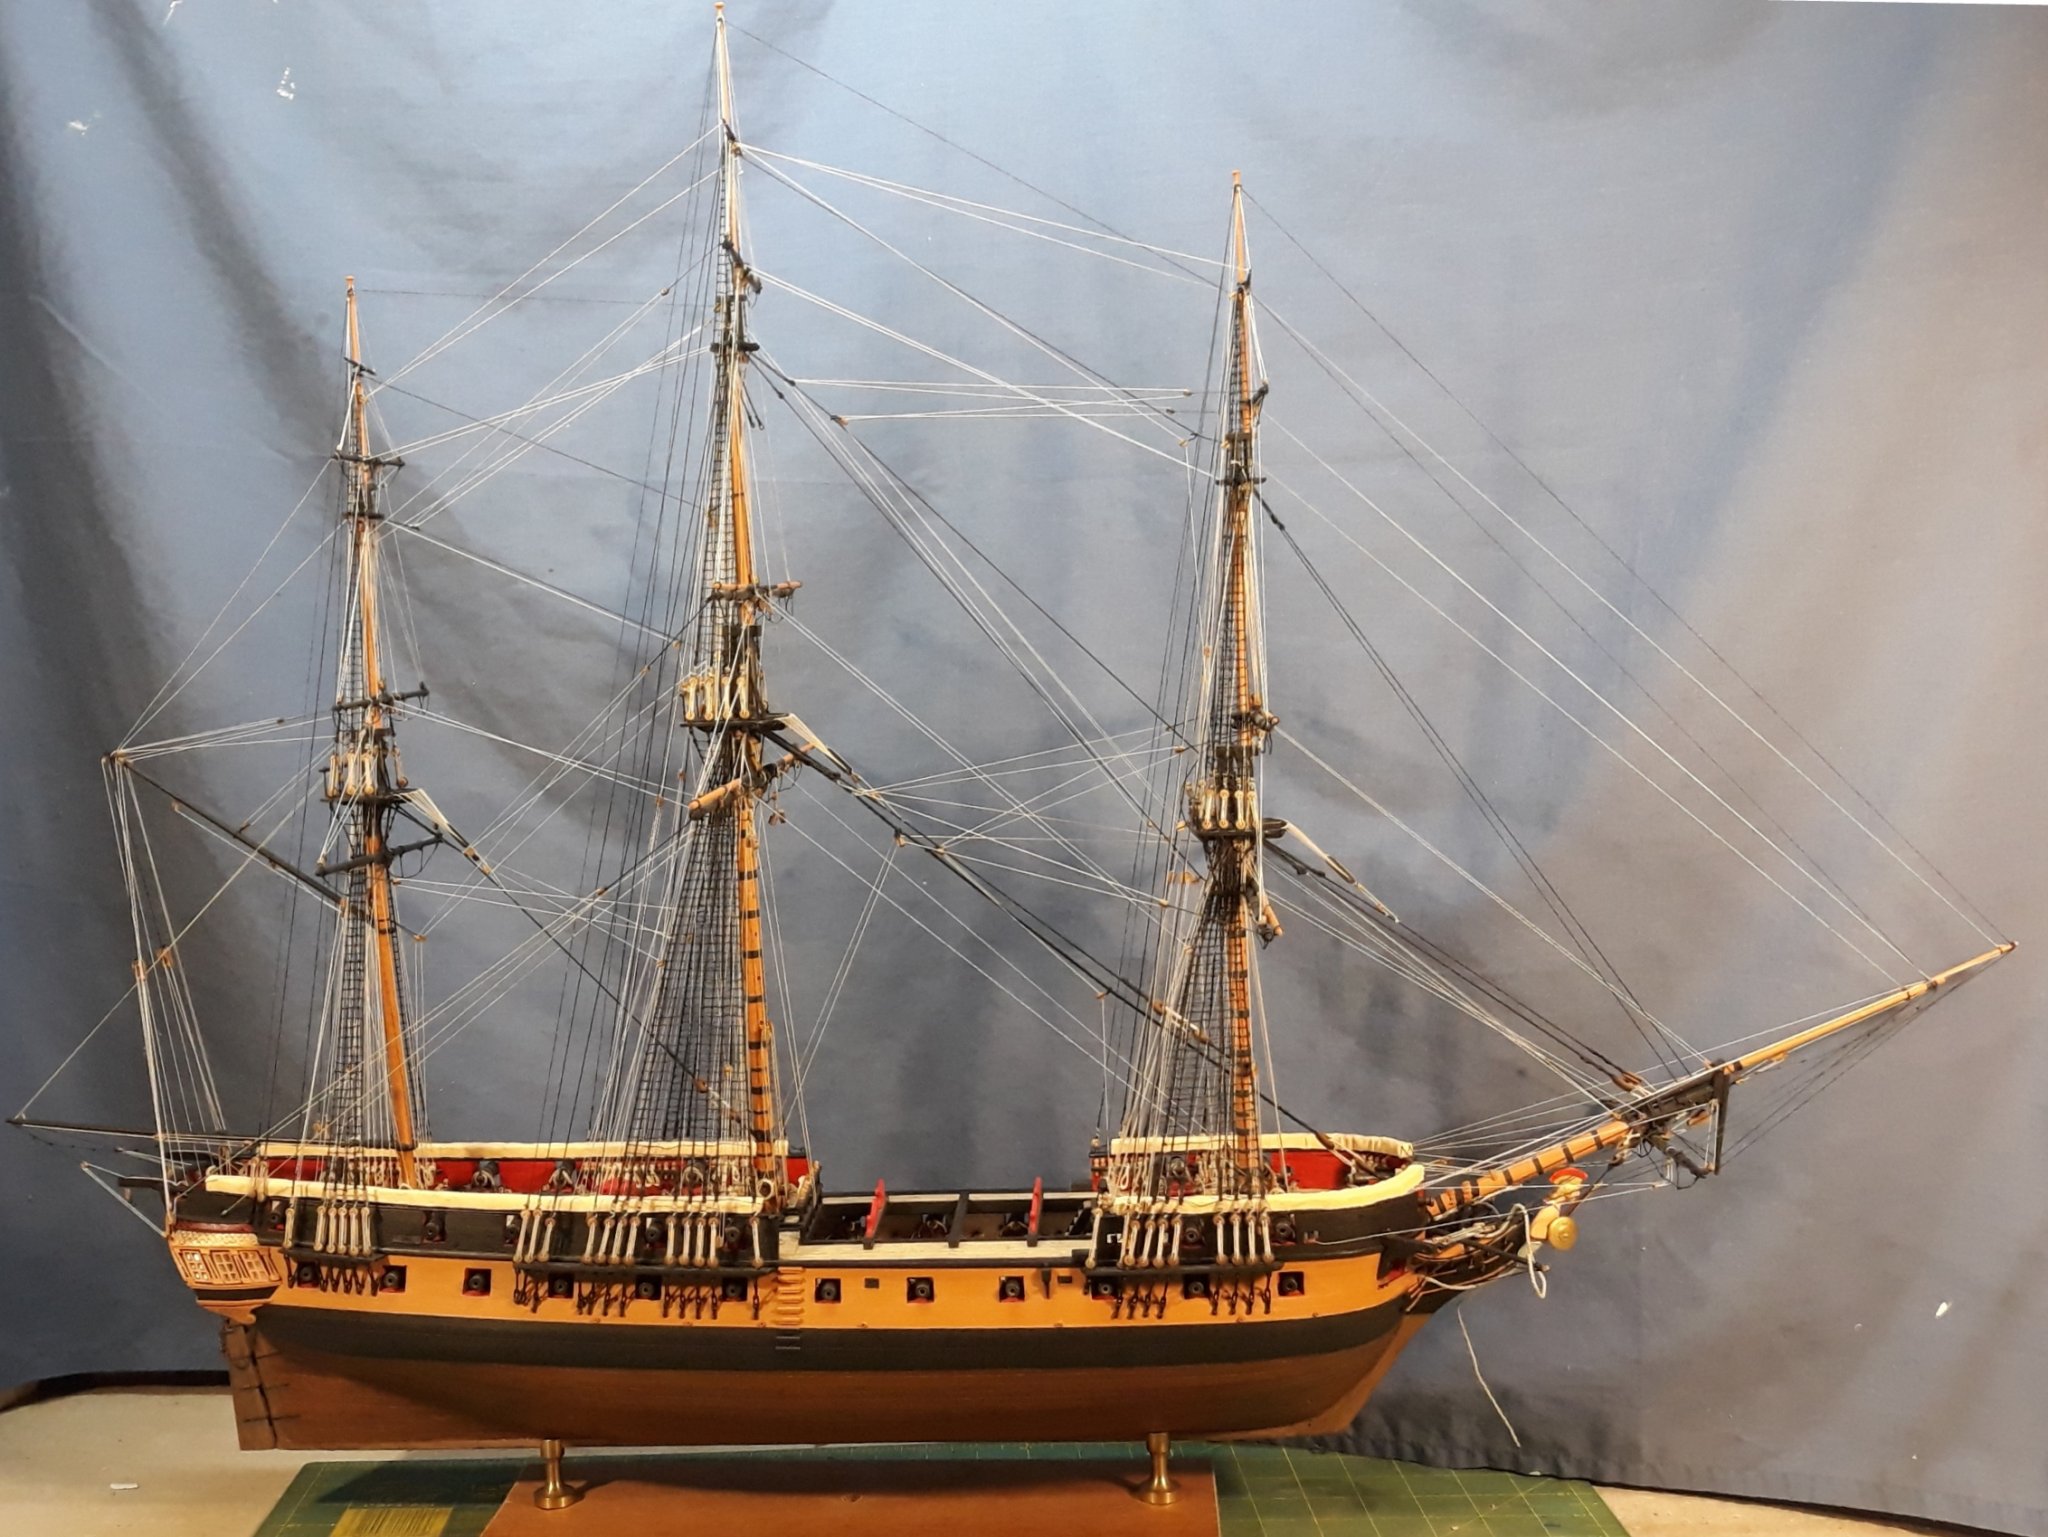
Now that the rig is almost complete ( I am leaving some of the lower level bits to complete later as they would make it hard to work on deck fittings) more of the details can be added. Something I had to consider long and hard was what to do about the hammock storage on the bulwarks. I have noticed that some models don't include these. I can understand why, whether to show the frames and netting without hammocks, or to show what I think they might look like with hammocks and covers is a vexing question. From my understanding the routine for British men of war of this period was that they greeted each dawn at full readiness in case an enemy ship had appeared during the night and a battle might occur. Also a normal part of the daily routine was for the hammocks to be rolled up and put in the nettings with covers over the lot. I considered building the netting cranes and netting until I tried to fabricate the cranes and discovered making up the number required out of brass wire was a difficult job and, for me, impossible to make look convincing. The netting was a whole other problem which I decided I could do without. That left making up hammocks and the covers as an option. Fortunately my current read, one of Dudley Pope's Ramage books, described that the hammocks were enclosed in covers which must have covered the cranes and netting. I realized including this detail was going to be a pretty drastic step as these covers ar going to be a very strong element in the overall appearance of the model. I had the sails left over from my Bounty build so had fabric which I considered could make acceptable covers. I searched through various sources looking for images of the cranes, netting and covers. The size, shape and extent of the covers varied considerably so it was one of those situations where I considered what looks most convincing and thinking about the function determined what I would build. These are images of hammock covers and what I built:
-
Fitting of yards and running rigging is going well, all the sticks are now fitted and the majority of the rig complete. I can now start on some more detail bits like the hammock netting and brackets, I haven't quite worked out how to do these yet, brass wire and I will need to try a bit of soldering. Gun port lids, cutter davits, and lots of rope coils all need to be done. In these trying times of social distancing a good hobby comes into it's own. Keep well. Cheers, David.
.thumb.jpg.93da3cf4aa3e30c854346c04a7af26bf.jpg)

- 256 replies
-
- 12
-
-
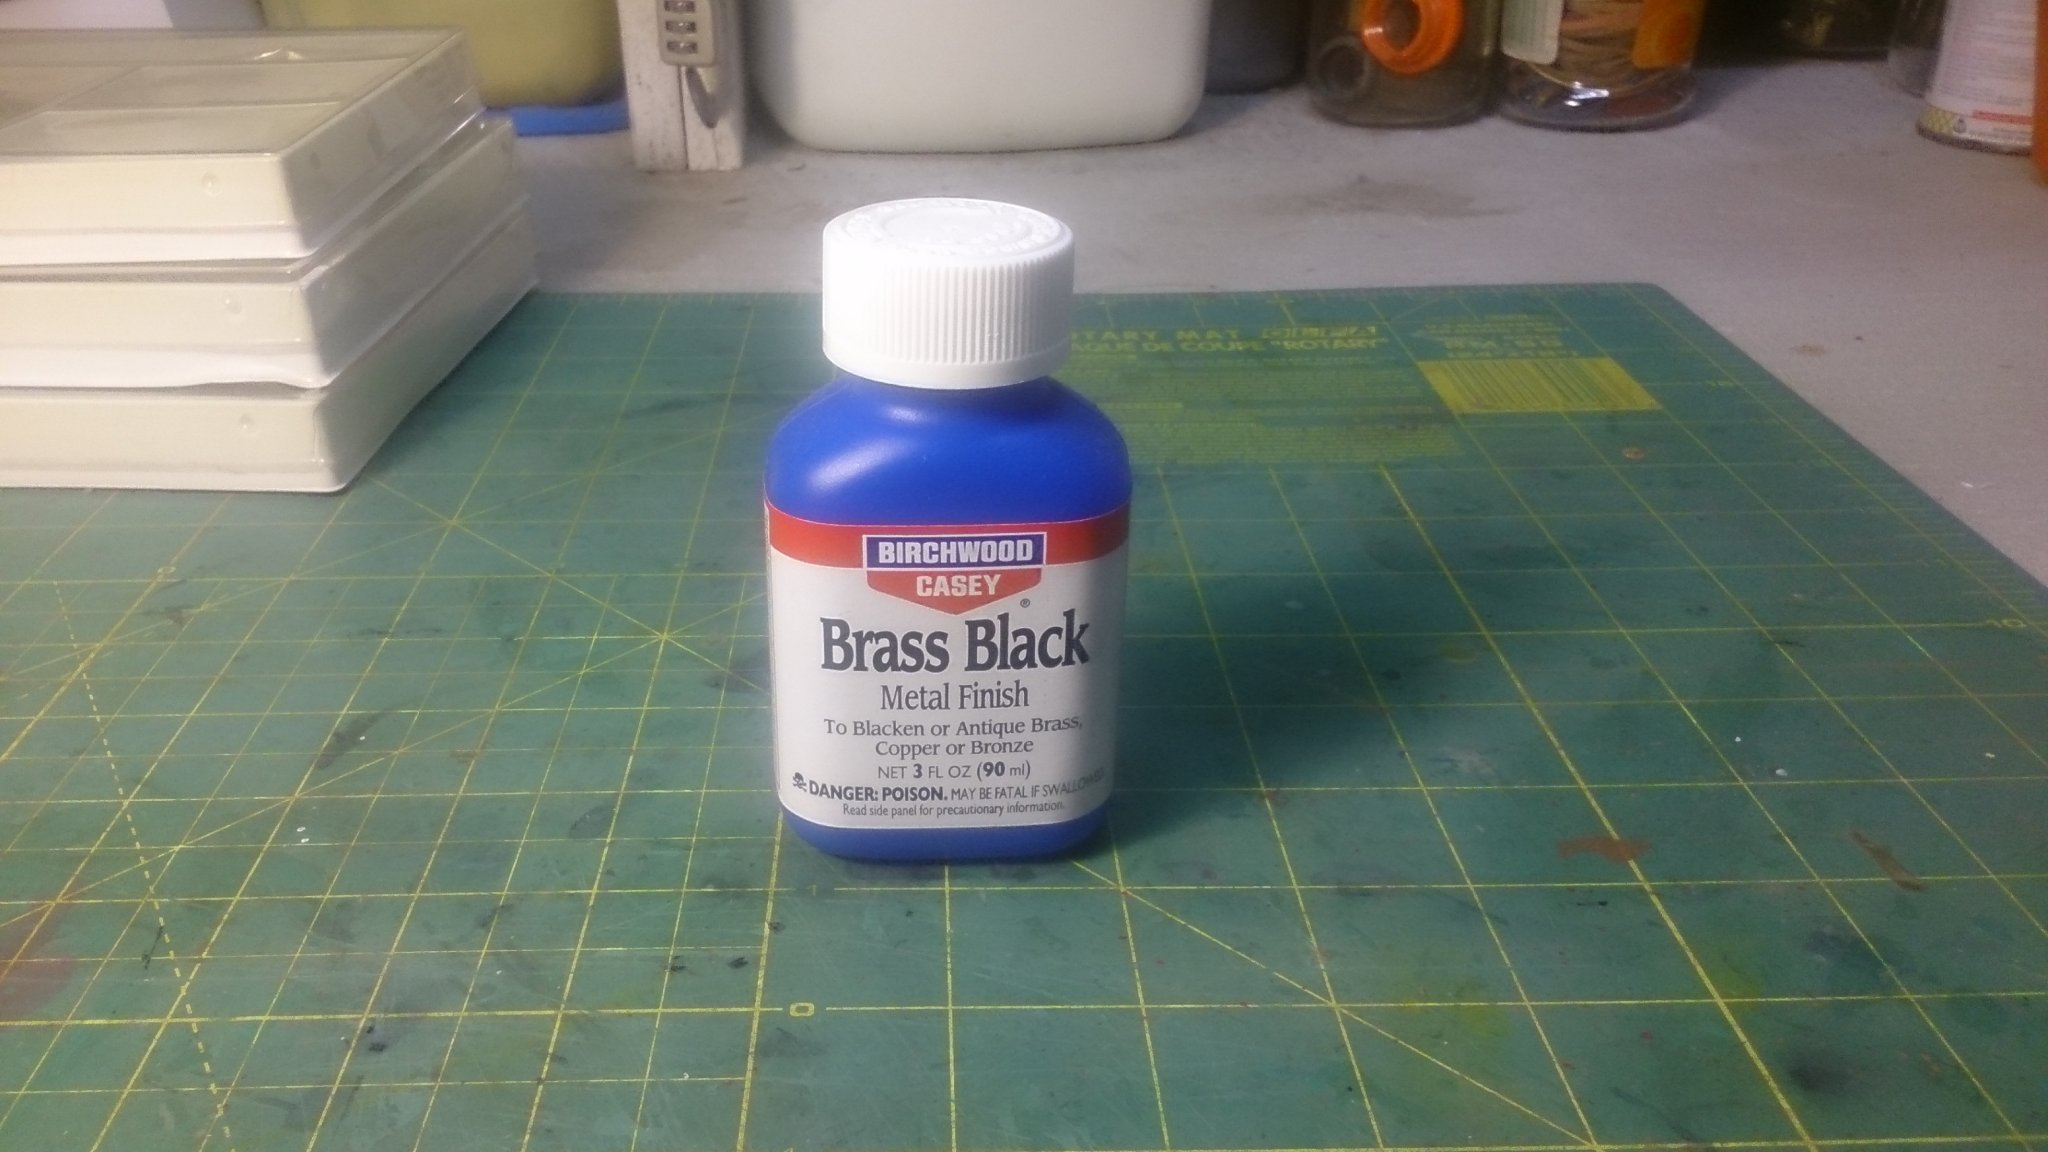
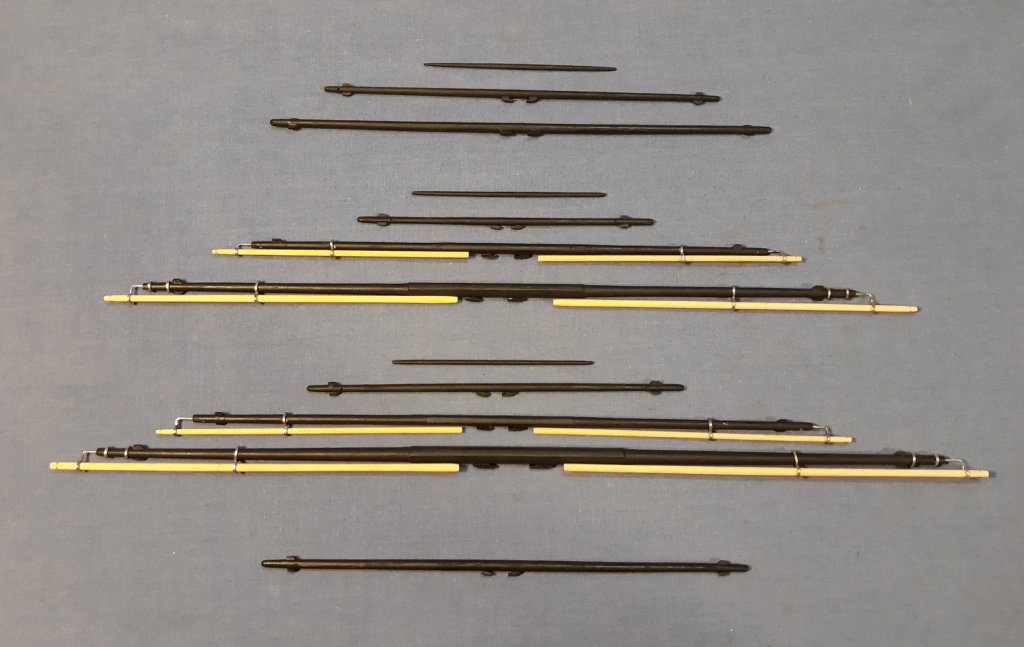
I use chemical blackening for much of the brasswork. The product is Birchwood Casey Brass Black Metal Finish which I bought from a local gun shop.

-
Rigging update. The foremast running rigging is almost complete, now for the mainmast. As more of the lines are fitted threading additional ropes gets trickier. I have had to unthread some as the initial route taken sometimes doesn't run clear and fouls those existing. Getting there. Cheers, David.

-
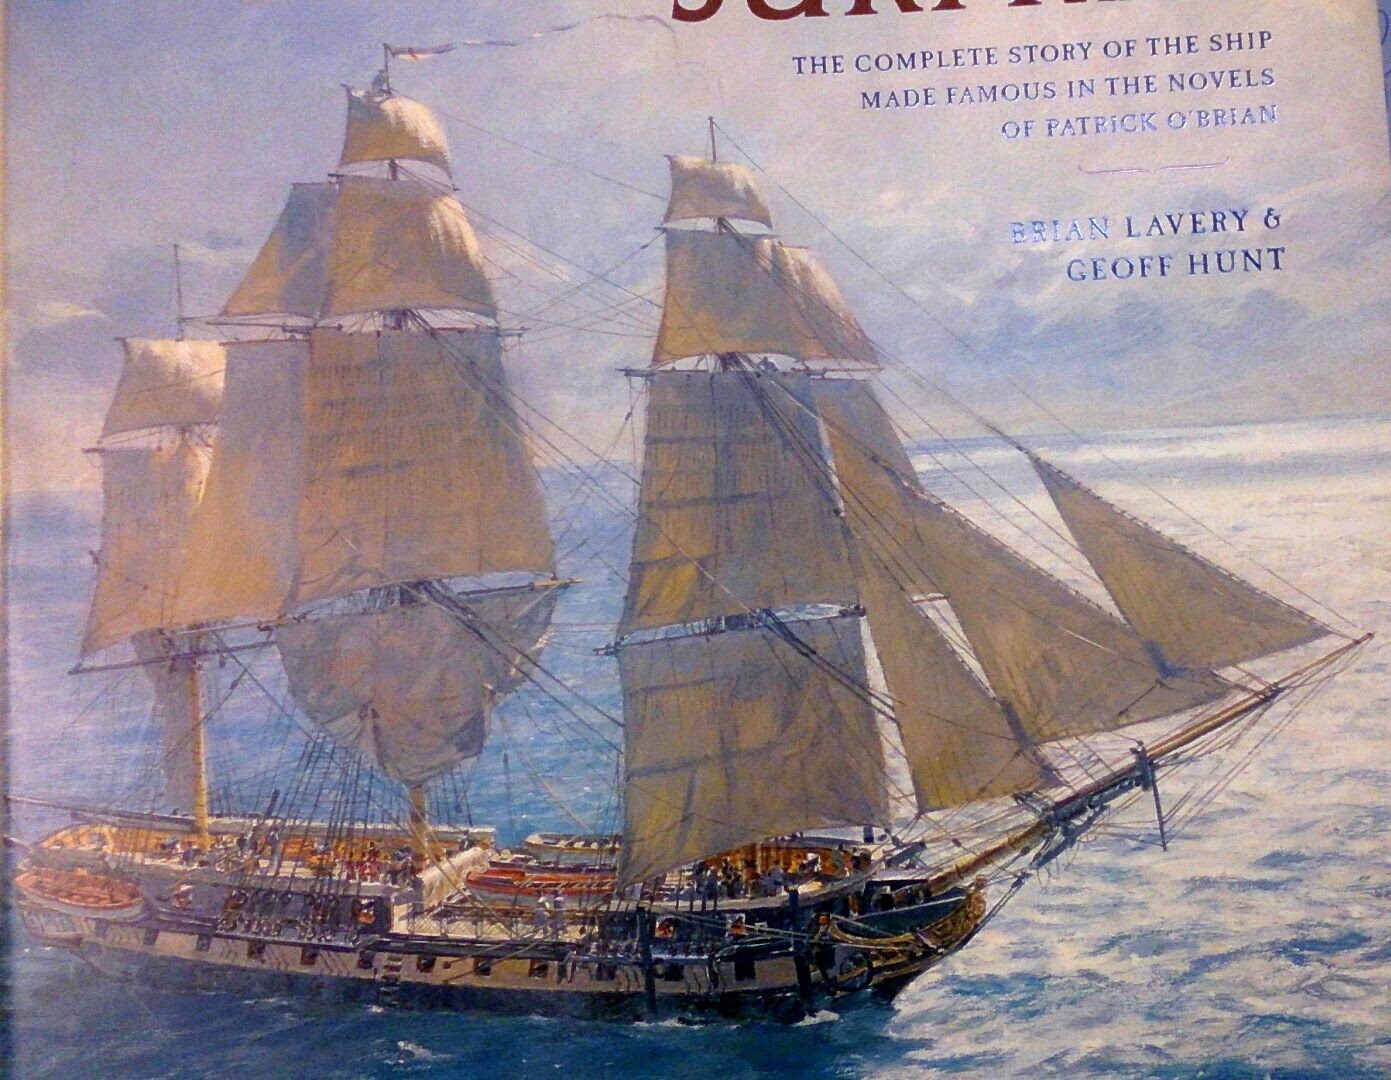
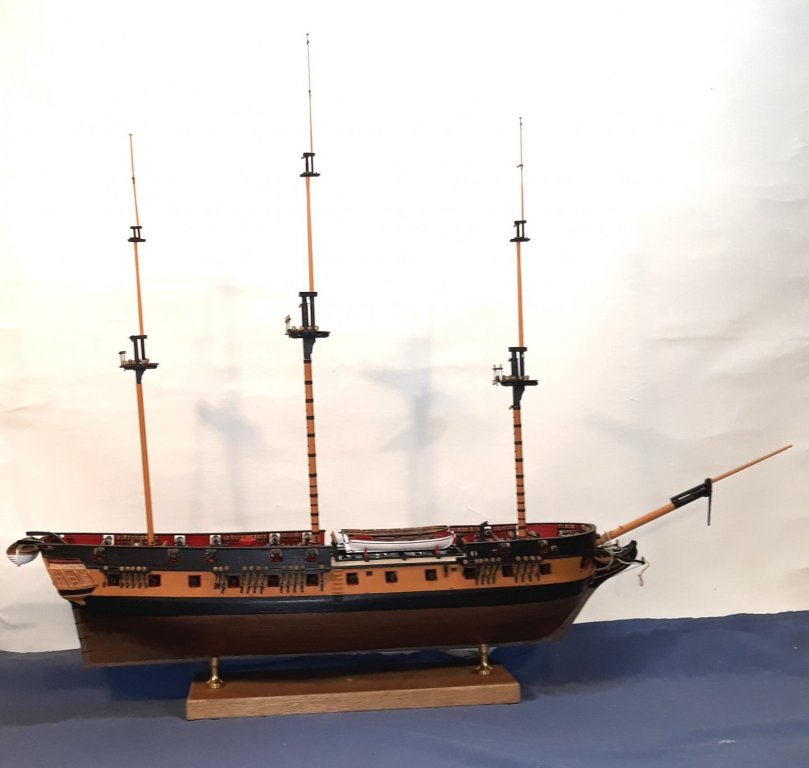
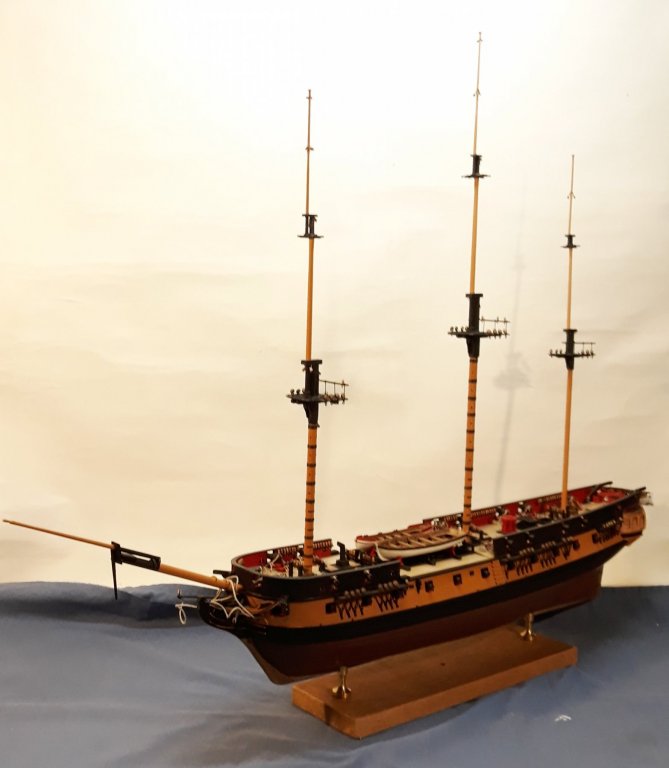
The rig is based on drawings in the Brian Lavery and Geoff Hunt book "The Frigate Surprise" which has both the original and the Patrick O'Brian masting with the 36 gun frigate main mast. My build includes the larger main mast. The layout in the book also increases the mizzen mast size to be almost the height of the foremast. I am no expert but I assume this is needed to balance the increased power generated by the larger sail area on the main mast. Any clarification would be appreciated. Cheers, David.
-
Fitting of yards started, foreyard first then upward and towards the stern. The fore sheet, tack and cluelines will be fitted further down the track, it's hard enough getting to the rig attachment points as it is, these lines would make it much more difficult. Cheers, David.


- 256 replies
-
- 14
-
-
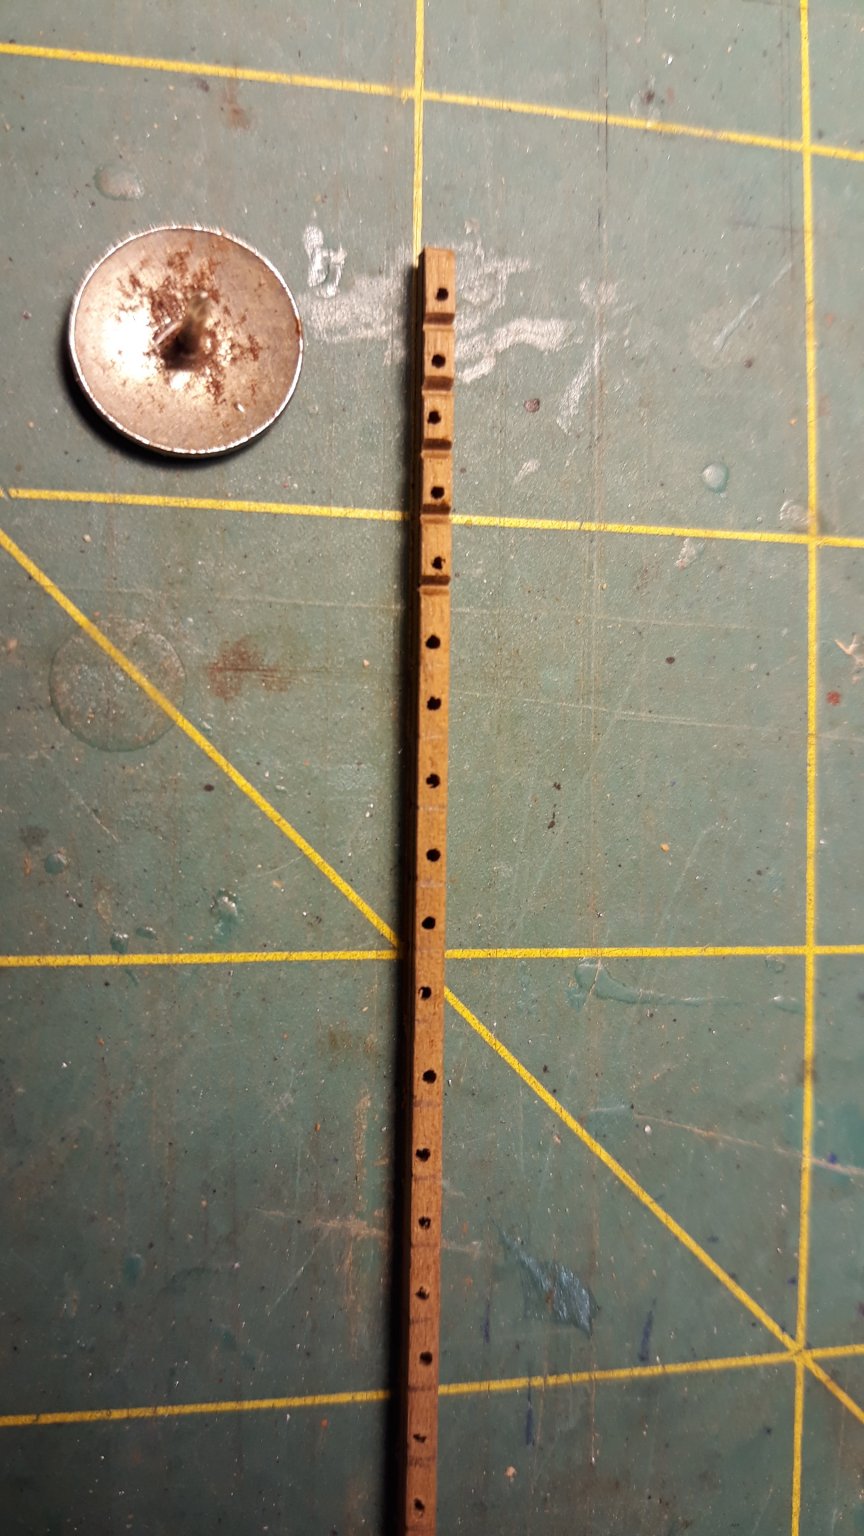
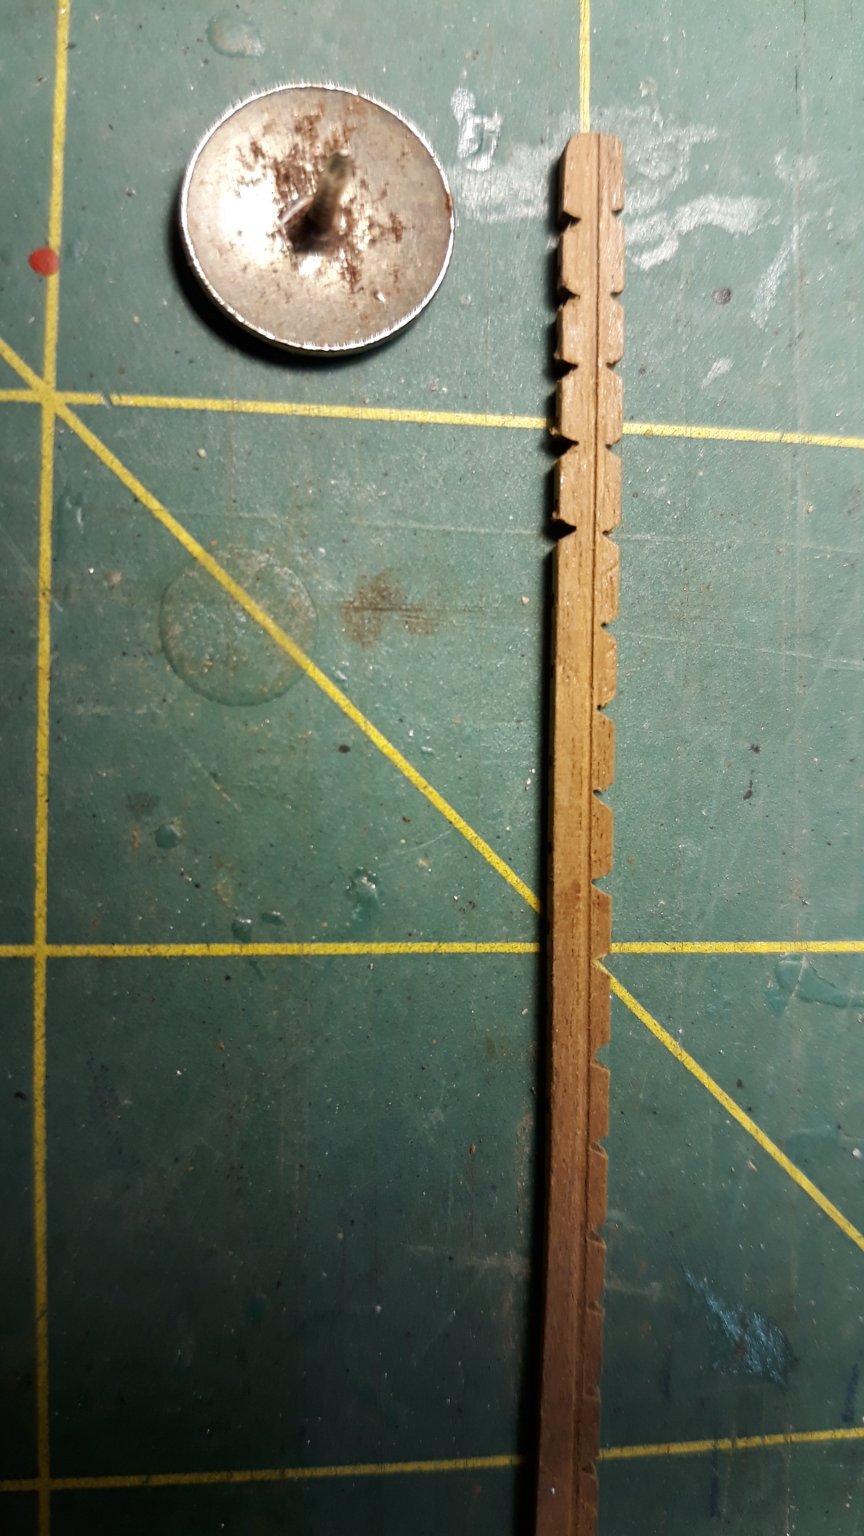
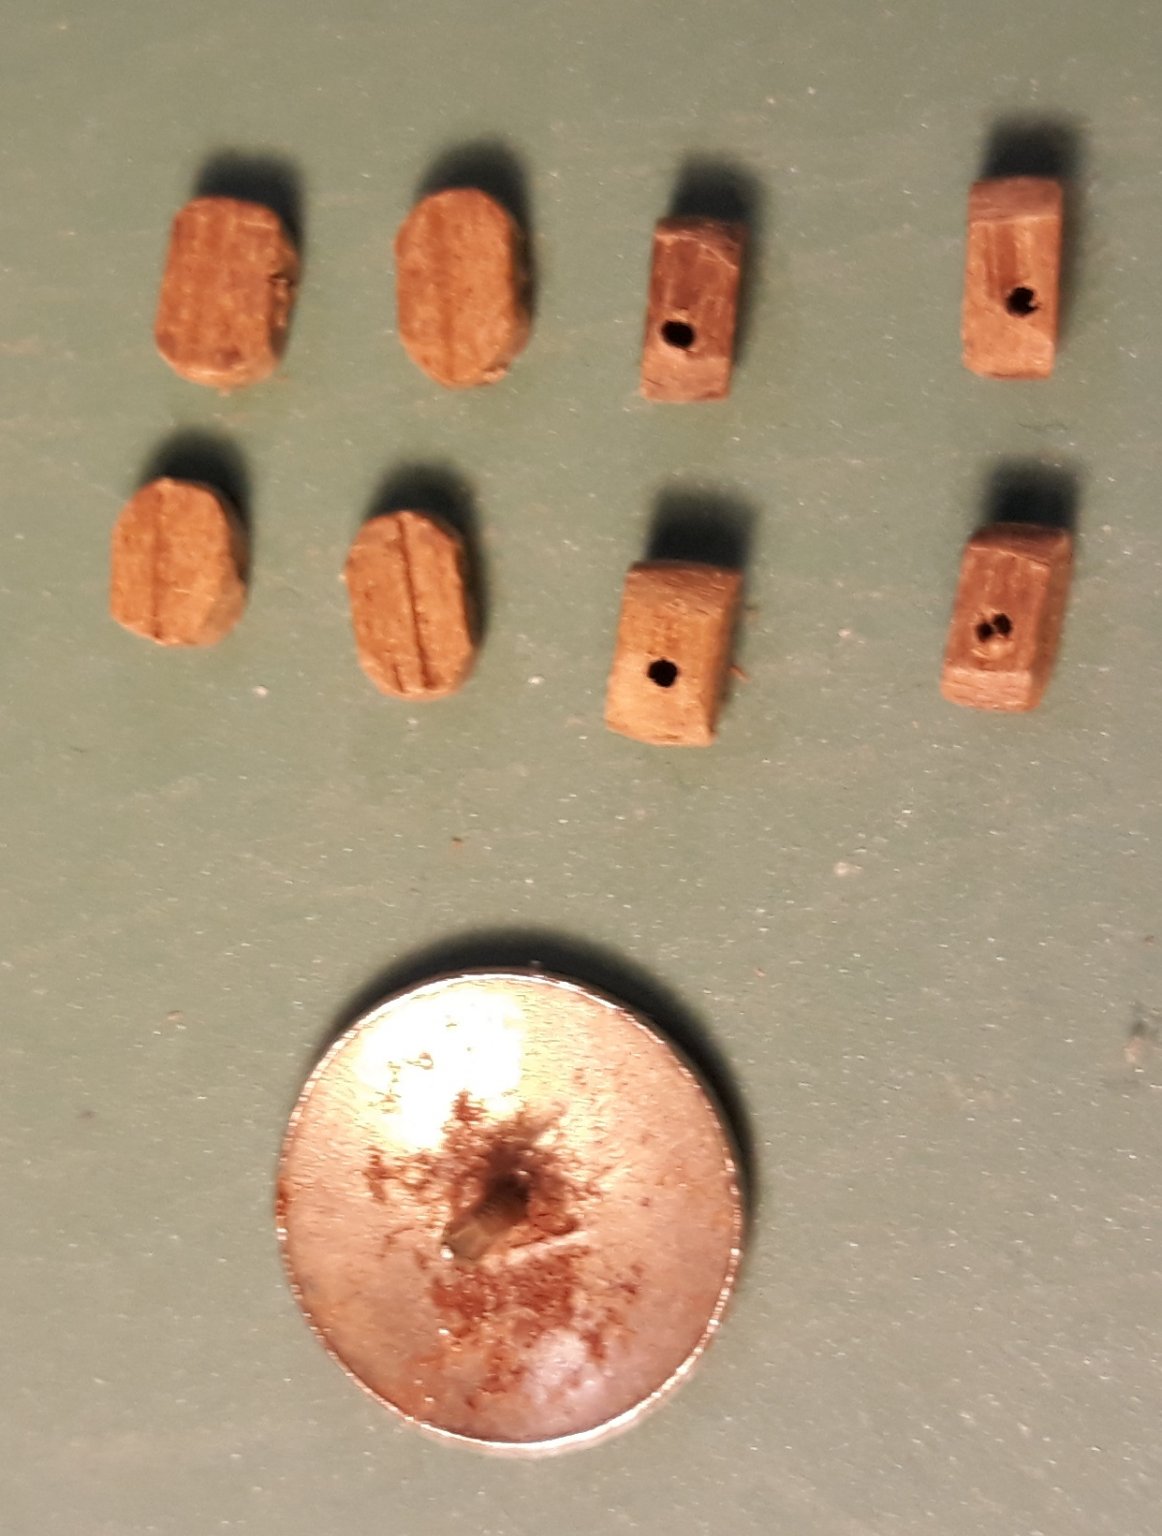
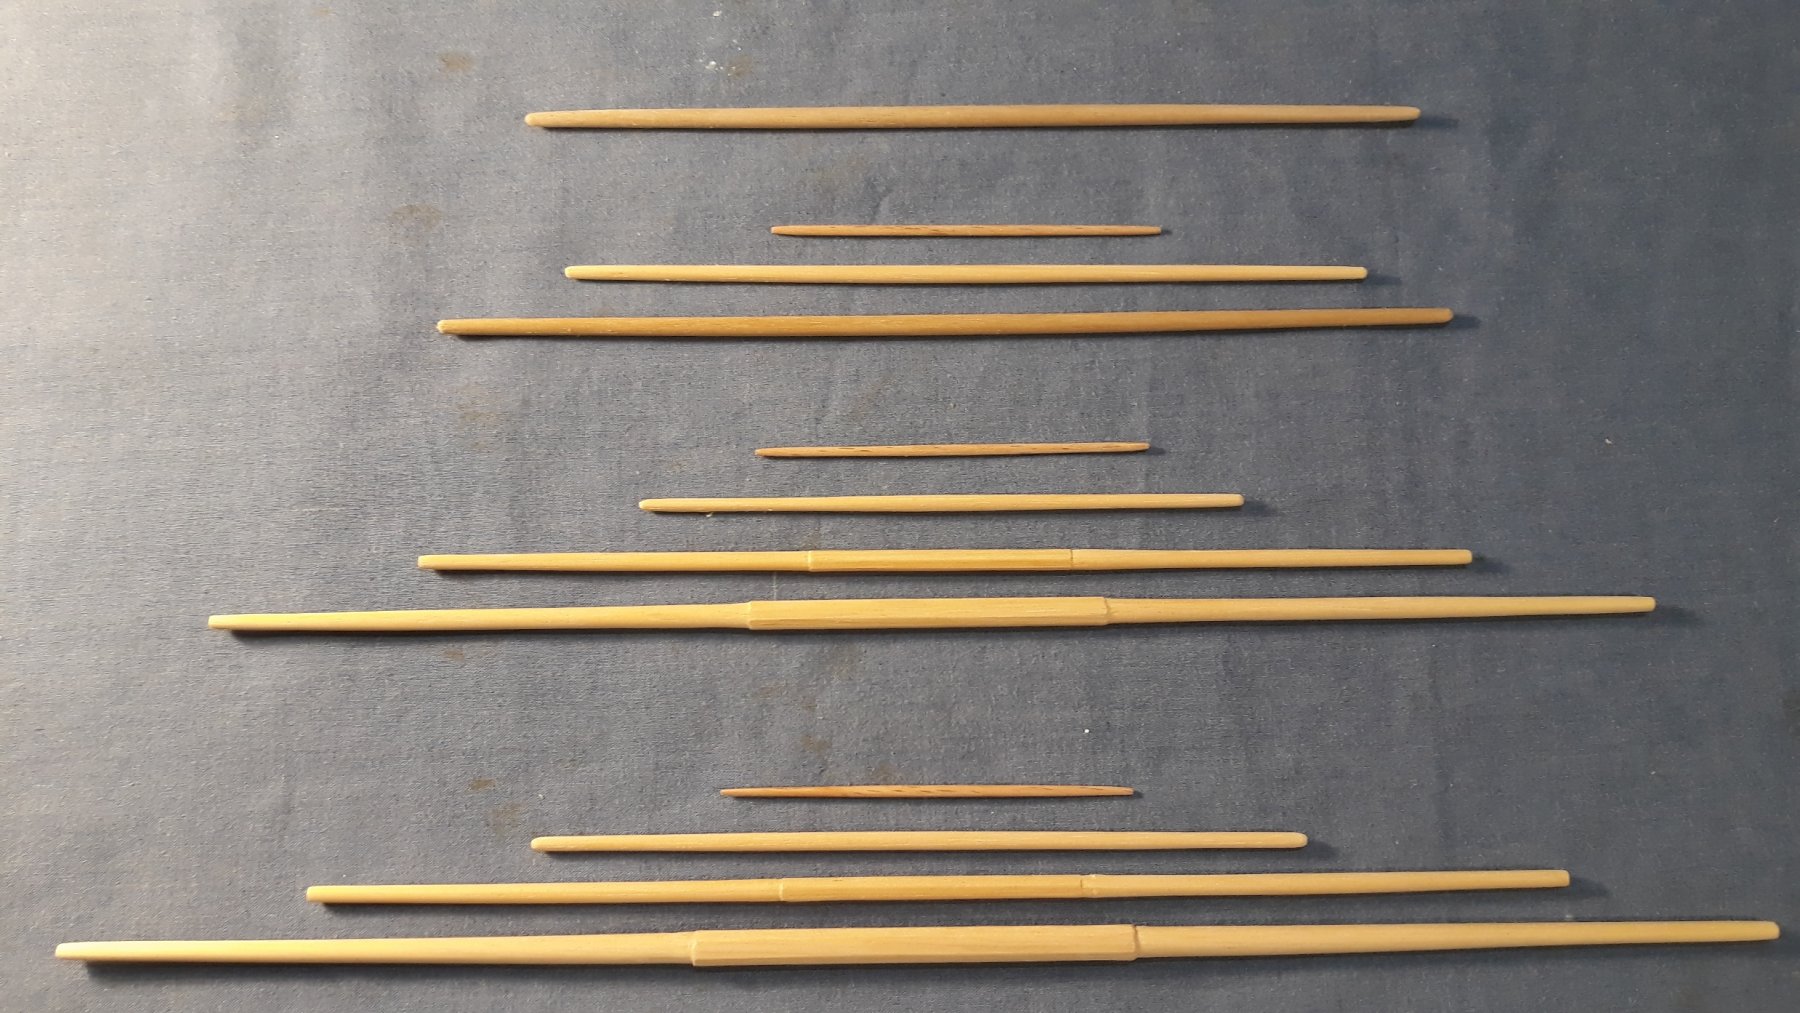
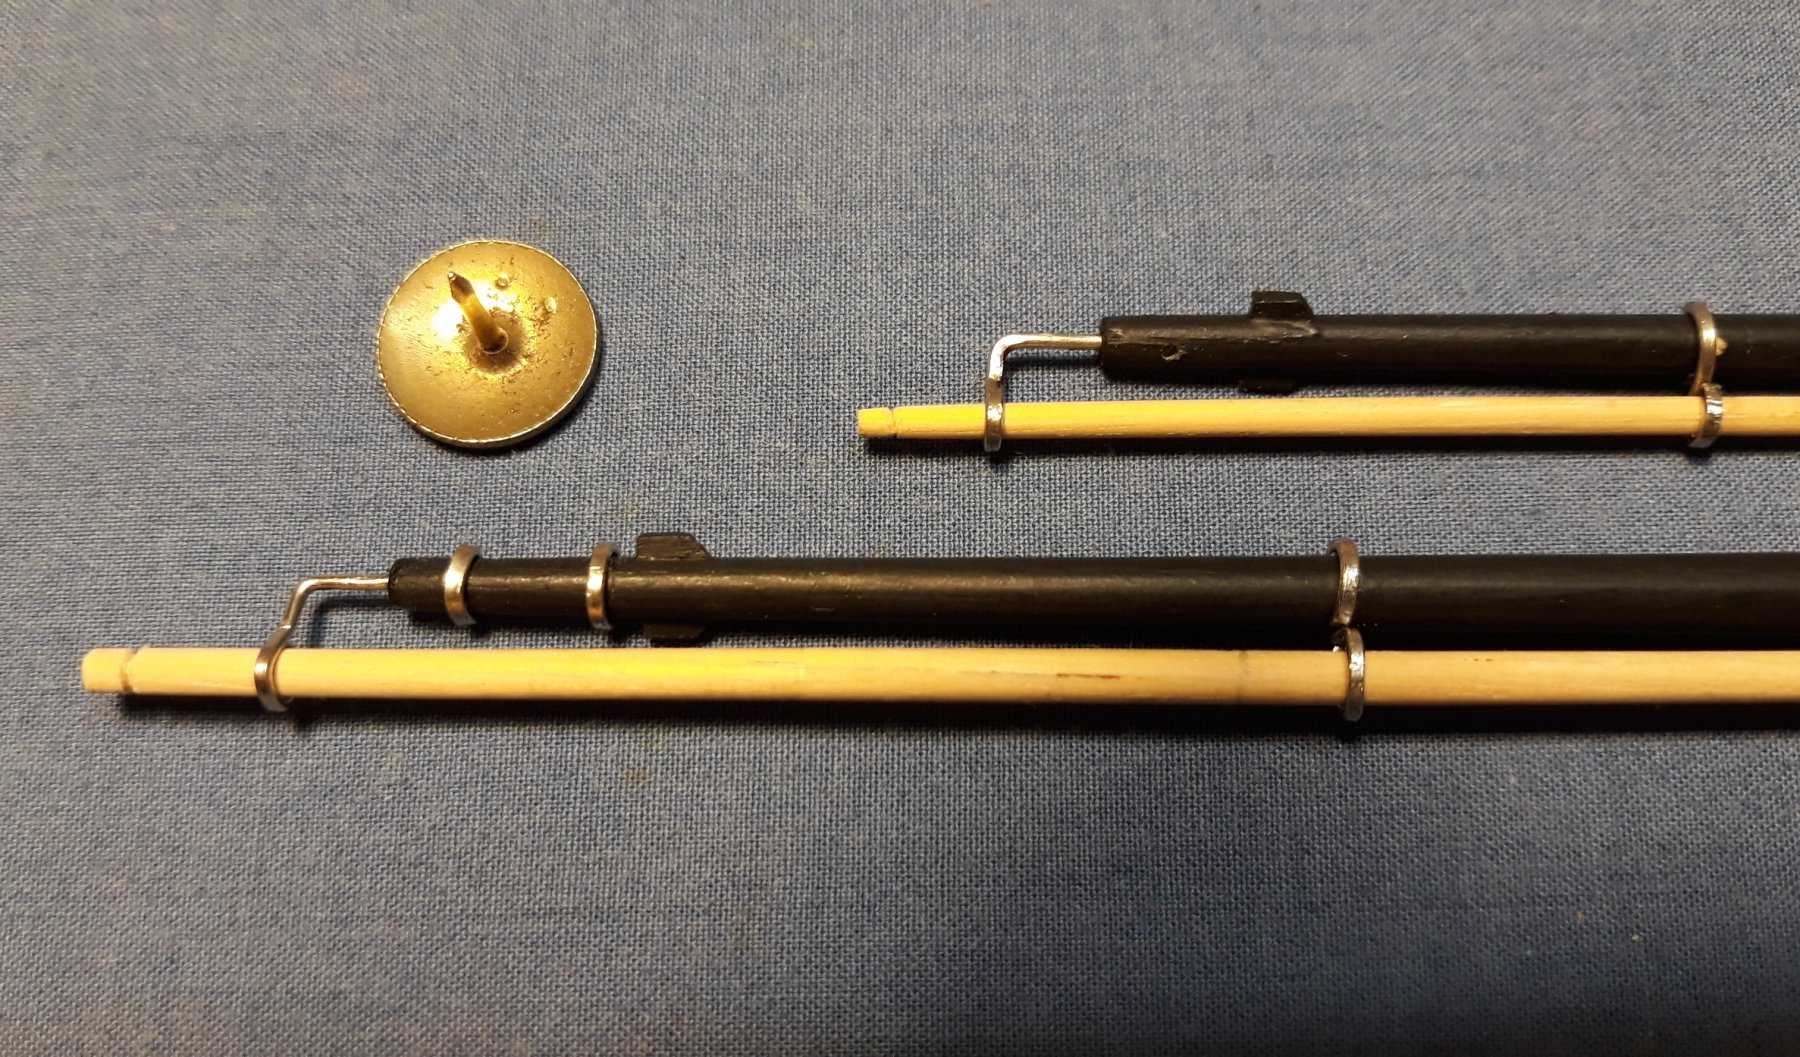
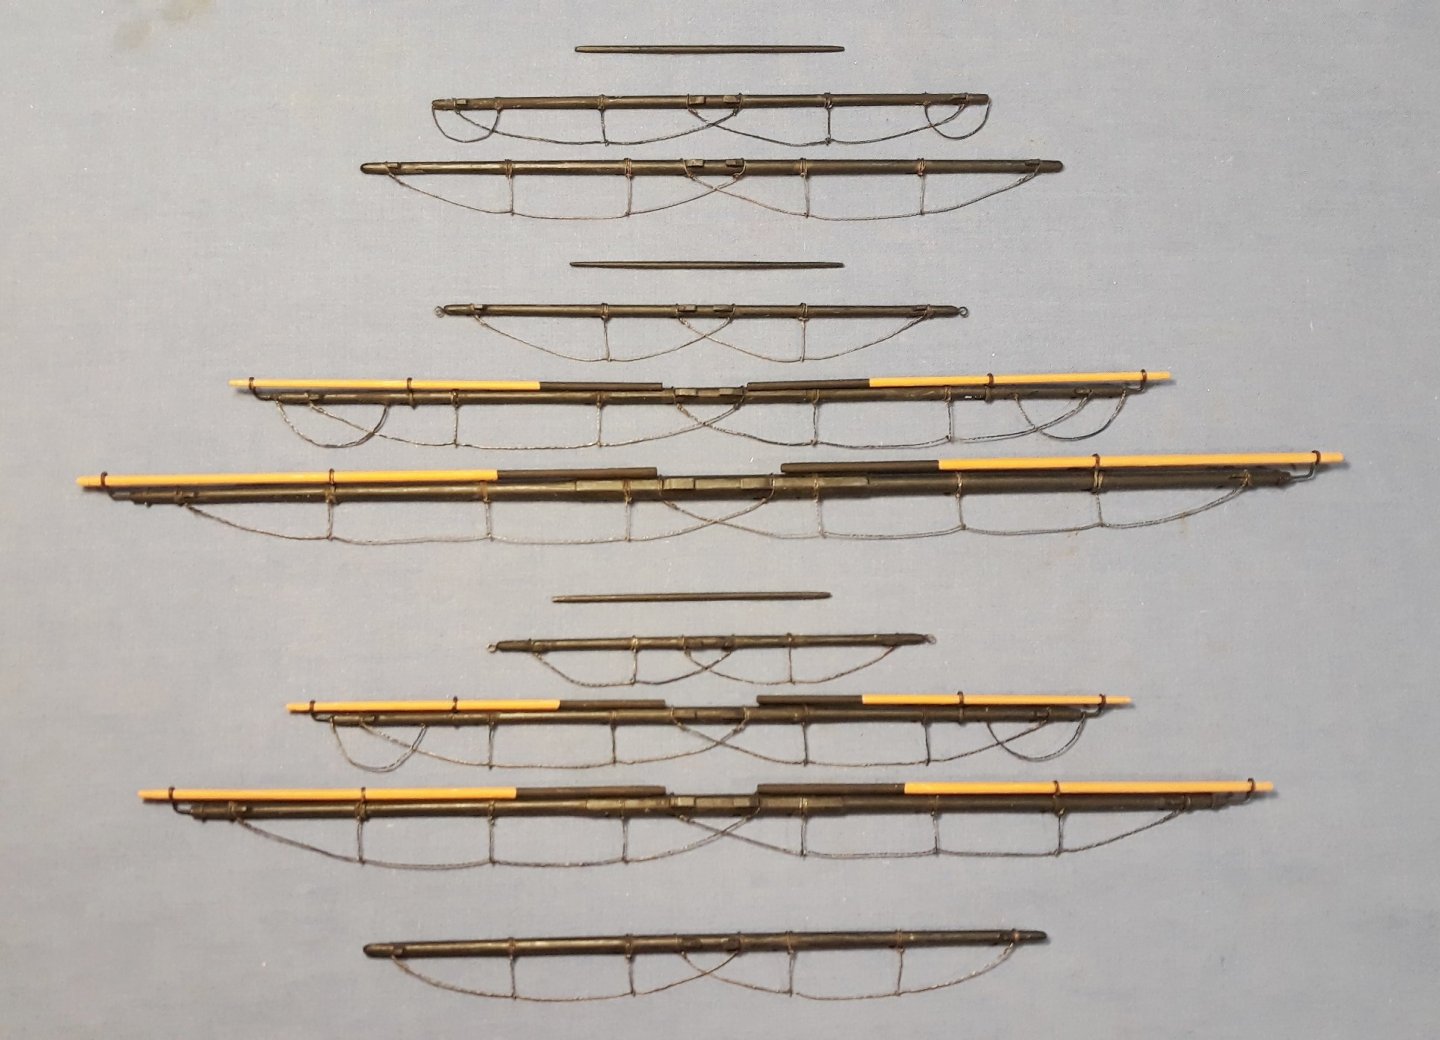
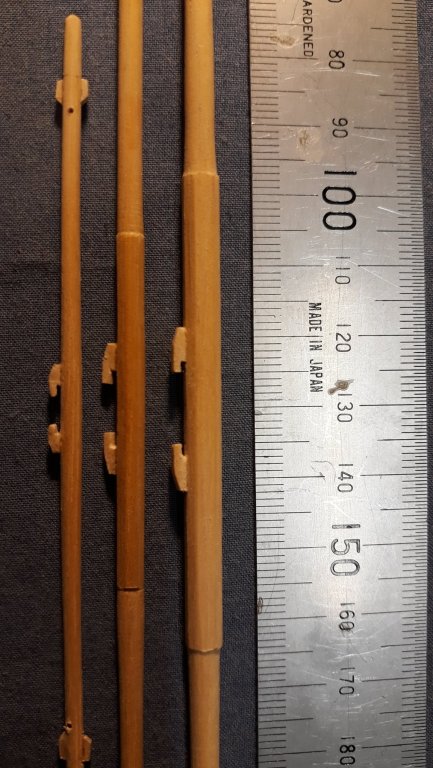
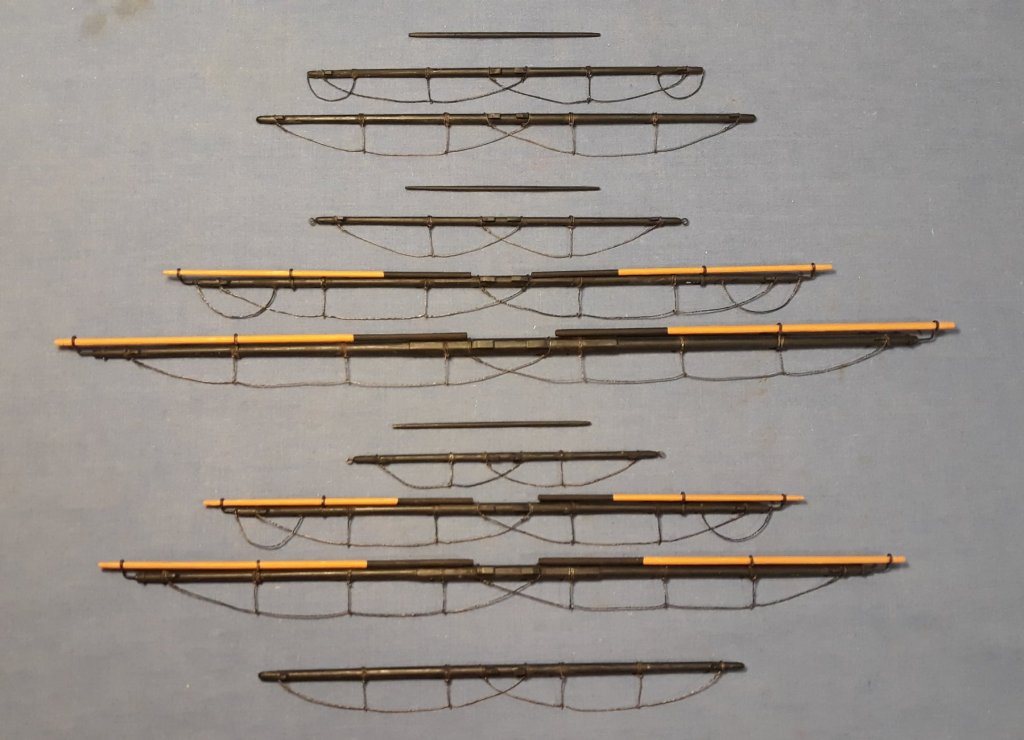
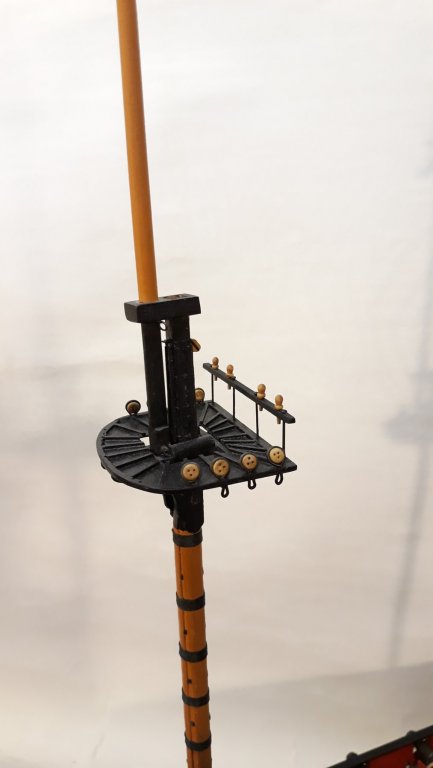
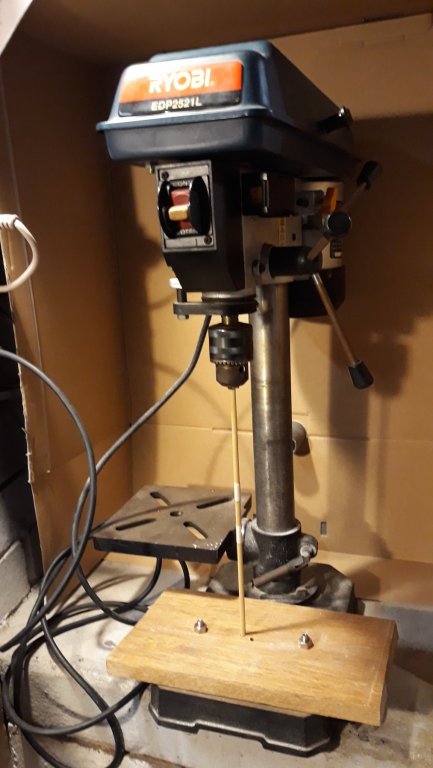
Quite a bit of water has passed under the keel since my last post, visits to families living in Brisbane and Beijing have taken up quite a bit of time. Summer weather is starting to develop and, as a Scot who arrived in Australia at 4 years of age, over the last 66 years I never really seemed to have adapted to the hot Australian summers which I find exhausting, particularly as they seem to be getting hotter. So the coming months are good ship building days for me as I can huddle in my man cave basement and work away. Some months ago when I had completed the yards I thought I would be attaching them to the masts in the near future but then I consulted the rigging oracle and realised how many blocks needed to be attached to the yards and that this was going to be much easier before the yards were fixed to the masts. The next challenge was the number and sizes of blocks required. I had purchased quite a number of blocks when I started the build but my initial count was never going to be enough. So a block making program was started. I had never made many blocks before so there was a bit of a learning curve. First the type of wood to use. I have a good stock of off cuts as I don't throw away any small pieces, I just pop them into a container working on the time honoured principle that "this will come in handy some time in the future". And my collection of walnut bits and pieces has certainly come in handy for block making. Up to now I have probably made about 150. The hardest part of the process has been drilling the 0.8-1.0 mm holes through 2.0-2.5 mm thick stock for the lines to pass through. I initially tried this by hand with my Dremel but found it very difficult to get the holes even on both sides. I thought I would try my fairly large bench drill and firstly found to my amazement that the chuck would grip a 0.8 mm bit, then that I could reduce the speed so that the bit didn't instantly snap, and that it was accurate enough to drill pretty centrally through the stock. This made block making much easier. There are about 100 blocks of 5 or 6 different sizes attached to the yards. Yard construction has NOW reached the point where I can start attaching them to the masts and install the running rigging.


-
Hi, I just came across this post. It explains why I decided to scratch build Surprise. 6 years ago I had just finished reading Patrick O'Brian's Aubrey/Maturin series and decided to build the ship. I searched for a decent kit to either build or use as a starting point for a kit bash but decided all the kits I could find were inaccurate as they seemed to be based on a model of something else and had serious flaws, right down to the basic hull/deck shape. So a scratch build it was. It has been an interesting 6 years, much learning! Cheers, David
-
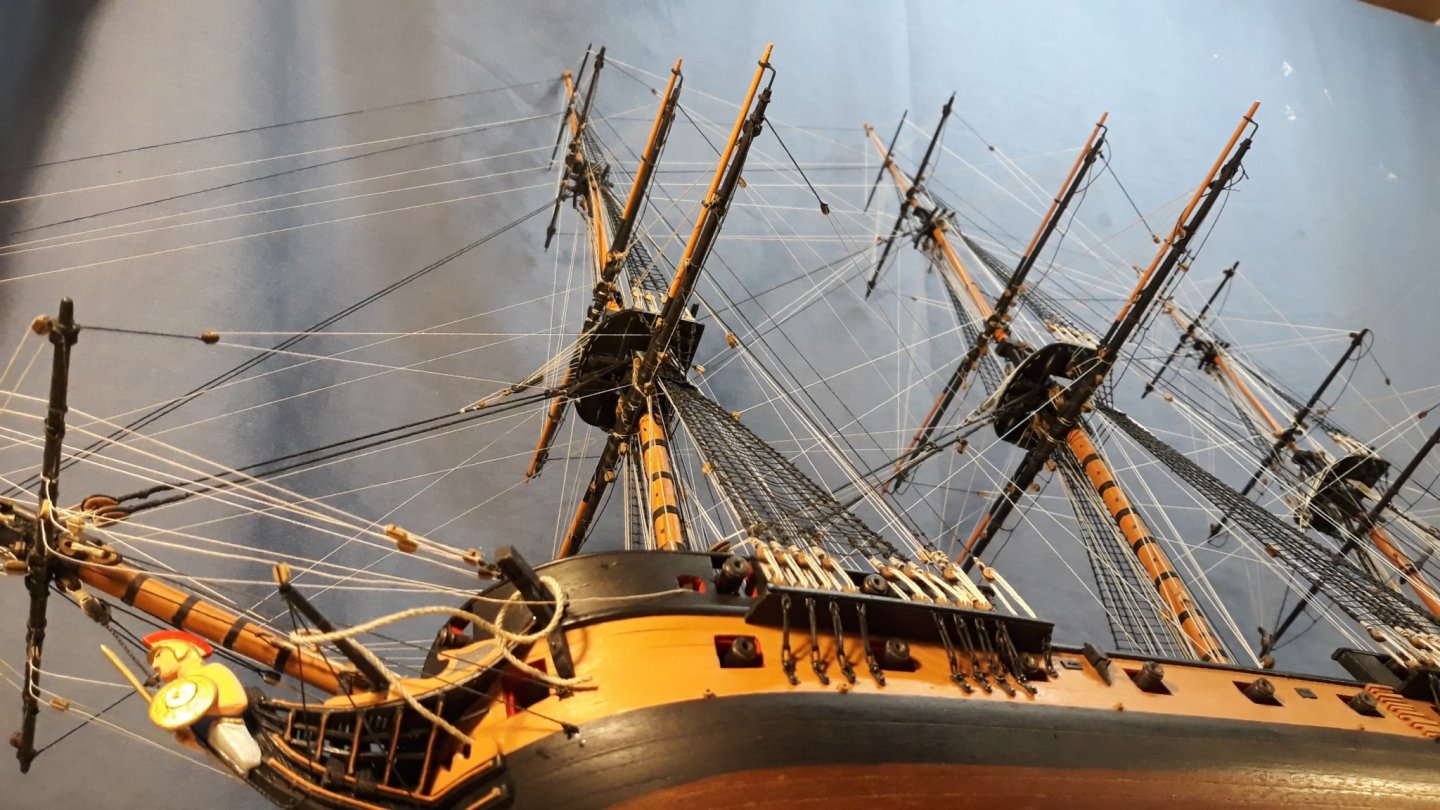
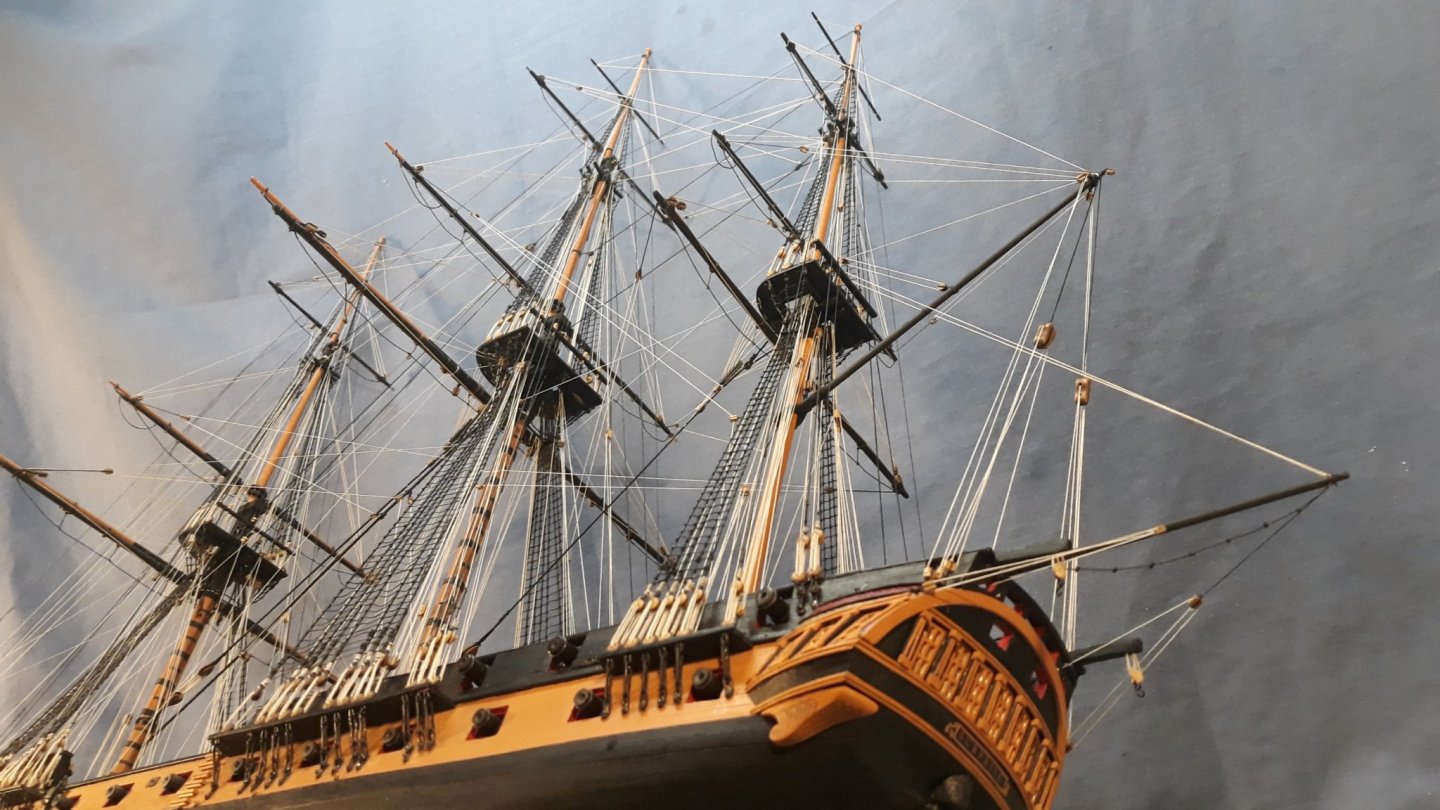
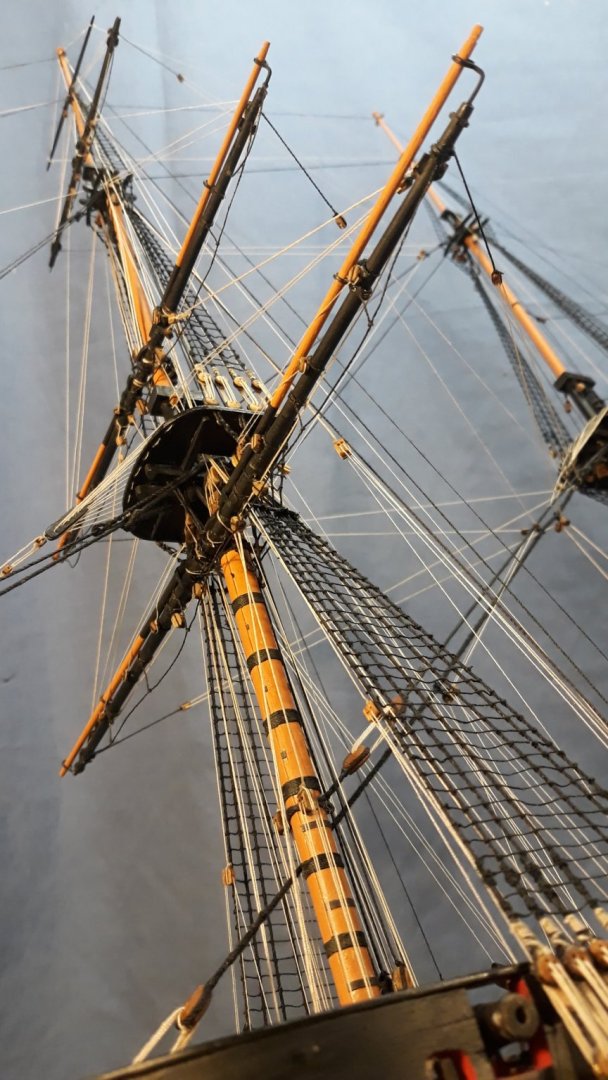
Shrouds, ratlines and stays completed to all masts. I'm very glad the ratlines are finished. Now I can start fitting yards and their tackle. Cheers, David
- 256 replies
-
- 11
-
-
Rigging, the next part. Shrouds, ratlines and stays to the fore, main and mizzen masts complete. I am very glad to see the end of the main extent of the ratlines. That was a LOT of clove hitches! The top and topgallant mast shrouds and ratlines should progress a bit more quickly. Cheers, David.
-
Rigging Part 2 (of many!) Mainmast shrouds, ratlines and stays complete. I'm glad to have finished these, doubtless the most time consuming part of the rig. Mizzen next, only half as many shrouds. Cheers, David.


-
Now that the figurehead has been completed and fitted I can get on with the rigging. The bowsprit and foremast stays shrouds and ratlines have been done. Next the mainmast. On my Bounty build I made the mistake of not progressively doing the ratlines and almost went crazy doing them all in one hit. Never again! Cheers.
-
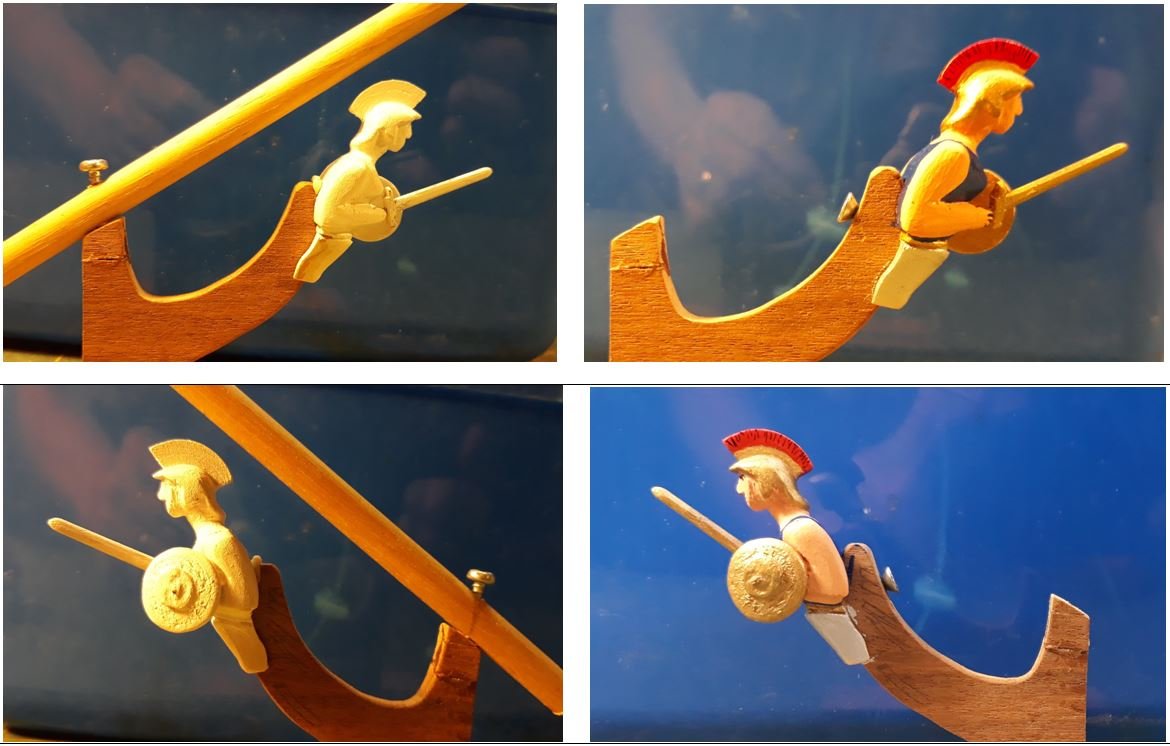
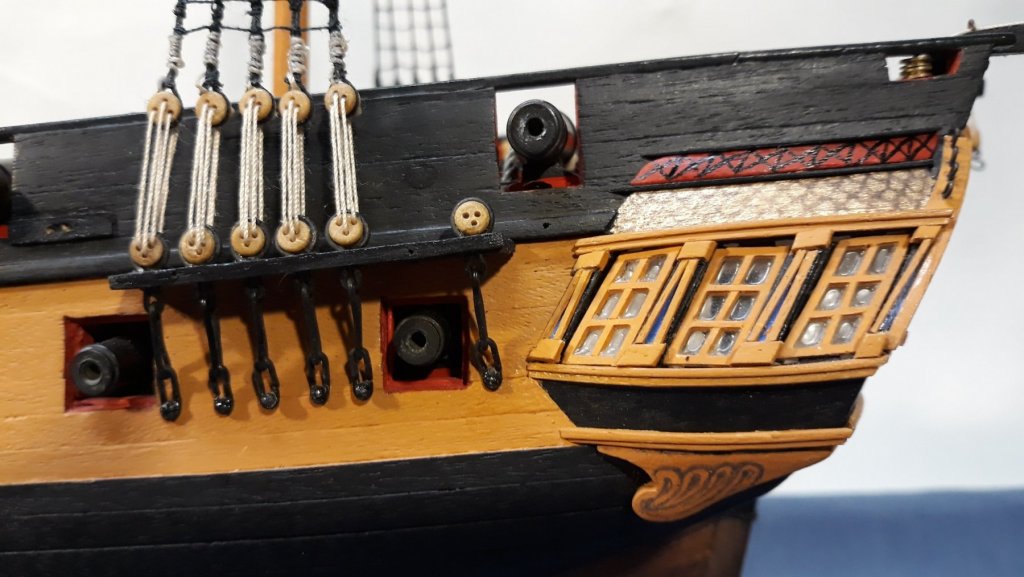
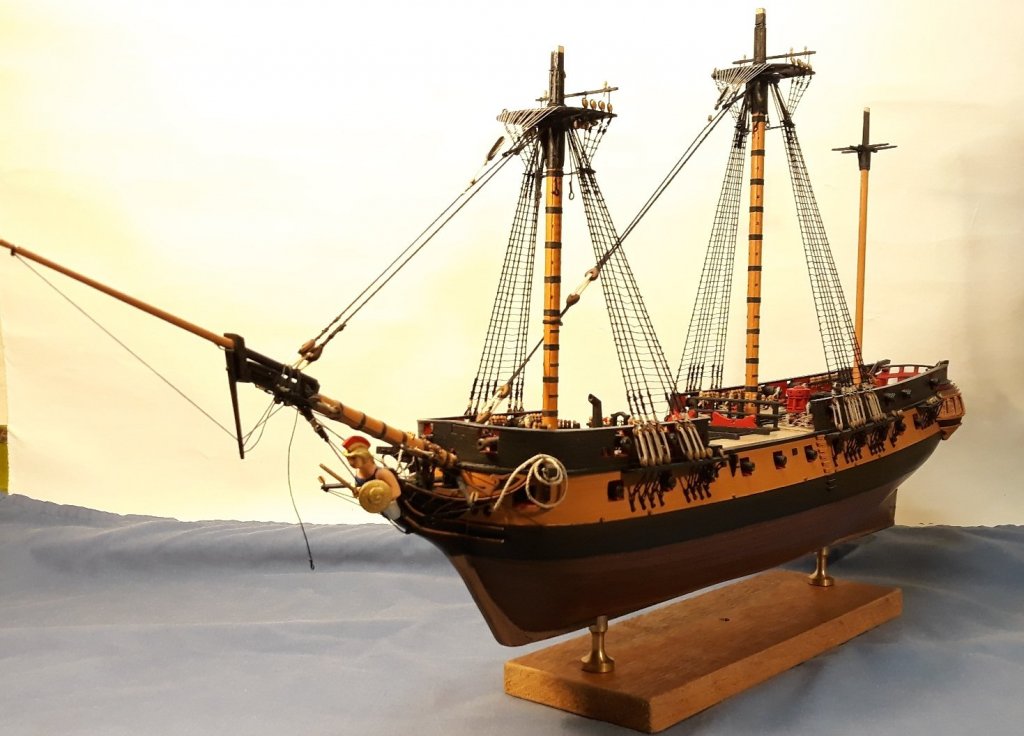
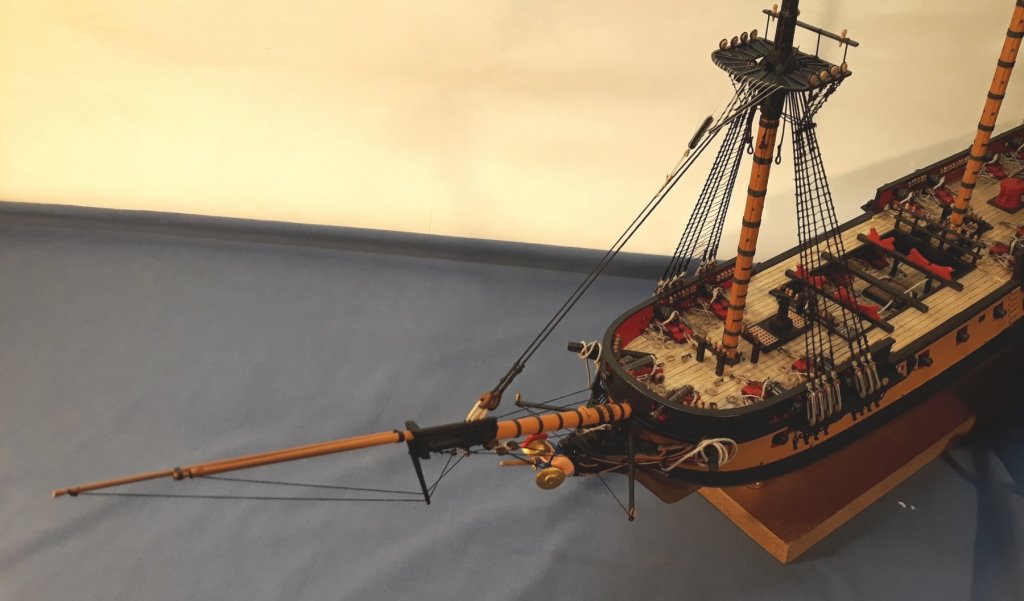
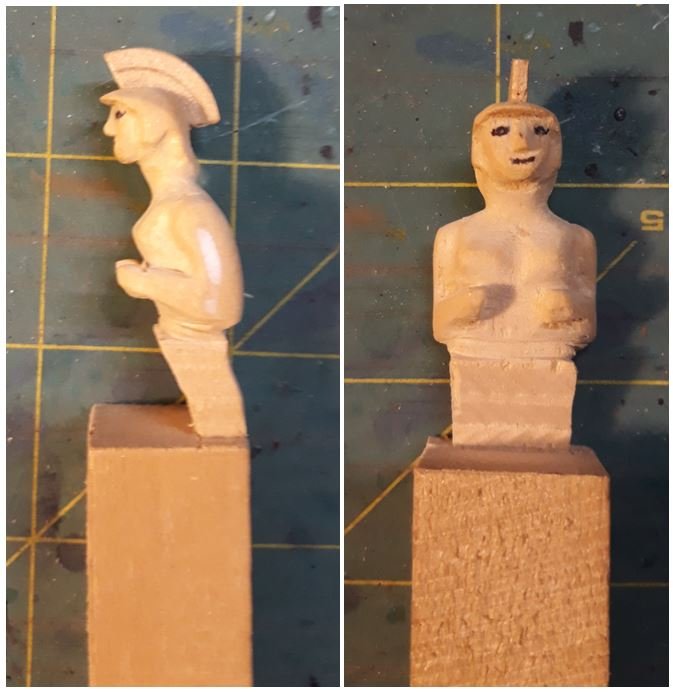
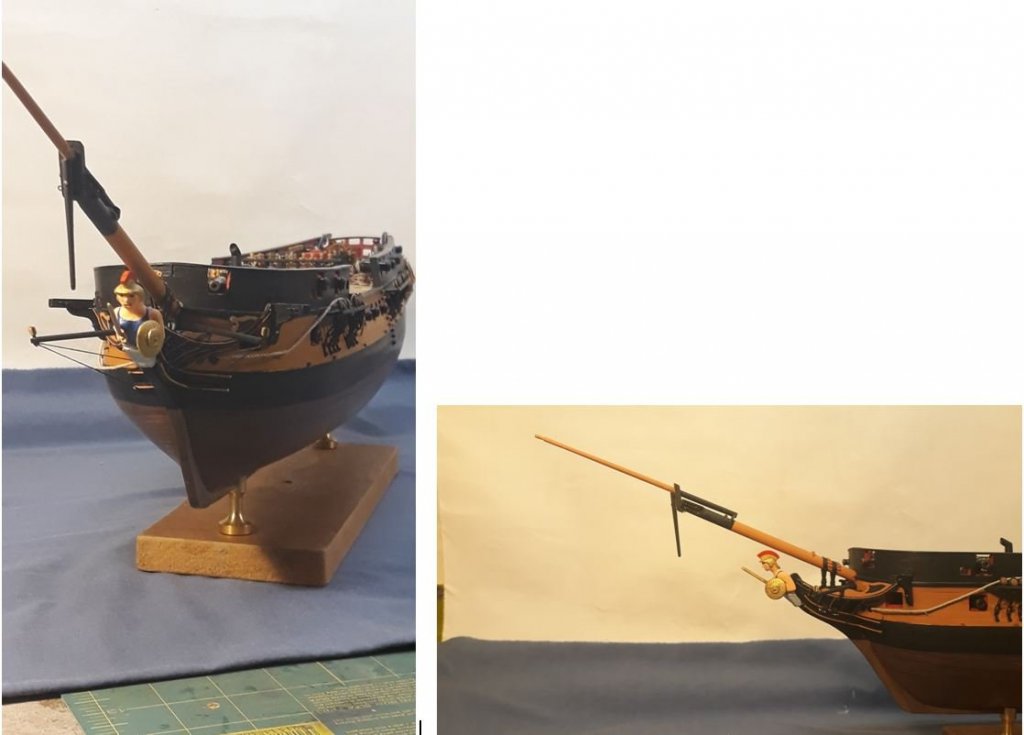
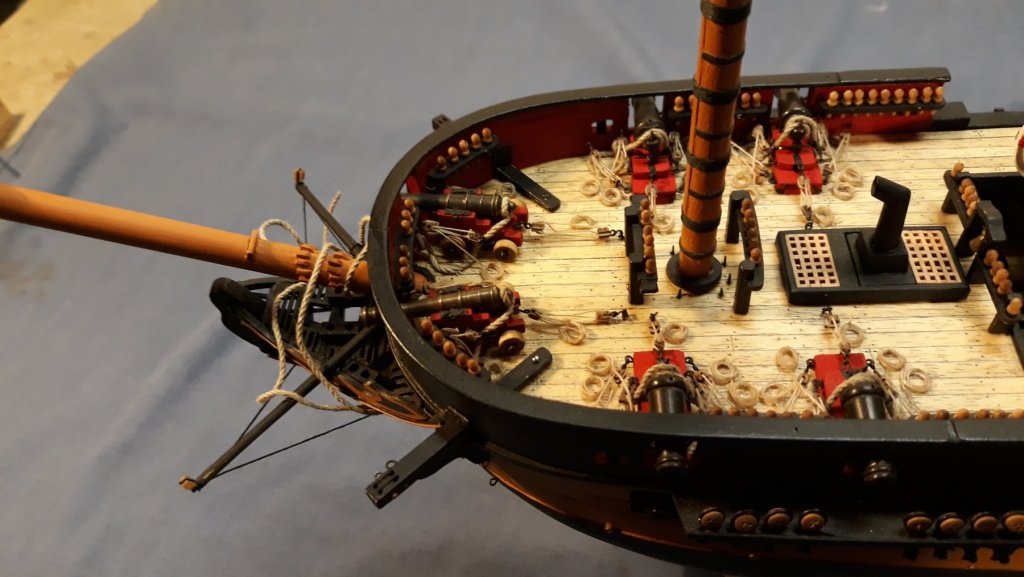
Another hurdle to clear before I can start the rigging. The figurehead! I intend to start the rig at the bow and work towards the stern so the bowsprit is the first work area. I can't start on the bowsprit rig until the figurehead is installed. I have been putting this off for too long but the time has come and I can no longer avoid this part of the build. Unfortunately my 3d people shape modelling skills are zero so this is going to be a steep learning curve and I don't have great confidence in the likely result. The first challenge was to work out what medium to use. Do I build up a shape using some sort of modelling medium or do I carve from a block of something? I have some timber a friend gave me that he said was good for carving so I thought I would have a go at this first. The next challenge was the shape of the figurehead. The Surprise carries the goddess Athena but she has many manifestations ranging from the elaborate metal look item on the replica used in Master and Commander to much more mundane items on other models. I decided to go for the mundane. After much searching I found a model which had a fairly simple Athena and I decided this would be the example I would attempt to build. I feel I can justify a fairly simple approach as Surprise was very much a working frigate and as the figurehead would most likely be damaged in any major sea battle fought repairs would need to be made by the ship's carpenter with timber to hand. The process and result are in the pictures. I am happy with the result, my first attempt at wood carving.


- 256 replies
-
- 11
-
-
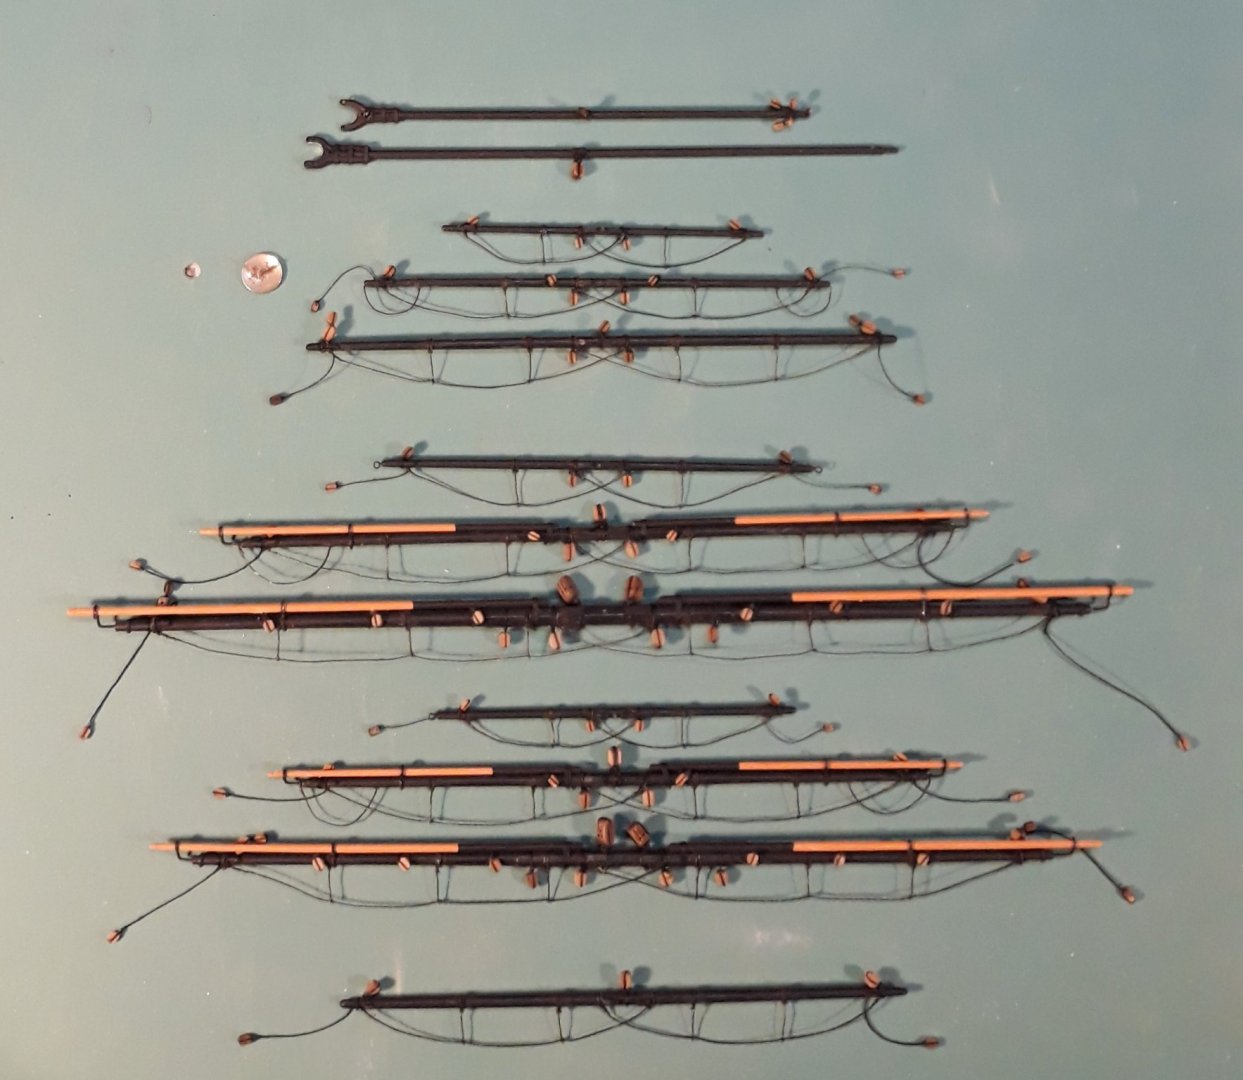
Hi All, I haven't had too many opportunities to progress construction what with end of year, visiting grand children and all the other distractions that keep me away from building. Yard construction has progressed and they are now completed apart from fitting of the blocks. After a frustrating time making the foot ropes for Bounty from fine cord and having a lot of trouble keeping the required shapes I decided to try a different approach and use fine copper wire spun into rope of the right size. Once fitted to the yards they were blackened with a chemical treatment. This was much easier to work with and I am happy with the result. The studding sail boom irons were again made with paper clip wire. I find that I can hammer the required lengths flat to make the rings the booms pass through and as the wire is quite malleable to start with I can still shape it into the required circles. Starting the rig is getting ever closer and I am quite looking forward to this part of the process. Cheers, David.

- 256 replies
-
- 10
-
-
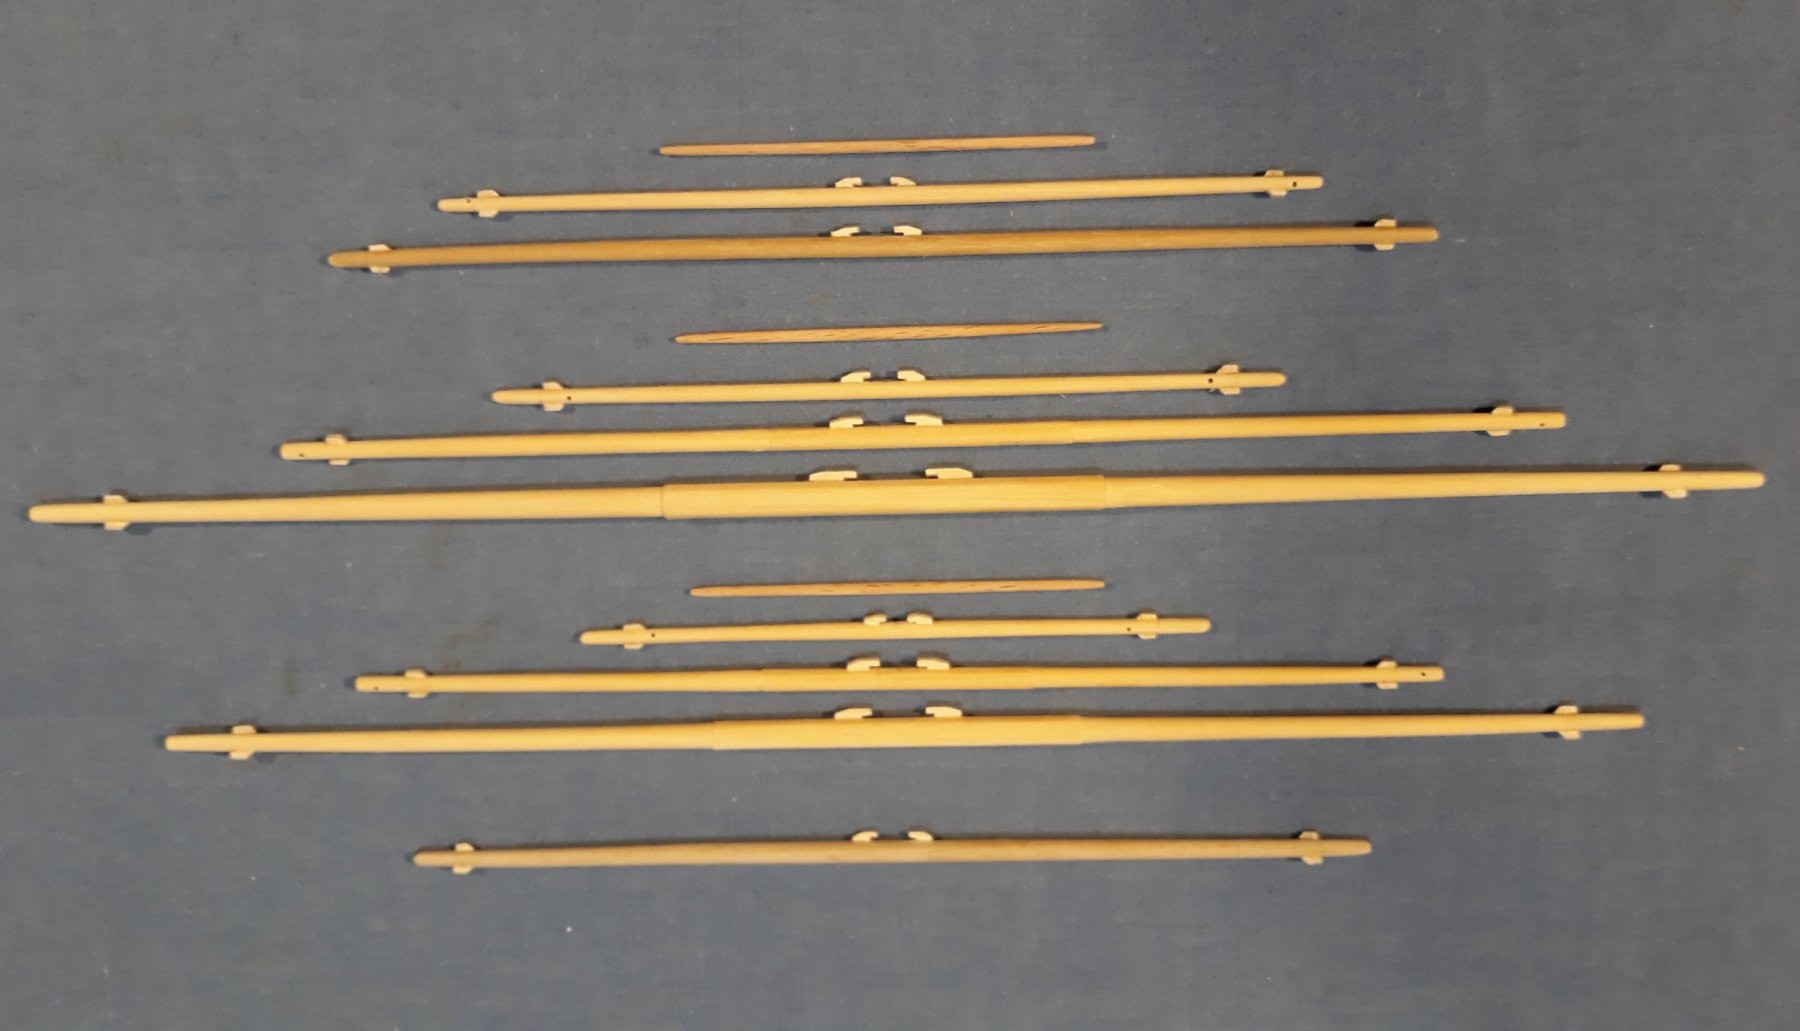
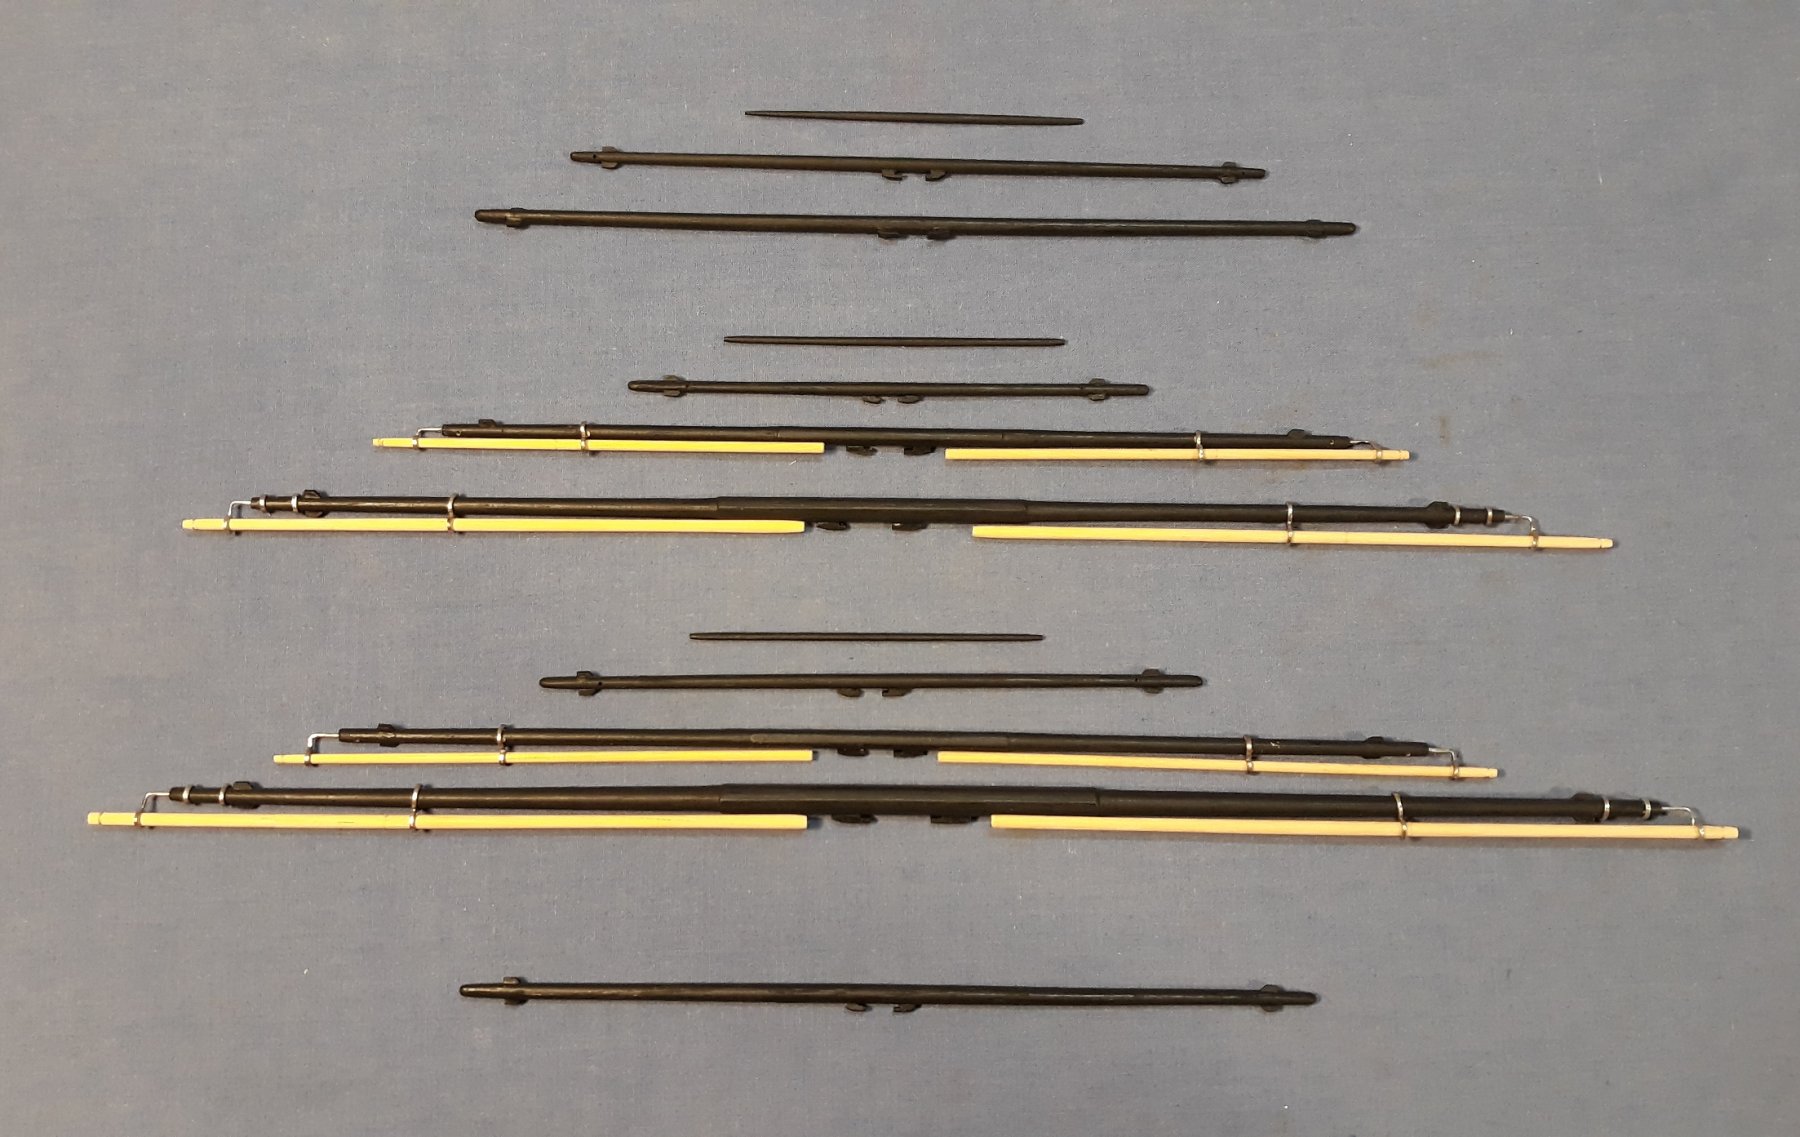
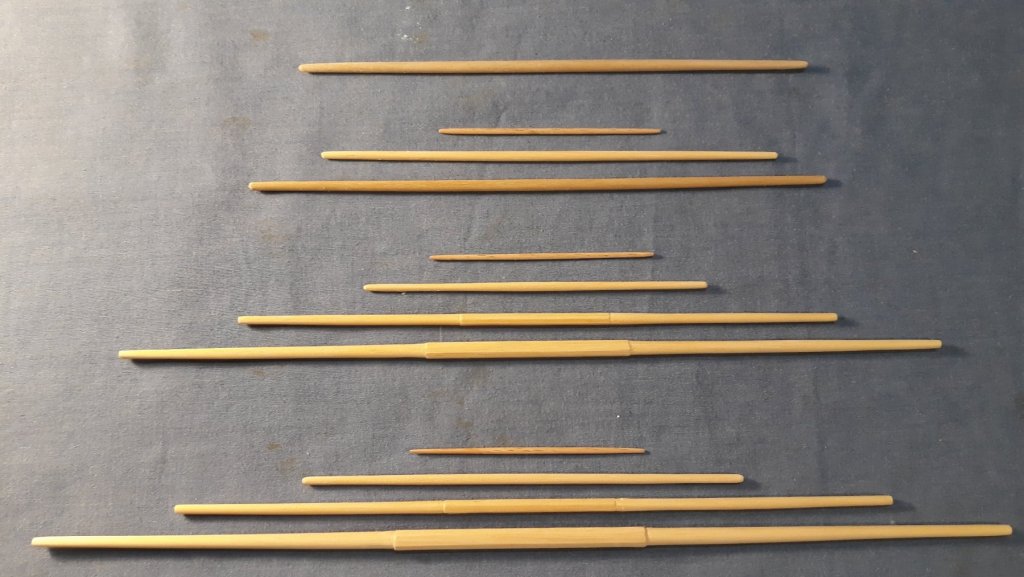
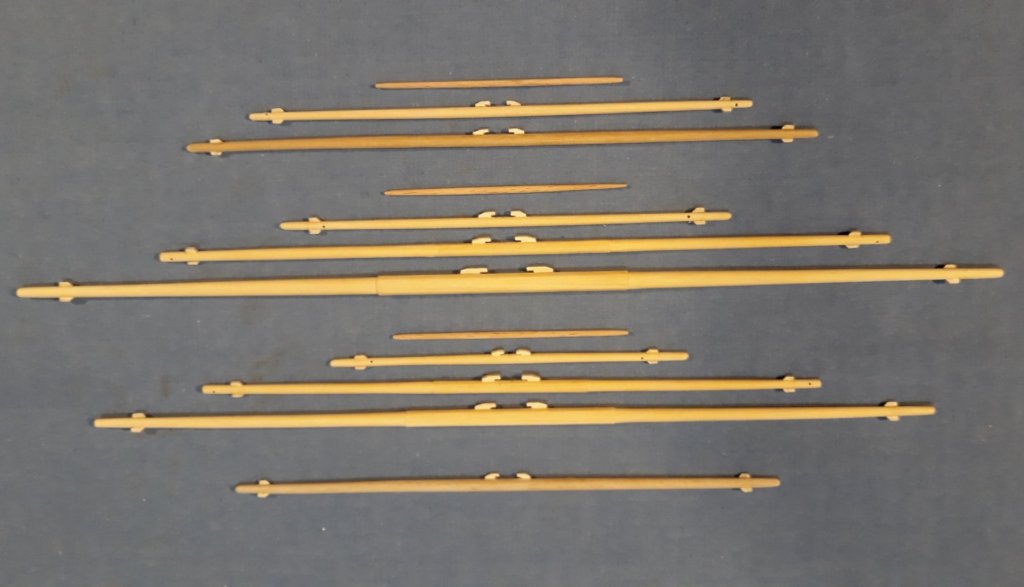
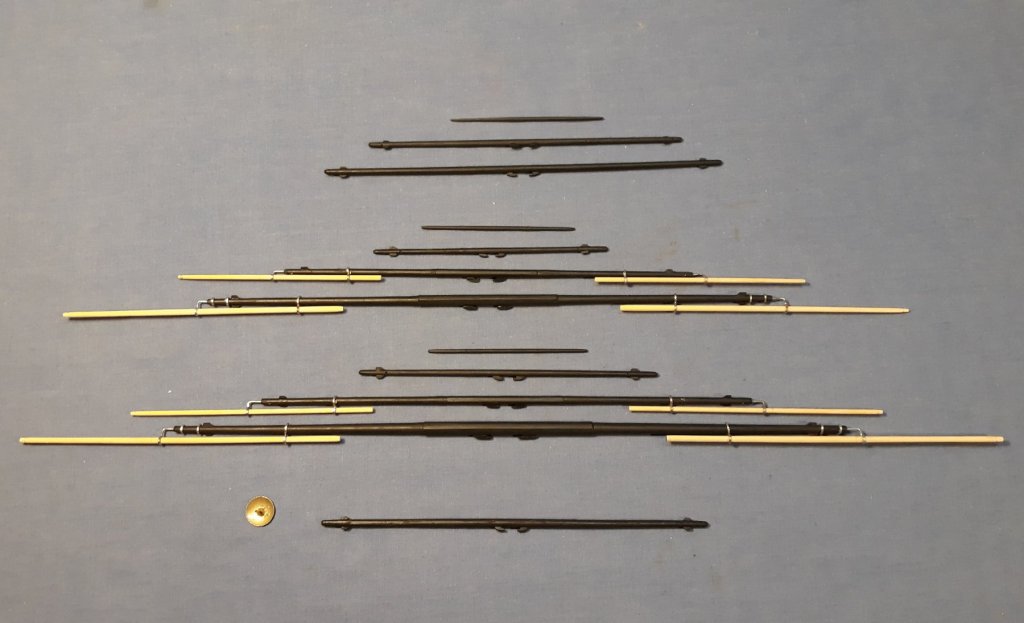
Lots of distractions have meant not much visible progress but I have managed to work my way through Lennarth Petersson "Rigging Period Ship Models" and have attached most of the blocks, rings and cleats that will be needed to complete the rig. On previous builds I had to attach a lot of these bits and pieces once the masts were in place, not so easy. This time a bit more planning ahead means that I should minimise this. The next part of the process is to make up the yards and other spars. To achieve the required tapering I am using a bench drill as a vertical lathe, it works well. To minimise dust I made up a booth from a cardboard box and fitted a vacuum nozzle to the back. Cheers, David.
- 256 replies
-
- 12
-


.jpg.a181cc1a7312bf9149bed7f4deaea09c.jpg)