Blighty
-
Posts
316 -
Joined
-
Last visited
Content Type
Profiles
Forums
Gallery
Events
Everything posted by Blighty
-
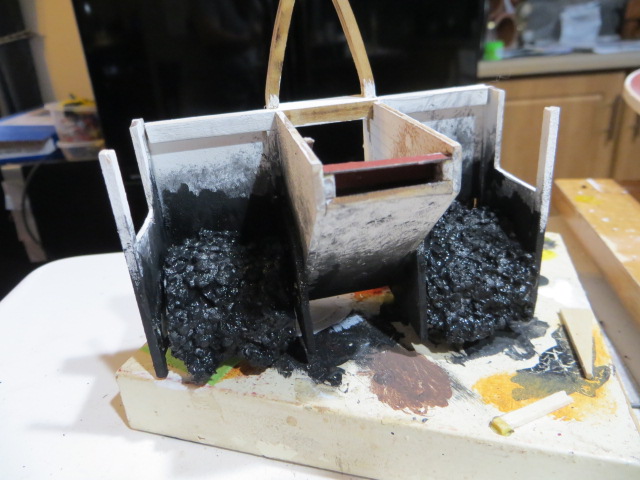
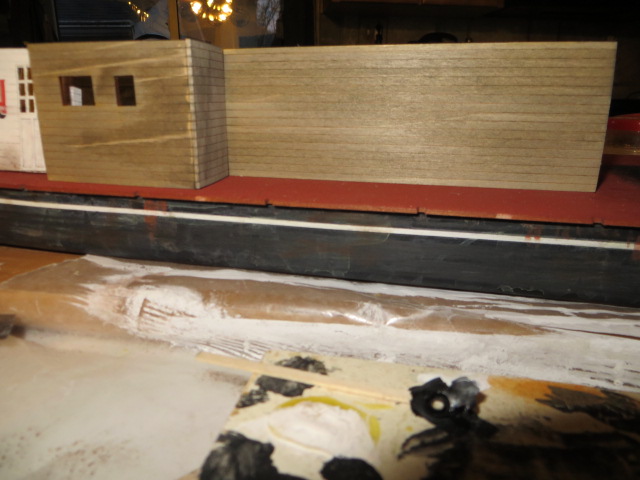
 Ken, What a great pic you sent, that is the exact look I'm looking for, been round the block a few times. I will definitely attempt to add the chalking details, I think it looks great. That will be quite a bit later as I plan to go round the bottom deck to the level I have then add more detail on another lap and likely finish it off with one more go round. Most of the weathering will be on the lower level, the next deck will be in better shape as you would expect. Thx so much for digging the pic out. I have a couple more updates to show. They are still incomplete but I think the intent is plain to see. Coal bunkers roughed in, still looking for mini coal piles!!! Some detail added to the wall shown earlier. The bundles of paper (or whatever) are the remains of the boilers I was going to detail. Thx to all for following. Len

- 296 replies
-
- 5
-

-
- chaperon
- model shipways
- (and 1 more)
-
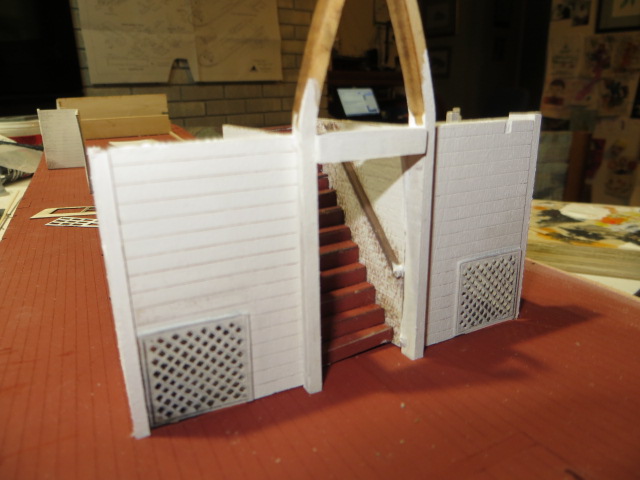
Hi, a couple of updates, I am working my along the SB side, have the first wash applied, then a thin coat of white that still shows the wash. In the inside corner I applied a heavy coat of white because I figured there would be little ware in the corner. Pics 1 and 2 show the panels at the back, just detail to add and a final wash to make it match the Chaperon panel. Last pic shows status of frt of cabins and the stairrail. Non of these panels are glued to deck.

- 296 replies
-
- 9
-
-
- chaperon
- model shipways
- (and 1 more)
-
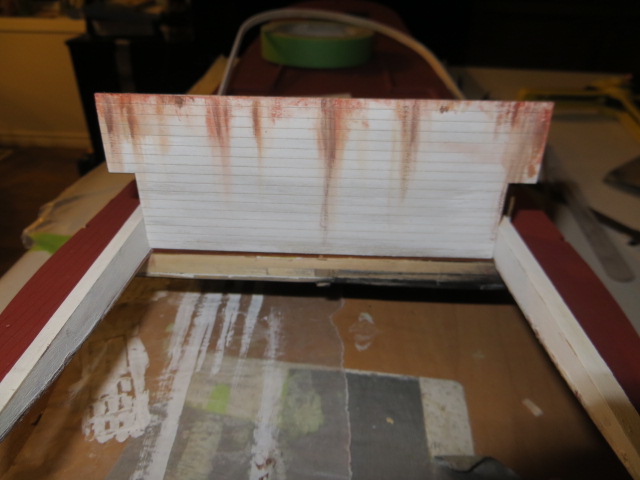
Cathead, that's awesome you following the weathering I'm doing, I hope you find something of use. I don't really have a plan except I want it to look a little unloved. Based on the photos of the Chap I've looked at I think it possibly was. I will post individual panels as I do them, however I have made changes as I go so you may see them differ from time to time. ie. I have changed the deck already and I plan to distress the finish on that a fair bit more. Anyway, if you see any issues, shout it out, if it works with my theme I'll change things up anytime, your input is most welcome, as is anyone elses, I hope you continue to enjoy the log. Couple more pics. I am adding coal bunkers both sides of the stairs. The rear panel I painted white, being in perpetual water saturation I figured rust stains would be a good bet and show up better than on a red surface. Len..
- 296 replies
-
- 7
-
-
- chaperon
- model shipways
- (and 1 more)
-
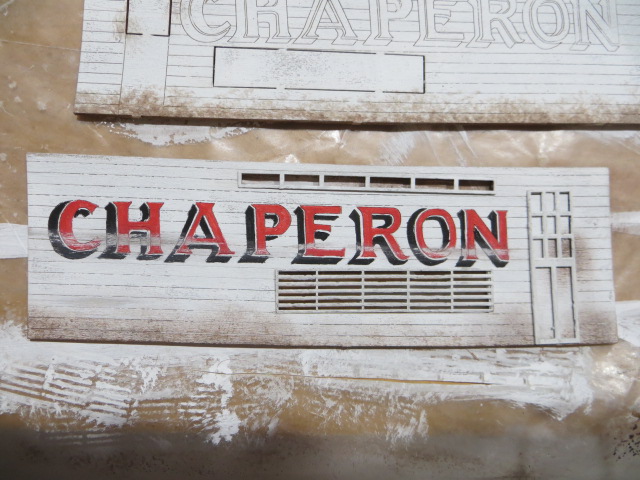
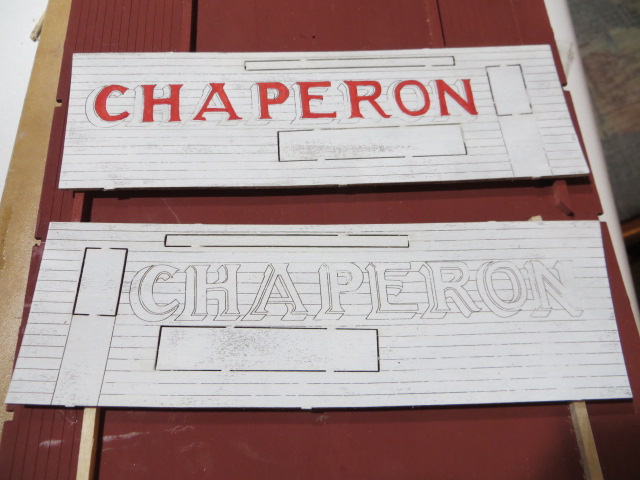
I felt terrible running the edge of a folded 220 sandpaper sheet through that lettering :(
- 296 replies
-
- 7
-
-
- chaperon
- model shipways
- (and 1 more)
-
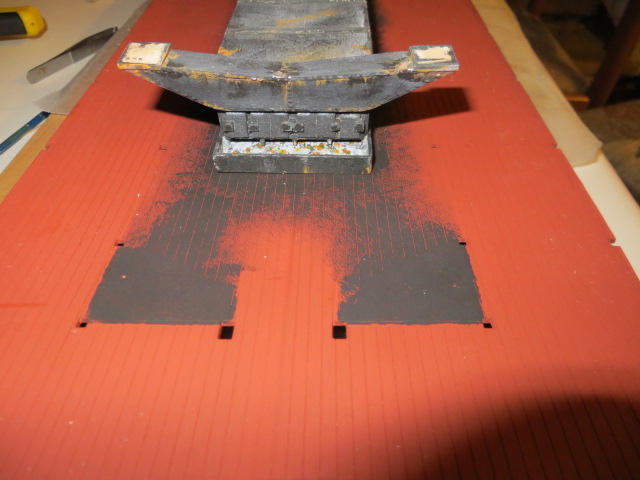
Thx Cathead, I'll have to air brush that mud line, but I like it and will definitely add it to the model, thx for digging this pic up, explains a lot.
- 296 replies
-
- 5
-
-
- chaperon
- model shipways
- (and 1 more)
-
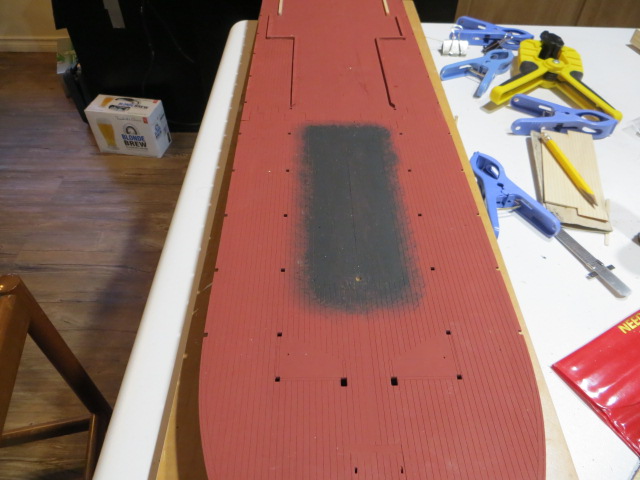
Started to add detail to the deck, cool times ahead!!!
- 296 replies
-
- 9
-
-
- chaperon
- model shipways
- (and 1 more)
-
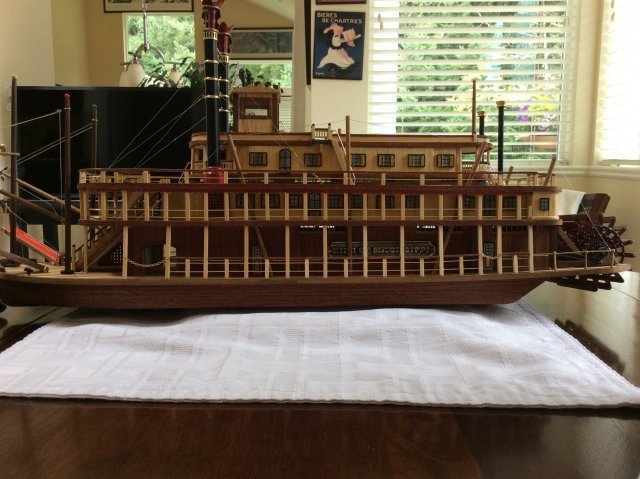
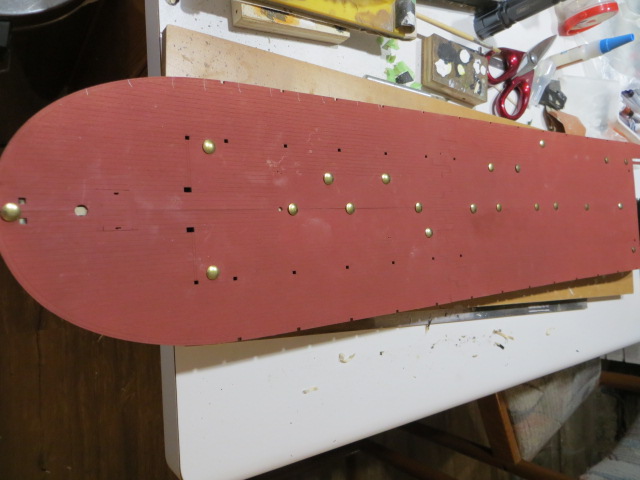
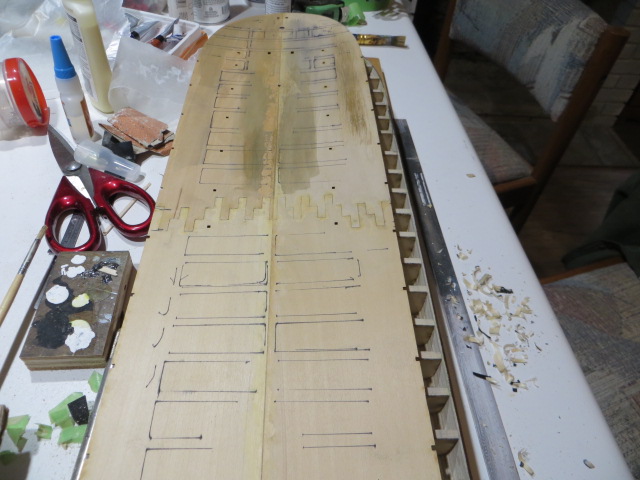
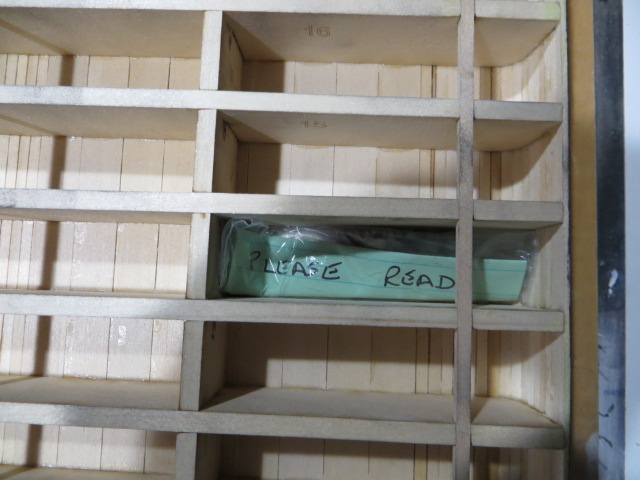
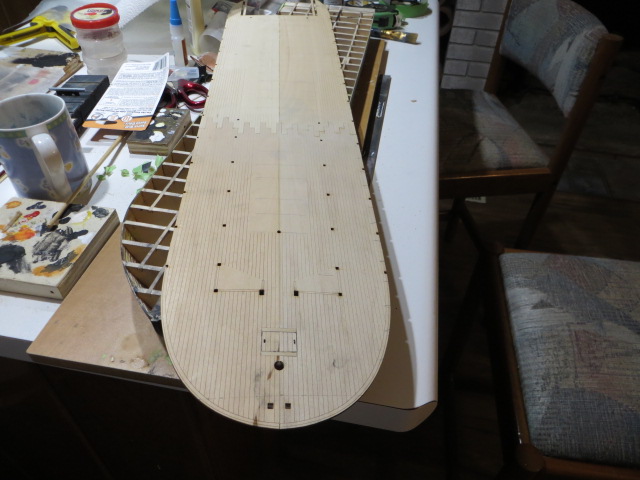
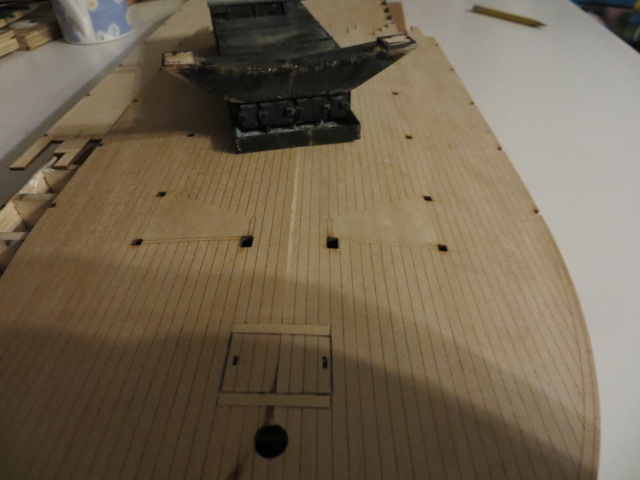
Deck went on last night, before I glued it down I tucked a message sealed in a zip lock bag between the bulk heads, I hope it is a distant future descendant of mine who finds it. (It has to survive the current batch first, that will be a challenge with 6 Grandkids). ;) The other pic might be useful, prior to planking the hull I taped the deck on and ran a fine line felt tip roughly round the bulkheads, these locations were then easily transferred to top surface so I knew where to put pins and land on timber below.
- 296 replies
-
- 8
-
-
- chaperon
- model shipways
- (and 1 more)
-
Hi Cathead, Sounds good idea, I'll try it out, I have some more detailing to do first but should see it on the model tomorrow or Monday, I assume it would represent the waterline, is that right? I'll see if I can find a sample pic of a mud line. Thx for the tip, I having a problem making it look real, but this might help.
- 296 replies
-
- 5
-
-
- chaperon
- model shipways
- (and 1 more)
-
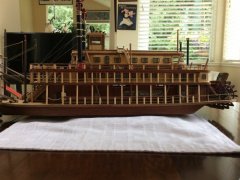
I have 3 'epics' to date: My first wooden model build, Emma C Berry My current, Chaperon And my next, I don't know what that is, I like the larger scale, working boats, the old eyes are not what they used to be so I avoid intricate rigging. This riverboat is a blast. Len
-
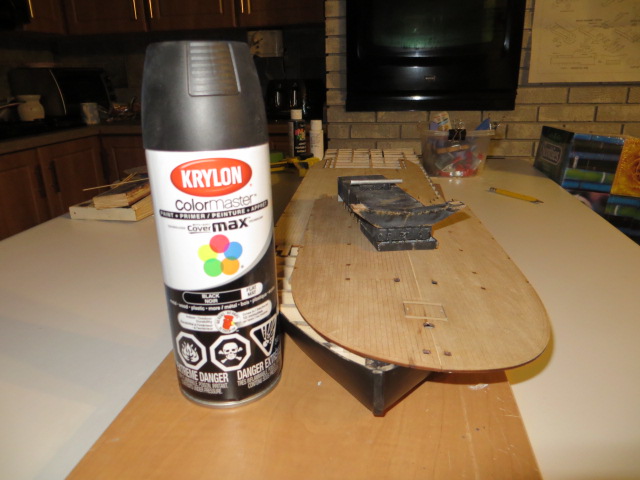
Hi again, The hull has 2 coats of wash on it now, white & green, I have also added some detail rust deposits and a little dry brush work. I'm not over pleased with the results, it's not what I was hoping for but still fairly easy to repaint if this aging process does not work out. I have some more detail to add with a brush and I will decide at that point what paint job the Chap gets. I have now glued the deck together and I need to mount that before continuing the paint job on the hull, so it's off to the garage to spray the deck with auto undercoat Red Oxide spray can from Krylon. Here's a couple of pics showing the latest. Thx for reading...
- 296 replies
-
- 6
-
-
- chaperon
- model shipways
- (and 1 more)
-
Thx Em, I want to see your 'new' room too, pics looked good, plenty of room for models!!
- 296 replies
-
- 5
-
-
- chaperon
- model shipways
- (and 1 more)
-
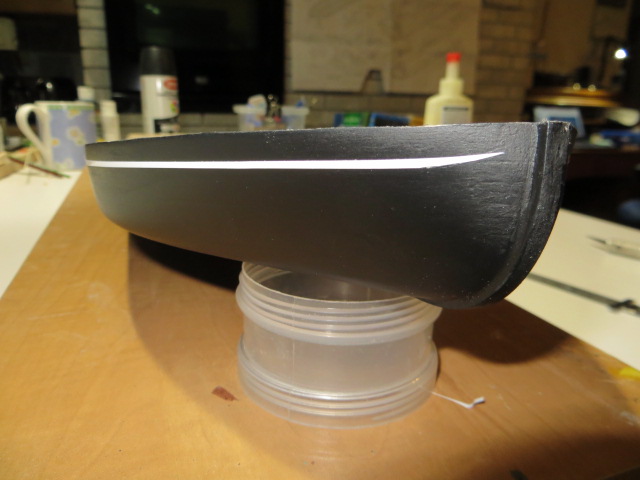
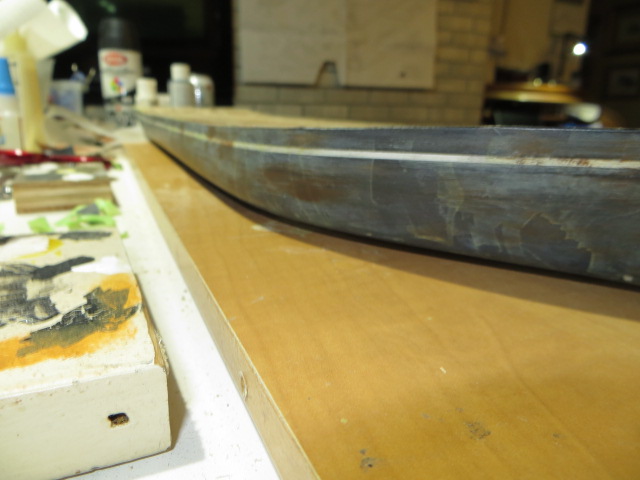
Stage 1 of painting the hull, next step will be adding a white stripe to the side, stick on, not painted on.
- 296 replies
-
- 7
-
-
- chaperon
- model shipways
- (and 1 more)
-
Just waiting for the camera to charge, shouldn't be long, nothing to see though just a black hull right now.
- 296 replies
-
- 4
-
-
- chaperon
- model shipways
- (and 1 more)
-
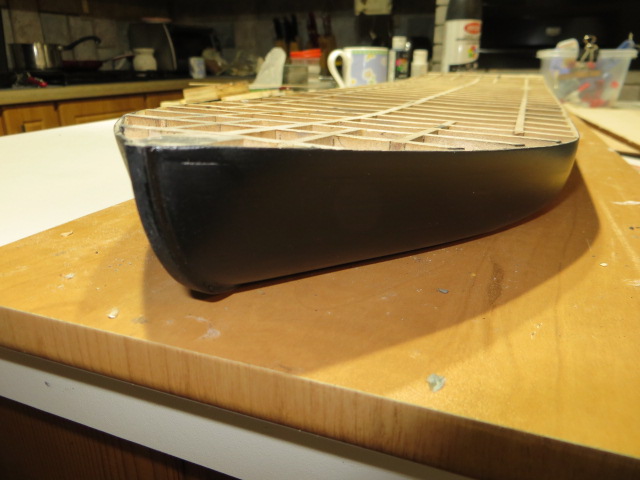
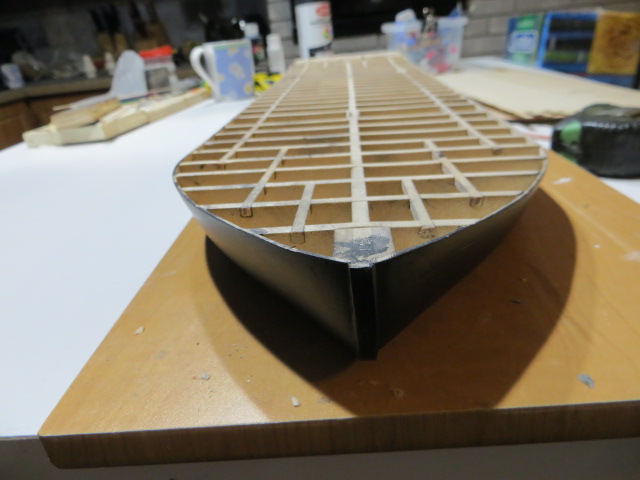
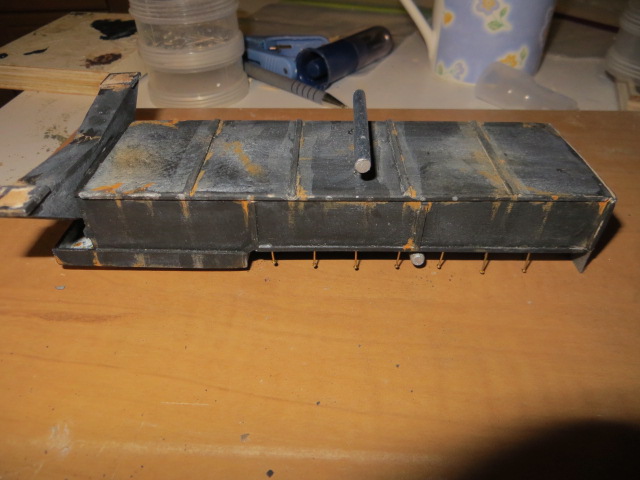
Hi, I'm at a bit of a loss today, the Admiral has gone for the day, baby sitting the Grandkids, it's cold and raining outside so I'm stuck in the house with nothing to do................ I know! a bit of modelling today. If I extend one arm to reach the hull I can extend the other to reach the Keurig coffee maker. Does life get any better? Here's a couple of shots showing status to date. First pic shows the access cover just behind the capstan. All I did was cut a couple of shallow divots to load the cross planks, if it didn't work out right it would have been an easy fix to repair the deck. Second pic shows all I've done to date, hull painted black, deck currently in 2 pieces to store safely on top of fridge, I'll glue it up on the flat work top before asm'g to hull, as mentioned previously. Third pic shows the top of the boiler insulator box divided up to smaller sections. 8' x 24' single sheet is huge! an easy fix to show probable real world detail. Is this a good assumption? Final pic shows the detailing on front face of boiler, more suggestive tan accurate but I think it looks ok. Gages and valves to be added later. I have to find out how to associate text with each pic, sorry about this. Aging the hull today, I'll take plenty of pics as I go, but right now charging the camera battery. Thx to all who are following my log and a special thx to those with opinions to share, Ihope there are others reading this that will also benefit.
- 296 replies
-
- 6
-
-
- chaperon
- model shipways
- (and 1 more)
-
Hi Ken, thx for comments. It's good to know you have some history on vinegar solution, I will try it out on the deck and post progress pics as I go. Depending on how that works out I may apply to side walls also. Right now, I'm just about to add the last coat of matt BLACK paint to the hull, should start the weathering process tomorrow. I'll put some pics later today. The hull planking was not to difficult, with knowledge that it is to be fully covered with paint a little licence was allowed for filler, how much filler, I forget . No vinegar treatment on the hull, just washes and detailing. Servicing, maintaining, lubricating, polishing, I'm sure you are right, the engineers applied plenty of all these activities in abundance on their gals but my Imgineering needs satisfying more than my desire for historic accuracy on this model. Right from the decision to build a steamboat I had a desire to build it a little distressed, after looking at pics on line they looked tired and dirty, the sag in the cabins evoked a vision of being worked to hard like us. This ship's paint job will be a little left of center, but I will back off some of the rust patches on mechanical parts to keep it somewhat real, thx for keeping me honest. Len
- 296 replies
-
- 5
-
-
- chaperon
- model shipways
- (and 1 more)
-
Hi Em, Yes I will paint the deck but I plan to put a very thin coat on it and sand areas back to bare wood, I've seen this on staircases many times. I will add more aging wash after painting also.
- 296 replies
-
- 3
-
-
- chaperon
- model shipways
- (and 1 more)
-
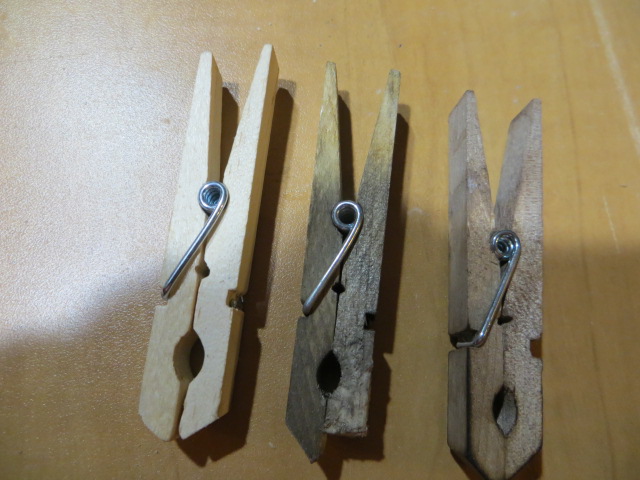
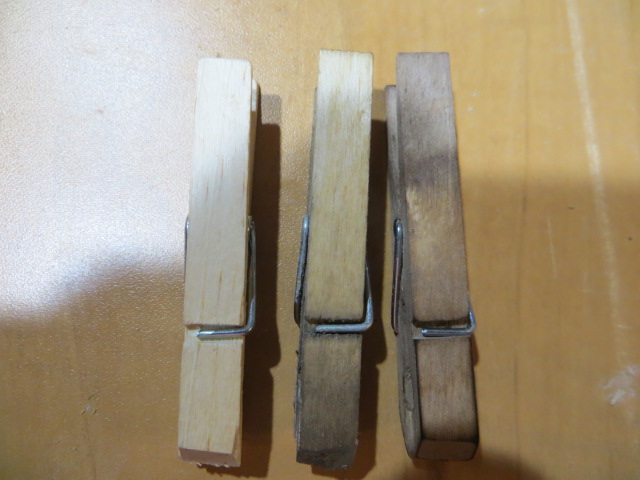
Hi, I've been checking out Youtube for some wood aging techniques and I really liked the effect of dipping in a solution of vinegar, baking soda and wire wool. I experimented on clothes pegs, the results of which you can see below. The problem with this is it is a very wet process and the thin sheets of decking will warp. But the advantages are great. No skill required, just wet it and wait. Looks very genuine, much better than any painting I'm capable of. The stain penetrates deep into the wood, so any filing or distressing of surface will still be aged if the original surface is removed. (I cut off the end of the peg to see depth of penetration, it basically appeared to be right to center of wood section). I would like to treat the deck and lower side walls prior to painting, then sand off areas of paint in high traffic areas to show bare deck boards. Can anyone recommend a safer process? Thx for reading. Len
- 296 replies
-
- 4
-
-
- chaperon
- model shipways
- (and 1 more)
-
Great build, I have just added the gun boat to my short list, following with great interest. Len
- 701 replies
-
- 3
-
-
- phantom
- model shipways
- (and 1 more)
-
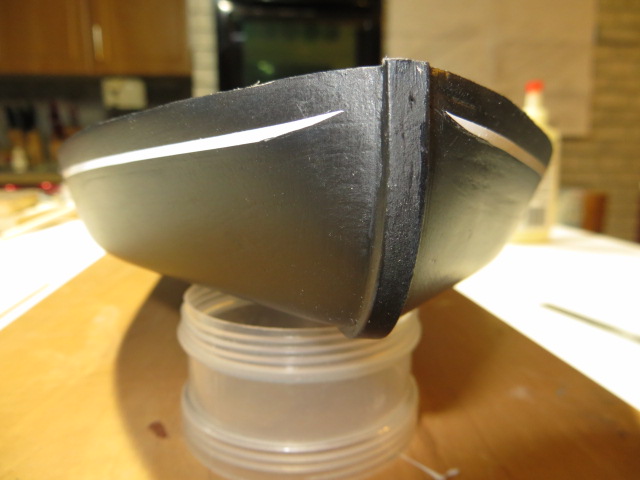
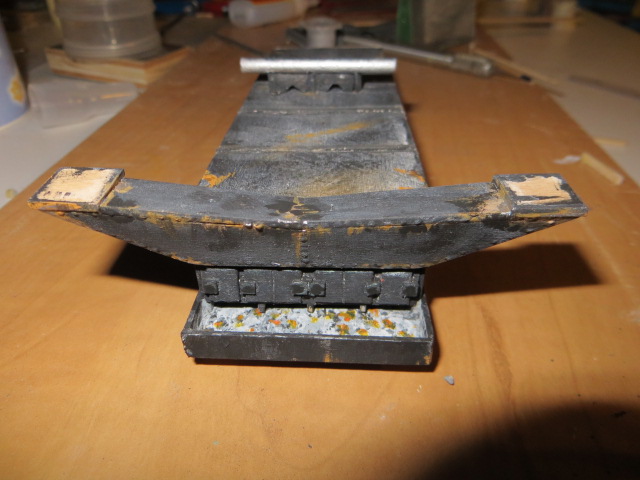
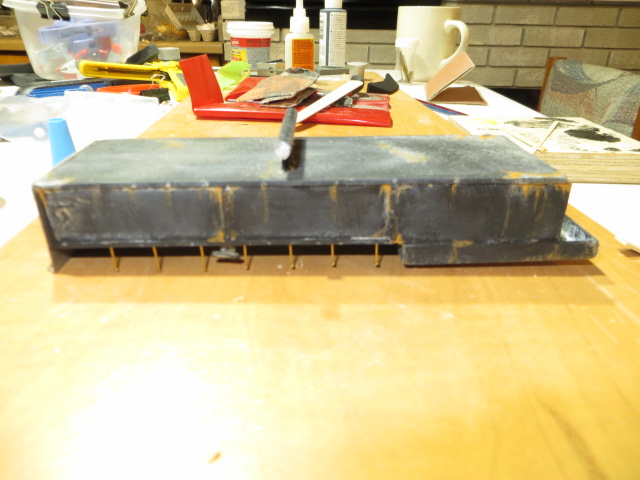
I'm well into the boiler asm. now, that has been a fun little project it took me most of today. Sticking with the plan to weather/age the old gal, I might have over done it a little!!!! What do you think? it will be easy to back off a little and reduce the rust onset. The smoke manifold is still to be weathered. Back to the hull tomorrow, time to decide on colour options.

- 296 replies
-
- 7
-
-
- chaperon
- model shipways
- (and 1 more)
-
Hi Doug, nice looking build, I'm here to check out your kit, I have the Bluenose from Model Shipways lined upfor the near future, good luck with the build., I really like your adaptive gadgets! Len
-
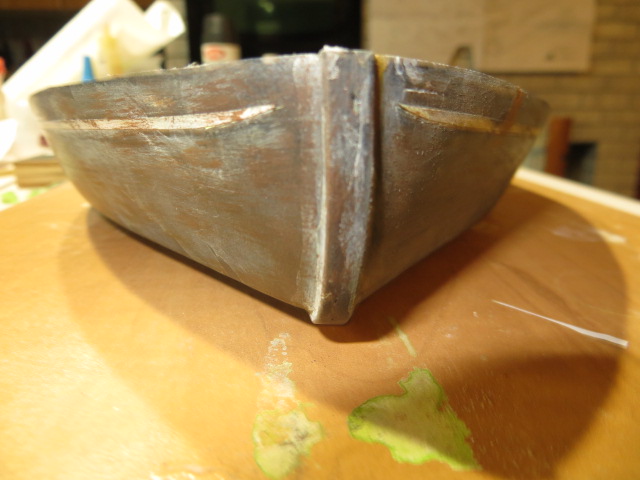
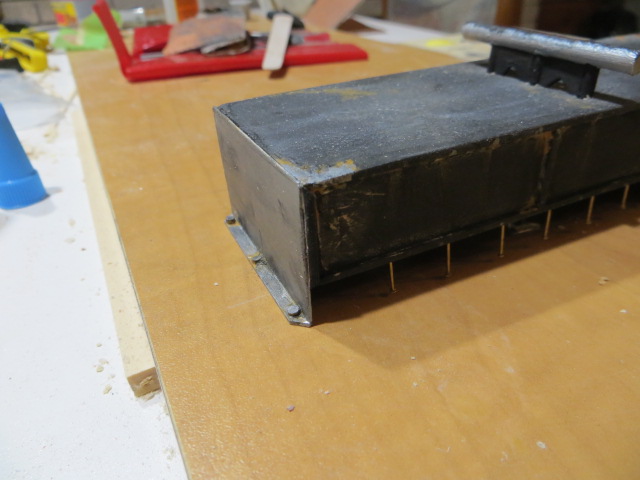
I've started to construct the boiler asm and found a use for the meet tenderizer. I beat up the surface of what will be the ash pan to simulate a layer of ash, I've also added a coat of black paint to see if the effect is any good. Should work ok. Note I extended the front edge of the pan to show a little bit more. I will trim off the extra length when I've finished painting it. It gives me something to hold on too.

- 296 replies
-
- 8
-
-
- chaperon
- model shipways
- (and 1 more)