Don Quixote
-
Posts
1,689 -
Joined
-
Last visited
Content Type
Profiles
Forums
Gallery
Events
Everything posted by Don Quixote
-
Hi, Larry, I'm going to plank the deck before the hull, just for the experience. Deck is more crowded and will hide mistakes I expect to make in my learning curve. Having said that, I see (or at least I understand from what I'm looking at) from the plans regarding the bit holes for the fife rails, that I can do some framing, or I can use dowels. Not at all sure what that means. My interpretation: Leaving the framing off, I can put a small dowel in the center of the bottom of the rail posts, drill a hole of the same size through the deck, and rely on that tiny bit of glue to hold the posts (bit?) in place, OR I can build a frame to fit around the post itself and make the post long enough to fit into the framing through the deck. Which sounds sturdier. Or should I go smoke crack? Brian
-
Thanks. They're a huge help:) The folks that run this system had a corrupt drive that hosts our pics. They did a great job retrieving what they were able to. And thanks for the Welcome. I have a niece in up state New York that is Federal Port Authority and she saw the brig last summer in Buffalo and told me about it because she new I have long been fascinated by that war. (We should have let the Brits keep Detroit.) Born and raised in Grand Rapids, Michigan, I'm probably one of a handful that can name all the lakes. Much less tell you where each one is. Anyway, we're "planning" to fly to Grand Rapids, Michigan, from our current home in California in September to see family. From there we'll rent a car and drive along as much of the St. Lawrence in Canada as we can, stop and see the falls for the thousandth time, - Never see them from the U.S. side. What an arm pit - see my niece in Ogdensburg, about as up state New York as you can get, then drive the U.S. side back. They have tours scheduled until late September on the Niagara. I "THINK" you can help sail her in the summer. I know students can. Incidentally, the boys and I once camped along the St. Lawrence next to the locks. BIG mistake. 5 am, the ships blast their horns. I swear they do it to antagonize idiots in tents. I love up state Michigan. Lot's 'o Vineyards.
-
What's a kit bash, and a scratch build? Brian
-
I'm betting you catch up. I just took 6 hours to build 1 coaming. And thanks. Brian
-
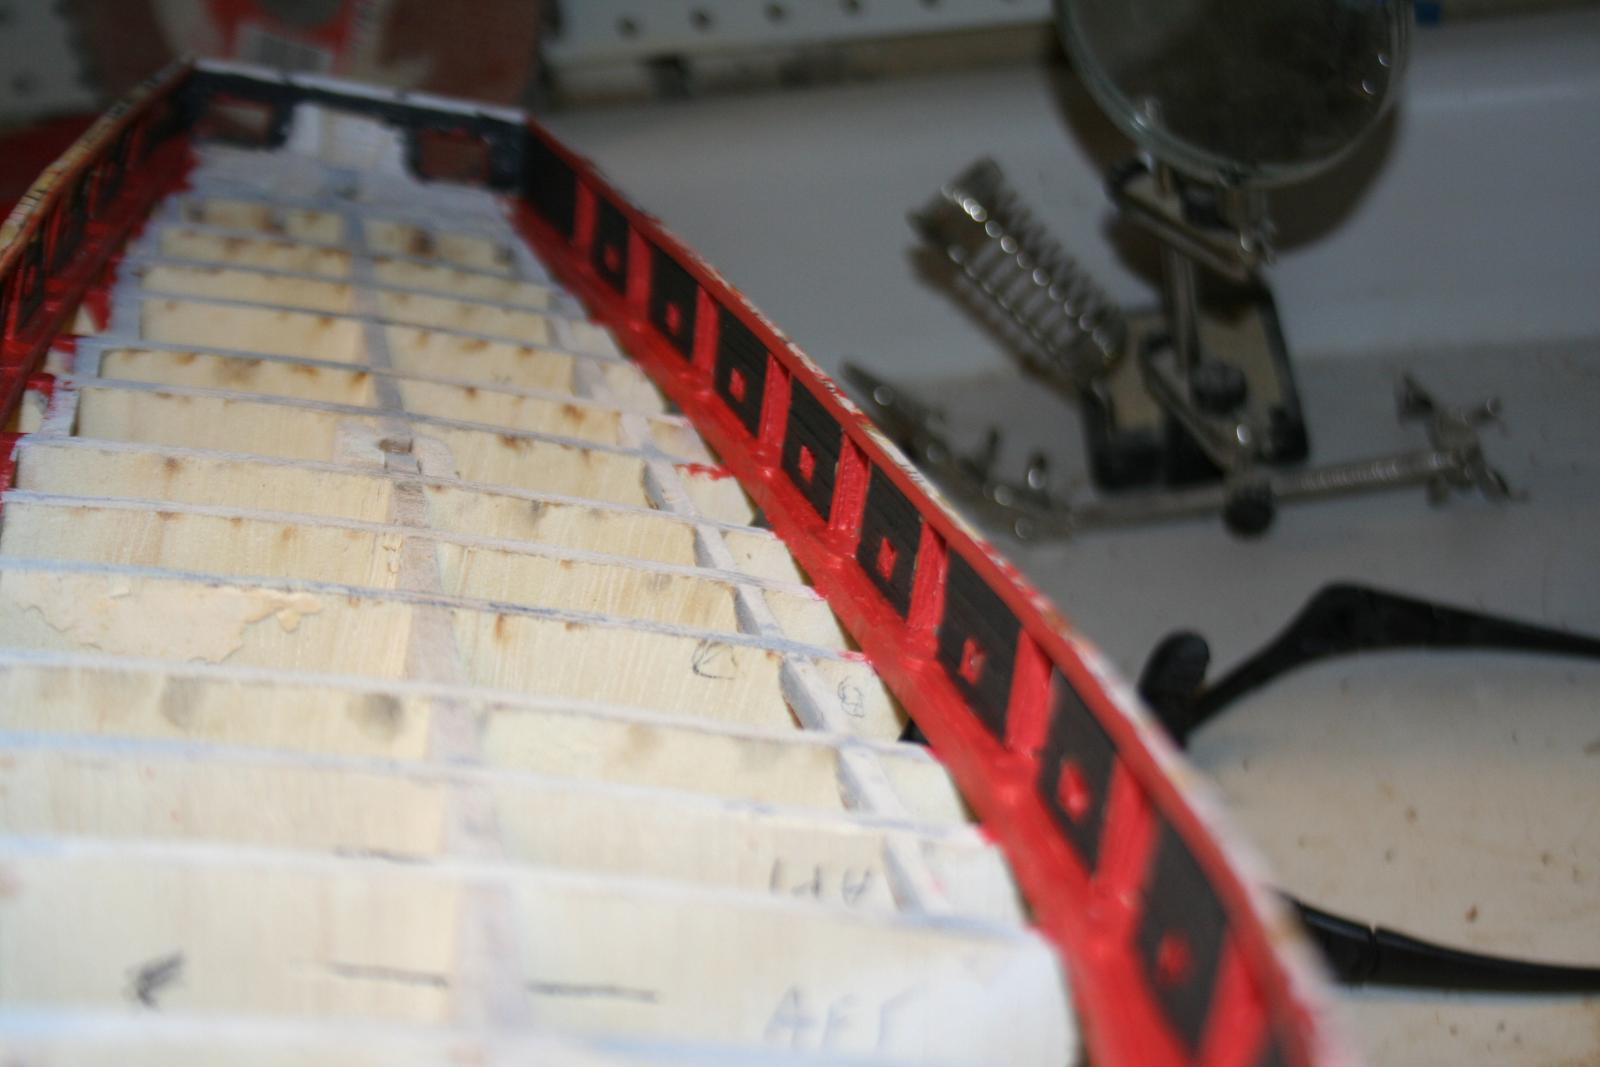
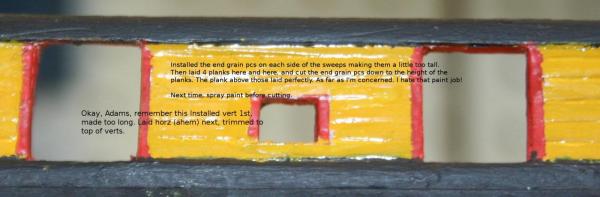
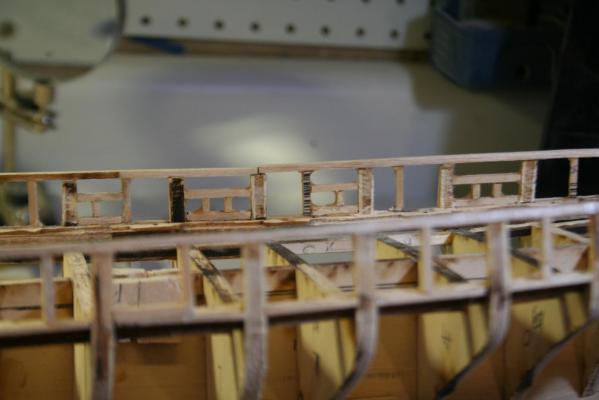
2 months later... My stantions may not look purdy, but I think the shape is close enough that the decking will lay satisfactory. One thing I DO have a lot of experience with is tape and paint. On plastic models. I used regular painters tape when on plastic I always used electrical tape. Definitely should have used electrician tape. Being more flexible it would have flowed better into the cracks and grooves between the planks. I thinned testors paint. Still too thick. THEN I found Greatgallions build and saw he painted them before hand. DUH!!! When I built plastic I used tape to make pin stripes. Parts to be put together I painted first. THEN I tested testors spray paint. Wood and I never did get along. I think I'm a little intimidated. I just hope I remember what I learned when I start my next ship. Yes, I know, I need to dull coat the yellow. One thing I think I may have done right: I had long since noticed my gun ports and sweeps are not perfectly square, so I actually planned ahead and laid the pcs covering the ends of the planks first in order to reduce the appearance of the lack of squareness. I then cut each plank individually, checking each and every one before placing them. I started at the bottom of the stern, cut the piece, laid it on a flat surface, cut the one above it, laid it above the first, on and on until I had all the far stern planks laid out. Then I cut the planks to its right, and laid those to the right of the stern planks on my flat surface. My reasoning is to glue as many on at a time before the glue dries, rather than cut a plank, lay it, cut it, lay it... Why so much detailed information on this build? So I can go back later to refresh my memory. Too much brain cell population control in my younger years. Believe it or not, the paint is not filling in and hiding any gaps between the grain end pcs and the planks. I actually got that lucky/good. I learned that I was good enough to do that when I cut and set the grain end pcs. However, trying to give the planks a nice look, I sanded the upper and lower edges to make an angle. Only to change the height of the planks so that they were not all the exact same height. Ok Adams, not what're you gonna do? I laid the first - bottom - plank, then laid the vertical end grain pcs, but made them all about a 16th" too tall. Cut and laid the planks between the sweep and gun port on each side of the sweep and cut the end grain pcs level with the top of the 2 planks to the sweeps right and left. Still not perfectly square, but now I see how easy a jog could have been.

- 287 replies
-
- 1
-

-
- niagara
- Model Shipways
- (and 1 more)
-
Thanks for the log! But um... A lot of pictures are missing I'm working on the Niagara as well, but I bit it off as my first ship. Seemed like a good idea at the time. You name it, I've made it. Outta plastic. This is an entirely different world! Loving it though.
-
What tool/tools did you use to make the hammock rails and stanchions on page 14? Thanks, Brian
-
Model Expo's parts picker
Don Quixote replied to Don Quixote's topic in Modeling tools and Workshop Equipment
That's exactly what I'm hoping:) -
http://www.modelexpo-online.com/product.asp?ITEMNO=MT1036 Anyone used this and what did you think?
-
Oh, Pee-Shaw. Mine's going to look at LEAST 1,000,000,000 times... worse... BEAUTIFUL!!!!! Thanks for the lessons
-
Removing paint
Don Quixote replied to Don Quixote's topic in Painting, finishing and weathering products and techniques
Thanks for all the ideas. Acetone worked, which was really cool, because I had the garage door wide open so the admiral had no reason to scowl even though I was getting stoned. First thing I noticed was that I had a cut on the 1st knuckle of my index finger. Didn't take long to find the right 4 letter words to deal with that, and once that was done it (the paint) came off very well indeed. It evaporates so fast that it doesn't get a chance to get into the pours of the wood which I was afraid of. I did end up scraping the worst corners with a flat blade of my knife kit (ugh), but I was able to take a 1/4" sq strip of bass wood from my local hobby shop and very tightly wrap some 150 grit, then 220, then 320, then 400 and then 600 grit sand paper around it and across the end. The way I did it, the end was a single 1/4" sq piece that could be replaced when it got clogged. I used contact cement. There are some curves that'll never look right, it's not ideal, but it's my first build and there's enough rigging and cannons...etc... that it shouldn't be too noticeable to anyone other than me. The most important thing is that I learned a valuable lesson. Test ideas, paints and what not on scrap wood first. I thinned the paint with a little testers paint thinner and it's much better. -
Are you alive and well? You haven't been on here in awhile. Did the admiral ground you? Brian
-
Removing paint
Don Quixote replied to Don Quixote's topic in Painting, finishing and weathering products and techniques
I've done that to most of it, it's the corners that I can't sand. I bought some bass wood from the hobby store. I'll try these suggestions and get back with what worked best. Little scared of acetone. Thanks, all... Brian -
Spare planks
Don Quixote replied to Don Quixote's topic in Building, Framing, Planking and plating a ships hull and deck
Let us prey:) There's always one side of a model that look better than the other, but I'd like to give the other a fighting chance! Thanks much. Brian. -
I'm working on Niagara, and messed up too many of the planks around the cannons and sweeps. Anyone have any spare 3/32 X 3/64 inch planks they wanna get rid of? Brian
-
Once again, thank you!
-
I saw that you said you had a lot of wood left over. By any chance was any the planking around the gun ports and sweeps? If so, I'll pay for shipping on whatever you have. Brian
-
My first wood build. Following another log, I used an enamel paint from testors. The black was a thin paint, but a redish color is rather thick, and looks like crap. LOTS of nooks and cranny's that I don't think can be sanded. Is there a way to remove enamel paint, or is there a trick for sanding tight corners? Brian
-
I should have paid more attention to the image that showed the cans. Probably because I spent some 35 years building plastic everything, I went with testors enamel. Nice and thick. Looks like crap. Exactly what is that paint you used so I can order some and figure out how to sand all the paint off.
-
This was not all done in 2 days as the log might imply. This has been 4 months, maybe 2 to 3 hours an evening. I think I spent 6 weeks figuring out how to make the gun ports and sweeps alone.
- 287 replies
-
- 1
-
-
- niagara
- Model Shipways
- (and 1 more)
-
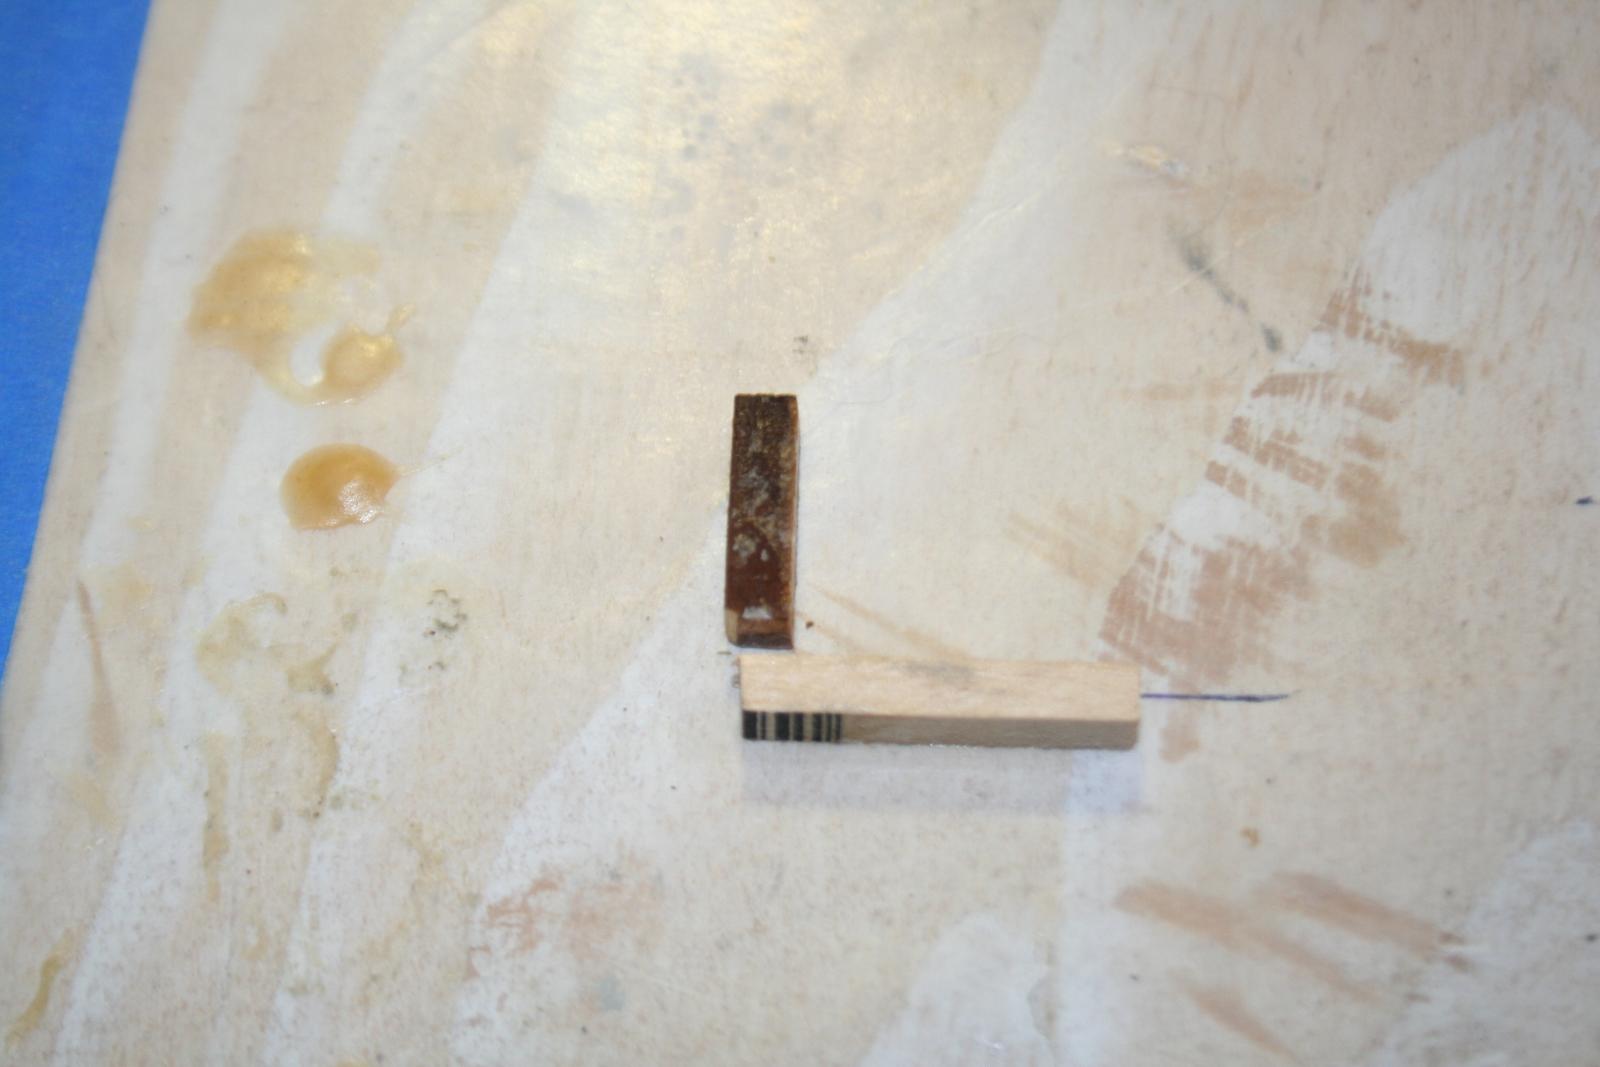
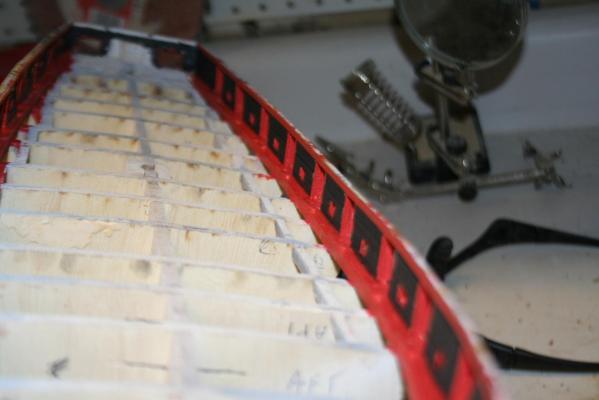
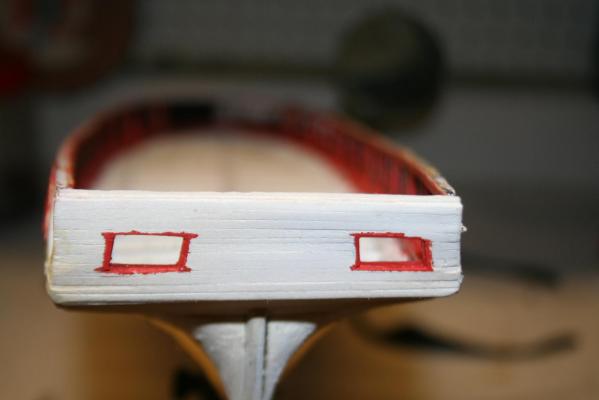
Having learned how to spell IQ, I placed the first plank, then set the 3/64" sq sweep boarders on top of that rather than hoping I got each one in the correct location and then laying the planking.

- 287 replies
-
- 1
-
-
- niagara
- Model Shipways
- (and 1 more)
-
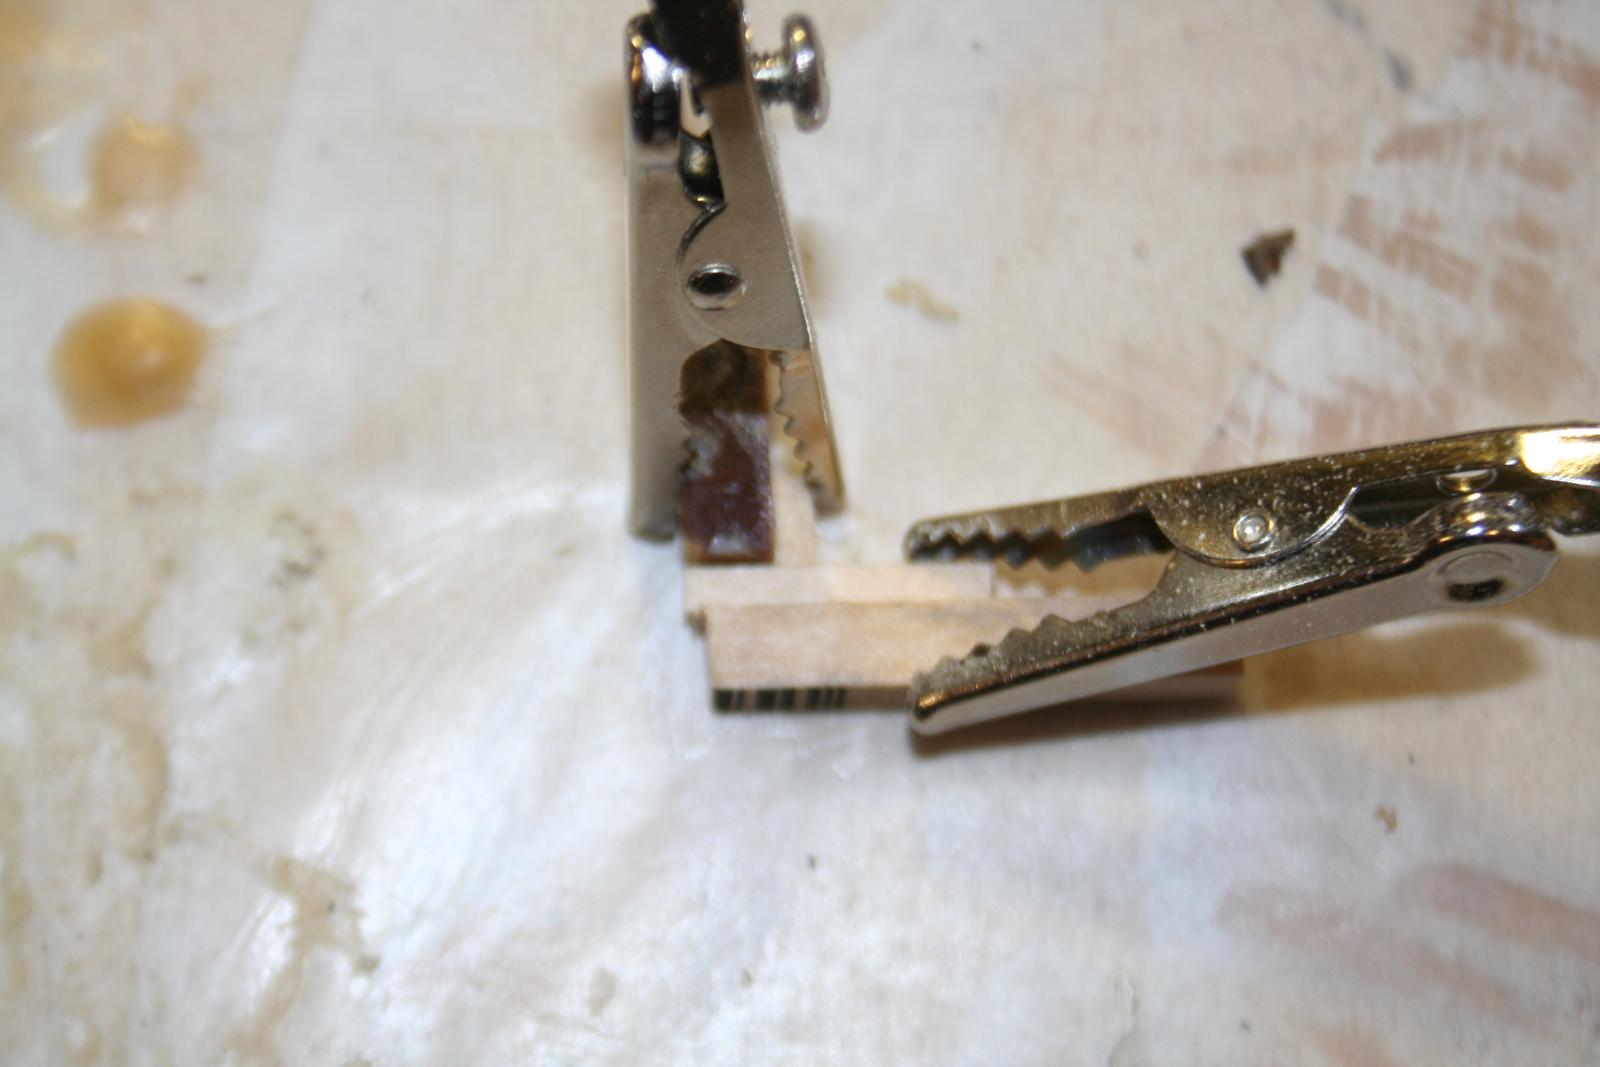
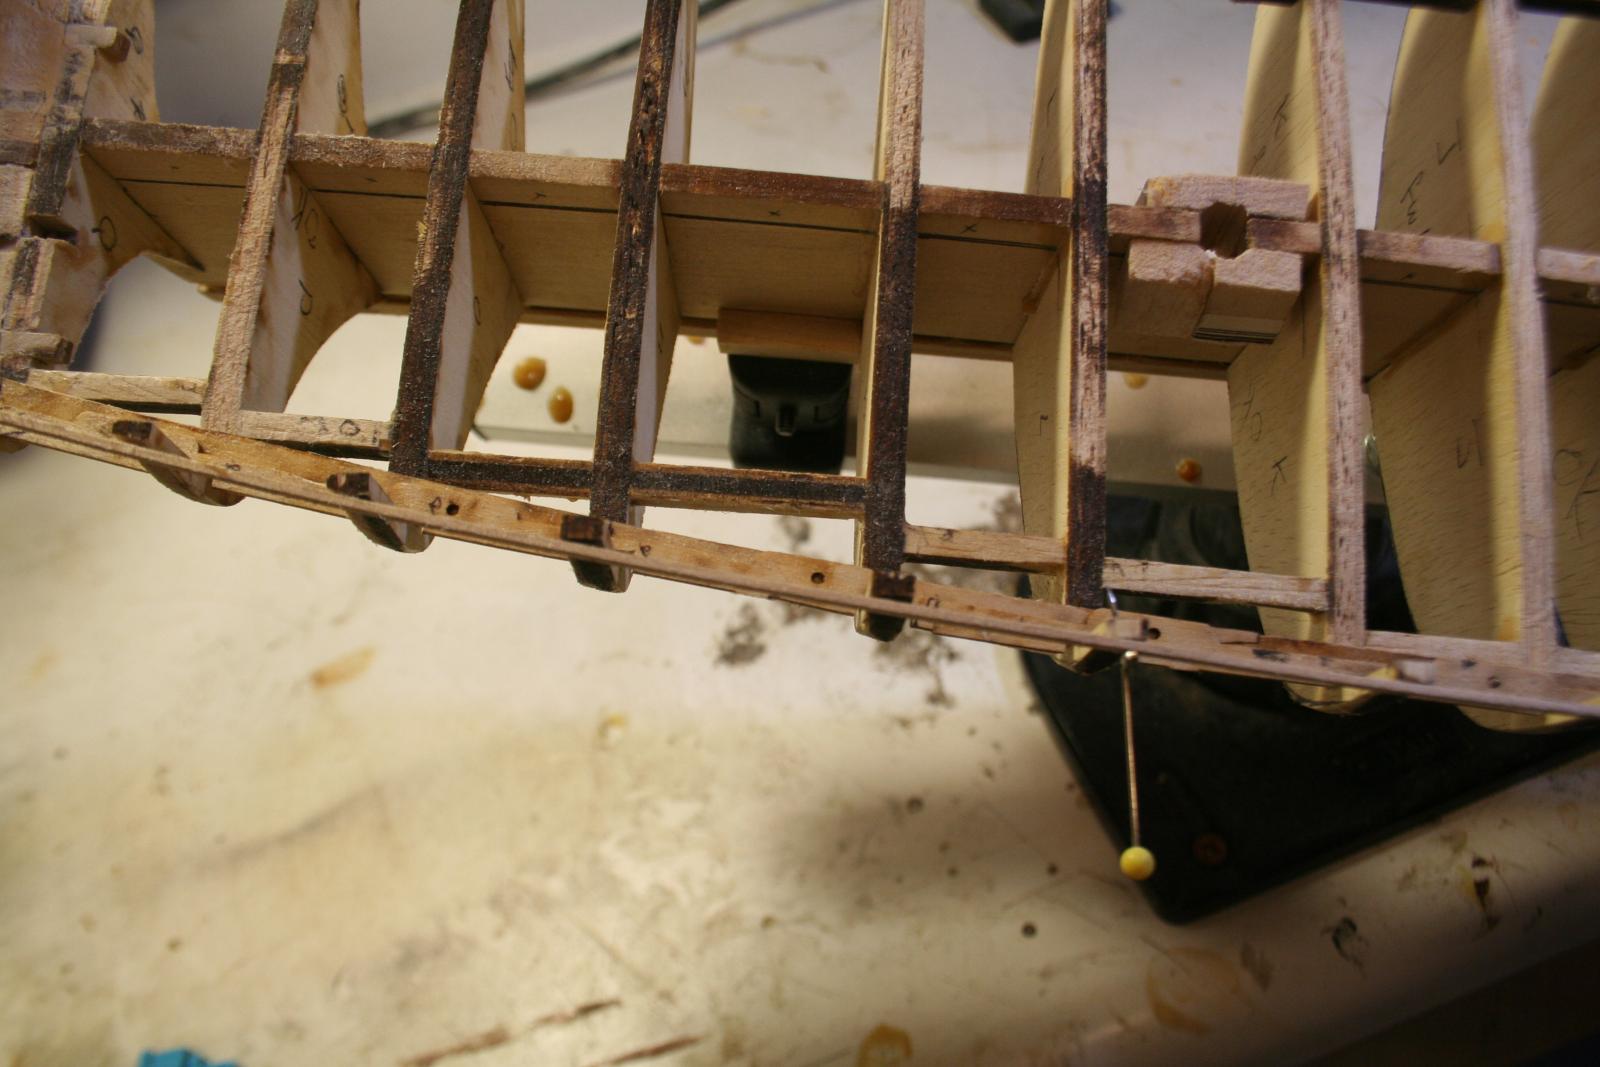
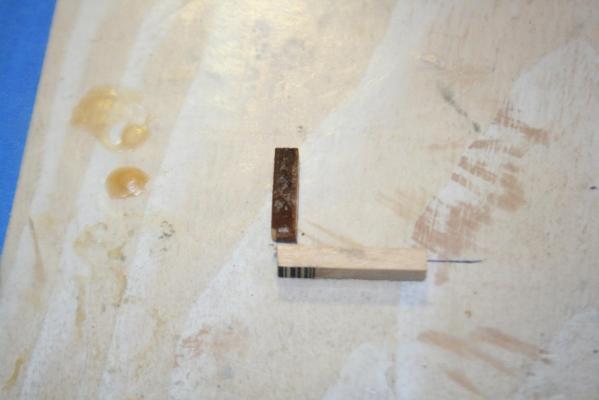
After redoing the sweeps 4 times I came up with my simple jig made from some of that 3/16" bass I got from the hobby store.

- 287 replies
-
- 1
-
-
- niagara
- Model Shipways
- (and 1 more)
-
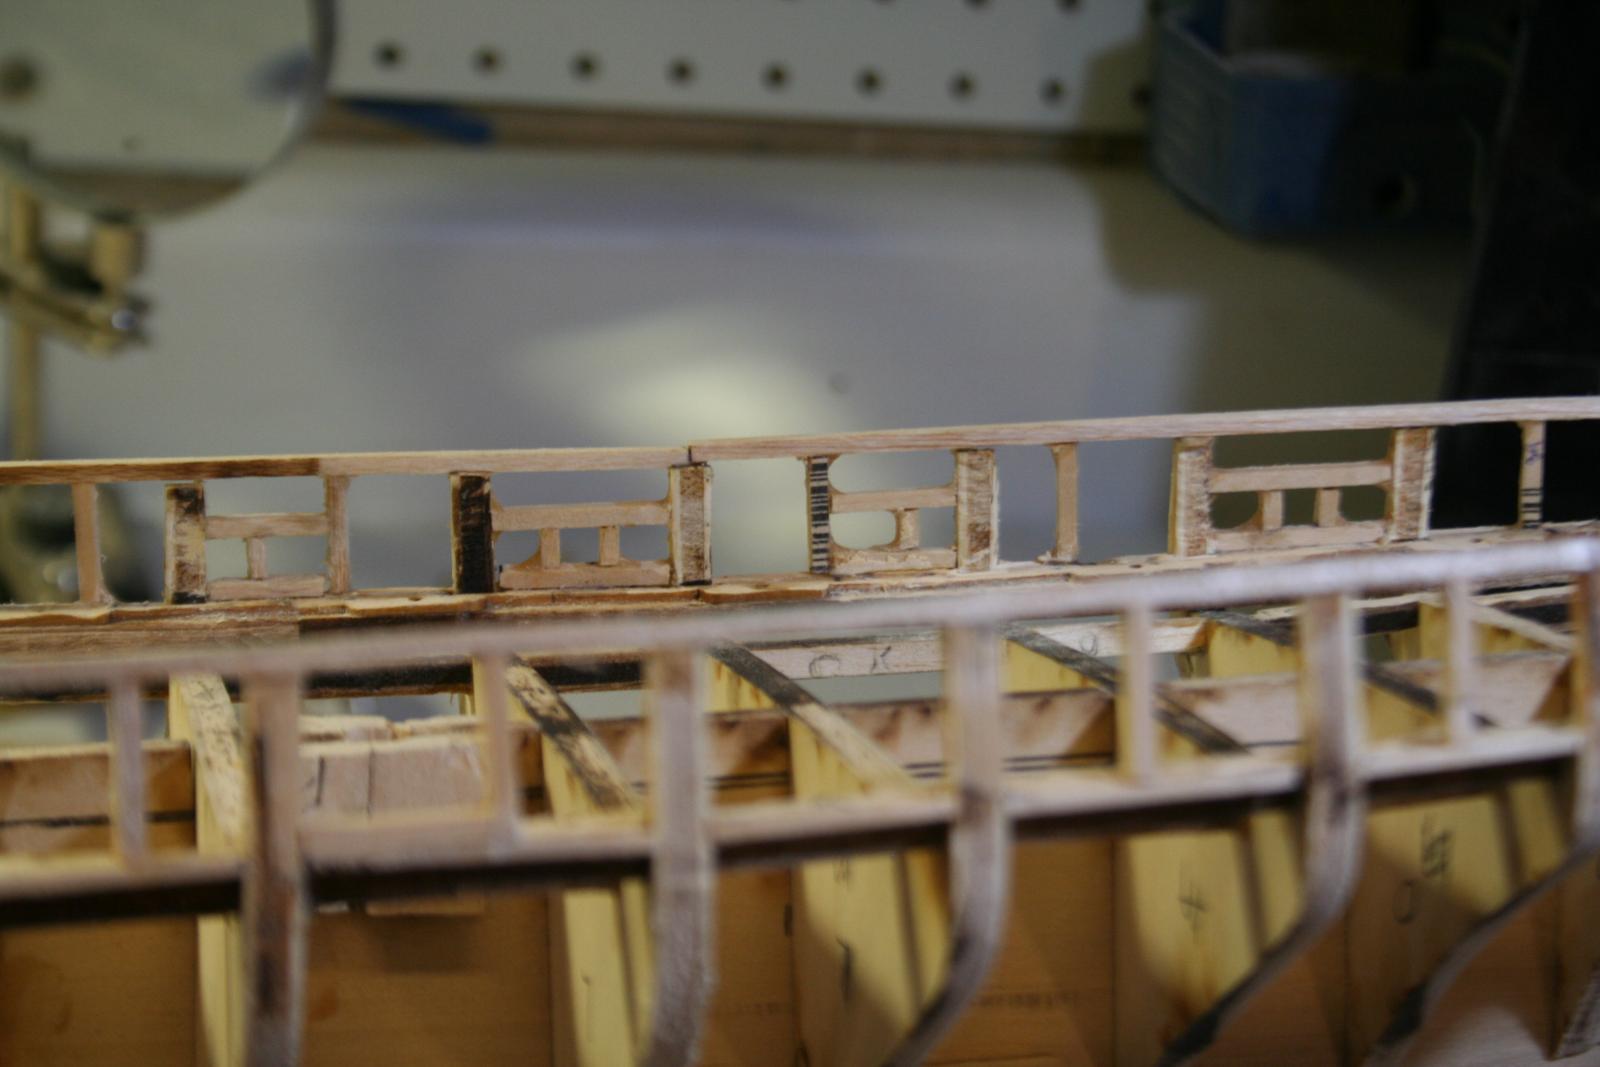
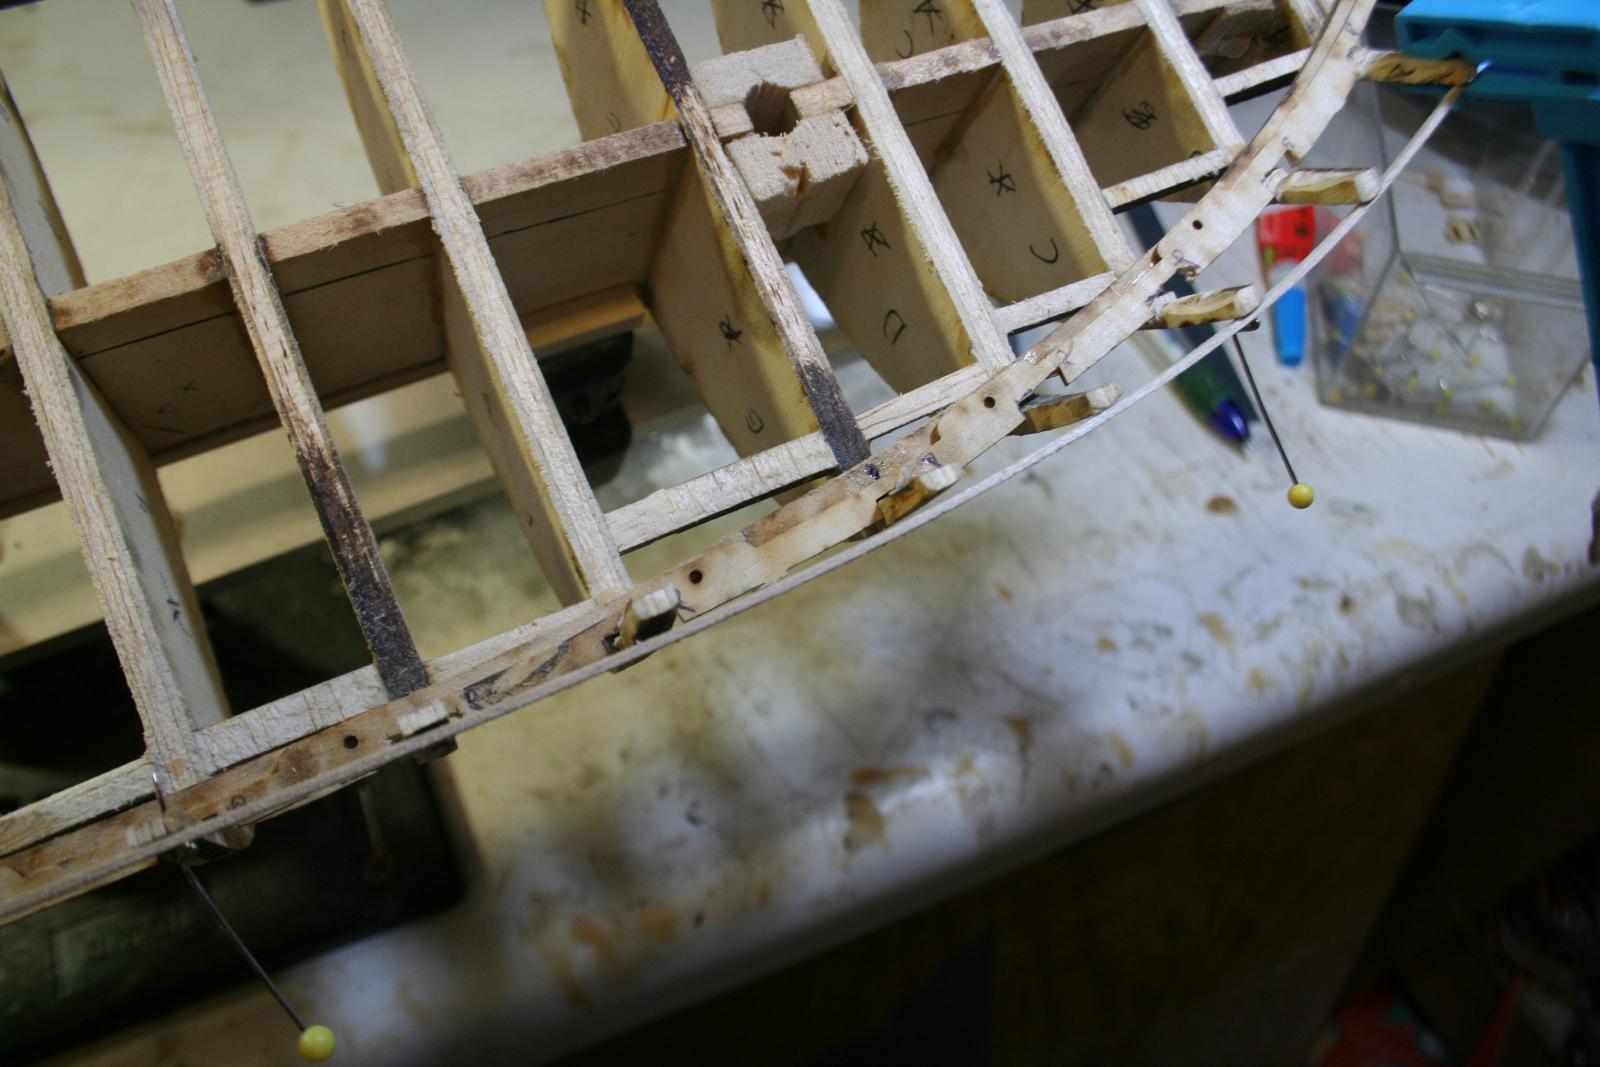
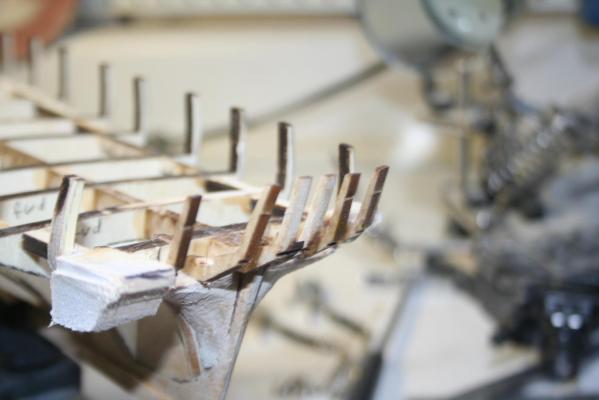
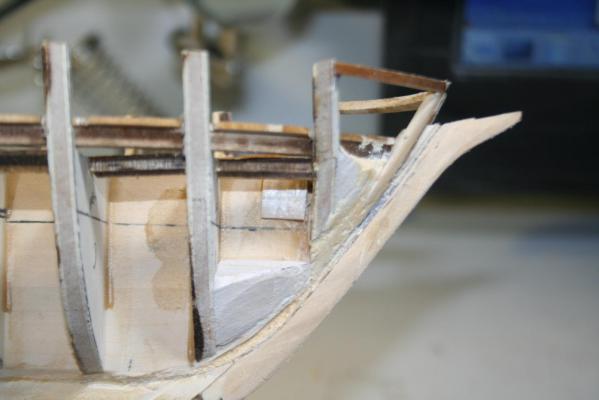
I also see that the timber heads need to be exact to accommodate the gun ports with 6 - .09375" planks. I found some 3/16" square basswood at the hobby store and made a .5625" square jig for the gun ports. It's just not "fare" at the stem. The stern looks better, but the timber heads are not square.


- 287 replies
-
- 1
-
-
- niagara
- Model Shipways
- (and 1 more)
-
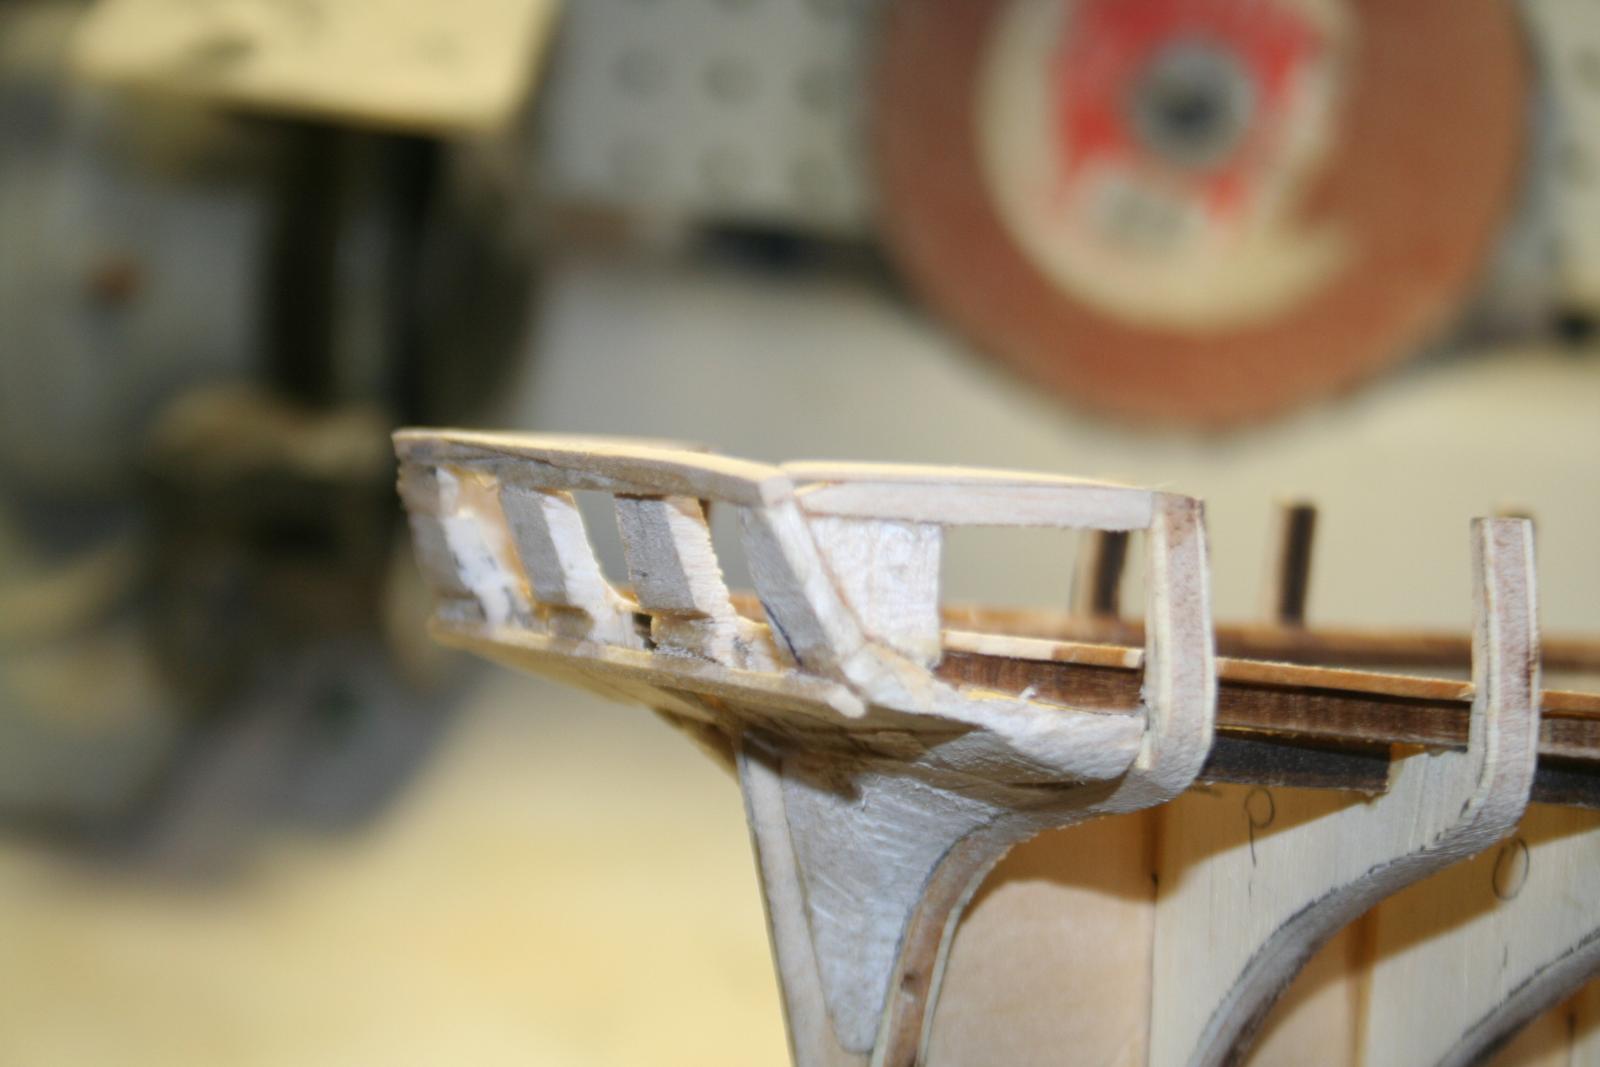
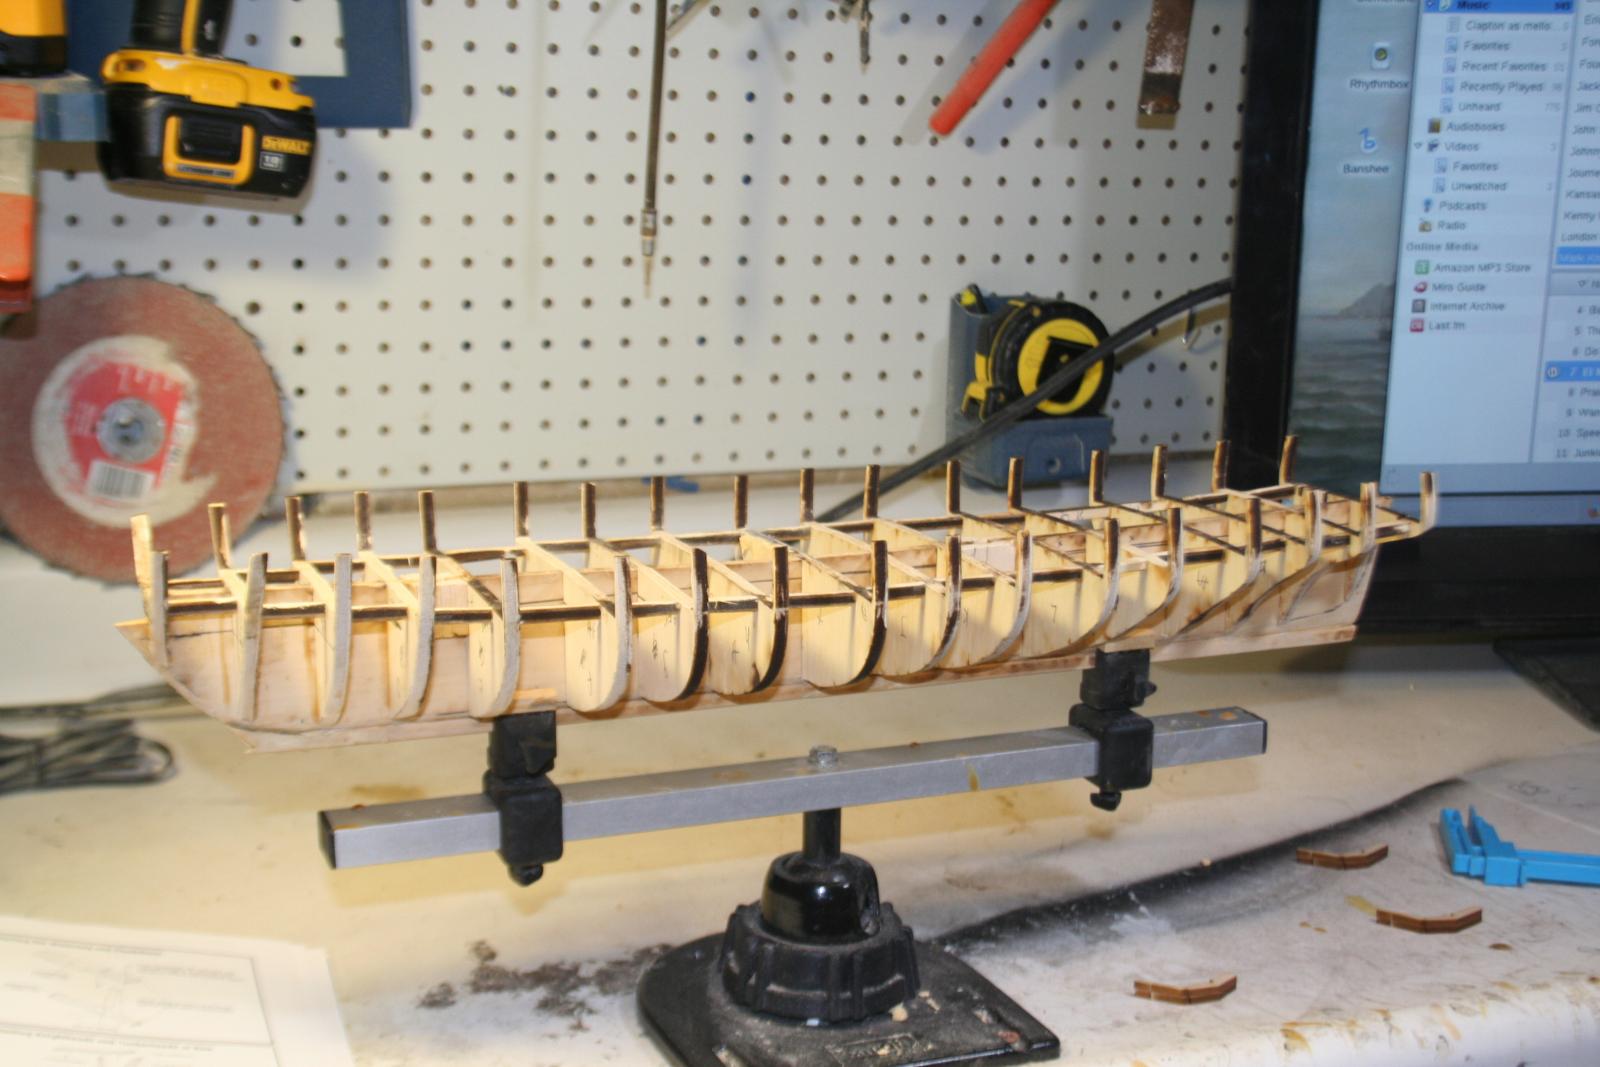
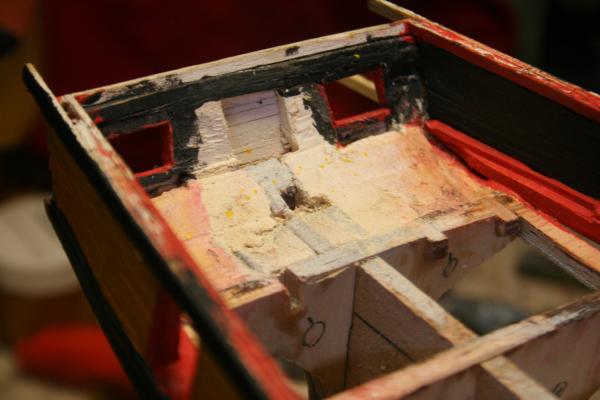
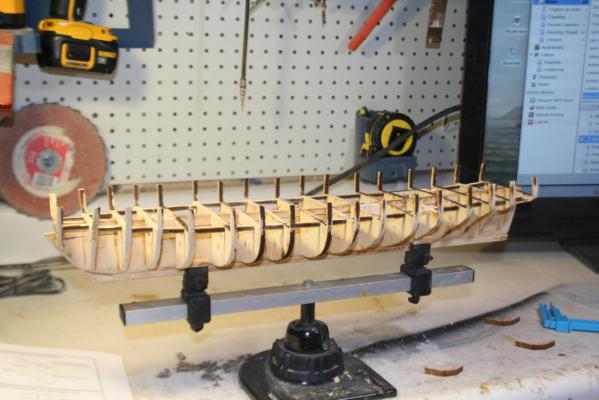
The stantions are WAY off, so I think I'll make them outta balsa too. I used to build houses, buildings, bridges...etc. for my model railroads out of balsa when I was a kid, so it seemed like a good idea at the time... Hind site. Should have just built up the short ones. Now I have to fill in the gaps. And, now I have some sanding and filling to do. But I'm still having fun!!!
- 287 replies
-
- 1
-
-
- niagara
- Model Shipways
- (and 1 more)
-
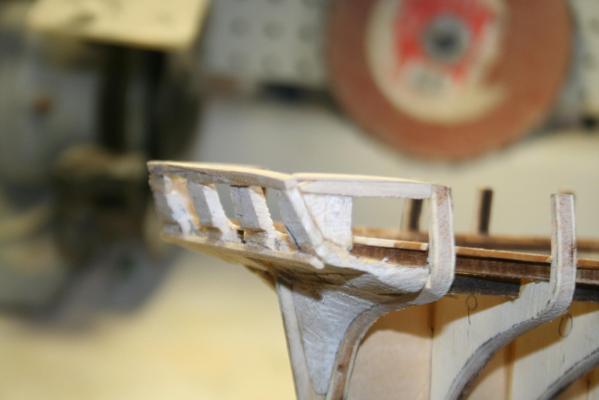
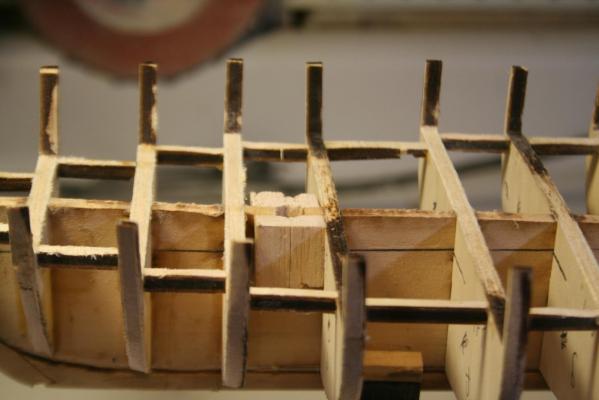
Added support to keep things - "semi"-square. I'm not talented enough with my band saw to use the blocks included in the box, so I used balsa wood. I also added a piece below not shown in the plans.
- 287 replies
-
- 2
-
-
- niagara
- Model Shipways
- (and 1 more)