Don Quixote
-
Posts
1,689 -
Joined
-
Last visited
Content Type
Profiles
Forums
Gallery
Events
Everything posted by Don Quixote
-
I'll look into that, thanks. I want to get a different one before I start my next ship. I'll have to drive 90 minutes to get to a decent size city where there will be a decent selection and more than one store. You'd think in a town of 200,000 people (Modesto, California) there'd be more that 1 half way decent hobby store, but the best one I can find is more about planes and cars. They have only 2 wooden model ships for sale and they're solid hull, $50.00 models. And they carry only 2 air brush kits, both badger.
-
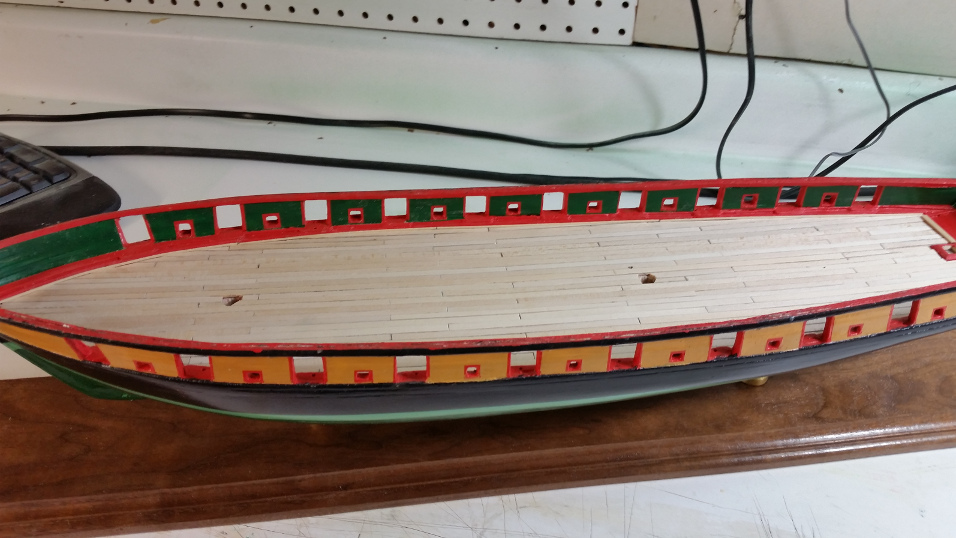
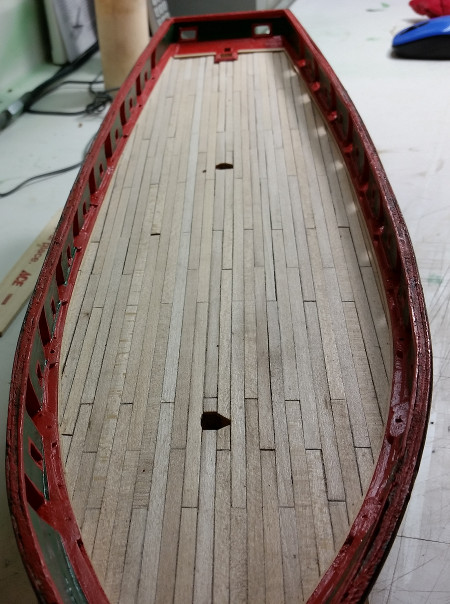
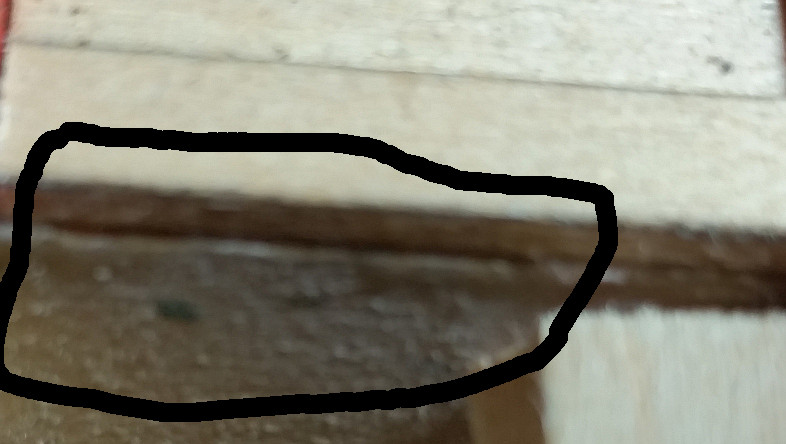
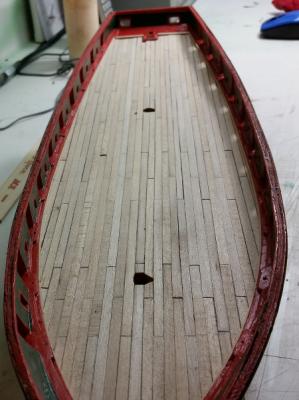
So that's exactly what I did. I marked the center of the keel, stem and stern, and ran a straight edge using those marks. The plank on the port side is 1/32" narrower than the other so I'm very happy with that... The trim along the edge is 1/32" square, so I'm happy with me on that too. Obviously my keel is bowed. Only thing I can think of is that at some point I must have leaned it at an angle instead of keeping it on a flat surface the whole time. Lesson learned there. I used a Ranco Arts, soft lead black lead pencil on the edge and ends of the boards, just one edge, not both. It was a little darker but I decided to give the deck one last sanding with 400 grit and that seems to have removed a bit of the lead. Ah, well... Lot's to learn. As you can see I'm choosing to put the hatches...etc. on top of the planking. I didn't want that worry in addition to the planking being straight. Plus, the ones I built before were not square. I'm not sure why they're not square, I used a square and glued some scrap wood in an "L" shape on top of some wax paper that I taped to the bench and did it successfully with no wrinkles in the paper. I'm open to suggestions on how to make them square. I used a plank cutter I got from micromark so the lengths would be the same size... I don't think the holes for the masts will be a problem either. Once that's all installed the (I think they're called spanker mast steps and wedges?) should hide the poor cuts.

- 287 replies
-
- 7
-

-
- niagara
- Model Shipways
- (and 1 more)
-
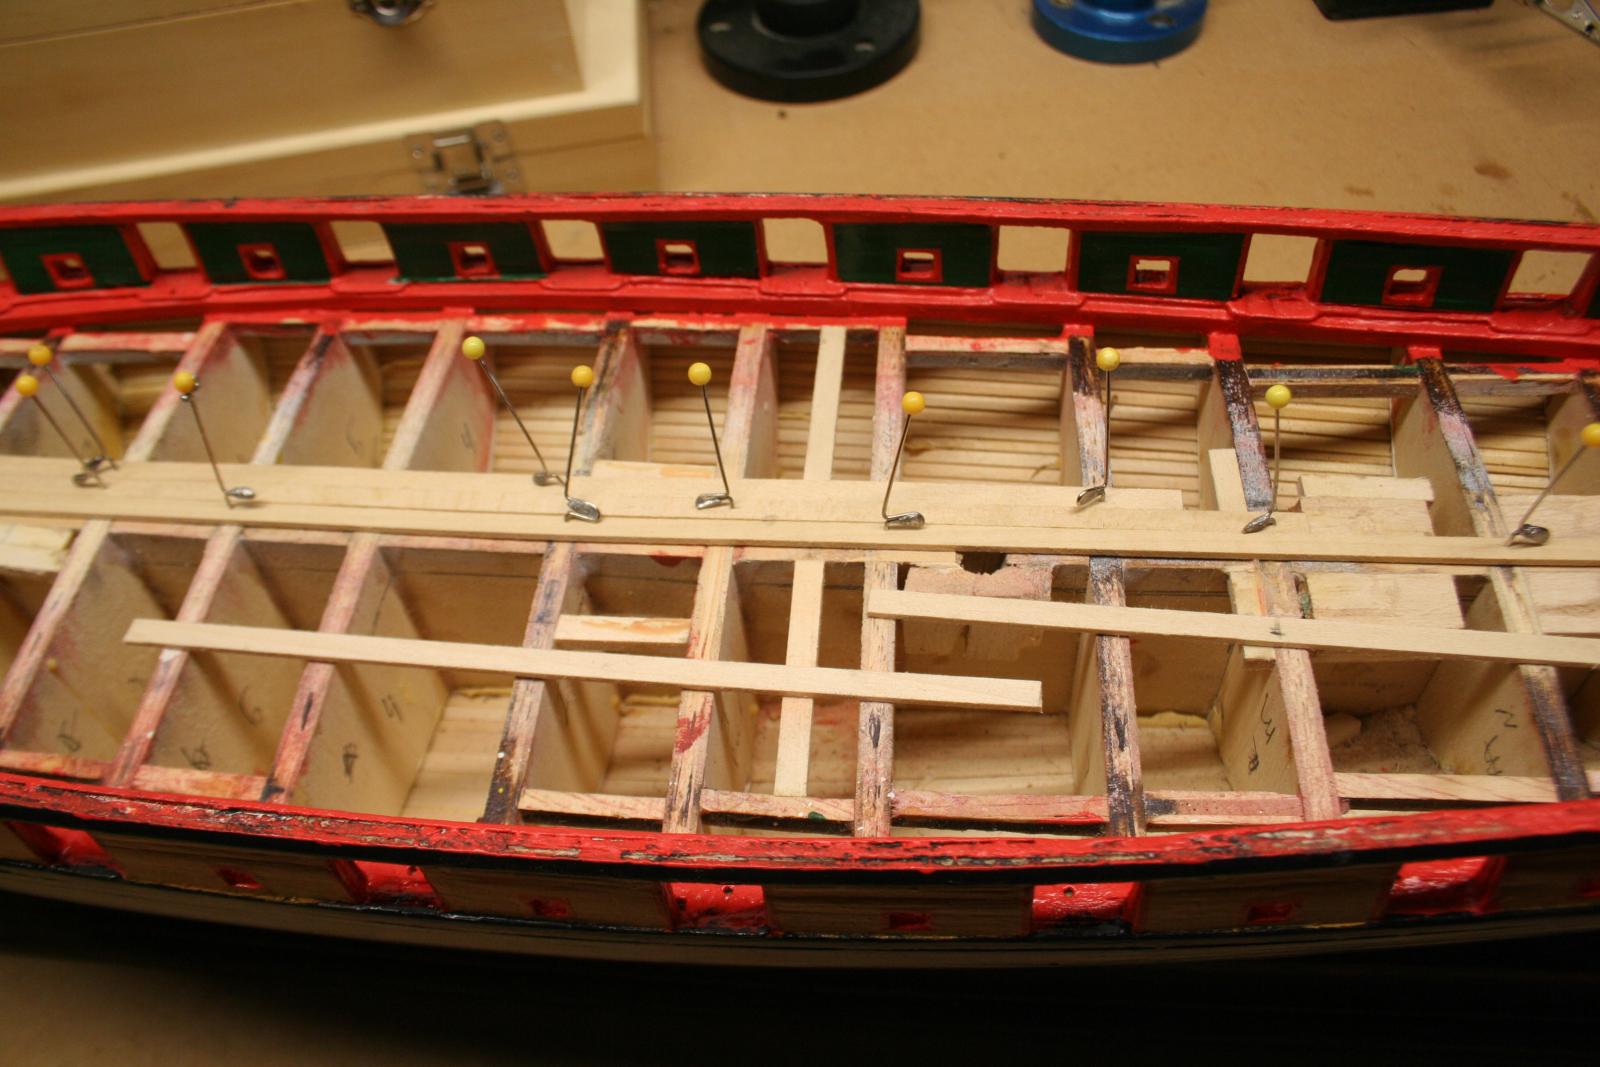
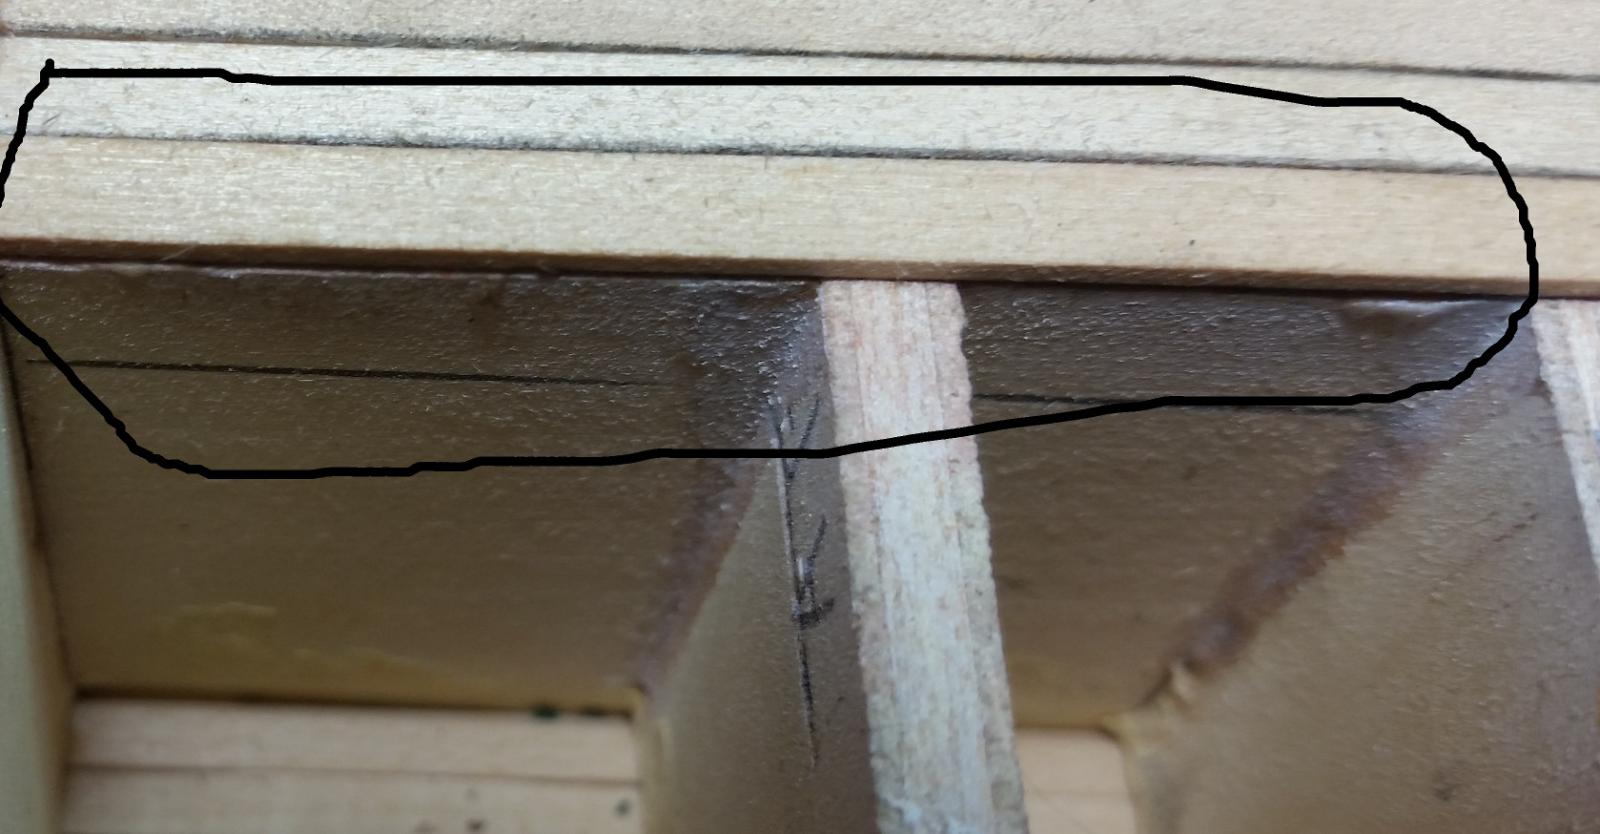
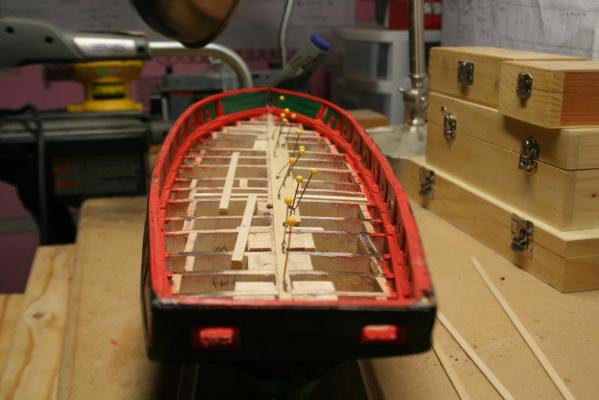
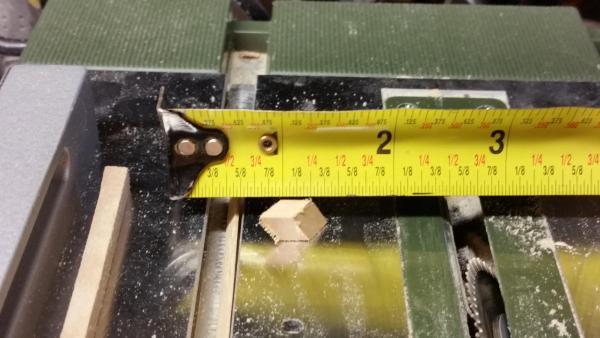
Using several dozen profane syllables, I pulled every thing up from the deck. I broke the frame to the captains quarters, but no one likes him anyway. I thought I had fared up the unfare-a-frame. I measured from corner to corner, I know of no better way to be sure something is square... I measured from the far right piece which is fixed, to the mobile part that rests against a bulkhead to be sure they were equally distant. I laid a plank edgewise on the table to be sure it was straight and laid it perfectly atop the keel at both stem and stern. As you can see there's a 3/16" difference at mid ship. How in the devils stomping grounds can that be? At this point I think I should mark along the edge of the plank atop the keel and use that as my straight edge because it looks to be straight. Opinions? And WHY am I still having fun?!!! By the way, I wear tri-foculs.

- 287 replies
-
- 4
-
-
- niagara
- Model Shipways
- (and 1 more)
-
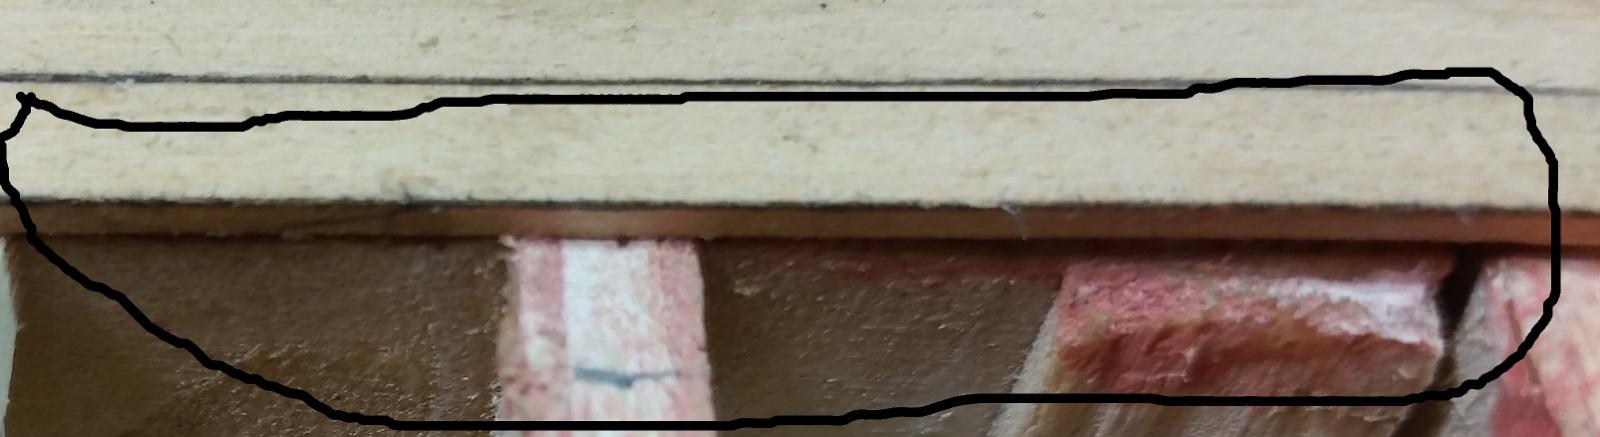
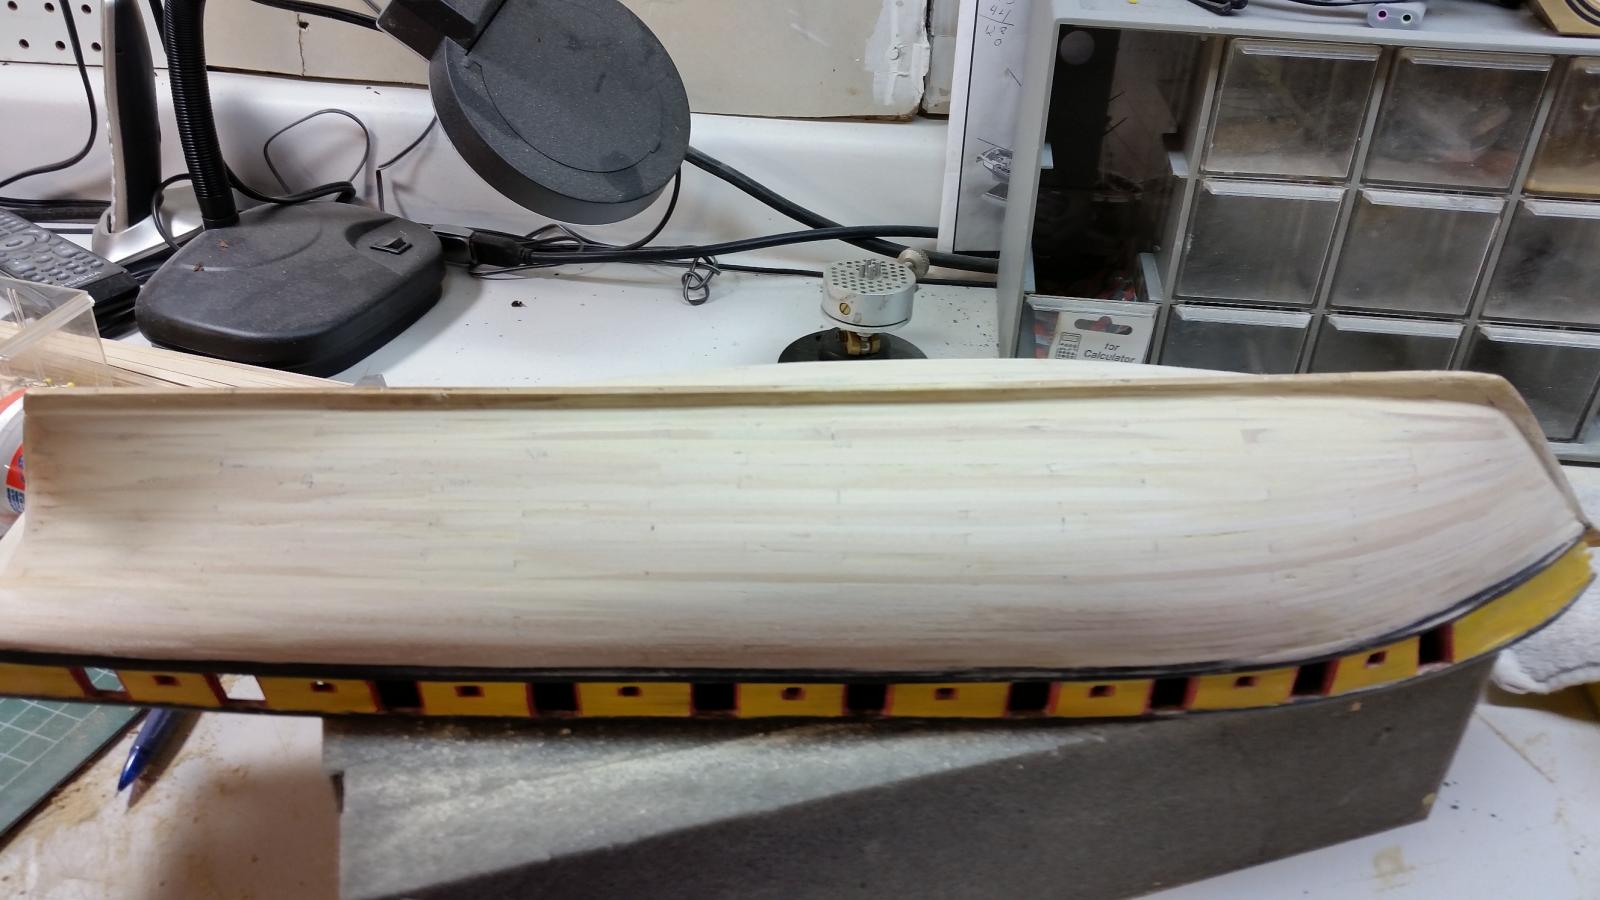
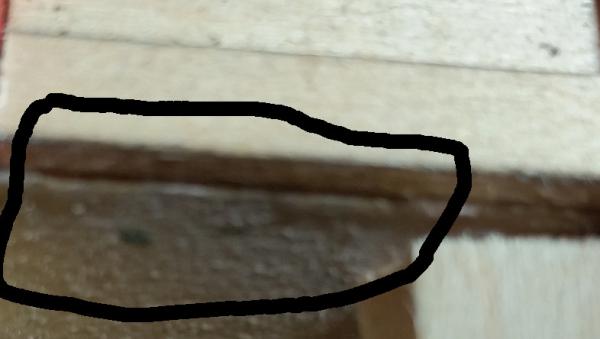
Looking along the deck you can see the planks are not straight. The false keel was 1 piece and I laid the first plank right down the center of it. Or so I thought. First picture is the stem. If my pictures are any good, you'll see it's hanging over by about 1/64". Next picture is mid ship. Looke to me like it's IN (or hanging over the other side of the keel) about 1/128th" Last picture is at the stern, where it looks to be perfect. As I lay planks it seems to be getting more pronounced. Question is, do I insert a corrective plank, slowely taper the planks 'till it's straight or just let is play out?


- 287 replies
-
- 1
-
-
- niagara
- Model Shipways
- (and 1 more)
-
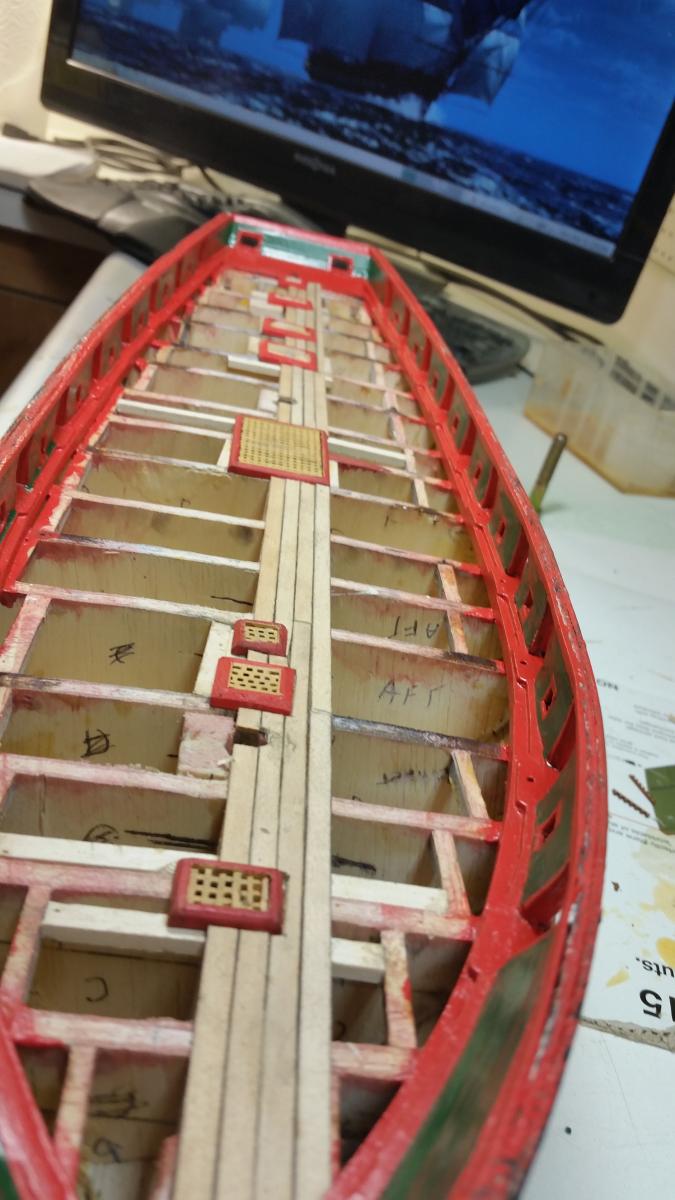
Thanks guys! I feel like I finally made some progress. I started this thing on Xmas of '13. I have some touch up to do on the inside of the gun ports and sweeps, then I'm finally ready to mount it on the stand. I'm SO excited! Again, thanks a LOT!
-
Jack12477 I do not like the way it feels in my hand. Can anyone recommend some alternatives? I got this from my mother some 10 years ago.
-
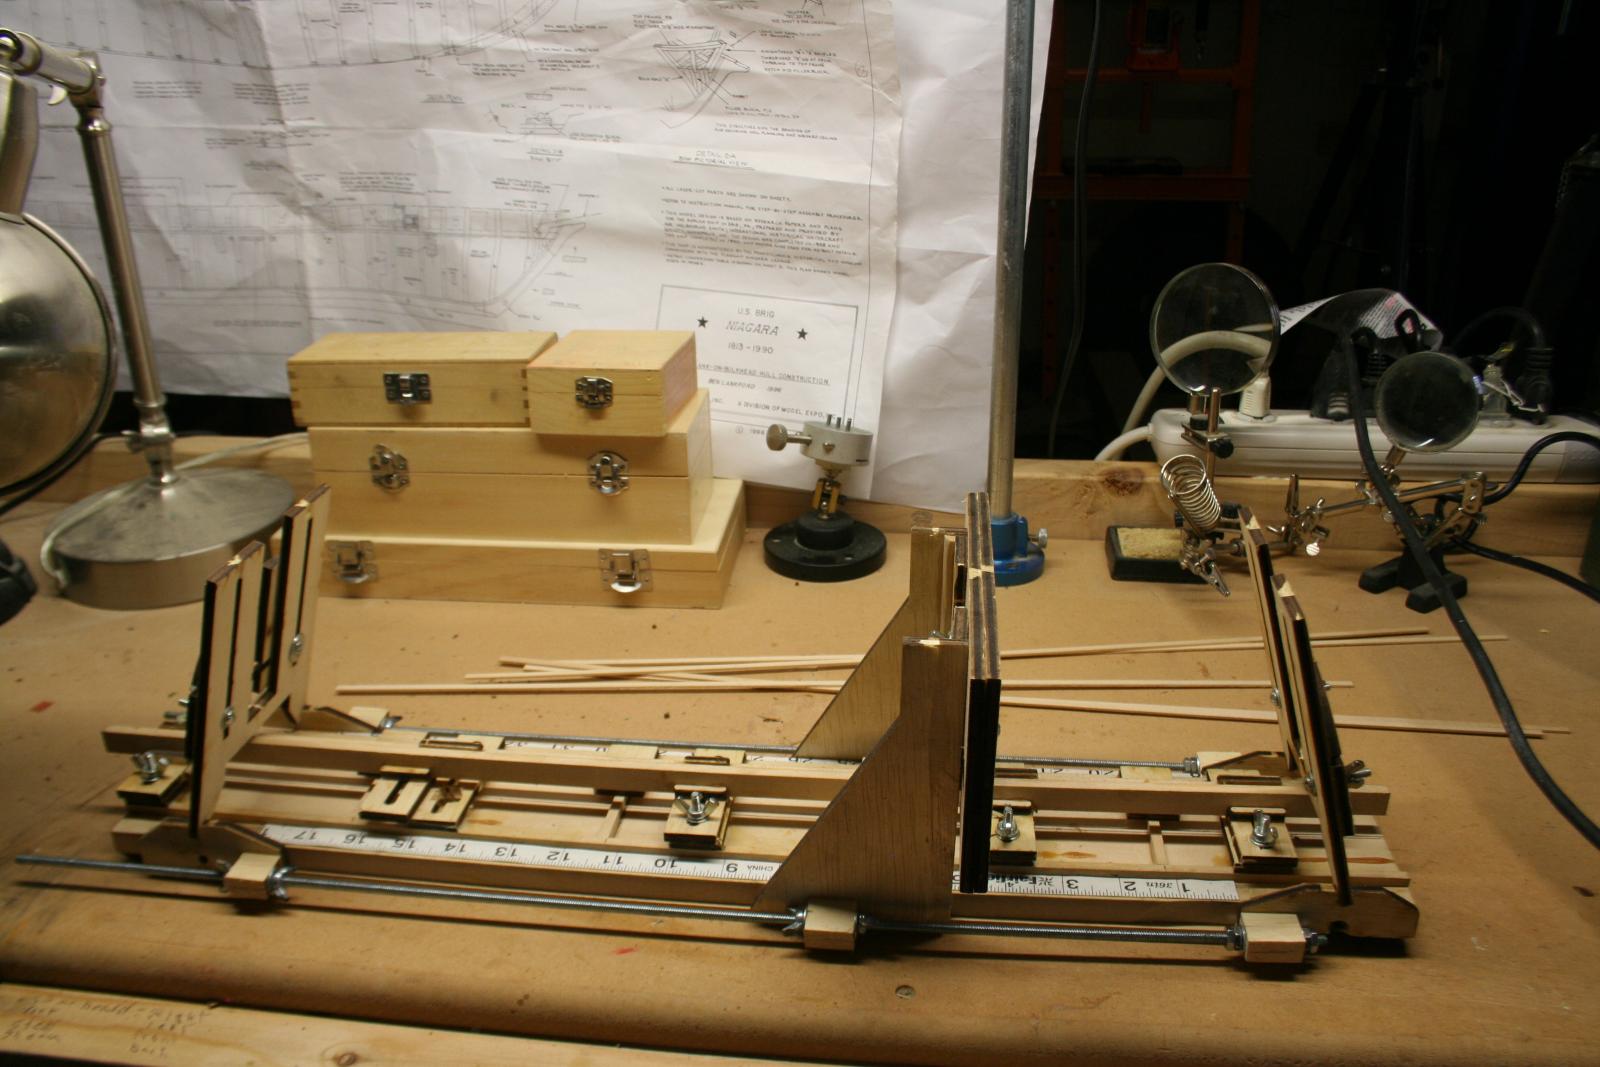
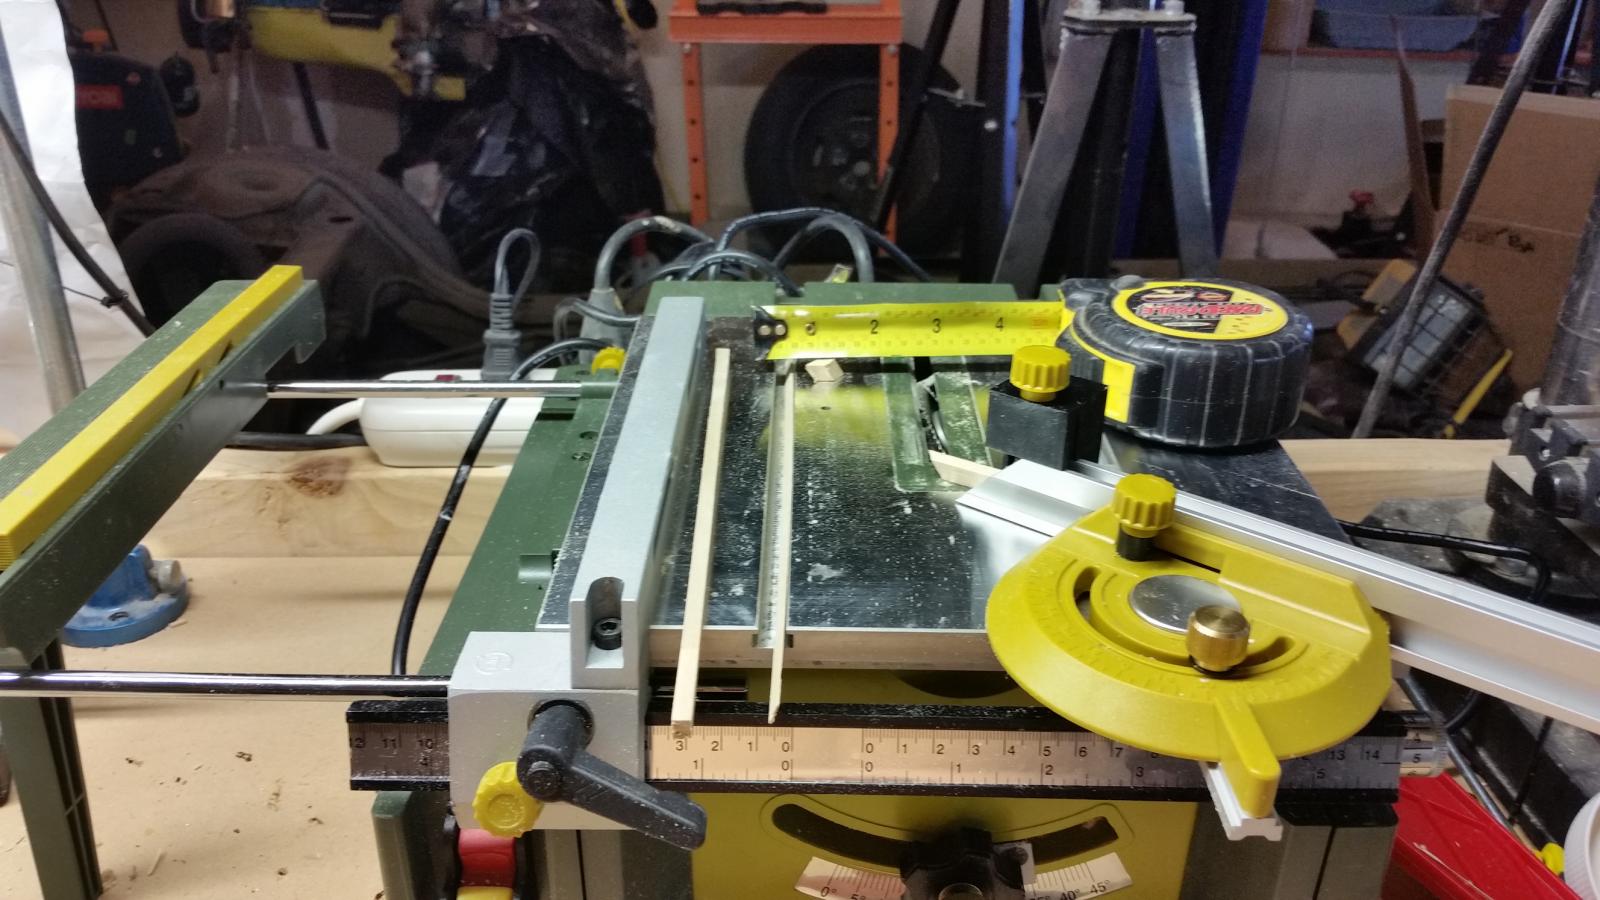
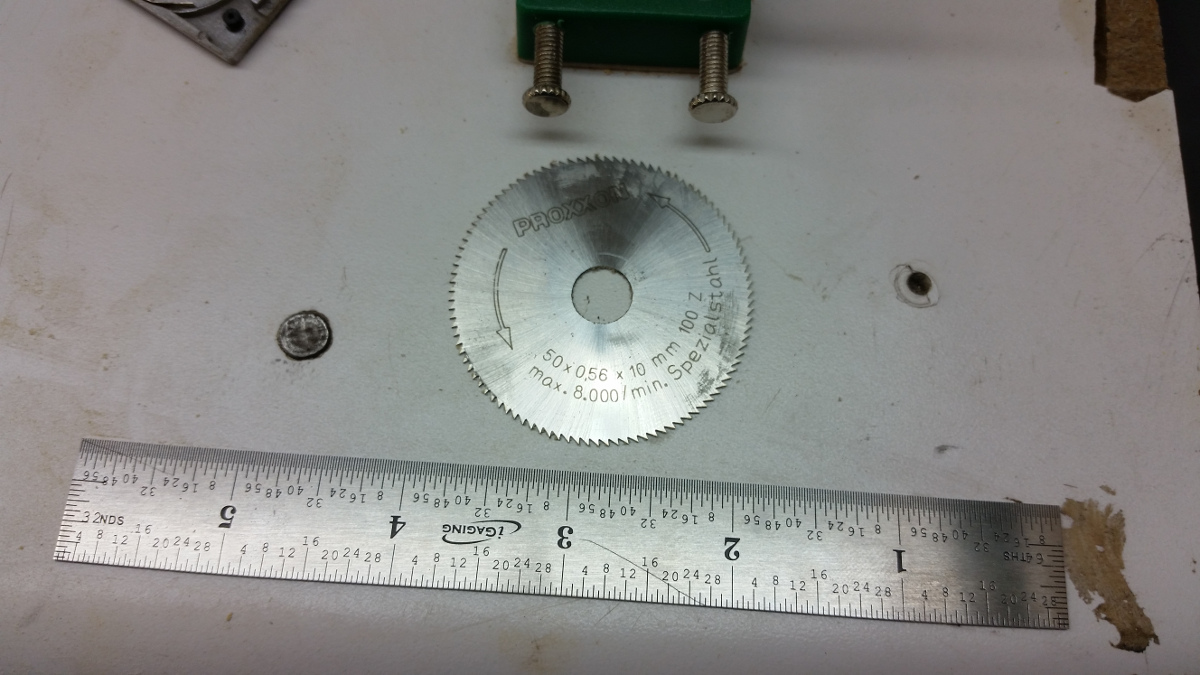
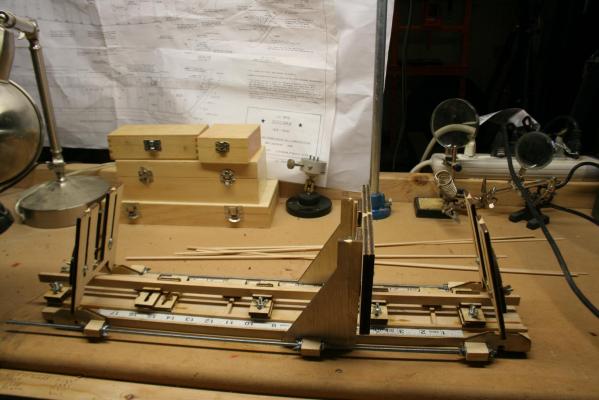
On another note, my wife got me this saw for X-mas and I played around a bit. Since then I've picked up a much smaller blade with a lot more teeth. I expect future cuts to be much cleaner. Note the strip running parallel to the guide channel. I was able to rip that thin piece as well. It's the Praxxon. I love how the table extends. Bit of a challenge to change the blade, but it seems well built.


- 287 replies
-
- 1
-
-
- niagara
- Model Shipways
- (and 1 more)
-
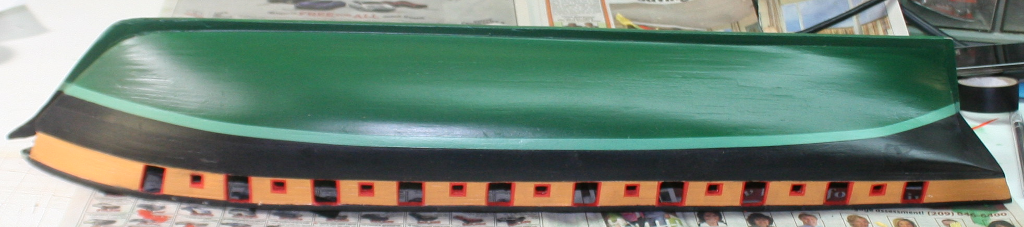
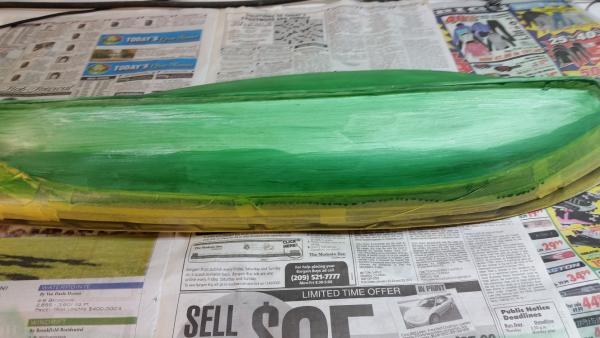
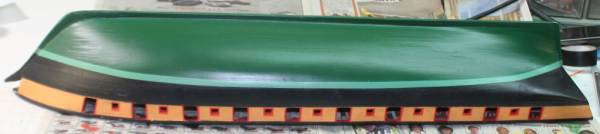
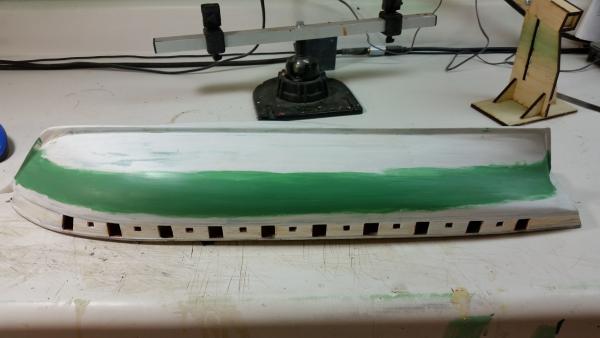
2 and 4 coats respectively. The problems I mentioned. I sanded it back down again and played with the viscosity on a 2x4" 'till I was happy. There is also an adjustment at the back of the badger that controls how far the needle is pulled back. That needed adjustment as well. The finished product is 3 coats. I sprayed a satin lacquer over the paint because I was having problems with my finger nails gouging the paint if an end of the tape stuck to the hull and I had to pick at it to get it loose to pull off. Also I will NOT use vinyl tape ever again. It leaves a residue of adhesive behind. That came off with mineral spirits. I'm re-finishing the inside (bulwarks?) for the gun ports and sweeps. I had painted it black according to another build I follow. (Done now) I like the green better. Simply more colourful. I also hated the yellow I used, so I added some white to the yellow ochre (Cowardly ogre) and am repainting that. REAL shame, because I had pre-painted the planks and 1/32" square end pcs, and I thought for a beginner it looked pretty good. I used a yellow enamel from testors. Now I'll have to tape it off to paint the gun ports and sweeps and that'll never look good. What's most bothersome is that I never did intend to spend the time making this as well as I can. Which is evidently not very) My intent was simply to learn. I do NOT want to keep going back over things like paint colors and perfecting straight edges of painted parts.

- 287 replies
-
- 8
-
-
- niagara
- Model Shipways
- (and 1 more)
-
We live in central california. Pretty much a desert. We have 2 seasons. Brown and browner. Dust is a HUGE problem for me. Worse is the pile of hair that comes from the problem dog. I'm thinking about pouring contact cement all over the floor and letting her make carpet.


- 287 replies
-
- 3
-
-
- niagara
- Model Shipways
- (and 1 more)
-
Whataya get if you mix enamel with acrylic? An anemic krill.
-
I just created a new topic on backing up a computer in shore leave.
-
I understood water should be used for acrylic. I just happen to have some 2% milk. (lactose free) I'll do some more experimenting. I had a 2x4 I tried it on and it seemed okay. Any chance the primer has an effect? It's the primer that came with the rest of the kit of pain we both got from model-expo. Trust me, I take that brush apart every time I use it. Even between coats. I just don't understand why the black went on so well, and not the green. Brush is a badger 150. No idea what the PSI is. It's a kit I got from my mother for my birthday. Only gift I ever got that didn't come with a belt:
-
Thanks Laxet. At the rate I'm going it;s going to take 5 coats or more. Is that normal? I'm adding only a couple drops at a time. It's either clog the brush, or barely cover. I'll upload some pics tomorrow to show what I mean. The black went on beautifully in only 3 coats.
-
Tell me more about dual action if you would please. The viscosity is what I'm having trouble with. There seems to be no real ratio since all paints are different. I have model-expo's paint for this model specifically. The black applies perfectly. The green is killing me. Sorry for any typos, I can;t find my glasses:( Thanks Tim. That's my son's name.
- 287 replies
-
- 1
-
-
- niagara
- Model Shipways
- (and 1 more)
-
I'm really not liking this air-brush stuff. Too thick, clean the brush, too thin, it doesn't cover. Beats the heck outta a brush though. Yet I am going to the hobby shop tomorrow to see what they have for a better brush.
-
Hopefully I'll have some pictures tomorrow.
-
How does one mount the ship when drawing the water line? If I mount it on the stand as show, the stand rocks just a tiny bit and doesn't make for a straight line. I can't imagine the ship is laid upside down, because the deck has a slight curve. If the hull doesn't look good, try cleaning your monitor

- 287 replies
-
- 1
-
-
- niagara
- Model Shipways
- (and 1 more)
-
It's now been 3 days. I've fired up 2 propane heaters. 'Sides. Like I said. Already tried with 2 different mediums. Already into it. I'm sanding it off, clogging a lot of sandpaper, but it's the nooks and cranny's that worry me.
-
Great, thanks. think it'll dissolve wood filler?
-
I'm guessing it was just a tad too cold when I painted my hull... I used an airbrush and the acrylic paint that I got from model -expo. The paint is still tacky after 48 hours so I want to remove it. Preferably without sanding. Acetone nor Jasco stripper work very well...
-
I have it. Seriously solid build. I haven't used it yet, but I've read from many that it's fantastic. Took about a week to get it here to the states. The only thing I saw a complaint about was the the holes the threaded rods go through should be greased with a heavy weight grease.
-
That'd help, huh? The parts you bought from Syren. I think I understood you bought them in anticipation, but have not used them yet, so you don't know if they'll be the right parts. If you haven't used them yet (which it doesn't look like you have) let me know how they work. If you have used them, let me know and I'll buy them now.
-
So you haven't started using it yet? If you remember, let me know how it worked for you.
-
Laxet, I see in your build that you fear your ship will sink. I'm proud to say, I don't think mine will. Again, learning from your experiences, the shipwright installed a dozen extra bilges.