HOLIDAY DONATION DRIVE - SUPPORT MSW - DO YOUR PART TO KEEP THIS GREAT FORUM GOING! (Only 68 donations so far out of 49,000 members - Can we at least get 100? C'mon guys!)
×

Chasseur
-
Posts
461 -
Joined
-
Last visited
Content Type
Profiles
Forums
Gallery
Events
Everything posted by Chasseur
-
 Yeah I have seen that book advertised on the Internet and it looks Ike a good reference. Trouble is if I order it new it comes from the U.K. And will cost a small fortune to get it here to Canada. Jeff
 -
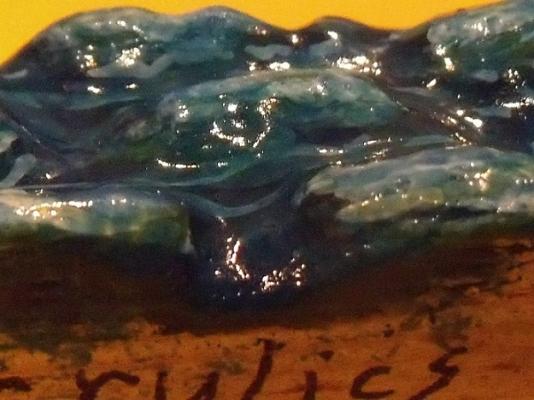
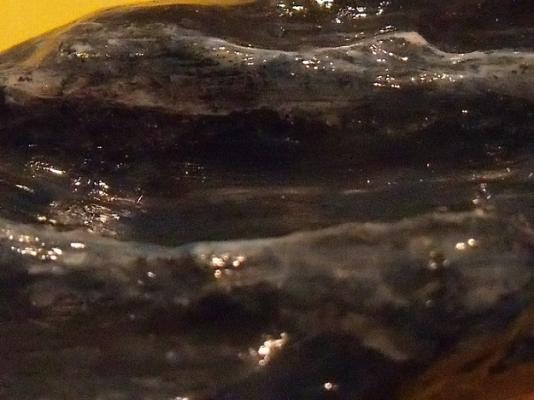
Today just for kicks I decided to try out making a couple of wake's. I used some clear silicon and then mixed in some skull white thoroughly. I let it dry and then dry-brushed on some light blue. After drying I put a coat of (semi-gloss) clear varnish on. Looks okay except if you look closely you can see a crackle effect. I think it should pass! Tuesday I'll stop on the way home from work and purchase some more supplies. I'll fine tune the colors and I should be ready to move forward with the real thing! Jeff


-
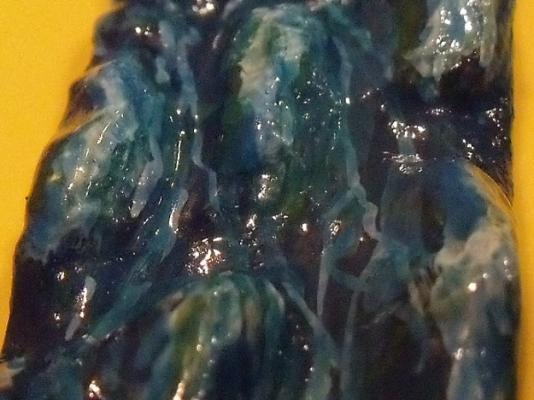
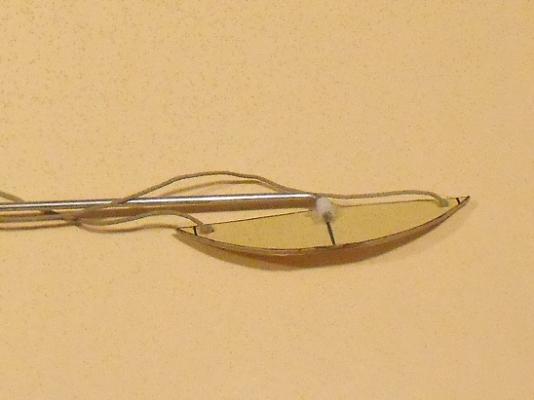
I was back at it trying to nail down my technique plus re-learn how to use my air brush properly. The trick is all in the thinning of the paint and a liberal application. This time I used the same colors and dry-brushed the white on before the silicon was applied. The first shot shows some random swells carved into the fir. Another thing I noticed I have to be really careful to ensure I do a close inspection of the wood before painting as... when acrylics dry they shrink and any flaws will be revealed once the paint has thoroughly dried. The next shot shows the stage just before the silicon is applied. For some reason I ended up with darker seas. I think this is because I never used the secret sauce before I applied the silicon. So now I know for sure the secret sauce is a must! The next two pictures shows the silicon applied and different light when taking the pictures. Also an epic failure on my part or.... maybe not depending how you look at this is.... I went with some swells and nothing was boiling/frothing up per say. As well, to be quit frank I am not liking this effect. It's not what I am looking for. The last attempt was closer regarding the boiling effect. So here is a summary of what I have learned to this stage of the build: Don't use cheap primer, I will by some Testors white acrylic primer and shoot it with the air brush Ensure the waves are cleaned up thoroughly and make sure no grain marks are left what soever I am probably going to dump the Dark Sea blue enamel and go to the same color in acrylic or close to it (fumes are bothersome because I can't shoot in the garage it's minus 30 degrees Celsius right now!) Ensure all the white dry-brushing is done before the silicon is applied Make sure the secret sauce goes on before the silicon Open up the application of the silicon to get the boiling effect I want Finally I think there needs to be a clear coat over the silicon with Future floor wax or this latex clear sealer I have I was trying to purchase a flow agent to use with my acrylic paints and couldn't find any at Michaels craft store. I went with distilled water and a few drops of dish soap. Things went okay however erything I have learned so far from the internet says to use the proper flow agent for the brand of paint. I am going to go to my favorite hobby shop and score some proper paint/flow agent and some more goodies. I want the final paint job to be bang-on. I am getting closer ....

-
Hey Daniel that's awesome. I have never met John just have emailed him, however he seems like a really nice man from what people say about him including yourself. Also you are right it's not what you know it's who you know that can give you the winning edge in life. Yes please say hi from Canada. Jeff
-
David a very interesting model indeed. I am fascinated by the stowage of the oars. I have never seen that type of concept before. John Fox III has been an inspiration as a SIB modeller to myself and countless others. When I was first contemplating getting into Ships in Bottles I think I must have read everything he had posted on his site. He is truly an artisan to say the least and apparently a really good musician as well. Good on you to be a gopher as it's always better to give than receive. I like to serve as well and it's a joy to help and great to meet new people. If you see John in the future say hi from a gopher in Canada ha ha ... Jeff
-
I would totally agree with you David. It's interesting as some modellers can pull off the illusion at small scales and it looks and feels right even though it might be out a bit in scale. Man that must have been a tough act to follow at that event you where at. What I really enjoy about MSW is everyone here is really friendly and always willing to lend a hand or share techniques. The latter really makes this forum a great place to hang out. I feel really blessed to be part of this fraternity. Jeff
-
Hi Omega...... yep still in the trying stage however getting closer ... Jeff
-
Yes David you are correct. I am hoping to capture some of that magic at this scale. lately inspiration is coming from Mr. Rex Stewart. I am hoping to set a new standard when it comes to modelling seas in a Ship in Bottle Model. Many times I wanted to throw in the towel and go back to plasticine. I will endure and persevere! Jeff
-
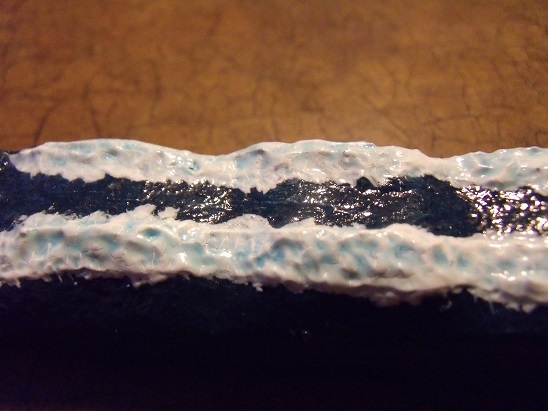
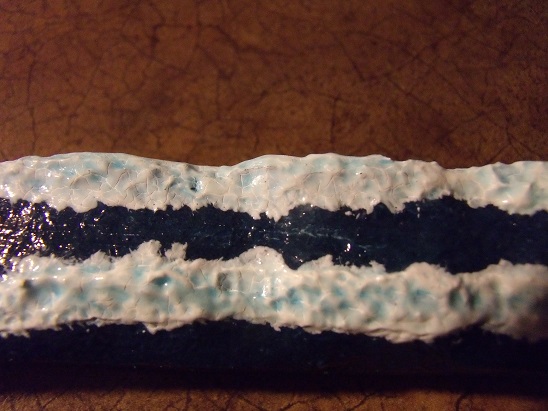
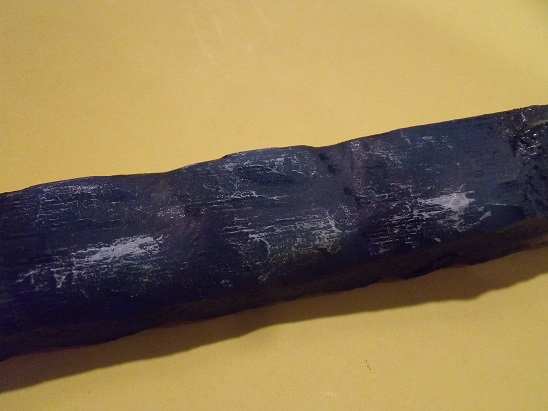
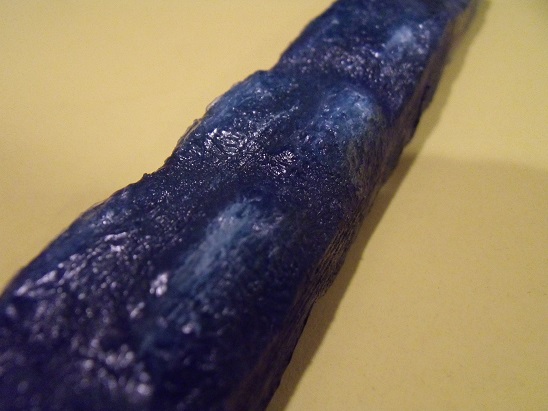
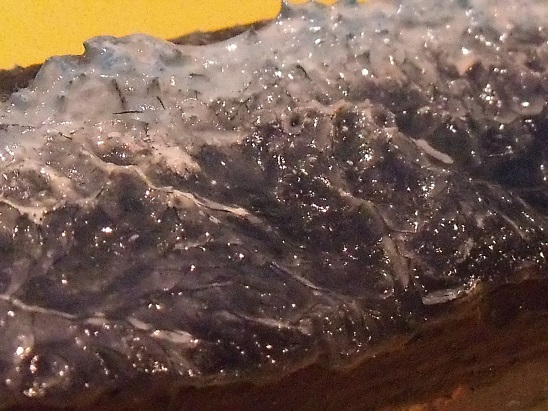
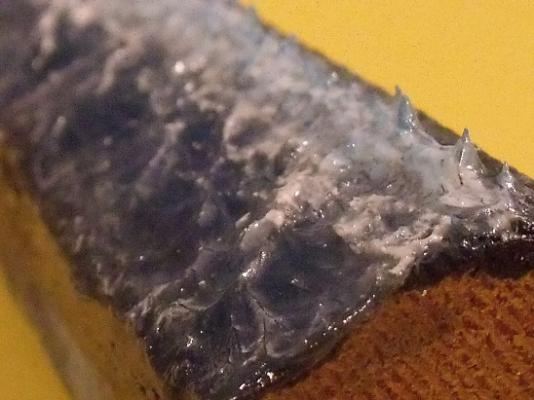
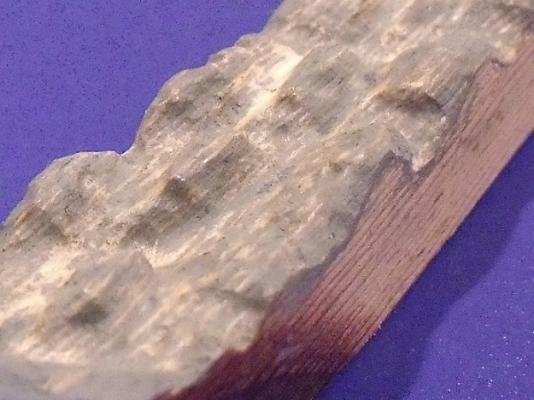
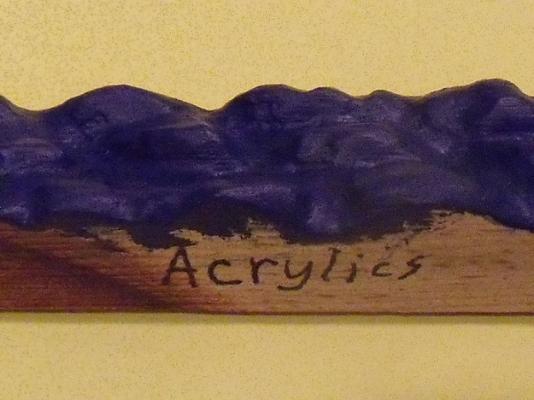
Well... I had last week off and I had a chance to do a lot of research into making seas etc. The following three pictures show all of the mistakes I made plus I learned some things of which I want to share so others will not make the same mistakes. Also I hit a website that had the answers I needed. What I found was best to just carve some basic swells "not too undulating" but just enough to show motion. I also found out the best way to feather in the acrylic paints (paint choice I made) was with my air brush to eliminate any brush strokes at this scale. The best thing after painting up to the wave crests to show the sea was the use of clear silicon dabbed on. Mistake number one was; I should of painted the sprays, and any high-lite detail, before applying the silicon technique not after. Mistake number two was; I should have mixed in the white acrylic paint into the clear silicon for the wave crests BEFORE applying the ice blue and clear coat. I tried dry brushing the Skull white and Ice blue afterward and it was a mess! Mistake number three was; I should of used Future Floor polish sprayed on the seas with my air brush instead of the varnish! The varnish tended to pool up and I lost a lot of the detail. I am getting closer with this technique. I'll do up another example to show all who visit here, and... hopefully it should be what I am looking for before proceeding to the next step. Definitely getting closer! Jeff


-
Thanks Omega! I'm getting closer with each try. It's also nice when you don't have to rush and can take your time. Thank's for the encouragement I really appreciate it! Jeff
-
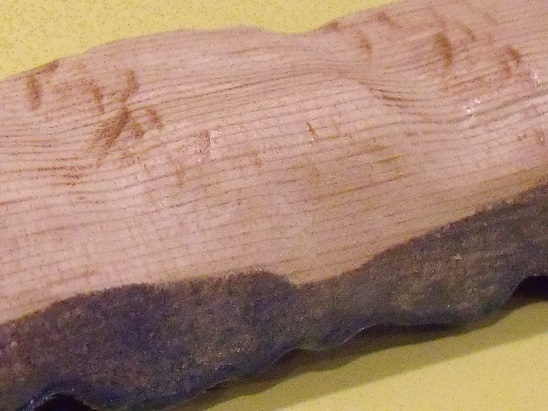
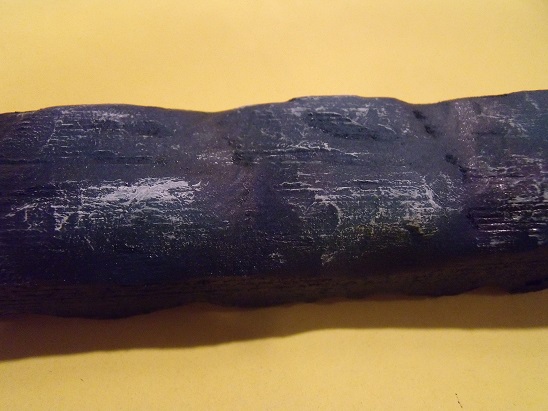
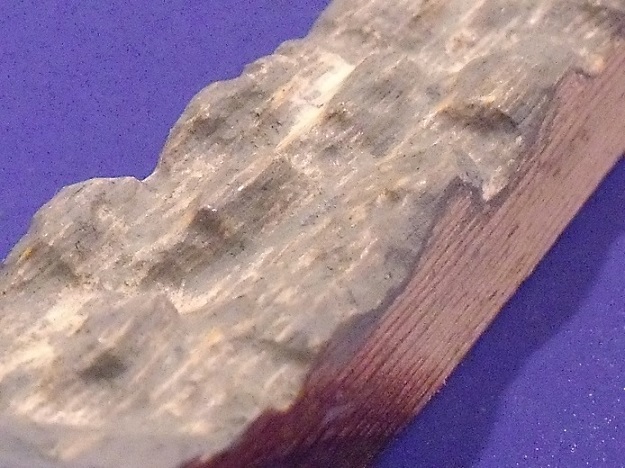
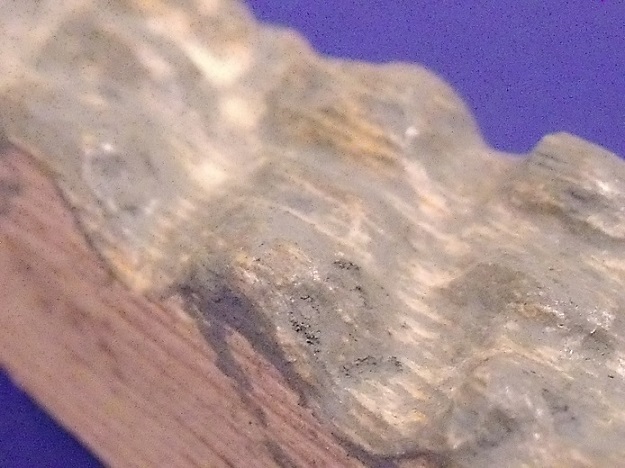
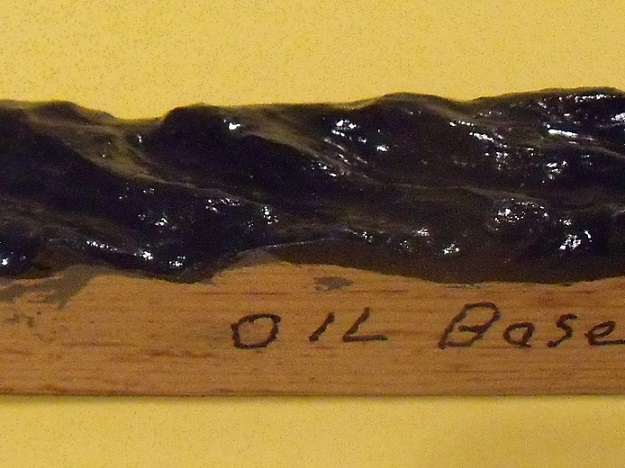
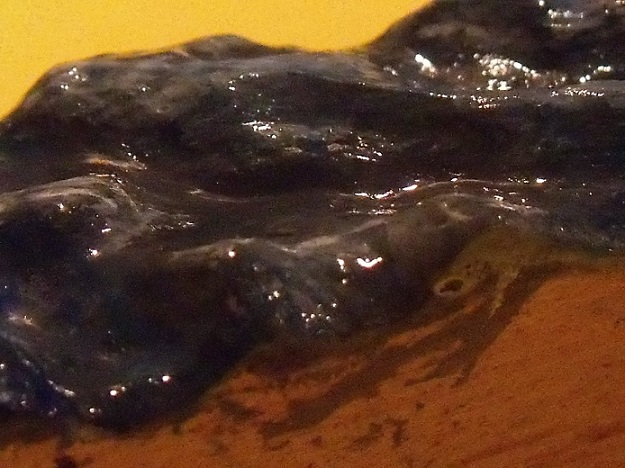
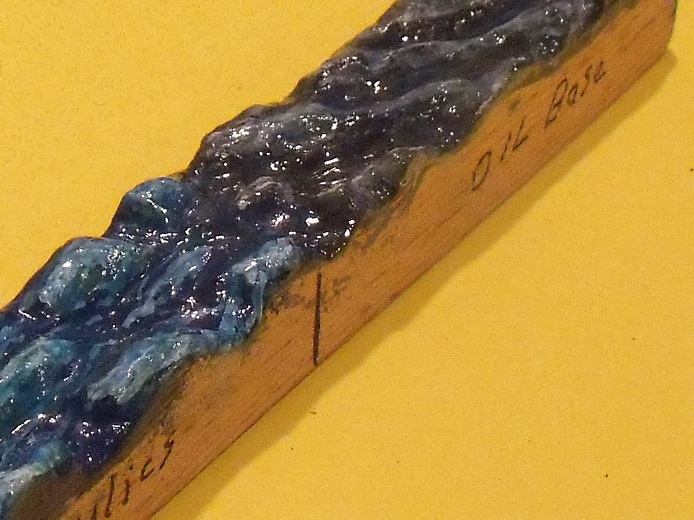
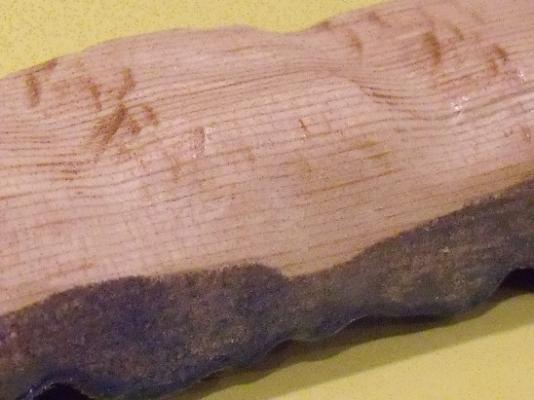
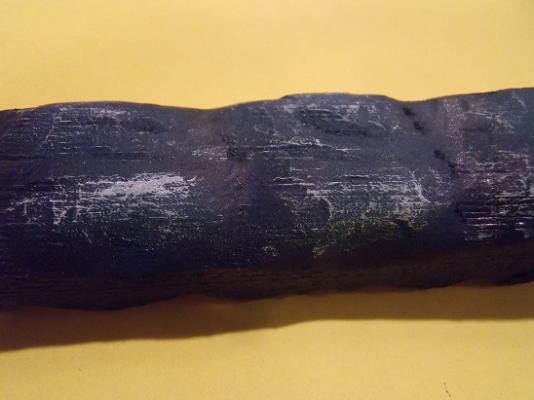
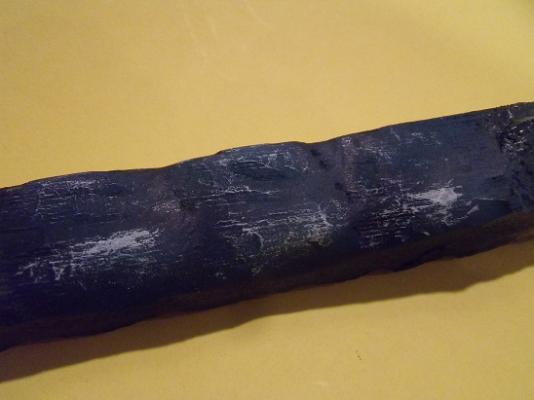
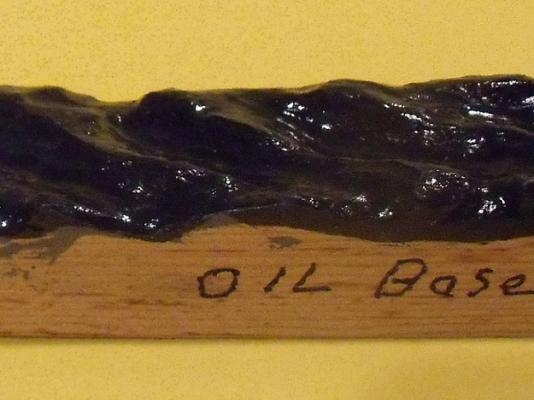
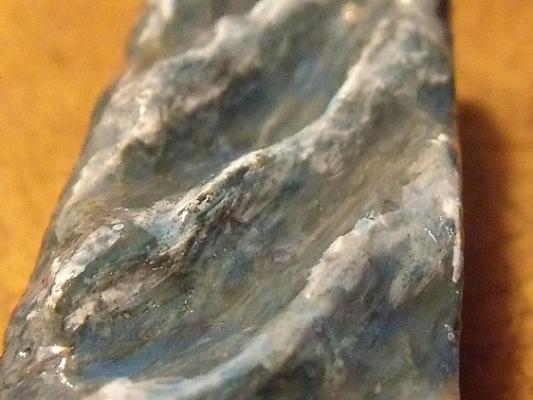
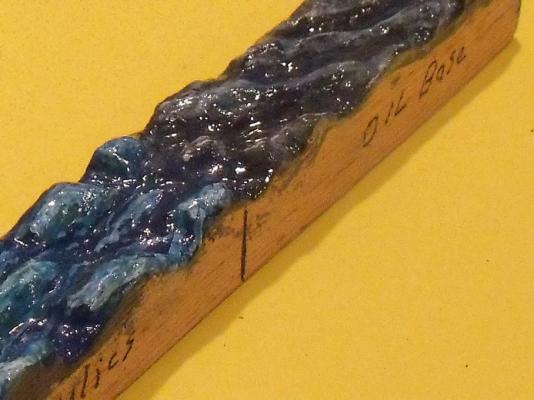
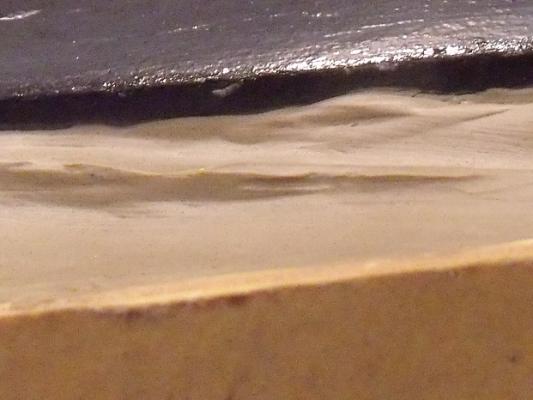
Today the Polar Vortex hit and we have snow, minus 21 degrees Celsius with the windchill. Good day to be inside. The first two shots shows my second attempt with deeper carving and wood primed in grey to show the fuzzes. I took my dremel and sanded the fuzzes off before continuing. Next shot is middle section done with Games Workshop acrylics. Old paint but still works! This picture shows wood primed with Regal Blue. Next shot is the right section done with enamel & oil paints. This piece is primed with Testors Dark Sea Blue. Next two photos we finish the middle section with some Regal Blue mixed with varnish (secret sauce) then some Scaly Green and Ice Blue, followed with some Testors White enamel for the white caps. I just love mixing things up to try new techniques. These seas as my wife call them are "Happy Seas" full of life and nice swells. I dislike them! They look like moguls on a ski hill. They do however look sort of Folk Artish. Next two shots we have the right section with Dark Sea Blue, secret sauce, and a rubbing technique I'll describe further on here in this post. Next shot is the same seas with different lighting. The color change is quite dramatic. I like this outcome! Next shot is the two side by side for comparison. My Eldest and youngster like the right, and the wife likes the middle acrylic section. I am still undecided at the moment. I still think I can do better! The one example on the right which most of us liked was a freak occurrence. I was in the process of using, and laying down, a bunch of artist's oil paint and was going nowhere real quick. I basically was making mud. I got mad and took a towel to wipe it all off and was pleasantly surprised at the outcome. It was the effect I was looking for. I know I'm close I just have to tweak it a bit and I should be ready to go for it. It's really hard to paint ocean on wood at this scale however I know I can pull it off. Still waiting for Jack Needham's book to arrive for color inspiration as well. Jeff


-
Yesterday and today I had a break-through regarding painting oceans and colors. Also I have Jack Needham's book coming to me on an inter-library loan to further my study on ocean waves, direction and color. An excellent link for ocean color and painting is Water Recipe's Parts; one, two, and three on YouTube by non other than Marge Kinney. Marge is a really nice lady and an excellent artist. Her style is impressionist based I. E. Vincent van Gogh etc. Marge does an excellent job of explaining color pallet etc. especially for oceans and she gets it right! https://www.youtube.com/watch?v=aucEi6YGc80 So this weekend into the Man Cave I go to practice some more carving and painting to... improve upon my technique until I get it right. Then I'll proceed with the final outcome! Stay tuned ... Jeff
-
Thanks Dave! You have given me a lot to think about and there is still more research to be done. Thanks for the knowledge about; There's also a wave that can propagate from the water that passes under the hull, rises to the surface (following the hull shape) and meets the water passing along the side. Where this occurs, it's magnitude and the angle of this small wave depends on the hull shape. Compared to a prop driven vessel, the wake will be relatively smooth with much less froth. & I suggest that you consider increasing the interval and magnitude of your swells and depict them with blown-away crests. The wind effects on the sea need to match the number and set of your sails. <<<<< This is great advice! Jeff
-
Mark, Wake will come later. Have to figure how much wood to come out first! Michael... nice link thanks for that! Jeff
-
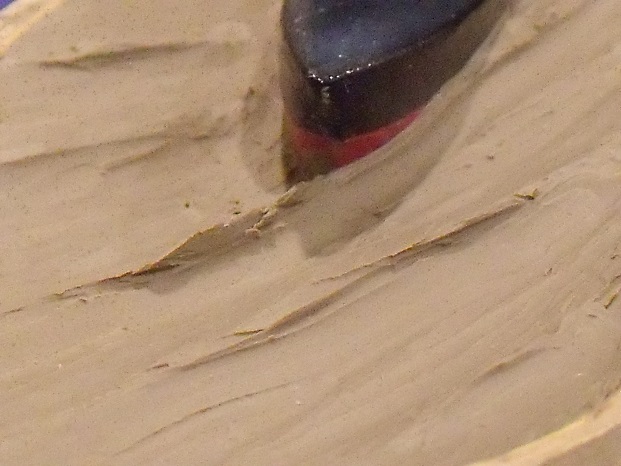
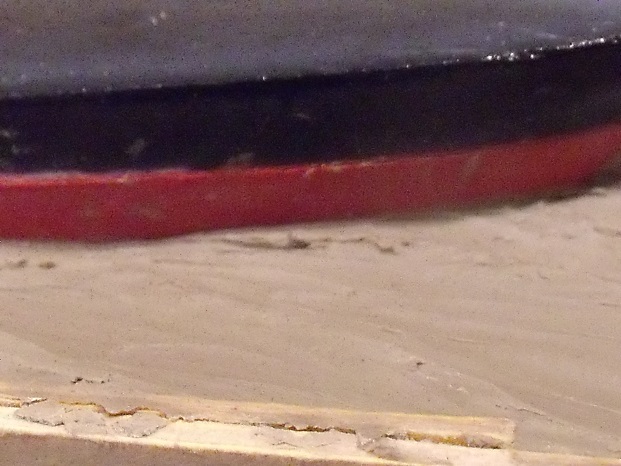
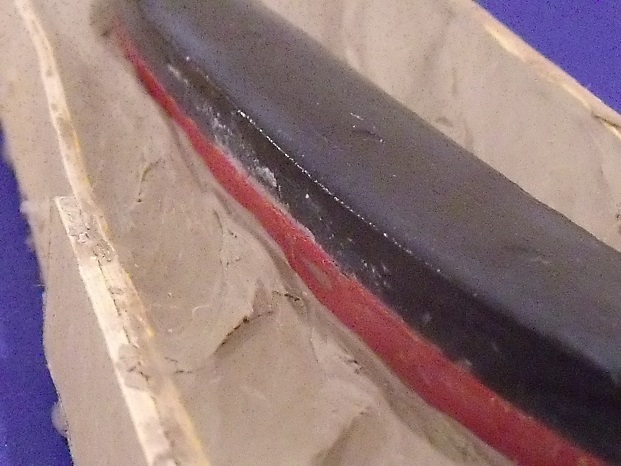
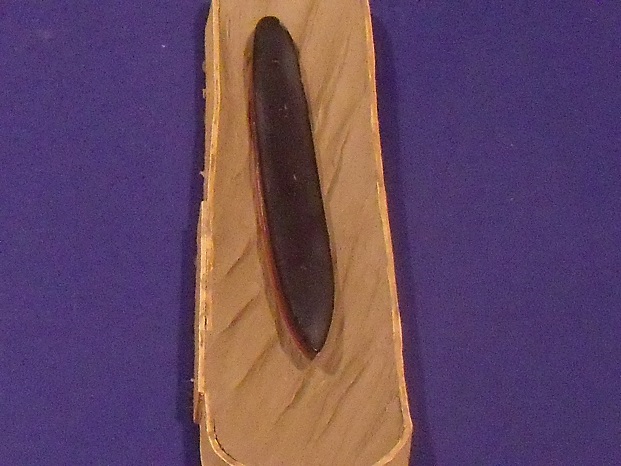
Calling all Mariners and Naval enthusiasts. Time to weigh in and please... give me some feed back, your comments and suggestions will be greatly appreciated. I am in no rush so the time to make mistakes is now before I start carving. In the following photograph's I have the dummy hull in some clay mocked up. I am trying to get the swells and waves orientated before I start to carve the Douglas Fir. I only get one shot at this so... scr## ups are not allowed! This first shot shows the bow, she is sailing before the wind and the wind/wave direction is coming off the starboard side. Please keep in mind I haven't done any mock up on the bow and stern wake yet. That I'll do with some acrylic colored silicon. Next shot is port side amidships with hull healed over to port with no waterline visible so as to depict a hold full of cargo. Next shot stern port side. I wanted to open this up a bit so as to show some rudder detail eventually on my model. No rudder installed here just my dummy hull plug for now. Another rear shot at the stern. Next shot forward of amid-ship starboard side. Next shot looking rearward from bow starboard toward midships, and please notice waves coming from the rear and breaking towards the hull. She is running before the wind as I mentioned so she is running hard trying to get back to the Mother Land with cargo in hand. No pun intended! Next is an aerial view. I tried to depict the waves in a sequence of rollers with swells and it was hard to determine how they are to line line up on the port side verses the starboard side. It has to be believable! I had to take into account the wind and the fact the ship is moving forward so how are the waves to break on the starboard side. Question... should they be how I have modeled them lagging a bit behind on the starboard side, or more in line with the waves on the port side or vice-verse? I haven't been to sea for 32 years so I have lost touch and memories are distant. Okay time to weigh anchors in! Calling all 'Old Salts' or young ones who {have sailing experience at sea} for comments and opinions. Please advise ... Jeff


-
Well done Dave! Everything turned out perfect. I especially like the figures and your base is first rate. The photo etching was a nice touch as well. I look forward to your work on the White Lady! Jeff
- 170 replies
-
- 1
-

-
- ogallala
- praire schooner
- (and 2 more)
-
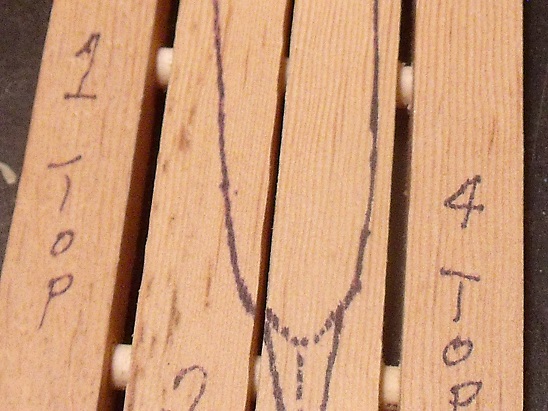
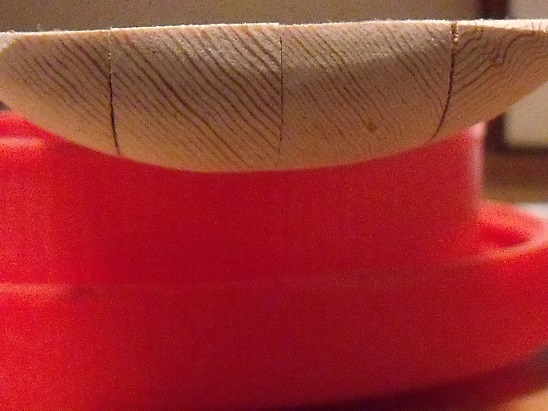
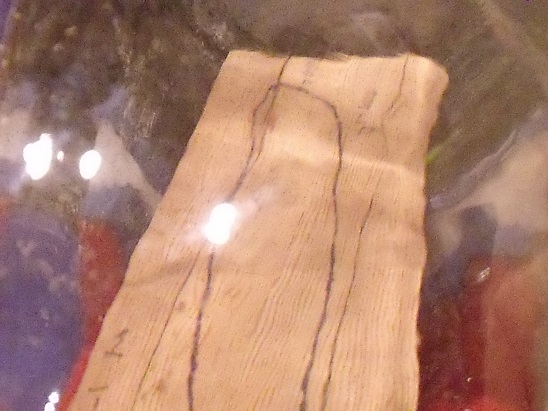
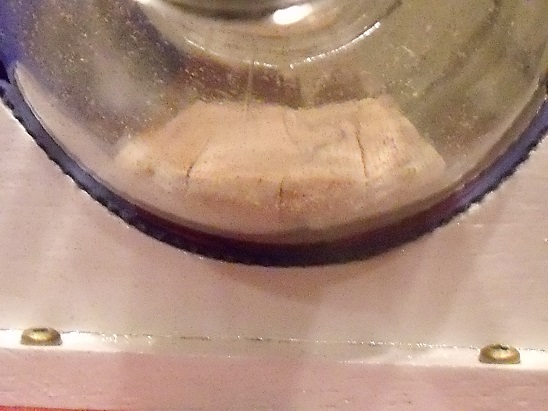
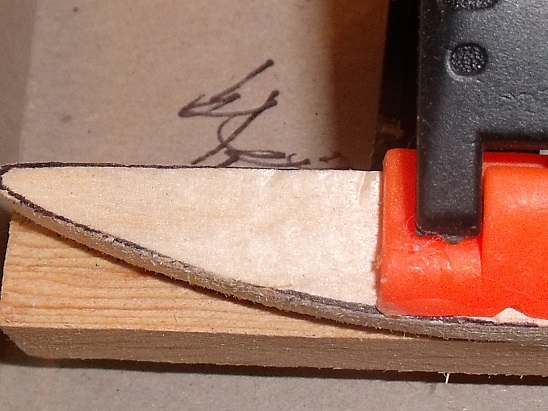
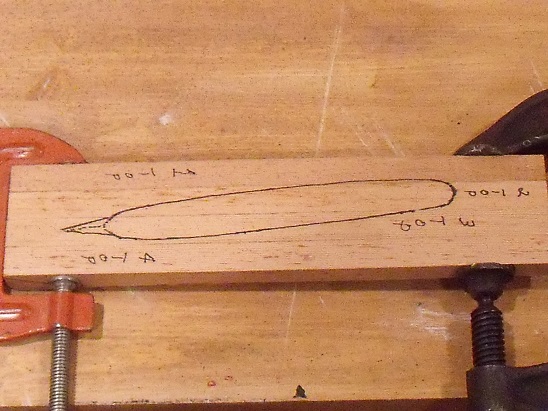
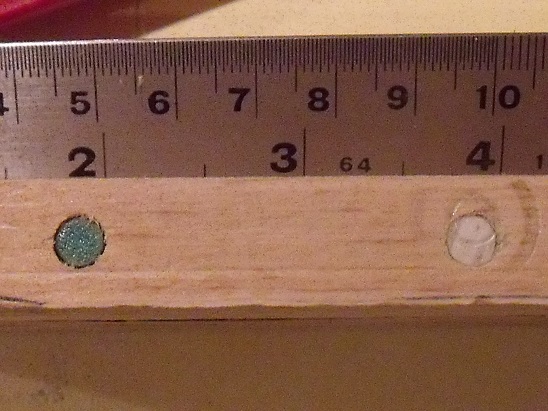
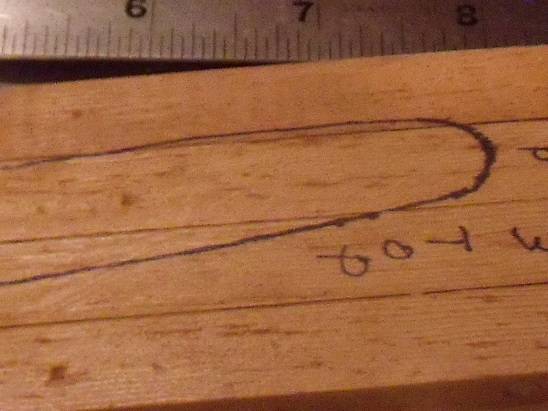
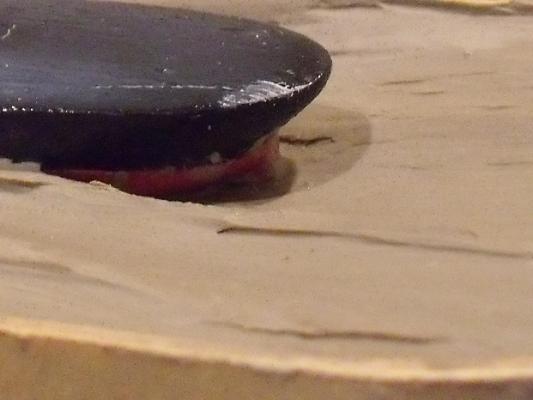
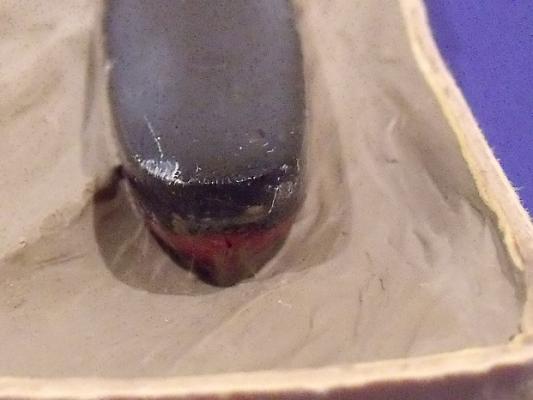
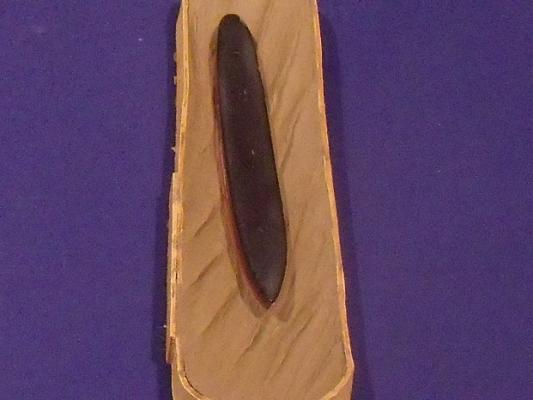
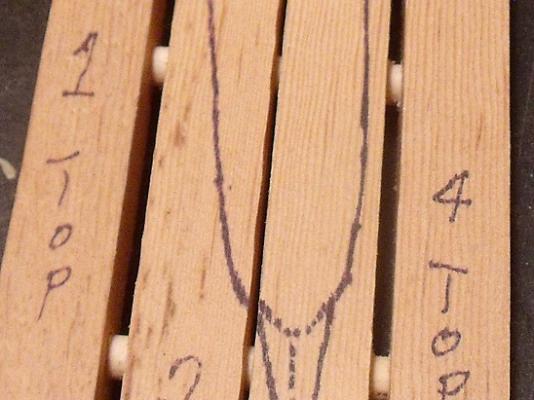
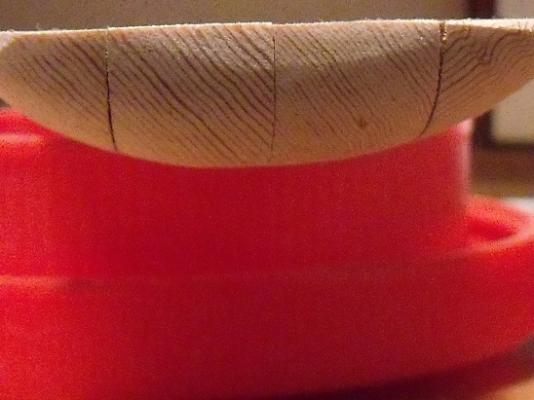
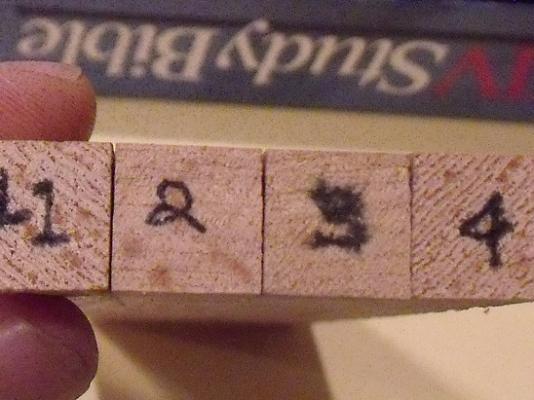
Today I can totally relate to Saw Dust Dave. Lots of carving and sanding however the pieces fit nicely and I am sure the magnet's will hold everything in place. The next picture shows the dowels holding them and worked really well while carving and sanding. Next shot shows the profile and the template doesn't lie. I had to get the wood curved exactly like the template plus there is one flat spot and one minor flaw in the bottle that caused a bit of grief. Next shot shows wood pieces laying in the bottle nice and flush. Should be good to go onto the next step which is a mock up of the waves in a tube (hopefully same curvature of my bottle) to see how the scale will be with modelling clay. I have to determine how to model the clay for the wind, swells, and bow/stern wake before I even attempt to start carving. I can also use the mock up as my guide while carving. Last shot shows the 4 pieces of Fir nice and snug without anything holding them together. Should be good here! On to the mock-up .... Jeff

-
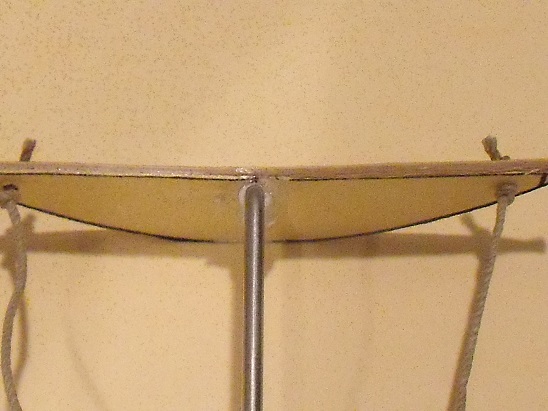
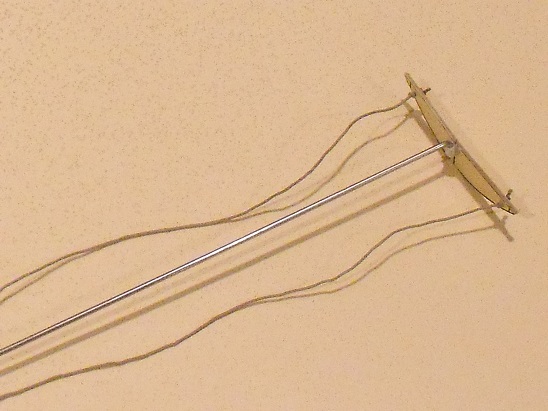
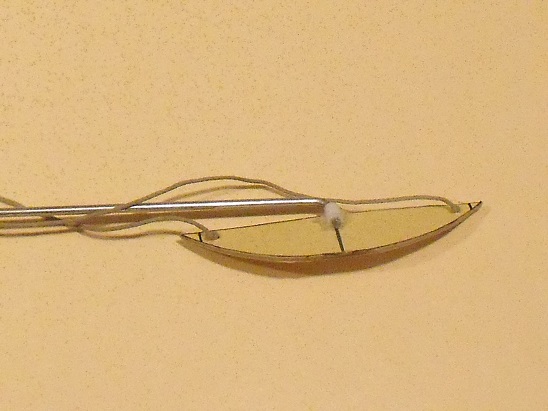
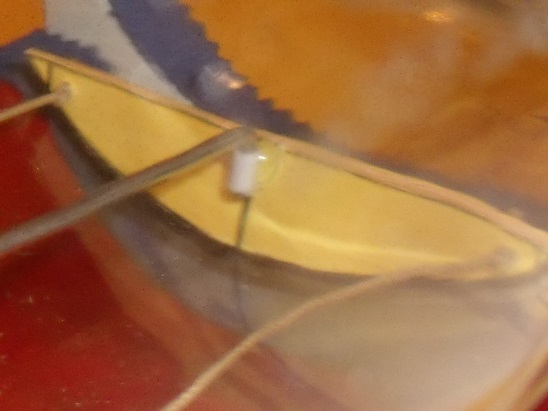
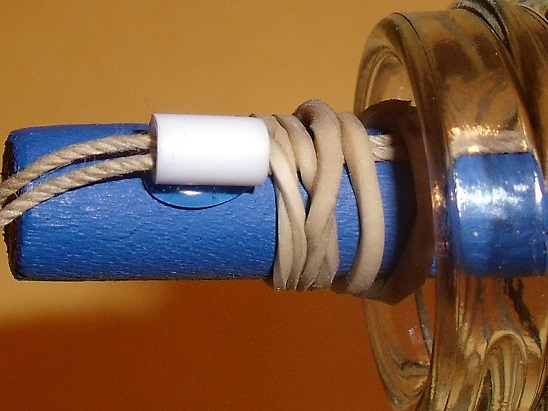
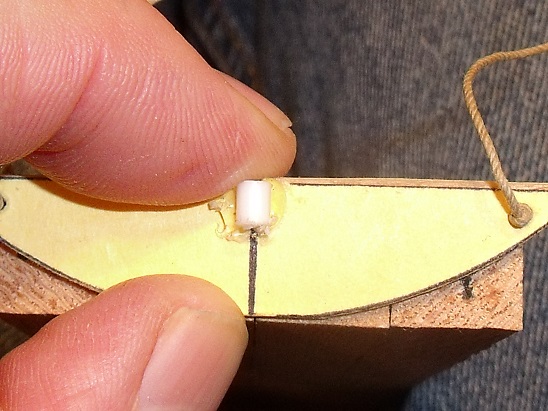
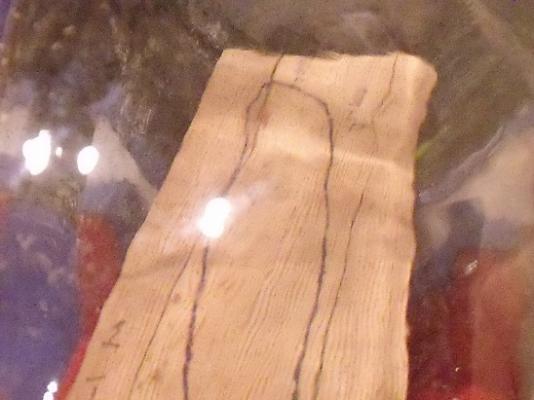
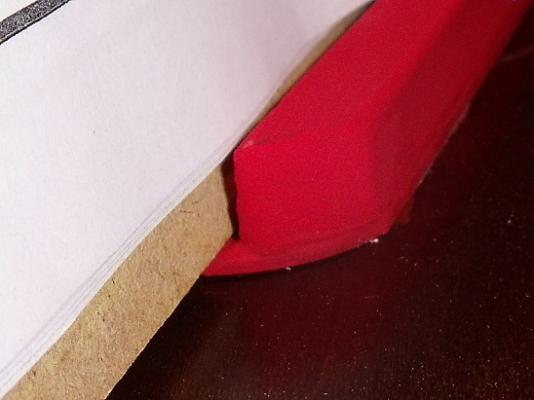
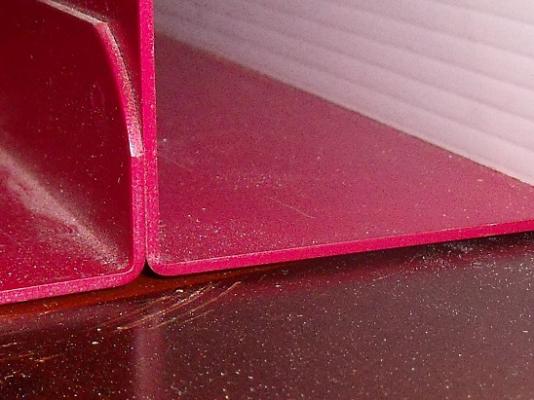
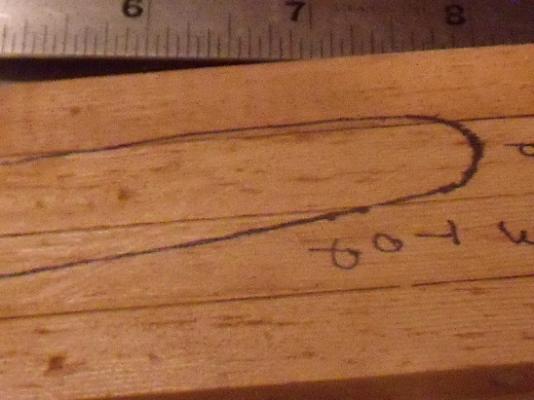
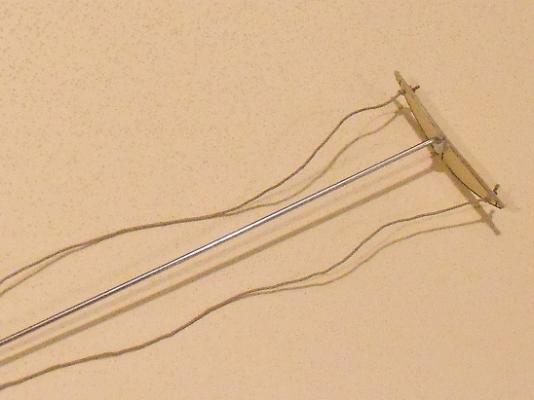
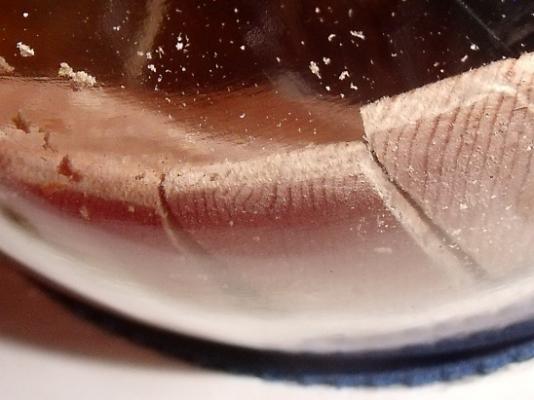
Well finally I got into my Man Cave to work on my SIB. Yesterday I had a few set backs with family stuff however I still forged ahead. First off was to remedy the plague of the plans falling all over the place on my bench. The later conundrum drove me nuts so time to take action. I had an old metal book stand which I quickly turned into a type of artists easel. Above pictures show a piece of balsa (painted red) glued to the front of the book-stand and plans pinned to some coroplast sign material. Problem solved! Next pictures shows work on clamping the fir sea material together. I then drilled four holes and pinned them together with some wooden dowels. Pieces fitted together and numbered for reference. Next I realized I needed to make a tool to determine the contour of the inside of the bottle as the wood pieces need to be tapered, curved, and fitted to the inside curve of the bottle. Wine bottles are fairly round but not perfect. Blowing glass is an art and getting a bottle completely round takes great skill. The following pictures shows my home made contour tool to measure the inside of the bottle. I made the tool to hinge and had the control strings fixed in position while measuring with an elastic band. Worked good! The next picture shows me checking my template against the inside contour. At this point I thought I was close however I am working in 2 dimensions, add in some wood and now it's 3 dimensional and I know things are going to change. Next picture shows the strings fixed with the elastic band. The next picture shows me transferring the information to the wood. The next picture shows the wood in position. I was gun shy when carving being extra careful not to take off too much without checking first. After getting the 4 pieces into the bottle you can see I need to take off some more material. Remember what Grandpa said... measure 3 times, cut once. Well maybe... cut twice! Easier to take more off than try to add on later. Jeff


-
Nice Job! We just have to get you hooked on doing a ship in a bottle. Time to convert my friend* Your skills are perfected. Jeff
-
Stellar Dave! I have next week off so this will encourage me to get onto my SIB. Jeff
-
Omega .... Are you going to put some furled sails on the yard's or are they stowed at present down below deck? Jeff
-
Michael, I can't make it as well too busy with life in general. Thanks for the encouragement Omega Germanus .... thanks again greatly appreciated! ....
-
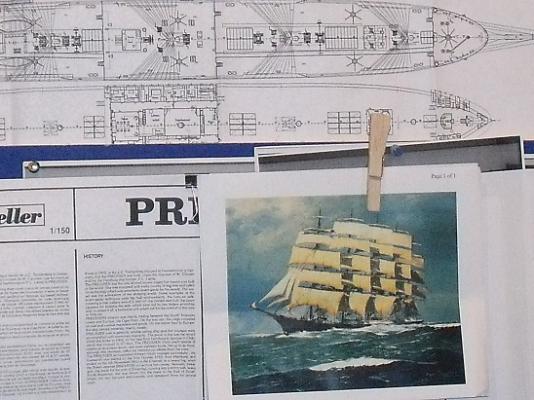
Today the eagle landed from Germany. A manila envelop from Germanus Hullen arrived with a much anticipated package of the Heller 1/150 plans. Absolutely outstanding! Everything I need regarding the following: 1. All deck features showing all the intricate details, winches, davits, boats, furniture, etc. 2. All tables for masts, belaying pins, and shrouds. 3. Detailed drawings for all masts, spars, blocks, and rigging thereof. 4. All running rigging in great detail. 5. Detailed drawings for all sails, clews, blocks, etc. including stay sails. Everything I need in great detail at my finger tips. There is even a drawing to set the yards at 15 degrees before the wind. Good to go ..... Zoom ...... Zoom .......