ChrisLBren
-
Posts
736 -
Joined
-
Last visited
Recent Profile Visitors
4,038 profile views

.jpg.d84ec4dad1d7791e855dca06210ab6f3.thumb.jpg.f45209242e851d4409eca1a09293165b.jpg)


-
 Archi reacted to a post in a topic:
La Renommee 1744 by ChrisLBren - 1/48 - 2025
Archi reacted to a post in a topic:
La Renommee 1744 by ChrisLBren - 1/48 - 2025
-
 Thanks Brad
 -
 dvm27 reacted to a post in a topic:
La Renommee 1744 by ChrisLBren - 1/48 - 2025
dvm27 reacted to a post in a topic:
La Renommee 1744 by ChrisLBren - 1/48 - 2025
-
ChrisLBren reacted to a post in a topic:
HMS Portland 1770 by Trussben - Portland Scale Ship Co. - 1:48 - 50 gun 4th rate
-
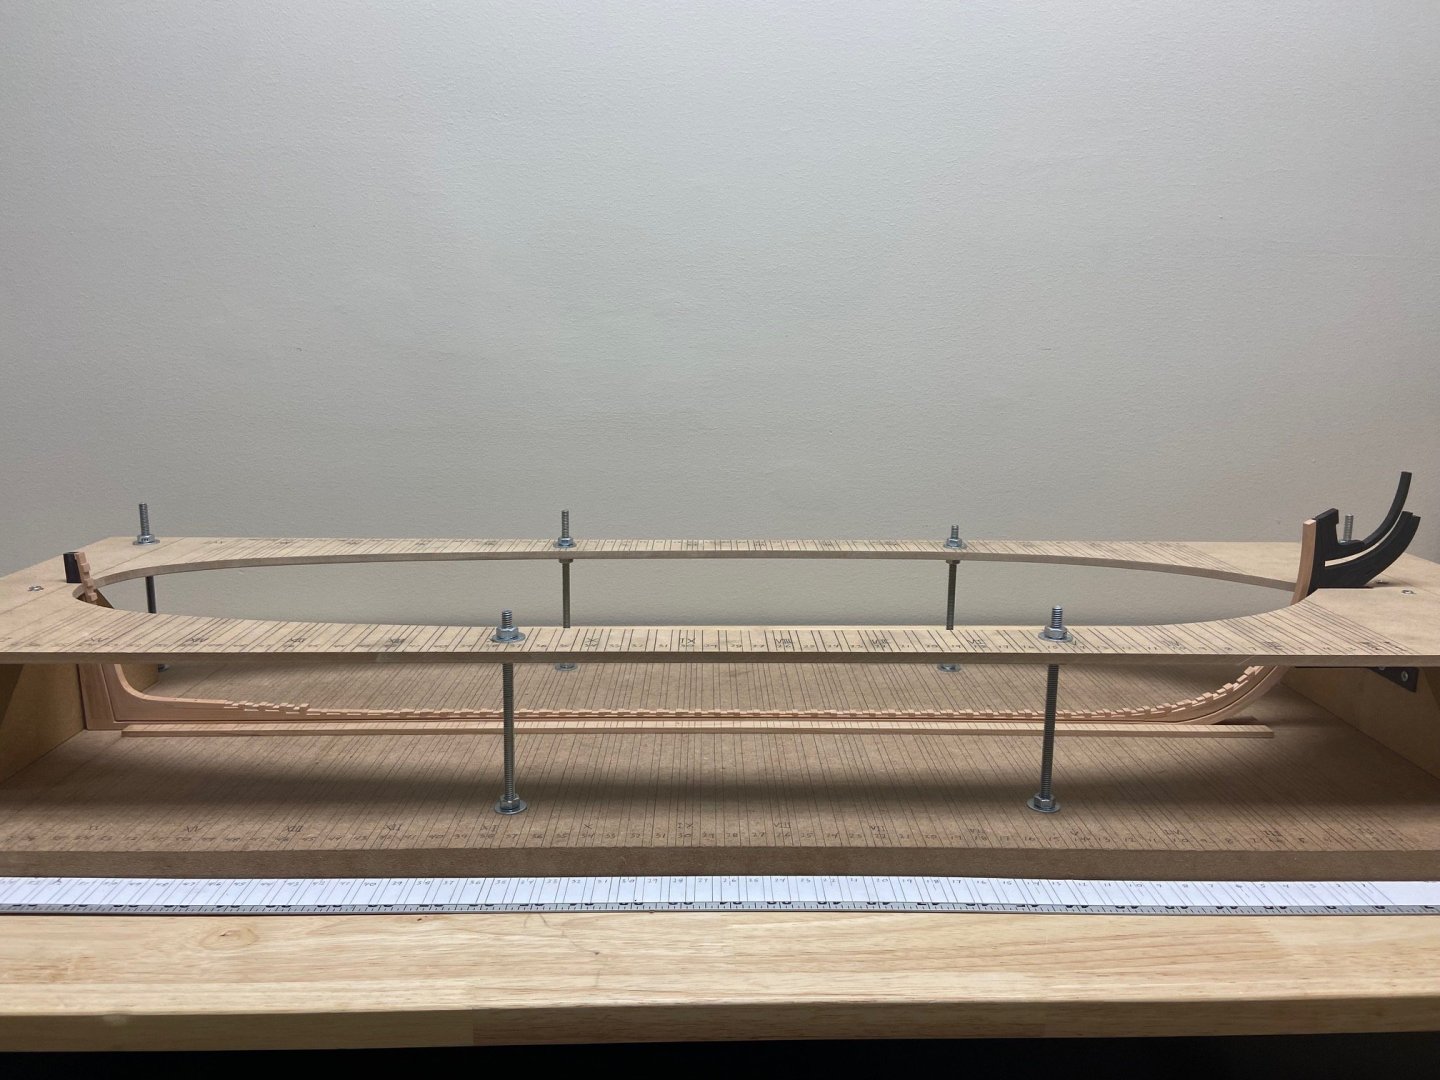
Construction site completed, aligned and ready for frames

-
AnobiumPunctatum reacted to a post in a topic:
La Renommee 1744 by ChrisLBren - 1/48 - 2025
-
AnobiumPunctatum reacted to a post in a topic:
La Renommee 1744 by ChrisLBren - 1/48 - 2025
-
AnobiumPunctatum reacted to a post in a topic:
La Renommee 1744 by ChrisLBren - 1/48 - 2025
-
AnobiumPunctatum reacted to a post in a topic:
La Renommee 1744 by ChrisLBren - 1/48 - 2025
-
AnobiumPunctatum reacted to a post in a topic:
La Renommee 1744 by ChrisLBren - 1/48 - 2025
-
ChrisLBren reacted to a post in a topic:
Le Chebec by Yvesvidal - CAF Model - 1/48
-
BradNSW reacted to a post in a topic:
La Renommee 1744 by ChrisLBren - 1/48 - 2025
-
Thanks Brad - I am following your build as well - love the Salamandre !!!
-
Archi reacted to a post in a topic:
La Renommee 1744 by ChrisLBren - 1/48 - 2025
-
Archi reacted to a post in a topic:
La Renommee 1744 by ChrisLBren - 1/48 - 2025
-
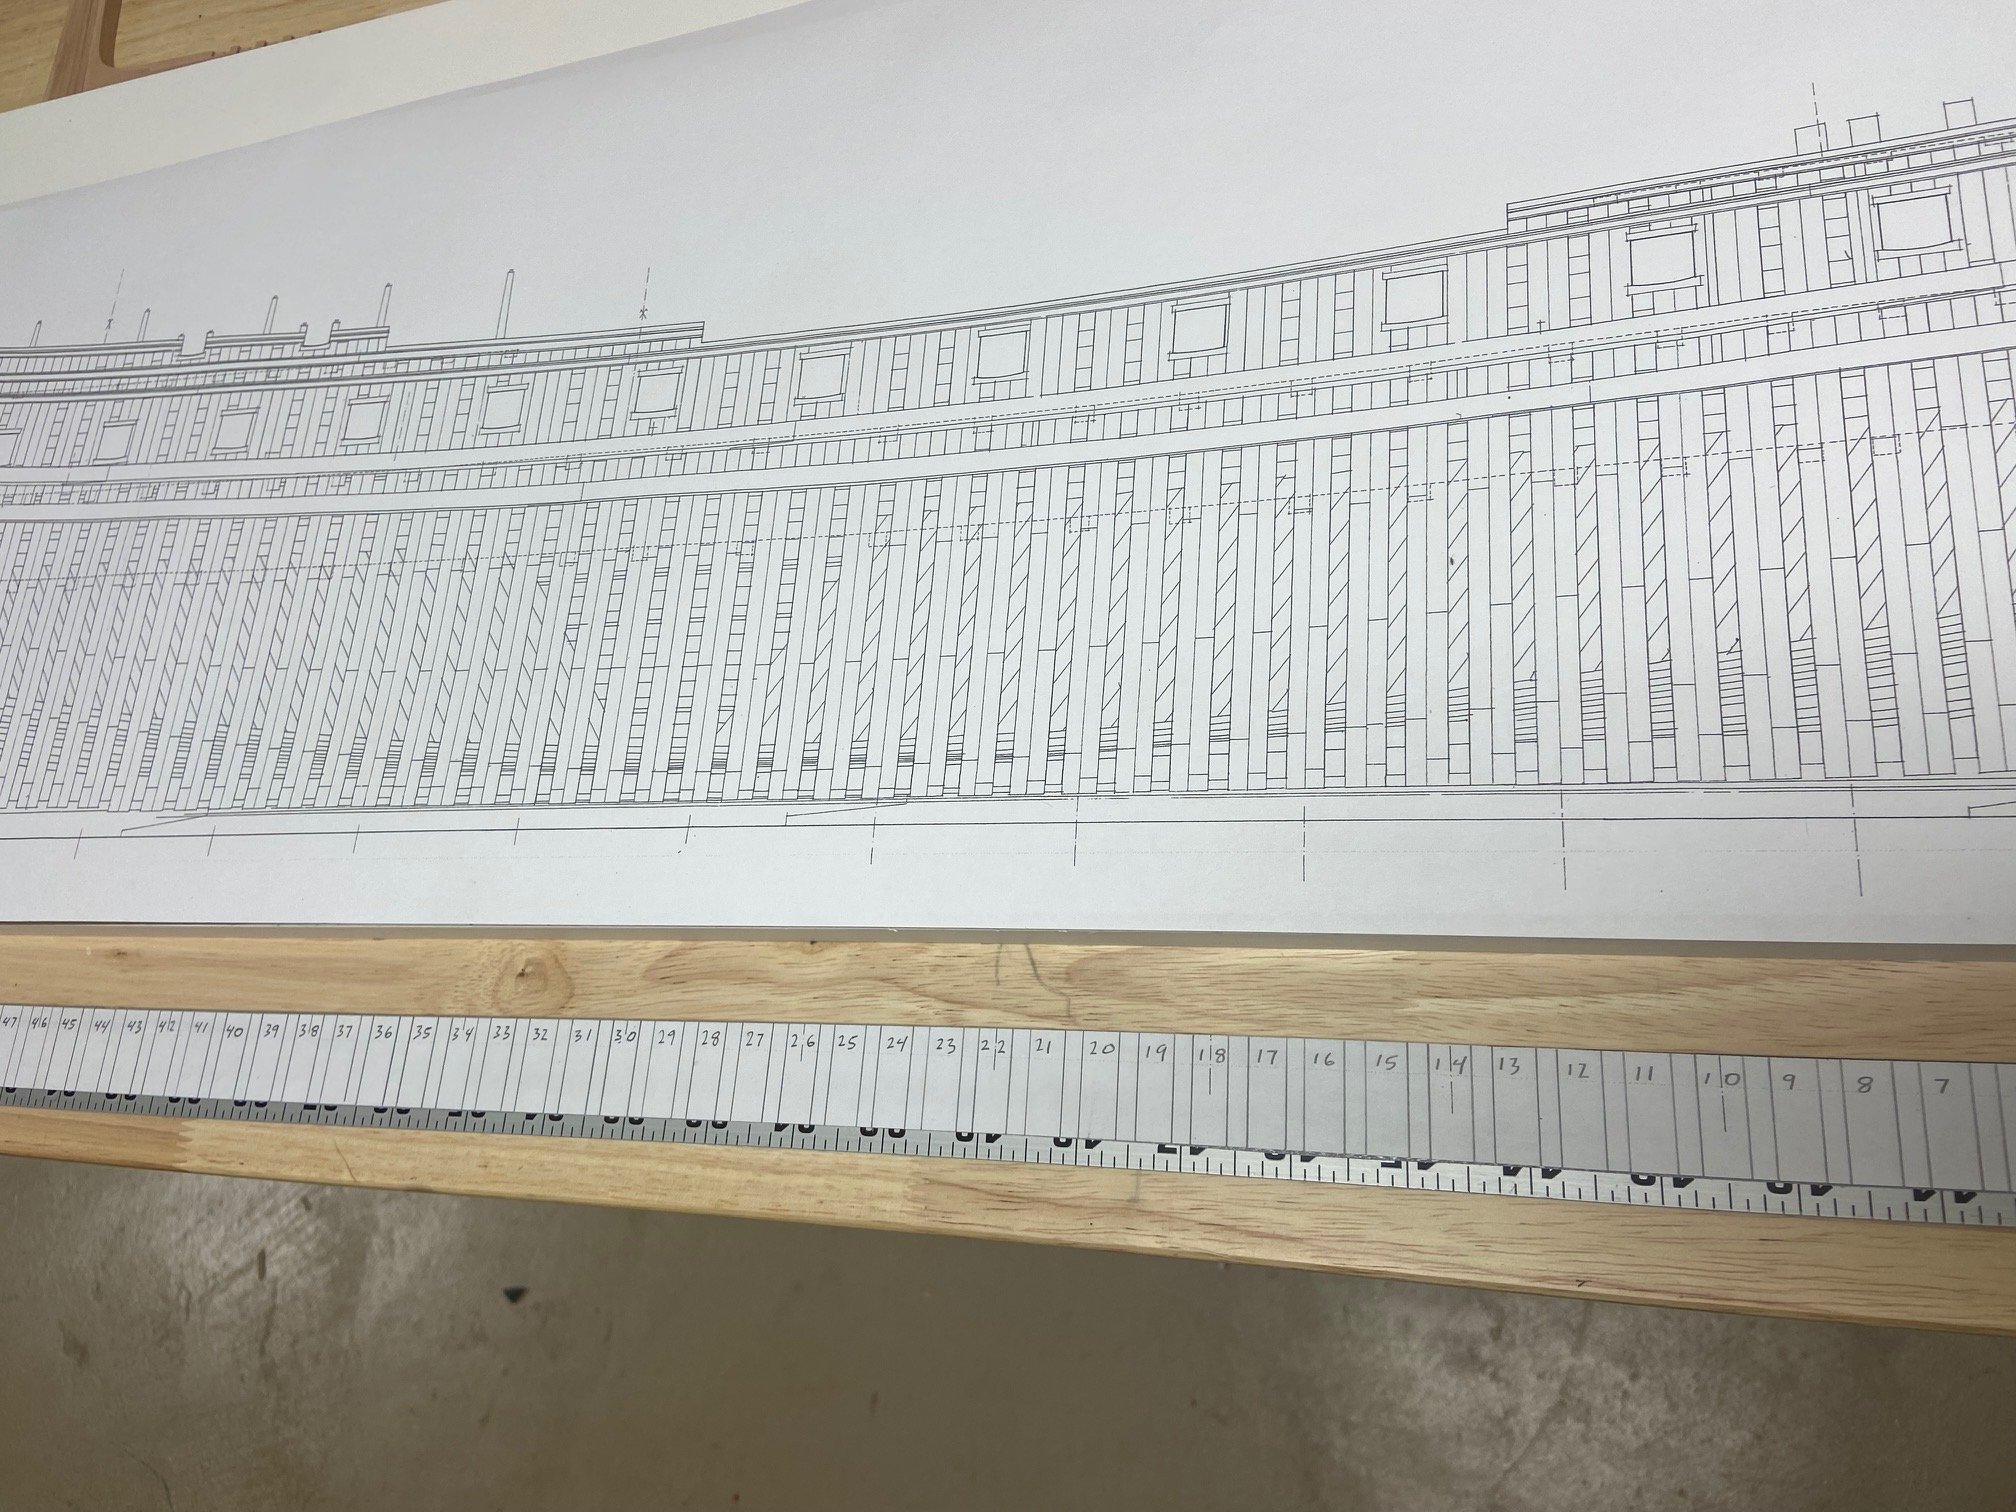
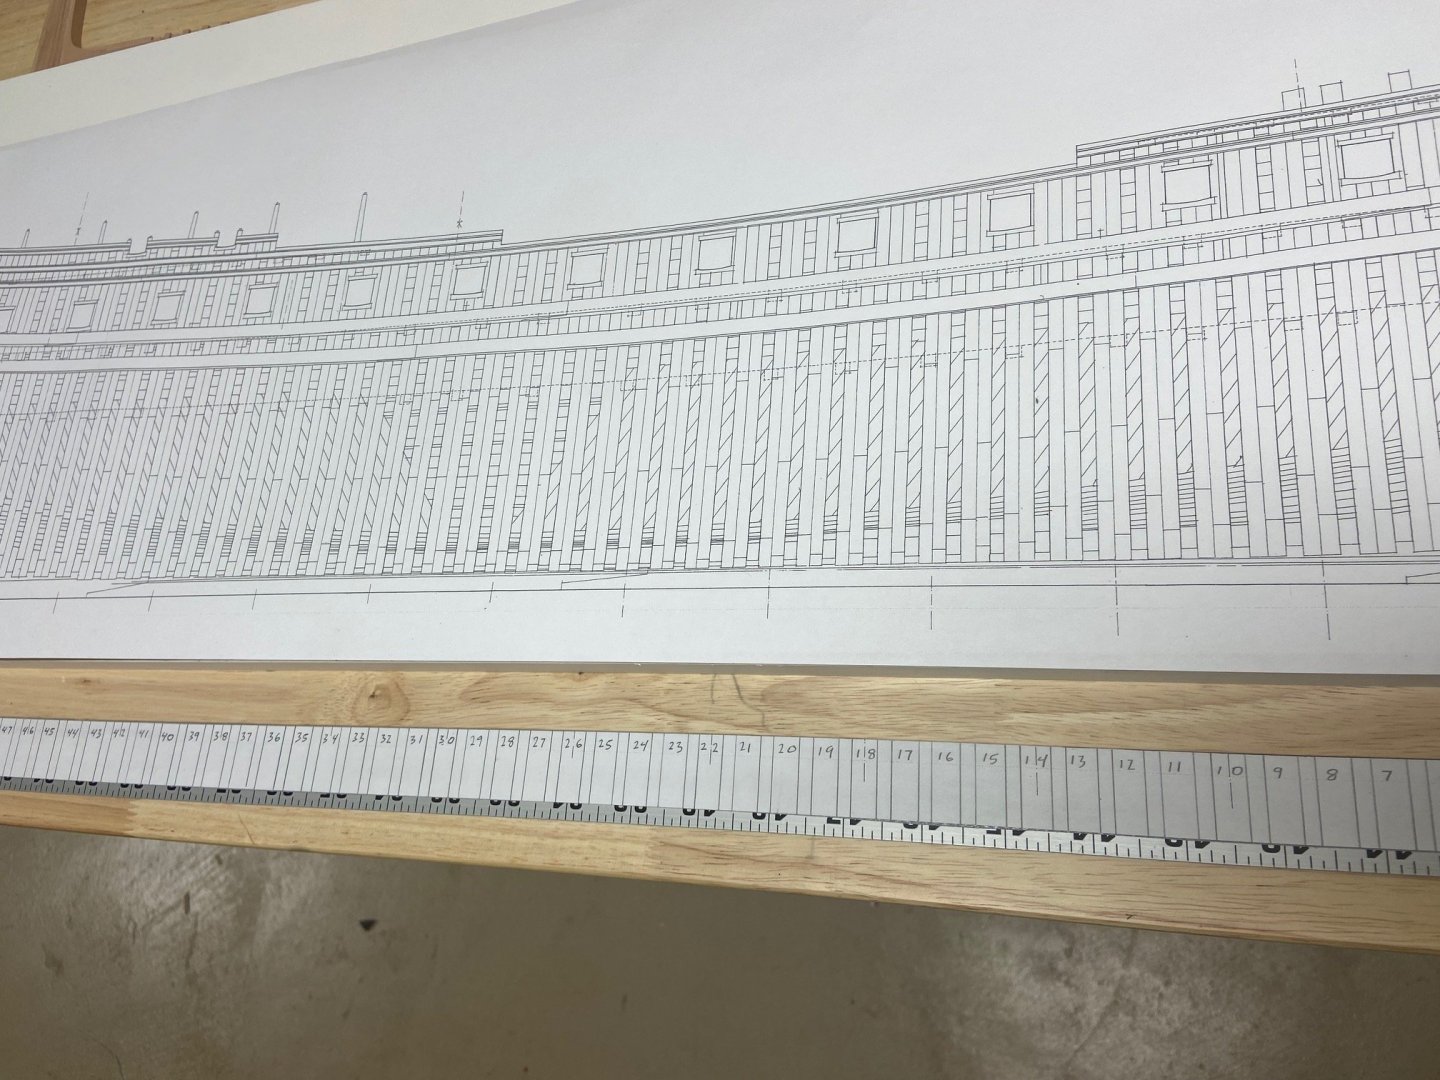
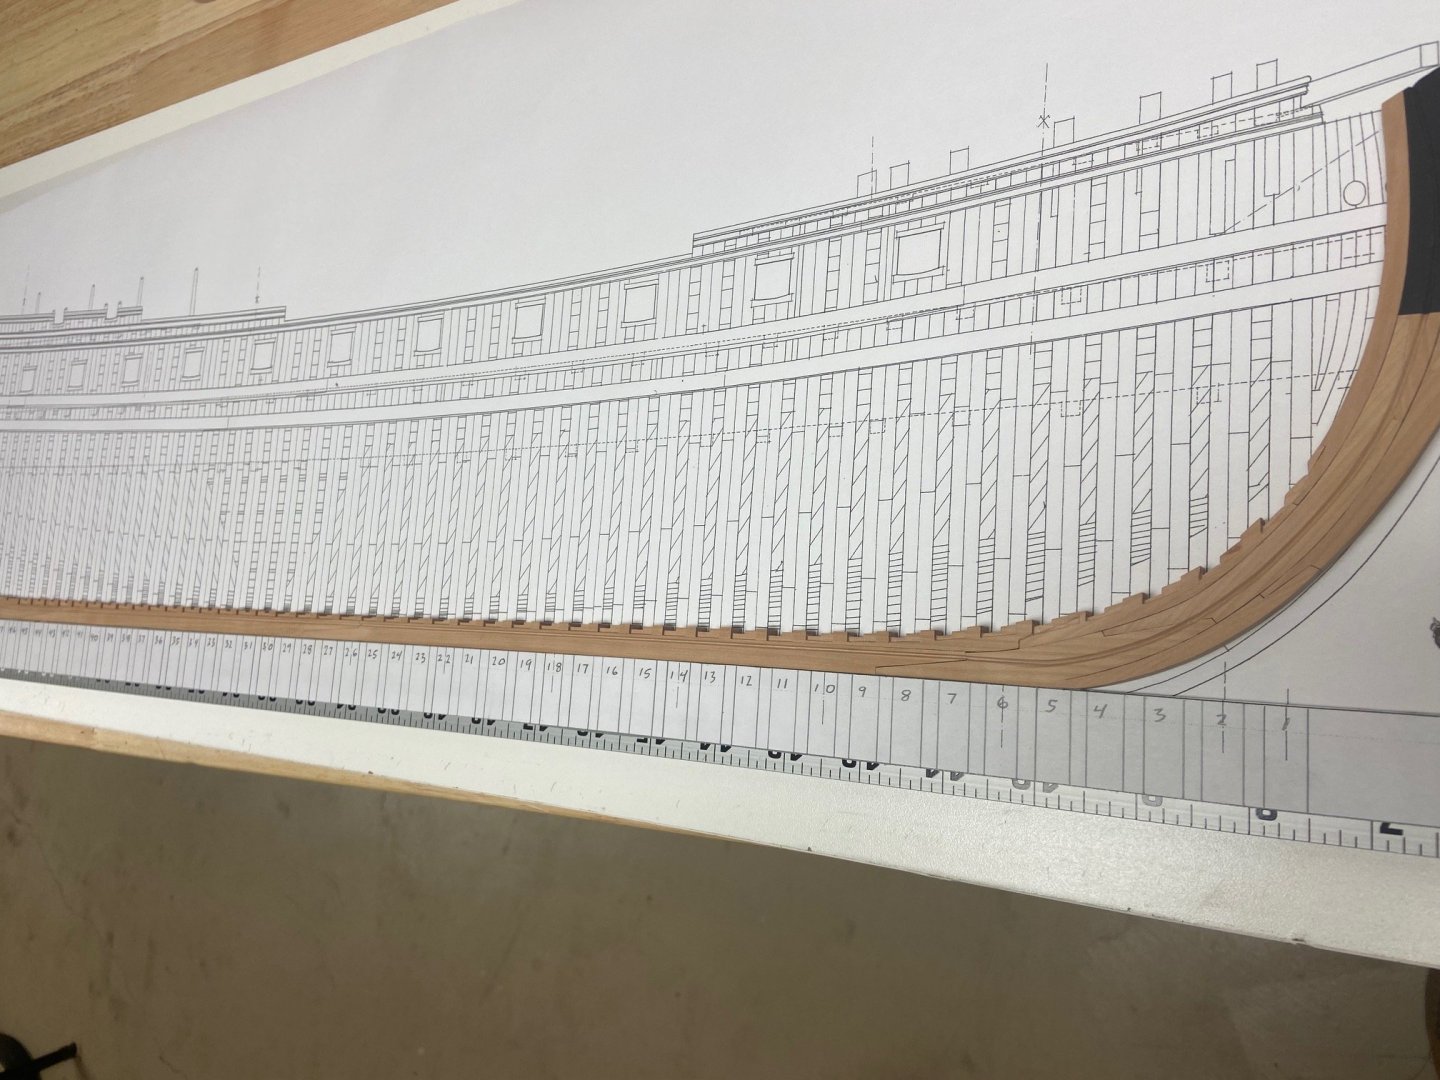
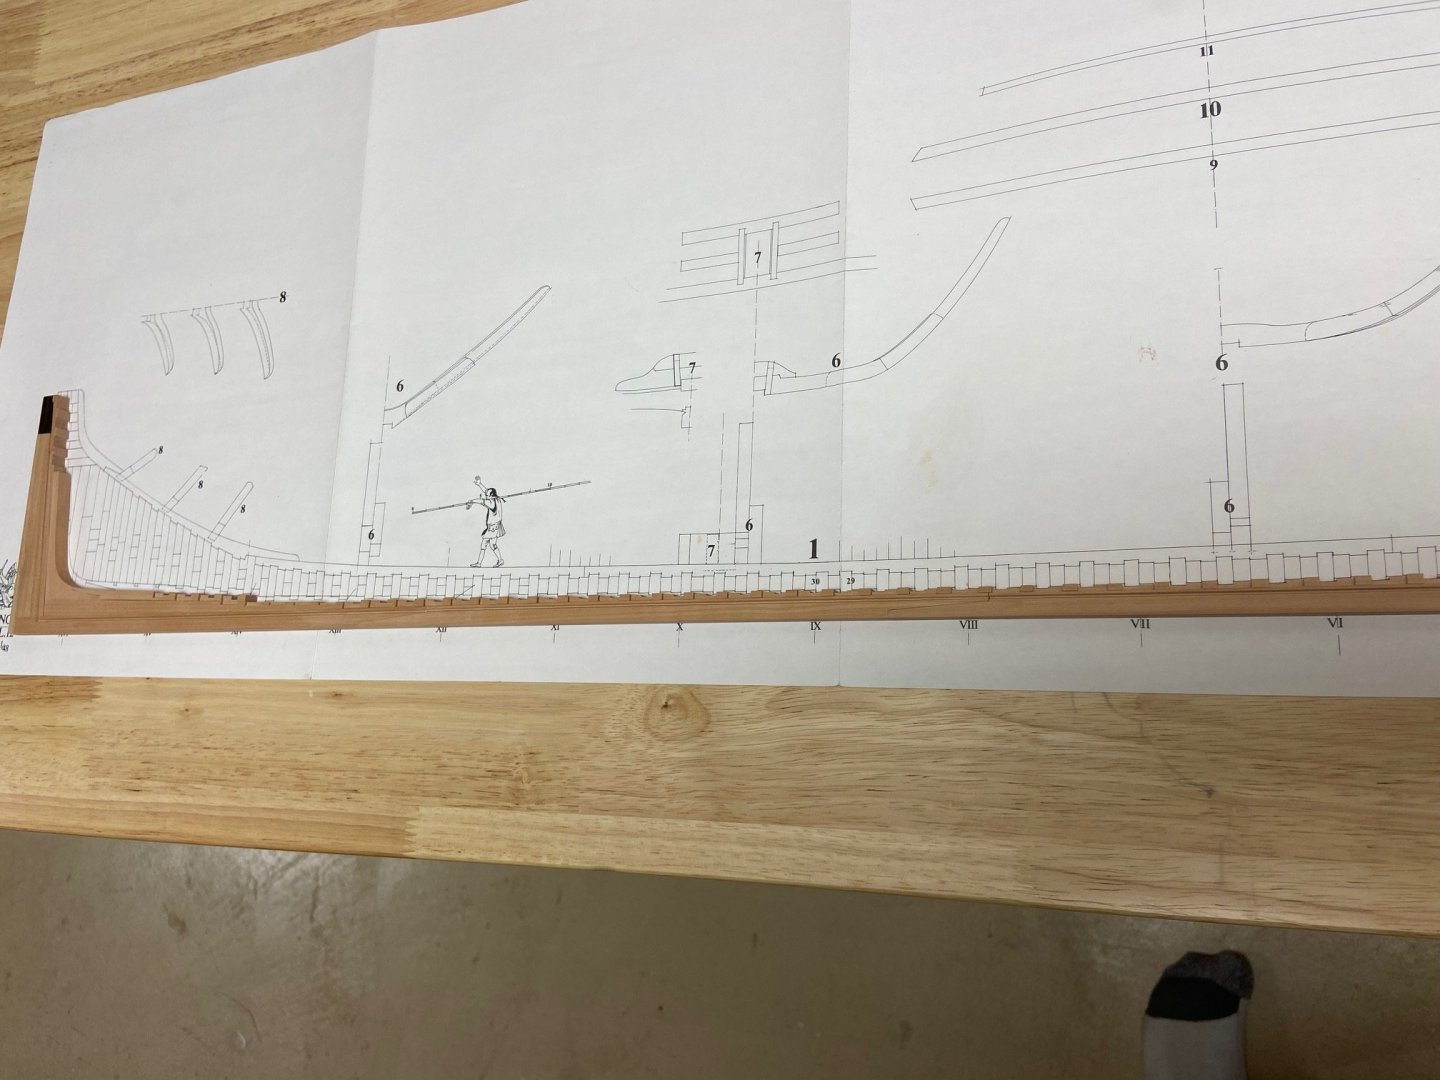
Here's a simple yet brilliant idea - a frame calibrated ruler. The applications including the creation of a construction site are many. Take the lines off the frame profile plan and apply it to a yard stick using double sided tape. I borrowed this one off a French site I have been referencing for my build.
-
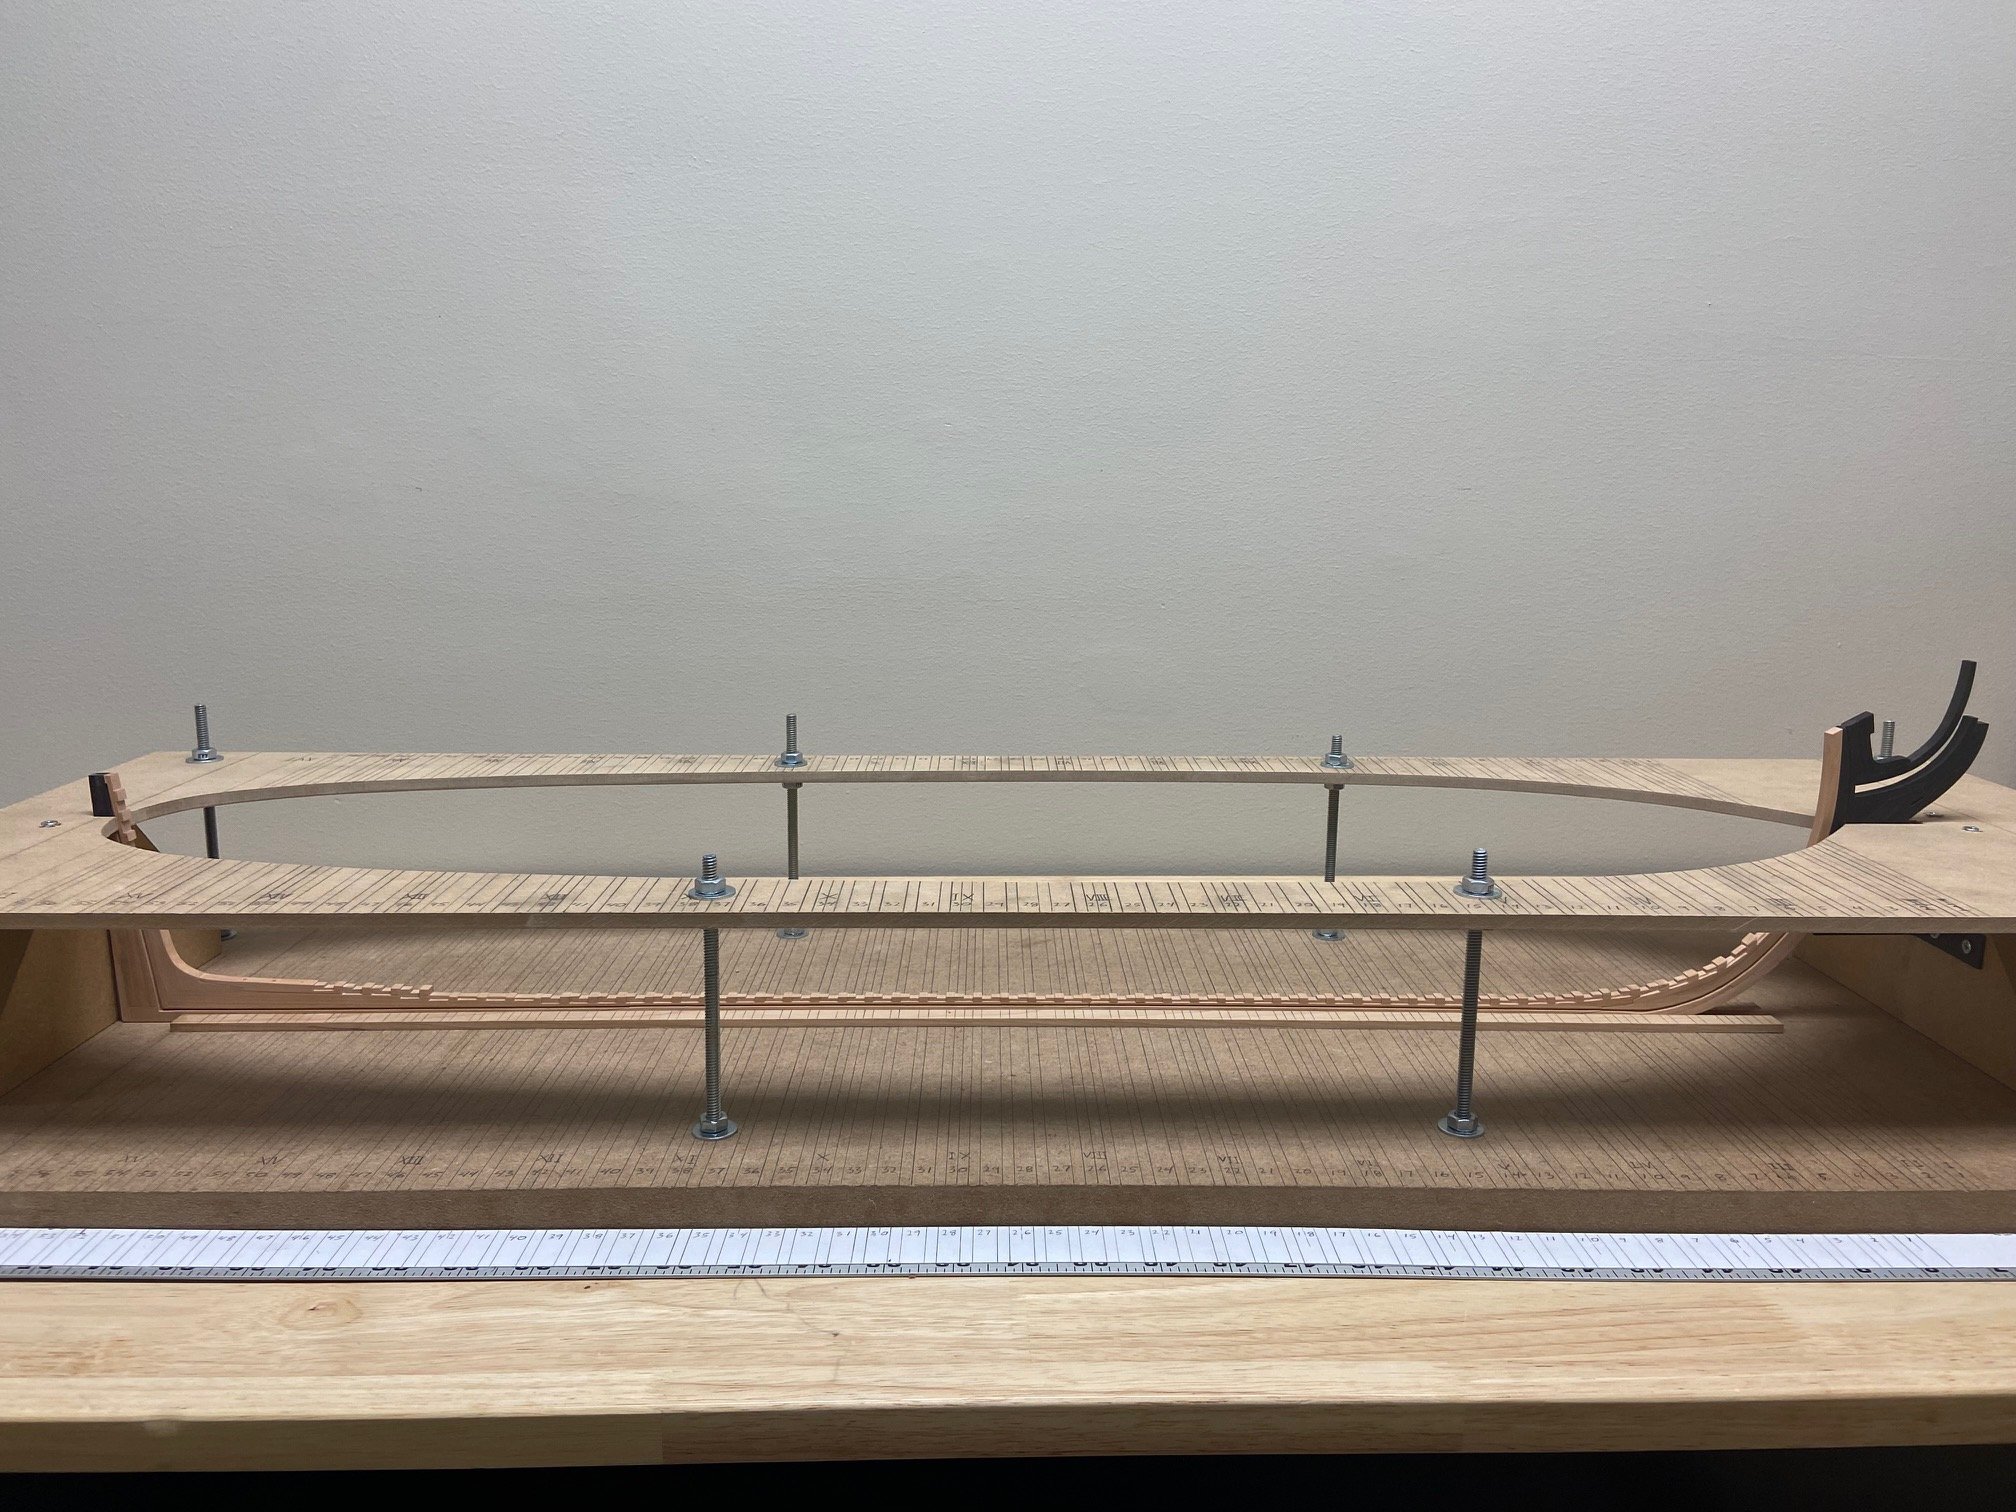
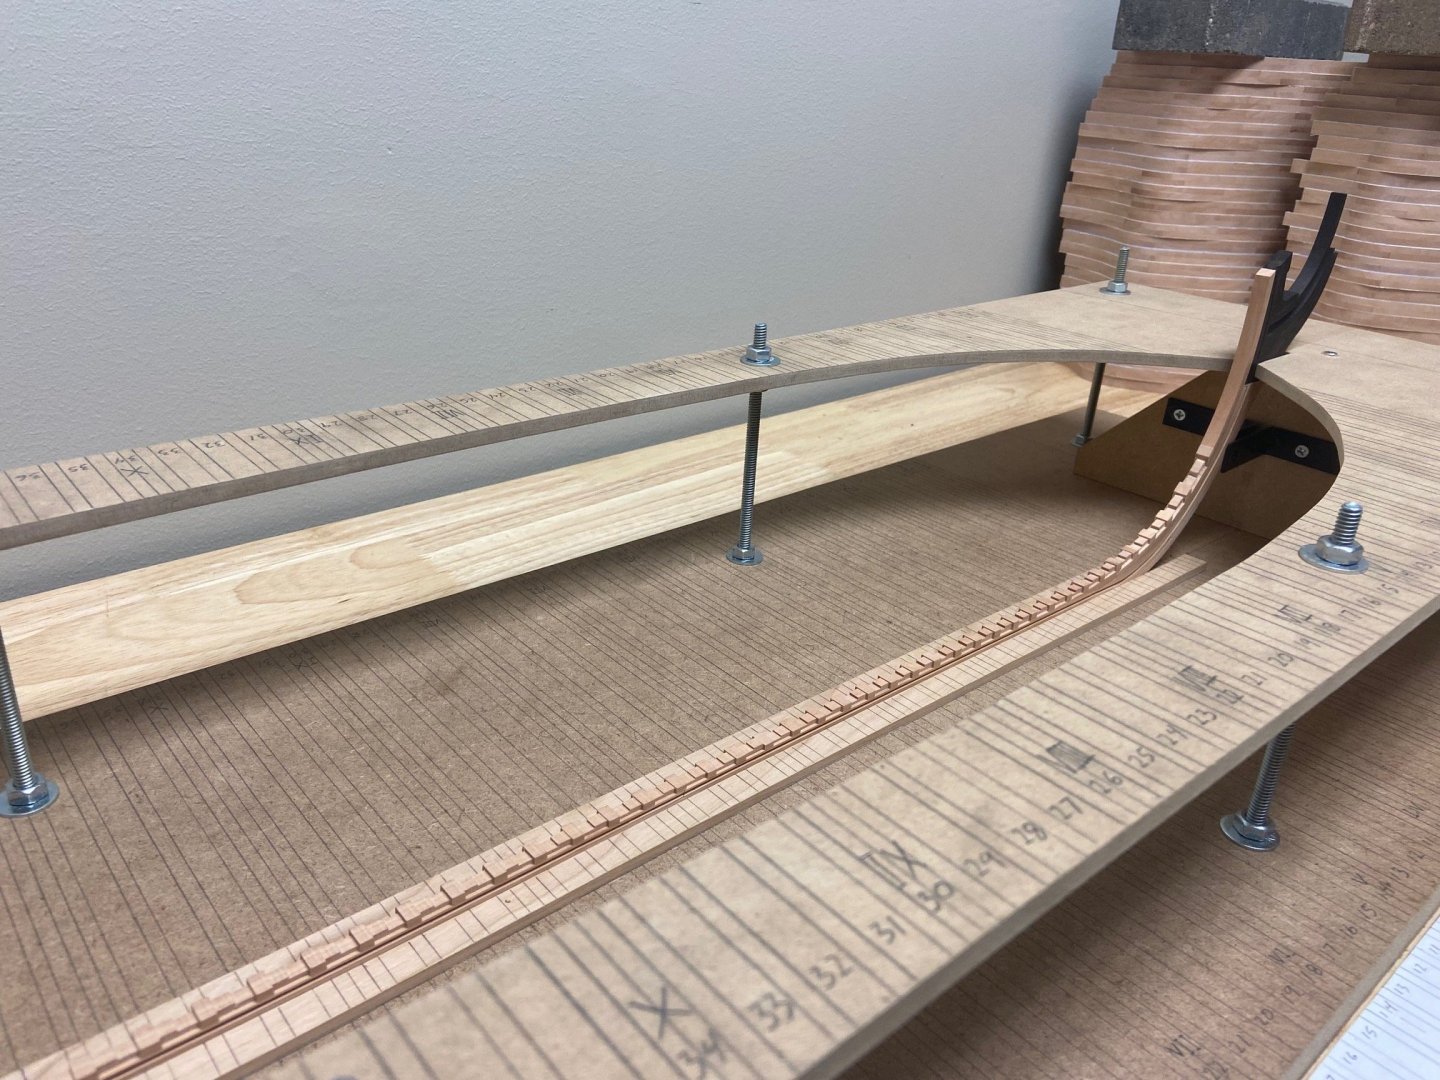
Thanks gentlemen ! Thats a really nice reference Greg. I really took my time with these assemblies so I am hoping for a nicely faired hull. I am about to proceed with the construction site and make sure its exact to give myself the best chance of success here.
-
Thanks Druxey - this keel assembly was not easy so I appreciate your compliment here !
-
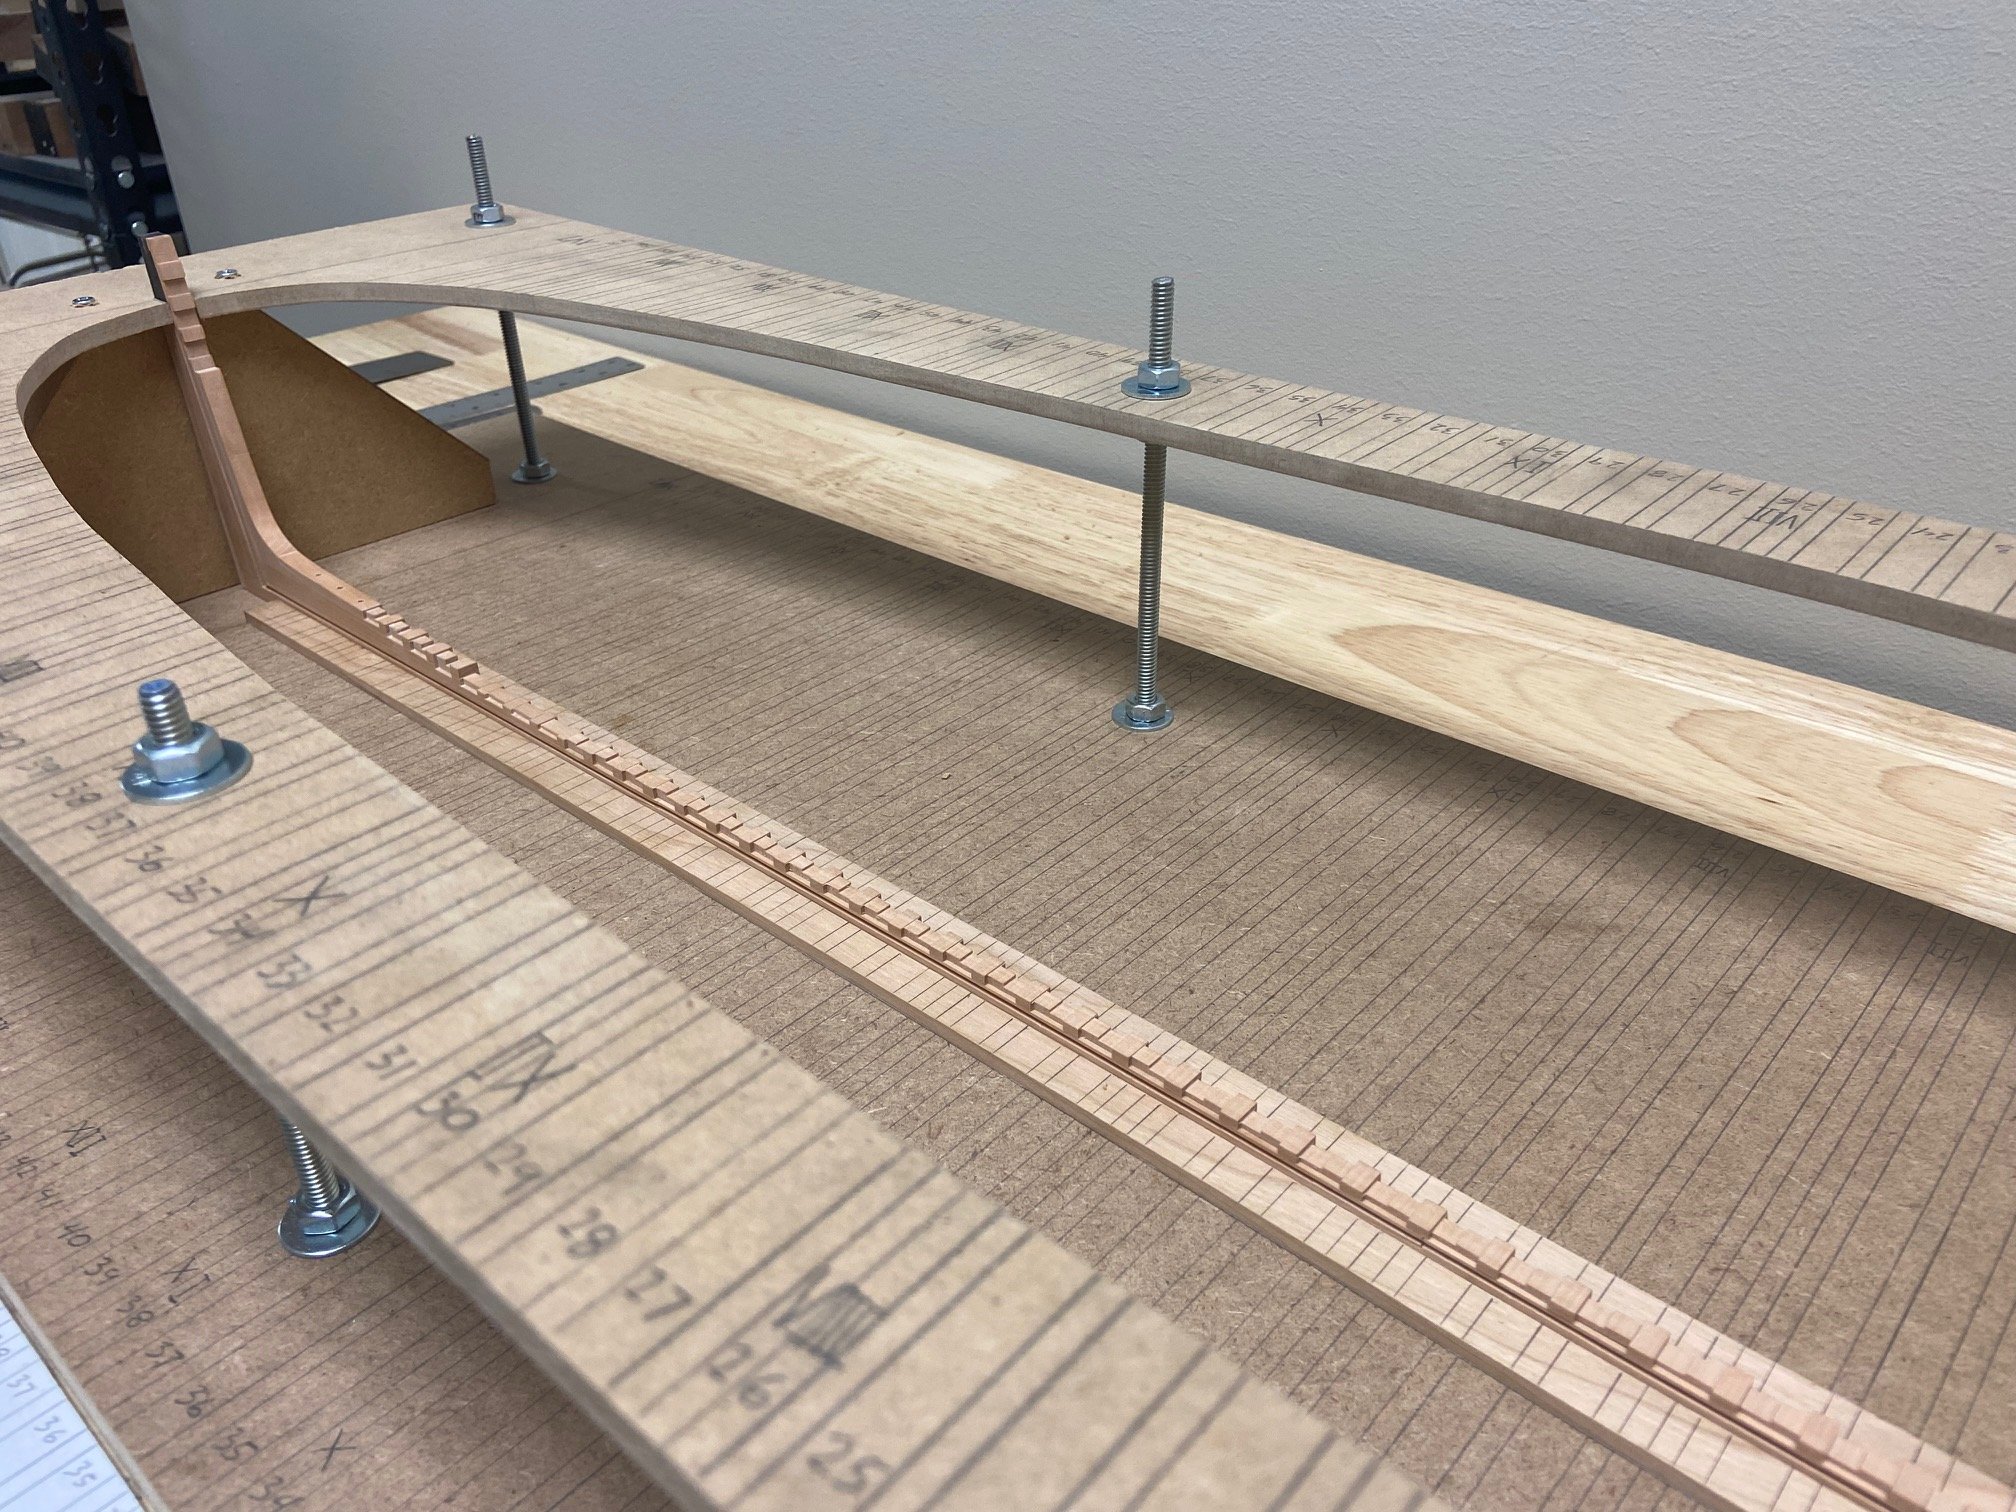
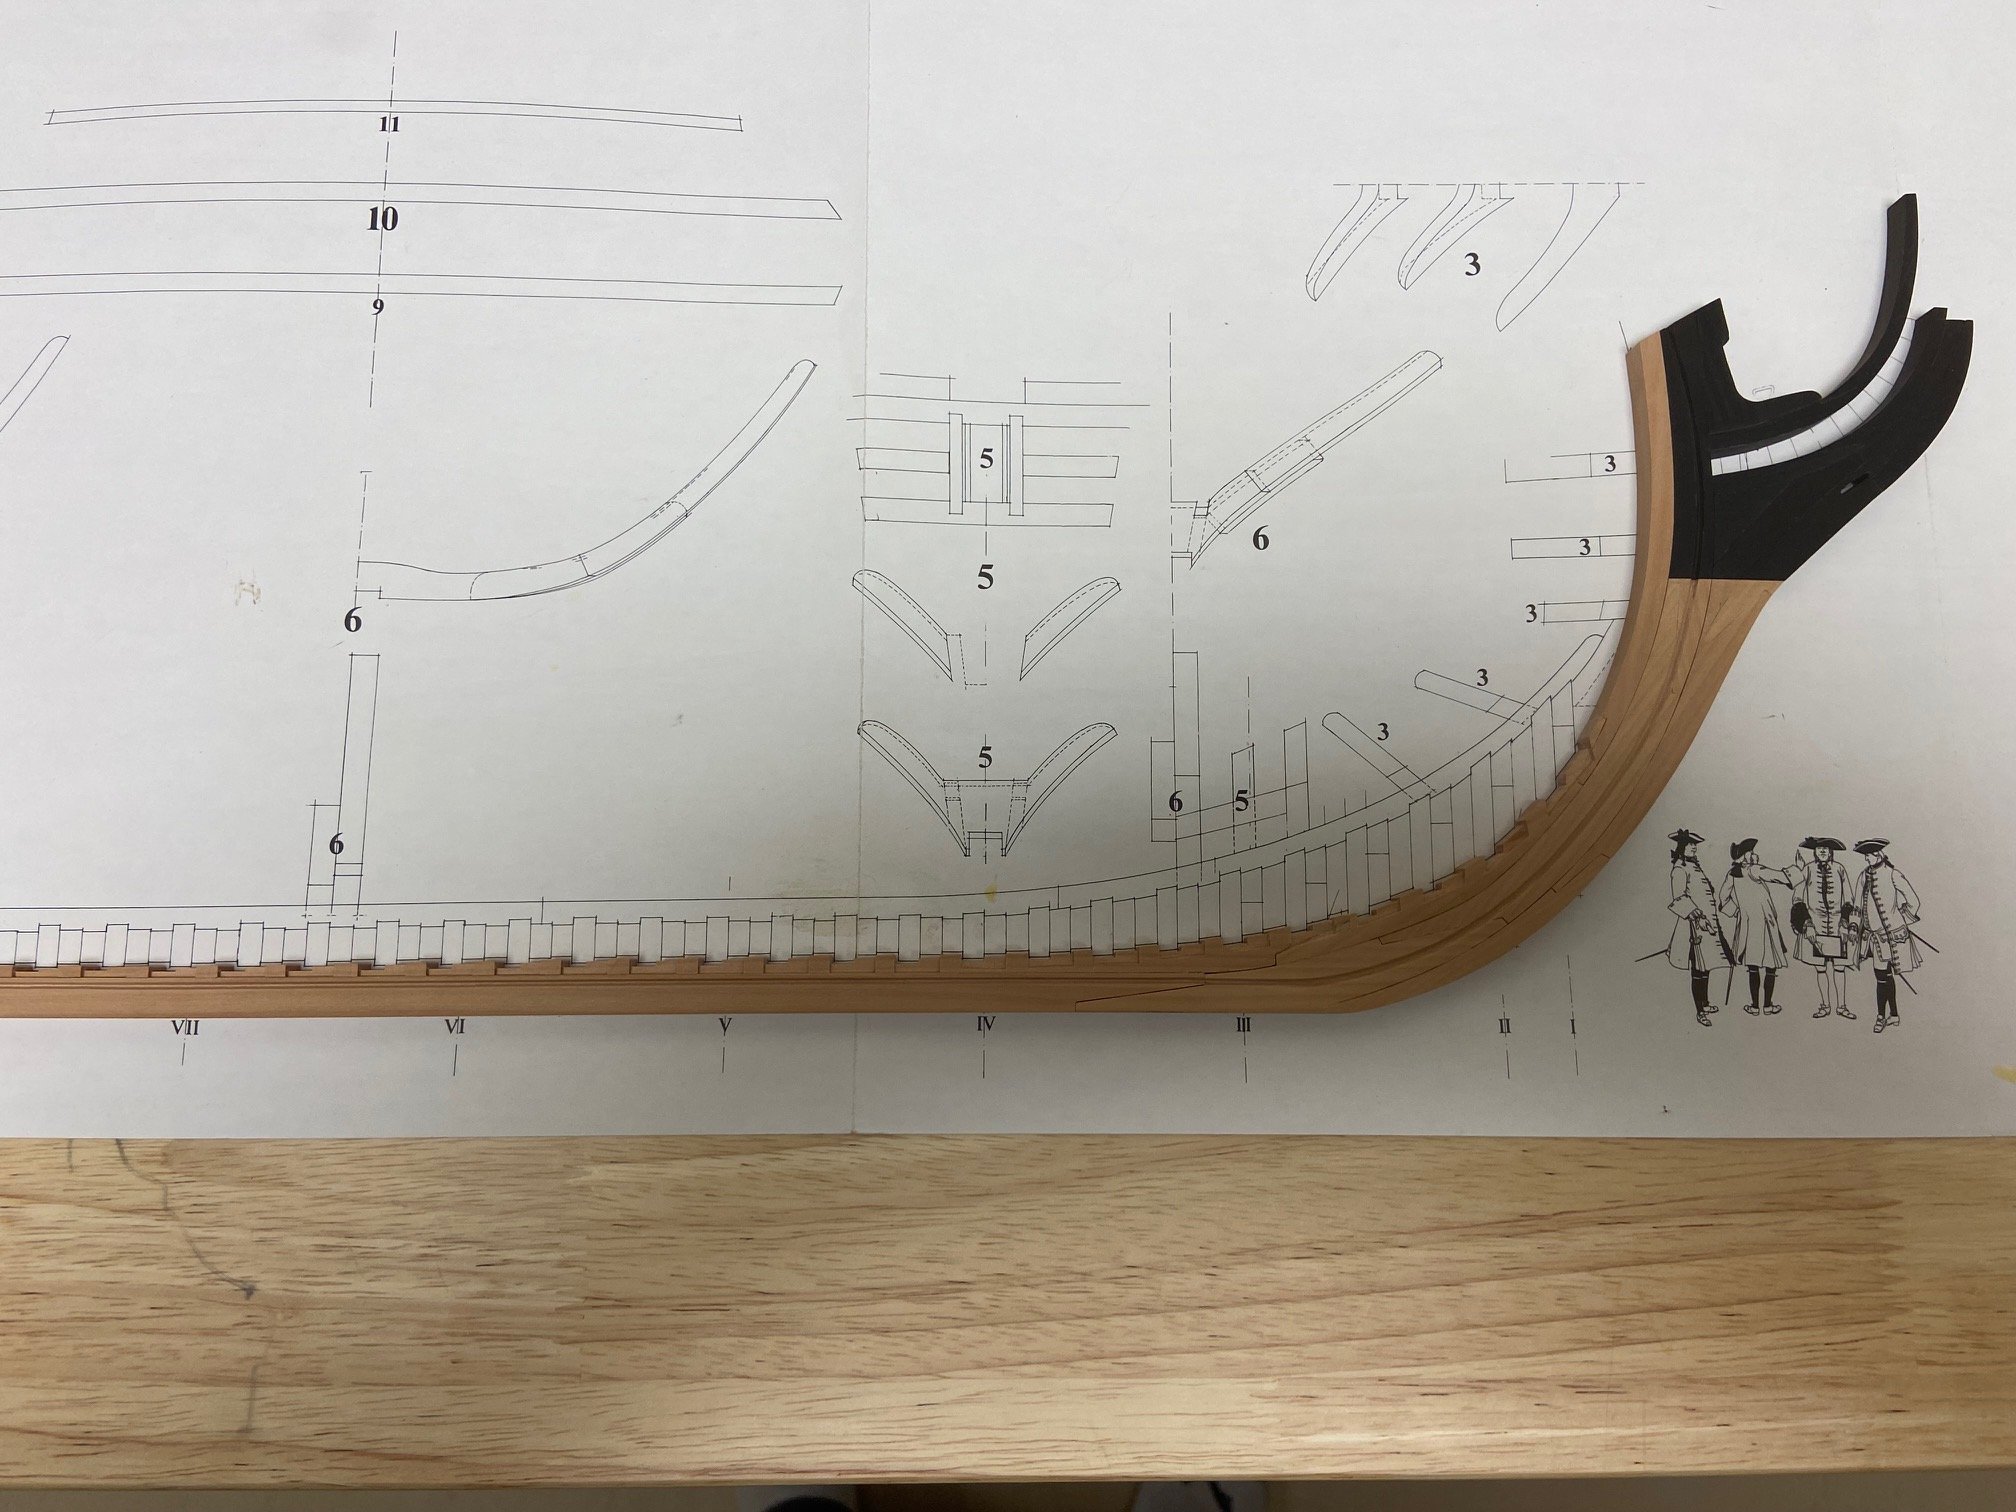
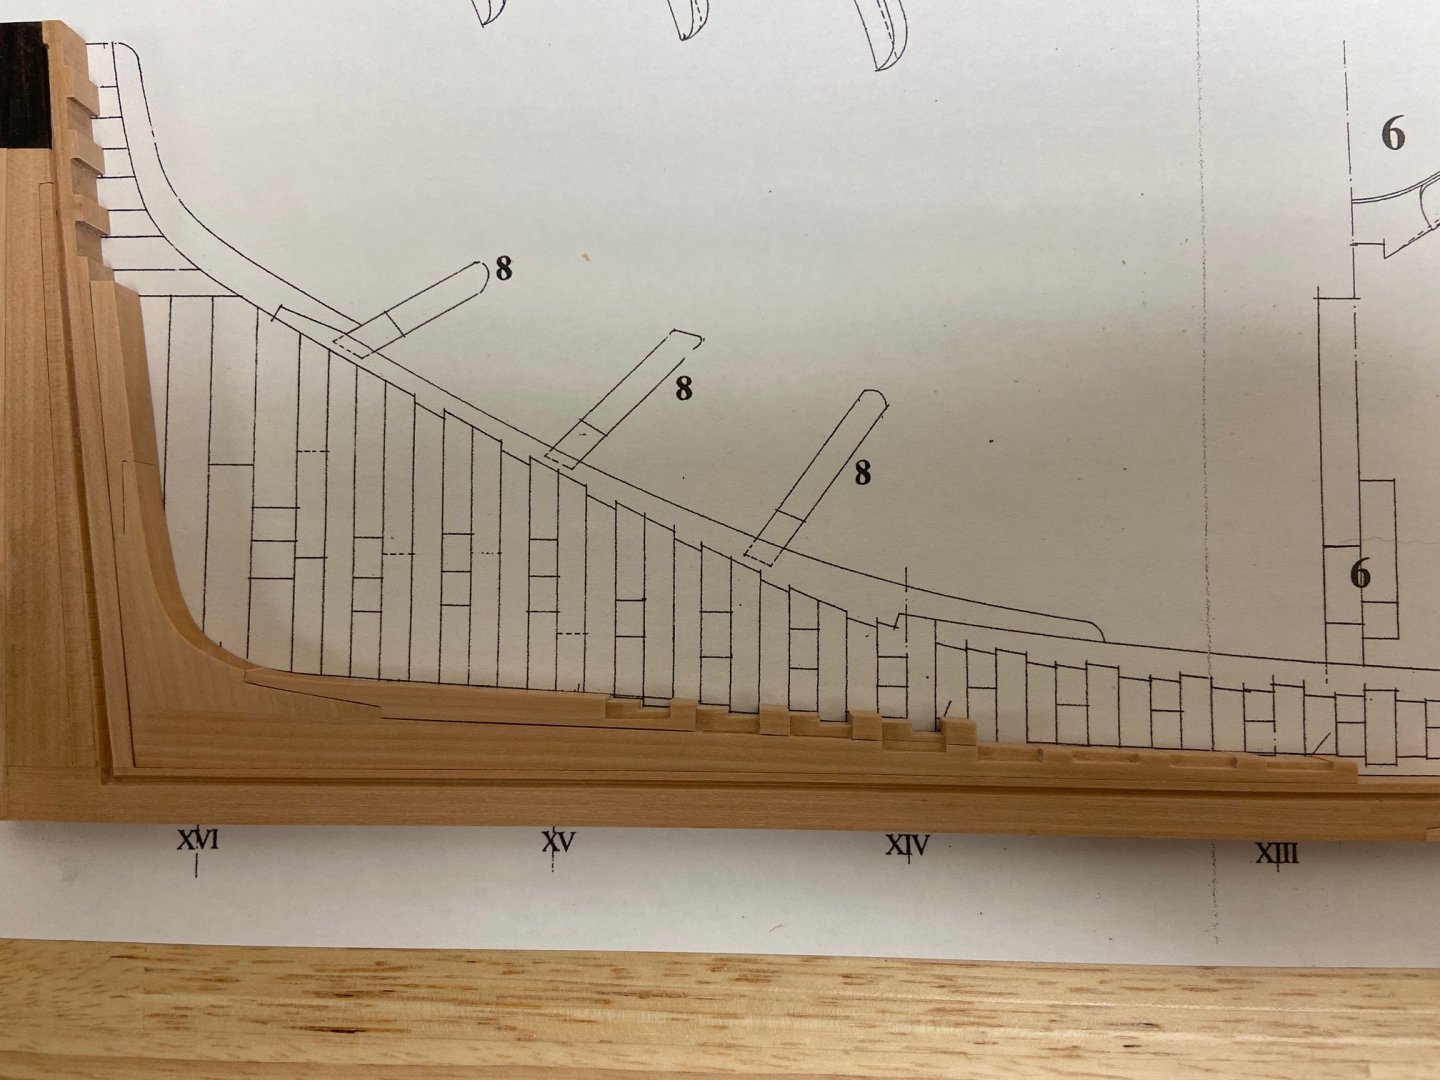
Good morning group, The keel is finished. In some places the joints could be tighter but most importantly its straight and all the notches are in spec with the plans to receive the frames. Time to move on to the construction site


-
ChrisLBren reacted to a post in a topic:
L'Amarante by marsalv - 1:36 - POF
-
Wow - nice work !!!!
-
L'Amarante by marsalv - 1:36 - POF
ChrisLBren replied to marsalv's topic in - Build logs for subjects built 1501 - 1750
It does - thank you V !!!! -
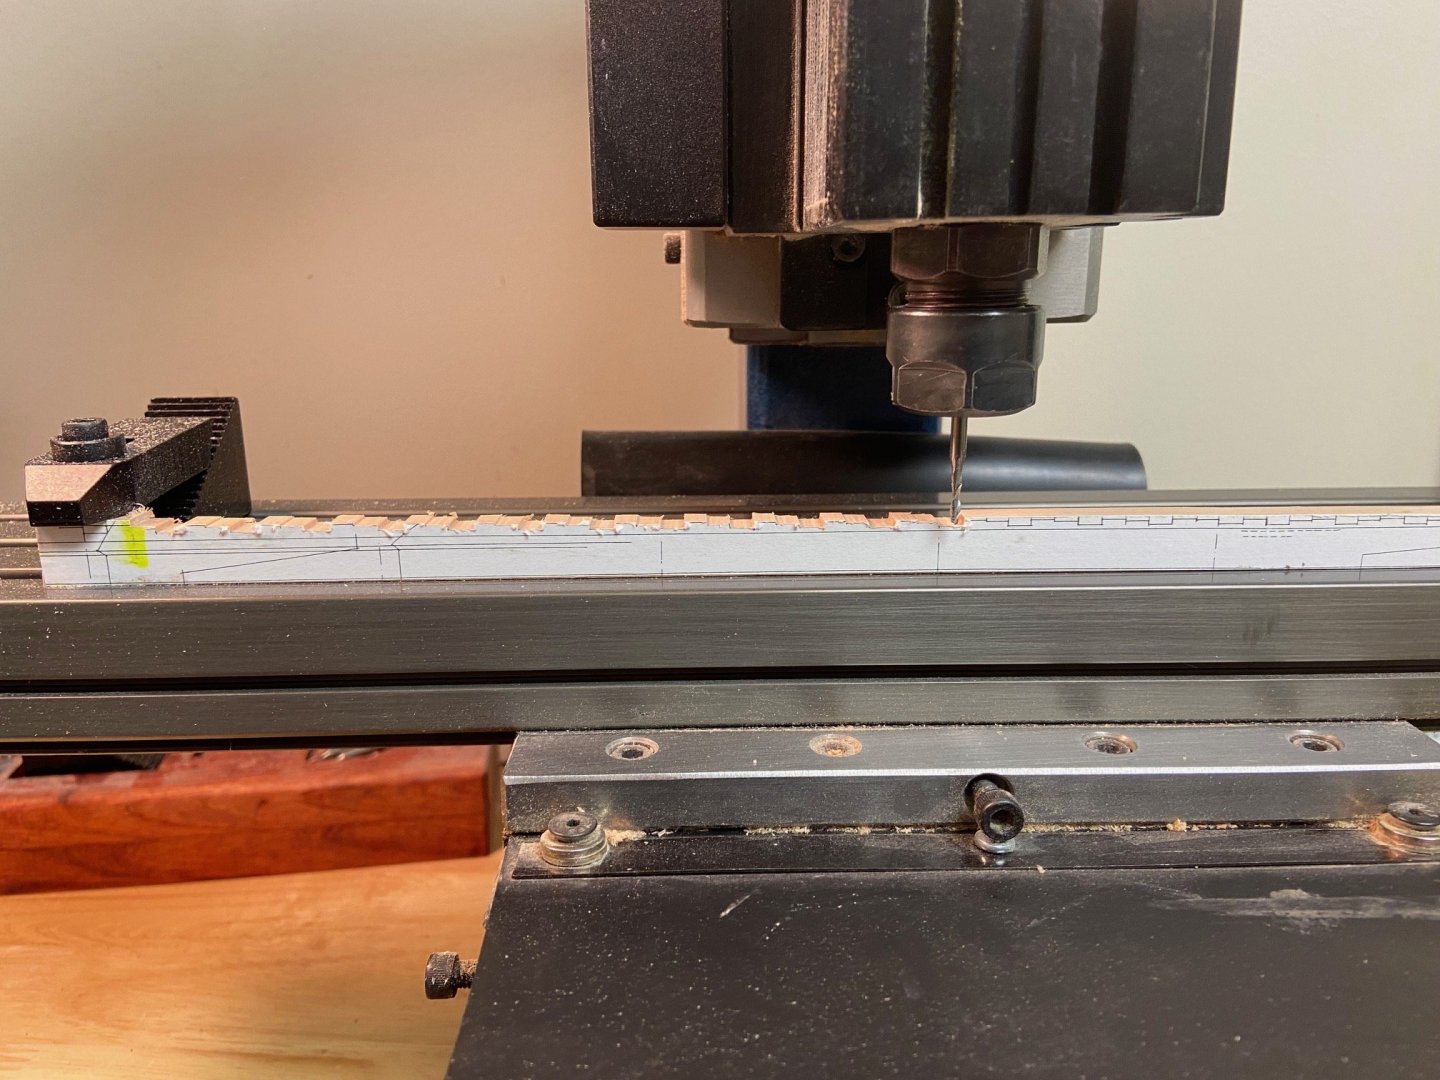
Thanks Greg - fun bit of milling this week on the inner keel parts. I used the TAIG Mill along with sharp Lie Neilsen chisels.
-
L'Amarante by marsalv - 1:36 - POF
ChrisLBren replied to marsalv's topic in - Build logs for subjects built 1501 - 1750
Looks really nice ! Question - it does not look like you simulate caulking on your models or if so its very subtle ? -
Thanks friends - still quite a bit of work to go on the keel before its ready for frames !
-
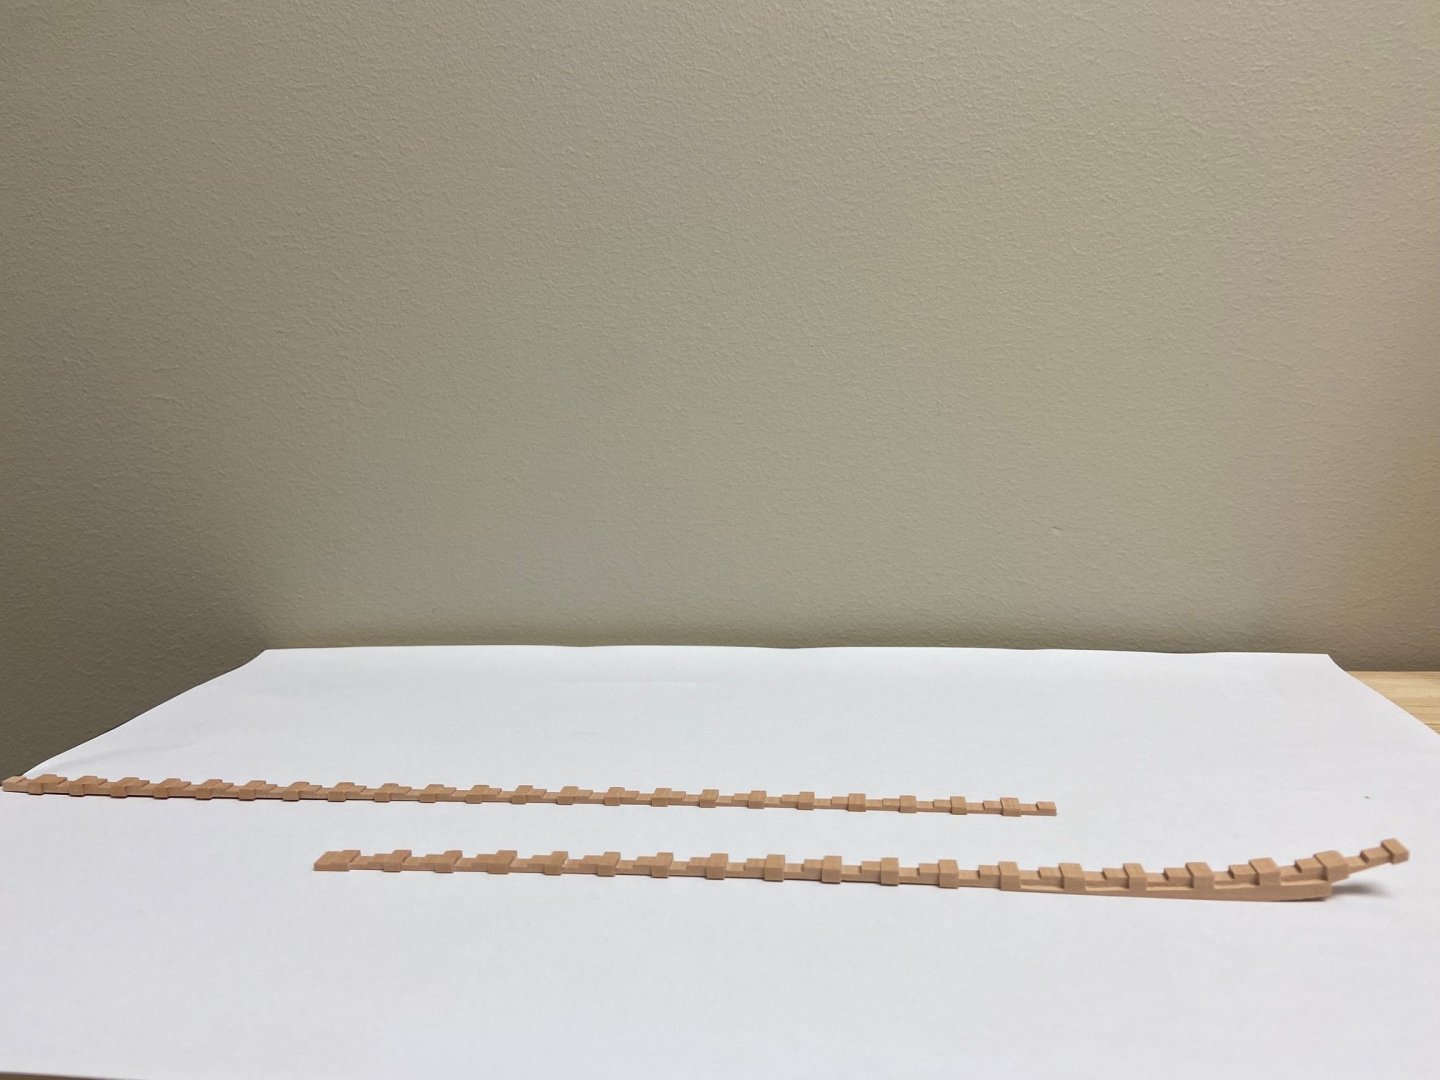
I struggled with this assembly - 6 attempts later here are the results. I can finally move forward !

-
ChrisLBren reacted to a post in a topic:
L'Amarante by marsalv - 1:36 - POF
-
Nice work Greg ! Currently Im plowing thru my keel on La Renommee - its a challenge to get it right - lots of milling. Its much more interesting than the monotony of building frames. Look forward to seeing your progress
-
ChrisLBren reacted to a post in a topic:
HMS Portland 1770 by Trussben - Portland Scale Ship Co. - 1:48 - 50 gun 4th rate
-
ChrisLBren reacted to a post in a topic:
LA CREOLE/ LA GUADELOUPE by matiz - 1:48 - by Tiziano Mainardi from Boudriot plans
-
Nice recovery Mark ! Have a great time in Crete