usedtosail
-
Posts
2,418 -
Joined
-
Last visited
Content Type
Profiles
Forums
Gallery
Events
Everything posted by usedtosail
-

Work area pictures only
usedtosail replied to Johnny Mike's topic in Modeling tools and Workshop Equipment
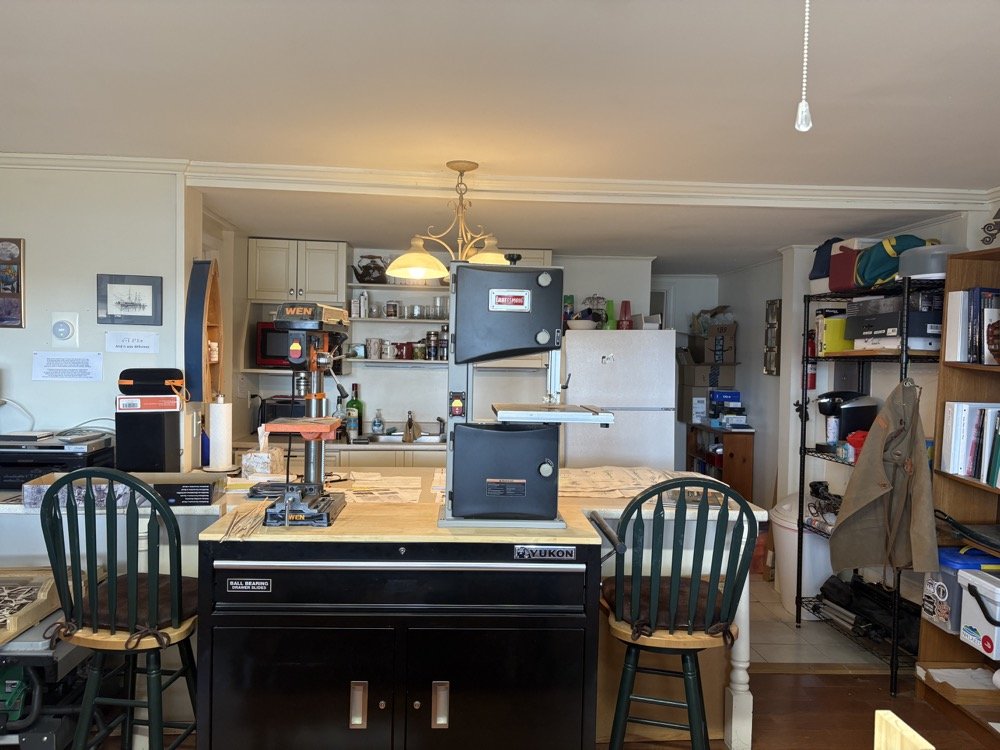
I was lucky when we moved up to New Hampshire that the condo unit we bought had a rental unit that we are not renting out anymore. My wife said I should use the kitchen and living room for my shop which I jumped at the suggestion. My main work bench (with a lovely view) The rest...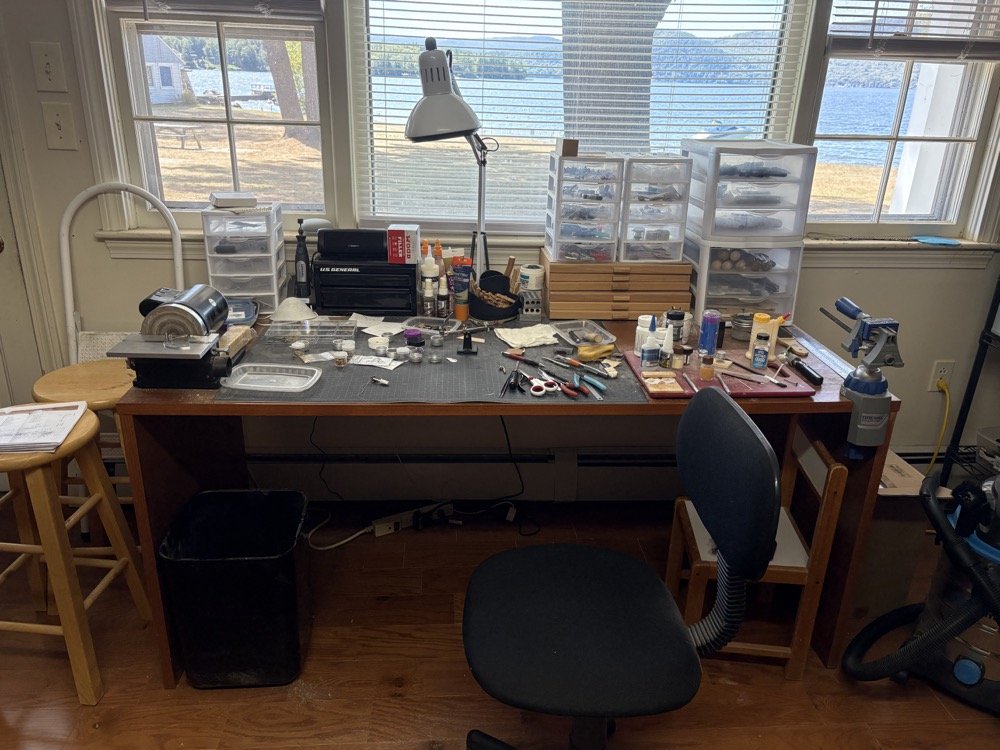


- 52 replies
-
- 19
-

-

-
Is the copper paint intended for the bottom of the ship's hull, to simulate the copper plates? The kit itself not include any copper for the bottom, but I had some rolls of copper tape left over from a previous build which I used for the bottom.
-
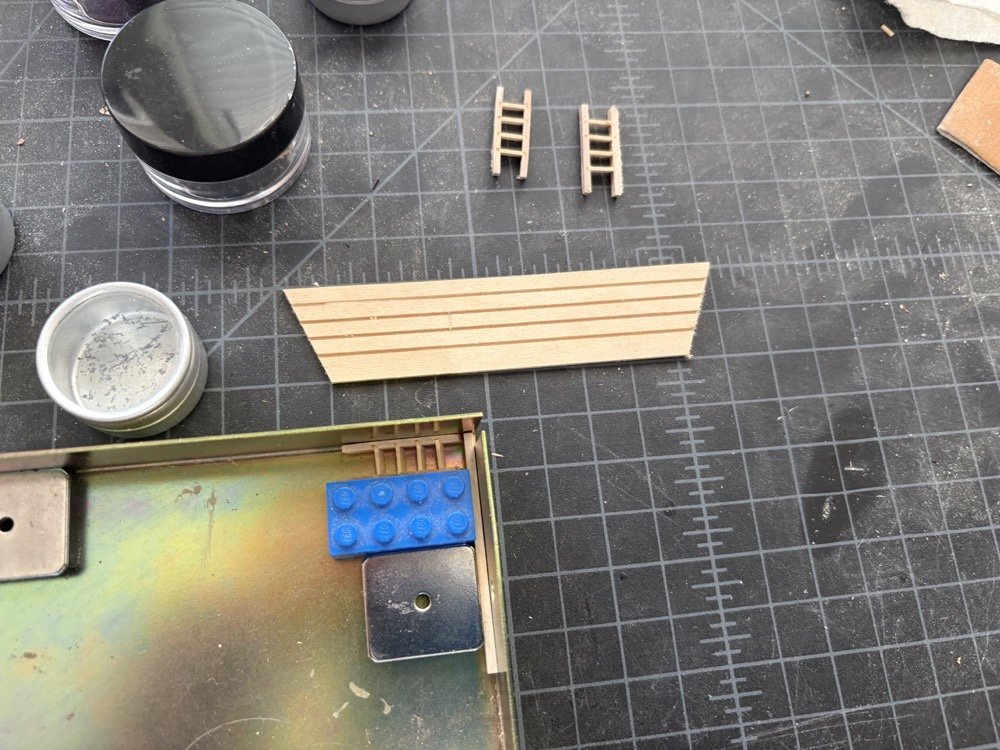
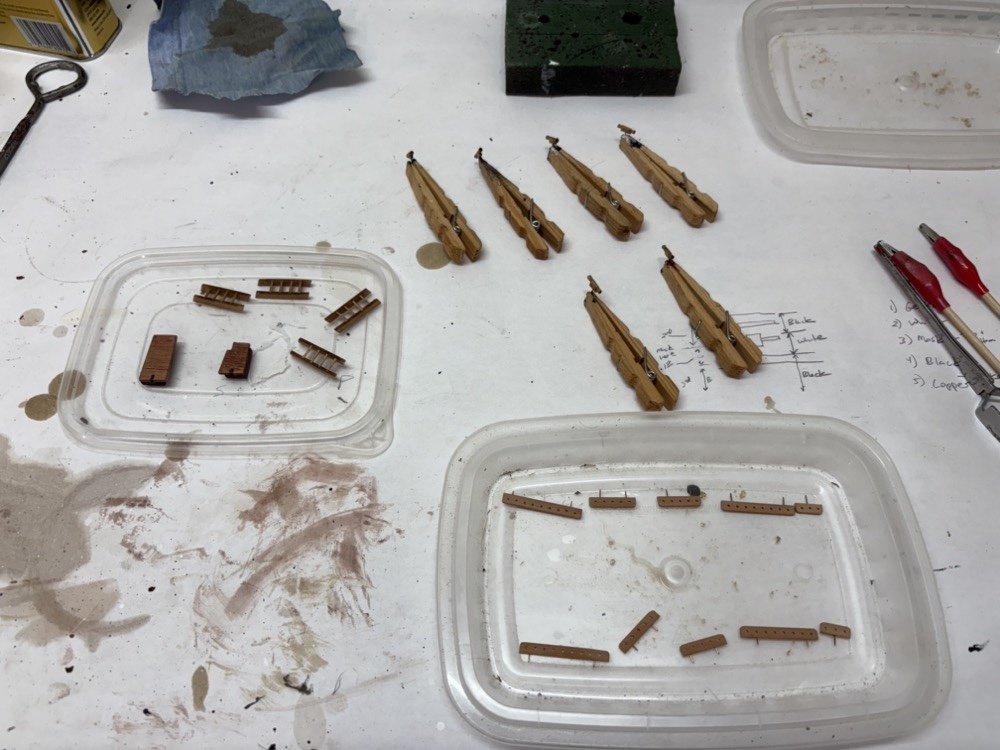
I made the flag lockers from the supplied pieces and added the hardware. The next step was to make the four ladders that are used to get to the upper fore and aft decks. The kit supplies pieces of photo etched brass for these ladders but I wanted to make them from wood instead. I cut four equally spaced slots in a piece of sheet wood on the Byrnes saw, then sliced off angled pieces from each side to make matching sets of ladder sides. The slots were just thick enough for a 1/32" piece of basswood strip to fit in, so I cut four rungs for each ladder, then used a magnetic jig to hold the sides while I slipped the rungs, with glue on the ends, into the slots. When the glue dried I sanded and stained the ladders. I also made all the pin rails that go along the inside bulwarks, using a strip of pear wood. I drilled the equally spaced holes using the sensitive drilling attachment on a Sherline lathe with the milling attachment. I also made kevels from boxwood using the lathe with a bit of wood so they stand away from the sides. Here are all those pieces waiting for a coat of wipe on poly.
-
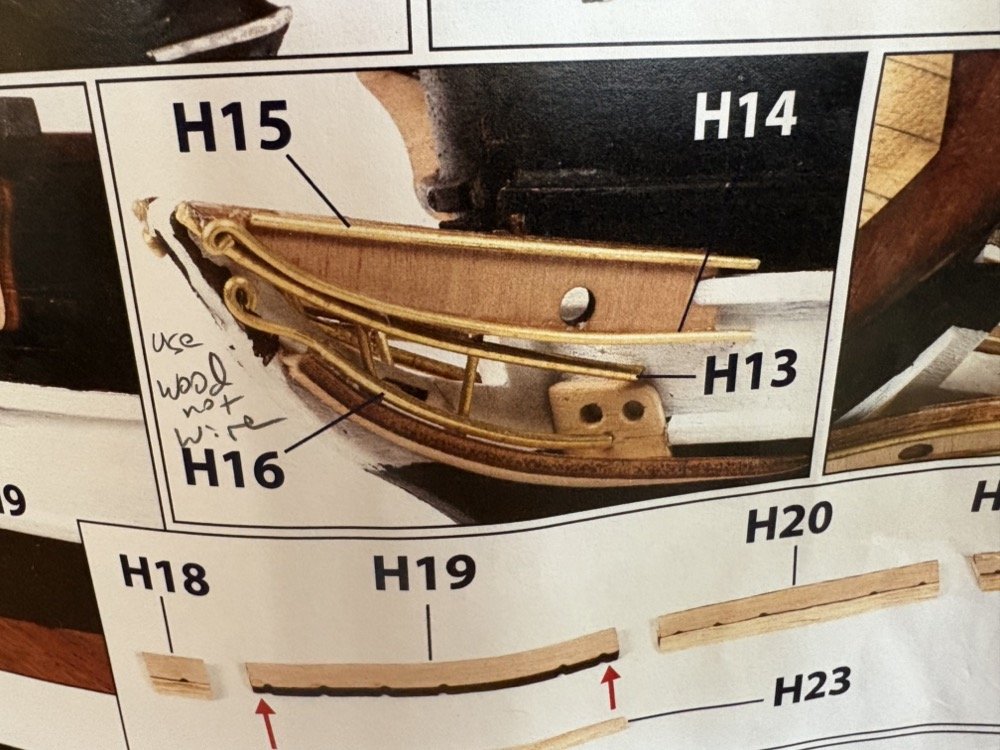
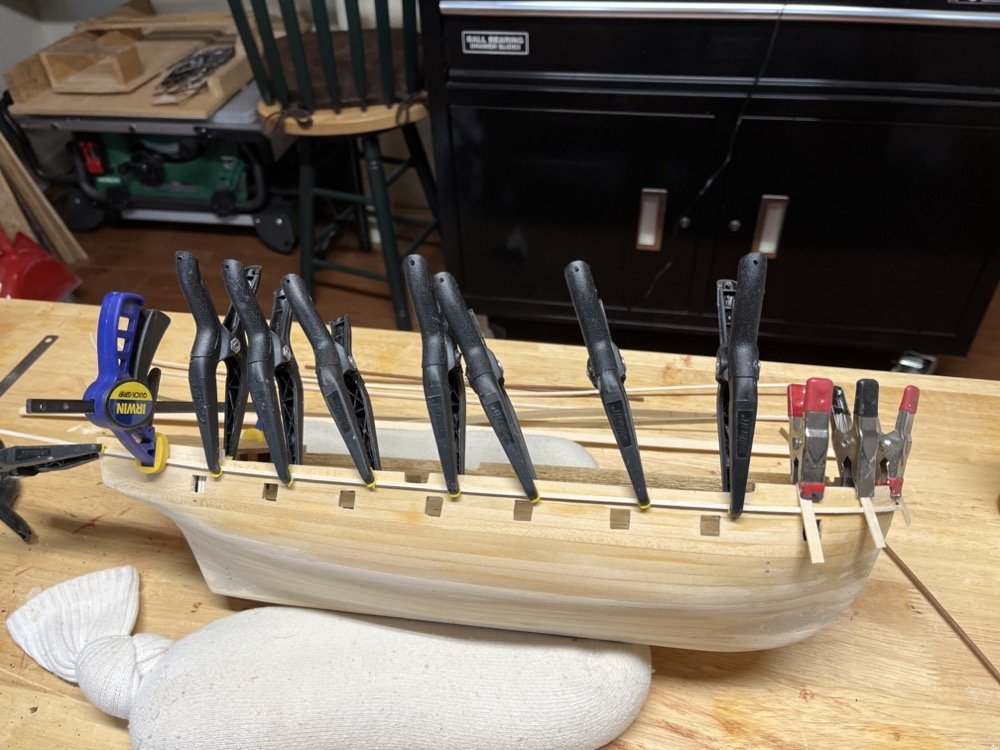
Thanks DAR. Yes it is a good task you can do away from the workbench. I used the laser cut channels that came with the kit, but I did have to file out the notches for the deadeye strops. I also added wire pins to the back of them to provide additional gluing strength. I thought I needed to add the deadeyes before gluing the covering boards over them but this proved too difficult to hold everything together while getting the covering boards straight. I found that I could slip the deadeyes into the channels after the covering boards were glued on by elongating the small loops slightly. After adding the deadeyes I drilled holes for the pins in the hull and glued the channels on. I then added the chain plates to the deadeyes by hooking the upper ends through the small loops on the strops. I bent the chain plates to sit flat on the hull and used a dowel and some string at the heights of the various shrouds to set the angles of them The lower nails were below the deck level so I could cut them long enough to handle easily, but the upper nails were above deck level so I had to cut them very short which made them hard to handle. I ended up drilling a good size hole so I could slip them in more easily but I had to glue them into the holes. I also added the three small chain plates on each side with the double blocks for the topgallant and mizzen topmast backstays. I ended up remaking the aft davits again as the ones supplied with the kit that I used as a template were too short, so I made the new ones that are a little longer. That completes page H of the instructions, with the aft davits and cleats added, the head area completed, and the channels and deadeyes. The next page I adds much of the deck furniture.
-
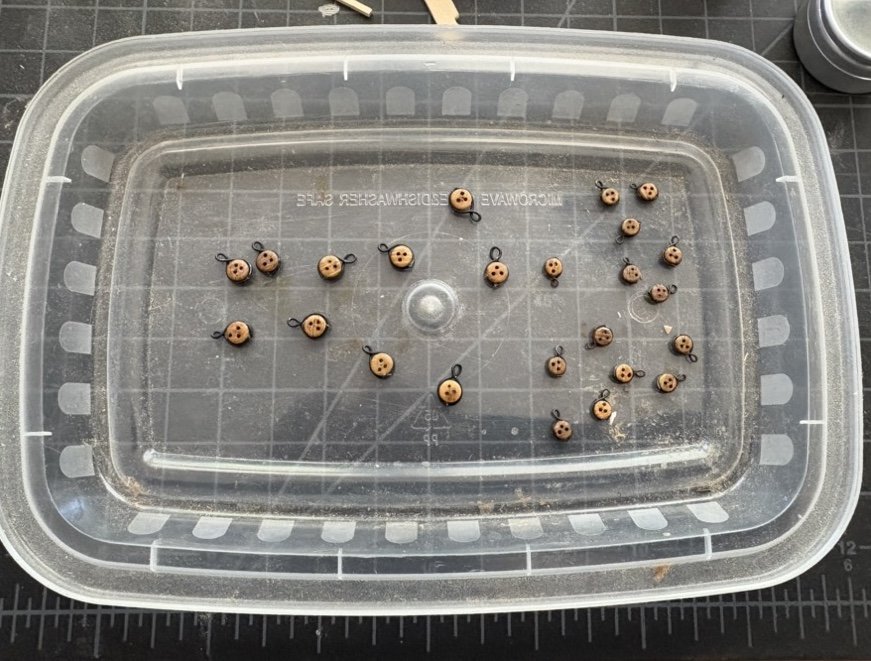
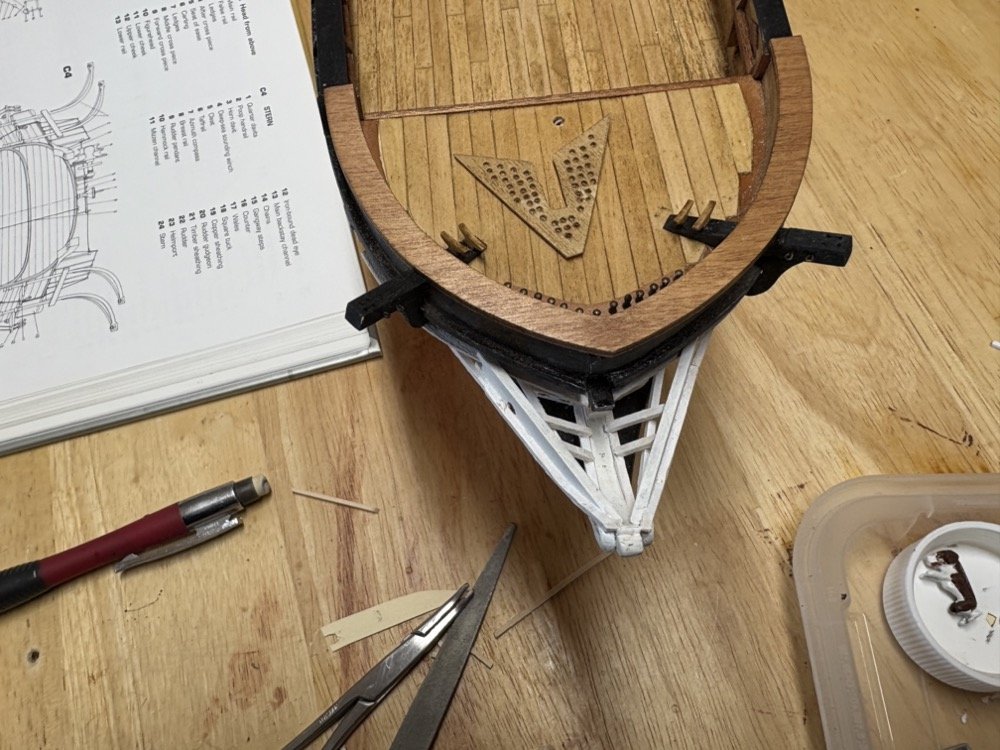
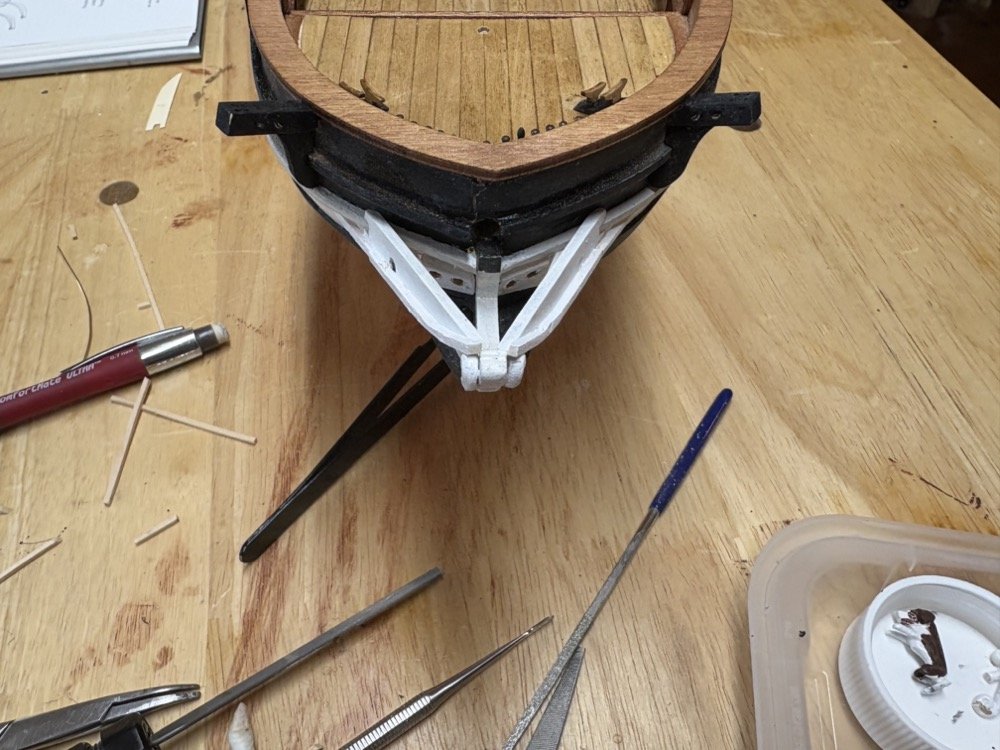
I added the rest of the rails to the head area and made a grating to fit over them. I will wait until I add the bowsprit gammoning to glue the grate in place. You can see it sitting on the fore deck in the first photo. I first made a template from manila folder material, then cut out the shape from some 1/16" birch plywood. Once that fit nicely I drilled holes and squared them off using reamers. I still need to do some clean up of the white paint on the rails. I have also cut out and painted the channels and the covering strips for them. I added pins to the backs of the channels provide more hold to the hull. I stropped all the large and small deadeyes to go into the channels. I made the strops with 22 gauge black steel wire for the large deadeyes and 24 gauge copper wire, that I was able to blacken with Birchwood-Casey, for the smaller deadeyes. I glued the deadeyes into the strops with thin CA. I am using the large deadeyes for the shrouds and the smaller ones for the backstays, again as shown in the AOS Beagle book. Next up is the add the deadeyes to the channels, add the covering strips, then glue the channels to the hull. I am stropping four double blocks with thimbles that are hooked to the hull for the topgallant backstays, which I will also add with the channels.
-
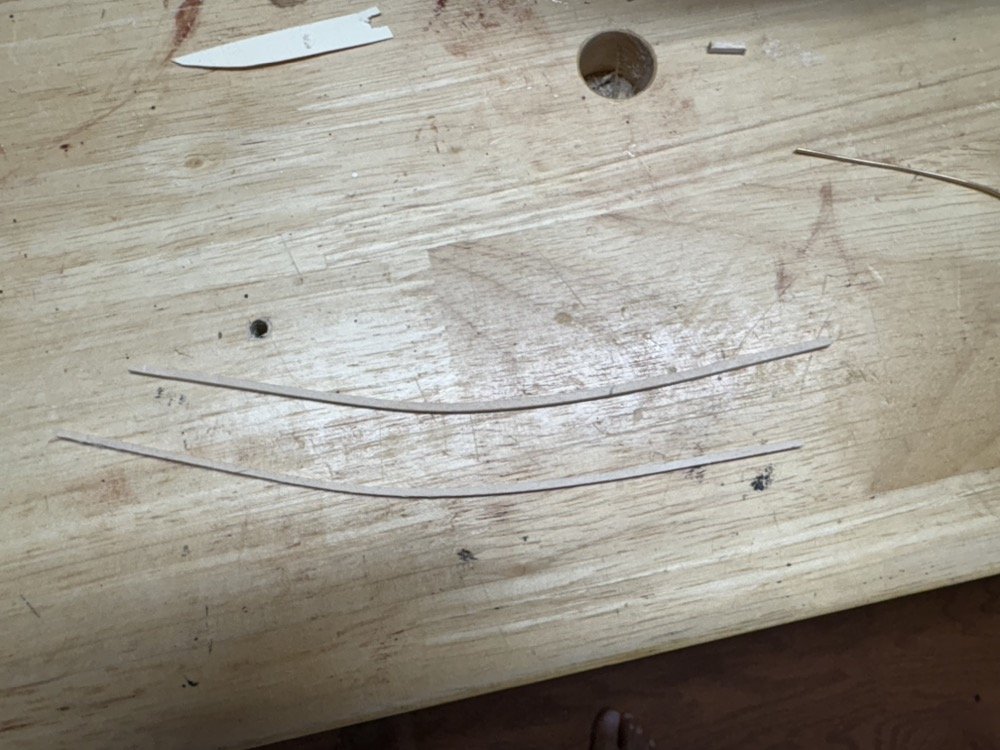
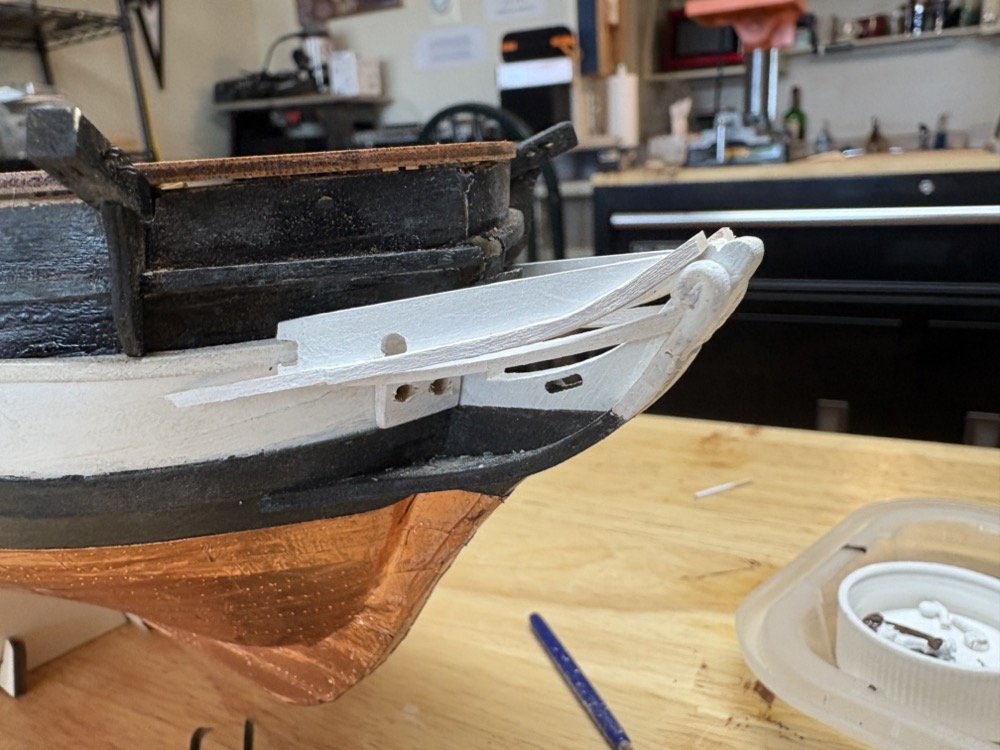
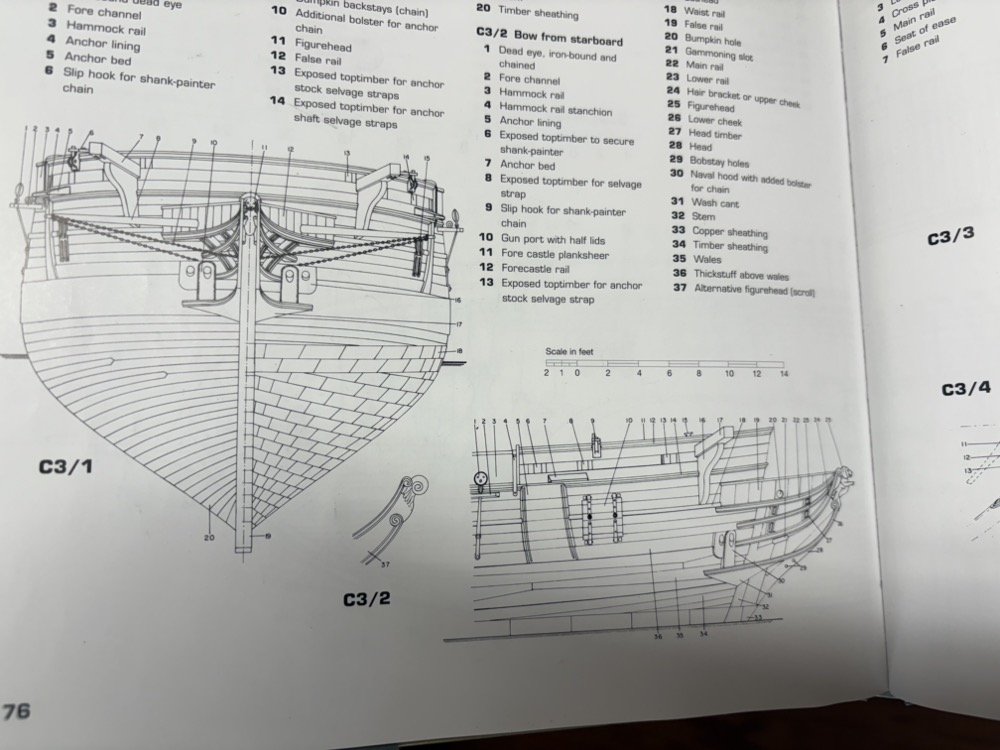
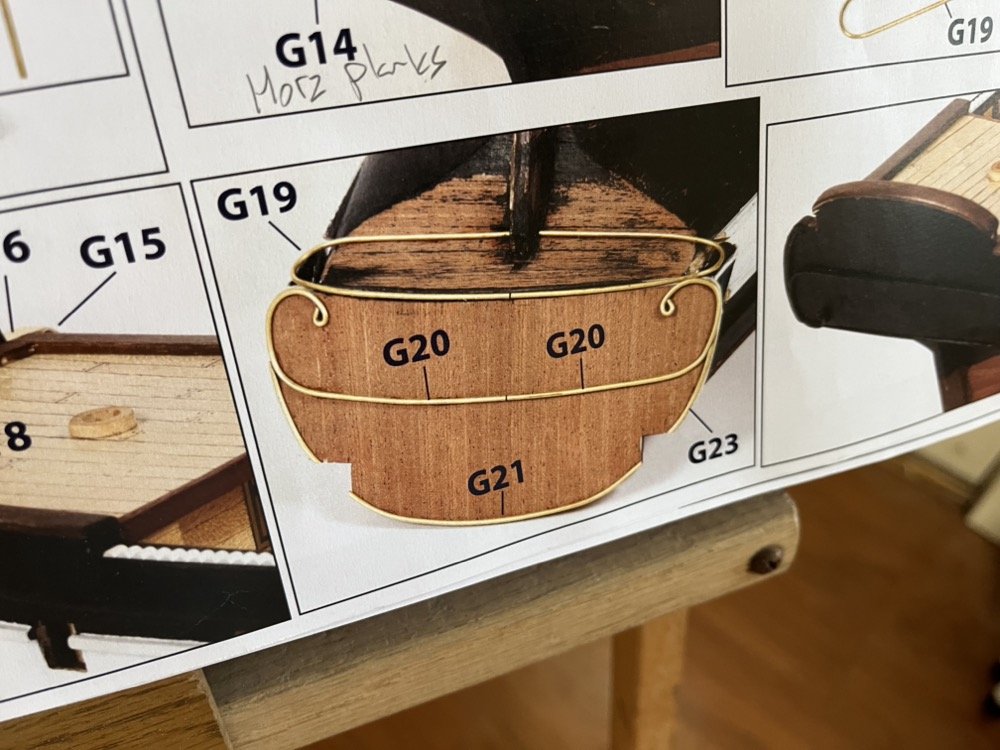
Thanks Tony and for the likes too. As I did on the transom, I am using wood strips instead of brass rod for the head rails and trim. For the head rails I am using 1/16" square basswood strips which I have bent using the same jig I used to bend the hull planks. Here is how OcCre shows to make the head rails in the instructions. In my case I am trying to emulate the head rail setup shown in the AOS Beagle book. I was able to use the upper and lower rails supplied with the kit, but I added wood trim to the upper rails. I also have a thin strip of wood painted black to add to the tops of them. For the lower rails I made two scrolls from Sculpey and extended the lower rails to meet them on each side. The middle rails will connect to these extensions. Here I have attached the upper middle rail. I am still working on the lower middle rail pieces. The trim on the upper rail extends a bit higher so it will be flush with the wood strips that I haven't added yet. I am waiting to add those until I fit a grate that I am making for the head area. I will probably wait to add that until I add the gammoning on the bow sprit to make that job a little easier.
-
I made the aft davits but am waiting to install them so I don't snag them on anything. Then I added the gun port lids. I first made them according to the instructions, using supplied plugs that I planked on both sides. I started installing them but did not like the way they fit and looked on the outside or inside. So I then made them from two planks of basswood each and glued them into the openings horizontally. I then added the hinges and painted them black. The final step was to touch up the white paint around them. You may notice that I repainted the fake gun port so it was all black, to match the real gun ports. This is the paint scheme shown in the AOS Beagle book. I am now focusing on adding the details to the bow and stem. I started with the hawse holes which I made from two pieces of basswood each and painted white. I used a large sanding drum by hand to sand in the curve of the hull on the back. I will drill out these holes in the hull when the glue dries. I am now working on the head rails and will have photos after I make more progress.


-
I have completed Section G of the instructions. This included the cat heads, rails, taffrail, transom decorations, and rudder. I had made a taffrail by bending a piece of basswood but I didn't like the fit so I cut one out of a block of pear which fit much better. The next section includes the aft davits, closed gun port lids, channels, and chain plates.


-
Well I was so happy with the cat heads but they are not correct. I used the laser cut pieces for the aft davits which looked like cat heads to me. I was able to take them off without damaging the deck or the bulwarks. I made the correct cat heads from the supplied square stock. They fit better than the davit pieces but I still needed to notch the bottoms to get them to sit flat to the deck, just not as much. I drilled holes for the sieves but this time I drill them at an angle so when the cat head is installed the holes will be vertical. They are pained black on the left in the photo below. I made the new aft davits using the cut out in the laser sheet from the old ones. There was enough excess wood on the sheet to make both of them. I again cut them out to a rough outline then sanded them with a sanding drum and disc sander. These will be left natural so I gave them a coat of wipe on poly after drilling the holes for the sieves. They are on the right in the photo. You can also see some of the rail and trim pieces after I stained them and gave them 2 coats of wipe on poly.

-
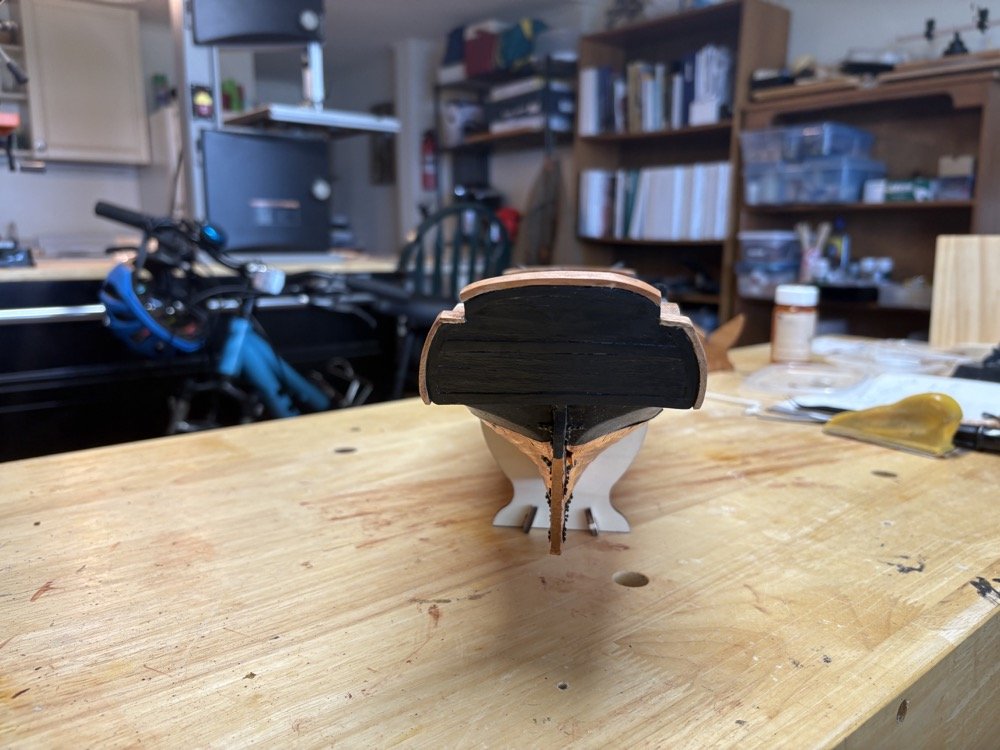
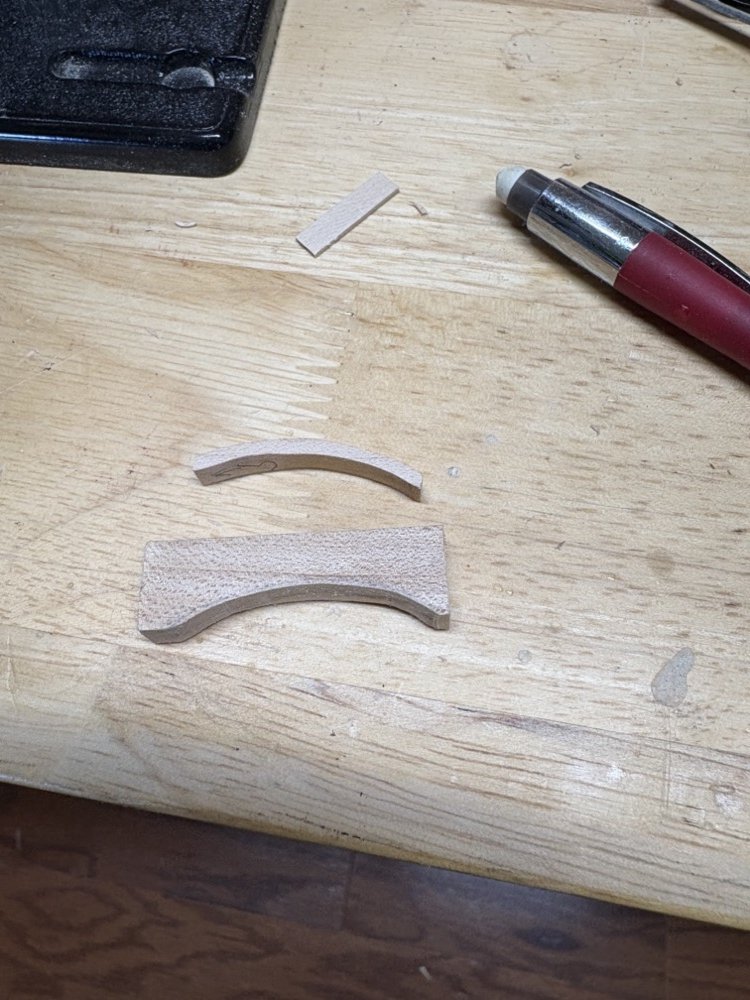
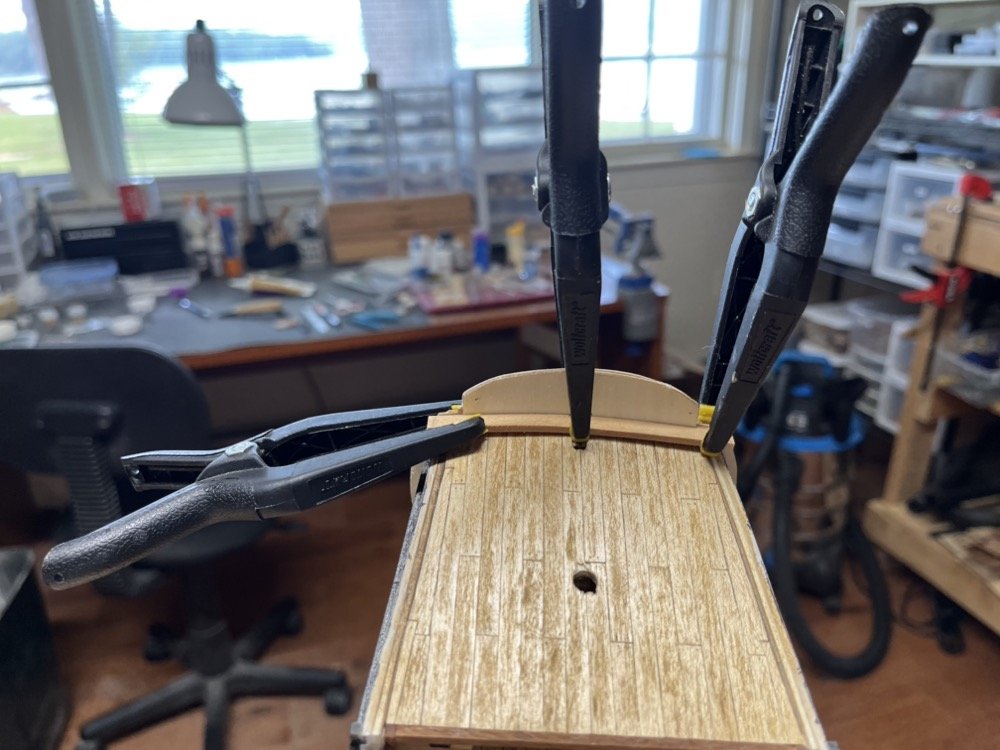
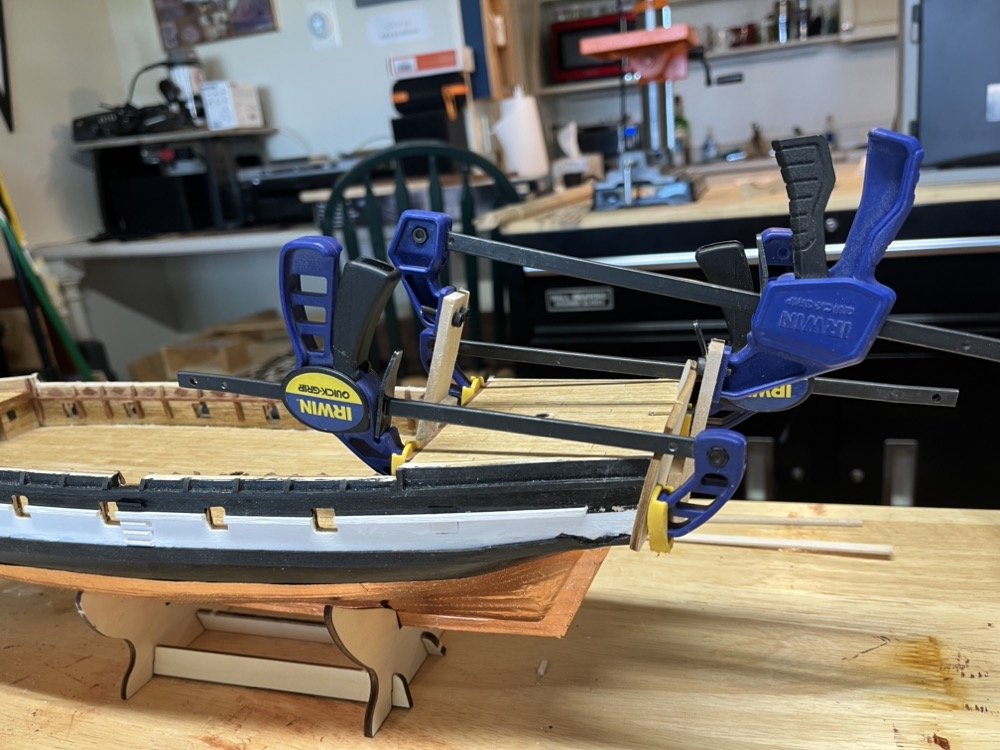
Time for an update. Even with the record heat we had been having I managed to get some time in the shop this week and last. First, as promised here is a photo of the cat heads. I haven't touched up the black paint on them yet, but you can see how much I had to notch them so the bow rail lays flat on them. The instructions show using brass rod to make the decorations for the transom and planking it vertically. I did not like the look of that, so I made wood trim pieces for the transom and planked it horizontally as it shows in the AOS Beagle. I did leave off the curly Q's though and the trim on the counter. My trim pieces may be a little too wide but I can live with that. This will all be painted black. I then sanded the planks down and glued the fake quarter galleries to the hull. On the other side of the transom piece instead of just painting the plywood black as the instructions show, I planked it as well. I will stain these planks to match the inner bulwark planks. I slightly edge bent planks for the rails at the top of the bulwarks and the aft deck. These will also be stained. The kit supplies a laser cut piece that goes on the inside of the transom piece at the deck and the fit was OK but not curved enough. I soaked and bent a piece of basswood and clamped it to the inside of the transom piece at the deck to use instead. This gave me a much better fit. Finally I have been working on the taffrail and outer trim pieces for the transom. For these I used the cut out from the laser sheet that held the transom piece and made two pieces of hardwood with the top curve and the side curve. I used the top curve piece to bend the taffrail (on the right), which came out very well. I tried doing that for the side pieces (left) but I could not get them to bend enough without kinking. So I decided to cut the side pieces from a block of boxwood. I first rough cut the inside curve with a band saw then sanded it using a sanding drum in my drill press, until I had a good fit on the transom piece. I then rough cut the outside curve with the band saw and used a disk sander to get it to the same thickness as the taffrail. Once I had one side piece made I used it as a template for the other side piece. These came out much better than the bent pieces. These and the taffrail will also be stained before I glue them on.


-
Thank you Jo, Keith, and g8rfan, and for the likes. I will definitely follow along with your Connie build g8rfan. Keith - looking in the AOS Beagle book, the ship did not always have that carronade in the front so I think you would be good either way. To me it is a big feature for the version of the ship that carried Charles Darwin so I will be including it.
-
g8rfan - I think he means a build log for your Conny build.
-
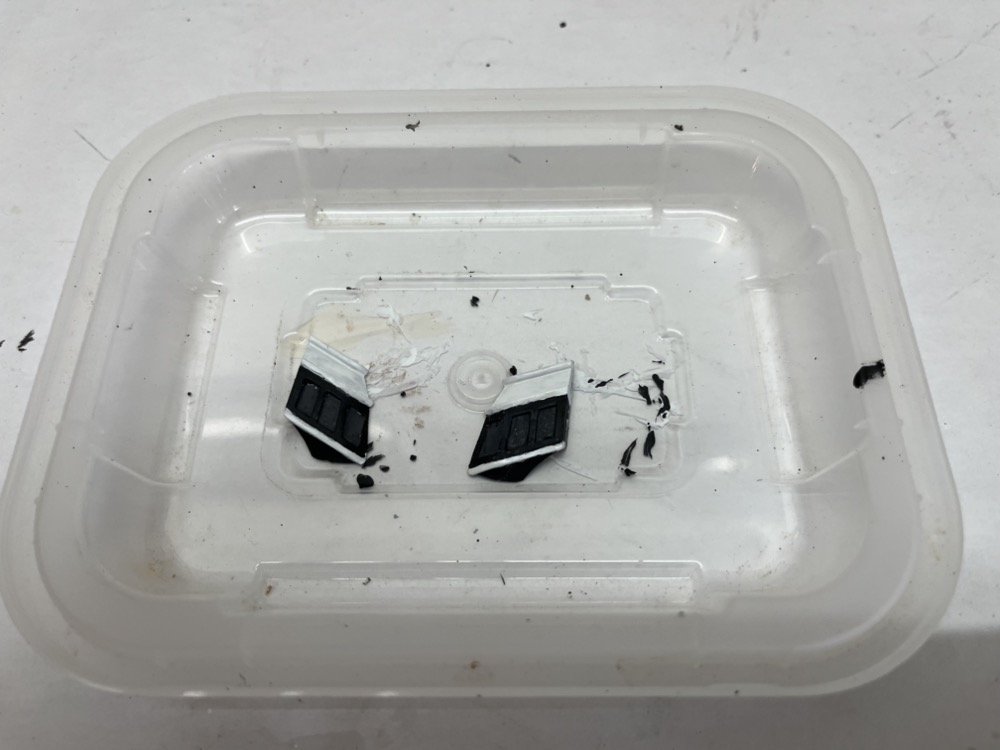
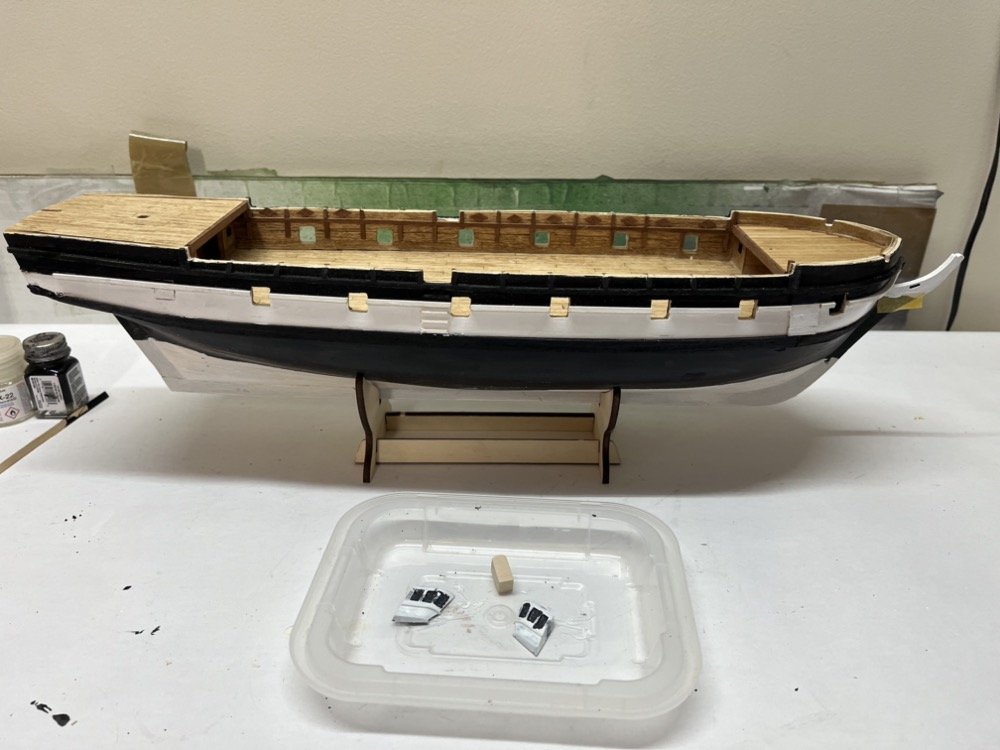
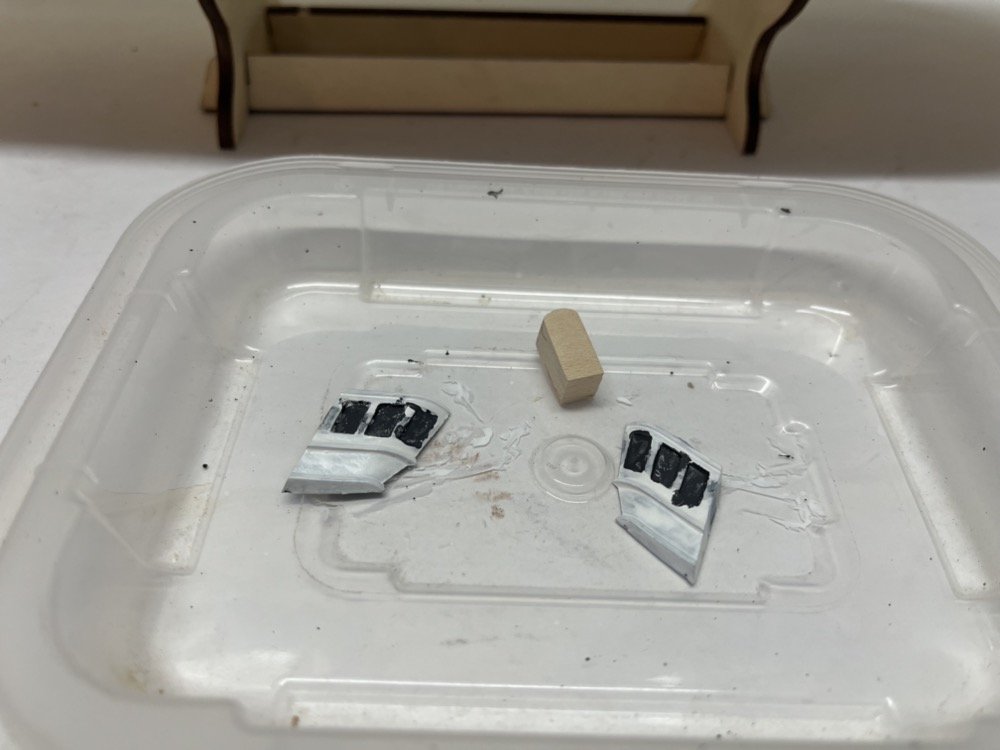
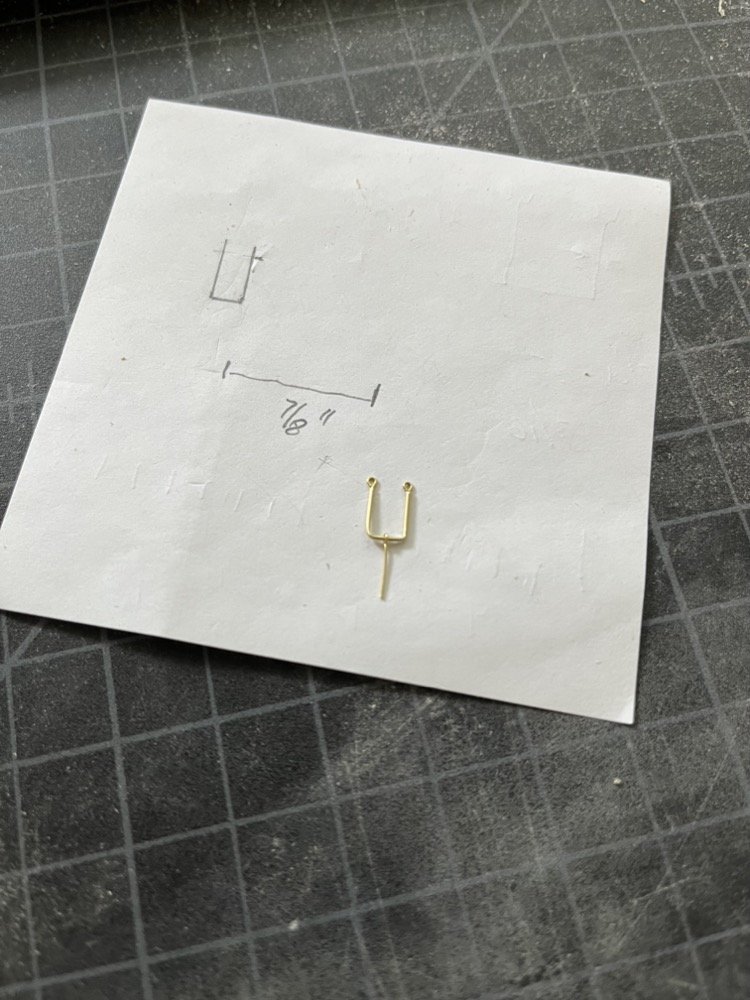
I removed the clamps from the transom piece and it was nicely glued to the hull, with no gaps on the edges. I finally finished painting the fake quarter galleries. For the final touch I used clear paint on the window panes. I test fit them and will glue them in place soon. I have also been working on the rudder and its hardware. The kit came with premade pintles and gudgeons which I was going to use, but after I blackened them I thought they looked too wide. So I used some thinner brass flat stock to make new ones. It took me a few tries to get the bends right but after I made a useable one I was able to reproduce it pretty well. I soldered a pin into the pintles then pickled and blackened all six pieces. Here are the new pintles mounted to the rudder with brass nails that I also blackened. In the cup are the new gudgeons on the bottom and the kit supplied ones in the top. Today I mounted the rudder to the hull. I did not glue the gudgeons to the hull, but used the blackened nails to nail them to the hull. I have also been working on the cat heads. I drilled holes in the ends for the sieves and painted them black. I then glued them in place after widening out the slots in the bow for them and notching them to fit flush against the fore deck. This took a bit of fiddling to get them to fit right. I'll get a picture of them for a later post.

-
Thank you Steve. I soaked the transom piece for 20 minutes and clamped it to the hull for a few days while I was away. Today I glued it to the hull.
-
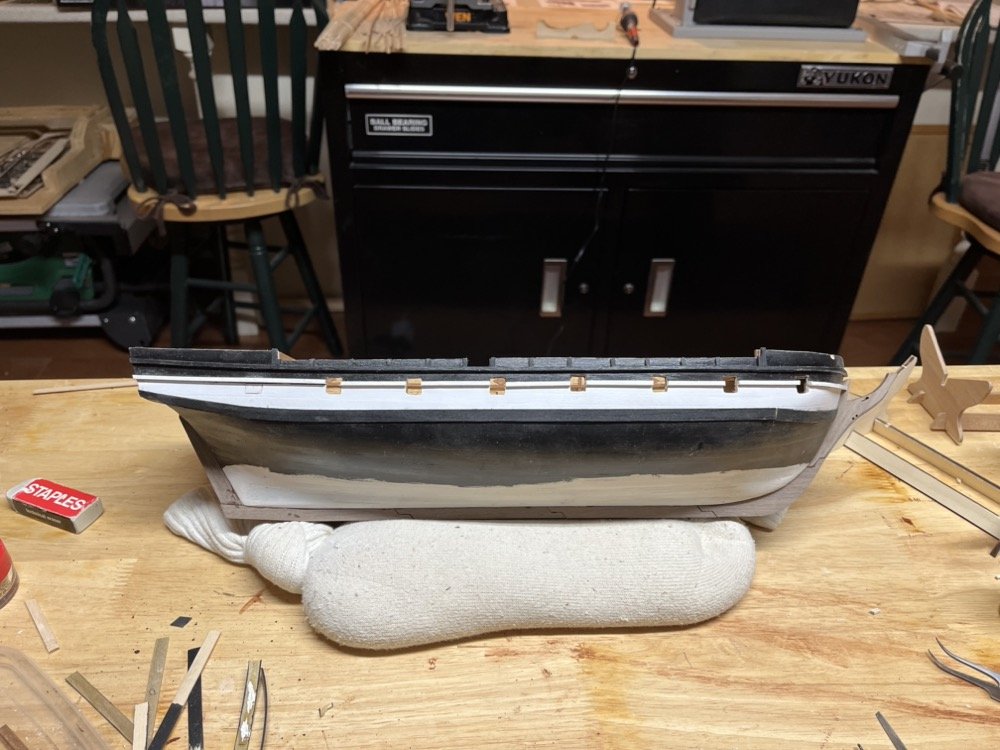
I coppered the hull and the rudder using 1/4" copper tape. For most of the hull I used whole strips with the plates marked out with a ponce wheel. For the top two rows I used individual plates around the curves. Next I will mount the rudder then add the transom piece and plank it.
-
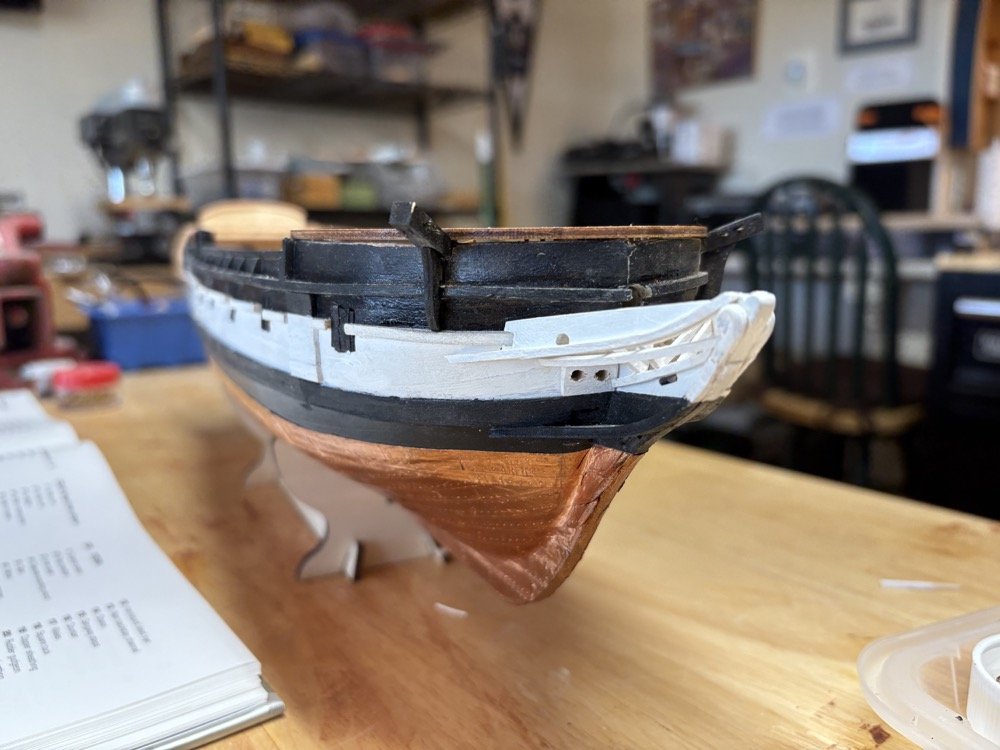
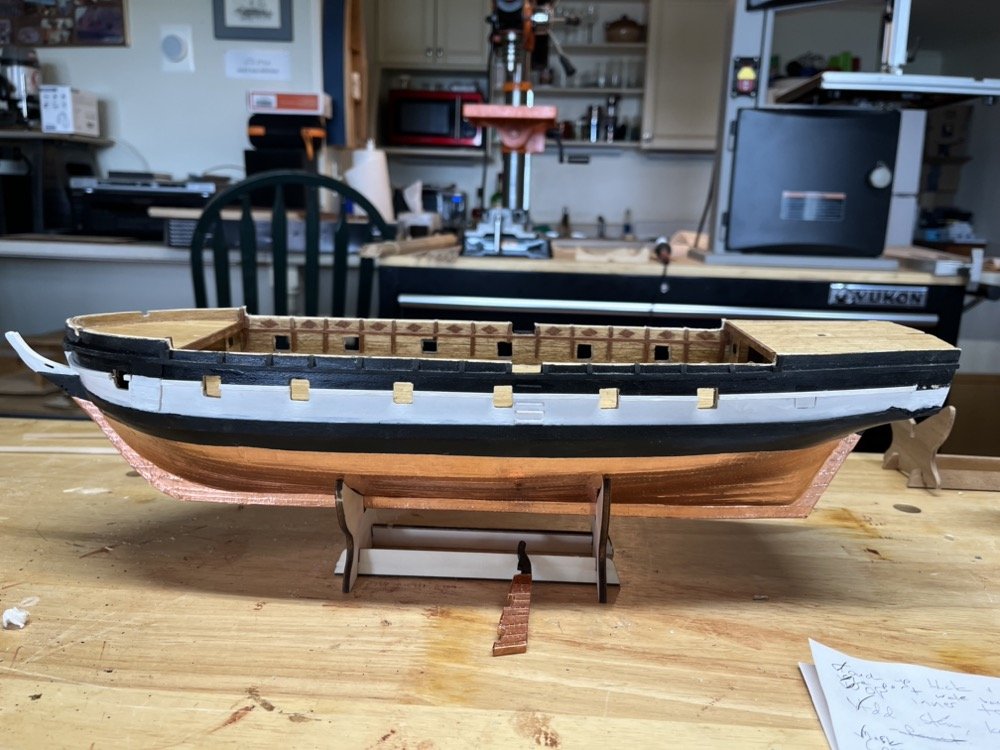
The state of the outer hull is coming along. A little more touch up painting to do. I added the anchor boards (is there a better name for these?) and the side steps which are not in the kit instructions. I glued a 1/16" and a 1/32" square piece of basswood together then cut the steps out at an angle. I trimmed the wales so the false quarter galleries will fit, then started painting the supplied metal galleries. I am using grey paint on the windows to distinguish them from the frames. I made up the entry port sides using some basswood sheet. I made five pieces then glued them together so I could shape them all at the same time. I then used alcohol to separate them. I am also working on the cat heads, fore deck and quarter deck rails, and the bow pin rail, which I am making from scratch because the supplied one has huge holes for the supplied belaying pins, but I am using smaller pins. I am also going to add the 4 sieves in the side of the hull for the fore and main sail rigging, which are not shown on the kit instructions, unless they are shown in the rigging section.
-
Sorry I missed your build log while you were building, but you have done a magnificent job on your Conny. You should be very proud.
- 301 replies
-
- 4
-

-
-
- Constitution
- Bluejacket Shipcrafters
- (and 1 more)
-
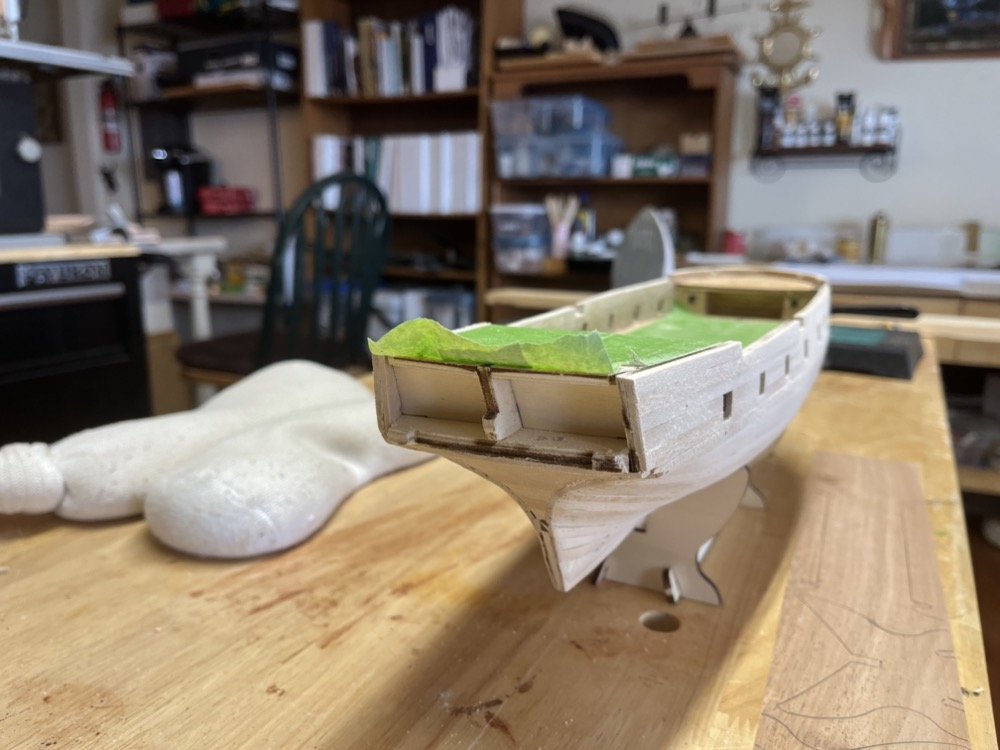
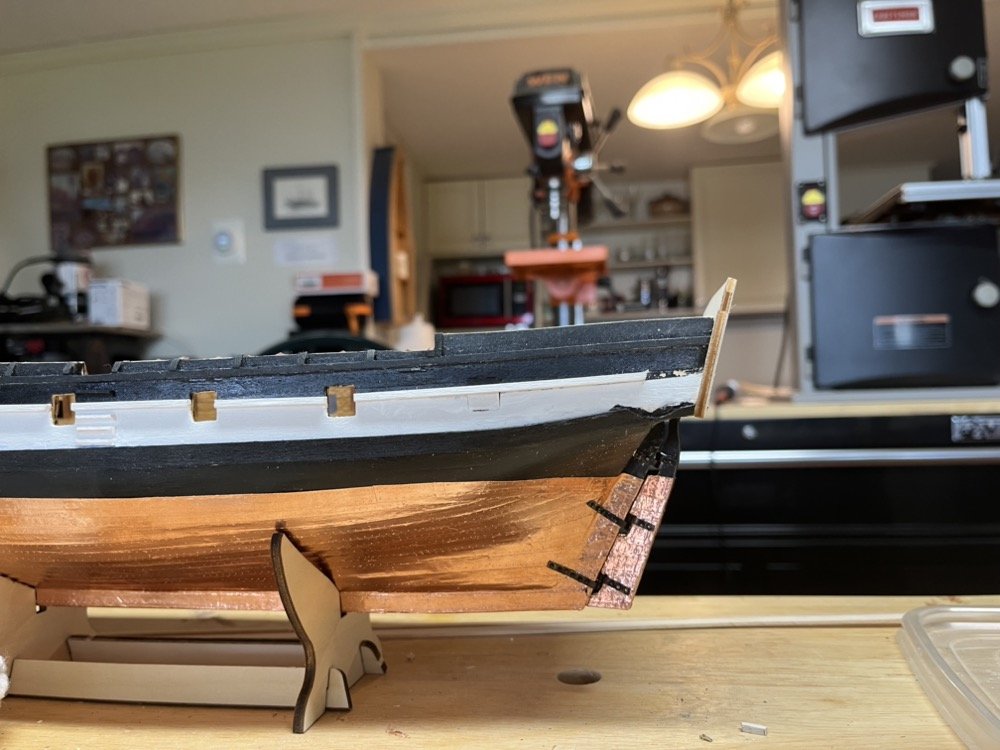
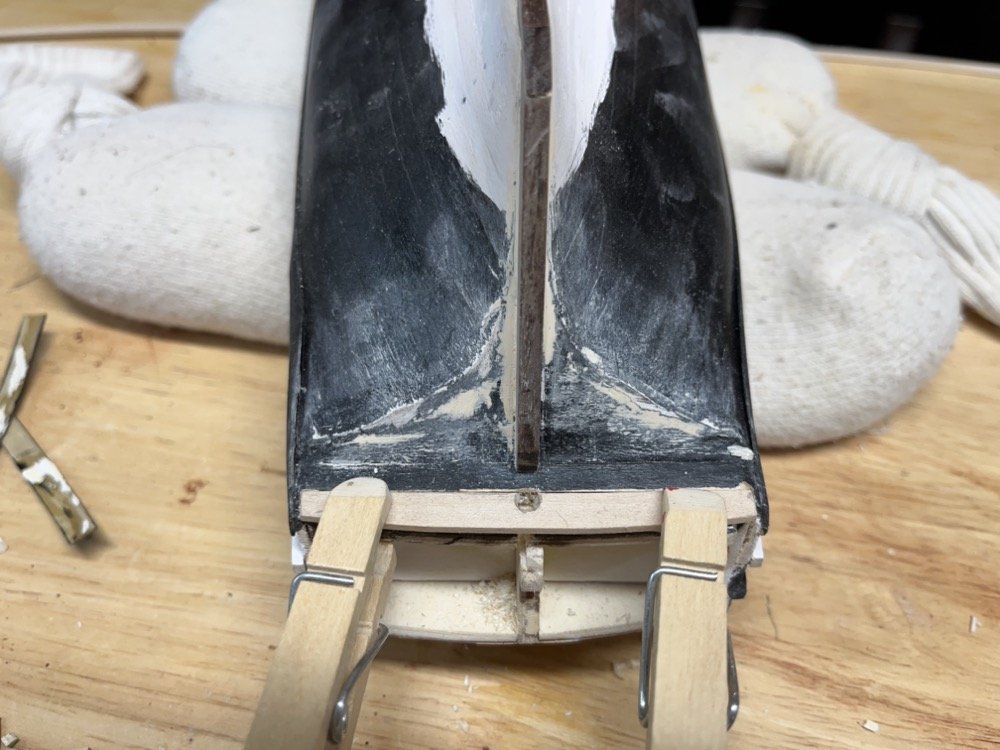
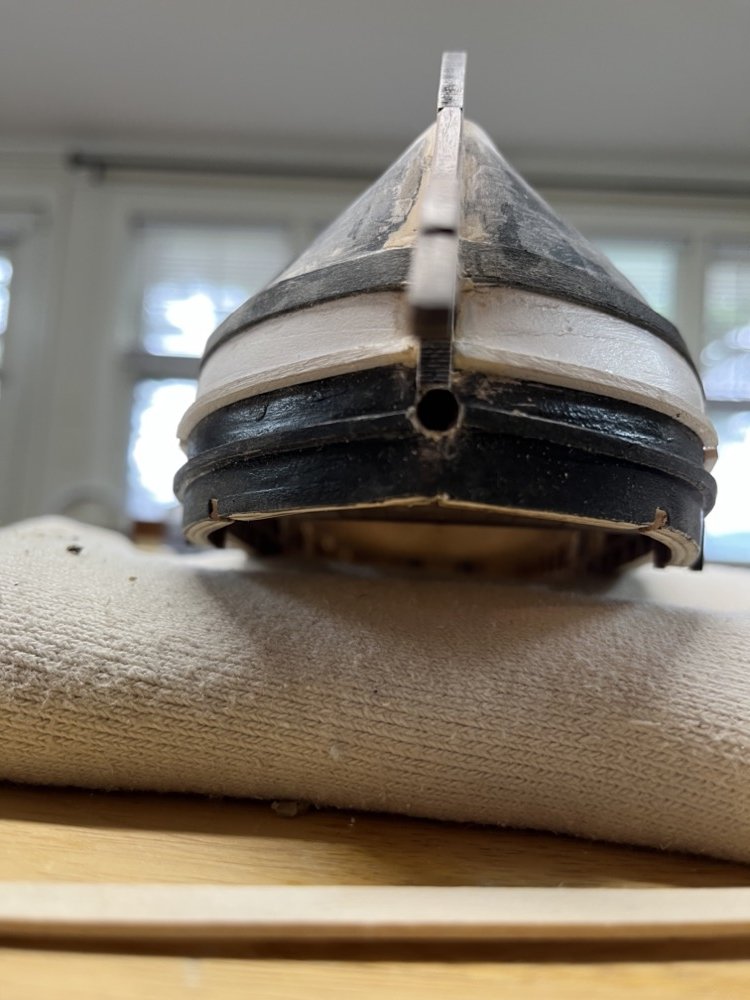
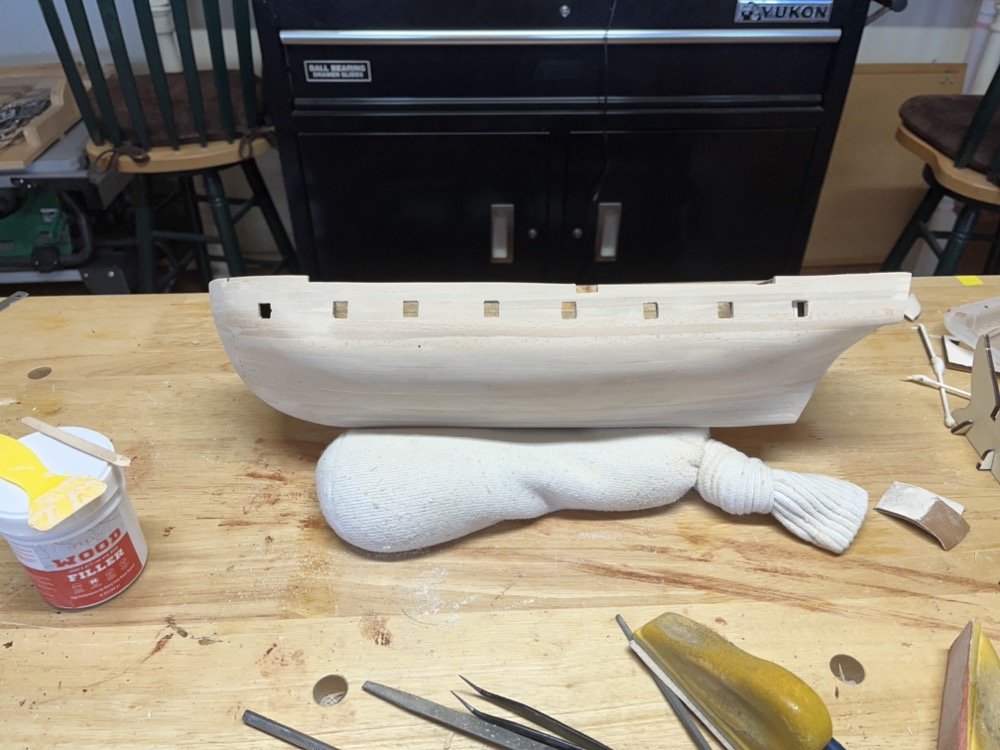
I finished adding the wales and used some wood filler to hide the joint and to fix a few other problems. I then added the stem and keel pieces and the stern post. I did sand down the front of the stem a bit before I glued it on. These pieces fit surprisingly well. In the AOS Beagle book it says that the last gun port was actually planked over, so I made plugs for each side and planked over them after painting the planks black and white. I then replaced the last middle rail section to fit from the second to last gun port to the transom. Nowhere in the instructions or plans/pictures does it mention drilling holes for the bow sprit and rudder. They just magically appear. So I figured this was a good time to drill them. I started with the bow sprit hole but first I had to cut away the top rail above the stem, which I did with a razor saw. I then used the top of the stem to set the angle of the hole for the bow sprit. The supplied rudder has a square rudder post which I sanded to round. I could not drill a hole in the transom for it because the stern post was in the way and I didn't have a long enough drill bit at that size to avoid it. However, I managed to carve a hole for the rudder using a semi round chisel. The rudder post has a curve to it so the hole was not close enough to the stern post and the rudder stood too far out from it at the top. I carved the hole closer to the stern post and the rudder fit better but now the hole was too elongated. I decided to replace the last two planks on the transom and drill a new hole before adding the new planks. The last plank was very narrow so I cut a single plank from some basswood sheet and sanded it to fit where the old two planks were. I then drilled the hole for the rudder at the correct angle, checked the rudder fit and glued the new plank in when everything fit well. I have a bunch of touch up painting to do now but it should be fine. I will give the stem, keel and stern post pieces a coat of diluted gesso before painting the areas that need to be painted. I also have to give the inner bulwarks a coat of wipe on poly with all the new trim pieces added. After that I believe I will add the copper tape.
-
About 10 years ago I remember there was a post on another modeling web site where a builder used his own urine to turn his copper plates green, right on the hull. I am not recommending that approach but thought I would include it for completeness, I guess?
-
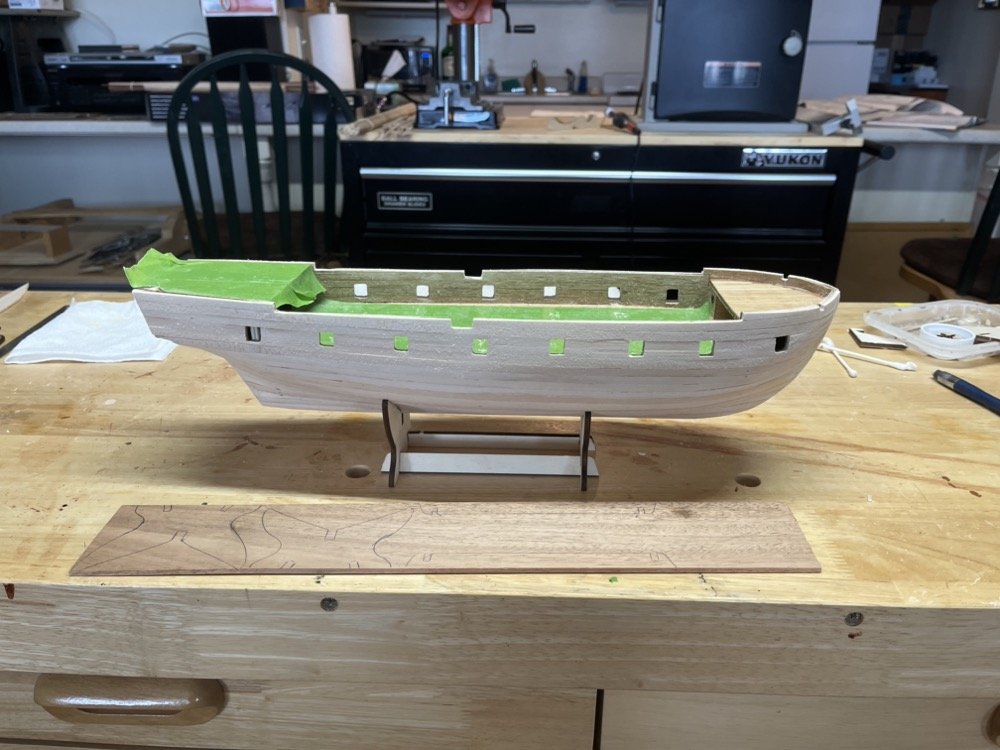
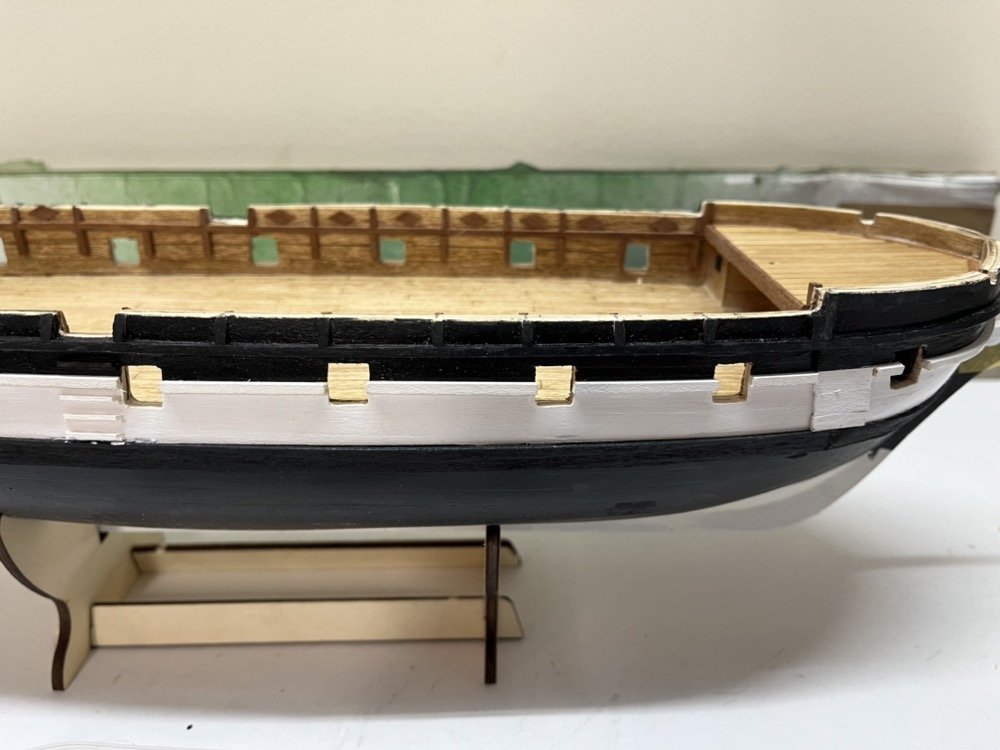
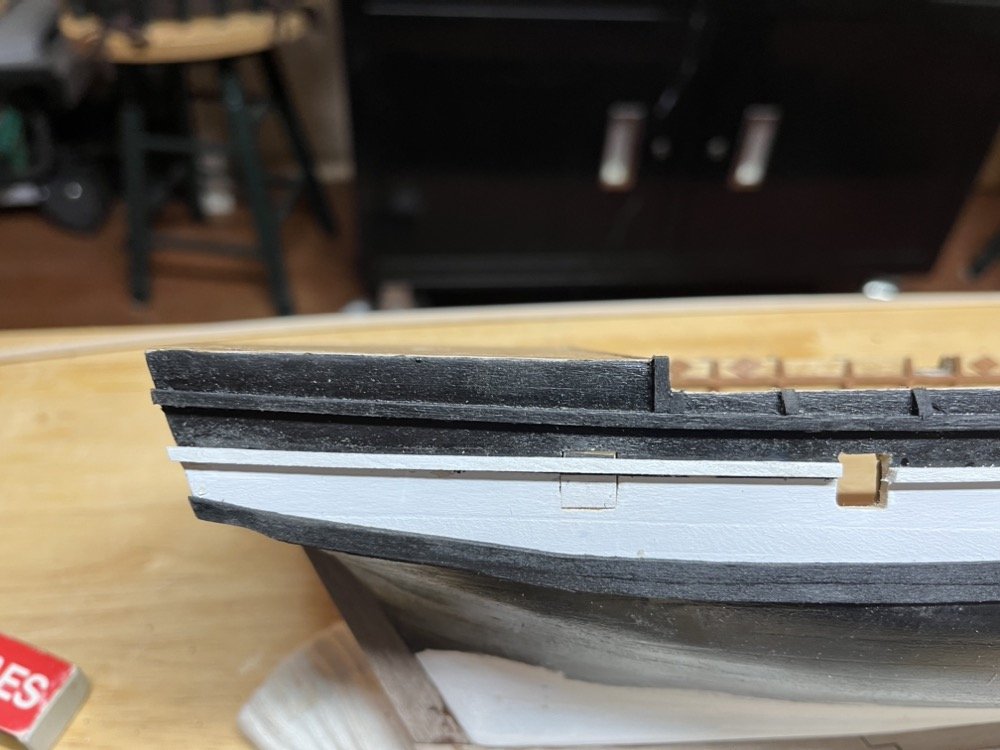
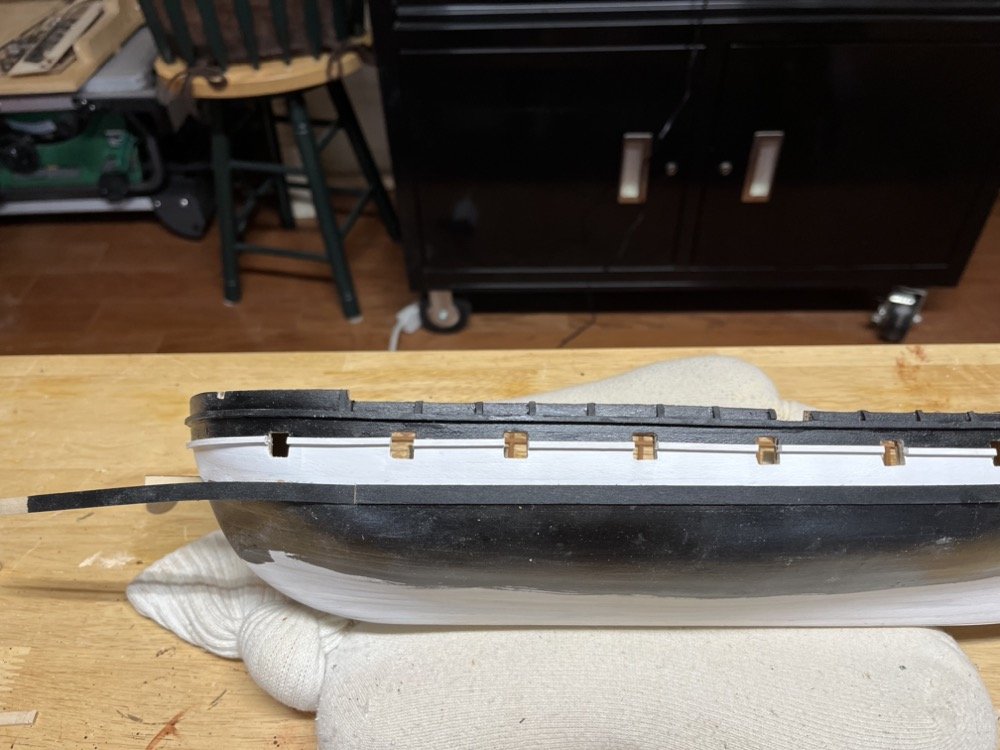
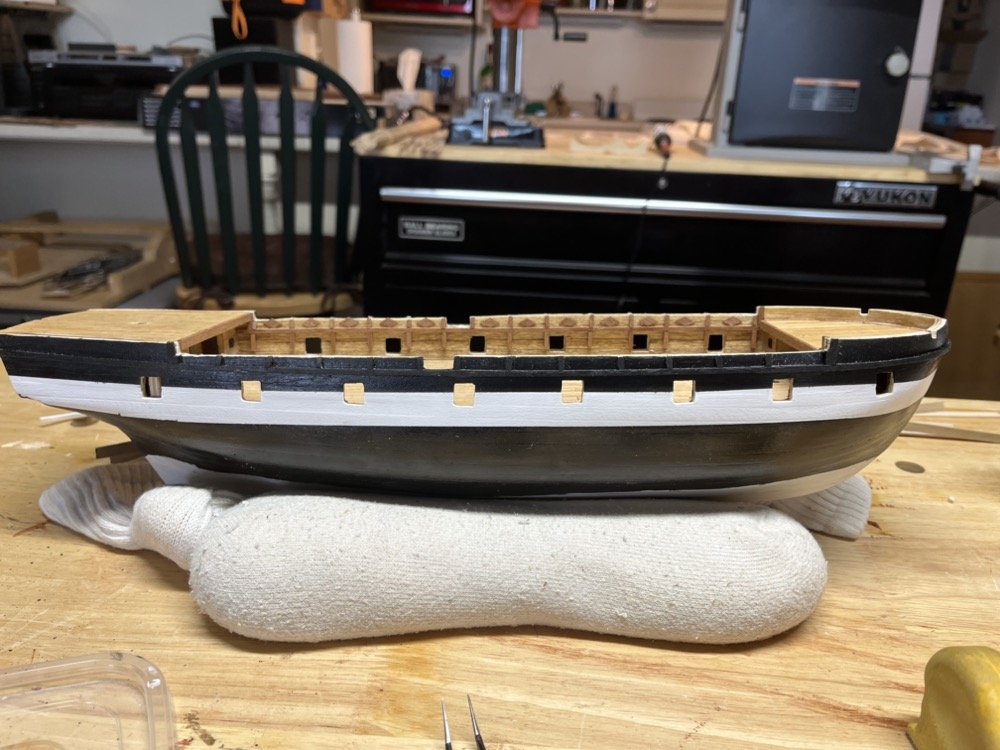
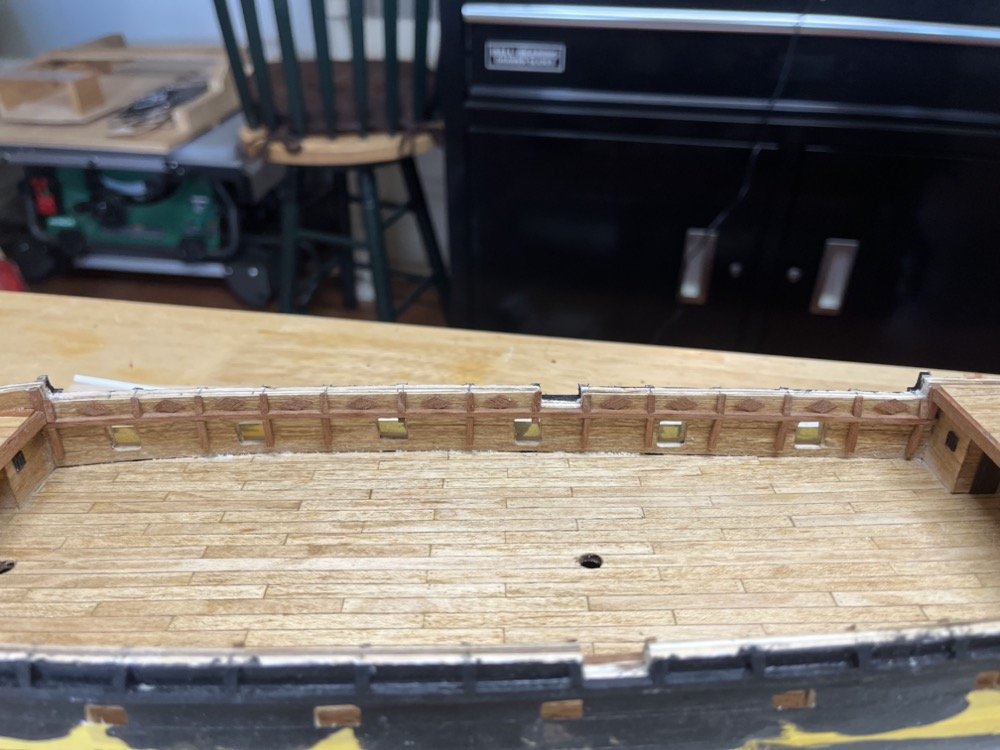
While I still had the masking tape on the outside of the hull, I finished adding the small detail pieces to the insides of the bulwarks, including the small diamond shapes and the vertical pieces. I then removed the masking tape and touched up the white stripe a little bit. The next step was to add the second white rail at the top of the white stripe. On the side shown I added these in sections between the gun ports, but on the other side I added the rail as one long piece and used an X-Acto saw blade to trim them at the gun ports, which came out better in my opinion. I then started adding the wales at the bottom of the white stripe, starting in the middle and working toward the bow and stern. As you can see in the above photo, I ended up replacing the bow sections with pieces that had more of a downward bend so they didn't curve up too much at the stem. I need to clean up and repaint the joint which should hide the fact that it is two pieces. I finished assembling the hammock cranes and blackened them using Birch-Casey. I am assembling a small jig to mark the copper strips and will be adding them to the hull after adding the stem, keel and stern post.

-
I painted the area of the white stripe and then masked it off for the black areas. I painted the areas above and below the white stripe black as well as the bent strips for the wales. I then added the small triangular pieces between the top rail top of the bulwarks. I first glued rectangular pieces on then filed and sanded them to triangles. This worked well but I had to be careful not to mar the black top rail. After giving the black areas another coat of black paint, and while the white stripe was still masked off, I glued the inside rails on and added the triangular pieces on the inside. For these I cut the rectangular pieces then used a razor blade to cut them on an angle making two triangular pieces. In most cases I used only one of the halves but for some I was able to use both halves. I need to finish up the inside trim pieces then remove the masking tape and add the second outside rail and the wales. I am also making the hammock cranes now that I have enough 0.7mm brass tube. I am using thin CA to hold them together, but I still plan to blacken them and will touch up any areas that don't blacken well with some black enamel paint.
-
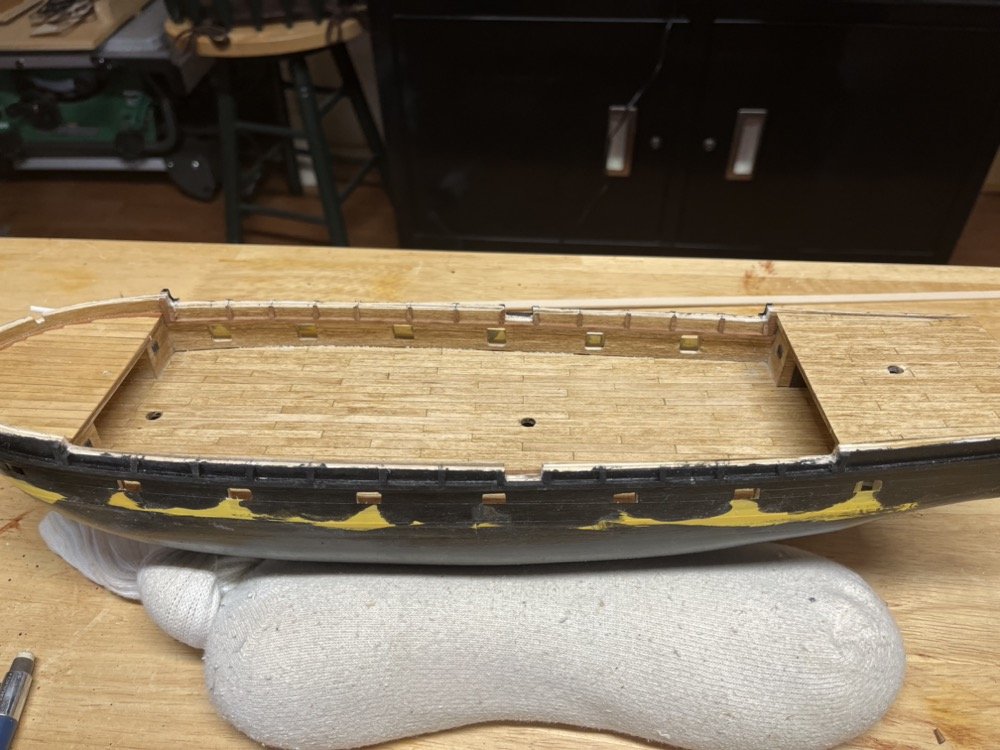
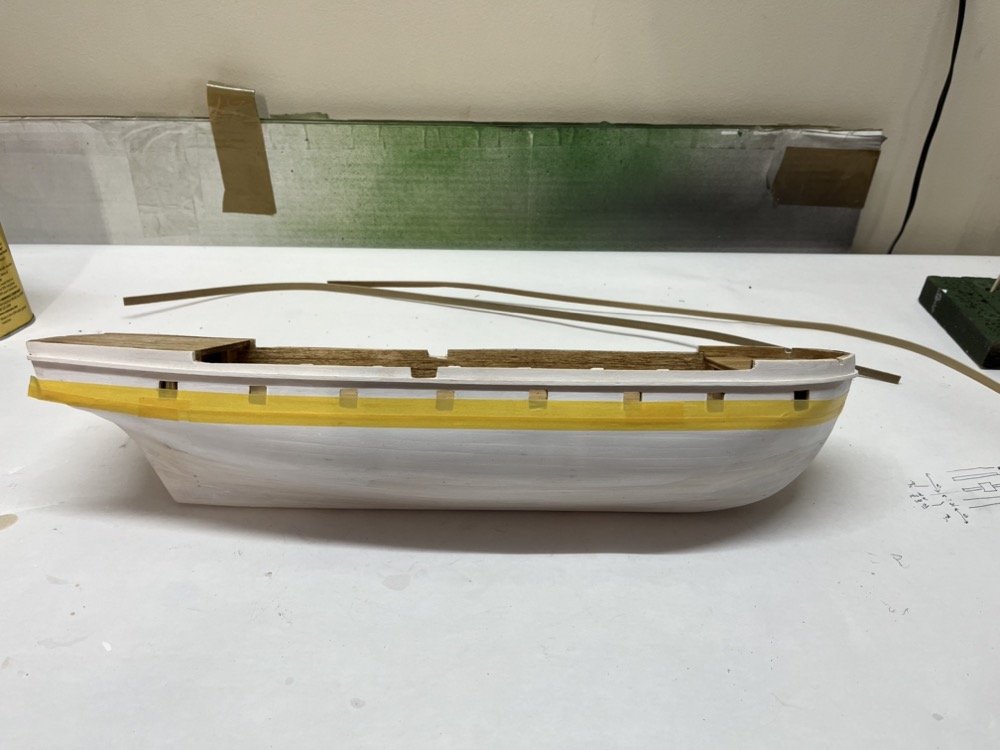
I cleaned up the hull using compressed air and mineral spirits. I ended up giving the decks another coat of oak stain and wipe on poly after I cleaned up the scratches from opening up the gun ports. I bent two pieces of 2mm square basswood for the upper rails and glued them on. The instructions say to put on two more rails like these but the AOS Beagle book shows wider and thinner wales where the third rail should go. I have bent some 1/4" x 1/32" basswood to use for these wales but before I put them on and the middle rail, I am going to mask off and paint the white strip since the middle rail and wale are the boundary between the white stripe and black upper and lower sections. I can get a much better transition line if I add the rail and wale after painting the hull and I can paint them off the model. The other change I am going to make is the cap rail between the fore and stern decks. The kit came with sculptured laser cut wood to use that is supposed to look like hammocks, with two square pieces of wood next to it on the inside and outside of the bulwark. The AOS Beagle shows a flat cap rail with hammock cranes, which is what I am going to make. I have a piece of 1/4" x 1/16" basswood to use for the cap rail but I have to make the hammock cranes. I have gone through a search on MSW and came up with a plan to make them using 0.7mm brass micro tubing and three eye bolts. Here is the prototype dry fit together. I had to order more tubing so I can make all 20 of these that I need but I am going to experiment with either soldering or gluing these pieces together while I wait for it to arrive.
-
I always use Pre-stain on basswood before staining. You put it on, wait 10 minutes, wipe off the excess, then apply the stain. I think the color comes out more evenly this way. I only use the pre-stain before the first coat if I apply multiple coats of stain.
-
I fit the stem, keel and stern post and did some more sanding of the hull to get them to fit well. I then bought some thin wood filler, which is very creamy. It goes on orange but becomes natural after drying. I coated the hull below the bulwarks on both sides. I sanded most of it off and it left a very smooth surface while still showing the individual planks. I then repeated the process on the bulwarks. At this point I think the hull is ready to move on, after I clean up all the dust.
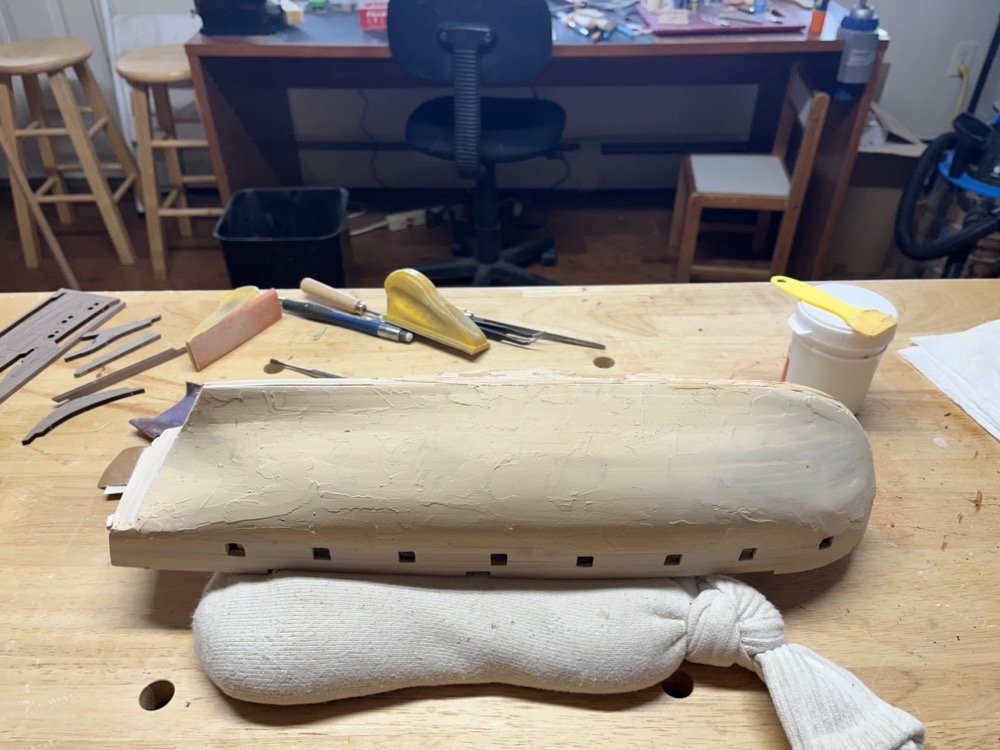

-
I agree with you @brunnels. Way too easy to sand right through it. Basswood isn't the best wood to use as the top layer but the planks supplied are nice and thick but sand easily. If I was going to leave the hull with a natural finish I would have used pear or yellow cedar for the planking. I have finished planking the rest of the hull and opened up the gun ports again. I gave the whole hull another rough sanding and shaped the planks at the stem and the transom. No wood filler applied yet but there are some areas I will be adding it. I put together the supplied cradle which I will use as a working cradle. I did trace the pieces onto a sheet of mahogany, as you can see above, which I will cut out as use as the display cradle. I spent some time cleaning up the transom so that the transom piece will fit without leaving gaps around it. I have cut out the stem, keel and stern post pieces and will be dry fitting them soon.