


usedtosail
-
Posts
2,418 -
Joined
-
Last visited
Content Type
Profiles
Forums
Gallery
Events
Everything posted by usedtosail
-
 Again I used the copper tape instead of the photo etched copper pieces for the rudder.
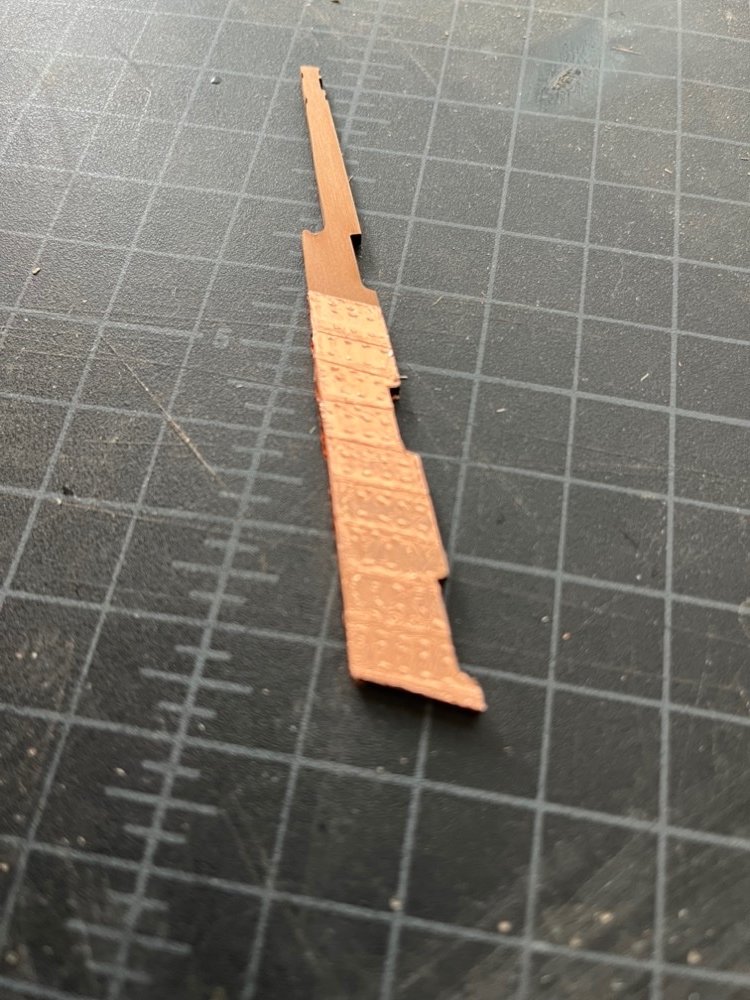
- 144 replies
-
- 9
-

-
- HMS Speedy
- Vanguard Models
- (and 1 more)
-
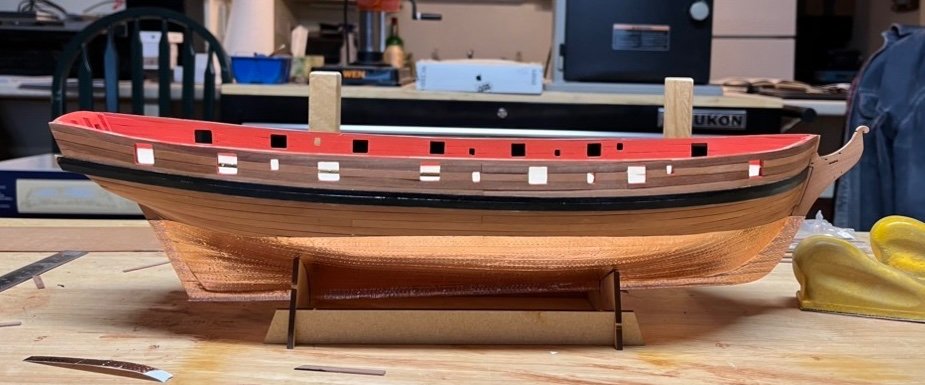
And finished up the starboard side this morning. Next up is building and attaching the rudder.
- 144 replies
-
- 14
-
-
- HMS Speedy
- Vanguard Models
- (and 1 more)
-
I finished adding the copper foil to the port side and have started on the starboard side this morning.
- 144 replies
-
- 8
-
-
- HMS Speedy
- Vanguard Models
- (and 1 more)
-
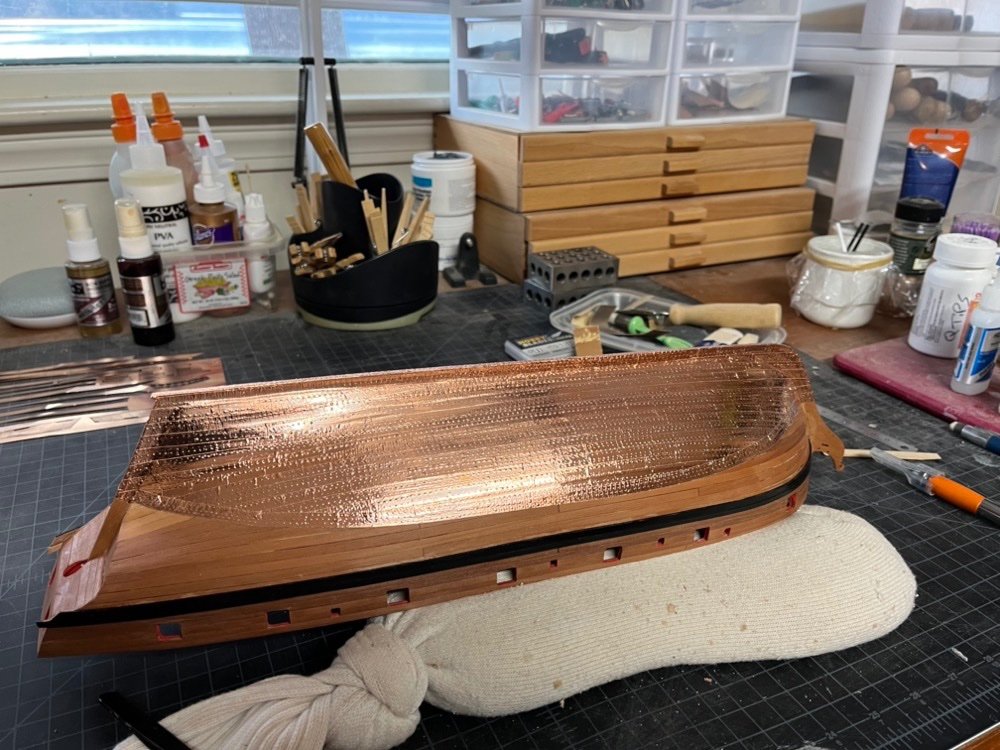
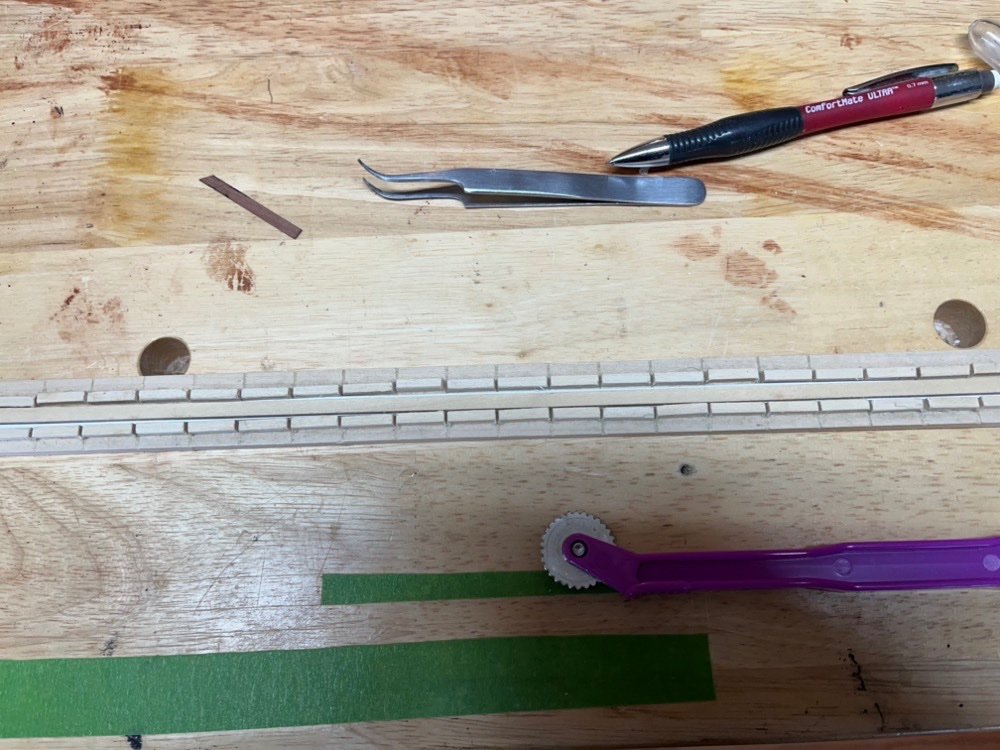
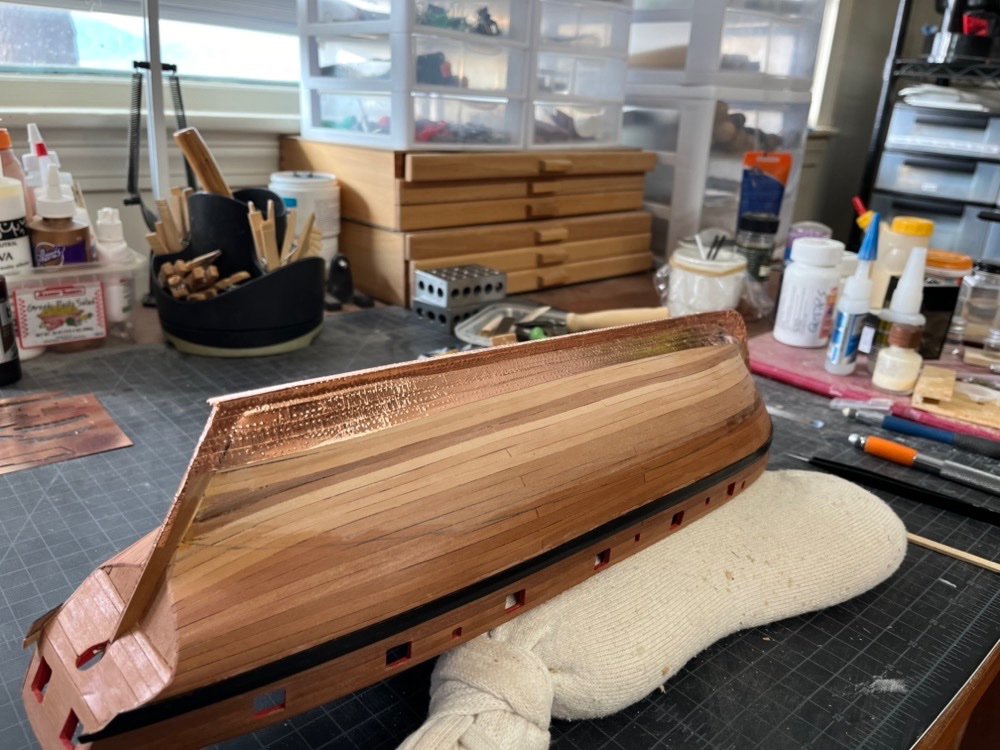
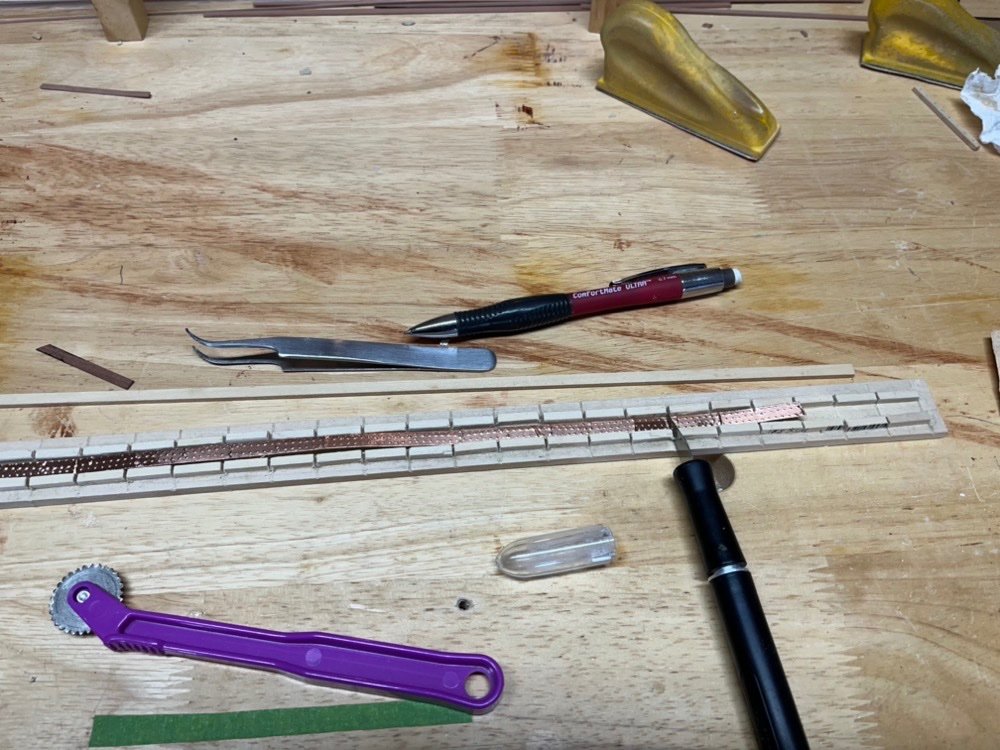
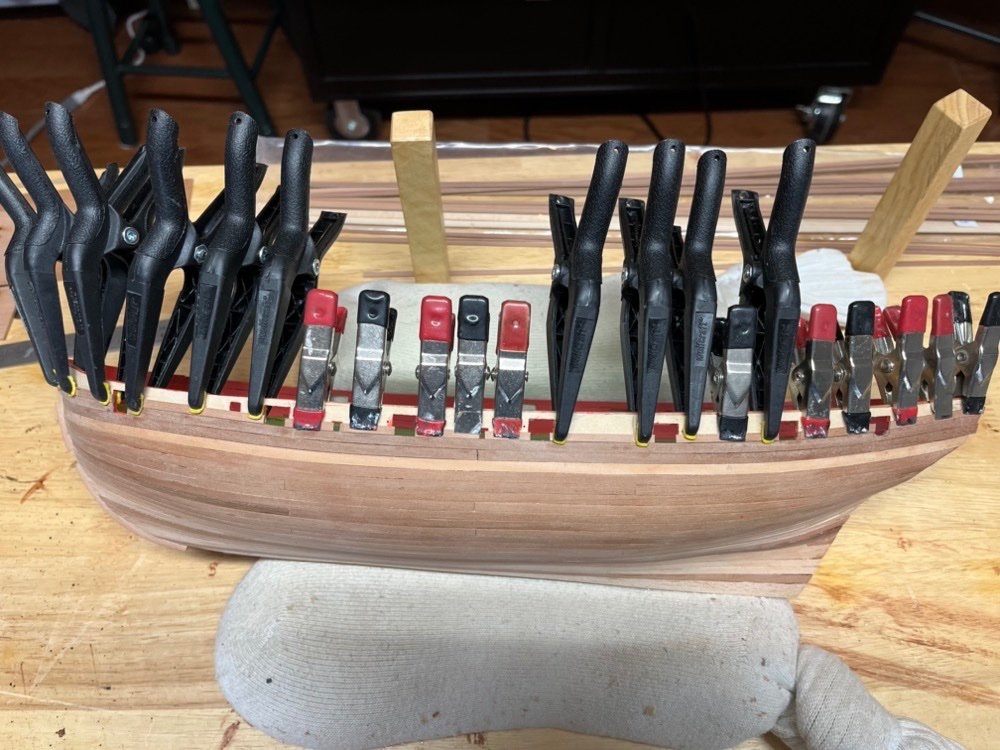
I added a strip of pear wood under the keel, then marked off the waterline. I put the hull in the supplied cradle then used a laser level on a tripod to visualize the water line on the hull. I marked positions of the line on the hull with a pencil and used masking tape to connect them. I then ran a pencil along the edge of the masking tape to mark the water line. The next task is to add the copper plating to the hull. The kit includes some photo etched copper pieces for the keel and two rolls of copper foil for the rest of the hull. I have used copper foil before and I like its flexibility. I tried gluing the photo etched pieces but found that they are too stiff and kept coming off the hull. So I discarded them and am using the foil for the whole job. I am applying the foil directly to the wood as it seems to hold very well without any finish on the wood. I had made this jig when I built the Constitution for marking the foil and it turns out the plates for this model are the same size, so I am using it again. I put a piece of copper tape into the jig copper side down, then place a strip of wood over it as a guide. I run a ponce wheel down each side holding it tight to the wood strip. I then remove the strip and carefully run the ponce wheel down the center of the jig. I then mark the edges of each plate by running the ponce wheel through each of the openings between wood blocks on the jig. I then turn the copper strip over and offset it slightly and mark the plates with the back of an X-Acto knife in each opening. It takes only a few minutes for each strip. I attach them to the hull in strips so it easier for me to keep the lines of plates straight. Before adding the first strip at the keep, I ran a strip down the bow and along the bottom of the keel and back of the stern post, wrapping the excess around each side. I then started add the copper strips. Here are the first few on the port side. I burnish the strips down with a rounded off piece of basswood to finish the process. The "dimples" may be oversize but I like the look better than smooth copper tape.
- 144 replies
-
- 6
-
-
- HMS Speedy
- Vanguard Models
- (and 1 more)
-
Sorry I don't know the answer to that question.
-
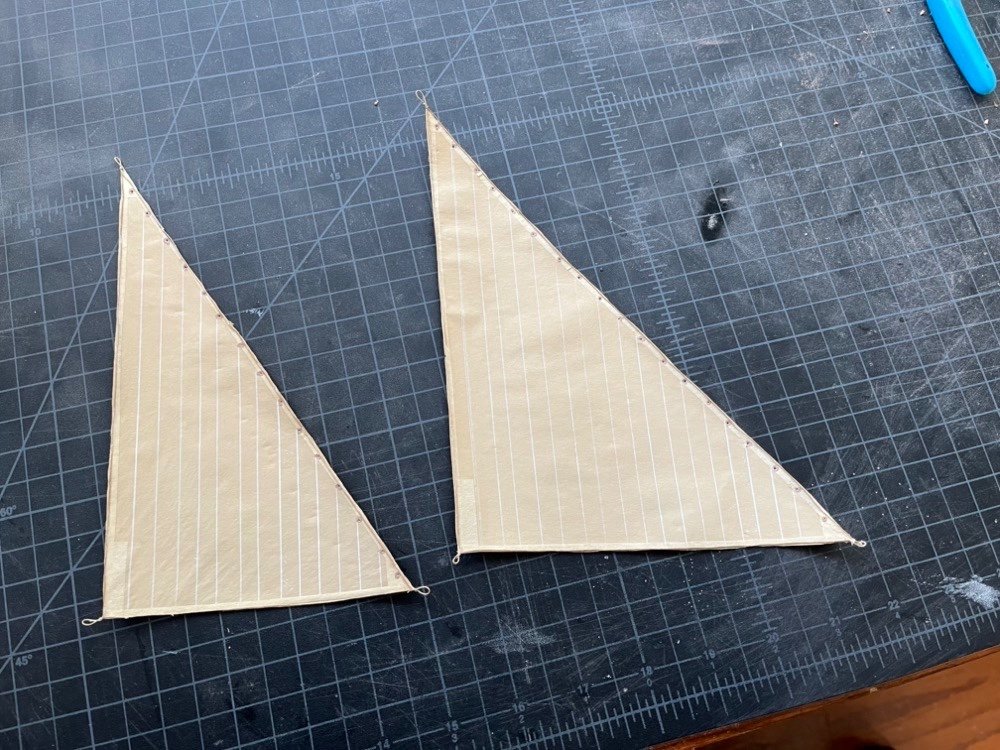
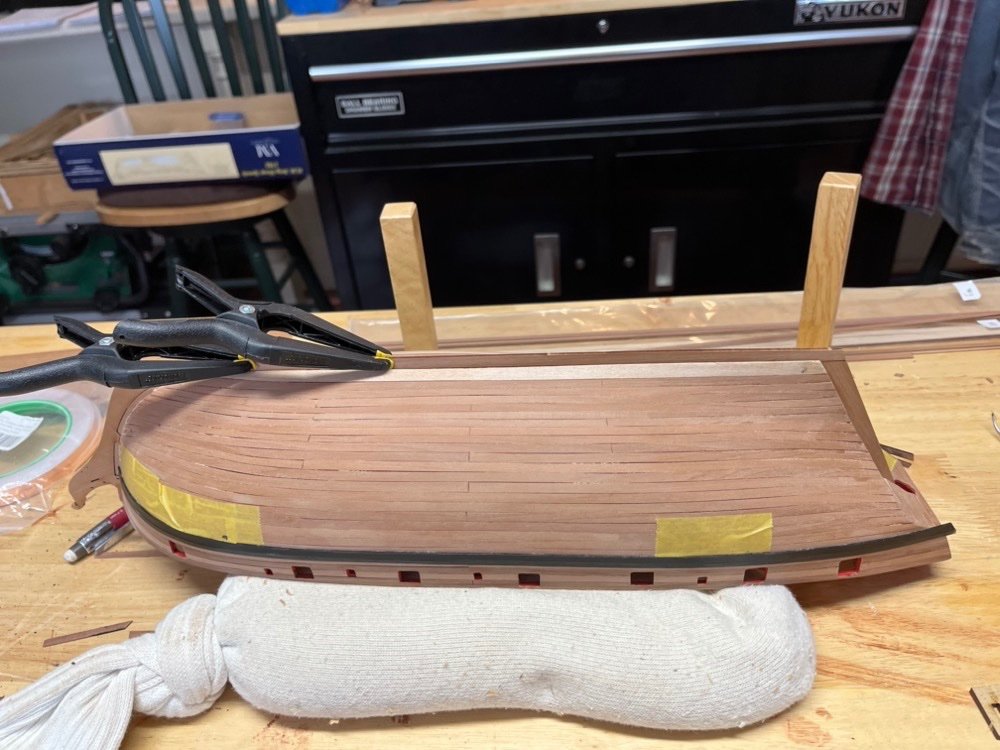
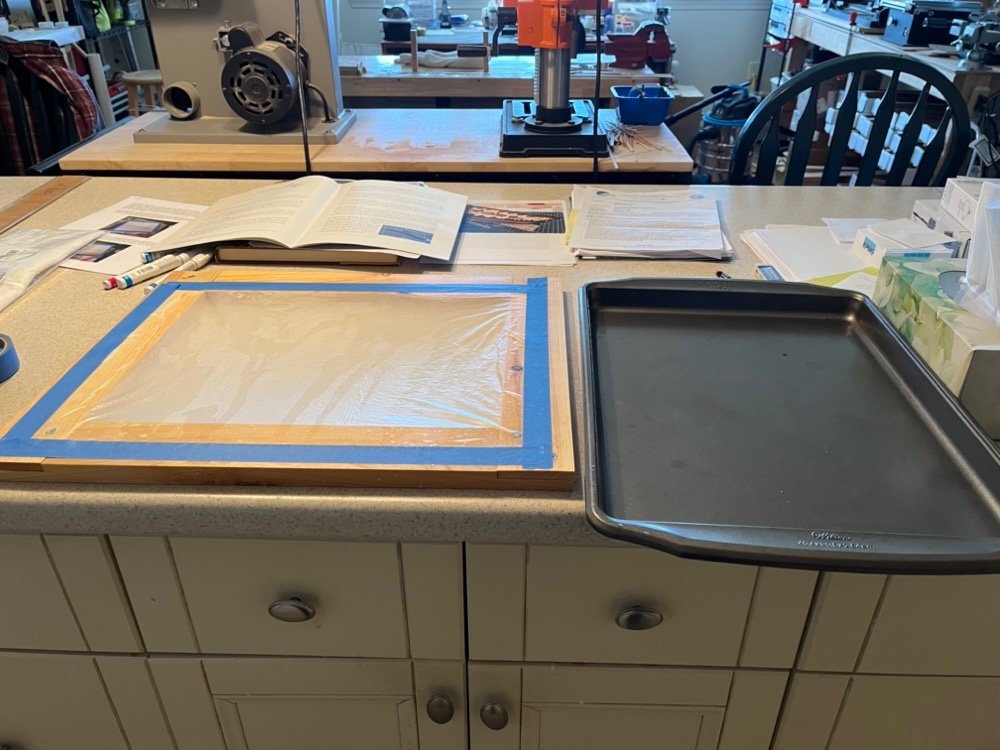
I gave the hull above the waterline a coat of wipe on poly. I also did the same on the deck. I am going to add the copper foil to the hull below the waterline but I don't know yet if I will add them over the bare wood or give the wood a coat of primer first. I cut out the two sails from the silk span using an X-Acto knife. I cleaned then up a bit and glued down the bolt ropes in a couple of spots that had come up. I am going to make the spanker sail next as I can get the dimensions from the plans.
- 144 replies
-
- 15
-
-
- HMS Speedy
- Vanguard Models
- (and 1 more)
-
I marked the waterline on the hull today, using a laser level on a tripod. I also finished the last step on the sails which was to paint spots along the front edge and then drill holes through the spots for the grommets. I found that it was better to use a T pin to push a hole through the paint instead of drilling a hole. The next step is to cut the sails out and trim the reinforcement pieces and bolt rope ends.
- 144 replies
-
- 4
-
-
- HMS Speedy
- Vanguard Models
- (and 1 more)
-
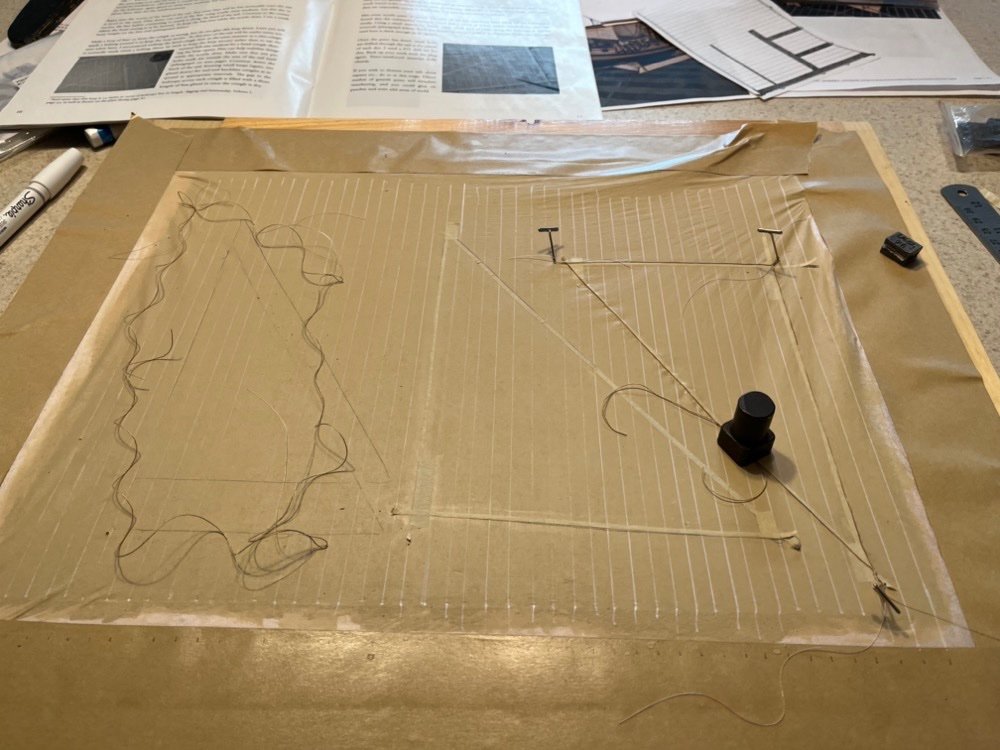
After touching up the paint on the inside bulwarks, I removed the masking tape on the deck. There were a few places where the bulwarks paint bled under the tape, but I was able to scrape it off with an X-Acto knife and some small riffler files. I then added the prow, keel, and stern post pieces. I used the edge of a flat file to file a groove into the stem so the stern post fit flush to the hull. I used a combination of medium CA and wood glue on these pieces. I traced the outlines of the jib and fore stay sail onto the piece of silk span on the frame. On thing I found out the hard way how easy it is to inadvertently punch a hole through the tightened silk span. Luckily I still had enough left to use for both sails, since they are triangular. I cut out the reinforcement strips and glued them on with diluted matte medium. When everything dried and tightened back up again, I cut some 0.021" tan line, that corresponds to about 1.3" at this scale, for the bolt rope for the jib. I seized a loop and started gluing the bolt rope on using a less diluted matte medium than I did for the reinforcement pieces, using small weights and T pins to keep the bolt rope in place. I then seized another loop and glued more of the bolt rope on, then one more loop and the rest of rope. For the other sail, I seized three loops on before starting to glue the rope on. The seizings are loose so I can adjust them at each corner as I glue it around. I'll use the matte medium to fix the loops at the same time as I glue the rope down. Happy Thanksgiving to all who celebrate it here in the US.
- 144 replies
-
- 8
-
-
- HMS Speedy
- Vanguard Models
- (and 1 more)
-
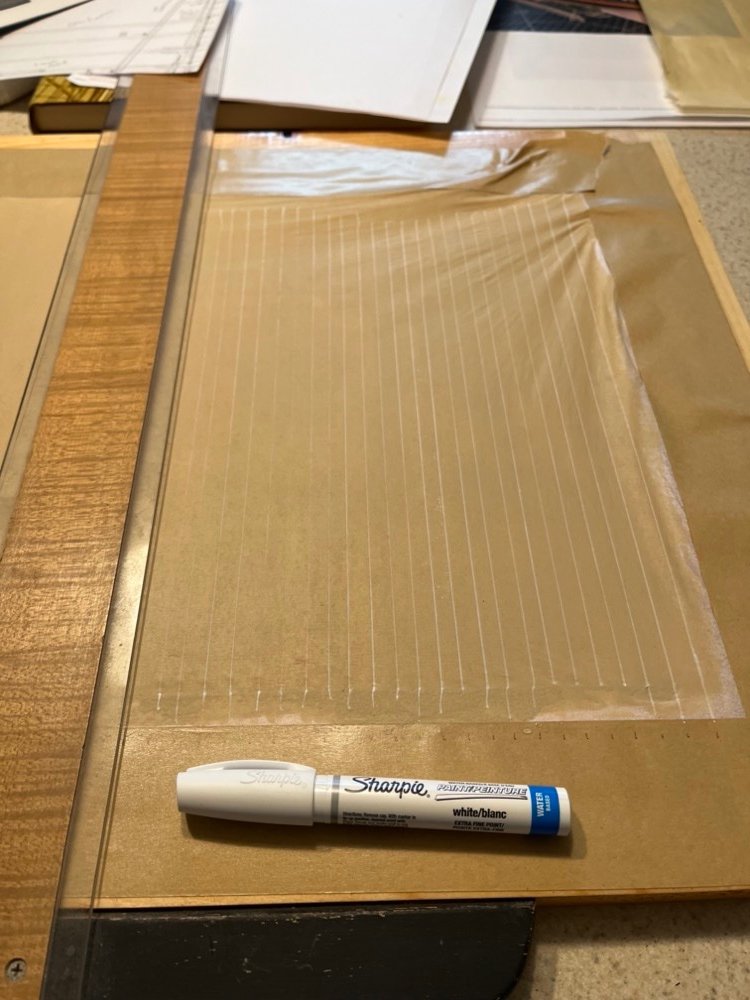
I am so saddened to see the news about Jim Byrnes this morning. I never met him in person but from what I have heard he was a great guy and will be greatly missed. My condolences to his family and friends. I finished adding the wales to the hull, then gave them a sanding to even them out. This took off some paint in spots, so I masked where it was needed and gave the wale pieces another two coats of black paint. I left the ends at the transom long, as these will be trimmed back when I add the fashion pieces later. Next will be touching up the inside bulwarks paint again, then adding the stem, keel and sternpost. On the sails experiment, I mixed up some unbleached titanium white paint with a little burnt umber and yellow oxide and lots of water so it was very thin. I gave the silk span three coats of this and let it dry between each coat. As per the TFFM instructions, I cut this one out of the frame and will use it for the reinforcement strips. I repeated the procedure with another piece of silk span, but this time left it on the frame after painting it. I then made up a tick strip for the cloth spacing, with 21/64" divisions. I transferred these to the bottom tape and used a T square along the bottom of the frame to draw the lines for the clothes. Instead of using an ink pen I tried a Sharpie white paint stick and was very pleased with the result. I know they are whiter than they should be, but I like how even the lines came out. I will let this dry then use it for the head sails, as the size of these is not as precise as the square sails.
- 144 replies
-
- 9
-
-
- HMS Speedy
- Vanguard Models
- (and 1 more)
-
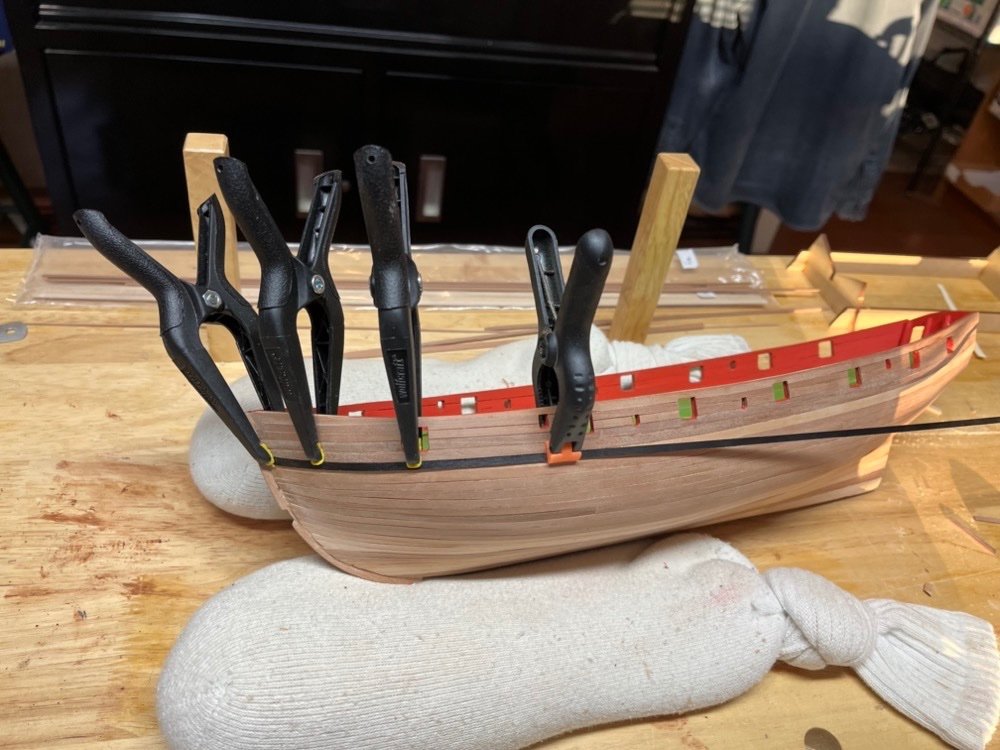
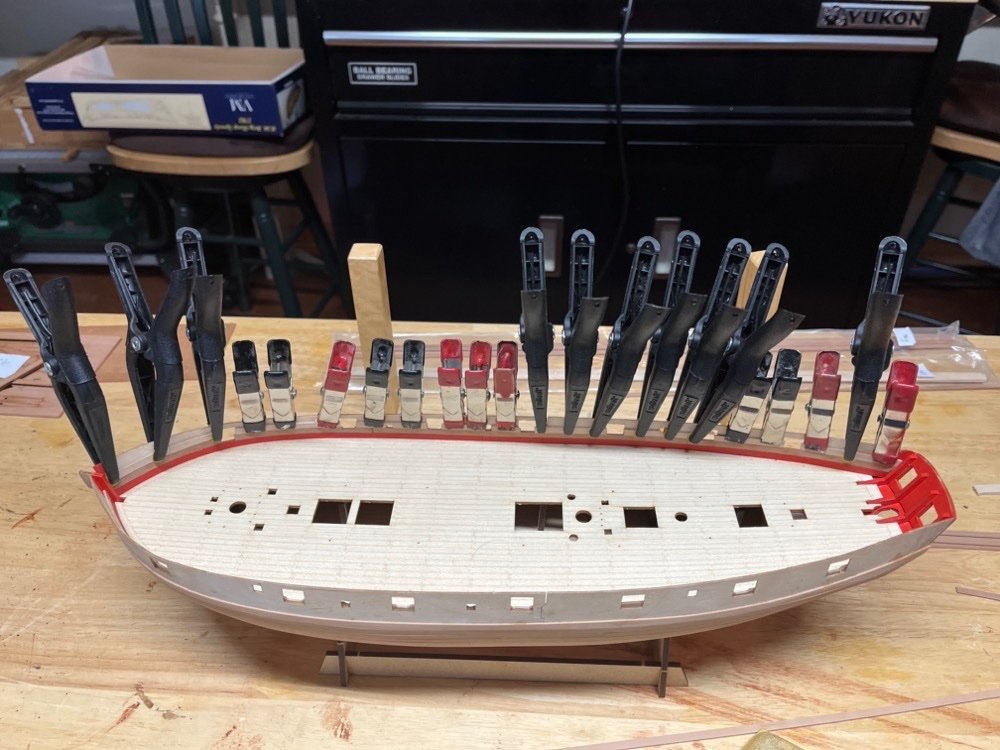
I am adding the wales to the hull. I started on the port side, which is not the display side. I bent a 3mm and a 4mm strip of pear wood to fit the hull, then deviated from the instructions. I painted them black before gluing them on the hull, because I think that will make it easier to keep black paint off the hull planks. I will probably still need to sand them after gluing but then I can touch up the black paint on them with a small brush. I may still mask them off depending on how much painting they will need. I prepared those strips by running them through the Byrnes thickness sander so they are the same thickness. I am using wood glue to glue them to the hull and clamps to hold them while the glue dries. I luckily used a light strip of wood as the plank under the wale so it easy to line up the first strip with the edge of that plank, which is the correct wale position. Here is the bow section glued on and drying.
- 144 replies
-
- 7
-
-
- HMS Speedy
- Vanguard Models
- (and 1 more)
-
Chris, congratulations on your success and the growing pains that go with it. I am sure you will be able to get them all worked out. I hope you can get back to the design tasks, as I have the feeling those are your real passion. And I can't wait to see the new designs. Your kits are so much fun to build.
-
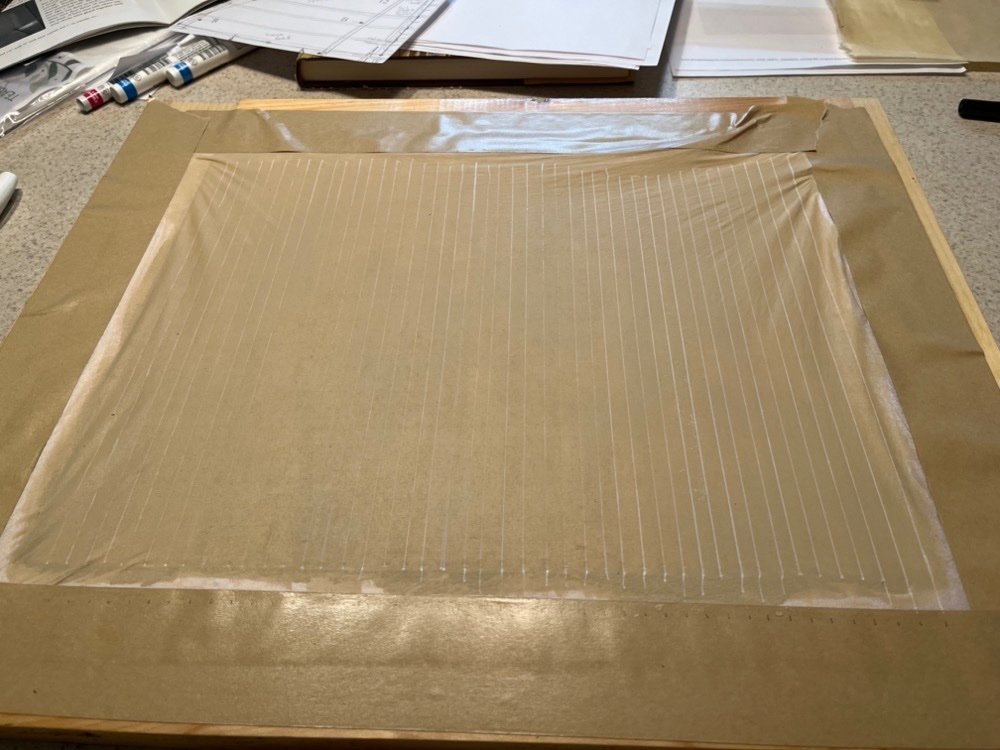
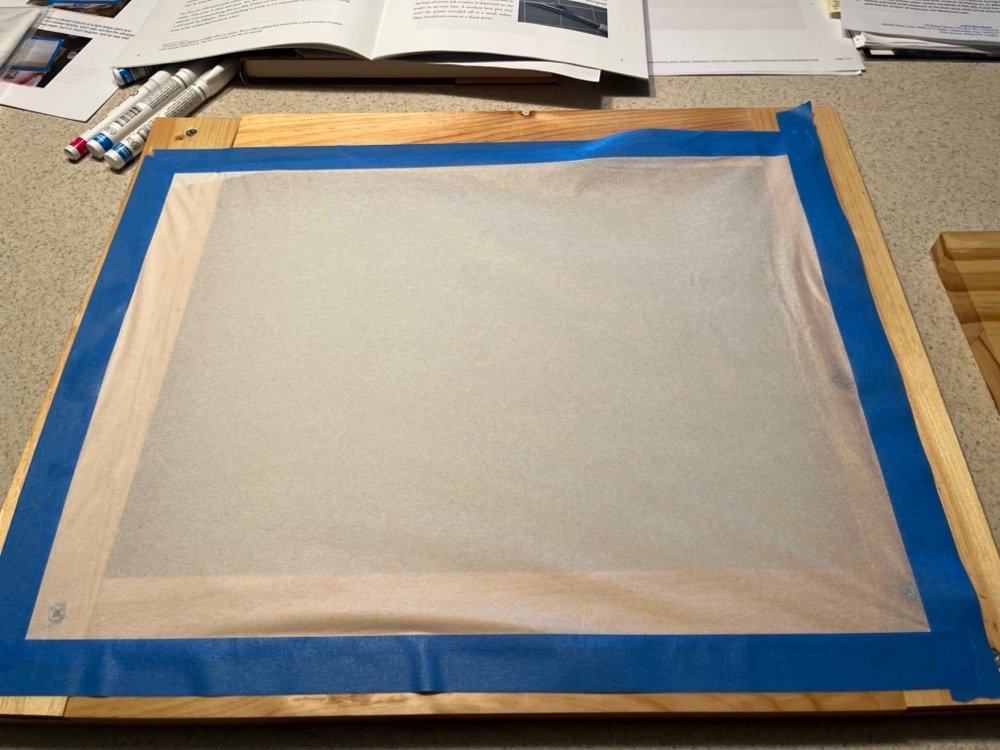
I let the silk span dry overnight and it tightened nicely. I had ordered some gummed tape to hold this down which has arrived since I took this picture. I re-taped the silk span down and wetted it with a spray bottle to remove the waves on the sides.
- 144 replies
-
- 3
-
-
- HMS Speedy
- Vanguard Models
- (and 1 more)
-
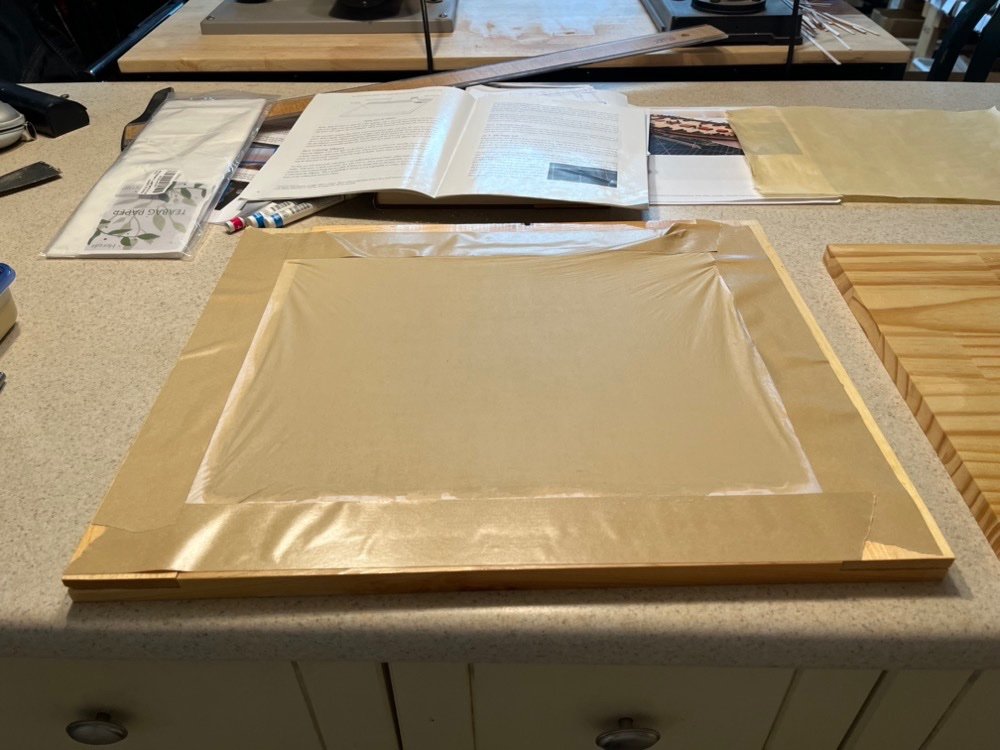
I received the silk span I ordered so it was time to start experimenting with it. I first soaked a piece in a small tray by folding it first, which was a mess. Once that stuff is wet it wants to really stick together and there was no way to unfold it. So I borrowed my wife's oven pan and soaked another piece flat in it. This worked much better. I was able to transfer it to the frame, tape it down and remove the insert while it dries. I'll see tomorrow how much it tightens up.
- 144 replies
-
- 6
-
-
- HMS Speedy
- Vanguard Models
- (and 1 more)
-
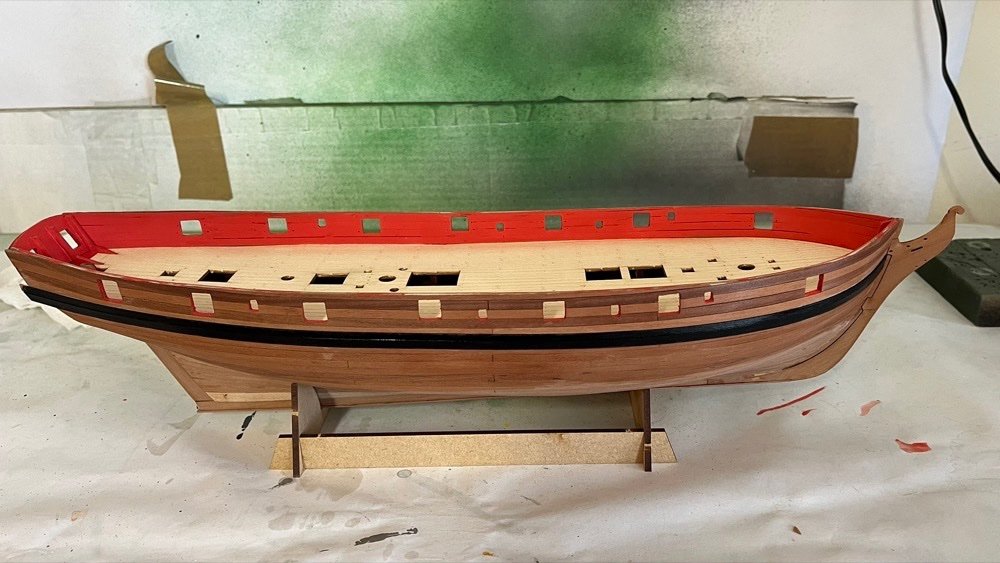
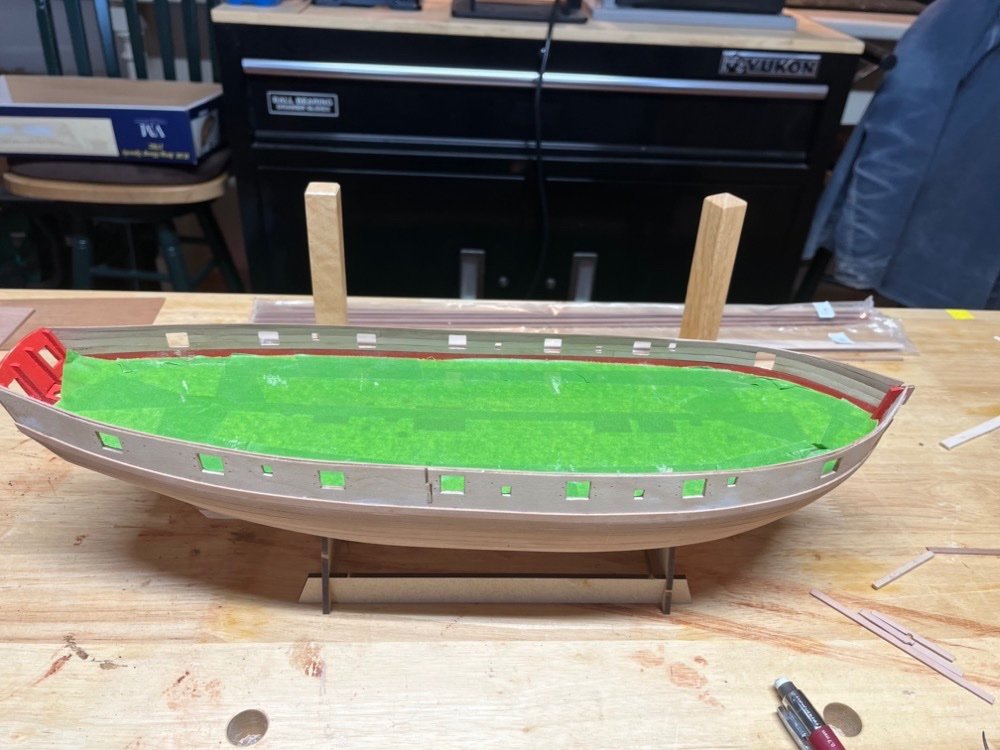
I finished opening up the gun and oar ports. I made a rectangular sanding stick that fit inside the gun ports and used it to square them off. I gave the hull a final sanding then gave the inner bulwarks another coat of red paint. I also carefully painted the insides of the gun and oar ports with the same red paint. I am now ready to add the wales.
- 144 replies
-
- 8
-
-
- HMS Speedy
- Vanguard Models
- (and 1 more)
-
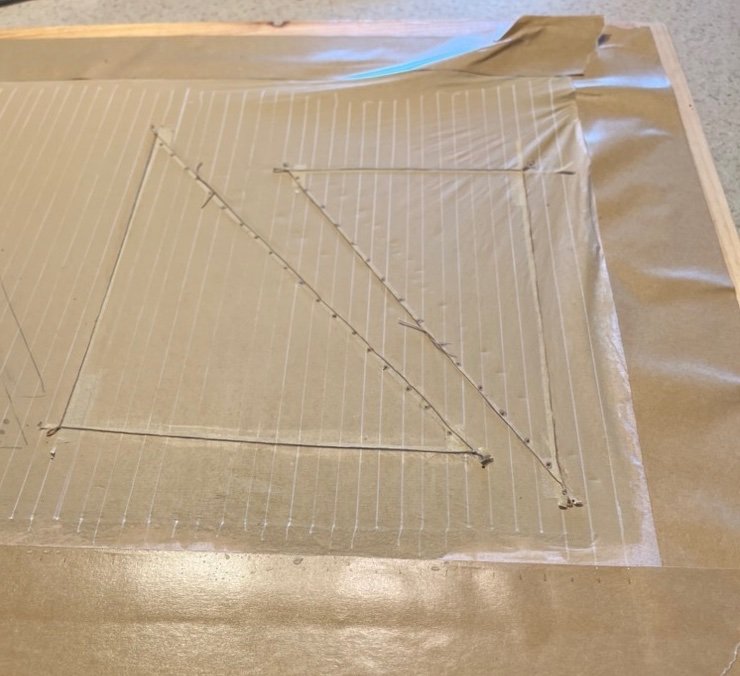
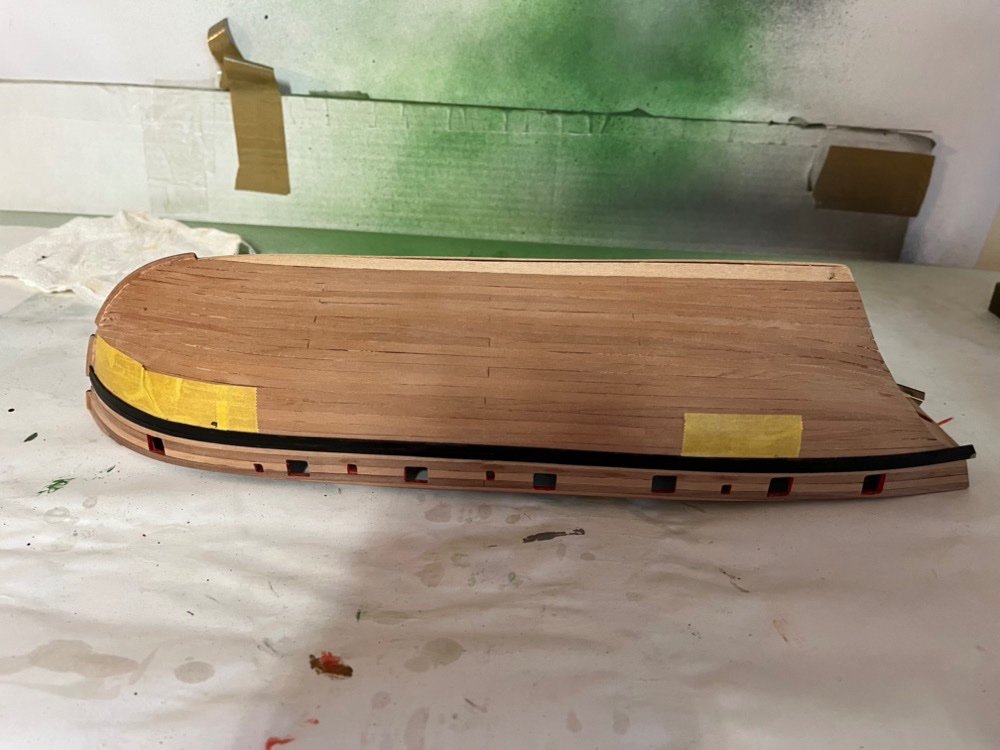
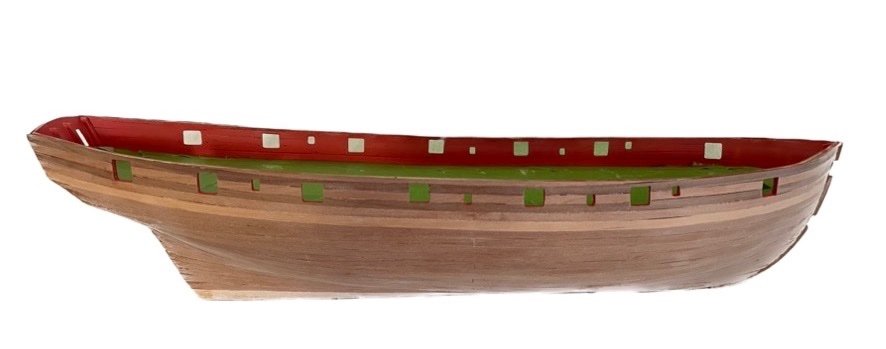
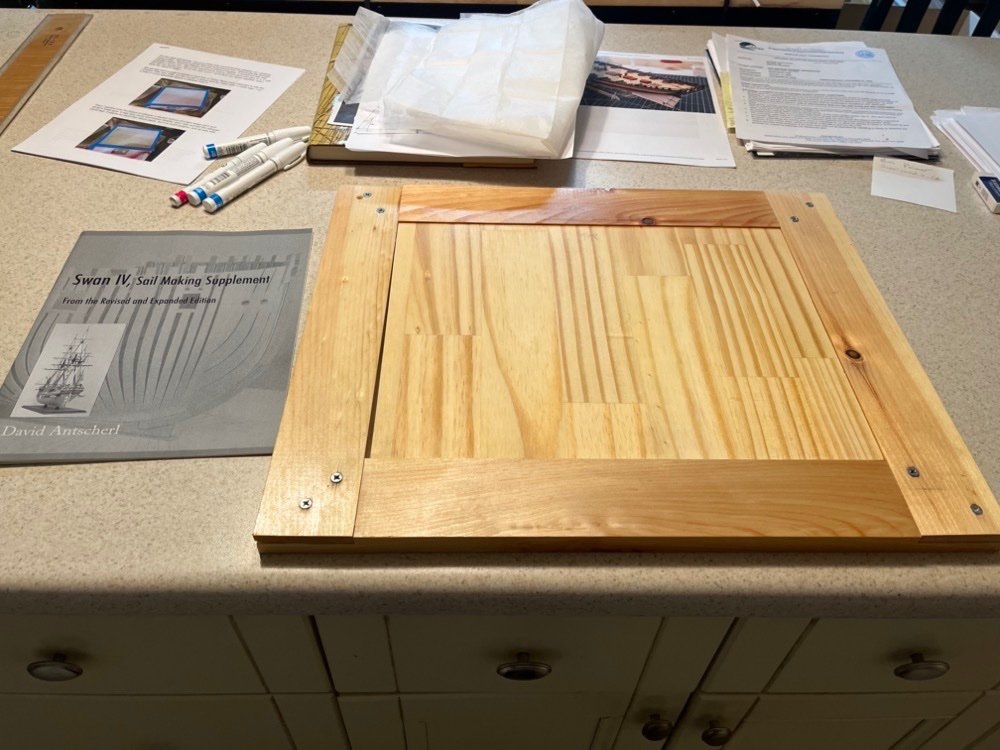
I have finished planking the outer hull up to the sheer on both sides. I am in the process of opening up the oar and gun ports and trimming the excess plank lengths at the transom. I had to glue one of the sections back on that popped off when I was filing the gun port opening. I also built a frame to stretch silk span for making sails. I am using the TFFM sail making supplement from David Antscherl, as well as @whitejamest build log as a guide for this.

- 144 replies
-
- 10
-
-
- HMS Speedy
- Vanguard Models
- (and 1 more)
-
I make hooks like that out of pre-made eyebolts, so I only have to bend the hook part. The small eyebolts that Model Expo sells are what I used on the Conny.
-
Thanks James. Your build is coming along very nicely too. I will be experimenting with the sails as I finish the hull work which I will be sure to document here.
-
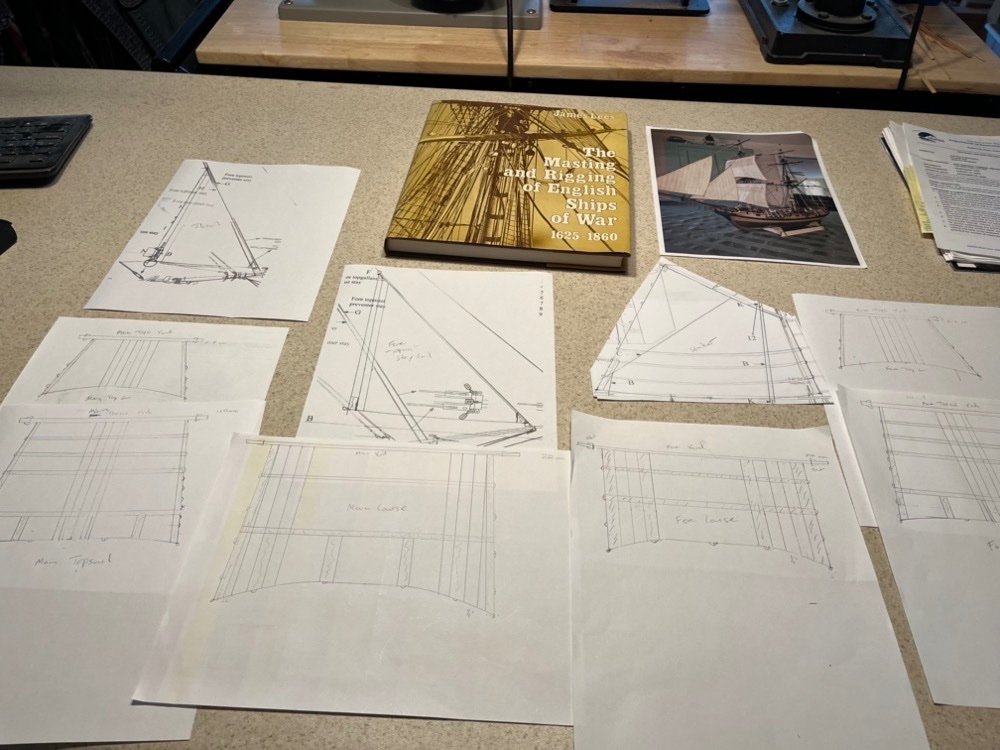
I painted the inner bulwark planks with bulwarks red, then drilled the holes for the gun eyebolts and cleats from the outside. I sanded the holes in the inside and gave the inner bulwarks another, probably not the last, coat of red paint. I then started planking up from the last of the outer planks. This plank is really a set of small planks that fit between the gun ports. I am still using medium CA to glue these planks in place, even though I can clamp them. While waiting for things to dry, I have also been sketching out a sail plan for this ship. @DennisL added sails to his Speedy and I really liked the look so I am thinking about adding them to mine. I have been developing plans for the sails from the kit plans and Lee's Masting and Rigging... book. I will be waiting until I start making the masts and yards before finalizing on these plans, since there are a few dimensions that I can't quite finalize yet. I also need to decide what material to make the sails out of. I am leaning toward silk span but we will see.
- 144 replies
-
- 10
-
-
- HMS Speedy
- Vanguard Models
- (and 1 more)
-
Thanks Theodosius. Your Speedy is coming along very nicely. I masked off the deck, then finished cleaning up the excess inner planking around the gun and oar ports, using a combination of square and other files. I planed down the excess plank above the gunwale for now but will finish this after adding the outer planking. I will be painting the rest of the inner planks bulwarks red then drill the holes around the gun ports.
- 144 replies
-
- 9
-
-
- HMS Speedy
- Vanguard Models
- (and 1 more)
-
Model Expo and Model Shipways are the same company. I have found that they don't respond to parts request emails but the parts show up in the mail anyway.
-
I have started planking the inner bulwarks. As in the instructions, I painted the bottom planks before gluing them in. I am now adding the planks that go between the gun ports on the starboard side. I notched them also at the sweep ports. These planks will get painted after they are all installed.
- 144 replies
-
- 11
-
-
- HMS Speedy
- Vanguard Models
- (and 1 more)
-
Jon, that would be me, the same member you bought the cannons from.
-
Sorry to keep you all in suspense for a few weeks but I forgot to post his before we went on a 10 day vacation to Seattle and Alaska. The deck did glue down well to the false deck using the above method so now I can focus on planking the inside bulwarks. I started by running 10 of the pear planks through the thickness sander to even them out and remove the saw marks from the planks. I should have done this with the outside planks too. I also continue to blacken the PE parts.
- 144 replies
-
- 2
-
-
- HMS Speedy
- Vanguard Models
- (and 1 more)
-
I fit the planked deck to the false deck. I only had to widen the slots at the transom to fit around the braces. I then used a stiff paint brush to brush wood glue onto the false deck, making sure to go all the way to the edges. I used clamps on the bulwarks to hold down the outside edges of the deck and weights to hold down the inner part of the deck. The slots at the transom were tight enough to hold that section down. I'll see tomorrow how this worked out.
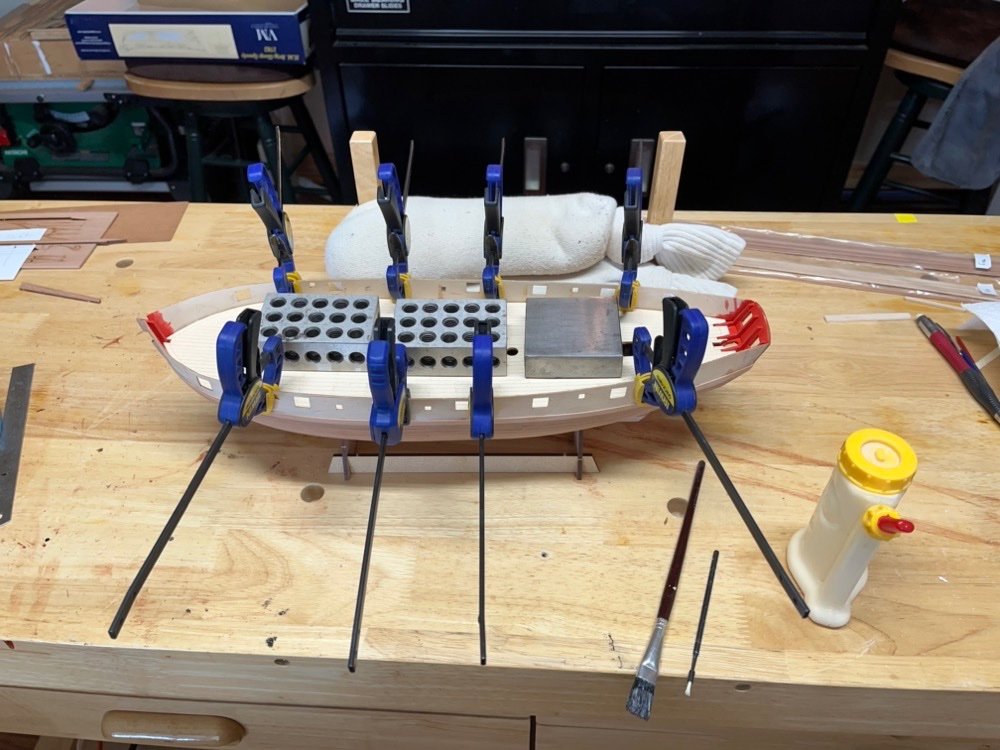
- 144 replies
-
- 6
-
-
- HMS Speedy
- Vanguard Models
- (and 1 more)
-
I also use Birchwood Casey for blackening brass. I do use Sparex if I have solder joints to blacken, but for these I have been just soaking in Acetone for 10 minutes, rinsing in water, then 3-4 minutes in diluted blackening solution, then another rinse in water.