


fnkershner
-
Posts
1,595 -
Joined
-
Last visited
Content Type
Profiles
Forums
Gallery
Events
Posts posted by fnkershner
-
-
Jim may get tired of my saying this but he deserves the credit. I have a bit of a unique story regarding his service. I currently own the Sander and the Table saw. and like everyone else I can say I haven't owned a finer power tool.
One Christmas recently a family member tried to give me a very thoughtful present. A feather board for my Table saw. Unfortunately they bought the feather boards for the Micromark saw and Jim does not offer feather boards. When I explained the situation to him he told me to ship all the pieces to him. He took the Micromark pieces and adapted them to his saw. I now have the only custom made feather boards for a Jim saw made by Jim!

-
BE - That is the best finish I have seen! That far exceed my experience. wow. I will take some pics tomorrow and post them.
-
Doris - I have been a fan for a long time. When you first started to post your models and talked about them being out of paper. I had never heard of paper models. I have since come to understand what a wonderful hobby it is and that you are one of the finest at that craft. Today I finally got my wife to sit thru this whole build log. She also finds your work unbelieveable. She has asked me to tell you that you are a real artist. I look forward to seeing the RC fully rigged. Thank you for sharing with us.
-
Mark - I am sorry to tell you this but you better hurry up. Windows "Blue" is coming in 6 to 9 months. Win8 will be old by Xmas.
-
I would like to start a discussion on Blacken-IT or similar products. It has been about 3 yrs since I purchased some of this from a model railroad hobby shop. I have had mixed results.
So here is what I know -
1. You must clean the surface thoruoghly. Preferably with acetone or a similar product.
2. You must take care not to get oils from your skin on the surface you wish to treat.
3. The Backen-it should be deluted with water. I have heard several different answers to the proportions. Most often I have heard 1:1 or 2:1 Water to Blacken-IT
4. The item being treated needs to sit in the bath for a period of time. Again I have heard many answers to this. From 10 min to overnight.
5. Once treated the item needs to be rinsed to stop the reaction.
6. Dry it completely to keep from developing water spots etc.
So lets hear your experience and comments. Do you have a different process? Or do you use a different product?
How long to you leave the item in the bath? What is your preferred concentration? How do you clean it before and after treatment?
-
Mark - Since I work at Microsoft and I am responsible for much of the testing of certain Microsoft products, I am also using Win 7 & IE 9. So what did you do? This morning I pull up the pictures and there is no cropping. Are you trying make me look bad?

PS soon I will be going to Win 8 & IE 10. Wish me luck! One of the reasons I play with sticks & string is as a counterpoint to Computers.
Also Harvey - Do you want me to be authentic?!! I agree just cutting it out with the saw would be easier. But we have to try everything once.
-
Good Idea Desert Sailor. I will remember that next time. It was very frustrating. Thank goodness I had 3 planks. the 3rd was used for the Taffrail which gave me some extra. So do you have a suggestion on how to get the bow end of the cap rail to line up? On this build it is not bad but I wanted it better. Also frustrating is the fact that none of these planks goes the full length of the model. Good thing the Cap rail at the stern will be under the Davits for the ship's boat.
As to the cropping. it appears that the cropping only occurs on the thumbnails not the actual picture. If you click on one of my pictures you will see the whole thing.
-
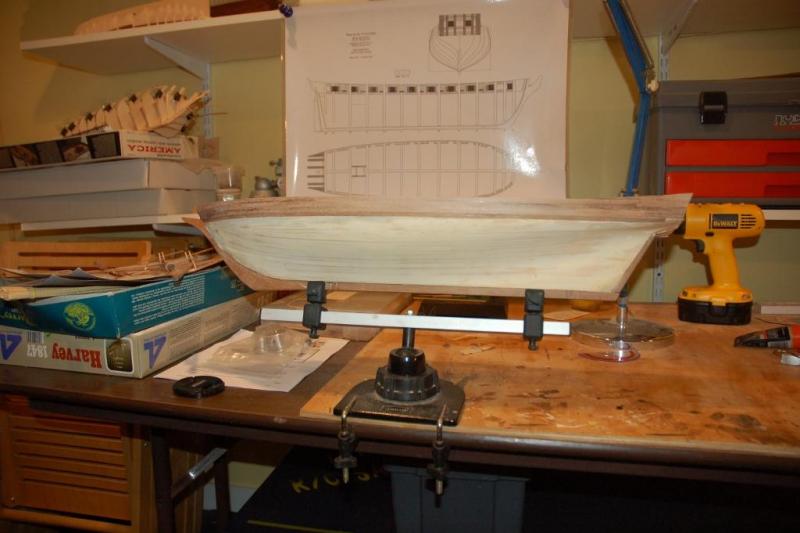
PS after much experimentation I have determined that the forum crops my photos. For example the 2 pictures above have the bow cut off. The vertical picture is not cropped.
Also you will note in the background Chuck's book on the Syren. Chuck I would have paid full price just to have that book. I find it very useful and full of ideas. I think I will adapt your design of the binnacle for this model.
Also I want to take this opportunity to thank Hank. I ordered the crew for this build from Modelshipyard and also ordered a Windlass. They are on their way by slow boat across the pond.
-
Ok here is a bit of mid-week progress. But first disaster! I soaked the walnut cap rails over night. I also had the false deck from another kit that I clamped the rails too. So after 1 night of soaking and 1 night of clamping the first picture is the result. So I started over with a new strip. Soaked over night and clamped over night, then I glued and clamped to the Hull. Lastly I let that sit over night and this morning I removed the clamps. Here you see the results.
Finally its time to get back to the 2nd planking. I may just have all the deck furniture in the next month.


-
Sure for the right price you can have it!
-
Gil - I am glad to hear you will be here. You may want to play with the rope walk. Sadly there will be one more meeting in the Workshop. We will have to talk about where to hold our meetings in the future. If I have my way it will be on the deck of my new home or inside somewhere. I am working on the admiral to relax a bit. She is still against the idea of sawdust inside the house.
-
So Jim where's your update? Come on now no hiding. No dithering either. It's long past time for some progress!

-
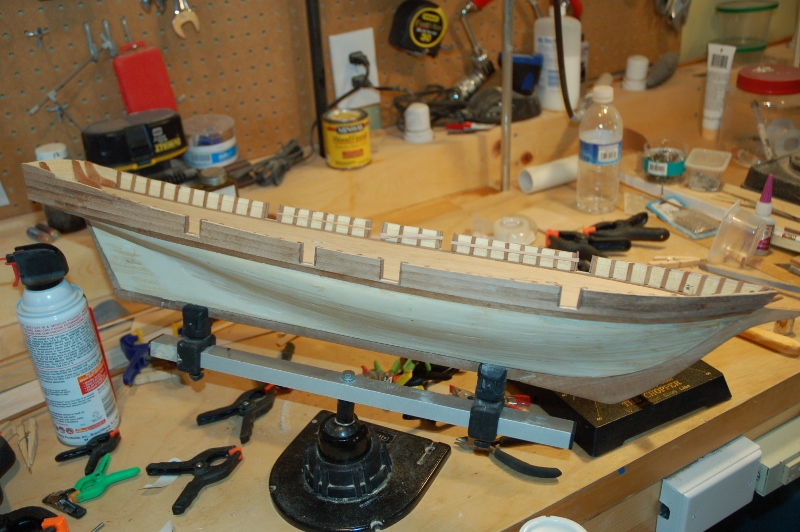
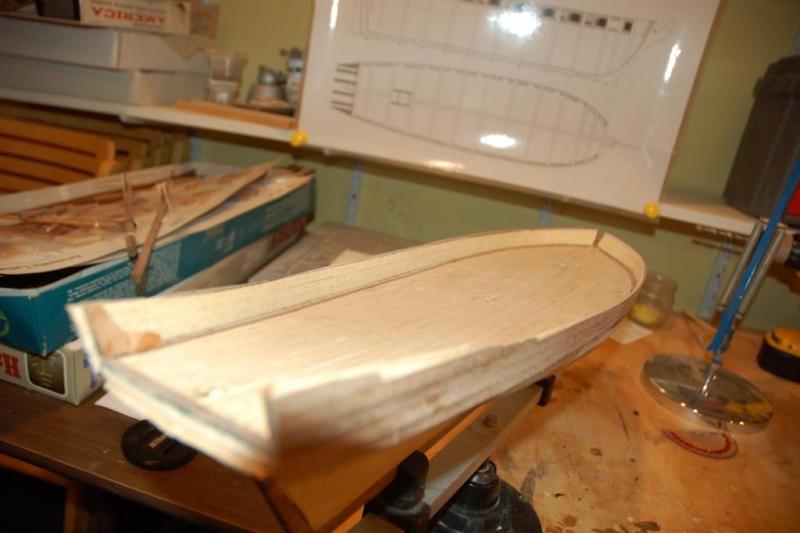
Ok Another week has gone by and another wonderful weekend spent in the Boat shed. Let me post this week's progress. As mentioned before I was concerned about the flimsy nature of the balsa Bulwarks so I planked them inside and out. I then moved on to preparing for the 2nd layer of planking. This is when I found that I didn't have enough wood strips. I put out a note to my friends in the local club and I believe I may have my strips at next week's club meeting.
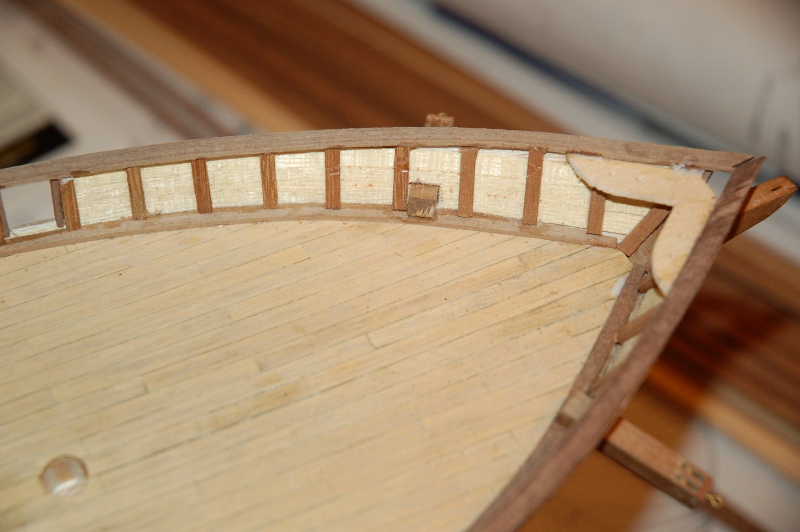
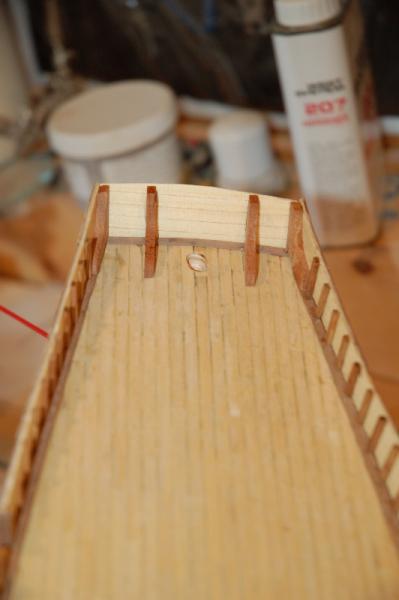
But not wanting a weekend to be wasted. I decided to cut out the cannon ports and install the Bulwark Stantions. I also planked the inside of the transom and installed it Along with the stern knees. Well while cutting out the cannon ports I found that the Bulwarks are only held in place by the slimest of Balsa. Not good! So I had to install the Stantions, the Breast plate, & the cap rail. All of this added strength to the Bulwarks. Currently the caprail is drying after being soaked and shaped. I also lined the gun ports with walnut. I hope to install it tonight. in the last picture you will also see I have started to cut the hole for the Catheads just for fun.
Hopefully next weekend will be when I get to the 2nd layer of planking!

-
Bob - I agree with Alphons. I dont use CA unless I have to, but here it makes sense. It will add enough strength that you can redrill.
-
Wow! How many Clove Hitches is that? Very nice. You should be proud.
-
Mark, I am disappointed in you! Isn't this a ship forum? and what we are talking about here?

-
All I can say is you guys are a riot! Is this a ship modeling forum or what? And now I have contributed to the spam in this thread.
-
My Wife jumps for joy now when a MicoMark or Rockler catalog arrives. Because I have announced that she can throw them away. "I already own everything in that catalog I could use."
-
I think I build boats just so I can buy tools.

-
Randy - I stand my PVC on end and cap only 1 end. Thsi way I know when the wood is completely soaked. It doesn't float! Also ti doesn't take as much room. I use zip ties to attach it to the leg of my bench. It is handy so I can reach in pull out a strip and install it.
-
I beleive yours was the 3rd version of this kit. I have both of the first 2 versions. In both of my versions there is no provision for scuppers.
-
Harvey, you need a seperate log on the assembly of that ships wheel. What you showed me was astounding. It is also a great practicum on how to do it if you have a Lathe. For everyone else's benefit. The Ships wheel on this model was made all from 1 solid piece of wood. Except for the spokes. I will let Harvey explaind and post the pics. It is a wonderful job.
-
Rats, I can see I need to work on my photography. The Flash washes everything out.
-
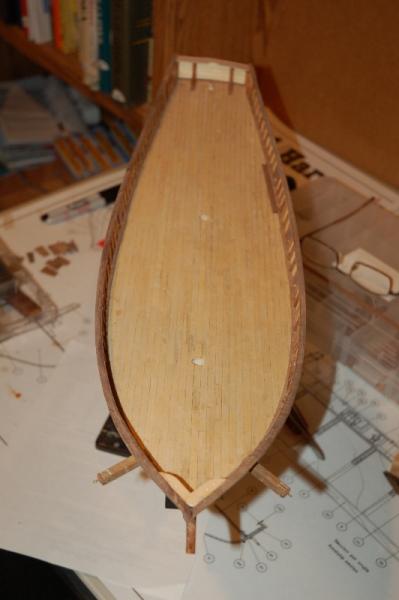
Ok, its time to post this weekend's progress. (admiral wants to go to a concert so there will not be much progress today.) I mentioned before the bulwarks are made of 4 pieces of thin plywood and are likely to delaminate if soaked in water. Also I could just see the issues of having to line up 2 different pieces at midships. So I created 1 full length piece out of 1/32" Balsa. Now I know that the next step should have been to begin the 2nd layer of planking. But as I started to line off the bulkheads. I became very concerned with how fragile those Bulwarks were. So I decided to reverse things a bit and plank the bulwarks.
The plans call for planking the bluwarks inside and out with the same strips as the 2nd layer of the hull. This is when I ran into a major problem. There was not enough wood! I counted out the strips and there was only enough to plank the hull below the deckline and no extra! God bless my Jim Saw. I found a piece of Walnut that was close to the same color etc. and I made myself enough planks to plank the bulwarks. I used the micrometer attachment to get the strips down to .75 mm. It worked beautifully. This was the first time I had used my slitting blade.
I also had long ago decided this model would not have any paint. it was going to have all of its color from the wood used to build it. So I decided to plank the inside of the Bulwarks with a lighter wood and a different color from the deck. I used some leftover deck planking from another kit.
You will also see that I took the opportunity to install the knees for the Transom. I am planking that now.
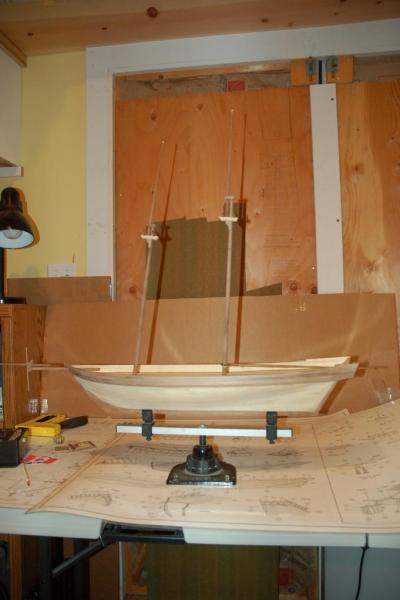
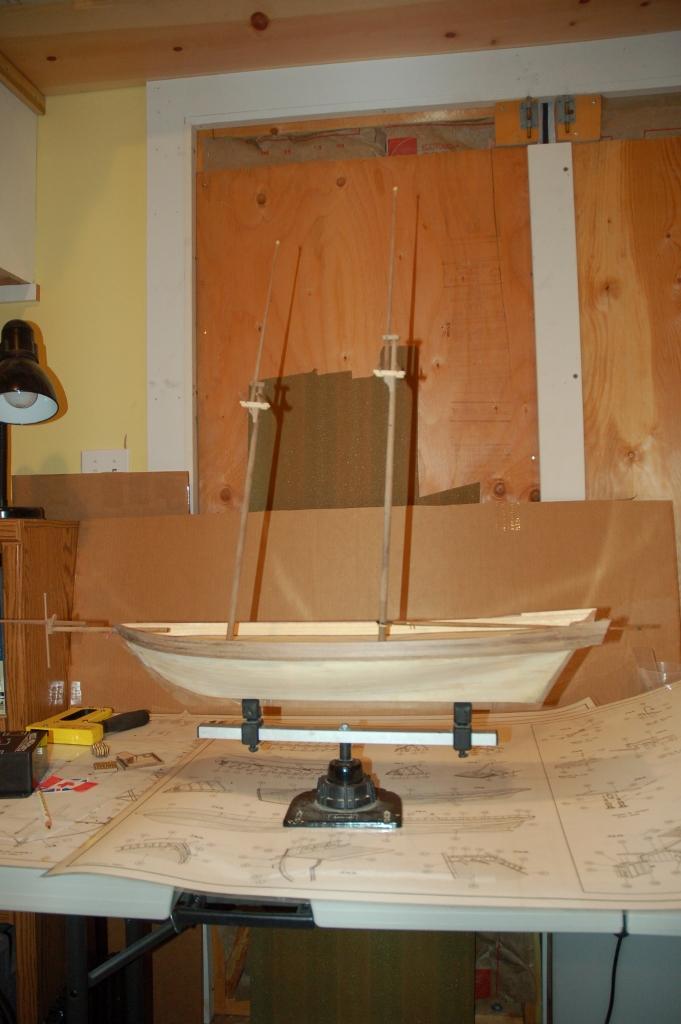
The last time I worked on this model many years ago. I wanted to try my hand at tapering the masts using the electric drill lathe. So my final picture shows her on the stand with the masts and bow sprit in place. This will also give the admiral an idea how much space she needs to find in the house.


Rigging Ratlines
in Masting, rigging and sails
Posted
I found that after 8 to 12 rows I needed a break. For me this is definitely not the funest part of the build. But when it is done you will marvel at what you have done. Also very few people will know that you even used a cow hitch or clove hitch.