fnkershner
-
Posts
1,595 -
Joined
-
Last visited
Content Type
Profiles
Forums
Gallery
Events
Everything posted by fnkershner
-
Ok after what appears to be a 2 month break with other distractions. I am back to this model! I have completed all the shrouds and laced the lanyards. I am now working to completed the Bowsprit. So by next week the only thing that will remain is the Sails to be bent on the boat. I do have a questions (if anyone is still following these builds) is there an easy way to determine .018 from .025 light brown line? I think I have used the wrong one is some places. And yes I need up to date photos. I will post this weekend.
-
Peter - Are you aware that F360 has a Slicing feature? It is a free addon that you can install. If you have a solid design, you can slice it into frames. You can specify the number of frames and the thickness of each frame. You can also specify the number of frames lengthwise and side to side. For our purposes this allows you to create the former and bulkheads of a ship's hull. The slicer function will even lay the parts out on a sheet for Laser cutting. If you specify the thickness of your material the parts will even have the slots defined to create your structure to be planked. I am currently working on a Scratch build of the original America. Your work above has been a huge help. I hope to start a build log soon and will share what I learn about F360 here. I have access to both a large format laser cutter & CNC router. My plan is to build a 1:24 scale model. I have purchased the plans from the Smithsonian. and scanned them and with some help built the hull model in F360. Now comes the testing, tweaking, etc. So that I can build a plank on bulkhead model.
-
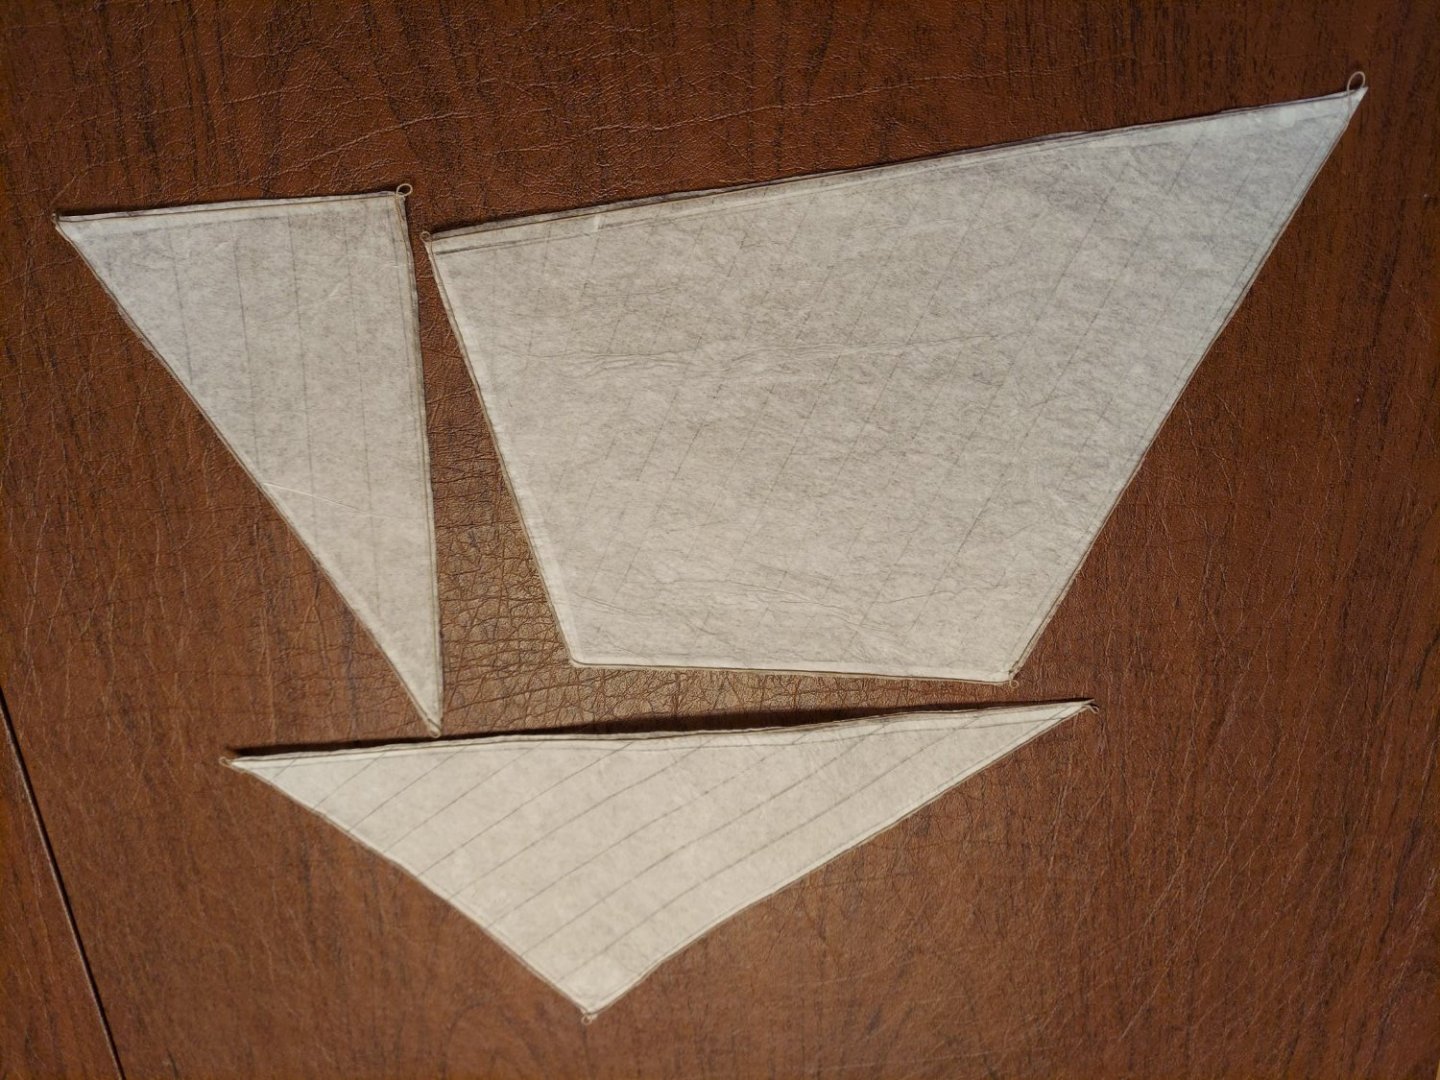
Finally, after much delay and learning. I have sails!!
-
Sorry I did overlook this response. Yes, this is the info I need. On the fore sails did you just add bolt rope to the luff & foot? And not the leach?
-
Tom - As mentioned elsewhere I was having lots of trouble with all of this. So, when a friend offered to help. I put it all aside until we could get together. Now that we have met, and he has shared his experience I have had a much better time creating the sails. Before I hang them on the model. I want to add the bolt rope as you did. My question to you is what size of rope did you use. I am working with Chuck's .018 and how did you attach it to the sail. I have tried several times to use the diluted glue I used for the layers of the sails. but it doesn't seem to stick. Also, I am quite impressed with the fact that you the bolt rope exactly on the edge. Can you share how you did that?
-
I have not decided whether I will go for bulkheads or frames. But I don't like the idea of all that chiseling. Like you I don't have the skills, but I have an ace up my sleeve. The CNC will cut or carve any wood that is 4 ft X 4 ft by 2 inches. And my CAD Software has a feature that it will create slices from a solid. I can specify how many slices and the thickness of each. From your feedback, I think the best path for me is to buy the plans and maybe the fittings. I will supply my own wood and do my own design. Thanks!
-
I am considering my next model. I have the plans for this Schooner from the Smithsonian. I also have access to a CNC router. I have already modeled her in CAD. I have been trying to decide between this kit and just doing it myself from scratch. Can you tell me what you like and what you don't like about this kit? Looks like you had a lot of extra work to do with the framing.
-
Thanks Chuck, I think I have finally figured out the weathering powders. I wanted it to be uneven etc. I like the result.
-
I am still struggling with Silkspan. I have a friend in our local club who says he has several great ideas and lots of experience. We are getting together on the 15th. So in the meantime, I decided to work on a different small project. Here is the result.

-
Any model completed is worth celebrating. It is my hope to have more completions than Viking burials before I die. Nice job!
- 32 replies
-
- 3
-

-
- Model Shipways
- Philadelphia
- (and 1 more)
-
Thanks to both of you. I am going to work on this with my mini kit for the stove. I am intrigued with these powders and want to develop a good technique. I also picked up some small sponges today. And yes I use a dull coat as the last coat.
-
For those of you who have used weathering powders. Please share your application methods. If you "paint" it on you get a consistant color across the surface. This is not what is desired. Especially for Rust. I want a random pattern. Inquiring minds want to know.
-
The key is that with Chuck's designs if you have a problem, you know it is your doing and not his. This is not the case with all kits. I would say you are a quick learner. My best building technique is sleep. When something doesn't go right, I sleep on it. It's amazing the work I do in my sleep. My biggest problem when I was at your stage was making sure I didn't drill too far into the plank. I was slow to learn that you didn't want any holes showing on the inside.
- 155 replies
-
- 1
-
-
- Medway Longboat
- Syren Ship Model Company
- (and 1 more)
-
I have gone over the instructions very carefully and I can only guess this piece is extra.
-
I now have 4 that are broken. so yes I am going to need another set. See below I do cut the tab but they are very fragile and tend to split.

- 1,784 replies
-
- 1
-
-
- winchelsea
- Syren Ship Model Company
- (and 1 more)
-
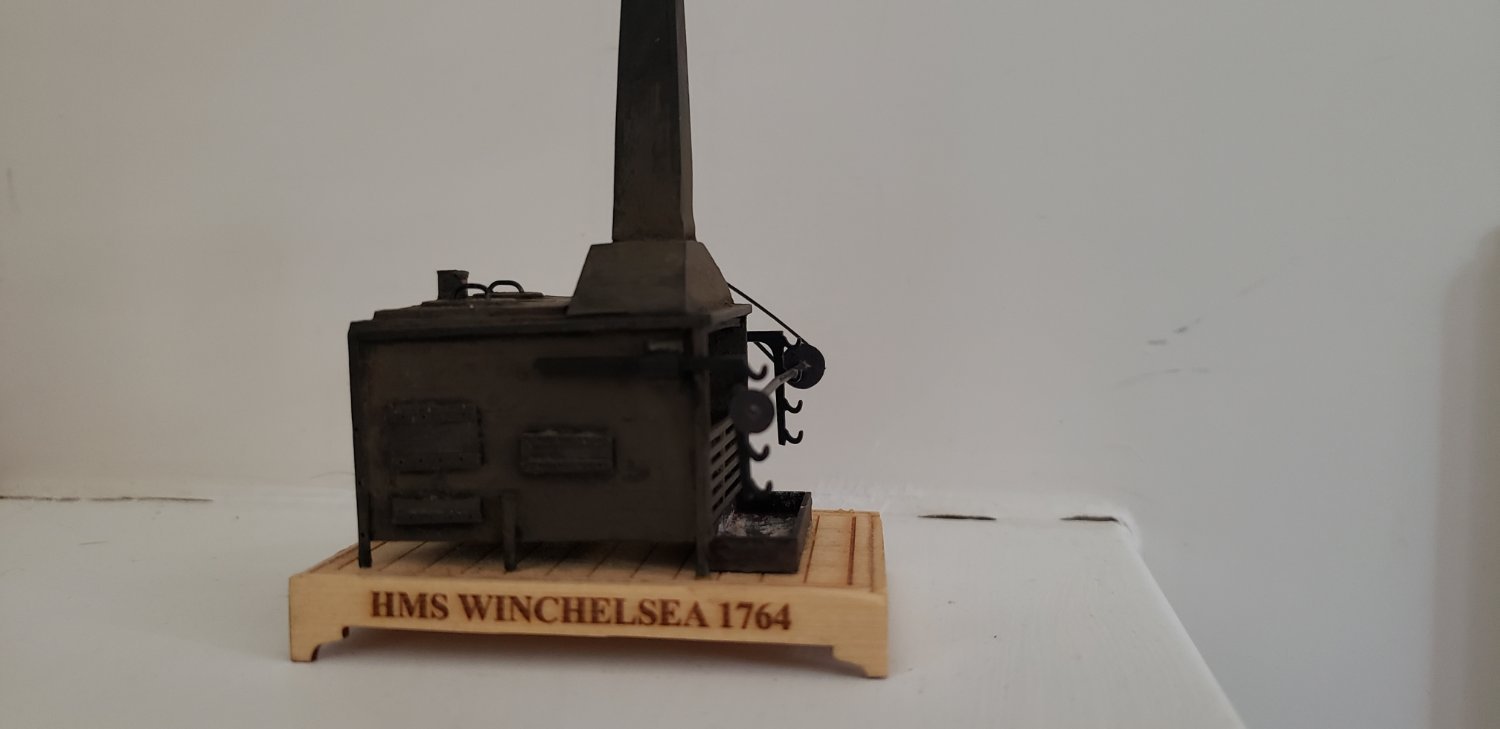
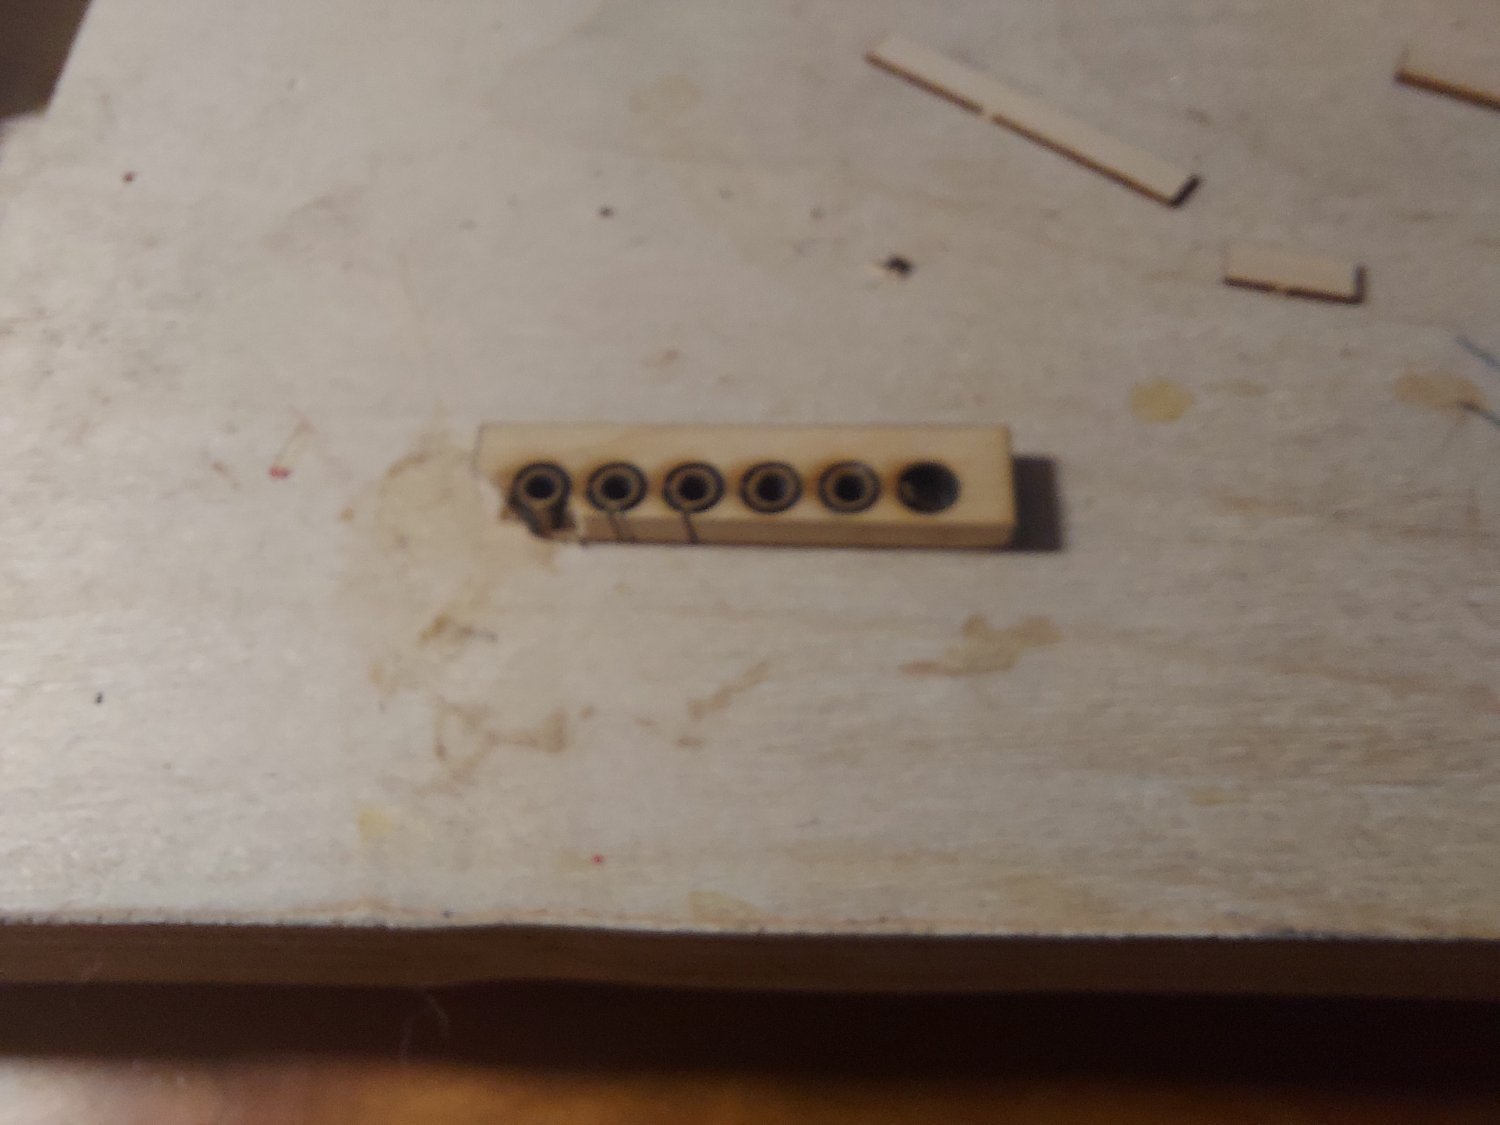
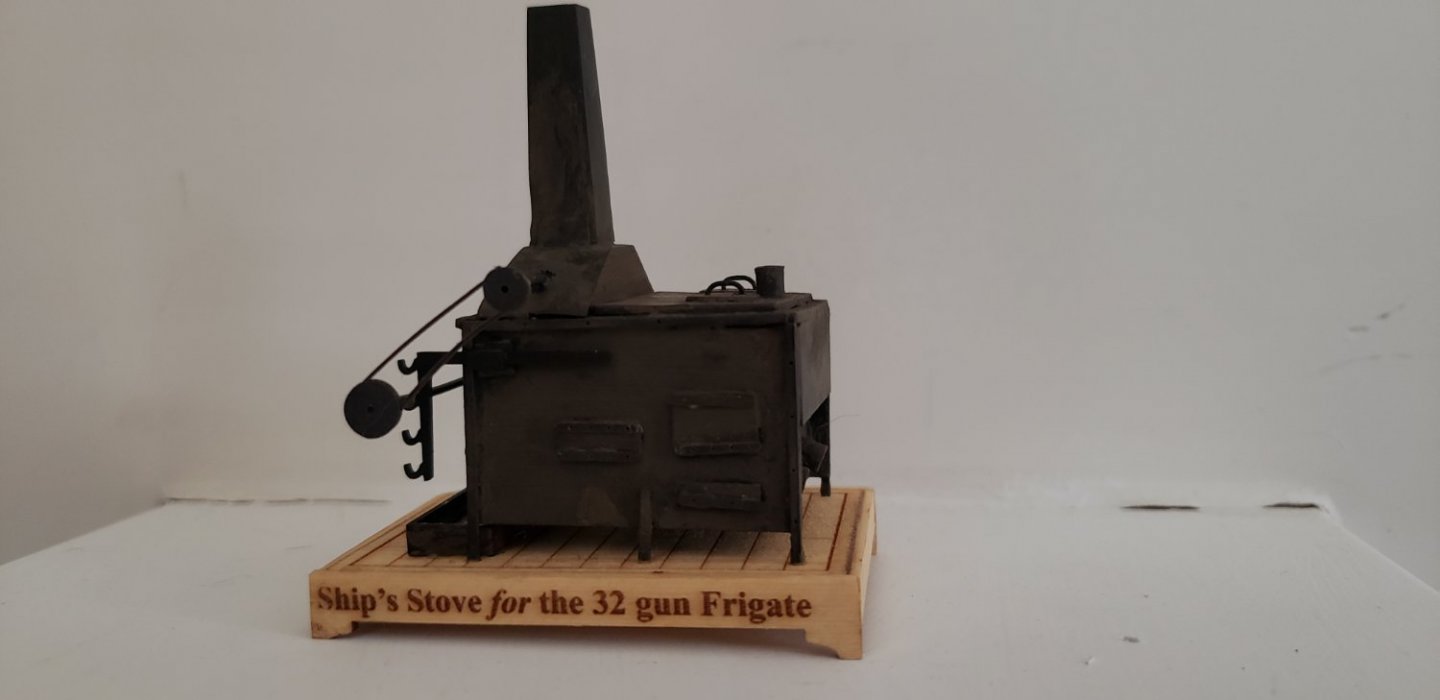
Chuck - I truely hope to begin working on my own Winnie. but for now I am focusing on some of the mini models. My current project is the Stove. Let me ask a question - How do you remove the round laser cut vents from the wooden sprue? I have broken 2 of them trying to push them out.
- 1,784 replies
-
- 1
-
-
- winchelsea
- Syren Ship Model Company
- (and 1 more)
-
Bob - I am not sure if I will actually build the Winnie. But I decided to build some of the mini kits. The Stove is particularly of interest to me. It is a fun project and something I can tackle in 2 or 3 days. I have been following your build of the Winnie and I wish I had your skills. On the stove I would like to ask a question - On the laser cut stencil for the grating there is a square piece the same size as the grating. I have looked everywhere. Can you tell me where to install it. I am sure I have overlooked something but I am stumped.
-
On my first try I did try to smooth out the wrinkles with my fingers and ended up with holes in the fabric. But I will try what you suggest again tomorrow.
-
Thanks Tom. you aren't kidding when you say delicate. Okay so more to learn. I also notice you have small loops in each corner of your bolt rope. This picture is helpful.
-
If there is anyone who has experience with Silkspan I am all ears! So let me bring you up to date on my progress. I have the shrouds installed and the bottom deadeyes. I have also installed all the stropped blocks for the backstays and the in the bow. I have served the shrouds & backstays. I held off completing the shrouds & backstays so that it would be easier to install the furled main sail. So, this is where I am stuck. I am finding silkspan challenging to work with. Since I have no experience with silkspan I took a sample and tried to glue a strip of silkspan to that scrap. This worked ok but it also stuck to the glass. I also found that it was very difficult to handle. The silkspan is very fragile. And if you let the glue dry it sticks to the glass. I then tried a layer of wax paper between the silkspan & the glass. When I tried to peel the wax paper away it tore holes in the Silkspan. Please Please some deliver me from this hell.
-
Tom, I hope you are well. It has been several weeks since we last heard from you. I sat down today to begin gluing Layers of Silkspan. I began with a test on some scrap. First, I am very surprised at how fragile the material is when wet. And the multiple wrinkles. Do you have any advice on how to glue the layers?