*Hans*
-
Posts
465 -
Joined
-
Last visited
Content Type
Profiles
Forums
Gallery
Events
Everything posted by *Hans*
-
 I can imagine this churrasco is pretty spicy (at least it sounds so). Or isn't Brazilian food that spicy?
 -
Batavia by *Hans* - FINISHED
*Hans* replied to *Hans*'s topic in - Build logs for subjects built 1501 - 1750
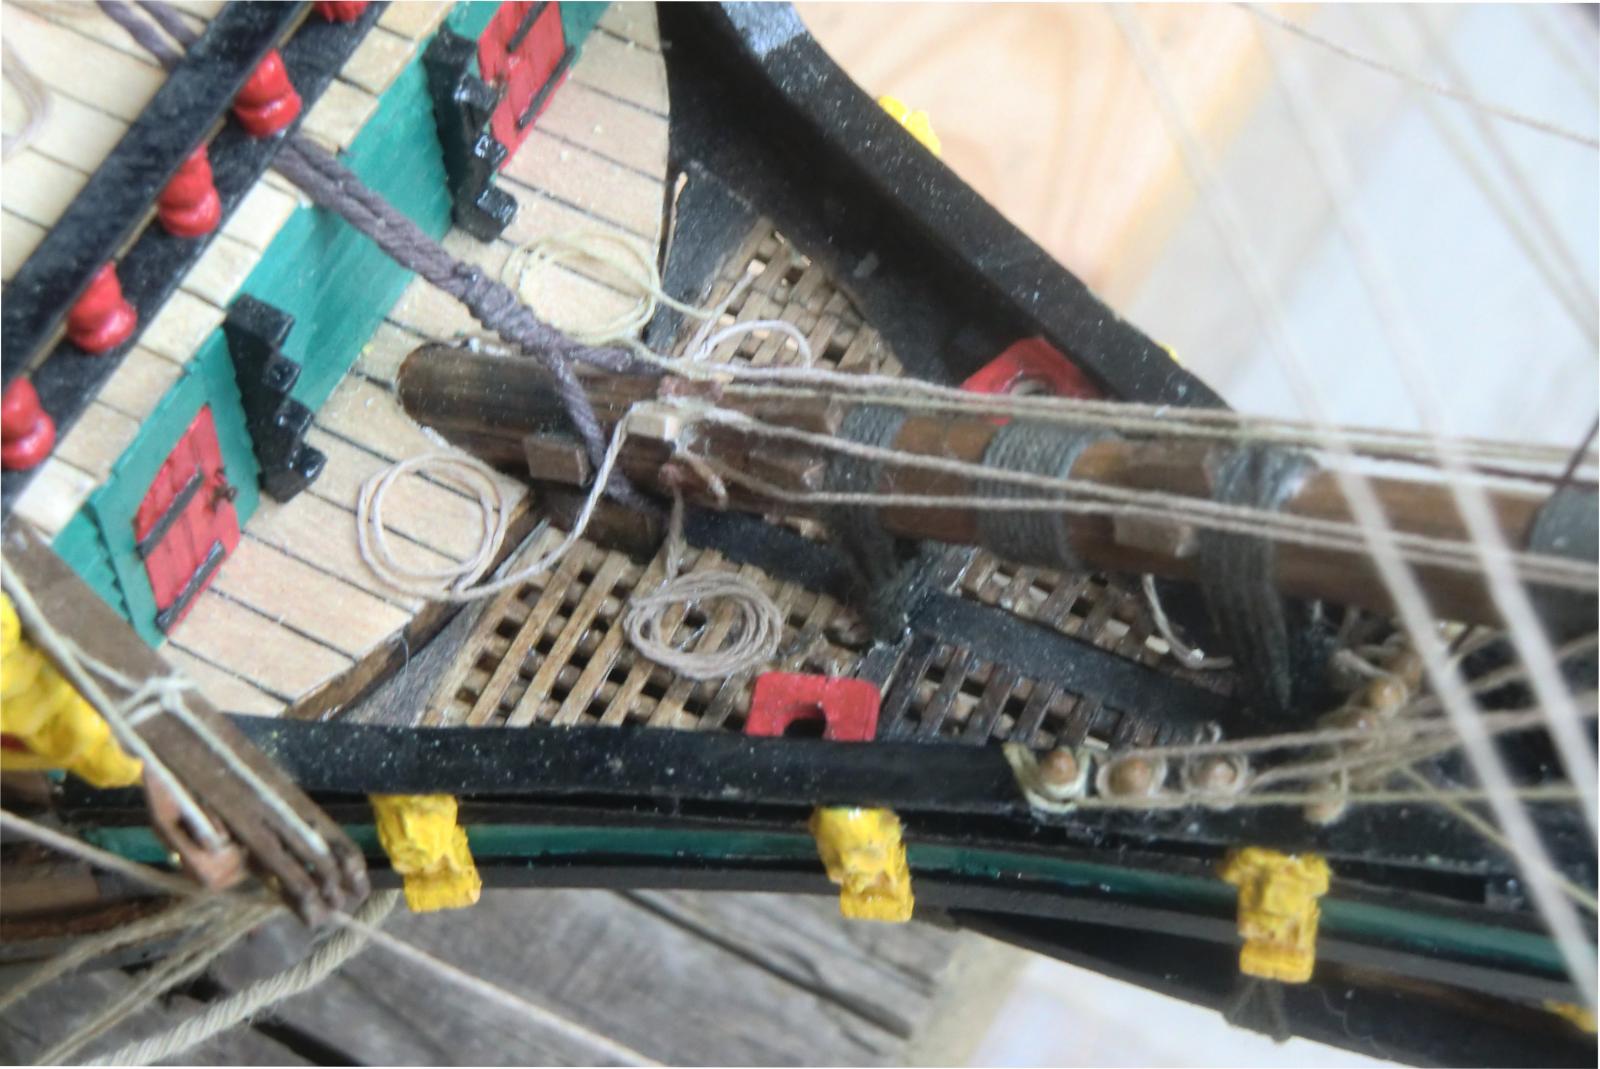
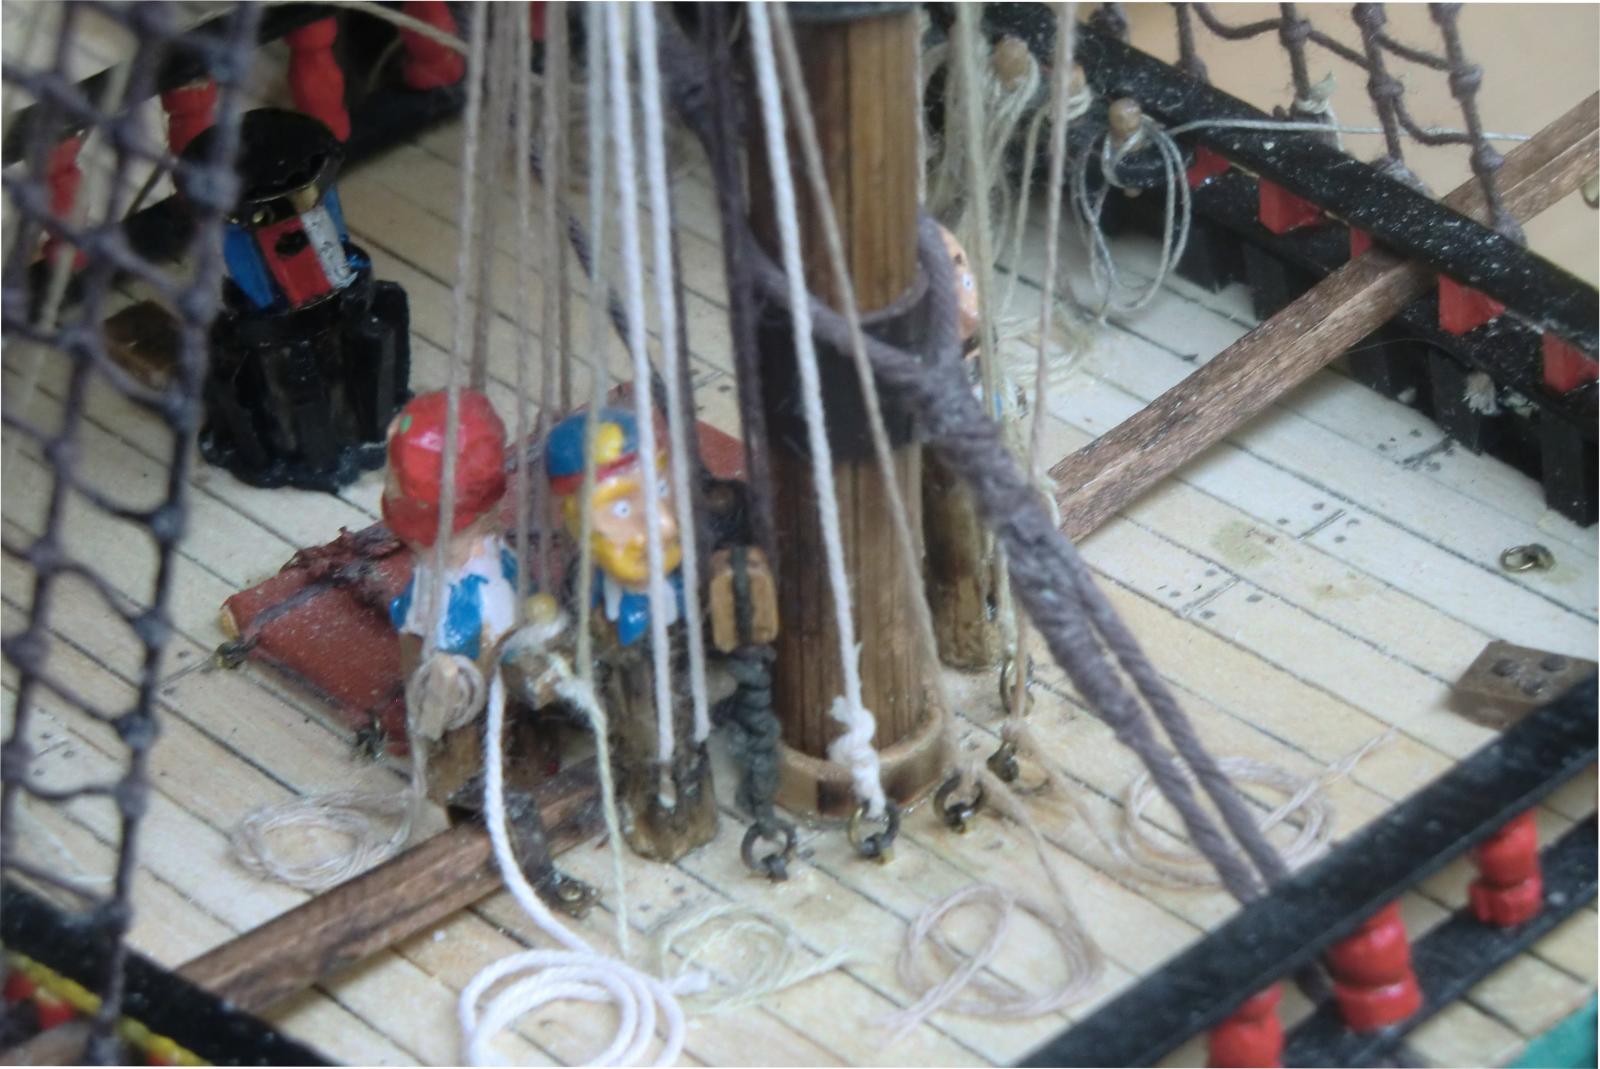
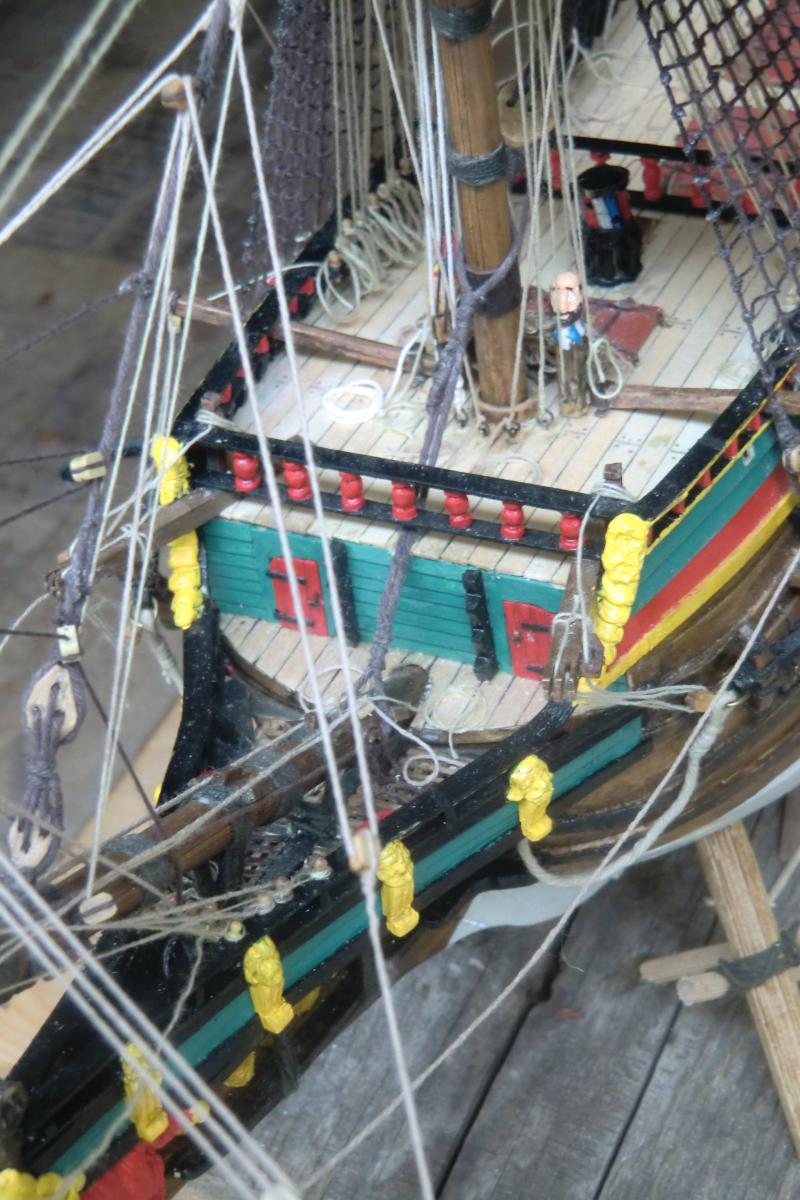
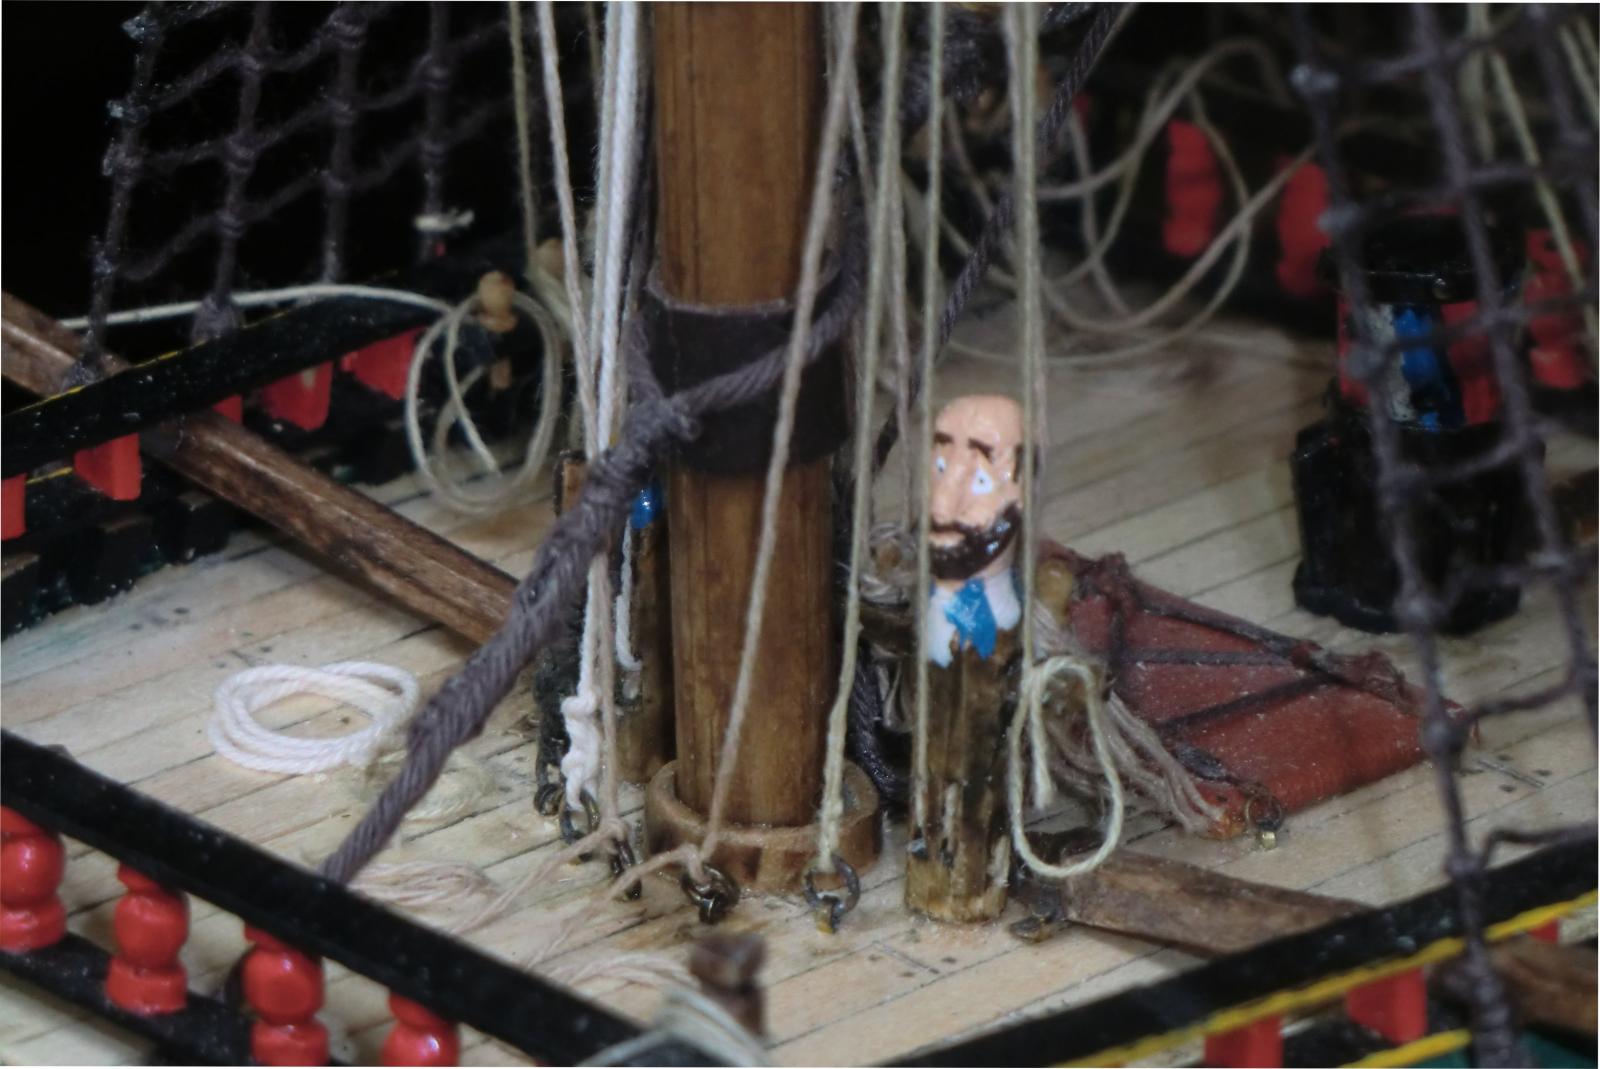
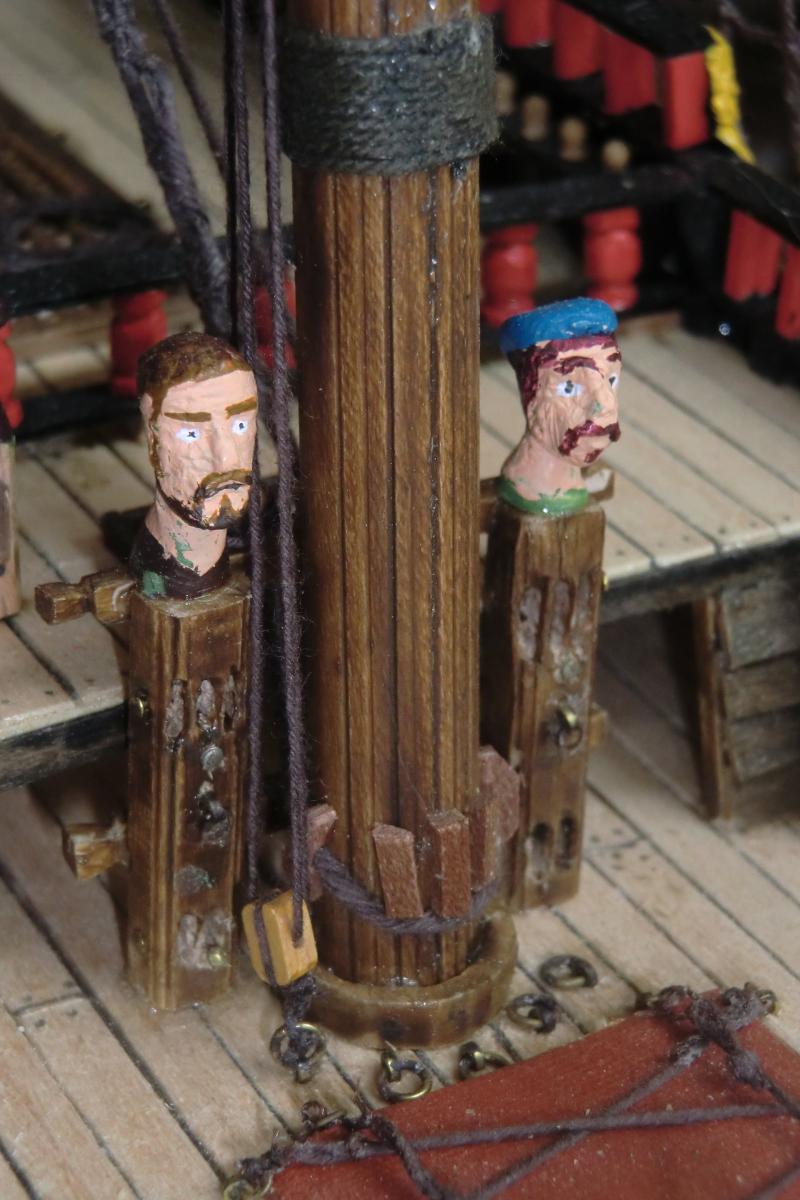
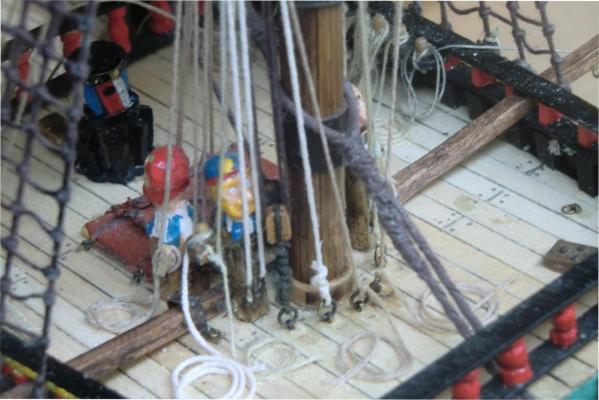
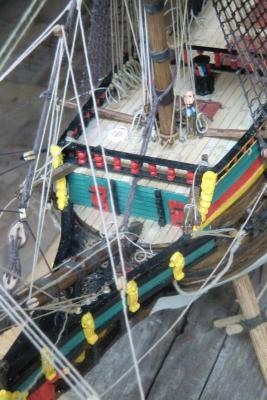
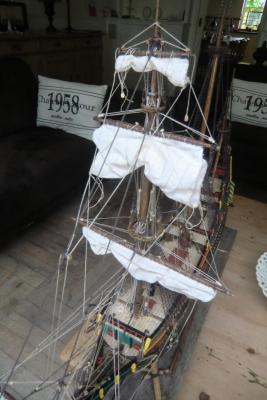
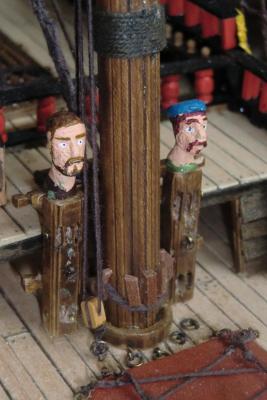
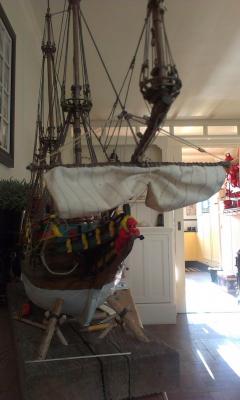
The foremast and its sails are almost ready - time to post some more detailed images. These images however do also show the limitations I have as a shipbuilder - sorry for that! Bow including lion - belaying points and pooboxes Same - from another point of view Base of the foremast with its rigging. Bow plus foremast Foremast - other side Foremast with sails Mainmast - no rigging yet. The left guy is my son Overview from the back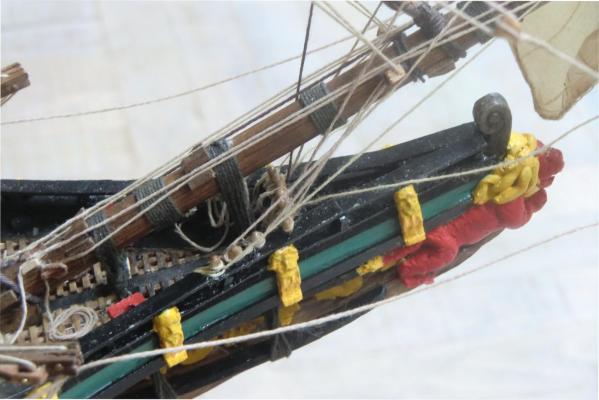


- 238 replies
-
- 11
-

-
Well - about 6 feet?? 1 meter 80 at a max?
-
Batavia by *Hans* - FINISHED
*Hans* replied to *Hans*'s topic in - Build logs for subjects built 1501 - 1750
Sjors, thank you! As said - I received the plans for this small yacht via Janos, and he did sent me a lot of pics from Australia too. Like! -
Vivian, Very nice build and not a common ship! And the info you are giving is quite nice. It is also rather difficult to find the right information on how a ship looked or for what purposes it was build, but you did a great job on this!
-
Batavia by *Hans* - FINISHED
*Hans* replied to *Hans*'s topic in - Build logs for subjects built 1501 - 1750
Thank you, thank you! The 17th century ships where very rich decorated, and this was rather a challenge for me too. Thanks to the modelling clay I could make some nice "carvings"which would otherwise have been a (maybe to) difficult part for me. The ship is almost finished - two masts to go and some small stuff around her. Then a nice standard and in the end the flags to decorate her. I will try to post a few more detailled pictures within the next time. -
Batavia by *Hans* - FINISHED
*Hans* replied to *Hans*'s topic in - Build logs for subjects built 1501 - 1750
I have a book about the Batavia voyage written by Mike Dash. It's to my opinion a quite "romantic" version of the journey and its horrors. -
Batavia by *Hans* - FINISHED
*Hans* replied to *Hans*'s topic in - Build logs for subjects built 1501 - 1750
Hello you Royal Highness Bindy! :im Not Worthy: (or should we call you Cleopatra?) Thank you for your kind words! It's been a pleasure that you could find some time to visit my humble shipyard here in the Netherlands, thank you, thank you! (Now I have to stand up again because this hurts my back and my knees). As you may have read the replica of the Batavia which is in Lelystad was made as a project for unemployed to see if they could bring back alive the craftmanship of the Dutch of the 17th century. I am trying to make the scalemodel as close as possible to this replica - which is not always possible. In fact she is a "normal" 17th century retourschip (which ment sailing to and from the Netherlands - Indonesian Archipel) and was named Batavia because of the horrorstory that happened after the shipwrecking of the original Batavia. My model is almost finished, and I have some plans in mind to build two other 17th century ships: The Duyfken - afgter the replica in Australia (with thanks to Janos for the plans) and the "Dordrecht" which was the sistership of the Batavia. I do live in Dordrecht in NL - therefore -
Batavia by *Hans* - FINISHED
*Hans* replied to *Hans*'s topic in - Build logs for subjects built 1501 - 1750
Never knew that -
Batavia by *Hans* - FINISHED
*Hans* replied to *Hans*'s topic in - Build logs for subjects built 1501 - 1750
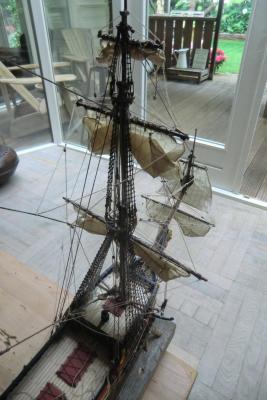
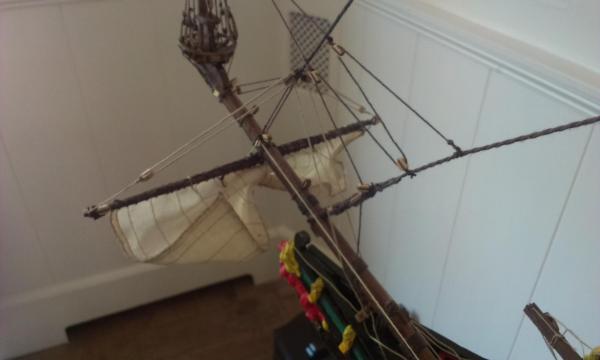
Update! Two sails of the foremast are in place. I want to make her look like she's just about to anchor. This means the sails are not complete up (or down?), but halfway. The rigging and the decks are better visible in this way.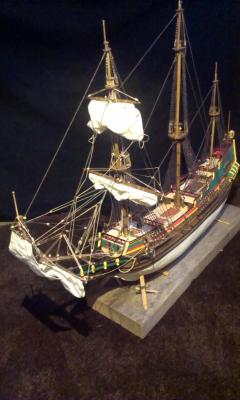
-
Batavia by *Hans* - FINISHED
*Hans* replied to *Hans*'s topic in - Build logs for subjects built 1501 - 1750
Thanks guys! Marc, I've send you a PM on this. -
Batavia by *Hans* - FINISHED
*Hans* replied to *Hans*'s topic in - Build logs for subjects built 1501 - 1750
Man surely learns some new English words. I have fitted the first yard on the foremast, and had to make a parral for this. I therefore have bought me some 3 mm black beads - carved some small ribs and rigged the whole thing together around the mast. Mind you, I didn't make the parral first - I started with a line around the yard - then through beats and upper holes of the ribs around the mast - then around the yard and back through beads and ribs - lower holes. Again around the mast - around the yard - through a ring in the yard and back through the parral, adding the last beads. Then through another ring on the yard towards a block, and then fitted on the deck. pretty job for your eyes Hopefully this image shows what I tried to describe: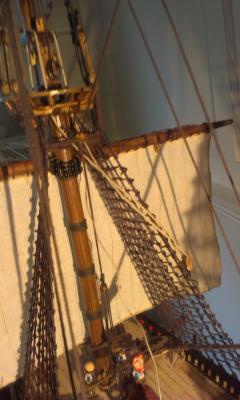
-
Batavia by *Hans* - FINISHED
*Hans* replied to *Hans*'s topic in - Build logs for subjects built 1501 - 1750
Nice picture Jan! And I was planning to make some extra pins the way it can be seen on this picture. -
Batavia by *Hans* - FINISHED
*Hans* replied to *Hans*'s topic in - Build logs for subjects built 1501 - 1750
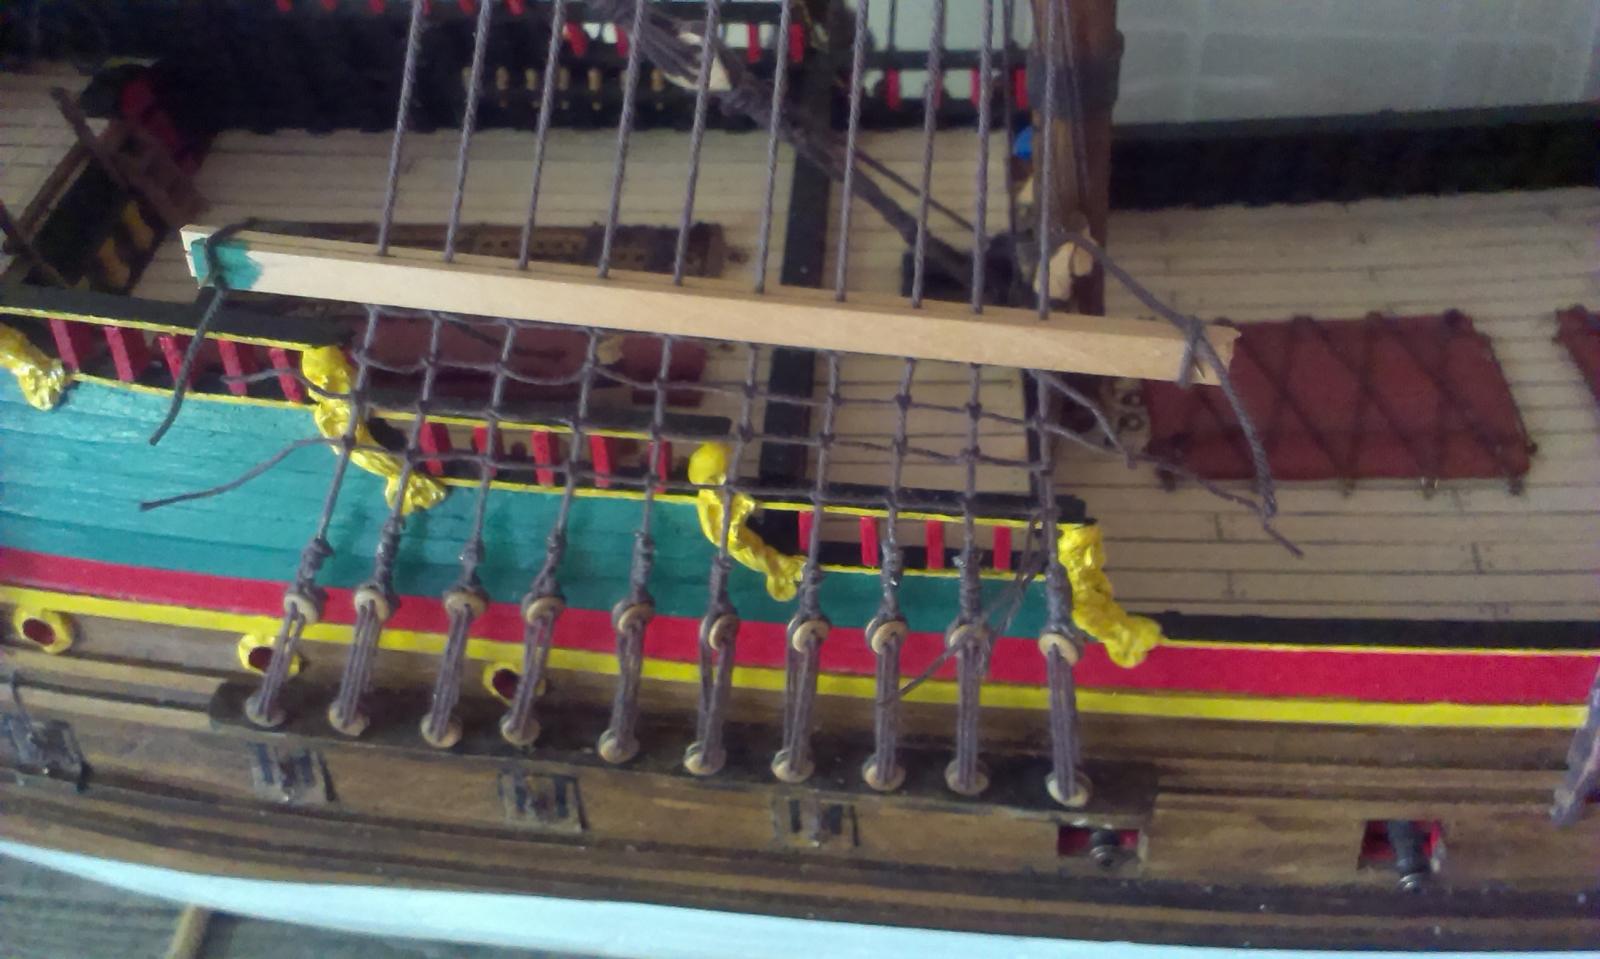
Jan, Yesterday I managed to find out how these lines are belayed, From the forestay they run back to a block on the bowsprit, and from there to the pins on the gallion. And so I did -
Batavia by *Hans* - FINISHED
*Hans* replied to *Hans*'s topic in - Build logs for subjects built 1501 - 1750
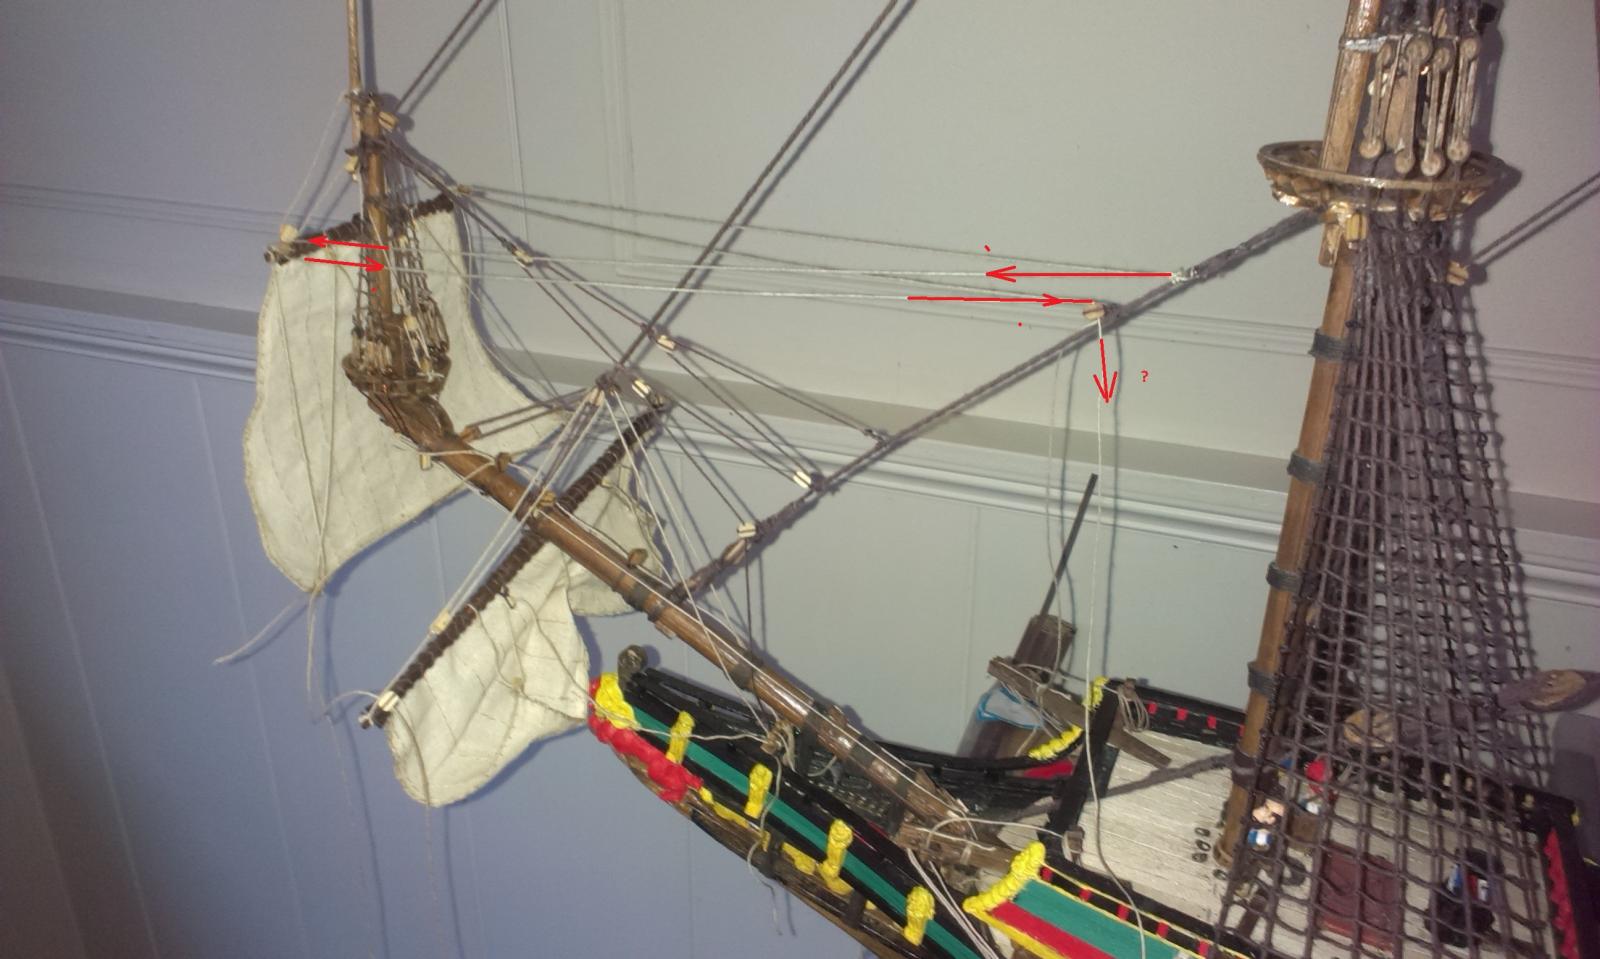
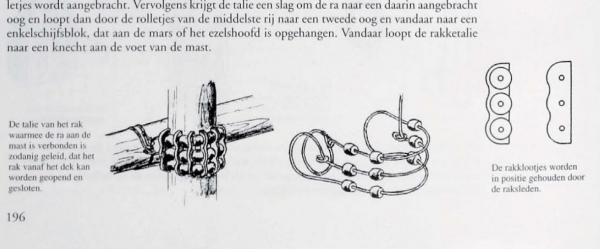
One step a time will build a ship in a year. Rigging of the spritsails slowly gets some shape - although I do have some difficulties in finding out where which line has to go. The plans of the Batavia aren't always very clear in this. But with the help of many books and other modellers pictures I will manage. F.i. the red marked lines in the image - I am puzzling how they go, and where they are belayed.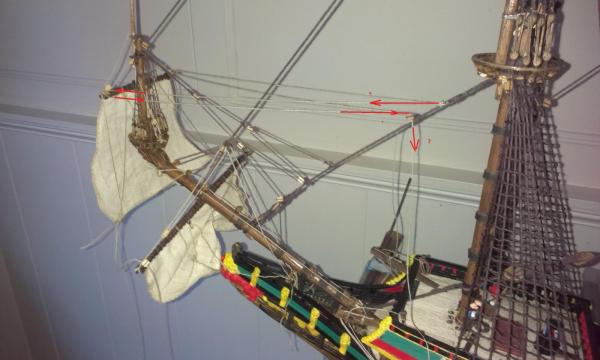
-
Batavia by *Hans* - FINISHED
*Hans* replied to *Hans*'s topic in - Build logs for subjects built 1501 - 1750
Sjors (and others), Busy on the sails now, yards etc. Still is some work, yes. Sails: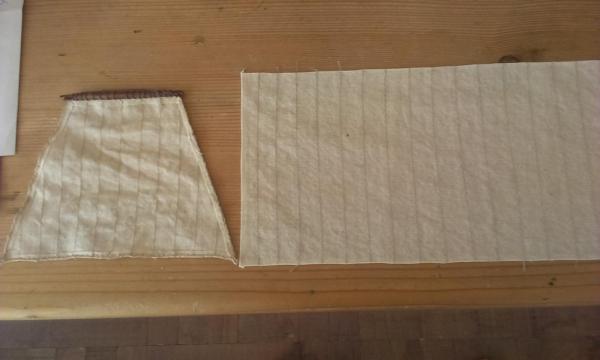
-
Batavia by *Hans* - FINISHED
*Hans* replied to *Hans*'s topic in - Build logs for subjects built 1501 - 1750
It has been quiet for a while on my Batavia-wharf - simply because I was busy with a rather dull job - the ratlines. This is finished now, so I can move on with the sails. Then some more small stuff to do, and the Batavia is almost finished.
-
Batavia by *Hans* - FINISHED
*Hans* replied to *Hans*'s topic in - Build logs for subjects built 1501 - 1750
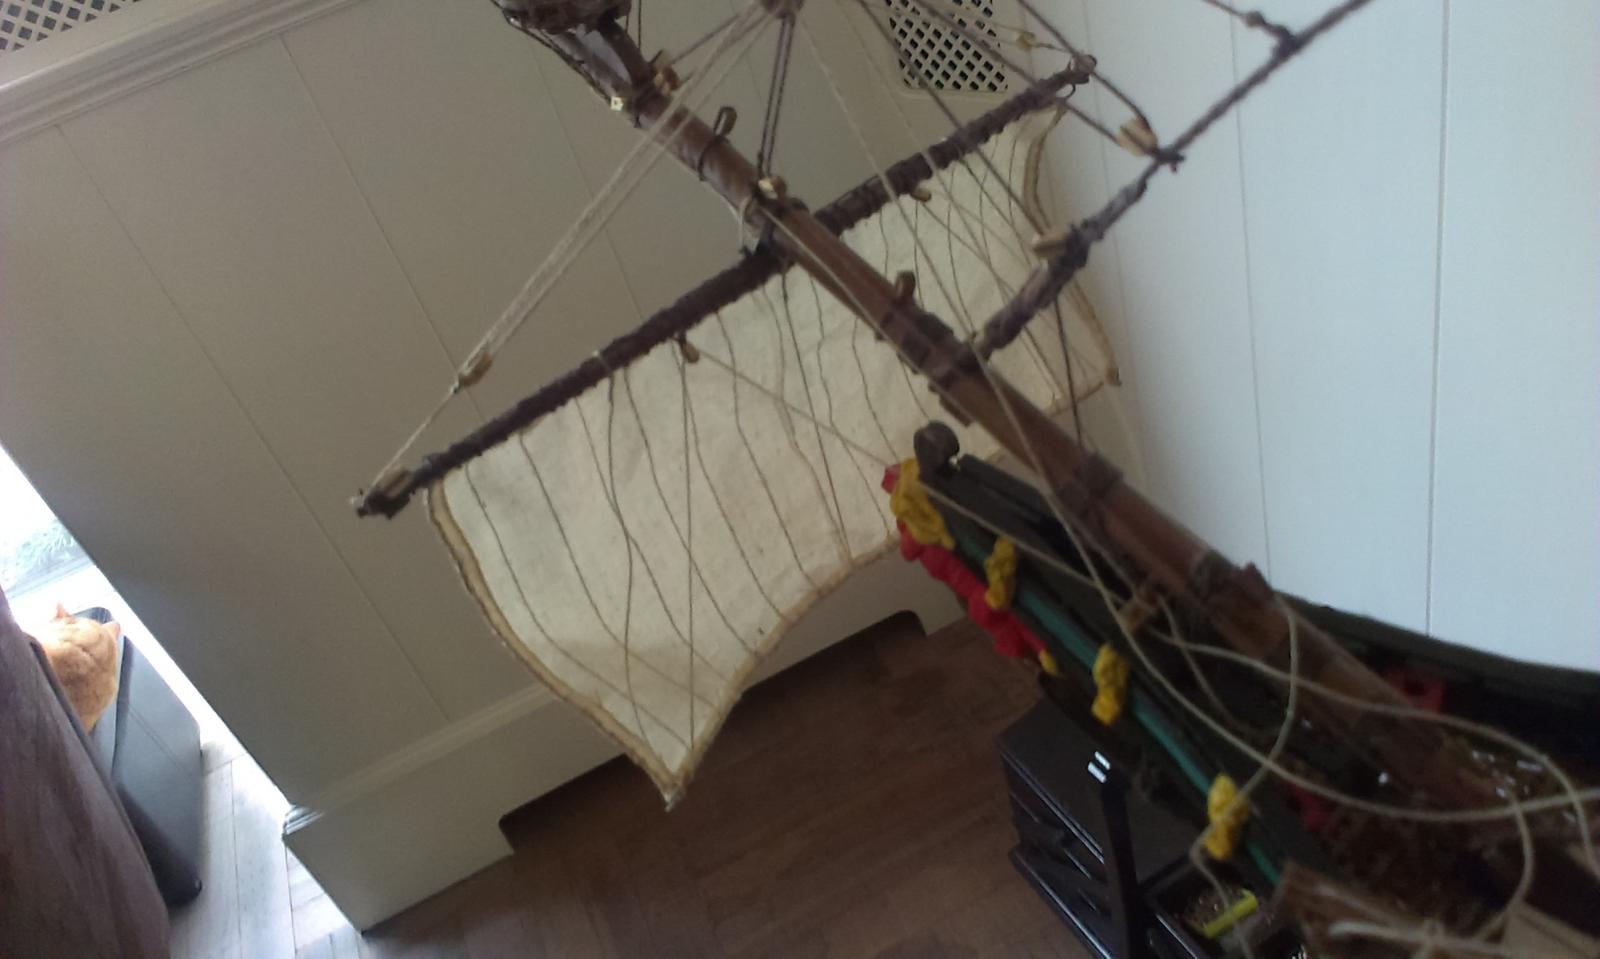
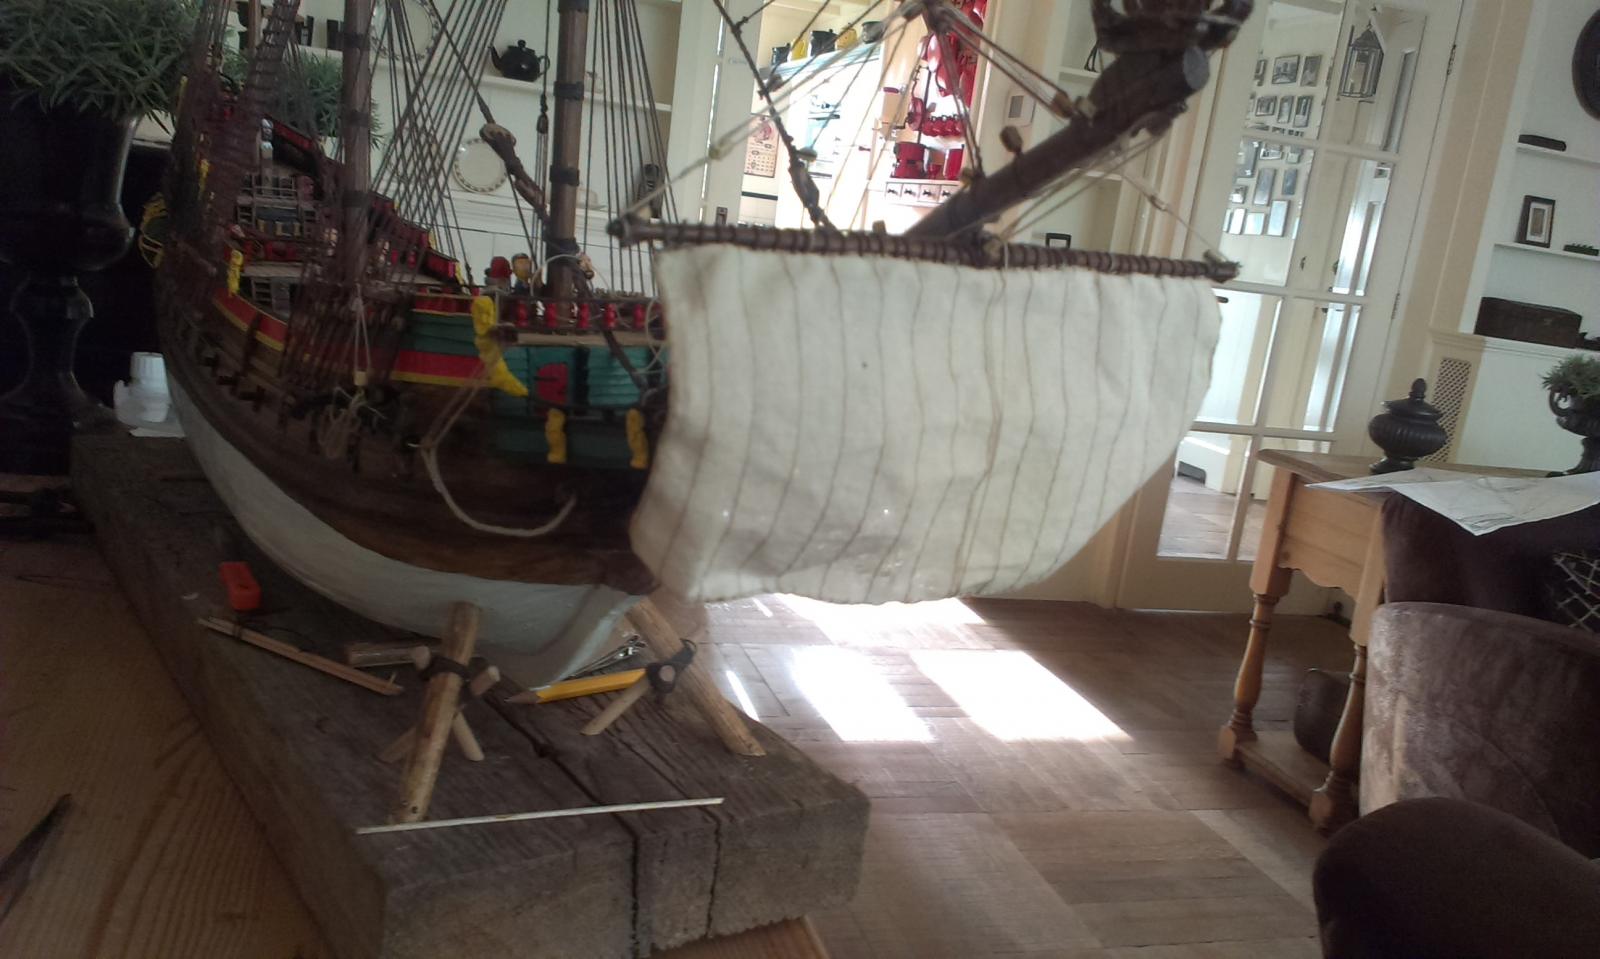
Before going on with the ratlines, my son (future owner of the ship) is not sure if he wants the sails fully out or lowered. So I mounted one of the sails and tried both: and lowered: Because of the fact the sails are done with diluted glue they are a bit too stiff for this...

-
Batavia by *Hans* - FINISHED
*Hans* replied to *Hans*'s topic in - Build logs for subjects built 1501 - 1750
Jan, No sails in the Corel kit? -
Batavia by *Hans* - FINISHED
*Hans* replied to *Hans*'s topic in - Build logs for subjects built 1501 - 1750
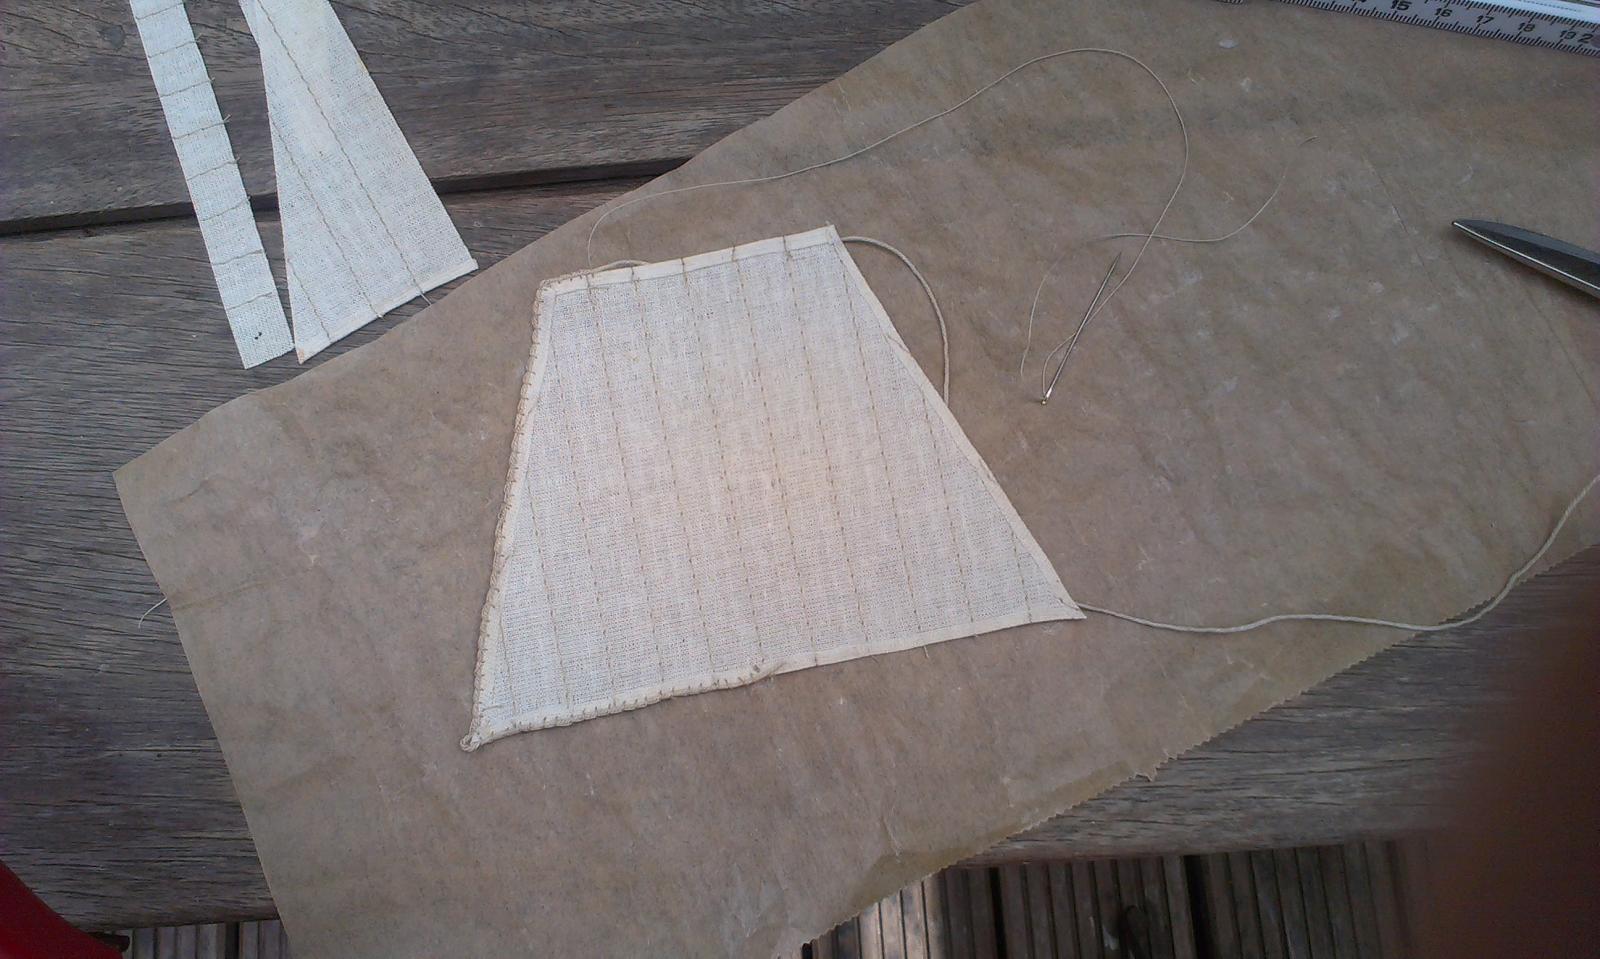
In the meantime I received the sails back from the sailmakers workshop (my mom). I took some thin cotton sheet, impregnated this with diluted white glue - in which I had added some ocre paint to get a more "old" look. Then at a width of 1 cm (which is 70 cm in real) the vertical stitches where made. With a paper knife I have cutted the sail in the right shape and dimension and then started sewing a piece of rope around it. So far the result:
-
Batavia by *Hans* - FINISHED
*Hans* replied to *Hans*'s topic in - Build logs for subjects built 1501 - 1750
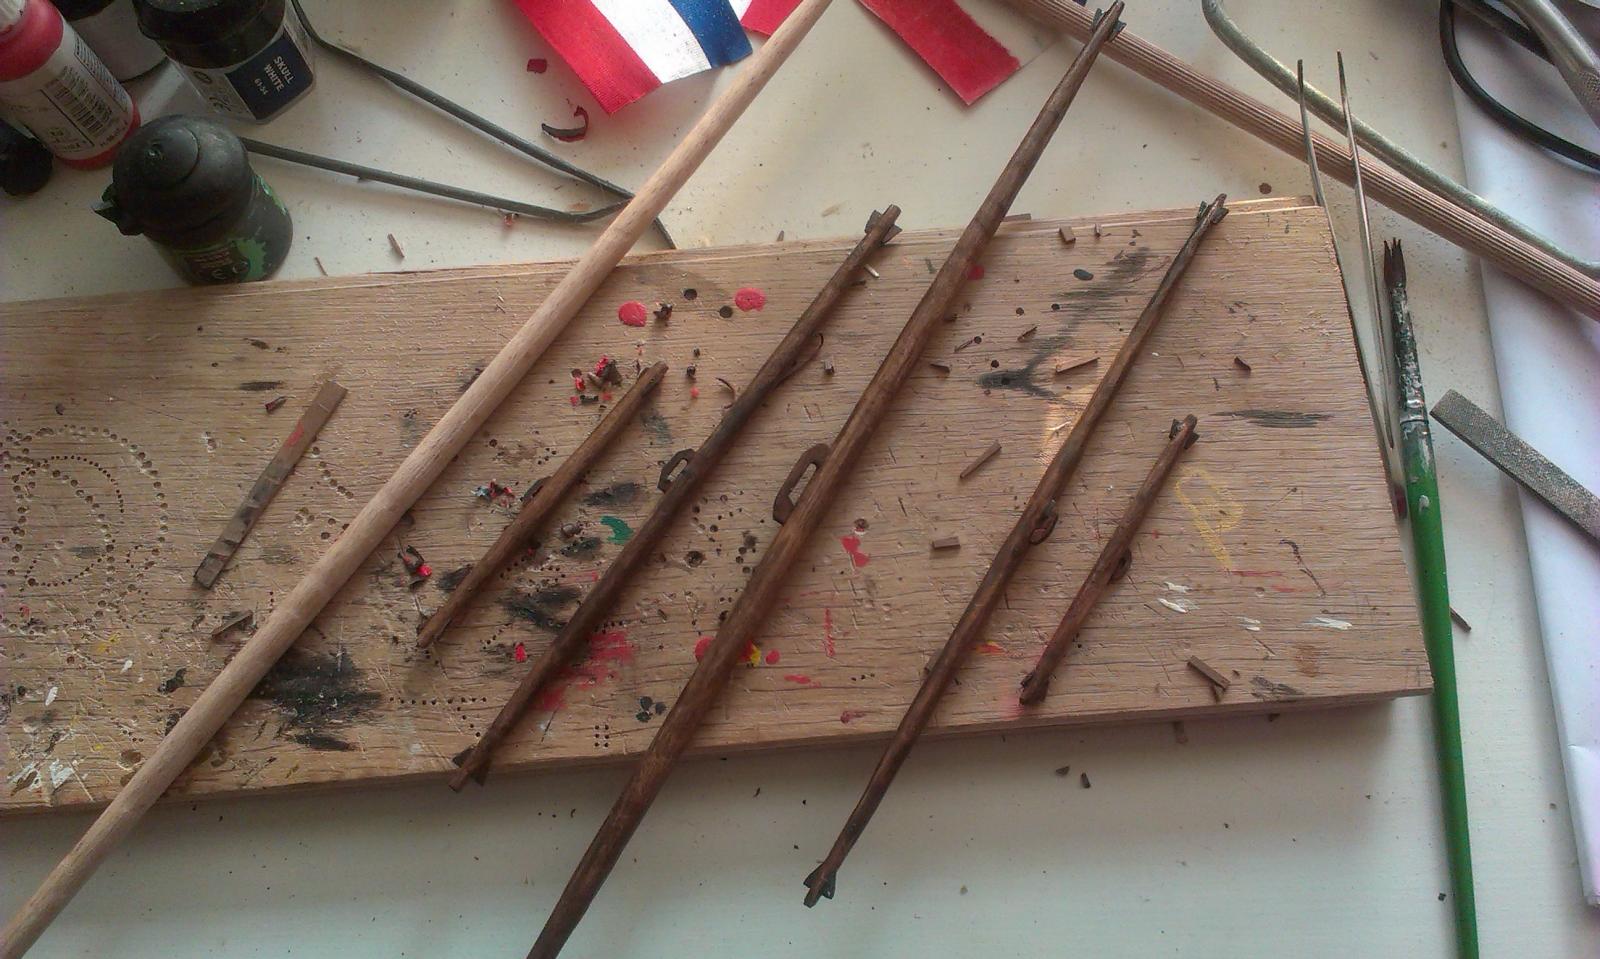
Rather dull work, doing the ratlines. And yesterday we had the Dutch footballteam playing against Spain (is this still called soccer in the States?) which made me a bit nervous (for no reason - after all). I couldn't sit still for a moment. Took the opportunity to make some of the yards: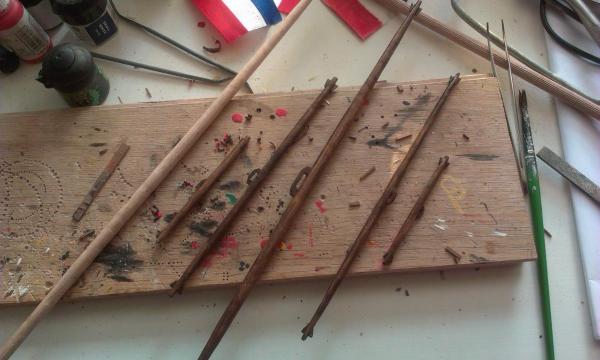
-
Batavia by *Hans* - FINISHED
*Hans* replied to *Hans*'s topic in - Build logs for subjects built 1501 - 1750
Jan, when I'm further I will post a photo from a straight angle. -
Batavia by *Hans* - FINISHED
*Hans* replied to *Hans*'s topic in - Build logs for subjects built 1501 - 1750
Although my ratlines are not too tight it is quite difficult to not get an hourglass model in it. But think it's ok.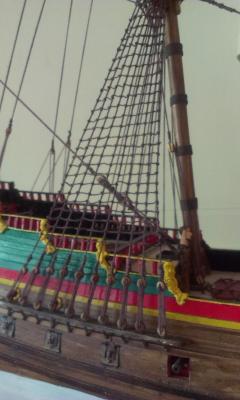
-
Batavia by *Hans* - FINISHED
*Hans* replied to *Hans*'s topic in - Build logs for subjects built 1501 - 1750
Hey guys, thanks! Working on the ratlines now - will post a photo this evening (Dutch time - might be this morning for Australia) -
Batavia by *Hans* - FINISHED
*Hans* replied to *Hans*'s topic in - Build logs for subjects built 1501 - 1750
For the ratlines I made myself a little helper excisting of two small pieces of wood in the right width (or almost). These two planks are clamped on the right place on the standing rigginglines and then I start to knot the ratlines onto it - this with the clove hitch I learned from Sjors. (so no fun for his laughing gnomes - this works perfectly )