


Rich.F
-
Posts
381 -
Joined
-
Last visited
Content Type
Profiles
Forums
Gallery
Events
Posts posted by Rich.F
-
-
-
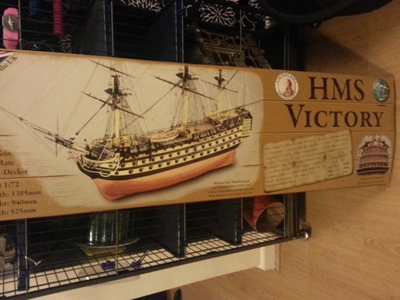
We all know the same story of the History Lord Nelson and HMS Victory.
This Ship kit was not chosen because of the large amount of currant builds, but because of the pure beauty of the ship, and the fact it’s in my home town.
I’ll will start this log with the prayer.
May the great God, whom I worship, grant to my country and for the benefit of Europe in general, a great and glorious victory: and may no misconduct, in any one, tarnish it: and may humanity after victory be the predominant feature in the British fleet.
For myself individually, I commit my life to Him who made me and may His blessing light upon my endeavours for serving my country faithfully.
To Him I resign myself and the just cause which is entrusted to me to defend.
Amen. Amen. Amen.
And so the Log begins:.
Mach 26th 2014.the order was given to start the biggest ship ever constructed.
Length: 1385mm
Width: 525mm
Height 940mmWeight 0.015 tonnes
Armament 100 guns:
· Gundeck: 28 × 42 pdrs
· Middle gundeck: 28 × 24 pdrs
· Upper gundeck: 28 × 12 pdrs
· Quarterdeck: 12 × 6 pdrs
· Forecastle: 4 × 6 pdrs
Cost approximate £750.00 Stirling
Approximately 6000 branches are required and should arrive and arrive at dry dock Ten in Portsmouth on the 3rd of April 2014

-
Hello Vivian,
You have done some great looking work. Look forward to more
Rich
- Vivian Galad and cannonball
-
 2
2
-
HI Andy,
the only power tools I have is a dremel drill, I'm just about to start the Caldercradft Hms Victory. All though i don't use it much past 1900 really. I try to keep noise down.
Hope this helps
Rich
-
She looking great.
But has anyone built the Victory with sails. My wife would like sails I don't. But...
-
-
She is looking Great, Nice work
Rich
-
Hi John. Door looks great. What about stain/paint door frame little darker/lighter?
-
HI John, First welcome, and Good luck with the enterprice. its a great kit best one i have built.
Rich
ps I brought her for the same reason :-P
-
Sorry to hear that about your dog pal,
 ,
,Other from that, today was my first time in a week or two,
Look forward to pictures, Tc.
-
coming along very nice pal, very nice work indeed,
Gary Look forward to seeing your build also. ( May Should be a good time to come She The Victory, Should be lots of things going on but at the moment there is a refitting the ship, end of last year there was no masts)
I have lived In Portsmouth and until last year never visited the Ships.. But regardless Would till suggest seeing her.Rich
-
Hi, Patrick.
Coming along lovely.
Cant wait to start mine, feed up laying in bed looking at it in the corner, ,. What do you mean in your post ((I'm going to rig fully rig the 10 guns that showin the ship's waist. Just doing the breech ropes right now, then onto the side and train tackles. ))
-
Hi Sam,
Happy New Year, (time is just upon us)
Great Looking work as always. How do you get the square holes to the hand rails, and file the parts so the same ?
Rich
-
Hi Dan. Merry Christmas and Happy New Year to you and your Family. Ship is looking great. Mistakes is how I learn. Keep Up the Good Work
Rich
-
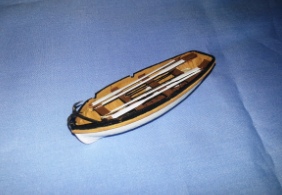
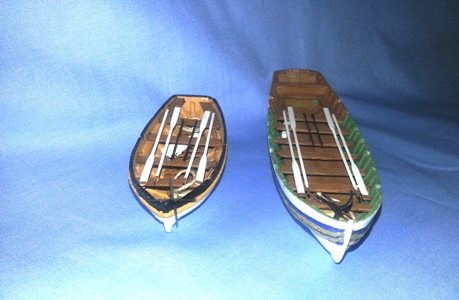
The other bit of progress achieved before I started my log was to install and plank the upper gun deck. Since then I have made the various fittings, including gratings, bitts and the stove.
Like most kits the gratings come as notched strips like coarse combs. I found the easiest way to assemble these was to fit them together dry and then to dip them in dilute PVA. Once the glue had set I trimmed off the excess timber and sanded the top, bottom and sides. Here are some step by step photos:
Some of the gratings dry-assembled. A 'grid' is made to suit the overall size of each grating:
Next the gratings were dipped in dilute PVA and then the excess dabbed away using kitchen towel:
Finally each grating was trimmed and sanded smooth:
Once this stage was complete I added the coamings around each hatch, some of which incorporate the openings for the companionways between decks.
Here is an example of one in situ. The corners were cut square and butted. I believe the real ones were half-lapped at the corners, but I didn't think this would be visible at this scale.
And here are a few more. On some of these you can see that i have added shot garlands along the sides.
Rob
Hi Rob,
She is looking great Well gone, Keep up the good work!! do love Looking a peoples pictures and process.
But i have a question about this post, I see you soak to diluted pva, but when dry, do you sand down to paint/stain or varnish.? not seen it done like this before and Soon ill be starting the CC Victory,
Rich.
-
Hi Don, Very Sorry to hear about your late friend, Pass our regards on to the family. Im Working on the Bluenose by Billings, I will finish her, But not like the plans nor instructions, I guess im still new to all this and dont have the answers, But what you have is Looking great so far looking forward to updates
Rich
-
-
Hi Bob, You have a great looking ship..Ill spend more time looking though to help me out on mine a bit more.
Rich
-
Hi Don, Your Ship Is looking very Nice indeed, Nice careful work.
Rich
-
-
Patrick< She is looking fabulous.>
Just hope mine will come out as nice as you.
Looking forward to more posts
Rich
-
Well thats if folks.. Just placed my order for the Caldercraft HMS Victory>
I will wait till Bluenose is finished.
Wish me Luck all

Rich
- Landlubber Mike and bryanc
-
2
-
Hi jack. First welcome to msw 2.0.
Ill be following your build as I have just started the billings kit if the bluenose.
Good luck and well done on a good deal and lovely kit.
Rich
.
-
HI Sam,
Yes, and the caldercraft Victory arriving by xmas:)
Rich


HMS Victory by Rich.F - FINISHED - Caldercraft - Scale: 1/72
in - Kit build logs for subjects built from 1751 - 1800
Posted
Thank you all, for words of support.