Rich.F
-
Posts
381 -
Joined
-
Last visited
Content Type
Profiles
Forums
Gallery
Events
Posts posted by Rich.F
-
-
Greetings All, Thank you every one for dropping by, Leaving a comment advice or a like.
Peter > See Pictures

Glennard > That's what I said to the wife, No ones perfect and if very one did it the same and to the book, No ship would be unique
Foxy > I have see that before, I personally don't think it the look i'm after.
Sam > I do try to er... keep quiet
 ( do i dare say it with out offending the fellow female builders) .... NO.. to scared ....
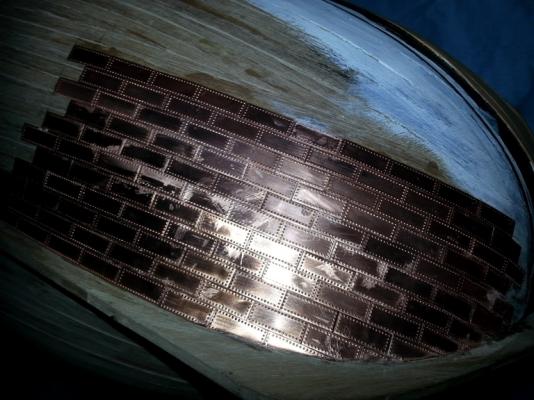

-
Greetings All, Thank you every one for dropping by, Leaving a comment advice or a like.
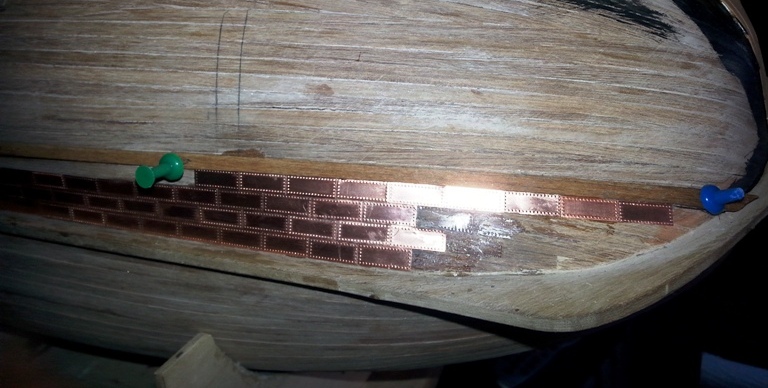
I have received some advice and not like how the tiles have came out so far, I'm going to rip and "do a redo" I have ordered 300 tiles from CMB, Far more than needed but just in case. this time im going to take a different approach by starting at the time on the water line.
If any one else has any ideas or what ever, Nows a good time to say
-
Very Nice work coming alone great!
-
-
Greetings All, Thank you every one for dropping by, Leaving a comment advice or a like.
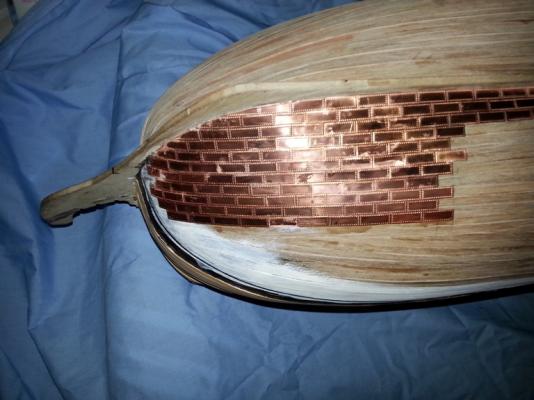
Peter, I guessed a proxamite the center, built a few planks left and right and 3 high, with about a 10" × 5X1mm strip, made sure it had not warped,(Used a mirror),
Laid it on top of the few i had already glued, yep, my guide line.
My plan is to finish 6 high on the starboard side and the mirror image the port, then repeate 6x high,
Although,, laying in bed(2324)gmt, wondering if I should have started at the top so a nice edge patten will be visible. ?.
-
-
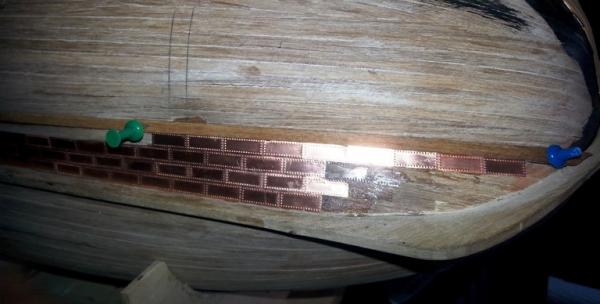
Greetings All, Thank you every one for dropping by, Leaving a comment advice or a like.
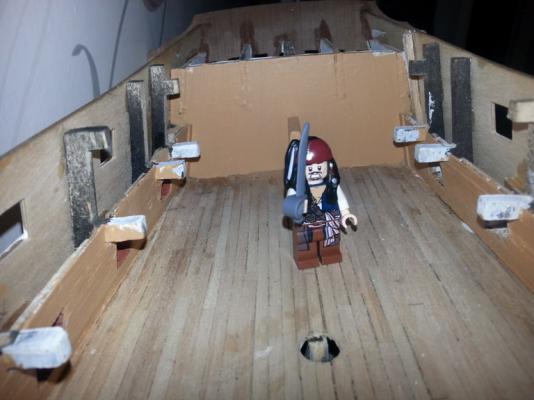
Just a few Copper tiles to start with, 100 So far that was over 5 hours. ( was watching Tv )
- peterwwebster, foxy and src
-
 3
3
-
Greetings All, Thank you every one for dropping by, Leaving a comment advice or a like.
Just a small update, base painted the Gallary Windows, With Primer and a coat of Orge Yellow. And I have started on the brass plates. Very slow atm, till I get the hang of it. Ill upload a few pictures later.
-
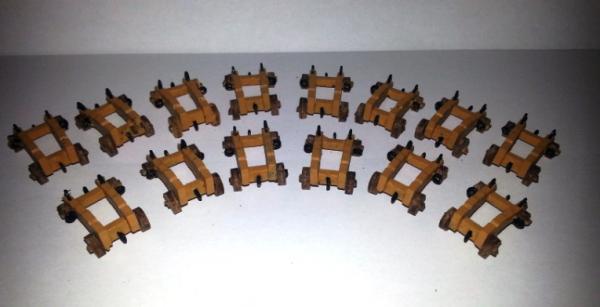
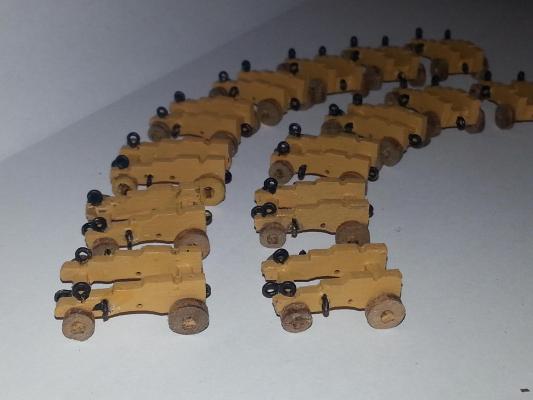
Greetings All, Thank you every one for dropping by, Leaving a comment advice or a like,
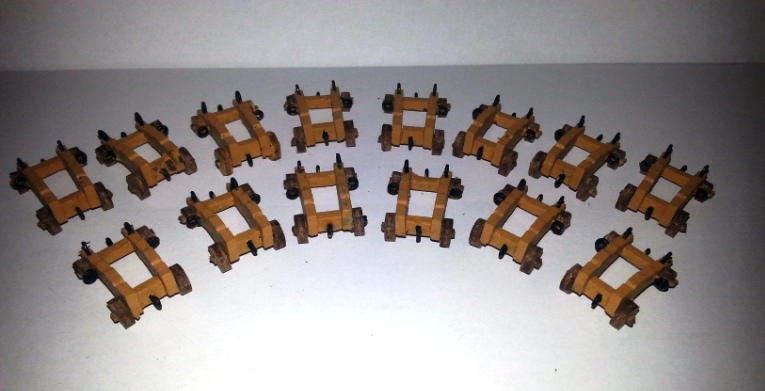
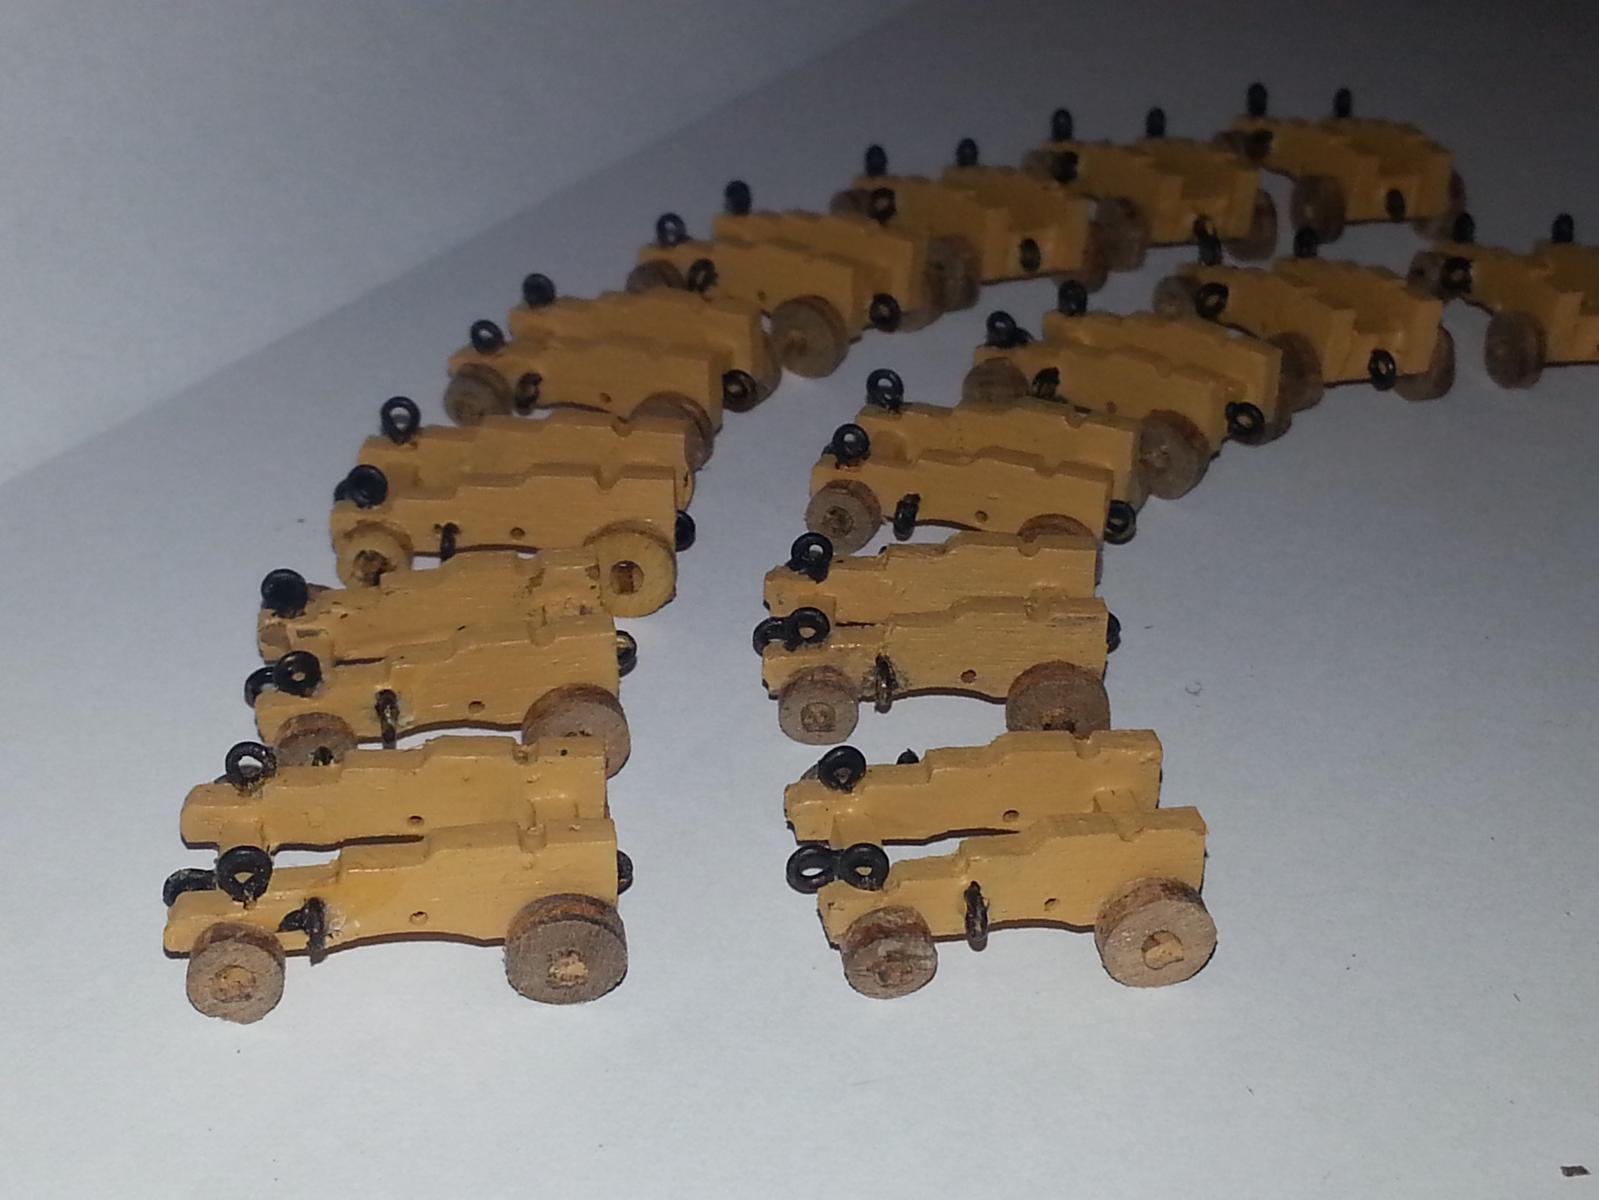
I have been working on these cannon base's for a few days now, Since I took the picture I have cleaned them up a bit more.
Im not sure if i should use blaken it, or just hand paint.? something to think about over the weekend. I'll be working back on the main build tomorrow night.
- WackoWolf, src, Shipyard sid and 4 others
-
7
-
Greetings All, Thank you every one for dropping by, Leaving a comment advice or a like,
Sam> Toothpick are underneath, as my first attempt, they stuck to the table, so just wanted to lift them off.
Shihawk:> good idea, going to give that at try
Lawrence :> Only Time will tell. But does look nice than just plastic sheet.
: I have Now added two of them, but just to busy atm with work to do any more, aill have to wait till next week to do any work.
-
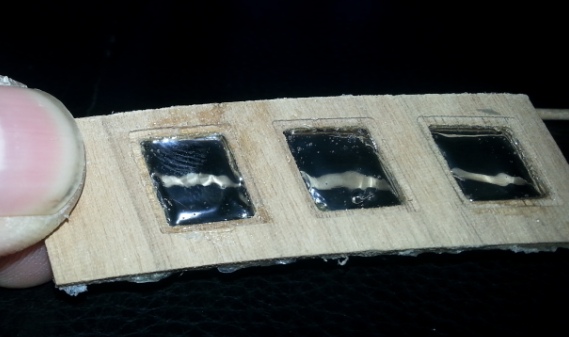
Greetings All, Thank you every one for dropping by, Leaving a comment advice or a like,
Quarter Windows, I have done a bit of research on this, I have read what others have done, and tried my own way,
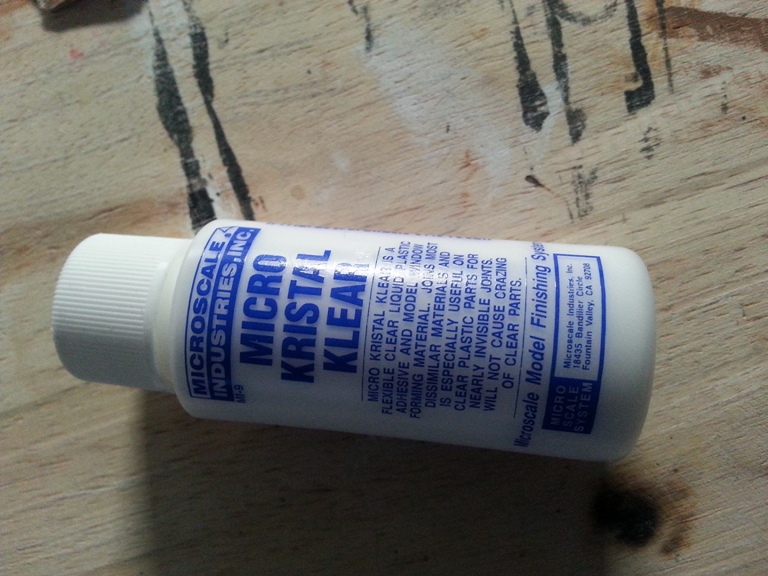
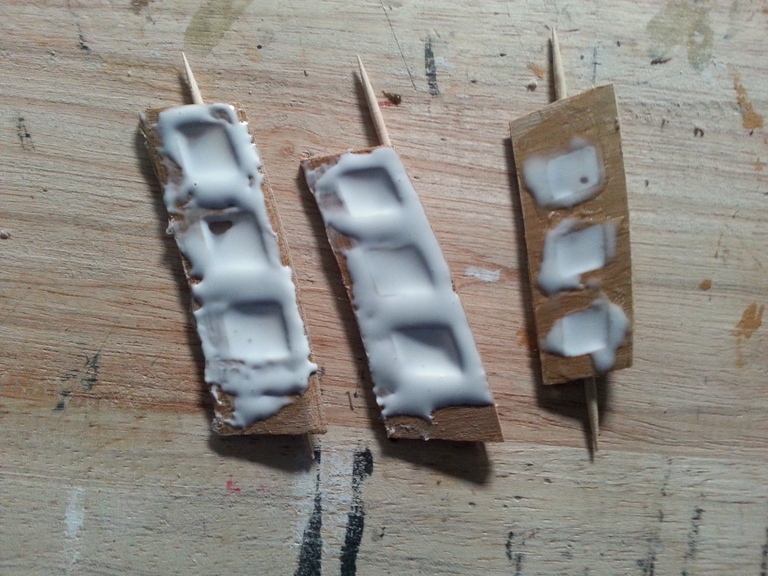
I had a go at just the plastic that came with the kit. I did not get the look I wanted, I found and ordered "Micro Kristal Klear"
The Pictures attached. is the first attempt, Although they are above the 1/4 inch recommended, It can be done. I'm happy with the result I'm now just waiting on the rest to dry, I'm going to give it a full two days to dry fully, ( although this does not dry to a hard finish, it is a strong rubbery.


-
Very nice work on the hull.
-
Greetings All, Thank you every one for dropping by, Leaving a comment advice or a like,
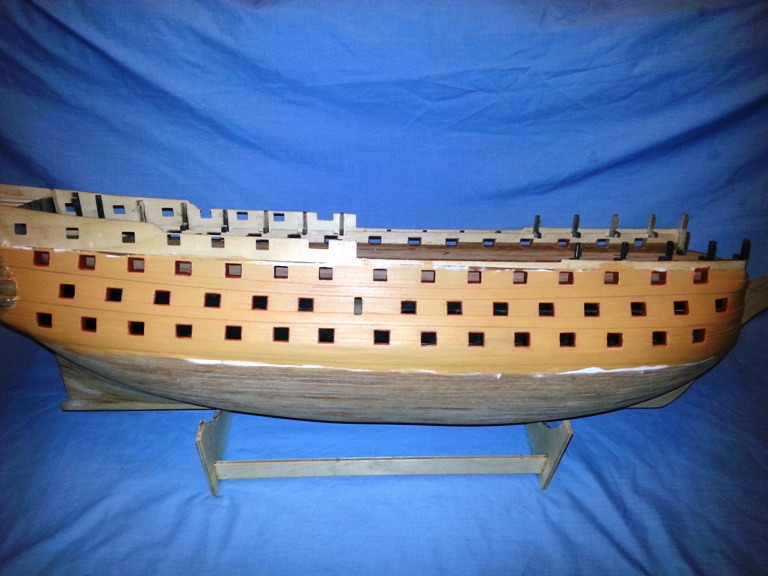
As i have had 3 whole days of work and nothing planed, I of course spent my time watching movies and working on the ship I have now primed and painted the starboard side only. after priming re going over with filler where needed, then the top coats, Reather happy with it now.
Over the next week or two, i'll work on the port side once this it done ill at the black strip so they match up.
Tc all,
- peterwwebster, schnu, src and 2 others
-
5
-
Hi Peter,
Ill copy this to your log also,
on the upper gun ports, Ports number 3-10 Need to be line before you do the 2nd player of hull planking.. I found the I need to Open all the gun ports, (What I did was take a lid,part no 323-324, and use that as a template opened up before I planed the Hull)
Once you have planked the hull, Line the lower 2 rows of gun ports with 1x6mm the upper ones are 1x16mm ""don't forget to set back by 1mm, As i was also informed get a few lenths of balsa strips about 3.2x3.2mm to line the inside so the linings ave something better to hold.
With regards to the linings not matching up I think this is a design flaw, This is from a Post David"Shipyardsid" sent me >
Trim the underside of the bulwark pattern until the outer hull and inner bulwark cills are level, then trim the top until the bulwark pattern fit in with the gun ports level. Don't worry about the bulwark patterns being a bit slack if you overdo it , It all gets planked and hidden. It's a good idea to make up a gun carriage and use the barrel as a gauge if you follow, but remember you need some planking strip under the wheels as your deck is not yet planked. Once you get the deck and bulwark patterns both planked fit a thin trim as an edging if you follow. I have added a photo to help you understand, but will delete if you tell me. Sorry to be long winded.
I think this is all, If you need anythng else or cant understand me ( most people don't) LOL Give me a shout
-
-
Hi Sam, Yes it is, I thought The gun ports took a while and be come tedious, Although with the brass plates I will see a change all the time.
-
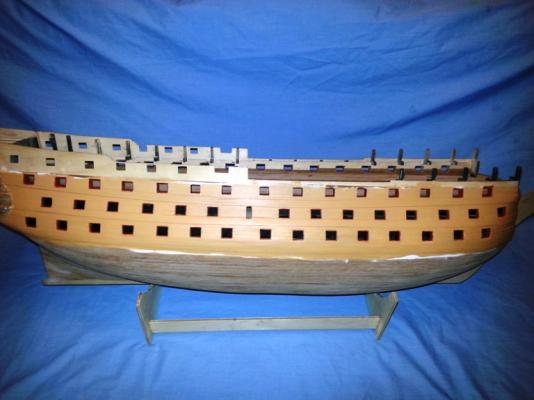
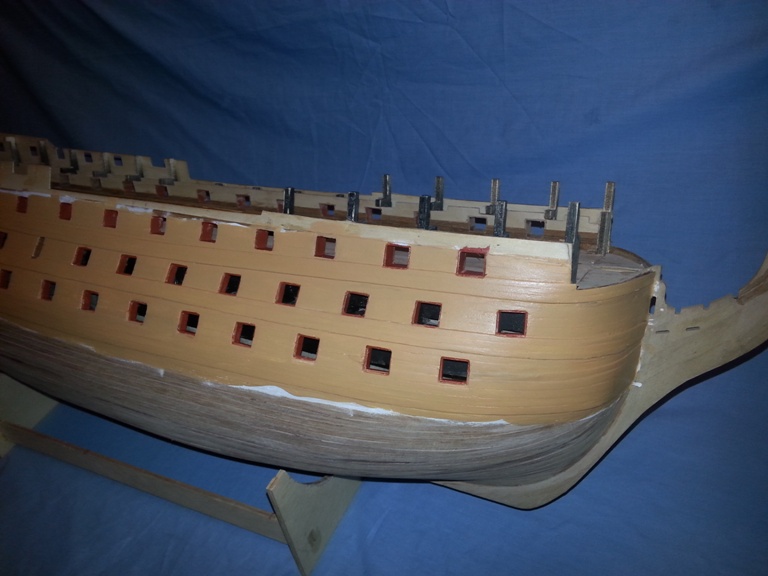
Greetings All, Thank you every one for dropping by, Leaving a comment,some advice or a like,
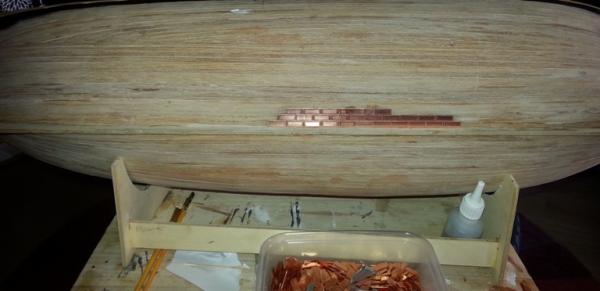
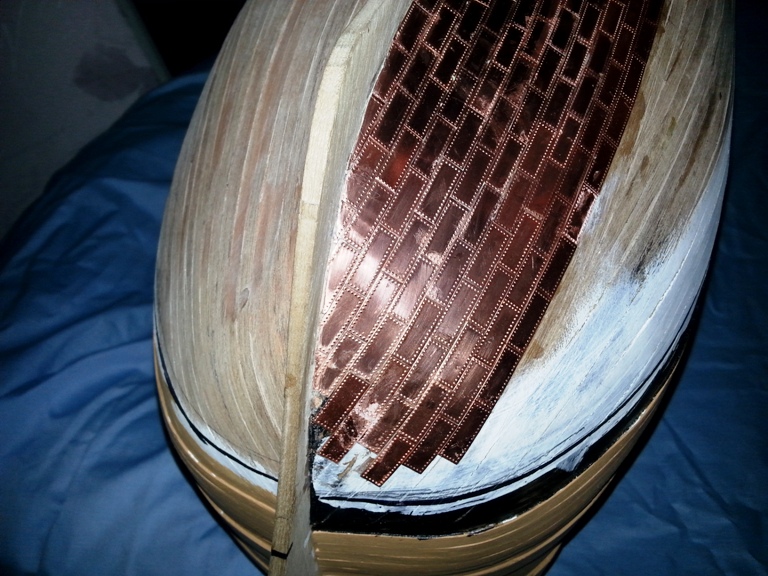
Schnu, Yes the hull will be painter and the copper plates added all 4500 of them give or take.
Sam, Your So right
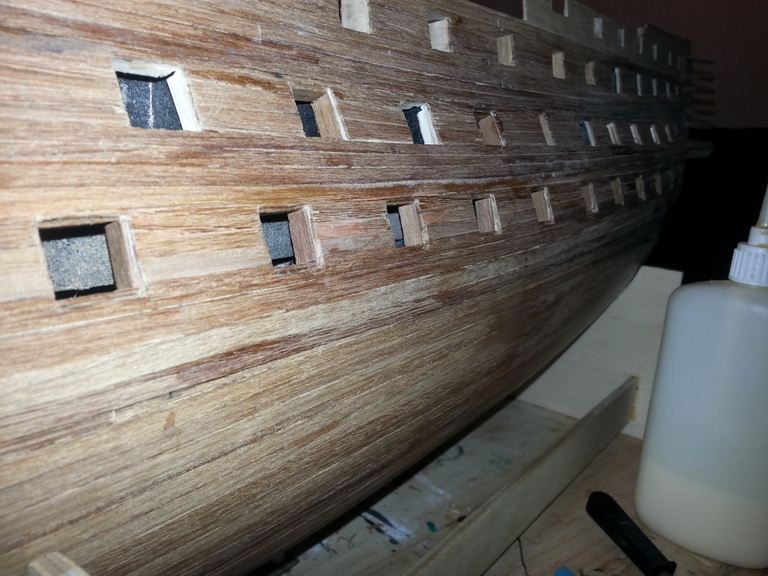
I Have finished lining the gun ports, filled sanded and painted, I happy with it atm, Might need a bit of fine tuning when I paint the Hull, Im Going to this afternoon Line the inner gun port walls so i can paint the rest of the gun ports and paint the hull.
Tc

-
Hi Jerry, hope your getting better by the day. As they have, our thoughts of a speedy recovery, and a quick return the ship, tc.
-
Hello Gary, she is she looking very nice, keep up the good work.
-
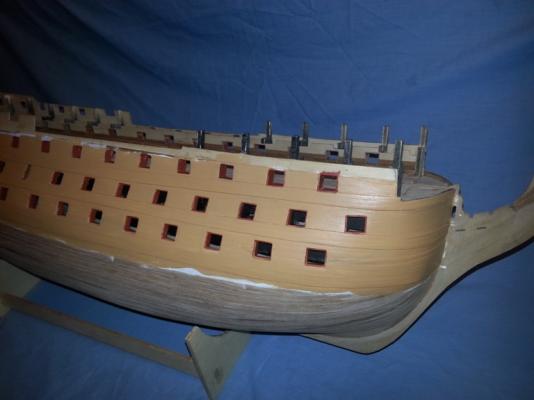
Greetings All, Thank you every one for dropping by, Leaving a comment advice or a like,
I know I don't always leave a comment on my fellow friends build logs, But enjoy reading comments. & follow up if and when i can on the laptop.
Small update:>
Still Working on the gun ports, getting there, I have had to re order the red paint. could not find it, why? don't know !

I have painted a few gun ports that are complete. and to be honest a little happier I have painted a few gun ports and looks very nice.
Should have this finished by next weekend.
-
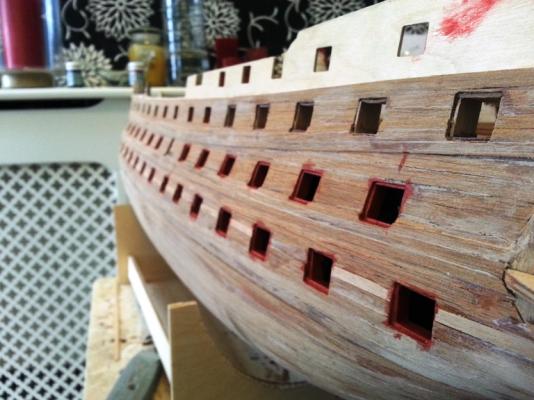
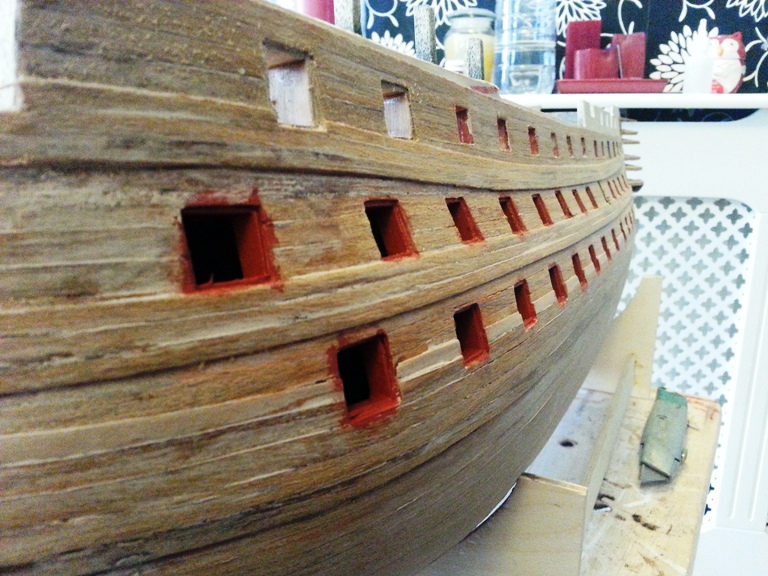
Thank you every one for dropping by, Leaving a comment advice or a like,
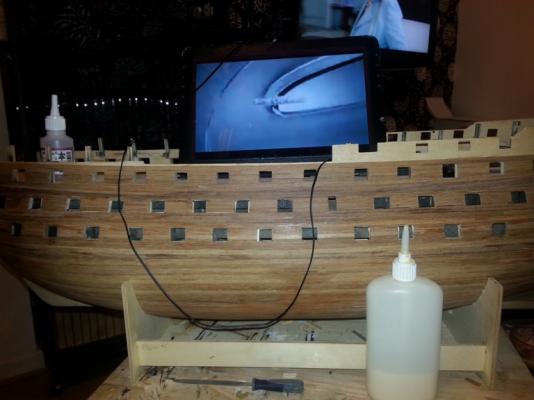
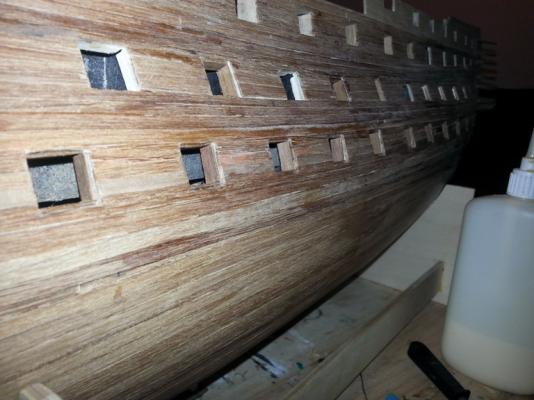
With Lining the Gun ports I have taken advices given and battened be hind with 3.2x3.2mm Balsa strip, ( its the smallest size the model shop had) but I think the right size for this task, worked well Lining with the 1x6mm stips I have spend the best part of about 5hours do the port side lower gun port. I have filled a few that i think looked a little out of place, but happy with them. No rushing sat there watching Tv and a Movie...
The first Picture is me watching Moves on my Tablet as the wife wanted to watch something else, Ill Be working of the port side middle gun ports next tomorrow at some port.
I'm going look maybe next weekend in getting a primer for the wood be for I start painting next month. ( any advice)?
-
Thank you every one for dropping by, Leaving a comment advice or a like,
David Thanks for the Pictures, i'll Need to get some 2x2mm. Probably at the week end as tomorrow im out again after work for my Anniversary, 15 Loooong years. But Happy ones.
Again Thanks everyone
-
After some help,
I have lost a few part of the lining, I spent about 45min setting up and then trying out some linings, but stopped as I was a little tried, and tbh was not in the mood to do any to much, i'm still aching from the weekends, ( I got a new tattoo, a few word so celebrate my 15th weeding anniversary) and along day at work with a "" I know it all... and I got I wrong ... Apprentice"")
Anyway..
Q1" is there a good way of doing this?
Q2" What about, putting a match stick style level with the opening before lining?
thank you in advance


HMS Victory by Rich.F - FINISHED - Caldercraft - Scale: 1/72
in - Kit build logs for subjects built from 1751 - 1800
Posted · Edited by Rich.f
Just came home from work to find this, Brought by the Wife