RDL
-
Posts
10 -
Joined
-
Last visited
Recent Profile Visitors
238 profile views


a.thumb.jpg.0d220a67a0520c621b587b05b51dcd99.jpg)

-
 Knocklouder reacted to a post in a topic:
Mayflower by RDL - Amati - Scale 1:60 my first build
Knocklouder reacted to a post in a topic:
Mayflower by RDL - Amati - Scale 1:60 my first build
-
Knocklouder reacted to a post in a topic:
Mayflower by RDL - Amati - Scale 1:60 my first build
-
GrandpaPhil reacted to a post in a topic:
Mayflower by RDL - Amati - Scale 1:60 my first build
-
Louie da fly reacted to a post in a topic:
Mayflower by RDL - Amati - Scale 1:60 my first build
-
Louie da fly reacted to a post in a topic:
Mayflower by RDL - Amati - Scale 1:60 my first build
-
Louie da fly reacted to a post in a topic:
Mayflower by RDL - Amati - Scale 1:60 my first build
-
Louie da fly reacted to a post in a topic:
Mayflower by RDL - Amati - Scale 1:60 my first build
-
Louie da fly reacted to a post in a topic:
Mayflower by RDL - Amati - Scale 1:60 my first build
-
Louie da fly reacted to a post in a topic:
Mayflower by RDL - Amati - Scale 1:60 my first build
-
Louie da fly reacted to a post in a topic:
Mayflower by RDL - Amati - Scale 1:60 my first build
-
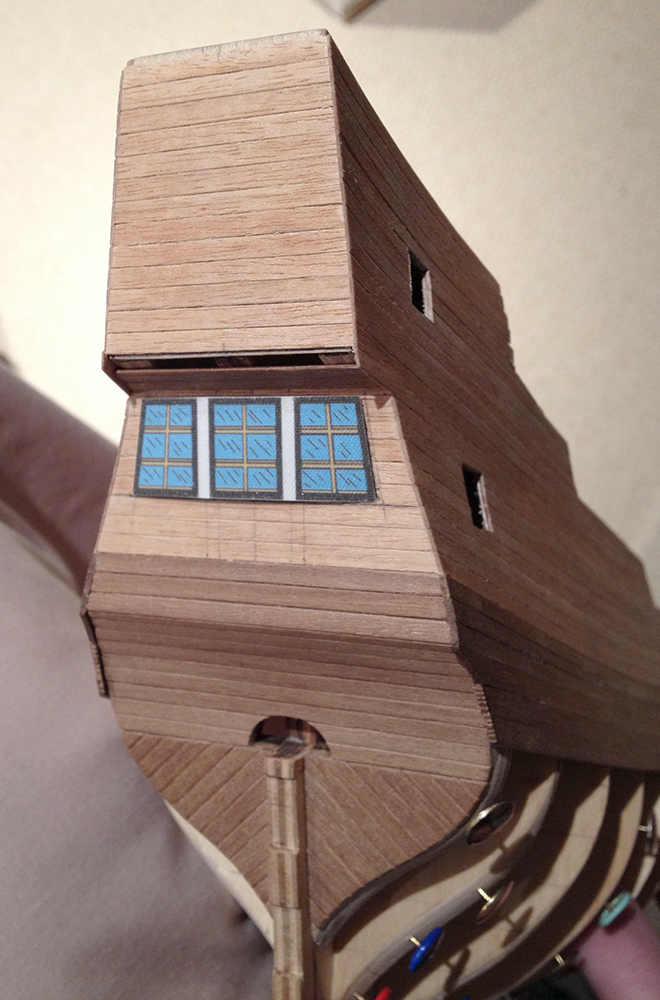
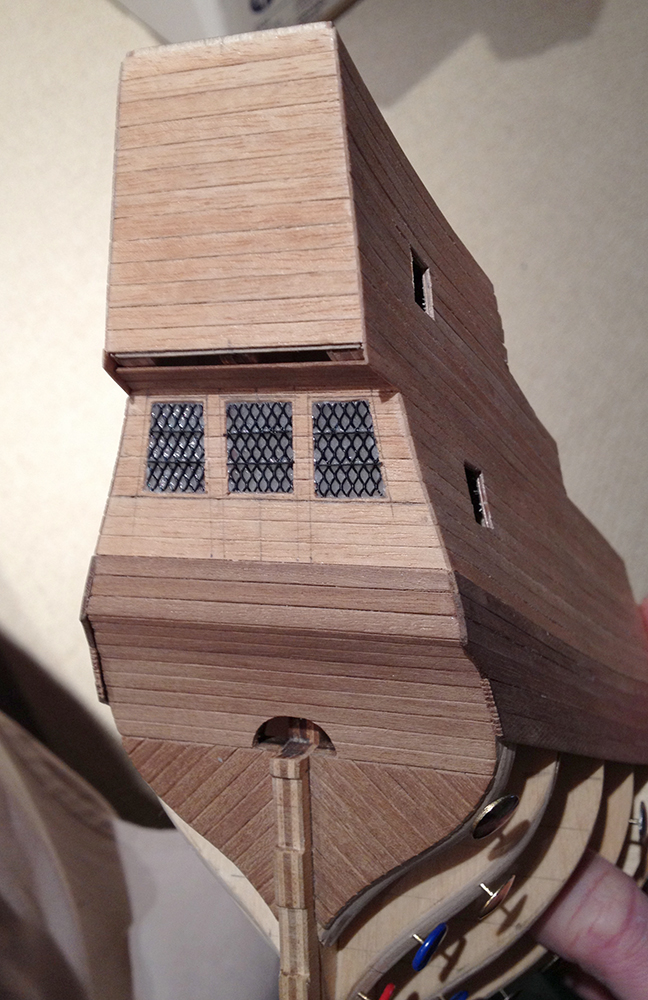
 Haha...thanks very much. I must say that I'm quite proud of how the windows turned out, especially when compared to how they would otherwise have been with the stickers!
 -
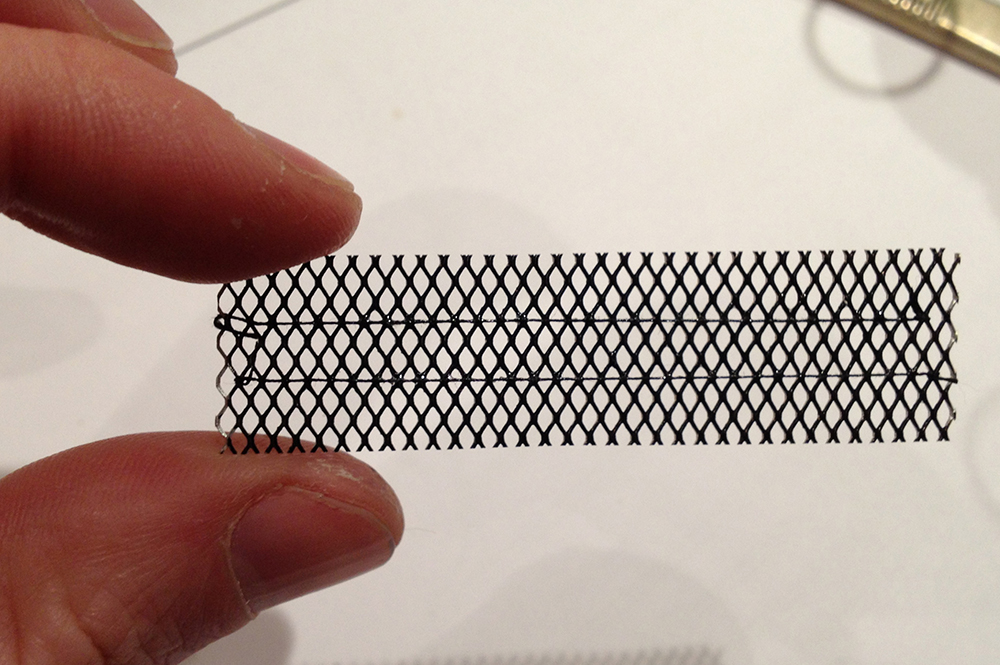
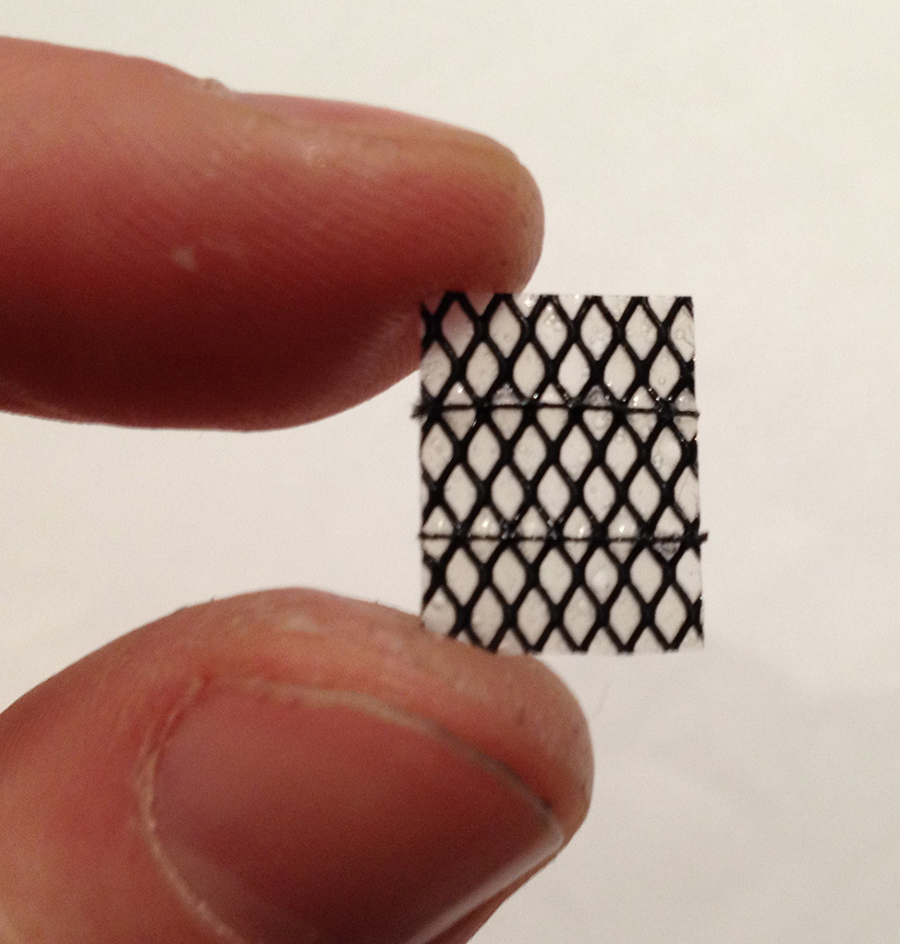
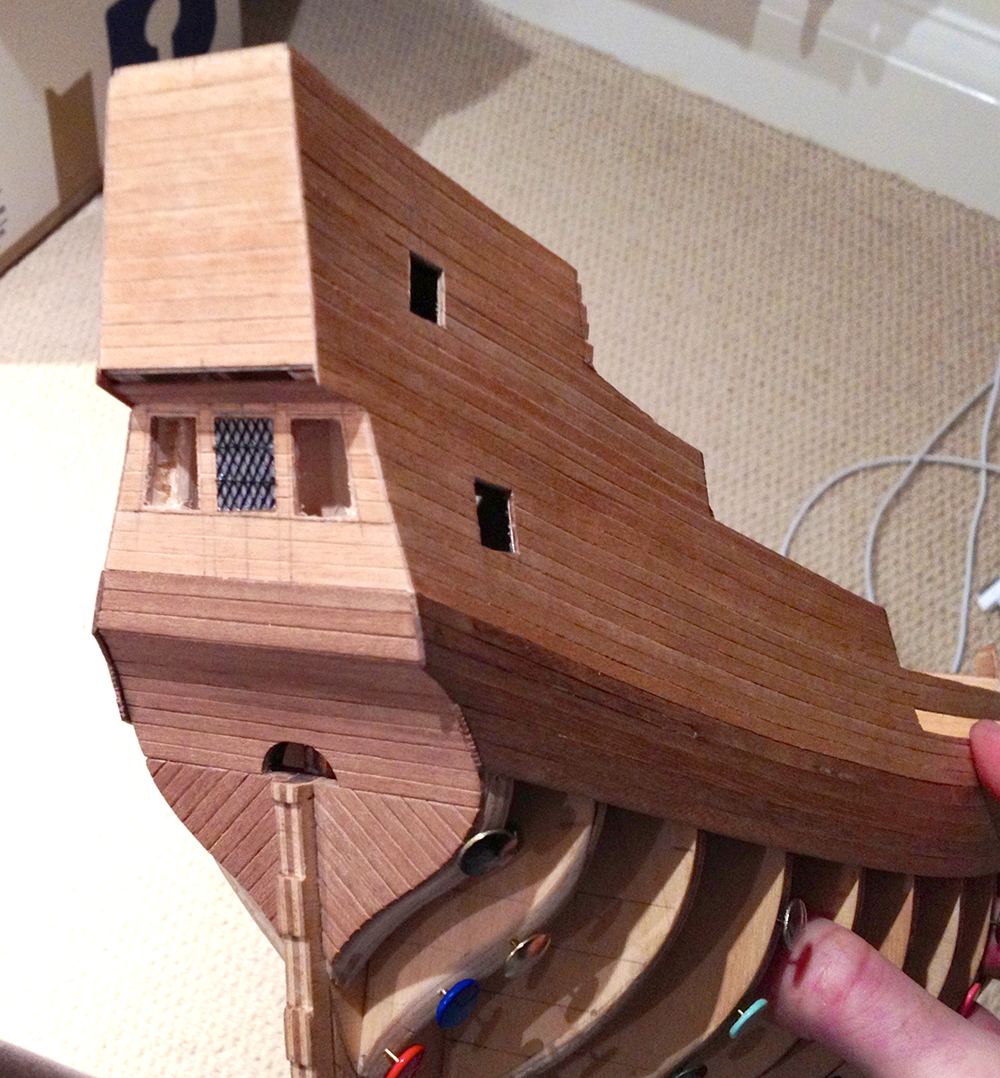
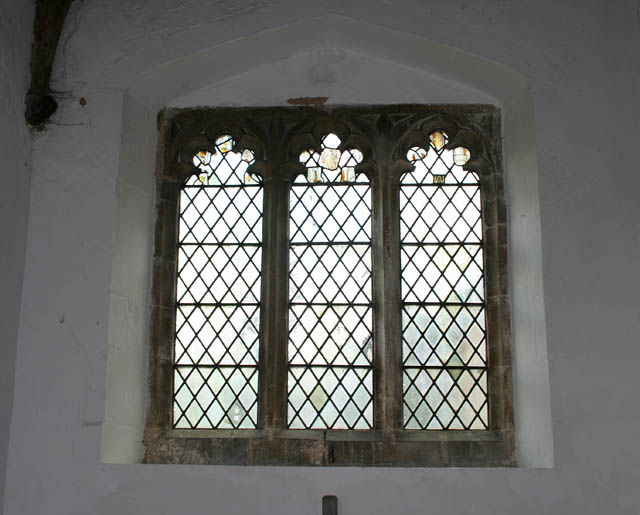
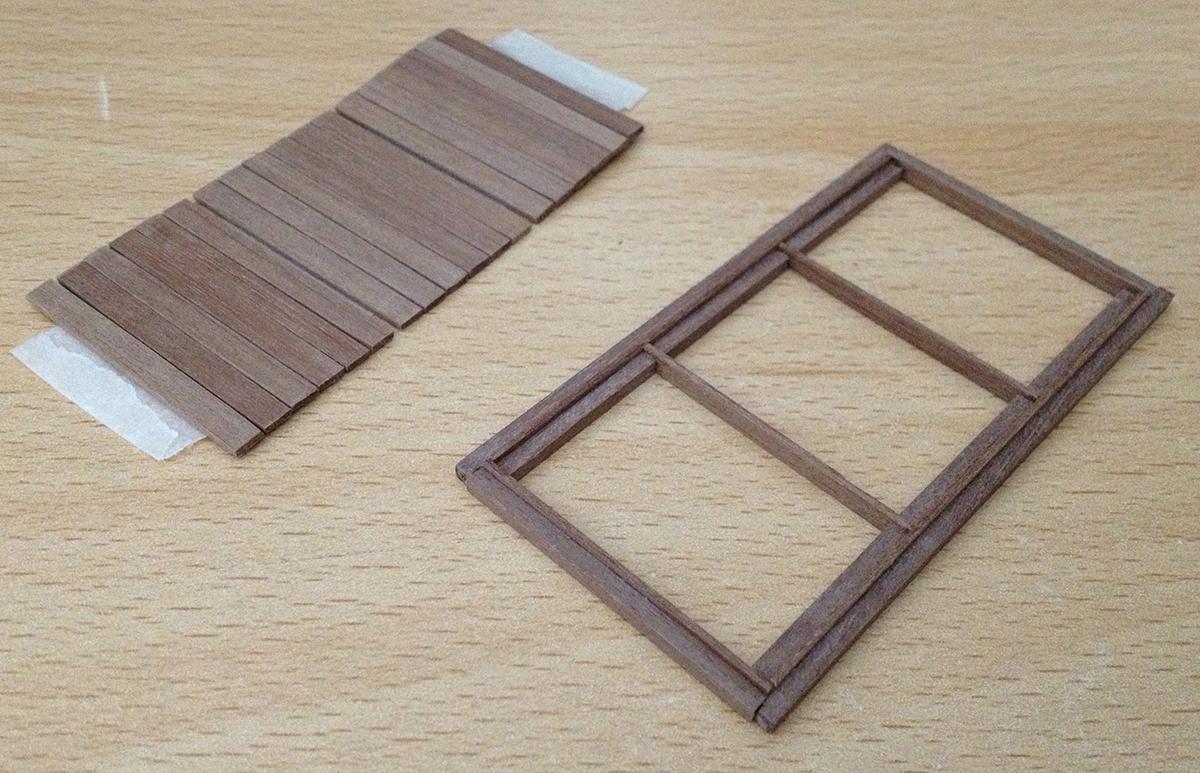
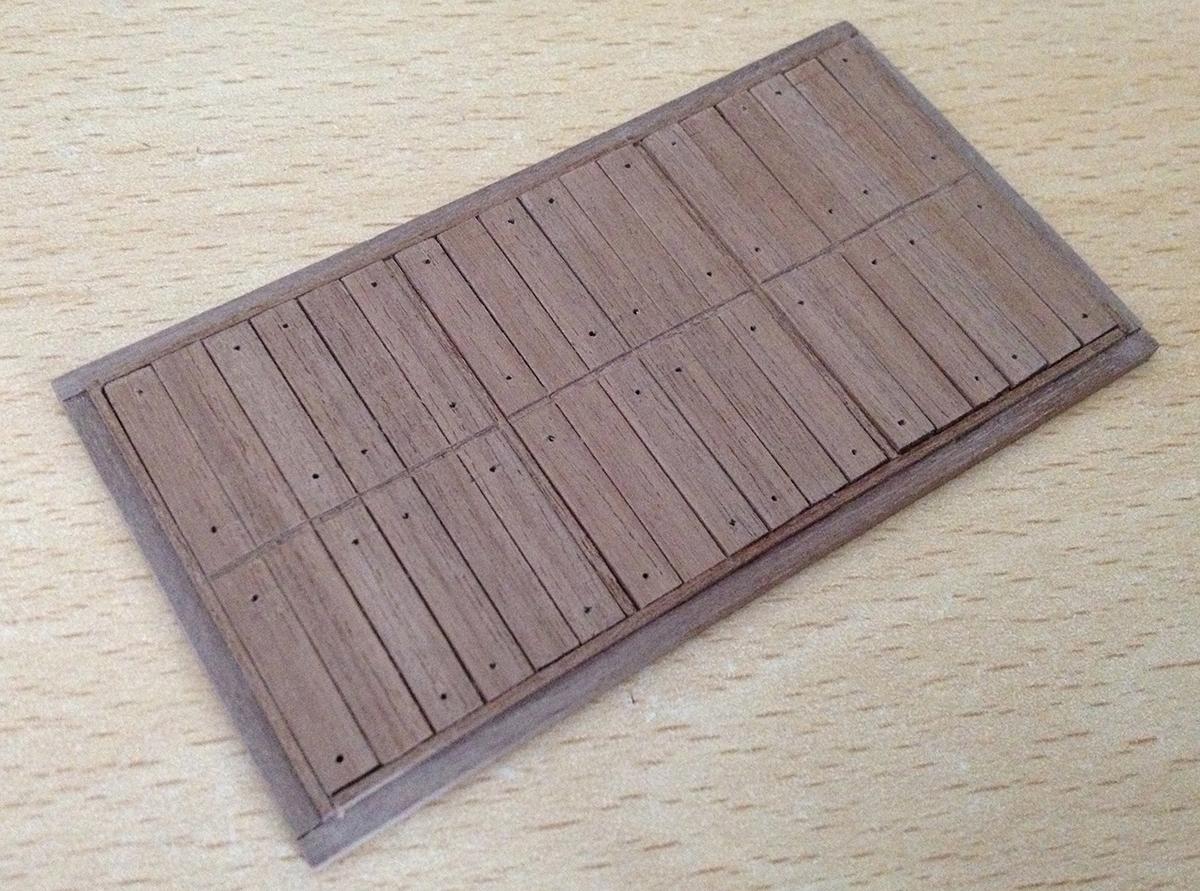
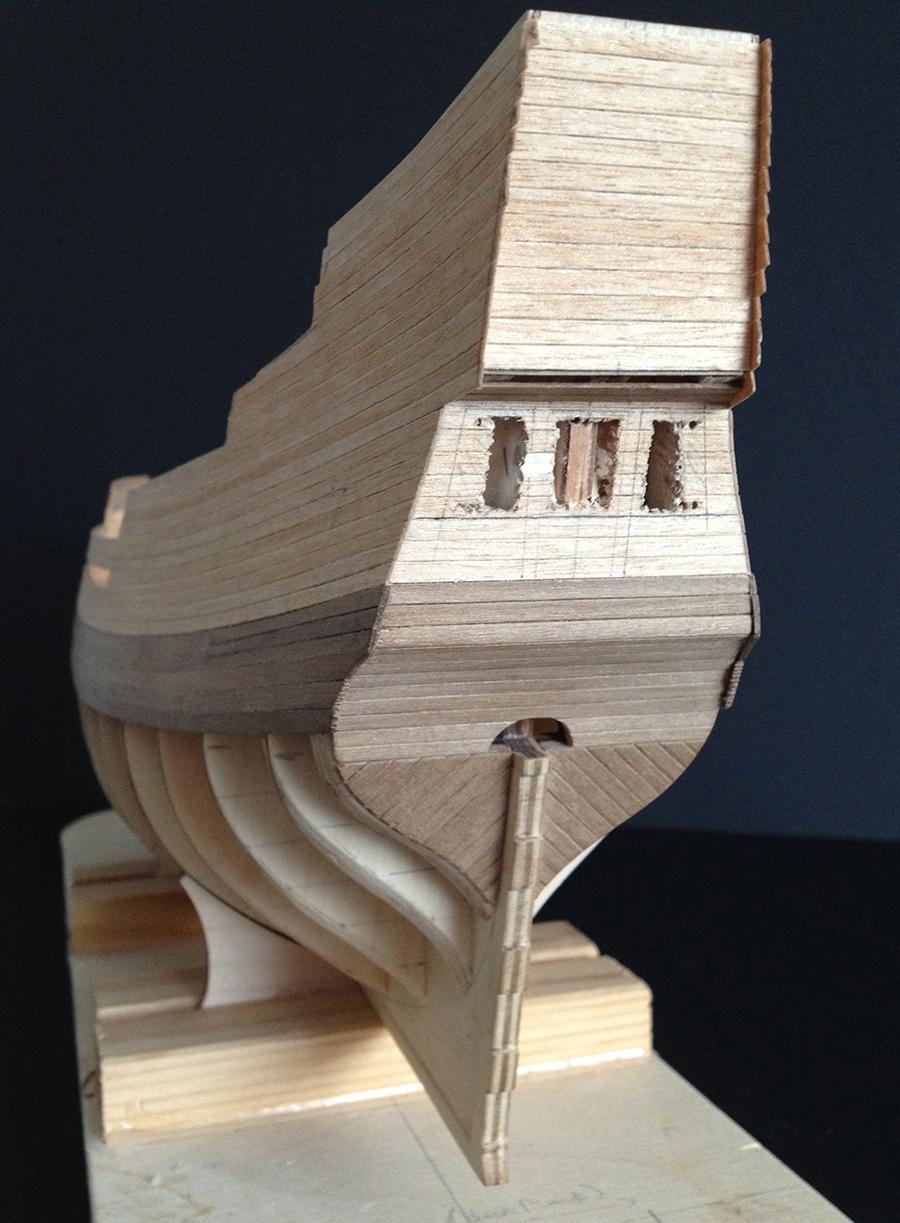
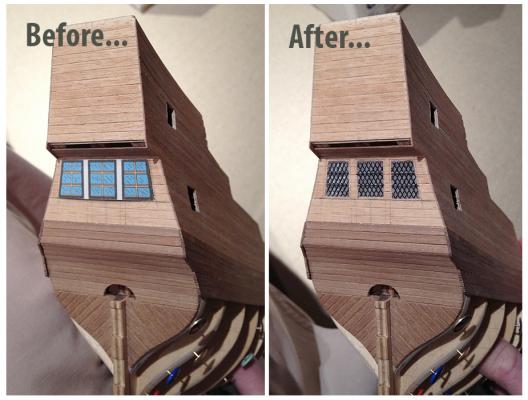
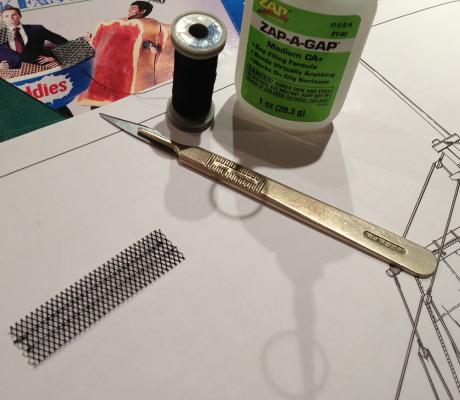
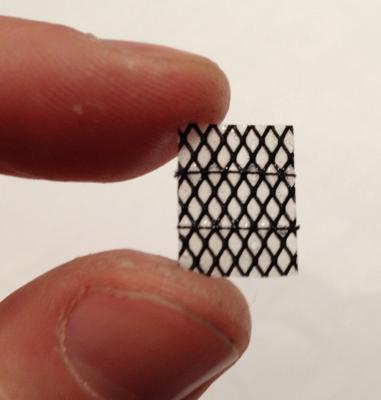
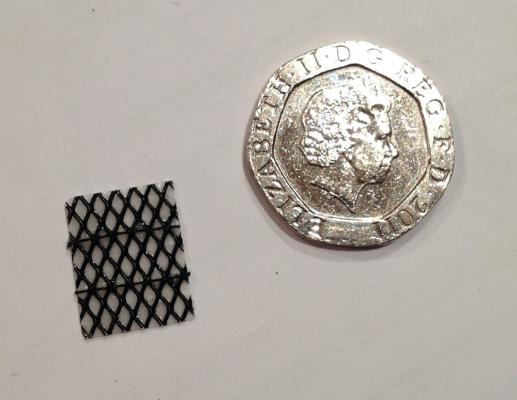
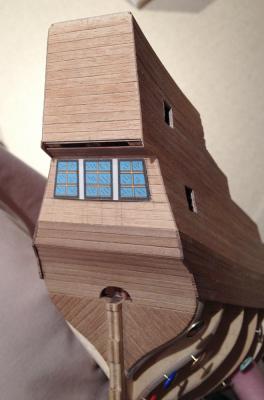
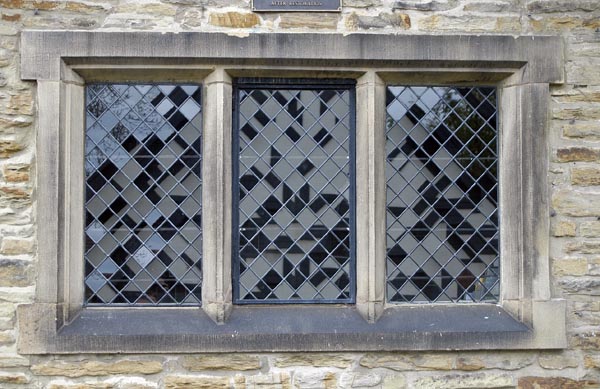
Window kit bashing.... I decided to move on with the stern windows this week. As previously mentioned, the kit provides stickers for these windows, but I wasn't very impressed - they looked a little fake - so an alternative was required. These are the kit provided stickers: After a quick Google search for '17th century windows' I found these reference images which I felt would suit the Mayflower and should definitely look better than the stickers: I had some spare wire mesh which was about the right scale. It's an aluminium wire mesh which is used for car body repairs - it helps to strengthen and hold car body filler putty. I first coloured it with a permanent marker pen then stuck on two pieces of black cotton with CA glue: When the CA was dry, I painted a layer of PVA glue over the back and left it to dry. The PVA dries near transparent and has a slightly bumpy, handmade quality that matches the look of the glass in the reference photo's. Cut to size, here's how they look: I'm quite pleased with the outcome, especially compared to what the kit provided. The panels still need to be framed with 1x1mm walnut, but here's the result so far:


-
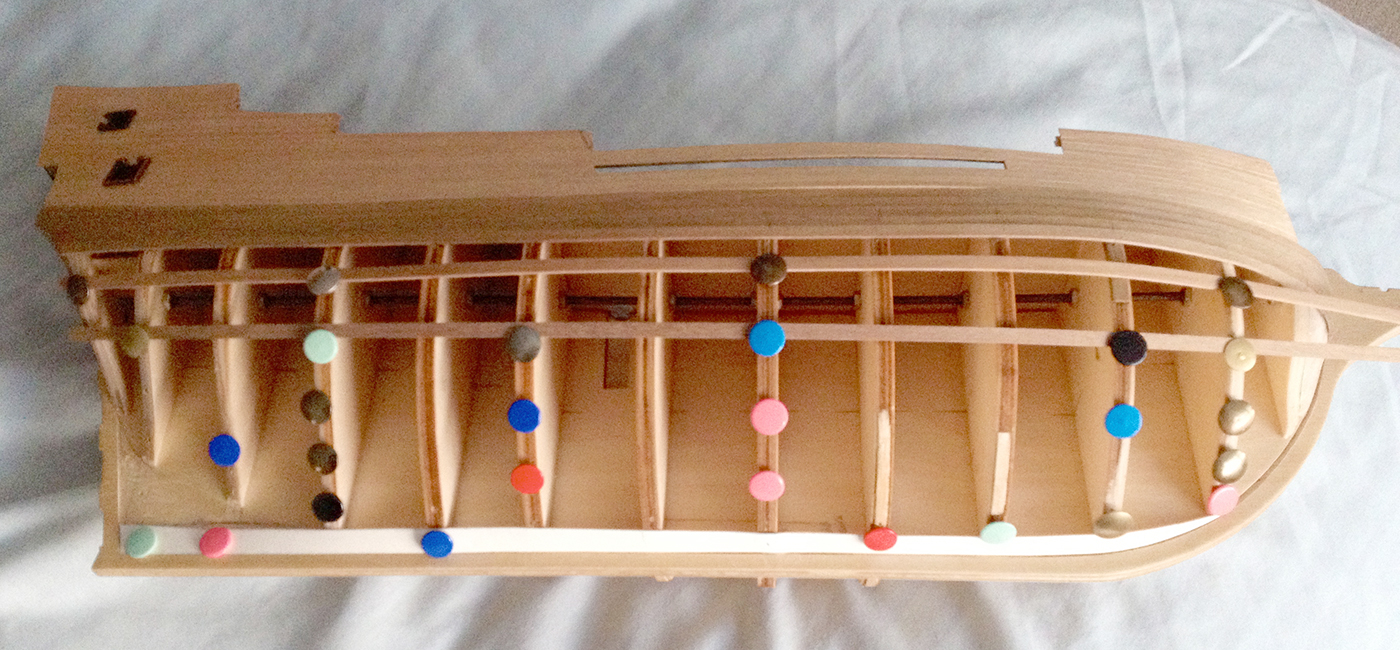
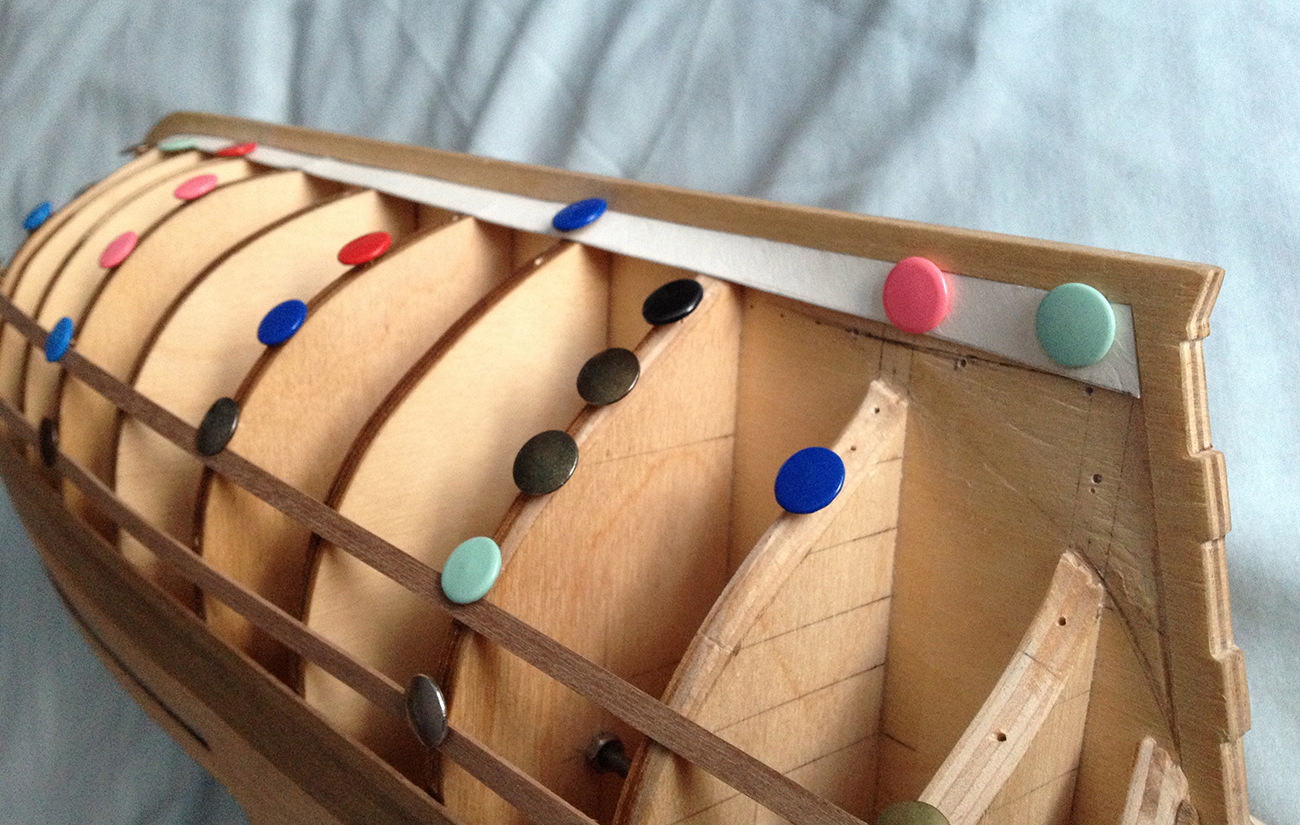
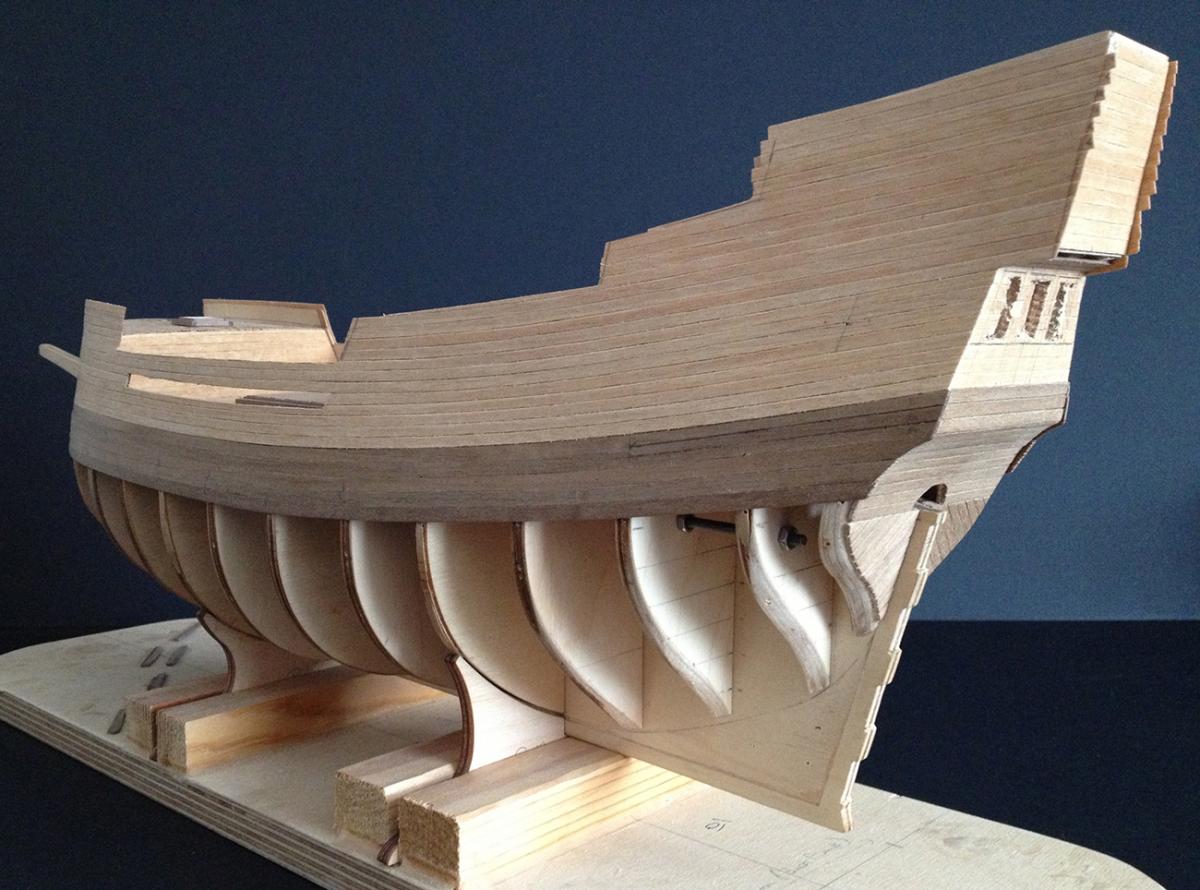
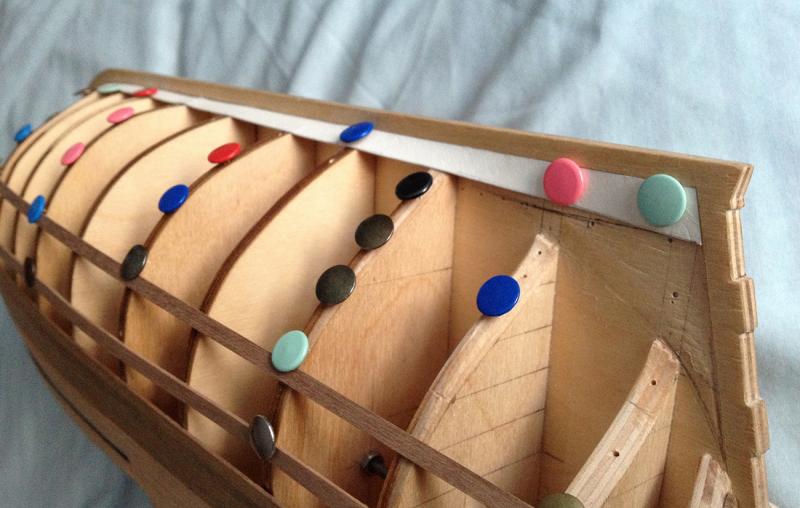
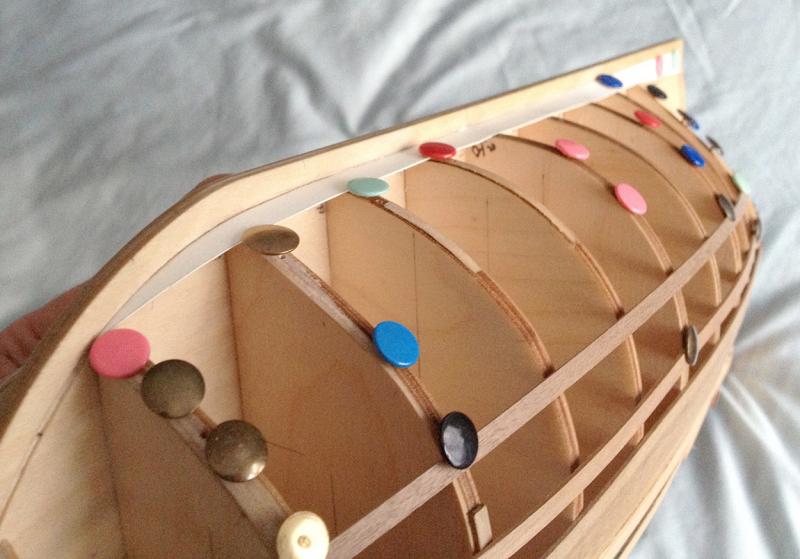
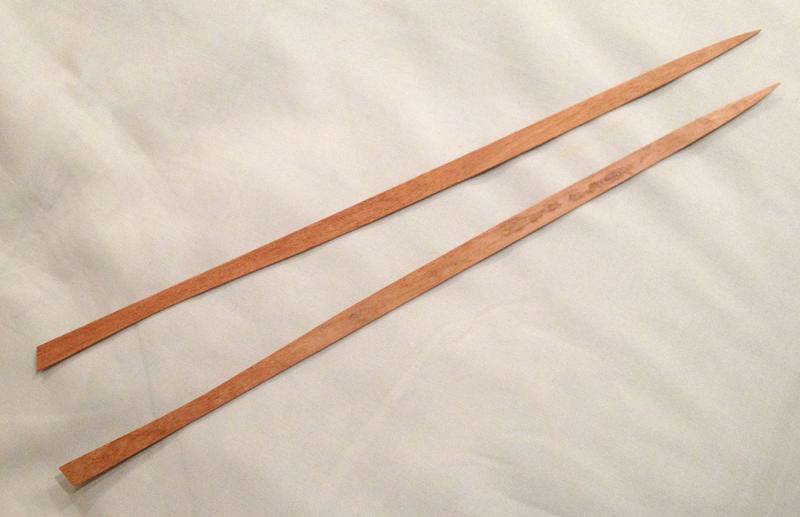
Slow progress of late, but a couple of big stages have been completed. The first four gun-ports have been cut at the rear of the ship (two on each side): One big job that I had been dreading was cutting and fitting the garboard planks. I've tried a few methods over the past few months(!) - poster-board templates, masking tape, measuring from the keel rabbet, string, prayer! - but finally settled on using strips of cardboard from a cereal box: The cardboard is pretty close in thickness to the 10mm wide walnut strips that I had bought for the garboards. It is stiff enough to hold it's shape without buckling, but has enough flexibility that it can be bent and twisted over the bulkheads. (the thumb-pins are for planking battens so that I can gauge how many planks I'll be needing for the next phase.) Time to cut the planks... I glued two lengths of the walnut back-to-back with a little contact adhesive and stuck the template on top of that. I was then able to cut and sand around the template, confident that the two planks would be identical: Next job: glue 'em in place...


-
Haha, thank you Alex. I think the main problem is that there aren't enough instructions - mostly drawings which assume understanding! My plan is to take my time, think a lot about what I'm doing and enjoy the process
-
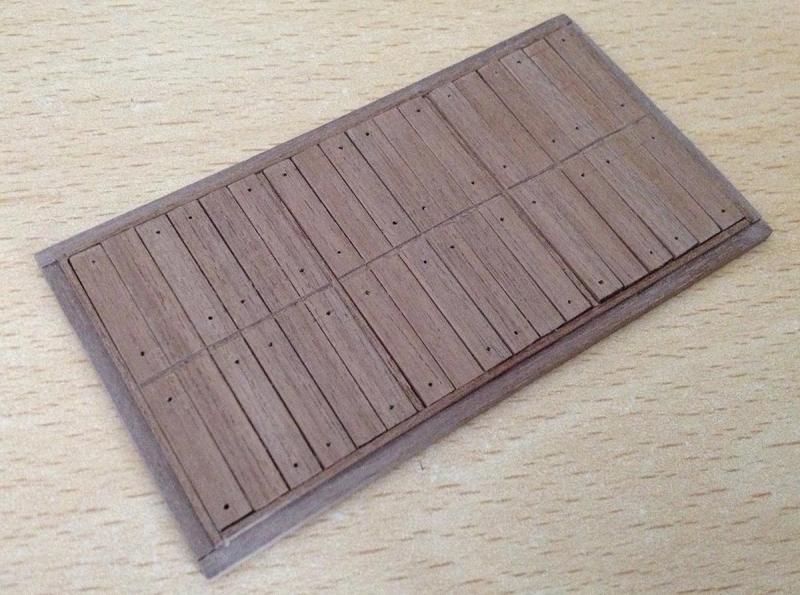
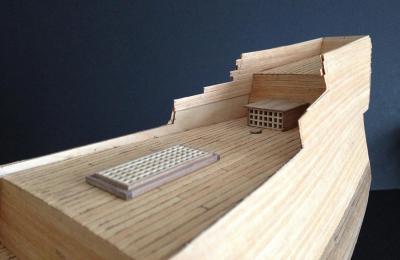
Slow progress of late, but I have glued together the loose parts of the hatchway (various sizes of walnut). Next step was to drill the holes for the brass eyelets; 48 holes in total (0.5mm diameter).... I have a sudden respect for those of you who decide to treenail your decks and hulls

-
Thanks for the reply and the recommendation John I'll be sure to try this trick when I make the windows for my Mayflower.
-
Hi John, Thanks for re-posting these images. I have a question about the windows you made for the doors: it looks like a clear plastic, scored with a craft knife and washed over with paint. Is this correct? What type of paint would you recommend? Rhodri
-
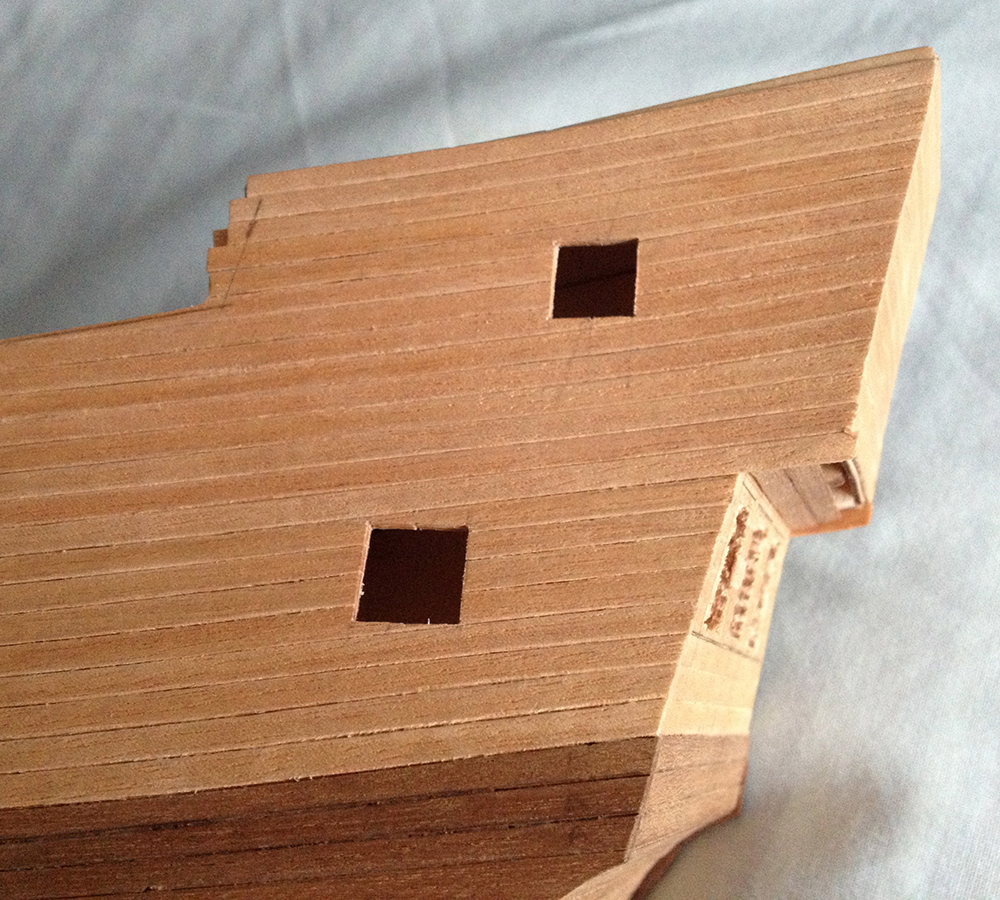
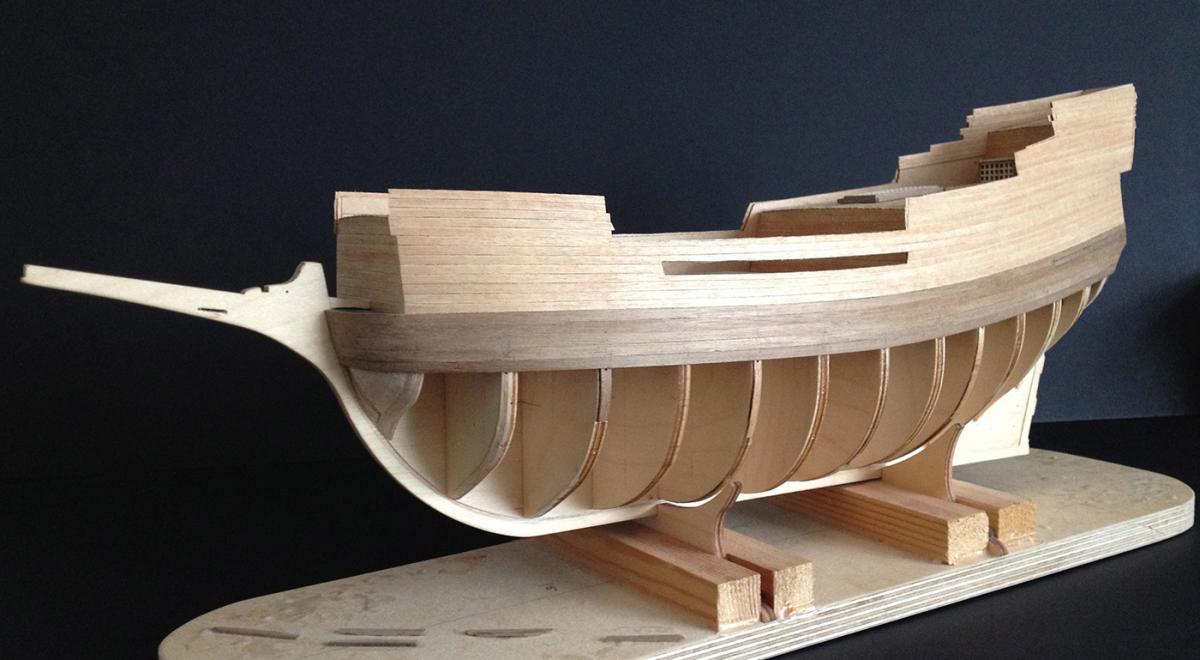
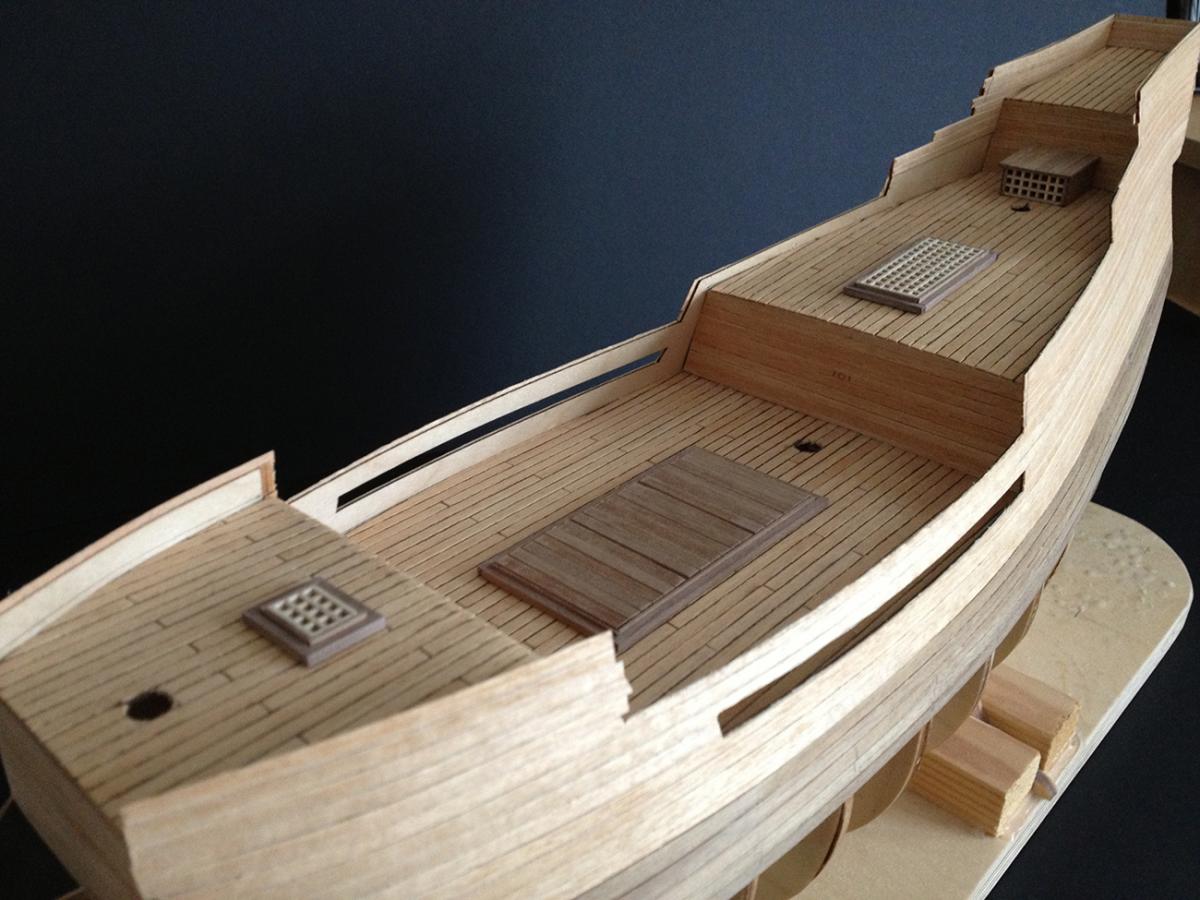
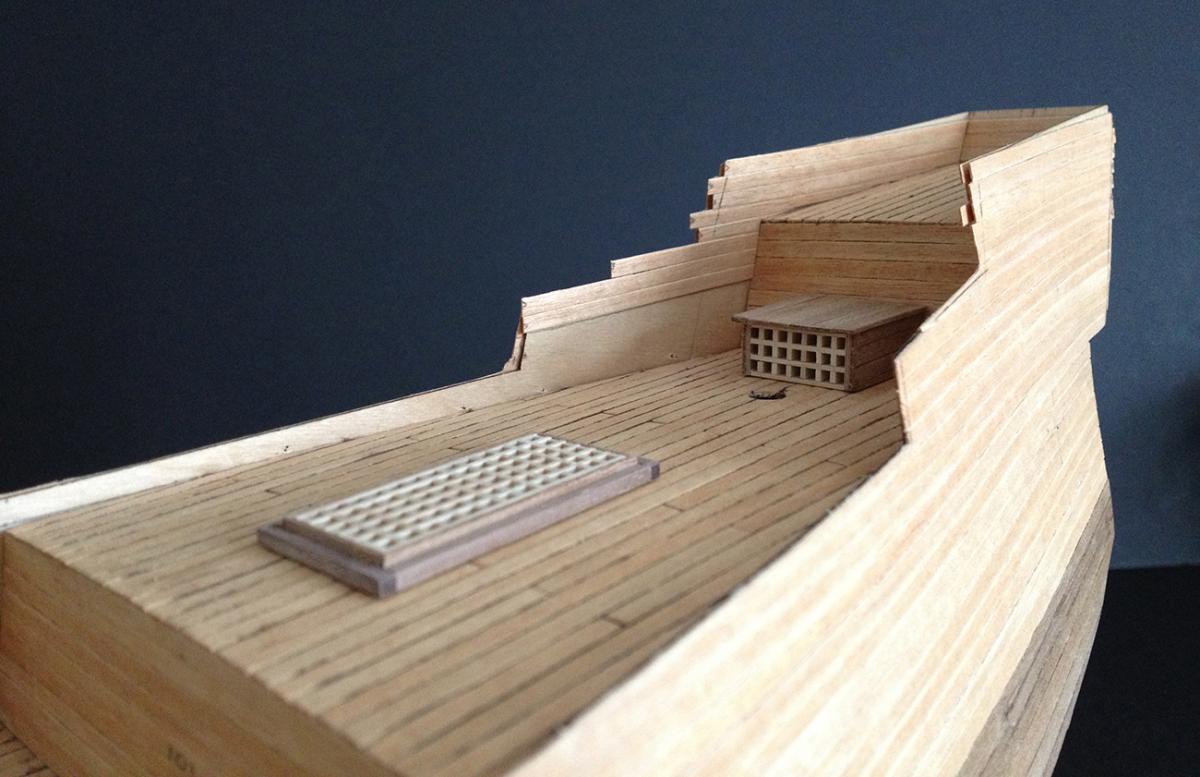
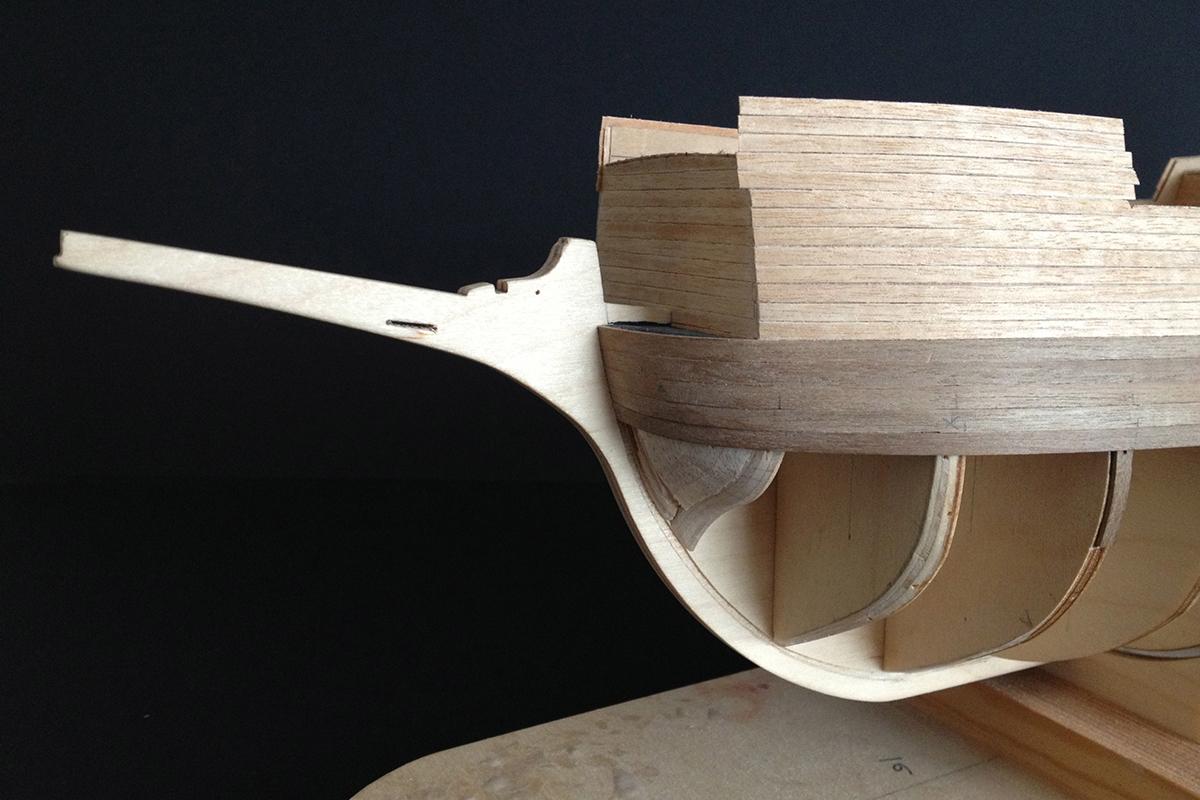
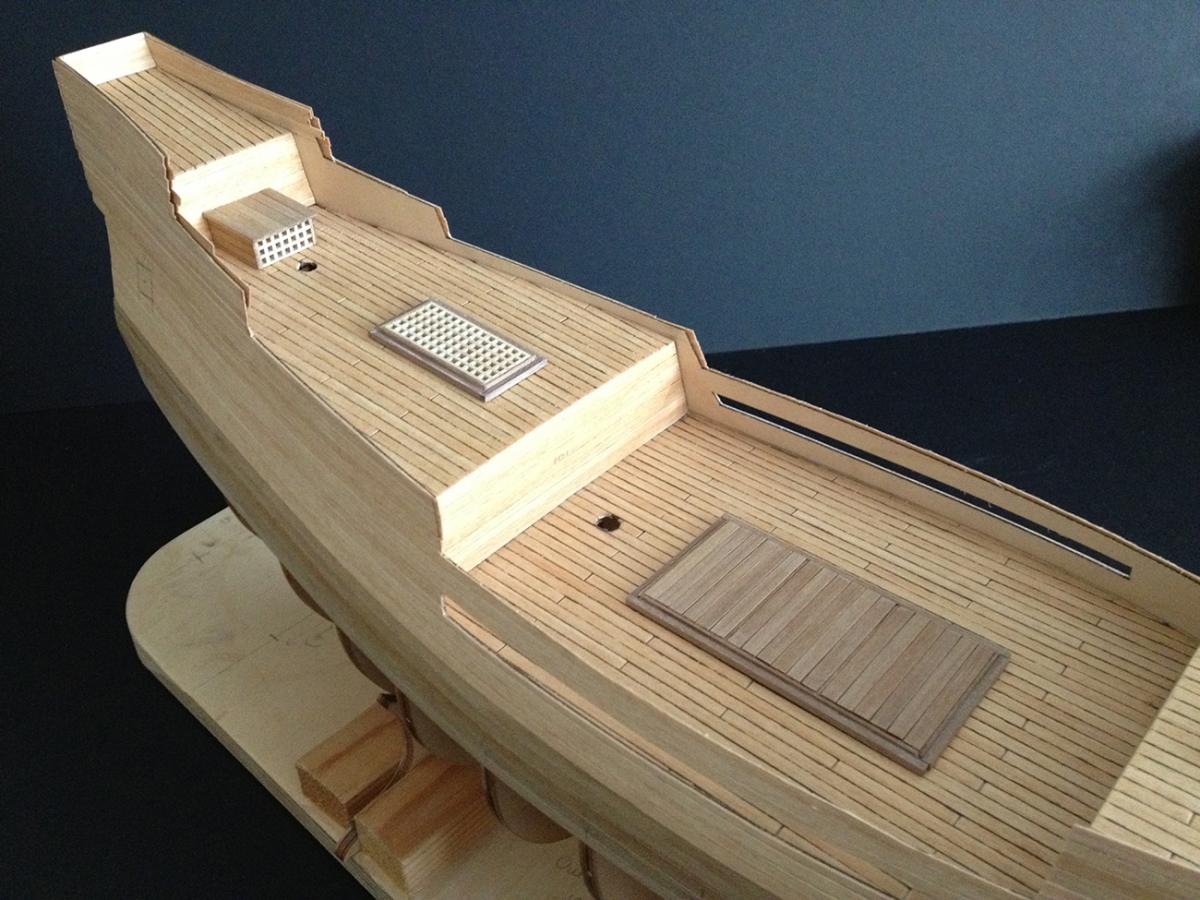
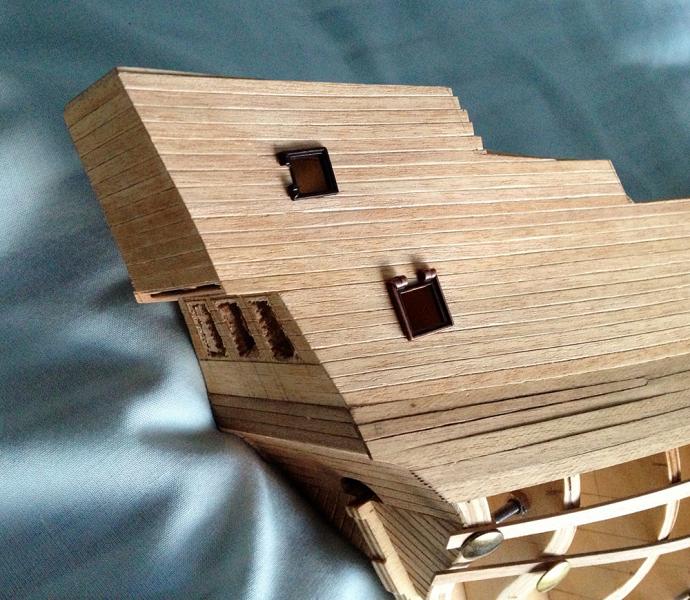
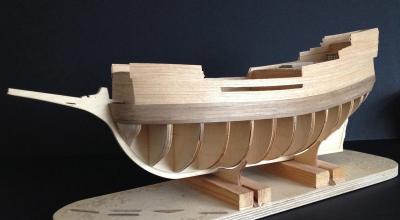
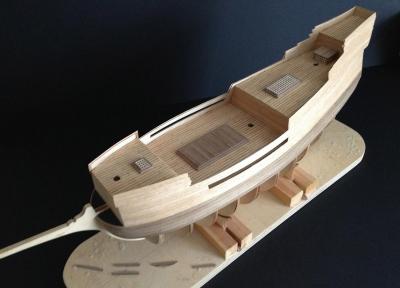
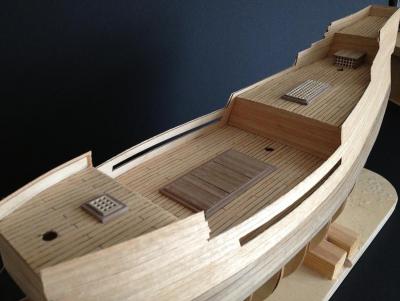
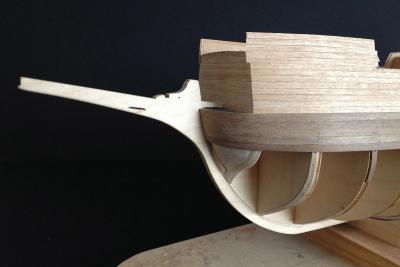
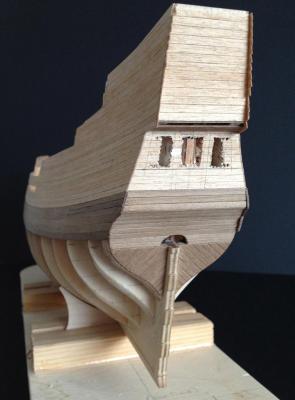
As mentioned above, I started this build almost two years ago and have made steady, but slow progress. Unfortunately, I've only recently started to photograph the ship, so my apologies for missing the early stages. To summarise: the false keel was slightly warped and needed a little straightening, but fitting the bulkheads was relatively straightforward. They needed a little sanding but fitted snugly. I then shaped the edges of the bulkheads to allow a smoother run for the planks at a later date. The instructions gave no details about bearding-lines, but having trawled through the old MSW forums it seemed like a good idea, so I cut one. The Decks were laid using the 0.5 x 3mm basswood supplied and lengths of dark brown cotton thread to simulate the caulking. The bulwarks fitted pretty well and are being planked on both sides with the same 0.5 x 3mm basswood. I've made a start on the planking of the hull (1 x 4mm walnut) but am taking this part very slowly as it's only single-planked and I want to do a decent job of it! I've also jumped ahead slightly (couldn't resist!) and built a few of the loose parts for the deck: the gratings, 'helmsman binnacle' and the upper deck hatchway. Deck furniture: The ship's stern features three small windows. The kit provides stickers which are applied to the stern wall and framed with 1 x 1mm walnut but this seemed a little cheap and nasty, so I've decided to 'freestyle' and construct the windows in a more realistic fashion by cutting apertures into the stern and filling with transparent plastic sheet. I'll show more images of these as they're built, but the rough-cut apertures can be seen below:


-
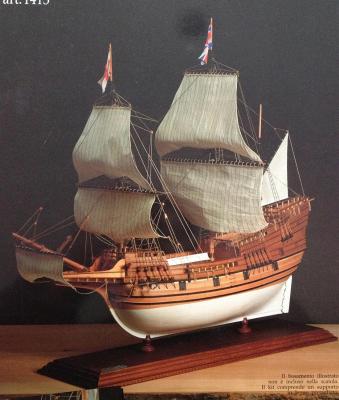
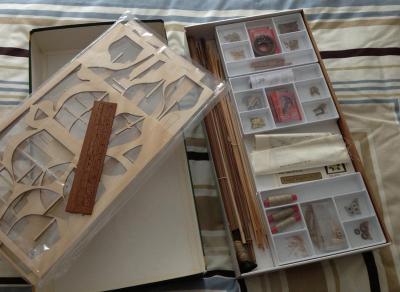
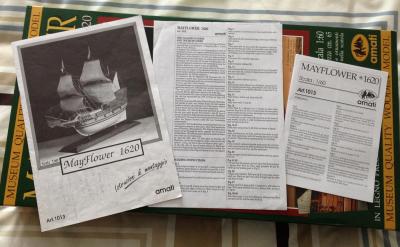
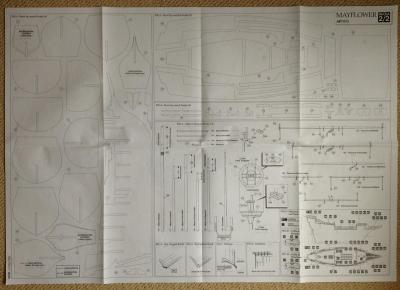
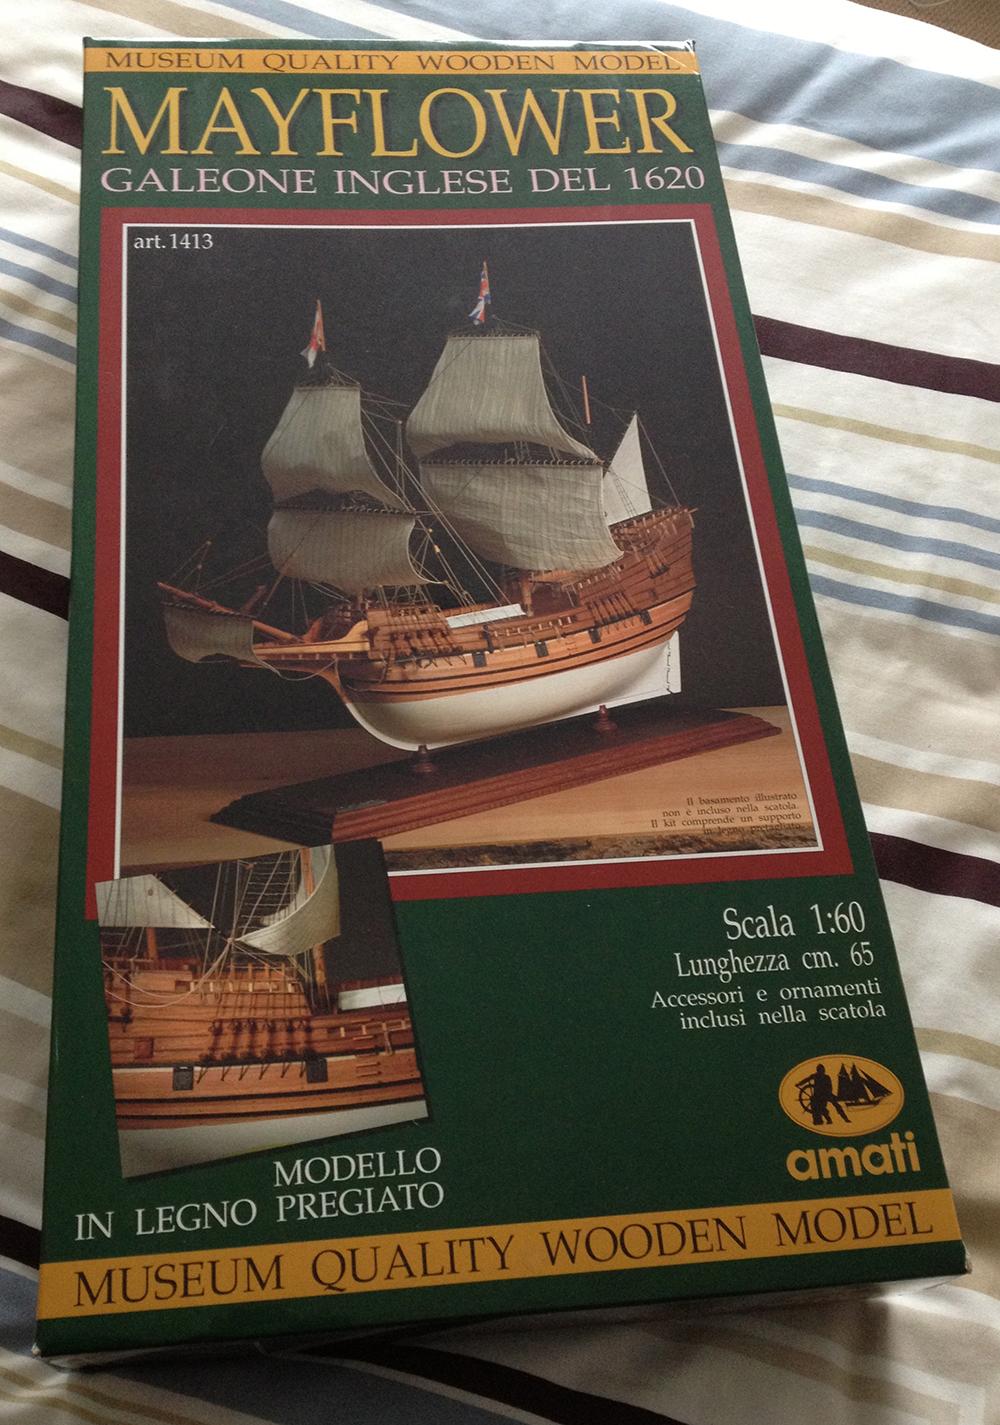
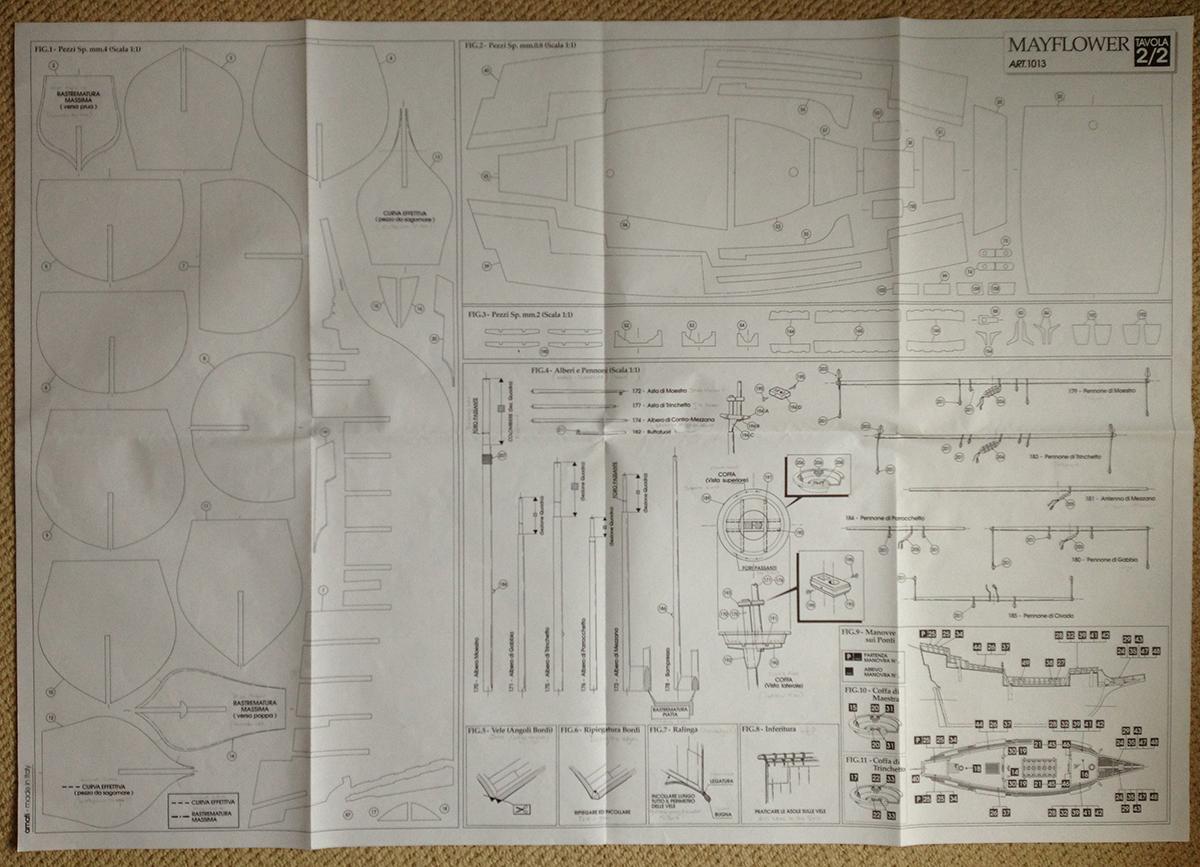
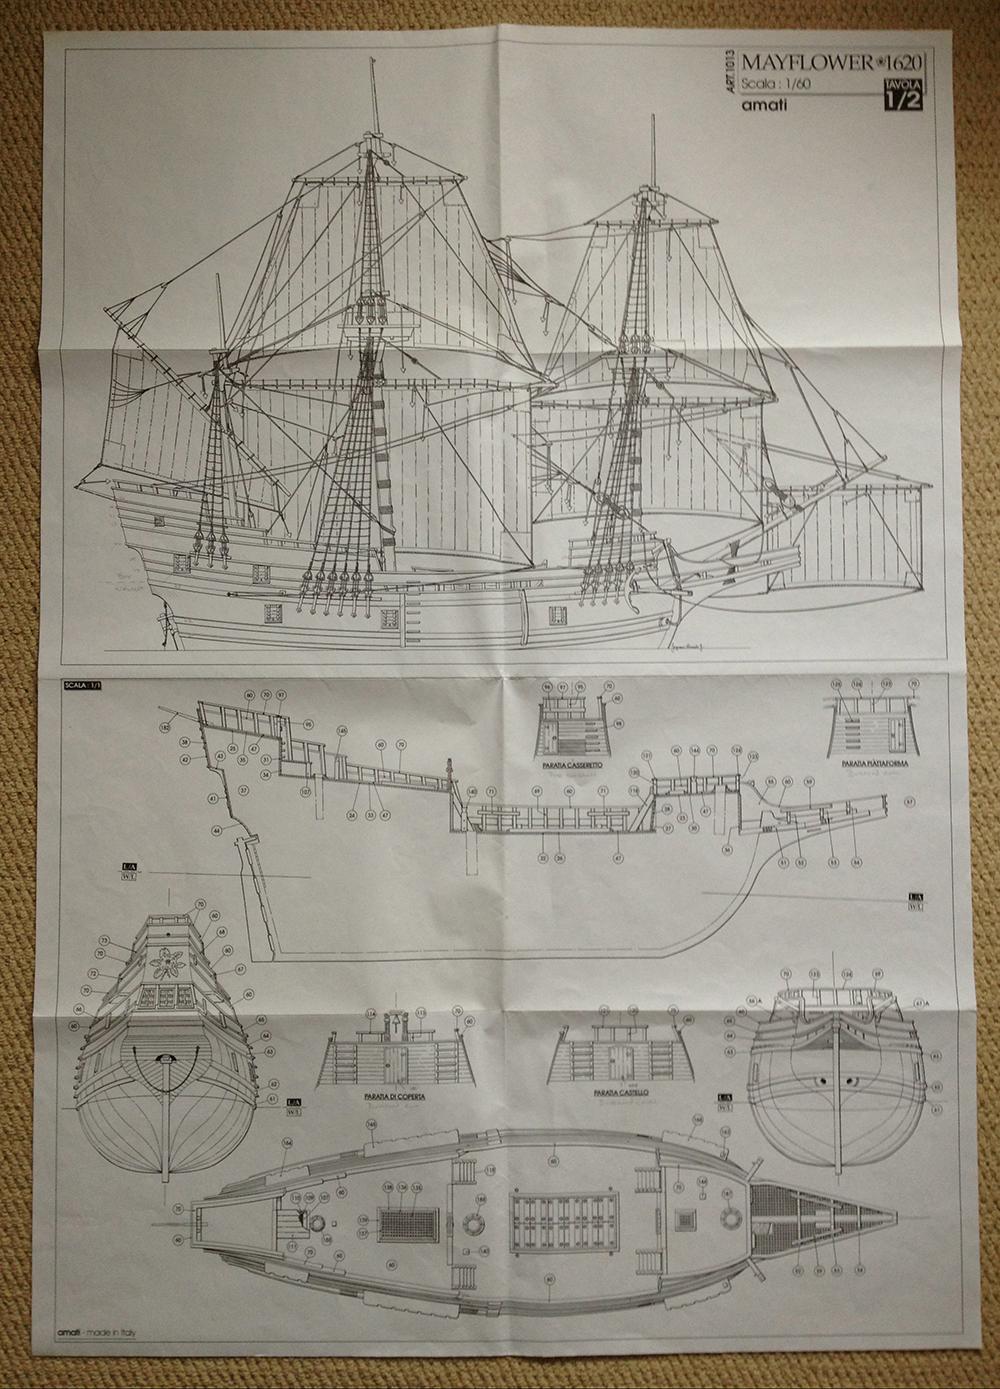
Hello All, I bought this kit - my first - in April 2011 and discovered the MSW site and forum soon after. It has been an invaluable source of inspiration and information and I was saddened to hear that a lot of work and information was lost recently when the site crashed. I'm sure the forums will soon be back to full-strength and hope that this build log will be a small contribution to that effort. It has been a slow build so far, but one which I am enjoying hugely. I'm determined to do a decent job, and not to rush or make silly mistakes. There's and old carpenters' saying: "Measure twice, cut once"; I've developed my own mantra: "Measure twice, stop, check the plans, measure again, have a cup of coffee and a think, measure again for luck, cut once!" Again, this is my first kit and build, so I have no real point of reference for comparison, but the kit (by Amati) seems to be of reasonable quality. The instructions are patchy and are mostly in Italian, so I've been relying on 'Google Translate' for some assistance. Here are some initial pics before moving on to the build: Packaging - nicely designed Photo on the box Contents Guide book and instructions (Italian & English) Plans (page 1/2) Plans (page 2/2)