KLarsen
-
Posts
127 -
Joined
-
Last visited
1 Follower
Recent Profile Visitors
1,478 profile views


-
 KLarsen reacted to a post in a topic:
Trireme Olympias by Richard Braithwaite
KLarsen reacted to a post in a topic:
Trireme Olympias by Richard Braithwaite
-
KLarsen reacted to a post in a topic:
Hobbymill.EU / precision milled exotic woods
-
KLarsen reacted to a post in a topic:
Trireme Olympias by Richard Braithwaite
-
KLarsen reacted to a post in a topic:
La Mahonesa 1789 by native one - scale 1/48
-
TJM reacted to a post in a topic:
La Mahonesa by KLarsen - Scale 1/48 - stern cross-section
-
KLarsen reacted to a post in a topic:
Trireme Olympias by Richard Braithwaite
-
KLarsen reacted to a post in a topic:
Trireme Olympias by Richard Braithwaite
-
KLarsen reacted to a post in a topic:
Le Rochefort by Some Idea - 1/24th Scale - First POF Build
-
KLarsen reacted to a post in a topic:
Bateau de Lanvéoc by JacquesCousteau - Scale 1:32 - From Ancre Plans
-
KLarsen reacted to a post in a topic:
Bateau de Lanvéoc by JacquesCousteau - Scale 1:32 - From Ancre Plans
-
KLarsen reacted to a post in a topic:
Le Rochefort by Some Idea - 1/24th Scale - First POF Build
-
KARAVOKIRIS reacted to a post in a topic:
La Mahonesa by KLarsen - Scale 1/48 - stern cross-section
-
KARAVOKIRIS reacted to a post in a topic:
La Mahonesa by KLarsen - Scale 1/48 - stern cross-section
-
KARAVOKIRIS reacted to a post in a topic:
La Mahonesa by KLarsen - Scale 1/48 - stern cross-section
-
KARAVOKIRIS reacted to a post in a topic:
La Mahonesa by KLarsen - Scale 1/48 - stern cross-section
-
 Mike Y reacted to a post in a topic:
La Mahonesa by KLarsen - Scale 1/48 - stern cross-section
Mike Y reacted to a post in a topic:
La Mahonesa by KLarsen - Scale 1/48 - stern cross-section
-
ChrisLBren reacted to a post in a topic:
La Mahonesa by KLarsen - Scale 1/48 - stern cross-section
-
Siggi52 reacted to a post in a topic:
La Mahonesa by KLarsen - Scale 1/48 - stern cross-section
-
druxey reacted to a post in a topic:
La Mahonesa by KLarsen - Scale 1/48 - stern cross-section
-
JacquesCousteau reacted to a post in a topic:
La Mahonesa by KLarsen - Scale 1/48 - stern cross-section
-
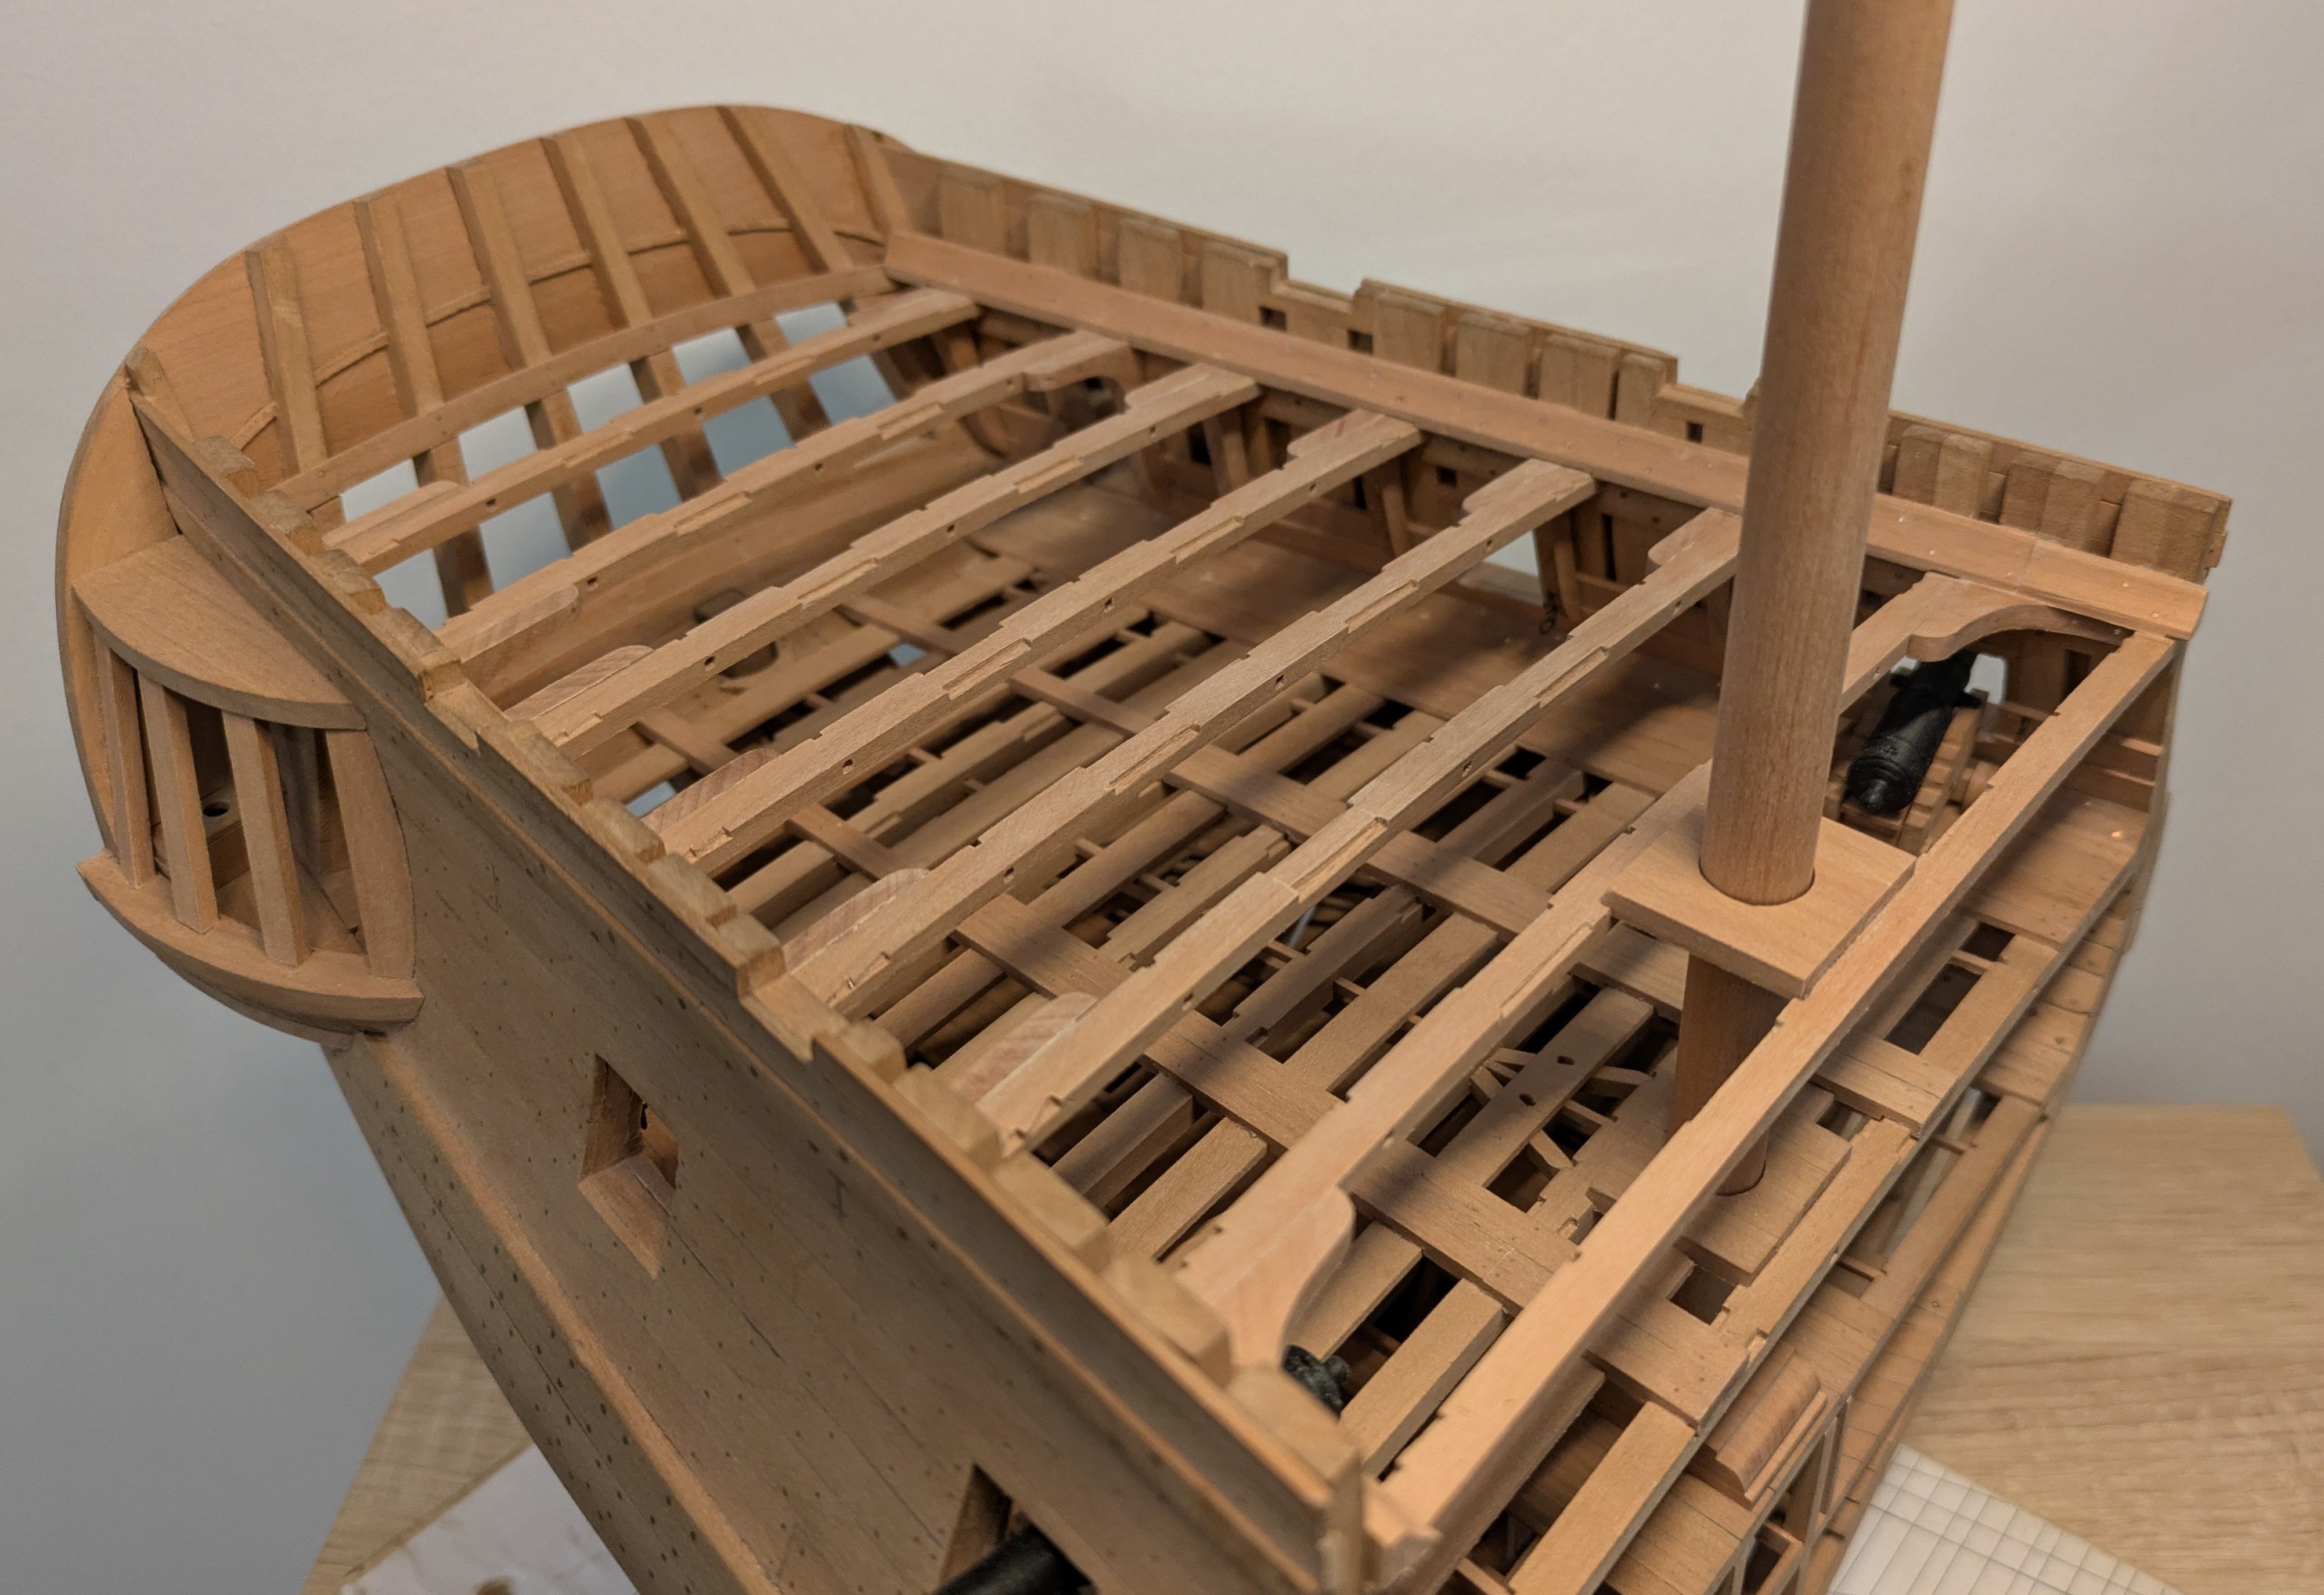
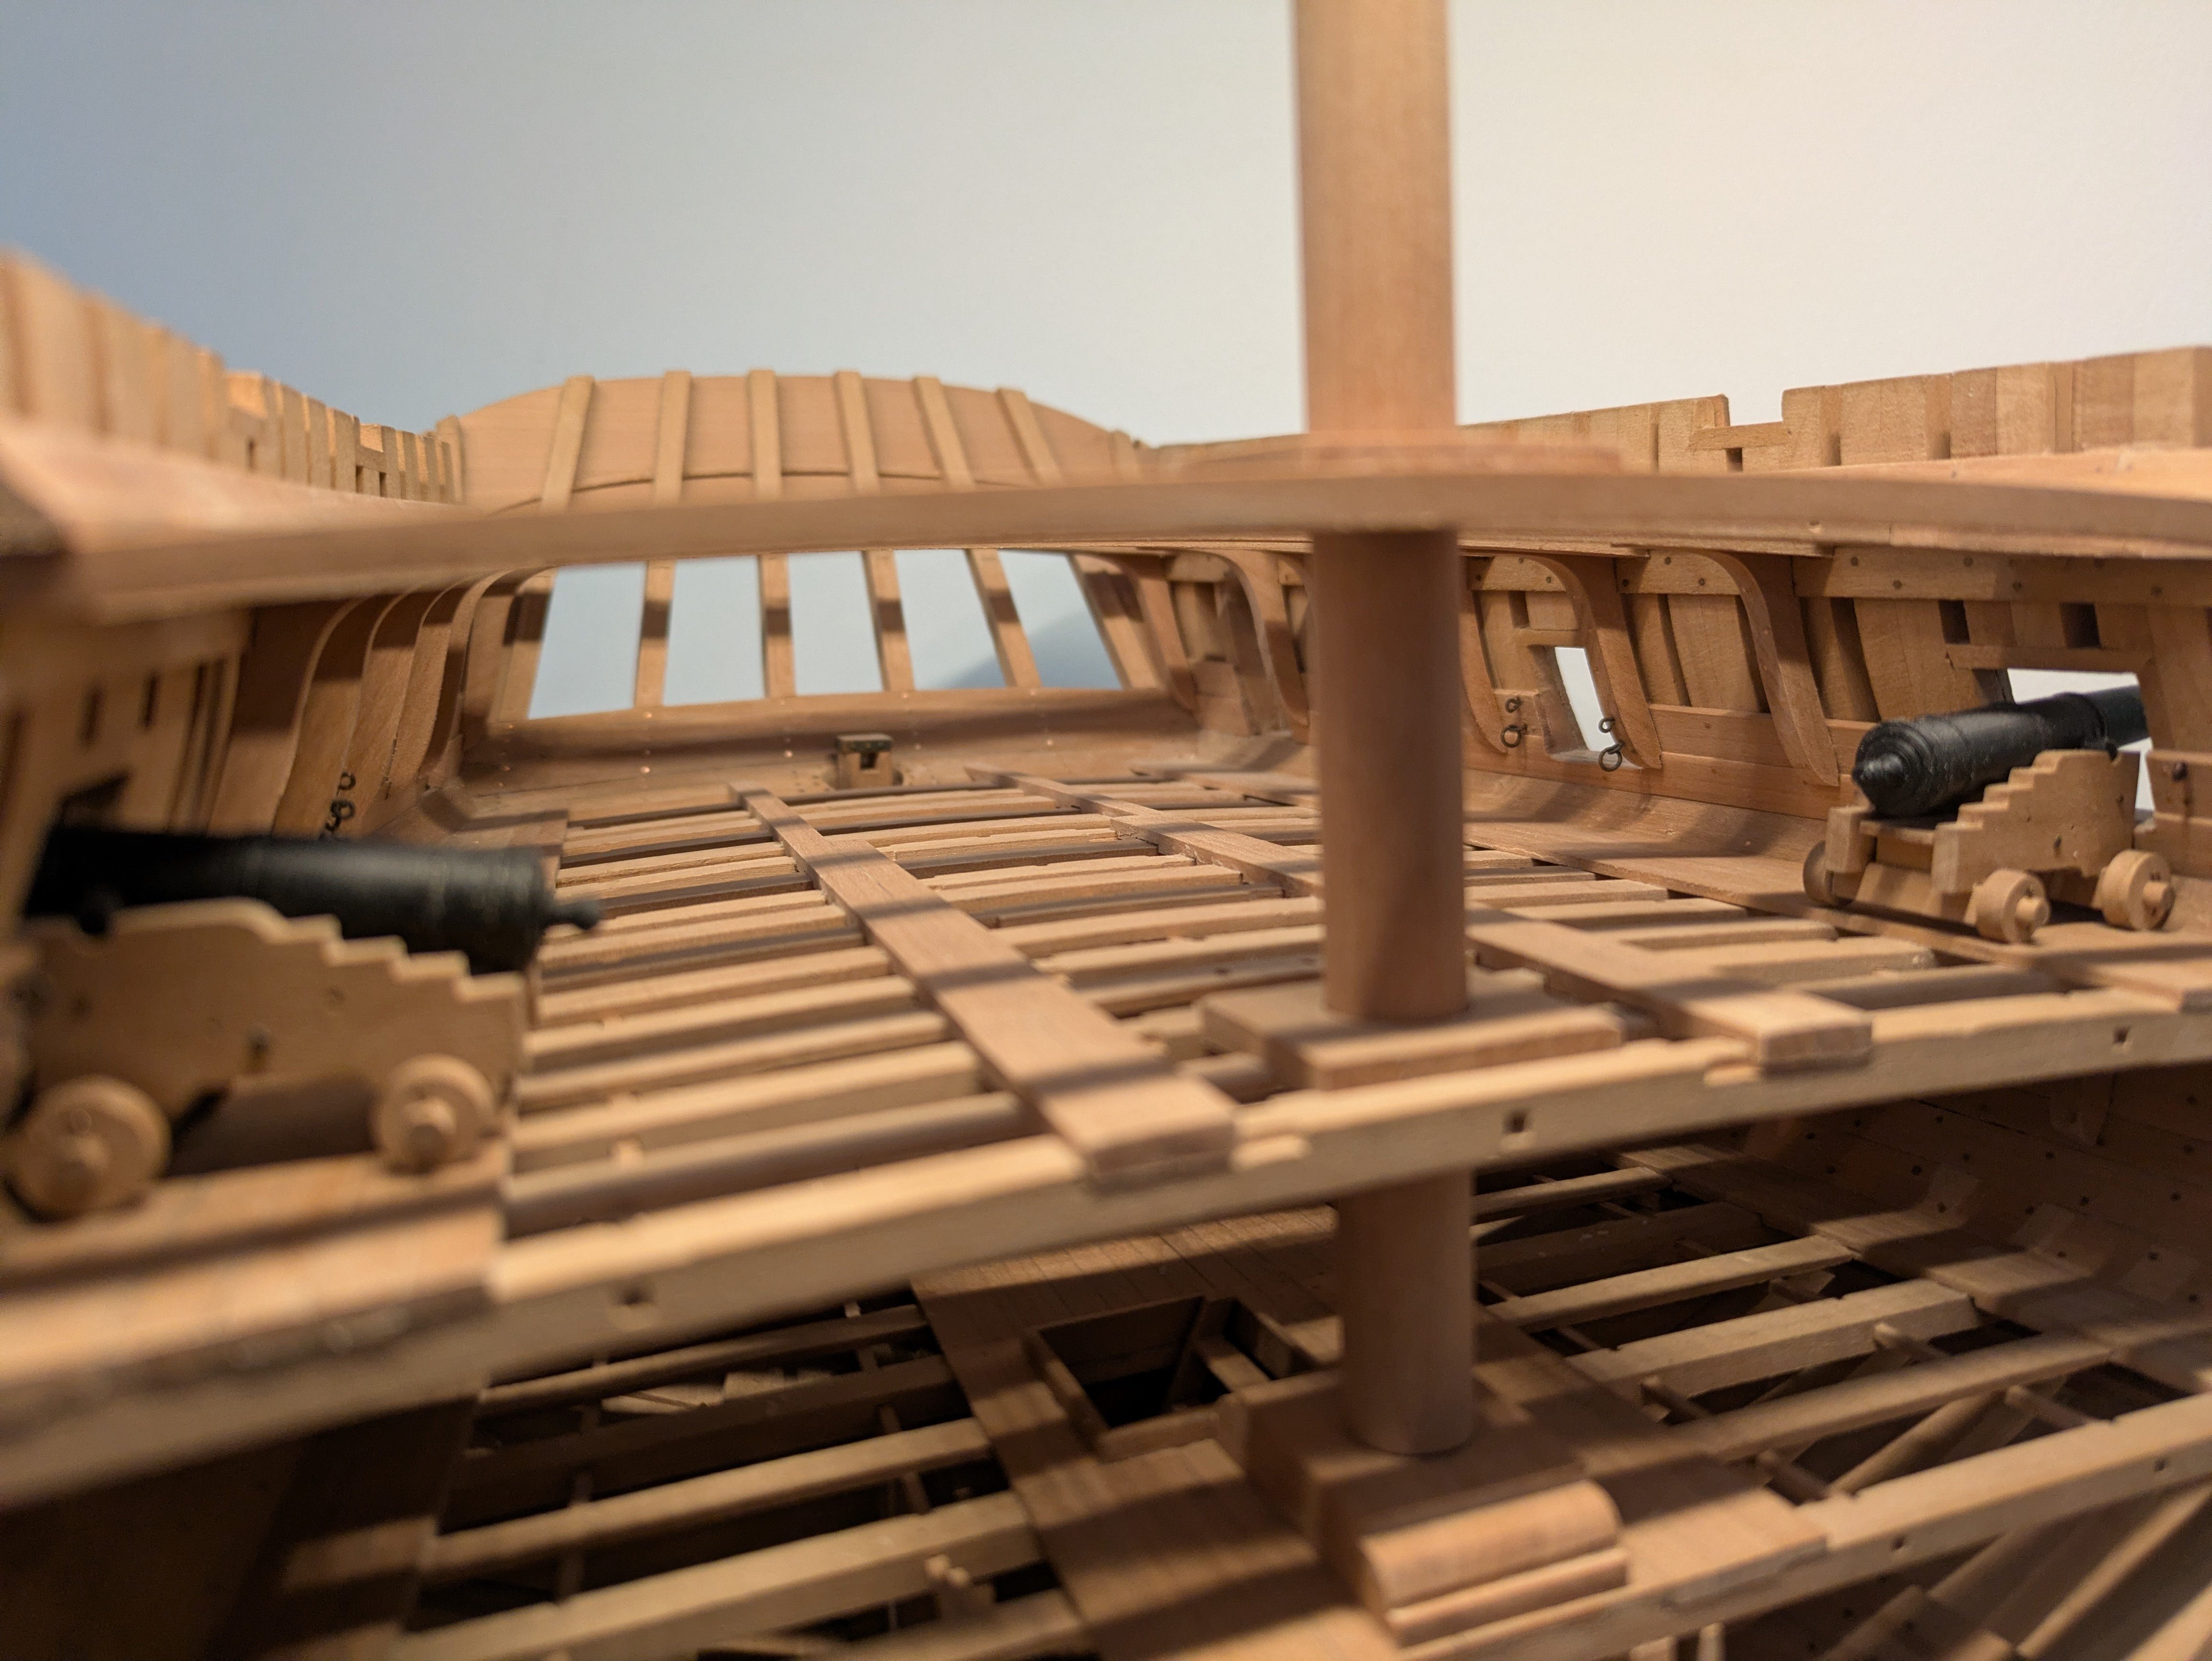
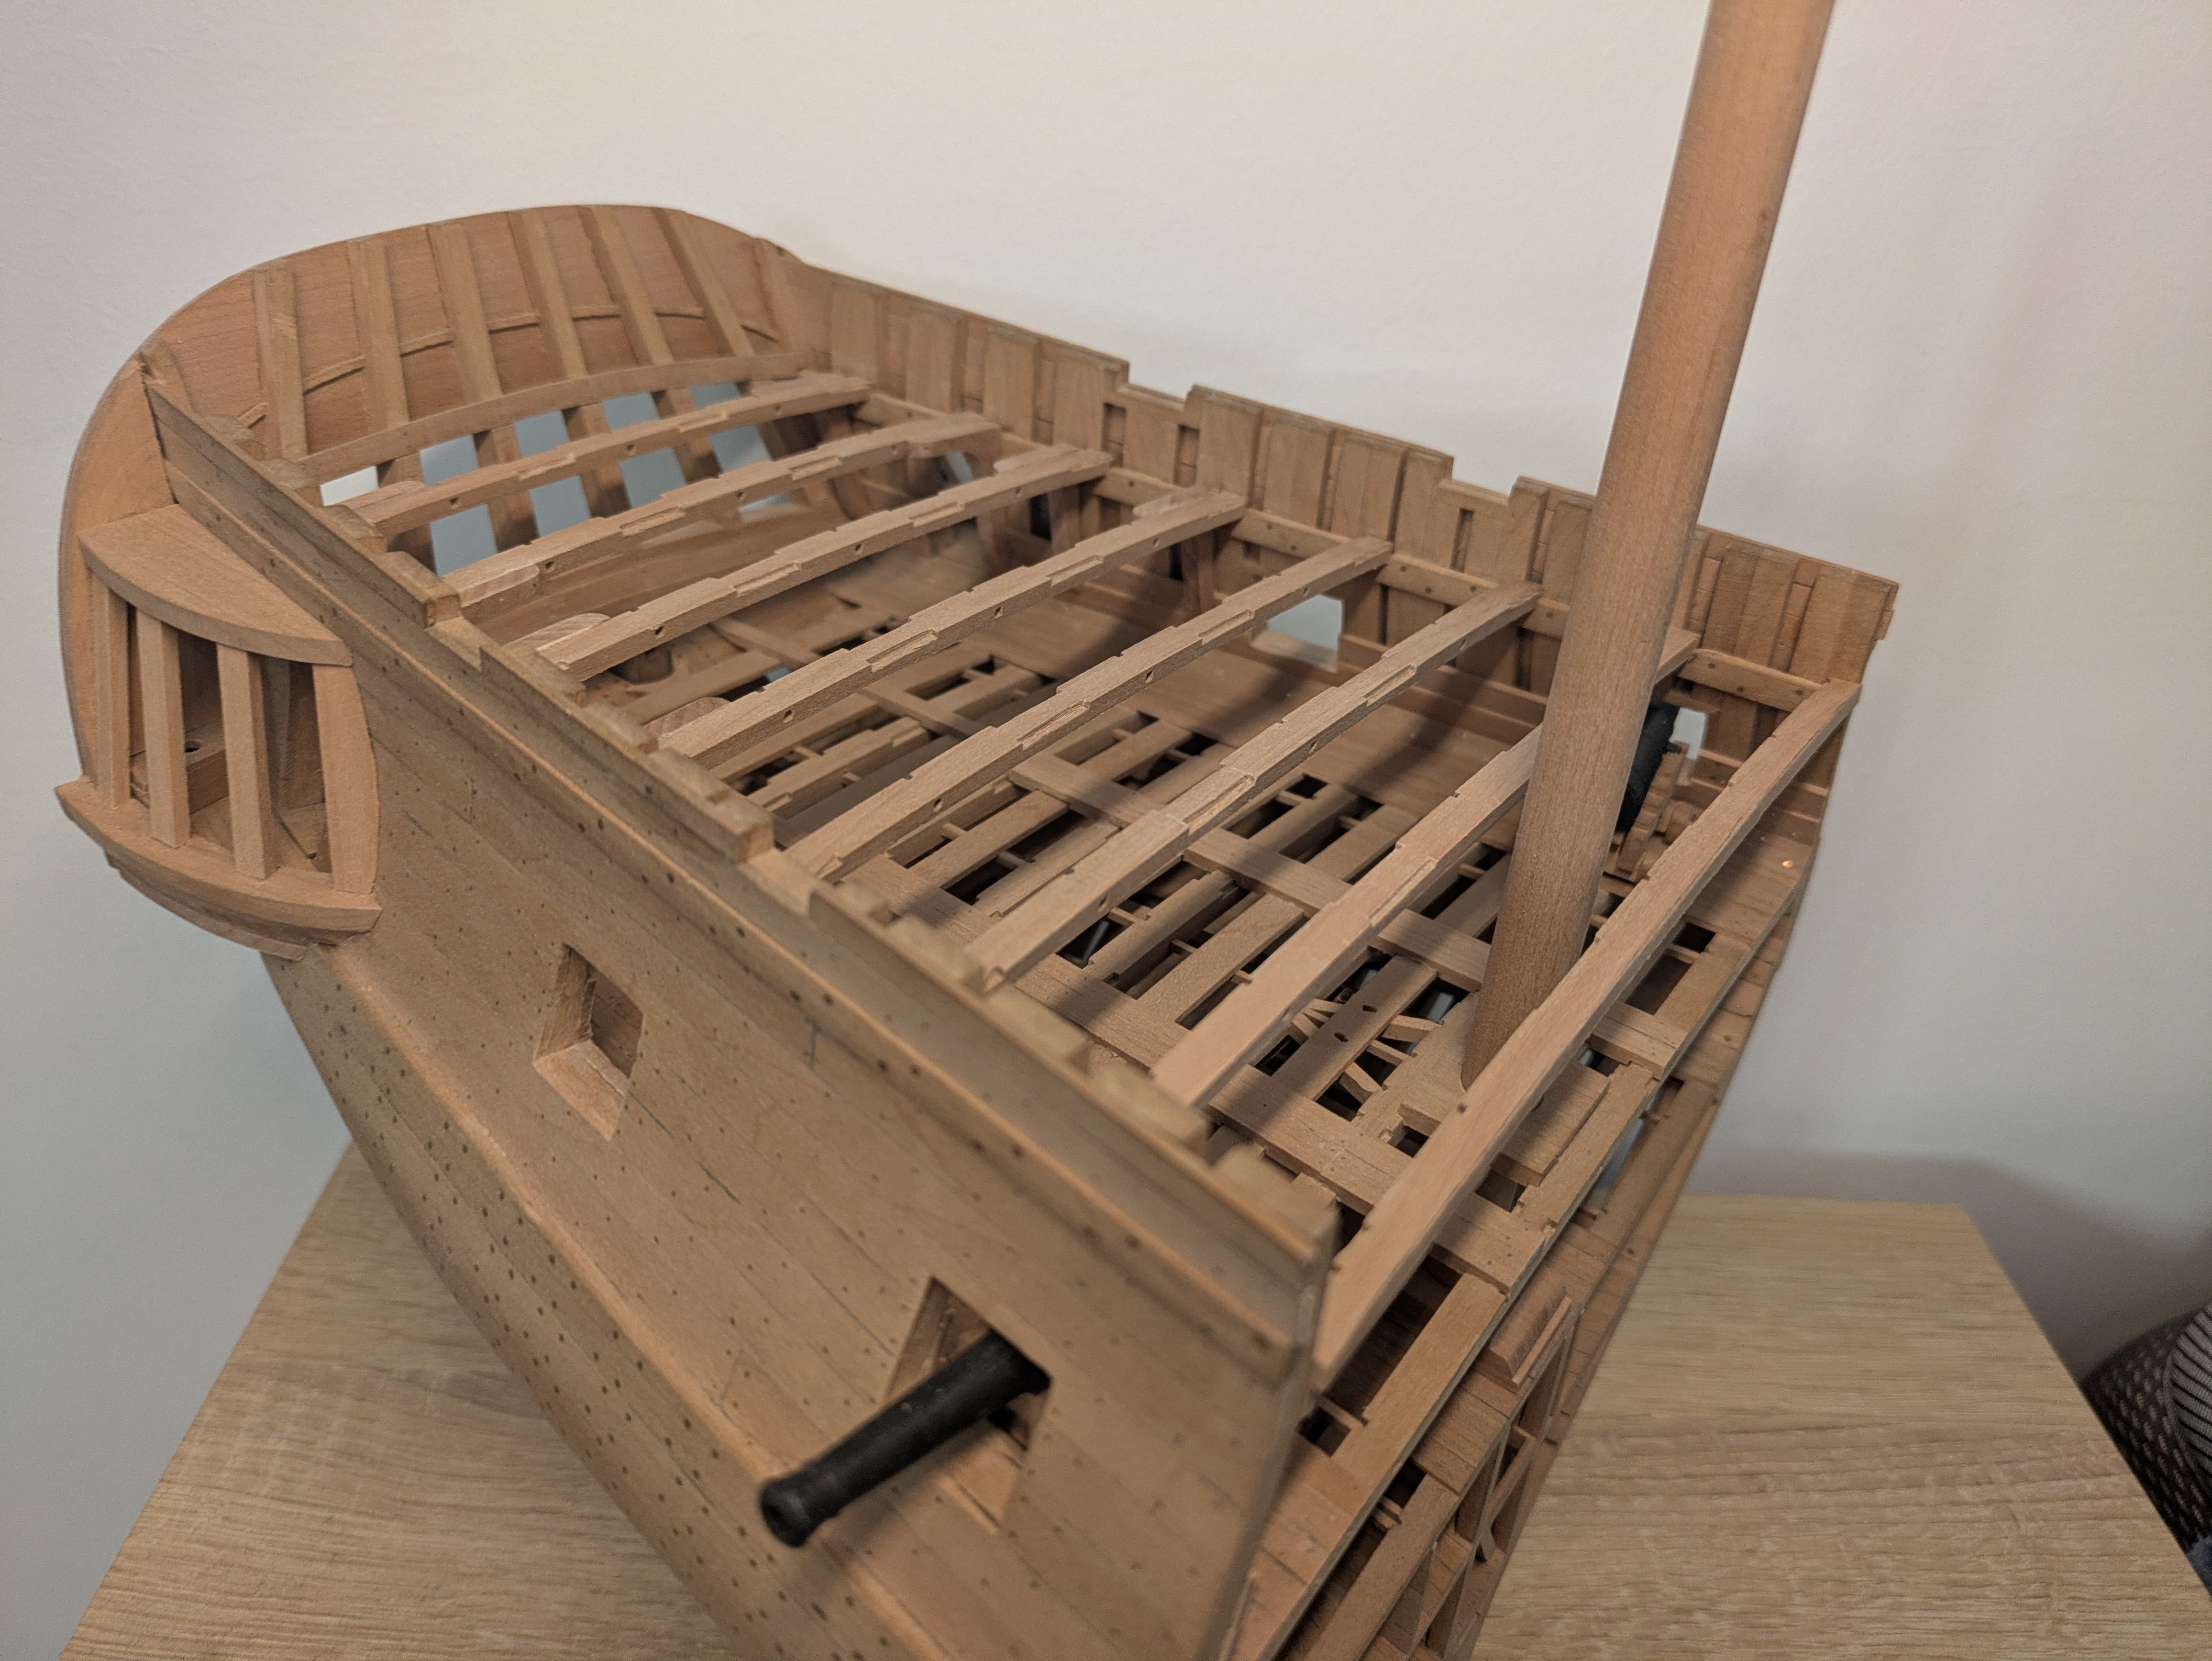
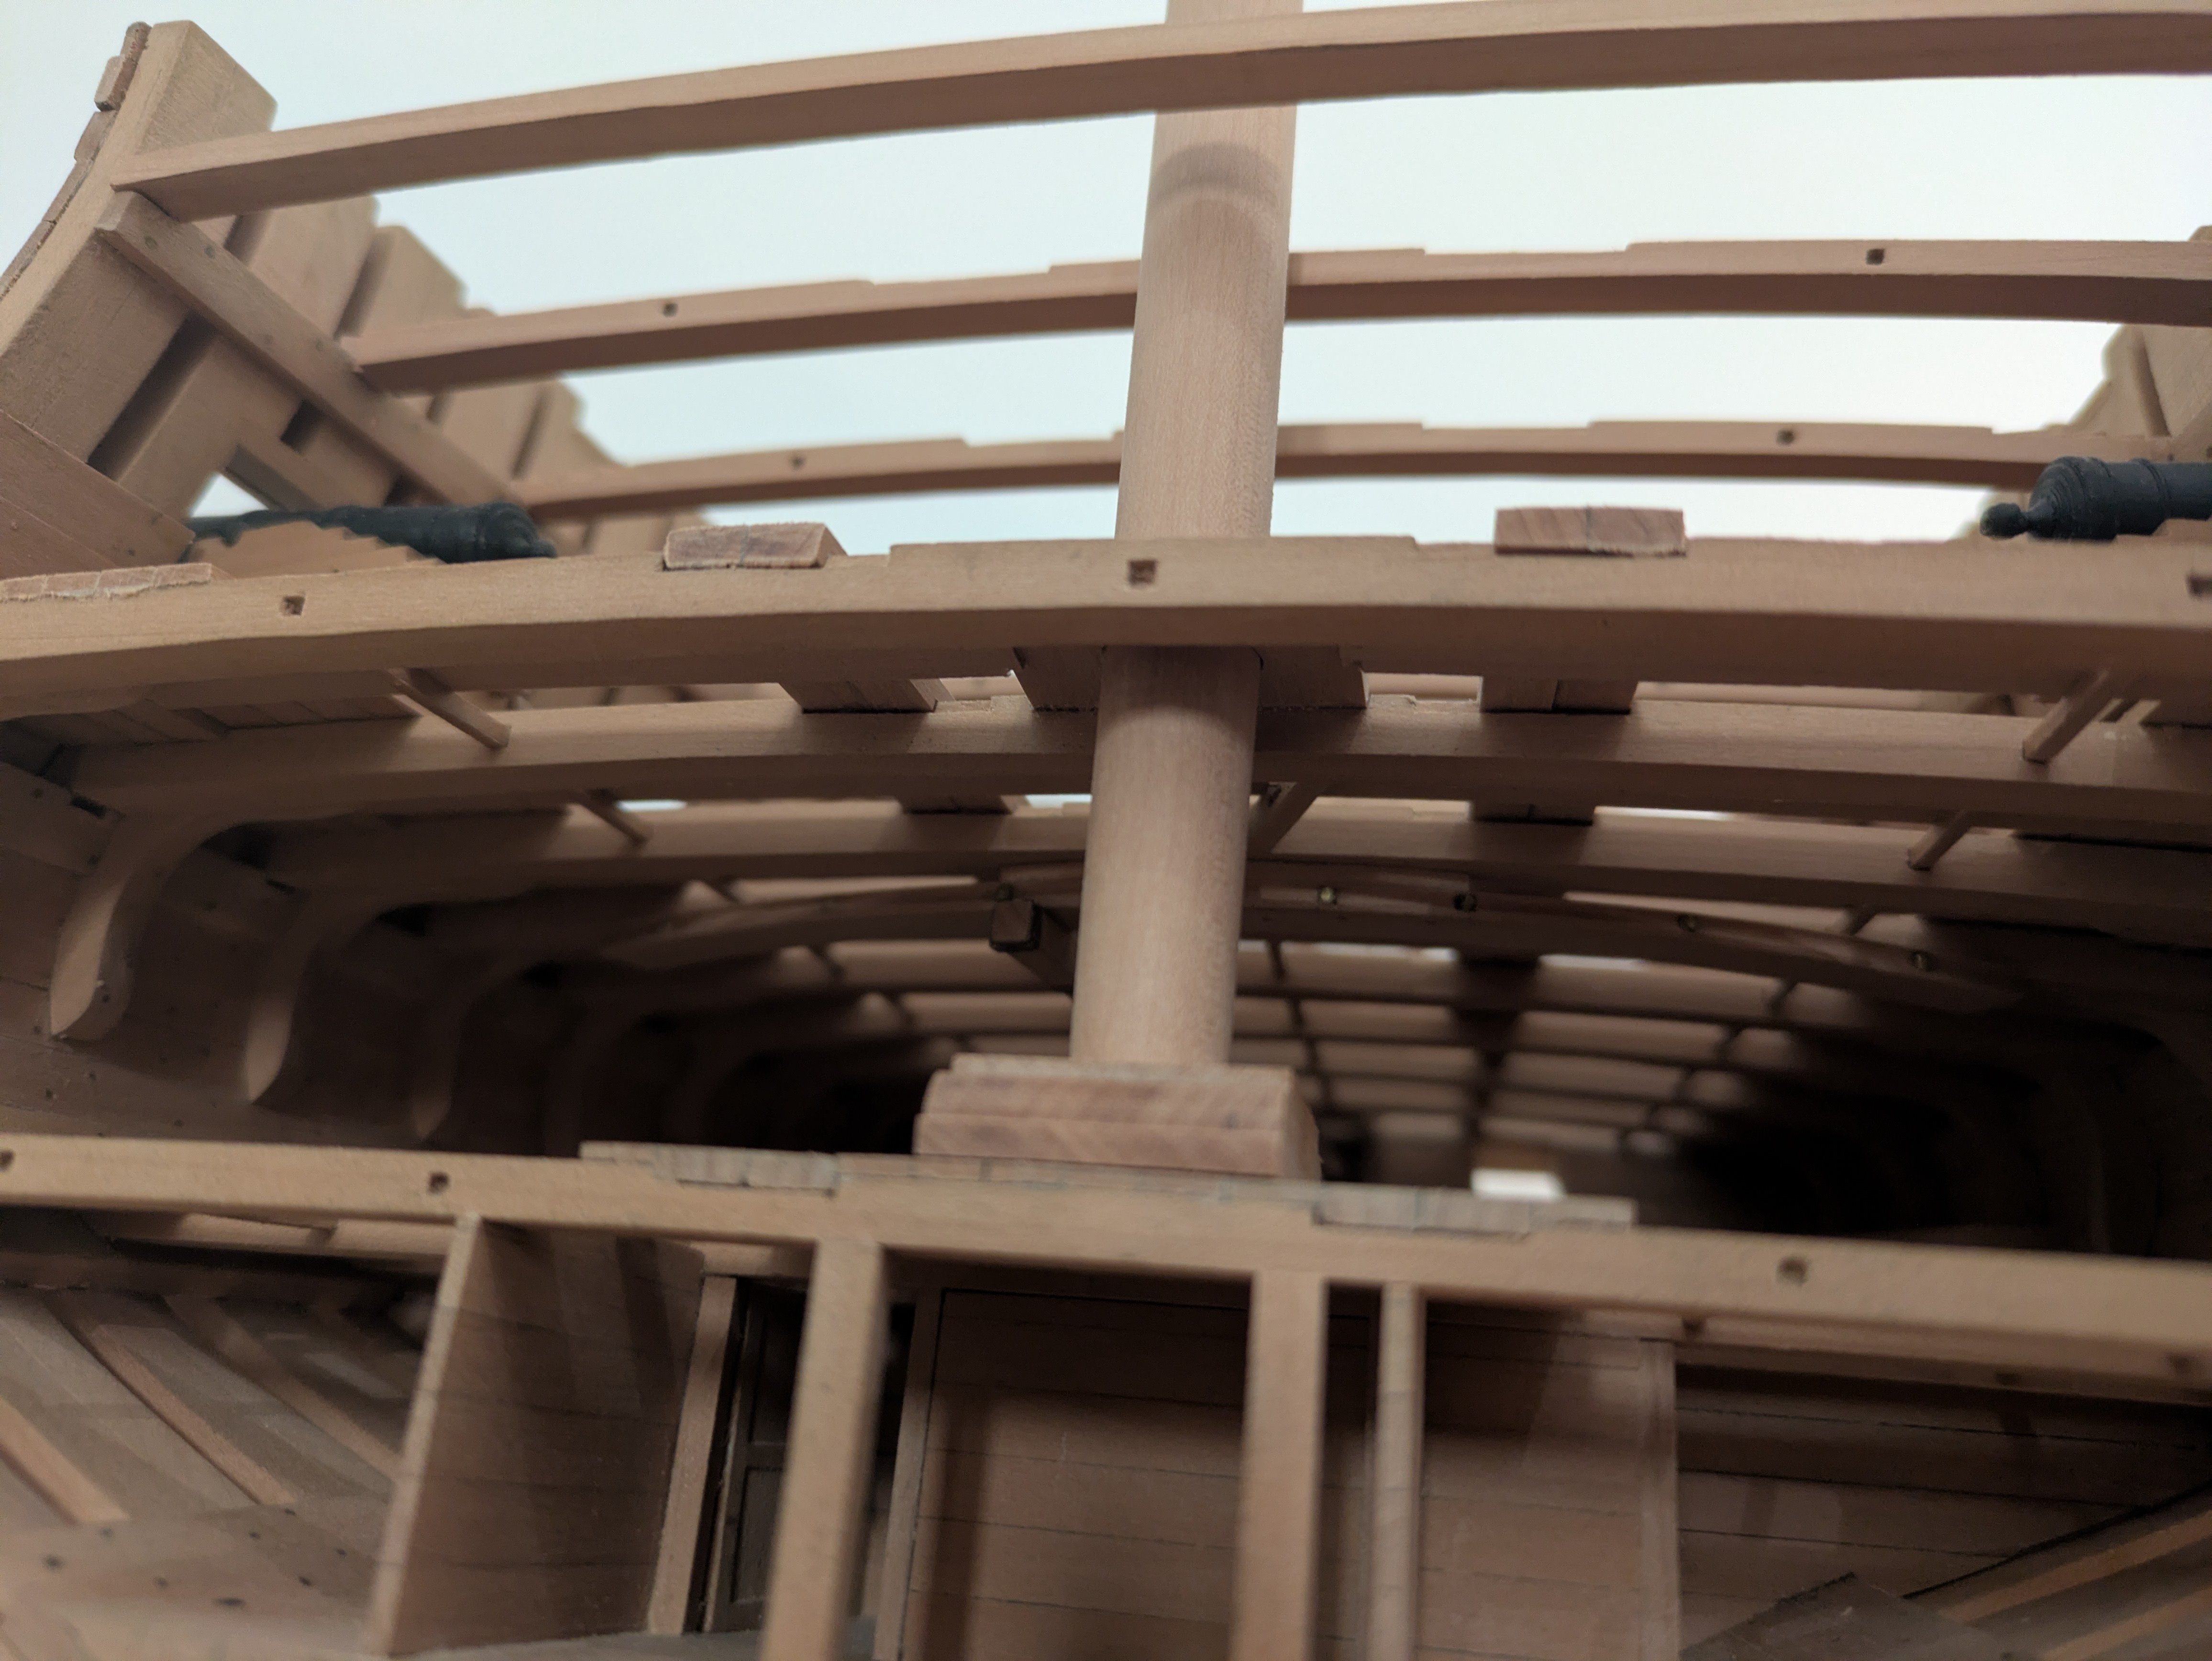
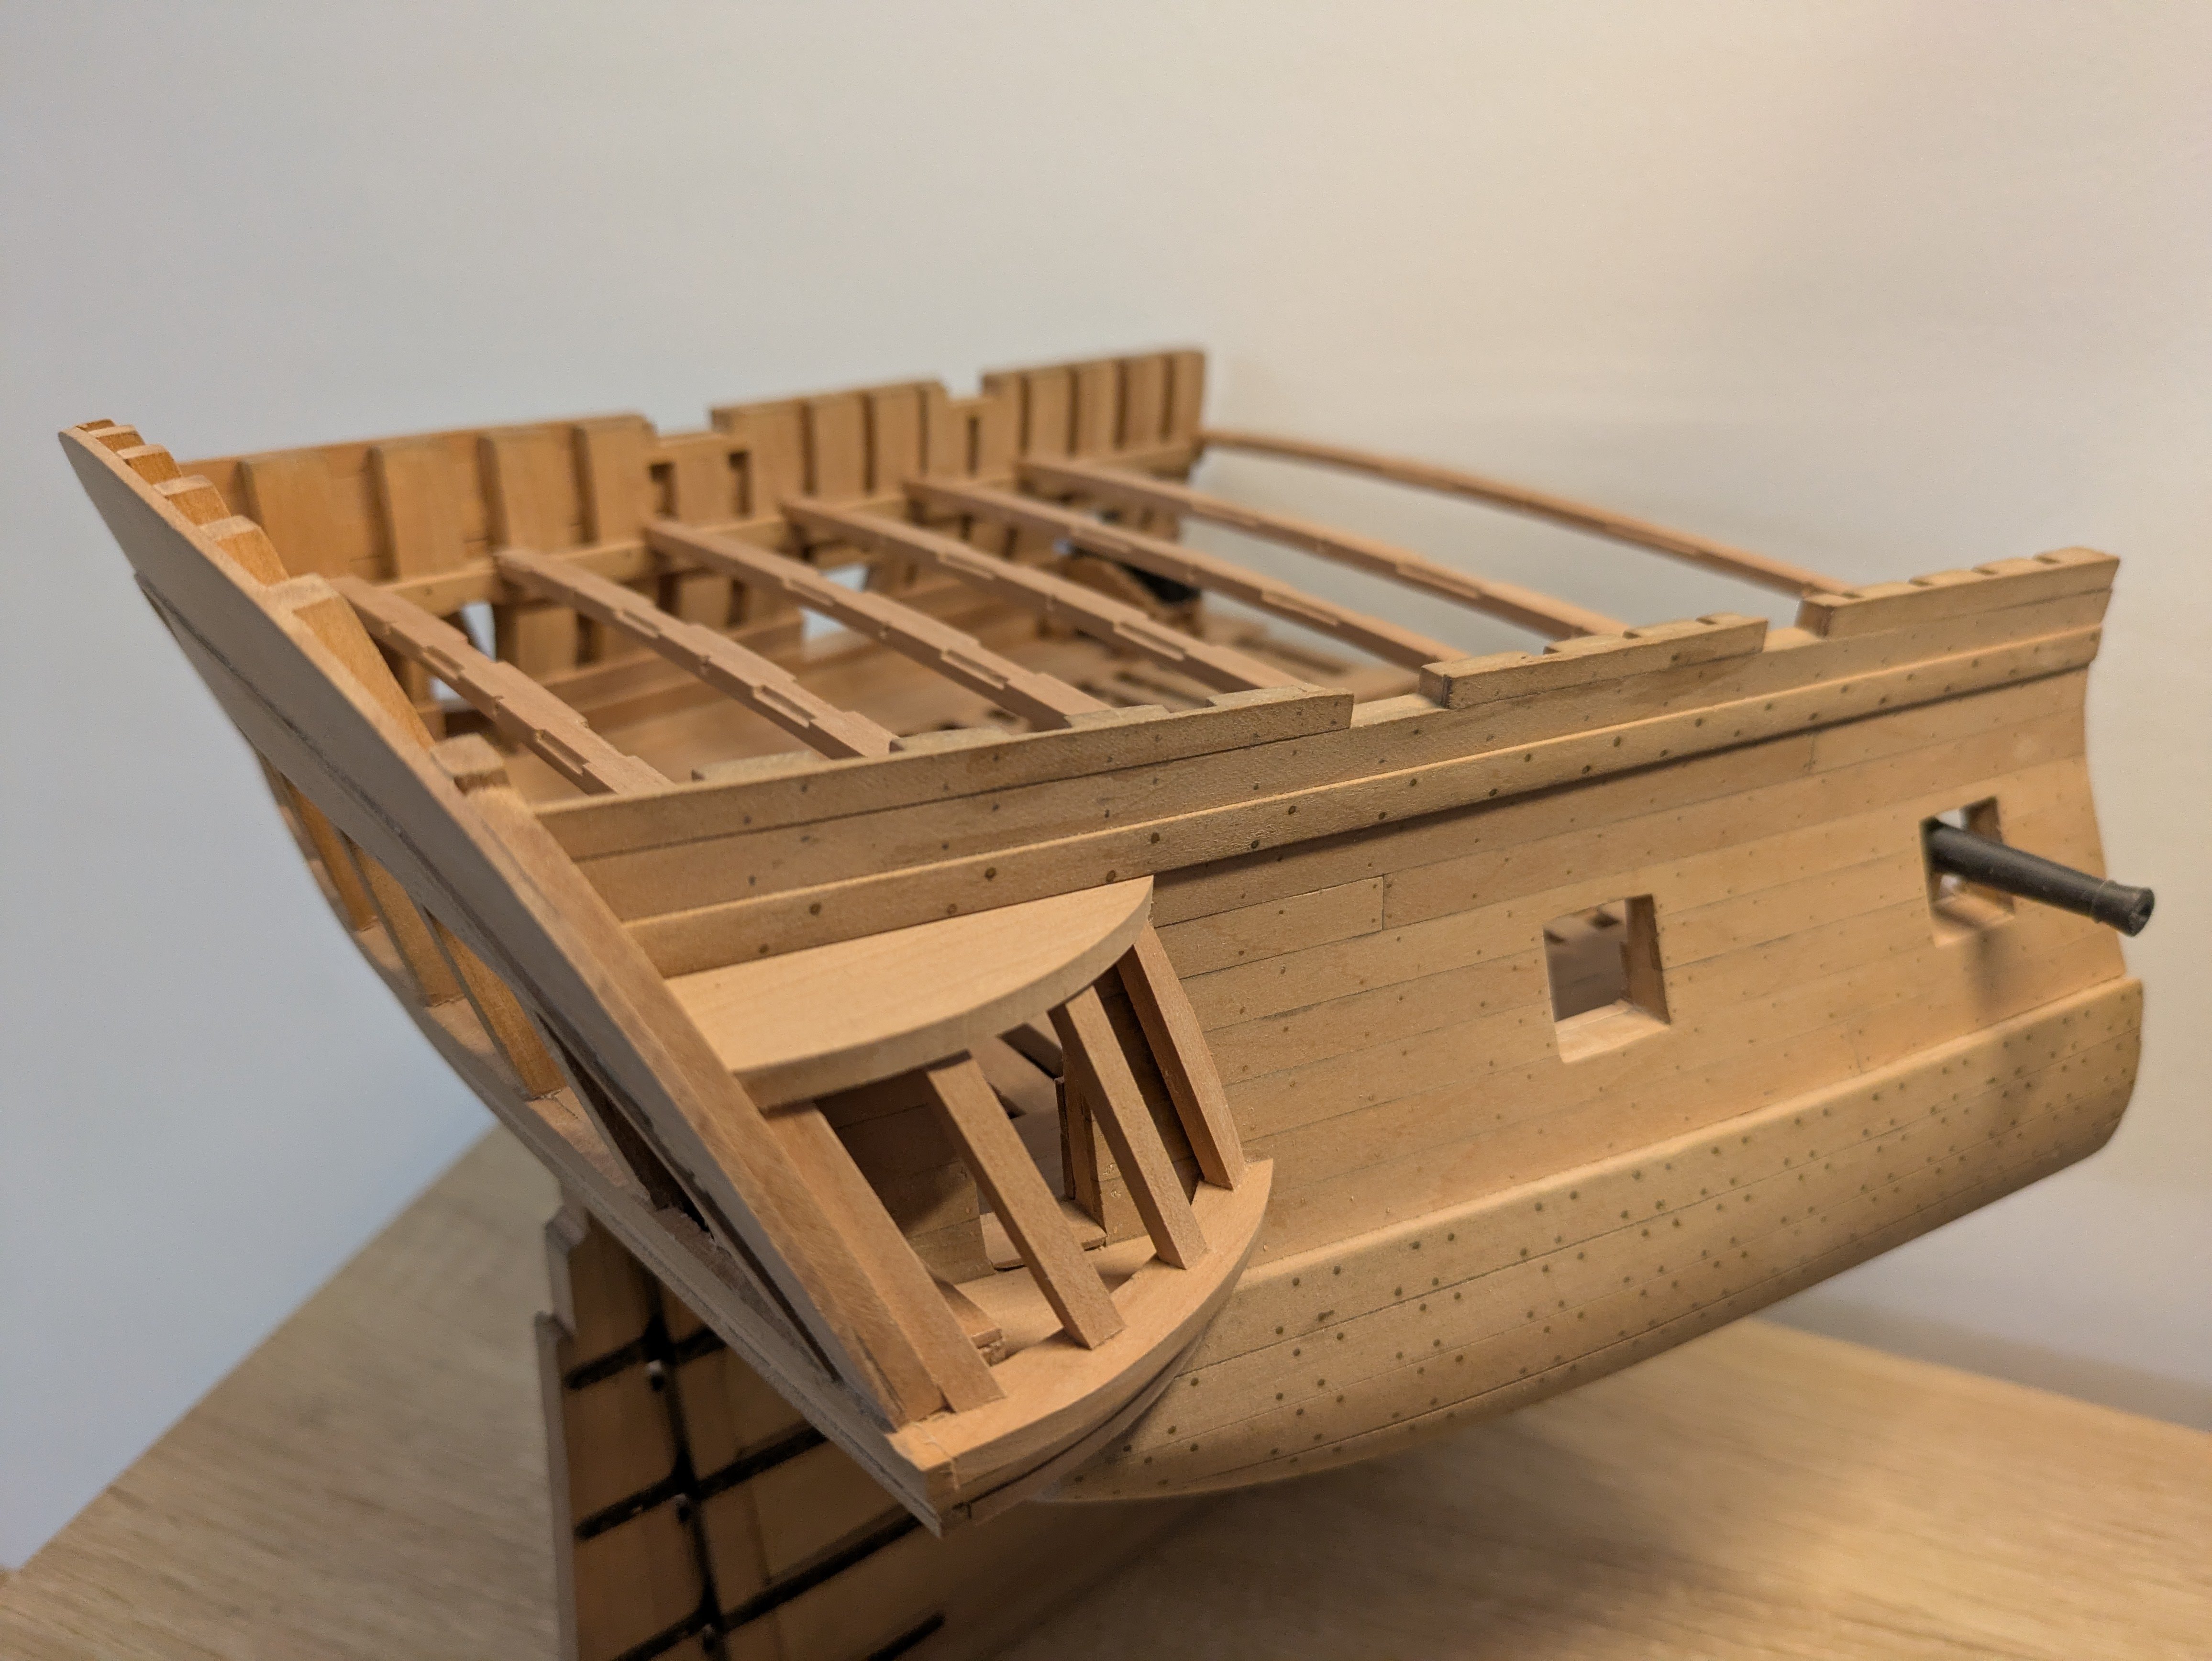
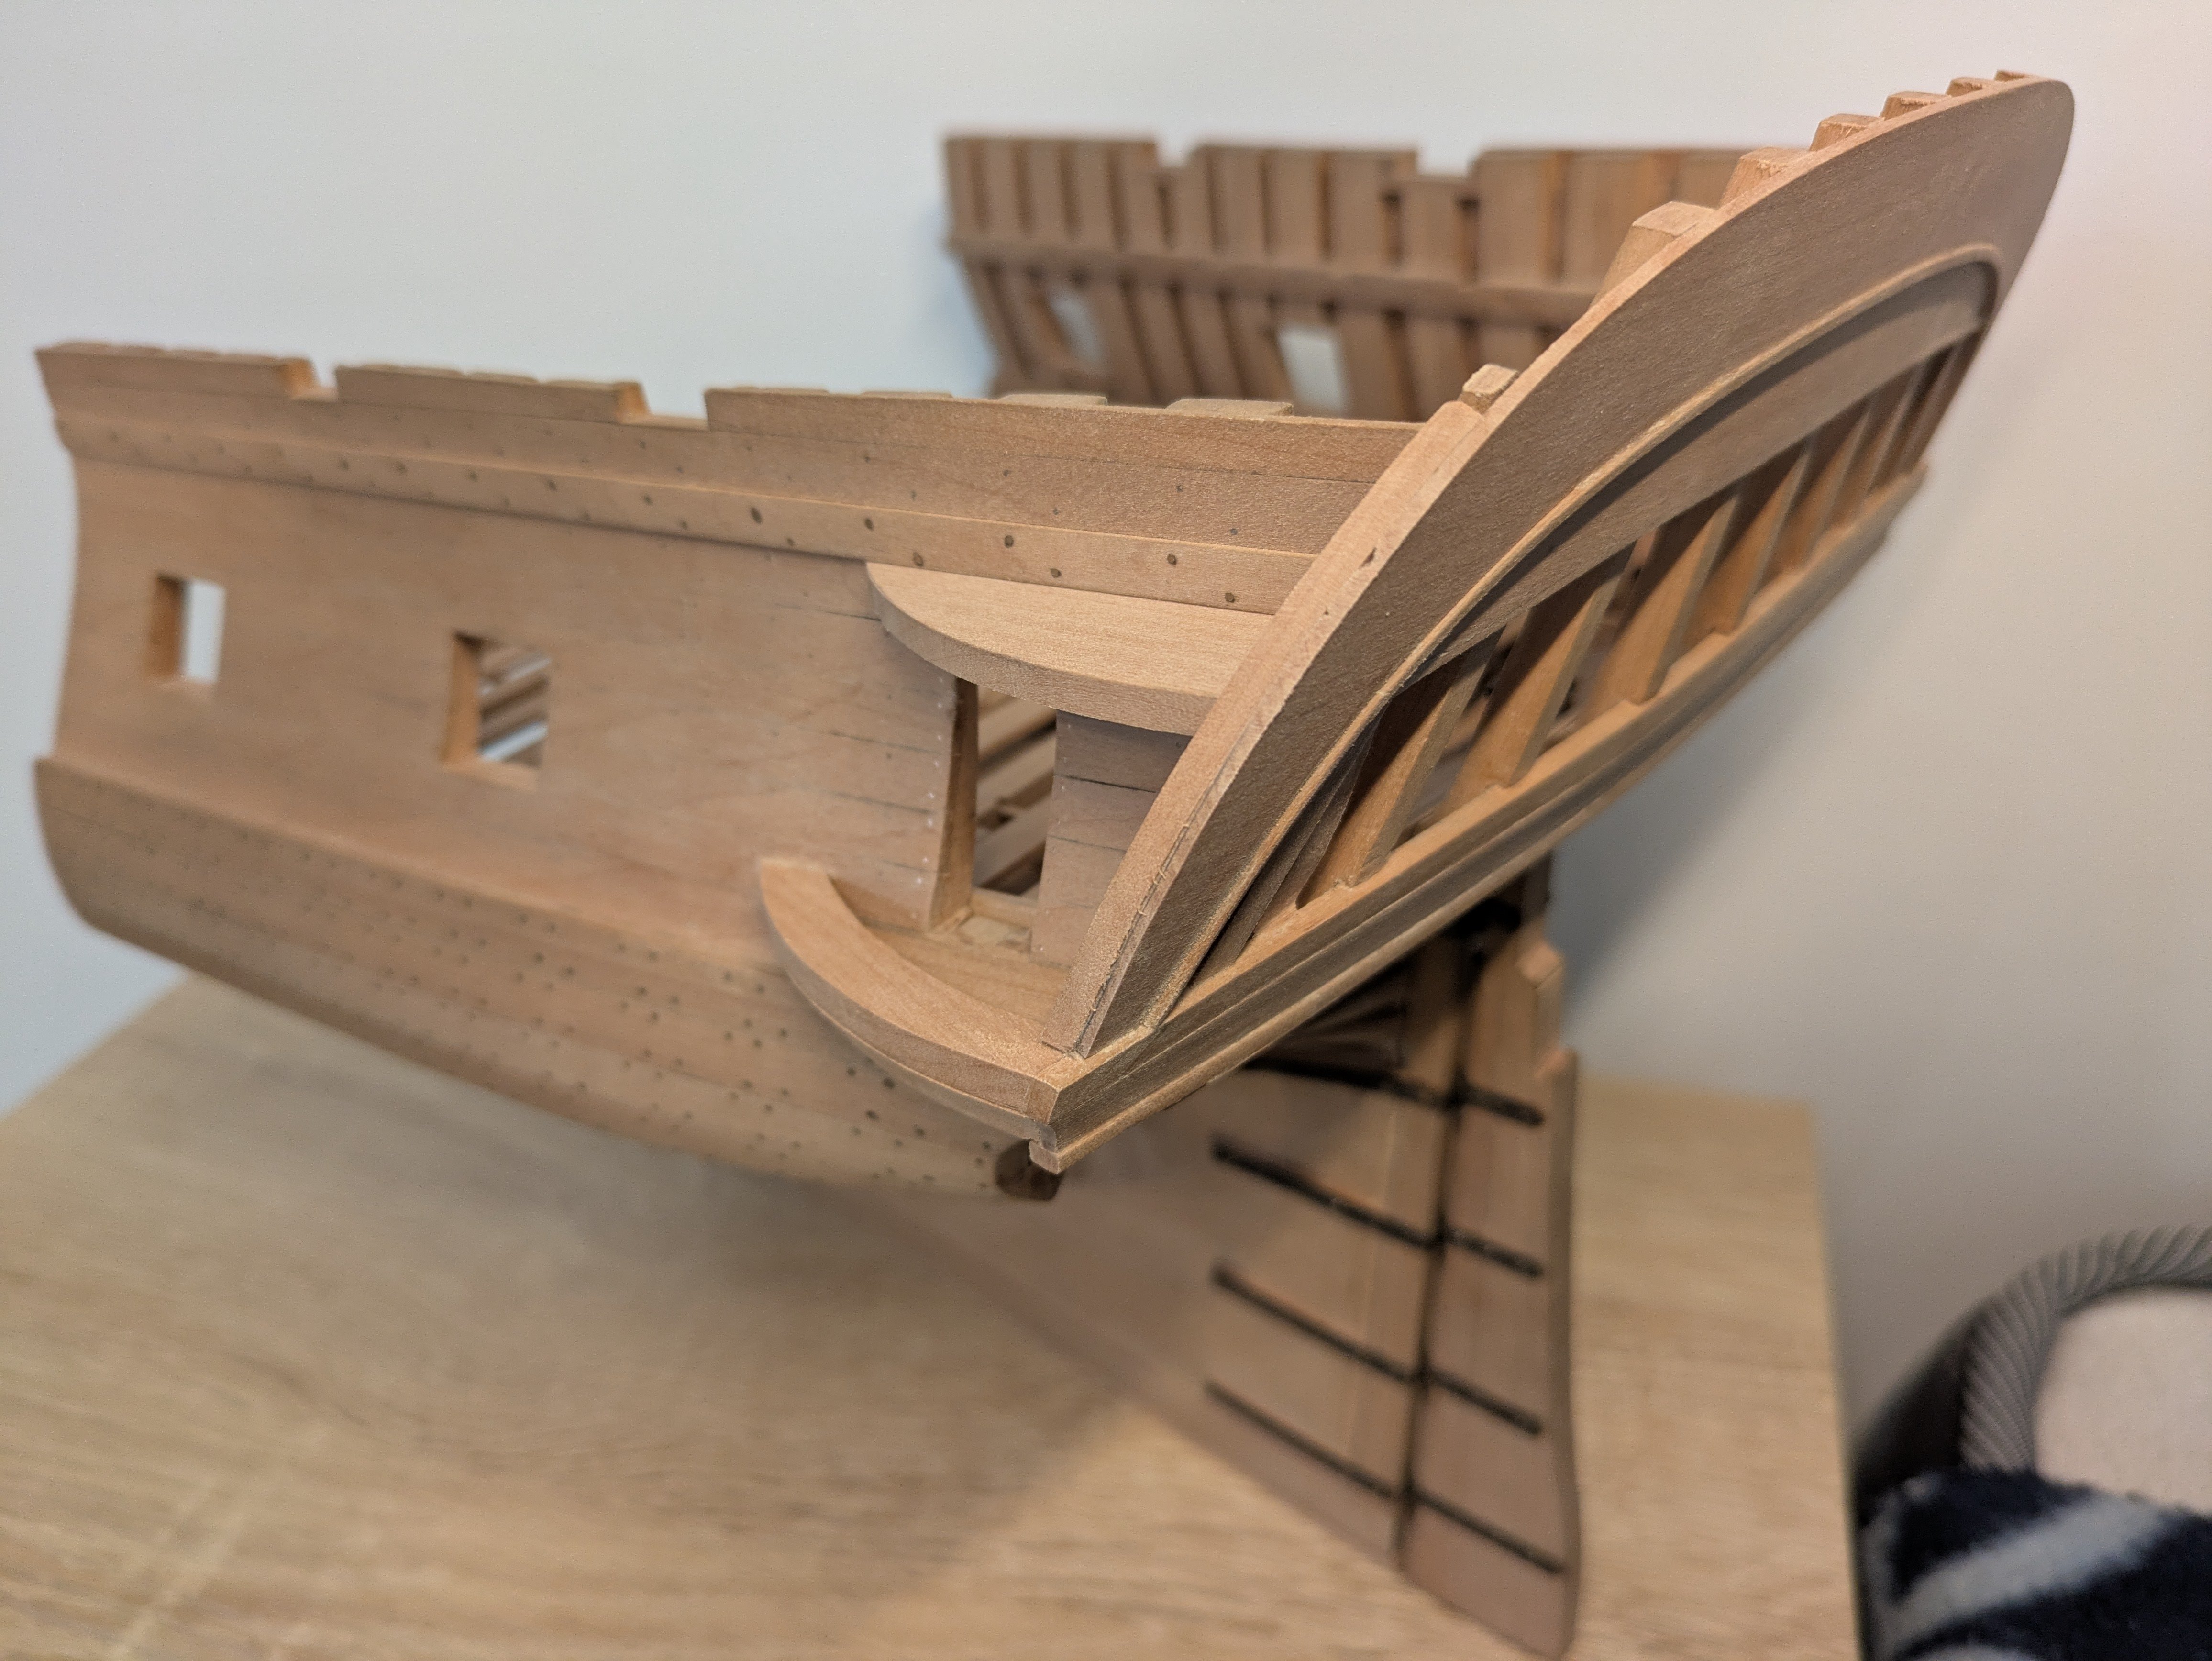
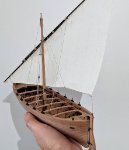
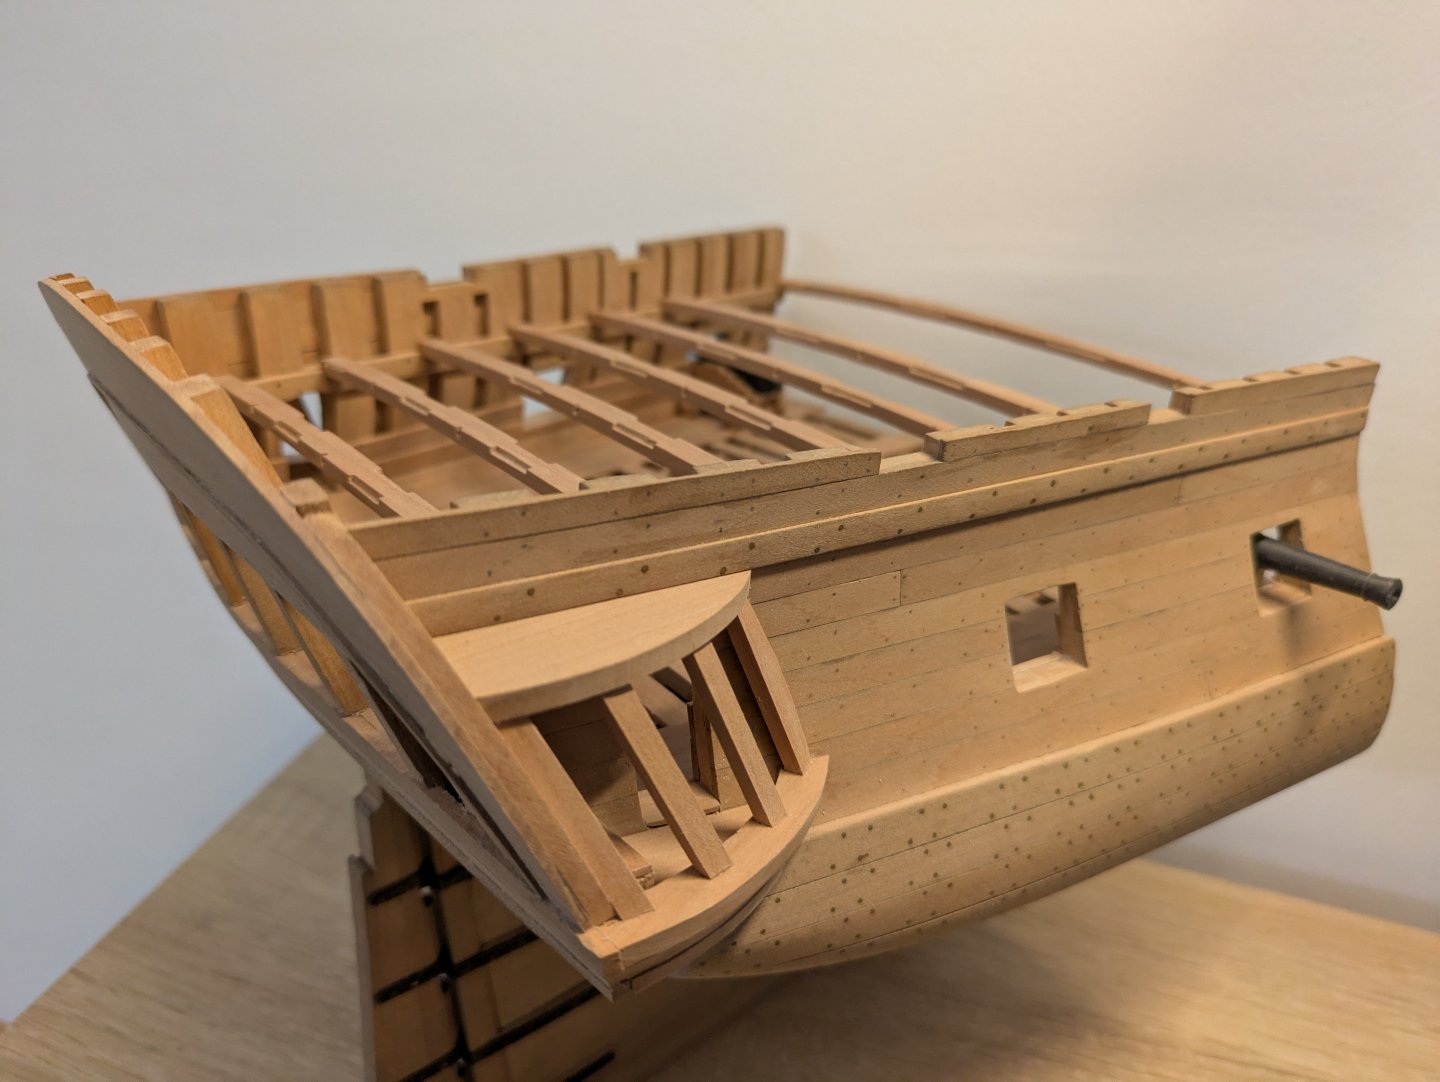
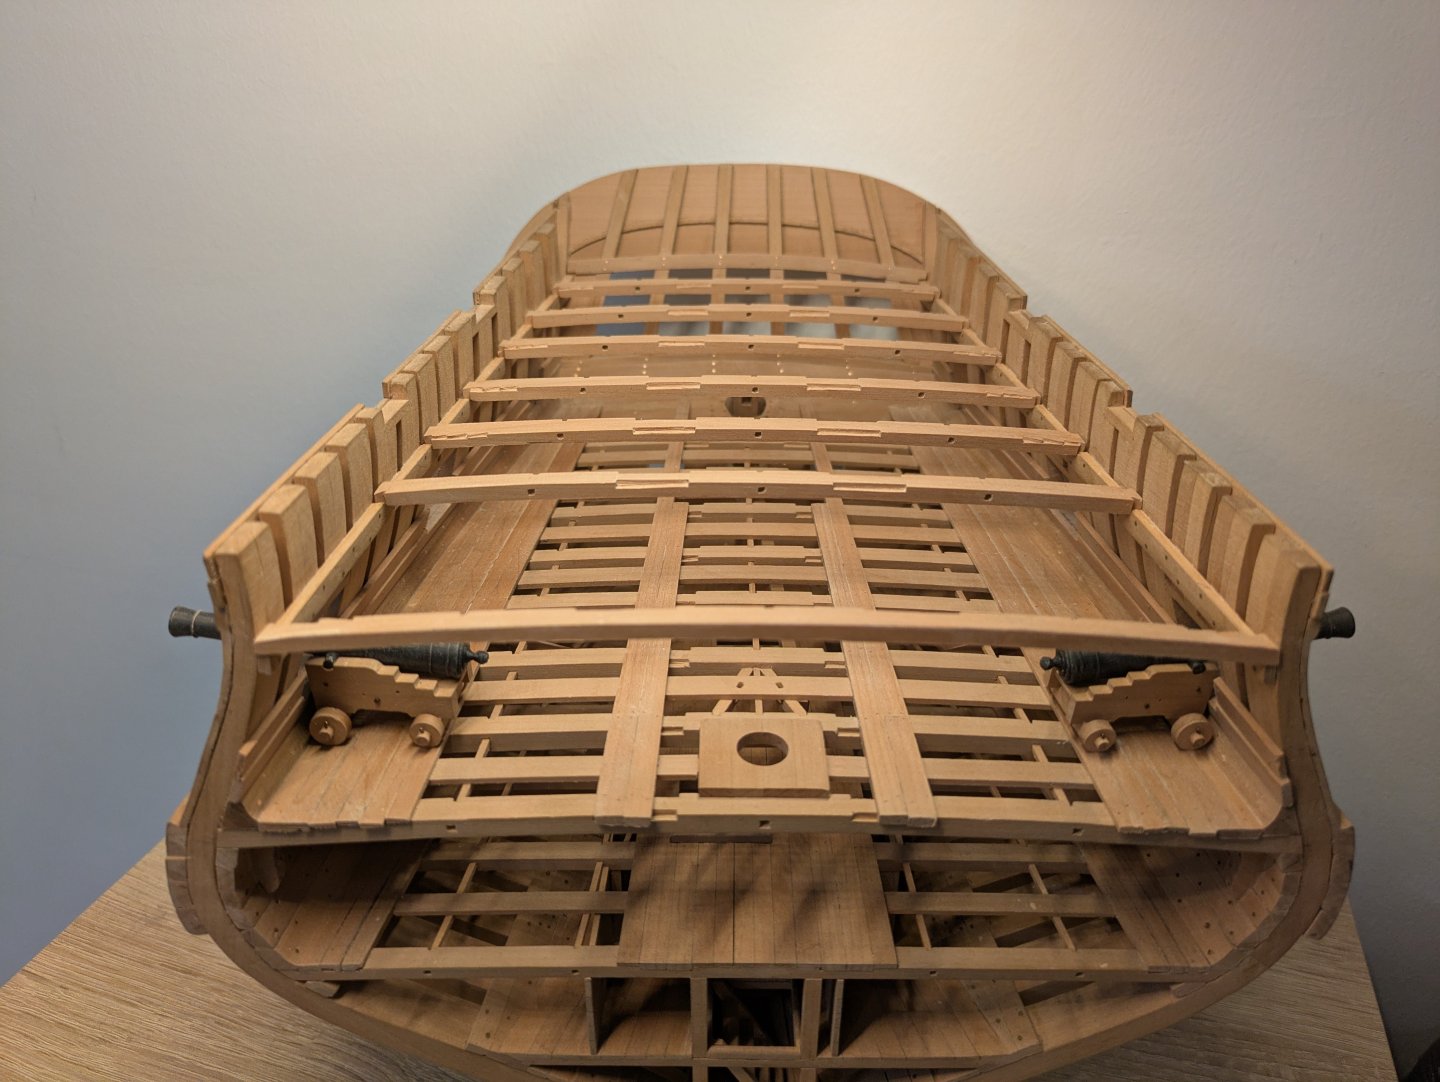
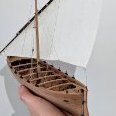 I've added the missing beam and all the knees, thanks again @druxey and everyone else for your input! With this I can continue with the quarterdeck: This is the view of the main deck and the captain's cabin: I decided not to add too much interior planking so the frames are still visible. It might not look as nice as the lower deck area which is completely planked, but having put that much work into the frames I didn't want to hide them away. When the deck is planked with a few strakes I can rig the rudder and then complete all the small details I've been putting off.

- 99 replies
-
- 9
-
-
-
- ancre
- La Mahonesa
- (and 1 more)
-
That's a good point, thanks! Some of the other beams amidships have angled knees, but this beam sits right on the top of the gun port so I don't think that's a solution, as you point out. Wouldn't a horizontal knee help support the forces from the mizzen mast though?
- 99 replies
-
- 1
-
-
- ancre
- La Mahonesa
- (and 1 more)
-
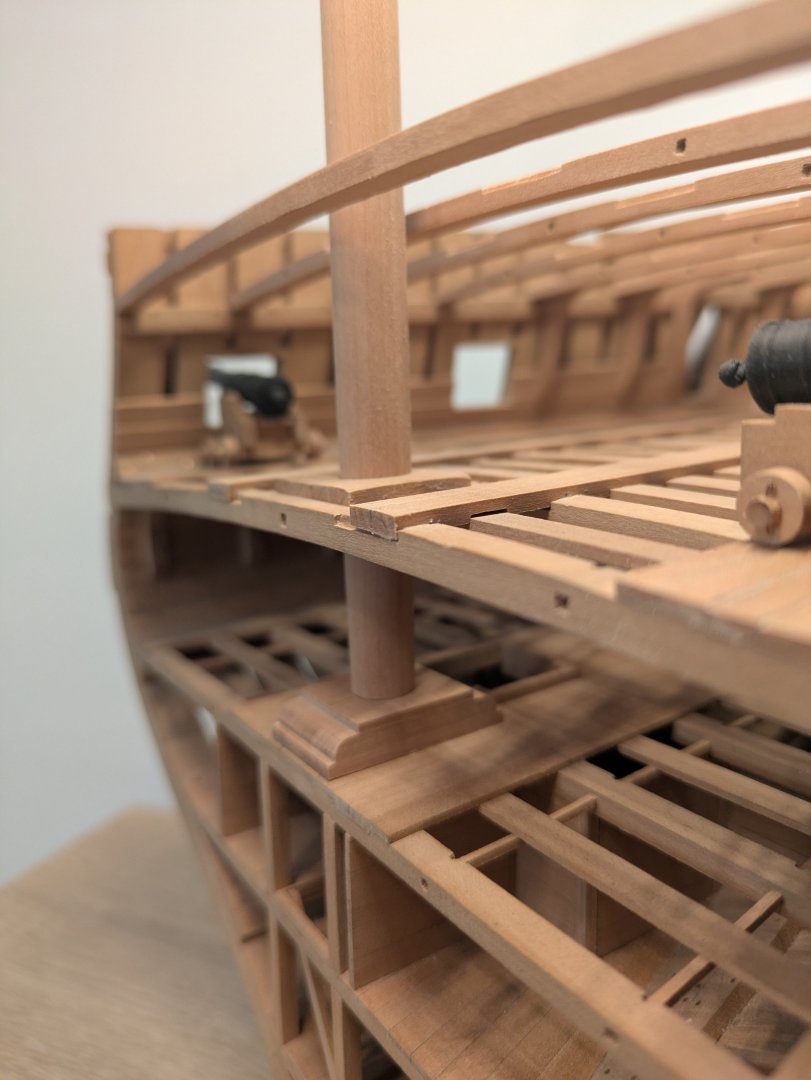
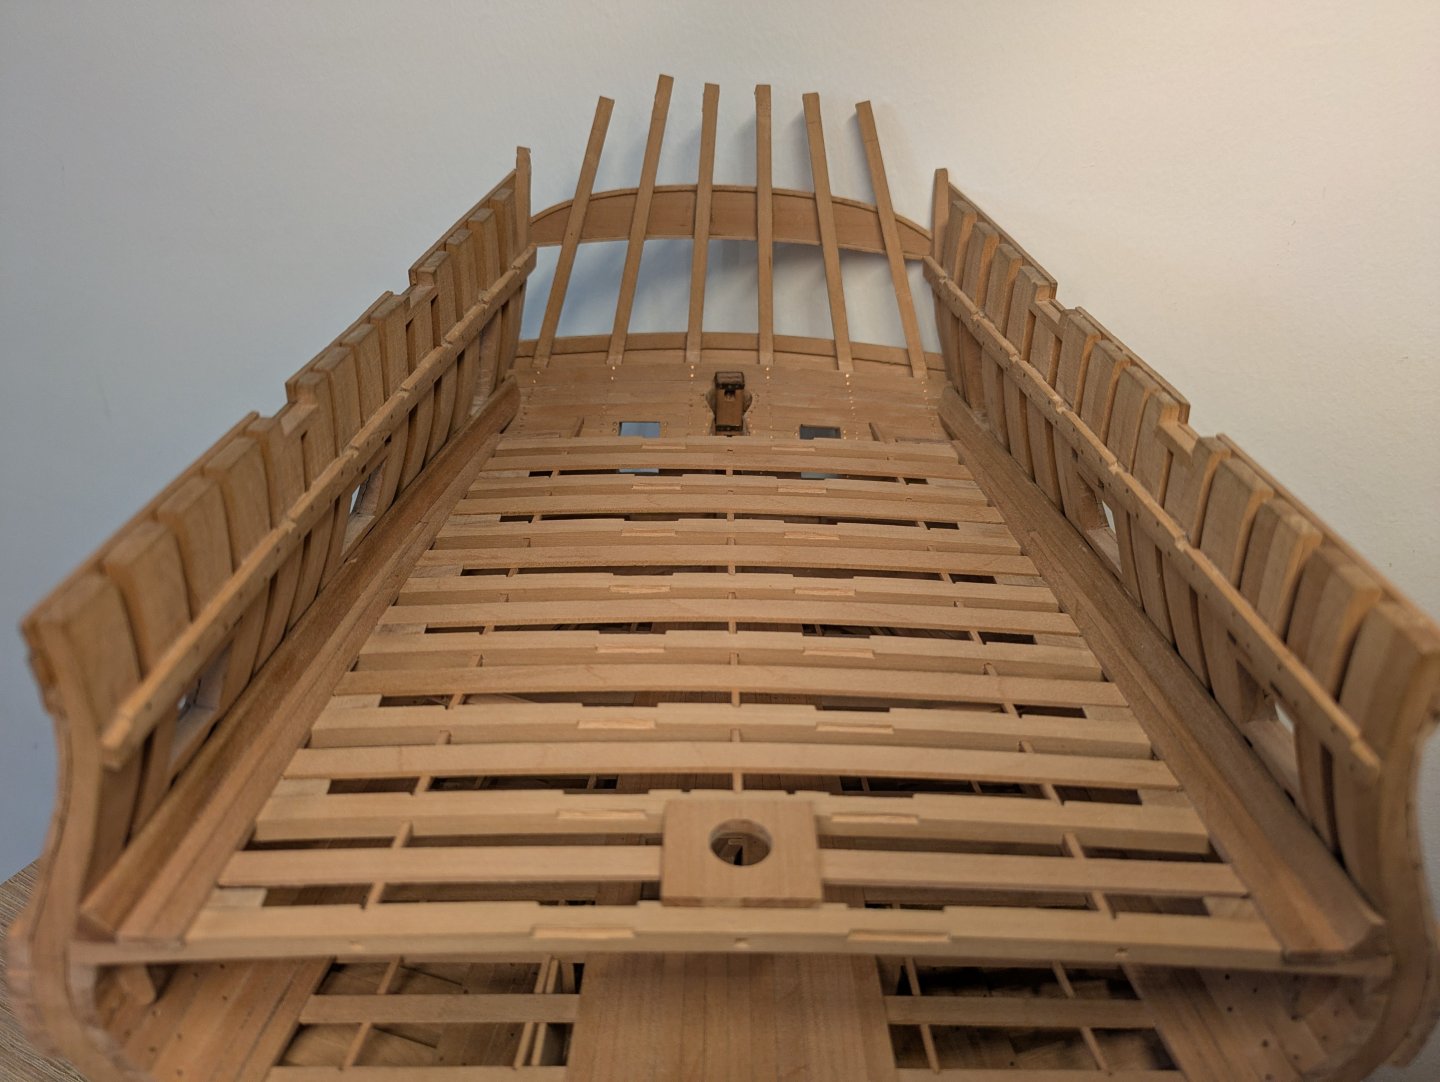
I've been looking at contemporary plans of Spanish (and other nations') frigates and ships of the line, and either they don't show the quarterdeck beams or there are none missing. I also can't see any reason whatsoever for the missing beam behind the mizzen, so I went ahead and prepared one. It's not glued in yet so I can still change my mind, but I think it's the most logical way to construct the ship. I can only imagine the mizzen would require some support since it's stepped so high above the keel, and a beam is the only way I can see to provide that. There's also still enough room to change the angle of the mast if that's something they did back then. Of course due to the gun port there's no room for a vertical knee, but I'll install a horizontal one instead which again would make sense to distribute the forces from the mast to the frames. Also, I'm probably overthinking this way too much! 😂


- 99 replies
-
- 11
-
-
- ancre
- La Mahonesa
- (and 1 more)
-
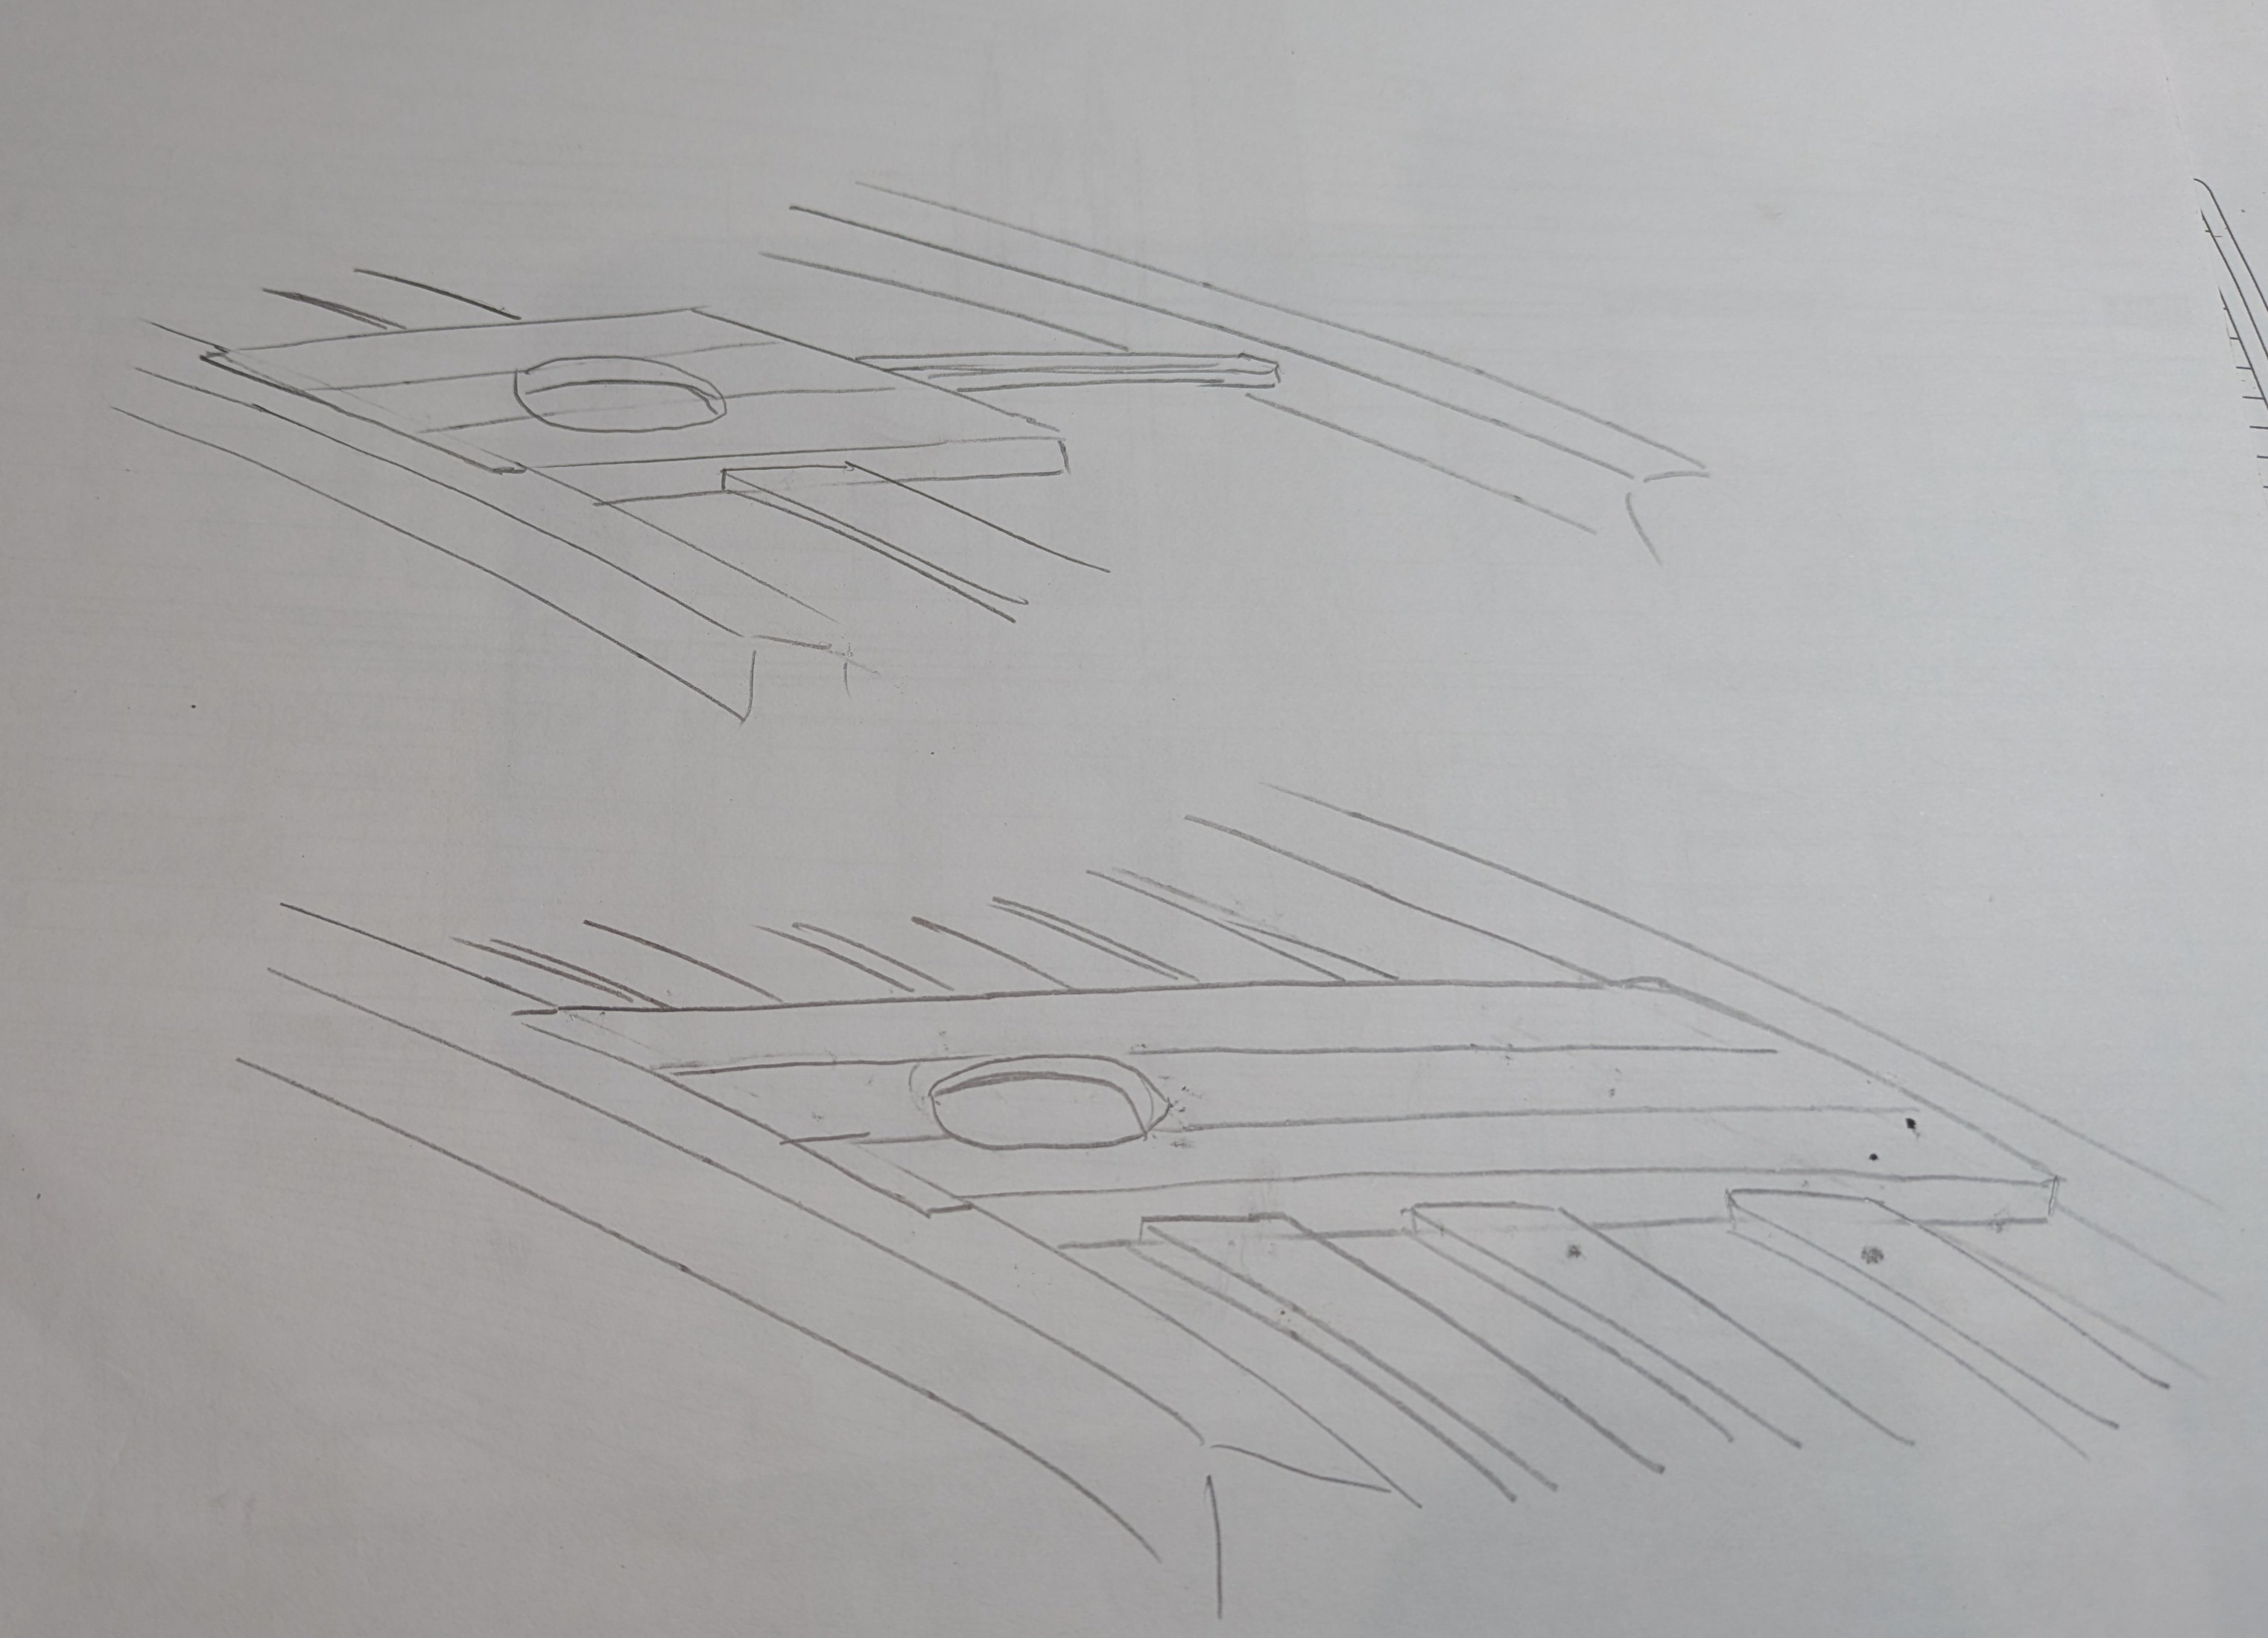
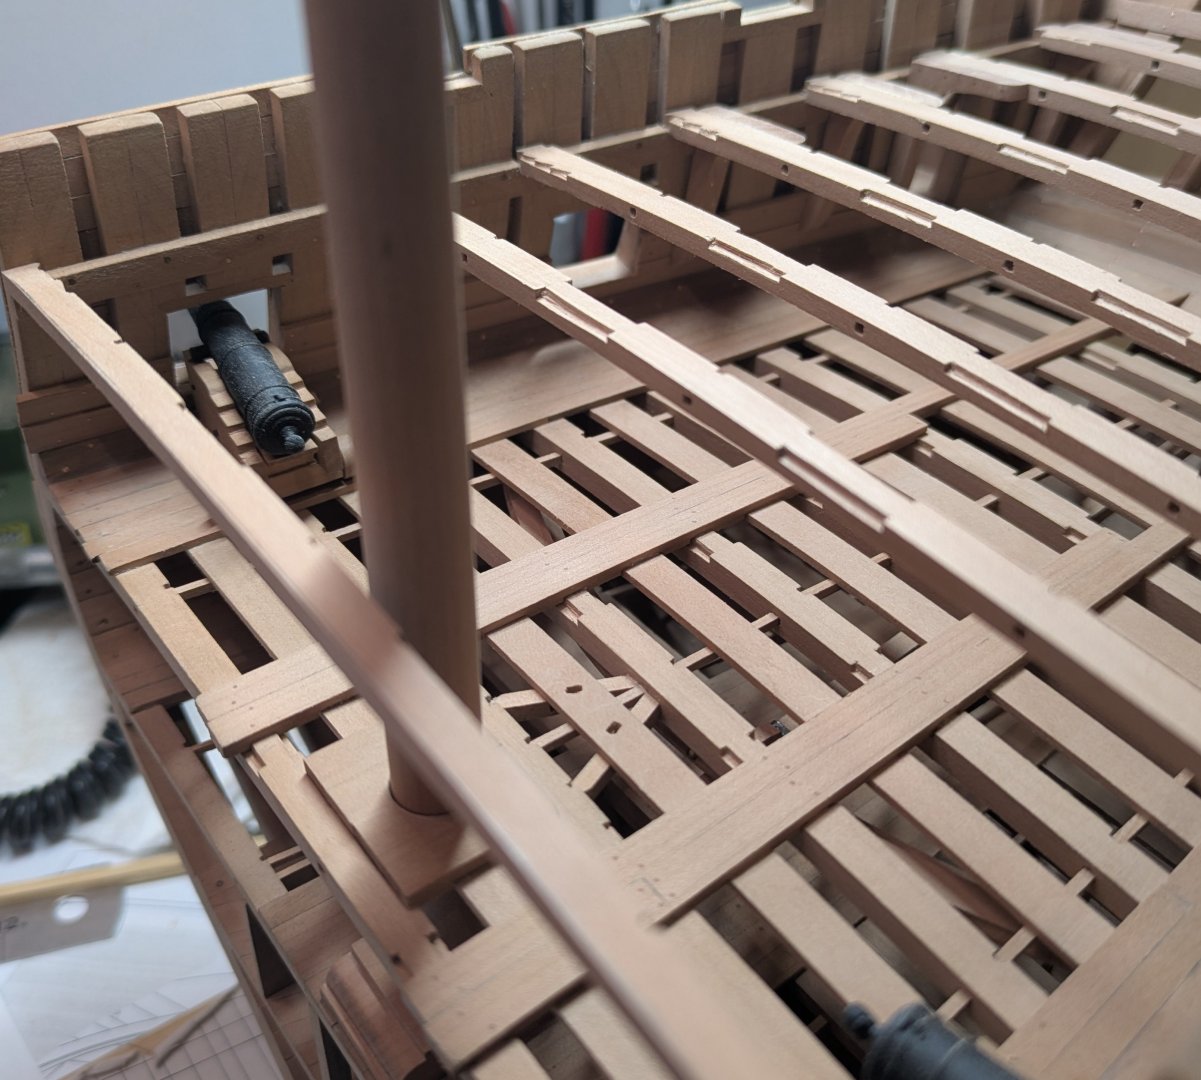
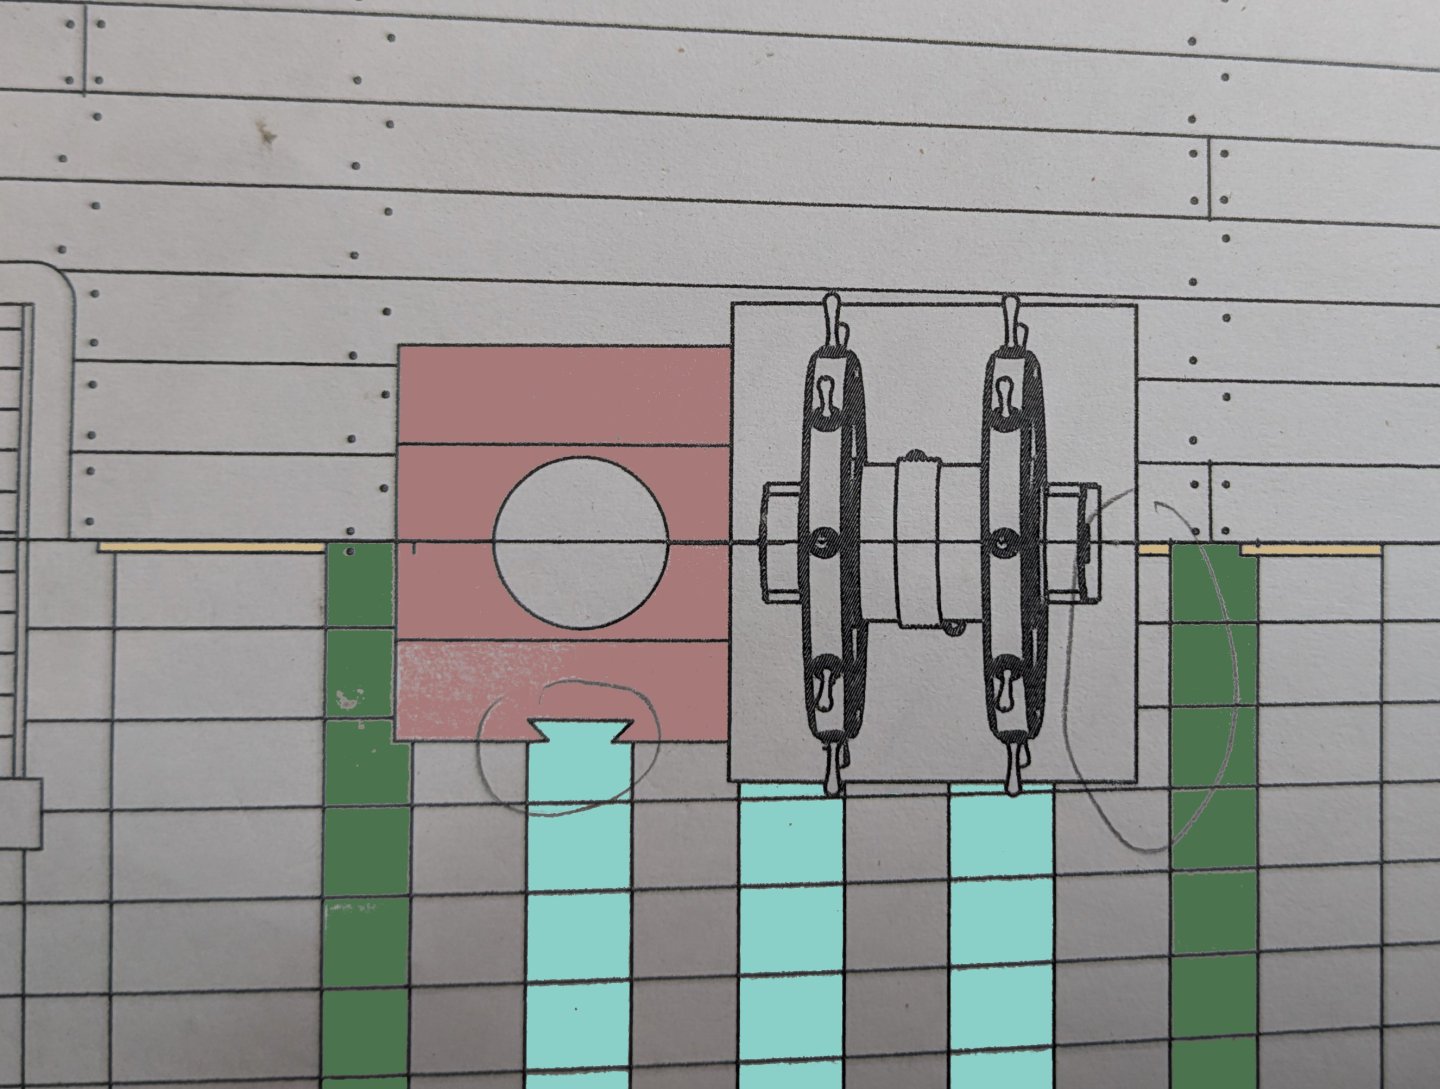
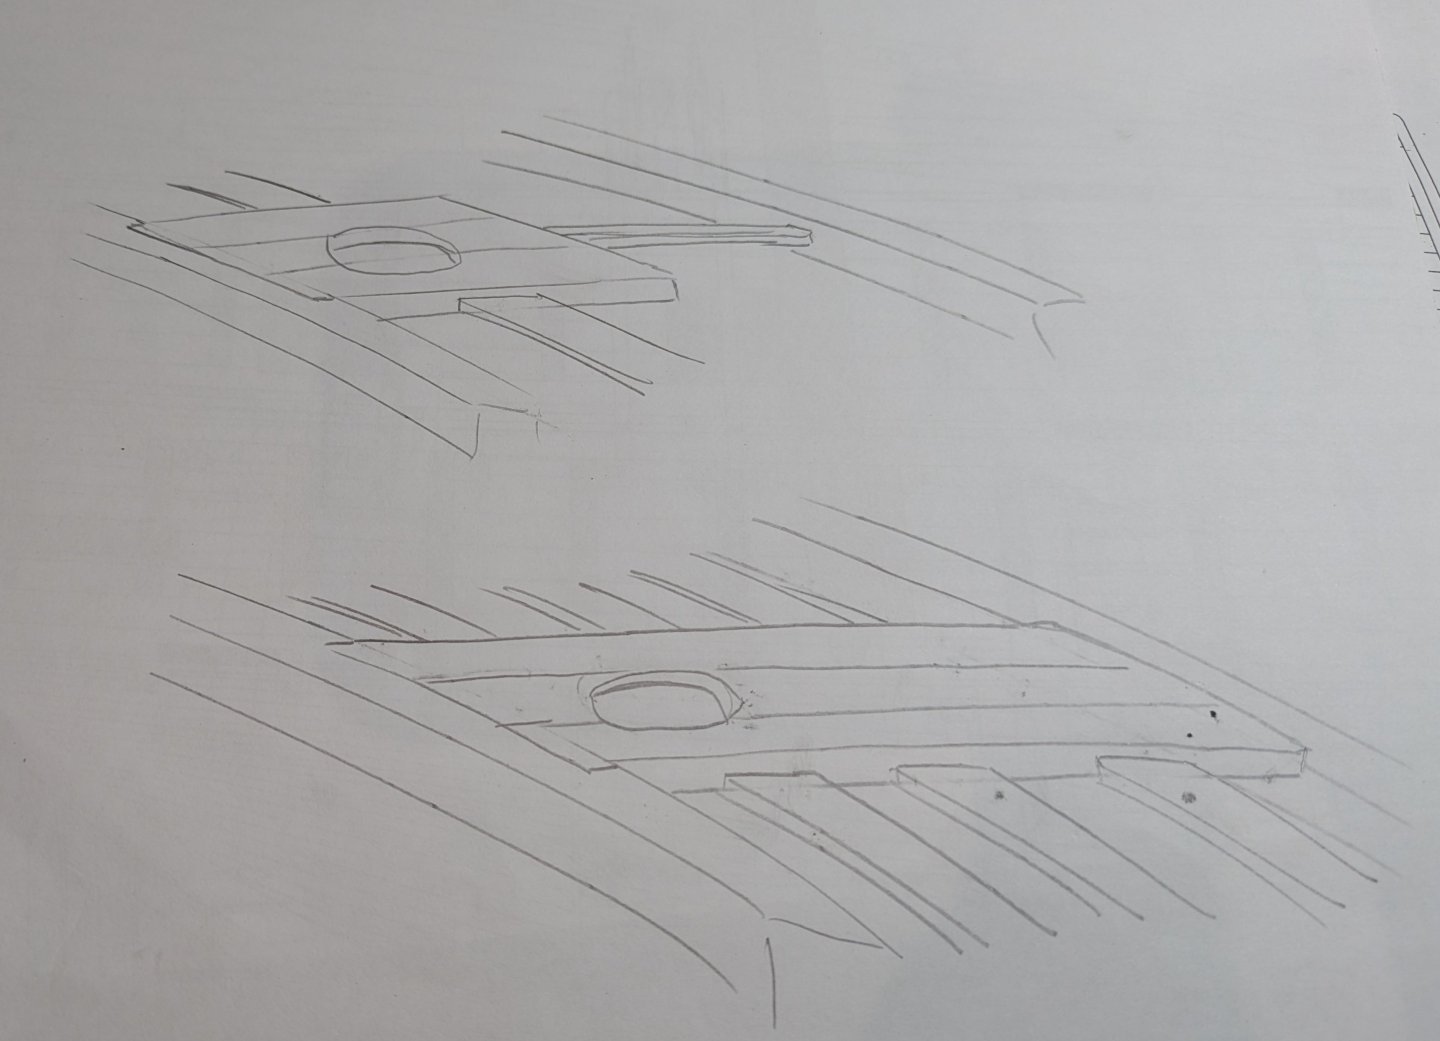
I have an issue regarding the beams around the mizzen mast on the quarterdeck. According to the plans there's a beam missing here, with horizontal knees to add strength around the nearby beams. However the way the supports for the mizzen are shown on the plans frankly makes no sense to me. They are shown as resting on only one beam and the other side is basically floating free. Here I've colored the beams in green, the red planks are the support for the mast, which as can be seen do not reach all the way to the next beam after the wheel. The 3 azure parts are the ledges, and the yellow the middle carlings on which the ledges rest. The above quick sketch is my interpretation of the plans and the next sketch is how I believe it should be, by extending the mizzen supports all the way to the next beam, which if course would add weight on the real ship. I just don't understand why there's a beam missing here; maybe to allow for the rake of the mizzen to be adjusted? As it is now, there's definitely room for another beam though of course I'd have to remove the horizontal knees (I haven't added them yet). I wonder if anyone can enlighten me, if you know of any other ship constructed like this. I've looked through contemporary plans of other Spanish frigates but they don't show the beam layout for the quarterdeck. Edit: I forgot to add - the missing beam is right above the gun port, which would make it very difficult for it to have knees underneath it. Maybe that's why it's missing?
- 99 replies
-
- 6
-
-
- ancre
- La Mahonesa
- (and 1 more)
-
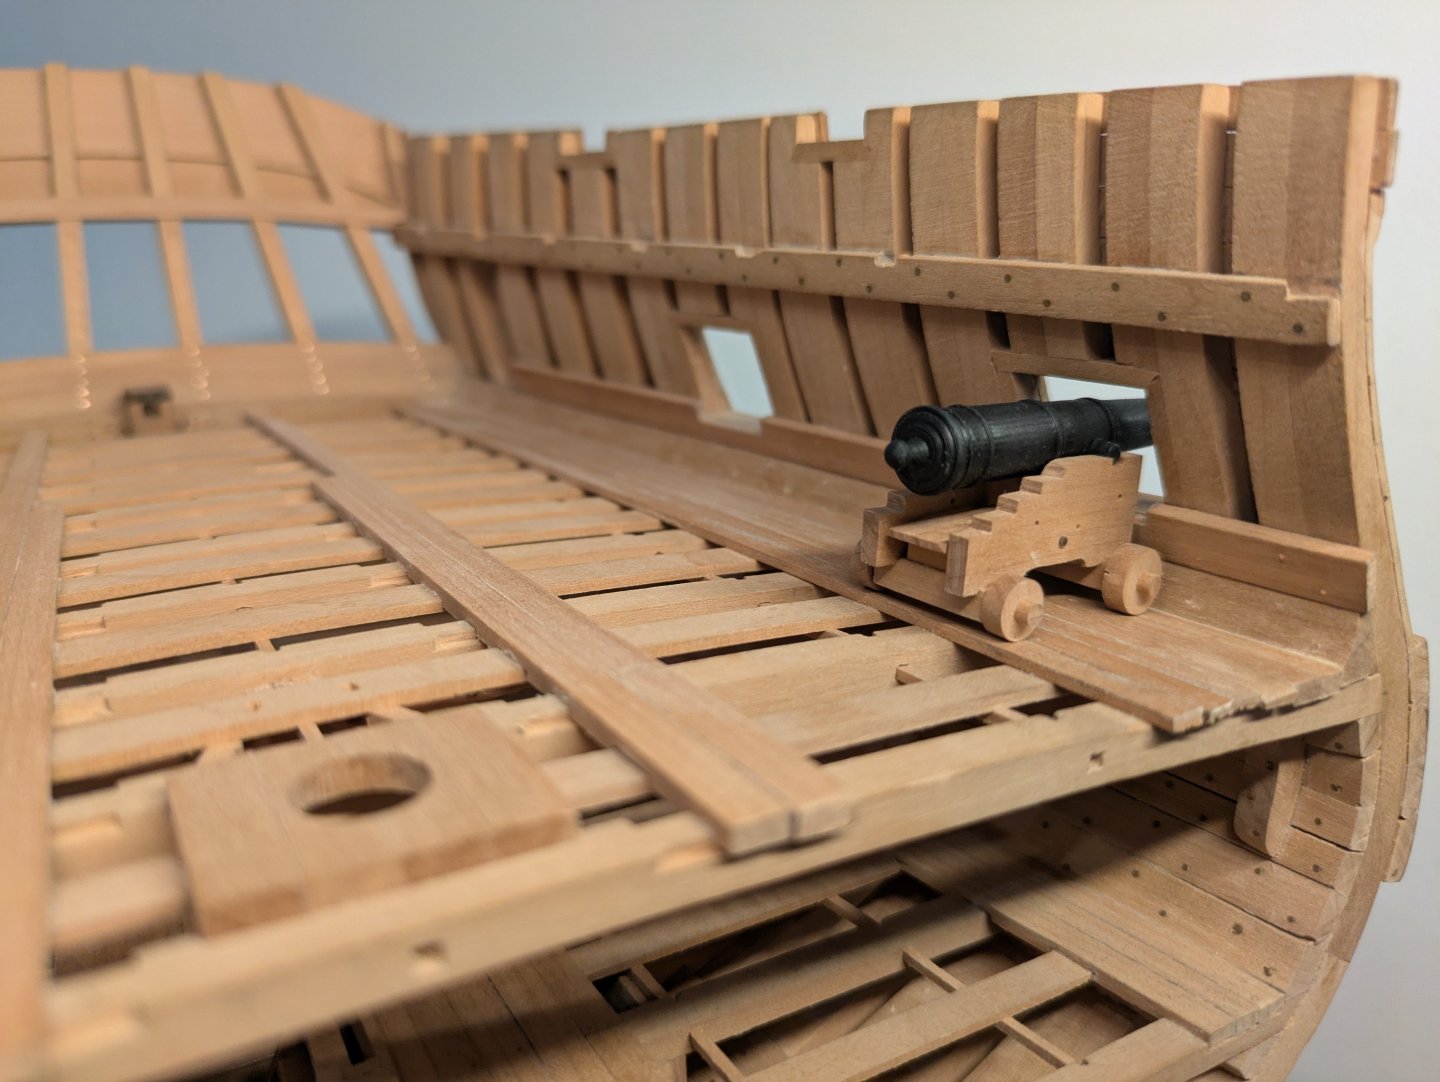
I haven't posted here for quite some time, but nor have I progressed much. A friend of mine created the guns in 3d and I got them printed in resin, however I wasn't at all happy with the result so I got them printed in plastic instead. These turned out a lot better, but I'm not sure I'll use them. I'm considering turning them in bronze instead, though I've never tried turning metal. I'm now proceeding with the quarterdeck, I need this done before I can finish the rudder tiller and its rigging. Strangely there's a missing beam where the mizzen mast sits, I would have thought that area needed more reinforcement, although at least those beams will be supported by horizontal knees.
- 99 replies
-
- 12
-
-
-
- ancre
- La Mahonesa
- (and 1 more)
-
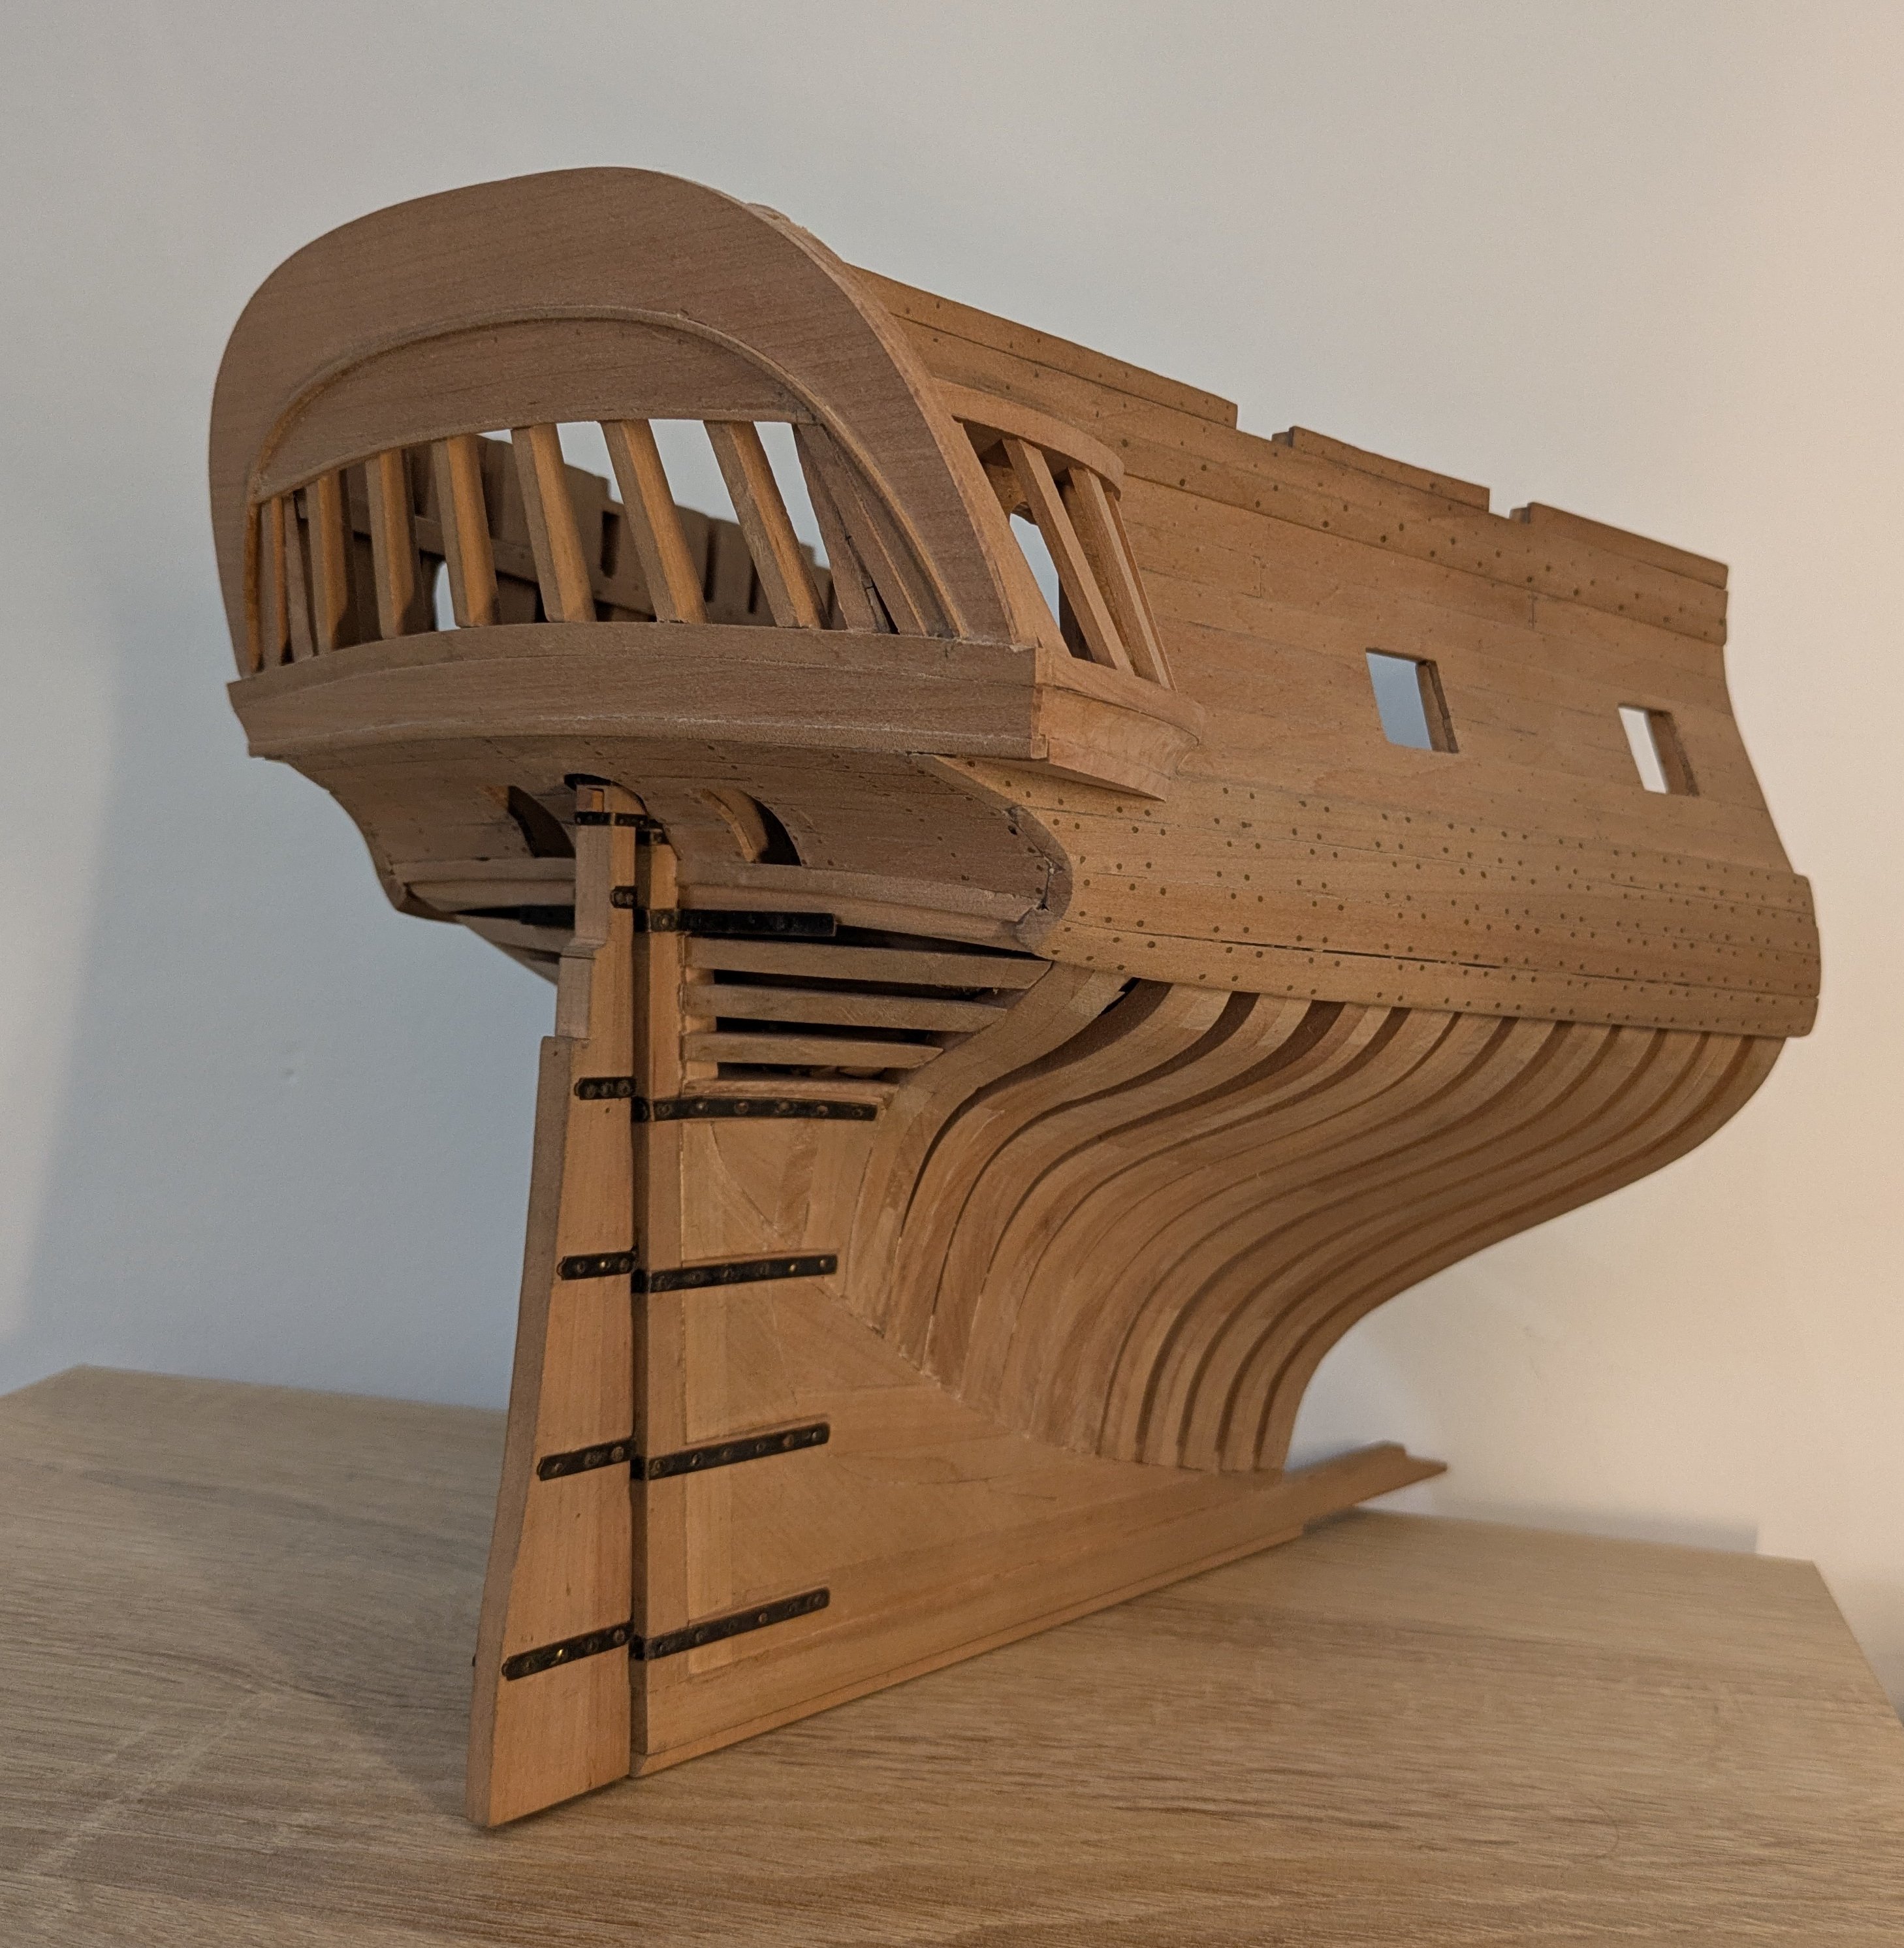
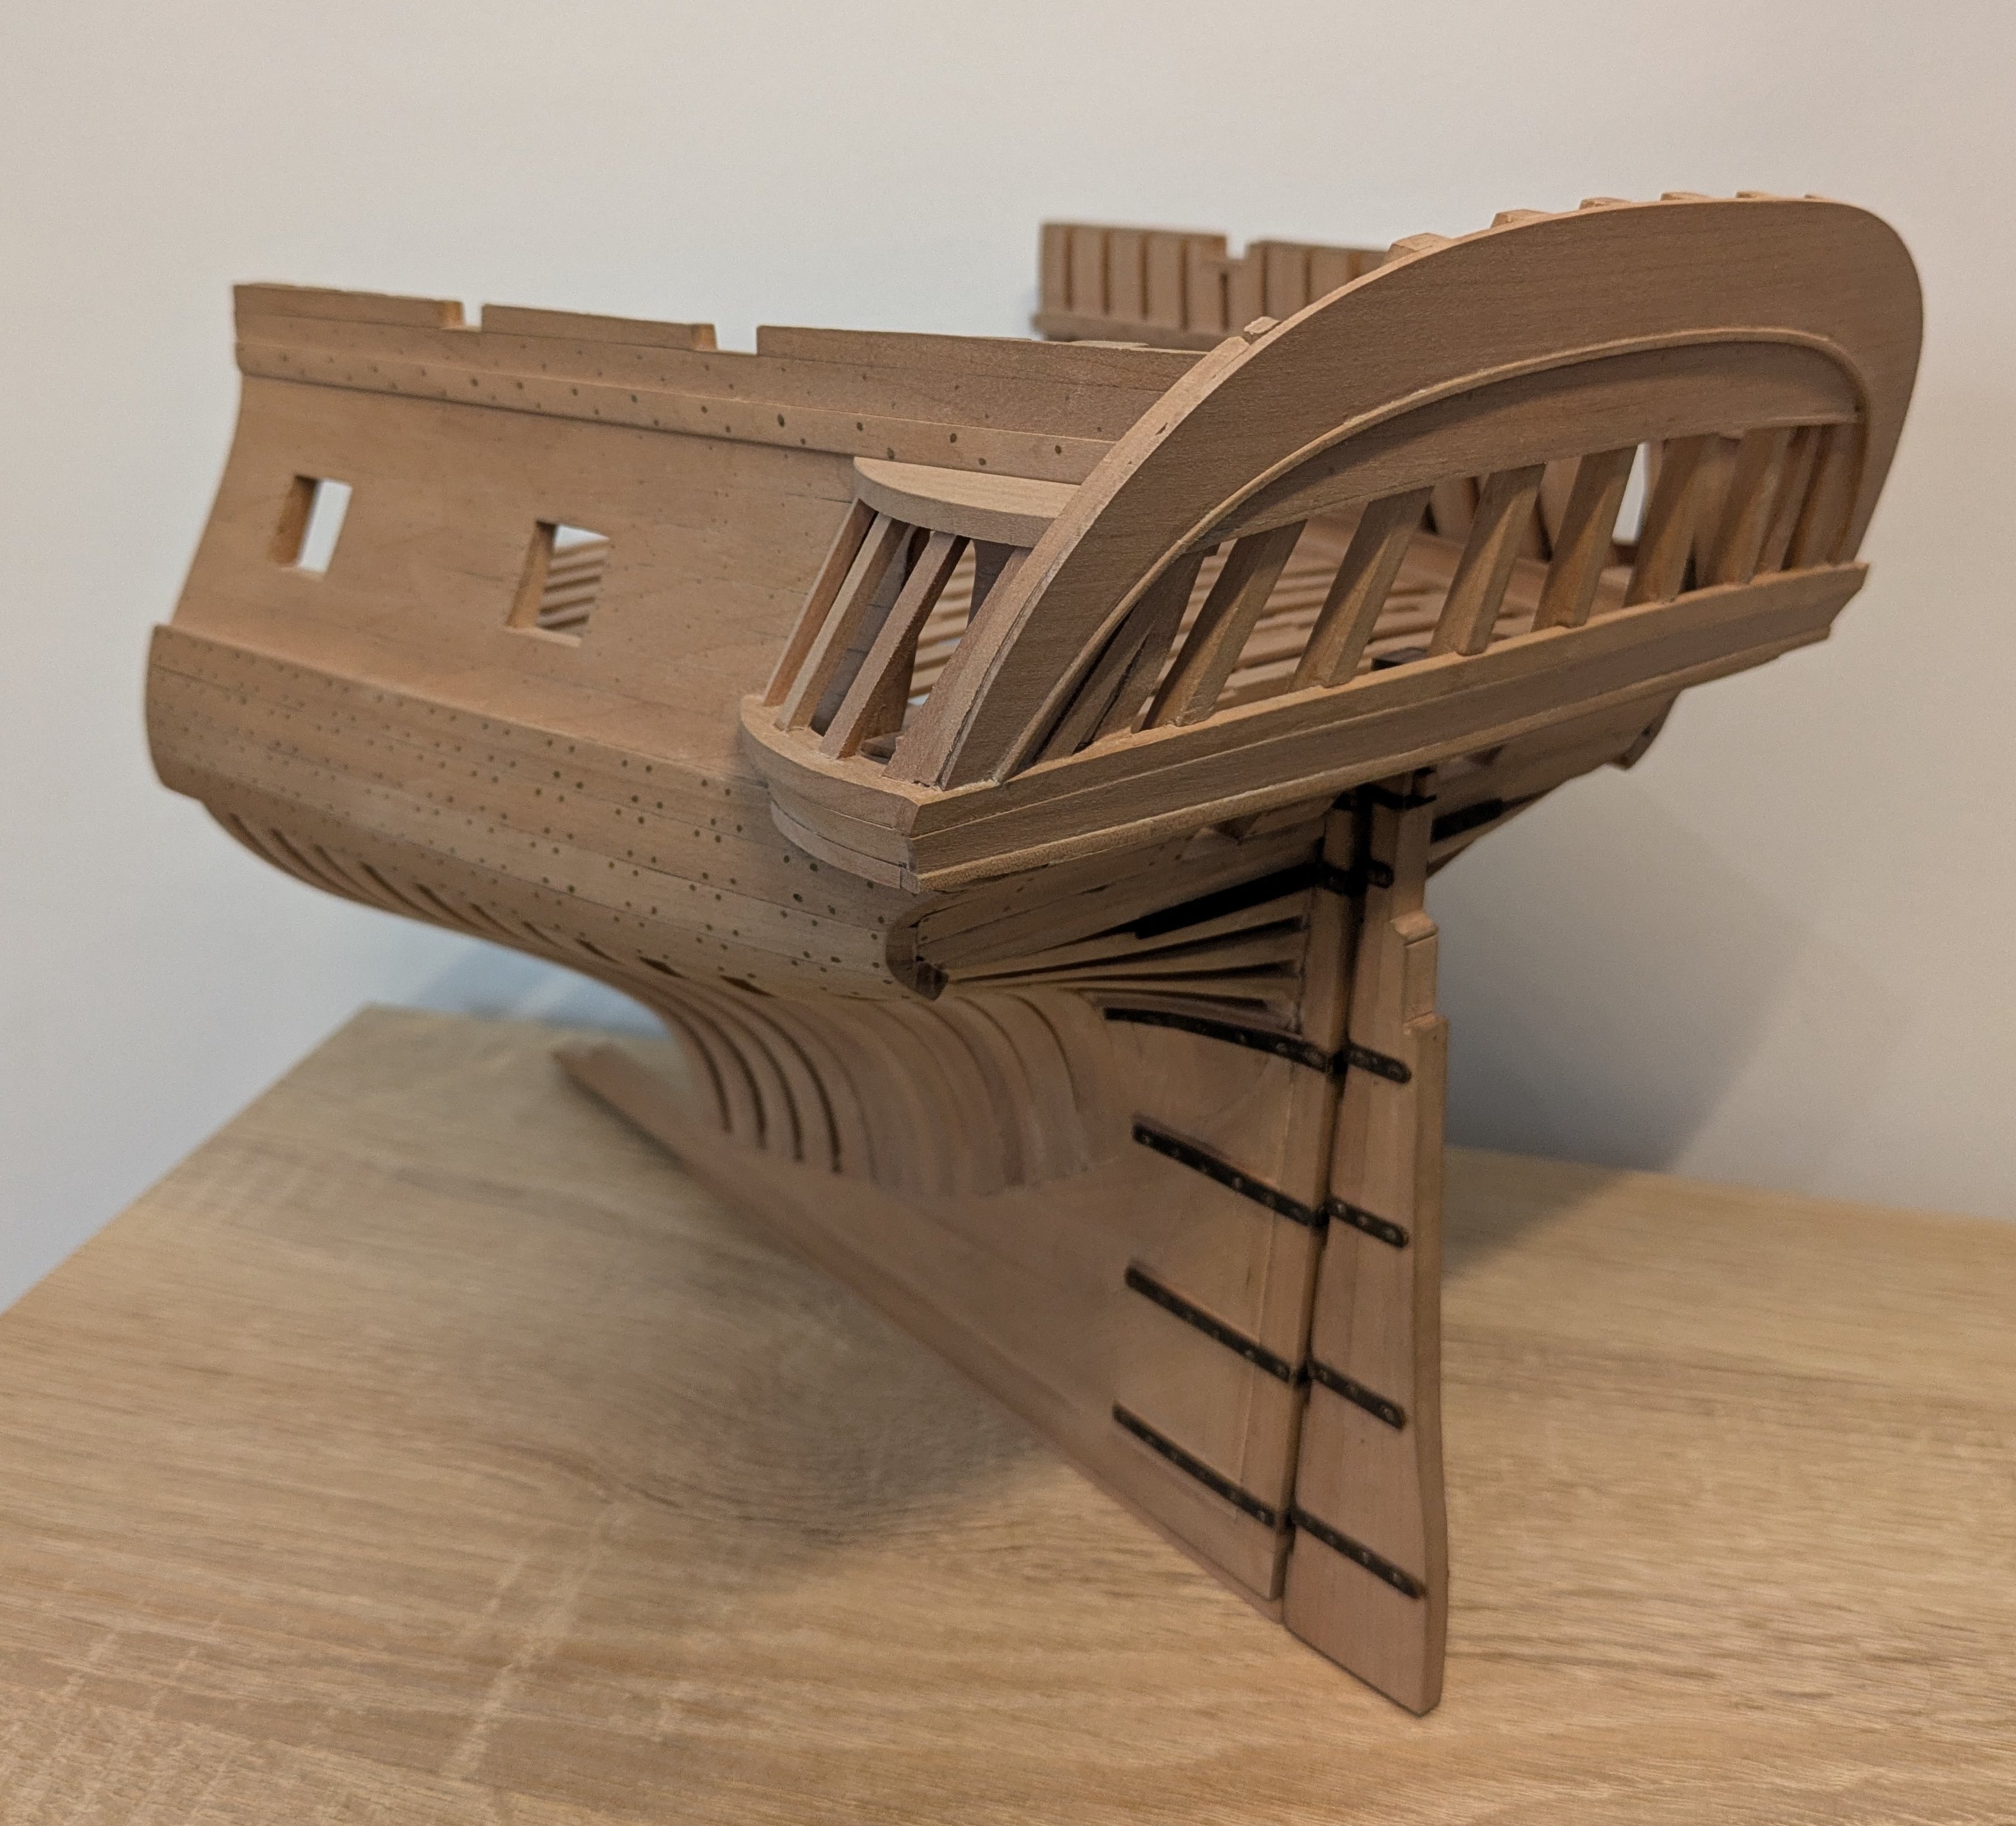
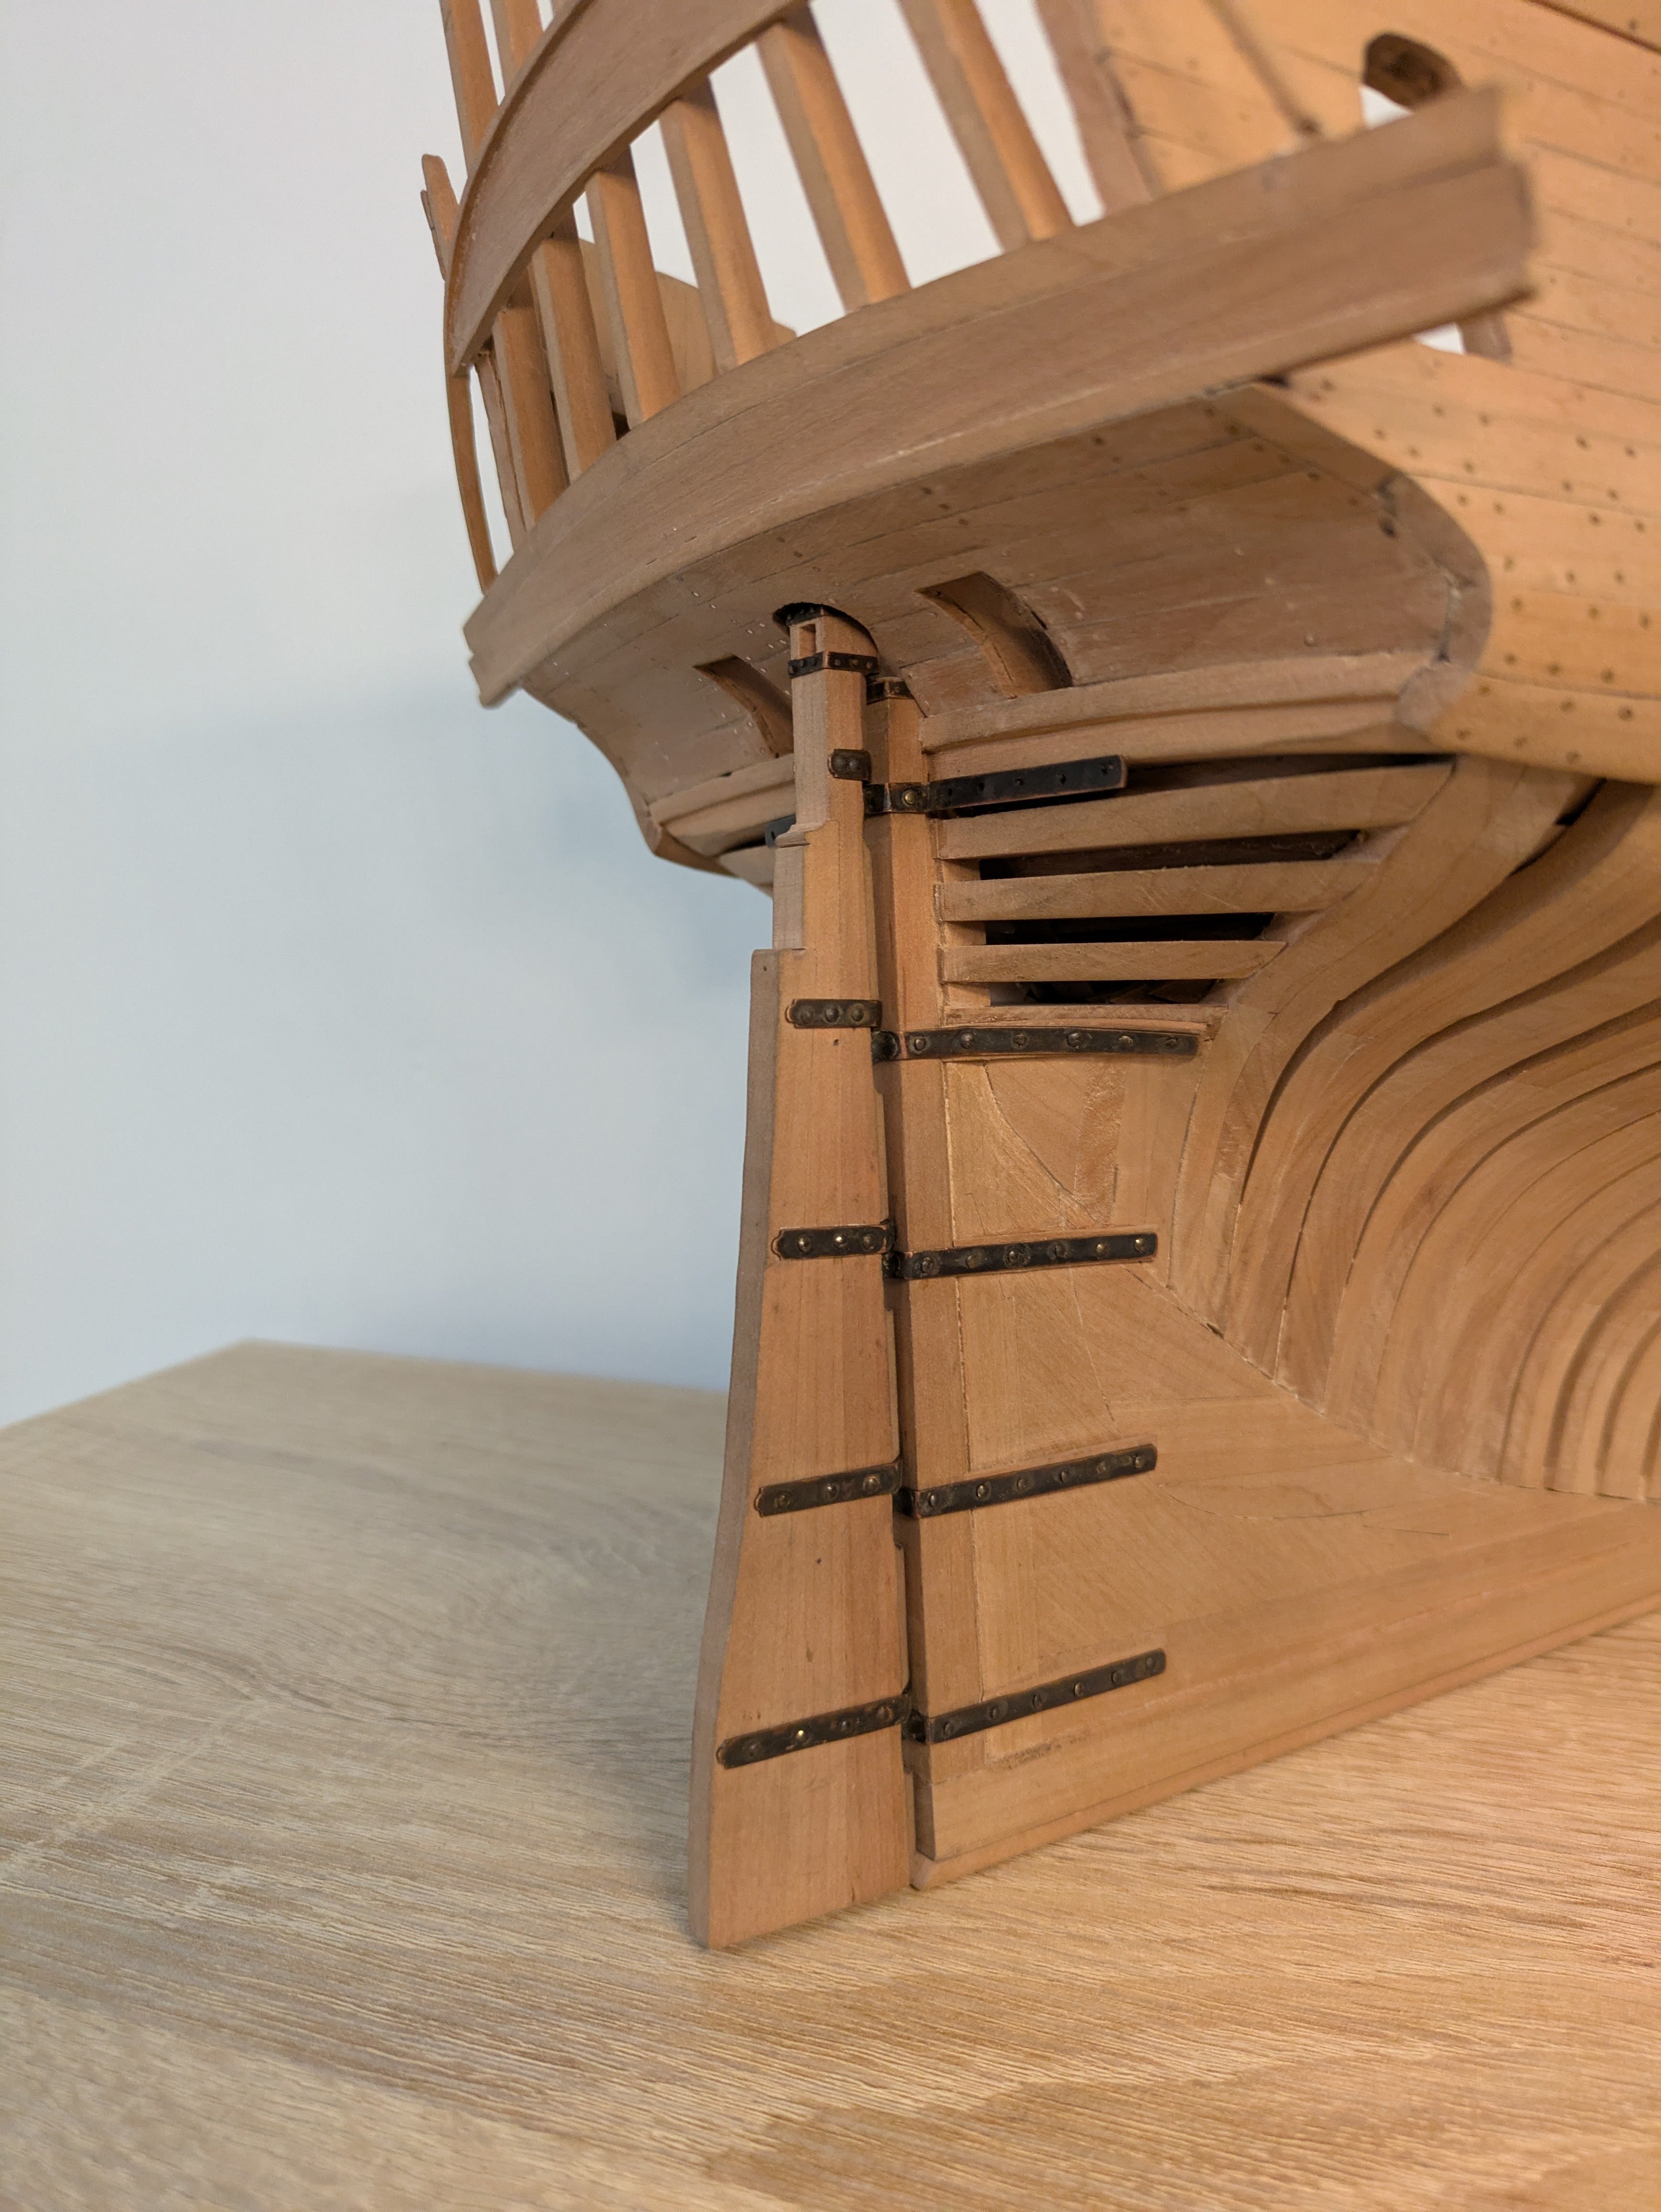
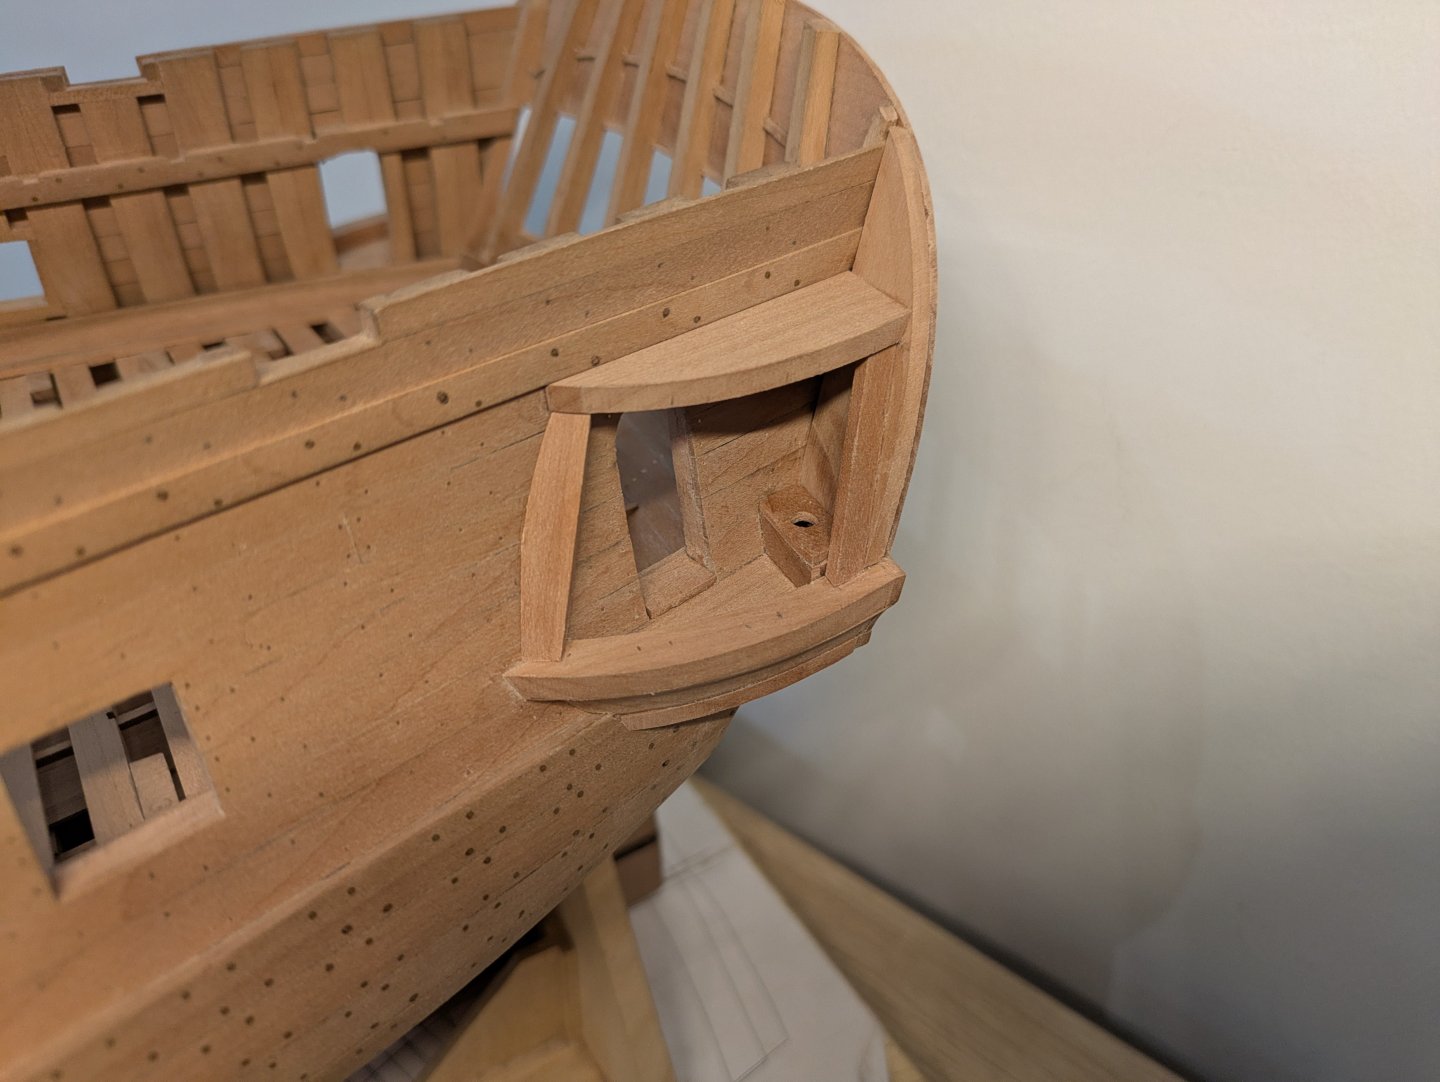
The structure of the side galleries is finished. Later I'll create all the decoration. Oh, and the most important part:


- 99 replies
-
- 8
-
-
-
- ancre
- La Mahonesa
- (and 1 more)
-
Thanks! And don't worry, I won't forget about them , they are a very important part of the ship! 💩
-
I'm continuing with the stern and side galleries. I decided to make the stern piece out of one piece only, even though on the real ship it would probably have been planked. The sheet I used has a lot of grain so it's not easy to see that it's just one piece. I just think it looks better this way. For the side galleries, the plans are not very specific. There are only side and top views, and no indication of how it's built up. I'm building it the way I imagine it was built originally, more or less. Almost everything will be covered by moulding strips, which I'll make much later out of boxwood.

- 99 replies
-
- 15
-
-
- ancre
- La Mahonesa
- (and 1 more)
-
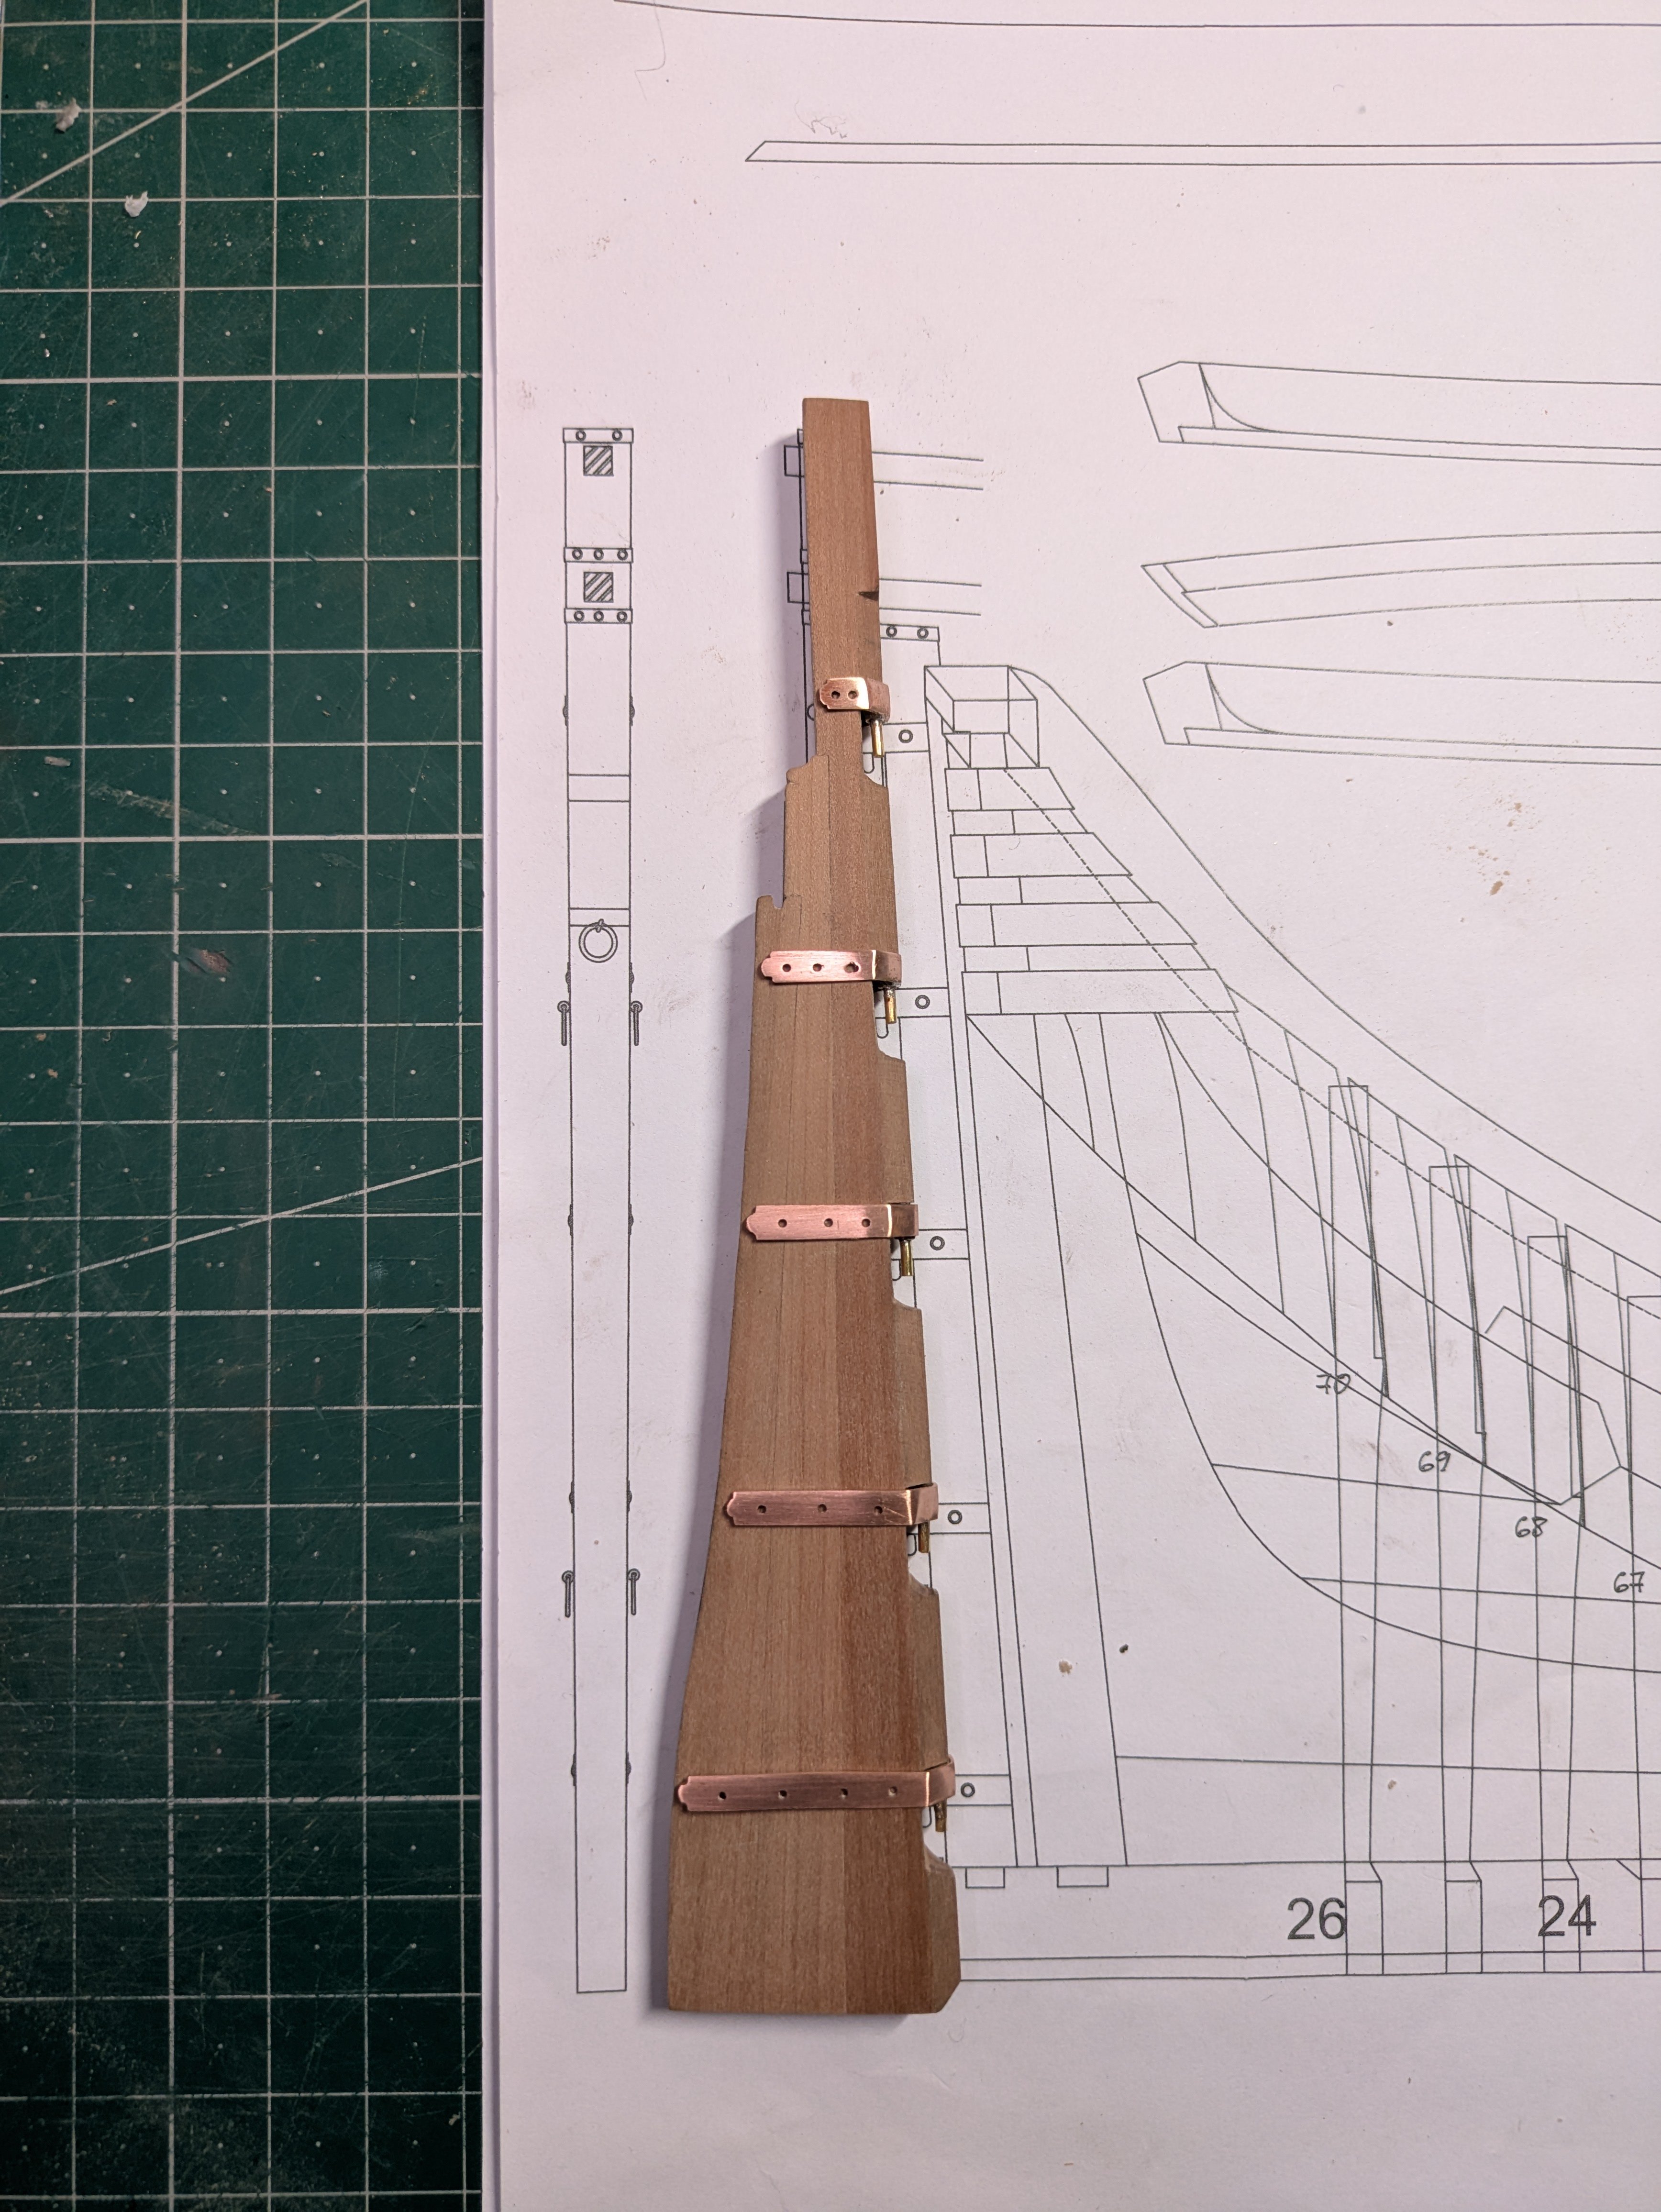
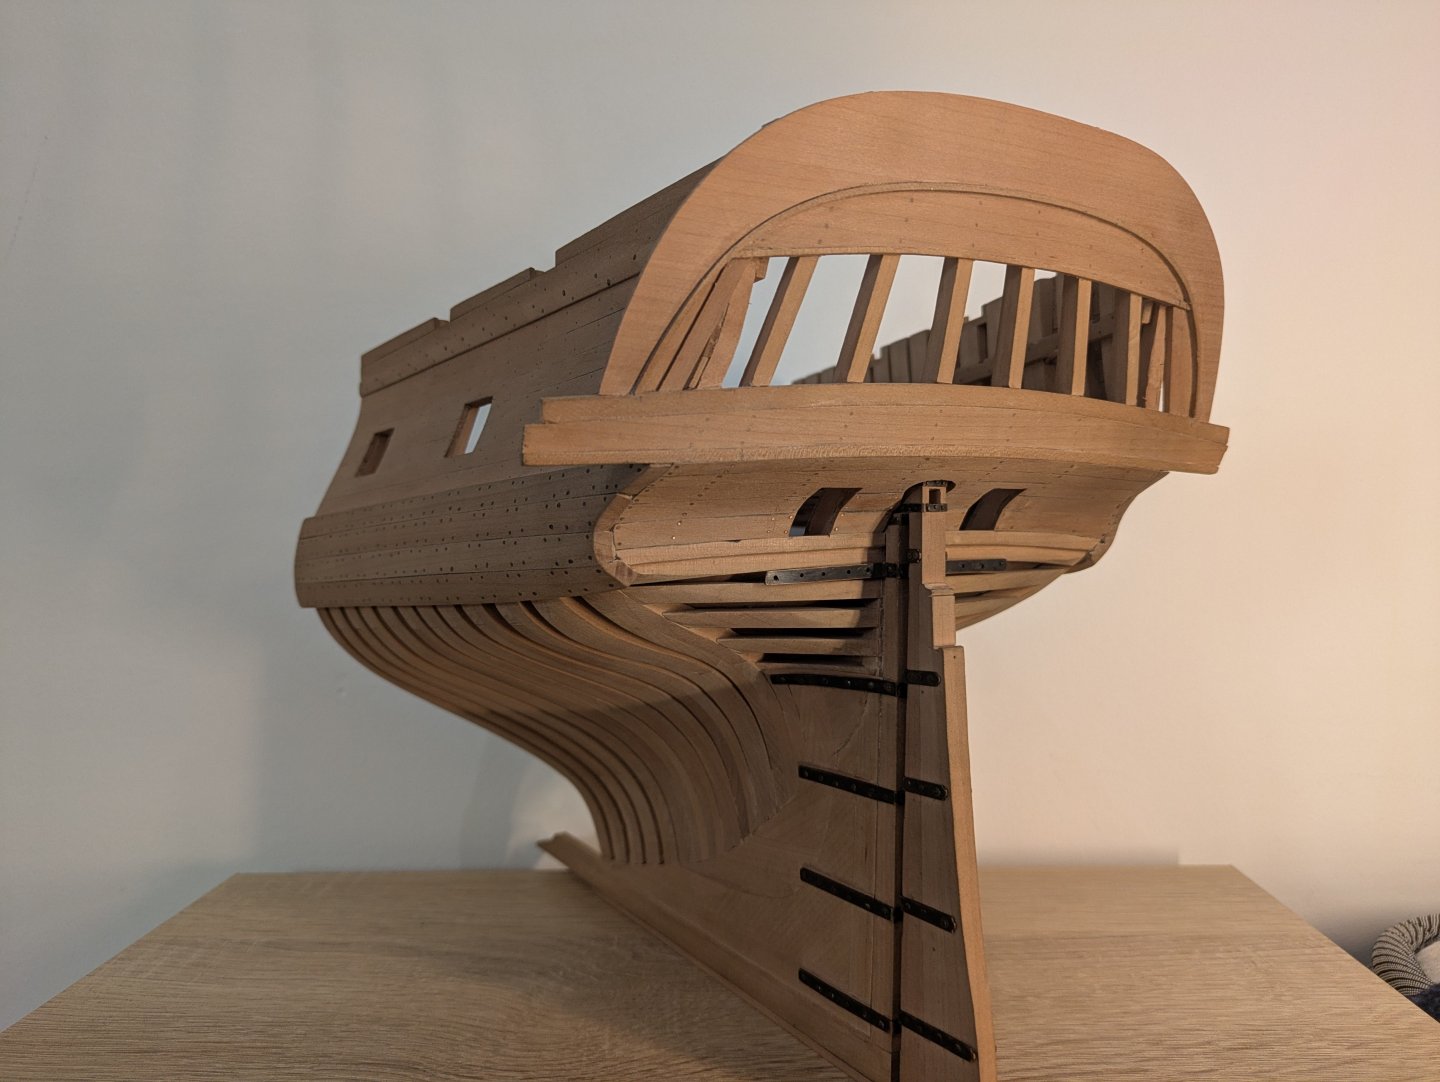
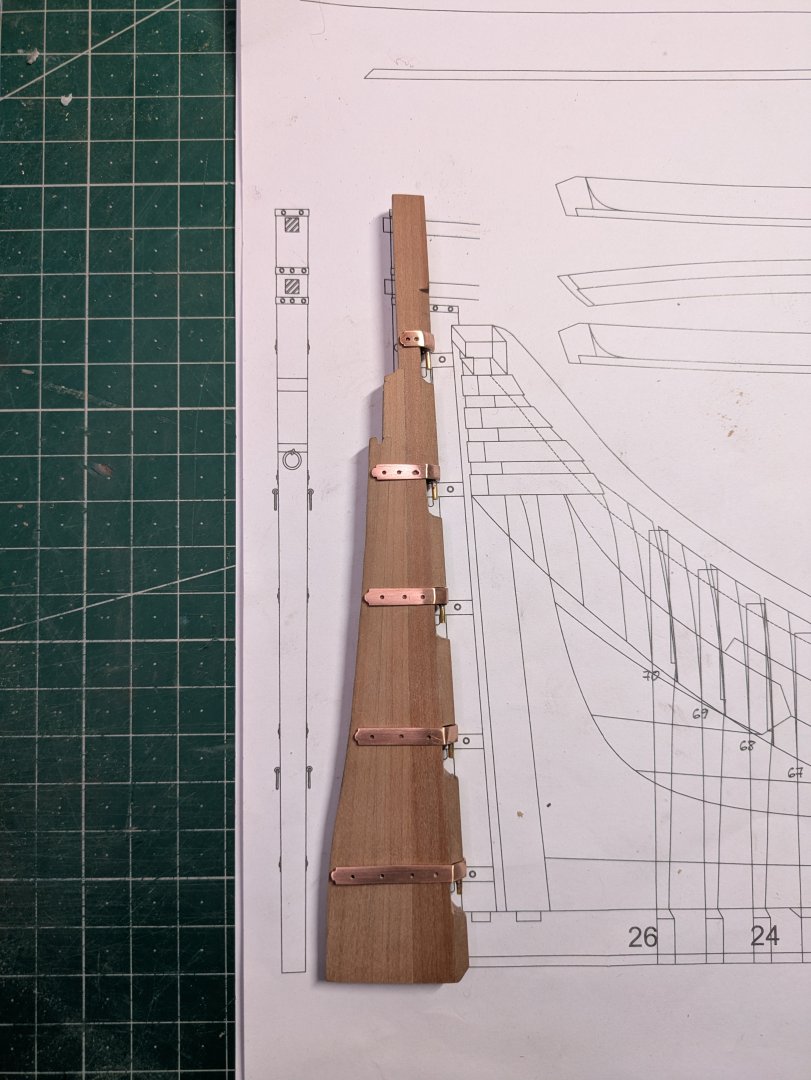
During the last couple of weeks I finished all the rudder hinges, they weren't easy to make but I'm happy with the result. I haven't decided what to do with the upper hinge on the stern, the rest have a piece of planking beneath them but this one has a lot of curvature so I'm not sure if it'll look good. Also, keeping in mind that the planks would go across the hinge, not along it. By the way, the rudder turns just fine on the hinges. 😄 I've also been working on the main deck, much of what you see is only loosely attached until I install the rudder and the tiller (I'll need access below in order to seize the rigging). After finishing the tiller I'll most likely start working on the stern and side galleries, I'm getting a bit tired of making decks so the stern deck will have to wait.

- 99 replies
-
- 14
-
-
-
- ancre
- La Mahonesa
- (and 1 more)
-
Very nice work, it's coming along great! However, when you lay out the frames to cut, try and use the curved part of the sheet to your advantage: some of the frames could have had the veins running all along them instead of across them. I always try to maximise the curved veins in a sheet when I'm lucky enough to get them 😁
- 139 replies
-
- 3
-

-
-
- ancre
- Bateau de Lanveoc
- (and 2 more)
-
I finally got around to working on the rudder. Metalwork is something I'm very bad at, and I've been struggling a lot with the rudder hinges. In the end they turned out fine and I think the solder is strong enough so the pinion won't break off. 🤞
- 99 replies
-
- 12
-
-
-
- ancre
- La Mahonesa
- (and 1 more)
-
There are only some low resolution photos on the Ancre website: https://ancre.fr/en/monograph/123-la-mahonesa-fregates-espagnoles-1789-9782382820131.html#/langue-1_2_serie_de_canons_au_1_48 Anyway I've got a friend of mine to create a 3d model of the cannons from the Ancre monography, if they turn out well I'll get them printed locally. Thanks everyone!
-
Thanks, however the Spanish guns on that page are almost 100 years too early, so I'd need to create the 3d model myself from the Ancre plans. And as I said, I don't have the skills to do that. That's why I don't mind paying a higher price for 3d prints of the correct cannons from Ancre, if the quality is worth it.
-
Sorry for reviving this thread, but has anyone bought any of the cannons offered by Ancre and can tell if they are of good quality? I'm thinking of buying some for my La Mahonesa cross section, and Ancre has confirmed that I can buy them piecemeal without having to buy a full set. They charge 4€ per cannon, which seems reasonable. I would make them myself, but my Blender/3D skills are basically non existent...
-
Great start to a very interesting boat, I'll be following your log! 😄
- 139 replies
-
- 1
-
-
- ancre
- Bateau de Lanveoc
- (and 2 more)