

j21896
-
Posts
287 -
Joined
-
Last visited
Content Type
Profiles
Forums
Gallery
Events
Posts posted by j21896
-
-
Way to go Augie! Looking good

Robert
-
Hi Jason,
Okay,maybe I'm a bit biased, but I love that companionway!!

If you'd like, I can send you some pictures to show how I made the hatch and doors functional on mine (which is based closely on the design of the companionway sliding hatch I observed on the actual Charles W. Morgan in Mystic).
Just let me know.
Cheers,
Robert
-
Aldo! You old scratch builder you! Nice work, and great to see you back in the shipyard. And Triton too? Wow
Cheers,
Robert
-
Wow Bob! That is prodigious output in both quantity and quality.
Robert
-
Just beautiful Bob! When did you build her in relation to your Fair American build? And how long did you spend on her?
Cheers,
Robert
-
Thanks very much Elia! Here are the gory details:
Sheave Slots (width about .028” = 1.8 scale inches)
As shown, I drilled starter holes through the cats at the ends of the slots, using a #70 drill bit (.028”) and the Dremel drill press.
I threaded a scroll saw blade (Saw Bird #2/0 = .027” wide, front to back, by .008” thick) through the hole, then attached it to the scroll saw.
I sawed the length of the slot, backed up, and using the blade like a sander, sawed it again to open it up by about twice the thickness of the blade (.016”).
Then I’d just disconnect the top end of the blade, move the cat over to the next slot, reattach, and repeat for all the slots.
The sandpaper band from which I cut narrow flossing strips is about .015” thick. Also, there is a stiff backing to the section of the sandpaper where it is joined to form the band. That section is .022” thick and pretty stiff – good to use once the slot is wide enough.
The sheaves (about .014” diameter x .02” thick) were drawn on pear sheet with a compass and cut out roughly to shape with an Exacto blade. After drilling through their centers, they were glued to a #76 drill bit and also glued to each other, using ca.
Chucked in the Dremel for use as a lathe, I sanded them to size, then dipped them in acetone to dissolve the ca and parted them with an acetone-drenched Exacto blade.
Maybe more info then you really wanted, but …
Cheers,
Robert
-
Aldo! I think I can speak for many at MSW, when I say, we've missed you! I'm guessing that pesky old job is still demanding all your time.
 I hope your "Peggy" can steal you away a bit in the not too distant future.
For "flossing", I cut narrow strips from a sandpaper band (the kind used with a micro sanding wand) as it has a bit more stiffness than plain sandpaper. I really didn't have to open the slots that much, as they are just a bit wider than the sandpaper band itself, and I used the scroll saw to get them to that point. So, with the cats clamped in a vice, I flossed more lengthwise along the slot from end to end vs. just pulling back and forth through the slot. The cherry holds an edge pretty well, and leaving a final sanding of all four sides of the cats until the end helped some too.
Cheers,
Robert
-
Hi Patrick,
I don't know the names of the running rigging lines yet, so I'm not sure which you refer to, but the drape of the ones shown now in place on your yards looks fantastic!
Cheers,
Robert
-
Thanks Hakan! And you're right, I have actually been using Ron's build log as a source of instruction (and inspiration) for a number of aspects of the build. Oh, and speaking of build logs, please send me the link to view progress on your Euryalus

Hey Patrick, I hear you on the wood replacement! I couldn't believe the difference in working with cherry and pear compared to walnut and lime! I think pear is the best, as cherry is a bit too grainy for my liking, but I'm living with it. Ah yes, if I only knew then, what I know now. But I guess that's what first builds are all about -- second builds!
Cheers,
Robert
-
Catheads
Before deciding on their placement, I had to make the catheads. I used Goodwin as my reference for dimensions, size and position of sheaves and sheave slots, end caps, etc. Since I don’t have a good machine for turning brass, I made the sheaves and pin from wood.
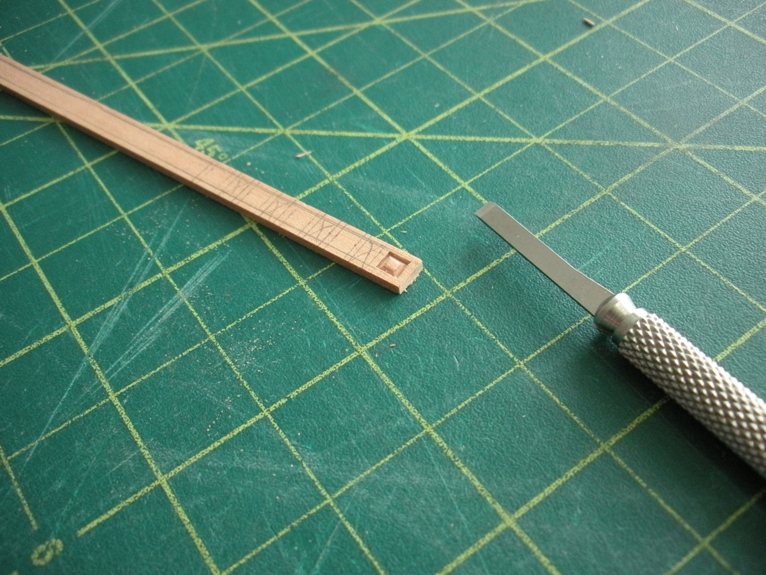
I traced the outline of the kit-provided walnut catheads onto 3/16” thick cherry sheet and cut them out using the scroll saw, leaving them a little long at the head and tail.
I drew the sheave slots in pencil, and also marked lines for cutting the excess length at the heads.

I drilled a starter hole so that I could thread a scroll saw blade through to cut the slots.
A little masking tape at the ends to hopefully remind me to stop my cuts…
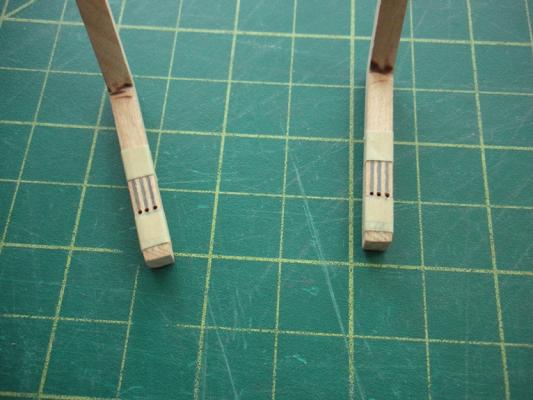
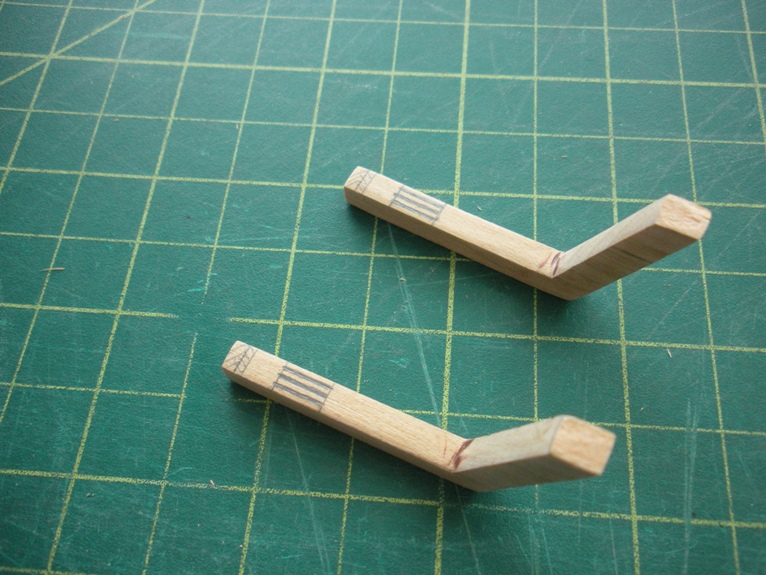
Once the sheave slots were cut with the scroll saw, I “flossed” them with narrow strips of sand paper to open them to width. I made the sheaves out of Swiss pear in the same manner I used to make the drumhead for the capstan, but on a much smaller scale, using the Dremel and a #76 bit. Some pear treenail stock I had prepared was used for the pin. End caps were finished with the “patina” design using a 1/8” chisel blade.
Unfortunately I didn’t take pictures of the whole process -- and those I did take, are a bit blurry -- but these show a bit of it toward completion.
Not yet cut to length at the head end, but the sheaves are installed and the “pin” of treenail stock is threaded through all. A couple of “extra” sheaves remain unused.

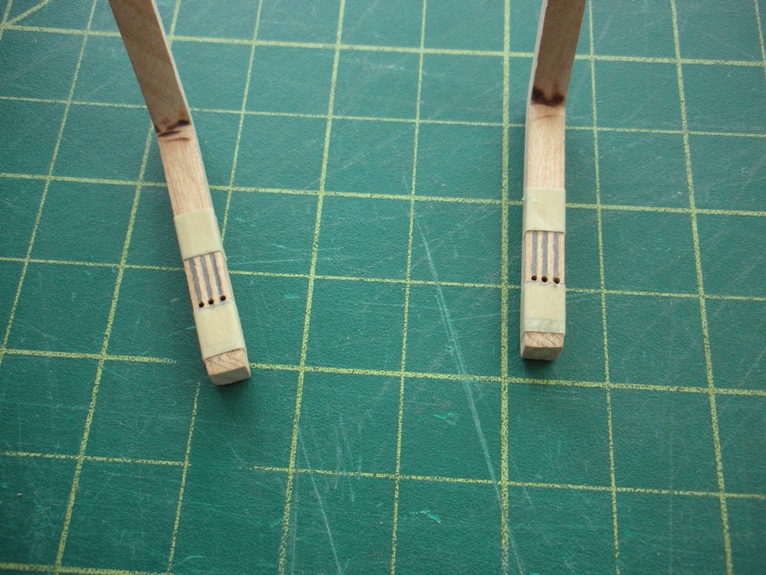
I experimented with making the caps using cherry, but eventually used Swiss pear for a little contrast.

The “fiddly bits” of these fittings…
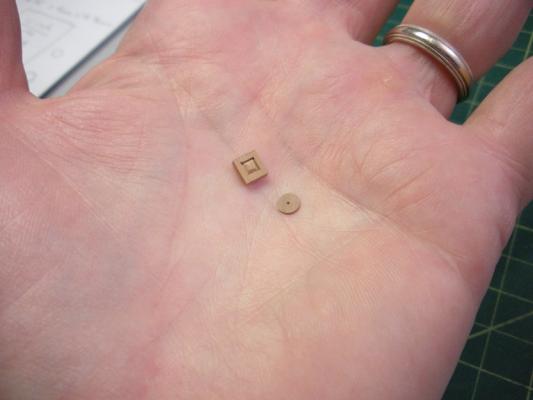
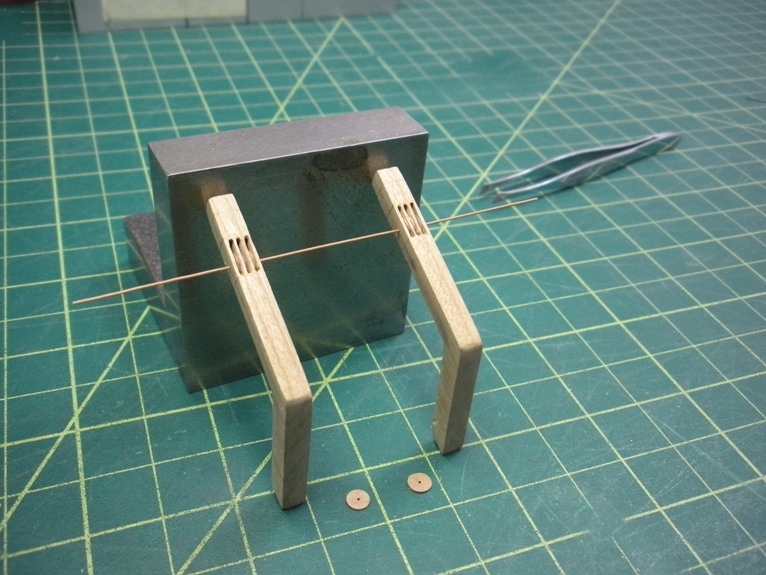
The catheads cut to length at the head end, caps installed, all sanded and ready to go. (Of course the obligatory “extras” snuck into the shots)
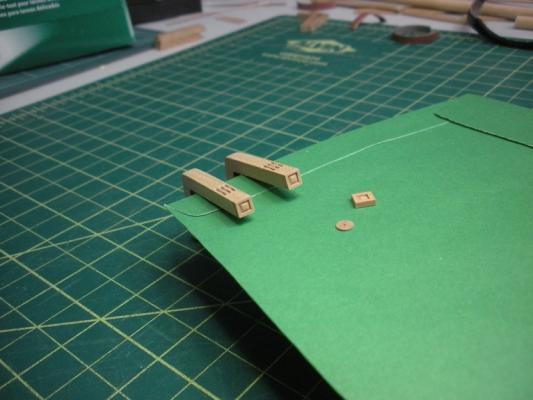
The tails of these cats have been left a bit long in case I decide to run them over the rail vs. under it. Yes, that decision still beckons me
But I can stall no longer, the time has come!- Gahm, garyshipwright and Blue Ensign
-
 3
3
-
-
In my experience, walnut varies greatly in color from supplier to supplier, and even between shipments from the same supplier. It can be difficult to match, so you may want to get all you need up front, at the same time.
It bends okay, but it doesn't hold an edge nearly as well as Swiss pear. I personally prefer pear.
Robert
-
I have to say it again Augie: That is one beautiful ship model!
Cheers,
Robert
-
Hi Alistair,
A recent post in the forums regarding rope coils made me immediately think of your AVS, as your coils are so superbly done.
How did you do them? Are they part of the actual line you belayed? Are they made separately off of the ship and then added following belaying? Please, do share your secrets to success Man
Thanks,
Robert
-
-
Looking good Patrick! That last overall shot is sweet.
Robert
-
I use a draw plate to make my treenails from wood. And, in my experience, the Jim Byrnes draw plate is the only way to go for this. Previously I had a draw plate purchased from MicroMark, which was greatly inferior, and impossible to use for drawing down to the smaller sizes.
Cheers,
Robert
-
That is just a beautiful ship model Augie!
Robert
-
Capping Rail – continued
All joints are cut and sections of the rail for the port and starboard sides are now scarphed together and taped & pinned temporarily in place. I won’t sand them to their final shape and dimensions until they are all permanently installed.
However, before I can permanently install them, it’s decision time on the catheads: under the rail as per the kit plans, or over the rail as per the NMM plans? Plus, I have to fabricate them!
I think I’m kind of leaning toward under the rail – though that involves a bit of nerve racking “excavation” work, as I did not leave openings in the planking at their positions.
About 3/64" more will be taken off the width in final sanding and shaping.
(Here the tape hides the "hooks" in the hook scarphs, but they're all there
)
Almost there...
And finally, all sections port and starboard.
- garyshipwright and Archi
-
2
-
I use both of these Bettina:
http://www.lie-nielsen.com/catalog.php?grp=1307
http://www.lie-nielsen.com/catalog.php?grp=1313
And Dave is spot on, they really are "heirloom quality". The blades are thick, heavy steel, that is finely machined. They can be dialed down to very fine, smooth and accurate shavings as needed.
Cheers,
Robert
-
Hi Bettina,
I hate to "muddy the waters" if you've already made your choice, but I absolutely love my Lie Nielsen model maker's plane:
http://www.lie-nielsen.com/catalog.php?grp=1307
I also have the convex sole version. They are a tad expensive, but the quality is fantastic!
Cheers,
Robert
-
Hi Chuck,
We're in a condo too, so space was also a consideration for me. The Ryobi is small, light weight, and very easy to move around. It was also the least expensive ($99).
I've used it several times so far and it works pretty good. However, the biggest issue, as addressed earlier in this topic, is the plastic insert in the table. It does not sit flush with the table. It’s recessed by about 1mm, and that presents quite a problem, that absolutely has to be addressed! The temporary shim I made is okay, but a more permanent solution like Jay’s is definitely a necessity.
In retrospect, I probably should have looked at other saws, as having to “fix” a brand new tool is a nuisance and just seems wrong on principle.
Robert
-
Hi Elia,
A terrifying bit of "excavation" work to be sure! But I know the new cove will be well worth it.
Cheers,
Robert
-
Hey Alistair,
Sorry to hear about your "crash"! I hope your recovery isn't too painful.
Nice to see shots of your AVS again -- that ropework is phenomenal!
Cheers,
Robert


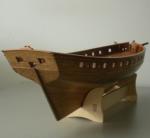
HMS Mars by j21896 - Caldercraft - 1:64 - modified kit
in - Kit build logs for subjects built from 1751 - 1800
Posted
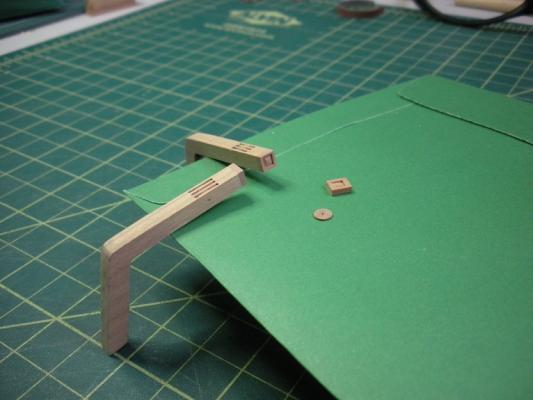
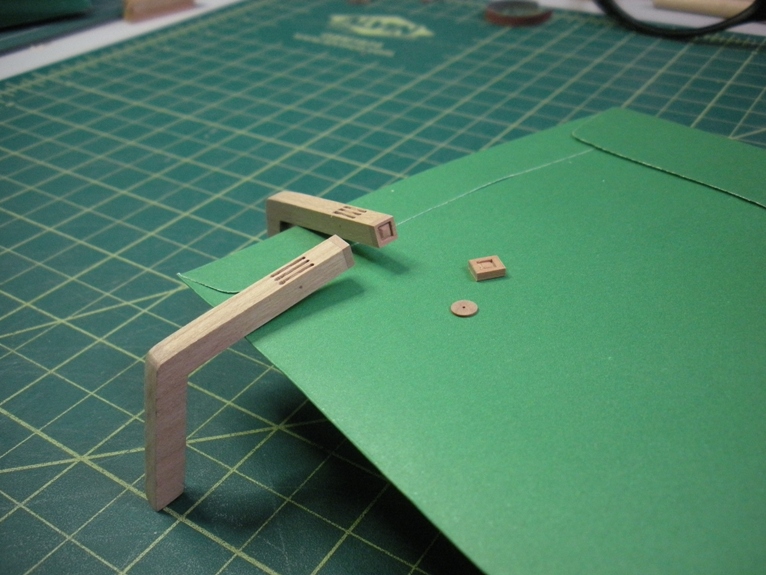
Catheads – continued
Decision made: Catheads will run under the capping rail. Time to do some cutting
To aid in aligning the slots in the bulwarks, the center line and cathead orientation angles were drawn on a piece of paper, and taped to the deck.
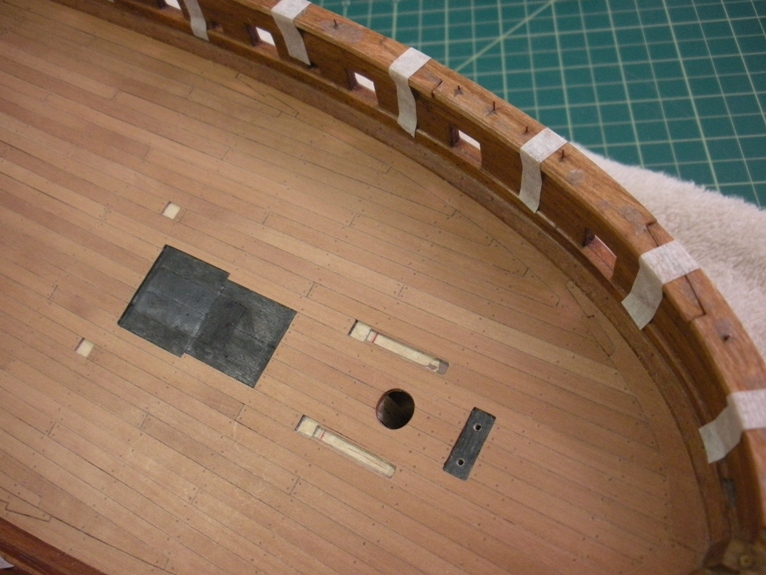
As suggested by the folks here, after drilling a few starter holes with a small bit, I used files to cut in the slots to the bulwark tops.
Using a chisel, I continued the “excavation” work in the spirketting, waterway and the edge of the margin plank.
A quick test fit ...
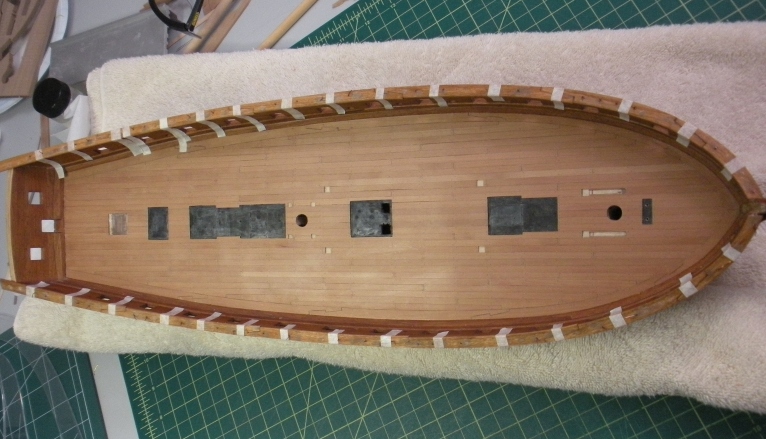
Then, repeat excavation on the port side.
Next up will be installation of the catheads and the capping rail.
Cheers,
Robert