Rich_engr
-
Posts
322 -
Joined
-
Last visited
Content Type
Profiles
Forums
Gallery
Events
Everything posted by Rich_engr
-
 Lol- thanks Larry! Yes, I'll get some pictures up soon (maybe after I get a few guns installed and rigged)- sounds like Sjors! lol But for now, my Niagara is my quiet, re-centering man cave that I will retreat to in the late evenings before bed. It's good to let the mind go, relax, and forget about the day's inactivity/lack of calls, and try to re-strategize for the next day. Only by a strategically-focused plan will I succeed! (This is chess, not checkers or tic-tac-toe.) Fingers working nimbly with rigging and some wood can do wonders for the mind and clarity of thought.
 -
Ok- strong lead was a no. I was a really strong candidate (95% what they needed), but lacked some design experience they required... grr.. but they'll keep me at the top of the list in case something similar opens up. Still no activity- working with a recruiter and searching around myself. Thinking of trying to teach myself some of the design software (looking for free downloads, tutorials, etc.)... Regarding the build, in the evenings I was able to install the breech lines on all of the carronades (was able to do about 5-7 a night before bed, which is a lot faster than I thought, once I got my rhythm). So next up is going to be finishing the rest of the tackle and figuring out the exact placement of the guns & tackle and installing them!! I still have to assemble the long guns and make their tackle. After that, its on to the deck structures, then channels & chainplates (that'll be interesting, especially from the "stories" I've read about making them! lol!). Now, if I only had as much progress in the job hunt (despite my efforts and time) as I have with my build (which has only amounted to maybe 2-4 hours a week), I'd be in fantastic shape!!!! [Hrm... less time = more progress... by that logic I should stop looking for work and I'll miraculously be employed, right?!? Same thing for winning the lottery! lmao!!]
-
Question on false seizing / zip seizing
Rich_engr replied to slagoon's topic in Masting, rigging and sails
Wow- I gotta try zip seizing now, because I've been doing the old-school, long-handed way of wrapping the spool of thread around the line to be seized, turn-by-turn... doh!! -
Question on channels and chain plates
Rich_engr replied to src's topic in Masting, rigging and sails
Wow- never heard of the "air space." But, not to get too mathematical here (remembering my college work back in the day), the channel was designed to be static, not dynamic (fixed forces, as opposed to acceleration/movement involved). I recall back to my Statics Engineering course, and there are only 2 formulas to remember: 1. The sum of the forces (in any direction) equals zero, and 2. The sum of the moments (applied torques) also equals zero. If you draw a free-body diagram of the channel, showing the shrouds and chainplates (tension along themselves), the vector components of the forces cause the channel to be in compression. Then, if you have a net tension in the +y-direction (ie, up the shrouds), in order to counter this you'd add a support strap below (to pull down and balance this force). In a similar fashion, reverse this logic if the chainplates exhibit a net tension downwards by adding a wooden brace underneath the channel, or a tension rod above it). This makes me wonder- when they were rigging the ships back then, did they have some device to measure the forces/tension in the shrouds (like a fish scale)? Definitely gotta give the old shipwrights and riggers credit for knowing these problems and being able to solve them (without a calculator or an IPhone app)! If they didn't know this, I doubt their ships would have made it across the ocean to the New World! -
Larry- thanks!!! Yes, I have thought about bringing up my hobby (or insanity, as we on the inside call it), and I do have the pics of my build on my phone (blackberry takes FAR better pictures than the PowerShot). I've showed some of the cannons dry-rigged to a few coworkers before, and they were very impressed, so hopefully it would be a slick little show-n-tell with potential employers (which would be professional engineers btw) to demonstrate my long-term dedication, patience, attention to detail, and willingness to learn and keep the mind sharp. Also, one could demonstrate their creativity and problem-solving skills, in addition to showcasing the logic and reasoning necessary for both short-term goals (a plank or stropping a block), and long-term strategic goals (finish the hull, complete the rigging). Lots of info about a person's skills and talents can be gleaned from a build. As for the build, I did manage to finish installing the rudder (minus the chains and tiller) the other day, and today I made the horse for the boom sheet/double-block, and made the capstan handles. Tomorrow I plan on having these items installed. Hunt-wise, I still have one strong lead, but the recruiter has been busy travelling and getting additional req's open for the company, so it's a little difficult to get in touch, and nothing yet on the others... hanging in there still and exploring my options!!
-
Ooooooooh- paint and planks!!! Ooooohhhh!!! donut!!! lol!! It's amazing how awesome she looks with some paint on her- glad that you're getting some bits done here and there while moving! Even a simple plank, or shaping a piece, or painting a stripe feels good and let's the regular stress wash away, if just for a brief moment of peace (or shall I say, piece). Good work!!!
-
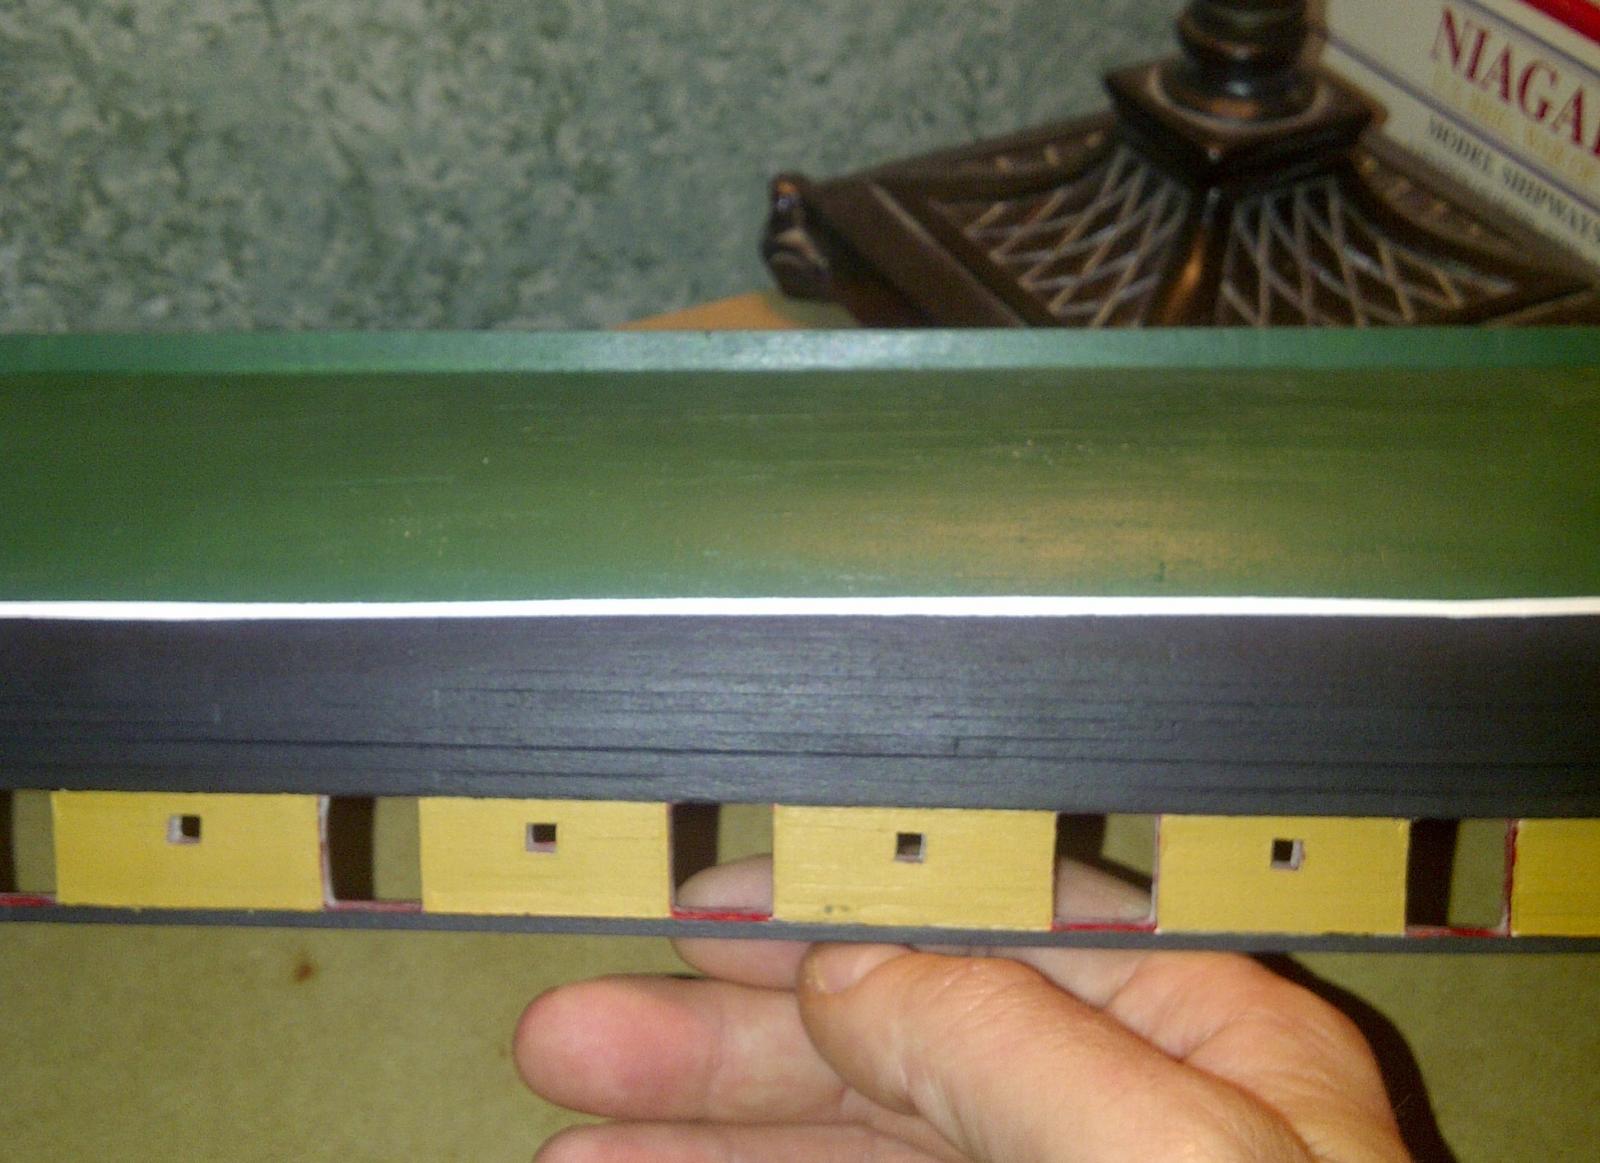
Nice progress!!! Definitely coming along there! I agree with Larry- the toprail issue might be intrinsic to the kit (I had to slightly shim around that joint as well). The gun/sweep ports were fun/tedious to do, but your approach is sound (use a 3/16 block to gauge the hole when assembling). I had to redo mine, since I just installed the framing, then sanded/filed them square, only to find that I over-sized them (which is why you see the 1/32 strips as framing on my sweep ports). lol! Still, slow and easy is the best way. As an idea, it might be easier to go ahead and paint the waterway and plankshear before doing the inboard planking- masking will be a pain!! (know this from experience)
-
Gentlemen: Thank you for the support and kind remarks! I am so thankful to have the kind of support on here that is very welcome and appreciated by me in times like this! Understanding the world of HR and hiring politics is like trying to know the inner workings of the Illuminati! lol! But I understand the legal issues (EEOC, discrimination, etc.). Still, I'm trying to be positive and focused while keeping my goals in mind, which runs in parallel with my approach to my build. (True, both can at times be equally stressful, but I doubt that I'd go back to my job search or work to get a break from my build! haha!!) Still, I'm focusing on what really matters at this time, and when I get a chance or need to chill out, that's where this build plays a big role (or getting the house fixed up and ready to move). Regarding the build, I almost have the rudder fully installed (few more nails/rivets), and after that I'll fab the tiller bar and associated rigging. I also have to make the capstan bars and have them stowed along the aft bulwarks. I'm trying to get as much of the small, inaccessible stuff as possible in place before rigging the guns and adding the deck structures. After all of that's done, it'll be onto shaping the masts and bowsprit, then the fun really begins!
-
I'd agree: entry level would require less time than an intermediate/advanced. It all depends on the level of detail you want to incorporate, and what you feel comfortable with. One could build a Vic or Conny as a beginner, but the learning curve would be considerably steeper and would take longer (more chance of getting discouraged), or one could build an AVS, Sultana, etc., and produce a fine model in a fairly reasonable amount of time (and time itself is relative). Then there's the ambitious, yet newbie such as myself, beginning with a Niagara (or Syren, etc.), where the learning curve is moderately steep, and it takes a good bit longer (in my case anyway), but where you learn the skills necessary for something more advanced later on. But I would have to say that as a beginner, one should first view the various build logs here to get a sense of what wooden ship building requires, and use their own judgment as to what they could handle first off, then progress. I'd rather start off simple/moderate challenge, than jump in with a 1st rate and get discouraged or frustrated, especially when one considers the cost of the kit and the time involved. Just my 2 cents~~
-
Ok... been almost 3 weeks waiting for the phone interview... (To HR: if it's a NO and you are not hiring, then just tell me so, because the waiting is very difficult!). Trying to re-strategize my job hunt... So, to chill my mind a bit, I managed to paint the mooring chocks and install them, painted the rudder, attached the pintles, and I should have it mounted to the hull later this evening... At least I got something done this week (not counting dishes, the lawn, and laundry. lol!) BTW, where have the rest of the Niagara club been??? Haven't seem too much activity lately.
-
Another quickie: In between recruiters calling today (should have a phone interview sometime this week, and one really awesome recruiter who takes the time to know her clients), and laundry, I managed to redo (again, for the umpteenth time) the stern mooring blocks. (It's amazing what a difference using the right size drill bit can make!)
-
Quick update: Pintles and gudgeons are blackened (actually more of the rust color like the gun hardware), and made the rear mooring cleats/blocks (after 3 tries for each). Not much progress, but every small piece here-and-there helps. On the job hunt: interview on Mon went well, but waiting to hear back (it's a different part of engineering for me, but who knows- they def need the help). Also, had a phone one on Fri that was great, but I'm lacking some of the experience they need, so that was a no (was hoping for that one, since they did some really cool stuff). And I'm still trying to get back with another HR rep for a 3rd place (which is right up my alley)... Still hunting and praying!
-
Regarding waxing the lines, when I run the synthetic line supplied in the kit (nylon??) through the block of beeswax (as shown in bogey's post), the wax gets all flaky/dusty, and it doesn't seem like much sticks or relaxes the line enough... Should I try melting the wax first, or is wax not the best thing for synthetic lines?? I really don't want to have to go and purchase all new lines, especially since I've already made over a hundred feet of rope with it and seized a ton of blocks!!
-
Yeah- ouch! Cut fingers really sucks for modeling (I sliced one down to the nailbed with a cleaver while chopping cabbage 3 months ago- nail is still messed up). But heal up Sailor, and you'll be back to it in no time!
-
Currently I'm blackening the hardware for the rudder. Due to upcoming phone interviews AND an actual in-person interview on Monday, I doubt there'll be much building going on over the next few days (which is fine by me)!! But, next up will be shaping the tiller bar and painting the rudder. One thing I did notice is that I may have put the waterline a hair too low, since the line goes right through the top hinge of the rudder... probably won't be perfect, but I'll just have to deal with it (otherwise it'd be re-painting the hull just above and below the waterline to correct this, which is a can of stink worms that I'm not going to attempt to open!!!!!) Yay!!!
-
Not much progress on the build this week due to job hunting (got a couple callbacks about 3 positions, mini phone interview, and a few more apps out...), mowing the lawn, and repairing the cord on the vacuum since the weenie dog chewed it (while it was plugged in- luckily he didn't get zapped!). Last night and this evening I did manage to fabricate the pintles and gudgeons for the rudder. Now I have to finish some shaping of the rudder post, then paint. After that I'll make the tiller handle. Hopefully my soldering work will hold, since the iron is rather underpowered and had a lot of cold-solder joints. For the pintles & gudgeons, I did the following: 1. Cut a strip of brass about 1.5in long or so 2. Drill holes for the rivets 3. Bend into the "proper" shape 4. Solder pins 5. Dunk in the tank of Blacken-it. I'll get some pictures up maybe tomorrow.
-
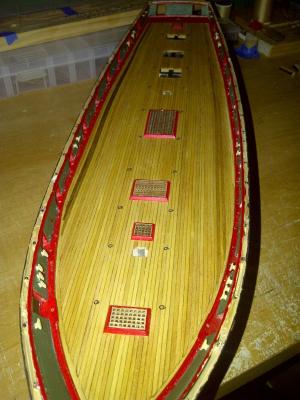
Ok... Managed to get the chafe blocks done (after 3 tries), painted, installed, and drilled the hawse pipes. Also touched up most of the paint on the hull, and while doing so I accidentally got some read paint on the deck... oops!!! So I wiped the paint off, then sanded a bit, then re-stained the deck, and this also prompted me to stain the gratings (which turned out nicely). So the boo-boo led me to some improvements on the deck- go figure! lol! Now it's onto the rudder- paint, fabricate pintles & gudgens, and add the chains. This should be fun, since I haven't soldered in a good while...
-
Patrick, thanks!! Right now I'm in between touching up the paint, installing the hawse pipes/chafe blocks, and maybe work on the rudder a little... I want to try to get most of the lower exterior finished before really digging into the deck stuff. So it's some "house cleaning," or should I say, "hull cleaning" for a little bit.
-
Joseph- looking good there! I found the fairing and aligning to be a bit of a pain since I was trying to be "overly cautious" (which probably can't exist in this hobby!). It is true that the plans are off a bit here and there, but if you stick to some logic and common sense, you won't notice it. Another thing to watch out for (once you get there pretty soon), is the beveling of the forward bulkheads, since they all taper and slant in the forward section of the hull. Check this with a short strip of wood plank, since this will also affect how the waterway and plank shear fit into place. Mine was off a hair, which is why there is a slight difference between my port and starboard sides (might be able to see it in the pictures in my build). Another tip: In addition to the filler/support blocks you have, try to get some strips/block that are flush with the top of the forward bulkheads just inside of where the plank shear goes, since these will help with the installation of the deck planks and nibbing strake (keeps the ends from sagging down). And watch the cat- they LOVE to chew bulkheads, horn timbers, and planks!!! (Had to replace a few, and fix a gun carriage from my Main coon! He also loves to shred paper, which luckily he hasn't touched my plans and paperwork.... yet...). LOL!!!! She's looking great so far- keep it up, take your time, and always have FUN!!
-
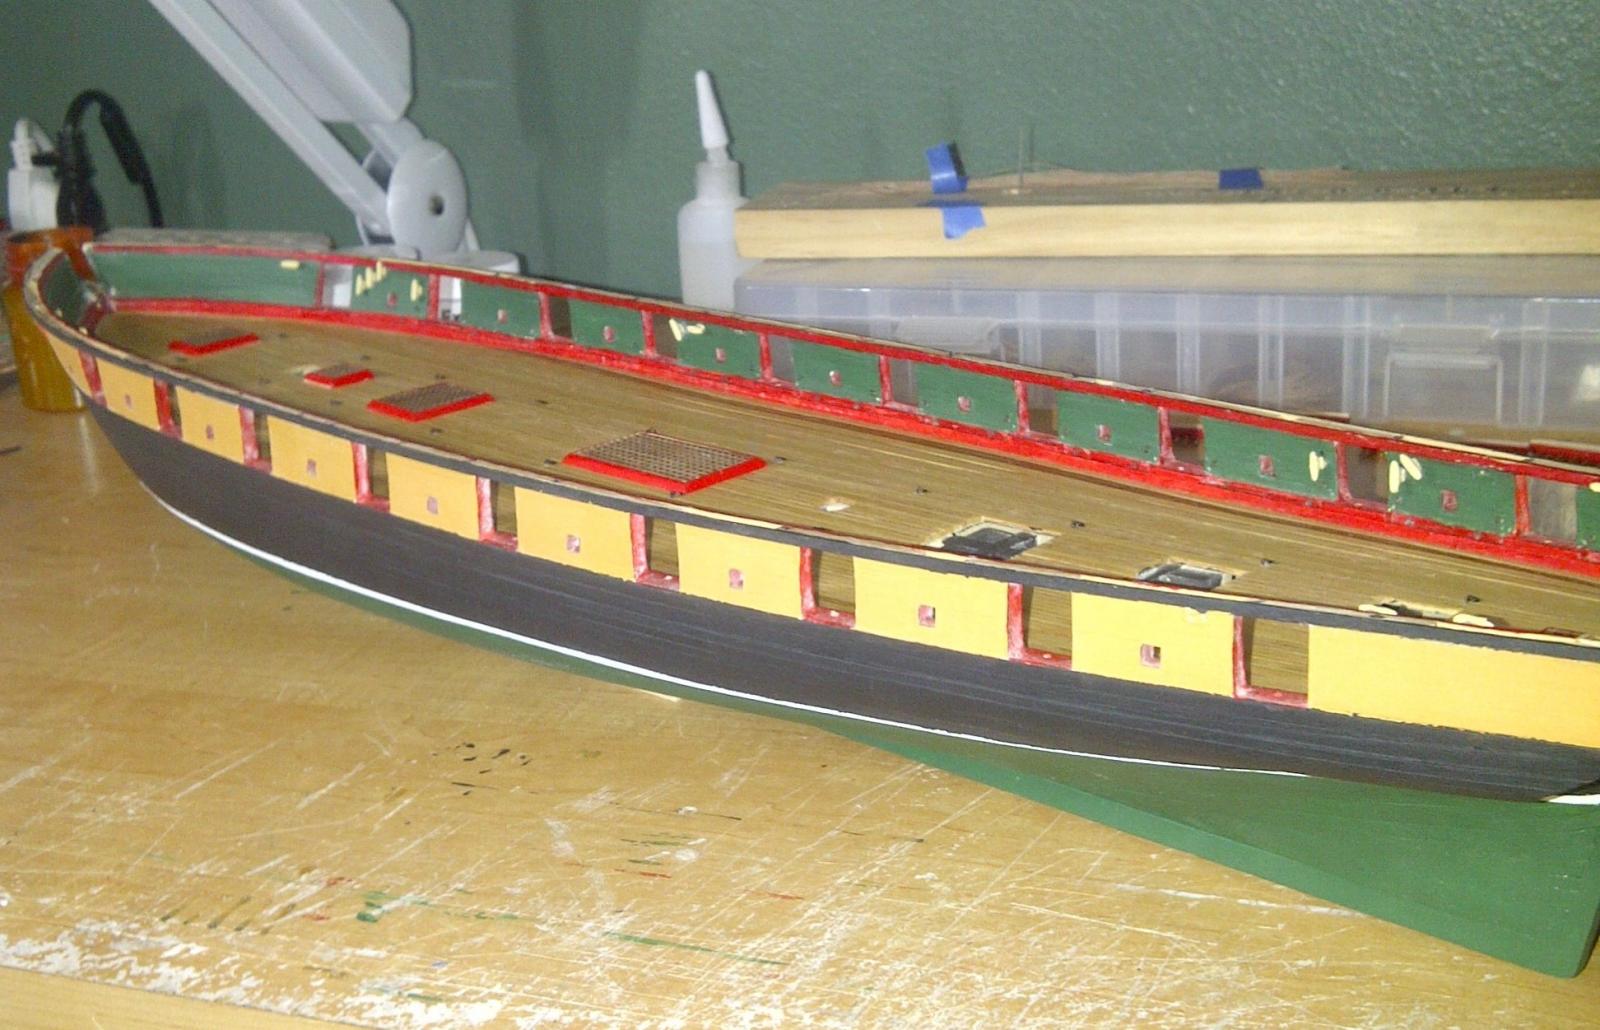
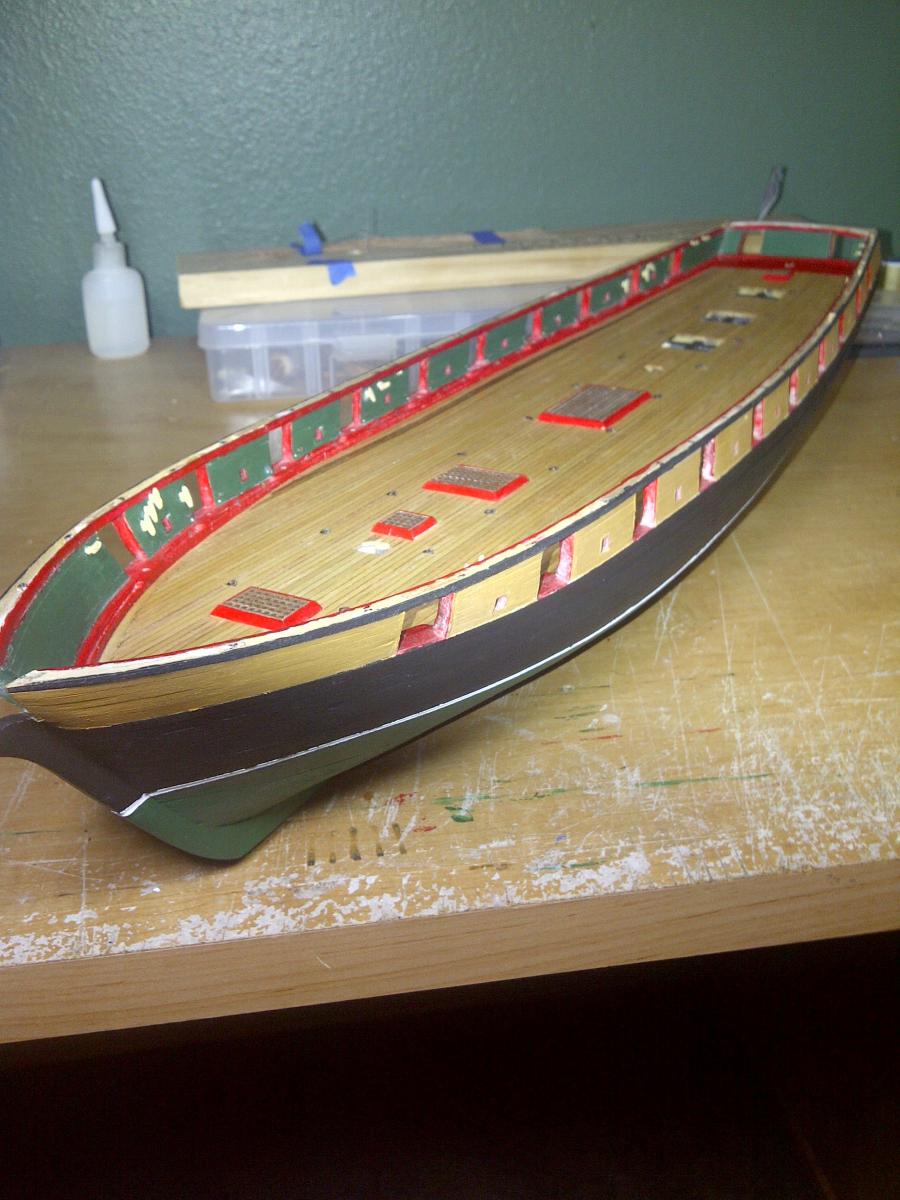
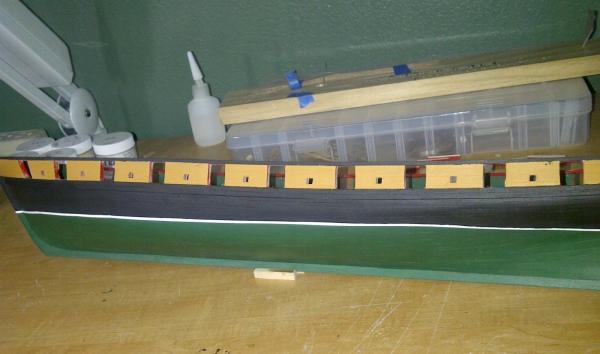
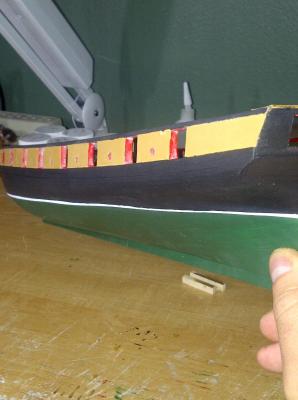
I really like how the white pinstripe-waterline turned out- I'm very pleased with it. Just need to do a few small touches here and there and then get to working on the deck stuff. So in a day or two (depending on interviews hopefully), I'll get the hawse pipes done, and then it's back to seizing the rest of the gun tackle (thank God the blocks are stropped at least!!!).
-
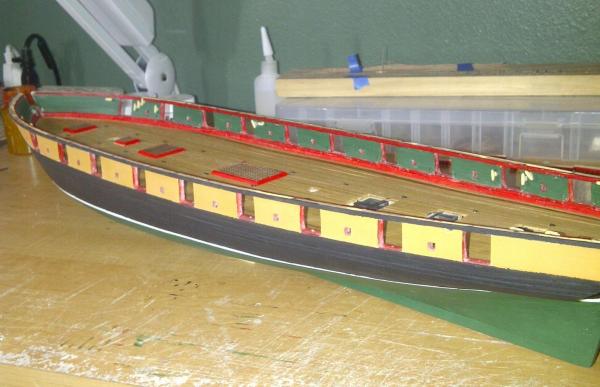
BUSY DAY! This was an awesome day for the job hunt (2 recruiters called, and had 2 mini phone interviews for a position I applied to on Friday, which is looking very promising!). At least it's some activity!!! And, the hull painting is now complete (minus some touch-ups here and there, of course):


-
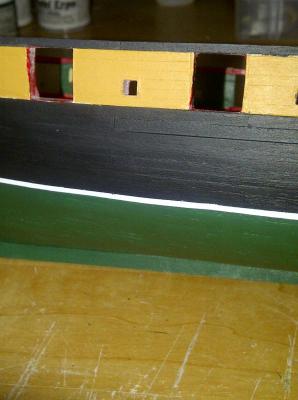
David- thanks for the tips! Your ship turned out great btw! I like the waterline marking device- I'll have to try that for my next build further down the road. But what I decided upon was to go with the basic black on the upper half, the regular hull green for the lower, and a 1/16" wide white pinstripe for the waterline. I should have it all done tomorrow. My method was this (albeit not as efficient): Painted the upper black portion down to the top edge of the waterline (lower part was masked. Cut strips of masking tape so they were exactly 1/16 in wide, and mask off the actual waterline. Paint the lower half the green. Reverse-mask the waterline (tape off both the top and bottom edge of my 1/16 in strip), and finally paint the white. I'll get some pictures up tomorrow evening (after hitting the job boards, and hopefully the gym) of both the hull and deck (sorry no guns installed... yet). (Painting the hull was actually somewhat sad, since all of the work of planking for two years or so is now covered up... was weird seeing all of that naked wood disappear into the paint.....)
-
Looking good Brian! I like the filler blocks between the bulkheads- they definitely make her strong and rock solid. Framing all of the ports was fun, and I made it extra challenging on my build since I went a little overboard with my file when squaring things up. Also, to check the alignment and spacing, use a long piece of square stock to pass through the ports on both sides. She's coming along nicely there- you'll be onto the nitty-gritty in no time!
-
Brian, yes I like the beer can idea (course I drink bottles)... lol! As for the job hunt, it's moving along (12-14hrs of looking and applying each day)- so far up about 25 applications all over the country, so we'll see... plus, had 3 recruiters call. Not as active/definite as I'd like, but it's better than nothing! And thank you for the support- I truly welcome it and it helps me stay positive and upbeat. Regarding the waterline, I just may go without either the white or teal stripe- after looking at numerous pictures of the actual ship I don't see any line that separates the upper black section with the lower green. I can probably start it this way, and if I don't like it, I can always paint over the top edge of the green with maybe a light yellow or white... Should get some pics up in a day or two.
-
Yea, I agree that bleeding may occur. I second that regarding the teal- I may go with white or an off-yellow (to balance the color of the bulwarks).... After the hull is done being painted, I still need to drill the hawse pipes and add the fashion pieces at the stern, and review the plans to make sure I didn't forget anything. After that all checks out, it's on to the rest of the deck furniture, finish seizing the gun tackle & then their installation. After the deck is done, it'll be the channels and chainplates, followed by shaping the masts & spars (which I am rather intimidated with at this point, but I know I'll conquer).