Rich_engr
-
Posts
322 -
Joined
-
Last visited
Content Type
Profiles
Forums
Gallery
Events
Everything posted by Rich_engr
-
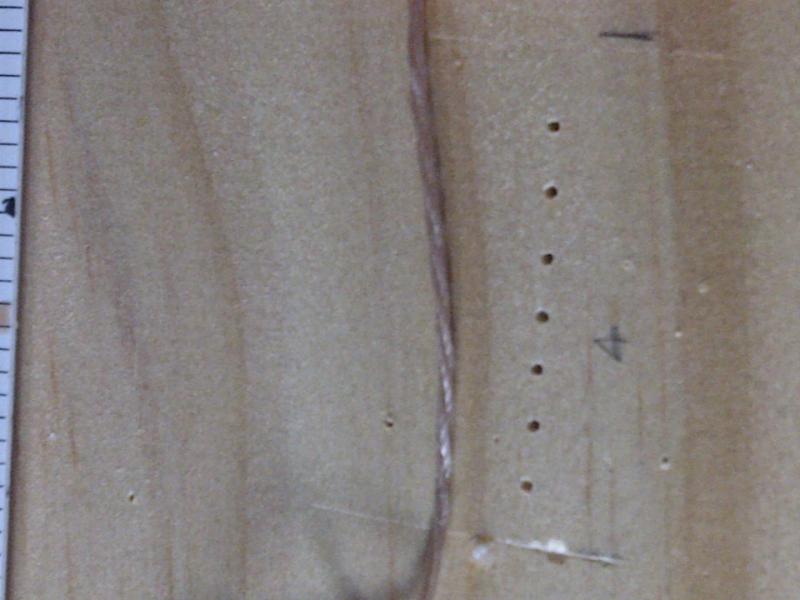
 Friday update: during by few breaks from the job hunt, I managed to form all of the breech and side plates and blacken all of the gun hardware. I just made a quick jig to hold the carriages and slides so I can drill the holes for the eyebolts in quick succession- takes only 5 mins! So now I have a full set of parts for 6 carronades, blocks & tackles included.
 -
Ok- time for a little break from the job hunt... Basically what's going on with the build is I blackened all of the eyebolts and cut some wire for a ton of rings (guns, deck, blocks, etc.). I need to finish painting the guns and make the remaining breech plates, then blacken those. Also, I need to wipe the extra "soot" off the blackened brass parts since selenium and toxic metals aren't a part of my nutritional diet (as far as I know anyway...). Once I get 4 full sets of carronade components I'll place them on deck to verify the scale, look & feel (should make for a good photo op that shows some actual progress!).
-
Ok... first post of the layoff period... over the weekend I painted the guns instead of using the B-I. Also, I used the B-I for the brass eyebolts. I might work on some breech and side plates today, just to let my mind relax a little so I can work out a plan for this "transition" and new job search.
-
Patrick, thanks for the reassurance. I thought something was weird with it- so I'll revert back to painting the guns, but keep the B-I for the brass parts. Definitely helps! I'm not going to try to rewrite the laws of chem just to get the guns done. lol In other news, probably won't get much progress today since I'm booked with eye and dentist appointments.... so much for a personal day off of work~~
-
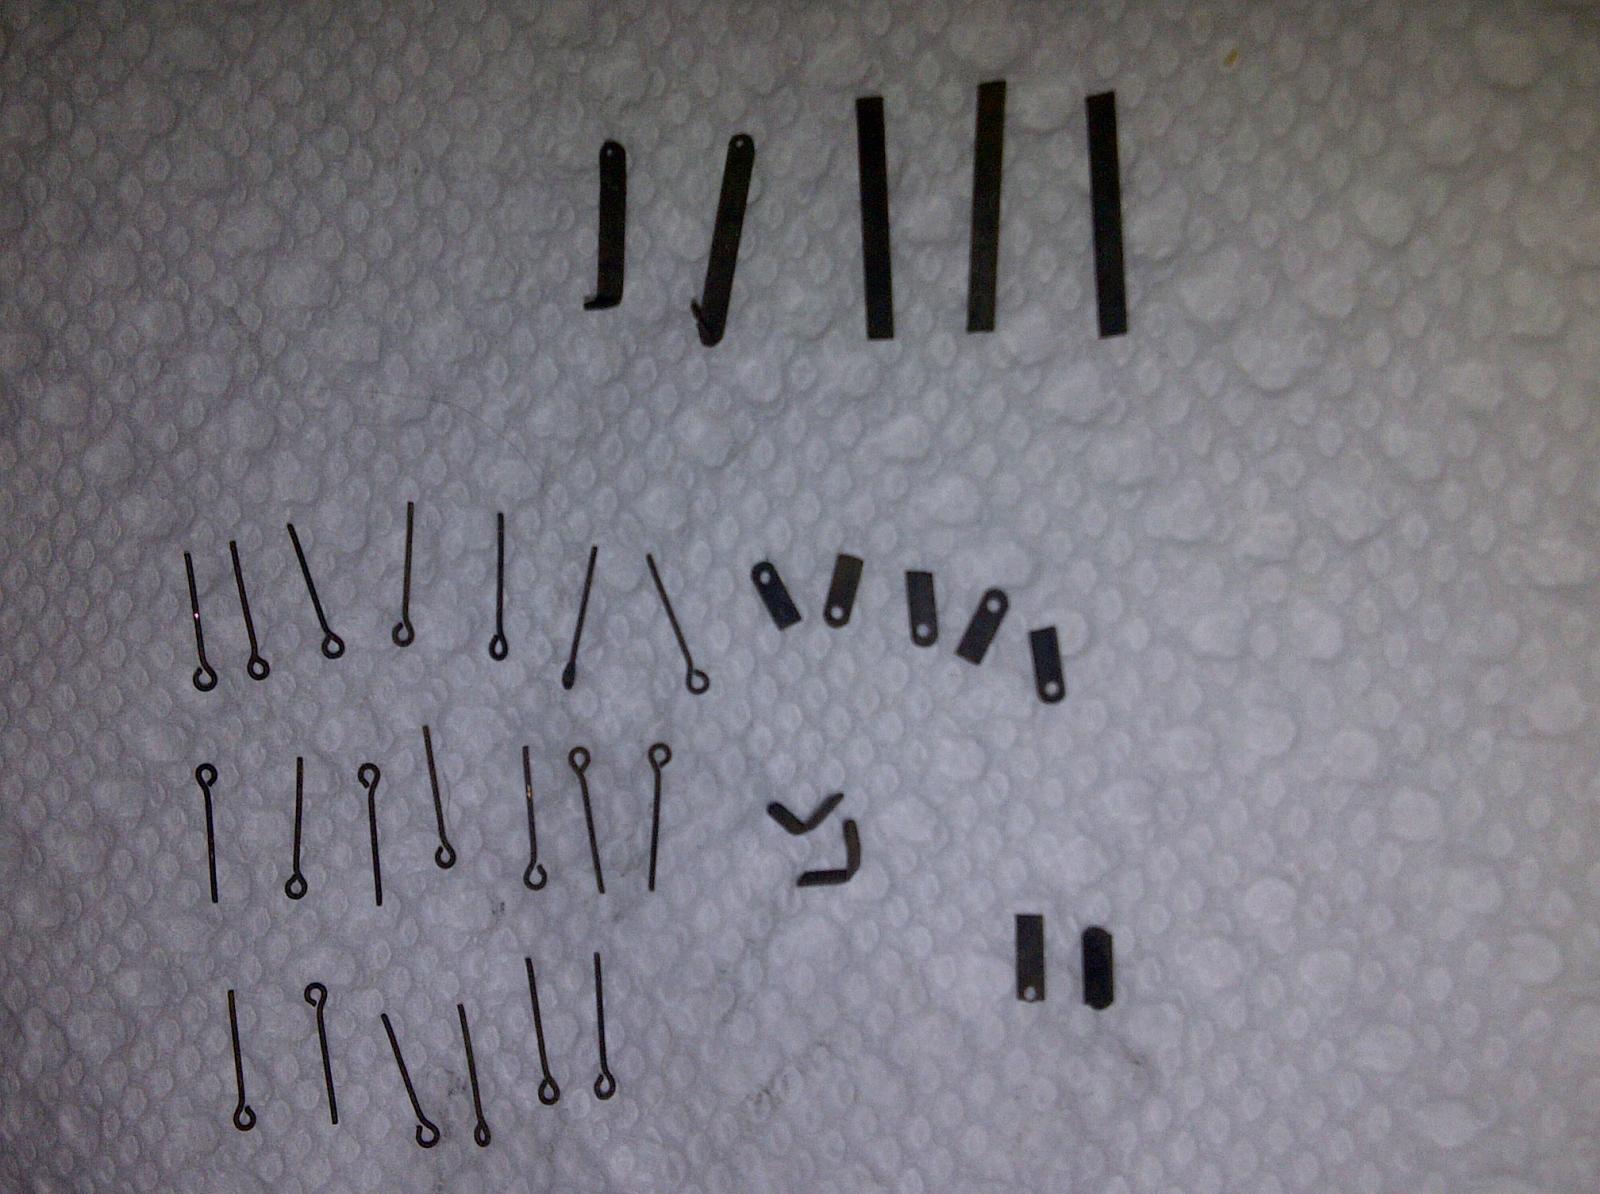
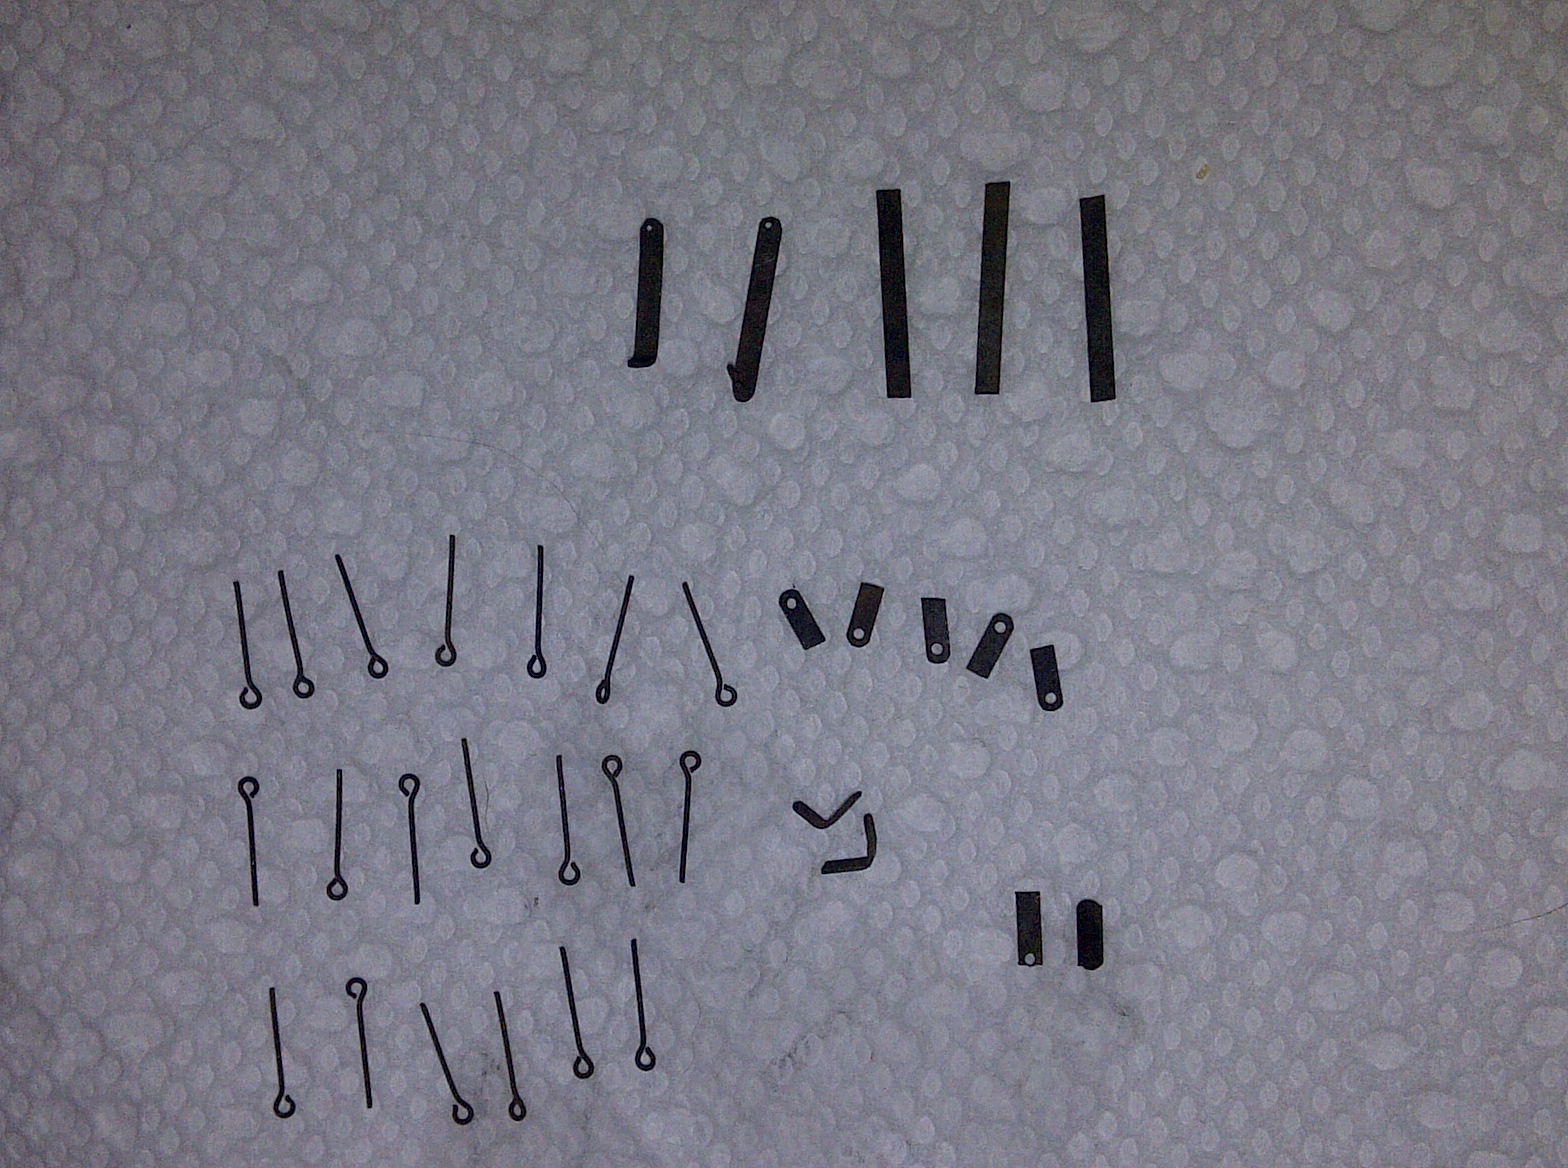
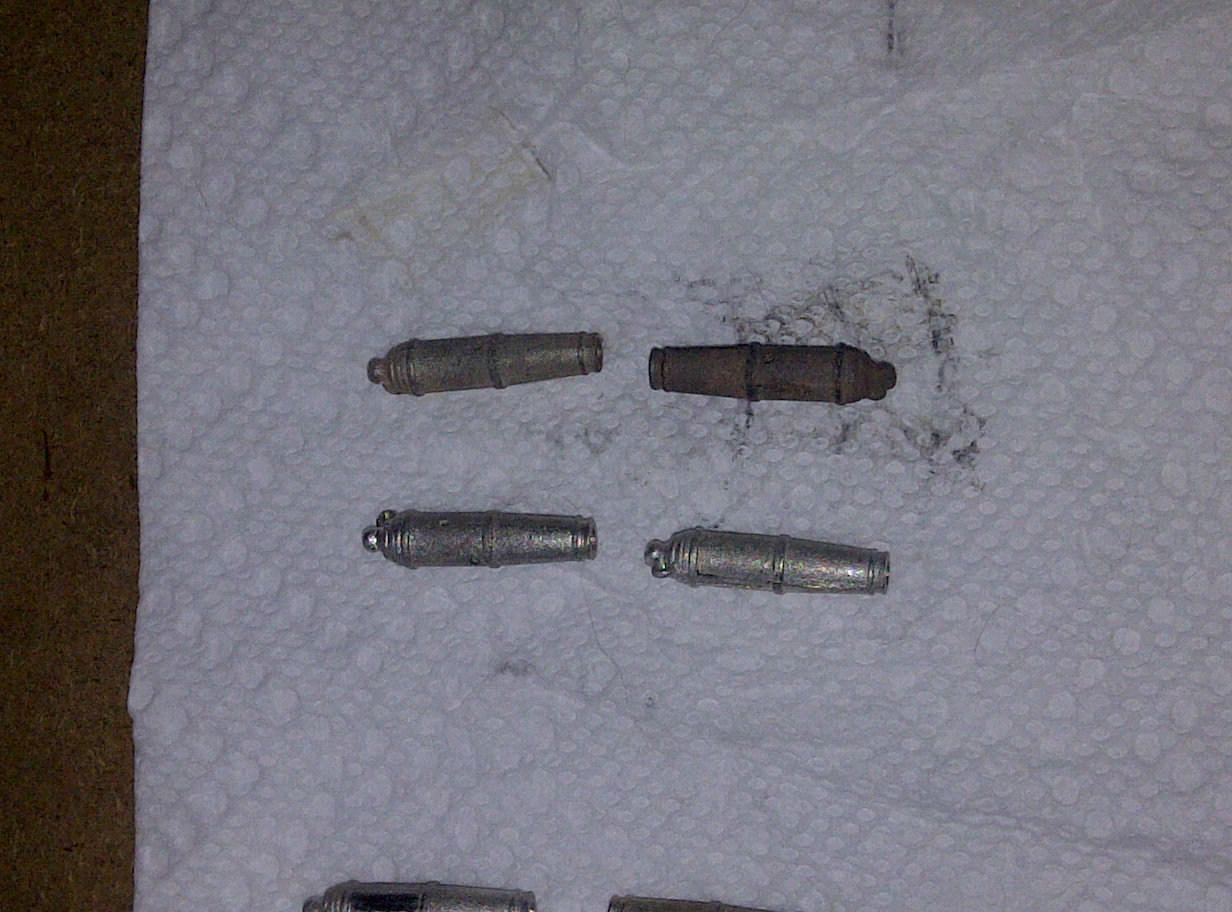
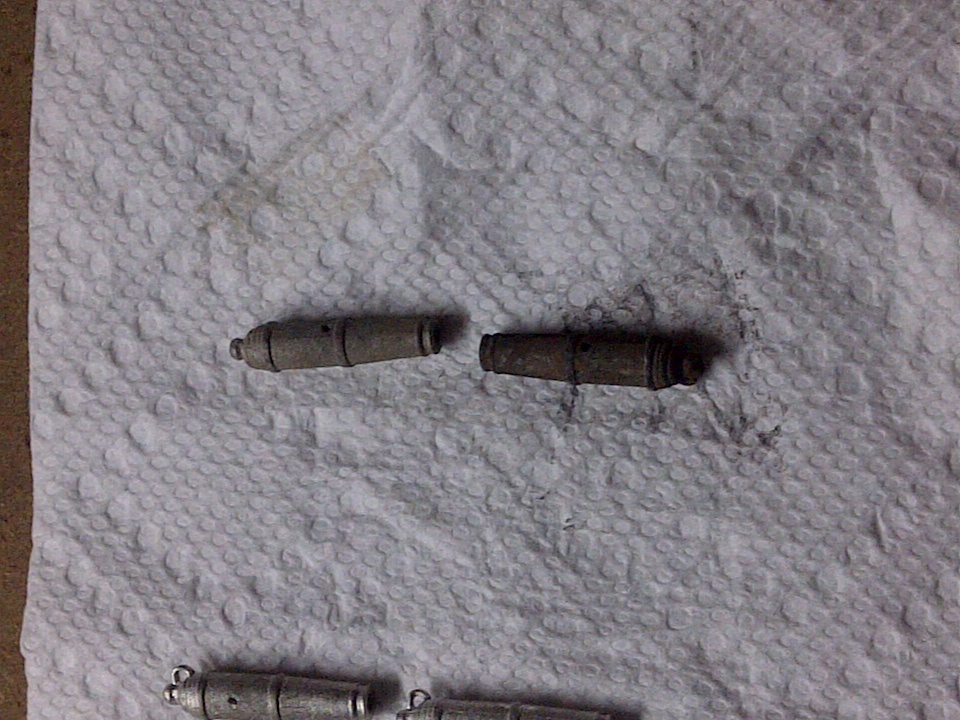
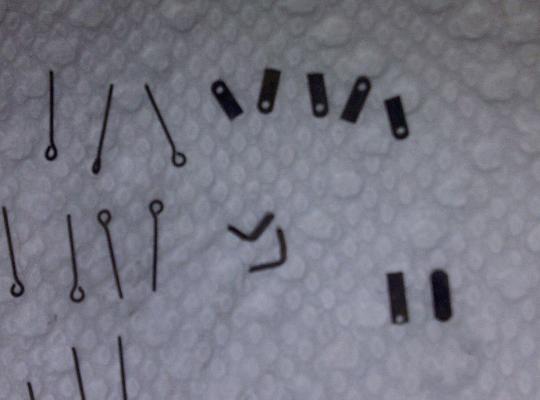
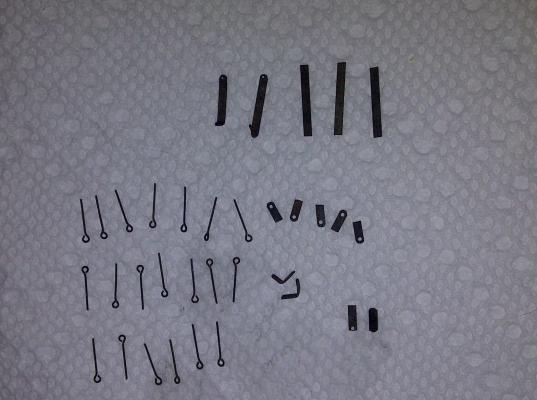
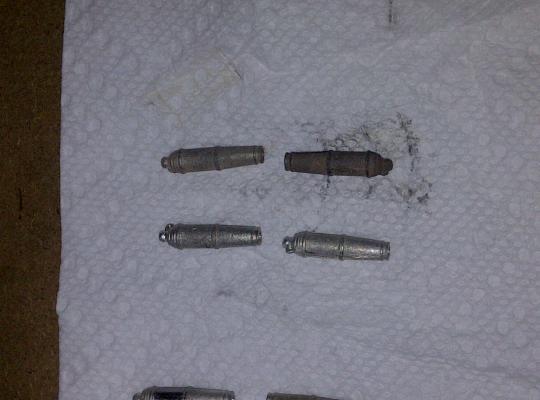
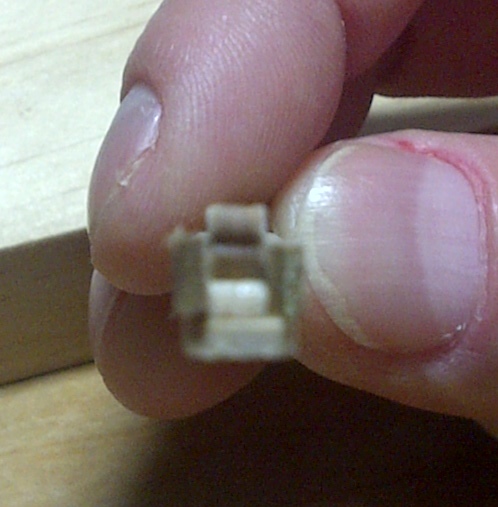
Ok... now that I've finished stropping and have a few sets of tackle ready, I'm trying my hand with the Blacken-It for the gun hardware, with poopy results thus far. So far, I think the stuff likes the plain brass more than the brittania metal for the guns (although all produce some soot, but at least the brass is blackening). Here's my process: Clean all parts in acetone for about 30mins or so. Rinse/soak in filtered water (this may be a problem, since I'm not sure if my filter on the fridge removes all metallic impurities). Pat dry Dip like metals (ie, Britannia metal guns in a batch, or brass in a batch- no mixing metals) in various solutions of Blacken-It. Solutions: I've tried a 1:1 of B-I (Blacken-it) and filtered fridge water (produced a slight greying of the Britannia guns), and pure B-I (dusty-black on Britannia metal or a sooty-black on the brass). I let the parts sit in the solution for anywhere from 5-30mins, just to maximize reaction time, while gently shaking to ensure that all surfaces get exposed. This picture shows the Britannia metal guns, the left one with the 1:1 ratio of B-I and water, the gun on the right is with pure B-I (bottom guns have only been cleaned). These show the pure brass parts (eyebolts and breech straps, side plates). These were left in the pure B-I solution for about 30mins:


-
Ok. Finished stropping the SB's for the guns, and seized & reeved the tackle for 2 whole guns. Now time for some pizza for dinner. and a beer~
-
Yep, that's about right... of course, since this is my first build, I am basically estimating the time for each step (masting, rigging, deck fixtures, guns, etc.). Some things tend to go a lot faster than I expected, while others take a good bit longer. One thing I am noticing is that as I gain experience, I can recover a lot more quickly and don't have to spend as much time re-tracing my steps if I don't work on her for a while. Also, I'm not constantly referring to the plans as my safety net- I can basically see how it's supposed to go, then refer to the plans for a specific location/reference point. Plus, I only have a few hours in the evenings and some on the weekends to work on it. Keel was laid in April 2009 or so, and there's been over a year where I didn't work on her at all, but if my momentum keeps up I should be able to pull that "2 years from now" in a bit. Nonetheless, I'm trying to do it right and incorporate as much fine detail as I feel comfortable with at this time- pushing my limits but knowing when to stop. As an update: The other night I stropped all of the DB's for the guns, and last night I stropped around 70 of the SB's (some need reworked since the wires broke). Next up: Finish the remaining 20 or so SB's and then seize the "pigtails" of the tackle lines to the SB's, followed by reeving the tackle. Then I gotta cut and drill the remaining breech plates and finish the rest of the carriges, as well as blacken the guns and eyebolts.
-
Here's an idea as to my process/order of events for the build- this is a Gantt chart I made up during lunch one time (apologize for the bad scanned copy). MS2240 Sched.pdf Although I'm not necessarily keeping to the milestones and dates, it helps me stay somewhat organized and focused on one aspect at a time.
-
John- check out my Niagara build log, page 2 or 3 for how to rig a caronnade. For attaching the strop to the block, I show a simple process for this. Once stropped, the tackle line is passed thru a small hole in the end of the strop (really just a gap big enough for the line to fit). This line is then seized to the block, then reeved thru the blocks. Although my guns have double blocks attached to the bulwarks and a single on the gun, the process should be very similar. I hope this helps! -Rich
-
Welcome back to the club Ken! We look forward to seeing your build! Sucks about the damage, but one good thing of starting a new one is that you have an opportunity to do it even better than before!
-
Lol! Patrick, that's funny!! Yeah, I tend to look for efficient ways when doing things (my ocd engineer in me). My management team must know yours, but we are working to improve the situation here (Gemba anyone?). I doubt it was my grilled cheese- most likely was adrenaline/focus (which one would think a few cold ones would have relaxed me after mowing...) Glad you like the blocks- I really hope when all is said and done, they still look ok scale-wise. We shall see. Over the weekend I'd like to have about 4 guns rigged so I can place them on deck to check the scale.
-
This evening I was able to strop 90 double blocks (and this was after moving the front lawn and making grilled cheeses for dinner). Tomorrow will be stropping the single blocks!!!
-
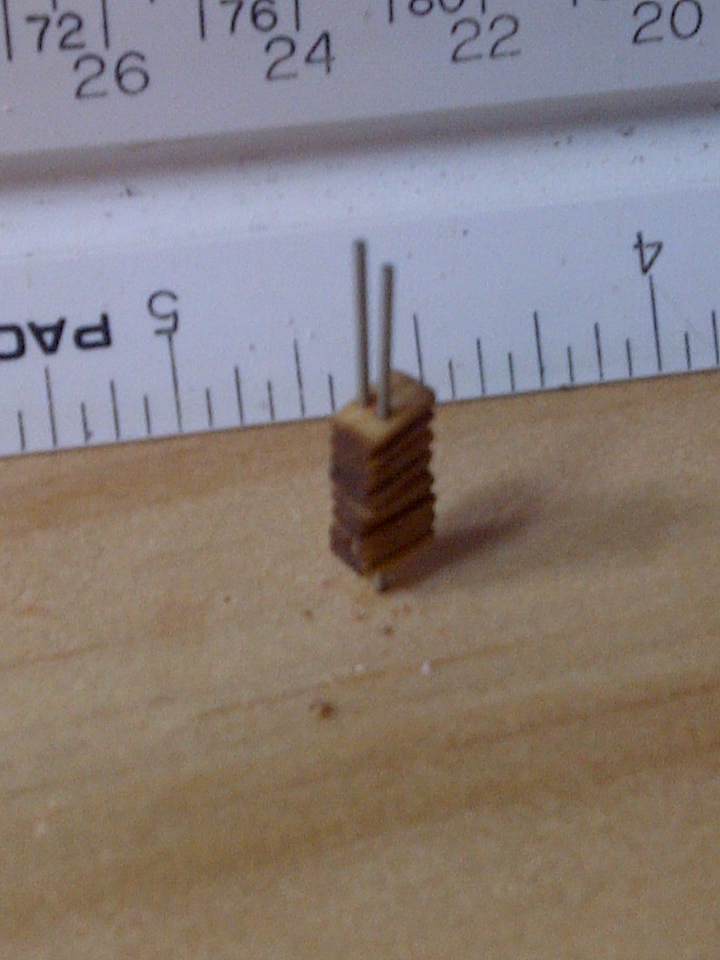
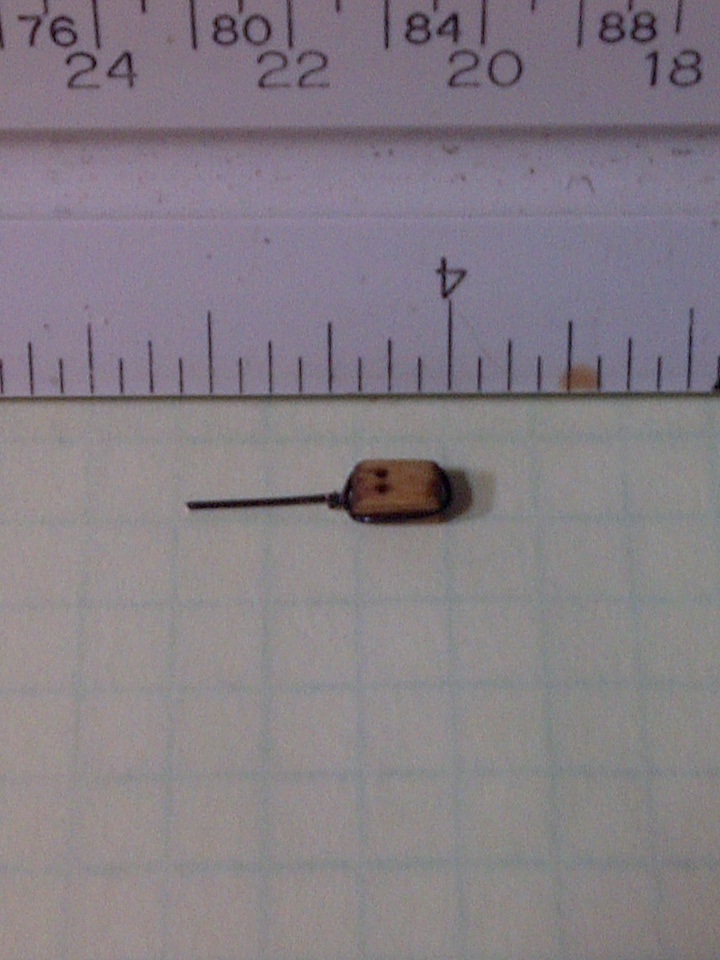
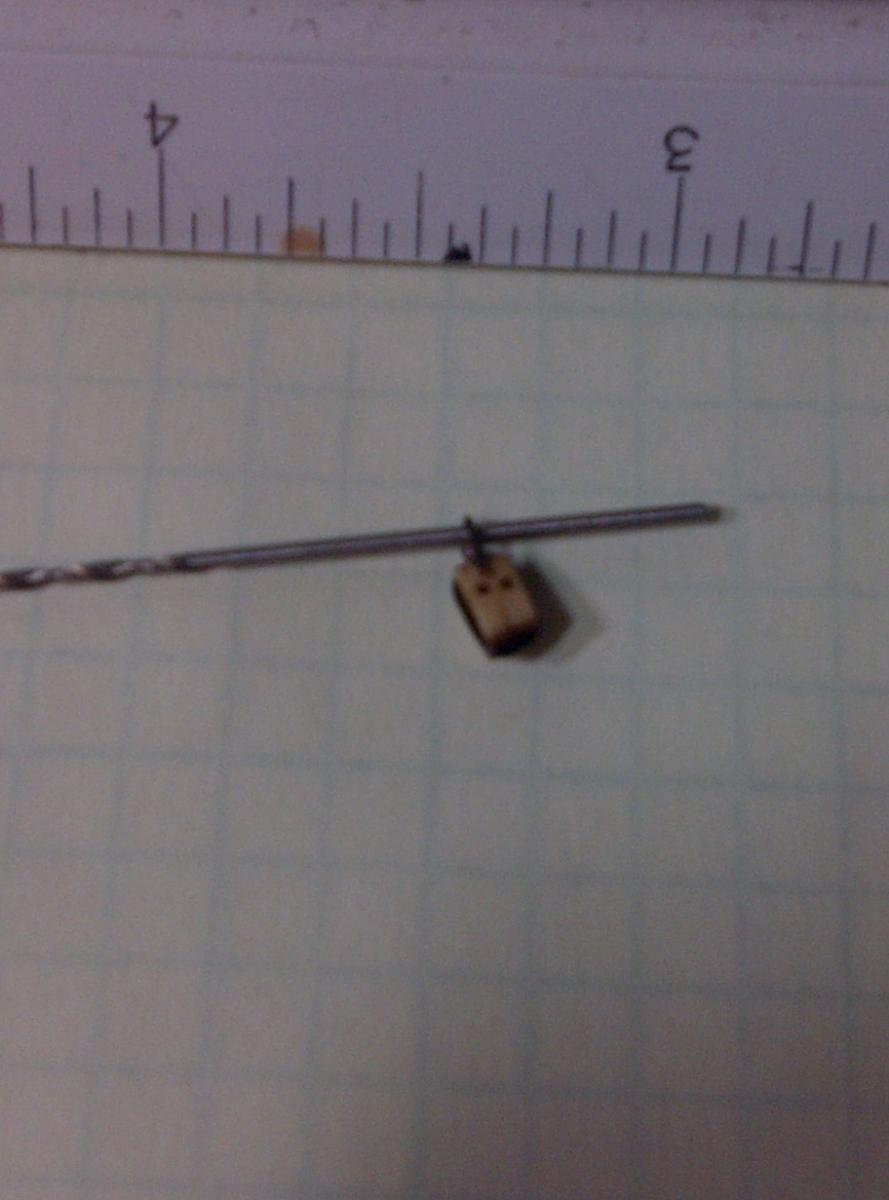
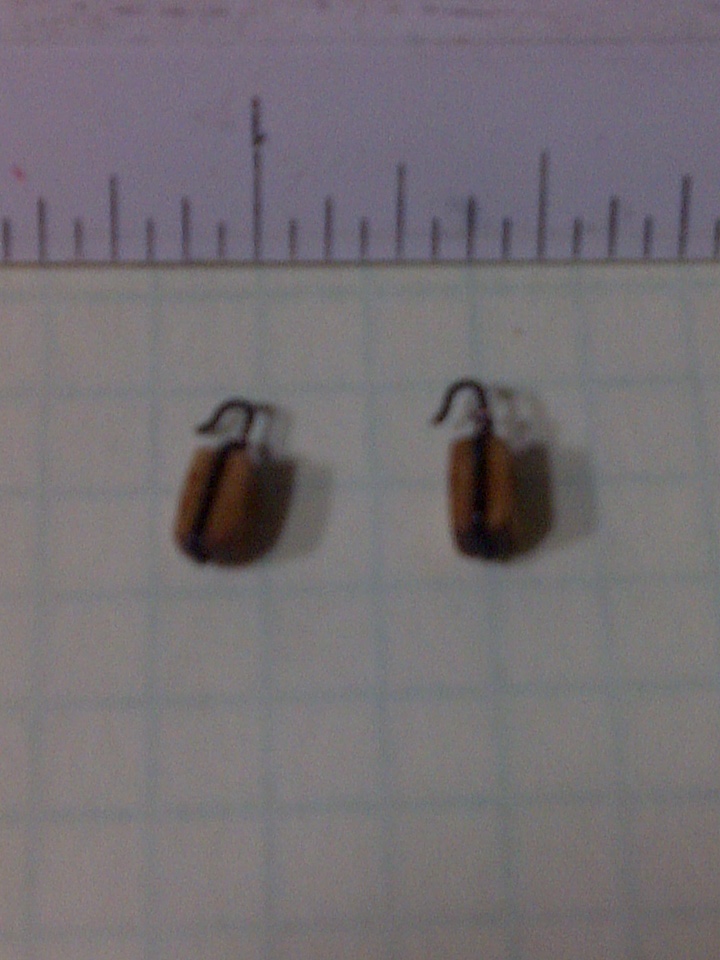
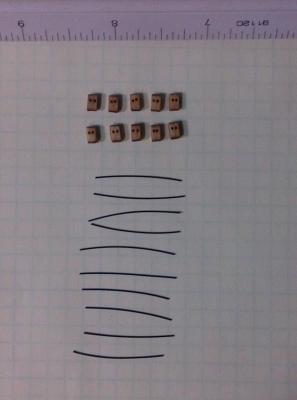
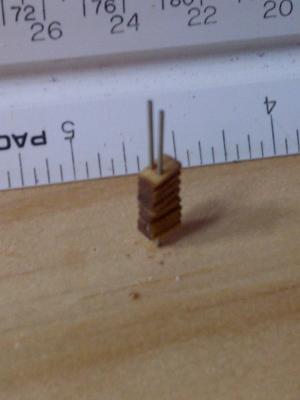
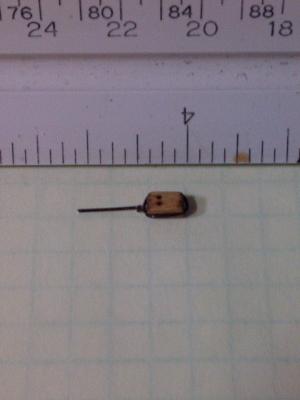
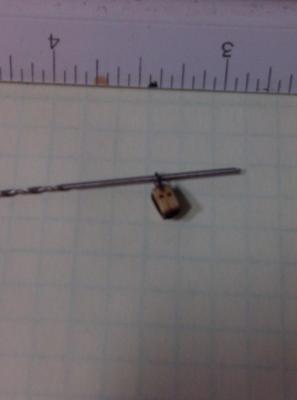
Here's how I strop the blocks: 1. Basic components here are the 5/32 double blocks (DB's) and some 1 in long pieces of 0.020 in wire (from Michaels). 2. I stick two drill bits the size of the reeve holes into a block to hold the DB's steady when I form the wire around them. In this case I can stack up to 7 blocks at a time. 3. With the wire formed around the block, I then use some small pliers and twist the end (maybe 1-2 turns, keeping it tight around the block) to form the "knot" at the top, while leaving one end longer (this end will be used to form the hook). 4. Next, I use a #60 drill bit (size may vary depending on the size of hook) to bend the wire around to form the head/top of the hook. 5. Finally, use a pair of nippers to slightly bend up the end and cut the excess off, leaving a nicely formed hook at the top.

-
Yeah, I know about the weather/seasons up there- I grew up in Pittsburgh. . Last time I mowed was Feb here (temps have been ALL over the place, 29 the other night, 70 today, 82 on Monday- it's a crapshoot right now!). The guns are gonna be fun, but I probably need to do a few then make some deck stuff just to keep it interesting and not so single-tracked. So far the guns and the deck have been the most fun (planking the hull for me was like having a sprinter try to run a double marathon!). Definitely looking forward to trying my hand at the rigging- guns are good mini-practice right now.
-
Not much to report for this evening, other than sanded down the remaining 50 DB's for the guns, tumbled them in my homemade block tumbler, and on the line drying with stain. The next few evenings will be stropping... or moving the lawn (depending on the weather). This weekend I hope to face the Blacken-it and get the guns & all metal parts done.
-
Sanded another 20 DB's & stropped 40. What I might do for some variety is after I complete this first batch of 6 carronades, I might move onto the deck & bulwark hardware and deck houses, then go back to guns.
-
Dave, Welcome to the Niagara club and MSW!! Glad you started a build- she looks fantastic! So 13 years and still going- sounds like my build (minus the kids, except I have dogs & cats to contend with). Keep it coming and good luck with the build!! -Rich
-
Ken, I'm skipping the butts and I'm leaving it as it is. I thought about doing the butts, but I decided to stick with the simpler tapered look. I may do both butt-shift and tapered planks for the deck of my next build. Patrick, thanks for the compliments! Yeah, the guns are going to take a while, but I think I can handle it now (again, getting over that "intimidation" factor). I just gotta sit down and knock them out in batches/stages. I also need to try the Blacken-it for the gun hardware, deadeyes, and rings.
-
Again, post-picture post: I think I'm making my seizings too long- maybe I only need 4-5 turns or so (don't know how many I have actually- should be counting those turns!!), especially since I'm trying to bring the size of stuff down to scale, like the blocks. More practice, and lots of stropping this week hopefully! (yes, I saw my deadeye on the carriage pulled out- I'll fix that.)
-
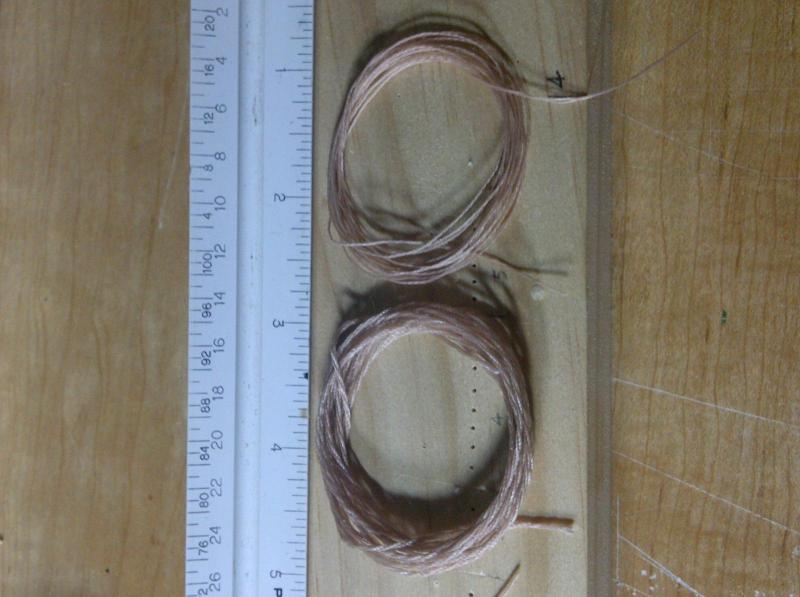
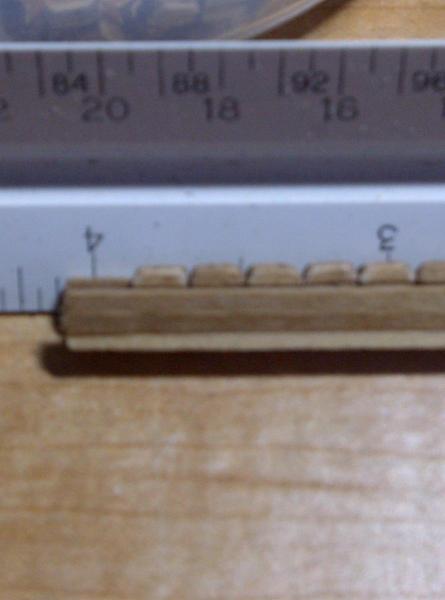
Here are some pics of my rope that I made for the tackle and the breech lines. Each hank is about 6ft of homemade rope with the ropewalk.

-
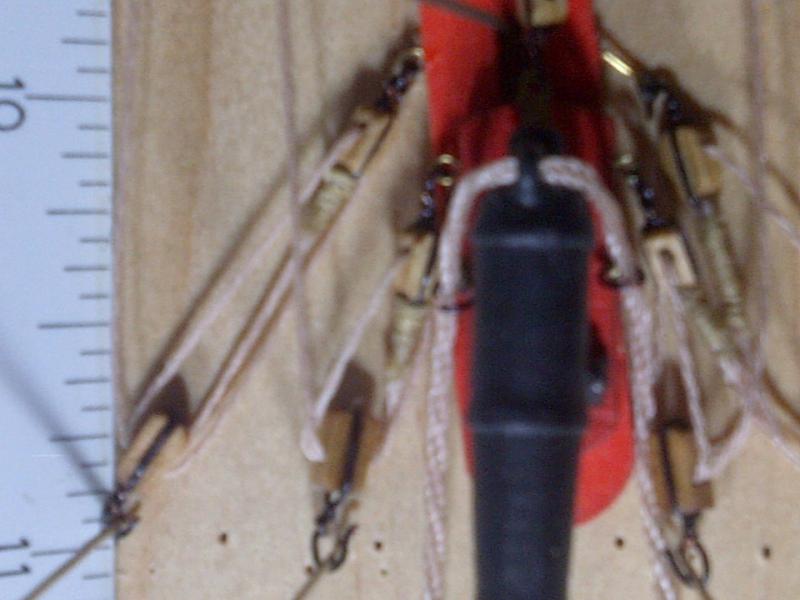
Sunday night update: Not too much progress this weekend, other than sanding and staining a few DB's. Reeved the tackle for 1 gun with the new, smaller blocks- here is one gun with the new blocks.

-
Thanks Patrick! Yes, one certainly needs to get creative in this hobby. I'm glad you like my deck- I was somewhat intimidated by it since I wanted to do it right, and I'm pleased with the results. As for my deck-planking jig, I'll try to get some pics up later- that one took some practice at first, then really sped things up a lot!!
-
Here's some of my block-holding/sanding jig... and half of my serving jib (holding blocks that have been sanded down, drying with stain).
-
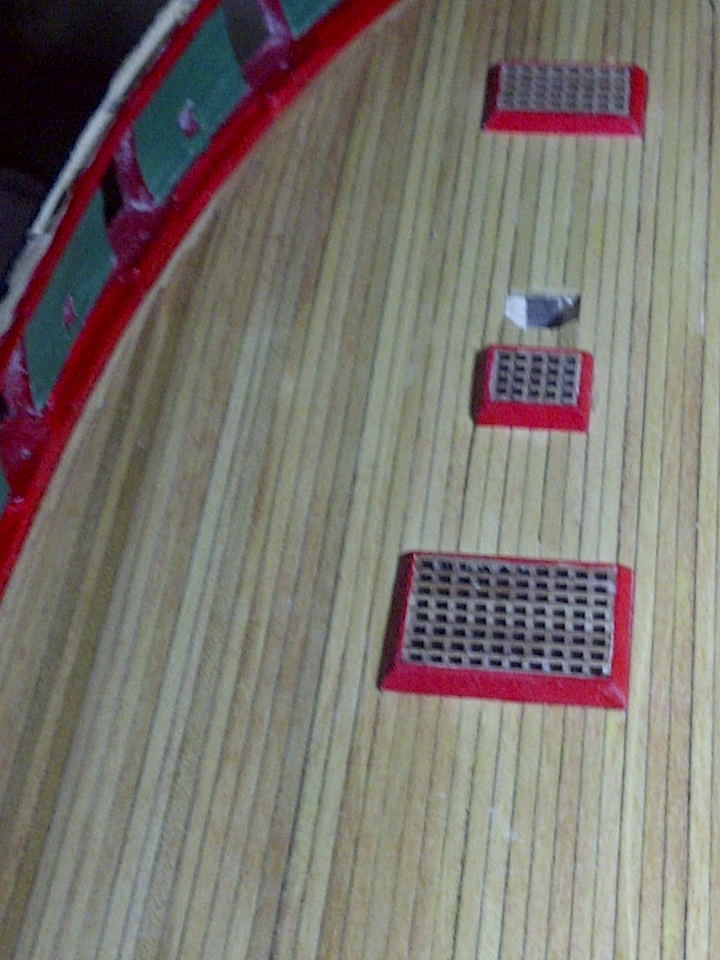
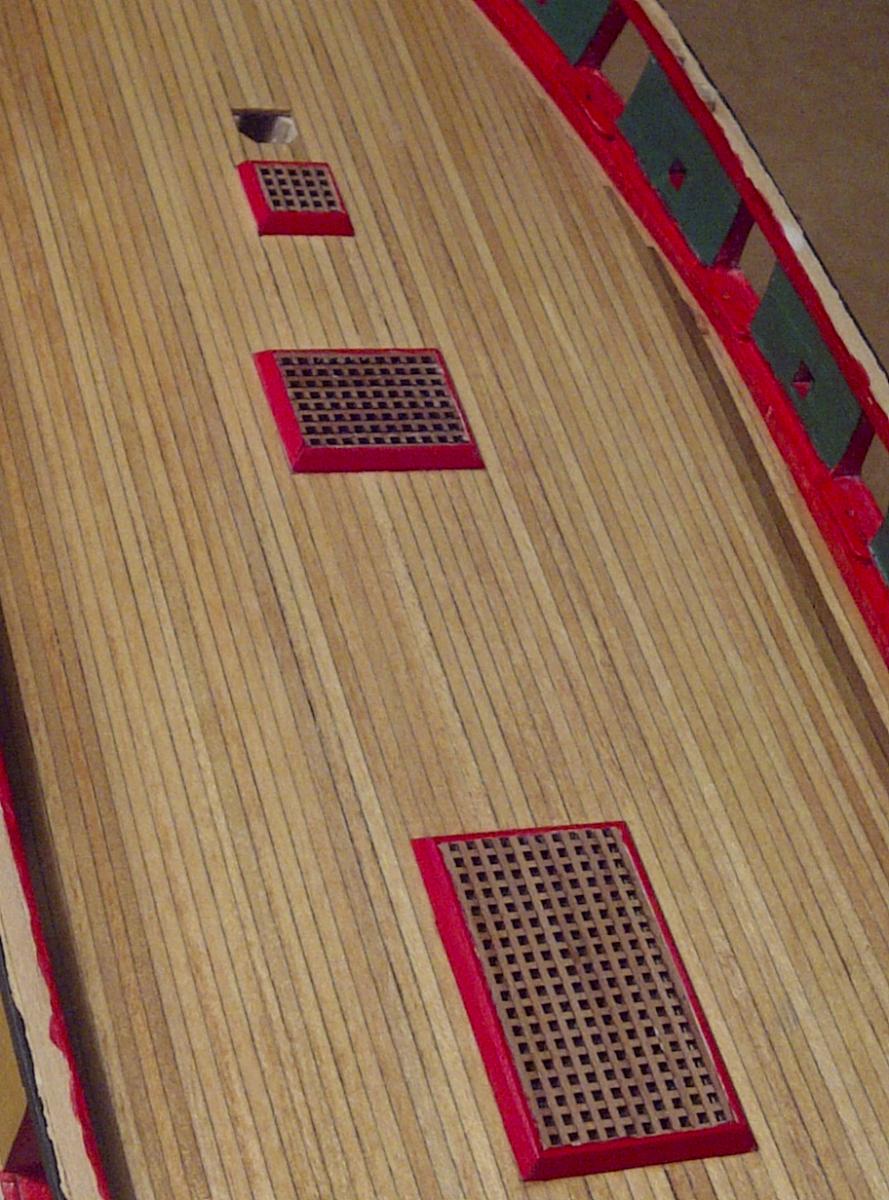
Ok... here's the pictures of the stained deck (have not added the weathered oak yet- just the golden chestnut stain).


-
Mainstay, it's referring to the fellowship we Niagara builders share- there's not a specific club/forum, only our build logs and shared experiences on this ship. If you are building the Niagara (or any ship), start a log and join the fun!!