hof00
-
Posts
1,654 -
Joined
-
Last visited
Content Type
Profiles
Forums
Gallery
Events
Everything posted by hof00
-
 Thanks Rick, Bowsprit/Jibboom was better the second time around.... 🙂 I had to glue the Bowsprit into its location as it kit does not allow enough penetration into the Hull. (I prefer Rigging to hold things in place, not in this case though.) I am working my way slowly with this one, My Cutty was easer at 1/78 scale. Once firmly located, it is not so much of an issue to tension things. (And, I ran out of kit supplied Chain, not surprising as this kit is more than a little "Light" on materials. It is fortunate that I have a few meters of the correct size chain in hand. 🙂) Cheers and Regards, Harry.
 -
Thanks Ian, The instructions are not good, Terrible would be a better word.... 🙂 Plans for Rigging are "Piecemeal" so not great at all, however, it is my intention to try and do justice in modeling this iconic Clipper. Cheers and Regards, Harry.
-
Hi Rob, Thanks for that, much appreciated!! I was using this: Flying_Cloud_Bradner_rigging-side-view.graffle to gauge the positioning of the Bowsprit Shrouds. There is no photographic record of Flying Cloud so I turned to Scott Bradner's plans that clearly show the Bowsprit Shrouds behind the Catheads. The Anchor Hawse Hole is also well clear of the Shrouds. In saying the above, I could relocate the items without too much trouble. I'll have a further think about the positioning. Looking forward to further feedback/comments from yourself and also from anyone else following this thread. I regard this too important not to have a discussion about it. 🙂 Cheers and Regards, Harry.
-
Thanks Chap!! Plenty more to go.... Cheers and Regards, Harry.
-
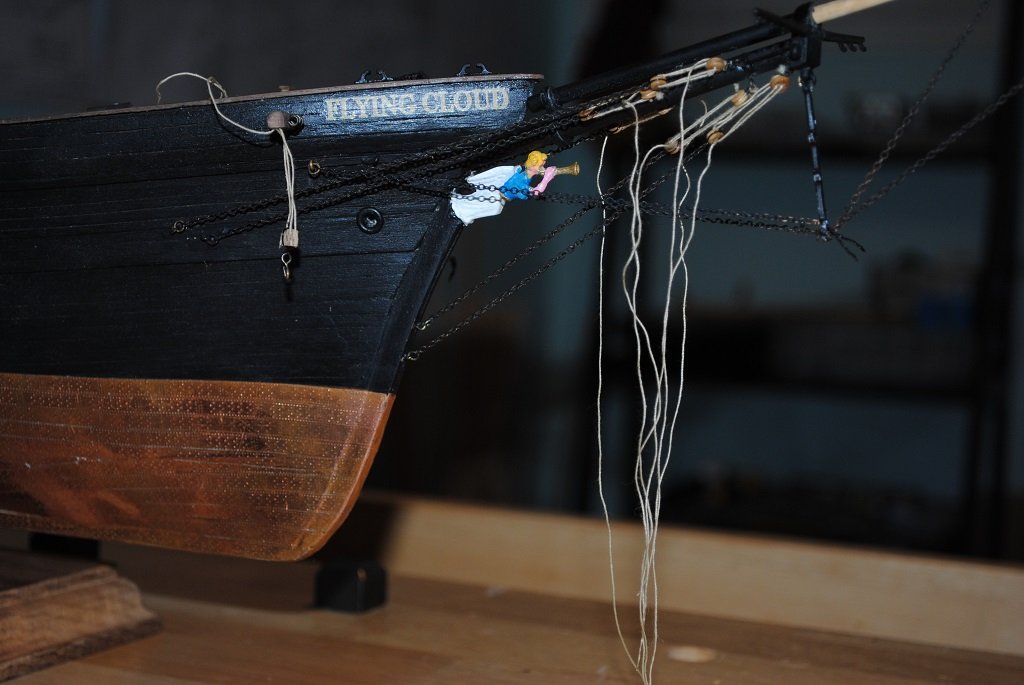
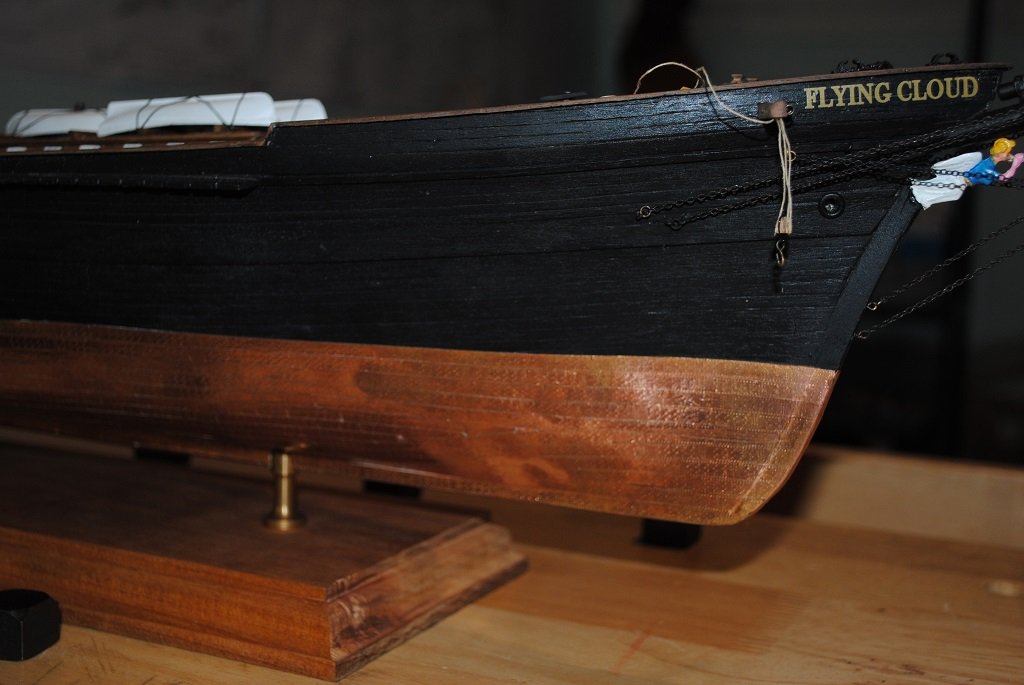
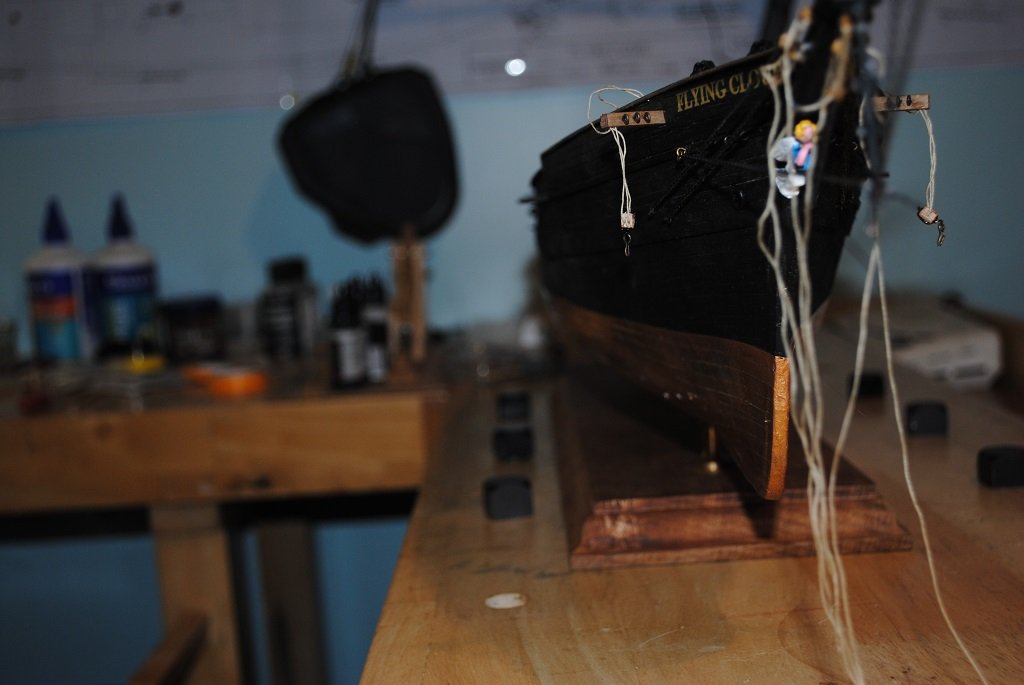
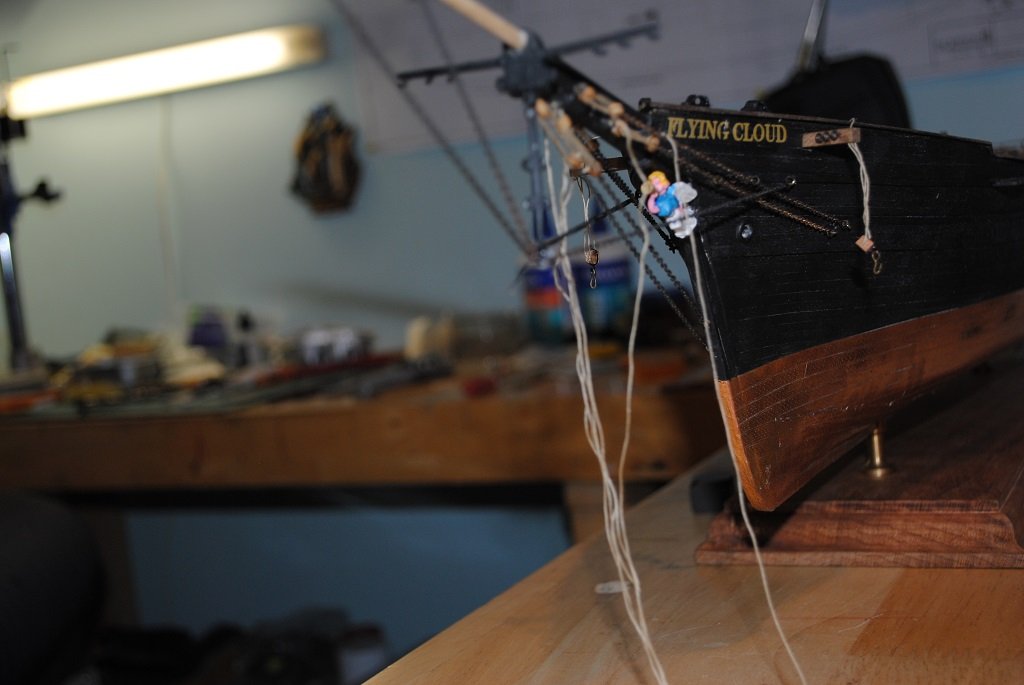
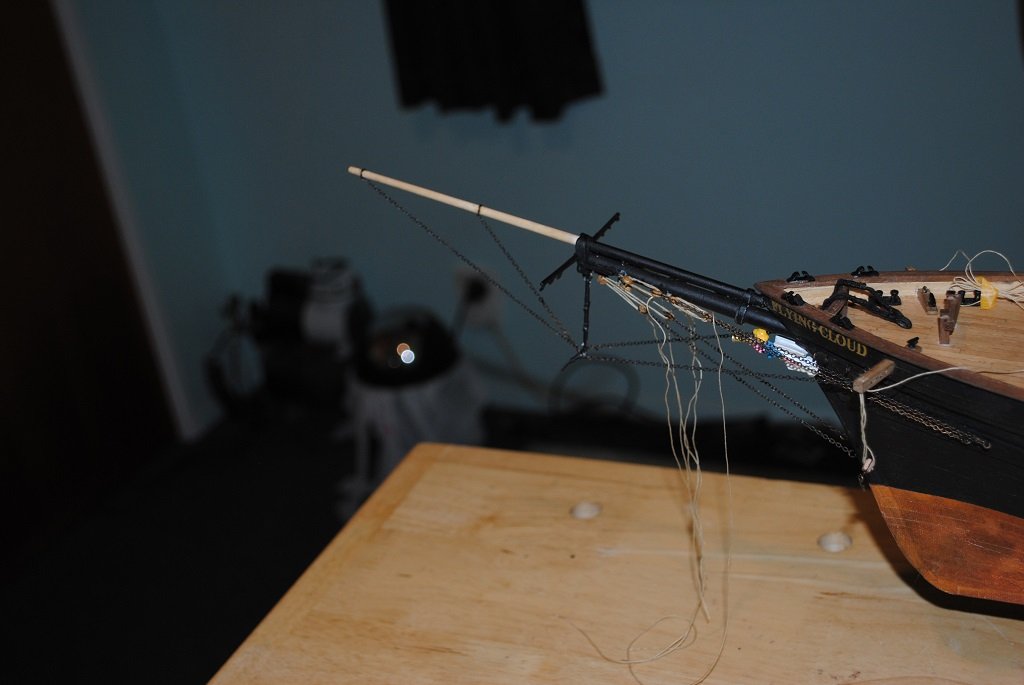
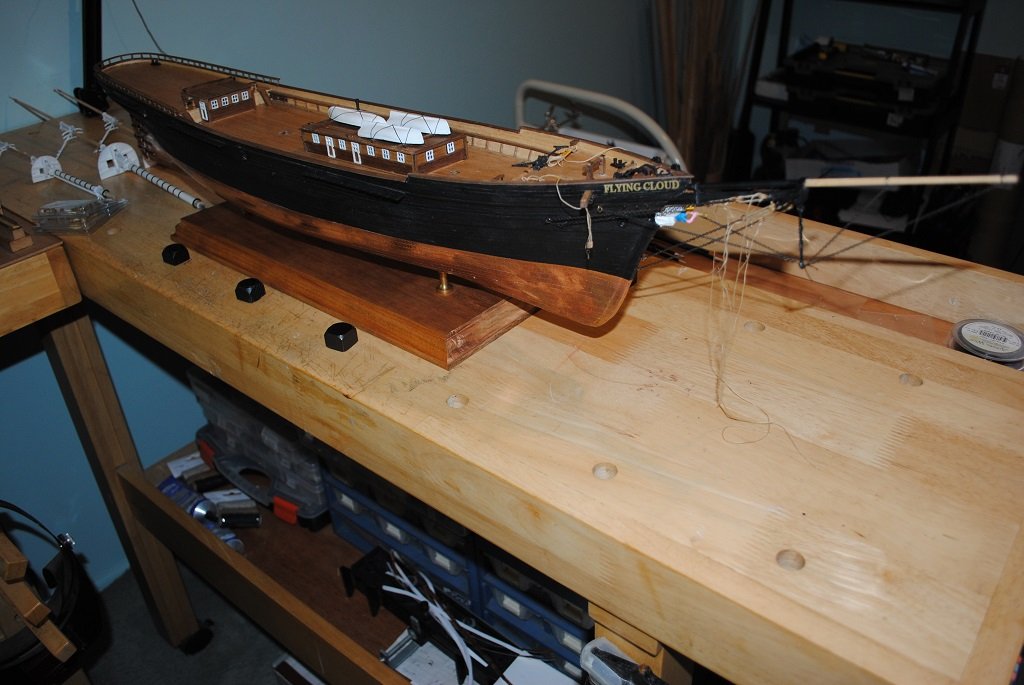
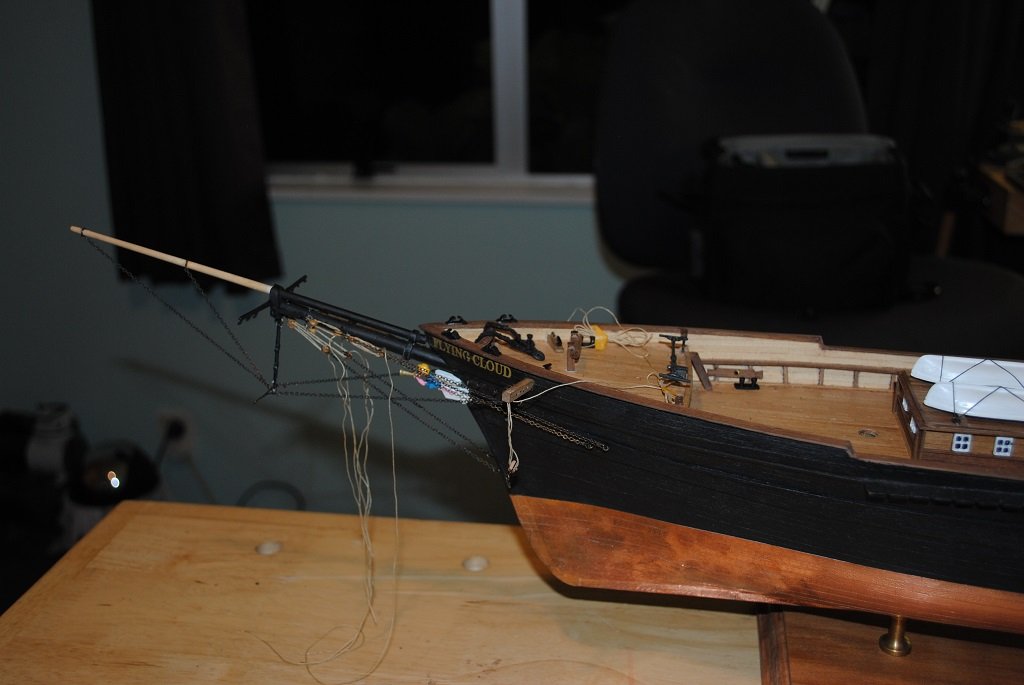
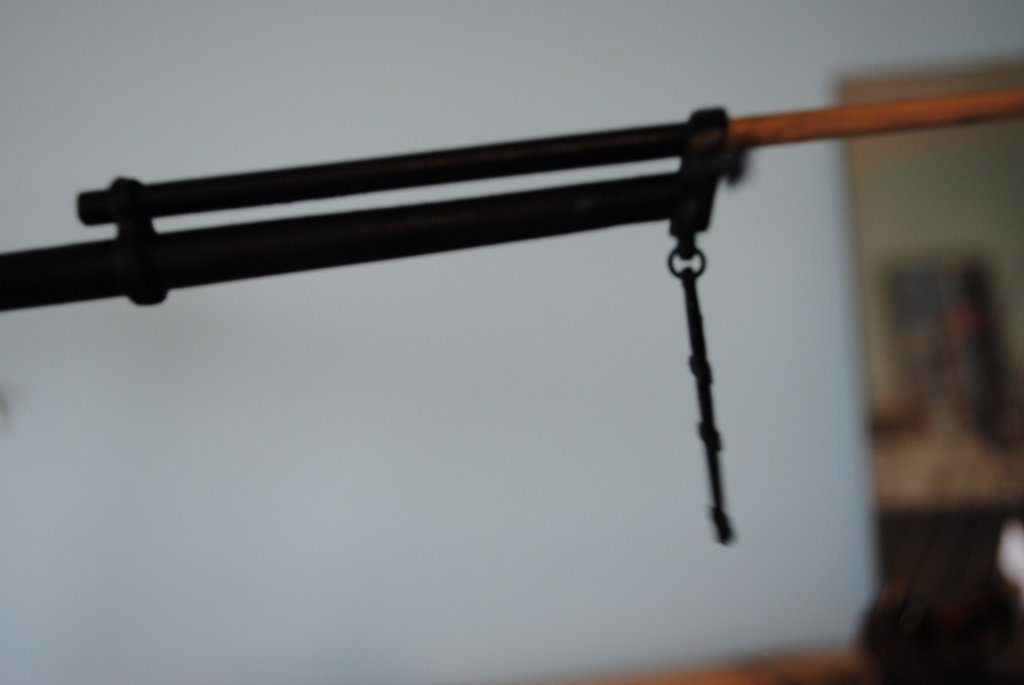
Hi All, Update: Moving on with the build.... Bowsprit, Chain Stays and Shrouds installed. (I must thank @rwiederrich once again for his input and photos, assisting with placement of Shroud/Stay termination points on the Hull..) (Kit plans were very confusing and not at all logical.) This took me two attempts, the first I just could not live with. The Rake of the Bowsprit/Jibboom was not in any way enough. I removed everything and started over, reaming out the Bowsprit mounting hole with a rotary tool. Second attempt I think much improved. ((The only downside, my grubby fingers on the Copper, not a huge issue, another polish will fix this. I have not quite completed this, I have left the Deadeye Lanyards loose at the mo. to enable further tensioning and Jibboom Guys are yet to be installed. I can now continue with installing the remainder of various Blocks/Eyebolts on the Deck followed by the remainder of Deck Furniture. Cheers....HOF. Photos:
- 200 replies
-
- 5
-

-
- Flying Cloud
- Mamoli
- (and 1 more)
-
Flying Cloud Bowsprit Jibboom Line/s Rigging Help
hof00 replied to hof00's topic in Masting, rigging and sails
Hi Rob, Many thanks for that. I think that it is already too late to embellish the Stem at this juncture. I have already attached the Bowsprit/Jibboom and am proceeding with associated Chin Rigging. I could try and modify thigs but i do not want to risk damage on what I have achieved over the past few days. I am however ensuring that Bobstays and Shrouds are Doubled up, the Kit only allows for one Bobstay, one shroud per side. Once again, Thank you for your assistance, very much appreciated. Kind Regards, Harry. -
Flying Cloud Bowsprit Jibboom Line/s Rigging Help
hof00 replied to hof00's topic in Masting, rigging and sails
@rwiederrich Hi Rob, I found the following: Flying_Cloud_Bradner_rigging-side-view.graffle I think this goes some way to solving my issues. Onward and upward perhaps.... 🙂 Thank you for your continued assistance and awesome photo references!! Cheers and Regards, Harry. -
Flying Cloud Bowsprit Jibboom Line/s Rigging Help
hof00 replied to hof00's topic in Masting, rigging and sails
Hi Chap, Thank you once again. Another great photo!! It looks like the Fore Mast Fore Stays all head towards the Fore Pin Rail, or somewhere near there.... Maybe? (It's driving me a bit "Nuts." 🙂) I need to have a look at Scott Bradner's plans, (Pin map), to ascertain where these Fore Stays terminate. One other method that came to mind this morning would be for me to "Mock-Up" the Bowsprit/Jibboom in situ using "Art Wire" or similar to enable reasonable placement/termination points of all Bowsprit rigging on the hull. Anyway, Still thoughts. 🙂 Cheers and Regards, Harry. -
Flying Cloud Bowsprit Jibboom Line/s Rigging Help
hof00 replied to hof00's topic in Masting, rigging and sails
Hi Chap, Thanks for that, Great Photo!! More food for thought.... It's looking like the chain Bowsprit Shrouds are well below the lower Rubbing Strake. (Good to see there are two per side, only one on the Kit, same with the Bobstay/s. Yup, happy with the Jibboom Stays, they terminate on the Catheads via Whisker Booms on the Bowsprit cap. Concerned regarding the three (6 total) Foremast Stays, I am wondering if these should pass through holes at Bow Bulwark level and terminate on the Fore Pin rail. (In your photo, I note the Fore Topmast Stay/s running through the "Bee" but were does it go from there?) Thoughts? Cheers and Regards, Harry. -
Flying Cloud Bowsprit Jibboom Line/s Rigging Help
hof00 posted a topic in Masting, rigging and sails
Hi All, Soldiering on with my Flying Cloud, 1/96 Mamoli. I am at a stage now placing Blocks/Eyebolts on the Deck and Hull Unfortunately, supplied plans are not at all clear on where the Eyebolts are located for the Bowsprit/Jibboom lines terminate on the Bow/Hull. On the plans there are 5 Eyebolts located on the Bow for the various Bowsprit Shrouds/Stays, that's fine, but where exactly are they located on the Hull. Are they all in a straight line or staggered above or below each other? How far, what distance are they spaced vertically and horizontally on the Hull? (At the moment, I am thinking they are located on the Upper Rub Rail just below the Catheads, but again, no real idea.) The only thing that I am sure about are that there are five Eyebolts per side. I have looked at the Lankford instructions for the Flying Fish and Scott Bradner's plans but cannot see anything absolutely definitive. If anyone has some diagrams/approximate positions of these, it would be very much appreciated. Cheers and Regards, Harry. -
Thanks Rick, Yup, I am much happier with the Bowsprit Black!! 🙂 Cheers and Regards, Harry.
-
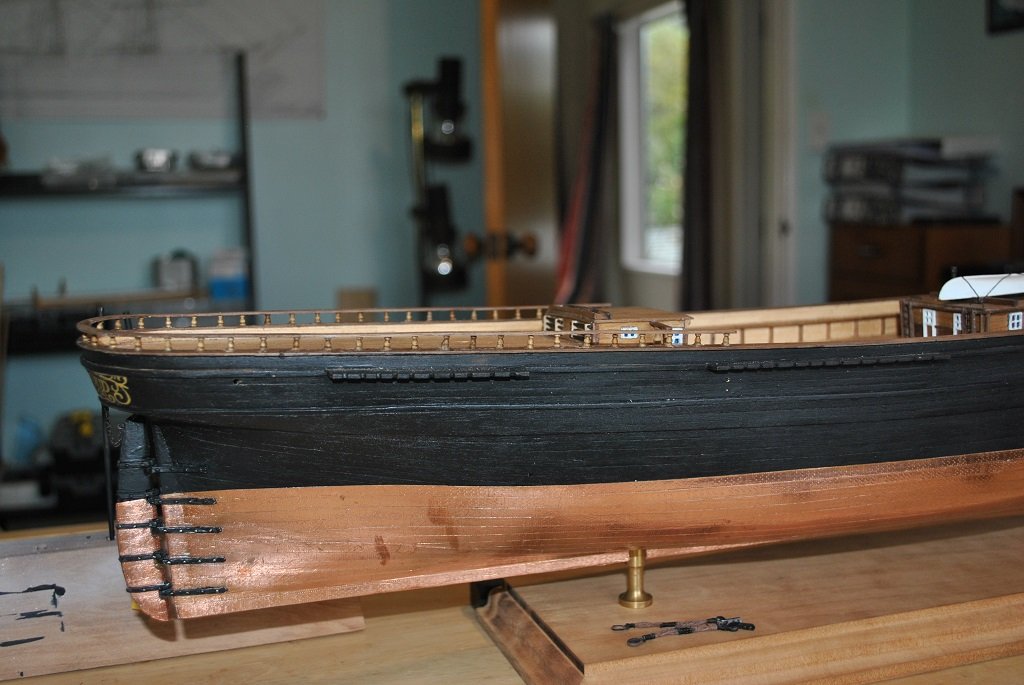
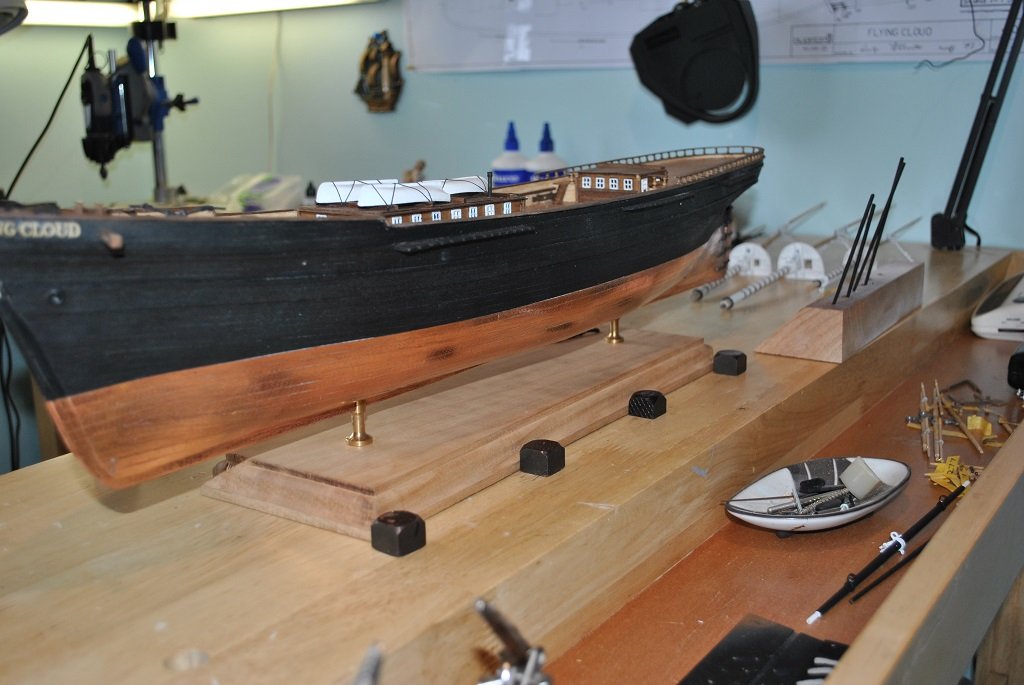
Hi All, Update time.... Poop Railing installed, a bit of a mission but got there.... Columns are spaced at 8.0mm intervals. Ladders/Stiars installed Focsle Pin Rails installed I relented and decided to polish the Copper Plating, I think that this was the correct thing to do as this will now hopefully, assume a consistent patina over time. Work Benches re-configured to enable easy access to both sides of the Ship. I also made foray into planning for Rigging and associated Blocks. I am again disappointed with the kit, there do not appear to be enough Blocks of all sizes. From a quick count, there may be "Just" enough.... I need spares and have put my feelers out for a supply of more. (I have also ordered replacements of the Capstans, (X 4) as there is something wrong with the kit provided ones.) So, that's it for the mo.... Cheers.... HOF. Photos:

- 200 replies
-
- 5
-
-
- Flying Cloud
- Mamoli
- (and 1 more)
-
Deck Cleats
hof00 replied to hof00's topic in Discussion for a Ship's Deck Furniture, Guns, boats and other Fittings
Hi Wefaick, All good information!! Many Thanks. Harry. -
Deck Cleats
hof00 replied to hof00's topic in Discussion for a Ship's Deck Furniture, Guns, boats and other Fittings
Hi Trevor, Many thanks for your considered information, much appreciated!! I do have the Corrothers book but missed the info that you mentioned, I found the publication more aligned to actual Hull construction than anything else. I have included Cavils on my build, they are in Scott Bradner's plans but not the Kit. Thanks also confirming no belaying lines around the feet of the crew. (I actually do not like the Cleats anyway, I reckon they are much too large at 7.0mm, that would make them 600mm (Or something like that) actual size.) I have also already placed two on either side of the Boom, these look o.k., and I more or less get their function. So, now back to the puzzle, next stage for me is Hull/Deck Eyebolts and associated Blocks. (This will take some time comparing plans, Mr. Bradner Vs "Mamoli." All good stuff!!🙂 Kind Regards, Harry. -
Deck Cleats
hof00 replied to hof00's topic in Discussion for a Ship's Deck Furniture, Guns, boats and other Fittings
Thanks Gentlemen, Interesting dissertation.... But.... Do American Built Clippers, circa 1851, make use of Cleats? (Deck/Mast) (If a Yacht, the answer would be yes.) Cheers and Regards, Harry. -
Deck Cleats
hof00 replied to hof00's topic in Discussion for a Ship's Deck Furniture, Guns, boats and other Fittings
Thank you Gr.PR, Much appreciated!! Kind Regards, Harry. -
Deck Cleats
hof00 replied to hof00's topic in Discussion for a Ship's Deck Furniture, Guns, boats and other Fittings
Thanks Jim, I think that Mamoli may have used some "Artistic" license. I'll go with the "No Cleat" solution and use Eyebolts in thier place unless someone comes back to the contrary.... 🙂 (Much more in scale.) Kind Regards, Harry. -
Hi All, This question relates to my build of the Mamoli, 1/96 Flying Cloud A conundrum for me recently is the addition of 7.0mm Cleats located at various points around the circumference of the Deck. (8 per side.) There are another set of 6 Cleats around the base of each of the Masts and two either side of the Boom, this I can understand. Scott Bradner's' plans do not show Cleats at all, rather, Deck Rings. (I would have thought that Eyebolts would look better at this scale anyway.) From my ruminations, I wonder if the Deck Cleats are just some "Mamoli" artistic license. (There are two "Deck" Cleats I can see sense in, these are on the Inboard, top of the Catheads.) Bitts and Fairleads, (Deck/Main Rail) are straightforward and I have no issue with these. If someone could please advise me further, it would be very much appreciated. Cheers....HOF.
-
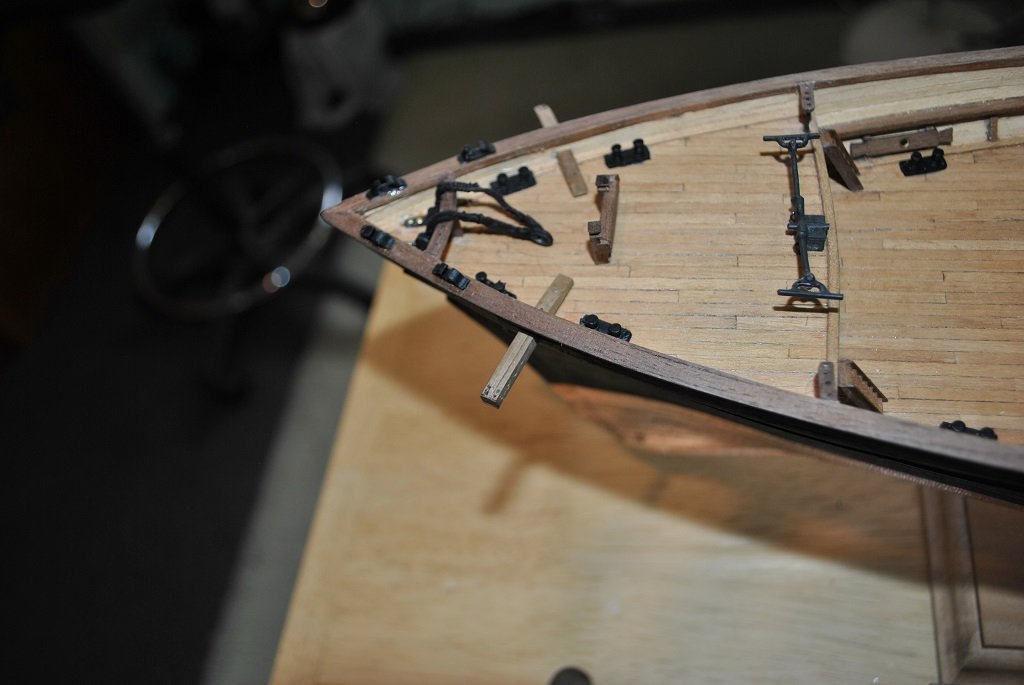
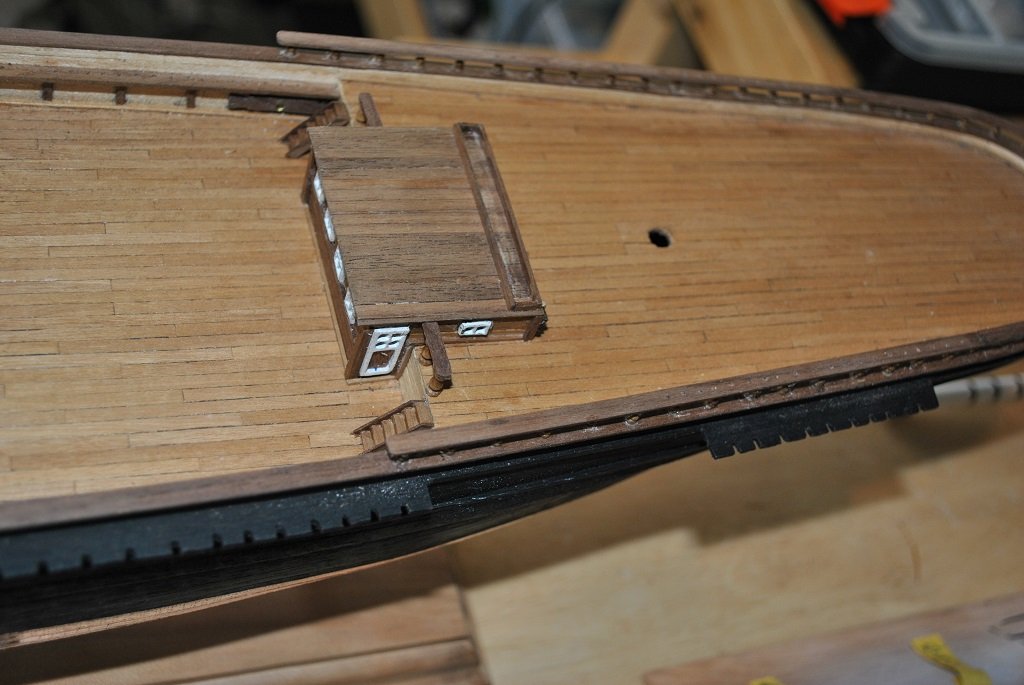
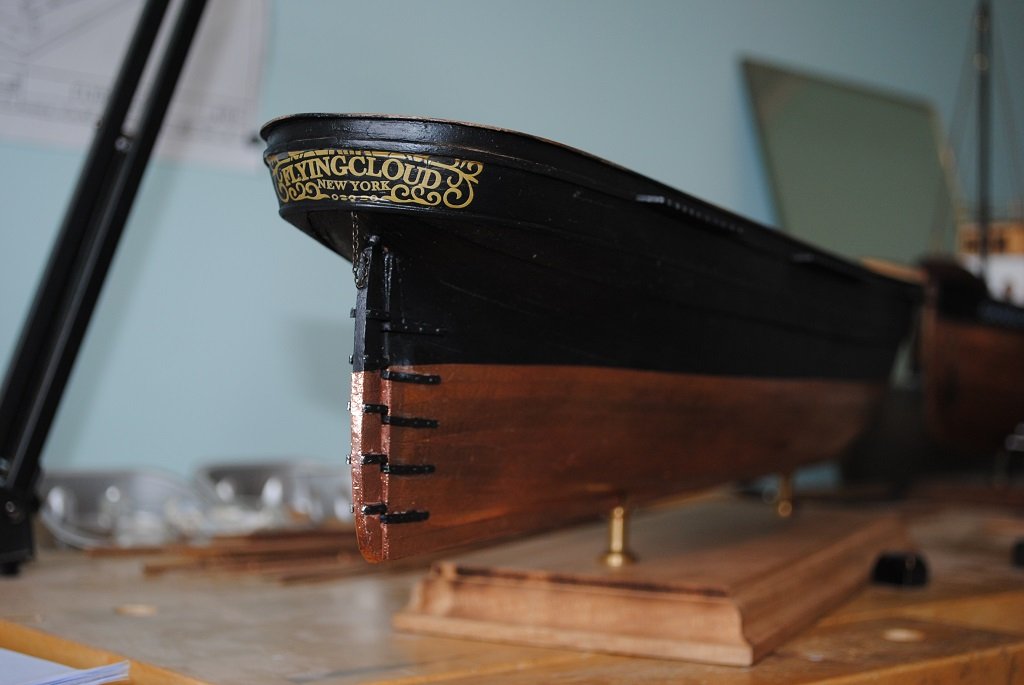
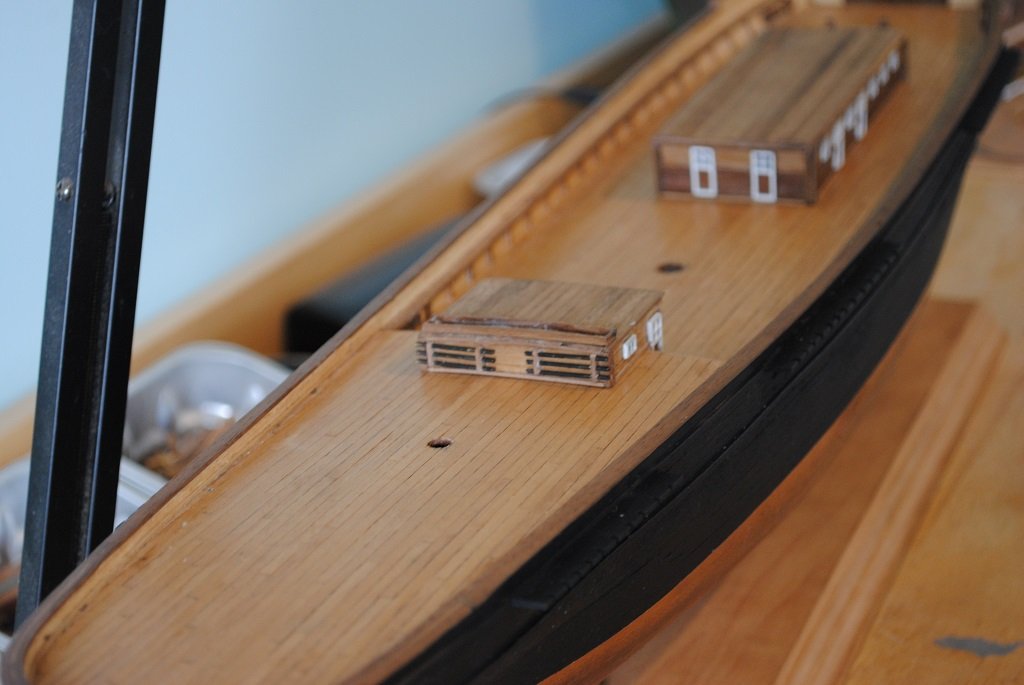
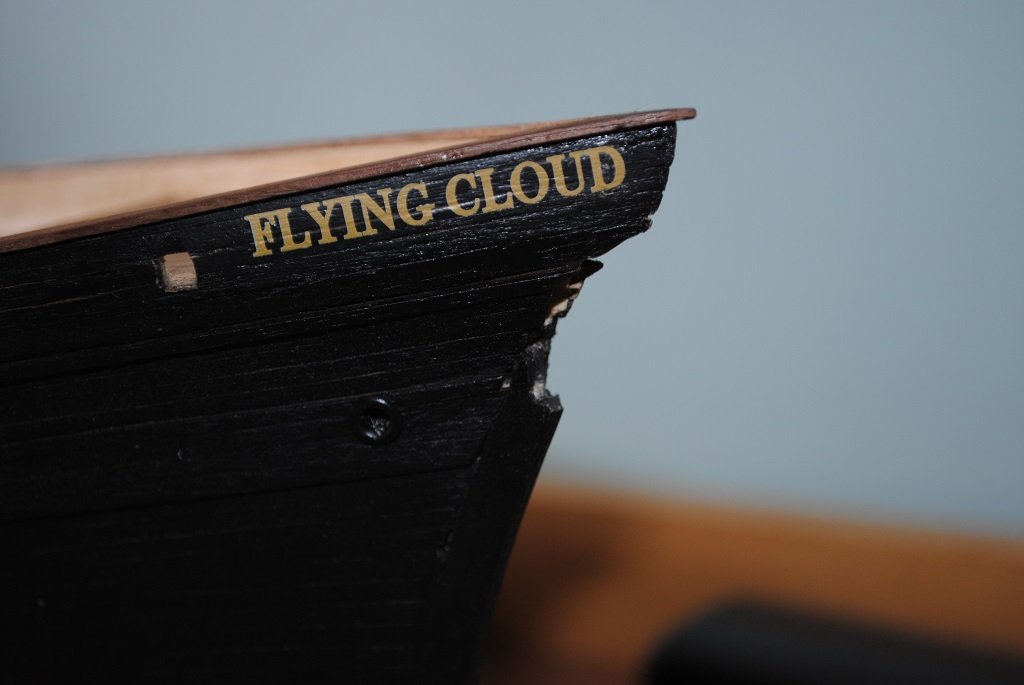
Hi All, Update: Coppering completed. I finally decided not to laminate the Copper Tape; laminating was just a waste of breath.... My little Embossing machine worked very well and allowed me to produce strips over a meter long. One thing that I should have done, taper Gore ends off the model. Never mind, live and learn it's done now and the tape cannot be removed, even if I wanted to. Copper Patina is underway even after a few days, I'll leave it thus. Bow and Stern Decals applied; I checked Mr. Corrothers book first to ensure that these were actually "Gilded." (Double check I guess.) Rudder fitted; I used the Kit Pintles/Gudgeons. Metal Deck fittings prepared, Painted/Varnished. (No Photo) Bowsprit/Jibboom rubbed down and resprayed Black. (The way it should be.... 🙂 Cavills constructed, four required, installed. Today's efforts, getting the Houses in position in a way that I can remove them prior to final installation. My solution was to use the Coaming Strips, Front and Rear to hold things in place, seems to have worked o.k. Plenty more to do.... Cheers....HOF. Photos:


- 200 replies
-
- 4
-
-
- Flying Cloud
- Mamoli
- (and 1 more)
-
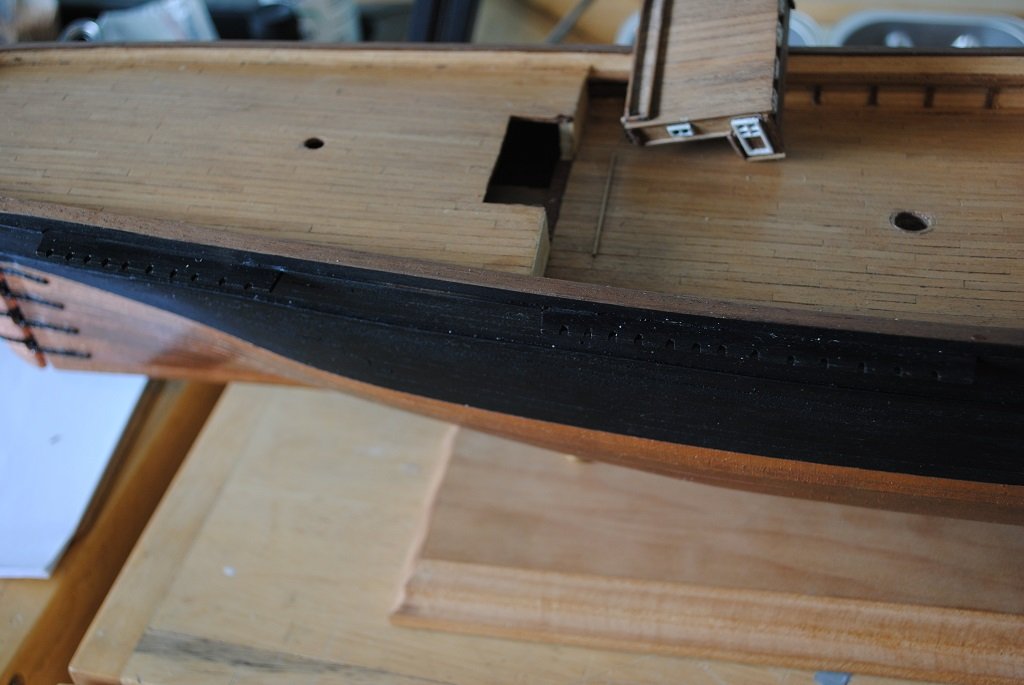
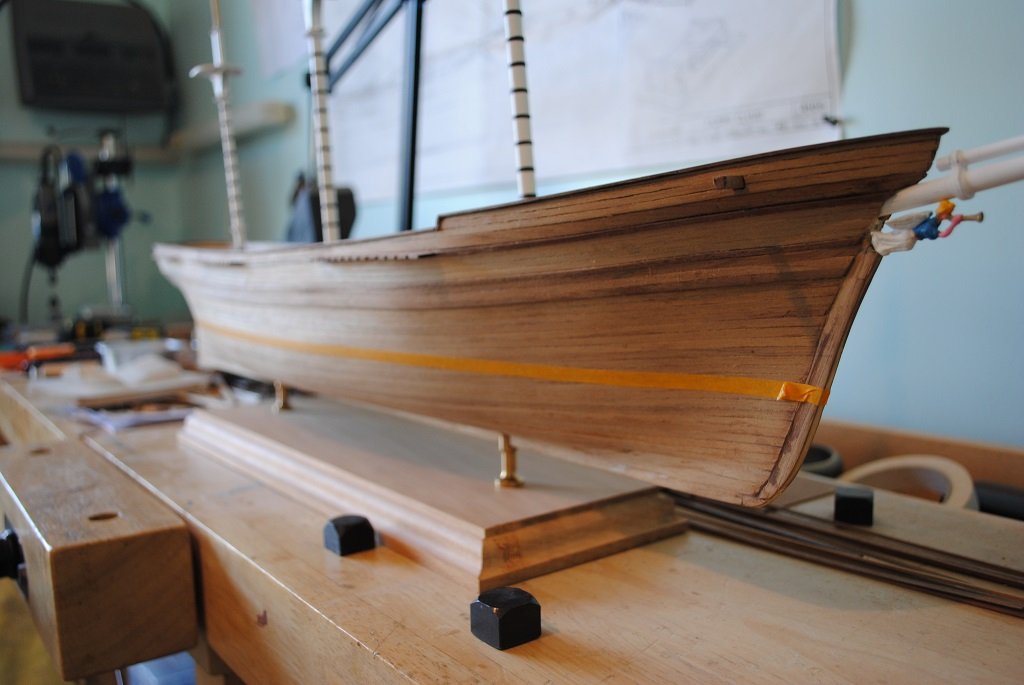
Hi All, Small update: Anchor Hawse Holes drilled, and Hawse Pipes fitted. Same for the Stern Boomkins but leaving these off until Plating completed. (I like to place the Masts/Bowsprit after these stages just to see how the overall model looks.) Hull Topsides masked and painted. (Vallejo Black followed by Vallejo Satin.) I looked at various images of the Flying Cloud last night, seems that the Bowsprit/Jibboom was actually Black. I am unsure if I will change the White, I have plenty of time to think about this. I guess that I'll make some Copper Plates tomorrow. 🙂 That's me for today.... Cheers....HOF. (PS. Thanks for the "Likes." If you wish to comment, positive or negative, please feel free.) Photos:

- 200 replies
-
- 2
-
-
- Flying Cloud
- Mamoli
- (and 1 more)
-
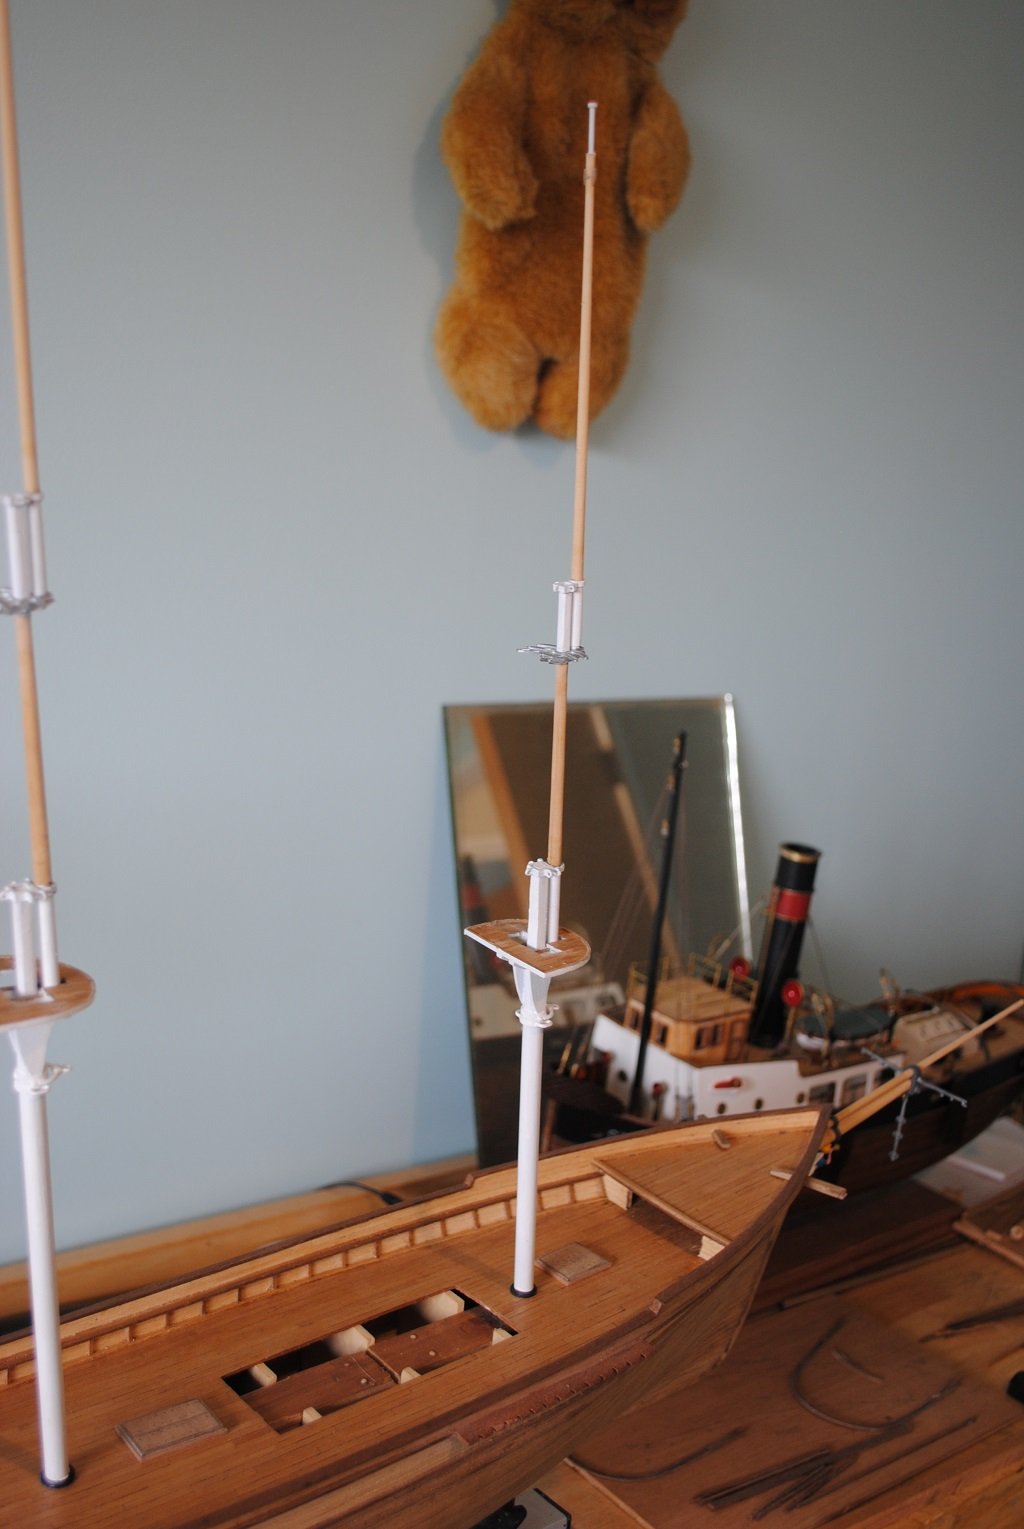
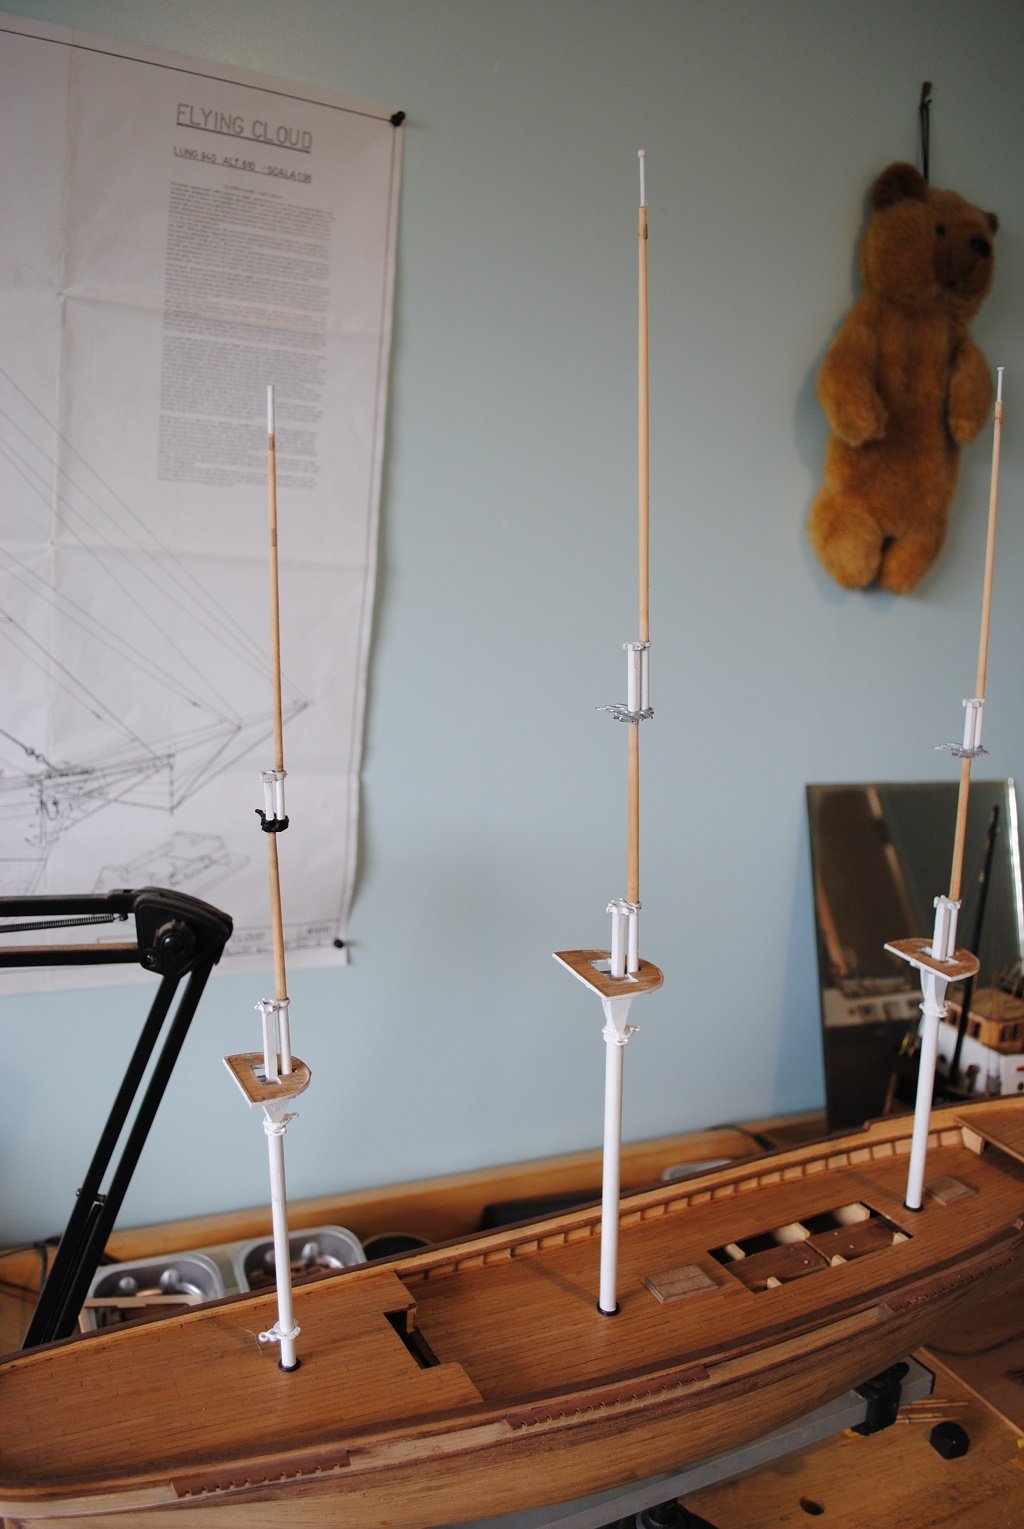
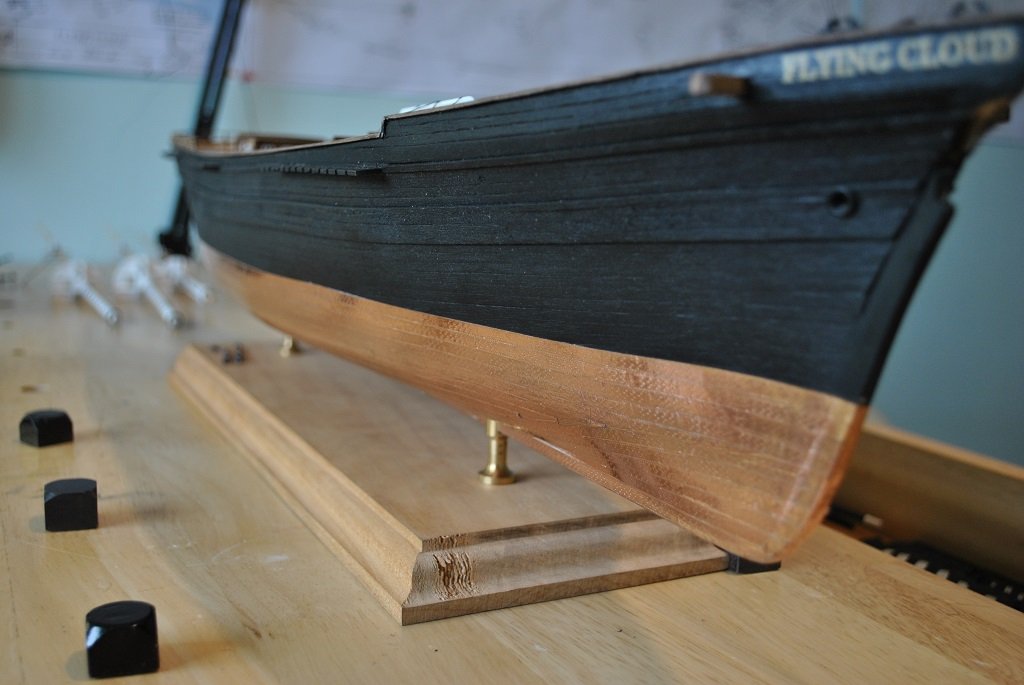
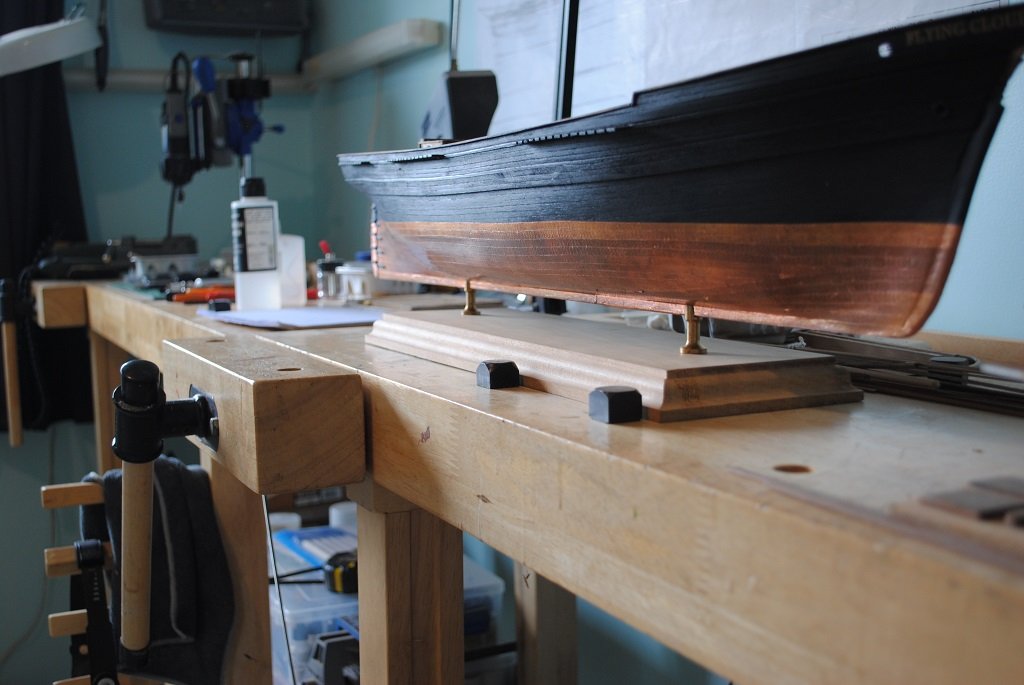
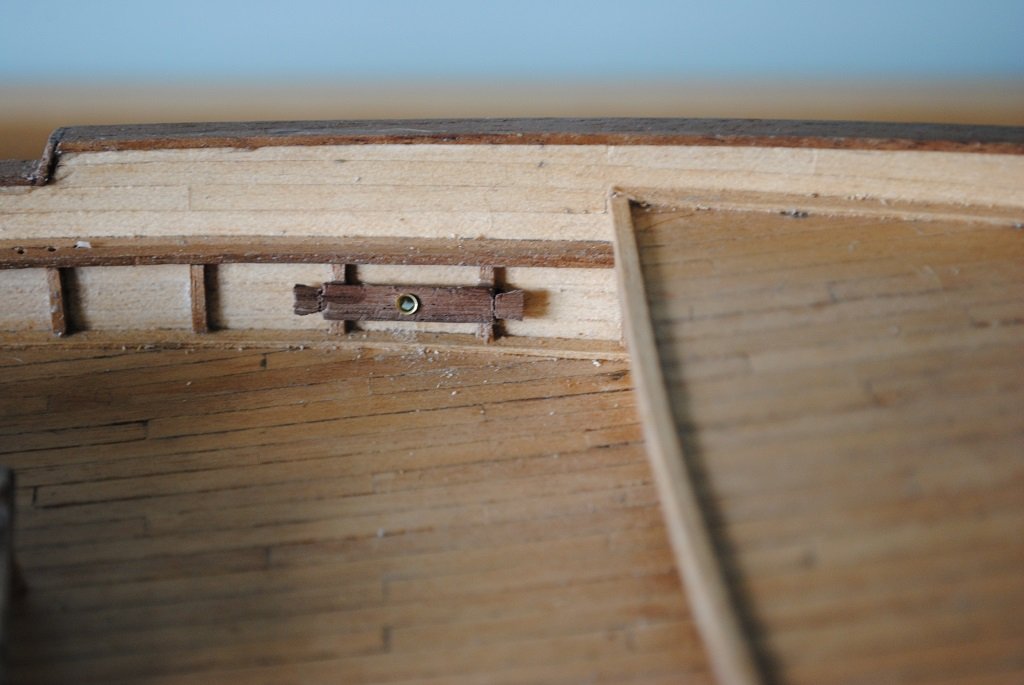
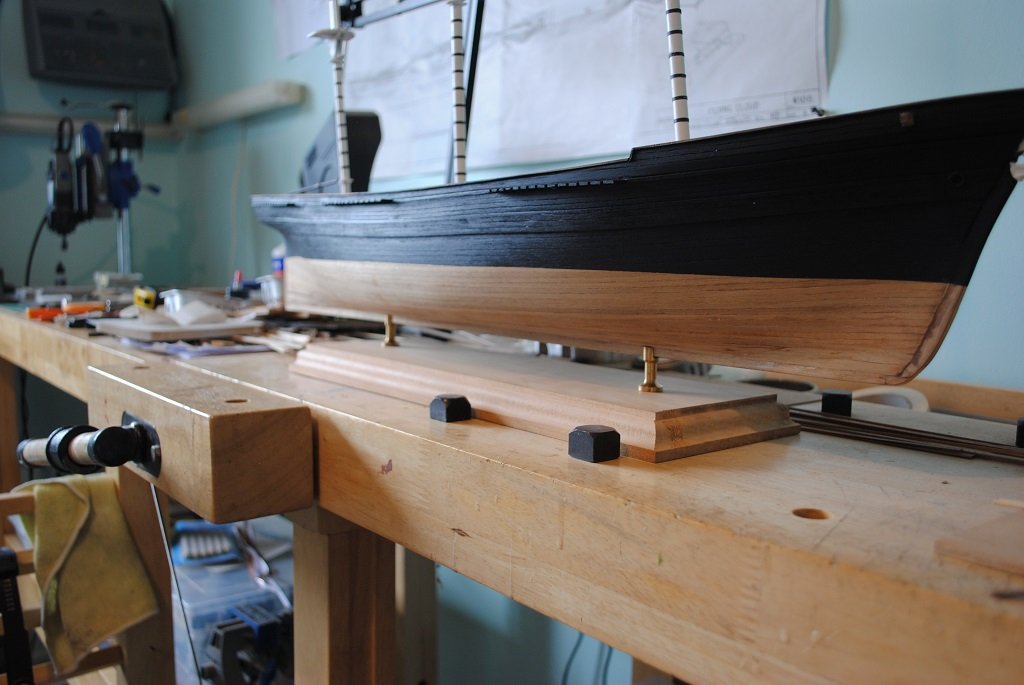
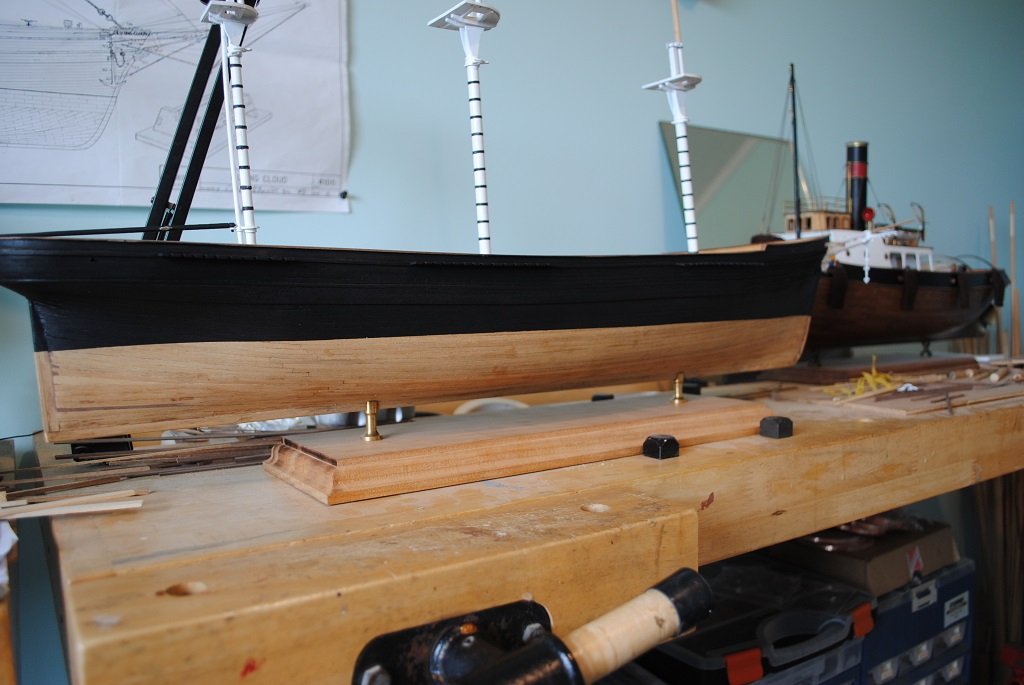
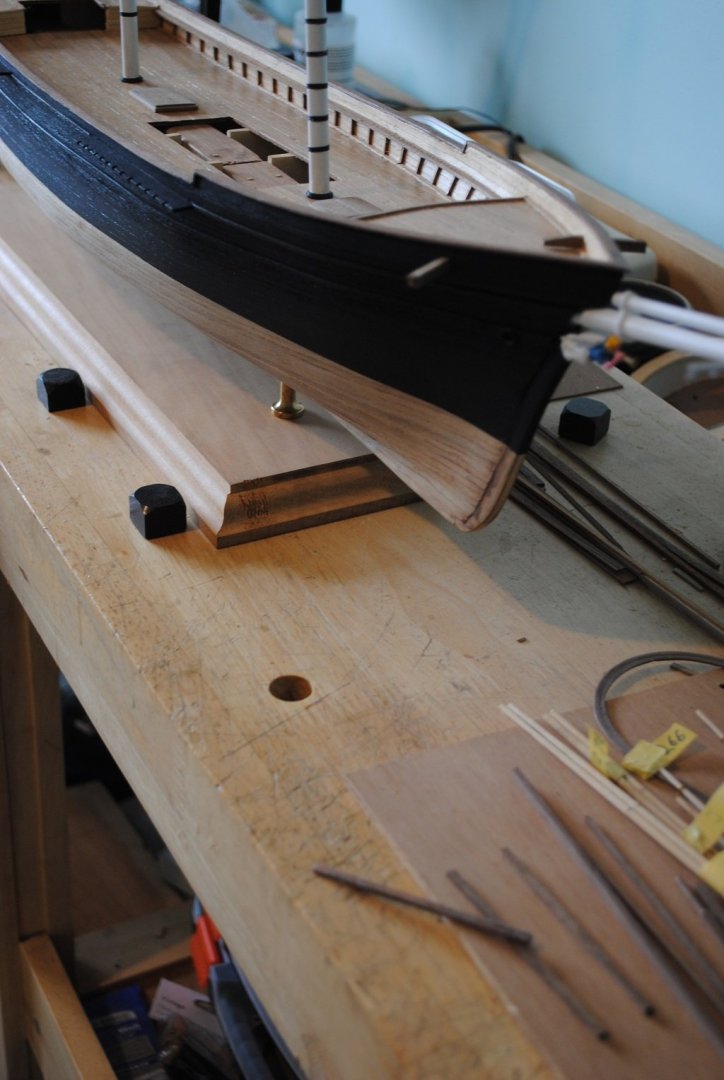
Hi All, Update time prior to painting Hull Topsides Black.... More Mast work, painting the dreaded White here and there.... 🙂 Lower Mast Bands done. I initially tried with thread but was not at all consistent, so, a trip to the local "Warehouse 150 GSM Black Paper and a "Fiskars" paper trimmer. Much better and much simpler. (Mizzen Bands installed, they do not appear on Mamoli plans but are on the box.... They are also on Scott Bradner's plans, I like the look.) Keel Drilled 2.0mm holes and 2.6mm Stainless Threaded Rod tapped, (Wound), in. Base of 25.0mm Kauri Milled (Something different for me, most if not all my woodwork is Rimu.... NZ Native Timbers Base drilled, Pedestals and Hull mounted. Hopefully tomorrow I can think about Painting Hull Topsides Black. Seems a bit "Criminal" but I think the result will be o.k. Thats me for the mo. Cheers....HOF. Photos:


- 200 replies
-
- 5
-
-
- Flying Cloud
- Mamoli
- (and 1 more)
-
Hi Peter, Thanks for that, (Also thanks for the other kind words of encouragement on this thread!!) I agree, it is good to see it get Tall but at this stage, just a gauge.... The face of the model changes again soon as I have now drilled holes for Pedestal Rods and marked the W/L in preparation for Paint, (Topsides and Copper Plating. I am also thinking of sealing the Hull that the Copper Tape will adhere to. (Sanding Sealer?) I figure that while it is unpainted, it will also be a good time to fit Anchor Hawse Holes and holes for the Stern Boomkins. I'll take a couple of photos before I temporarily remove the Masts. Cheers and Regards, Harry.
-
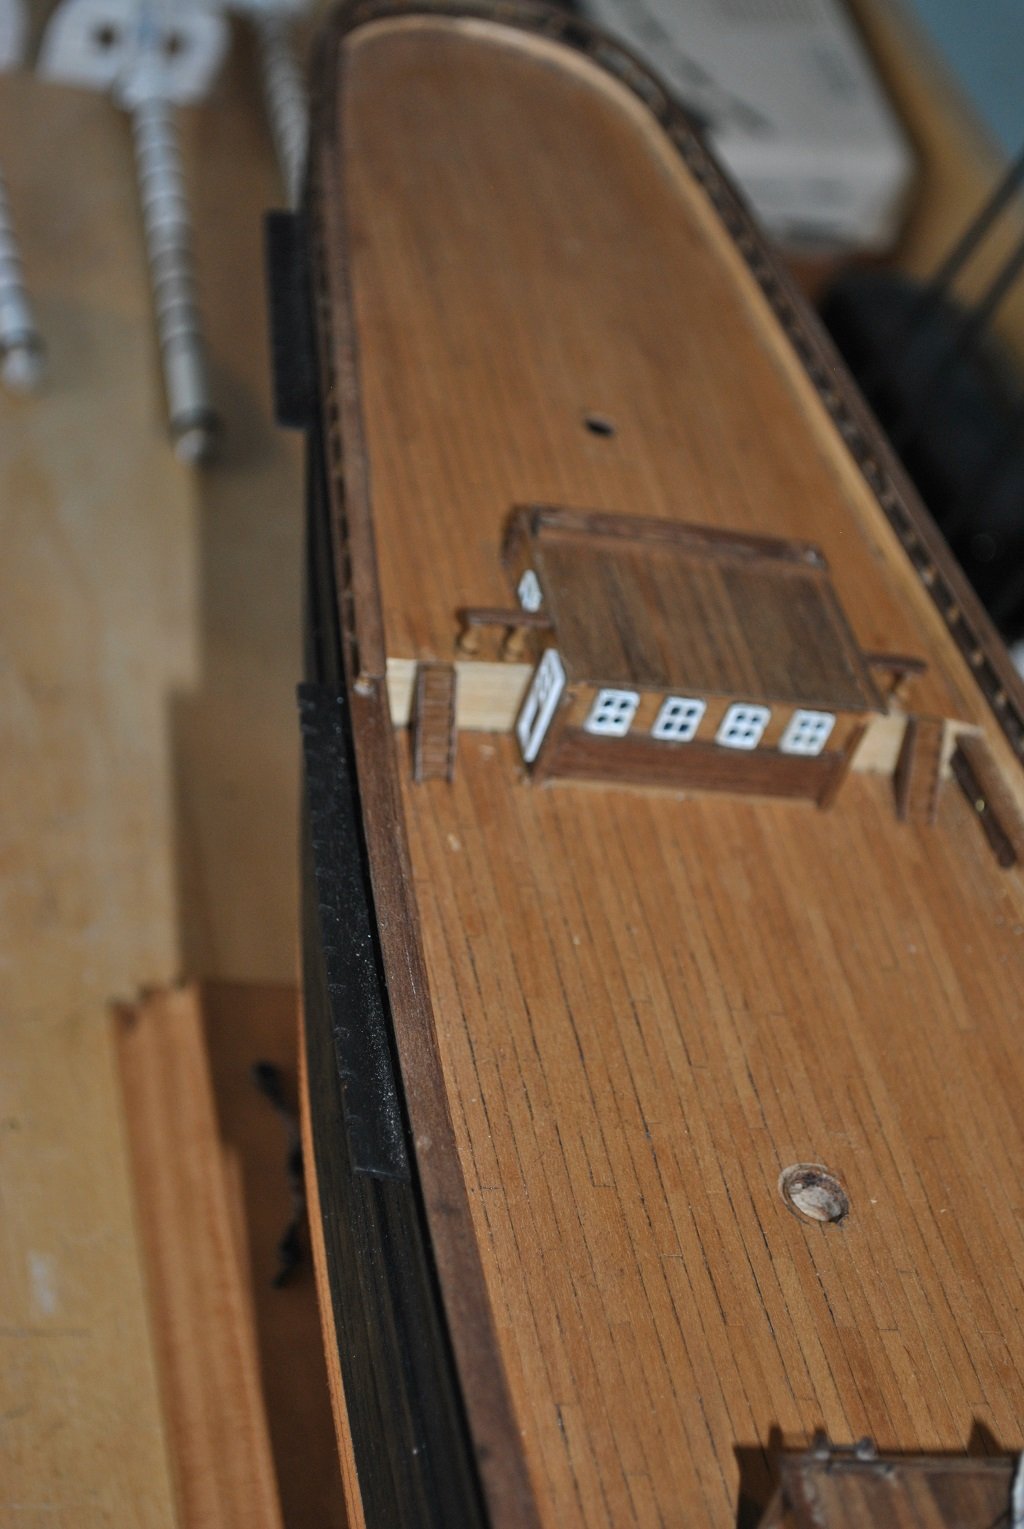
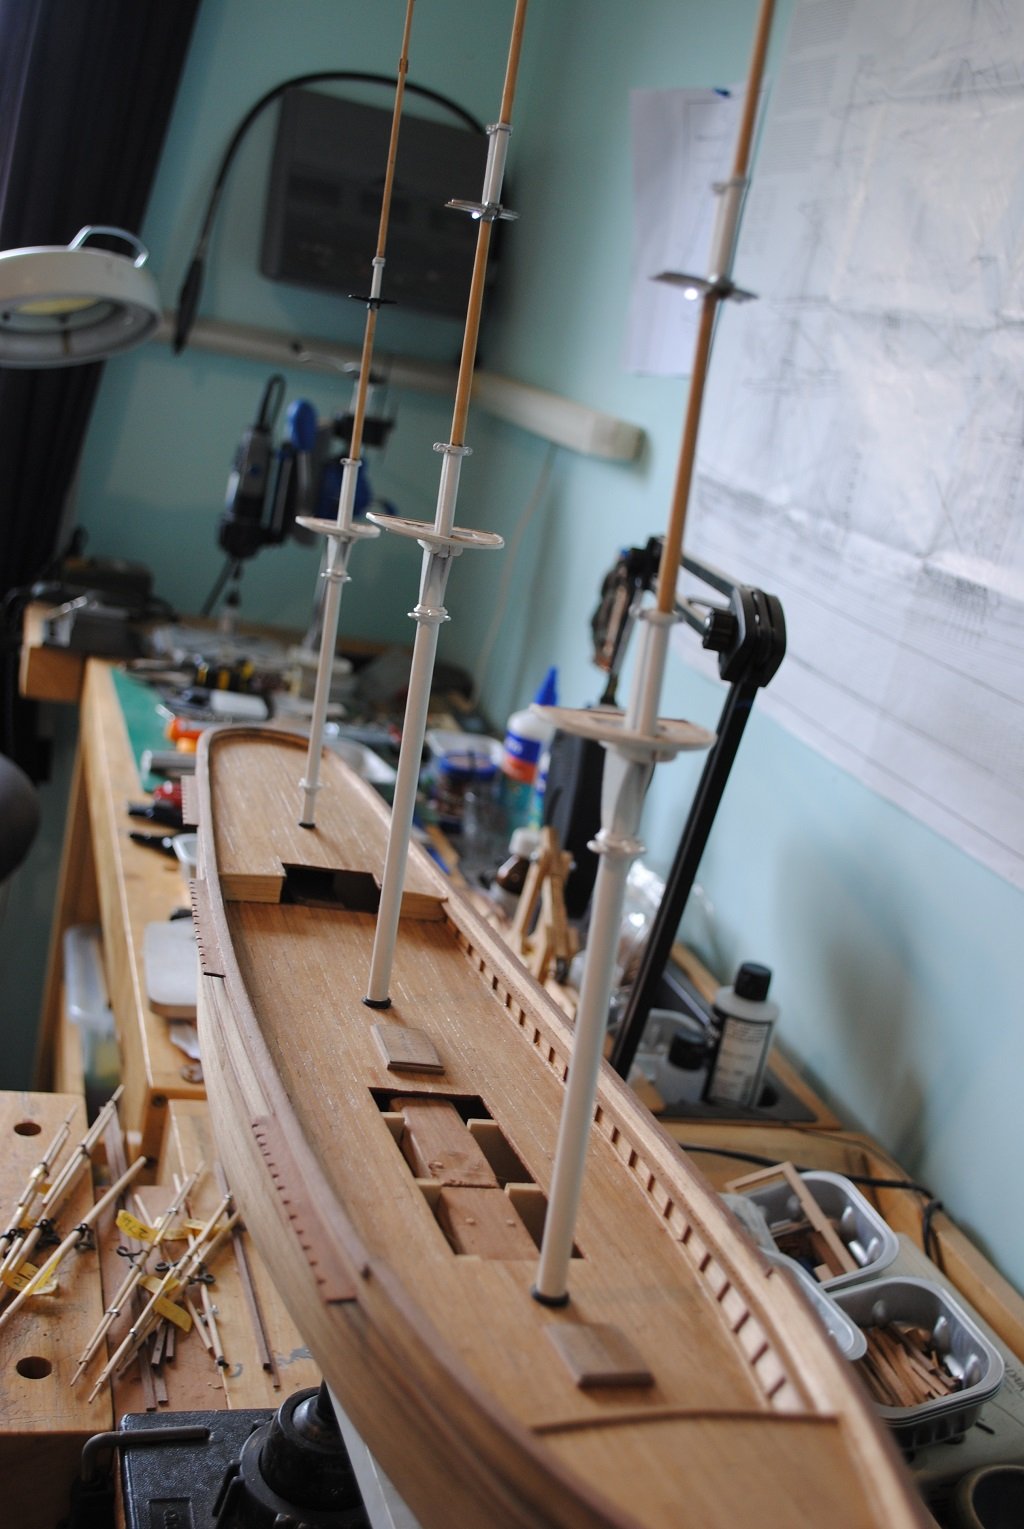
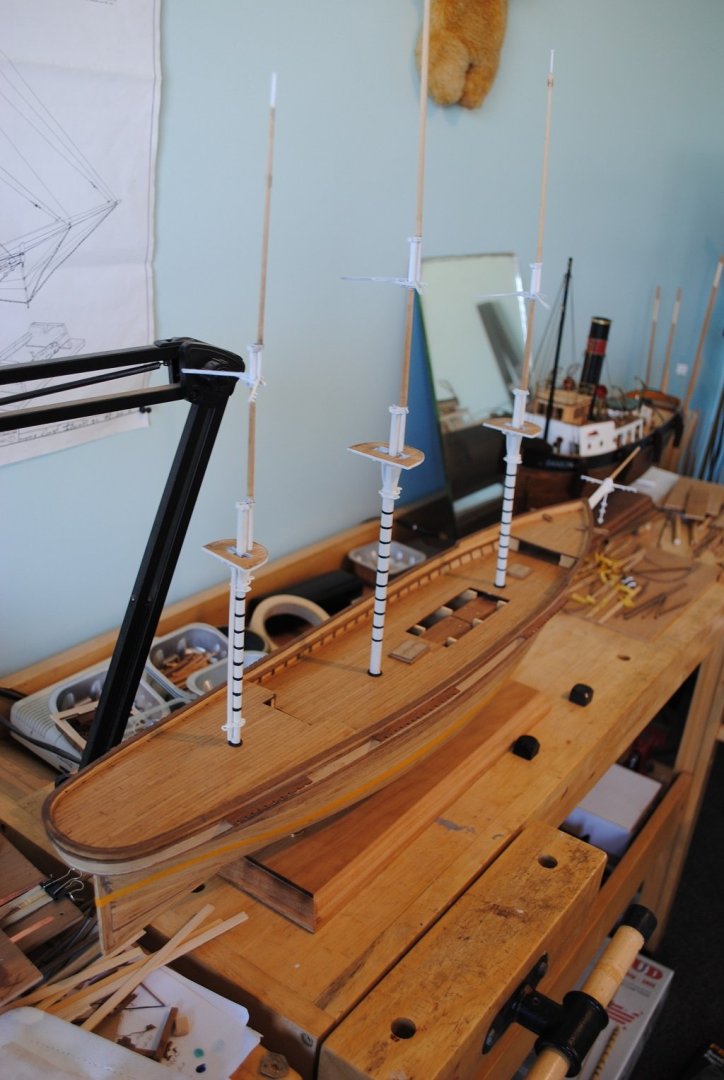
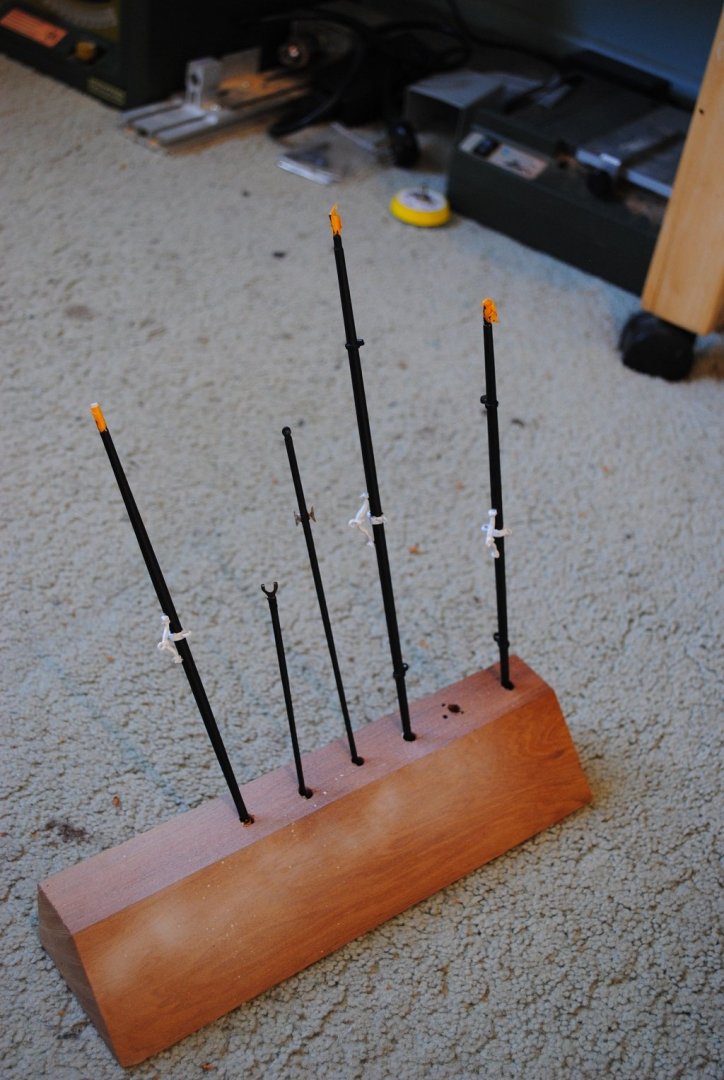
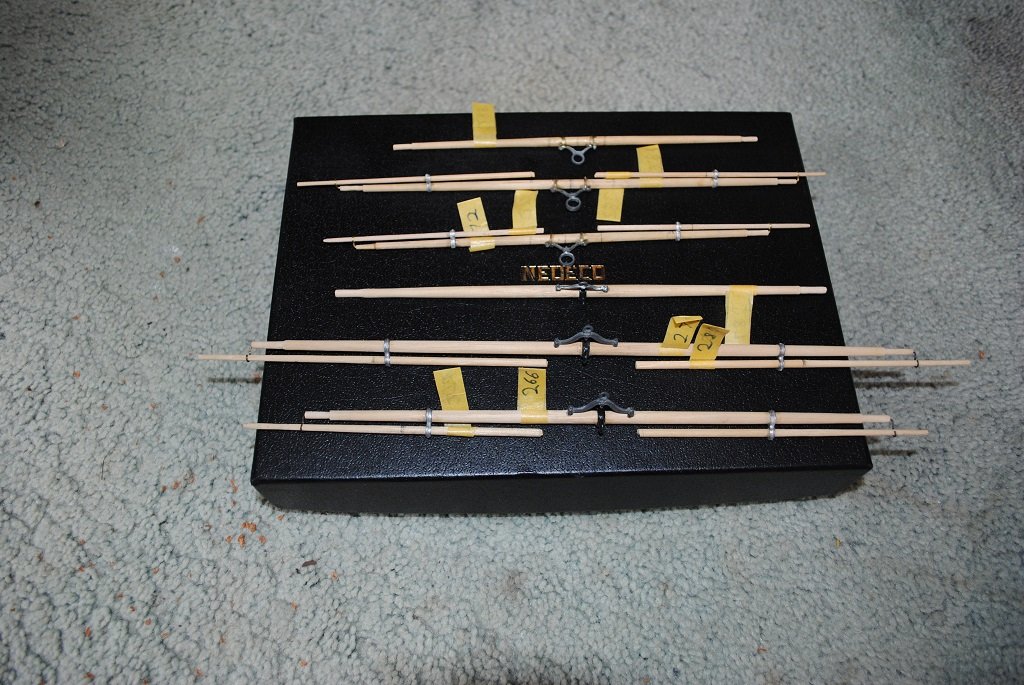
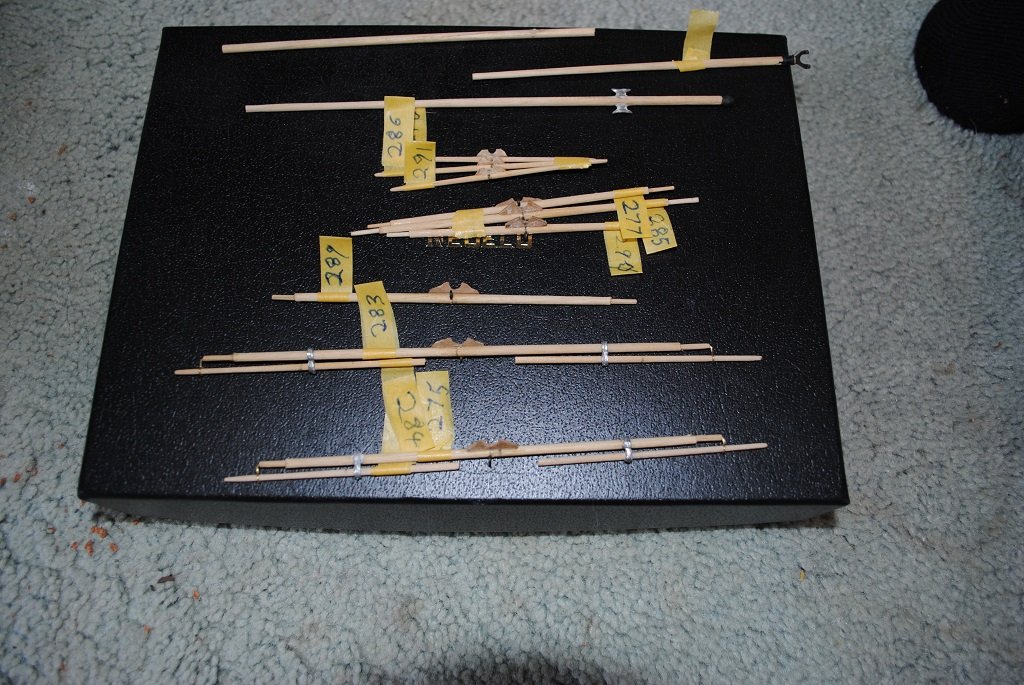
Hi All, Update time.... Over the past few weeks, I have not been a "Slouch...." I have continued on the Masts/Yards. (I know the Hull needs some love, I'll get on to this after I have drilled holes for Pedestal threaded rods.) Today I painted the various Mast components and put them together, (Without Glue at this stage (With the exception of Mainmast fittings and alternate Mast Caps to enable disassembly.)), to see if everything lined up. Not too bad, some touch-up work required. Mast Coats brought all Masts into line and the Mast Plug-In Housings were a real bonus. (I am pleased that I spent the time on these.) (The Top Mast Tops/Backstay Spreaders are yet to be assembled/painted. (The Tops require small holes for Topmast Yard Lift Blocks. Mast Coats required quite a bit of work to get them to fit as did the majority of Mast/Yard fittings. I assembled the Yards, again, no glue at this stage apart from the inboard Stunsail Boom fittings. (Yards need painting first, Bocks installed and then Stunsail Booms/Jackstays, Etc.) So, there you have it!! A footnote: Some castings are extremely brittle.... 🙂 Cheers....HOF. Photos:


- 200 replies
-
- 8
-
-
- Flying Cloud
- Mamoli
- (and 1 more)
-
Hi Chap, Sorry to hear that life got in the way, happens I guess. I sincerely hope that you can get back to completing your fabulous Cutty!! On a positive note, your model will wait patiently for your attentions. I hope that the description for the Plate Embossing machine was adequate. I'll get some photos up in the next day or so for some progress of the Flying Cloud. (It certainly has not been a very easy journey thus far.... 🙂) Cheers and Regards, Harry.
-
Hi Chap, How's it going and how's your "Cutty?" finished yet? (I have been wondering how your project had been going 🙂) Plate Embosser? I was not looking forward to describing this fairly rudimentary experiment.... O.K I started with the A/L 17.0 X 5.0mm Plates Marker, this worked well but was very difficult to keep "On-Track." My thought was to guide the Copper strip and pull it though a guide of some sort. The A/L Tool Wheels/Spacers add up to 5.0mm in thickness, all good but there are three PE pieces spaced around the circumference of the wheels that keep the wheels in line but also mark each plate as the wheels rotate. These three PE pieces protrude about 1.0mm each side of the wheels. I made up a couple of supports for the Plate Marker and decided to mount a square rod for the body of the Marker to slip onto so that I could remove the Marker if so desired, I also did not want to alter the integrity of the Marker at all. I attached to supports to a random length of hard wood and made the Marked Pivot so the Marker would engage at about 45" I attached guide strips along the length of the guide at 7.0mm in width and a couple of 1.0 X 1.0mm strips inside these creating a 5.0 X 1.0mm Chamel for the tape to ride in. (Clear as mud so far? 🙂) I now had to figure out how to ensure clearance for the afore mentioned PE bits so the wheels would rotate, removed about 10.00mm of the 1.0mm guide strips where the wheels rotate.. Also in mind was a slippery surface for the tape to slide on so used some 6.0mm Tamiya masking with candle wax rubbed on, paraffin wax I guess.... So, to try the device.... I had seen a chap building a "Victory" on You-Tube who laminated his 0.mm Copper tape to bump up the thickness to 0.2mm so that the copper is a little stiffer. I did this also. I Pulled my first, (Of many), test strips through applying downward pressure on the tool, not bad but the strip still wandered, I decided on an additional guide to ride on top of the tape so the Feed-In was flat and within the guide channel, a piece of 5.0mm thick wood fit the bill with the Masking/Wax treatment, to ensure this didn't slide forward and jam the wheel, I but a Brass rod through the front of this so that it "Stops" on the Pivot Uprights, clear of the tape channel and just rear of the wheels. Try again with pressure on the tool and pressure on the tape guide block, better but not perfect, I had to shim my guide rails with lengths of Tamiya tape on one side to get the "Track" centered. So, there you go, it seems to work. Someone with a good Lathe/Mill, (Yourself?), could probably knock out something better. 🙂 Happy to take some more photos of the device if you so wish. The build continues, currently working on Masts/Yards, I got sidetracked but it doesn't matter, it all has to be done anyway.... 🙂 If you are going to attempt this model, be aware of the issues I encountered, maybe my kit was a Monday morning/Friday afternoon production run? To be fair, I purchased mine maybe 15 years ago? (Old release.) Looking forward to seeing your Cutty progress at some stage. (No pressure!!) Really good to have your communique!! PS. Happy New Year to you and yours!! Kindest Regards, Harry.
- 200 replies
-
- 1
-
-
- Flying Cloud
- Mamoli
- (and 1 more)