HOLIDAY DONATION DRIVE - SUPPORT MSW - DO YOUR PART TO KEEP THIS GREAT FORUM GOING! (89 donations so far out of 49,000 members - C'mon guys!)
×


hof00
-
Posts
1,649 -
Joined
-
Last visited
Content Type
Profiles
Forums
Gallery
Events
Everything posted by hof00
-
 Thanks Mike, Lovely builds!! Yup, Maple is the very light wood, like the AL kit "Ramin" As my above reply to Jaager, I'll go with the kit supplied Tanginika for the Deck Planking and the Maple for the Inner Bulwark Planking. I have time on my side as I am at the early stages of the build, but it is important to have things lined up so to speak. 🙂 Cheers and Regards, Harry.
 -
Thank you Jaager, I did a bit more digging; the wood "Tanganika" seems to now be known as "Aningré Blanc" according to Wikipedia. I guess I'll be using it for Deck Planking regardless.... Thank you also for your mention regarding "Maple" Obeche would appear to be what I have, which would explain the color. (Looks similar to A/L kit wood "Ramin," Inner Bulwark Planking. I found a representative picture.... Aningre blanc alias Abam, Akatio, Aningueri blanc oder Osam In the interim, I'll continue with my learnings. Cheers and Regards, Harry.
-
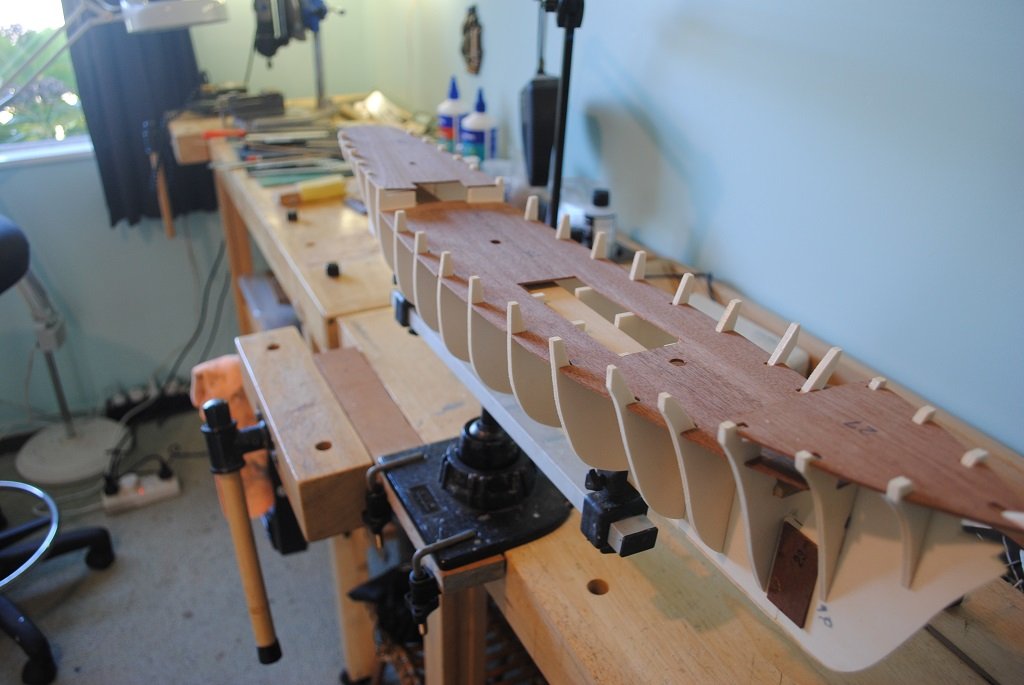
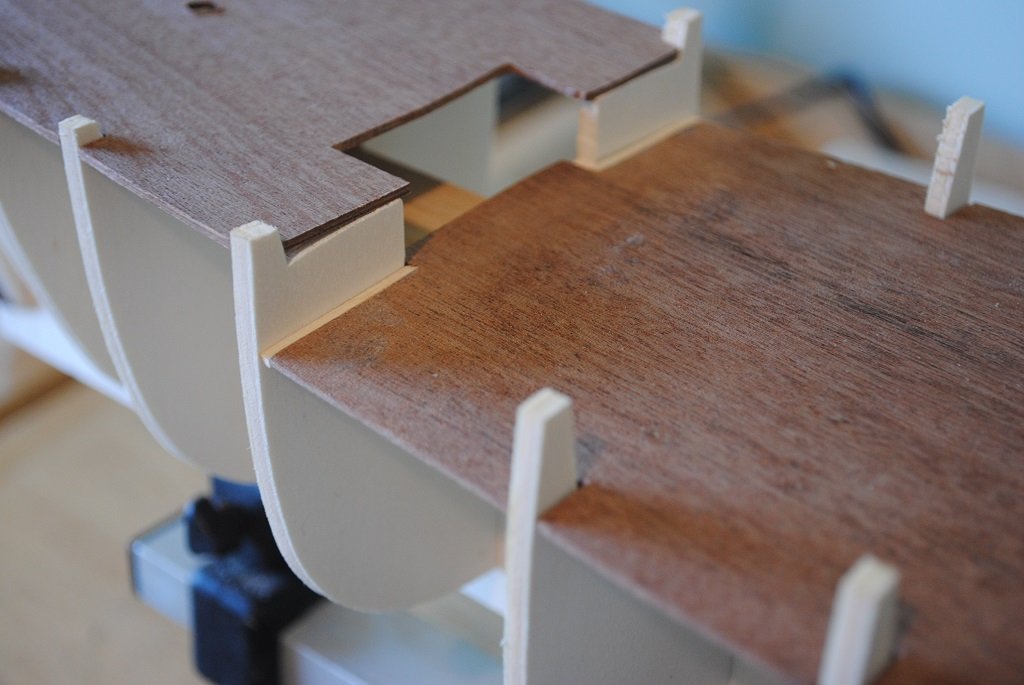
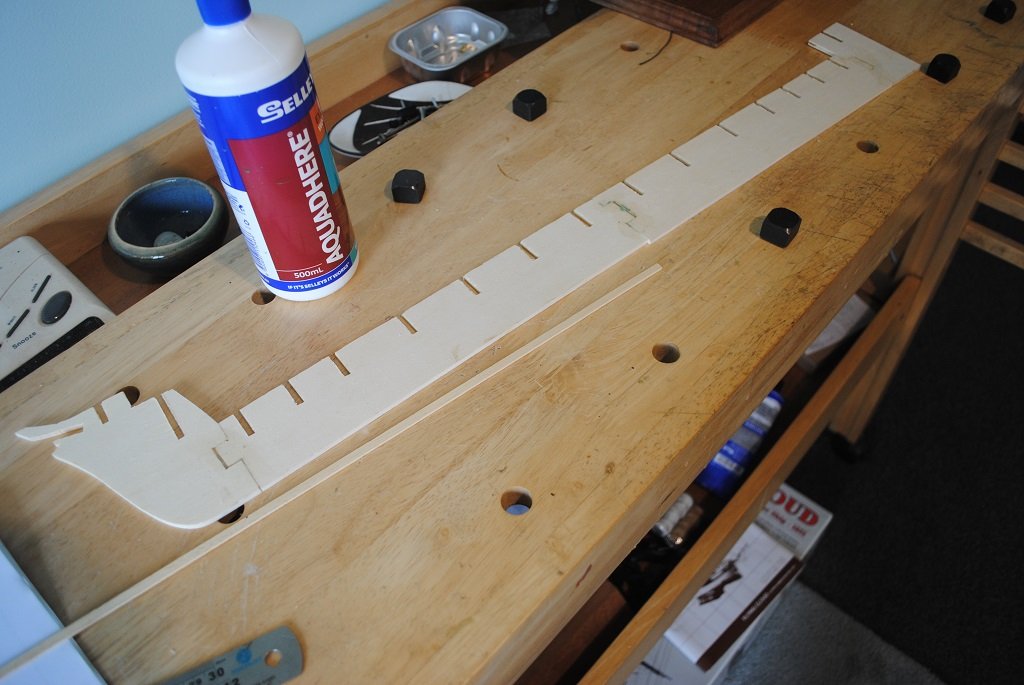
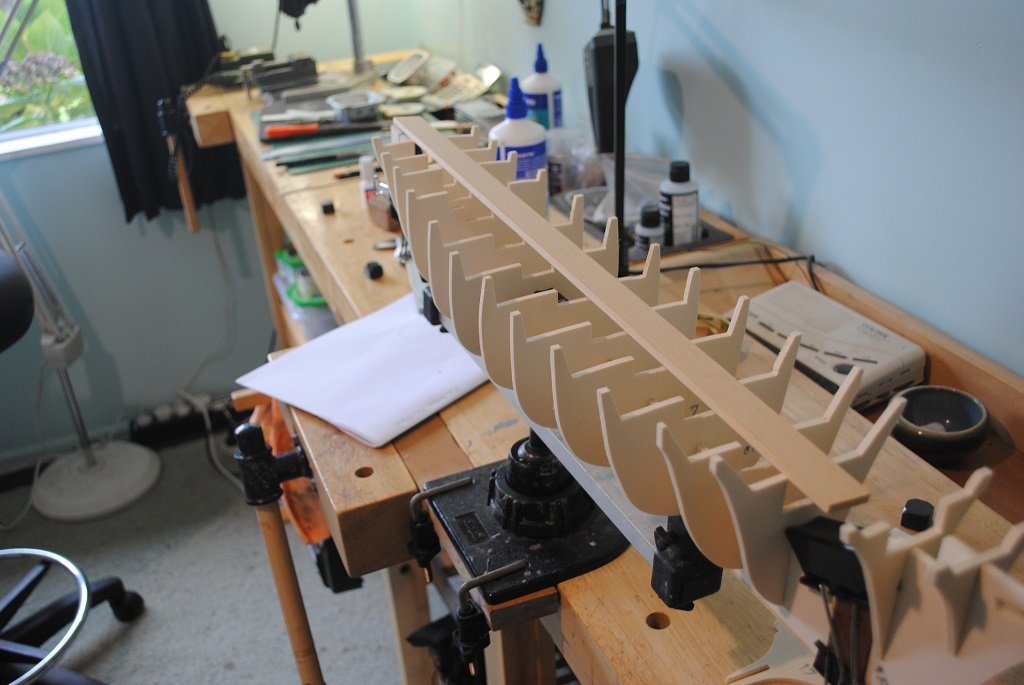
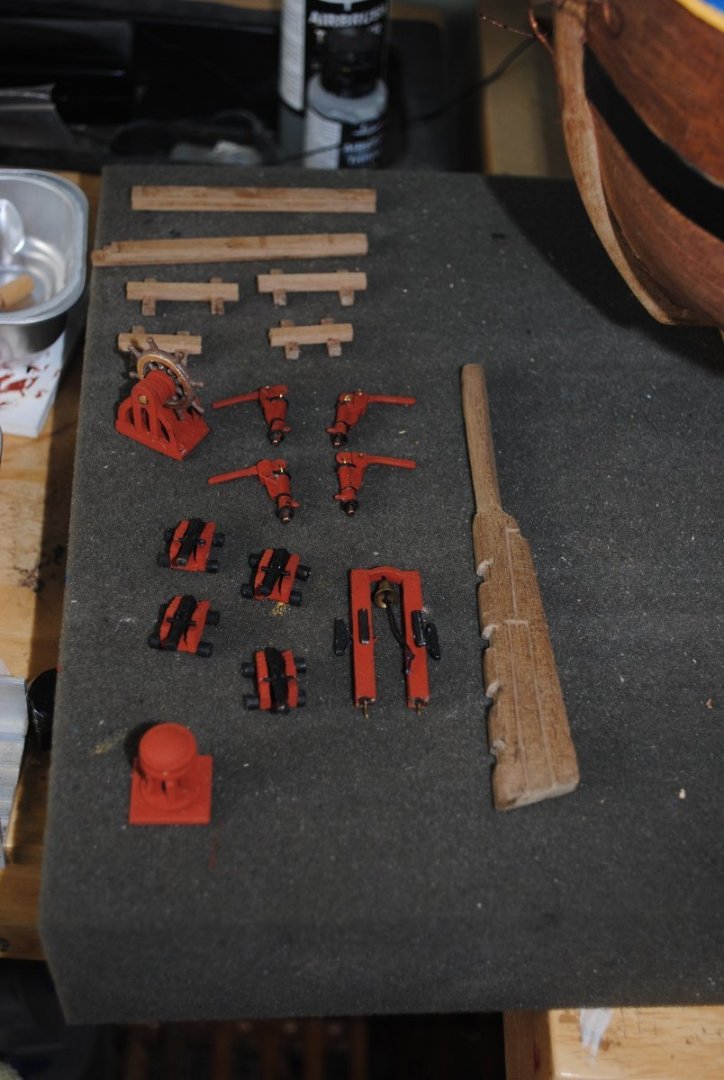
Hi All, Small update: Machined the longitudal Beam that stiffens the Hull, I had to shave 1.5mm off this. Another gap, this time on the rear Main deck and dealt with this issue also. The Hull structure is looking a little better at this stage and various components are fitting better after a few "Tweaks." No Bulwarks, etc. are affixed in place yet. The mast material gives me a few mm in length at the Base of each mast, the length differs from Mast to Mast depending on the relation of Deck to the afore mentioned "Beam." I scribed a line down the center of the Beam to give me a true centerline for Mast orientation. The trick will be to get each Mast raked aft at 5.95". I am thinking a Brass rod at the end of each mast, offset forward and hole drilled in the Beam to "Step" the Masts. (I don't want to "Glue the Masts in place, I'd rather have them set-up, removeable with the Standing Rigging to hold them in place.) Anyway, enough of me today.... 🙂 Cheers.... HOF. Photos:
- 193 replies
-
- 4
-

-
- Flying Cloud
- Mamoli
- (and 1 more)
-
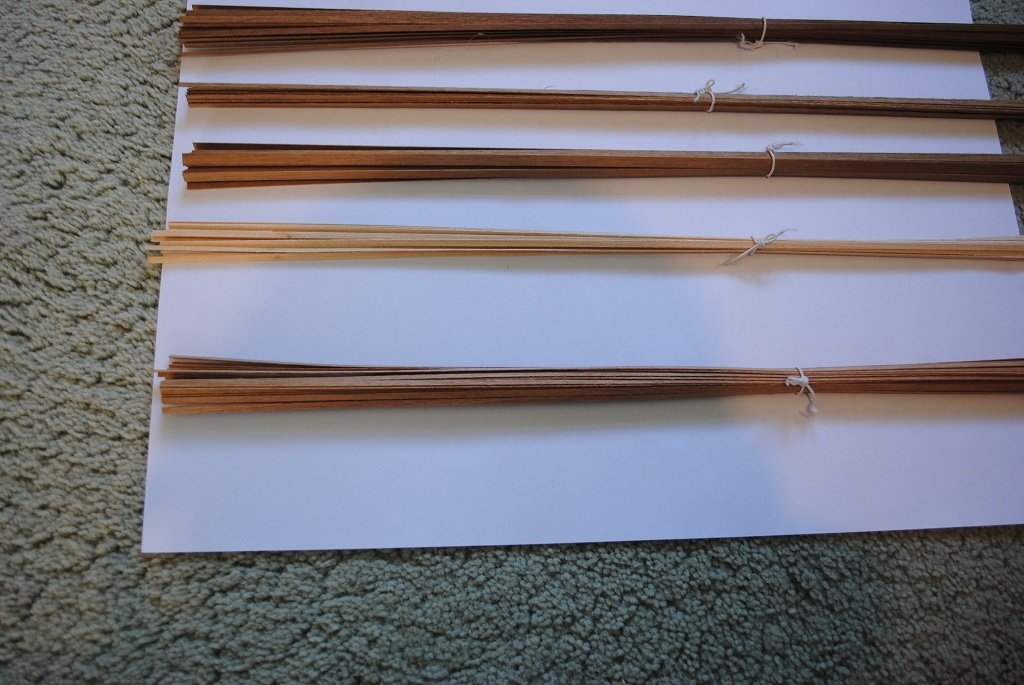
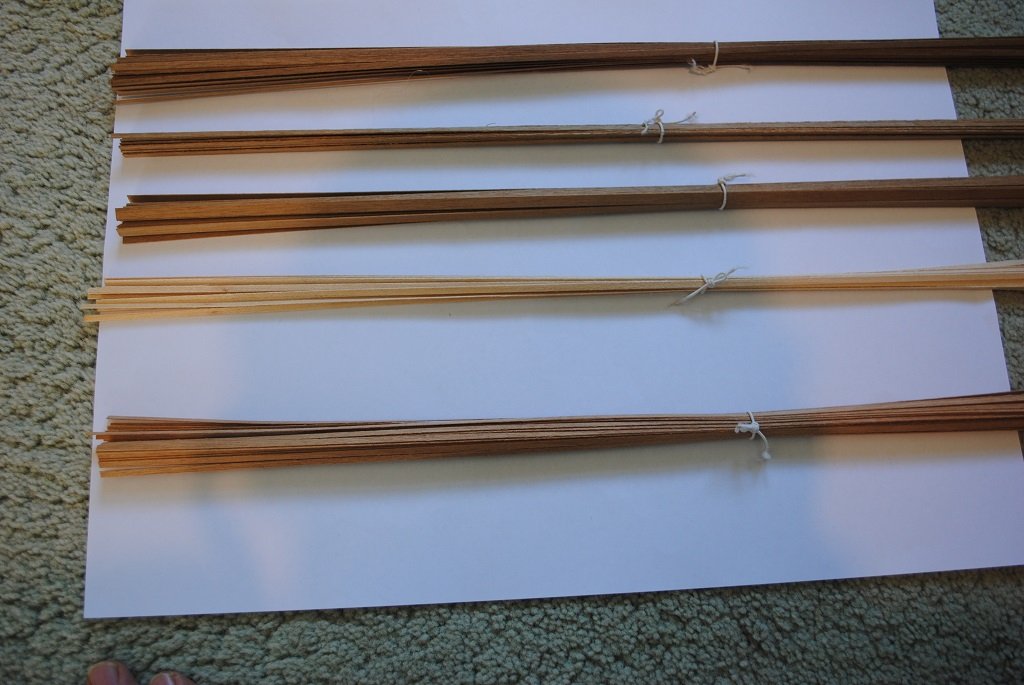
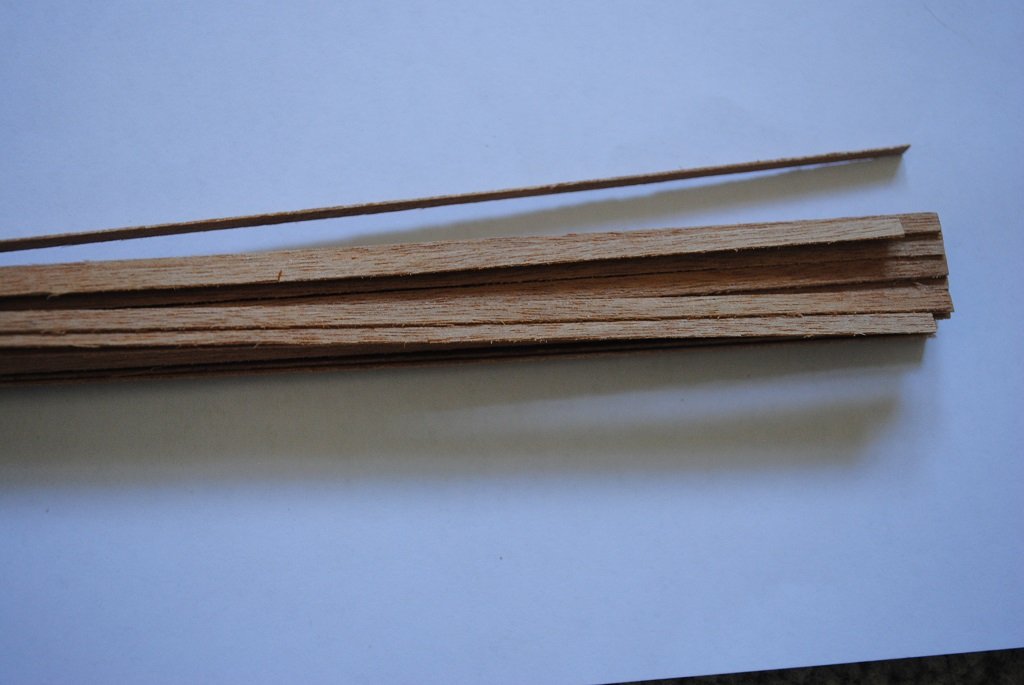
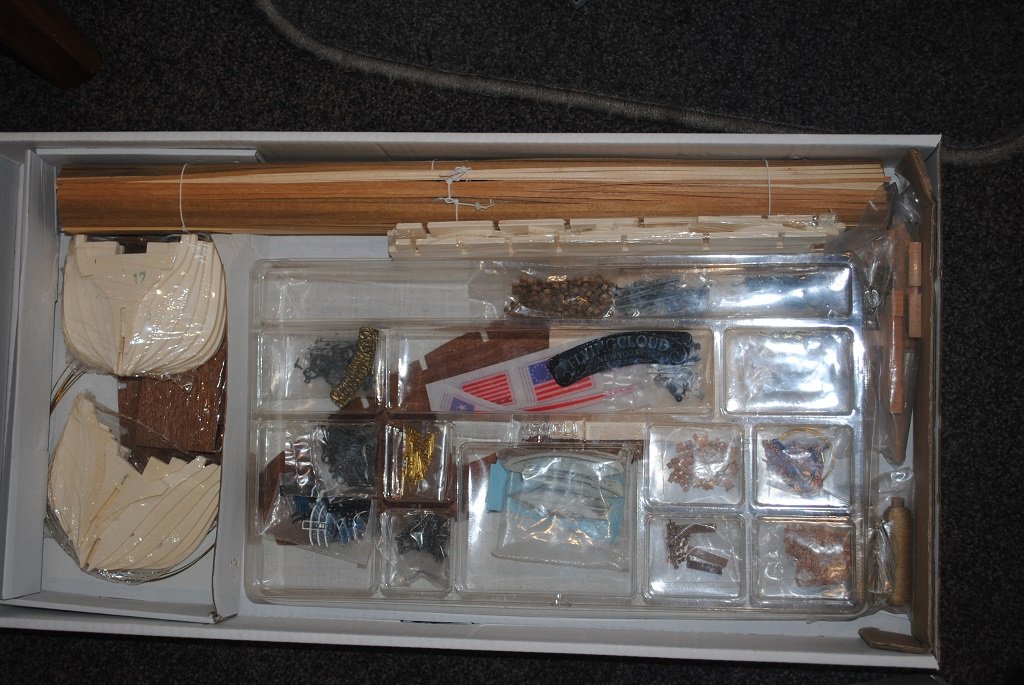
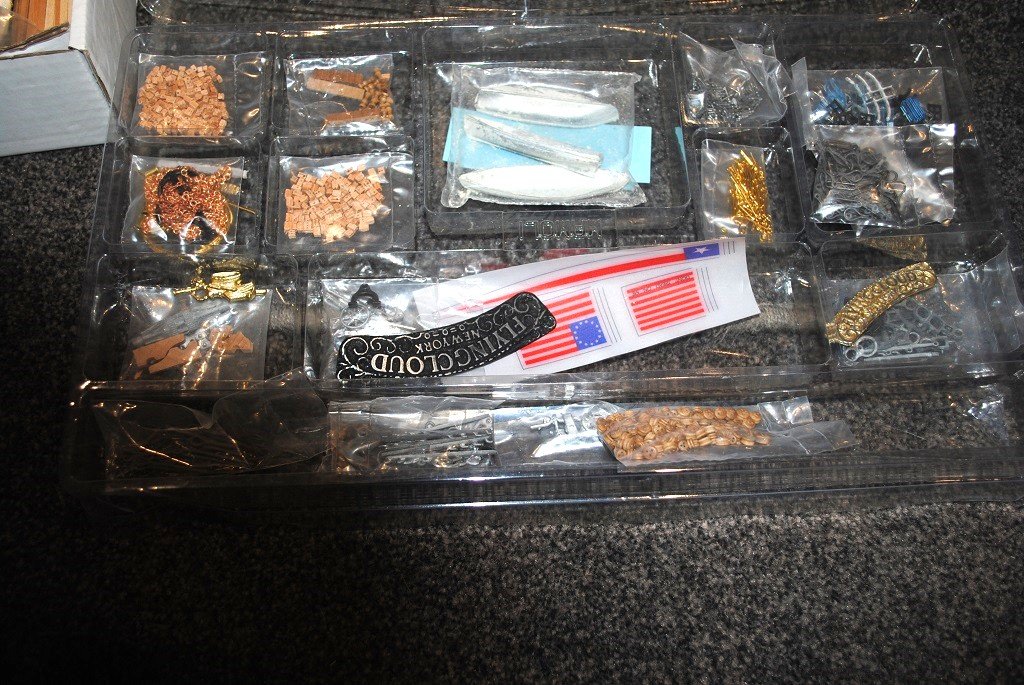
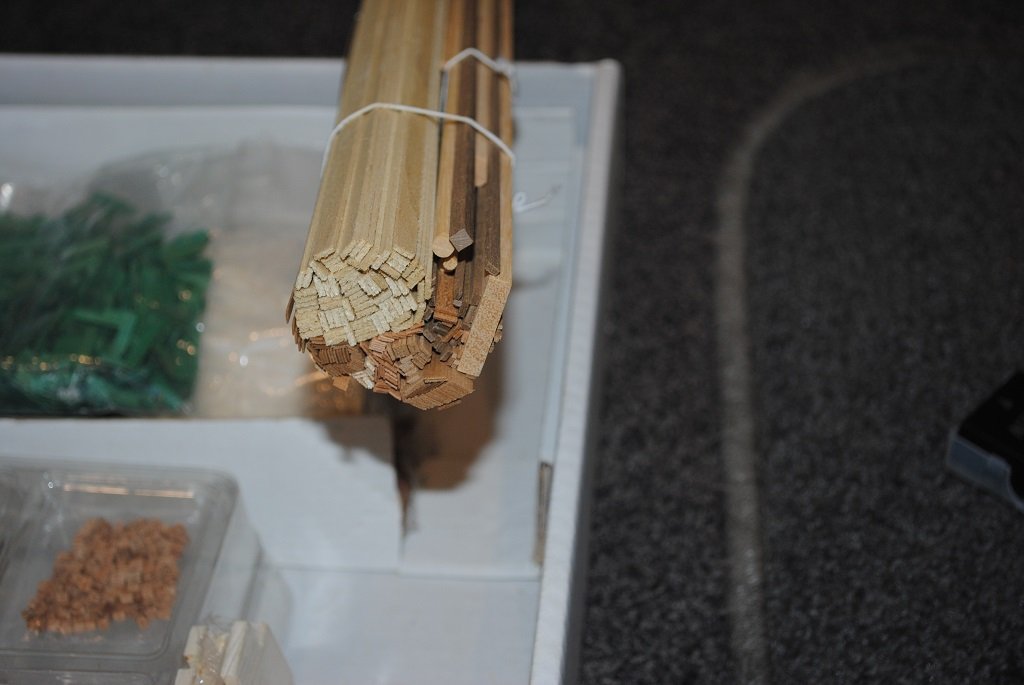
Thanks Mike, I have not had a look at your ships yet, I have been preoccupied with resolving the Second Planking/Deck planking. I had a "Deep Dive" into the second planking.... (The kit provides "Just enough" material in my calculations.) In the first couple of photos the top three bundles are Walnut for the majority of the Hull. (Short the Rubbing Strakes which I am assuming is in the Strip Wood bundle, not shown.) The second to bottom bundle, is, the only thing I can think of, is planking for the Inner Bulwarks, definitely not Maple.... The third bundle is what I am assuming is Deck Planking, (The third photo is a closer view of this material.) Tanganika? (It doesn't even come close to the "Key" on the kit box.... 🙂) Cheers and Regards, Harry.
-
Thanks Gregory, I sort of realized that the larger bundle would be for the deck, only one issue, it's the lighter of the two. What I think is Tanganika is a Red/Orane brown, and conversely, Maple is the slightly darker.... Difficult to tell.... I'll take a photo later today. Cheers and Regards, Harry.
-
Hi All, Searching for something I thought was pretty straightforward, I am after a Color Comparison chat, (Palate?), for woods used in Model Ship building. I cannot for the life of me find anything in the Database and I don't want to spend hours searching through thousands of posts. Specifically, the two timbers that interest me the most at this stage are: , Tanganika Maple I have never worked with these woods and am in need for an accurate identification. This is for the Mamoli Flying Cloud (There is a color key on the box-top, but this is not clear enough.) The uses slated for these are: Tanganika - Deck Planking (0.5 X 3.0mm) Maple - Inner Bulwarks (0.5 X 3.0mm) I can take an educated guess that the larger bundle is for the Deck Planking, but I would like to be 100% sure. If anyone has this color Chart/information at thier fingertips and could perhaps direct me to an appropriate website or similar, I would be very grateful. Cheers and Regards, Harry.
-
Thanks Rick. It's all a bit of a mystery at the mo. but seems to be coming together slowly. Getting together my research material and considering/planning the next move. 🙂 Cheers and Regards, Harry.
- 193 replies
-
- 1
-
-
- Flying Cloud
- Mamoli
- (and 1 more)
-
Hi Chap, Just "Chiming in" here.... From experience, I'd go with #$ followed by #2 My effort with the Sergal/Mantua is on this site. (Search Cutty Sark by HOF00) I have #2 in storage. I think that the Sergal/Mantua version goes together very nicely, and the scale makes things a little easier. (Granted, the size is something to be considered.) Cheers....HOF.
- 114 replies
-
- 1
-
-
- Cutty Sark
- plastic
- (and 4 more)
-
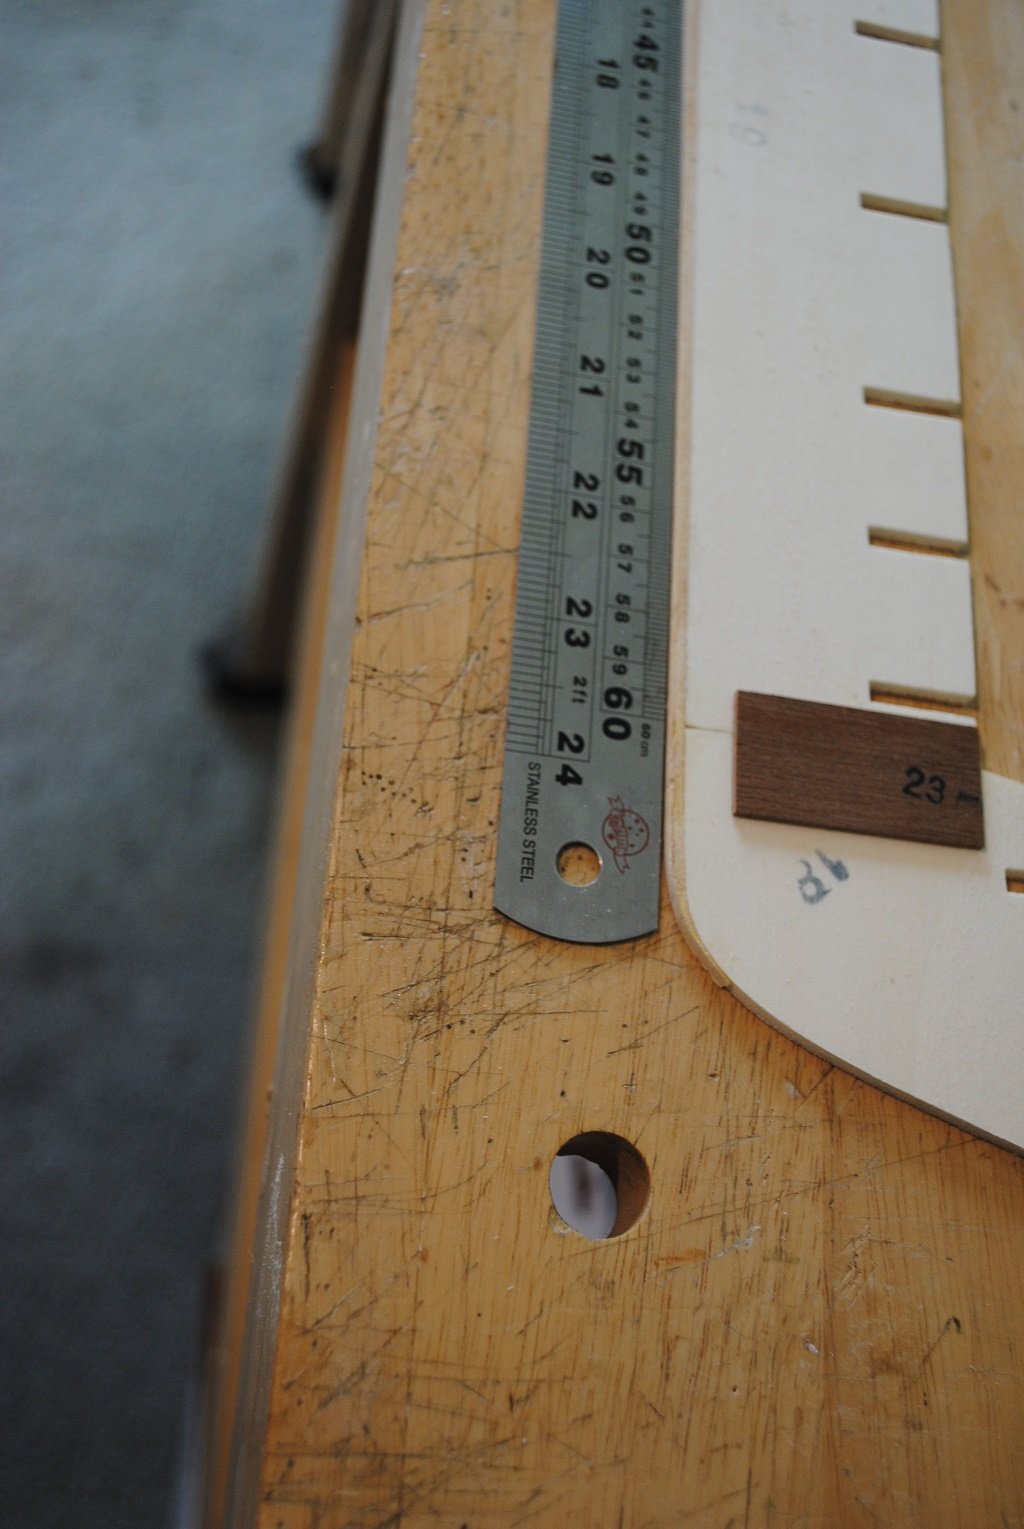
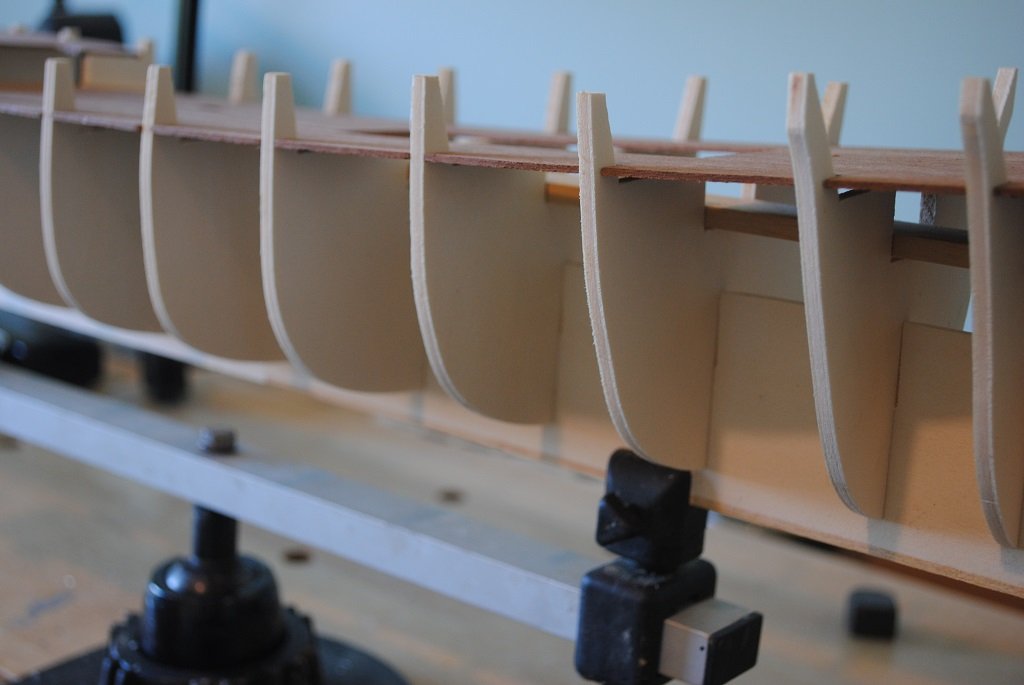
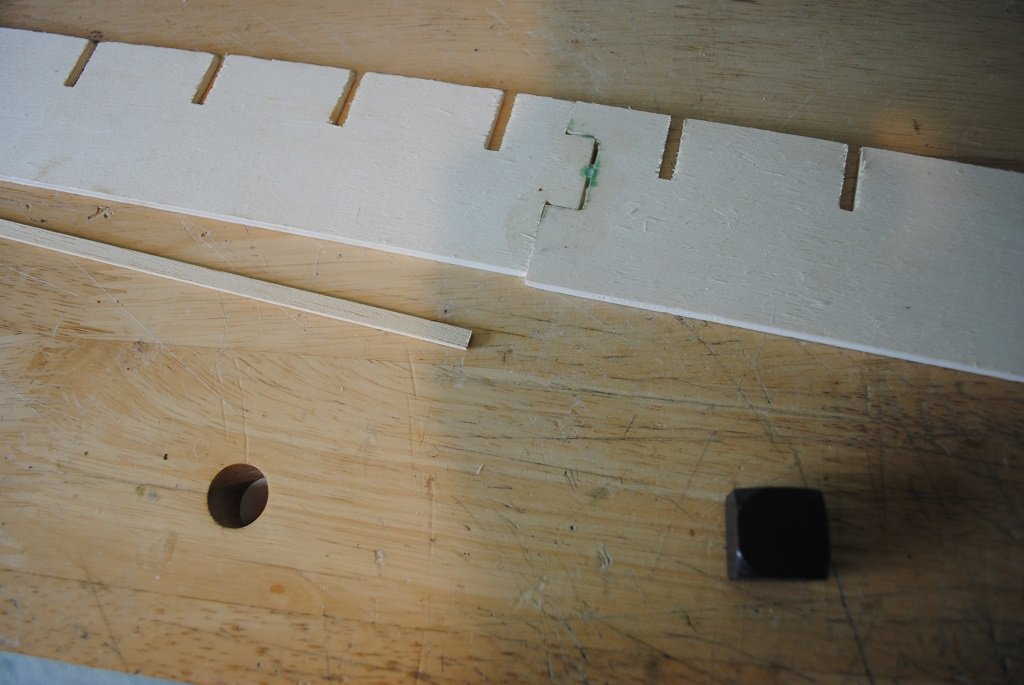
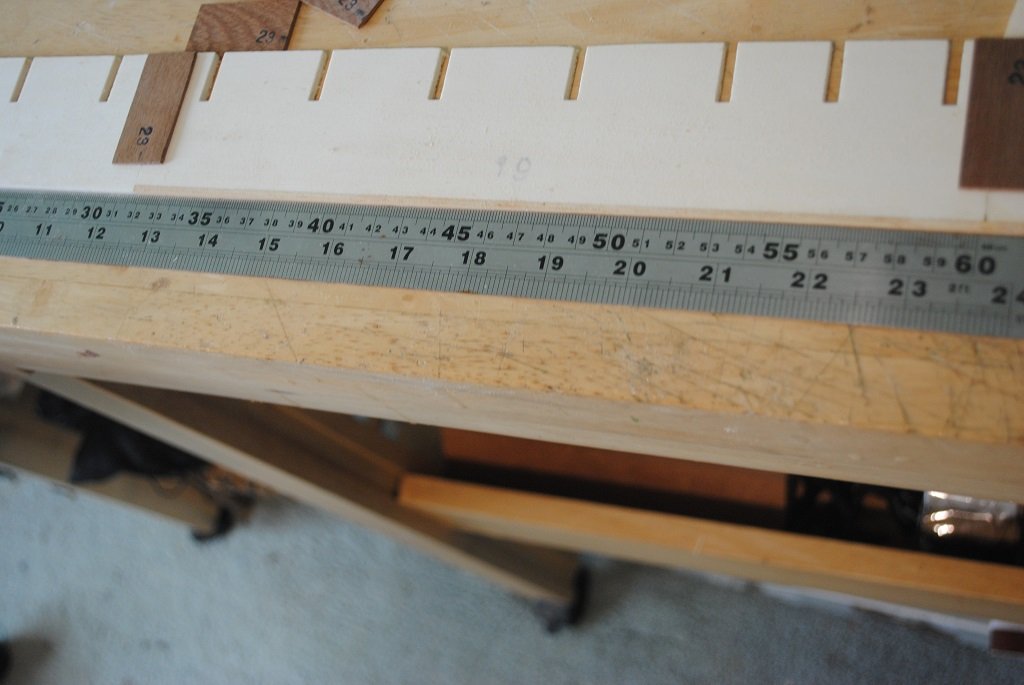
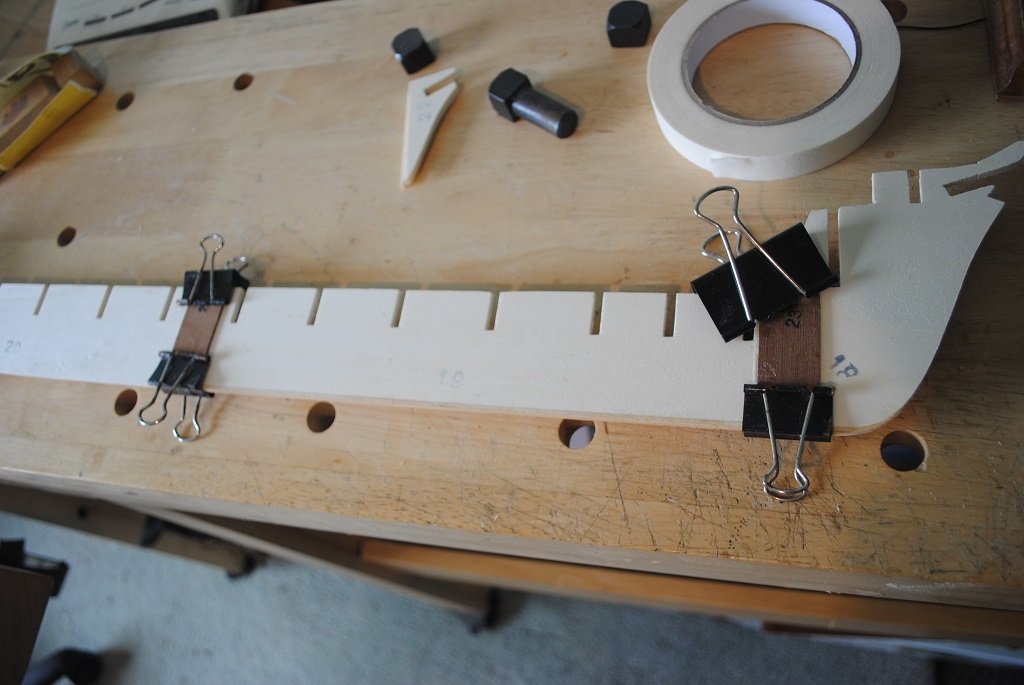
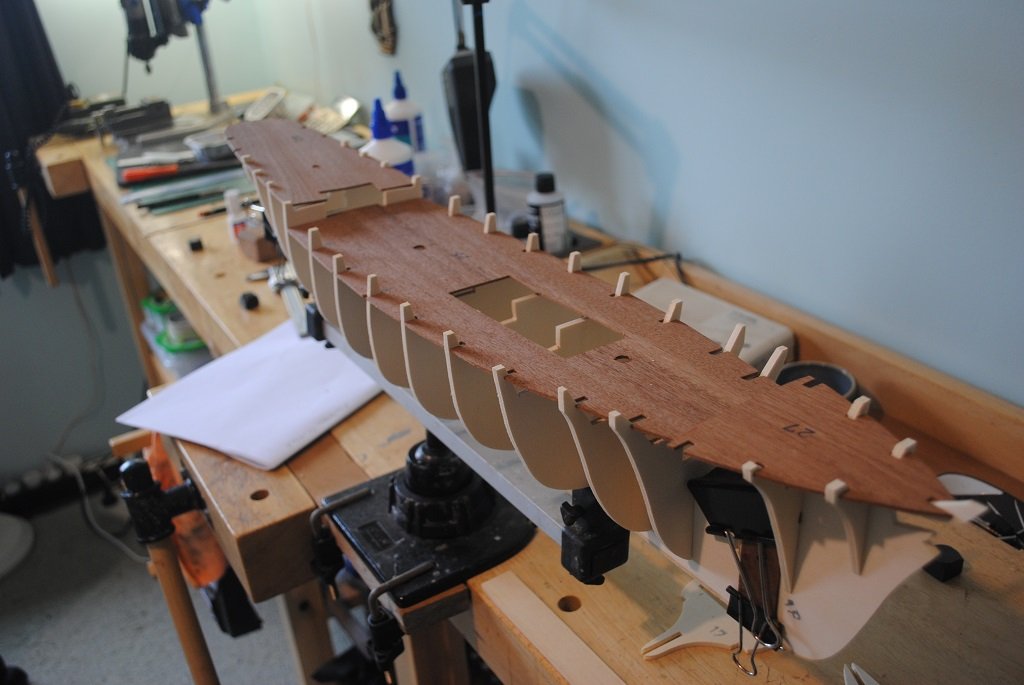
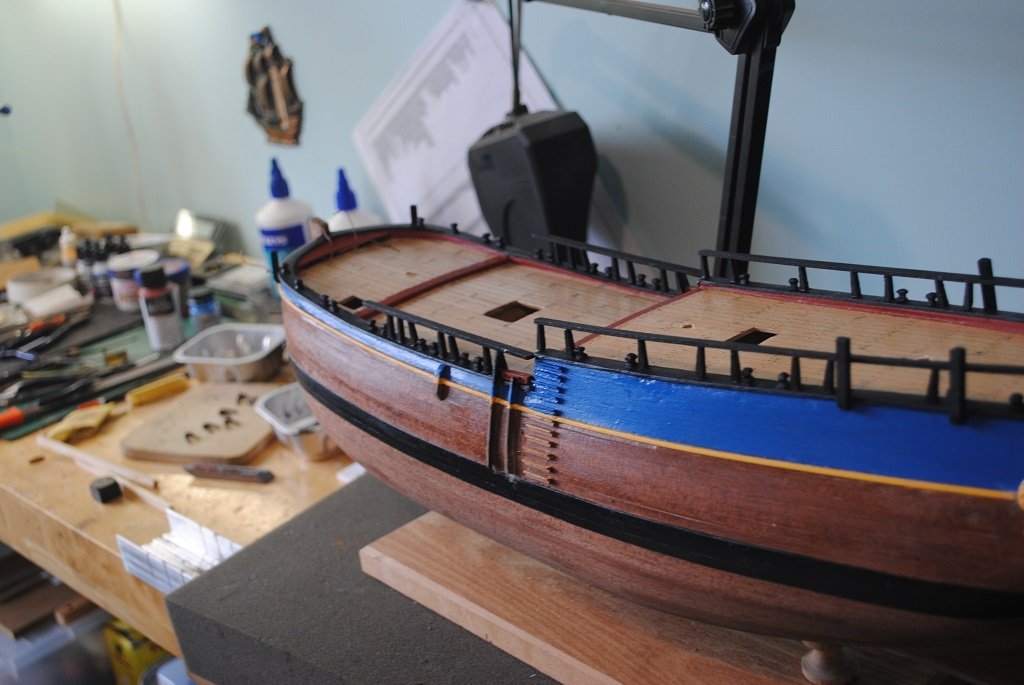
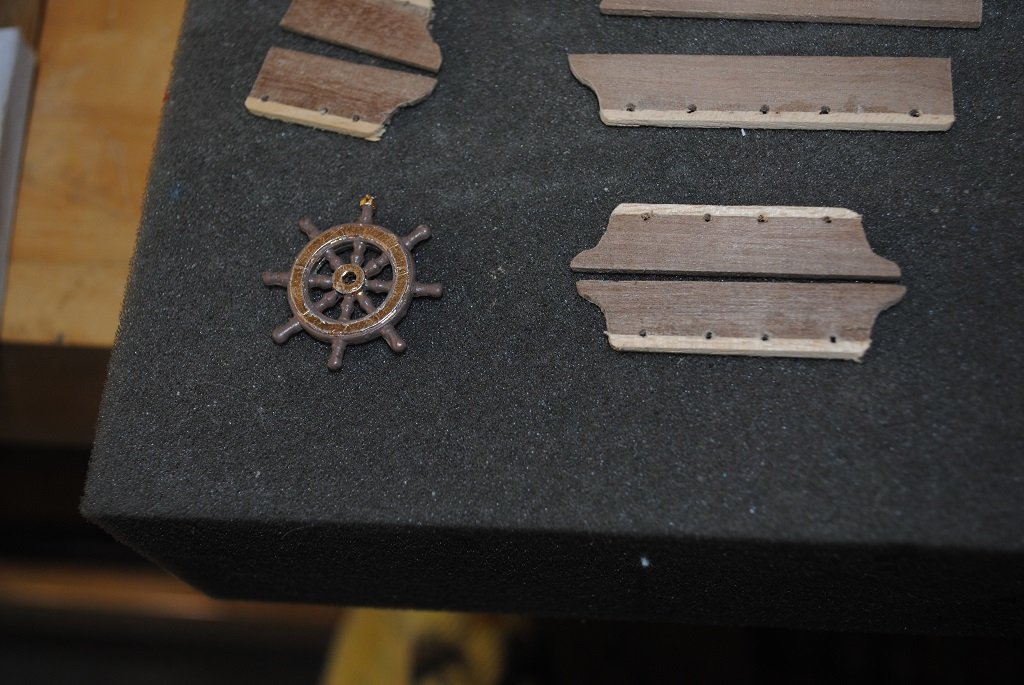
Hi All, Small update: Fixed Keel discrepancy Keel Doublers affixed I decided that I'd put the Keel in the "Clamper" and teat fit the Bulkheads, to my surprise they slotted in place very well!! (Not all Bulkheads are dry fitted as yet as the Doubler clamps are in the way at the mo.) There is a "Beam" that secures the Bulkheads, this is about 1.5mm too wide, I think that this doubles as the Mast Step. I'll cut my own as a template and then machine the kit "Beam" once my template piece is the correct size. The dry fit allows me to visualize/plan a little better. A cursory look at the kit "Stock," it appears that the Ramin Dowels are cut to length, I haven't measured the components as yet. I am hoping that there will be extra length to allow me to machine these, if not, I'll have to find my own stock. I'd be happy if anyone wants to "Chime In" regarding the First Planking. The kit describes the first plank laid at the Very top Stern, (Creating the Stern Upper Bulwarks and terminating some point at the Bow.) I have had a look, (You Tube), at the way Mr. Priske did his, he appears to have started First Planking at the Main Deck level. (I guess it doesn't really matter all that much at the end of the day.) Steve Priske also laid his Deck Planking on the False Decking, Decks installed after the Hull first Planking and inner Bulwarks completed. (The issue i have with that is how do you secure the Decks properly "Post" Hull Planking? My experience with the Cutty Sark was the planking the False Deck "Prior" to Hull Planking was not an issue. (I am not going to "Treenail" the Decki8ng as at 1/96 I don't think you'd be able to see this detail. Cheers.... HOF. Photos:

- 193 replies
-
- 7
-
-
- Flying Cloud
- Mamoli
- (and 1 more)
-
Thanks Gentlemen, I have now made a start, albeit a slow start. Checked off all bulkheads for sizing against the plans. The 4 pieces that make up the Keel, (X2), Stem and Sternpost have been glued together and are under weights to ensure that they are nice and flat. (Hopefully.) The two Keel pieces are 2.0mm different in width which does not bode well for the Bulkhead fit.... (I plan to add a strip of Lime to the bottom of the Keel to fix this discrepancy. All joints for the above needed "Adjustment." Going through the plans to translate really forced me to get very thorough with the component and build sequence. I'll get some photos in the next day or two. Cheers.... HOF.
- 193 replies
-
- 3
-
-
- Flying Cloud
- Mamoli
- (and 1 more)
-
Hi All, I decided to put HMB Endeavor on-hold for now as I was not feeling "The Love" so much with this. I have long been keen to get into the Flying Cloud, it's been in the cupboard fort a few years and it's t6ime to get into something completely new. So, out with the box and reviewing plans/instructions. Pretty early on, it was evident that the Italian Parts List was in need of translation. I have been working on a Spread Sheet this for a couple of days now and am at the stage where I can, very soon, make a start. (I have a few hundred other items to add to this....) To get things in order immediately, I have employed the services of Custom Hobby Decals, Australia, to render decal for the Stern Decoration/Trail Board Name in place of the kit supplied white metal castings. (I am hoping that the final render for these will be ready in a day or two.) I have also located some excellent reference material as well as some other bits and pieces. sobco.com/ship_model/fc/Flying_Cloud_plans_bradner.html The kit is double POB, reasonably standard stuff. I'll be looking to Cooper the Hull rather than using the kit supplied "Greenish" wooden plates. This will be the first time that I will have attempted a Mamoli kit and I am looking forward to a Clipper to keep the Cutty Sark company. Cheers....HOF Photos and Spread Sheet if anyone has an interest: Flying Cloud Parts List.xlsx

- 193 replies
-
- 8
-
-
- Flying Cloud
- Mamoli
- (and 1 more)
-
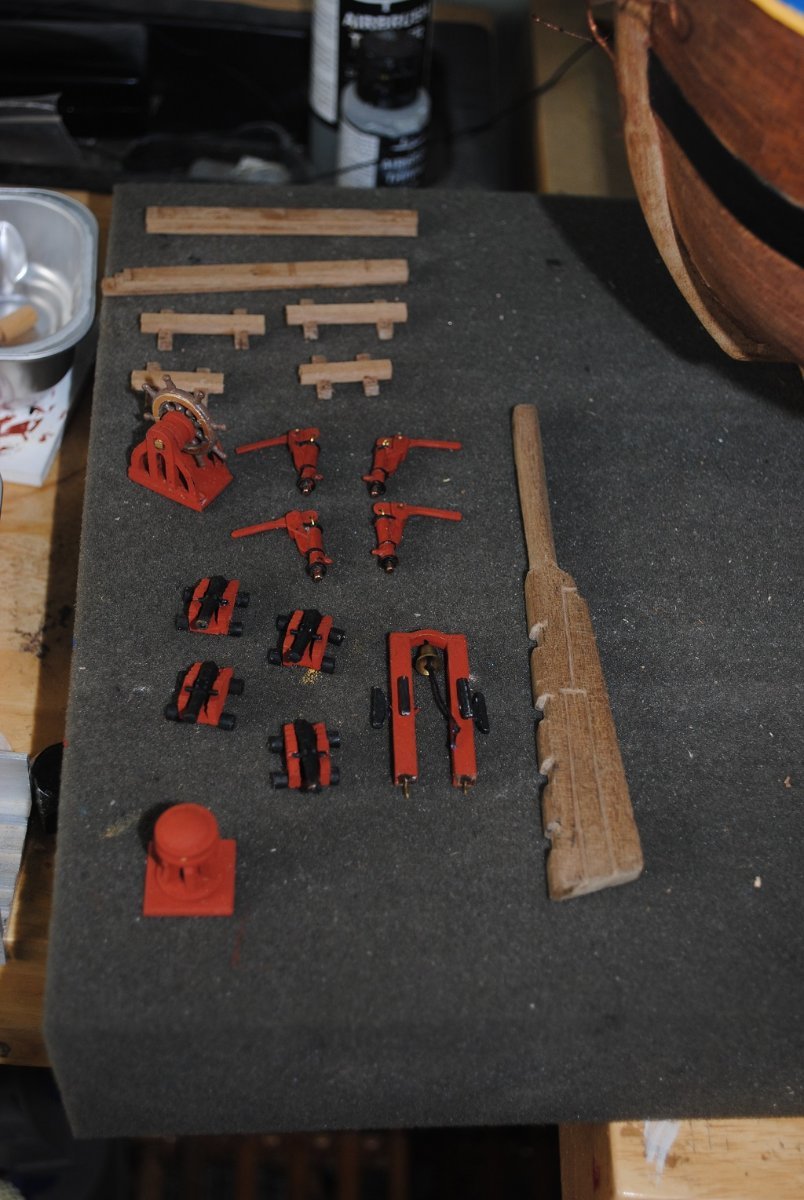
Hi All, Almost the end of March.... Time certainly flies. Update to the Endeavour: Railings/Timberheads installed. I used 5.0mm wide Mahogany for the Railing material. Gangway Steps constructed. and installed, 12 per side. Skids were problematic, I should have constructed from thinner material in a couple of "Laminations", would have been much simpler. Some Deck furniture constructed; Pump castings required quite a lot of work. Stern Decoration installed, I decided on the "Lipstick on a pig" approach and it looks o.k. Before installing the Rudder, I need to have a think about the color of the Hull below the Wales, Whit Stuff or Stain, unsure. Been thinking on construction of a "Tool" to cut the outline of Loading Ports, I am not using the A/L castings for these. Anyway, slowly onward!! Cheers....HOF. Photos:
-
Hi Mr. MW, That's a pretty good starter for ten!! I am working on a similar vintage A/L Endeavour, same issues, B/W booklet, etc, etc. (The kit leaves a lot to be desired....) I am currently in the process of finishing the Hull, cutting outlines for loading Ports and have yet to decide what to do with finishing below the Wales, White Stuff or Stain. (I need to update my build and to that end, I'll take a few photos of my progress in a day or two.) Cheers....HOF.
-
Hi Pat, As per my PM, thank you for your advice. I am sure that Mr. Marquardt's' book will get a bit of a "Thrashing." Cheers....HOF.
-
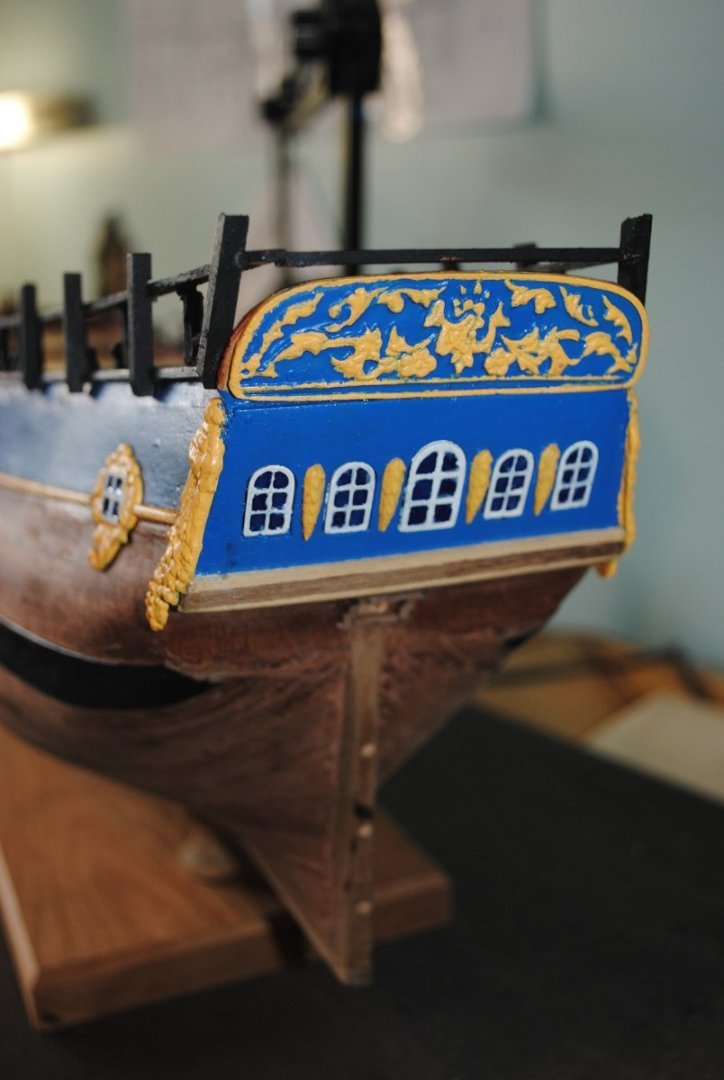
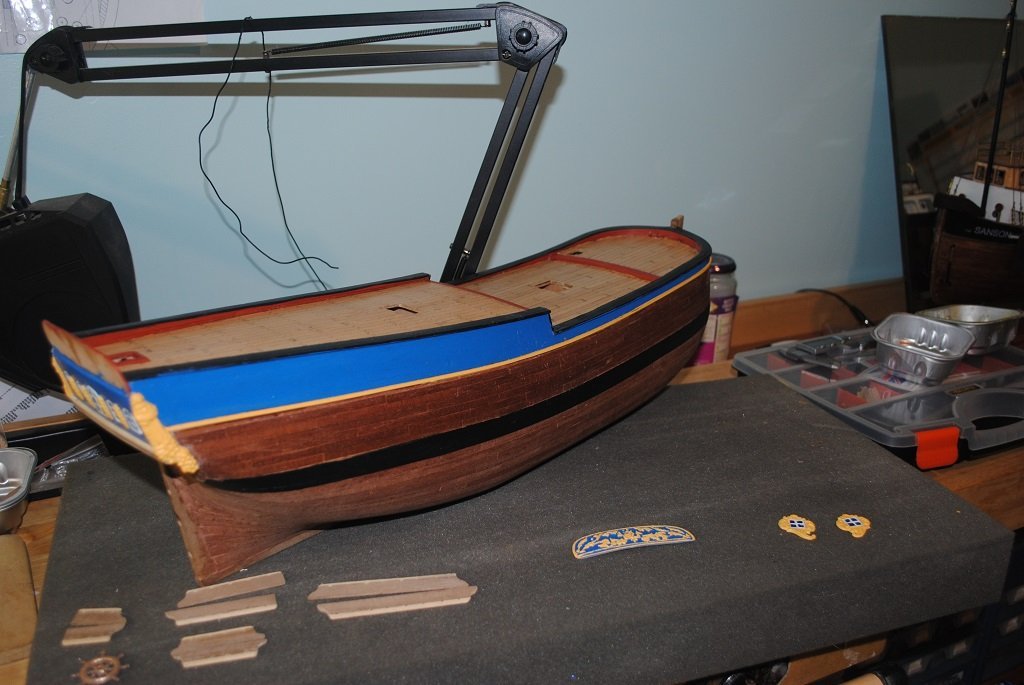
Hi All, A new post for this subject and a few photos as of today. Re-Planked Forward and Tween Decks Re-Planked Hull below the Wales Paint and Polyurethane Mucked around with "Castings." Attempted to model an alternative Stern Decoration, somewhat unsuccessful so opted for the "Lipstick on a Pig" version and use the kit decoration, not a very good molding at all.... My first 18th Century Ship, very different to the "Pointy" bows that I am more familiar with. I now am fully focused on this build "post" Bismarck and associated cabinet. My goal is to produce something of similar quality to that of @BANYAN (Pat) Thanks for the inspiration!! 🙂 Cheers.... HOF. Photos:


-
Hi Pat, Many thanks for that. I do have a question: Do you have measurements/plans for the Deck furniture that you crafted on your model? I think I'm getting somewhere. Cheers and Regards, Harry.
-
Hi All, Thank you all so very much for your suggestions and ideas, very much appreciated. Its' given my lots to think about. At the mo., I'm having another go at the kit supplied piece, if this doesn't look acceptable, I'll think about cutting a Frieze from 0.4mm Styrene. I will post photos of my efforts soonish on my build log. Cheers and Regards, Harry.
-
Thank you Christiano, That is a very nice result on your model! Certainly, gives me something to consider.... I'm unsure which way I'll go.... Cheers and Regards, Harry.
-
Thank you, Sir, Something to consider, I am also thinking about modifying the existing casting, thinking about it.... 🙂 I may just have to "Wear It" as-is. I have the luxury of time at this point to weigh my options. Kind Regards, Harry.
-
Thanks for the suggestion, Allan, That did cross my mind.... 🙂 I will have to have a look to see if there are any "Local" vendors available. In the interim, I'll see if any other Forum members can suggest anything. Kind Regards, Harry.
-
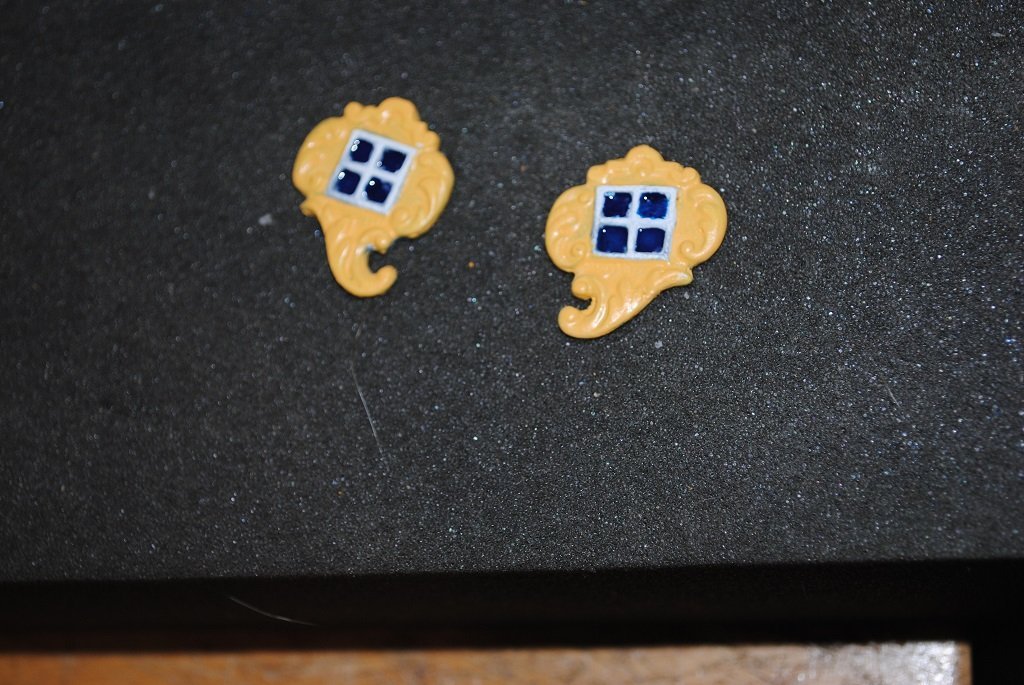
Hi All, I'm currently resurrecting my A/L 1/50 Endeavour. The Hull/Deck look o.k. after a bit of attention, anyway, does anyone know of "Aftermarket" or otherwise, Stern decoration? I have the kit item which is a rather hefty casting and not very realistic. I have had a bash at carving my own without much success. (Using AOTS diagrams as a starting point.) Any advice, thoughts or vendors would be very much appreciated. Cheers.... HOF..
-
Hi David, Have you considered Automotive Spray Putty? Cheap, sands really easily and gives an "Eggshell" smooth finish. I used on my BM and other ships.... (Give it a go.... 🙂) Cheers.... HOF.
-
Hi Chap, Looking really good. I had similar issues with components that you mentioned. Don't forget to "Fair" the Upper front Deckhouse sides. (If necessary.) Cheers....HOF.
- 68 replies
-
- 1
-
-
- Sanson
- Artesania Latina
- (and 2 more)