
HOLIDAY DONATION DRIVE - SUPPORT MSW - DO YOUR PART TO KEEP THIS GREAT FORUM GOING! (89 donations so far out of 49,000 members - C'mon guys!)
×


hof00
-
Posts
1,650 -
Joined
-
Last visited
Content Type
Profiles
Forums
Gallery
Events
Everything posted by hof00
-
 Hi Chap, Looking really good. I had similar issues with components that you mentioned. Don't forget to "Fair" the Upper front Deckhouse sides. (If necessary.) Cheers....HOF.
- 68 replies
-
- 1
-

-
- Sanson
- Artesania Latina
- (and 2 more)
-
Thank you very kindly. Many things there are that I would do differently, and I intend to, maybe in a year or two with the Trumpeter version that I have in storage. I feel that this was a good "Primer" for PE.... Anyway, onwards, HMS Endeavor to complete and a wood/glass display case for "Sanson." Cheers and Regards, Harry.
-
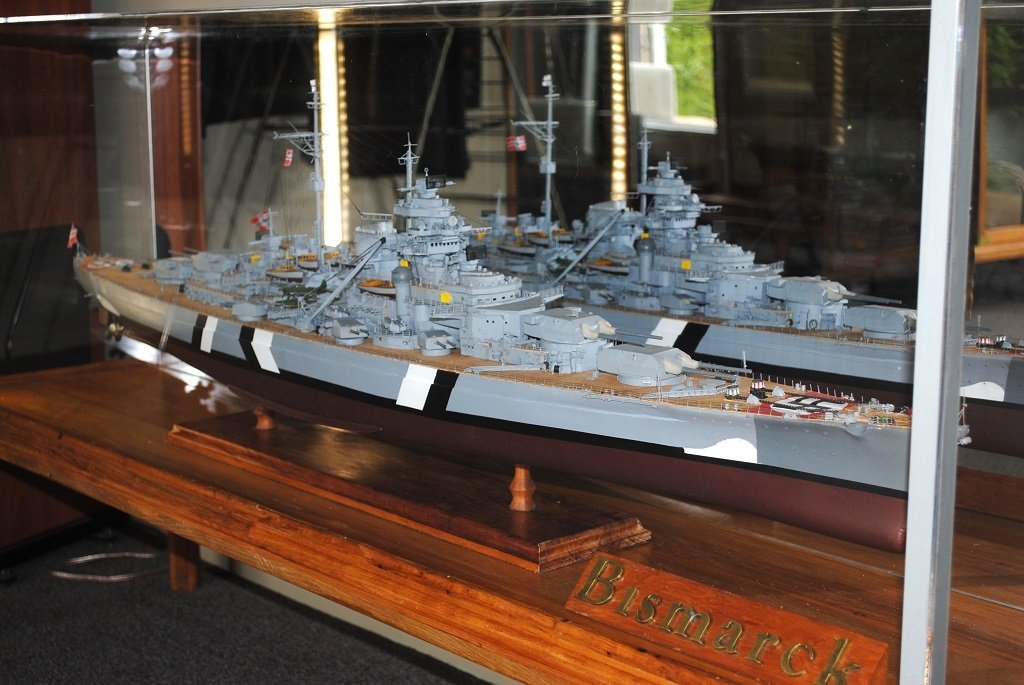
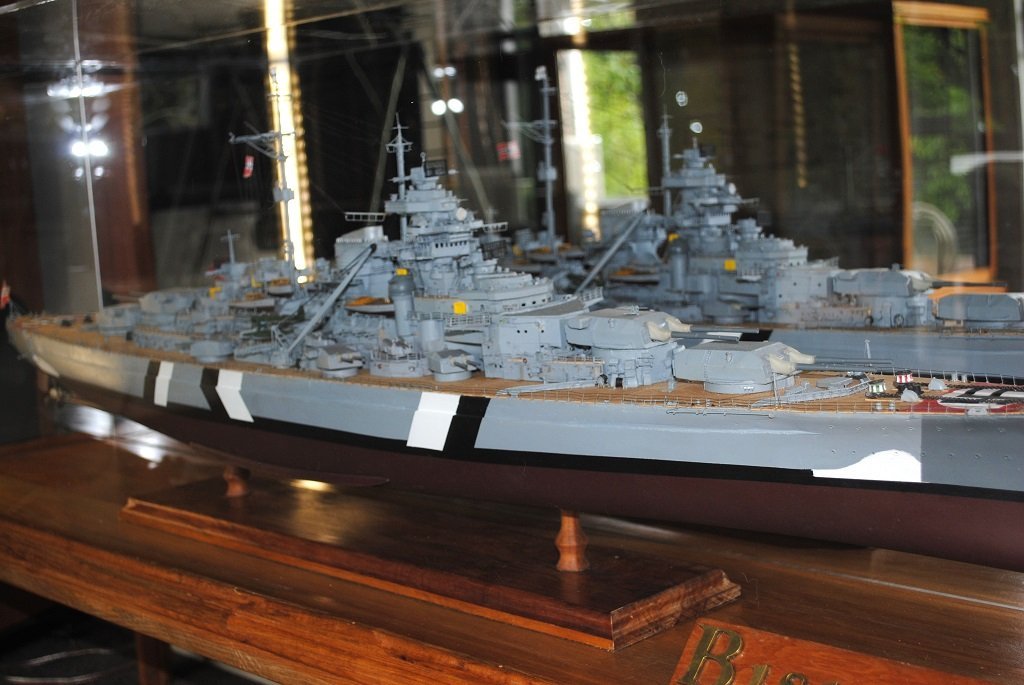
Thank you all for your kind words. The Cabinet base is recycled, spline jointed Rimu, my favorite native timber. Curved section lags are re-purposed 40mm thick ply shelf mounting brackets with milled Rimu legs extensions. (These can be unscrewed from the base if it ever gets put on a shelf.) (I should also mention that I required "Splayed" legs foo seismic reasons. 🙂) The Acrylic case is 4.5mm thick clear with a 3.5mm Acrylic Mirror double sided taped to the back, (4.5mm Acrylic), inside face. The mirror was a good idea as I only needed two LED Strip Lights and two Diffusers. Diffusers mounted to the Acrylic with double sided tape.)) Cabinet dimensions are 1400mm long, 450mm high, 300mm wide. I milled a Rimu "Bead" to enclose the Base. The Cabinet was manufactured by an Auckland company, Cambrian Plastics. (I really preferred glass and I could have had this manufactured for a comparable cost, but shipping costs were very, very expensive. Acrylic is much lighter and stronger, won't shatter and if my cats decide to jump on top, no problem. 🙂) Cheers and Regards, Harry.
-
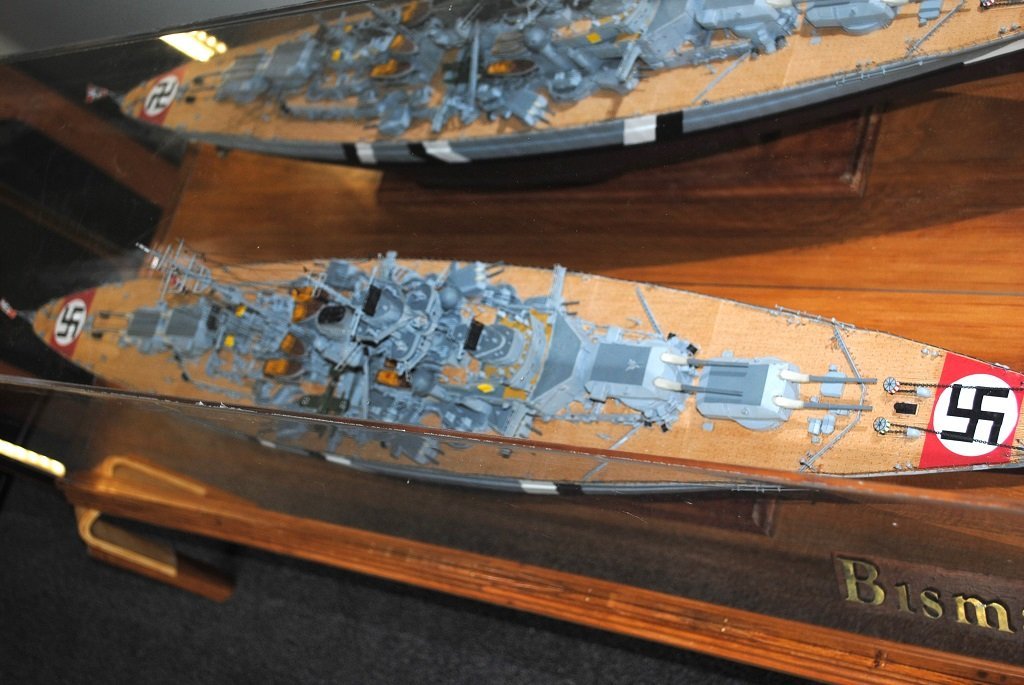
Thank you, kindly Sir. My first Ship with "Guns." 🙂 (I think that I can do better with my 1/200 Trumpeter BM, in a year or two perhaps? (Endeavor first now that I have the bench space....)) Cheers.... HOF.
-
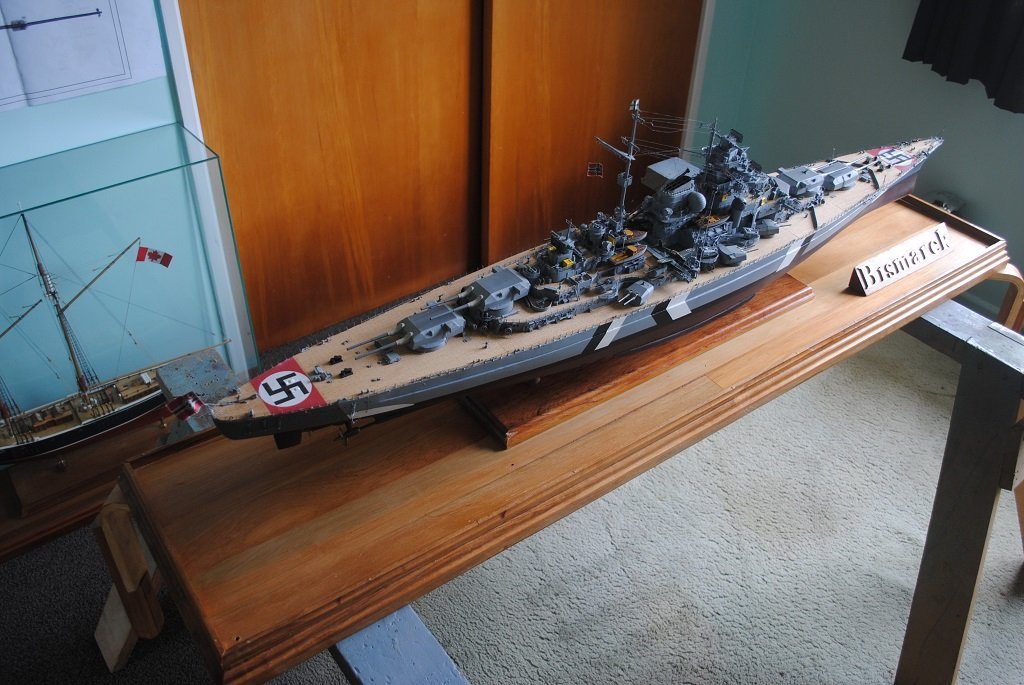
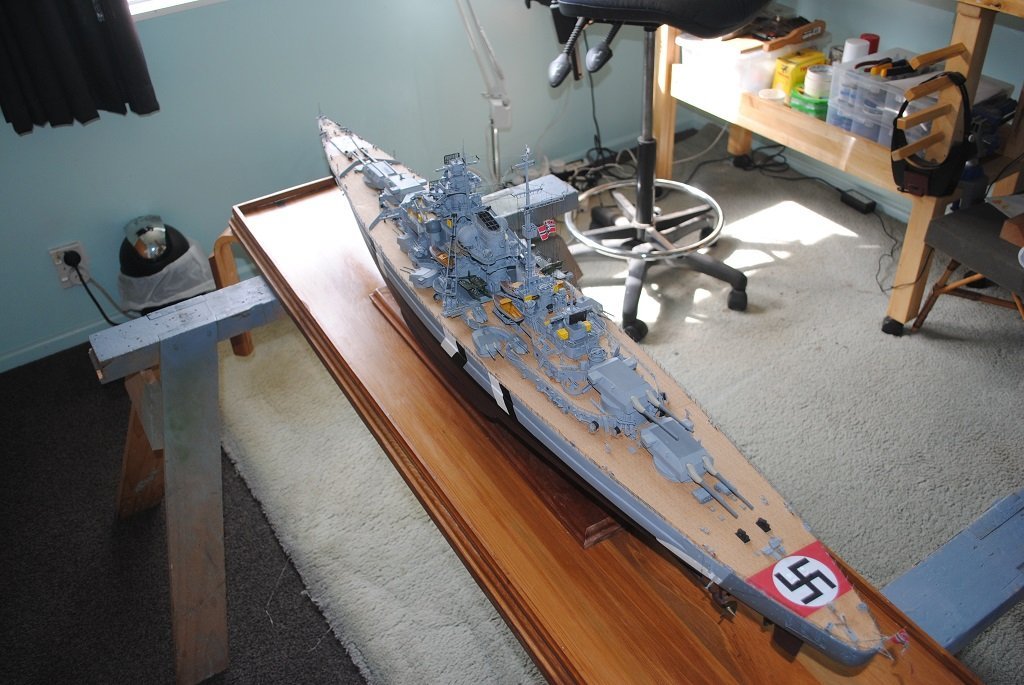
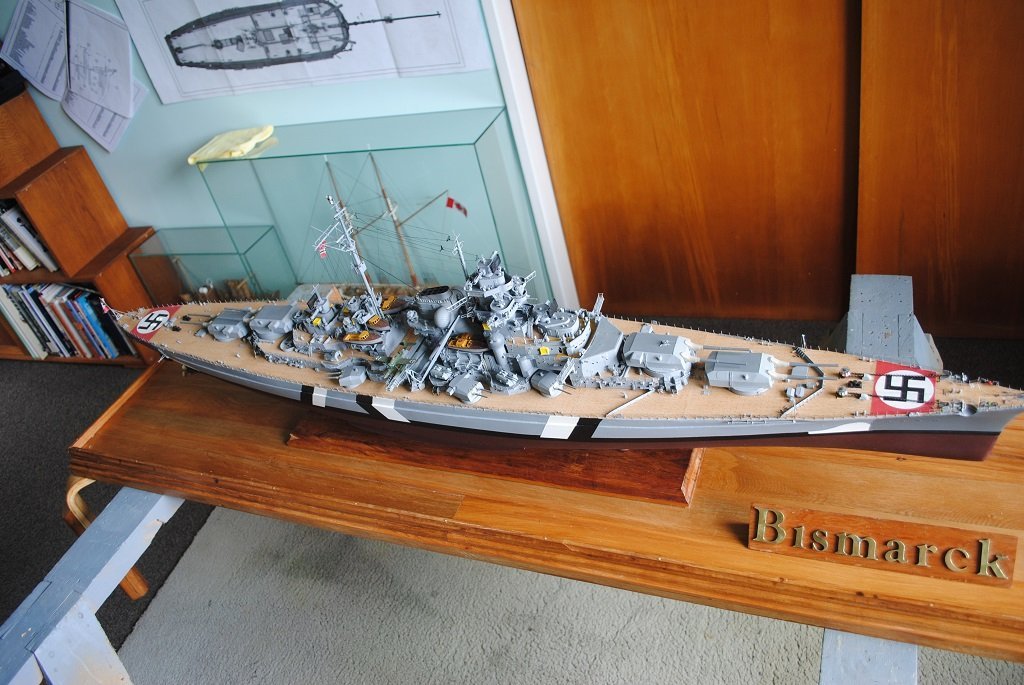
Hi All, A few final pictures of the Bismarck on its' "Table" and finally enclosed by its' Acrylic case. I can now call this project complete. (I now have some bench space to carry on with the Endeavor!! 🙂) Cheers.... HOF.

- 544 replies
-
- 13
-

-
-
Looking really good!! I had issues with the Stern Bulwark also and ended up using the "Shattered" kit ply piece as a template for two 1/32 ply laminations, I'll be interested seeing the lighting kit . Cheers.... HOF
-
Hi John, I bought the "Partworks" version. As you are aware, it is Amati, I am of the opinion that this was a "Pre-Prod" thing. There are 140 issues to the build and the instructions will have you bouncing backwards and forwards, all good fun!! 🙂 I think that you'll be pretty much set if you have all the parts/magazines. Only one plan came with the 140 issues, a 1:1 Plan and sheer view of the model/ship. I used this for Reference only as placement of sub-assemblies/rigging/etc. is covered quite well in the magazines. Unsure if this helps. Cheers....HOF.
-
Very Nice!! Looking forward to your build!! My BM was a "Partwork" thingy, I guess a pre-prod of the real kit but same contents with the "Amati" badge on stuff and the option to go RC.. (Currently awaiting a 1400mm long acrylic case for mine..... Takes up allot of workbench real estate. 🙂) Cheers.... HOF.
-
Very nice!! It sounds like you are building this for a very good cause indeed!! 😞 Cheers....HOF.
-
Very nice build!! I'll be very interested to see how you get on with you Bismarck build when you get to it. 🙂) Cheers.... HOF.
- 46 replies
-
- 4
-
-
- Fast Response Cutter
- Dumas
- (and 2 more)
-
Looking really good!! I'll be following along. Did you have a template for drilling the "Grab Rails" (Ladders) on the sides of the Hull? Cheers.... HOF.
- 68 replies
-
- 4
-
-

-
- Scharnhorst
- Trumpeter
- (and 1 more)
-
Looking very nice!! Crisp and clean. Cheers.... HOF.
- 122 replies
-
- 1
-
-
- Artesania Latina
- Pen Duick
- (and 1 more)
-
Hi OC, Personally, I'm just following along. I enjoy the detail and the "Wots next" installment. Your project is awesome as, I am sure, will be the finished result!! Cheers and Regards, Harry.
-
MSW is extremely slow
hof00 replied to Keith_W's topic in Using the MSW forum - **NO MODELING CONTENT IN THIS SUB-FORUM**
I am tending to agree! 🙂 -
MSW is extremely slow
hof00 replied to Keith_W's topic in Using the MSW forum - **NO MODELING CONTENT IN THIS SUB-FORUM**
Hi All, Still slow.... Esp. when subject post selected has photos. Text content, no problem. Other sites seem fine. (Maybe something with comms from the Antipodes?) Ping varies 124 - 137ms No packet loss. Cheers....HOF. -
MSW is extremely slow
hof00 replied to Keith_W's topic in Using the MSW forum - **NO MODELING CONTENT IN THIS SUB-FORUM**
Hi Keith, I have had the same issues over the past couple of days also. Cheers....HOF. -
Hi Chap, My experience with A/L kits, Decking is usually 0.5mm thick. Have you thought about dropping A/L a line to express your displeasure? (Maybe you could request replacement Planking?) Cheers.... HOF.
-
Nice Save!! (That Decking must be very thin, 0.25mm?) Cheers....HOF.
-
Hi All, Thank you all very much for your detailed responses, very much appreciated. I now have some very good "Food for thought." Cheers.... HOF.
-
Hi Chap, Looking very "Sharp!!" Cheers....HOF.
-
Hi All, I have been watching a series build of the 1/200 Bismarck on You Tube, (The Model Shed), and the Chap who performs the build advises Surgical Tweezers. I guess a couple of questions: What do you all use for PE Do Tamiya Tweezers cut it Where do I obtain "Surgical" grade Tweezers at a reasonable cost Cheers....HOF.
-
Very good. Is there a LED lighting kit for the "Upgraded" version also? (I did my own Lighting kit.... 😑) Cheers.... HOF.
