HOLIDAY DONATION DRIVE - SUPPORT MSW - DO YOUR PART TO KEEP THIS GREAT FORUM GOING! (89 donations so far out of 49,000 members - C'mon guys!)
×


hof00
-
Posts
1,649 -
Joined
-
Last visited
Content Type
Profiles
Forums
Gallery
Events
Everything posted by hof00
-
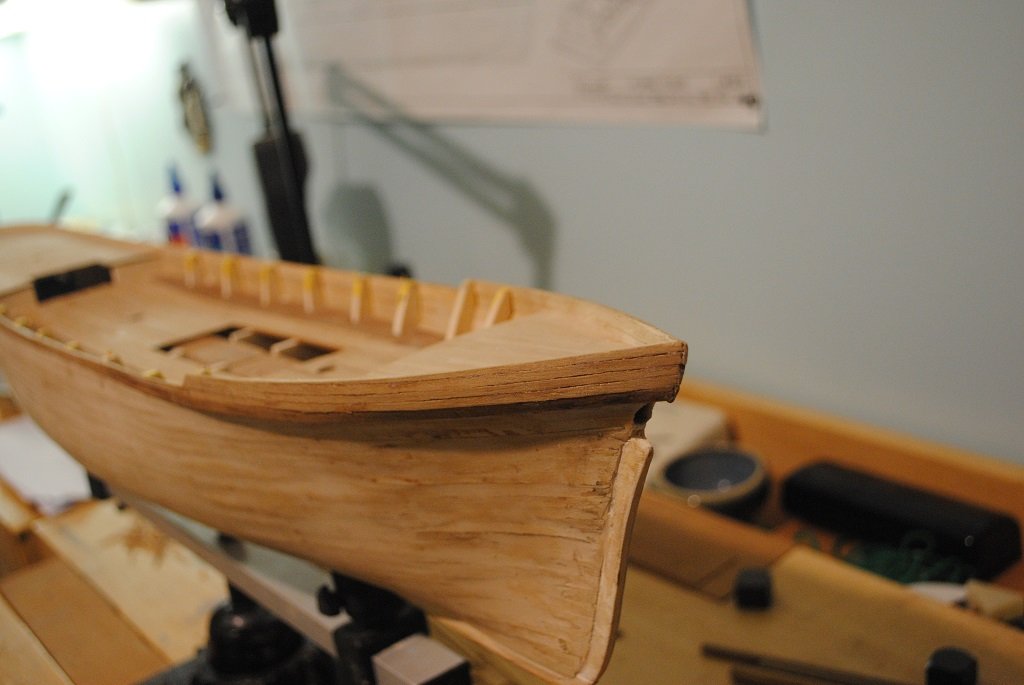
 Hi All, Bit of an update.... Bow and Stern Main Rail Prepped (Stern: 4 X laminations 1.0 X 1.0mm Not yet trimmed to length) Waterways, Bulwark Planking, Bulwark Stanchions and Pin Rails installed (Main Deck) Bulwark "Clamp" installed Remainder of Bulwarks to be Planked/Waterways installed, Bow, Main and Poop. I'll see how this progresses tomorrow. Cheers....HOF. Photos:
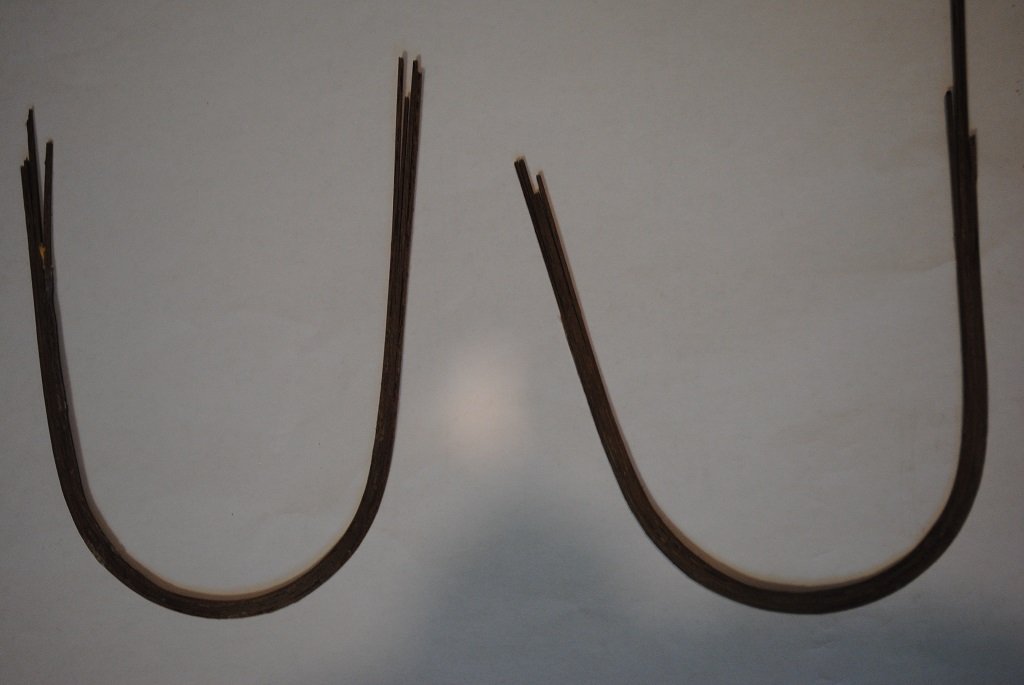
- 193 replies
-
- 1
-

-
- Flying Cloud
- Mamoli
- (and 1 more)
-
Thanks Gregory. Speaking for myself, I bought the old version.... Cheers....HOF.
-
HJ Jami/Ian, Sorry to hear of the missing parts.... I do not believe that Mamoli is a company any longer, I may be wrong, but I believe that a fire ended thier business, I think that you may be able to source Chain Plats as a Photo Etch accessory and is something that I want to have a look at also at some stage. Unsure of what company might deal with this but worth a look? I have also seen You-Tube videos on hot to make them, they don't look too difficult, maybe with a little practice. I wish you all the best with your endeavors.. Cheers and Regards, Harry.
-
Ditto to the above!! I'm interested with the Trumpeter version which I have in storage. I completed the "Partworks" (Amati) version but feel the Trumpeter version has more detail, esp. with the upgrade stets. (Maybe I'll get to this one day.... 🙂) Cheers..... HOF.
-
Thank you both for your kind words, very much appreciated. Yup, the Keel issues are now but a memory.... 🙂 Over the past few days I have been tinkering, thinking about the next logical steps. I assembled the Chain Plates, accounting for all of them. (I think I'll have to solder the middle link joint) Inside Bulwark Planking/Stanchions and Pin Rails have to be next. All good fun!! Cheers and Regards, Harry.
-
Thanks Gents!! Cheers and Regards, Harry.
-
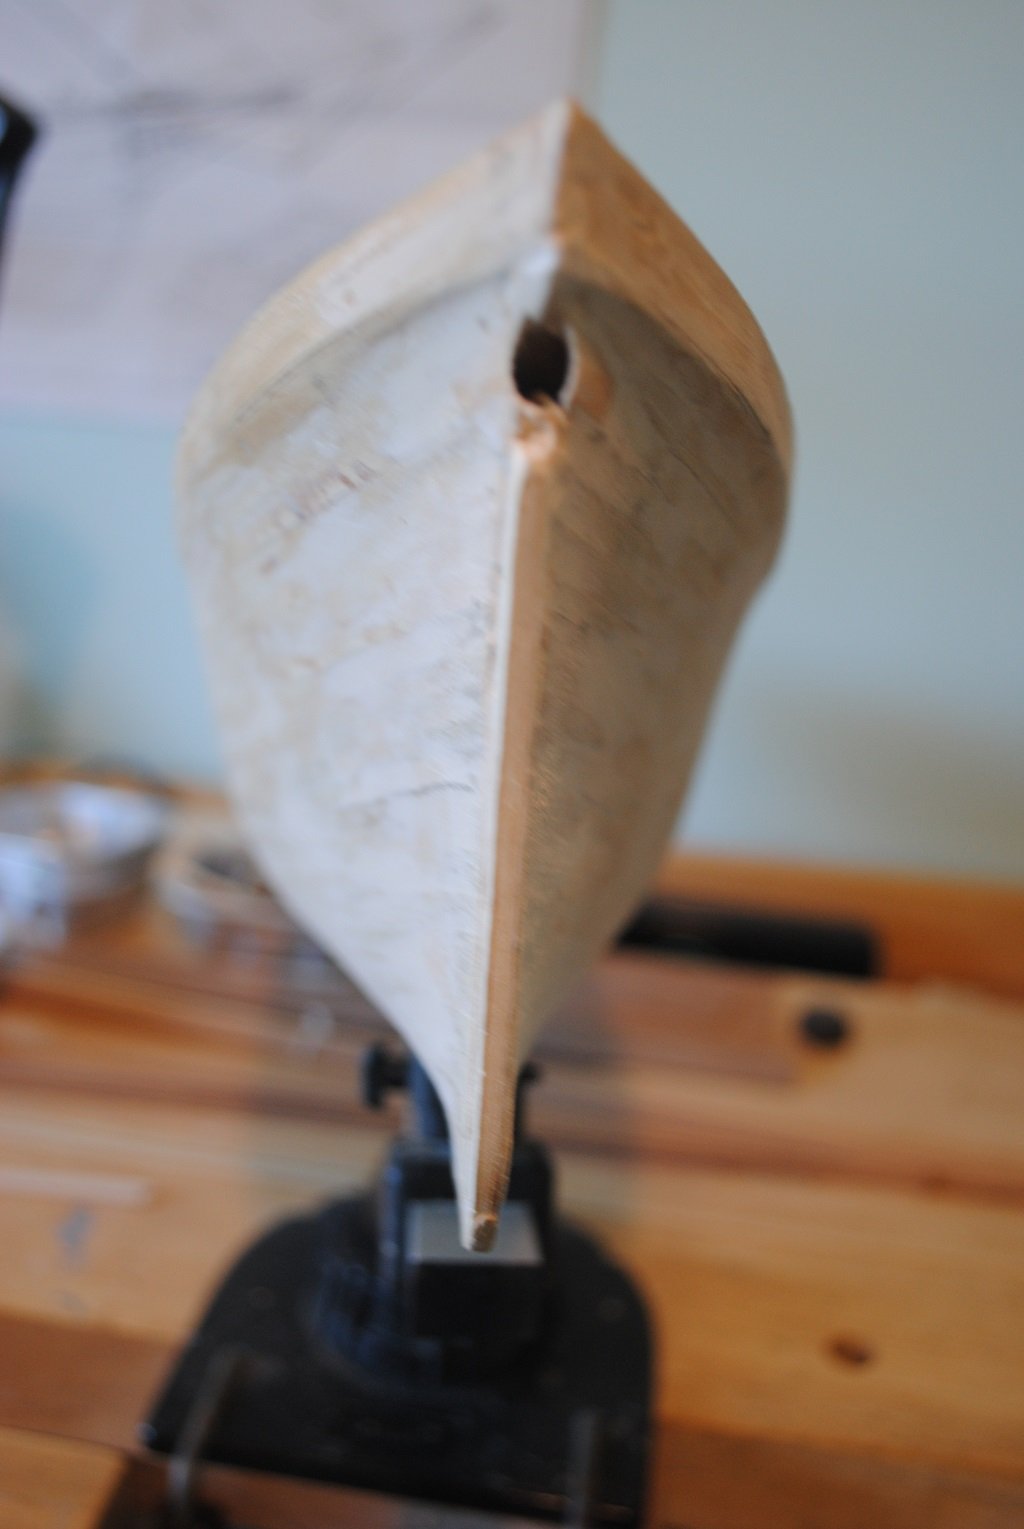
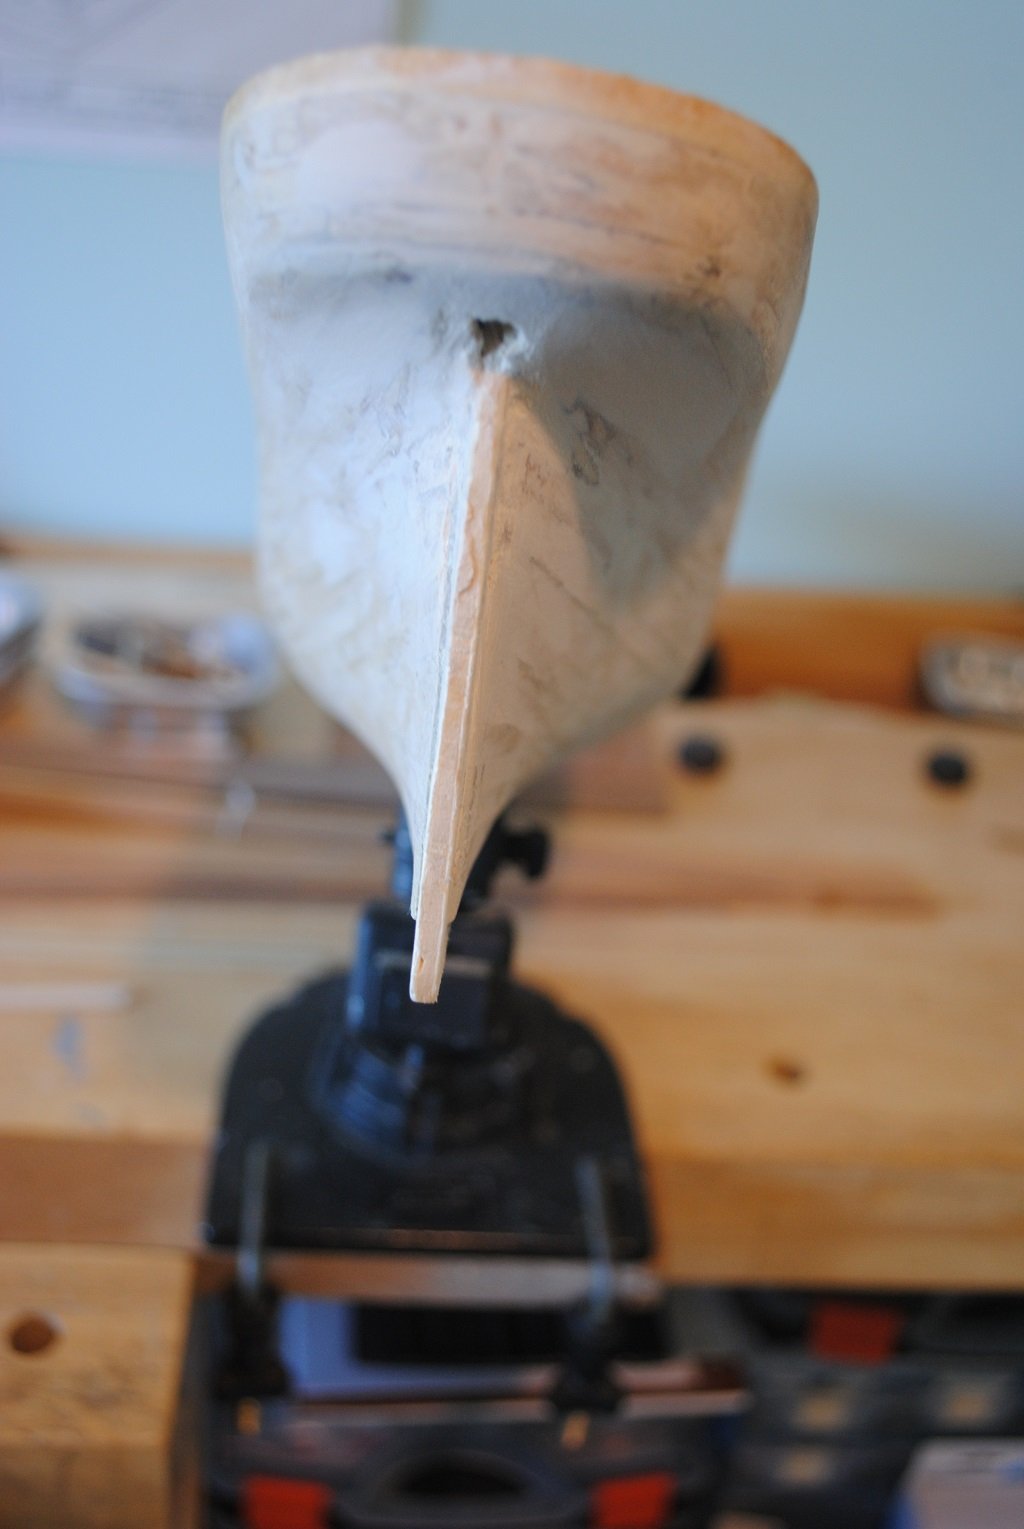
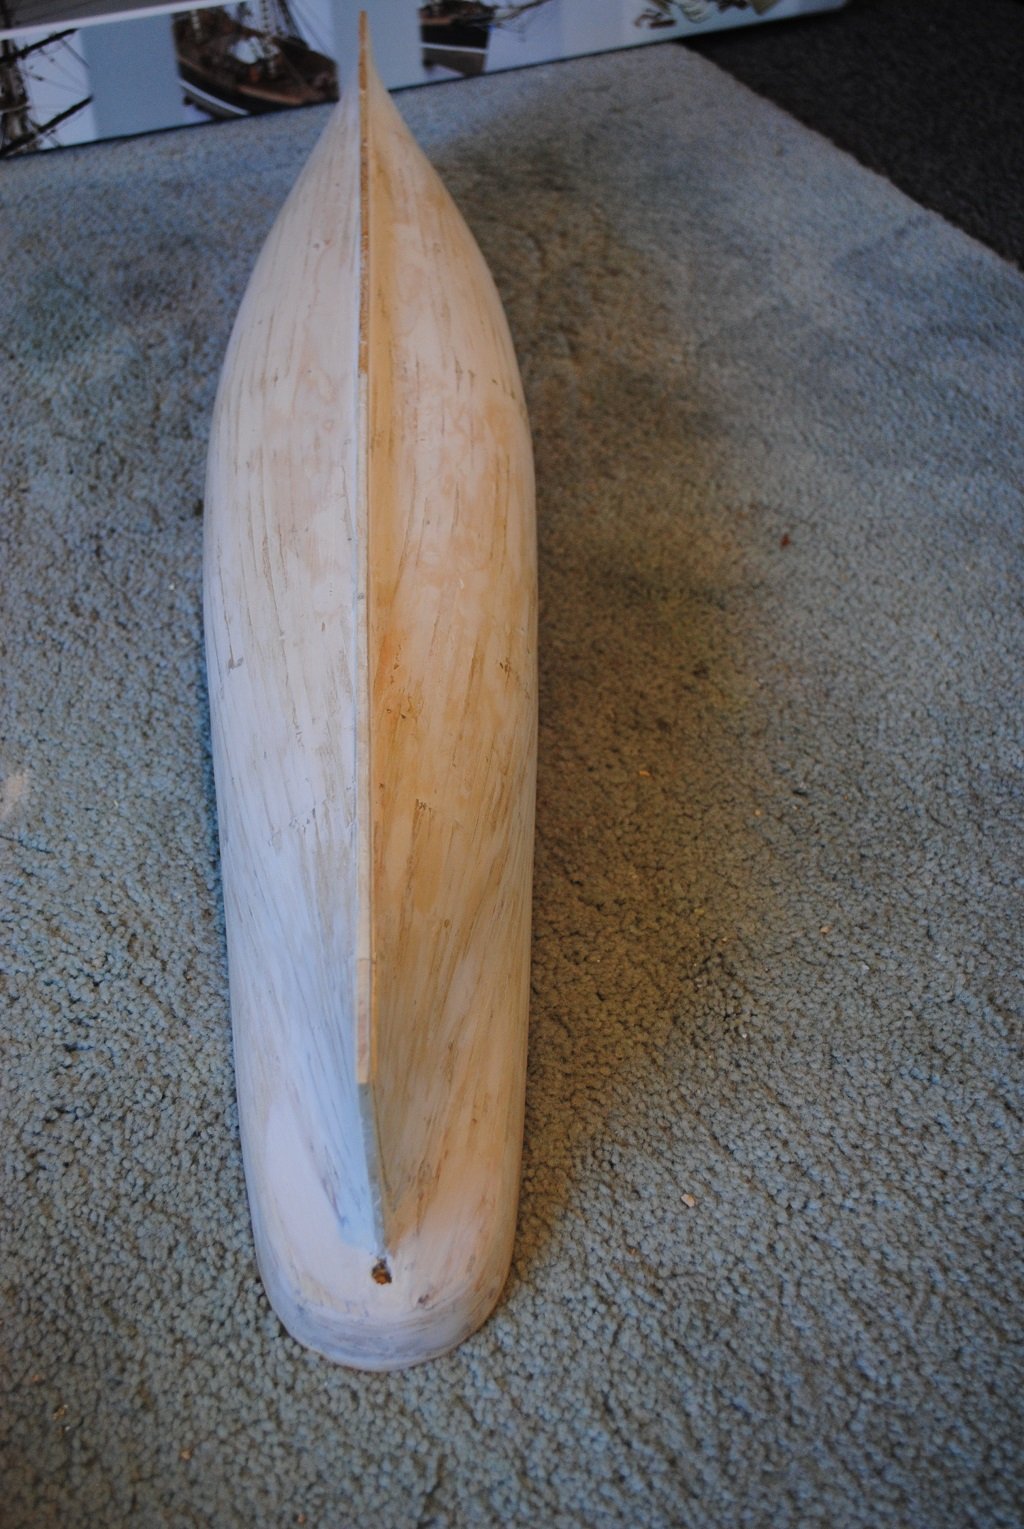
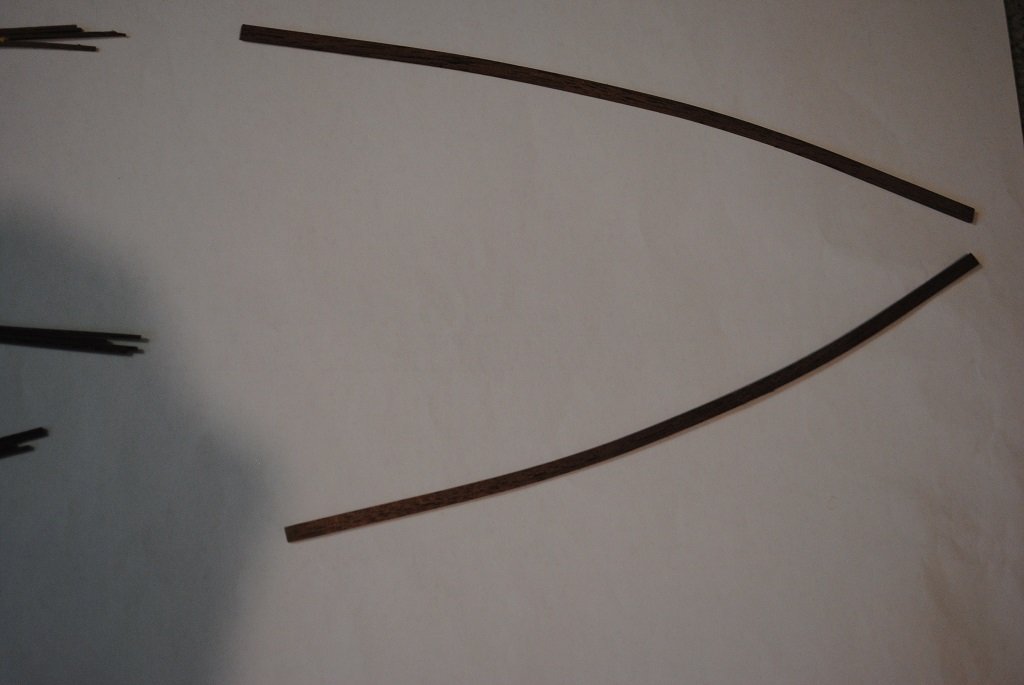
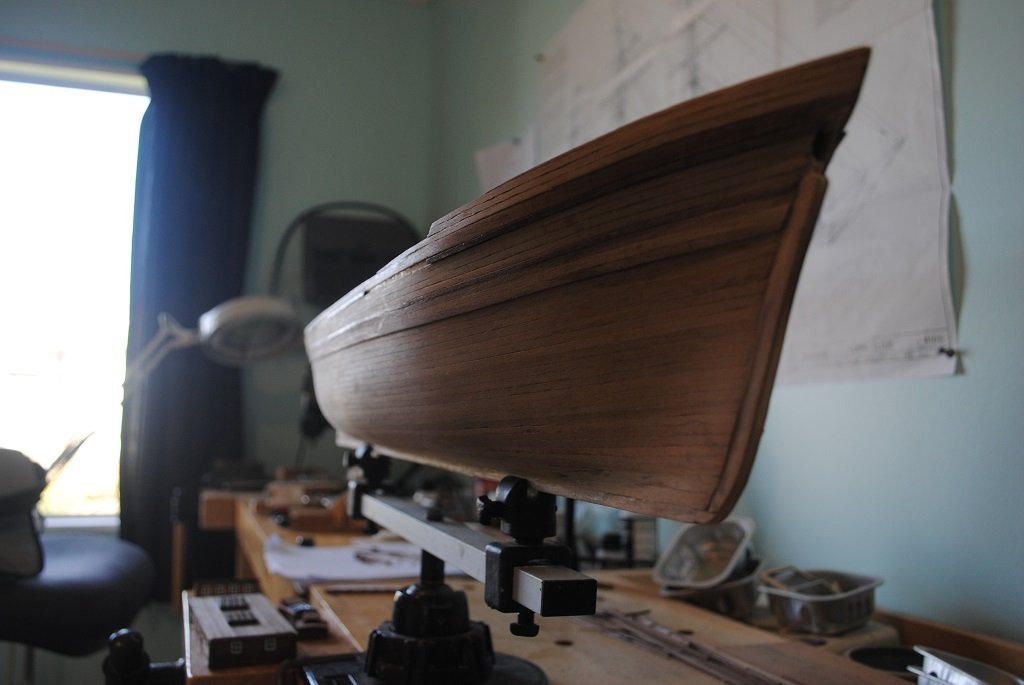
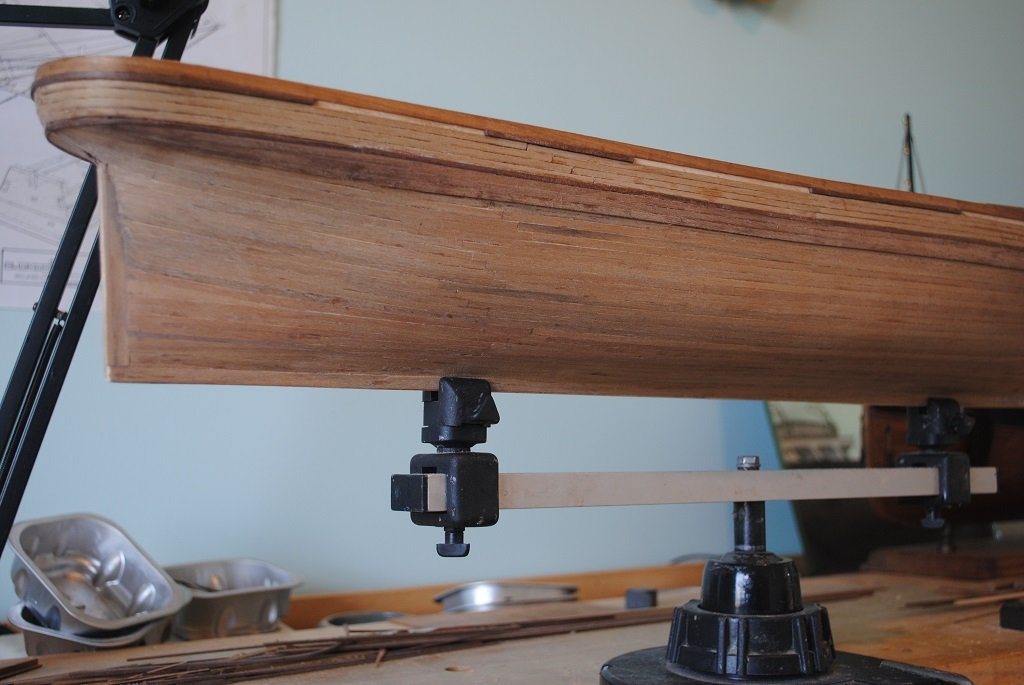
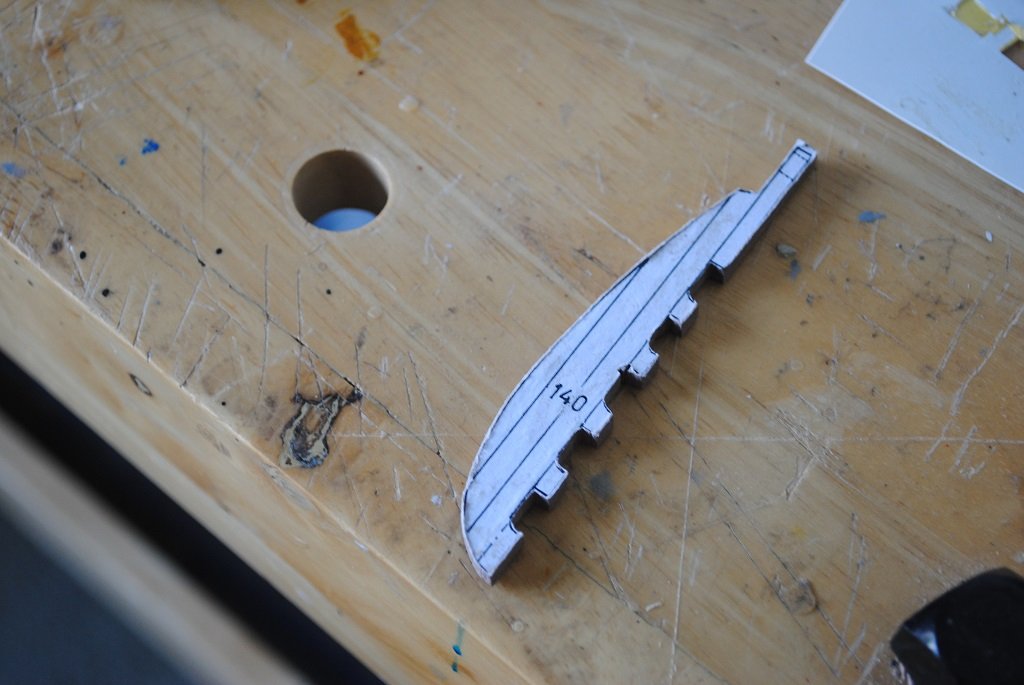
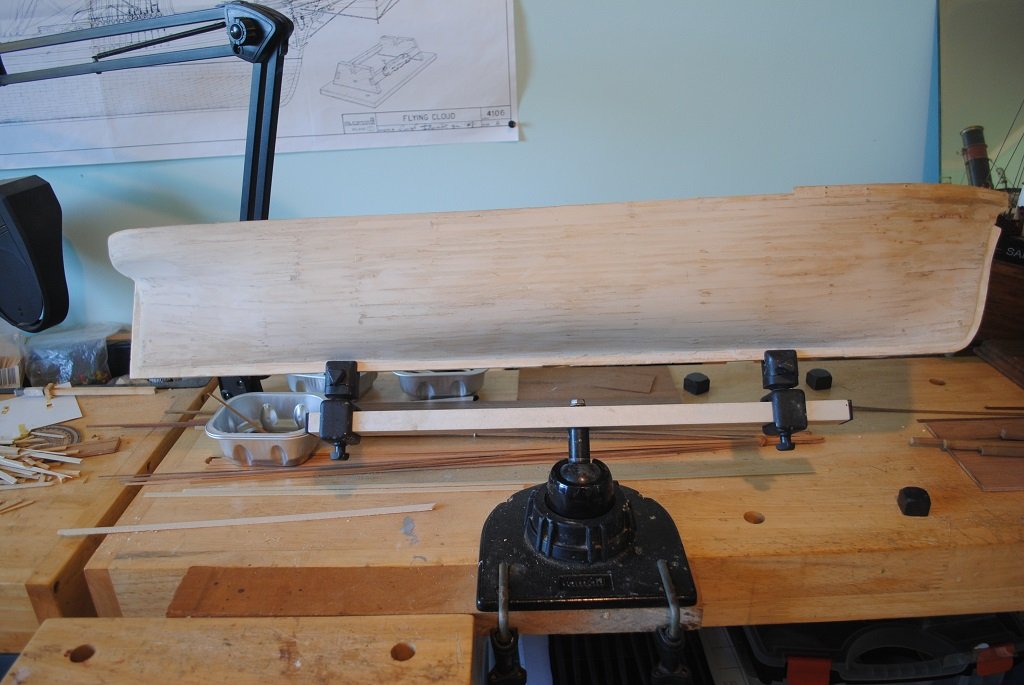
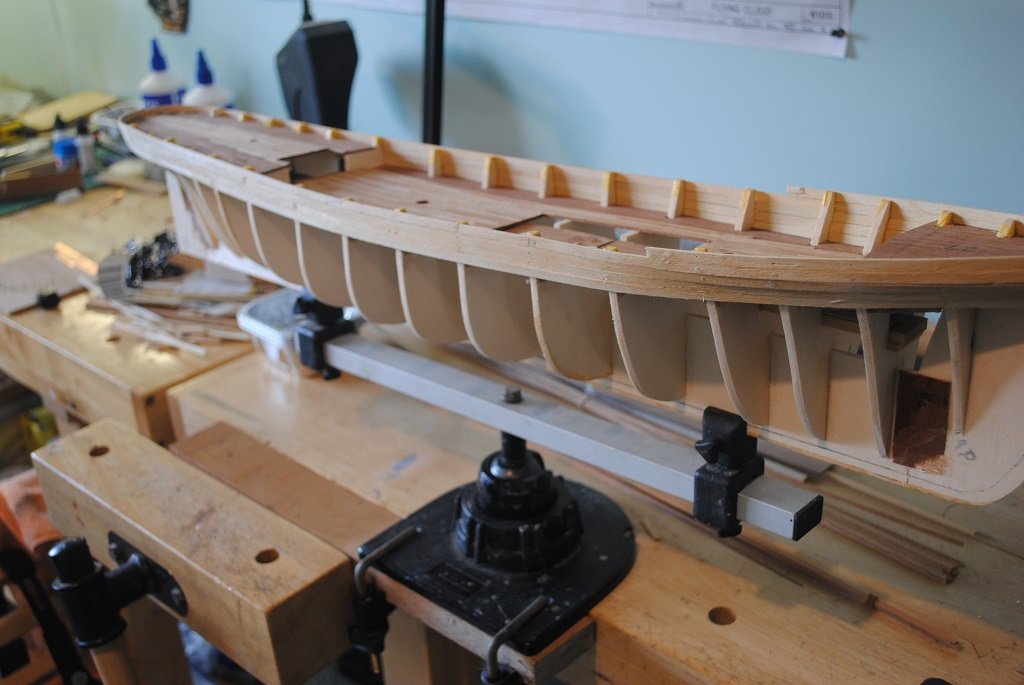
Hi All, Small update: Second Planking complete (Perhaps a "Tickle" here and there) Rudder Blank constructed So, the more I get into this model, the more I come to realize that it's more of a scratch build than a kit. I'm o.k. with this. There is "Sod" all in the way of materials, (As I have bemoaned about many times before), I had to have a damn good search for 0.5 X 3.0 MM Planking Material below the turn of the Bilges.... I milled my own 4.0 X 4.0mm wood for the Rudder laminations and other stock milled for Bitts, Etc. I am unsure what I will approach next, but I have plenty to do.... 🙂 Onward, I guess. Cheers.... HOF. Photos:
- 193 replies
-
- 5
-
-
- Flying Cloud
- Mamoli
- (and 1 more)
-
Thank you, Sir, It seems to be getting somewhere.... 🙂 Cheers and Regards, Harry.
-
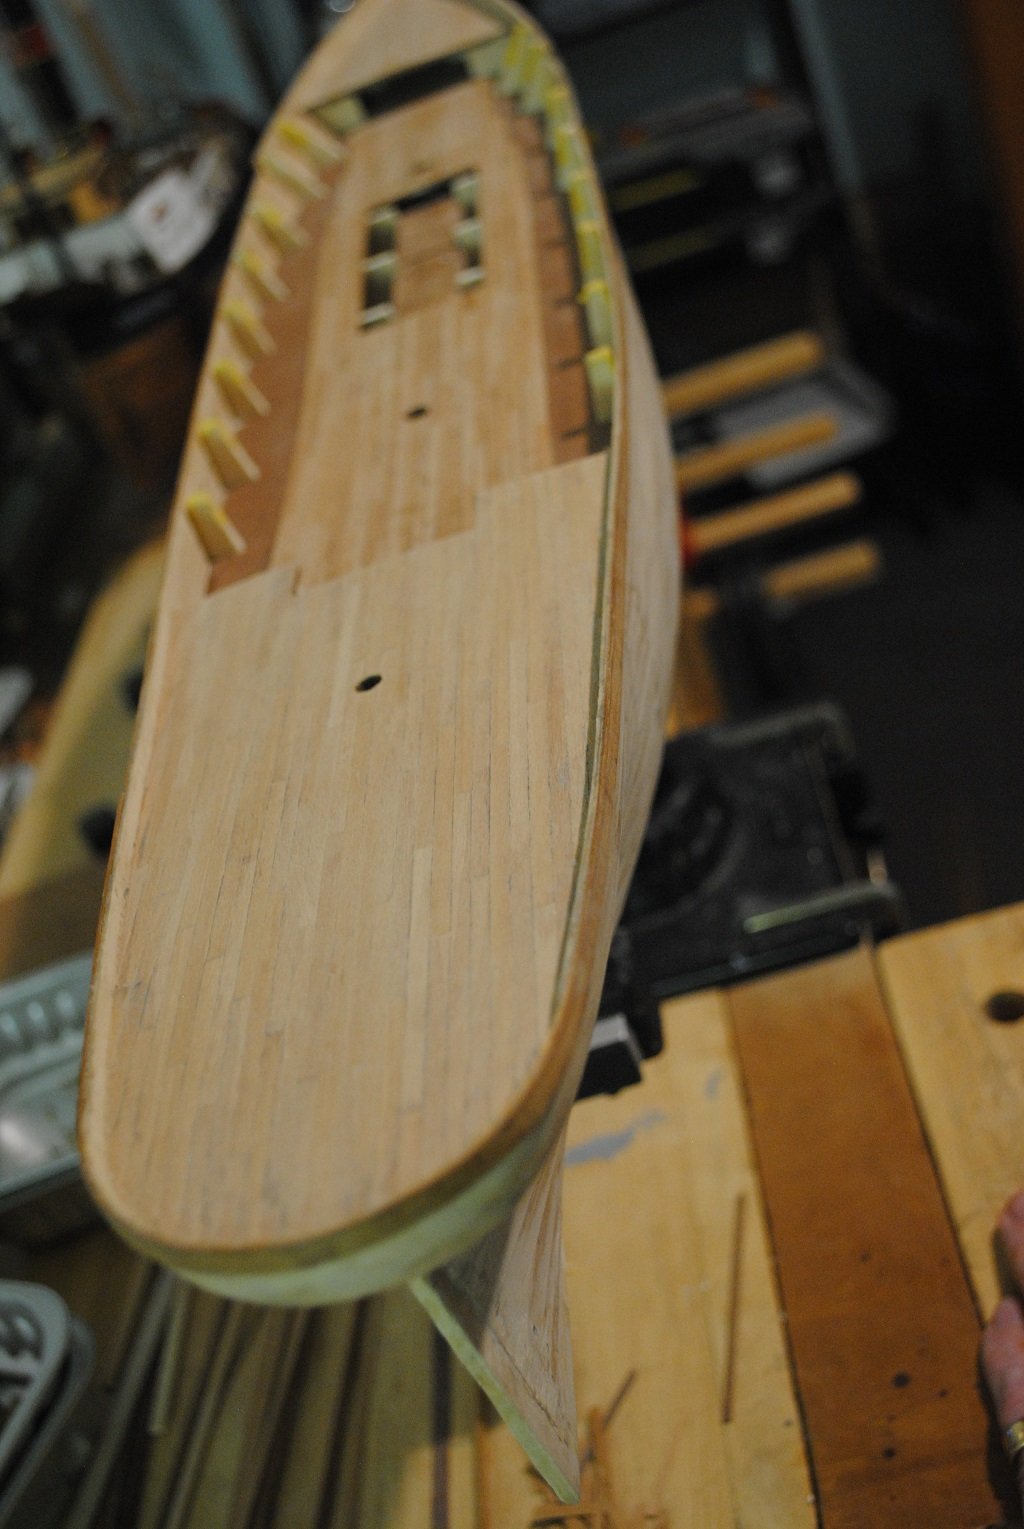
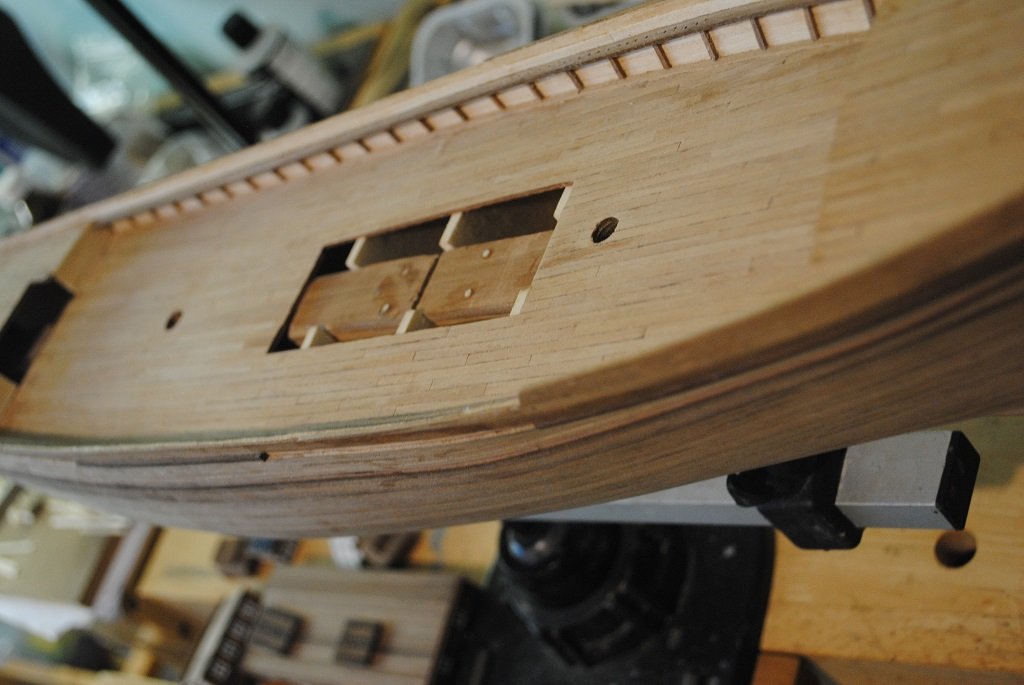
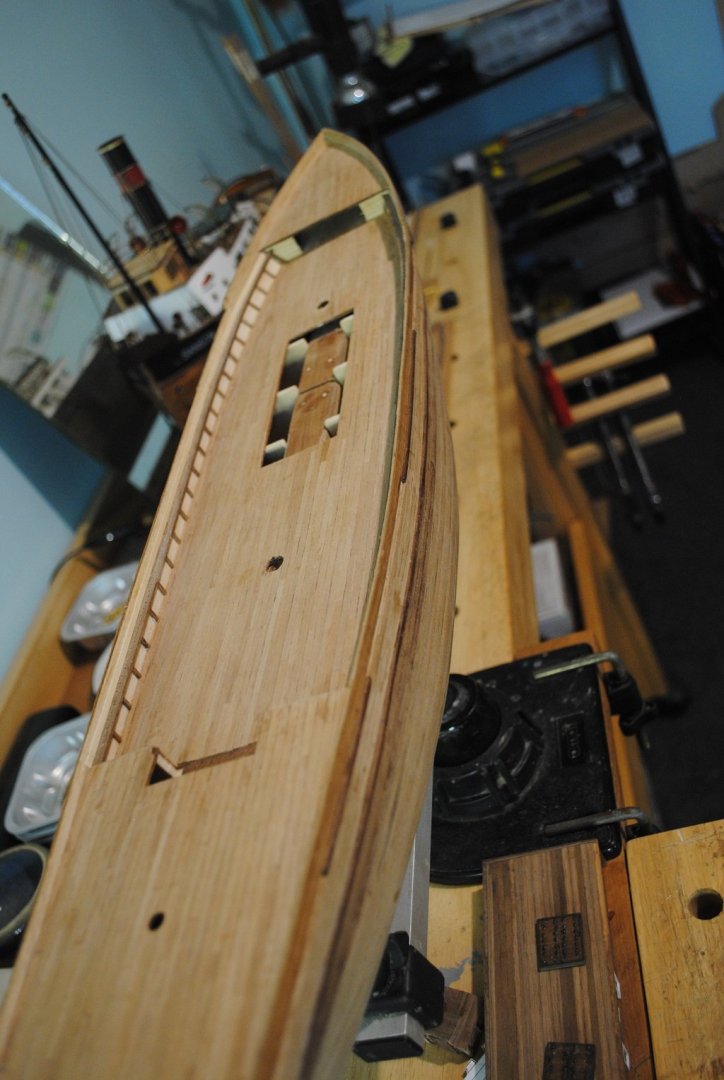
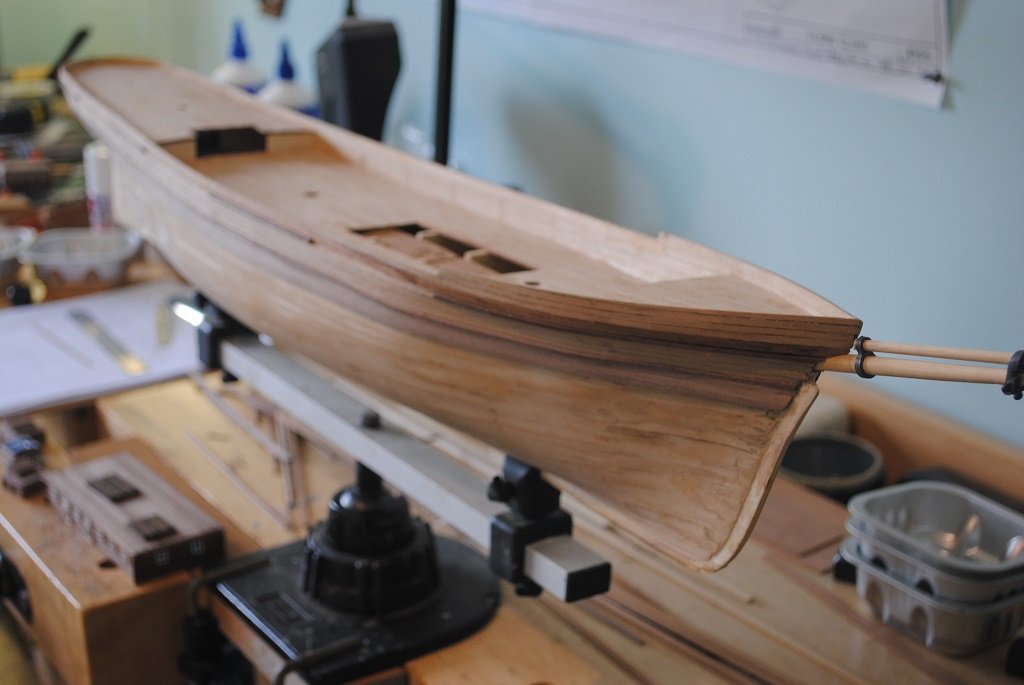
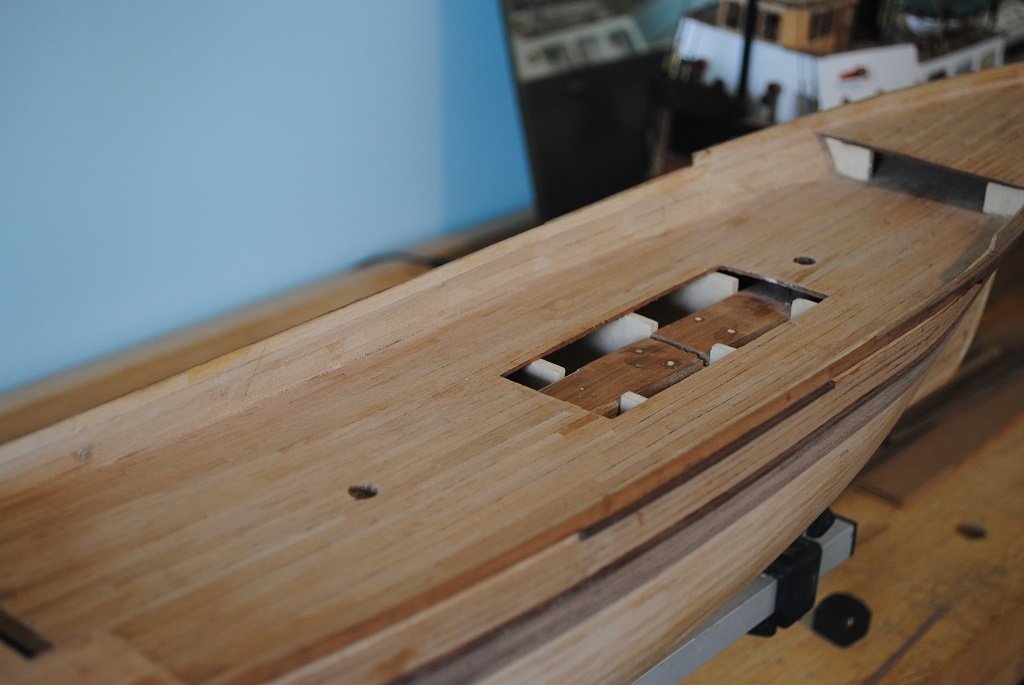
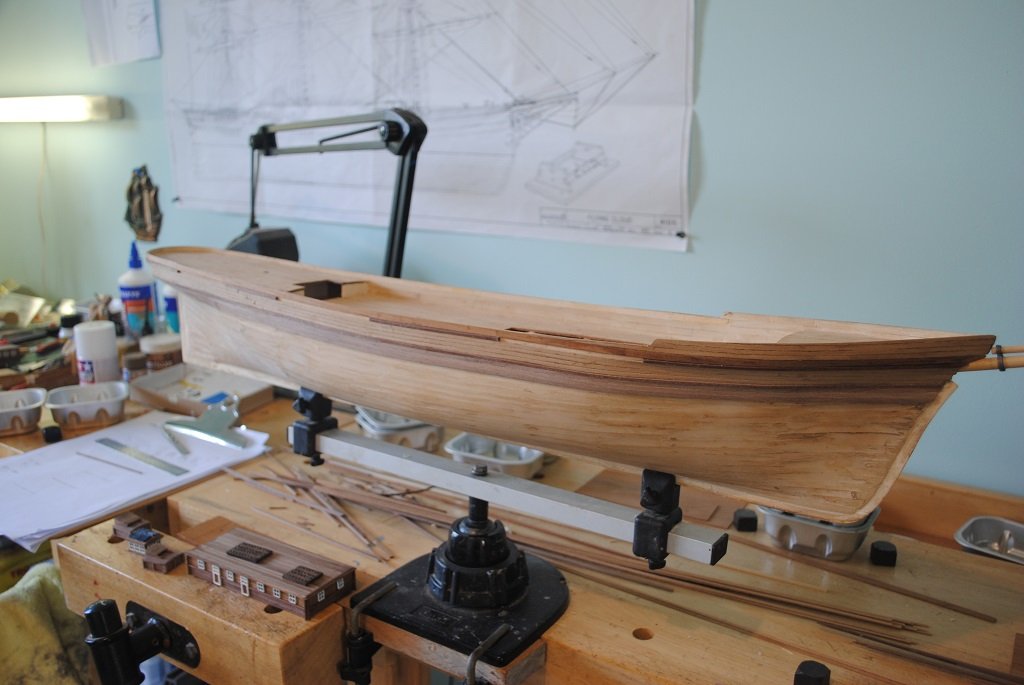
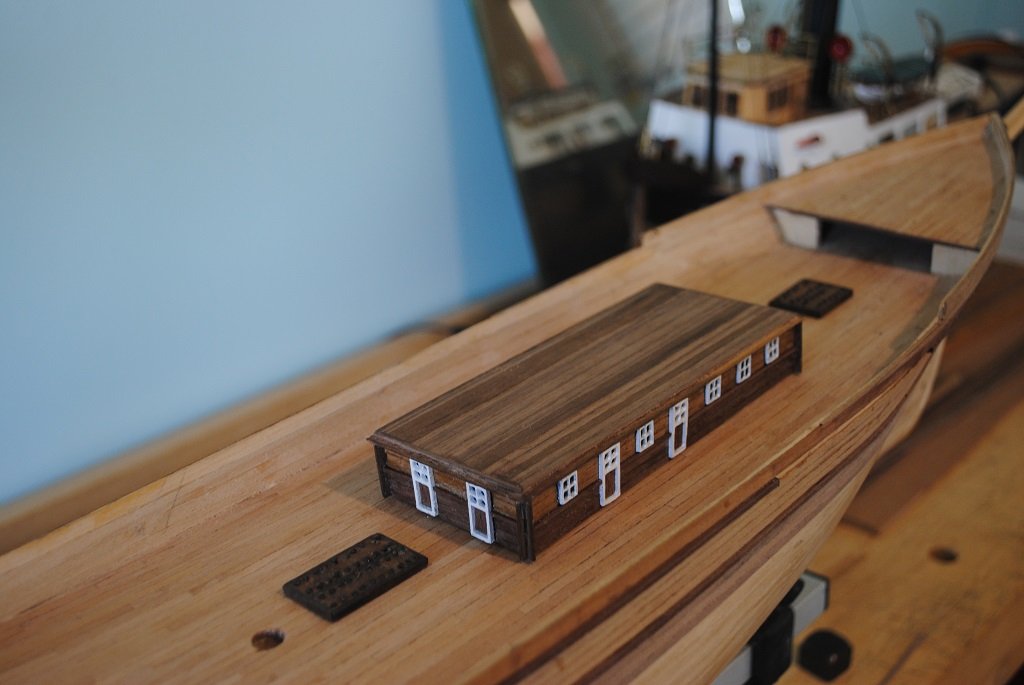
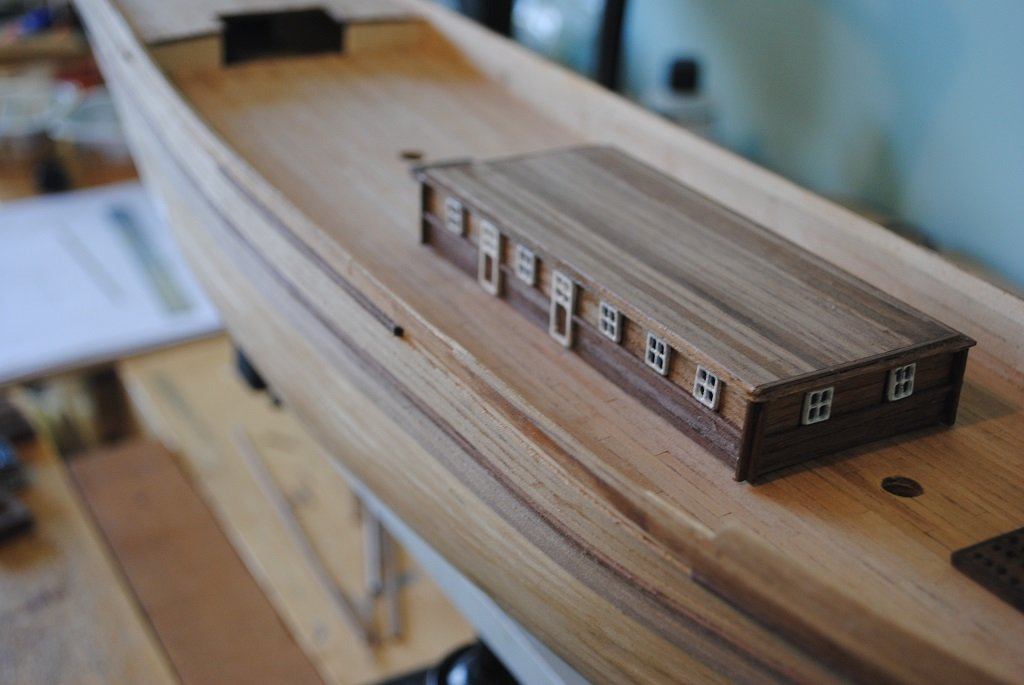
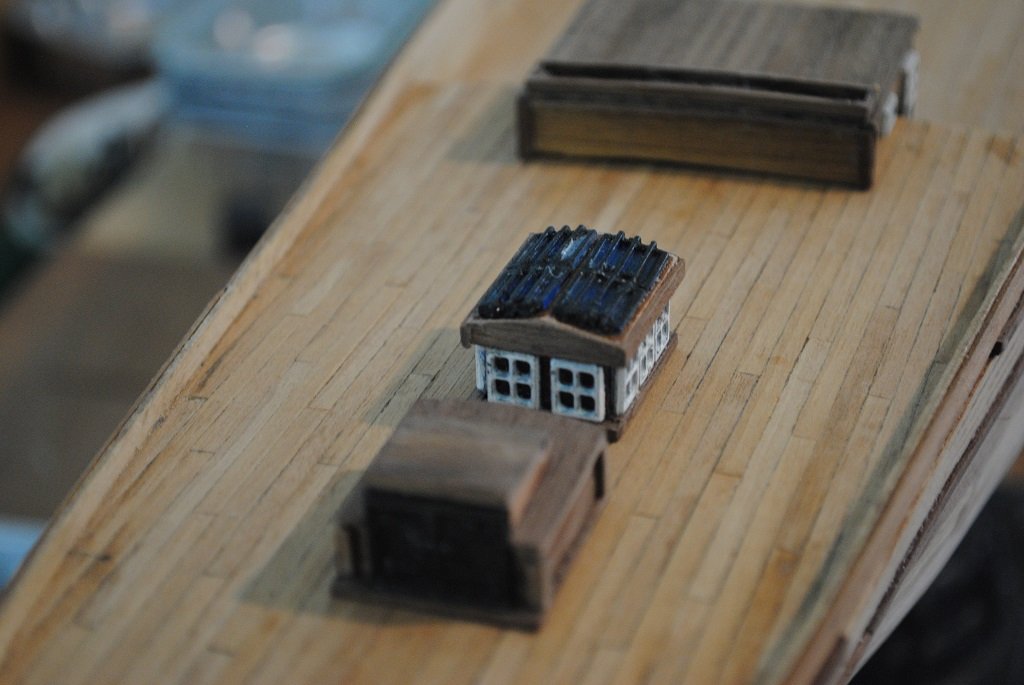
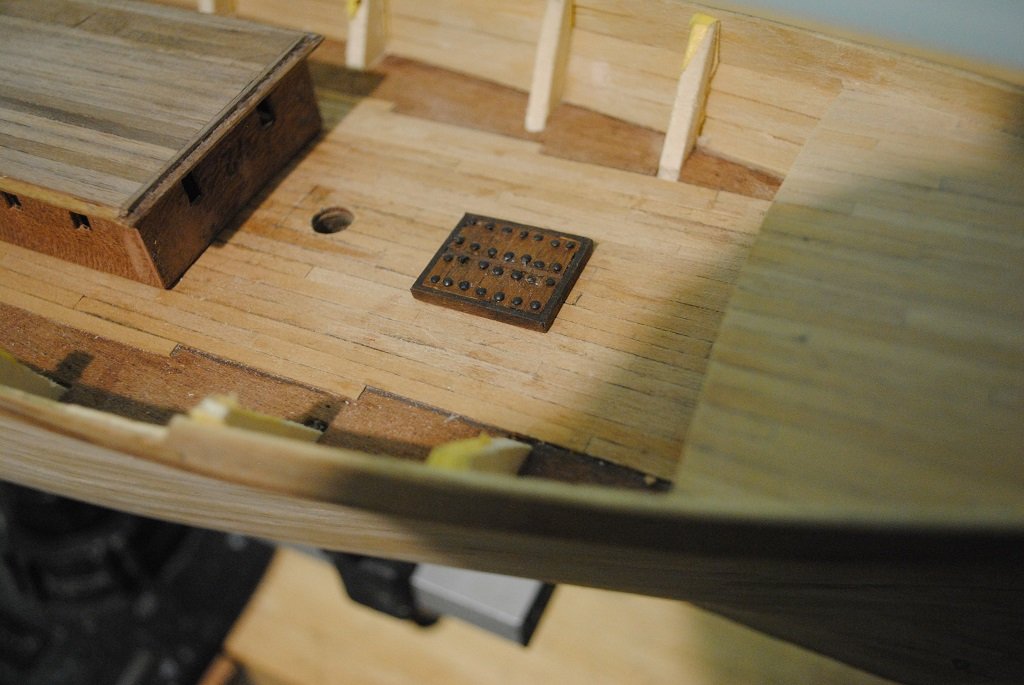
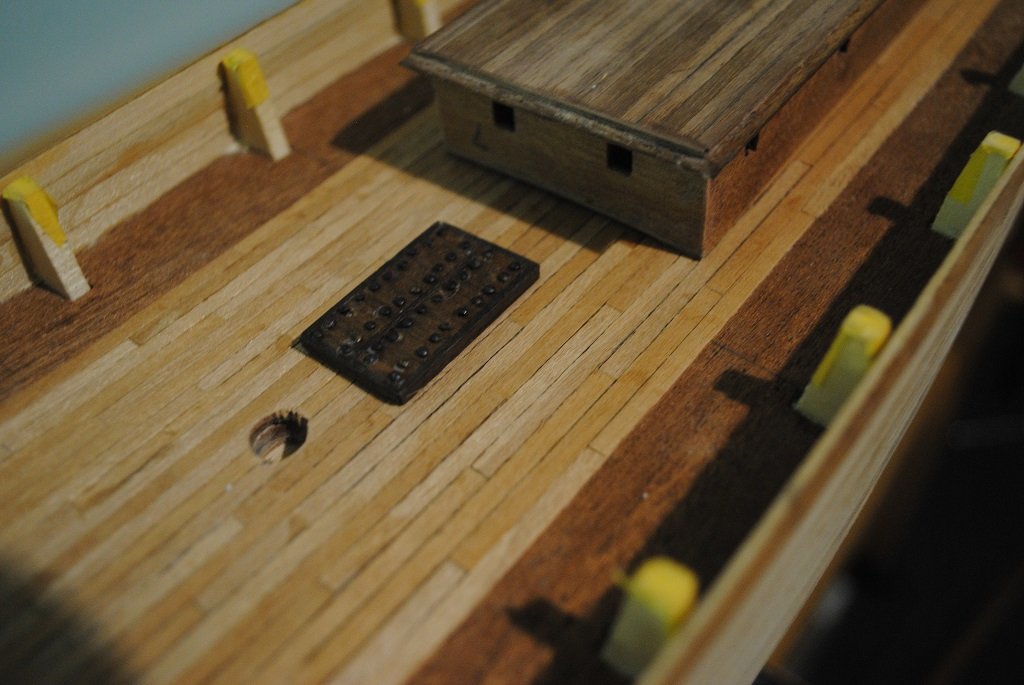
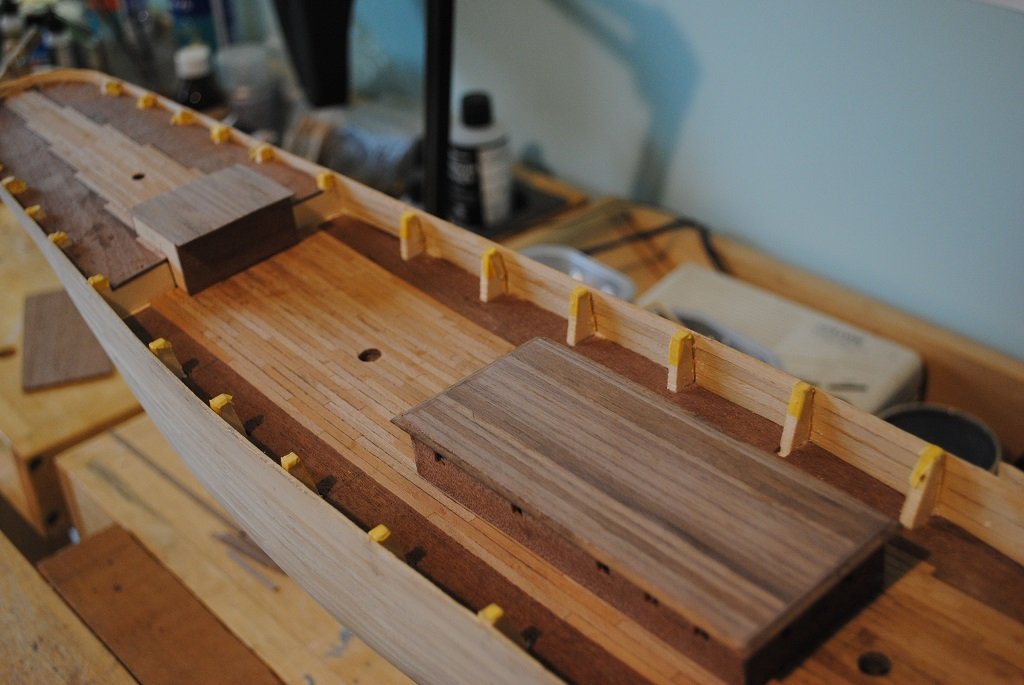
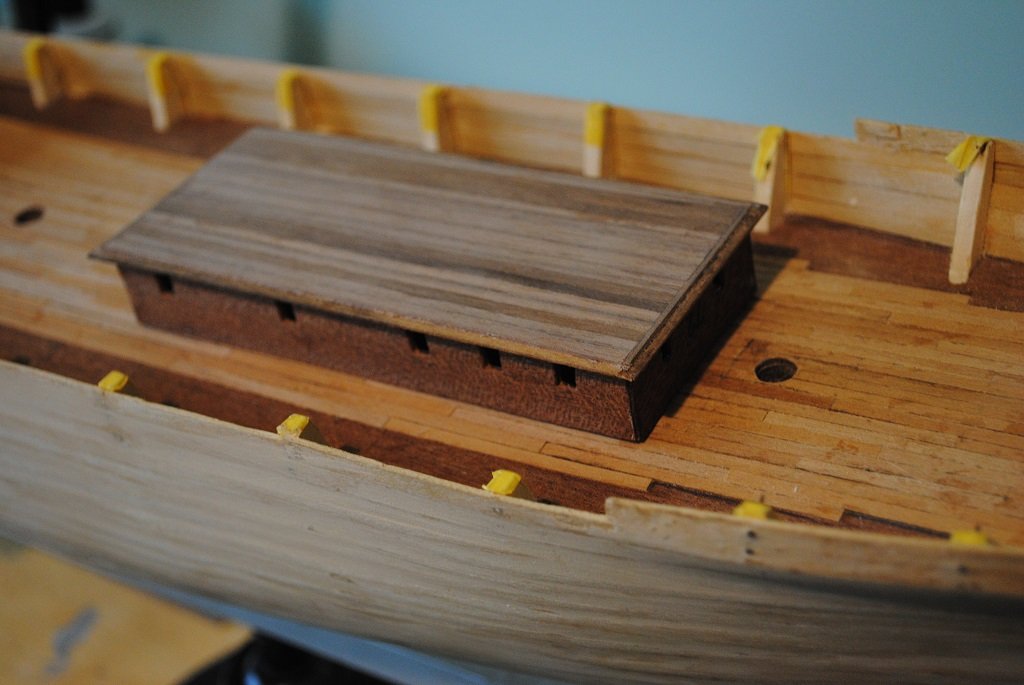
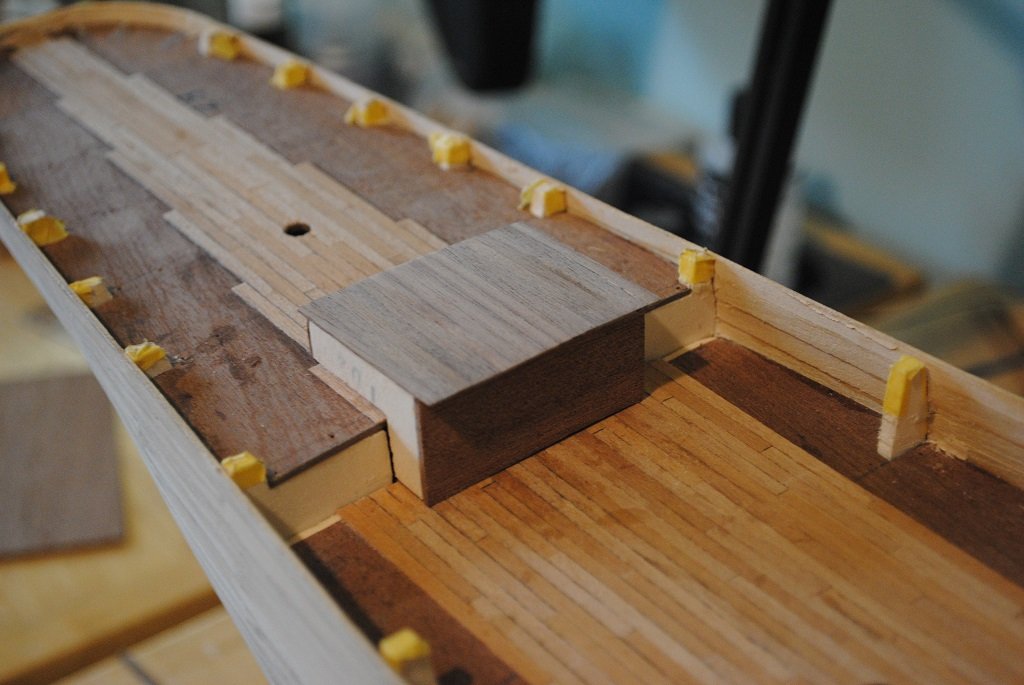
Hi All, It's been a few weeks since I updated this log, so here it is.... Main Deck Planking completed Hull Planking done up to and including Wales Bowsprit Jibboom tapered and test fitted Houses pretty much done Companionways and Skylights almost complete Additional comments: Hull Planking is multi shaded Walnut, but I am not too concerned as it will be painted Black Pin-Rails in Instructions and on Plan are more "Isolated" "Pin-Pads" and do not run the length of the Main Deck. To overcome this, I laminated and clamped two 2.0 X 1.5mm Strips on ech side, laminated in situ and removed once dry. I think that this will be much better House Planking is two shades of Walnut, the lighter is Kit supplied and I am being really frugal with this material as the Kit has already demonstrated the lack of material. The Kit supplied lighter Walnut is also for Planking below the Wales I used the kit supplied Window Frames, (Metal), but used the Doors I made previously and relented, painting the Frames White. Windows and Doors each have 0.16mm thick Acetate on the rears painted Tamiya Clear Blue. Glued onto the Houses using thinned Mig Ammo Ultra Glue So, I think that's all up to date for the mo.... 🙂 Comments/Suggestions always welcome. Cheers.... HOF. Photos:

- 193 replies
-
- 7
-
-
- Flying Cloud
- Mamoli
- (and 1 more)
-
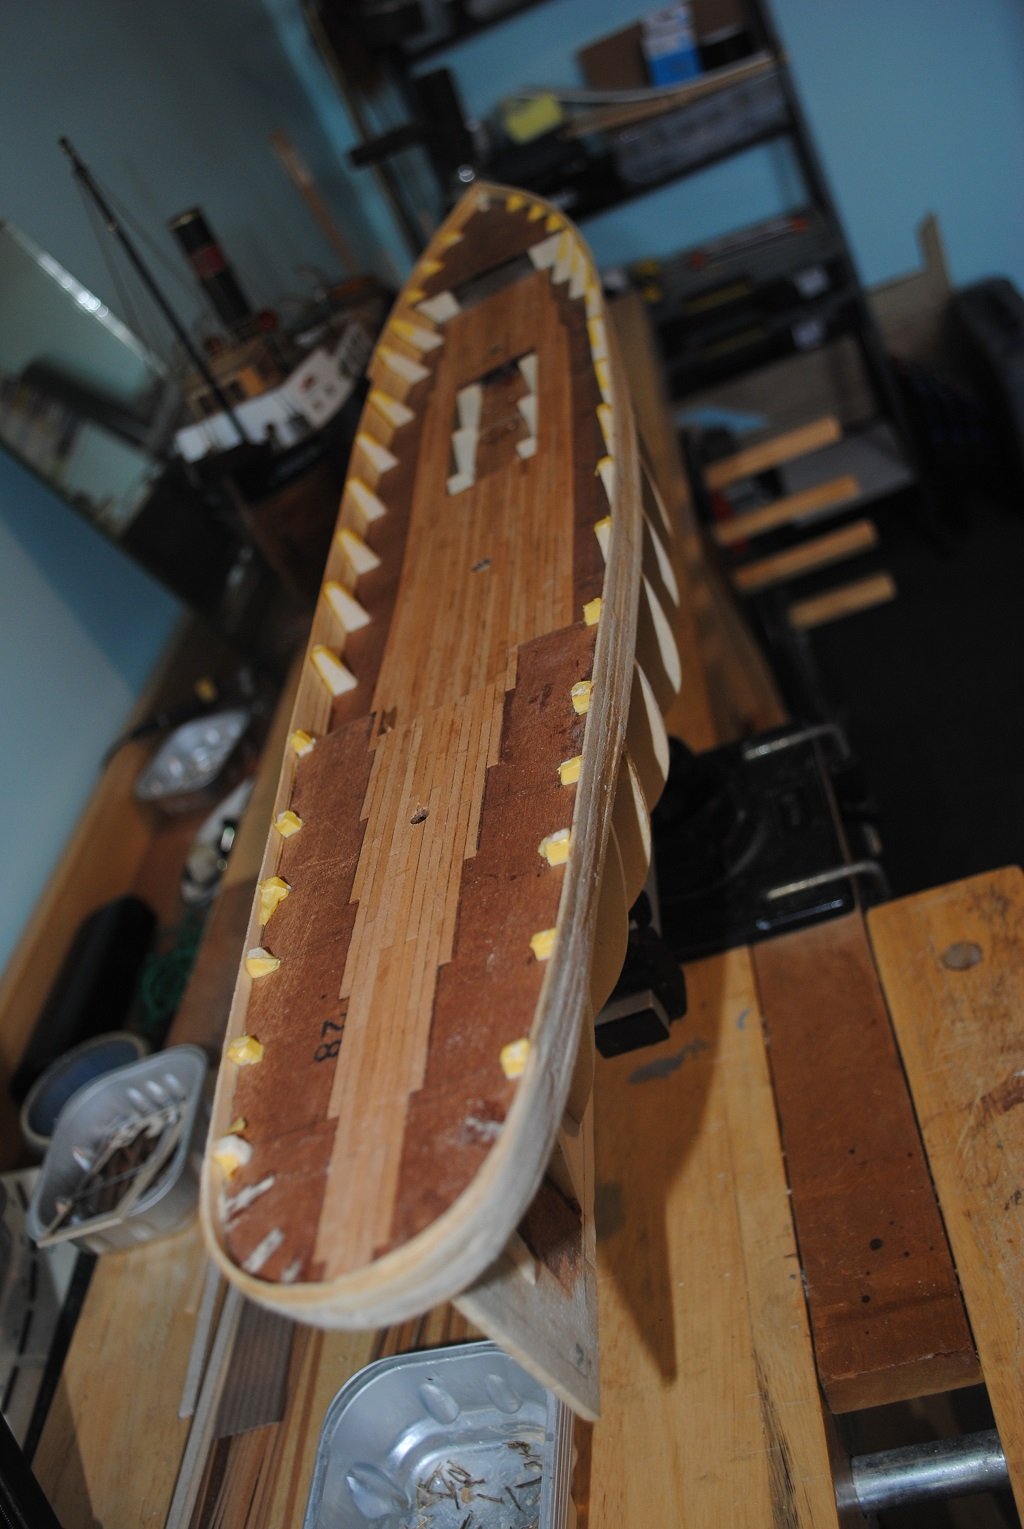
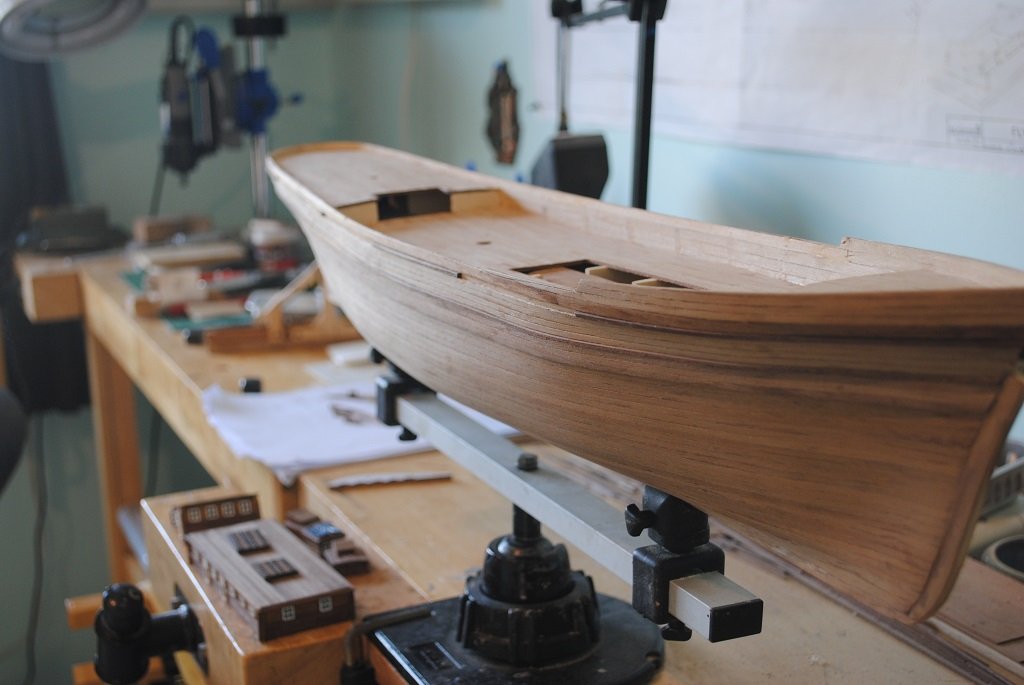
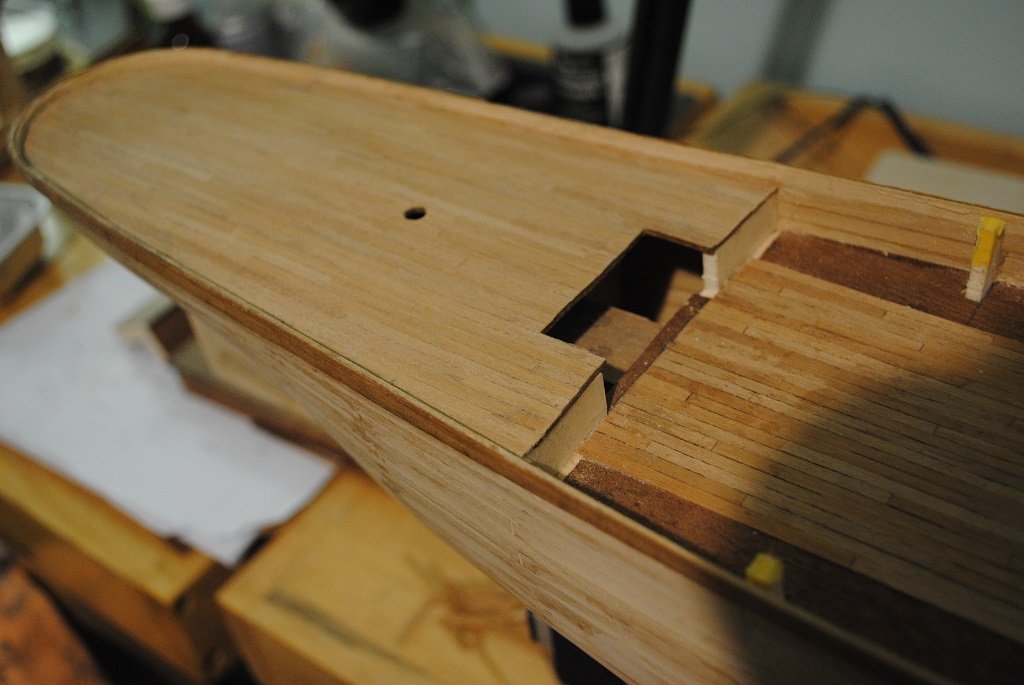
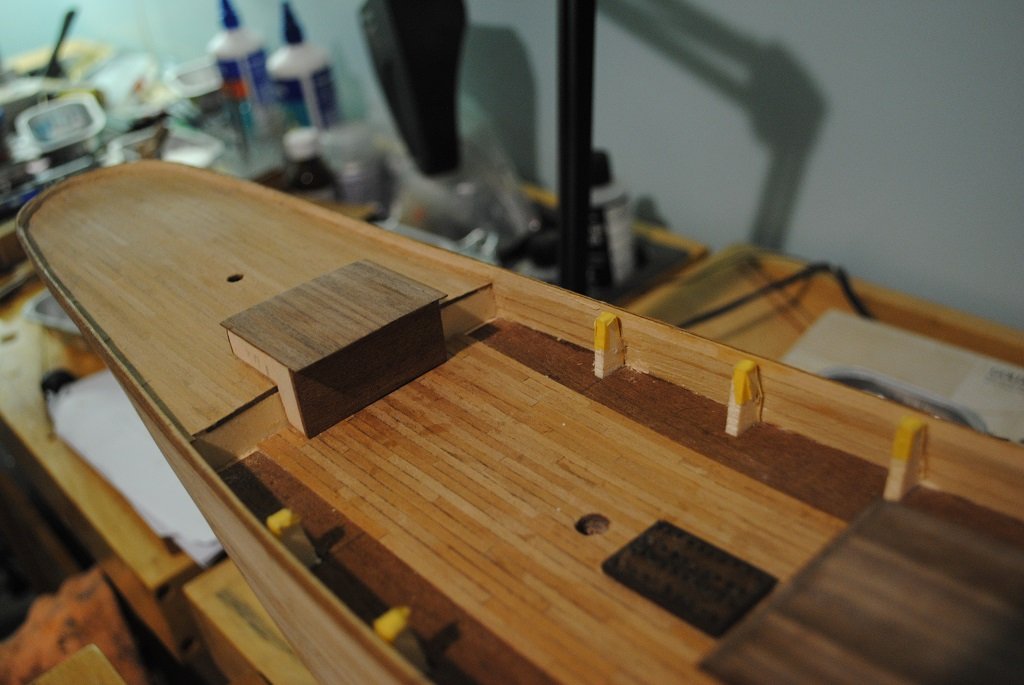
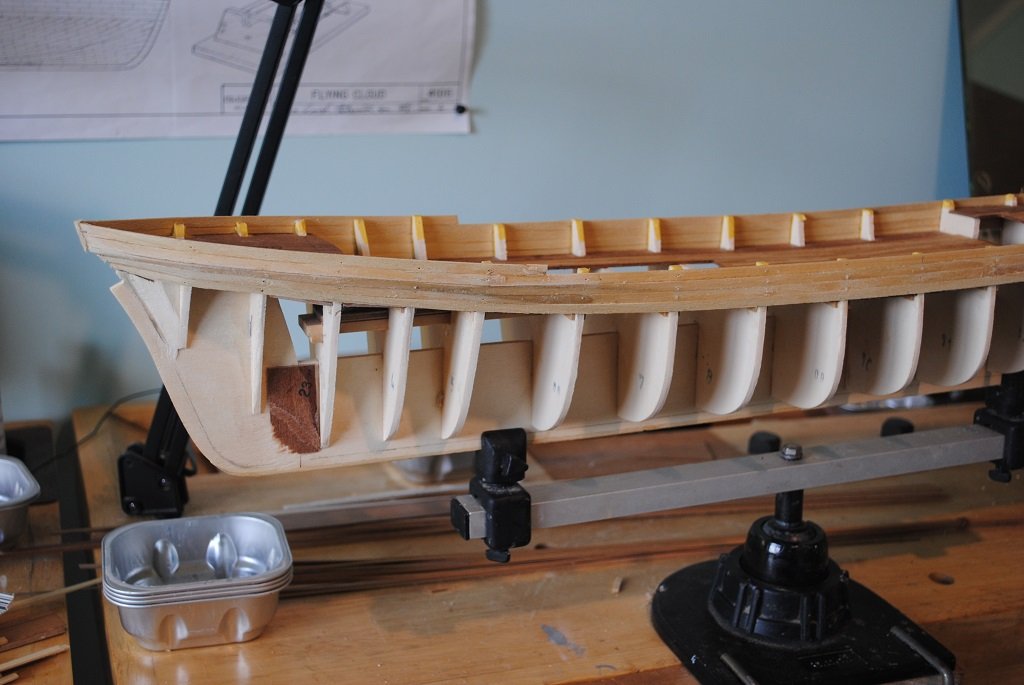
Hi All, Update: First External Bulwark Planking started. (5.0 X 1.0mm around the Bulwark tops and four rows 3.0 X 1.0mm Focsle Bulwarks) Focsle and Poop Bulkhead extensions removed Focsle and Poop Decks planked (Inboard Bulwark planking to be done at a later stage) Fore and Main Hatches assembled (I am unsure if I like these, I may have to re make these) Wood quality and quantity remains an issue and I have resorted to mill/resaw my own dwindling supply.... 🙂 On a positive note, I feel a sense of progress. Cheers.... HOF. Photos:

- 193 replies
-
- 3
-
-
- Flying Cloud
- Mamoli
- (and 1 more)
-
Thank you, kindly Sir!! I very much appreciate your input and interest with my build. There are discrepancies with the kit, for instance, Hatch Cover Planking, on the plans, runs lengthwise but should run across the width of the Hatches. With the research material I have, there are 20 planks across the Main and 16 on the Fore hatch. With my build, I have room for 10 (X2) Planks across the Main and 7 (X 2) across the Fore. The Planking width that I am going to use is 3.0mm wide, this should give me some wriggle room to represent Lifting Rings on each Hatch Plank. So, a compromise.... What works and hopefully what looks the part.... 🙂 The information that you have provided is very comprehensive and I am certainly taking this into account. Please continue to comment. Cheers and Regards, Harry.
- 193 replies
-
- 1
-
-
- Flying Cloud
- Mamoli
- (and 1 more)
-
Thanks Gorge, I intend to add the detail you mention. Cheers and Regards, Harry.
-
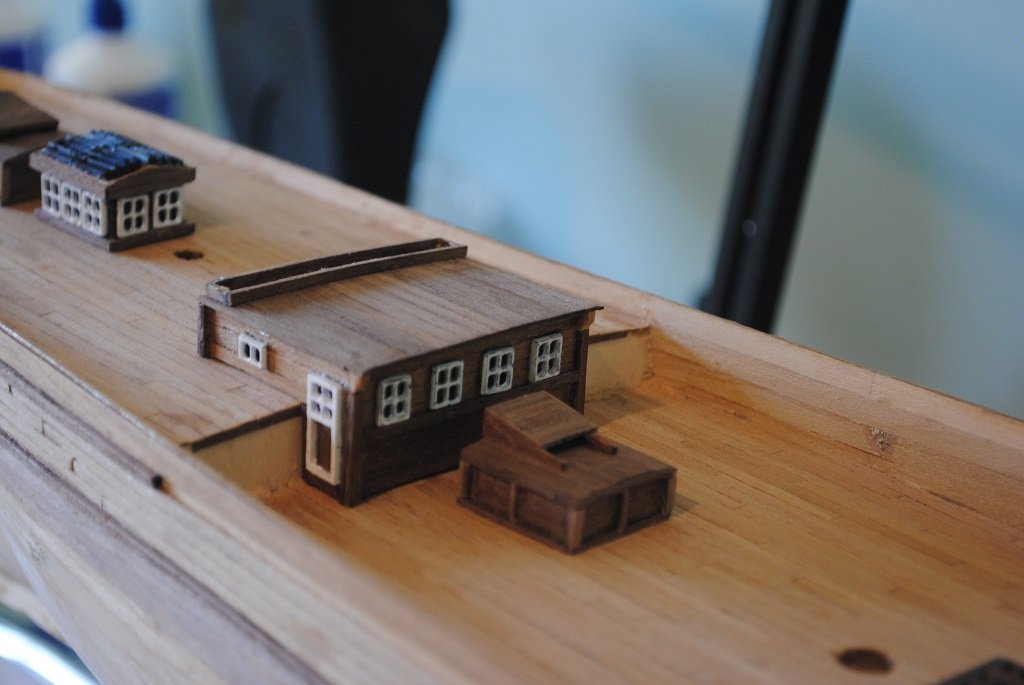
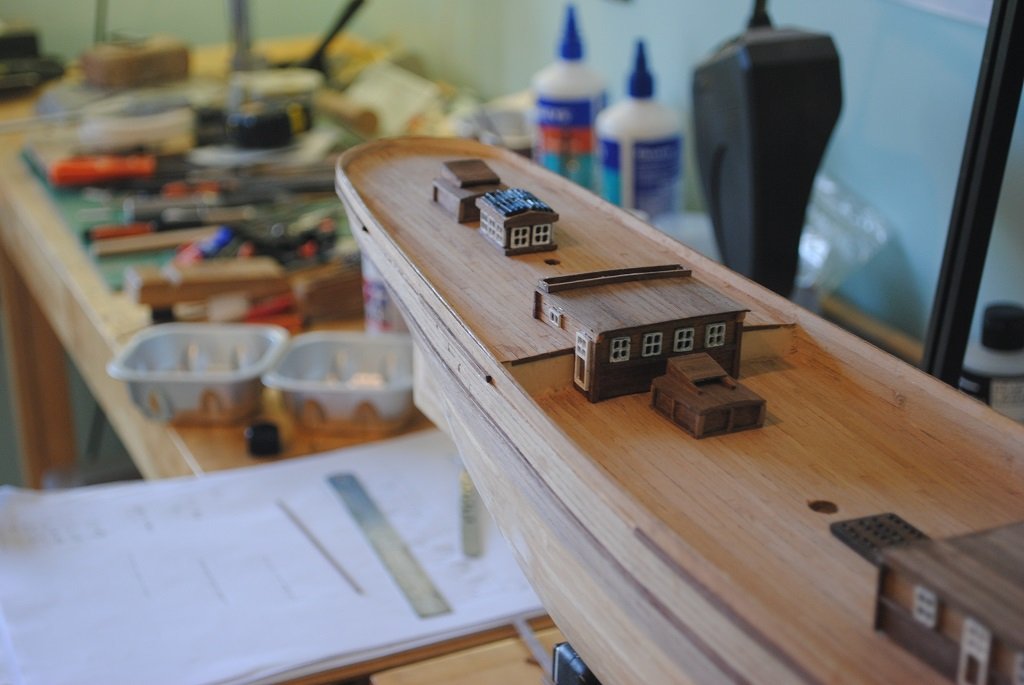
Hi All, Small update: Started constructing the "Houses" to give me a little break from the Hull Planking. (Second Cover) The work helps me to have a really good think about the best way to approach things. 🙂 I milled my own Walnut for planking as, as I have mentioned more than once, there is stuff all spare material in the kit....🙂 I have also made Frames for the Fore and Main Hatches, maybe I'll have a wee play with these items tomorrow. Regarding my 1/78 Cutty Sark, components were significantly larger, item at 2/96 are a bit more challenging, Micro Joinery? I do enjoy the Deck "Furniture...." Cheers....HOF. Photos:
- 193 replies
-
- 1
-
-
- Flying Cloud
- Mamoli
- (and 1 more)
-
Hi Clipper Fan, Many thanks once again for the Detail, descriptions and photos, much appreciated. I welcome the constructive critique. I agree that the Naval Hoods would look good, I need to give this some consideration. The Bowsprit entry Hole may/should be square, I get the reasoning for this but I feel that it is a little too late to perform "Surgery." I am also bound by kit constraints and the materials I have at hand. So, onwards.... Cheers and Regards, Harry.
- 193 replies
-
- 1
-
-
- Flying Cloud
- Mamoli
- (and 1 more)
-
@ClipperFan I guess, looking again at the plan, there are 24 Stanchions per side. To stop being lazy, I should represent these with something like 0.5 X 1.5mm strip wood? Does this sound viable at 1/96? Cheers.
-
Hi There, This diagram may help to explain.... These are the Stanchions that go from Deck to Pin Rail. Flying_Cloud_Bradner_hull-side.graffle (sobco.com) Trouble is, what do they actually look like? (Profile?) and exactly how many are there? 24 or 48 per side? Cheers and Regards, Harry.
-
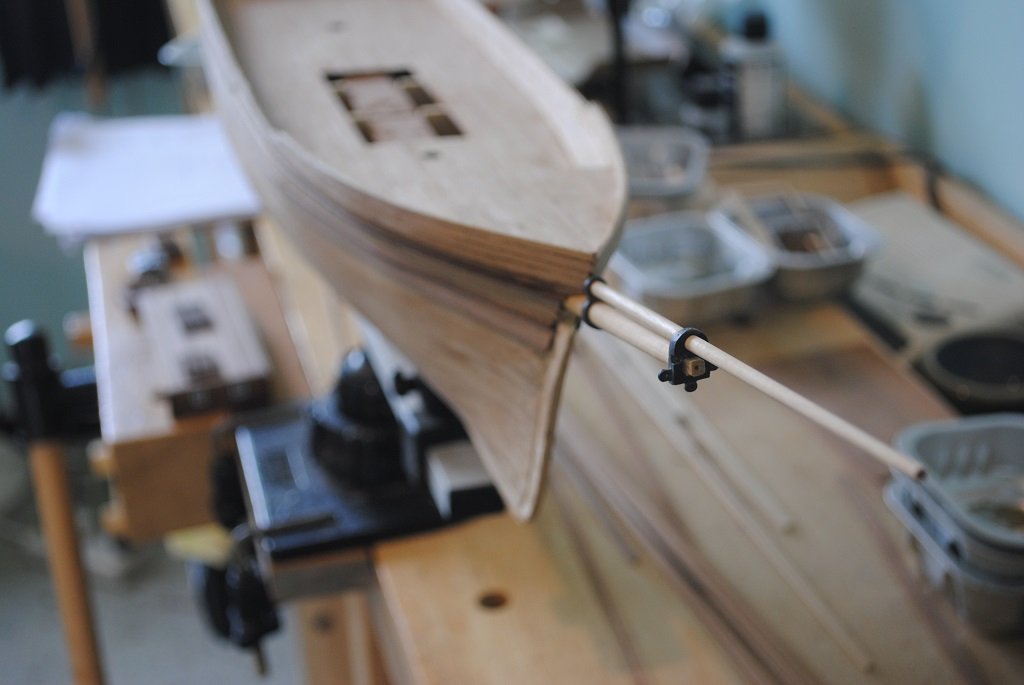
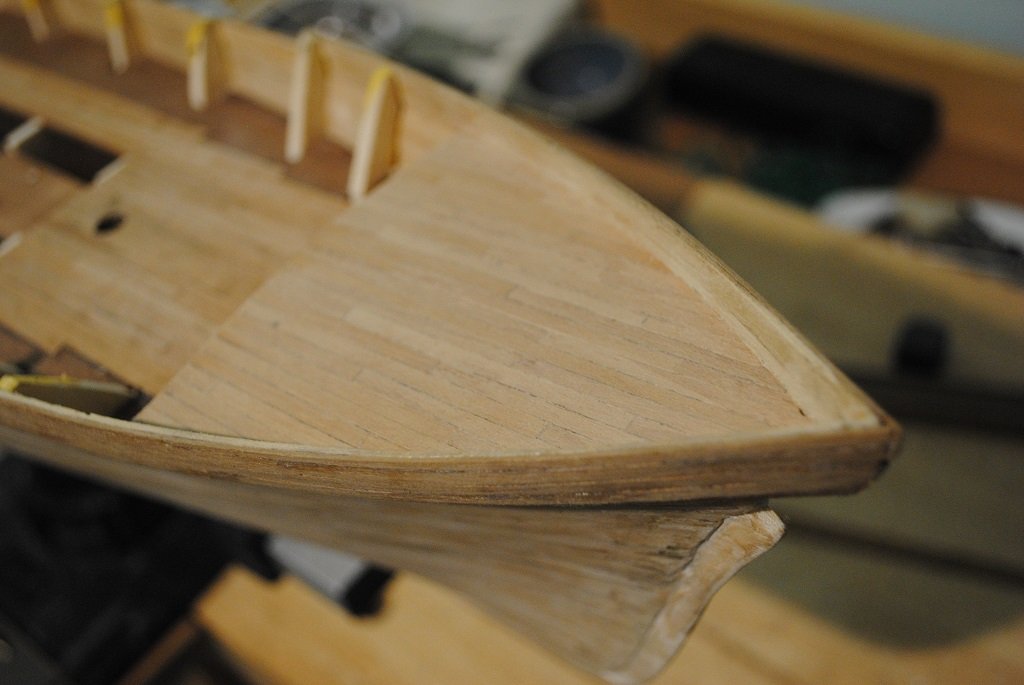
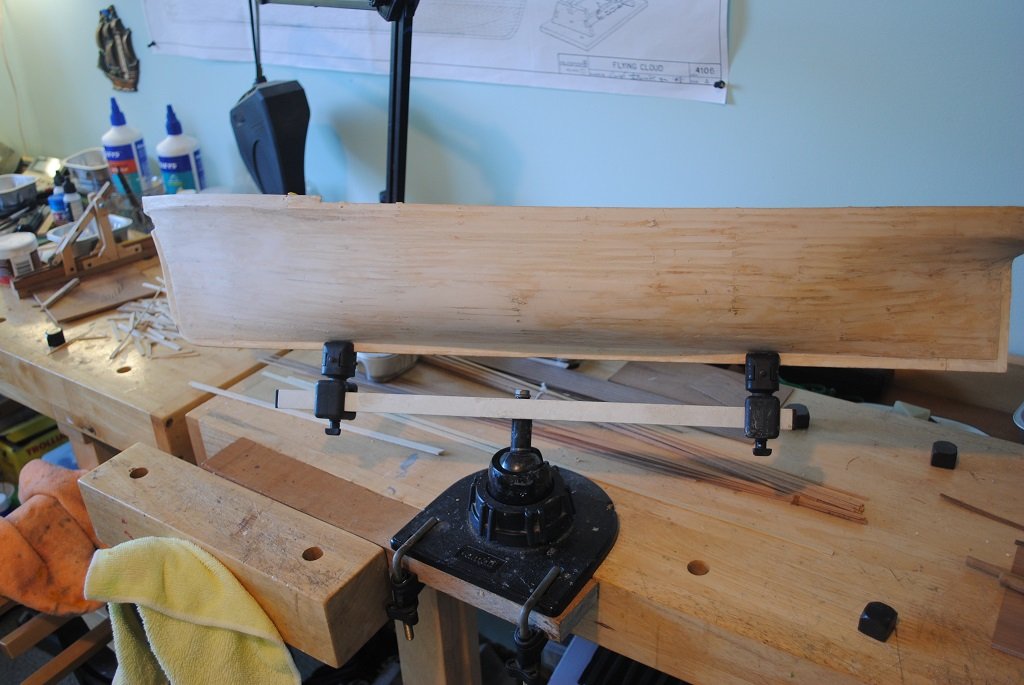
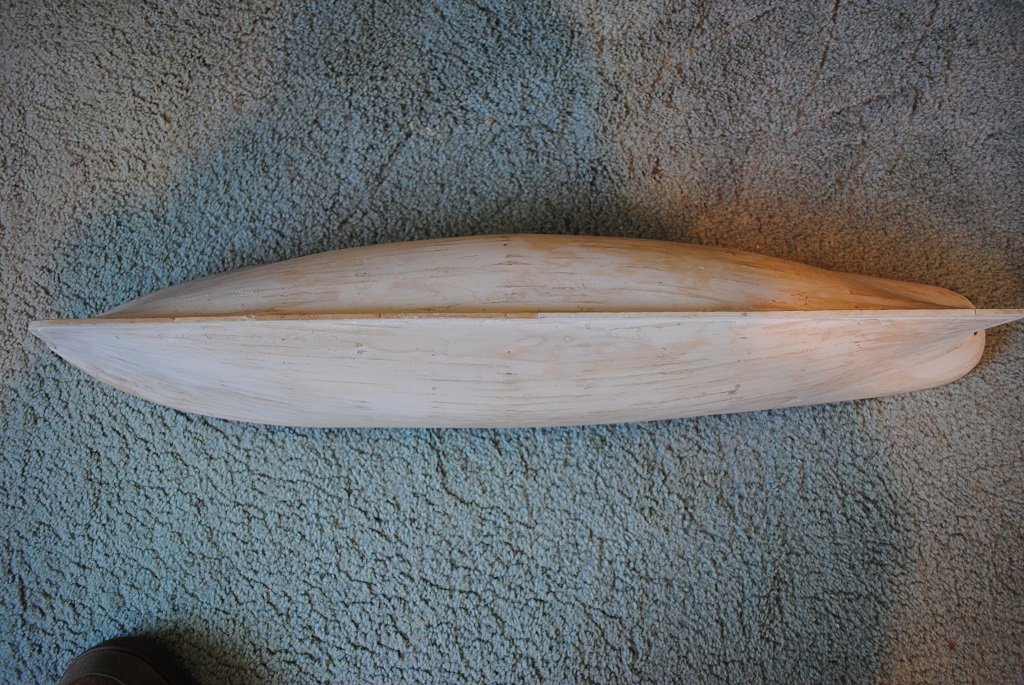
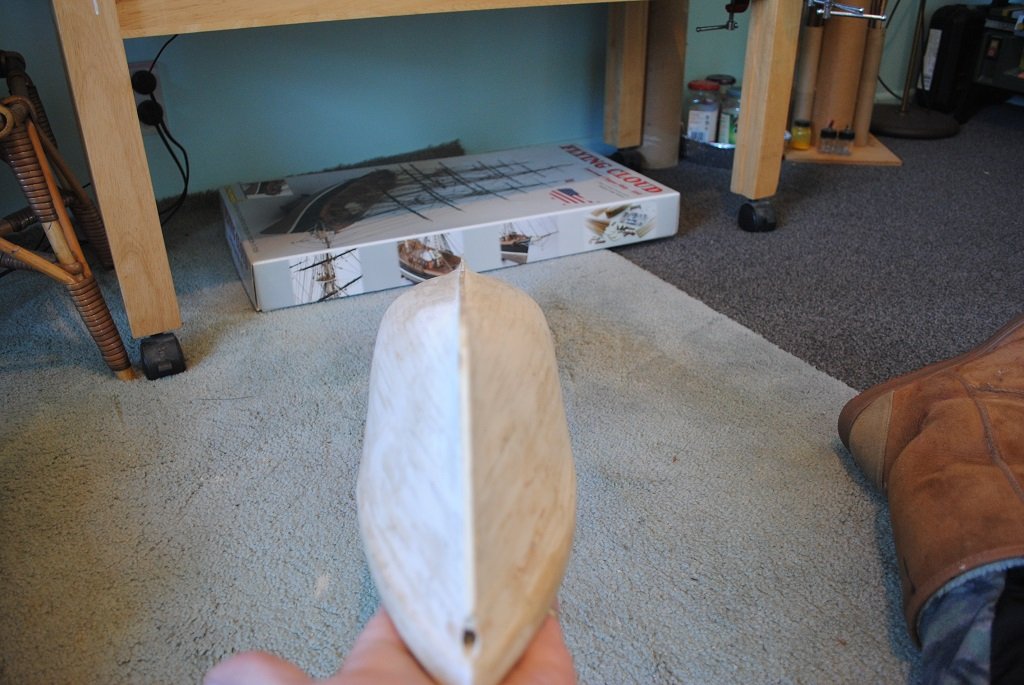
Hi All, It's been a few weeks since my last update as I have been otherwise occupied with the first Hull Planking. Firstly, for anyone that may be thinking about building this kit, be very, very frugal with the material provided.... I ended up using my longer Planking offcuts to complete. (I feel that this will be the case for all subsequent material supplied, in fact, I know this to be the case.... 🙂 Anyway, enough griping about things.... I feel that there were a few errors on my behalf, (The "Operator"), prior to laying the Strakes, I ended up using filler to get good and smooth lines, most of the filler being sanded away, (A good thing), but I would have preferred not to use any filler at all. The attached photos show the Hull as it stands this morning, I have to pay a little more attention to the Stern to complete. I believe that the best way forward now is to continue with the second cover before I remove the Bulwark extensions to enable me to complete the Deck and Internal Bulwark planking. (I figure it is a good thing to have the Bulwark Extensions in situ while I ham handling the Hull so much.) I am thinking I will build the "Houses" next to give me a break from the Hull. 🙂 Cheers....HOF. Photos for your appraisal and critique.


- 193 replies
-
- 1
-
-
- Flying Cloud
- Mamoli
- (and 1 more)
-
Thank you Sir, The info that I would like to obtain, if you have access to it, are the Stanchions that are visible on the Deck Bulwarks. (You have been very kind in giving me the information that I asked for.... My apologies, my error.) Cheers and Regards, Harry.
-
Gentlemen, Thank you both for your continued interest, feedback and information, very much appreciated. I have a question for you both: Do you have a photo or similar of the "Internal" Bulwark Stanchions? I have Mr. Bouchers plans but they are not 100% clear. The first Hull Planking is pretty much complete with some fine sanding to do. I will also post some photos tomorrow of progress to date. Cheers and Regards, Harry.
- 193 replies
-
- 1
-
-
- Flying Cloud
- Mamoli
- (and 1 more)
-
Thank you, kindly Sir, for your extensive dissertation and images!! I will get to your attached article in a day or two. I have been away from the PC for a few days now, concentrating on the Flying Cloud 1st Planking. (The lines are really starting to show themselves. I should have a reasonable update in the next few days. Thank you once again for your information, much appreciated. Cheers and Regards, Harry.
- 193 replies
-
- 1
-
-
- Flying Cloud
- Mamoli
- (and 1 more)
-
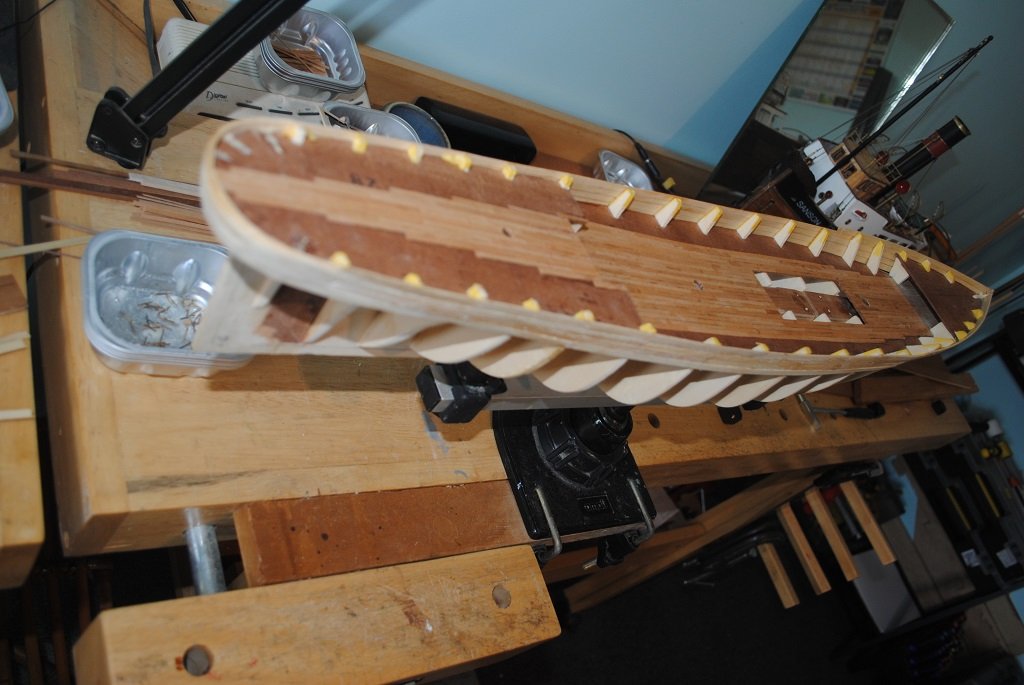
Hi All, Small update. Although I haven't posted for a while, I have been reasonably busy on the Flying Cloud. I have put my Plate marker to one side for the mo. to concentrate on getting some work done on the Ship. Attached all Decks Faired Bulkheads First four rows of 1.5mm Lime Planking attached So, another "Gripe" with the kit supplied material, the Lime is extremely brittle, it does not want o bend easily and is very prone to fracturing, great care must be taken when handling the Hull. I am hopeful that once the Bulwarks and Hull have thier extra layers of Planking attached things will be a little more "Robust." 🙂 Anyway, I have chosen to use this material and it was a good "Win" to get some real progress done With regards to the remainder of the first cover, I think that all Planks will need to be tapered. (I think that will be starting tomorrow.) Cheers....HOF. Photos:


- 193 replies
-
- 2
-
-
- Flying Cloud
- Mamoli
- (and 1 more)
-
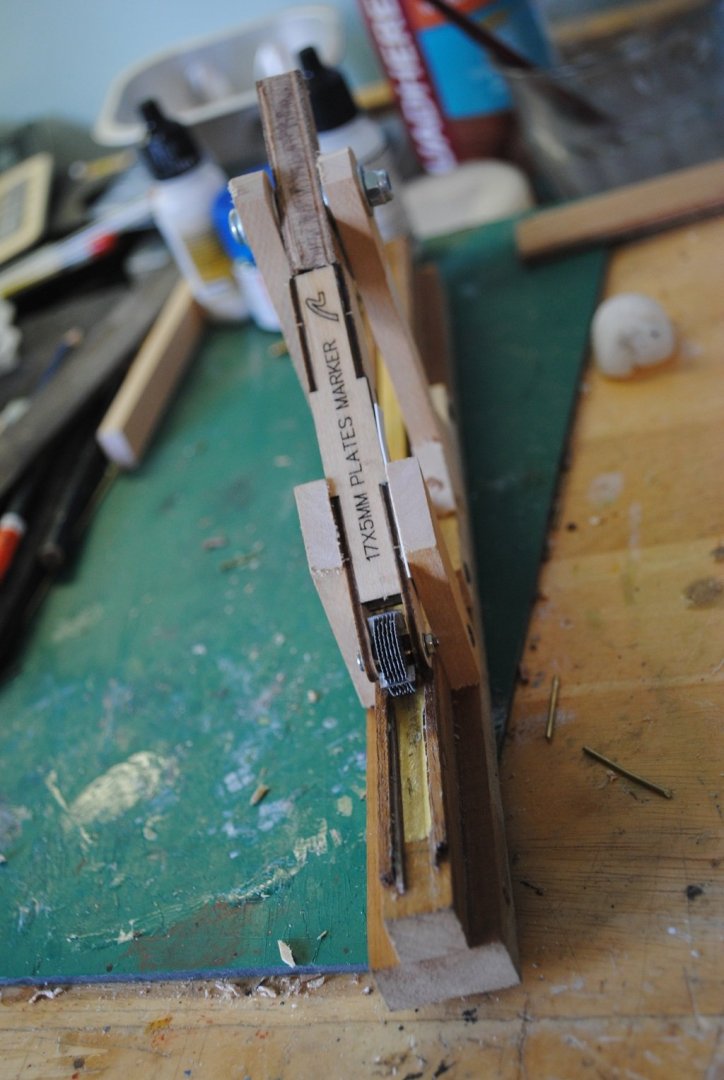
Hi Rob, A couple of photos of the Jig thingy.... It seems to work o.k. by dragging the Copper through the PE Wheels. Needs a couple of "Tweaks before I'm happy with it which I'll get to in the near future. The important thing for me was not to modify the A/L tool in any way. (I can remove the original tool with a gentle pull. Cheers and Regards, Harry.
- 193 replies
-
- 1
-

-
- Flying Cloud
- Mamoli
- (and 1 more)
-
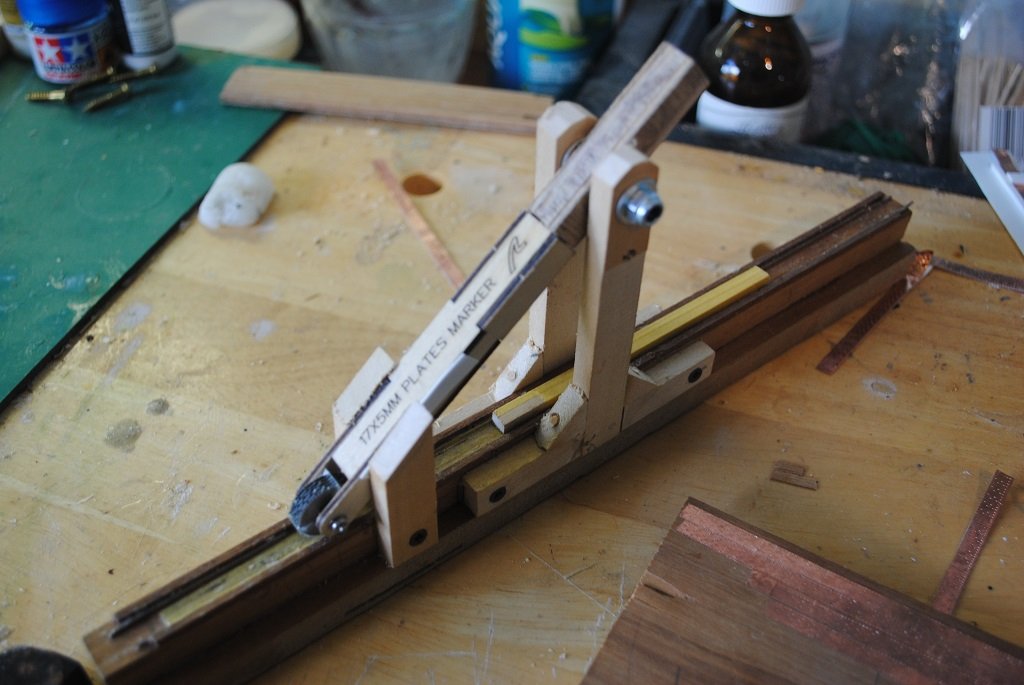
Hi Rob, Thanks for that. Yup, the Plates marker is a good innovation, the only thing that I don't like about it is keeping it centered on the Copper Tape. At present I'm in the process of developing a Jig for just this purpose. withought altering/modifying the Marker in any way. 🙂 It's taken a bit of time to think about and assemble. I am hopeful that I'll be able to test my device tomorrow. I have a plan "B" and "C" if the Copper Tape is a "Fail." The Tape is 0.1mm thick and I think that double this will be much better in terms of Plate "Stiffness." (I'll make a Jig for this as well.... 🙂) Cheers and Regards, Harry. Once this is complete, I'll be fixing the Decks in place and fairing the Bulkheads.
-
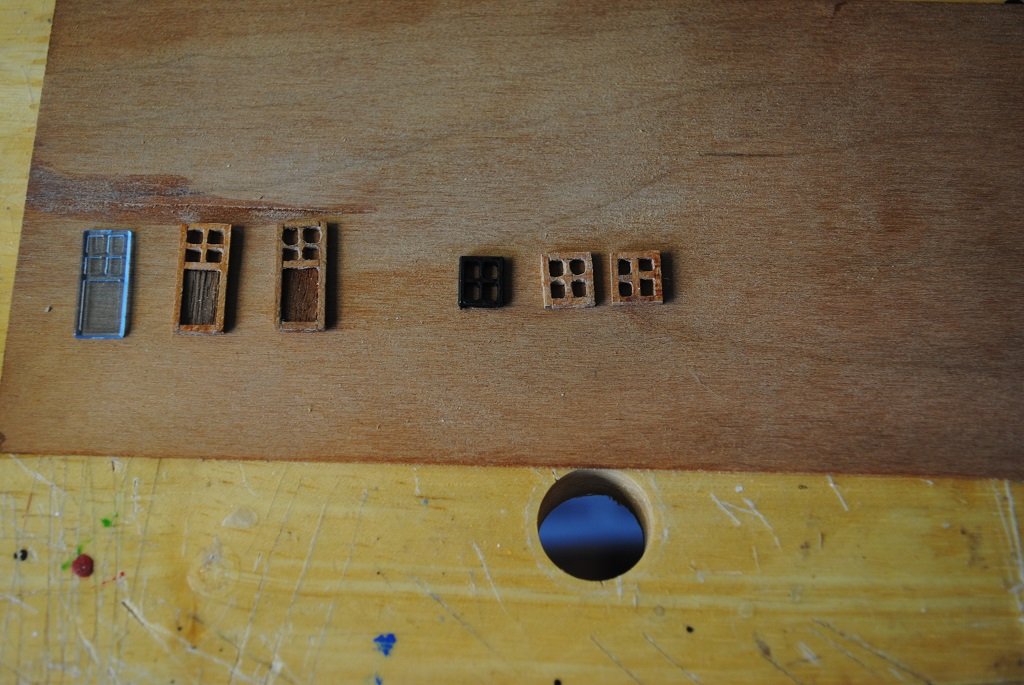
Hi All, Small update for some small pieces.... 🙂 I have been busy although I have not posted for a while. Since my Pin Push tool did not arrive, I decided, (A few weeks ago now), to try and manufacture some of the kit components that I was not happy with, namely, Doors, Windows and Skylights. I have pretty much finished these, (Perhaps a wee "Mullion Tickle" here and there with a Needle File and, not to forget Glazing) I'm much happier with the wood frames as they are rather than painting them White as shown on the box top. The research information that I have is that the frames were Oak, I think that the Cherry Frames are a reasonable analogue.... There are eight Doors required and twenty-four Windows required, I Will shortly have made twelve Doors and around thirty Windows, I can choose the best ones.... 🙂 I glazed three of the Skylights for a test, (Not glued as yet), 0.2mm Acetate, Back side painted with Tamiya Clear Blue. I also purchased an Artesania Latina 17.0mm X 5.0mm Plates Marker, a bit fiddly to put together but seems to work o.k. A bit more practice with this tool and it should be o.k. (I tried to make a Guide-Rail Jig for this tool but the best results at the mo. are "Freehand.") Anyway, like the Windows, Doors, Etc. That's further down the track but needs to be done regardless. 🙂 In the next couple of days, the intention is to fix the Decks in place so that I can start to "Fair" the Bulkheads, I'm also looking forward to re-ordering a Pin Push tool. I am hopeful that this will arrive in time for Hull Planking. Cheers.... HOF. Photos:


- 193 replies
-
- 4
-
-
- Flying Cloud
- Mamoli
- (and 1 more)