HOLIDAY DONATION DRIVE - SUPPORT MSW - DO YOUR PART TO KEEP THIS GREAT FORUM GOING! (89 donations so far out of 49,000 members - C'mon guys!)
×


hof00
-
Posts
1,649 -
Joined
-
Last visited
Content Type
Profiles
Forums
Gallery
Events
Everything posted by hof00
-
 Thanks John. Yup, I like the Color variation of the Deck, I think this will disappear after a light sand..... (I made a test piece, gave it a light sand and gave it a dose of Matt Vallejo Varnish, if you look hard, there is some very slight color variation NZ Post have lost my new Planking Nail Driver, so, in the interim, I'm working on the Doors/Skylights/Etc. Once I receive a "Nail Driver I can resume Bulkhead Fairing, Etc. Regarding Bulkhead thickness, they appear to be 2.5mm O/A with a 4.0mm wide Rail. Bulkhead Extensions removed "Post" external 1.5mm Planking complete. (Much like my Cutty Sark.) Anyway, I don't know everything at this stage.... 🙂 Advice and comments very much appreciated. Cheers and Regards, Harry.
 -
Thanks Rick, I agree 100% with that!! 🙂 Cheers and Regards, Harry.
-
Thanks John!! The Door Frames, Rail/Stiles are 1.0mm thick as measured off the plastic kit-supplied Doors. (You can imagine my disappointment to discover these Doors, (Porta), were plastic not Metal as described in the parts listing.... ☹️) The Mullions are pretty much the same, I do get what you are saying maybe 0.3mm different in section? I'll probably end up filing a slight Bevel on these. (I only need eight Doors that need to be 1.0mm thick so I should have a few "Spares" at my disposal. 🙂 Kit supplied Windows are 24 X Metal castings? The Frames/Mullions are 1.0mm in section all round. (I am thinking if I should make replacements for these as well, maybe....) Cheers and Regards, Harry.
-
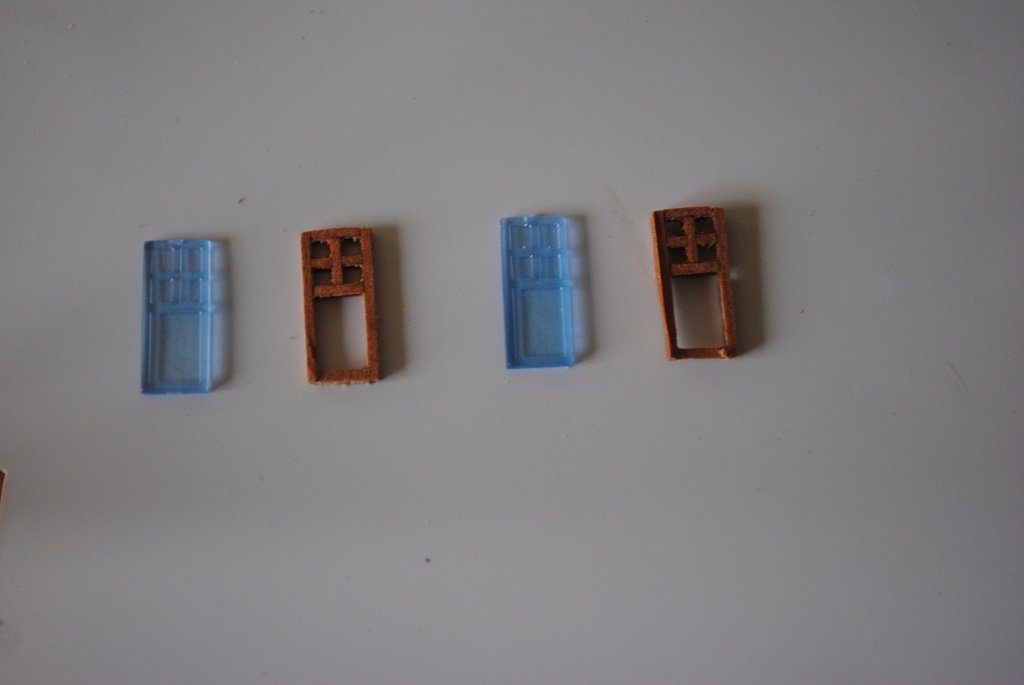
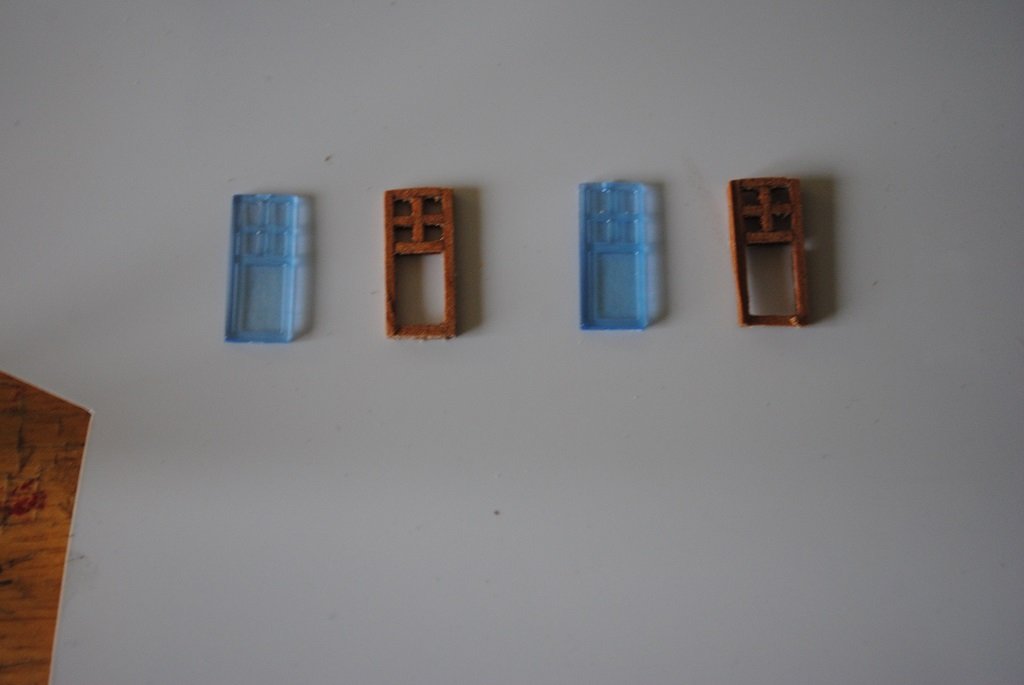
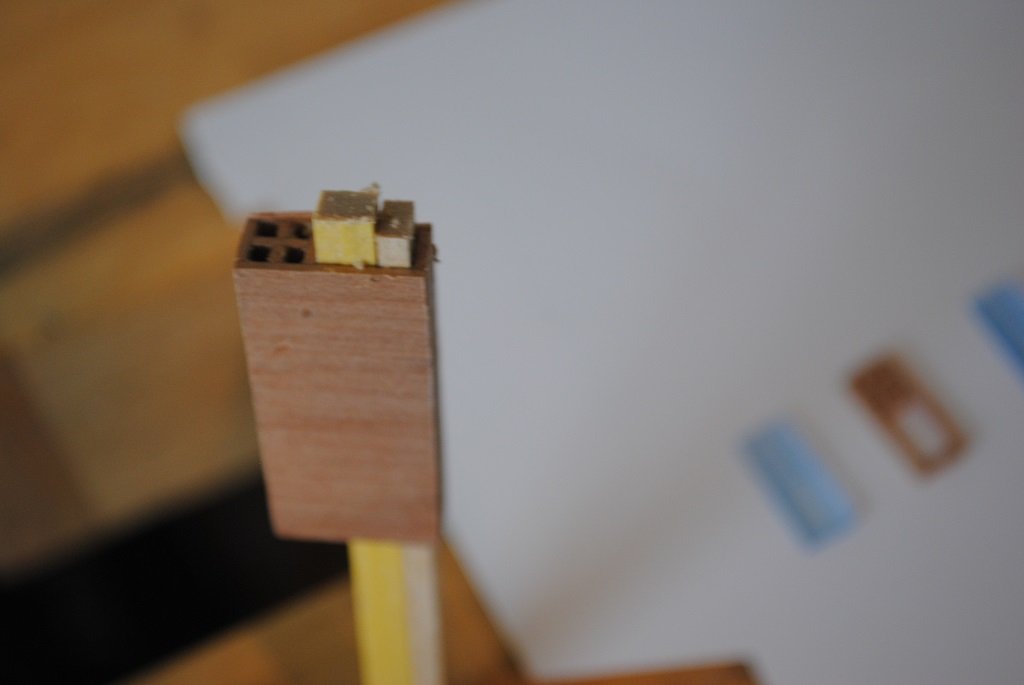
Hi All, Small update: While I await the arrival of my new Nail Inserting device, (Lost somewhere within the NZ Postal system), I decided to have a go at making my own Deck House Doors. I first tried with 1.0 X 1.0mm Strip assembled around a "Plug." This proved very frustrating and a very poor result. I thought about the "Plug" a little more and decided to assemble a "Billet?" around a wooden Plug. This worked a lot better and once assembled the Doors could be individually sawn off the Billet. One problem with my first "Billet" was that the Grain was running lengthwise resulting in very, very delicate Door Frames. I assembled a new "Billet" this time with all "Billet" components, Grain running Widthwise. The initial couple of Door Frames that I cut off the "Billet" were much improved and easily handled, (And filed), without the Frames crumbling... 🙂 1.0mm Mahogany Sheet was utilized rather than Walnut as the Grain is a little more porous for Glue penetration reasons. I can now also choose some nicely contrasting wood for the bottom panel of the Door. (The Frames are supposed to be painted white, I really did not want to mask these up and the less plastic the better!! 🙂) I took some photos of the Door Frames next to the Kit offerings. O/A dimensions of the Door Frames, 7.0 X 17.5mm I'm sure that this method is not a new idea, but I thought to share regardless. Cheers....HOF. Photos:

- 193 replies
-
- 5
-

-

-
- Flying Cloud
- Mamoli
- (and 1 more)
-
Thanks, Rob/Rick, It will be good not to worry about Serving. Having a break from the Hull/Deck today, I decided to make myself a Jig for replacement Cabin Doors Frames. I don't like the plastic offerings. I guess we'll see how that goes.... 🙂 Cheers and Regards, Harry.
-
Hi Rob, Many thanks for your input and ongoing interest in my efforts thus far. Yup, I agree wholeheartedly with your comments and realize that things might be well overscale. I do think that there will be many more "Issues" that I will discover further down the line.🙂 I have had a quick look at some of your models and I am in awe. I completed my 1st Clipper, Sergal/Mantua Cutty Sark, (On this site), in 2013 after 6 1/2 years of weekend work. It came out o.k. I think, but the thought was that I can perhaps do better. (Now that I am pretty much retired, I can devote much more time to modelling.) So, in conclusion, I do not feel that you are "Nit Picking," far from it, I value the input and aways prefer that people give me constructive criticism, maybe a paradigm shift? Always a good thing. I also value your knowledge and experience that you bring to the table. Please continue to "Critique" my efforts, this is very welcome. I do have a question for you, its' a little way off, keeping an eye to the future, do you think Serving Shrouds, Etc. is appropriate at this scale? If so, what thickness of material would be appropriate for Serving? My thought is that normal sewing thread would be too "Heavy.' Thoughts? Kind Regards, Harry.
-
Thanks Rob and Johnny, The more I look, the more things I see that need attention, today's efforts included lining the edges of the Poop Deck and discovering that another Bulkhead lacked symmetry, I fixed these, but I have found yet another Bulkhead that need some attention...🙂 I am also considering edge treatment on the Focsal Deck as well. I am now reasonably happy with the Main and Poop Decks. Johnny, I hear you regarding the Bulwark thickness, the Bulwarks are 2.5mm thick O/A, outside Planking: 1.5 + 0.5mm, inside Planking:0.5mm. The Bulwark Main Rail is 4.0m wide. I have left the Deck Planking where it is to facilitate "Flush" trimming of the extensions post 1st cover Hull Planking. The advice is appreciated regardless thank you. Thats' me for the day.... 🙂 Cheers and Regards, Harry.
- 193 replies
-
- 1
-
-
- Flying Cloud
- Mamoli
- (and 1 more)
-
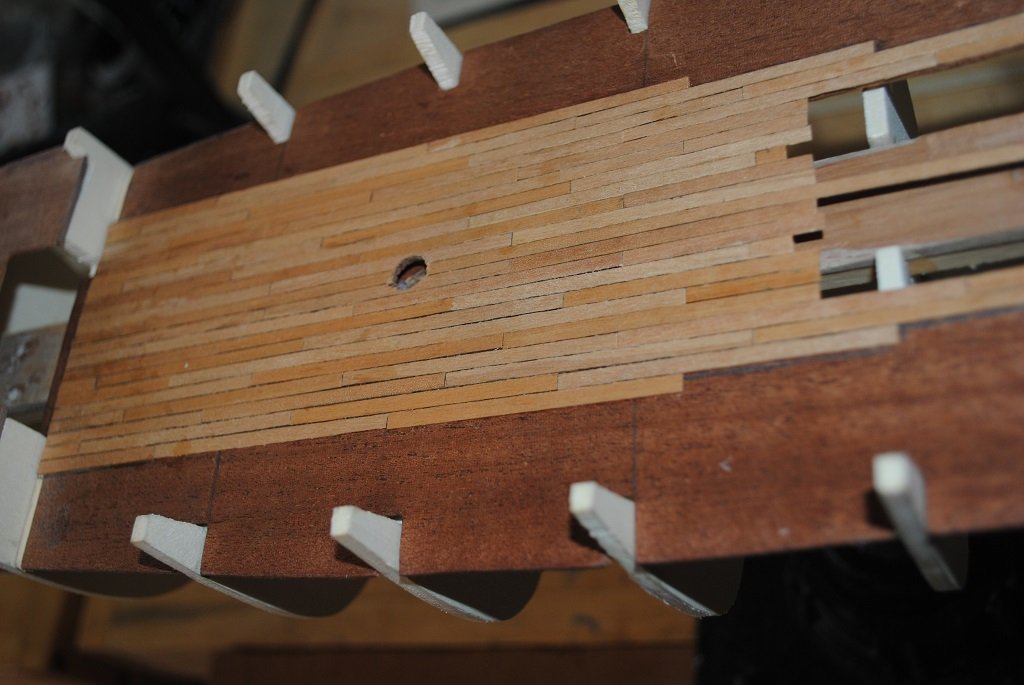
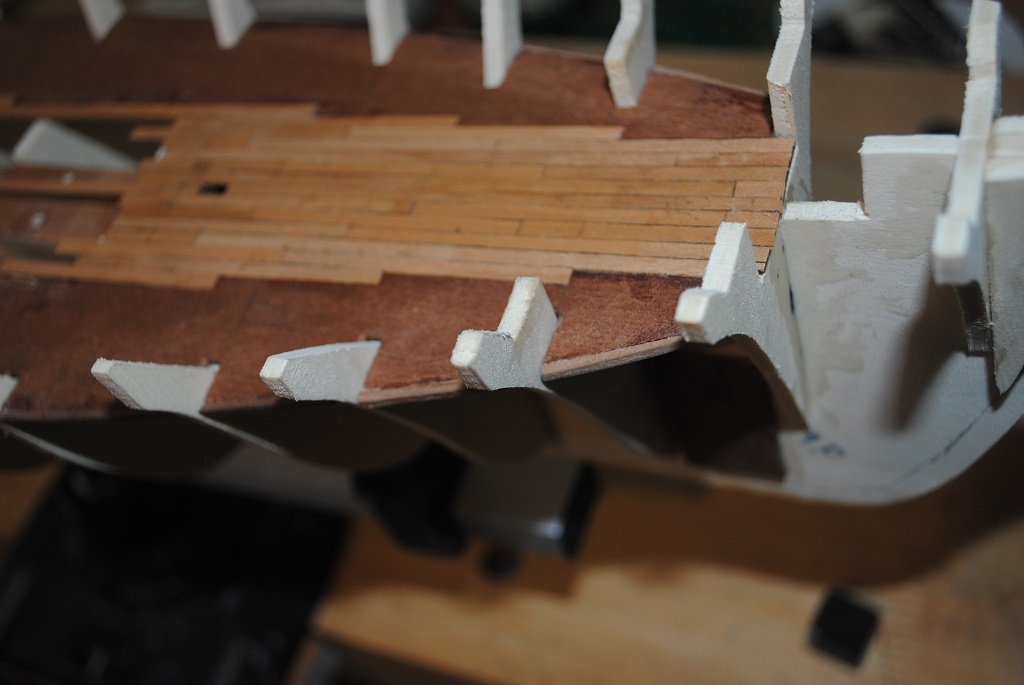
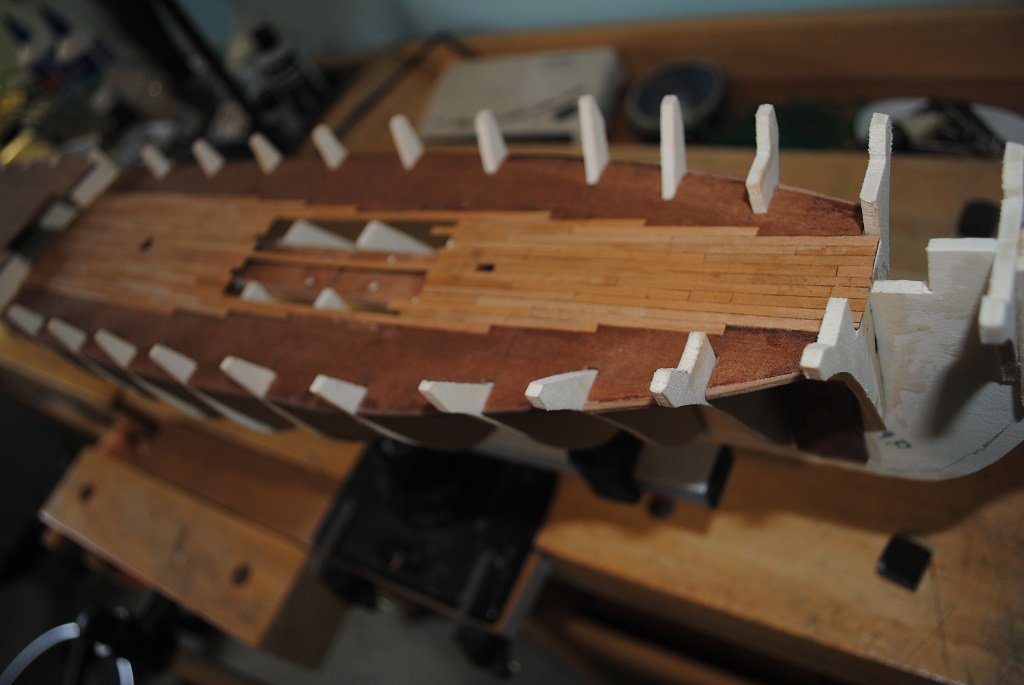
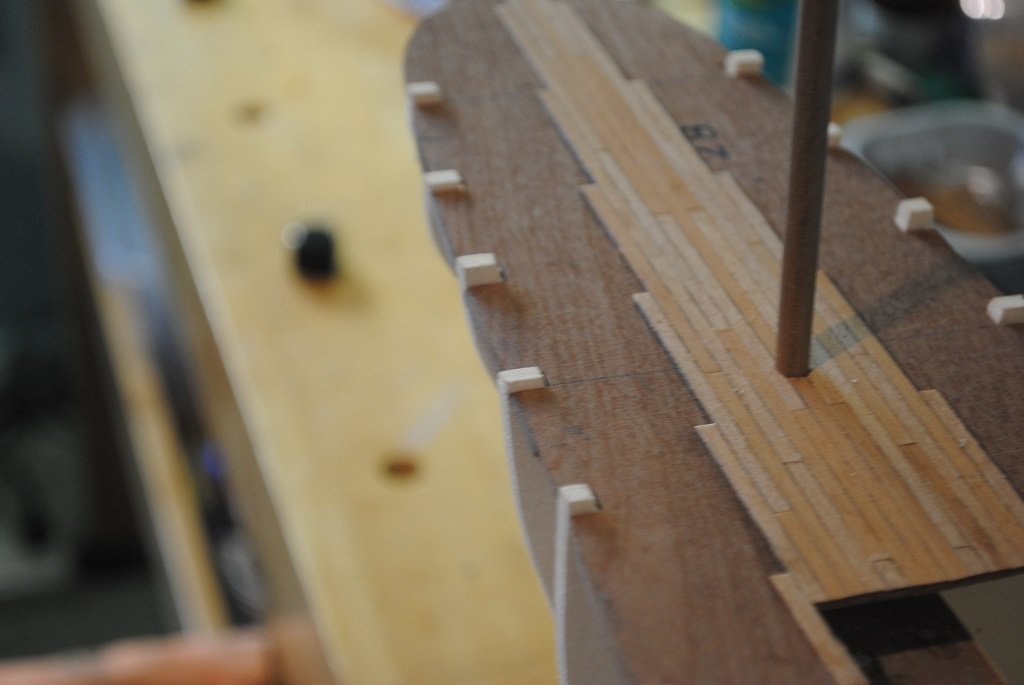
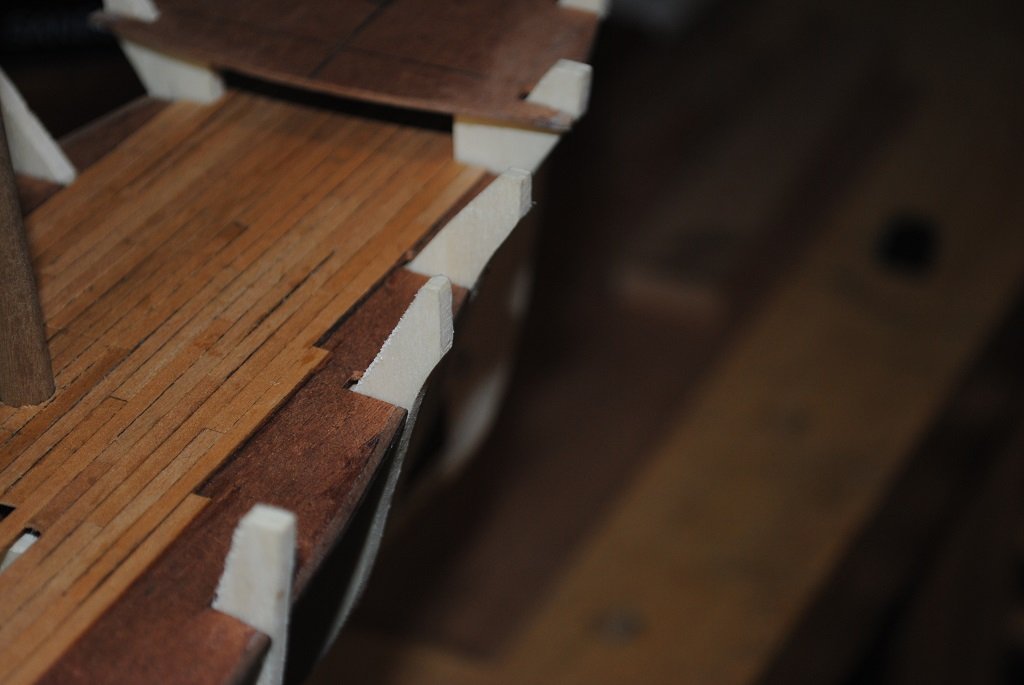
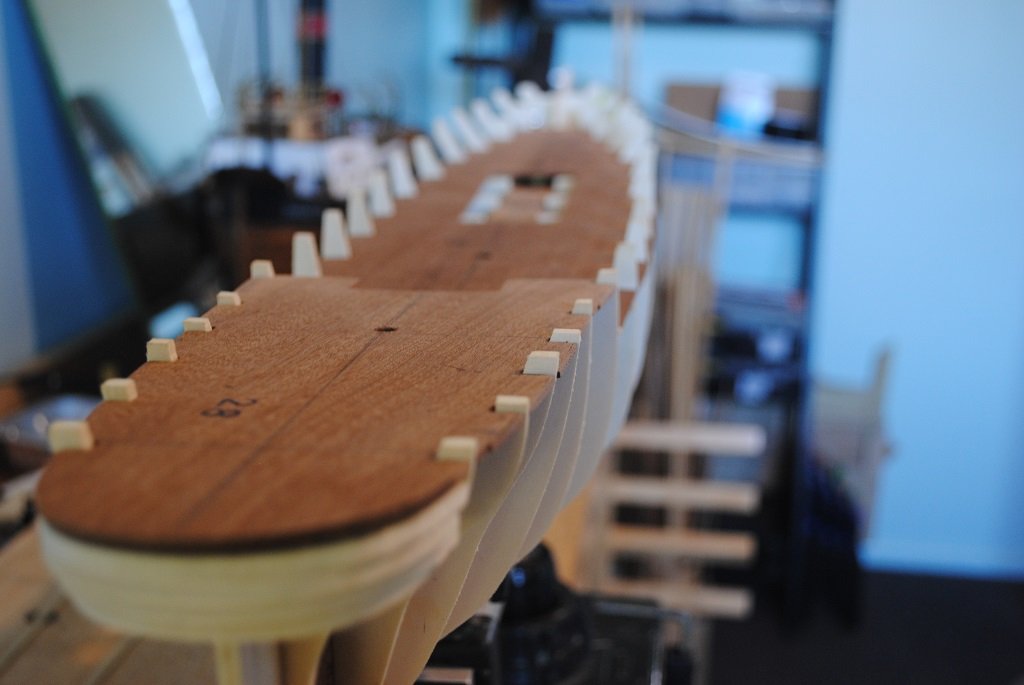
Hi All, Small update: Deck Planking has reached a point that I can no longer continue this task until the Hull is planked. (Otherwise, I'll be "Painting myself into a corner." 🙂) Kit supplied Tanganika, not all that good, some material is very "Rough" and I do not think that there is enough material to Plank all three Decks. I found some Billings Tanganika, (BL 1024), in my stock so have employed this as well. (You can see the random color variations; I think it looks not too bad.) Caulking is by way of a 6B pencil, and all attached with dilute PVA. I'm not too keen on sanding the Tanganika but I just think that I may have to, once the Decks are complete of course. I will tidy up around the hole where the Main House will sit. I guess that it will very soon be time to affix the Decks and start Fairing the Bulkheads.... I will have a think on the best approach to this. Cheers.... HOF. Photos:

- 193 replies
-
- 4
-
-
- Flying Cloud
- Mamoli
- (and 1 more)
-
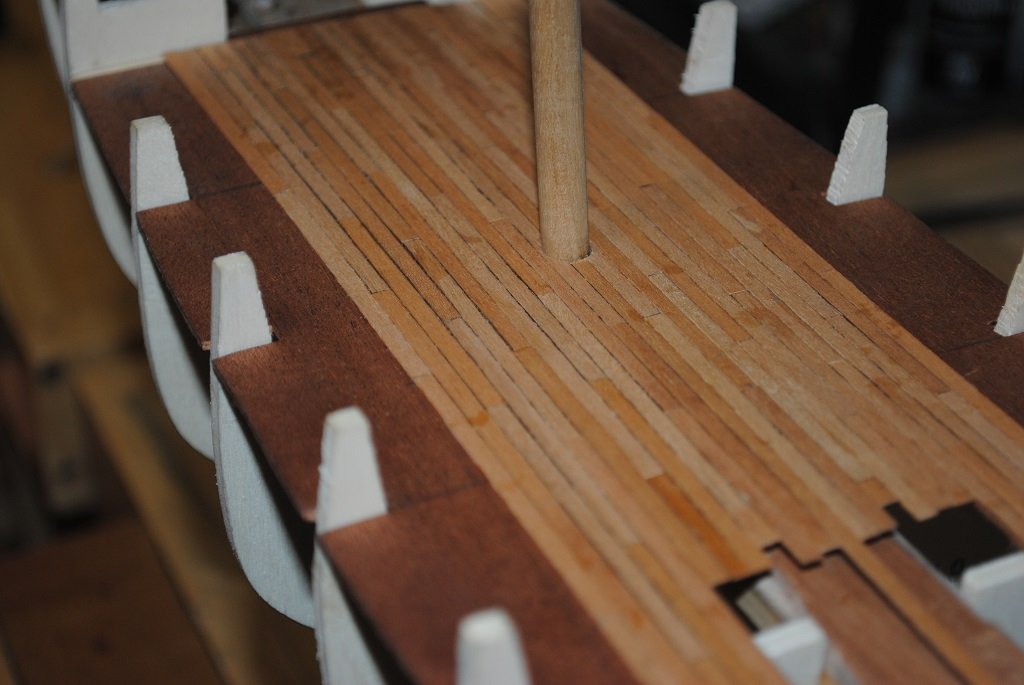
Hi Chap, I have used a Four Butt Shift. (This is probably a "Continental" pattern that I used on the Cutty Sark, as described by Mr. Longridge.) The Shift is as follows: 5 - 2 - 4 -1 - 3 Working outwards, each side from the King Plank The longest Plank, "5" is 60.0mm (Each # is a 12.0mm increment.) I don't know if this "Shift" was ever used on American Clippers, but I find the pattern "Interesting" to say the least.... 🙂 (It is also quite time consuming.) I have had a good couple of days now working on the Main Deck which I hope to complete tomorrow, (As far as I want to go, that is, being mindful that I have to "Pin" the False Deck to Bulwarks and Bulwark extensions have to be trimmed off "Post" Planking the Hull. At this stage Deck Planking is looking to be about 2/3 the width of the Hull.) I'll hopefully get some photos tomorrow. Cheers and Regards, Harry.
- 193 replies
-
- 3
-
-
- Flying Cloud
- Mamoli
- (and 1 more)
-
Hi Chap, Yup, Fairing the Bulkheads something I am not an "Expert" at either. I will make myself a nice sanding block and affix sandpaper to it, I might try Aluminum Oxide this time around as it does not clog. I'll be sure to really take my time, the good thing about Clippers, Midships don't need too much fairing, more Bow/Stern. I'll get some more Deck Planking down tomorrow before I think about attaching the False Decks prior to Fairing. Cheers and Regards, Harry.
- 193 replies
-
- 2
-
-
- Flying Cloud
- Mamoli
- (and 1 more)
-
Thanks for that Rob. The hull "Skeleton" is not too bad. Yup, fairing the Bulkheads will be interesting, I believe slow.... 🙂 Had a play with the Decking material today and have decided on a four Butt Shift. I intend to start this tomorrow with the Main Deck but I will only be planking about 1/3 of the Deck from the center out each side. This will leave enough room for me to pin around the perimeter before fairing the Bulkheads/Planking the Hull and trimming off the Bulkhead extensions once the Hull is Planked. That's the plan anyway.... Cheers and Regards, Harry.
- 193 replies
-
- 2
-
-
- Flying Cloud
- Mamoli
- (and 1 more)
-
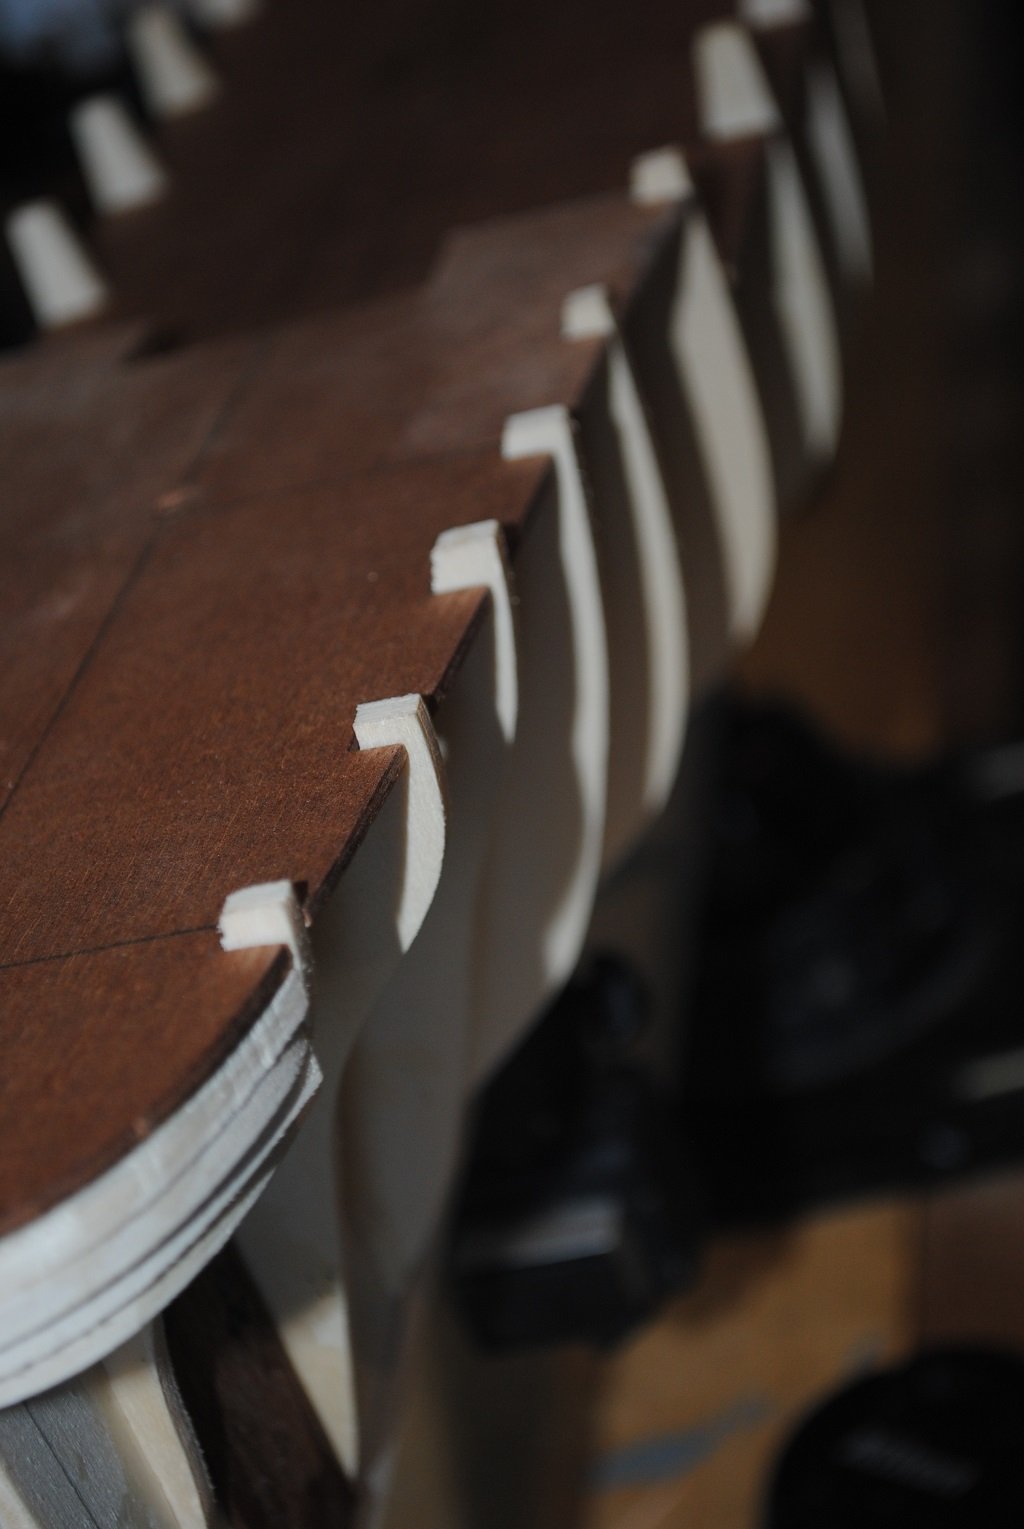
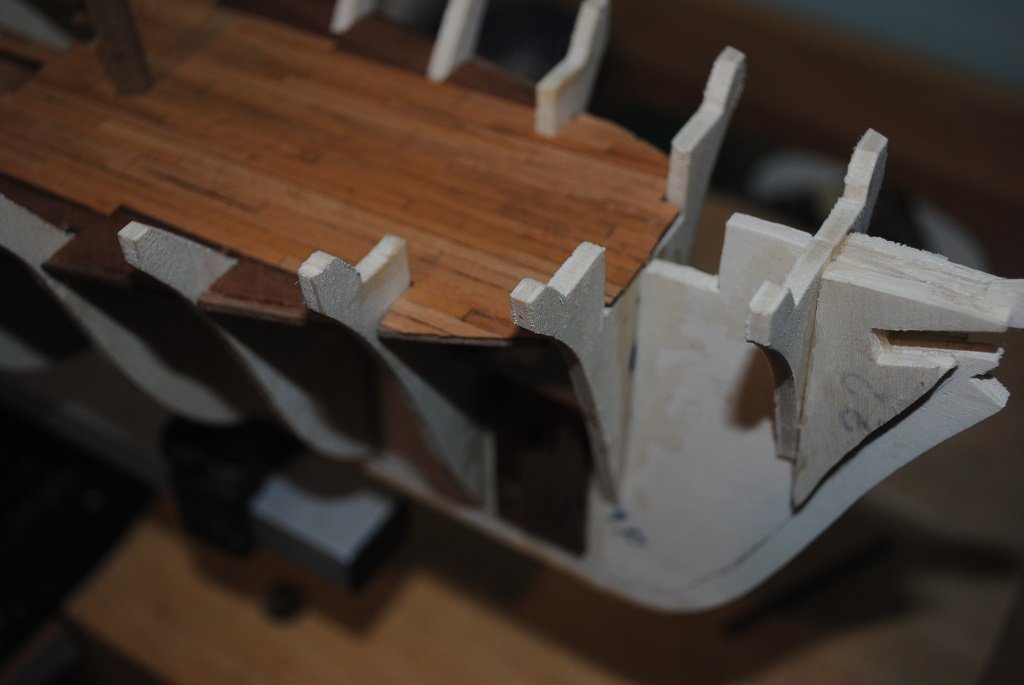
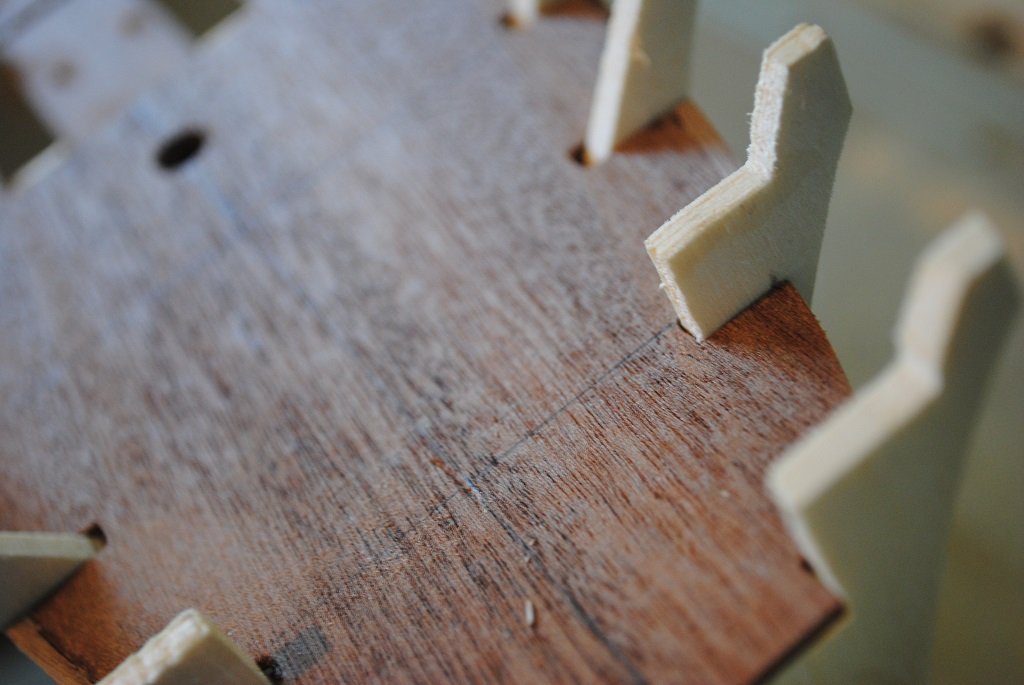
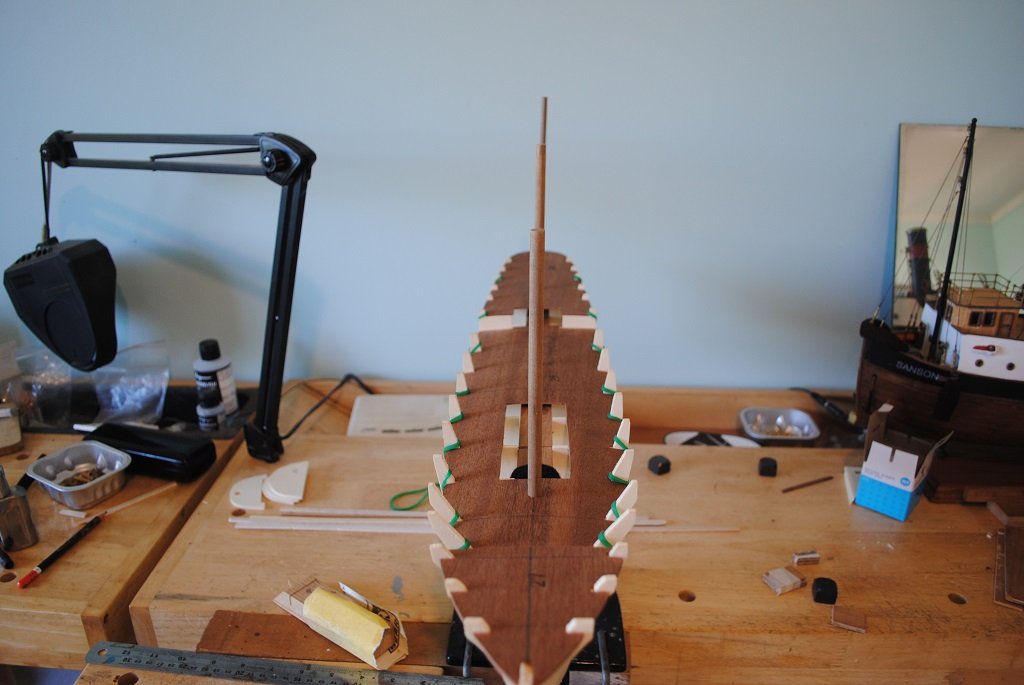
Hi All, Small update: Completed Deck width repair issues Triple checked overall Hull alignment All Decks look and fit much better. Port Side, Bulkhead #7 out of symmetry by 0.5mm (Mid Bulkhead) to 1.0mm (Bottom Bulkhead. Two laminations 0.5mm X 4.0mm glued and faired into bulkhead. Much better, I could see the discrepancy, it was really bugging me.... 🙂 (Planking Strake Port and Starboard to double check and all seems o.k.) So, I don't know if I'll do too much more today. Things to do next: Bow "Filler Blocks "Play" with Deck Planking - "Off Ship" Cheers....HOF. Photos:


- 193 replies
-
- 7
-
-
- Flying Cloud
- Mamoli
- (and 1 more)
-
Hi Wawona, Many thanks for looking in and your advice, much appreciated. I too was surprised at the issues I am faced with, no matter, just something to work through..... 🙂 Yup, I hear you regarding warped Keel/etc. (I have been very mindful of issues like these. I am pretty confident that things are "True." I did contemplate filler blocks and have attempted these a few years ago but was not a fan. Tomorrow, I'll get some photos loaded inc. a couple of the Hull structure I also hope to complete the Deck "Errors" and have a play with the Tanginika Decking material to work out Butt shifts and what medium would look best for Caulking. (Pencil/Sharpie) Cheers and Regards, Harry.
- 193 replies
-
- 1
-
-
- Flying Cloud
- Mamoli
- (and 1 more)
-
Thanks Rick, Nice to realize I'm not going insane.... 🙂 This build really gets me thinking. Cheers and Regards, Harry.
- 193 replies
-
- 1
-
-
- Flying Cloud
- Mamoli
- (and 1 more)
-
Many thanks Chap. Small update: Had a couple of days pondering things, my major concern was why the False Deck reach edges of the Bulkheads, widthwise. (If you look closely at the photos above, you might be able to see this.) My thought is that if not corrected it would seriously compromise fairing of the Bulkheads. Measured the width of the Deck at various points and it matches the part drawing Bulkheads not in error, all really well aligned, etc. (While I pondered, I decided to complete the Mast Steps.) I came to the realization that I was certainly not going to adjust Bulkhead width, so I resolved to add some Strip wood on the Deck between Bulkhead positions. The required width ranges from 0.5mm to 2.0mm depending on how far forward the Deck position is. (Strips are 1.5mm in thickness to match False Deck material.) So far, a much better result. (There are some positions that may require further investigation. 🙂) This kit is certainly not a Laser cut offering!! I'll hopefully get some photos tomorrow. Cheers....HOF.
- 193 replies
-
- 2
-
-
- Flying Cloud
- Mamoli
- (and 1 more)
-
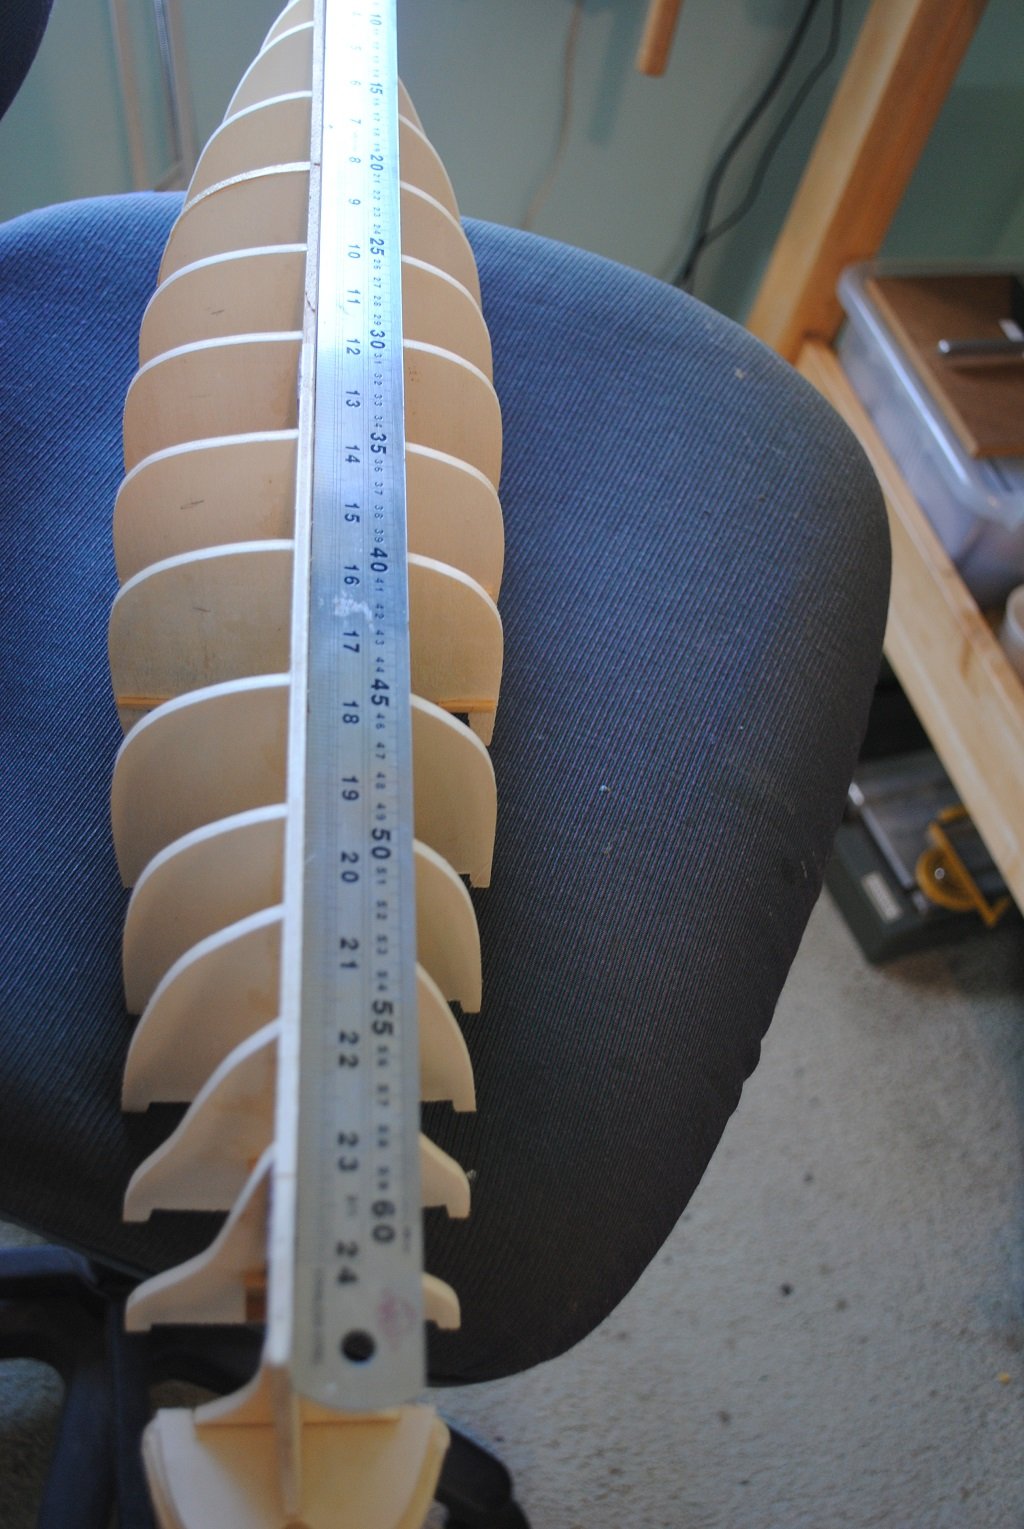
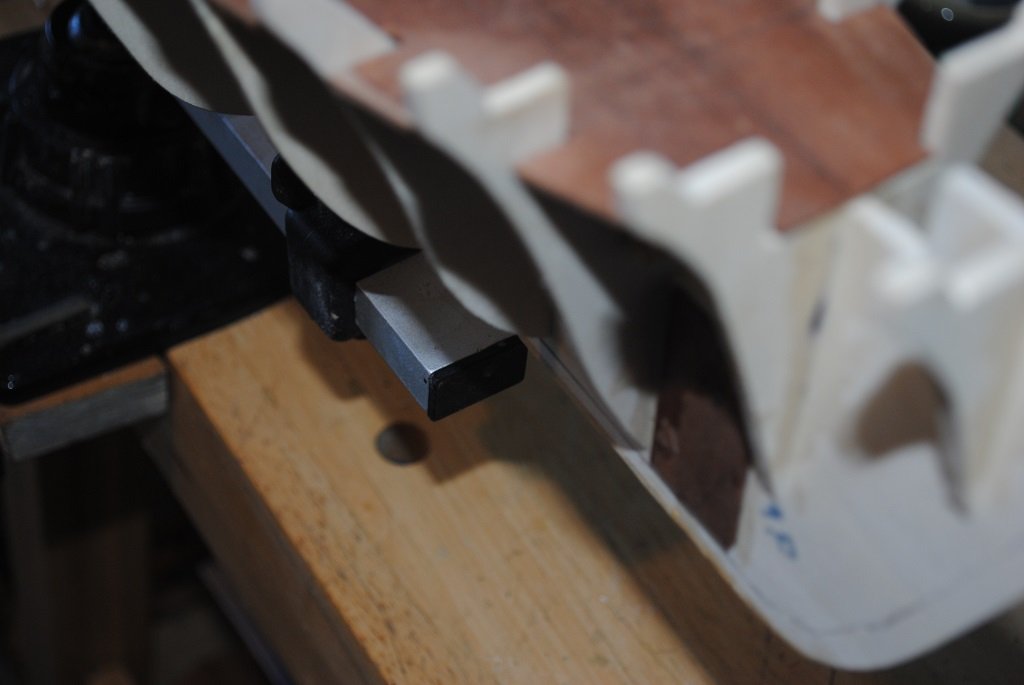
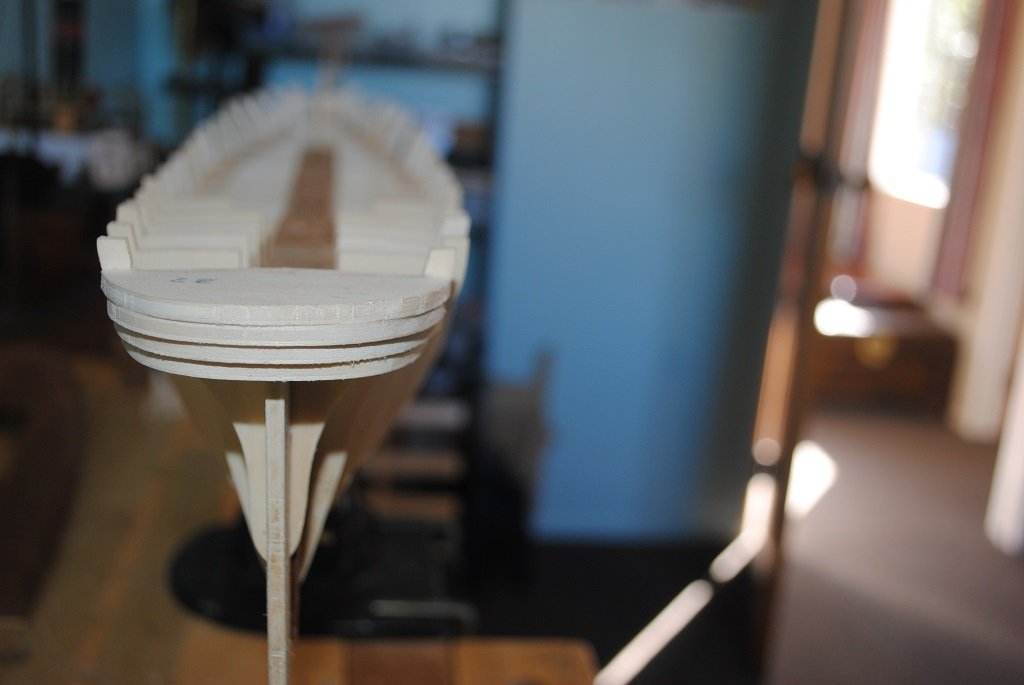
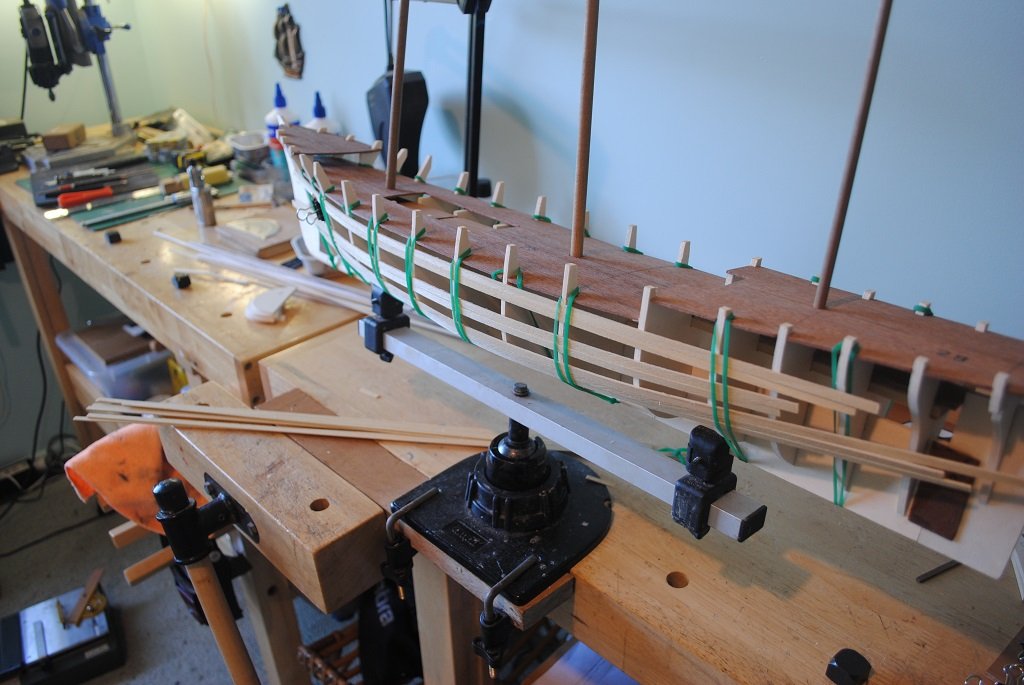
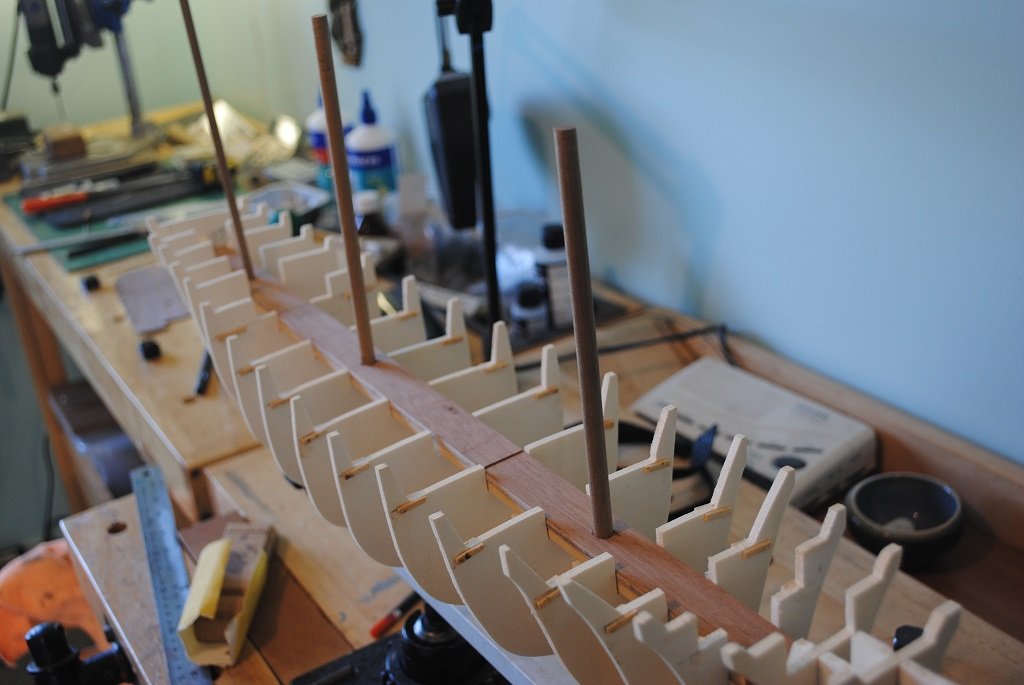
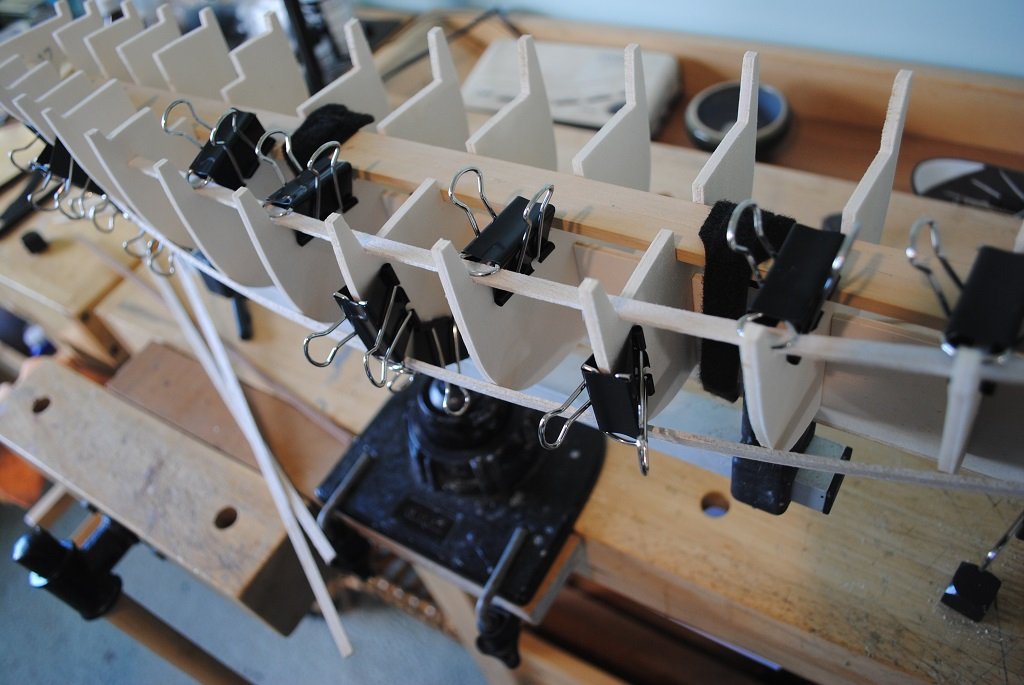
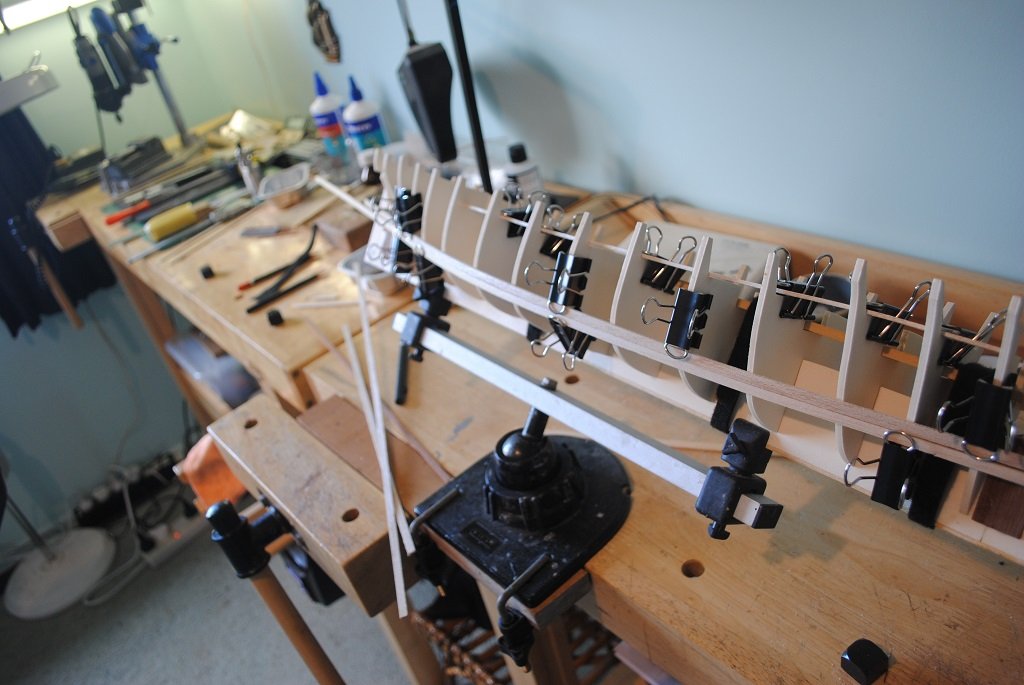
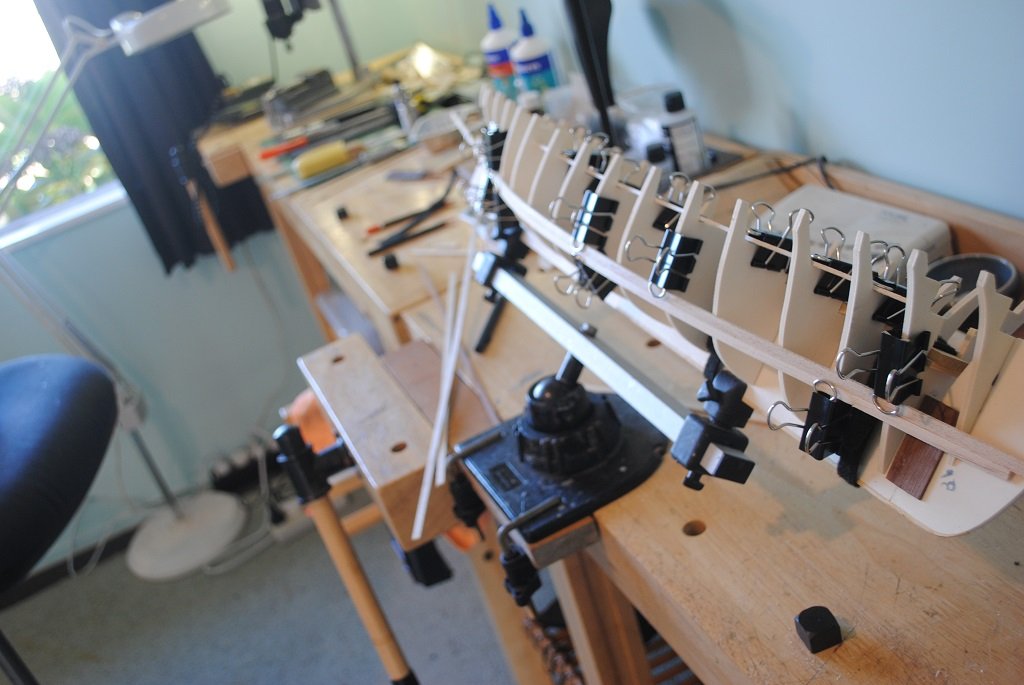
Hi All, Small update: Fine adjustments, (Many) on Hull structure Placed Planking Strakes along Hull to gauge Bulkhead positioning Fixed structure with rubber bands an cable tied lengthwise "Beam" Aliphatic Resin bead on all joints False Decks are not glued as yet, there are a couple of fine adjustments required on the Main Mast Housing. (Photo) I will leave everything to cure for a good few hours. Cheers....HOF. Photos:


- 193 replies
-
- 5
-
-
- Flying Cloud
- Mamoli
- (and 1 more)
-
Hi Alan, Many thanks for that. Gives me some good ideas to ponder. Looks like a "Four Butt" Shift? Cheers and Regards, Harry.
-
Hi All, I have been through a number of my publications regarding Deck Planking, "Shift of Butts" for American built Clippers but have not found anything definitive. Would someone here have some idea of the above? Iam currently working on a Mamoli - 1/96 Flying Cloud Decking material - Tanganika - 0.5 X 3.0mm Many thanks in advance. Cheers and Regards, Harry.
-
Gentlemen, Thank your your "Likes" and comments, very much appreciated. I am very much looking forward to Planking.... Firstly, I need to glue Keel/Bulkhead/Etc. together but not the False Decks at this stage., I'll utilize these to hold everything in line. I have bisected all False Decks in preparation for the "King" Plank. Since the Decks are supposed to be Planked "Post" Hull/Bulwarks are completed. (Parity due to Bulkhead extensions.) Anyway, I really need to utilize a Steel Rule to get the "King Plank aligned correctly, esp. Main Deck. On the subject of Deck Planking for this ship, can someone, @rwiederrich (Rob?), please give me some ideas about a Deck Planking "Butt Shift? I was contemplating a four Butt Shift, 5/2/4/3/1 similar to Cutty Sark. (Deck Planking: 0.5mm X 3.0mm Tanganika) Yup, I hear your concerns with the positioning of the bulkhead/Keel relationship. I have those concerns also but I think things are not too bad here, I have placed "Strakes" along the Hull esp. at the turn of the Bilges, there do not appear to be any sags or bulges. Also, I think that the sheer of the Deck is good with respect to the Sheer Plan view. (I intend to "Triple" check things before splashing any glue around.... 🙂) Today, I turned my attention back to the Mast Housings/Steps. One problem that was evident that the "Dummy Masts" were very difficult to locate in the Housing holes that I drilled out yesterday, Esp. the Main as the Mast penetrates below the Deck by only 8.0mm, Fore Mast was a little easier to insert at a depth of 13.0mm and the Mizzen, no real problem at 24.0mm So, I adjusted things, I inserted a 9.0mm Brass sleeve to house the For and Main Mast Bases the 13.0mm and 8.0mm respectively, the Mizzen was given a small 7.0mm Sleeve, 4.0mm in thickness. The Masts now "Plug In" very nicely indeed!! (I can take a photo or two if anyone is interested.) (The "Sleeves" will not "Pop" out as they are pretty much kept in place when the False Deck is on.) (I am not going to glue the "Sleeves" in place as I need the tiny bit of play, Fore and Aft to set the rake of the Masts. (I have decided on a 5' rake on all Masts rather than the 5.95' given in the research material, maybe a bit of "Scale Effect" here? Anyway 5' is a nice consistent angle for setting the Tops/Cheeks/etc.🙂) That's pretty much me for today,... As mentioned earlier, thank you for looking in and please keep the comment coming, Cheers and Regards Harry.
- 193 replies
-
- 2
-
-
- Flying Cloud
- Mamoli
- (and 1 more)
-
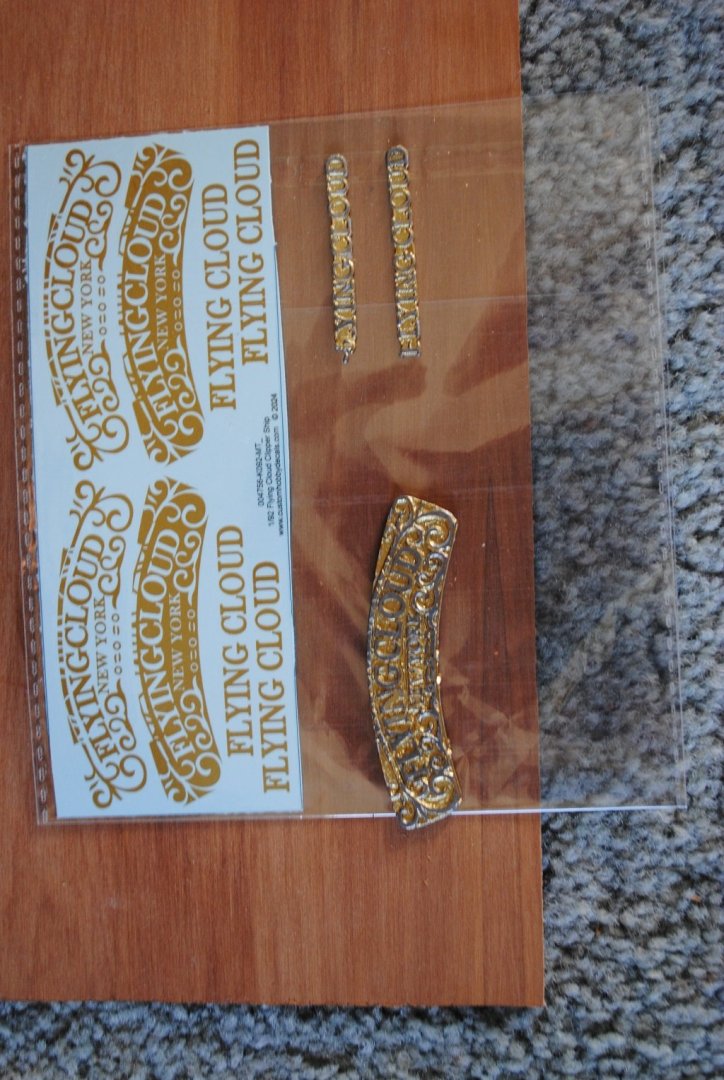
Thank you Jpalmer, I contacted CHD as I purchased my 1/200 Bismarck Decals from them. After one "iteration" of thier render, I sent them a scan of what I wanted, inc. dimensions. There were a few back and forth email but got there in the end. The resulting render was really good. The render, printing, shipping was AUD $56.00 Cheers and Regards, Harry.
- 193 replies
-
- 3
-
-
- Flying Cloud
- Mamoli
- (and 1 more)
-
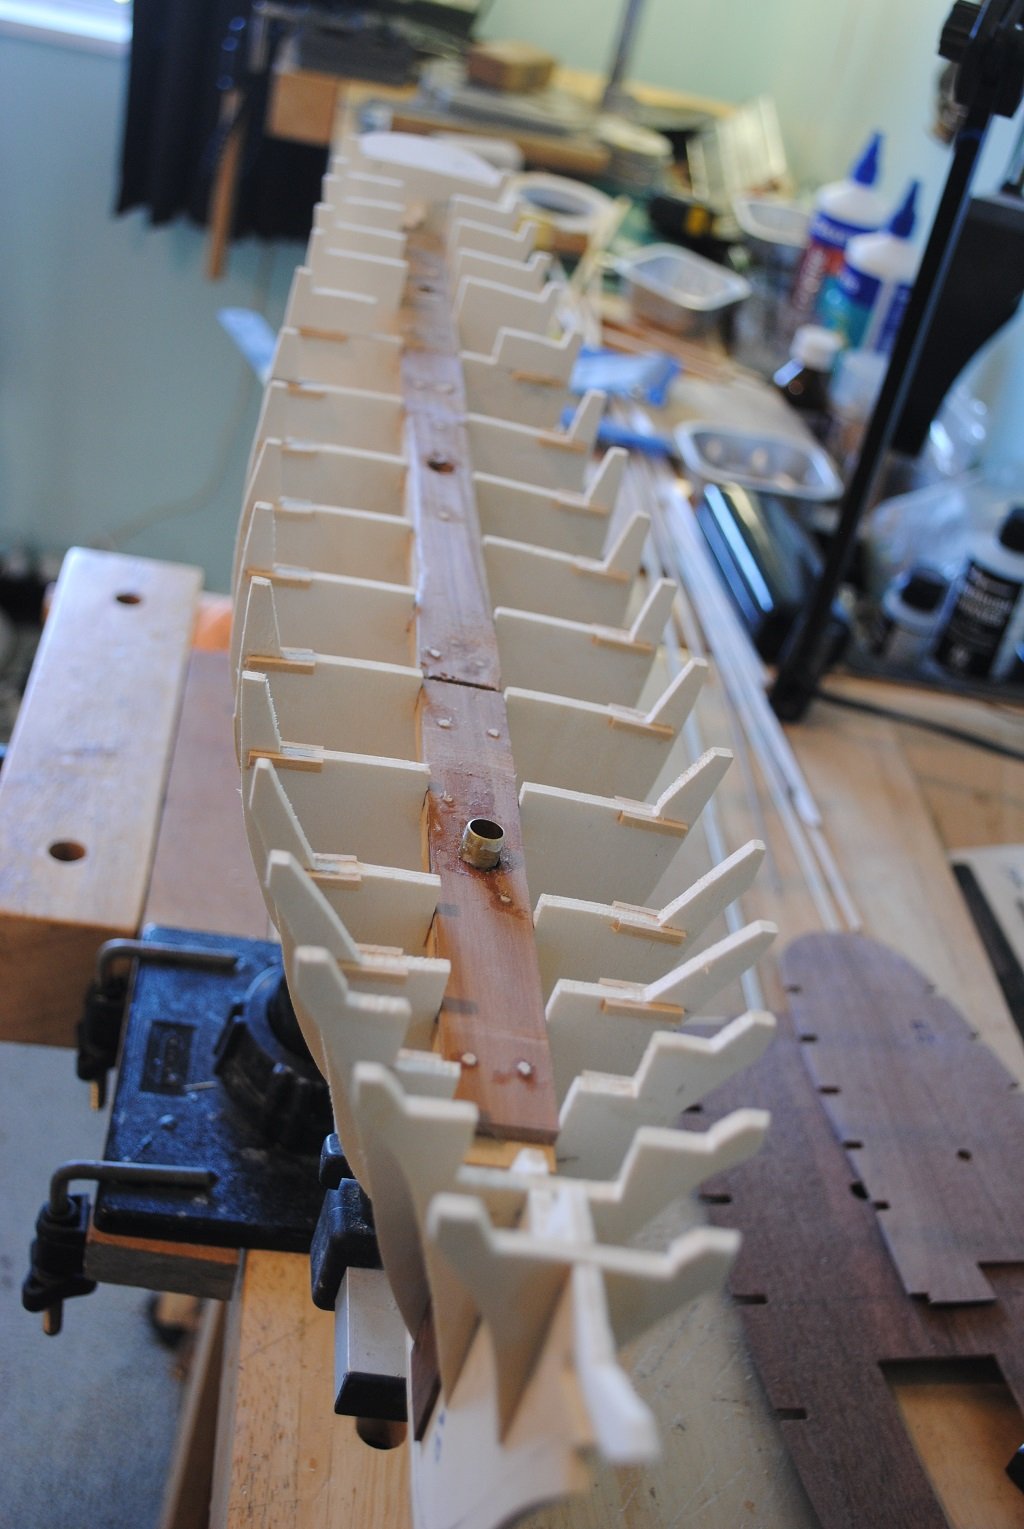
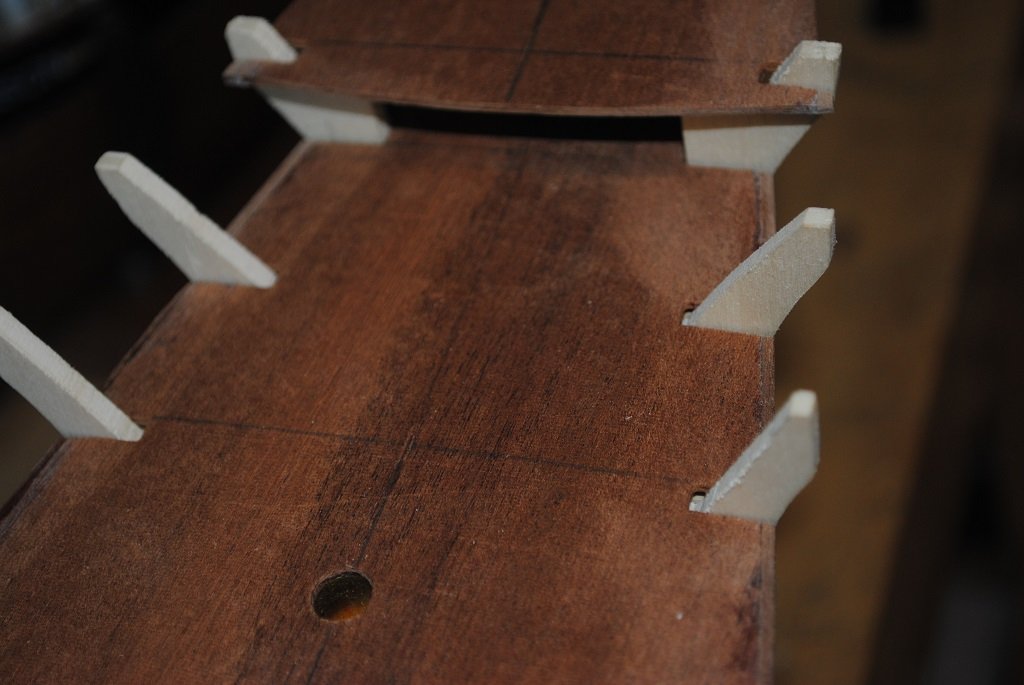
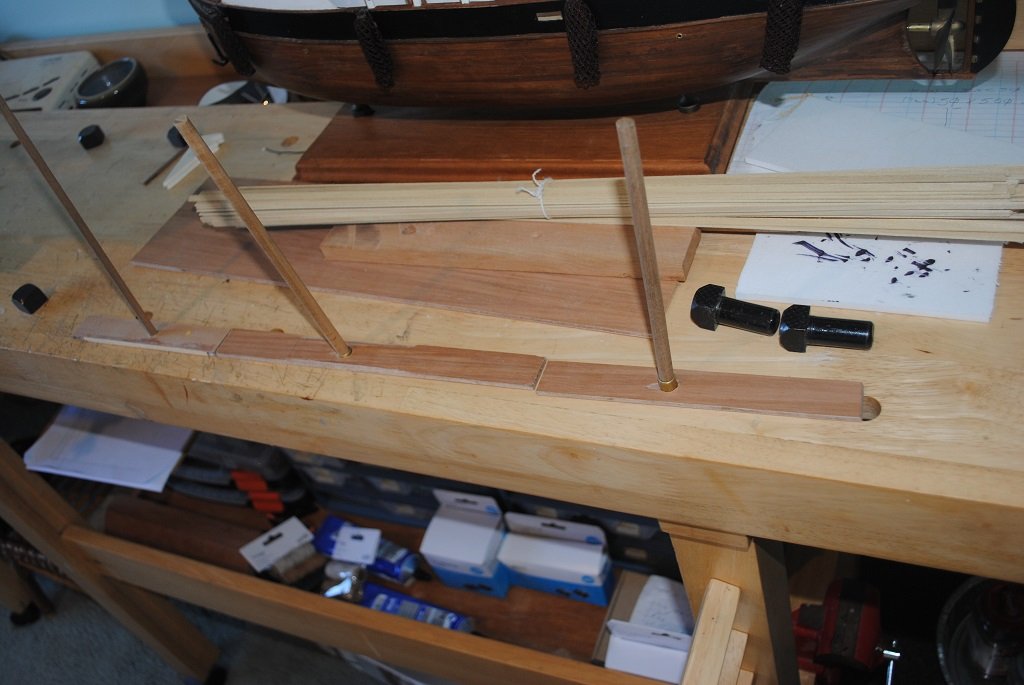
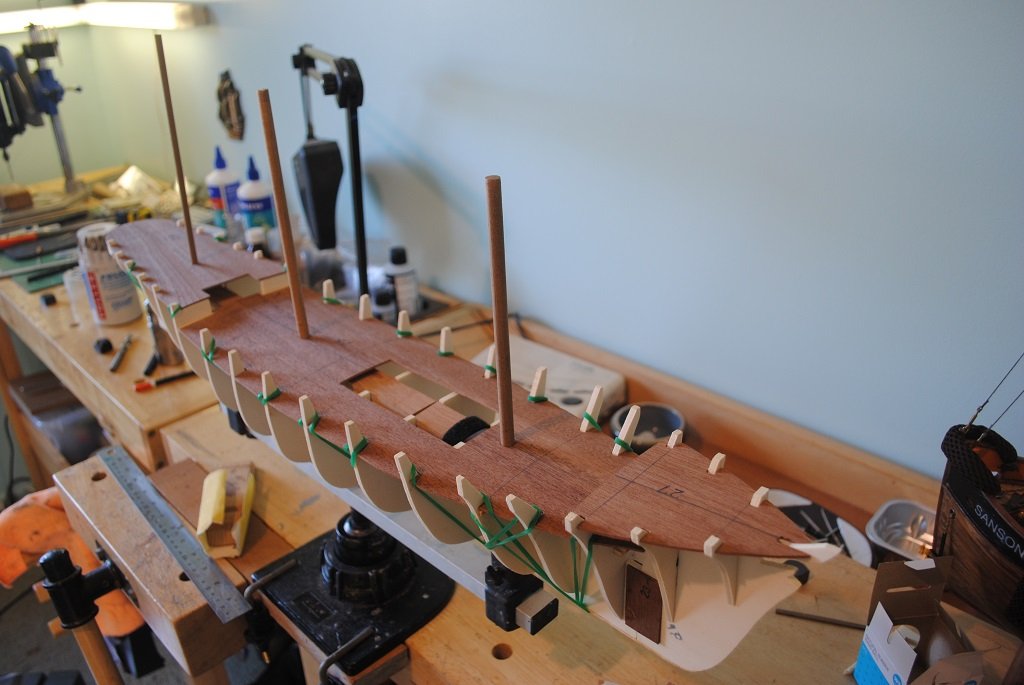
Hi All, Small update: Placed small strips at the outer edges of the Bulwarks to support Main Deck Edges (Sheer) Finally worked out and implemented housings/Steps for Mast Bases. Received Decals for the Stern and Trail Boards (Custom Hobby Decals Australia) Ok. My take on Mast Housings.... Milled 4.0nn thick Rimu Ply, 23mm wide to fit into center Bulwark "Beam" housing, retaining the existing Tanganika Beam "Jacked-up" the Rimu Beam to lie underneath the False Deck False Deck now became the template for Mast hole locations. Drilled holes in the Rimy Ply for Masts Re-assemble and test Note: The Rimu Ply Housing beam is cut into 3 sections, Fore, Main and Mizzen Masts. This is to facilitate setting Mast Rake; all Masts are supposed to be Raked at 5.95' Aft. The differences from 90" to the amount that the base of the Mast moves forward, (X Axis), to accommodate the rake/angle, is miniscule.... I have calculated at 4.0' (86')' as follows: "X" Horizontal Axis "Y" is vertical 90"(Beam to False Deck Fore: X - 0.9mm Y -13.0mm Angle -86.0' Main: X - 0.5mm Y - 8.0mm Angle 86.0' Mizzen X - 1.6mm Y - 24.0mm Angle 86.0"' (I will calculate at 85" also.) So, when I am ready to glue everything, I just need to "Slide" the Rimu housing a fraction forward or backwards to set the masts at the correct angle. I figured that it is much easier to "Shim" the housing beam from a known vertical reference point, Ie. Sterm Post/Bulkhead. I think that I have achieved my goal of "Plug In" Masts. Cheers....HOF. Photos:


- 193 replies
-
- 4
-
-
- Flying Cloud
- Mamoli
- (and 1 more)
-
Thanks Rob, Yup, right from the "Getgo" there were issues: Keel Frames differed in "Vertical" width by 2.0mm (I aligned the two pieces so that the slotted Bulkhead edge lined up and fixed the forward Keel frame post this with some strip wood.) Keys/dovetails? for all false Keel components required "Adjustment" for a reasonable fit Central beam required machining to fit comfortably into upper Bulkhead housings Bulkheads, (After a lot of testing/re-testing, checking/rechecking) proved to be "reasonable" but issues with the Ramin Center Beam, (As above) Main False Deck required strip wood fillers, Aft. The only reason I have some strip wood clamped to the edge of the Bulkheads is so that I can gauge the lengthwise Deck Sheer as the False deck is quite "Stiff" and after all the issues experienced, I wanted to see a clearly discernable line, (When "Eyeballed" with reference to the plans. 🙂 The kit, thus far, has proved a little difficult. (I am not sure if this was a "Monday morning" or a "late Friday afternoon," production.... 🙂) On the positive side of things, it's really good and forces me to think carefully about things before getting the glue out!! Cheers and Regards, Harry.
- 193 replies
-
- 2
-
-
- Flying Cloud
- Mamoli
- (and 1 more)
-
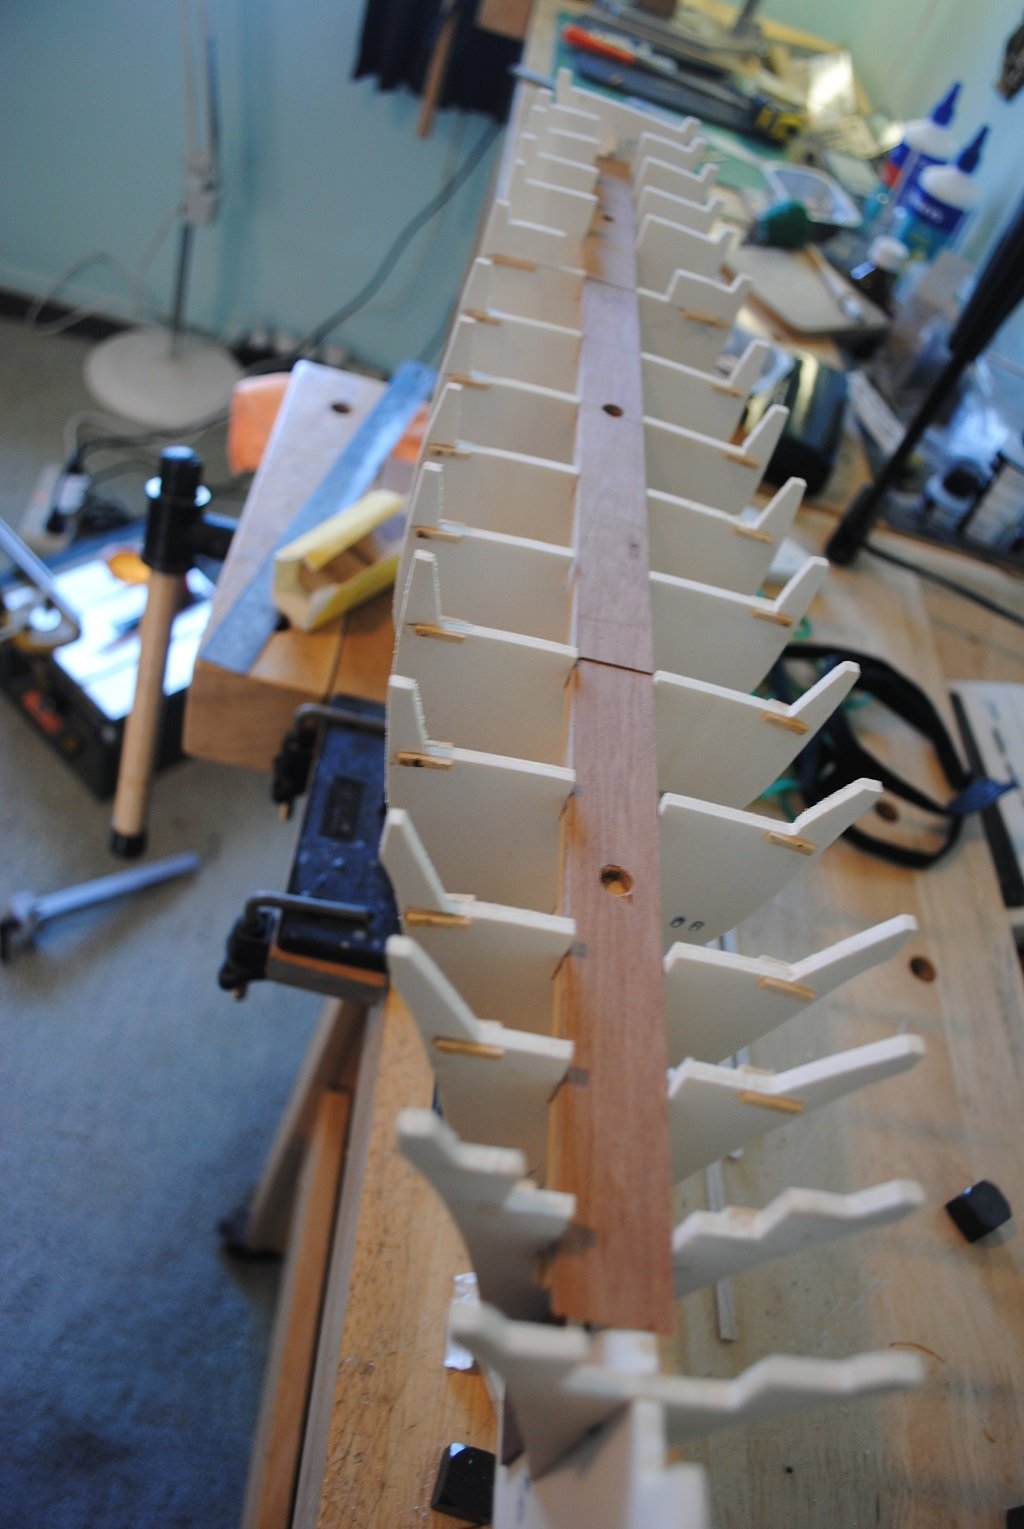
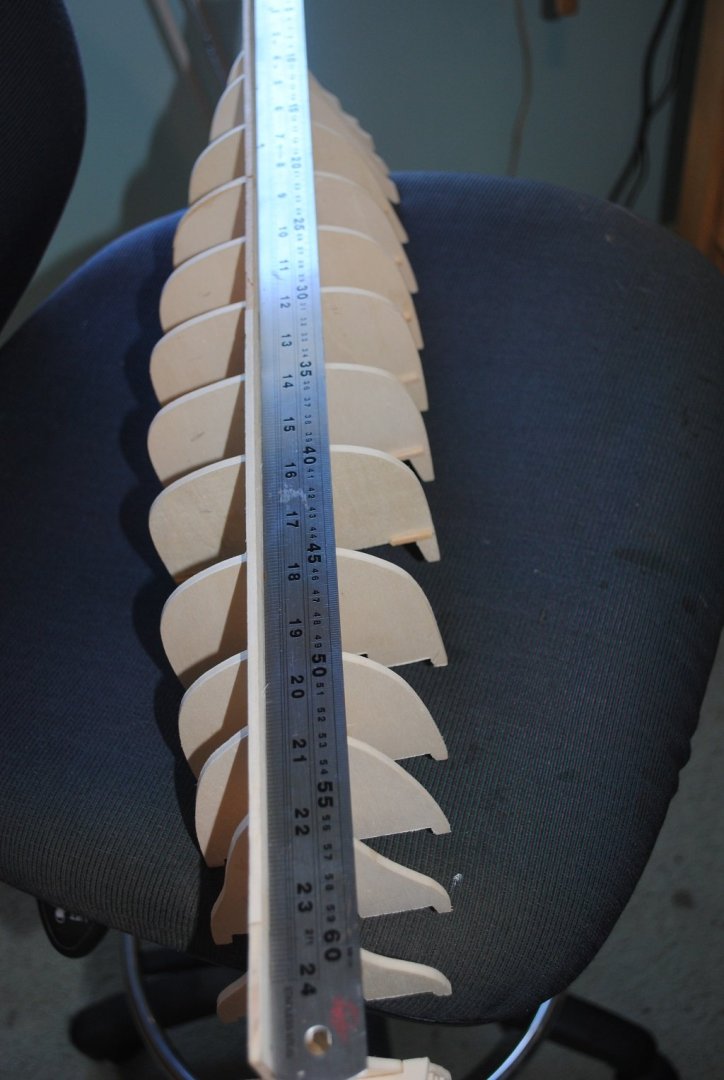
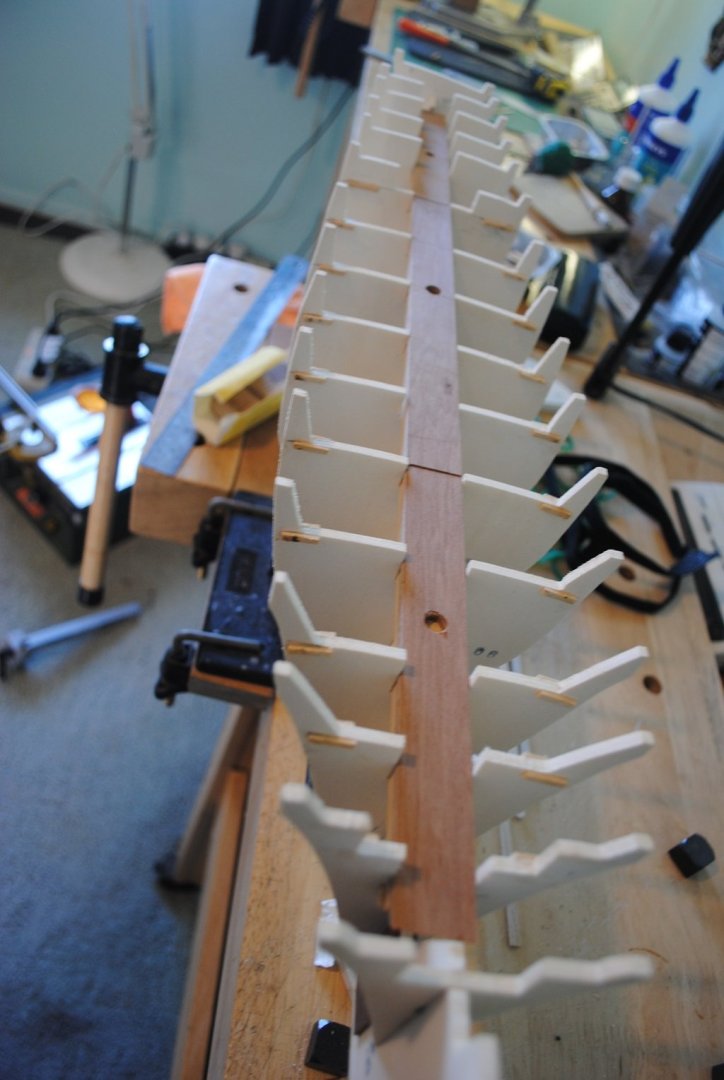
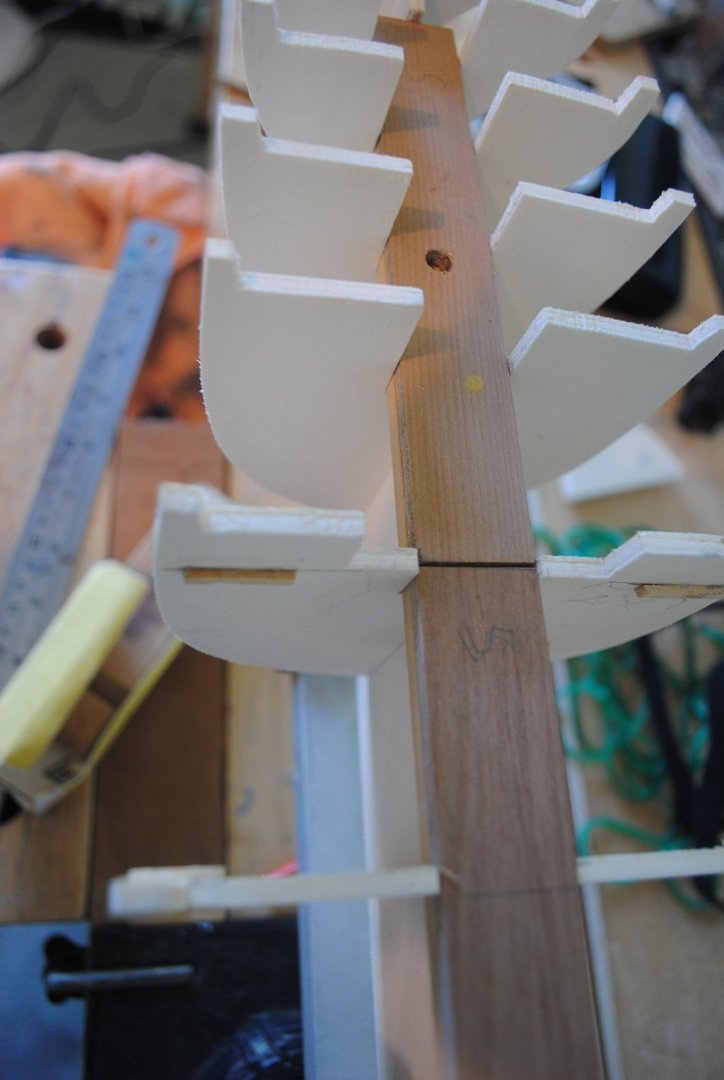
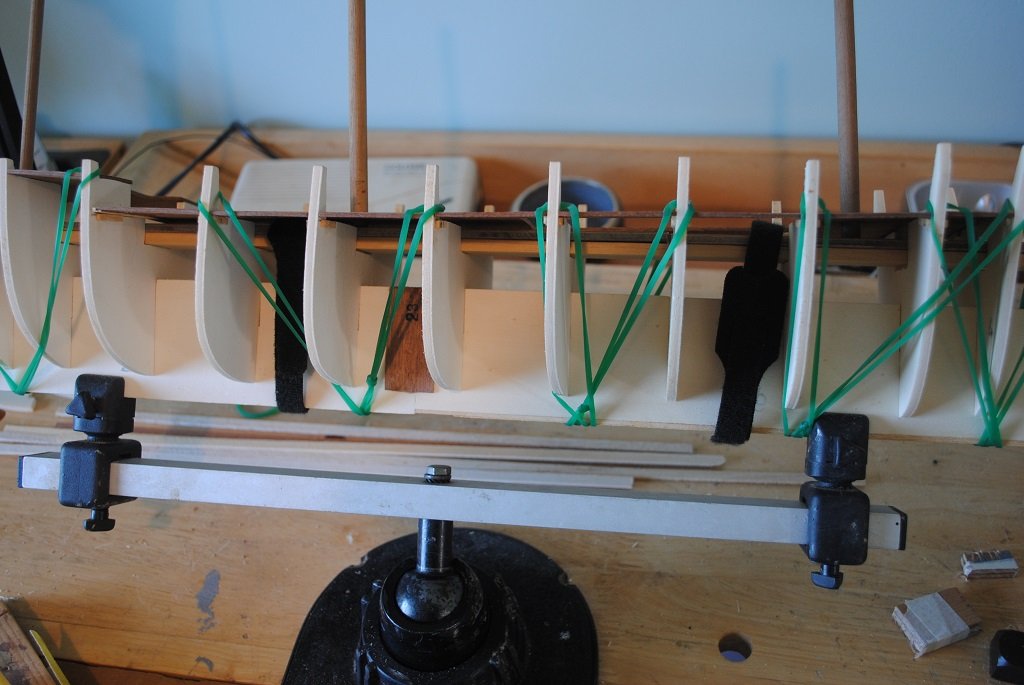
HI All, Small update: I have been continuing working on Bulkhead depth/alignment. The Centre Beam, Tanganika is extremely hard and inflexible, a good thing. The kit instructions say that the center of the Bulkheads must meet this "Beam," however while the majority do, there are 3 - 4 that do not and have spaces under the Beam ranging from 0.5mm - 1.0mm I have been agonizing about this discrepancy so decided to clip a couple of Planking Stakes on to the Hull. With the Bulkheads firmly pushed into thier respective slots and the Beam secured with Velcro Cable Ties, the gaps remain. The Planking Strakes lie well along the Hull with no bumps or hollows evident. I also decided to clip a plank along the line of Bulkheads to gauge Deck Sheer. If I move an offending Bulkheads up to meet the Beam, it throws out the afore mentioned Sheer. I think I am now good with where the Bulkheads lie. 🙂 Next step is to place small strips at the outer edges of the Bulwarks to support the outer edges False Deck. I am also working on calculating where on the central Beam, where the Masts will be stepped. Cheers....HOF. Photos:
- 193 replies
-
- 3
-
-
- Flying Cloud
- Mamoli
- (and 1 more)
-
Thanks Mike, The knowledge is invaluable, thank you. (I've only been doing this for 20 years or so.... 🙂) With this "Mamoli" kit I am really forced to look at things very closely, translation of components listed also made me look extra closely. I had another "Session" this morning sorting more Strip and Stick Wood and also came to the realization there was not going to be enough material to plank Deckhouses/Etc. I found my own stock that should "Foot the bill". I have been spoilt in the past with the likes of A/L, (Even Mantua), kits in the more clearly defined colors/sizes, not to mention quantity and uses of material provided, Anyway, enough of me today, Thank you to yourself, Jaager and Gergory for the advice and assistance. Cheers and Regards, Harry.
-
Thanks Rick, I have just started.... 🙂 As stated in an alternative post regarding wood, there seems "Just" enough wood for Hull second planking and not much else.... Mamoli is not like the generous A/L kits.... I had a look through my stock of spare wood and am reasonably confident that I now have enough material to complete satisfactorily. Therefore, no progress today apart from ensuring Bulkheads are where they are supposed to be with respect to the base of the Keel. (This was a bit of a concern, initially, as a couple of Bulkheads do not contact the longitudal "Beam" by approx. 1.0 - 1.5mm No worries, I'll "Shim" these.) I also placed a strake along the Hull in various places to ensure there are not going to be any issues with the Bulkhead positions/placement. I have some lengths of Dowel that I will play with to get the masts "Stepped" correctly. (I'm still considering my options. (Removable Masts, or "Plug In" Masts are a definite "Must have" for this chap. 🙂) Edit: Flying Cloud Parts List.xls updated on topic page of this thread for those that are interested. It is far from complete, I will update as I get more done. Cheers....HOF.
- 193 replies
-
- 2
-
-
- Flying Cloud
- Mamoli
- (and 1 more)