DaveRow
-
Posts
692 -
Joined
-
Last visited
Content Type
Profiles
Forums
Gallery
Events
Everything posted by DaveRow
-
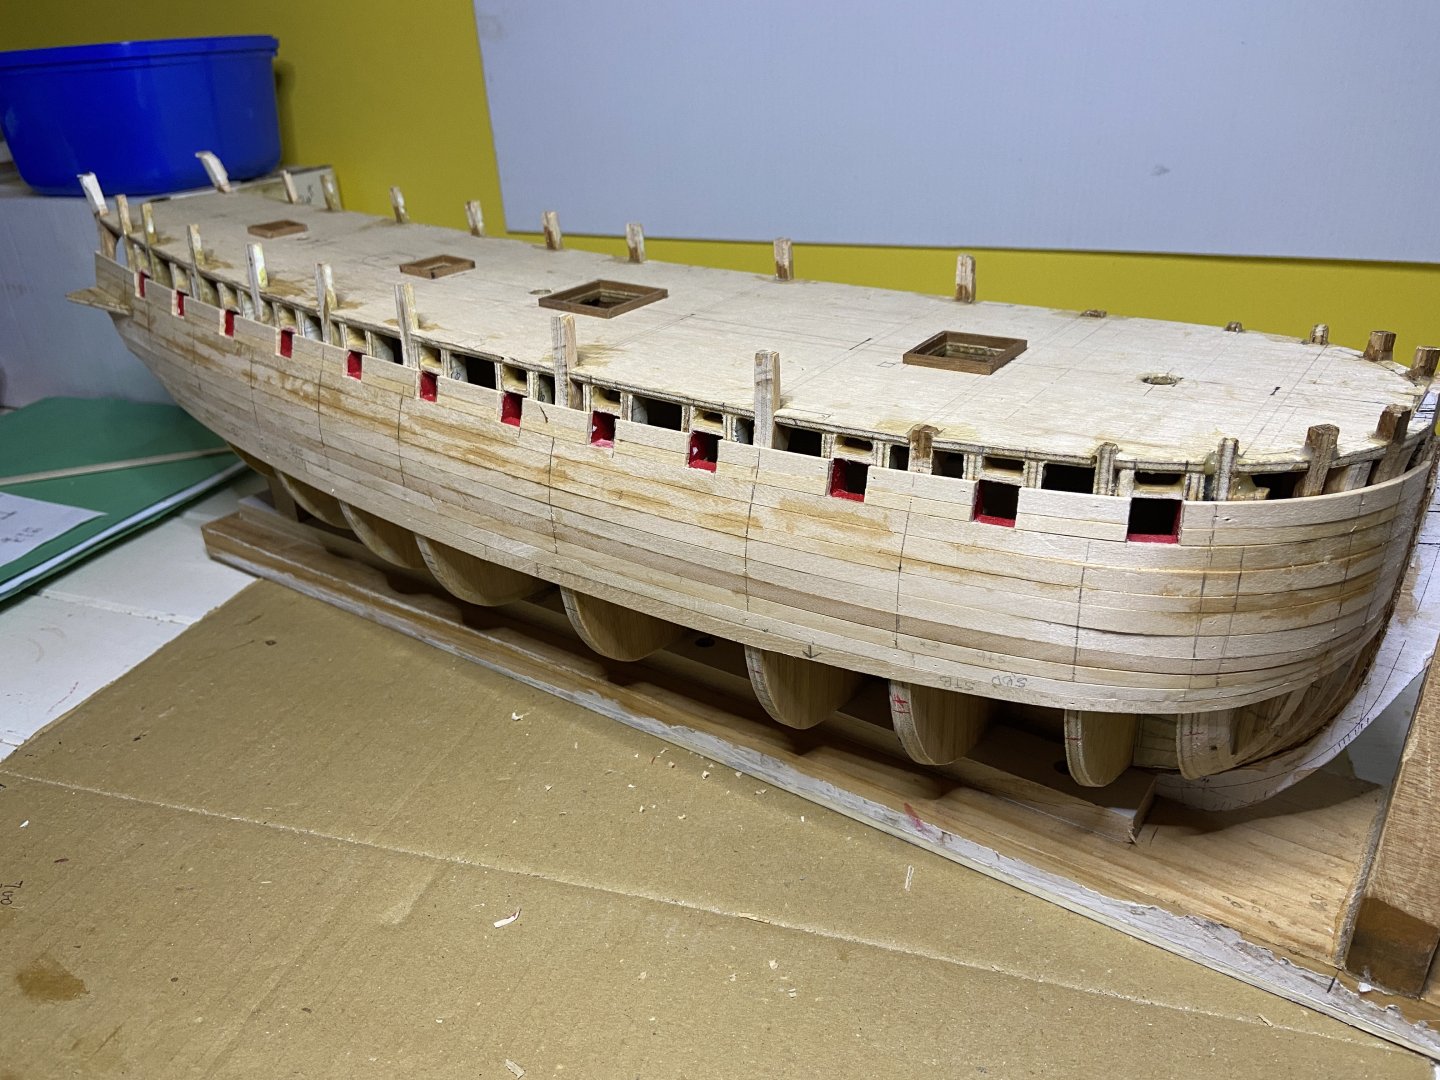
 Back in the Shipyard 25 January 2026. Progress has been slow on the 2nd layer planking. Still carrying a trigger finger splint on my right hand. 6 weeks rest, specialist says another 3 months rest. So Xmas break, I cannot help myself, had to keep planking. Up to about 2/3rds the way around the bottom now. 2 sets of dropped planks up on the Bluff bow. Progress is slow(not pushing the finger/split too hard).


-
Bit of an update on the Build I've had to take some time off on doctors advice. 6 weeks at least to let my right hand ring finger hopefully recover from "trigger finger". Which is when the finger does not straighten with the others when opening ones hand. Basically, I've overworked the muscle which pulls the finger straight. As well, wife and I had a holiday planned overseas. So shipyard is on hold for a while, possibly a fer months.
-
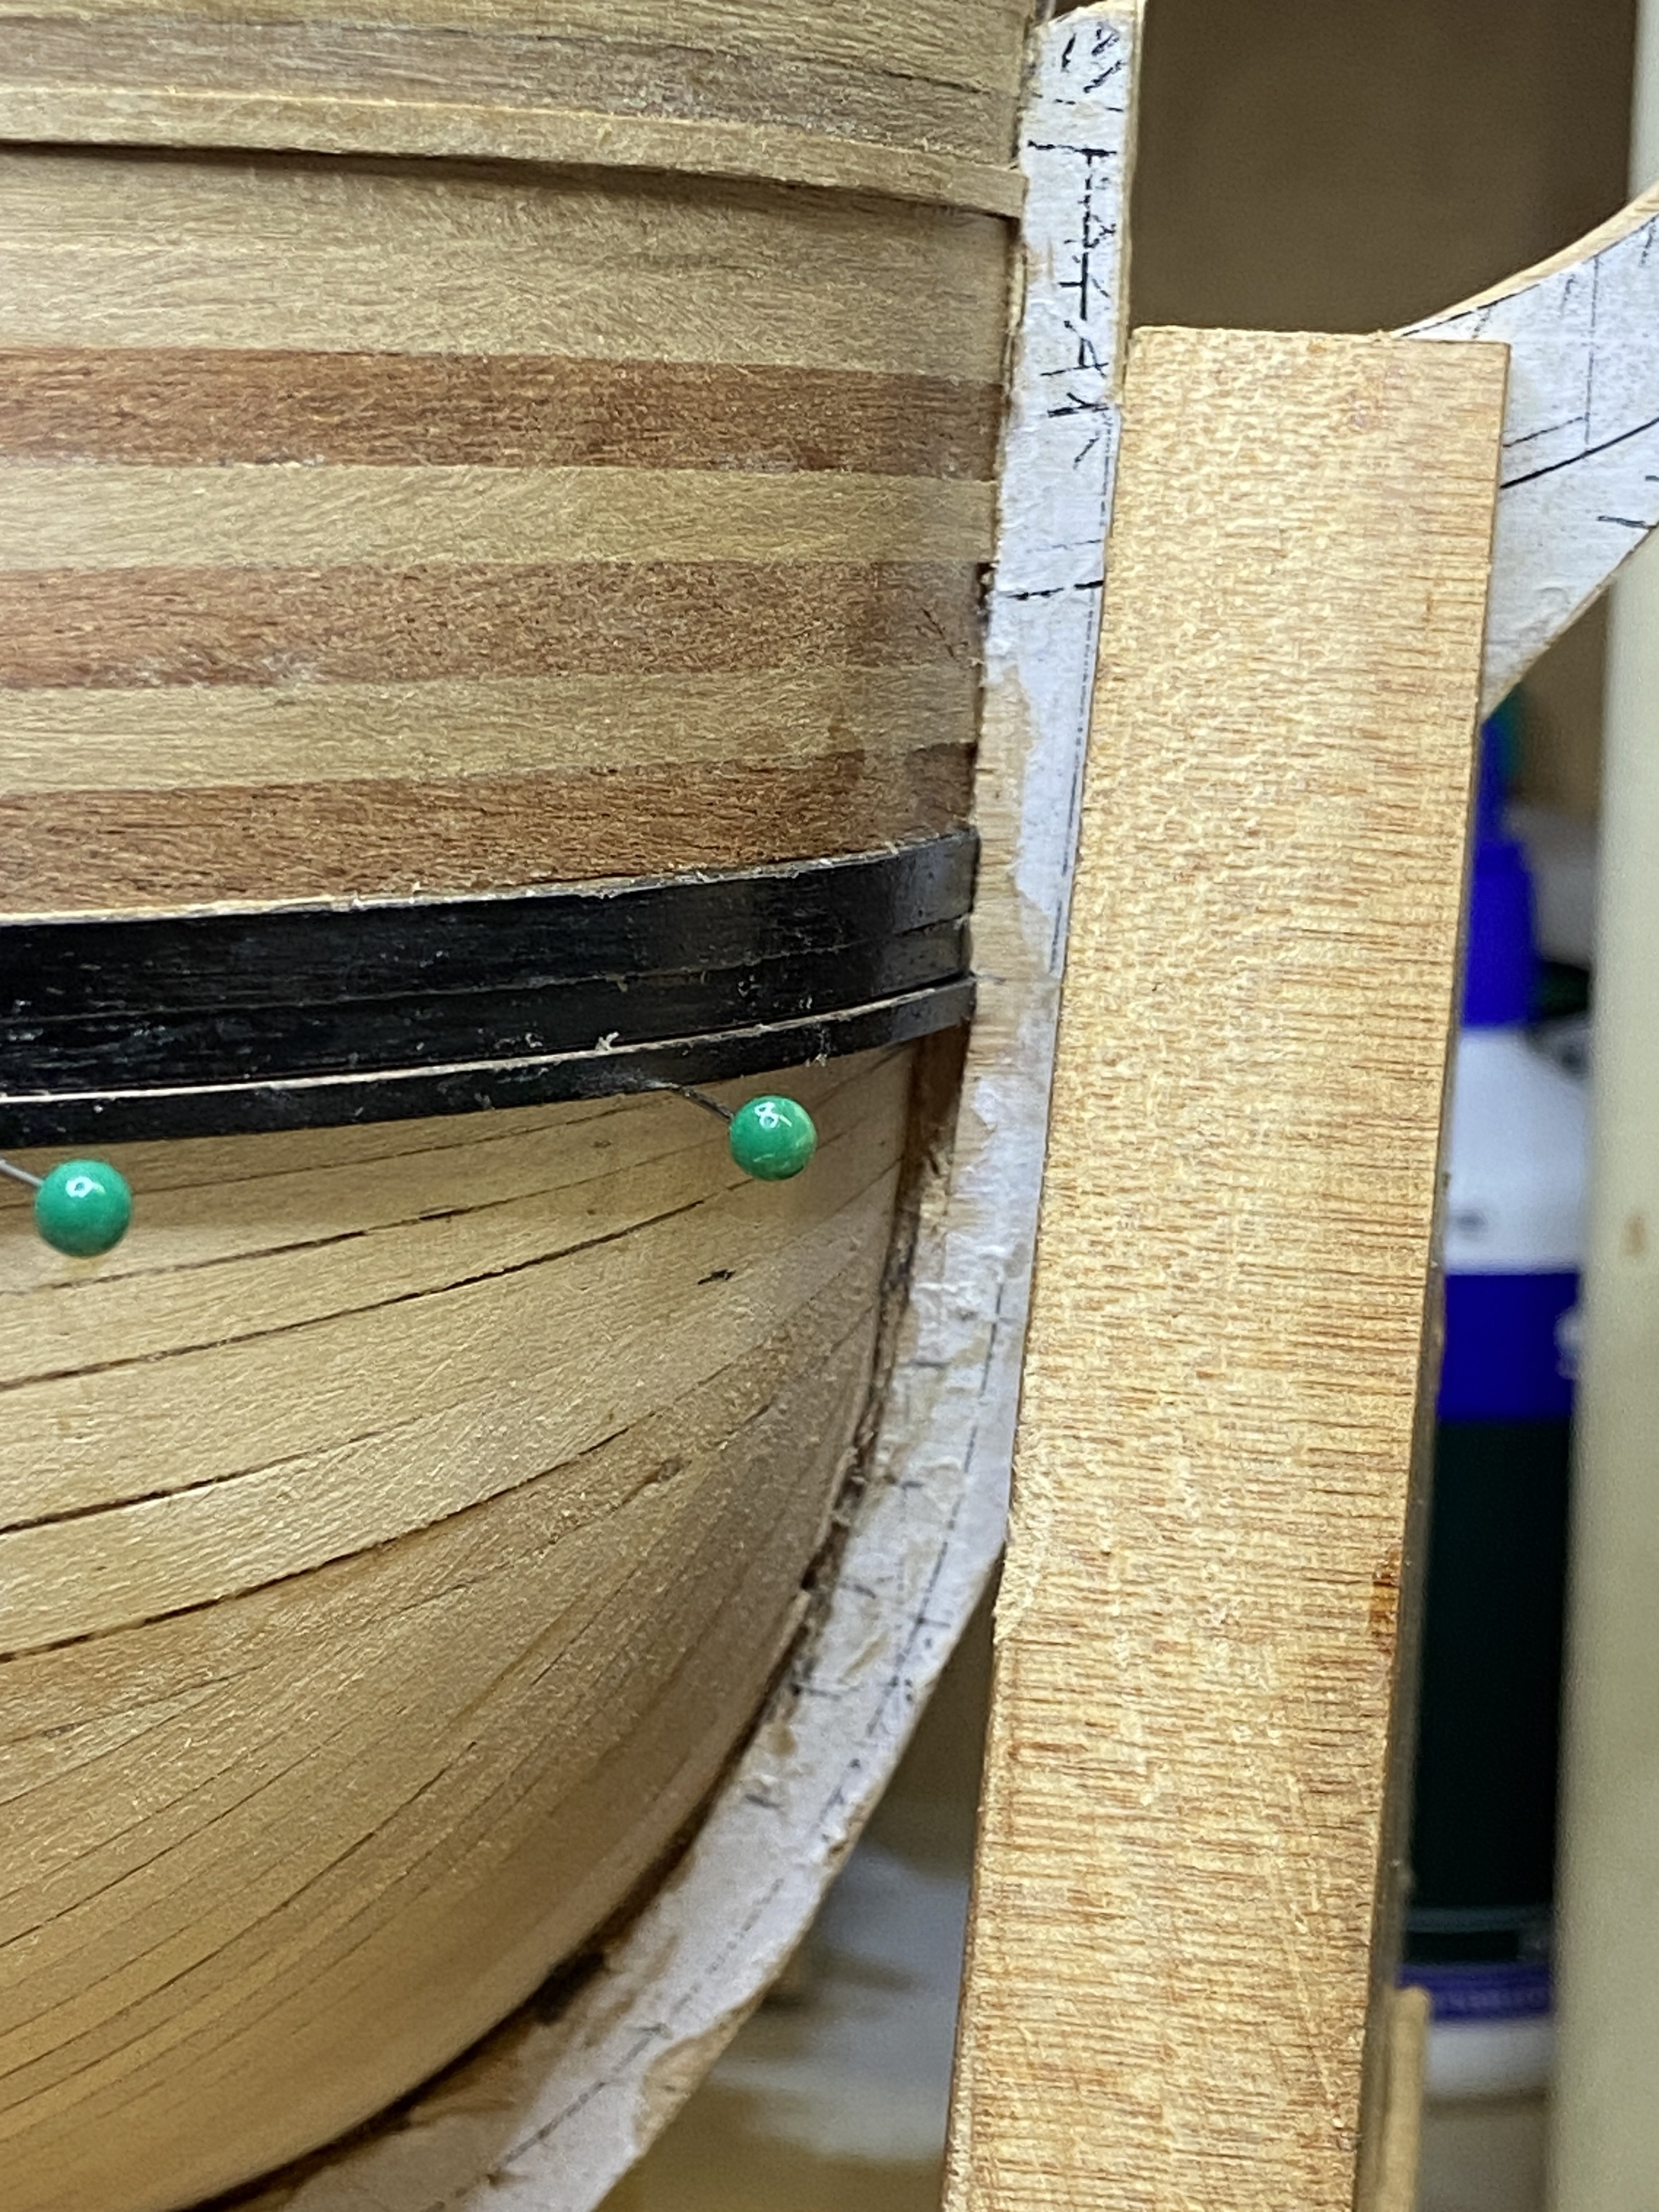
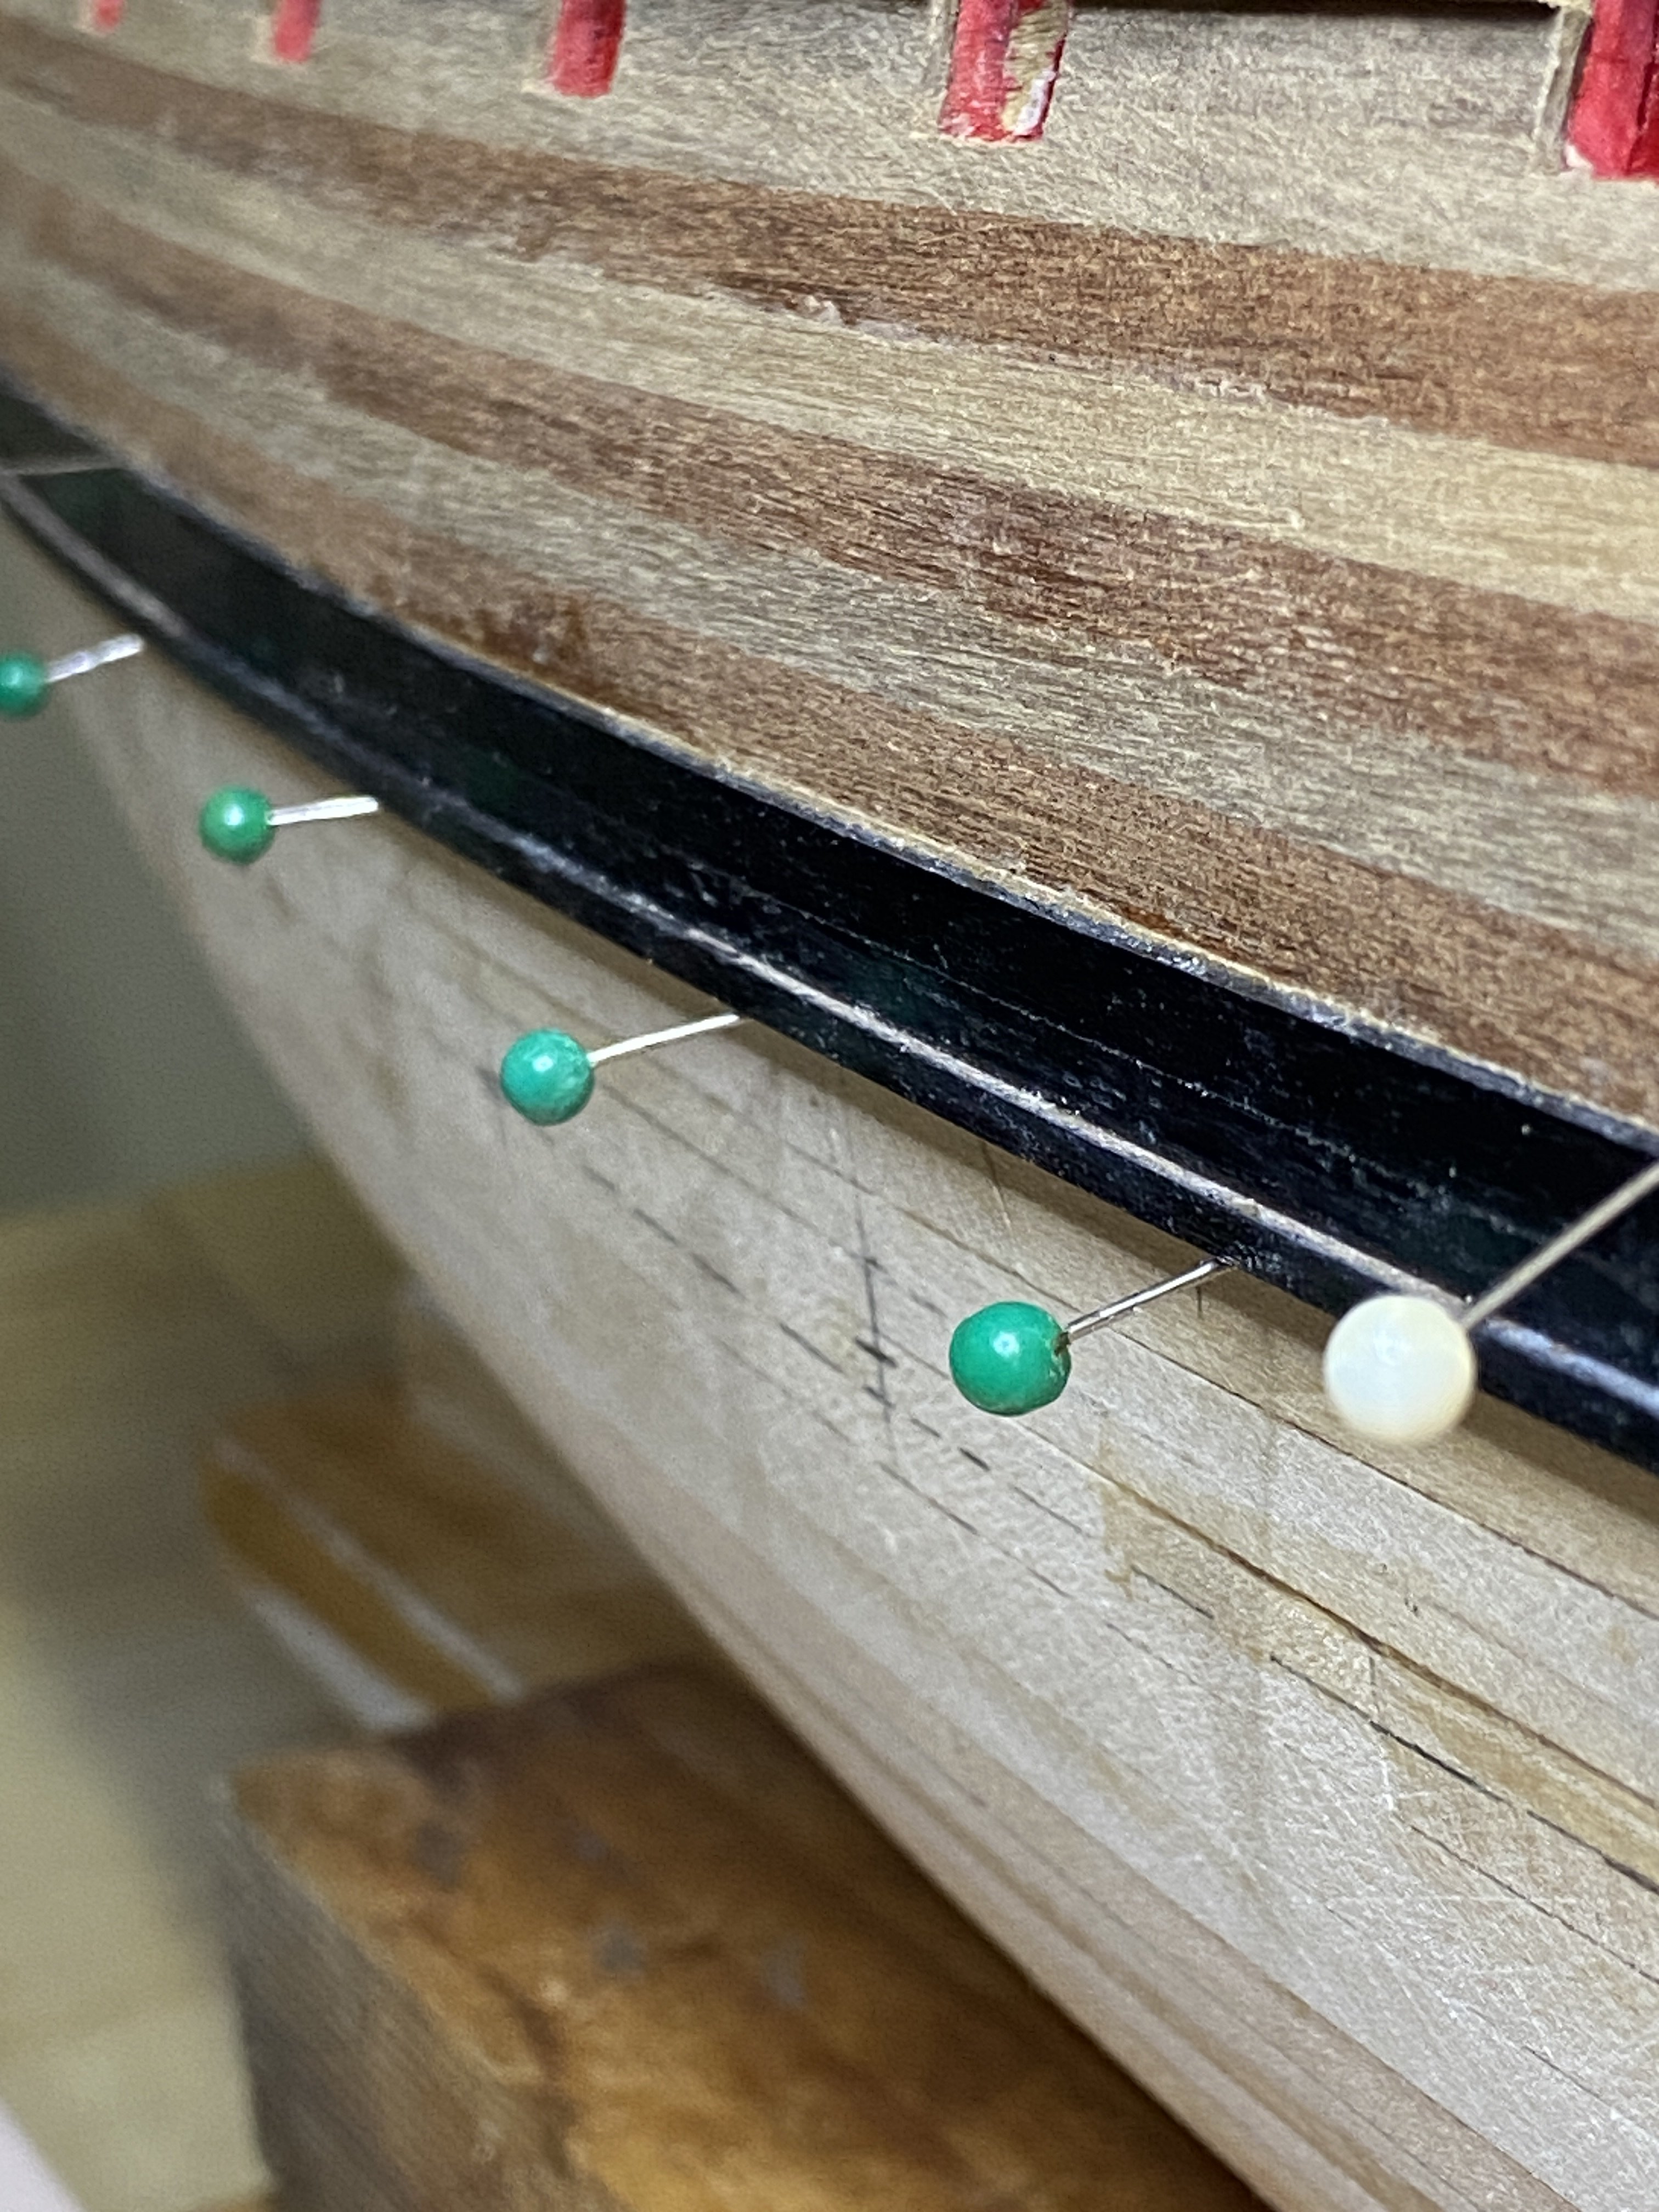
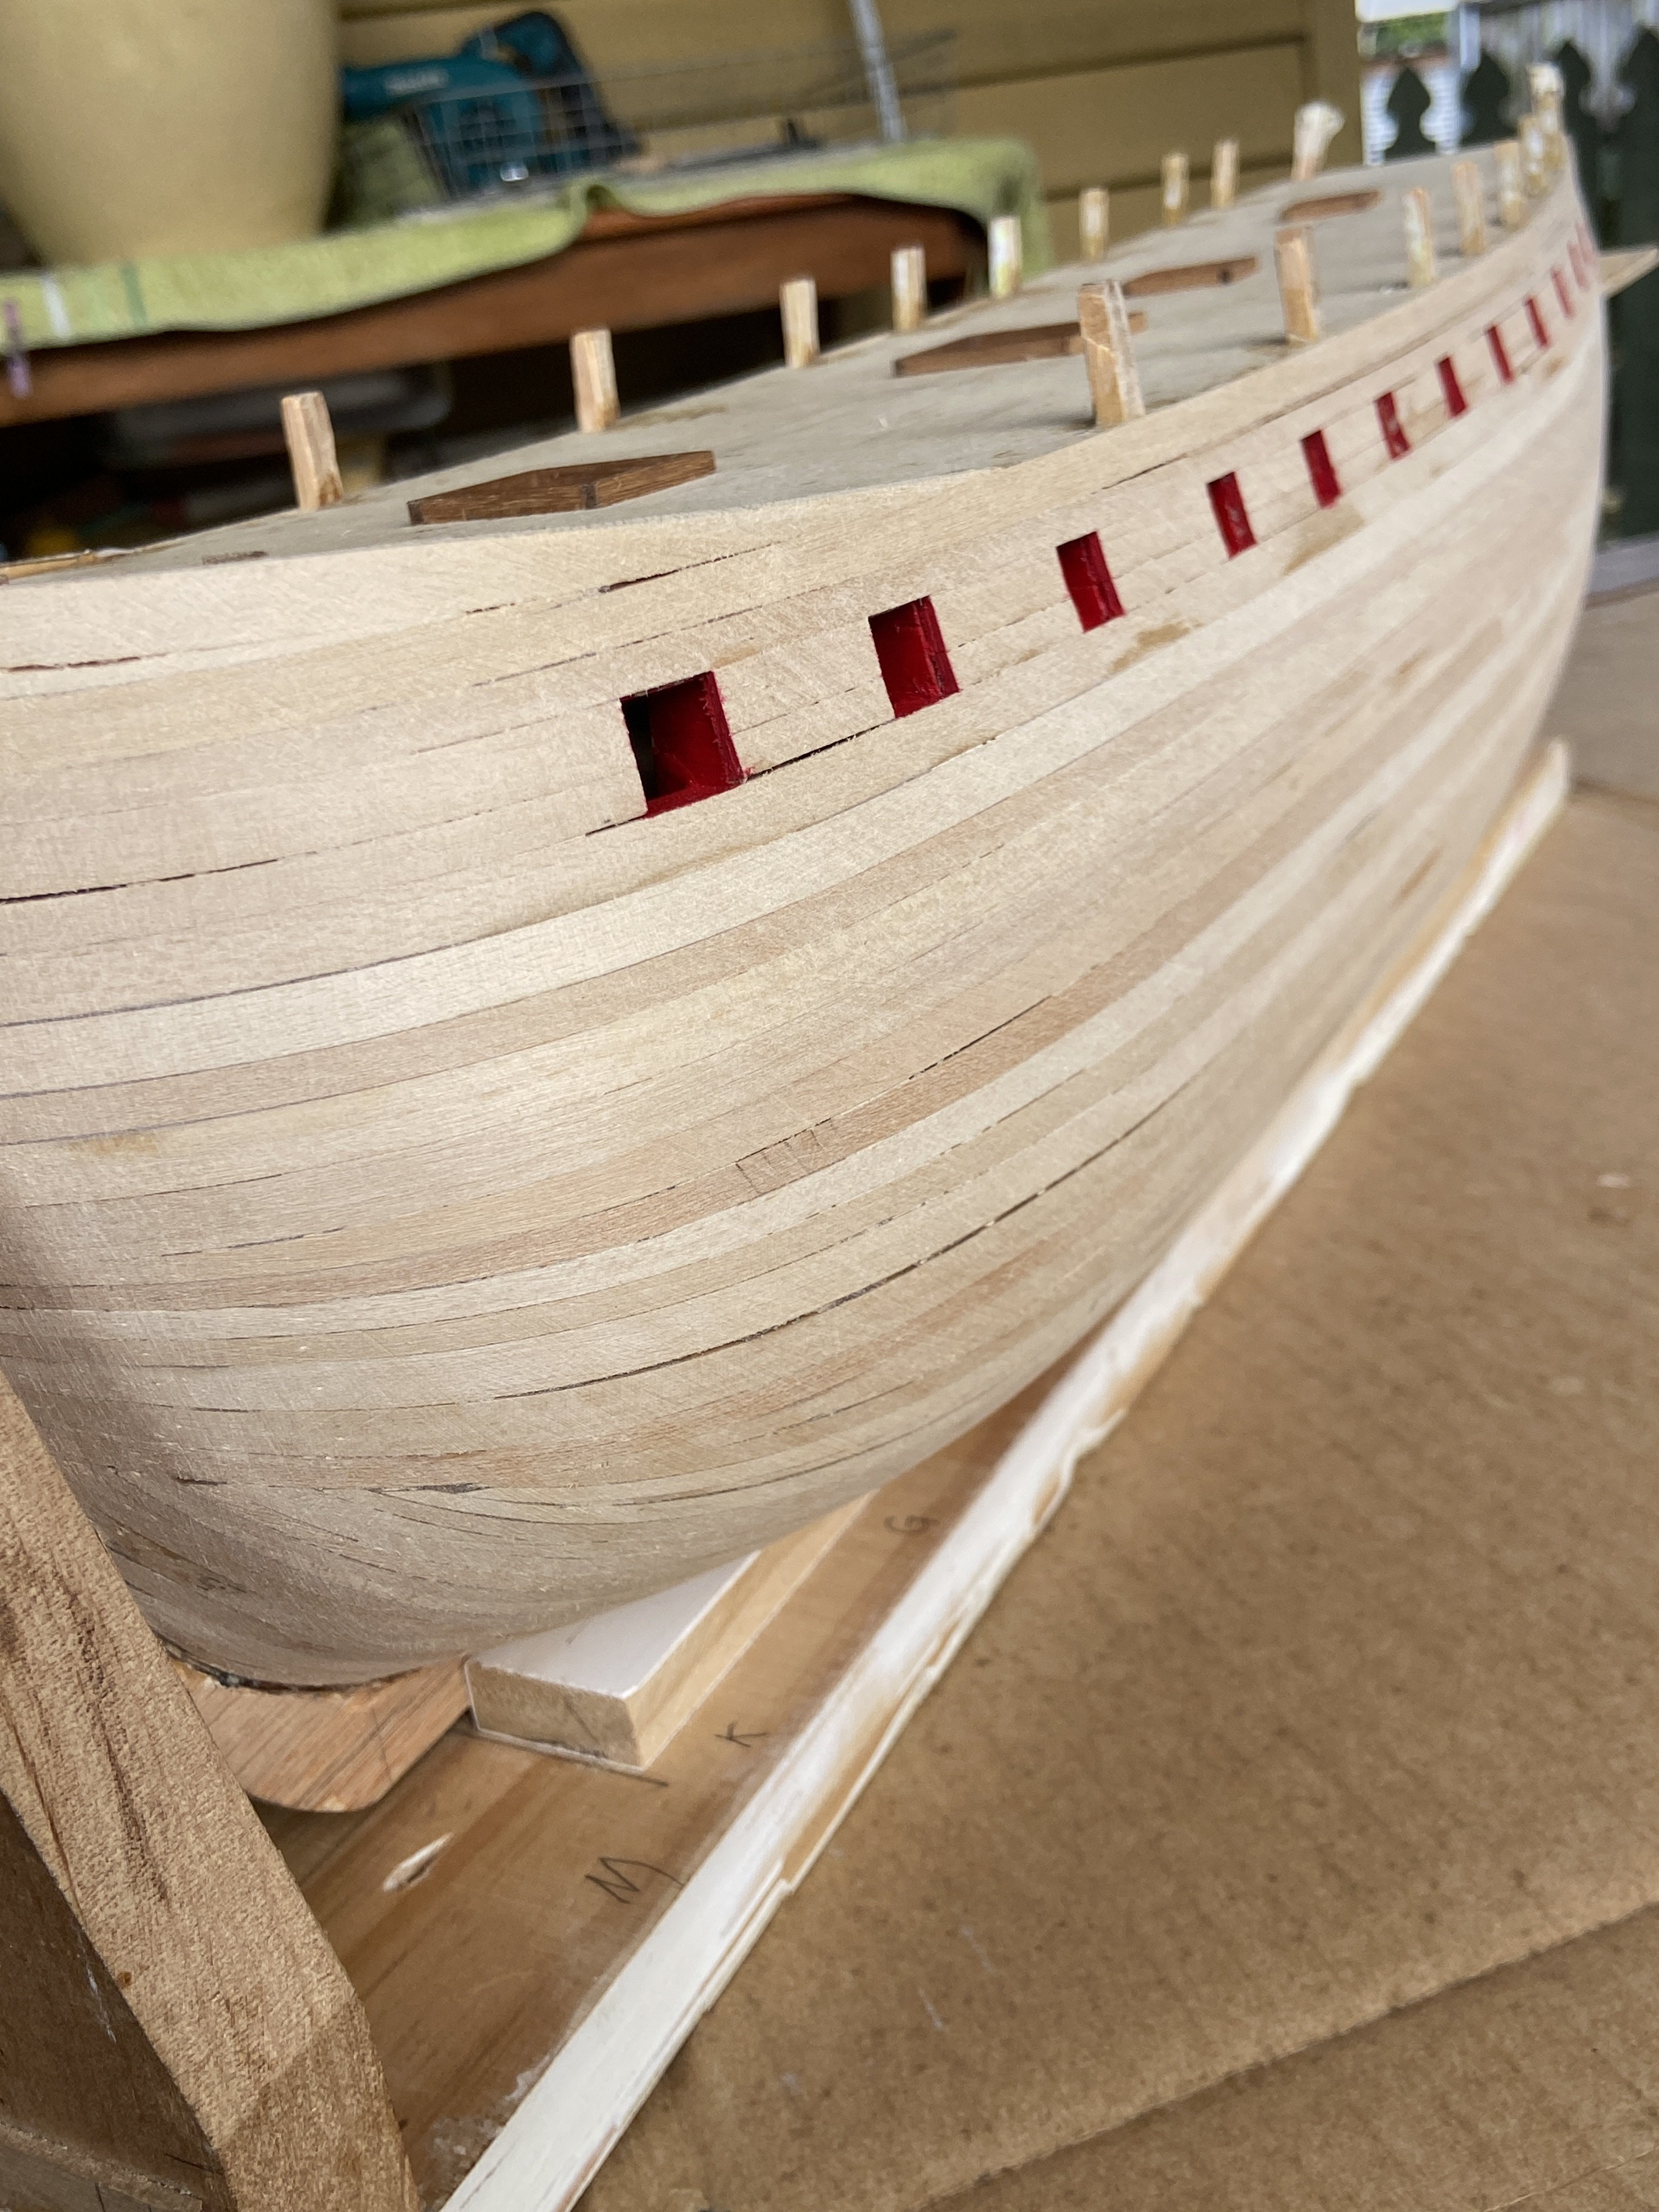
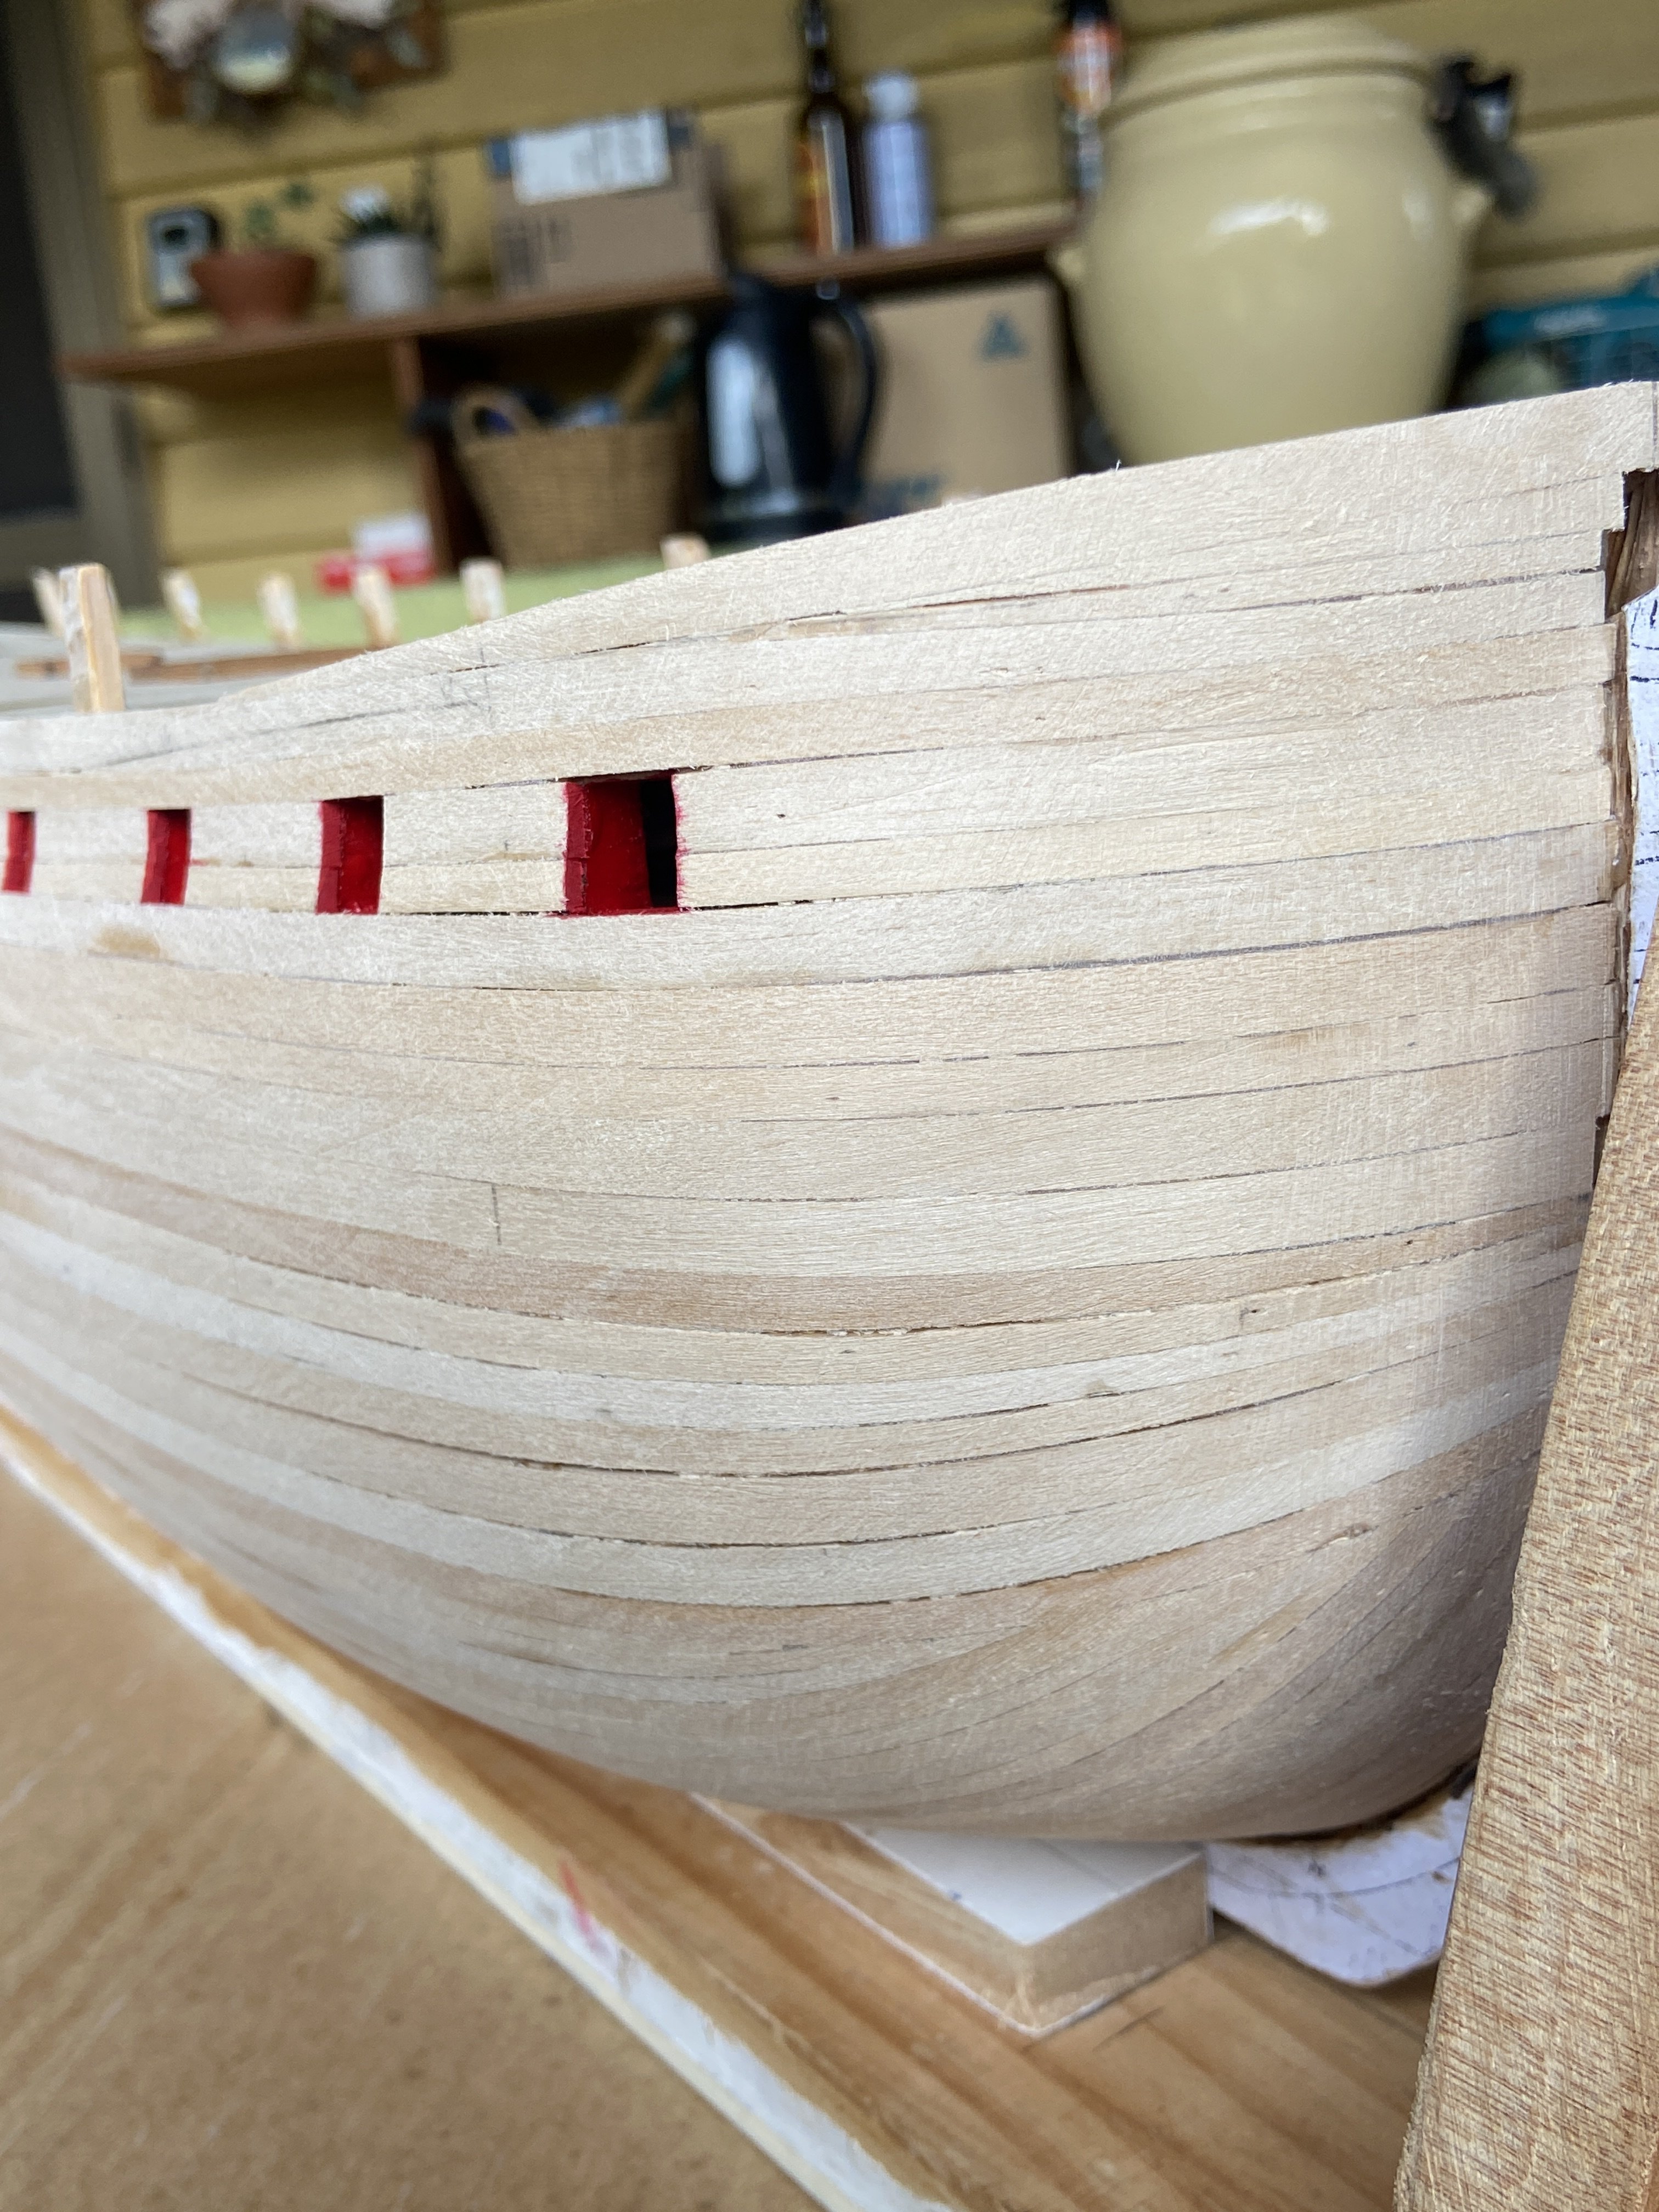
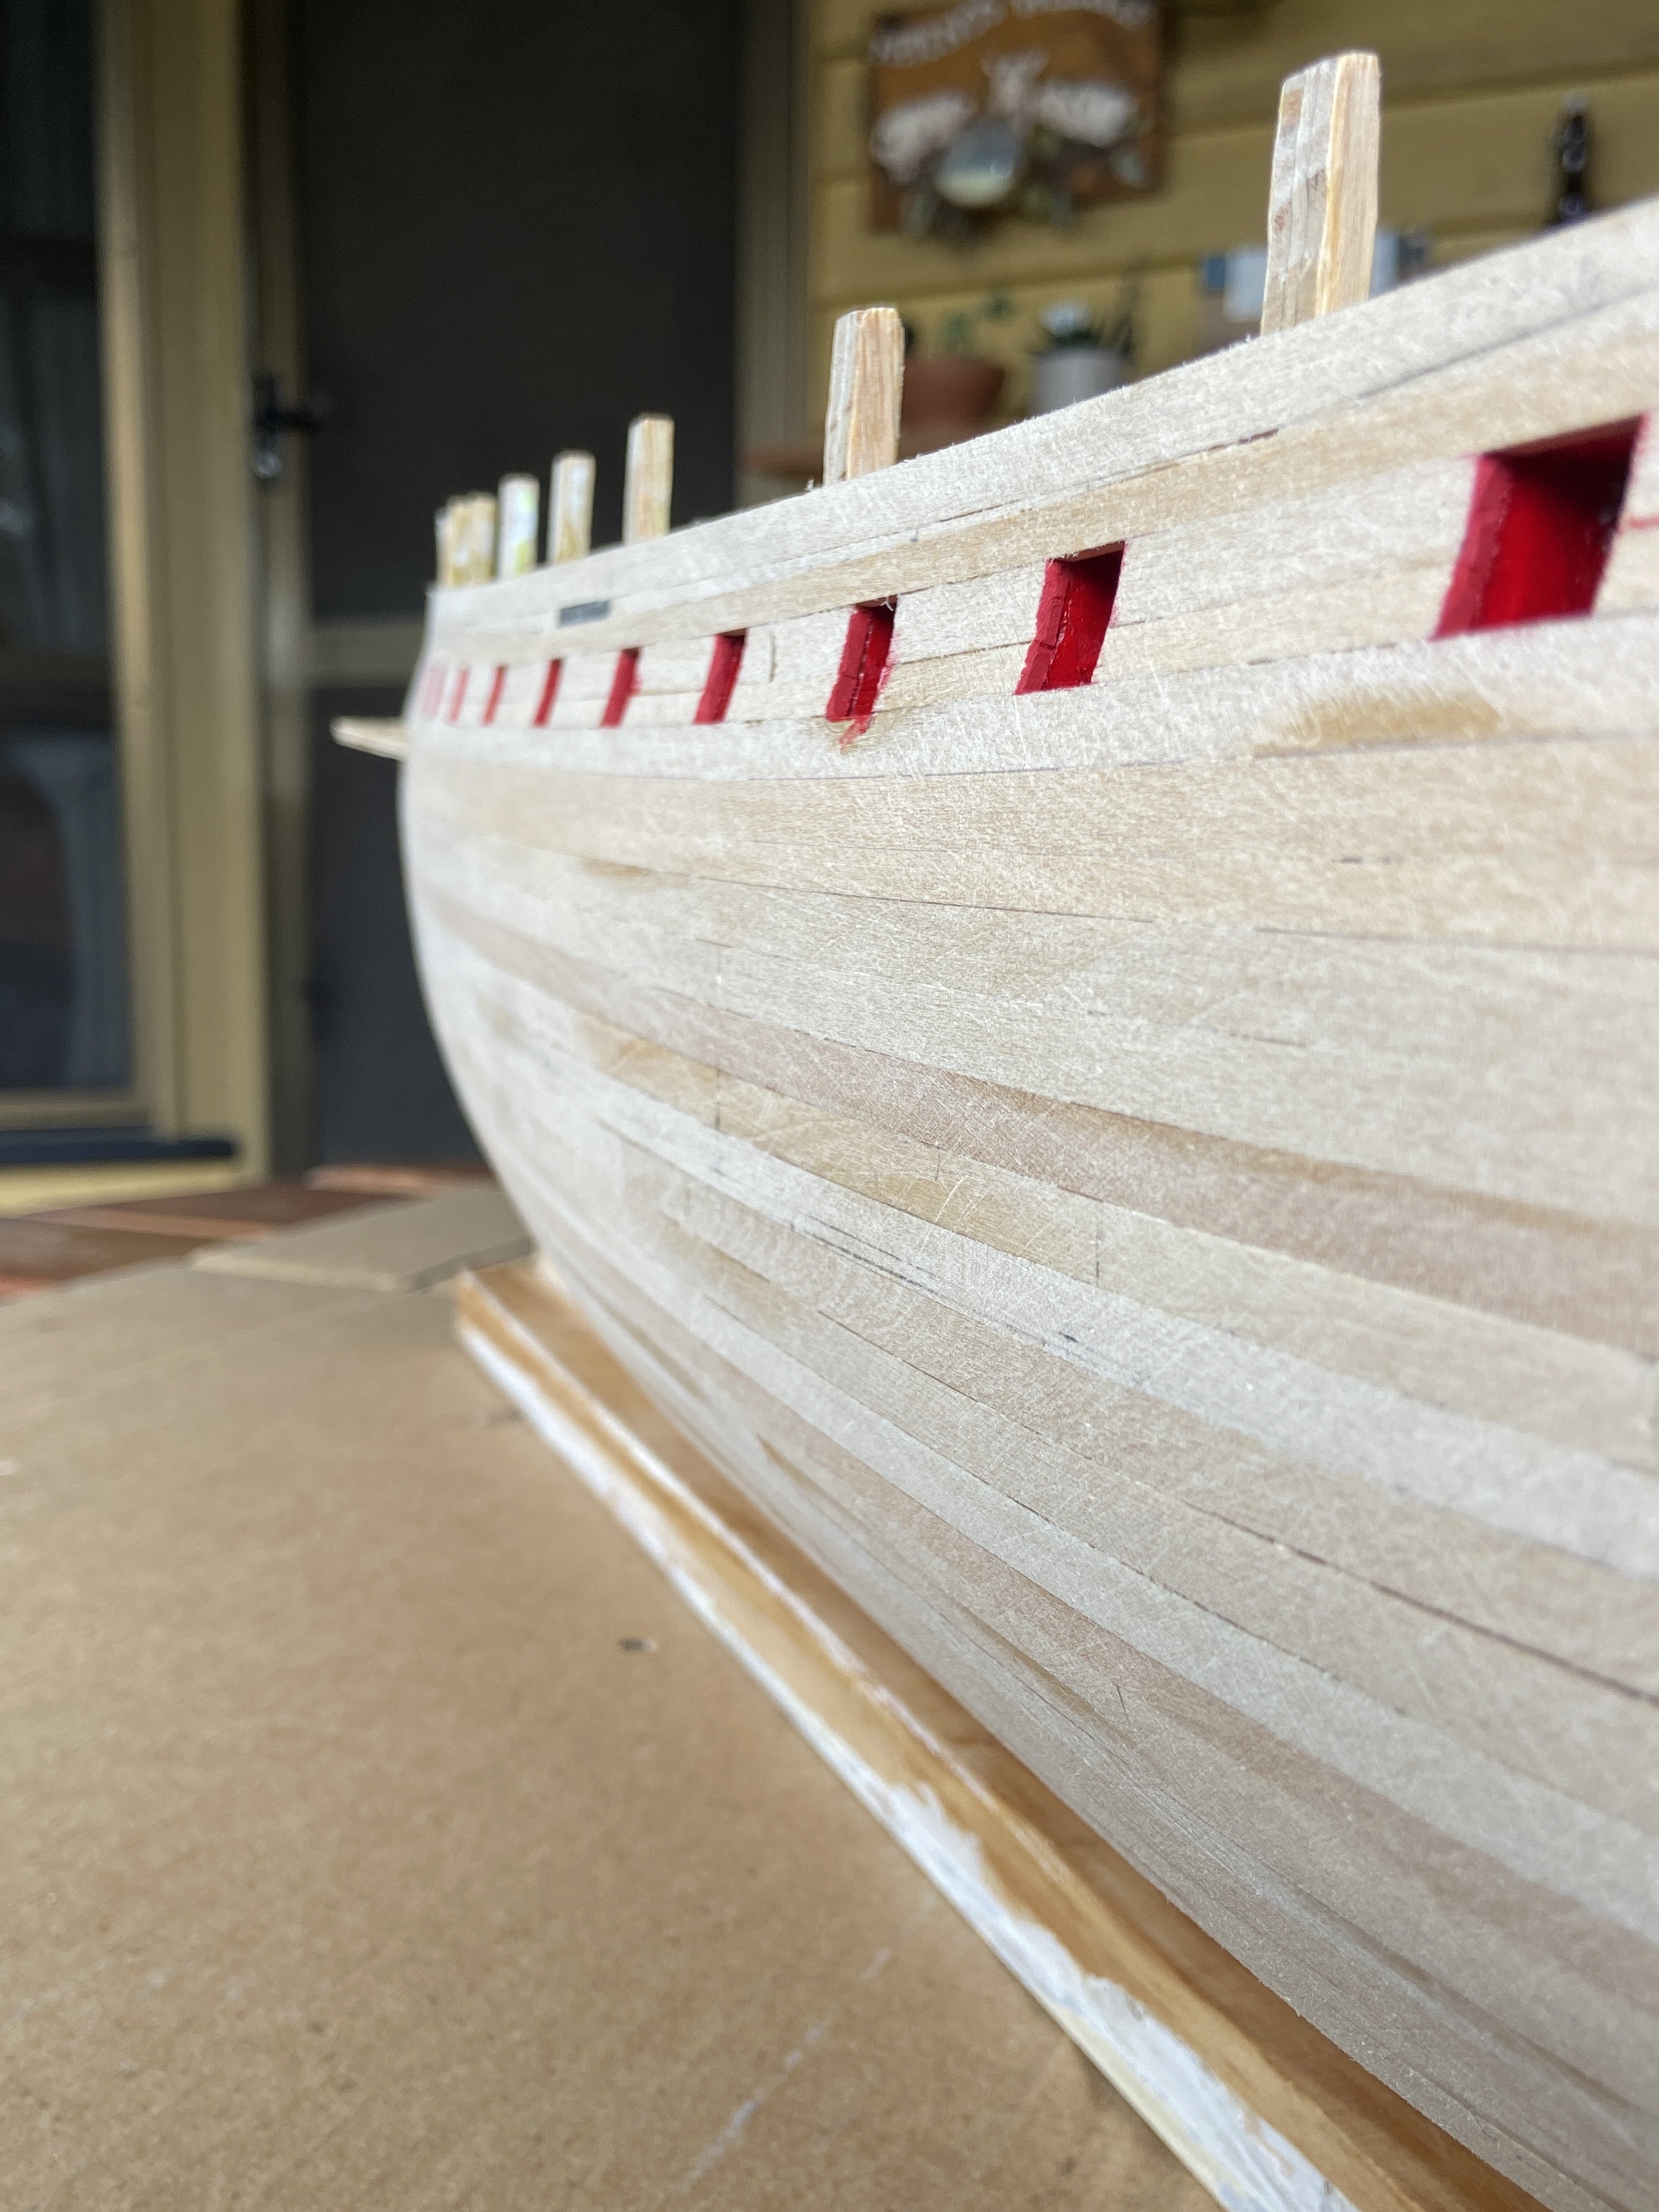
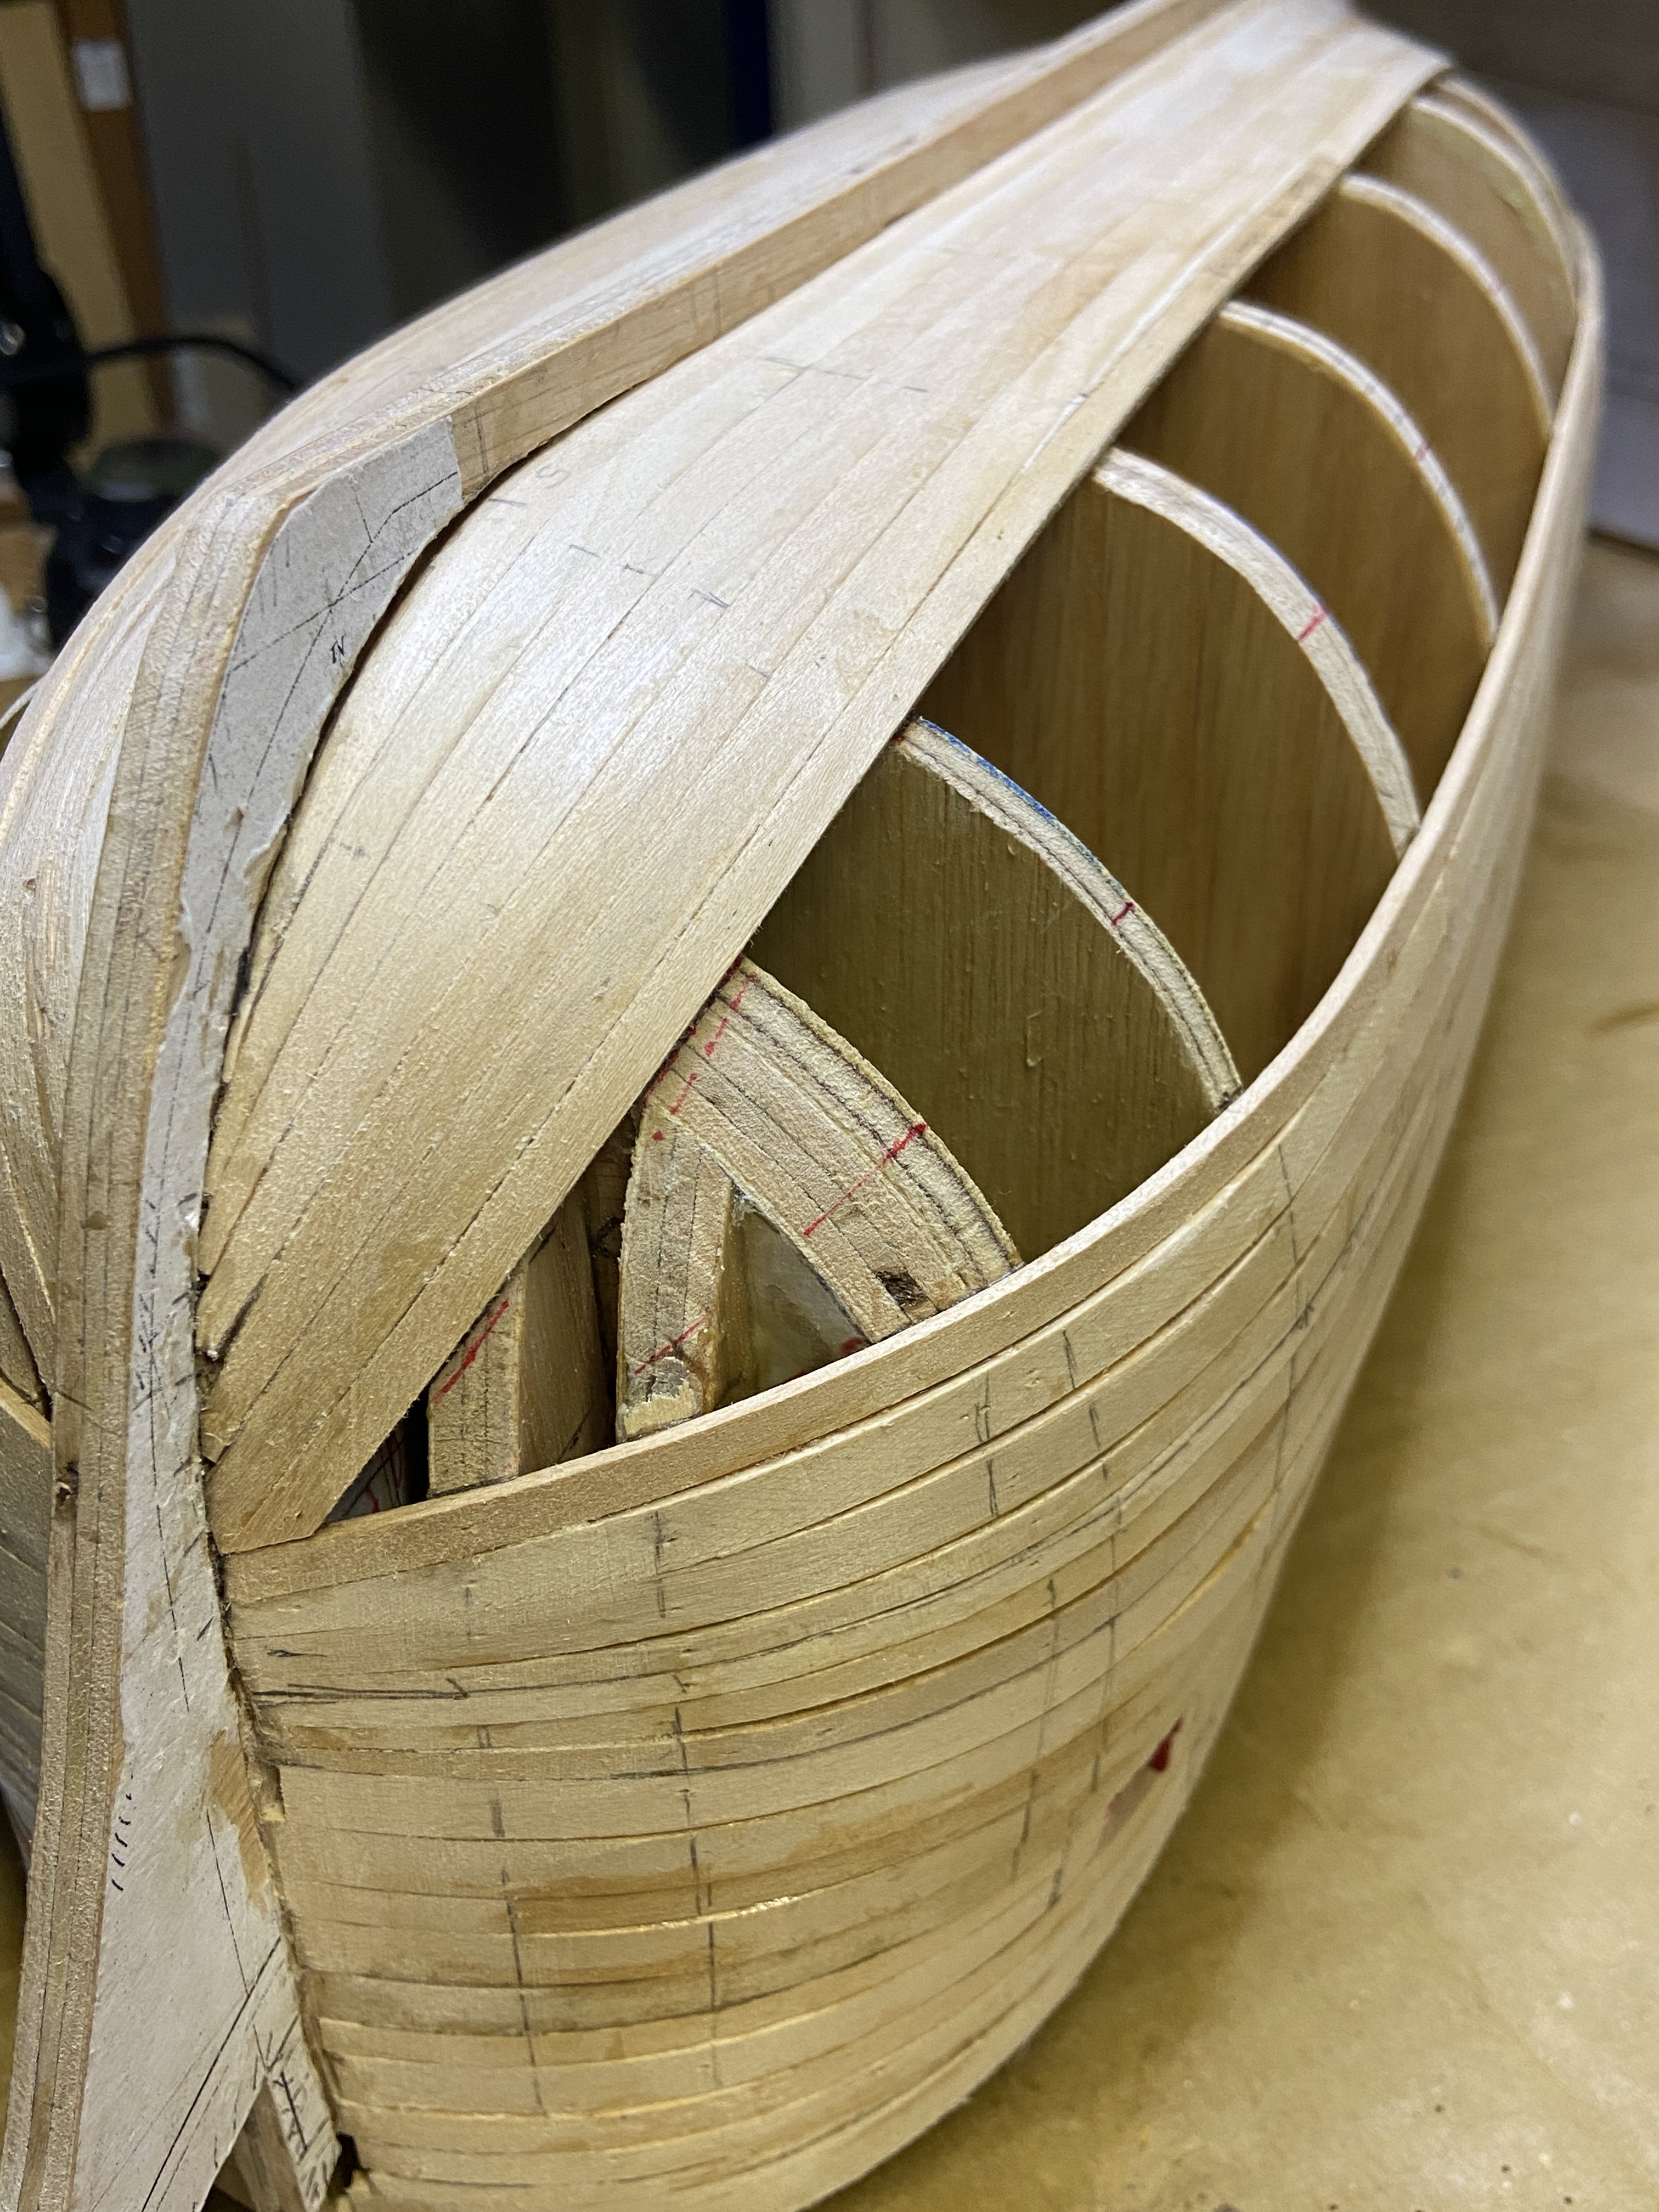
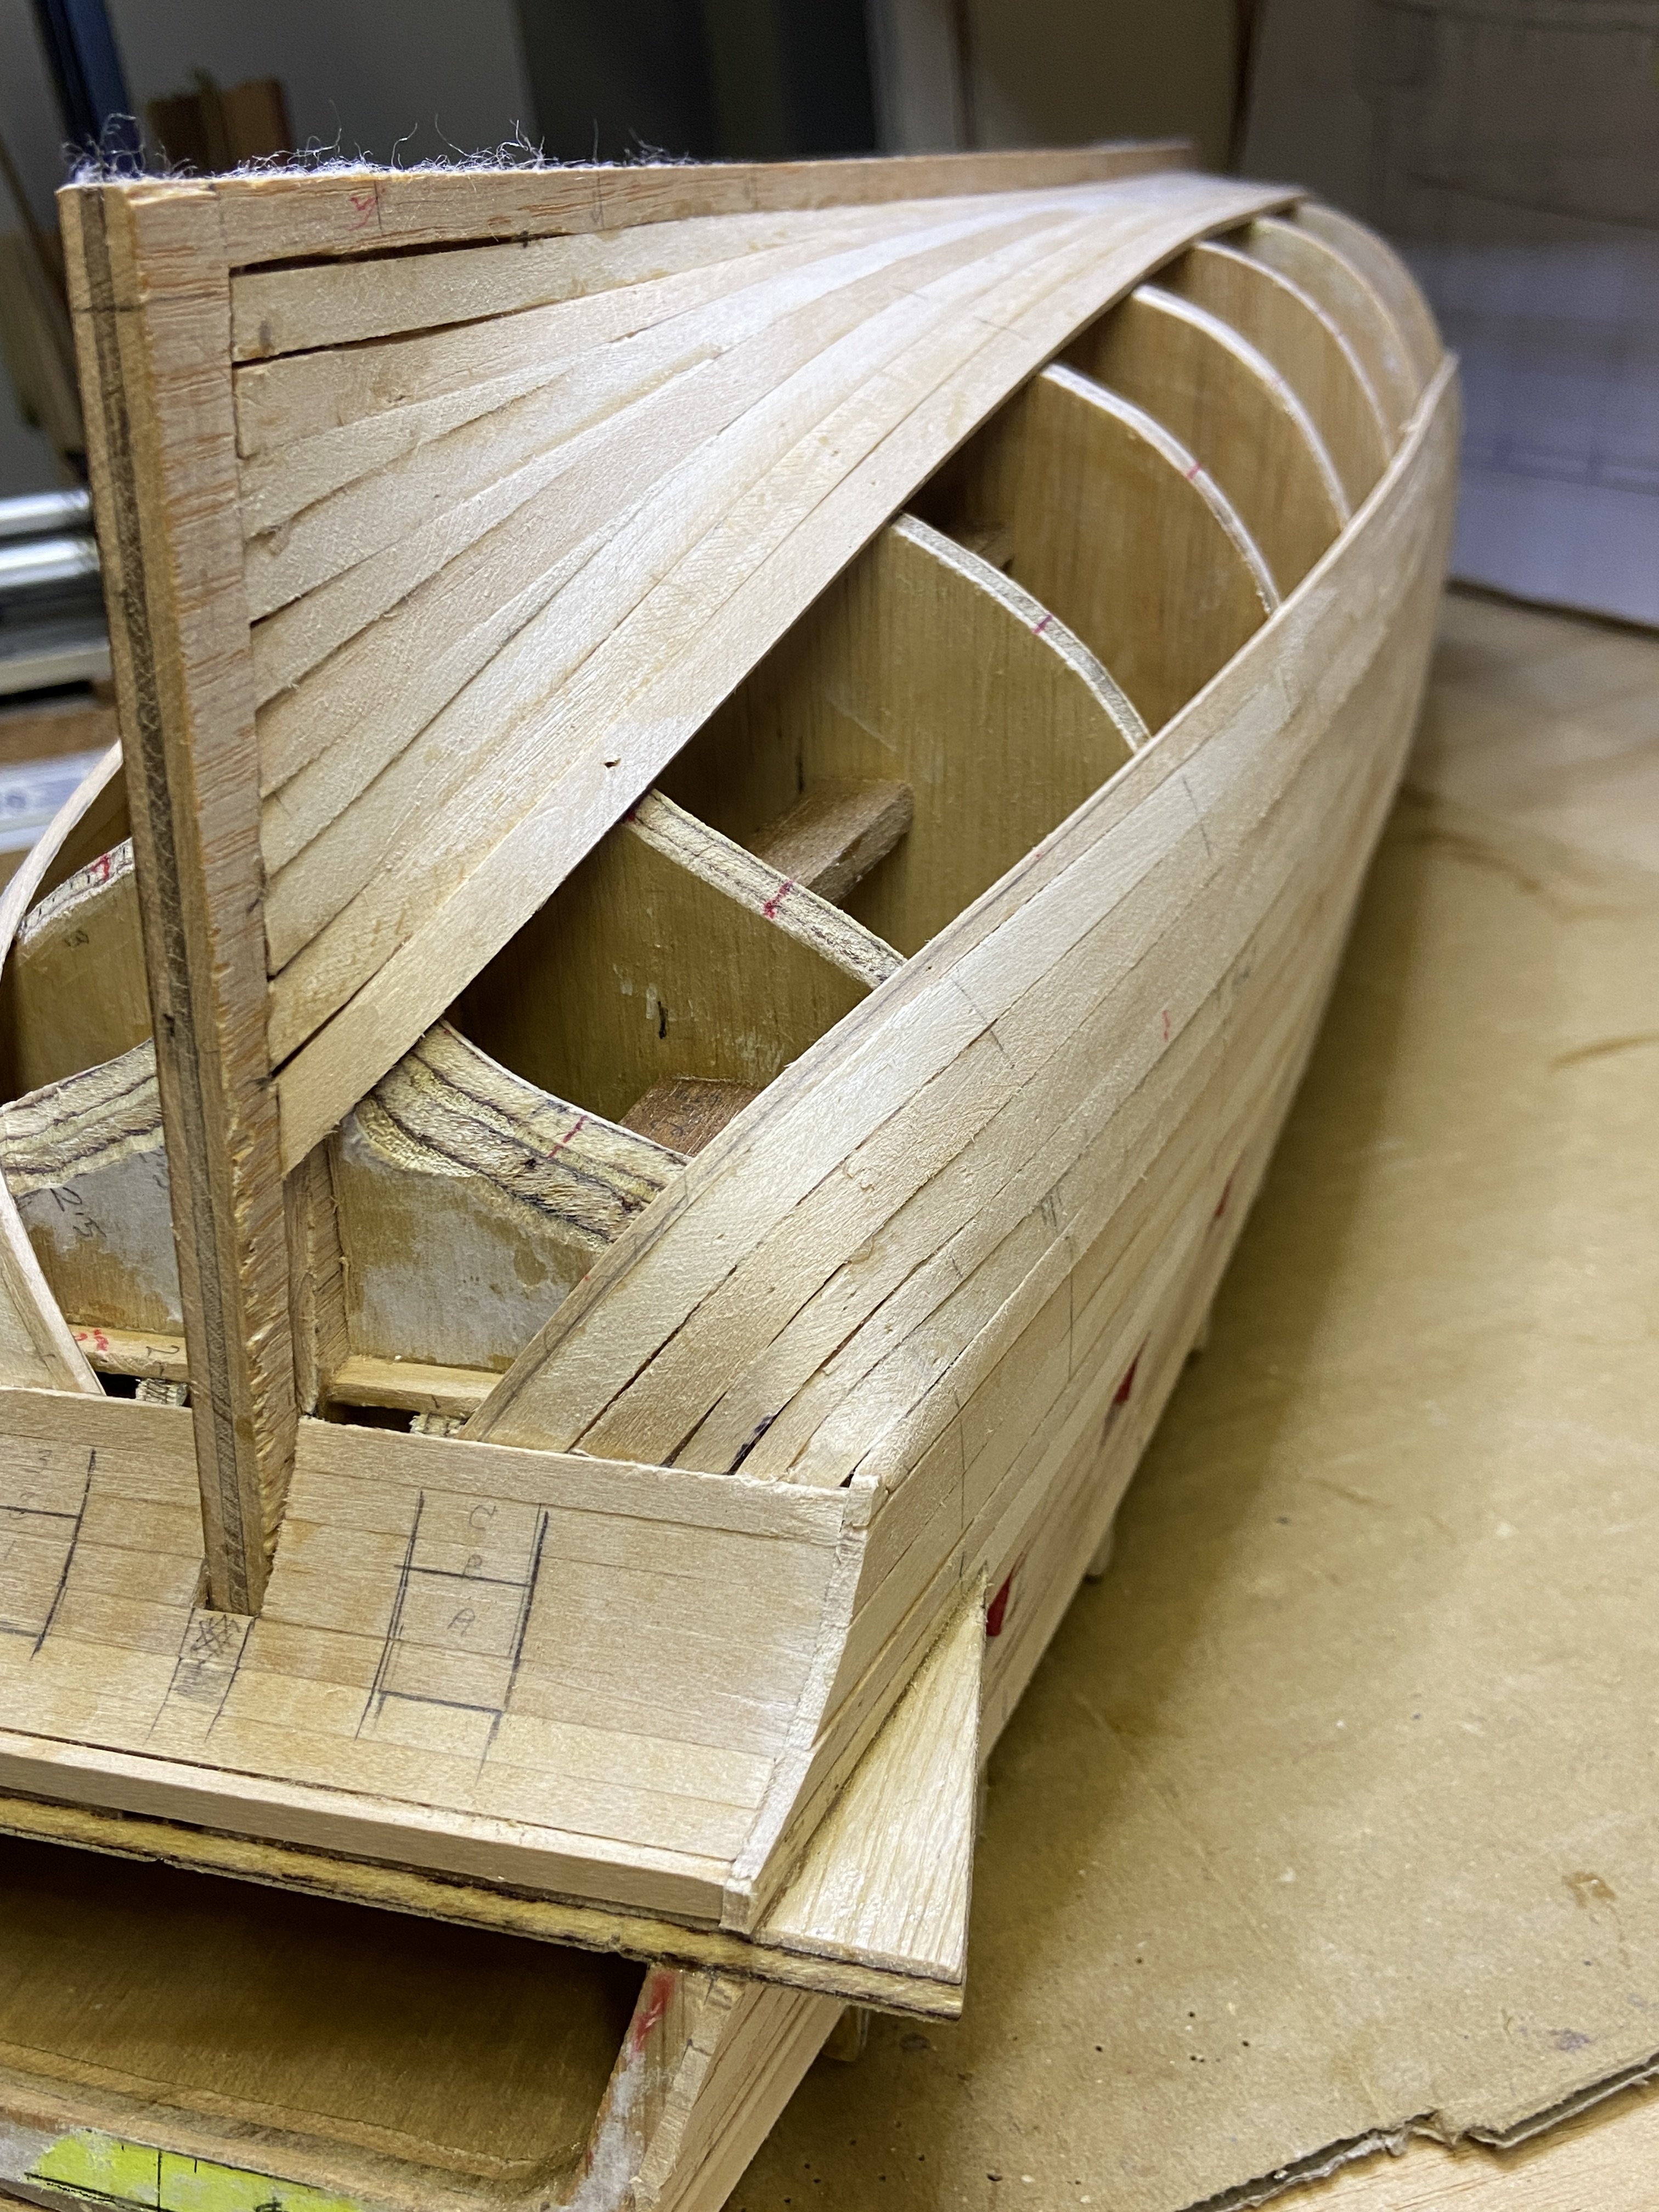
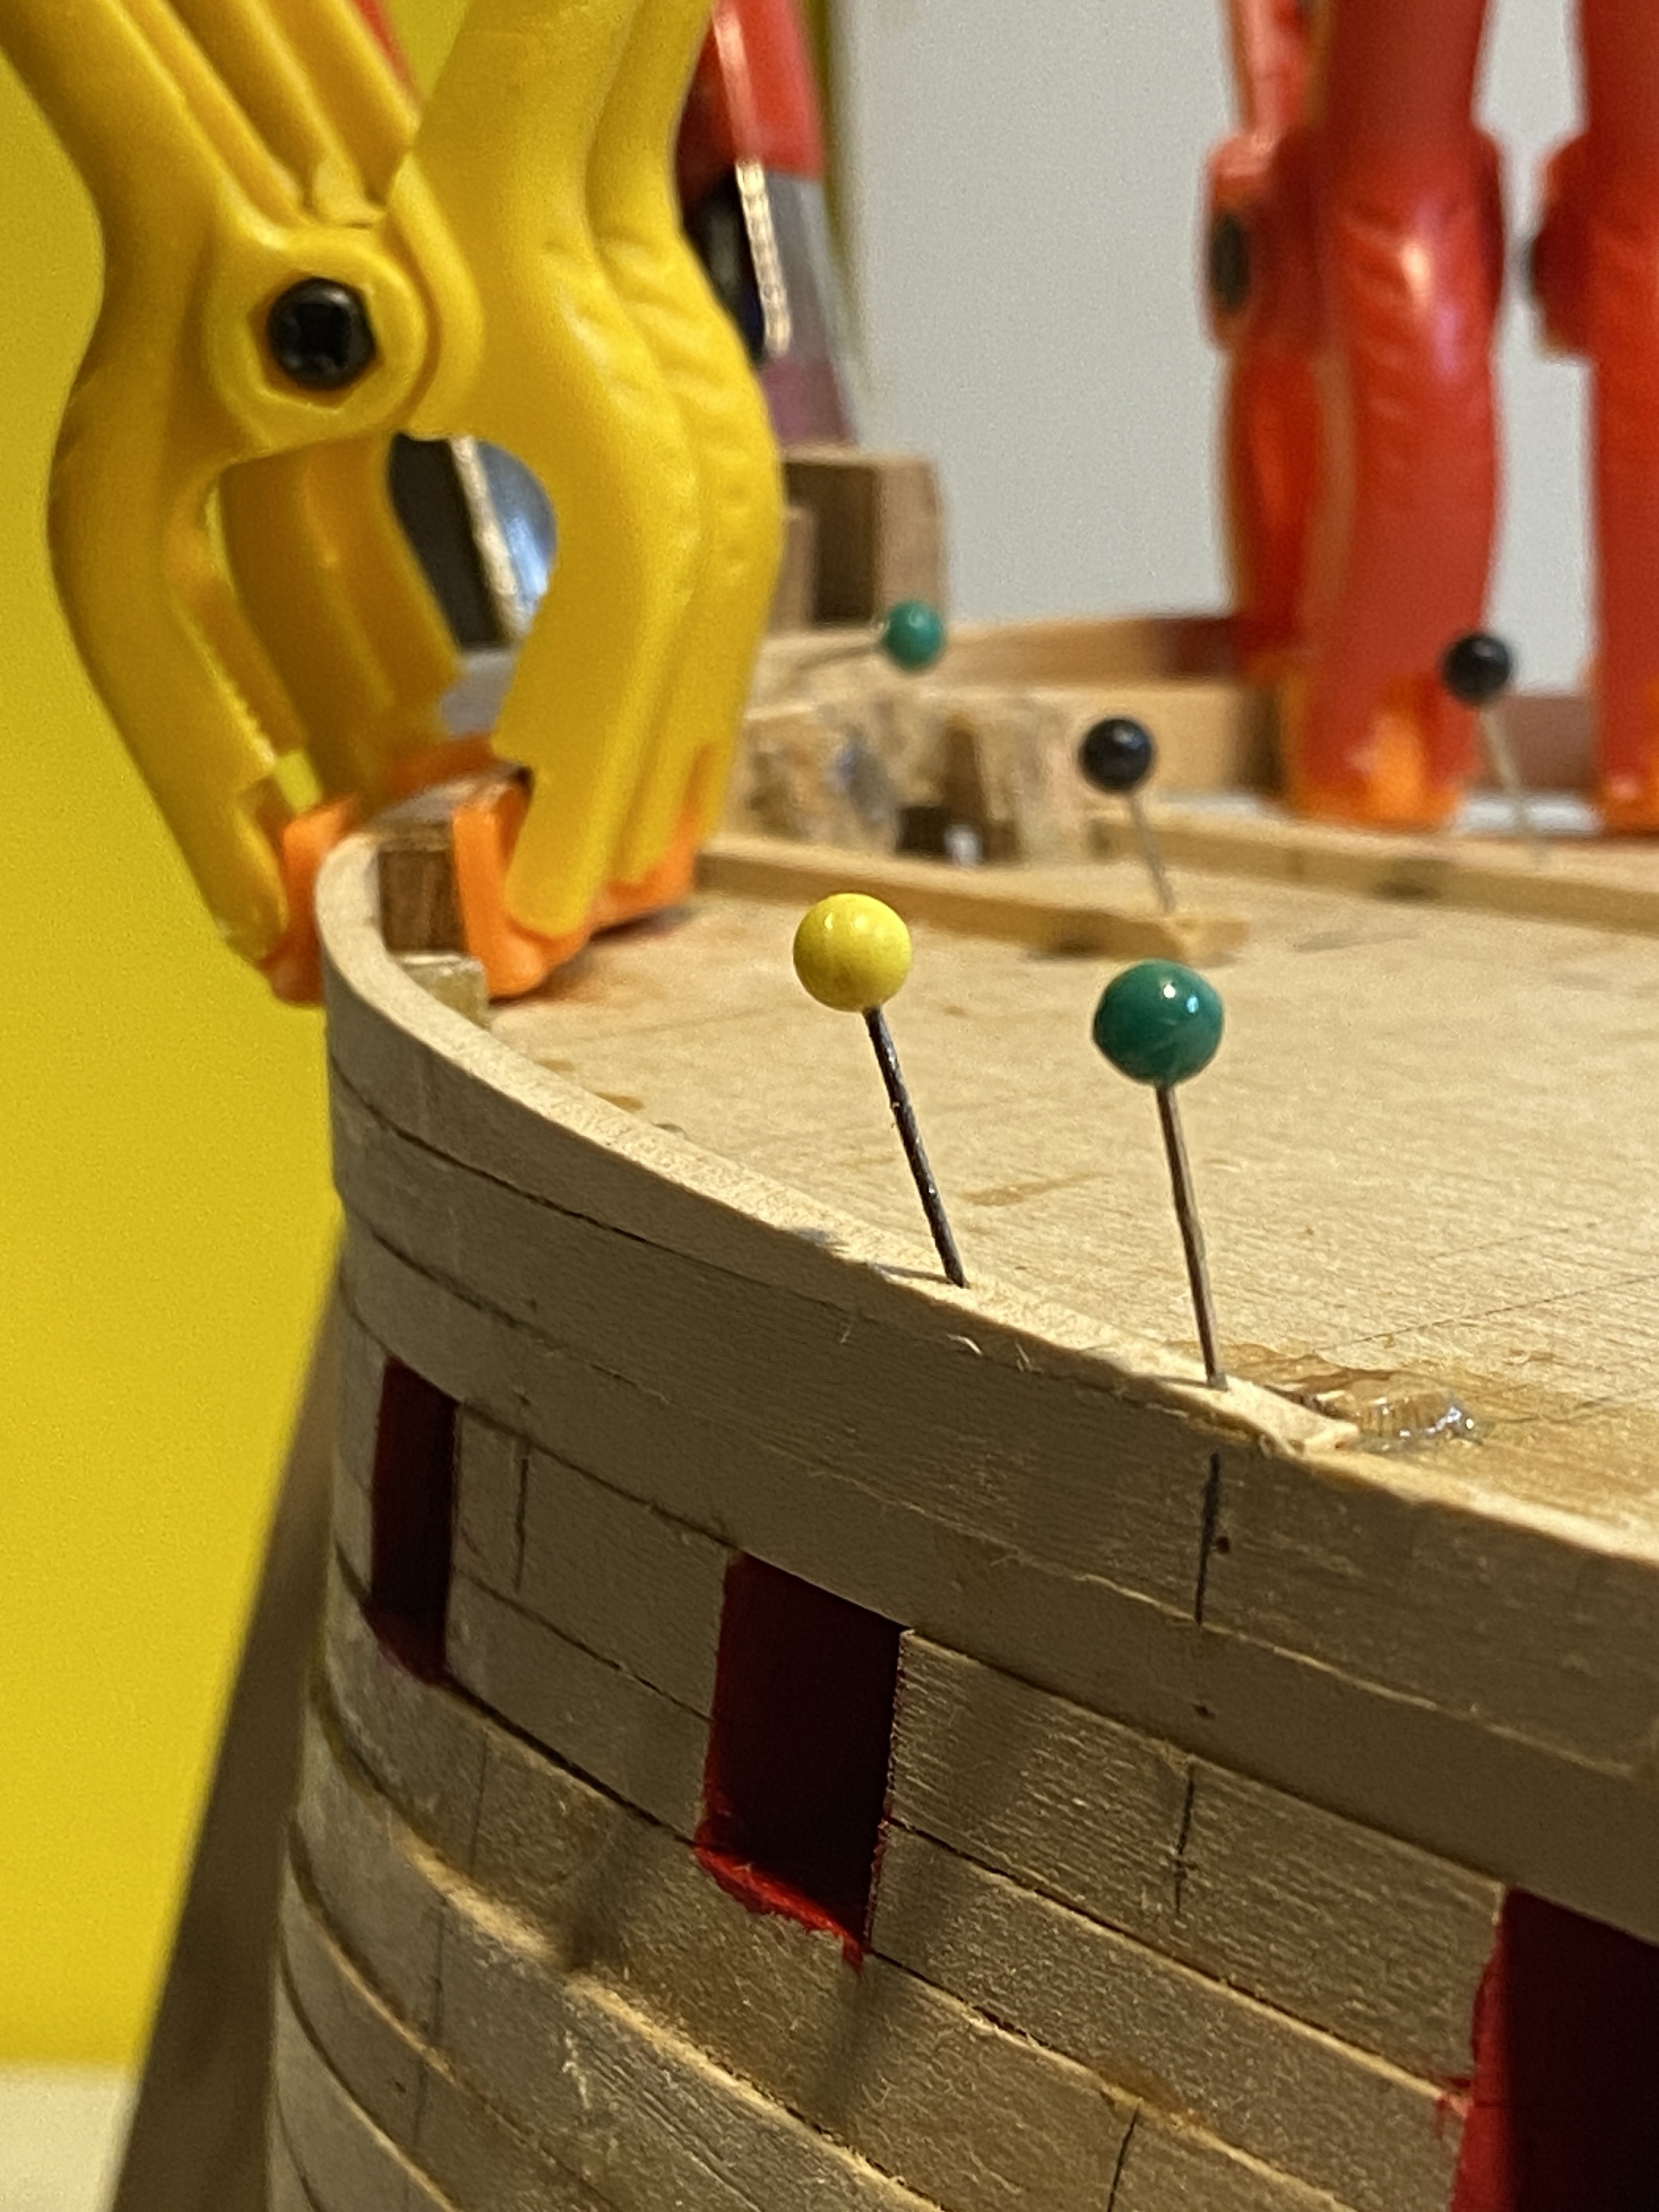
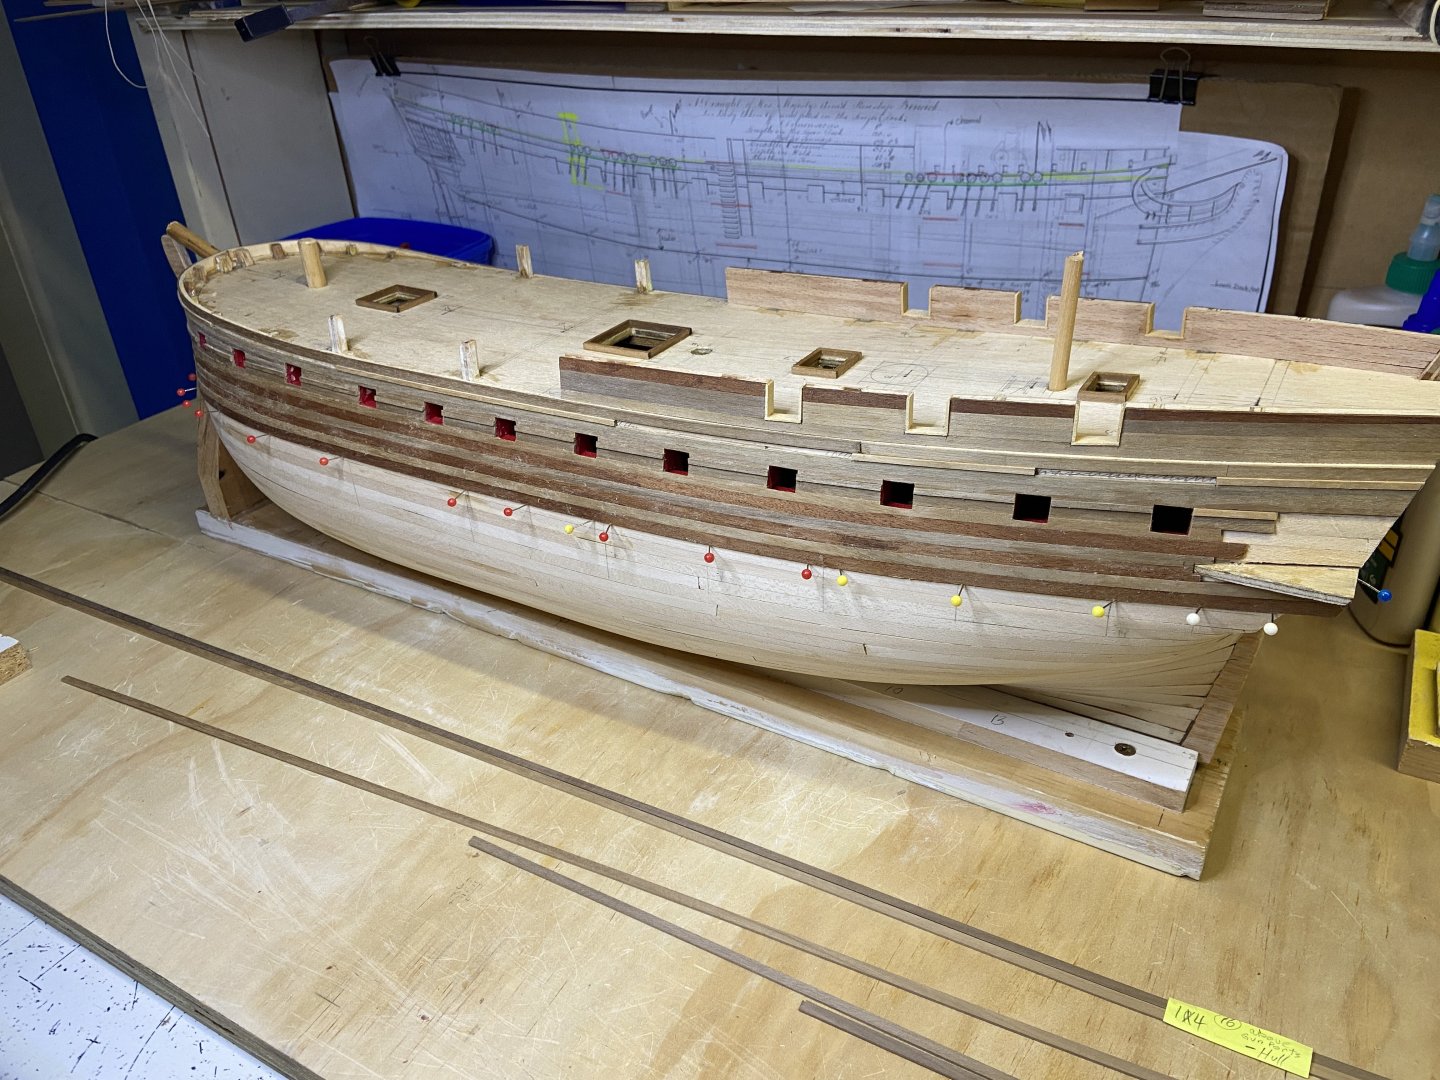
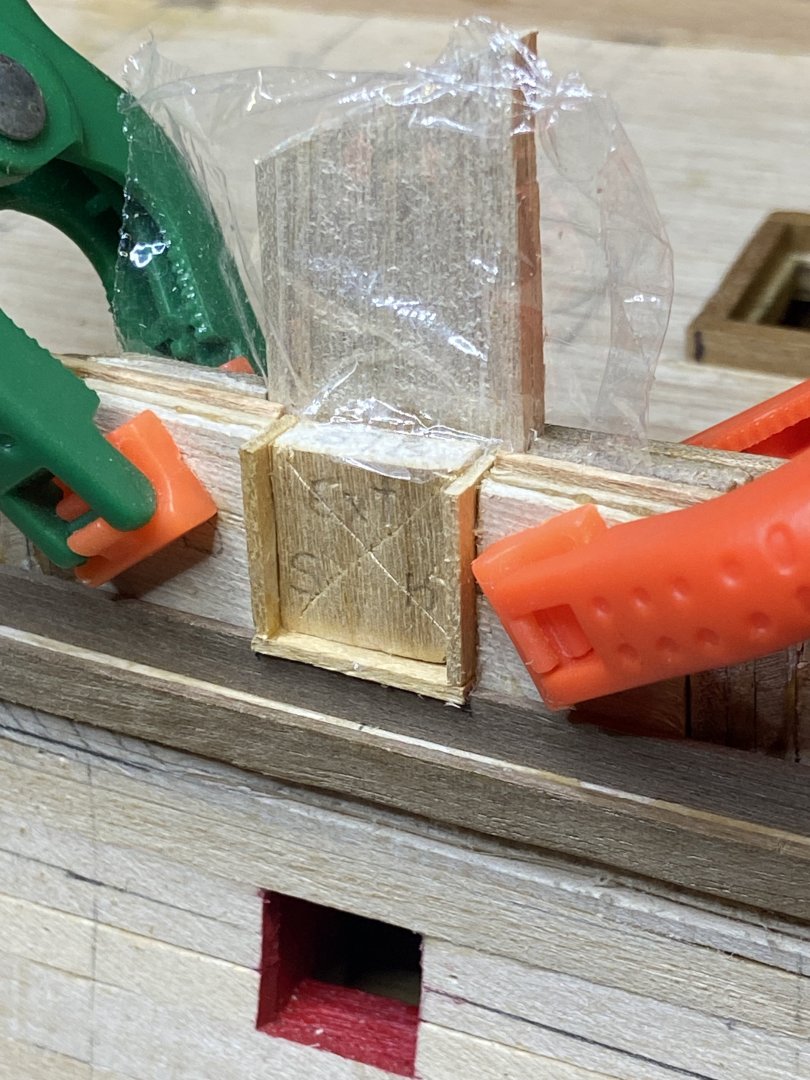
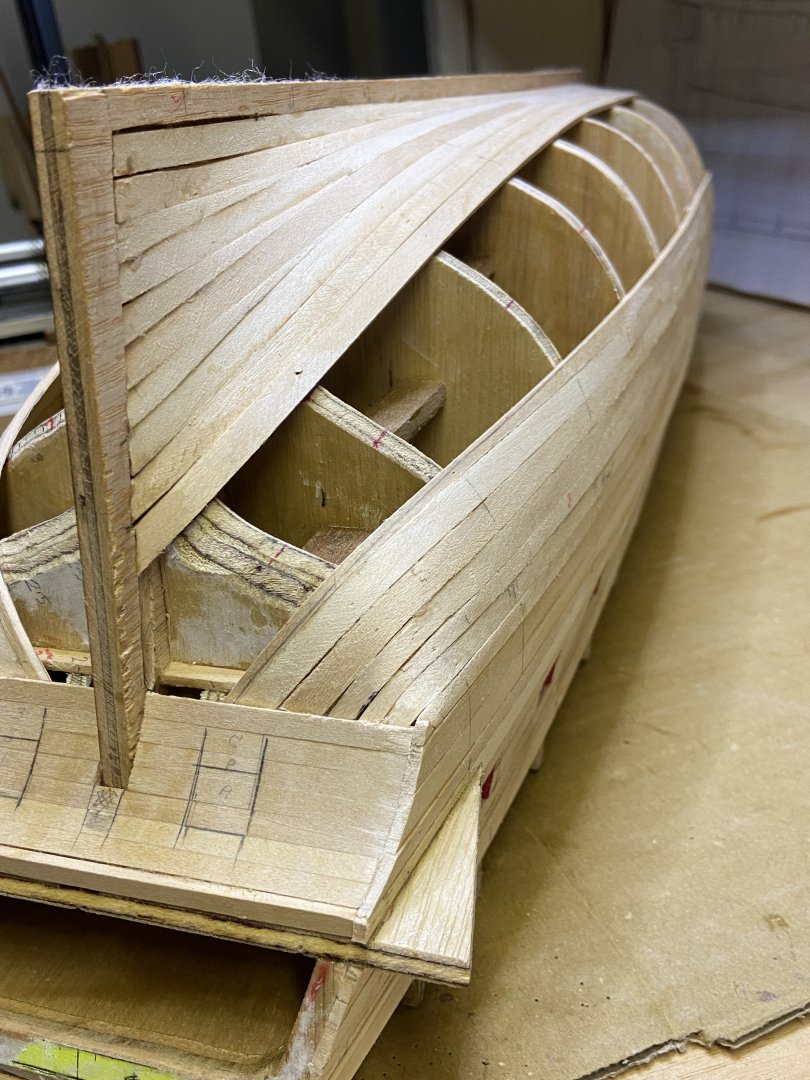
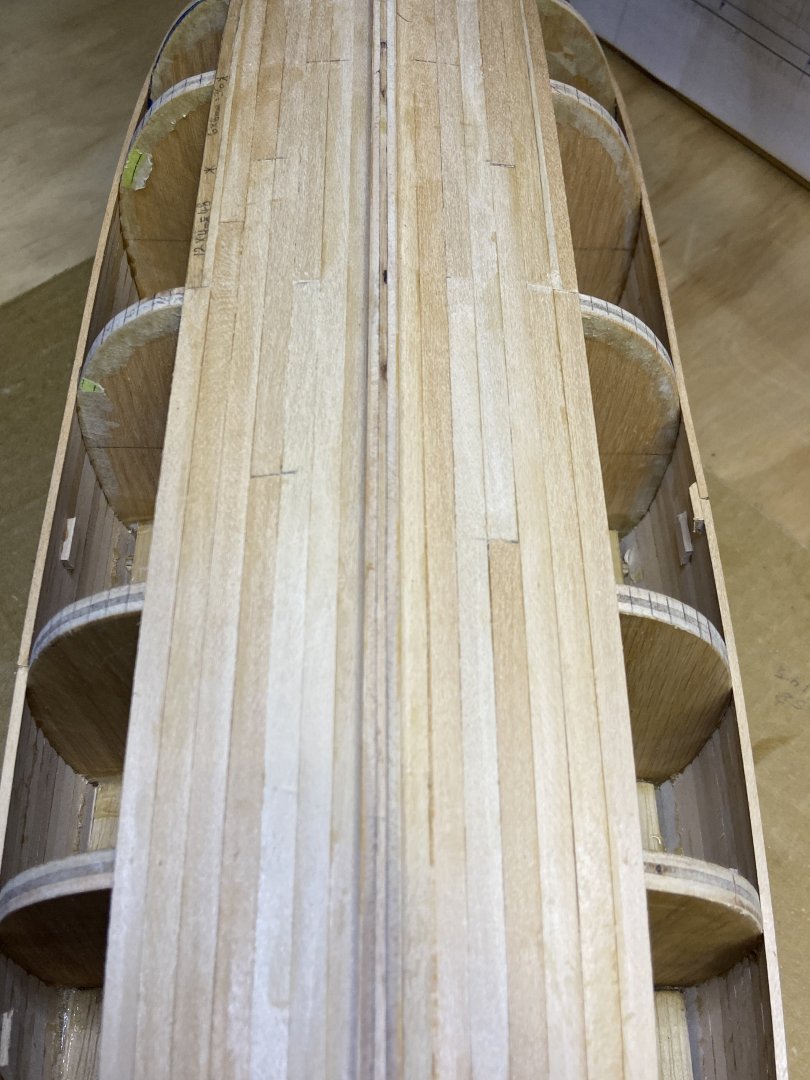
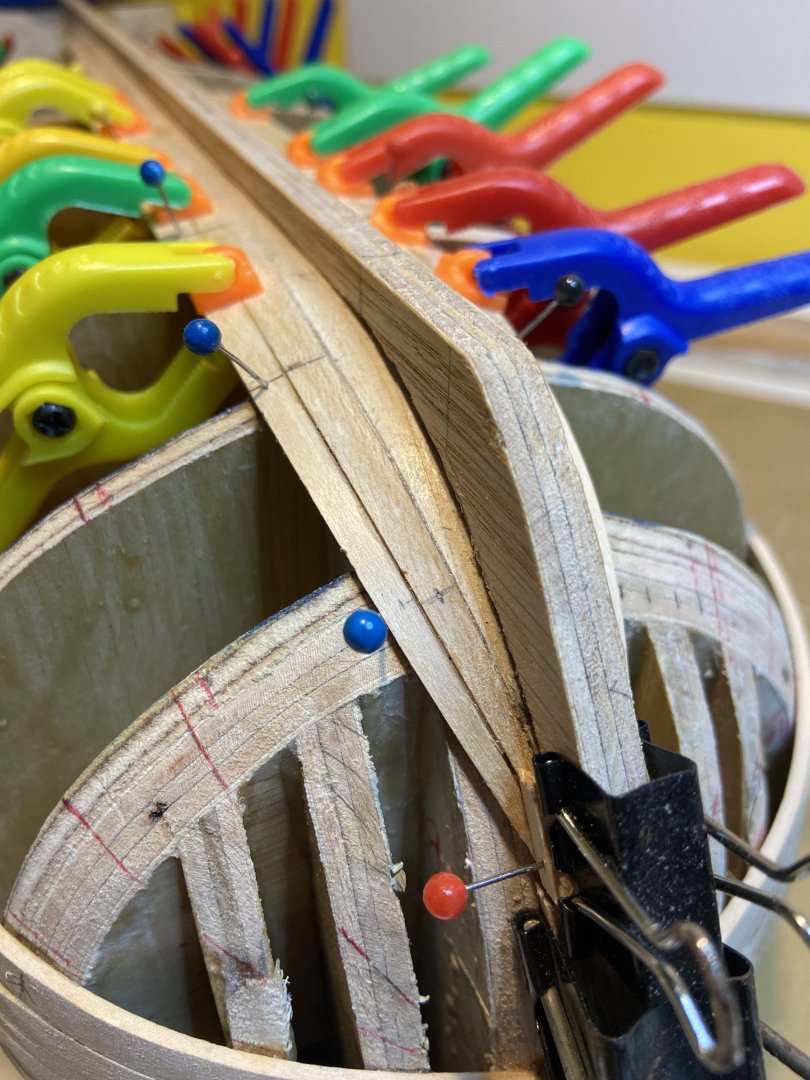
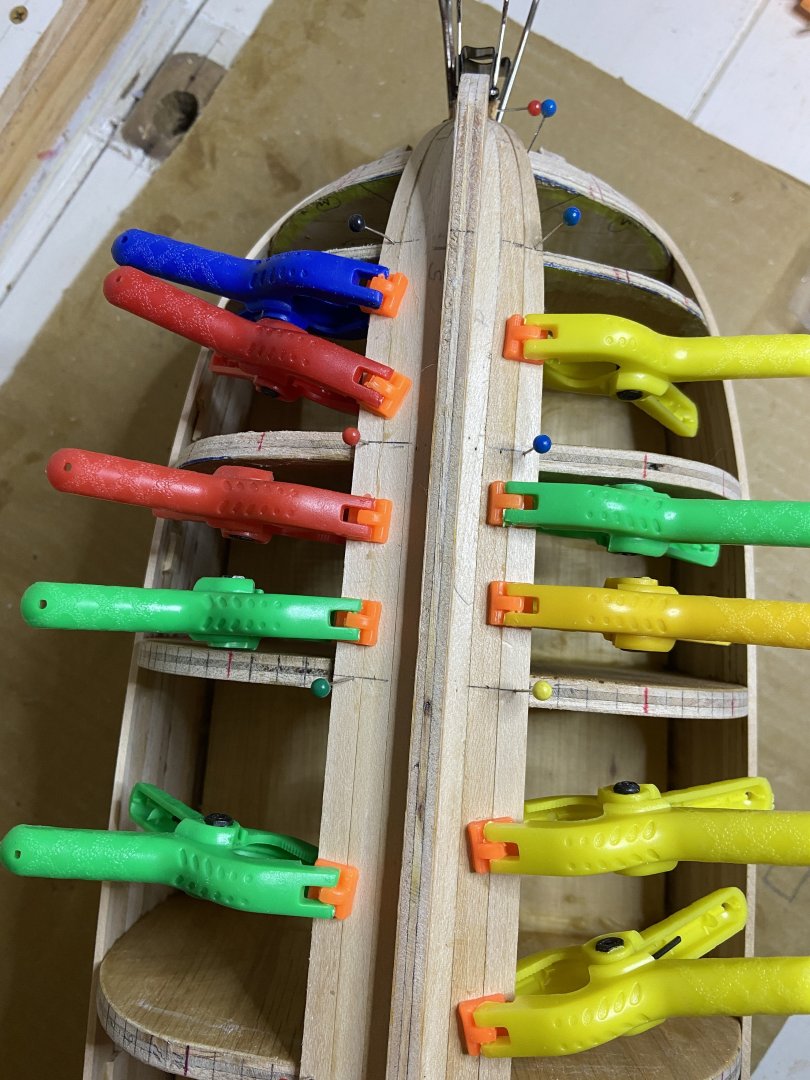
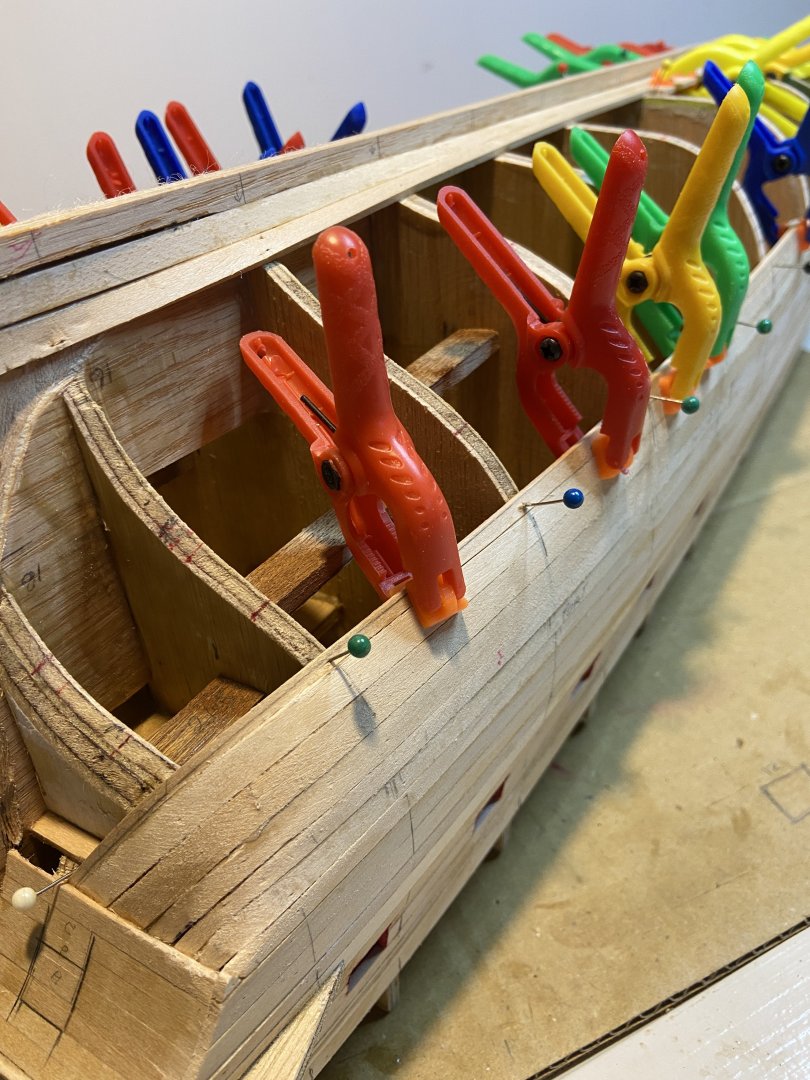
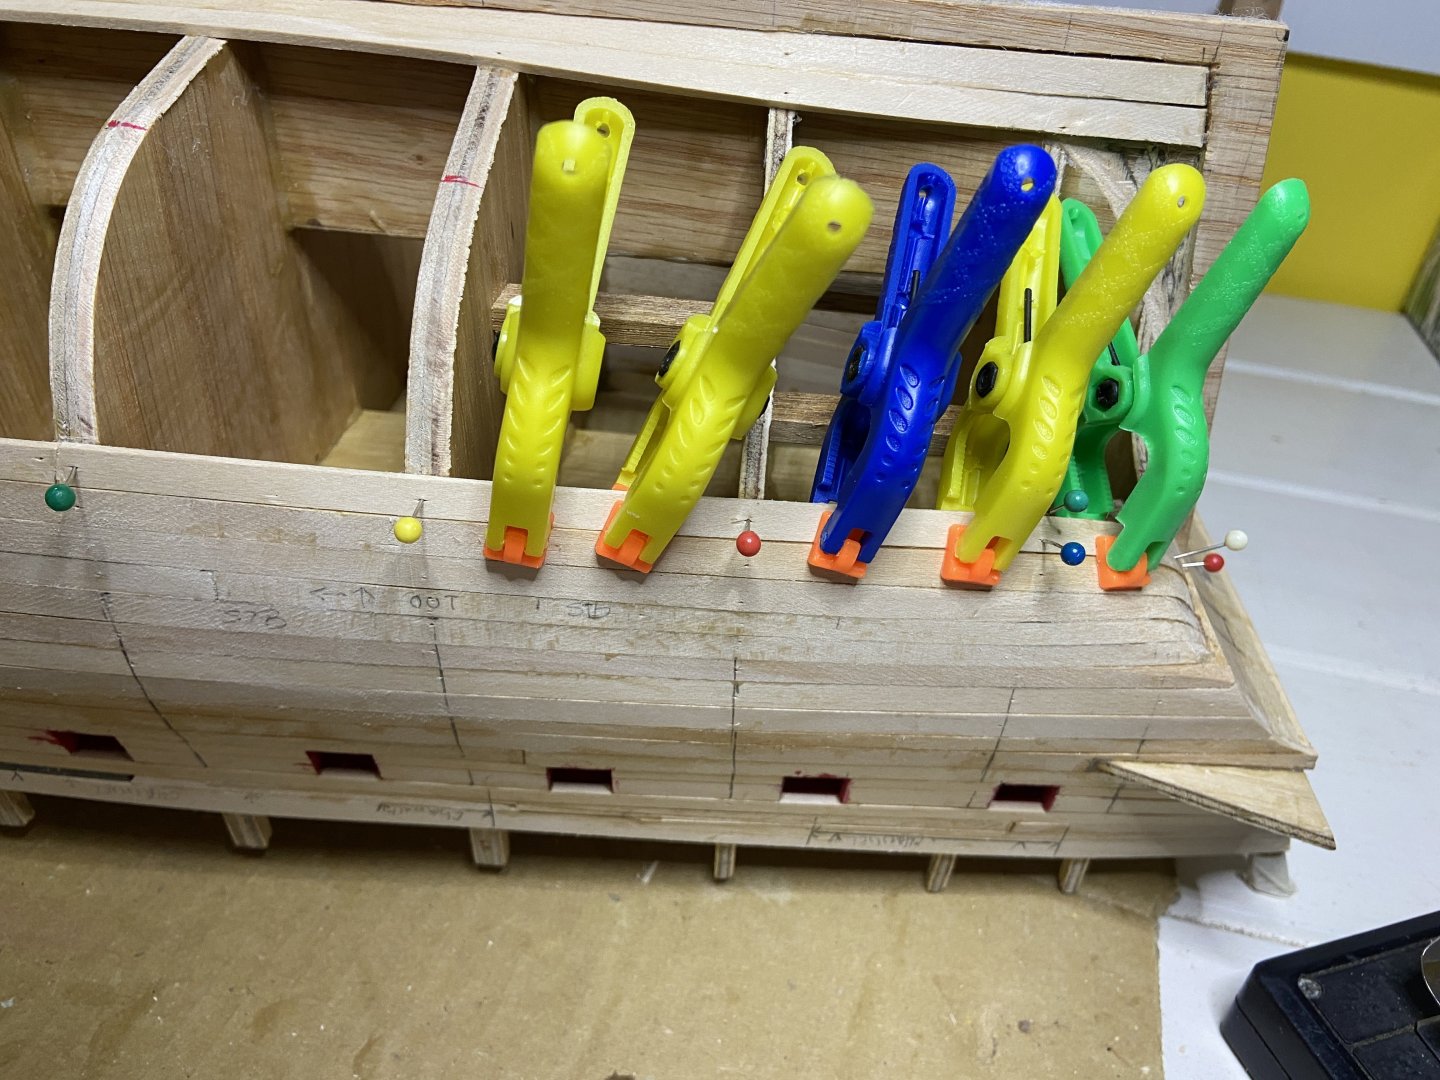
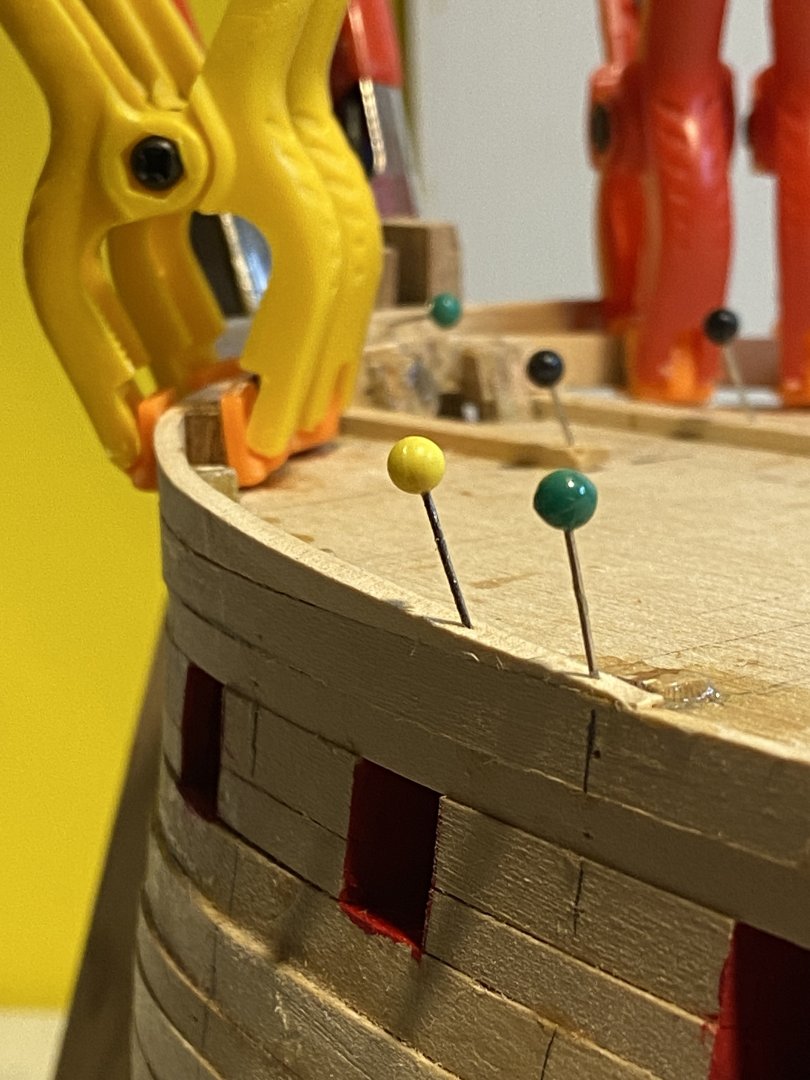
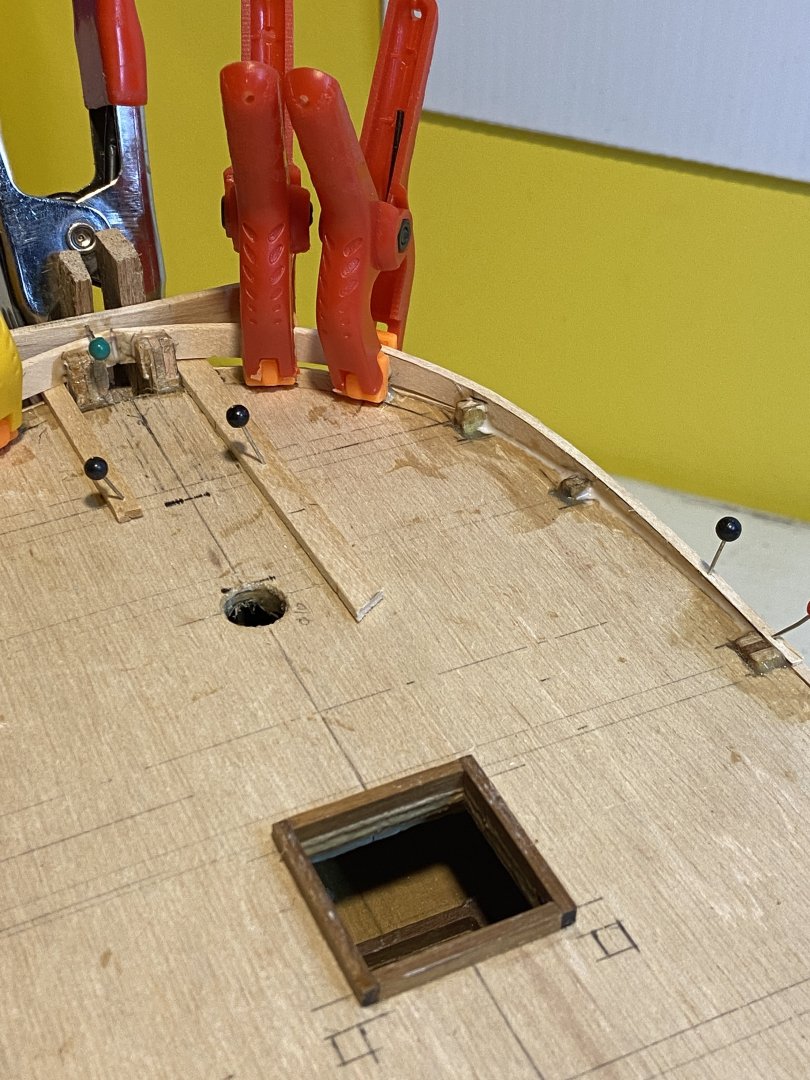
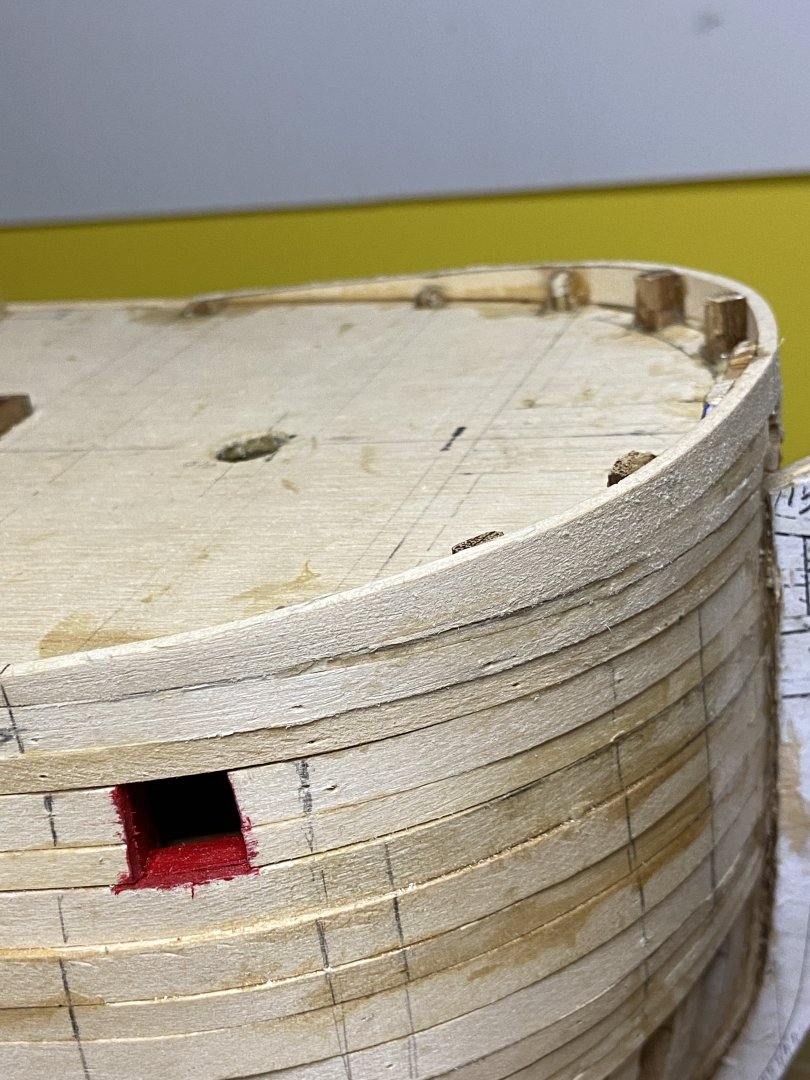
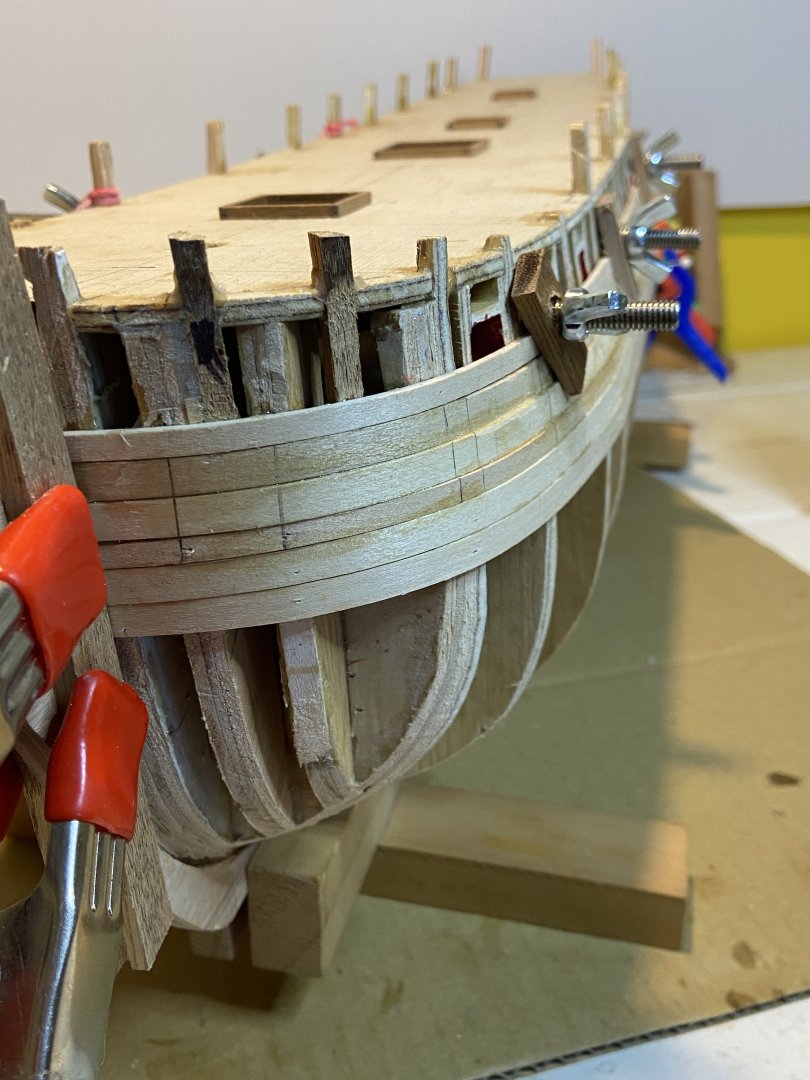
Back in the Shipyard 06 October 2025. I cannot believe nearly a month has gone since the last post. Been a few things going on, slow progress. Bit of a catchup post below. The Sirius has been flipped/mounted on a new base for the 2nd layer of planking. There are 25 - 5mm wide planks from the Wales to Keel. So some need to disappear, "dropped" 8 Planks have been run into the Bluff Bow of the Sirius. 3 to the Stern to date. I'm using a Cada 4 - 3 planks between joints, staggered planking pattern, planks join every 4th frame(max. ~ 9.7 feet long). Some join over 8 frames for convenience of the build. I groove every 4th joint though. The shaping of each plank takes time to get them to lay as flat as possible. Especially around the Bluff Bow. The planks ending at bow are "hooked" to allow the plank behind to end at a half width. Well that's what I'm aiming for. Where talking in mm at the plank ends. At the moment I'm getting away with pre-bending the plank ends and pinning the open plank edge to hold the planks whilst the glue dries. A light sand and will/should result in a smooth finish. The Garboard plank is glued in place. If you look closely a Half Stealer was added in to the keel rabbit for the Garboard to lay naturally. Just to the left of the Red Pins, you'll see the first 2 dropped planks. They'll be another 2 planks dropped in the next set of 4 planks. A keen eye may see the gap above the Wales on the left. I need to cut a filler plank in "one day". A few of the first planks have been pulled around to the Transom. The 1mm Beech planks bent very well in this area. A timber strip to be added at the intersection when all planks on. Wales need to be finished off. Wel, the planking is not being rushed. A few o/s holidays coming up before Xmas.


-
Back in the Shipyard 10 September 2025. Since the last update, the Bow Gun Whales have appeared. With the aid of 3mm balsa as a filler, this provided plenty of support for the run of the inner planks. The Gun Wale was cut from 6 pieces of Rosewood, and used what I call a "scarf joint"(is that correct) on the side joins. The picture shows the finished product.
-
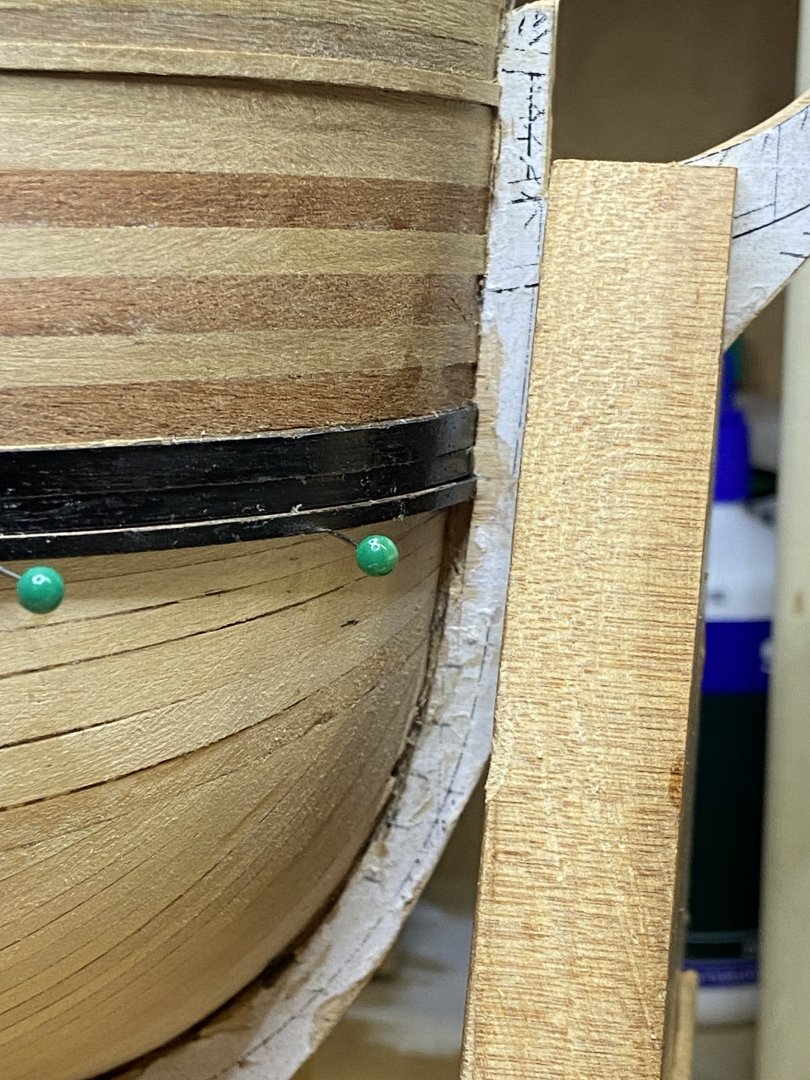
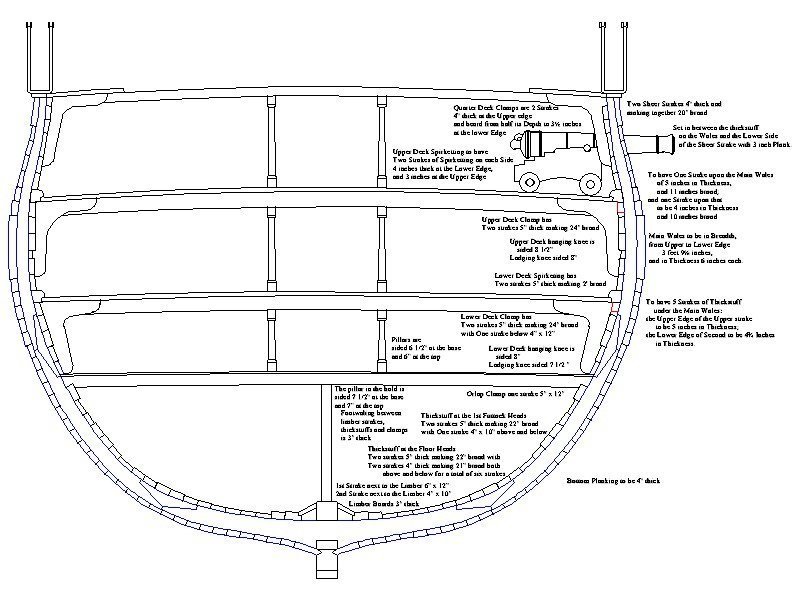
More progress from the Shipyard 28 August 2025. The last few days have been onto the "Wales", which run Bow to Stern, at around the max breadth of the hull frames. I'm basing the location & vertical depth from the RMG plan. They will be added on by: Two(2) strakes on top of the Main Wales. 11" & 10" broad(8.9mm @ 1:60). They may have been up to 3-4" in thickness. At 1:60 equates to 1.3 to 1.7mm. The Main Wales 3' 9" broad(1:60 equates to 19mm) and 6" thick(1:60 equates to 2.54mm) The larger the ship, it may also have had a number of lower strakes below the Wales. Visually, I'm going 1mm for the top Strakes and 2mm for the Wales. The above cross-section is not the Sirius(Berwick). I've included this section for reference to the location of Strakes/Wales & thickness, depth of them. The model Wales will be all up around 18mm in width/depth. The aim is to taper them a bit towards the stern as well. The top and bottom Wales are pre-painted black. I've enlarged the bow Rabbet to hold the strake/Wale ends firmly. All the above to strengthen a ship's hull structure. They were the thickest timbers on the side of a wooden ship hull. I've seen some discussion that Wales also prevented "hogging", when in heavy seas a ship may longitudinally bend up/down. And not to mention the Wales being at the widest part of the hull, were in contact when berthed, or rafted too other ships. Back to the Ship.

-
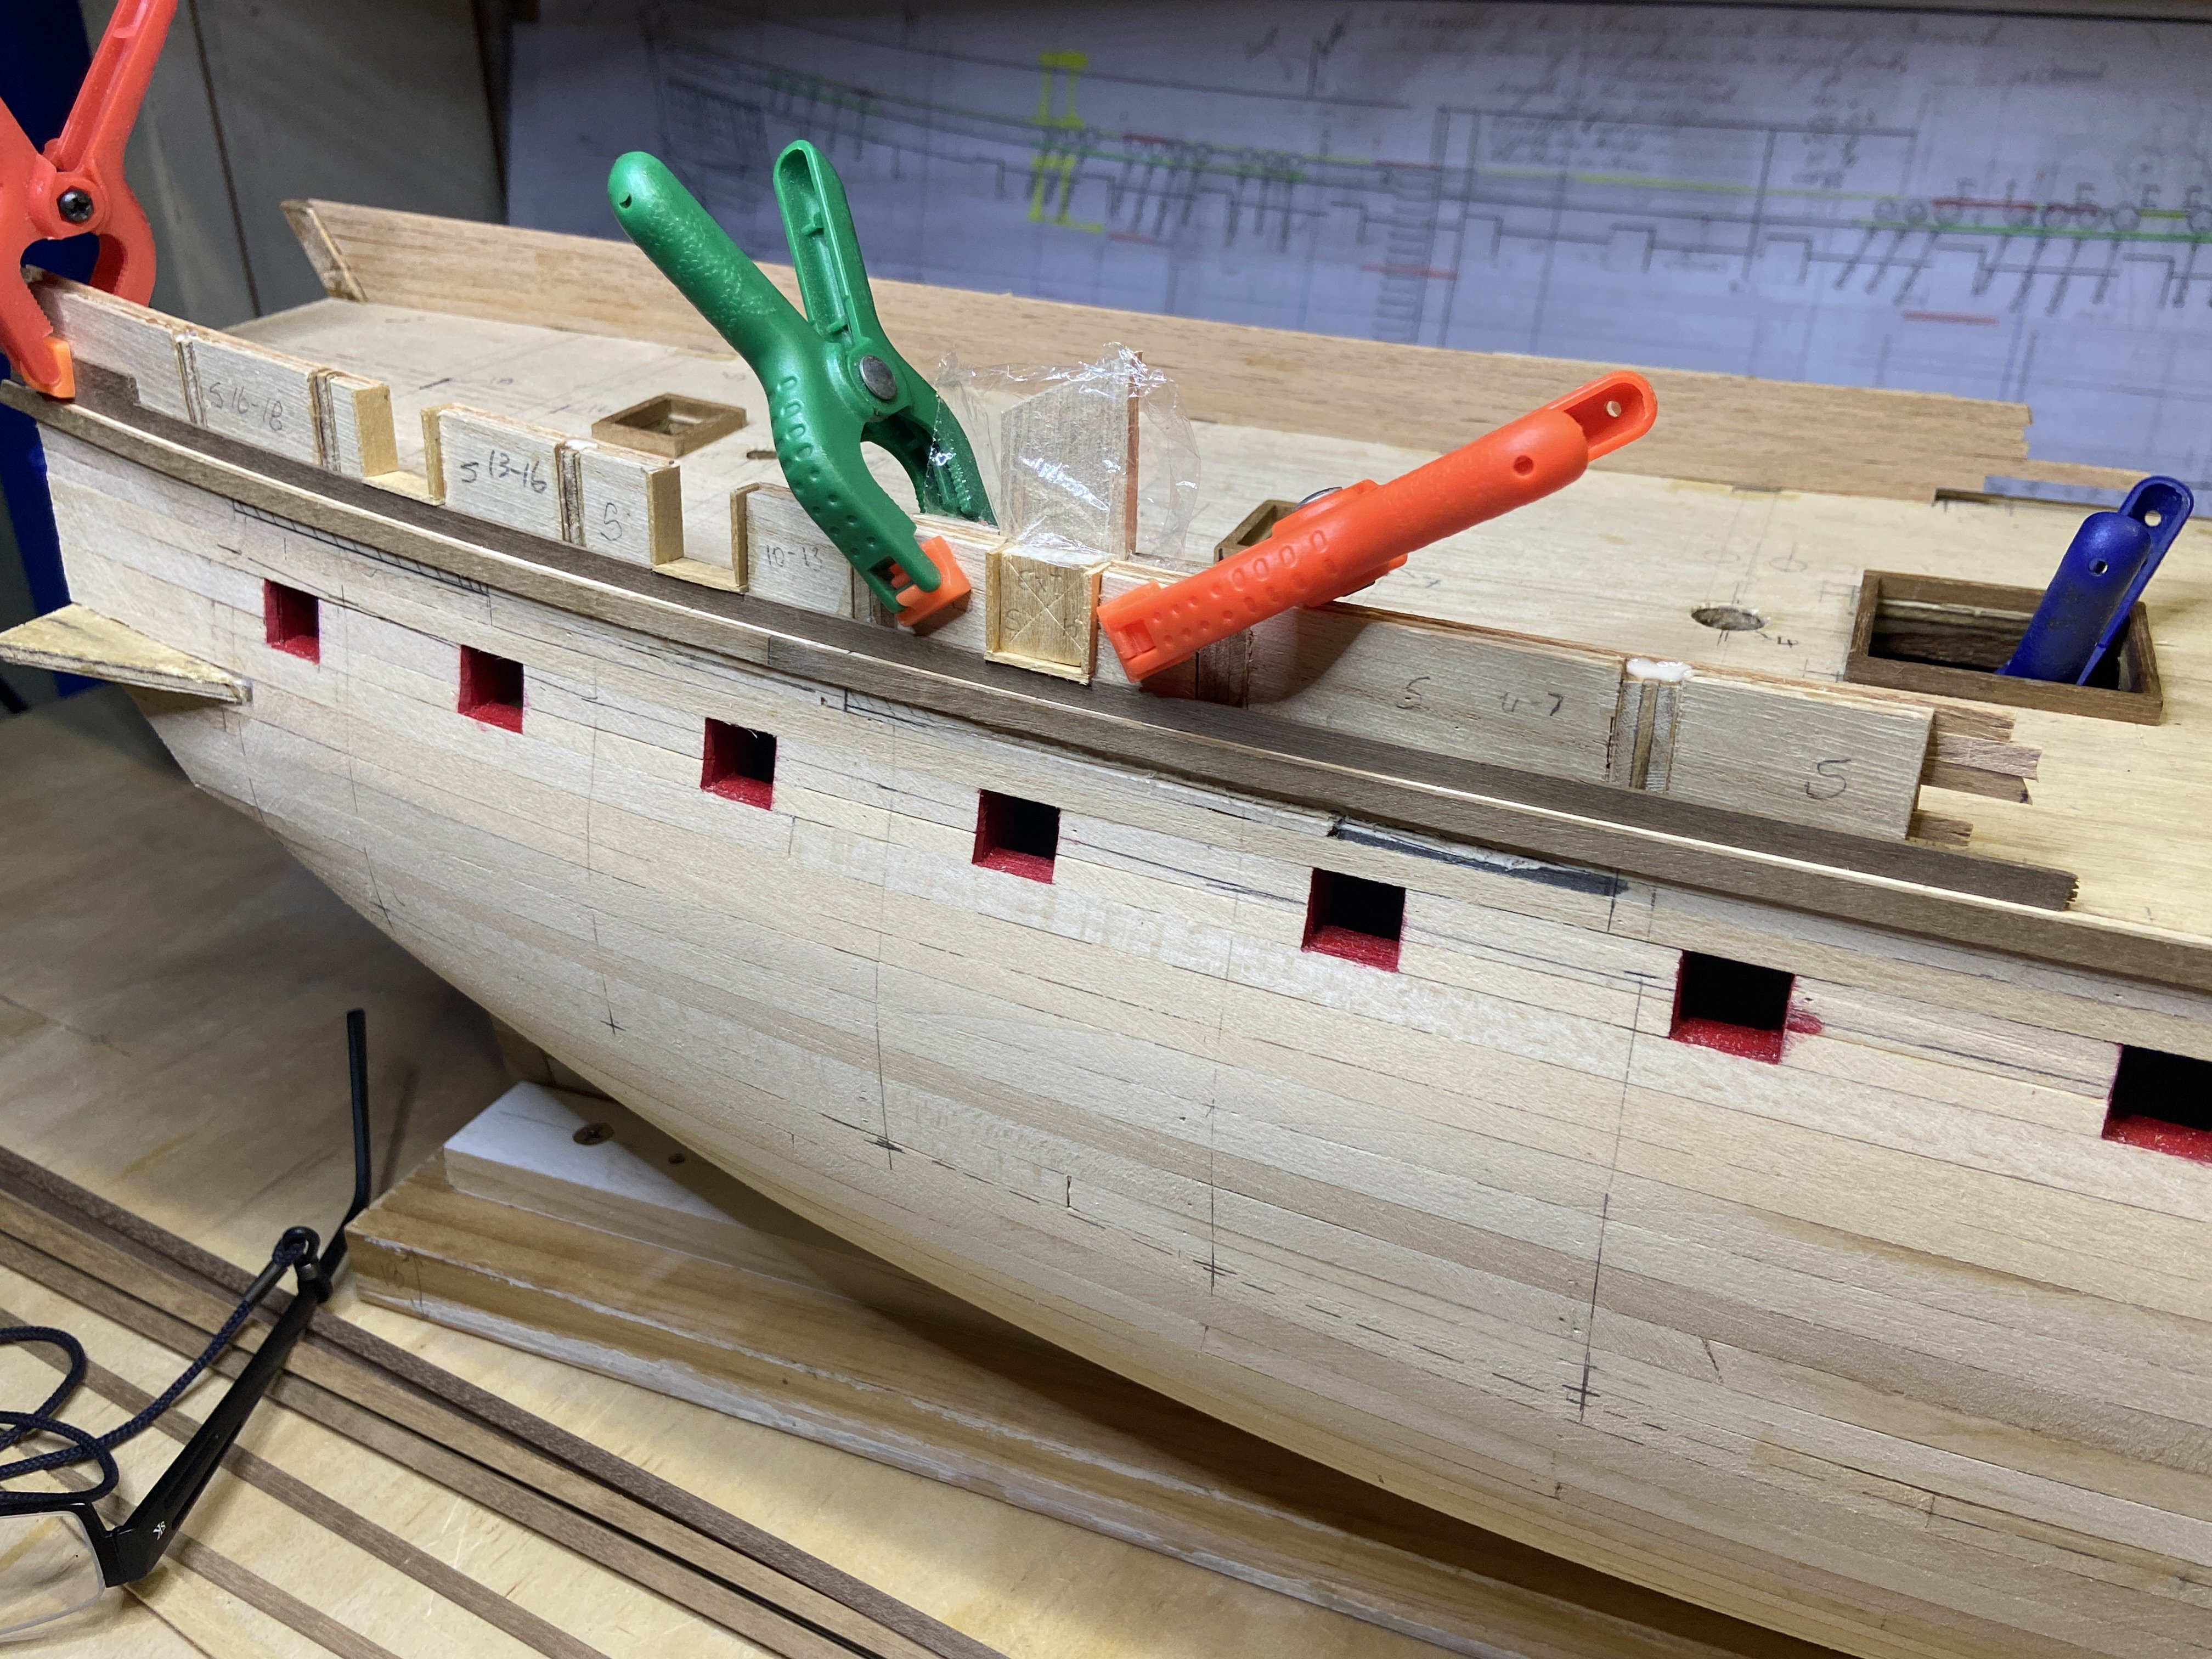
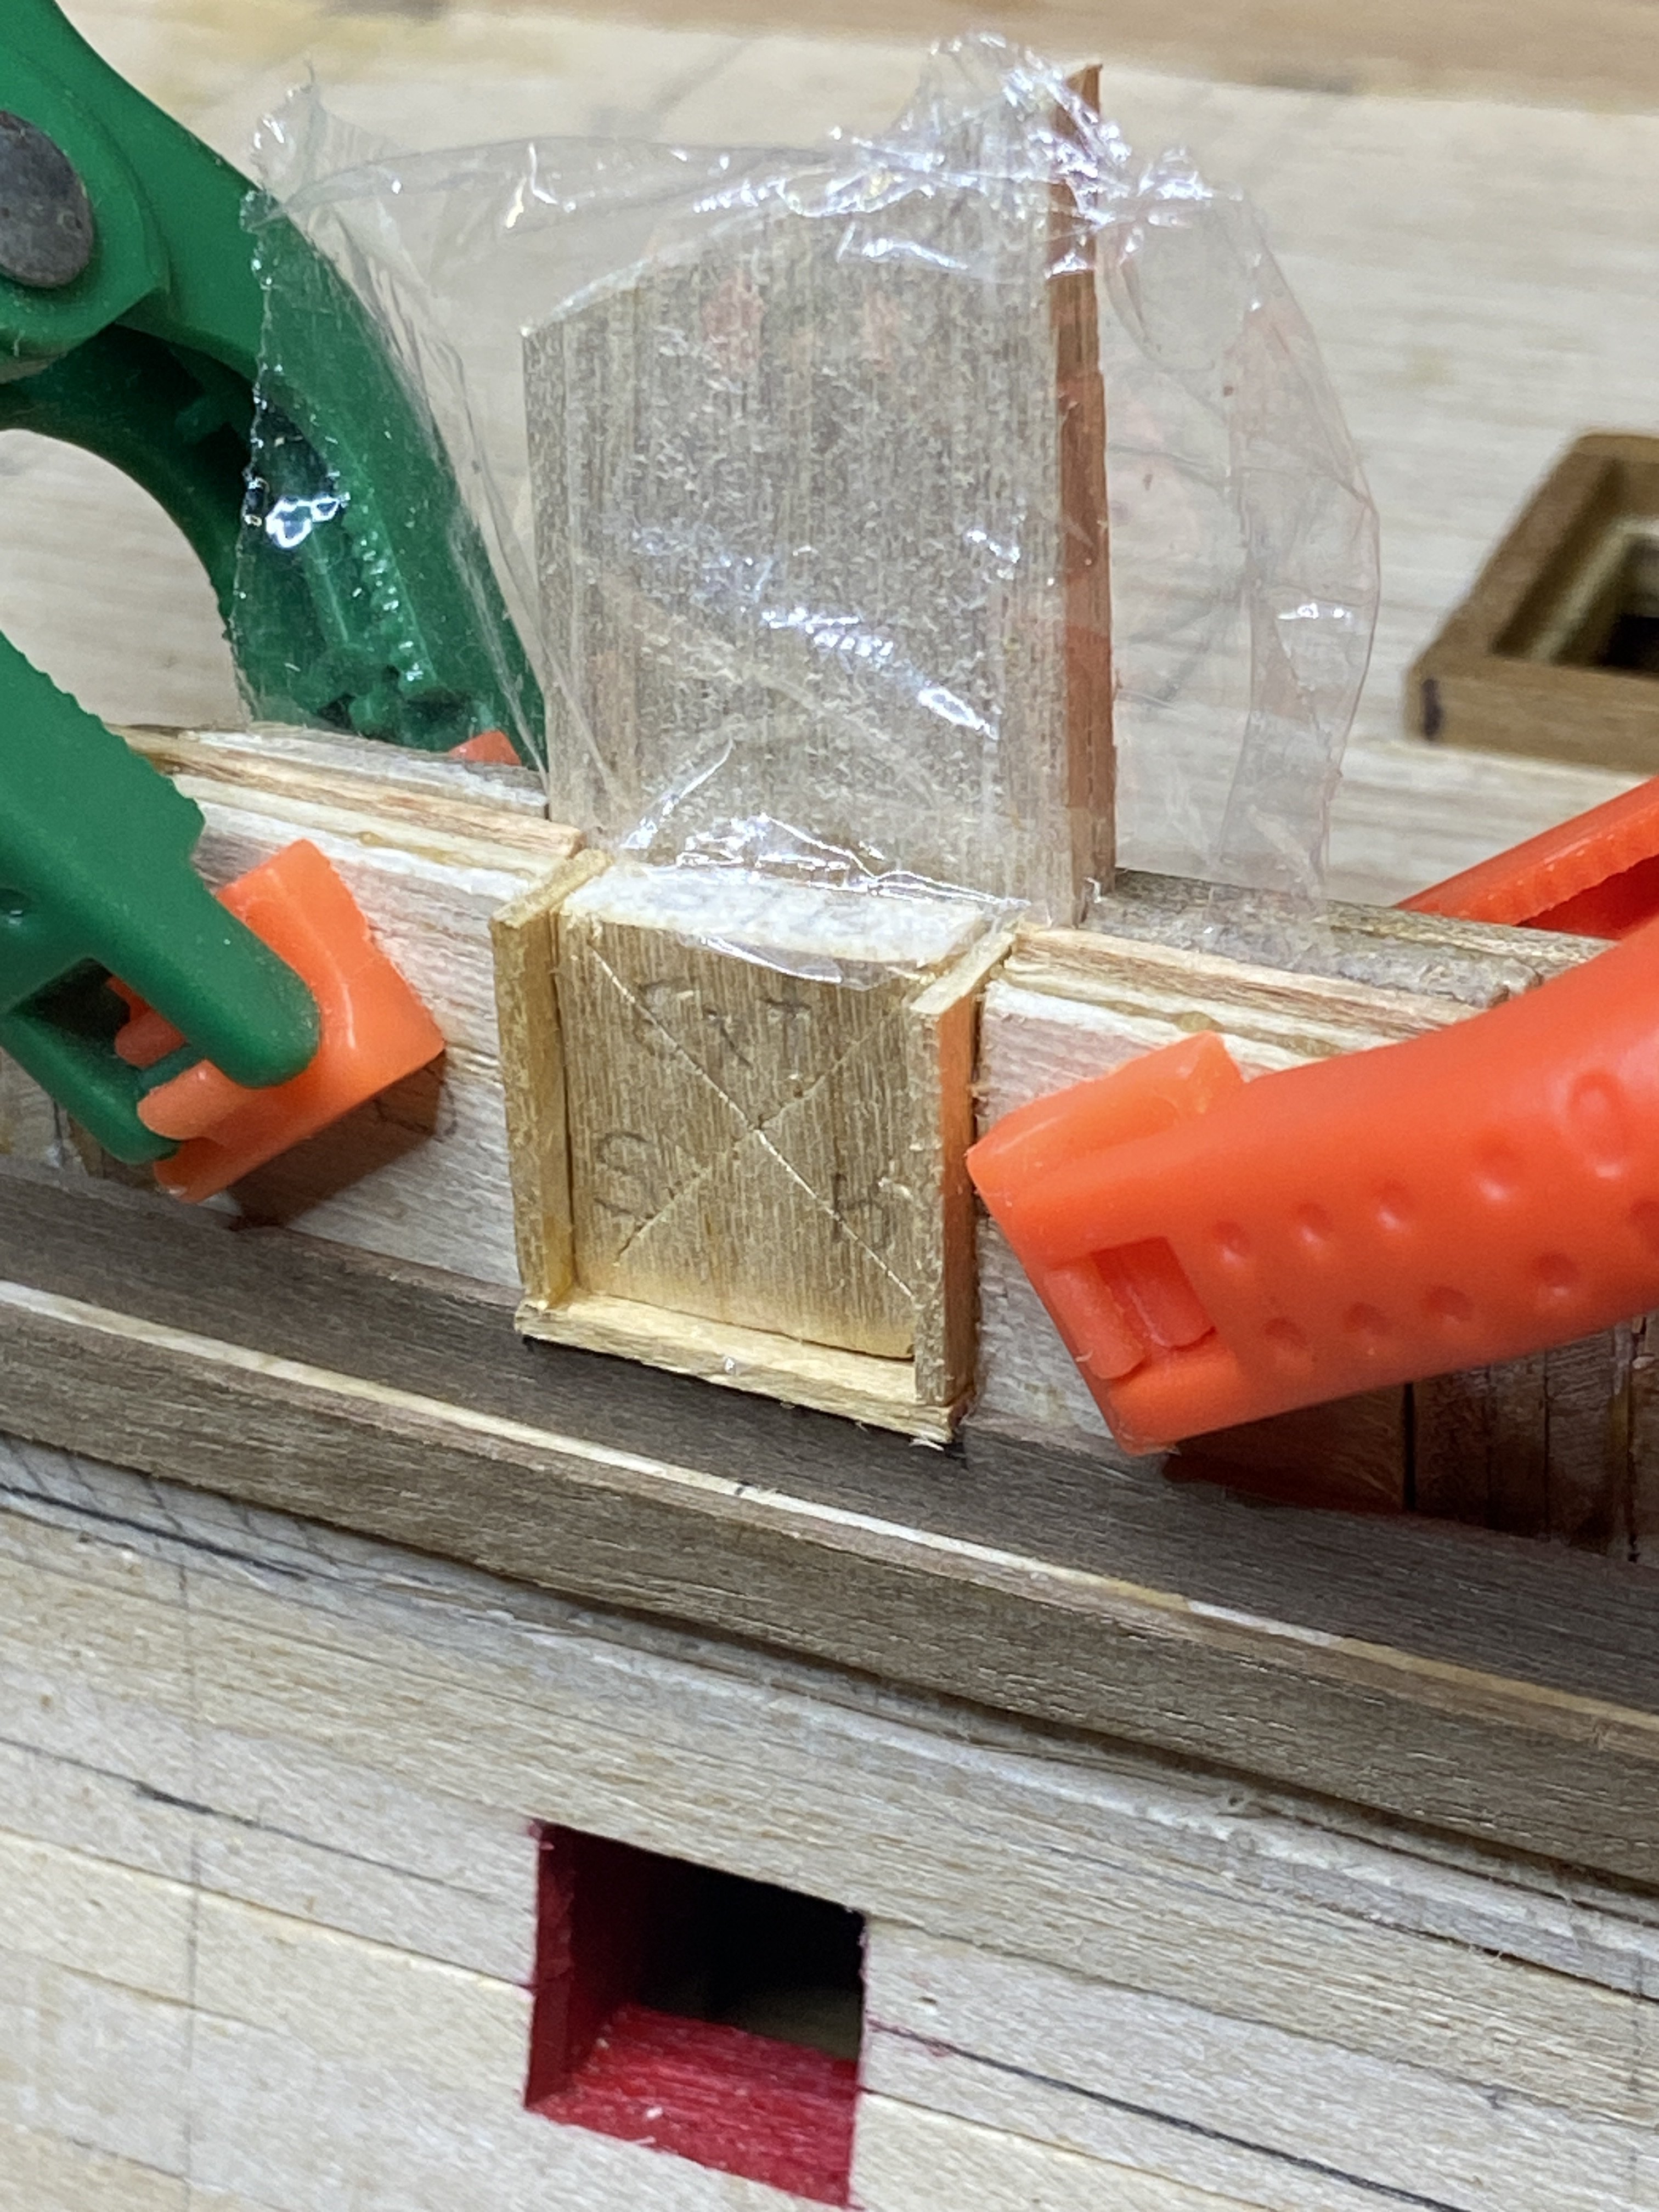
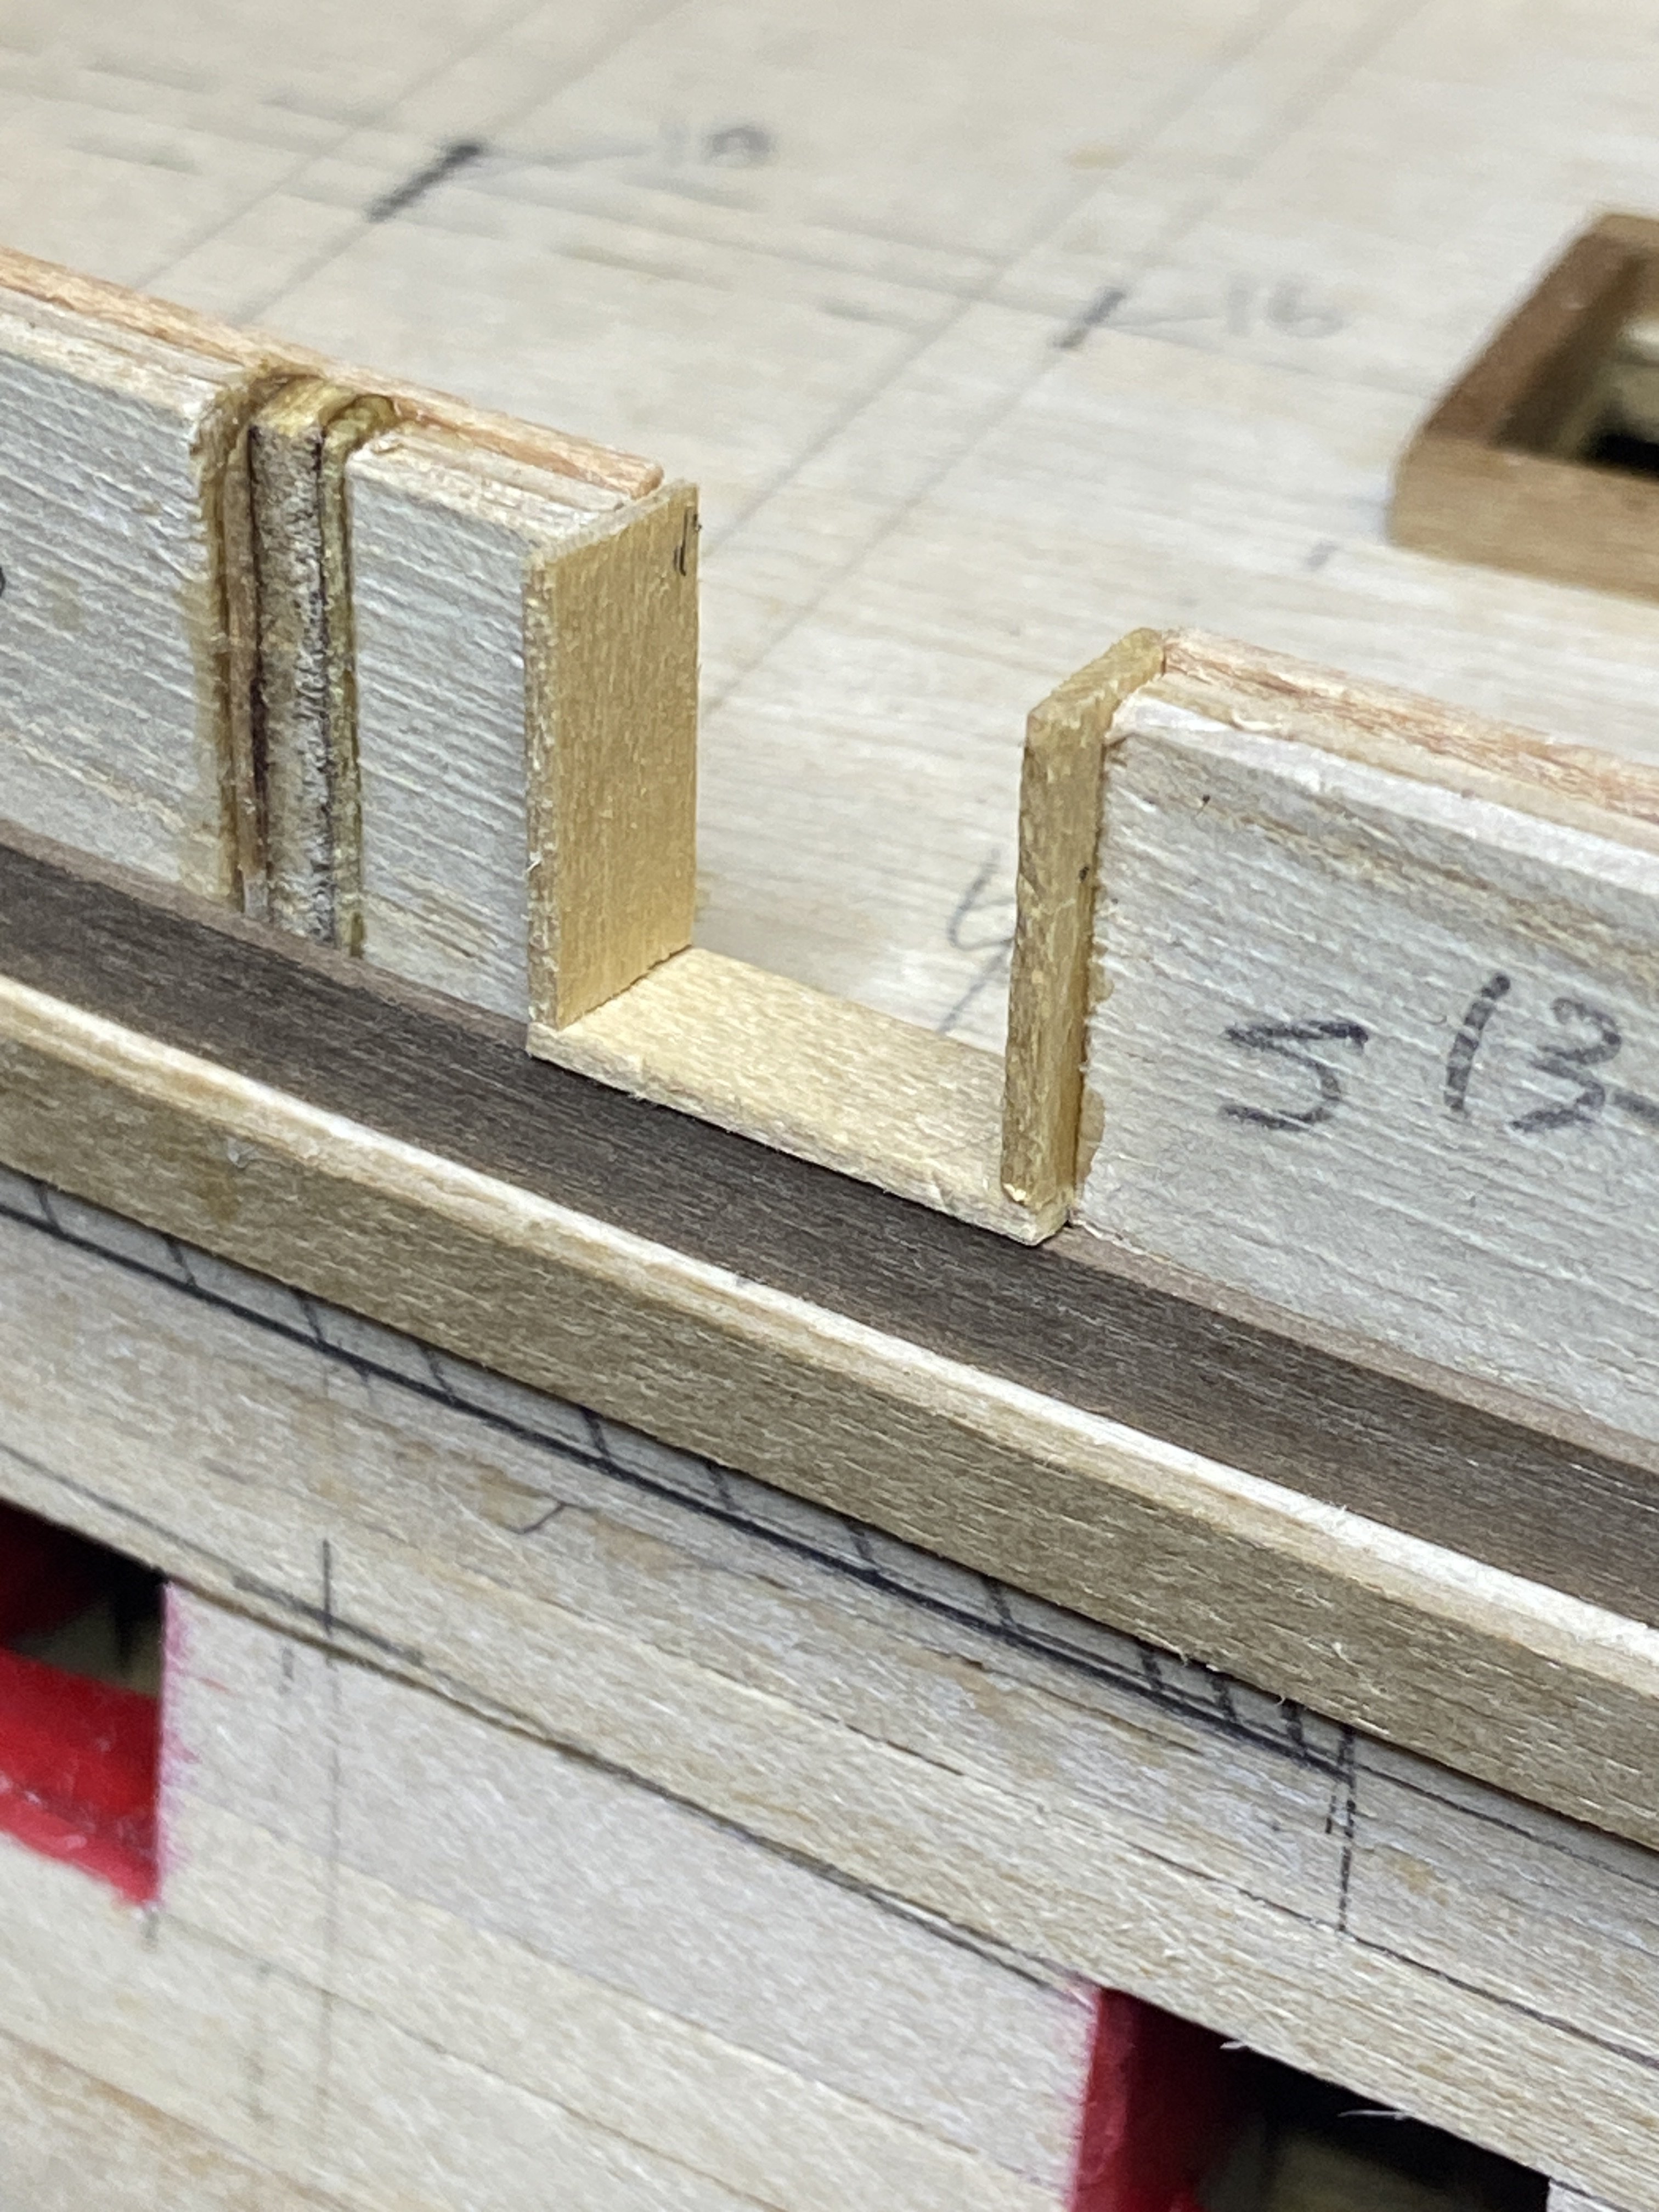
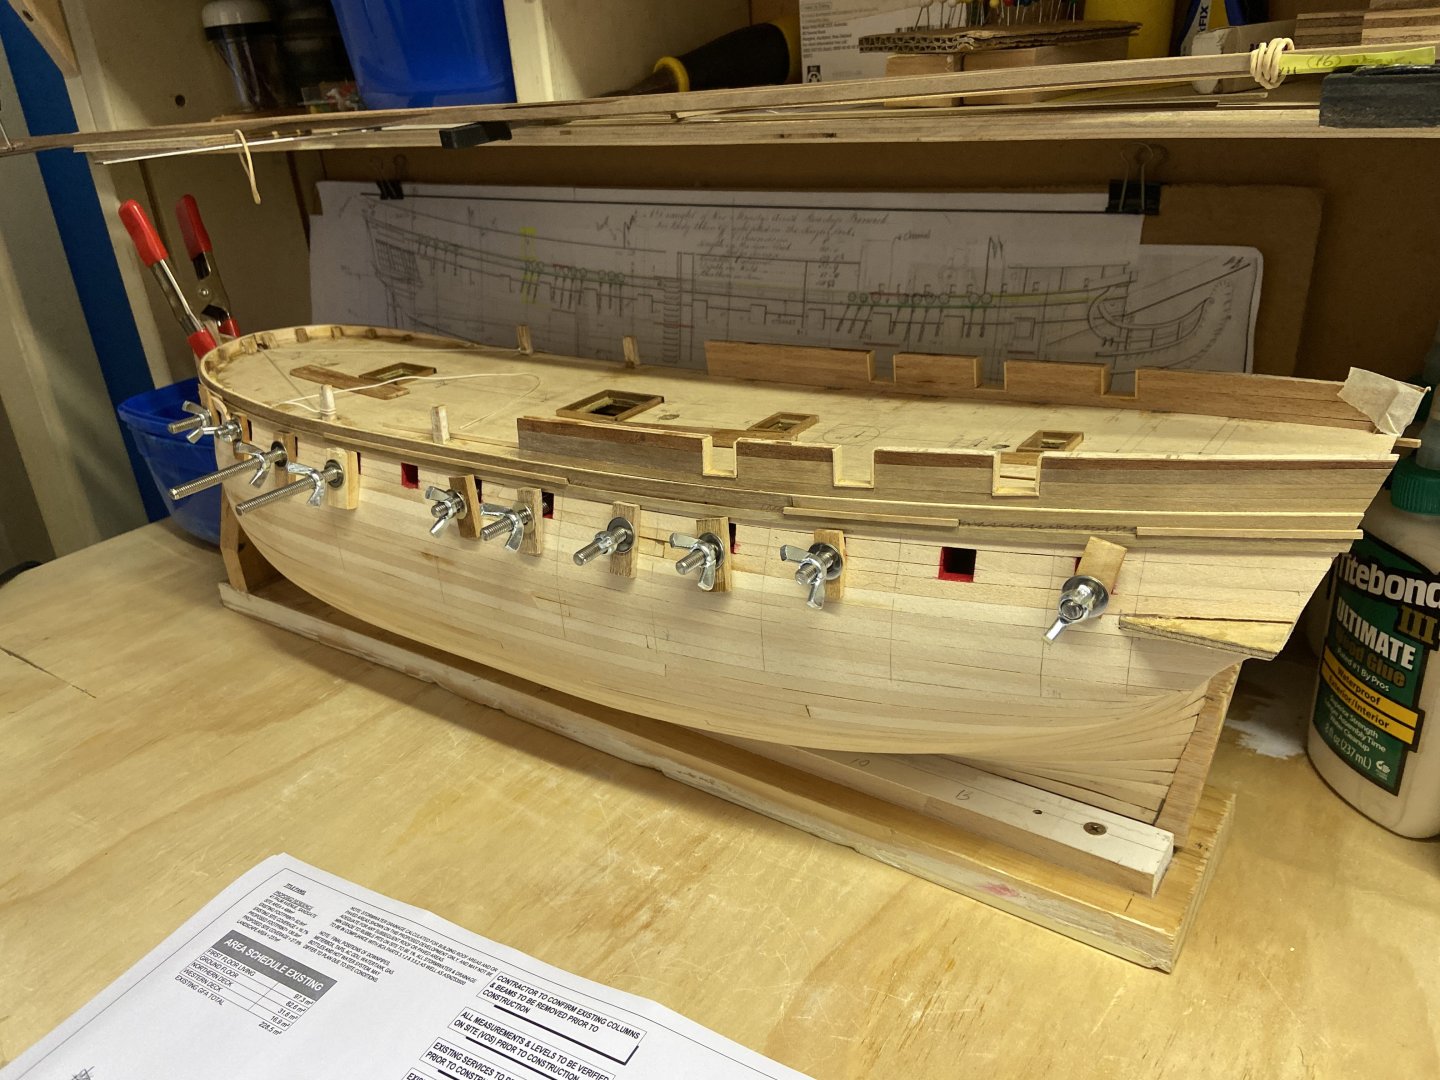
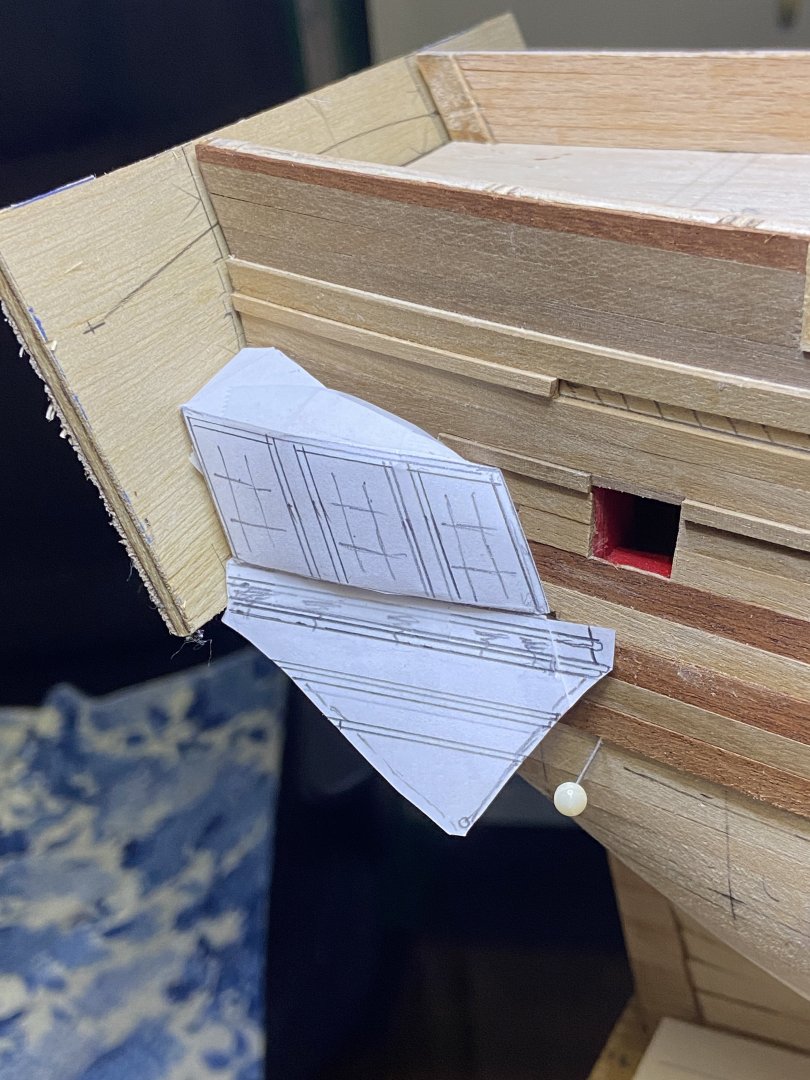
Update from the Shipyard - Thursday 14th August 2025. The shipwrights(🤔) are back onto the planking. Started on the recess's in the Strake for the Mast Channels(3 per side). I am making use of the Gun Ports to hold the strake @ planking in place -> as in photo. More Planking: I've had a bit more of time at home of late, after a bit minor surgery. Just a bit of preventative stuff. So, plenty of time to add more planking to the hull. Before you fellas get into me re: the fact of mixing timber species for the planks. As this is a scratch build, I'm using timbers left over from my previous Kit Build Endeavour. I plan to stain the planks and "hopefully" blend the finish to a more "oldish look". Planning Ahead: And a bit of paper mock-up on the rear to see how the heck to build the window pop-outs.


-
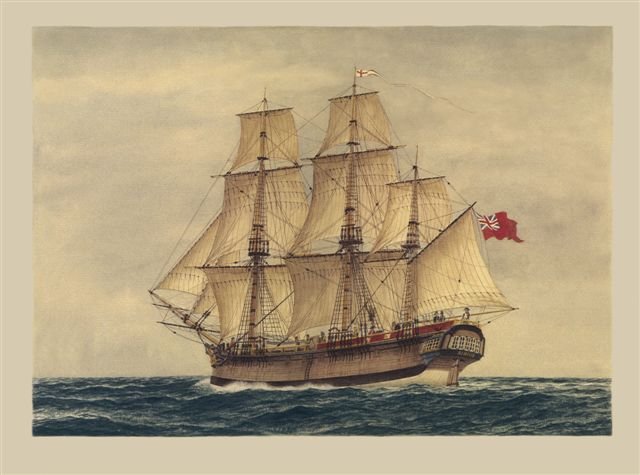
Hi Steve, Thanks for looking in on the progress. Watercolours, paintings, sketches !! I have several pictures/paintings of the Sirius. All "historical" representations I assume. Between them have 3 versions of bulwarks/rails. It's similar for "how many guns did she carry on board". By all references in the books I've read to date, All her "Berwick" guns were removed during the 1786 refit "Her commission stated that the Sirius 'would' be armed with four 6-pounder carriage guns, six 18-pounder carronades & eight swivel guns", a very light armament. "Then on 31 October orders were given to obtain: 10 more 6-pounders to be put on board....". But it was unsure how many actually made it on board as "with respect to the guns, camp equipment, tents etc that were ordered from the Tower,...he[Phillip] had not specified and quantity, therefore I cannot judge what room may remain[on the First Fleet ships] Bulwarks or Rails ! So back to the rear. I pondered for some time what to do back there. I wondered if I was on board for that arduous journey, most of the time out in open waters, what would I prefer on either side whist on watch back on the aft deck area ! However, I wasn't, but went for the Bulwarks anyhow.

-
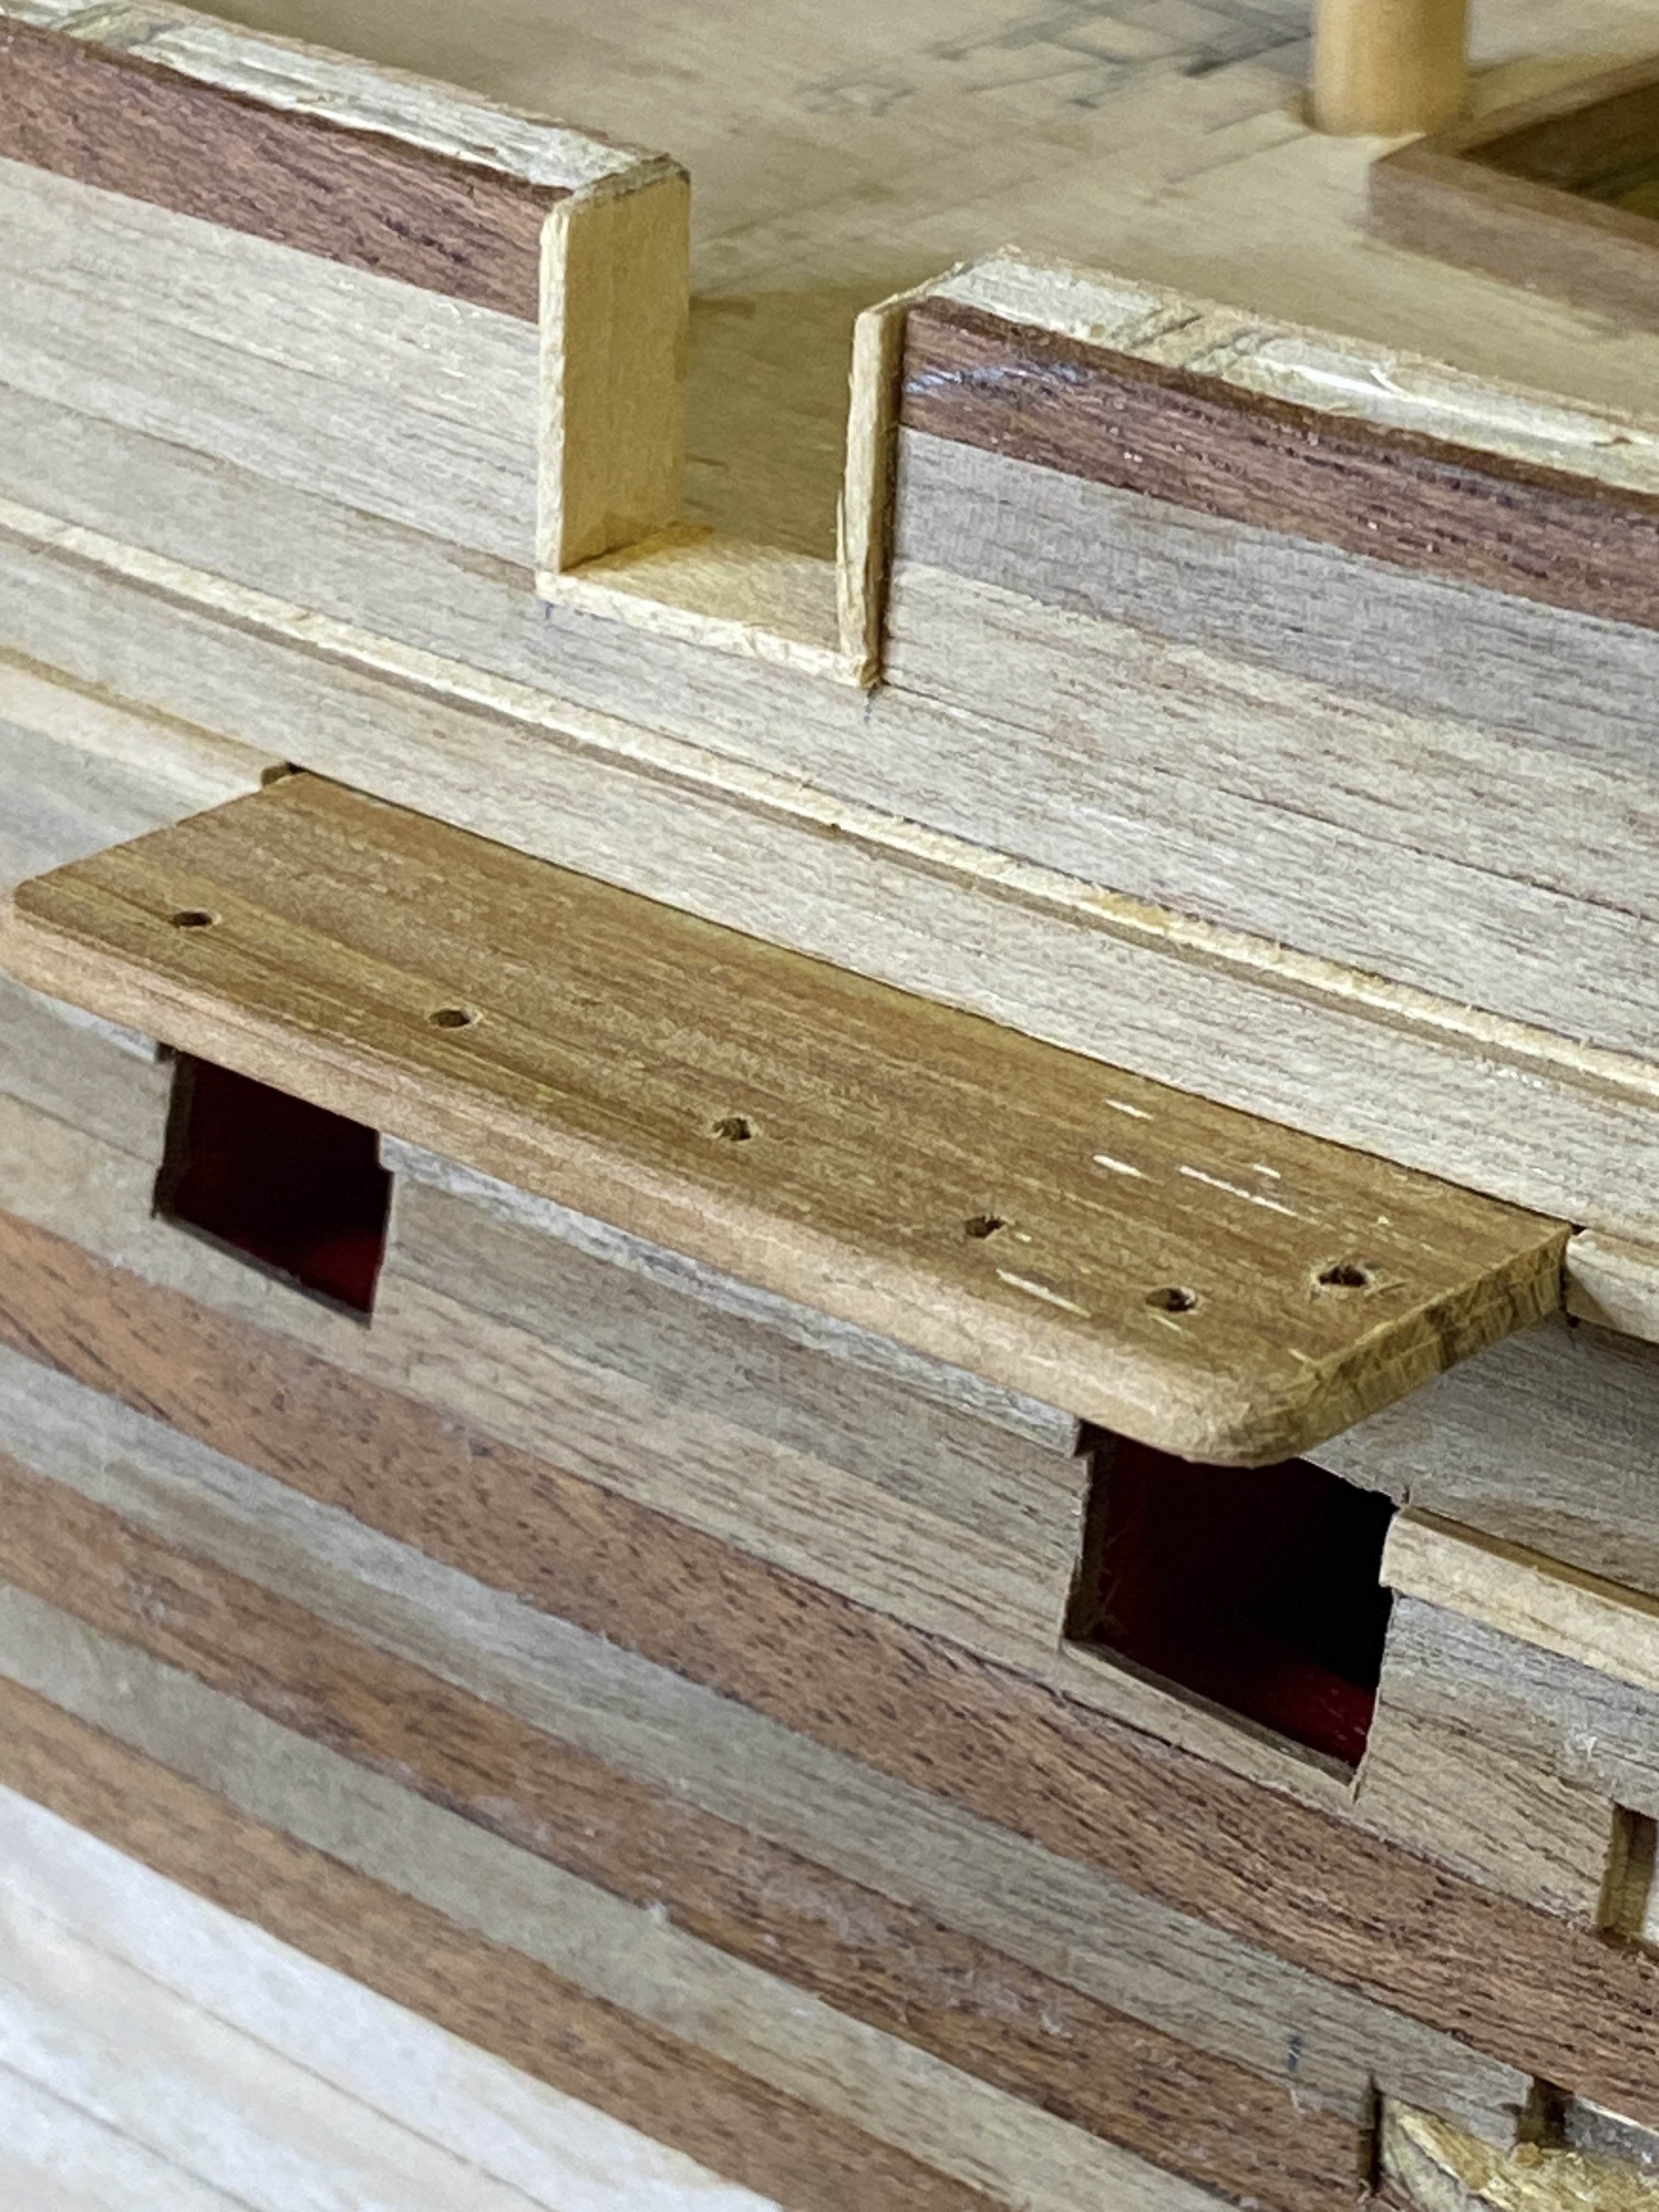
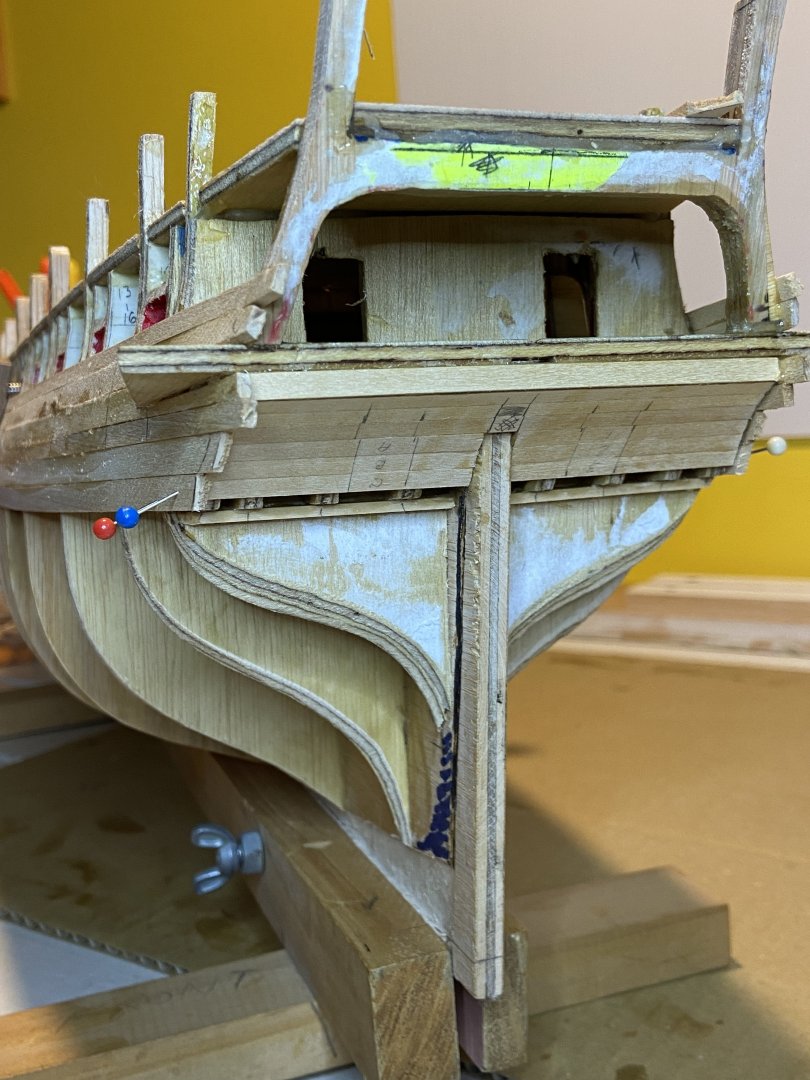
Update from the Shipyard - Thursday 14th August 2025. The shipwrights(🤔) needed a break from hull planking. We decided to move onto the aft sides, top strake, boarded side rails with gun ports. From the RMG Draft of the Sirius(previous Berwick); not much detail on the side rails other than the height. Reviewing a number of colour paintings and the Sirius model in the Australian Powerhouse Museum(PM), I adoption the boarded side rails with 3 x Gunports per side. For me it makes sense the Sirius had solid side rails at the back for protection during the long arduous journey to the other side of the world. I filled in between the "Long Top Timbers" with balsa wood to provide a solid base to glue the outer side rail boards onto. I made a jig to hold the bottom & 2 sides of the Gun Ports to make sure all are the same. Finished Gun Port, ready for the outer boards to go on.


-
More progress from the Shipyard - Thursday 7th August 2025. A bit of a push over last week to get all the 1st layer planks onto the hull has been reached. I spent a few hours fairing(sanding) the planks today. I did carry the upper planks too far down the side. However, for the first layer it's been a good refresher on planking before the 2nd layer of planks. I'm pretty happy with the outcome so far. Port Bow Port Stern_Side Port Stern Starboard Bow Starboard Stern_Side Starboard side I'll be marking out the Wales & thickstuff's, Sheer Strake, and the Channels next


-
Excellent. I did see the capstan was a double one. I see now, the pawls are not shown on the "Berwick" draft. I might just take the pawls off the 3D Capstan I made. possibly too much detail anyway. Thanks for adding the rigging plan - I have similar >> below

-
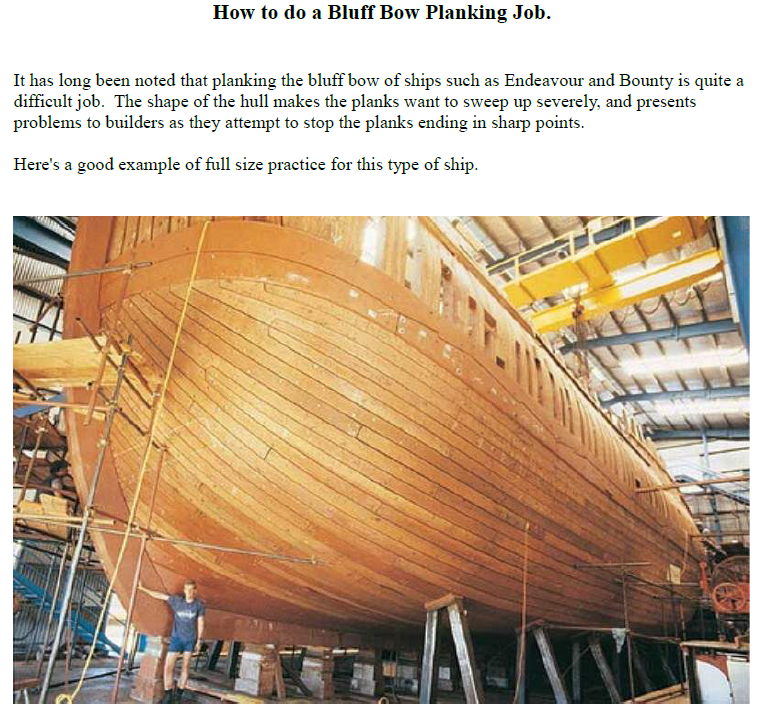
I should point out. The ship model in your pictures, has a finer entry bow. The HMS Sirius is a Bluff Bow ship. Very similar to the "HMB Endeavour" I build a while ago. I am trying to match the planking of the article below, which is the actual bluff bow "replica" of the Endeavour. Even with the replica build; "the Garboard strake has been allowed to creep up the stem, and if this had been kept a little lower they may not have needed as many dropped planks." (This was noted by a member of the Replica board) Most of my planking to date on my model, follows the natural lay of a plank over the frames.
-
More progress from the Shipyard. Slow progress on the 1st layer planking. Another 3 planks added from the keel. All 6mm wide. The first 4mm wide plank of 12 has been added, where they go over the curve section of the frame. As I had not kept the garboard plank shorter, the rest have swung further down. But being 1st planks, I have learn't.

-
Your correct. I've had a bit of a time to get the following bow planks onto the keel. The 2nd layer, will be done differently as you have pointed out.
-
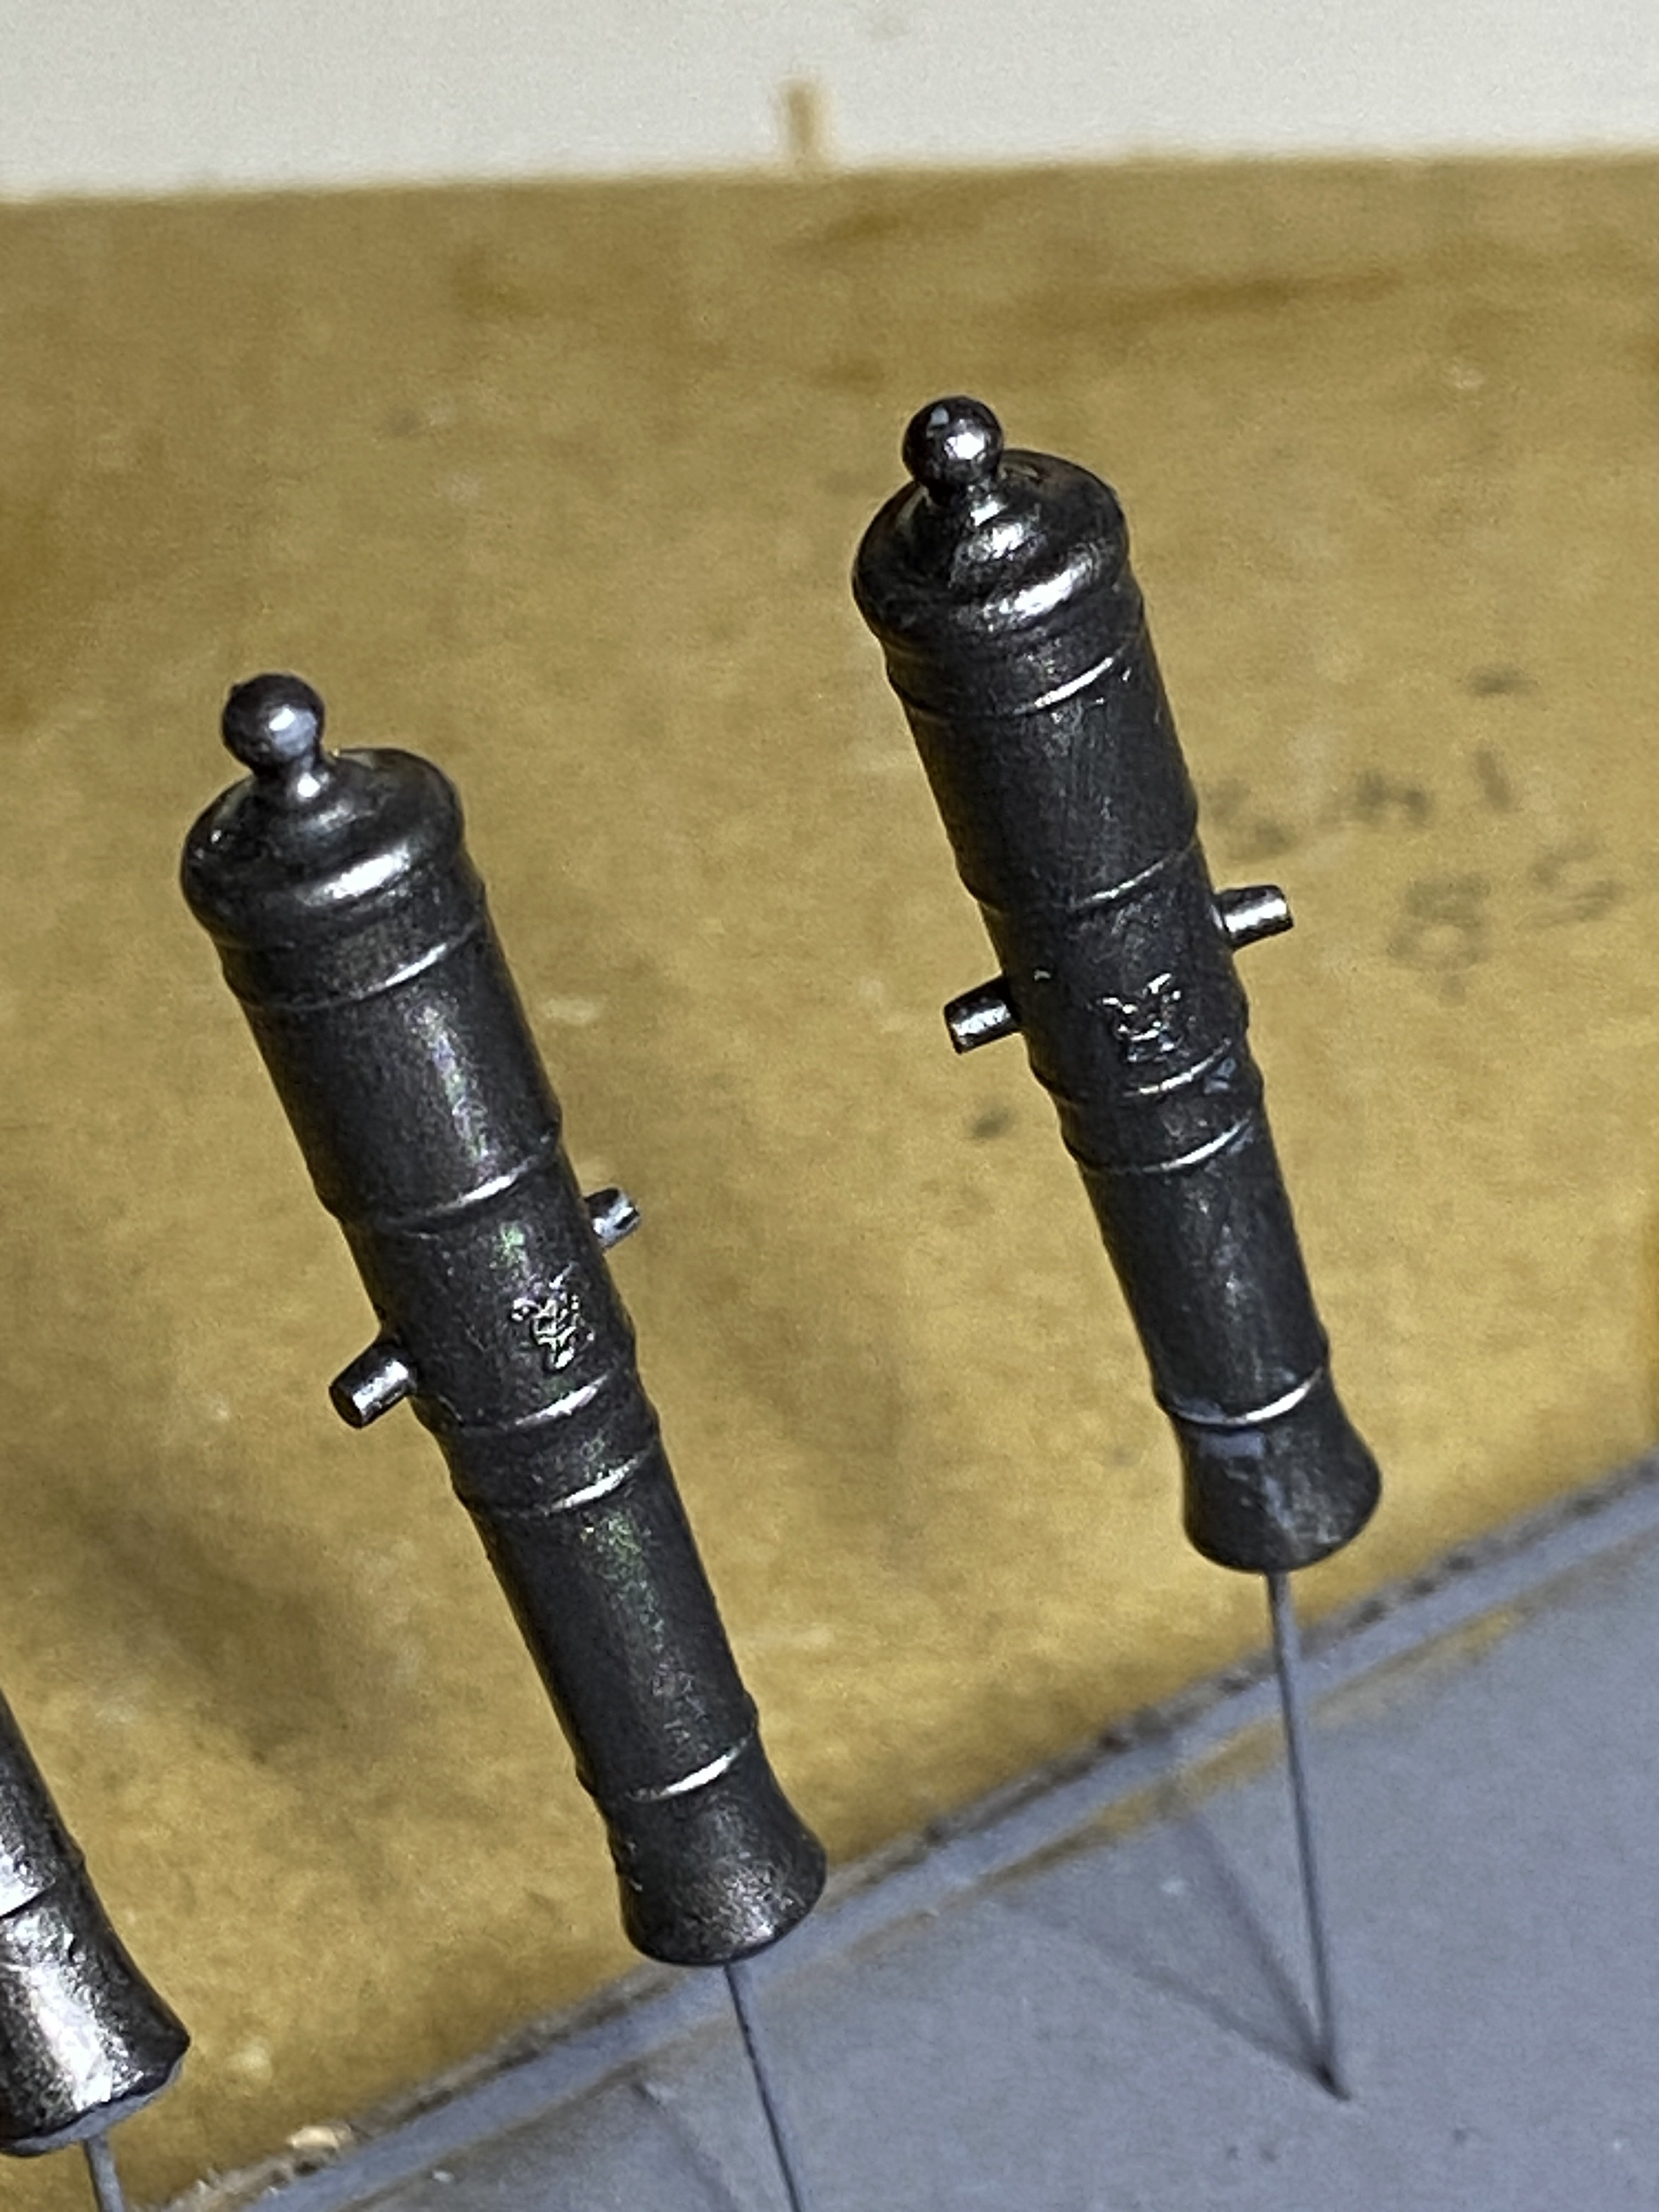
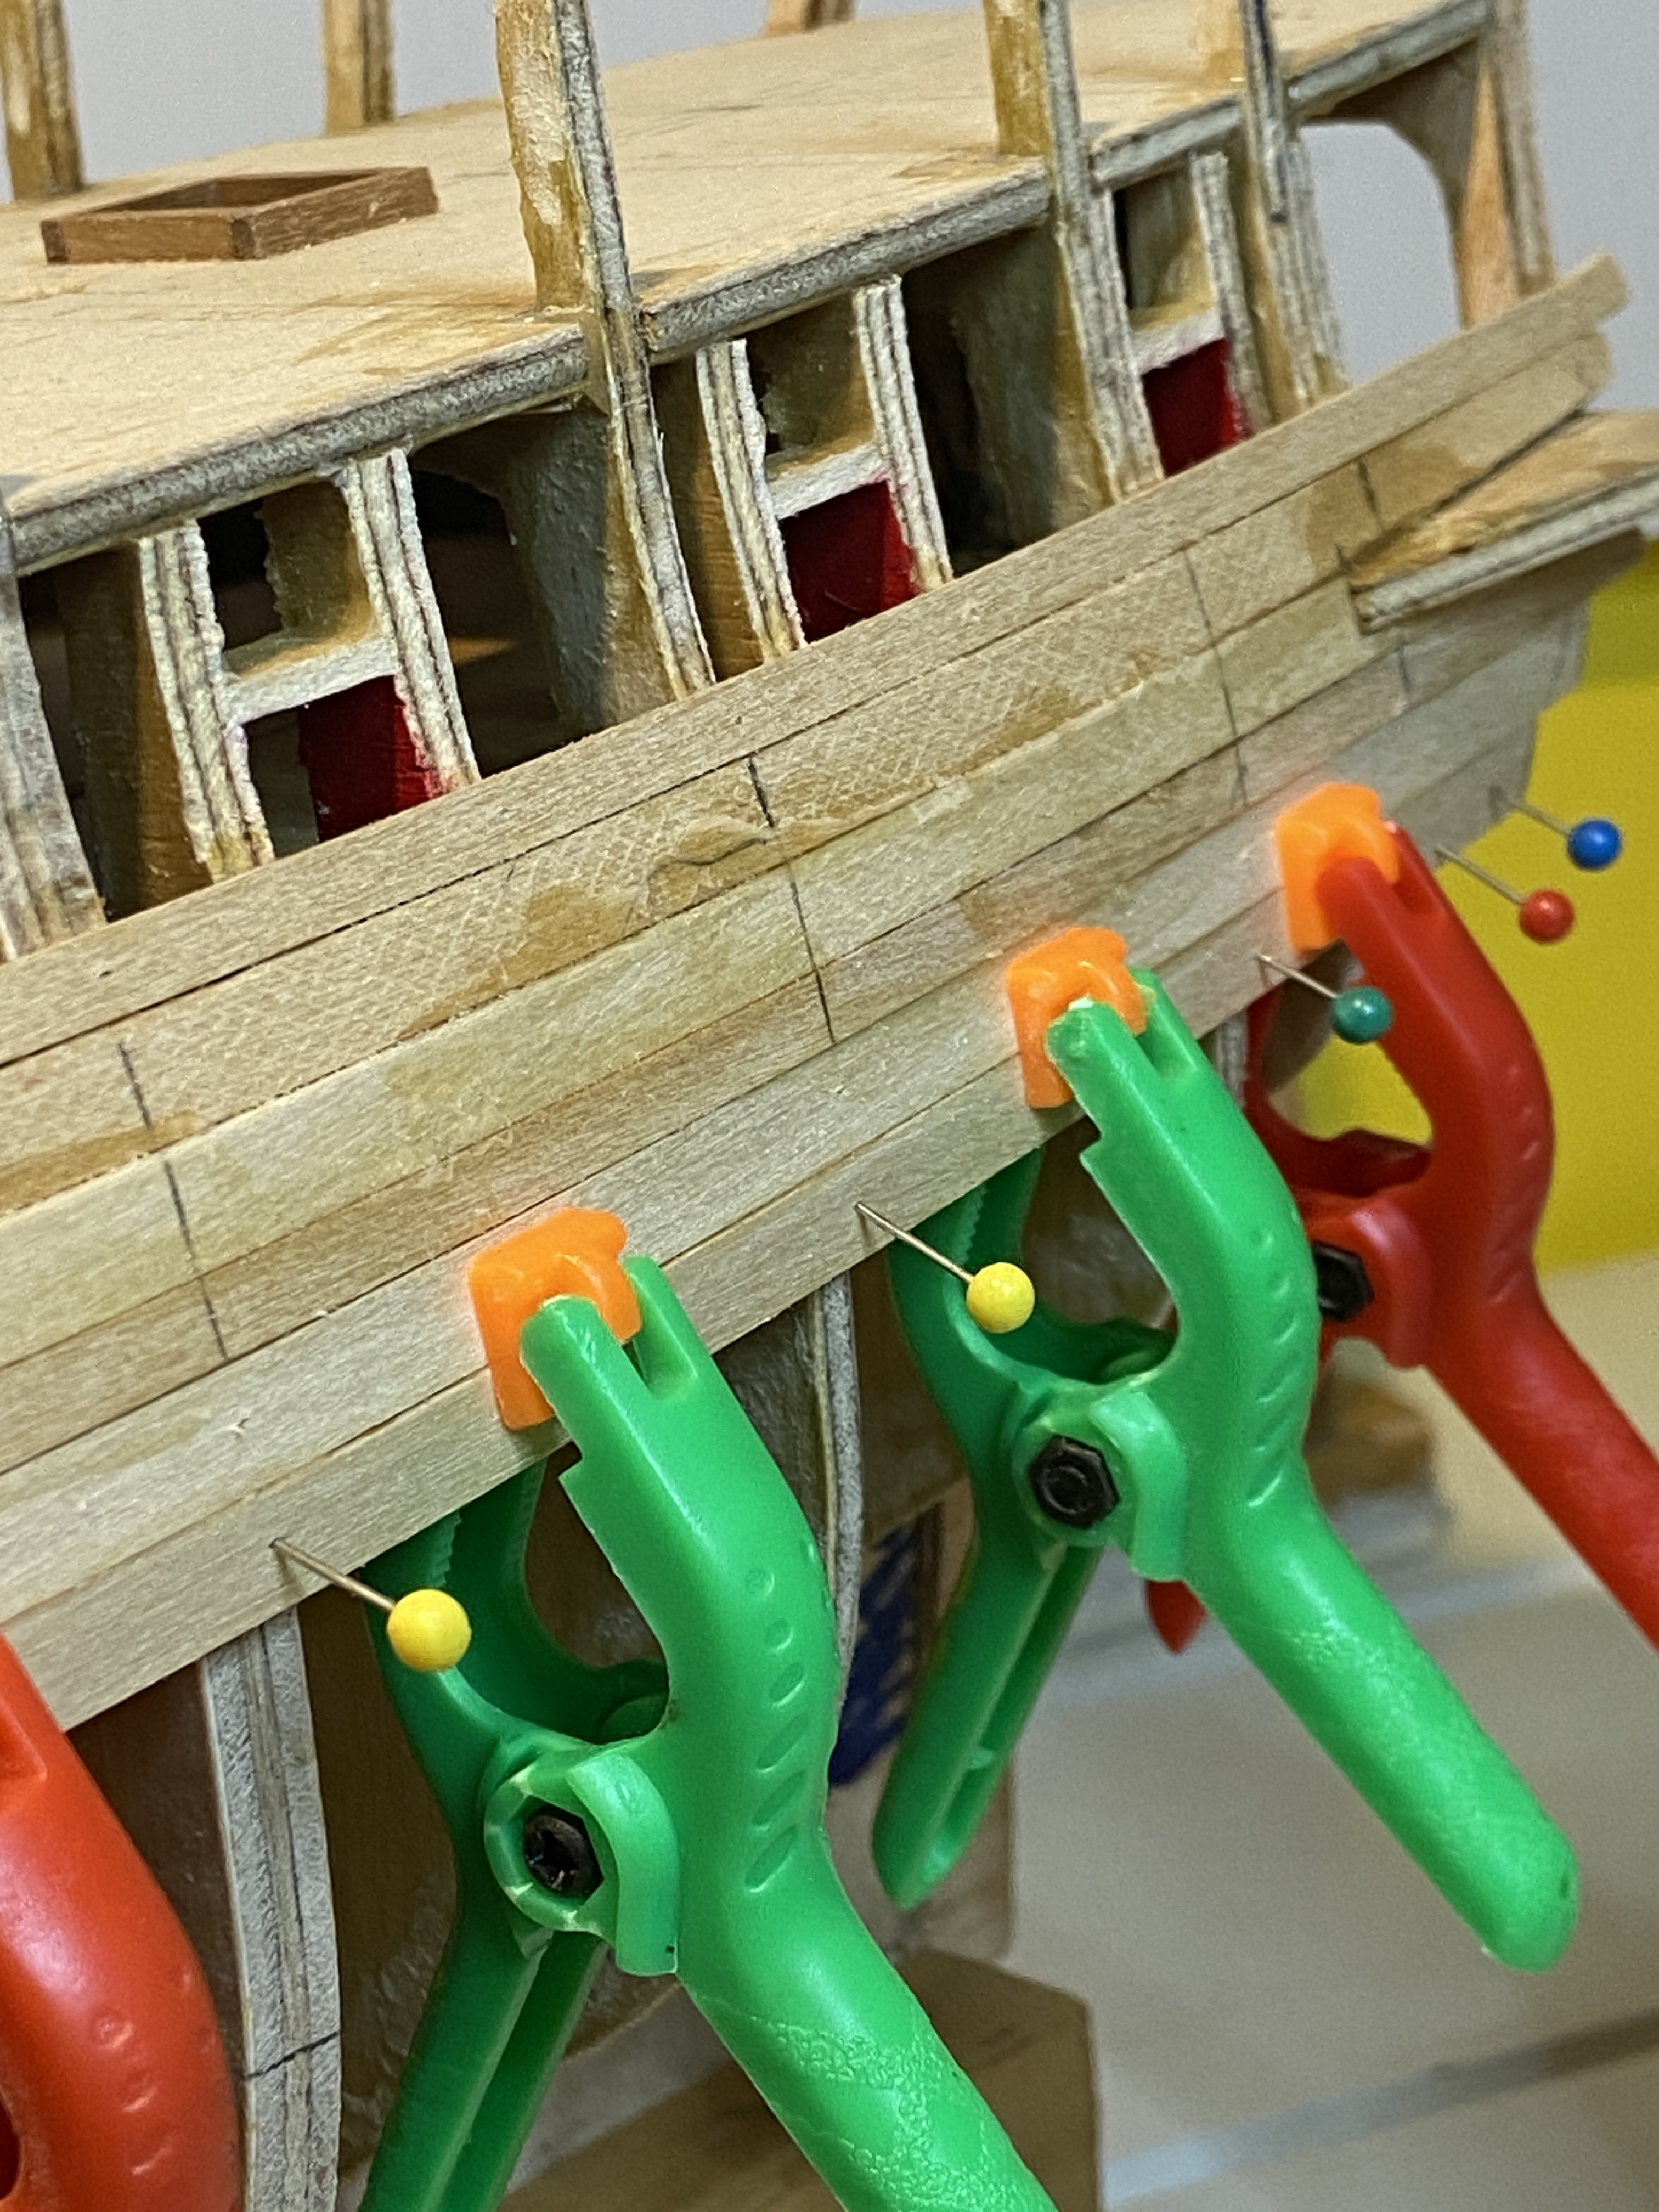
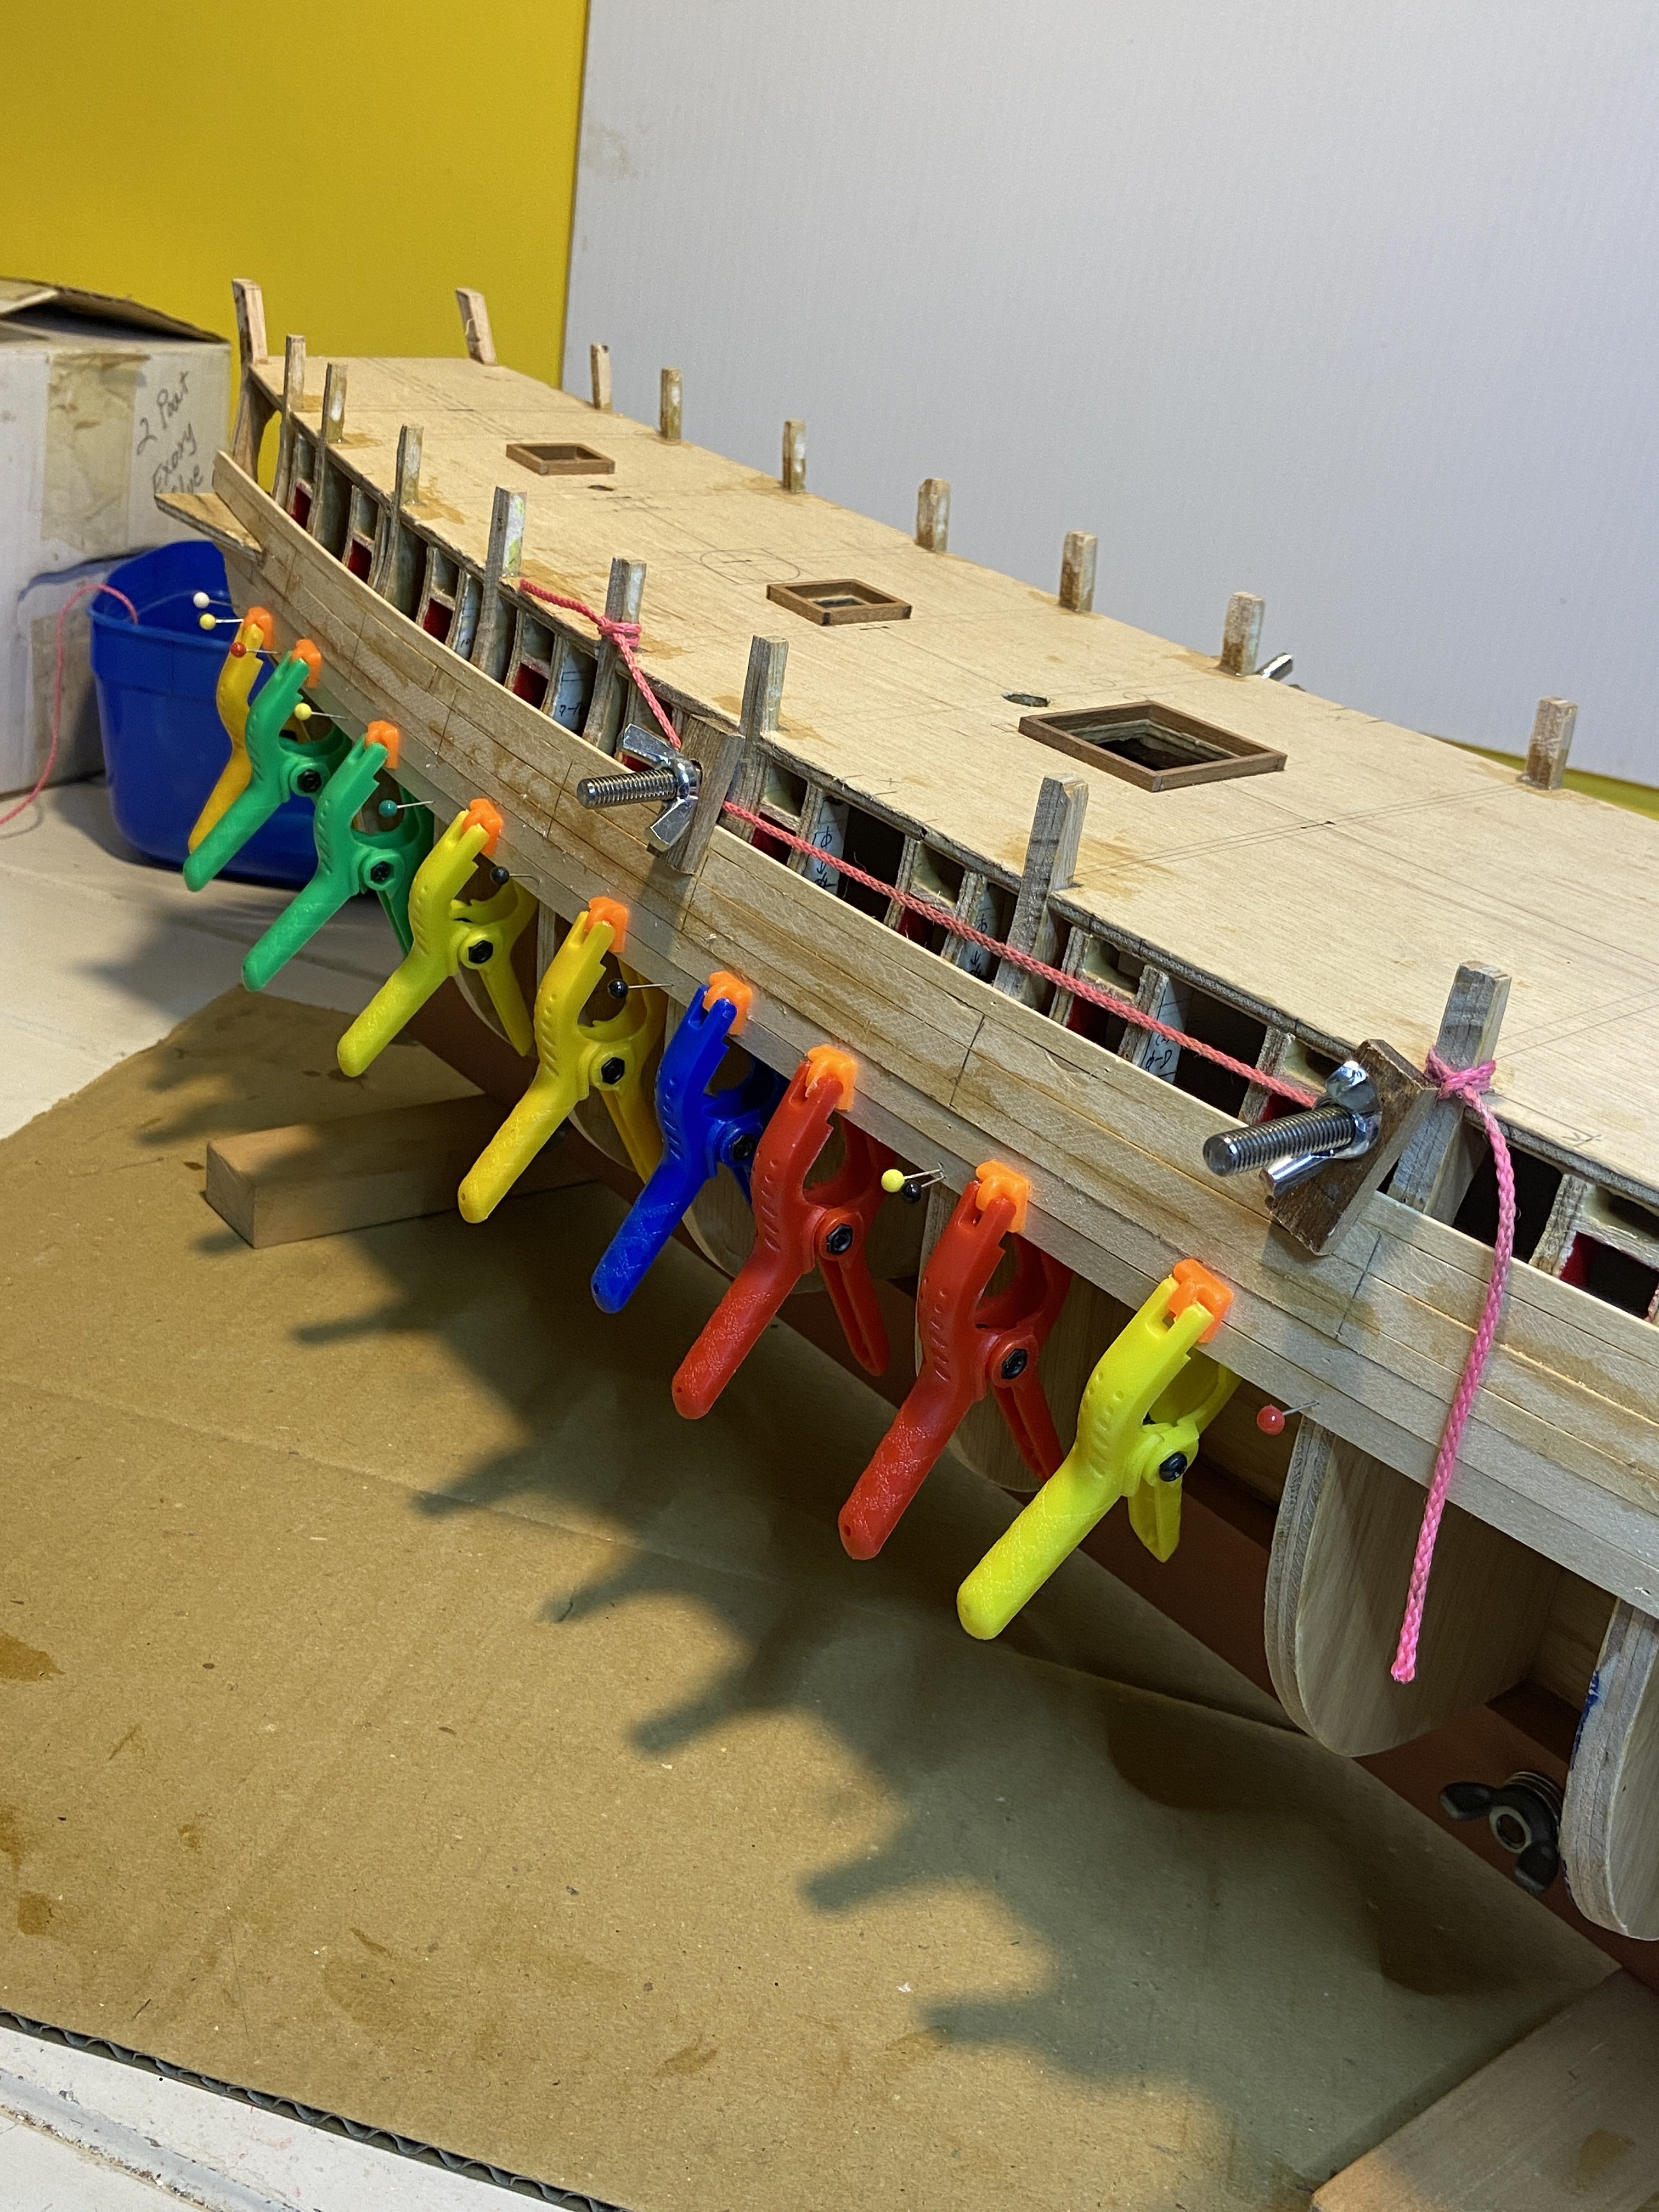
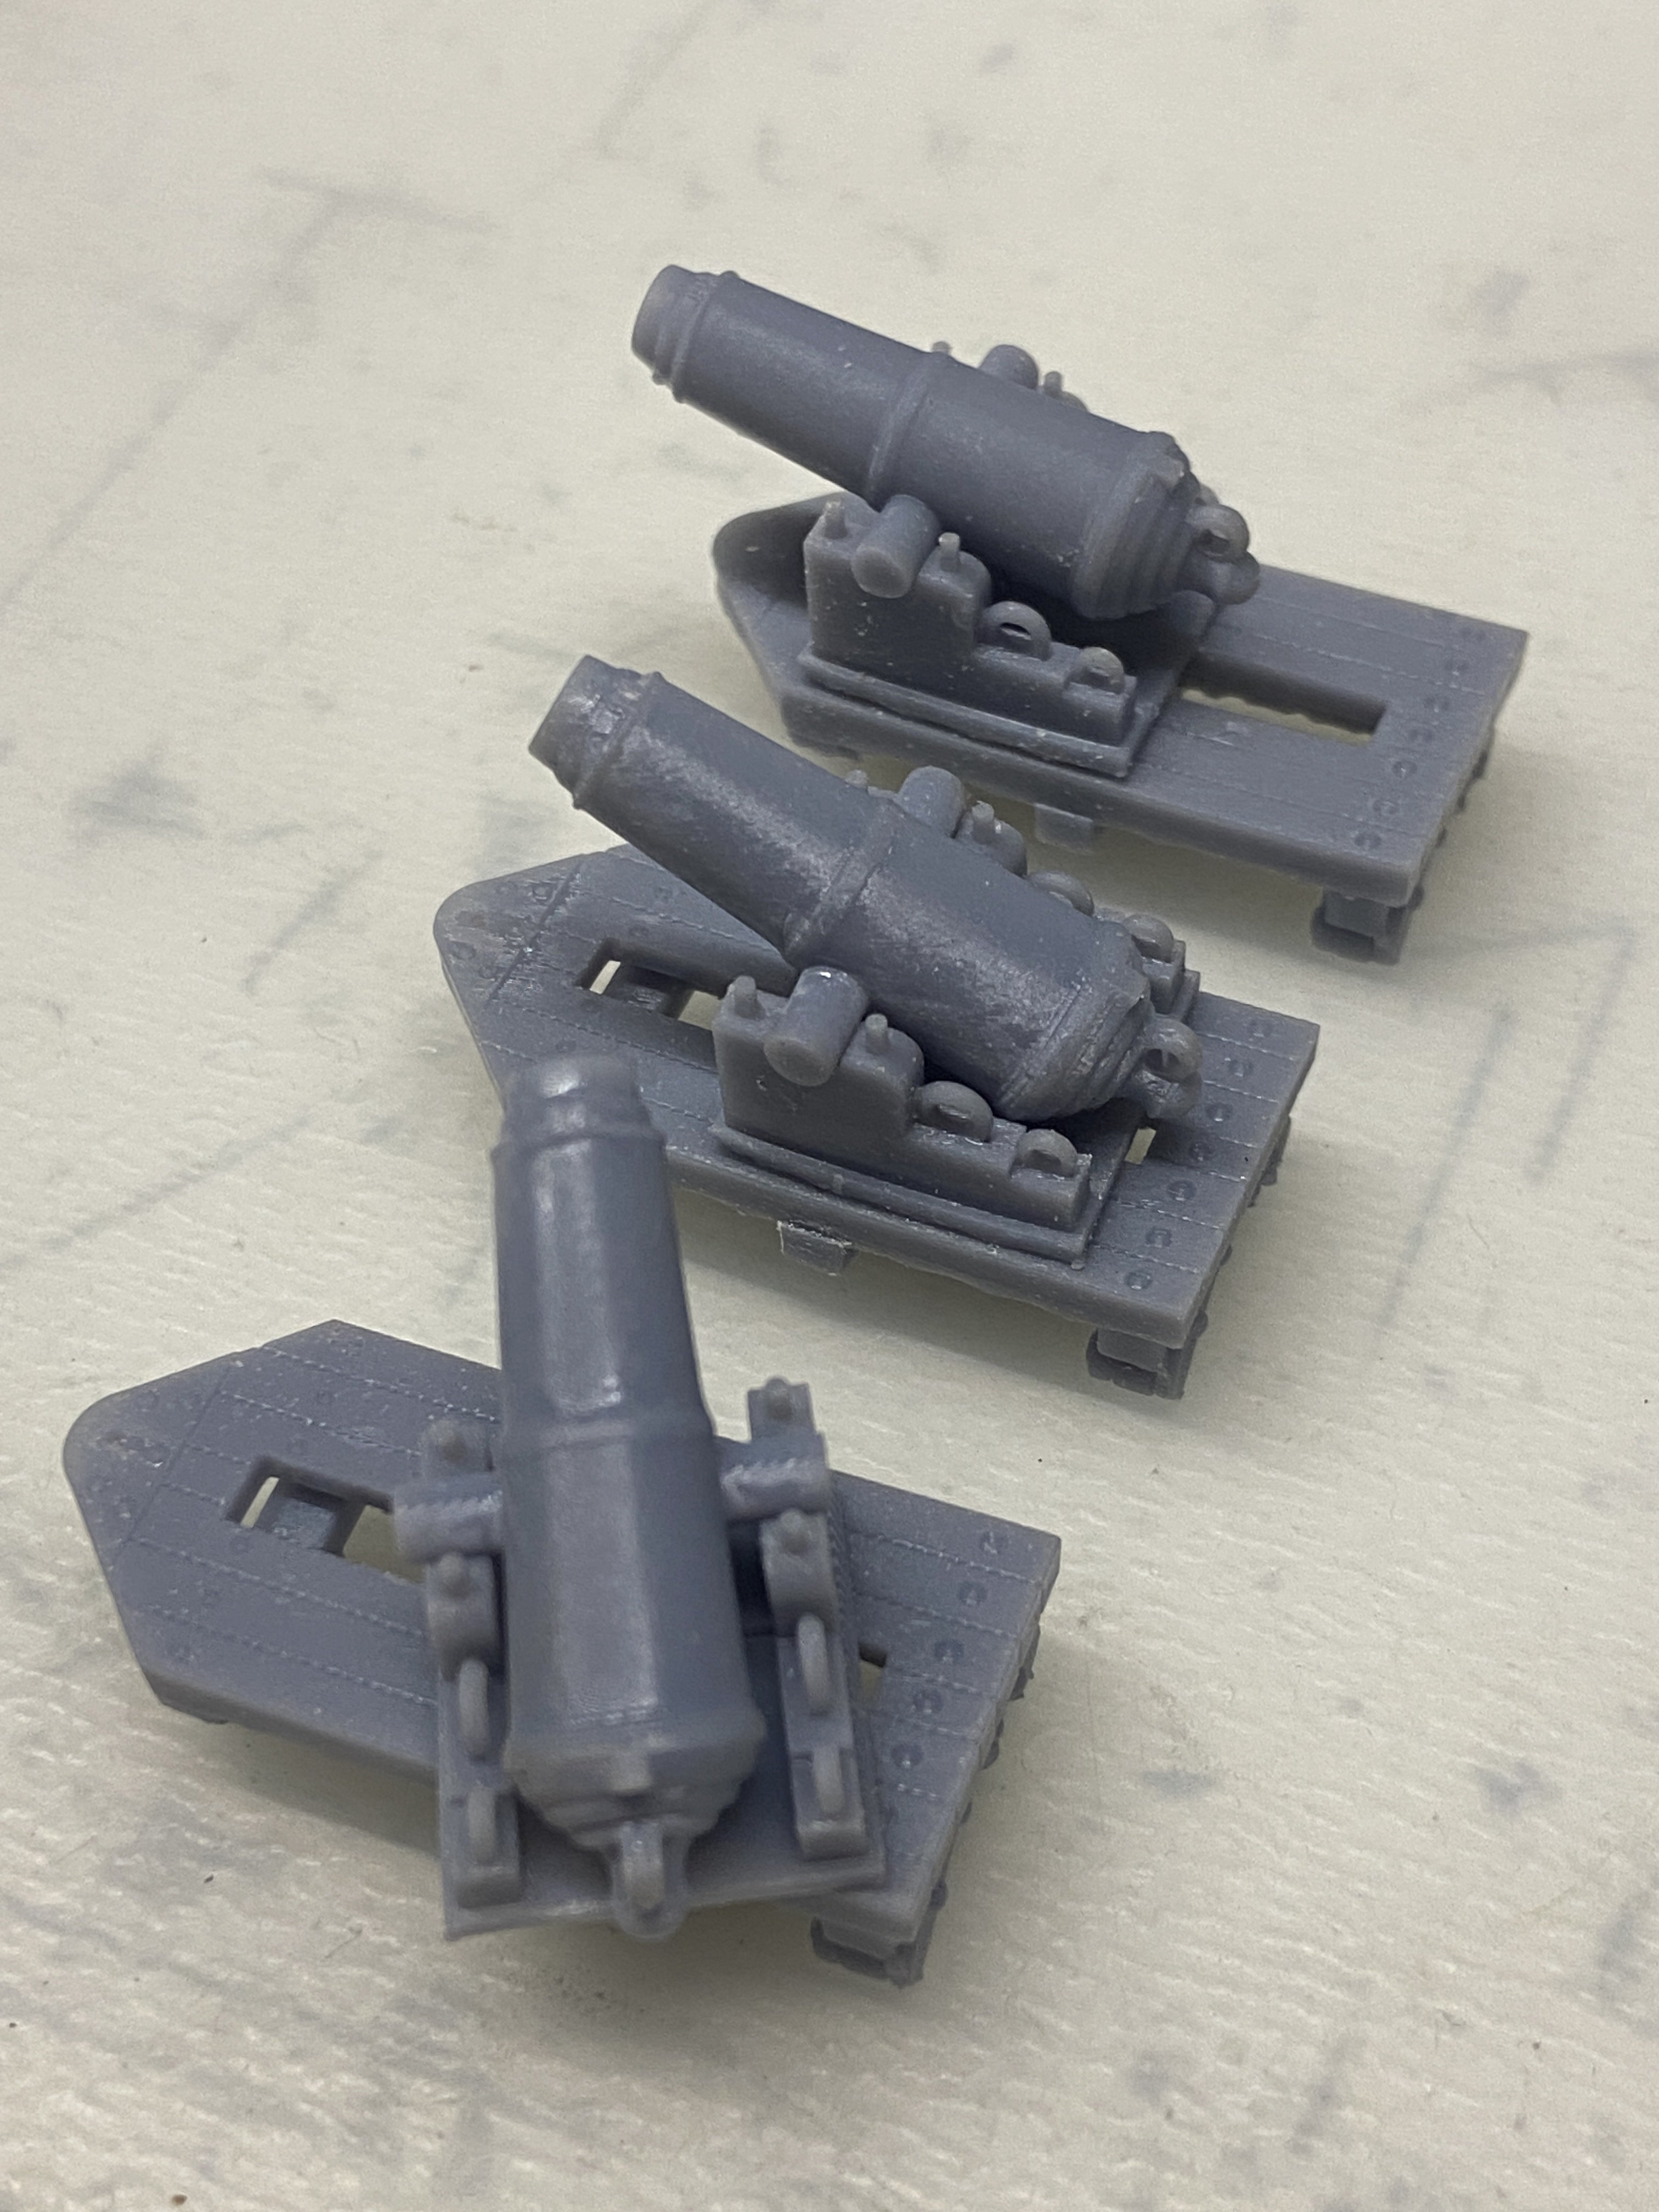
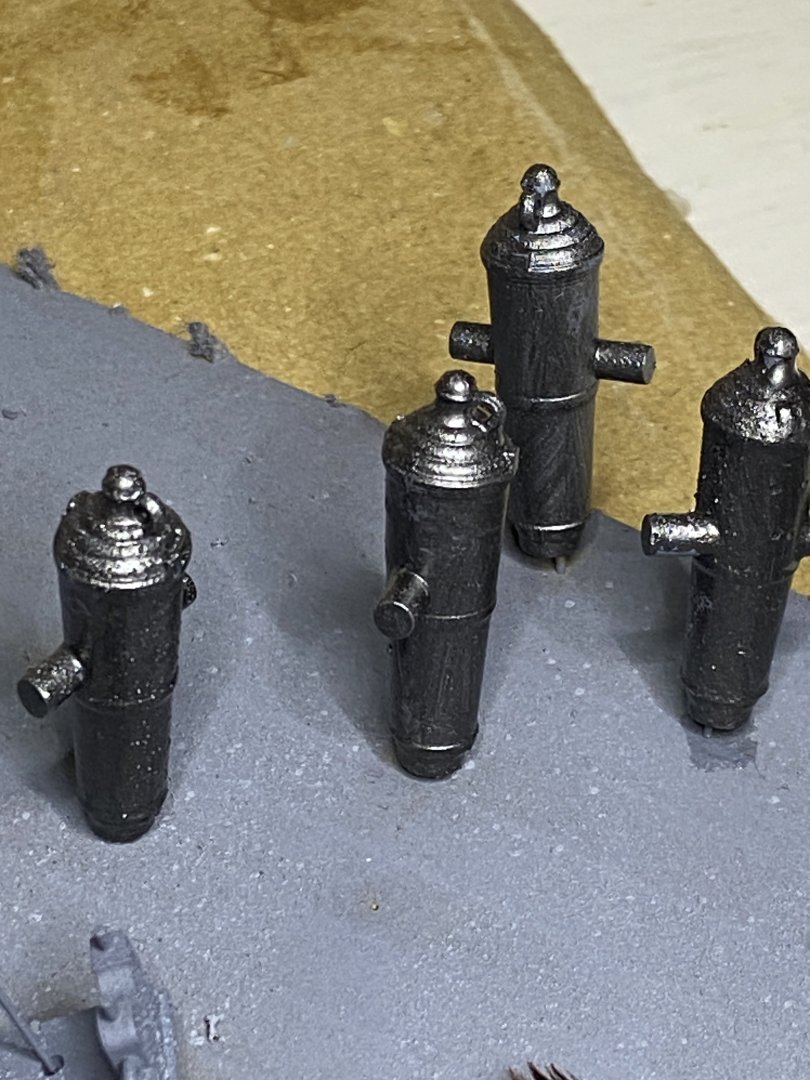
More progress from the Shipyard. Since last post, more first layer planks have been added to the hull. And some 3D items in the pipeline. I've made a start on a few planks against the keel. Also marked out the lines for the tapering of the planks(in groups of 6) I'm using 6mm and 4mm wide planks. 4mm where the hull curves most, 6mm on the straighter sections. I usually pin each plank onto a frame and use plastic clamps, in hope to get the planks butted up neatly. This doesn't always work, especially where planks are curving a lot. Sandpaper time then... Here we are transitioning from a run of 6mm to start of 4mm planks - stern port side. Here we are transitioning from 4mm into 6mm planks - stern starboard side. The next few pictures are some works in progress on creating 3D Models and Resin Printing. I'm hopeful that with the right details and finishes, they will look presentable installed on the ship. Also been testing some paint on the 18 pound Carronade Cannon Base. Come up pretty good I reckon. Bit more touch up to do underneath(for the beady eyed) Same for the 18 pound Carronade Barrels. And the 6 pound Cannon barrels. Have also developed a 3D Model for a Capstan to print & paint. And before someone asks, it does not turn - yet !! See how it turns out. Well, always more planking to get on with. Dabble with 3D development whilst glue dries.


-
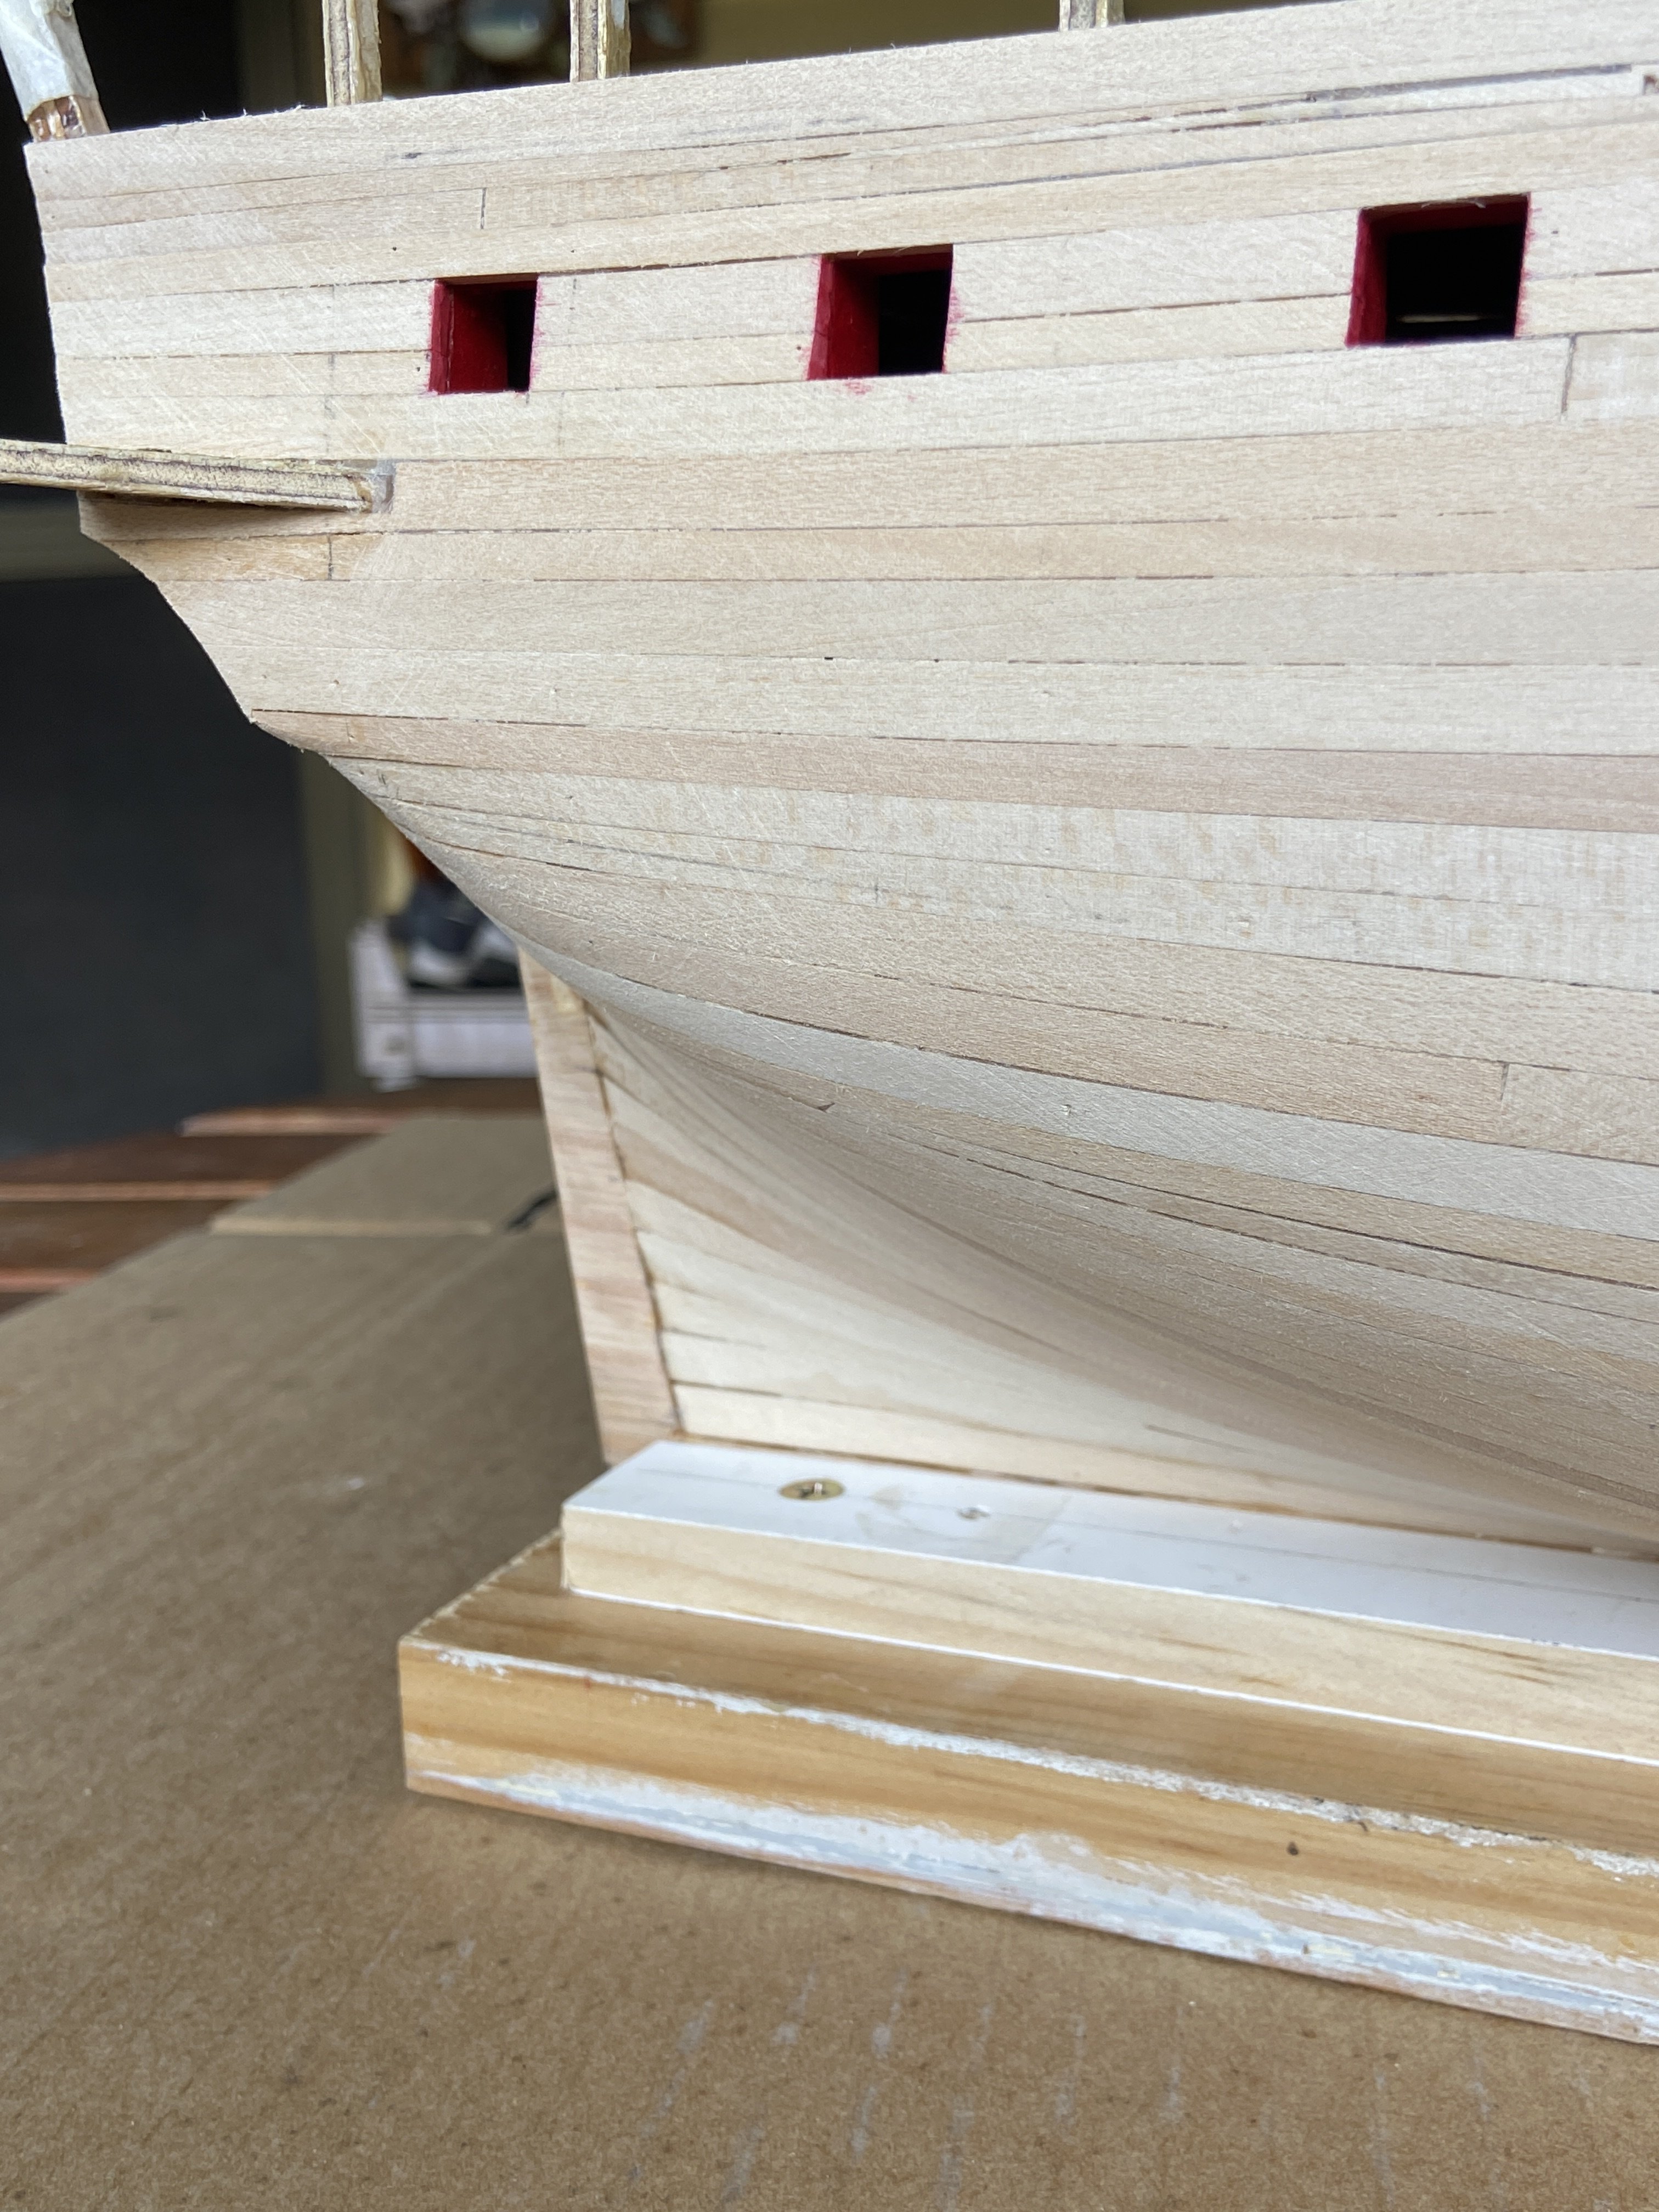
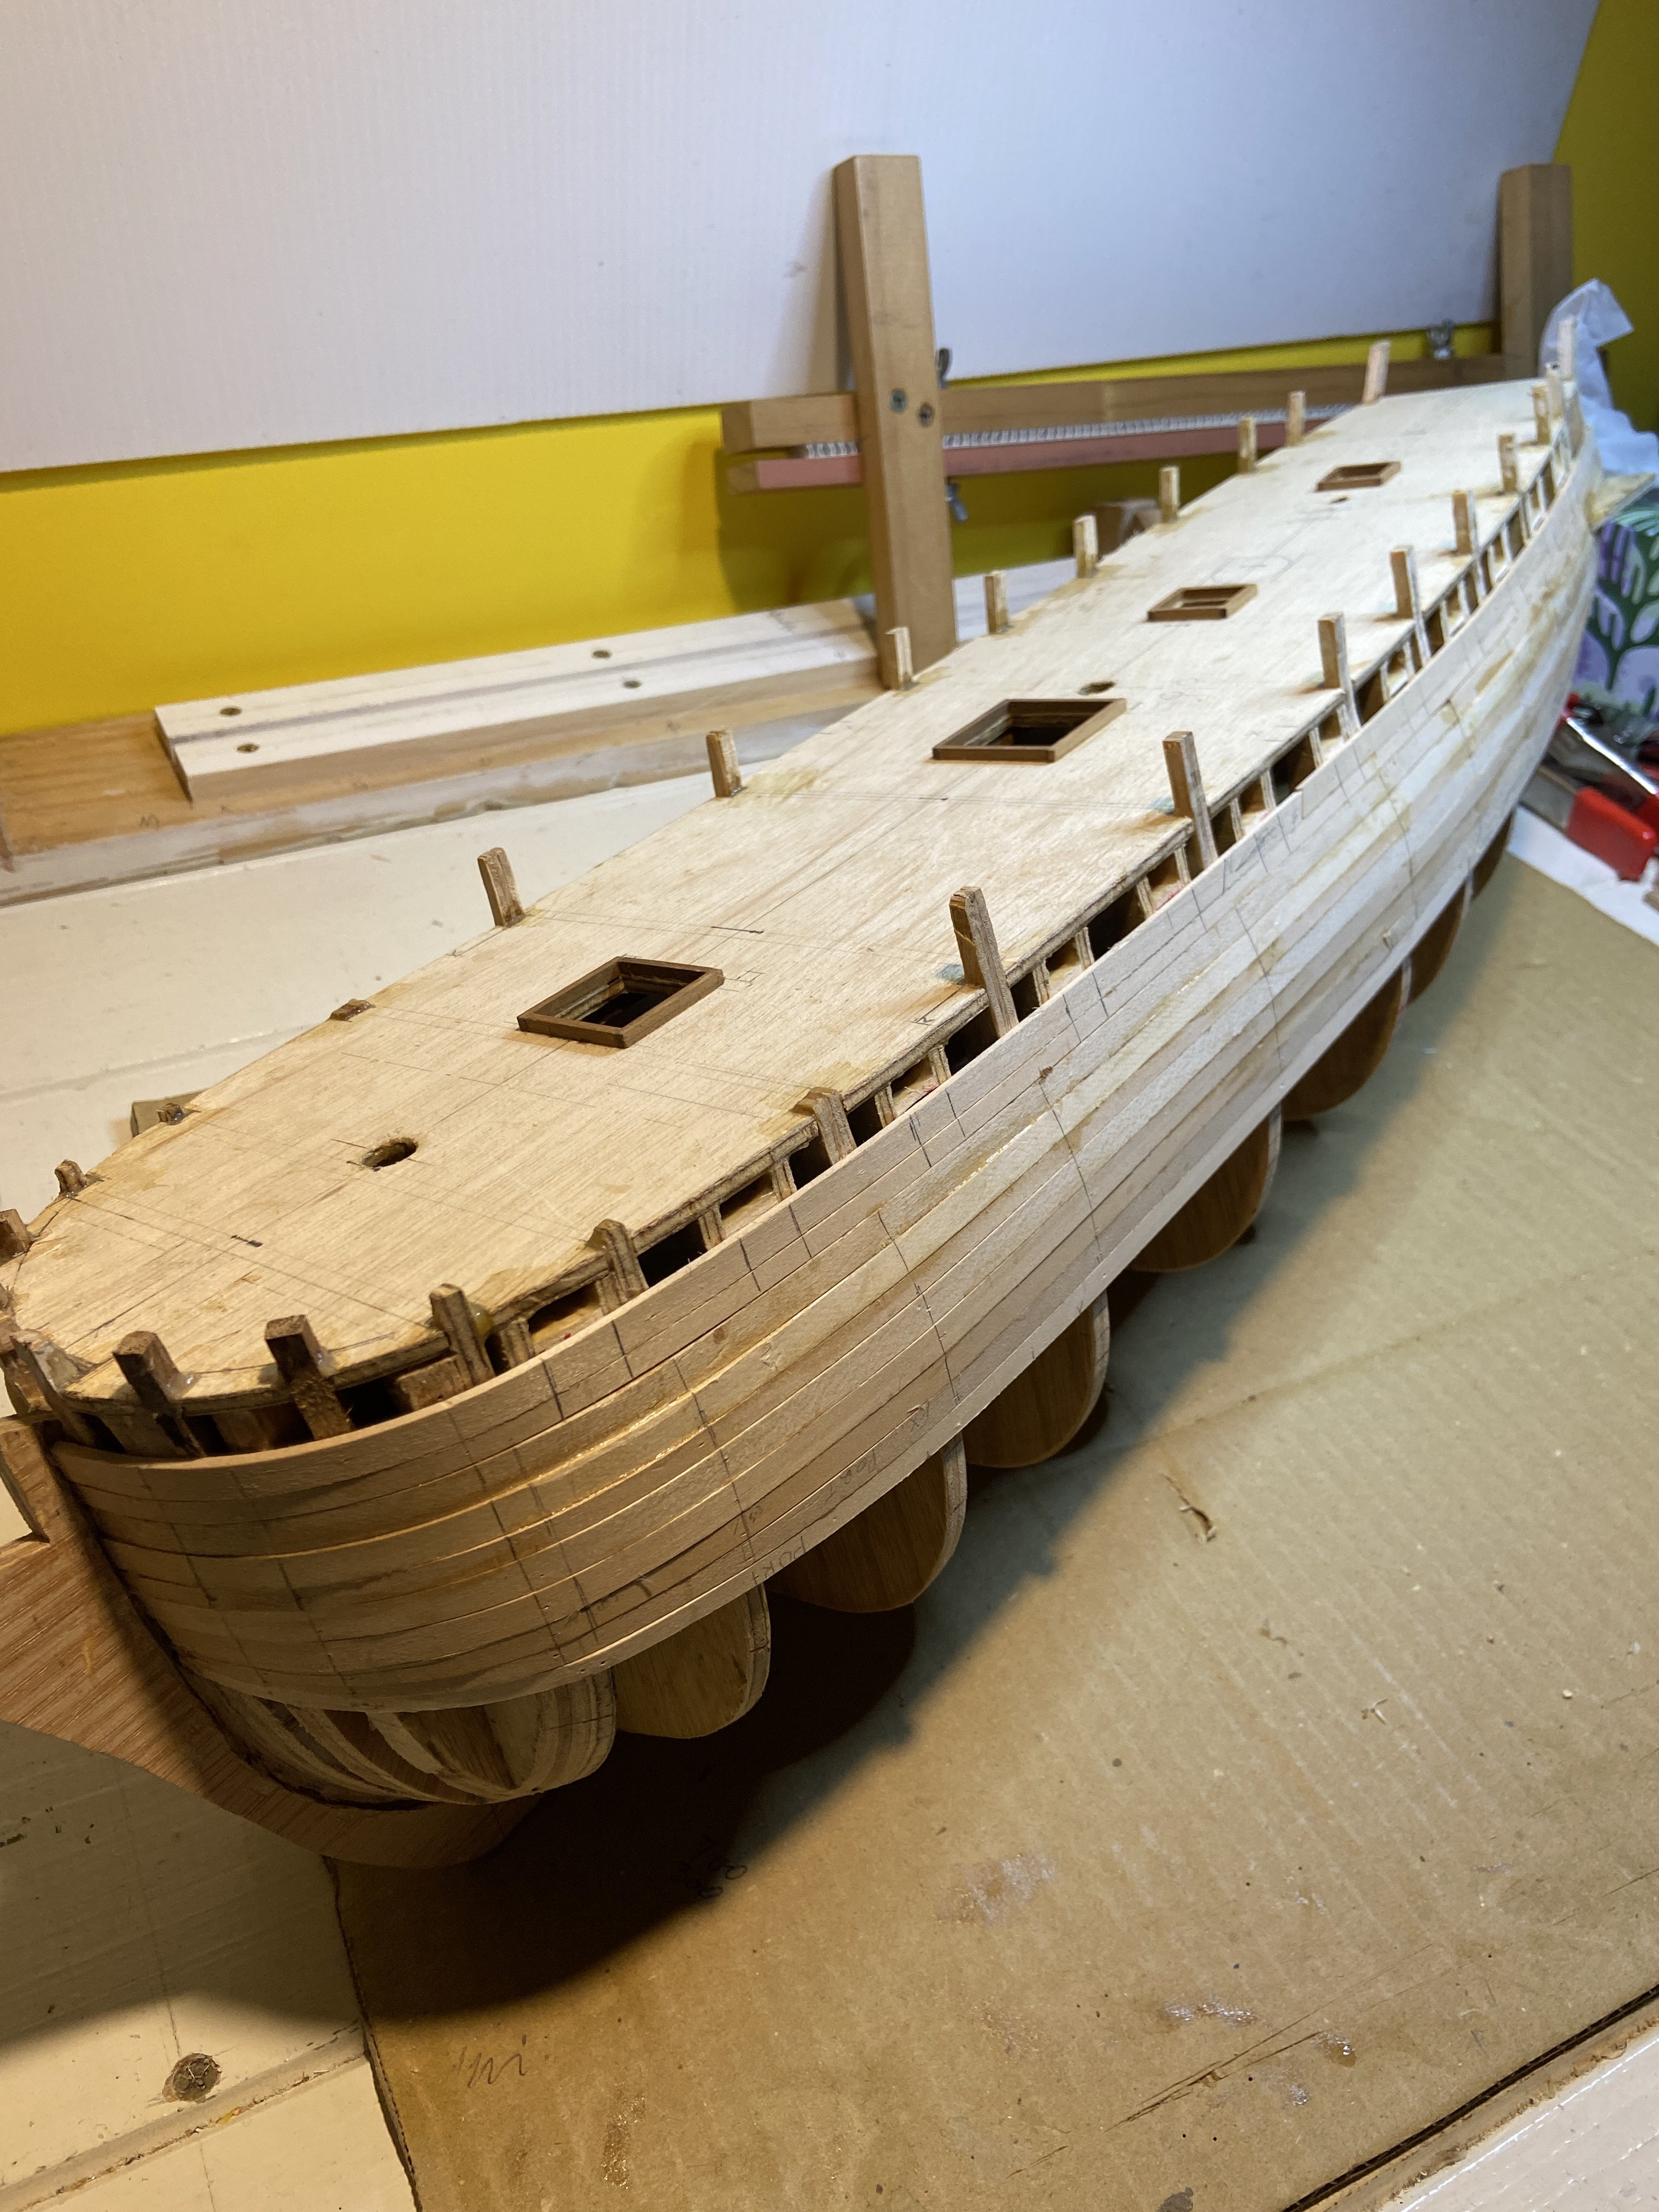
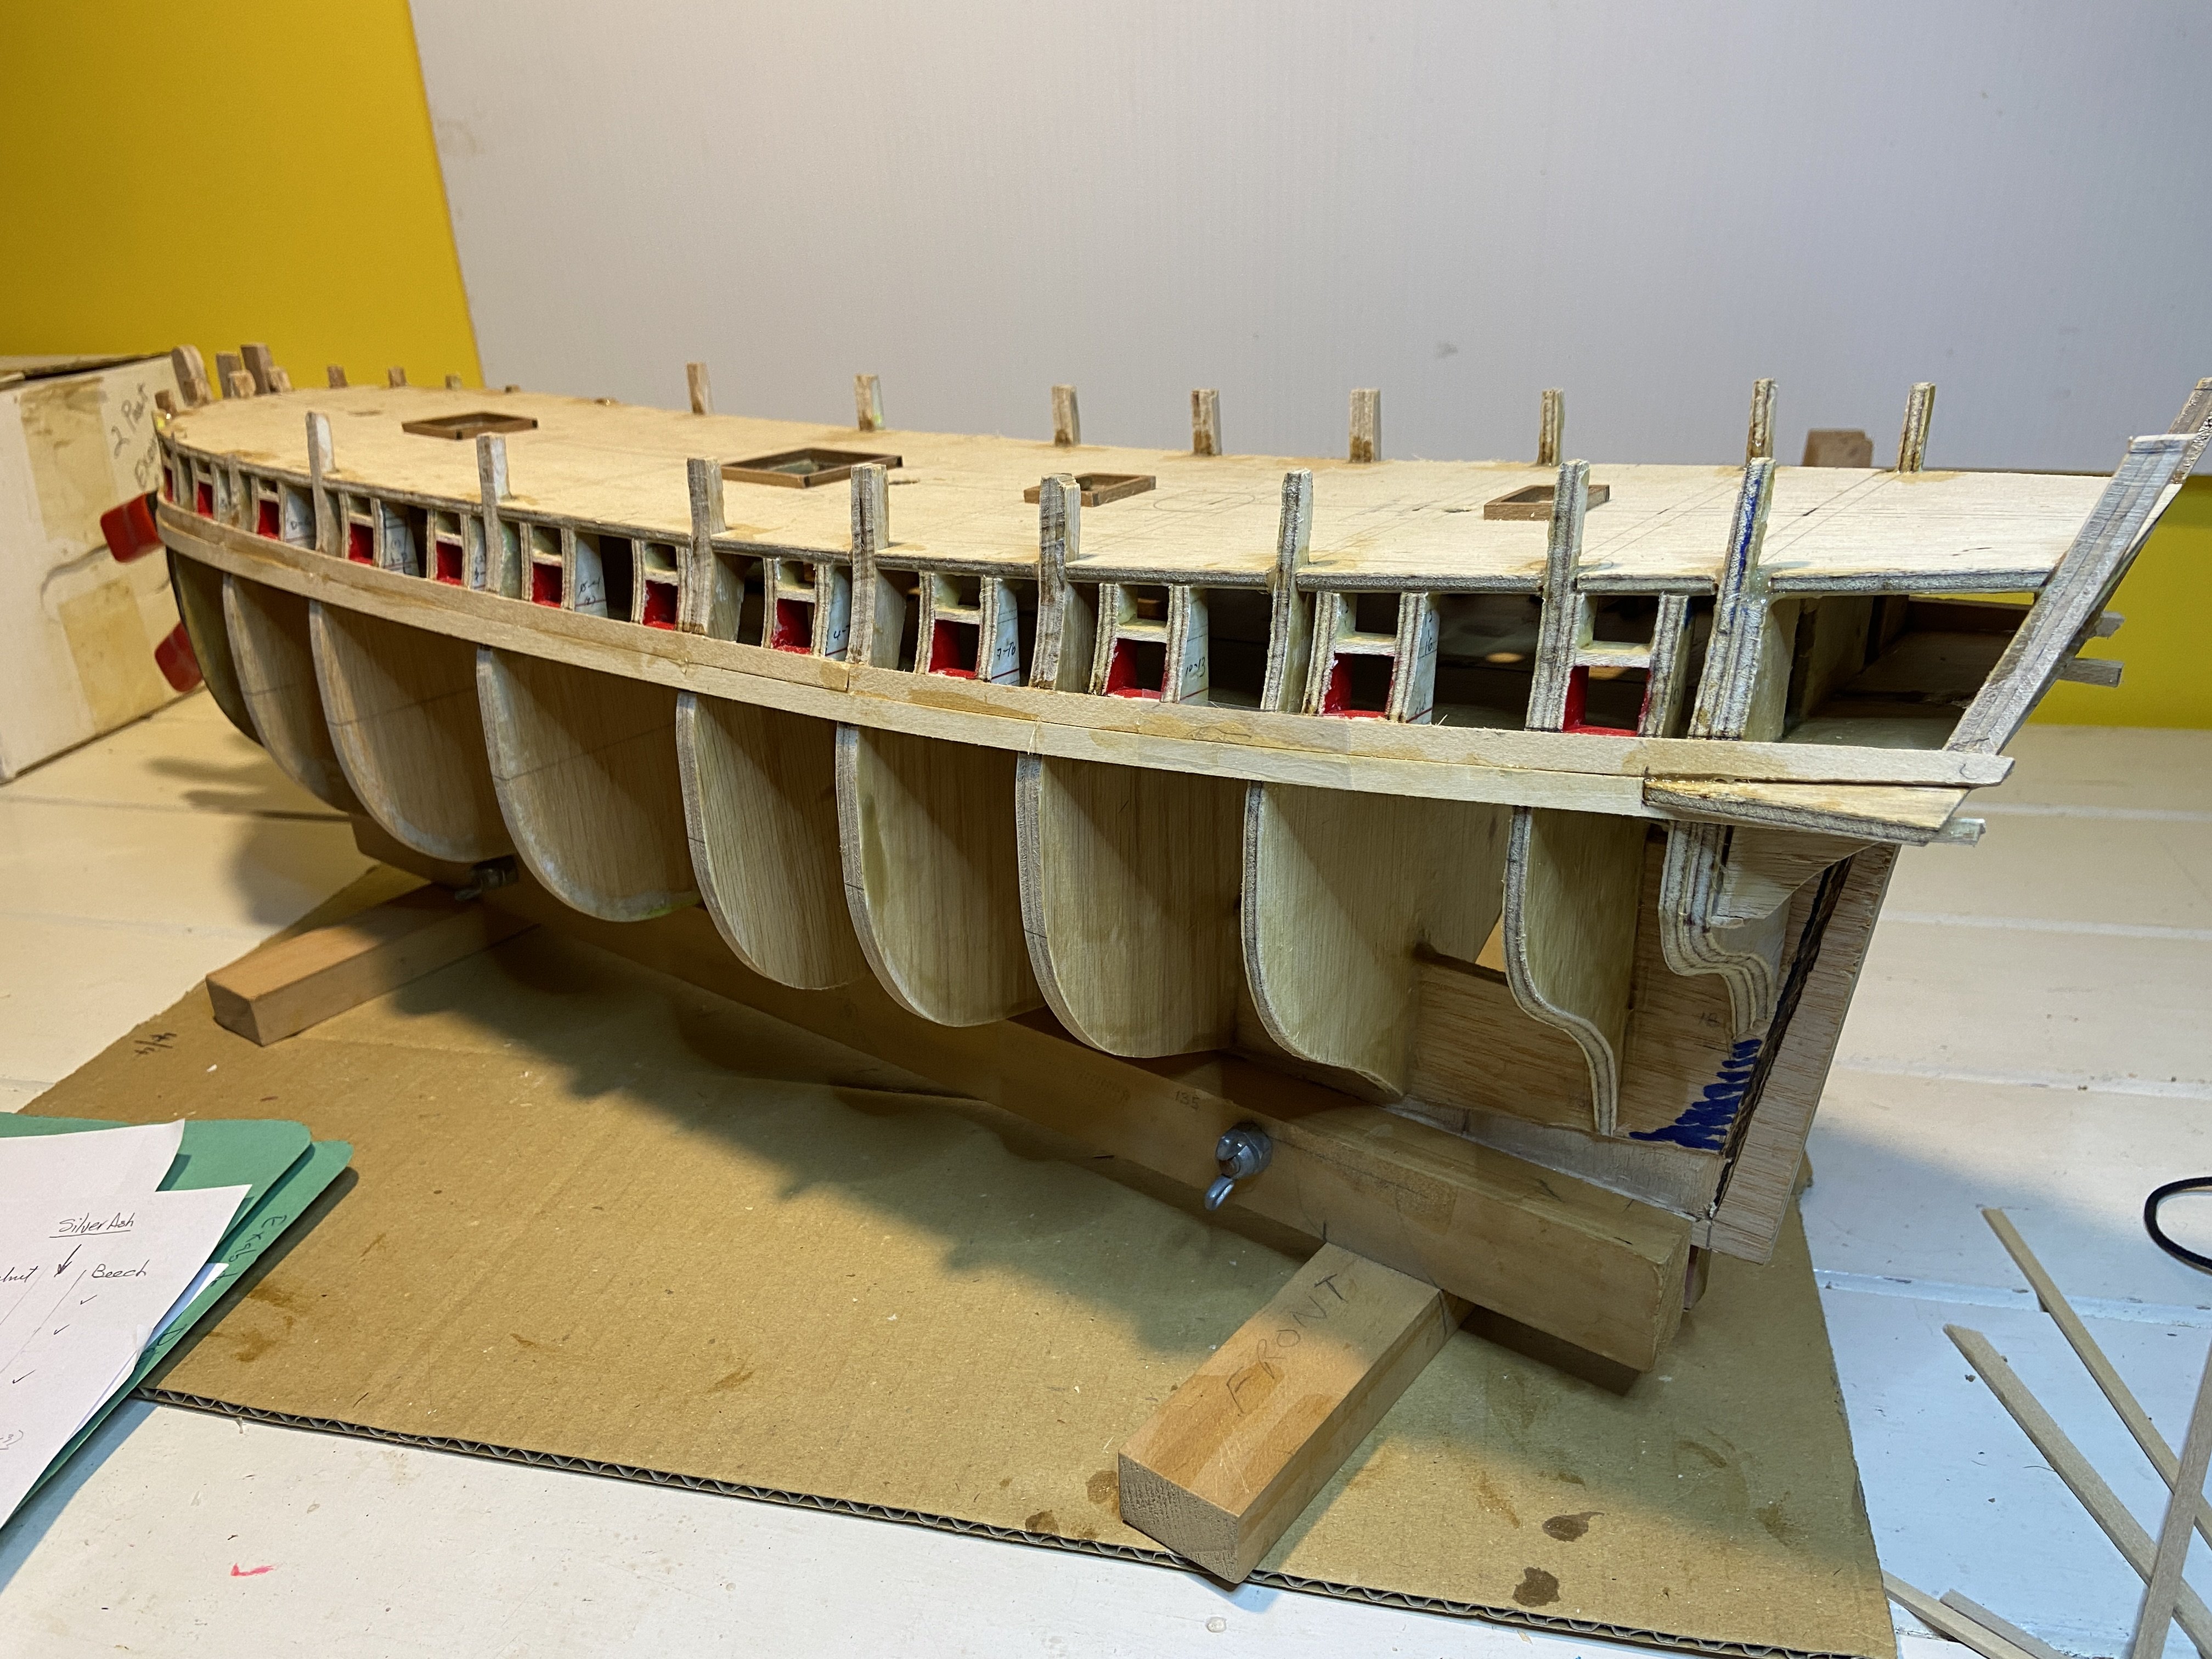
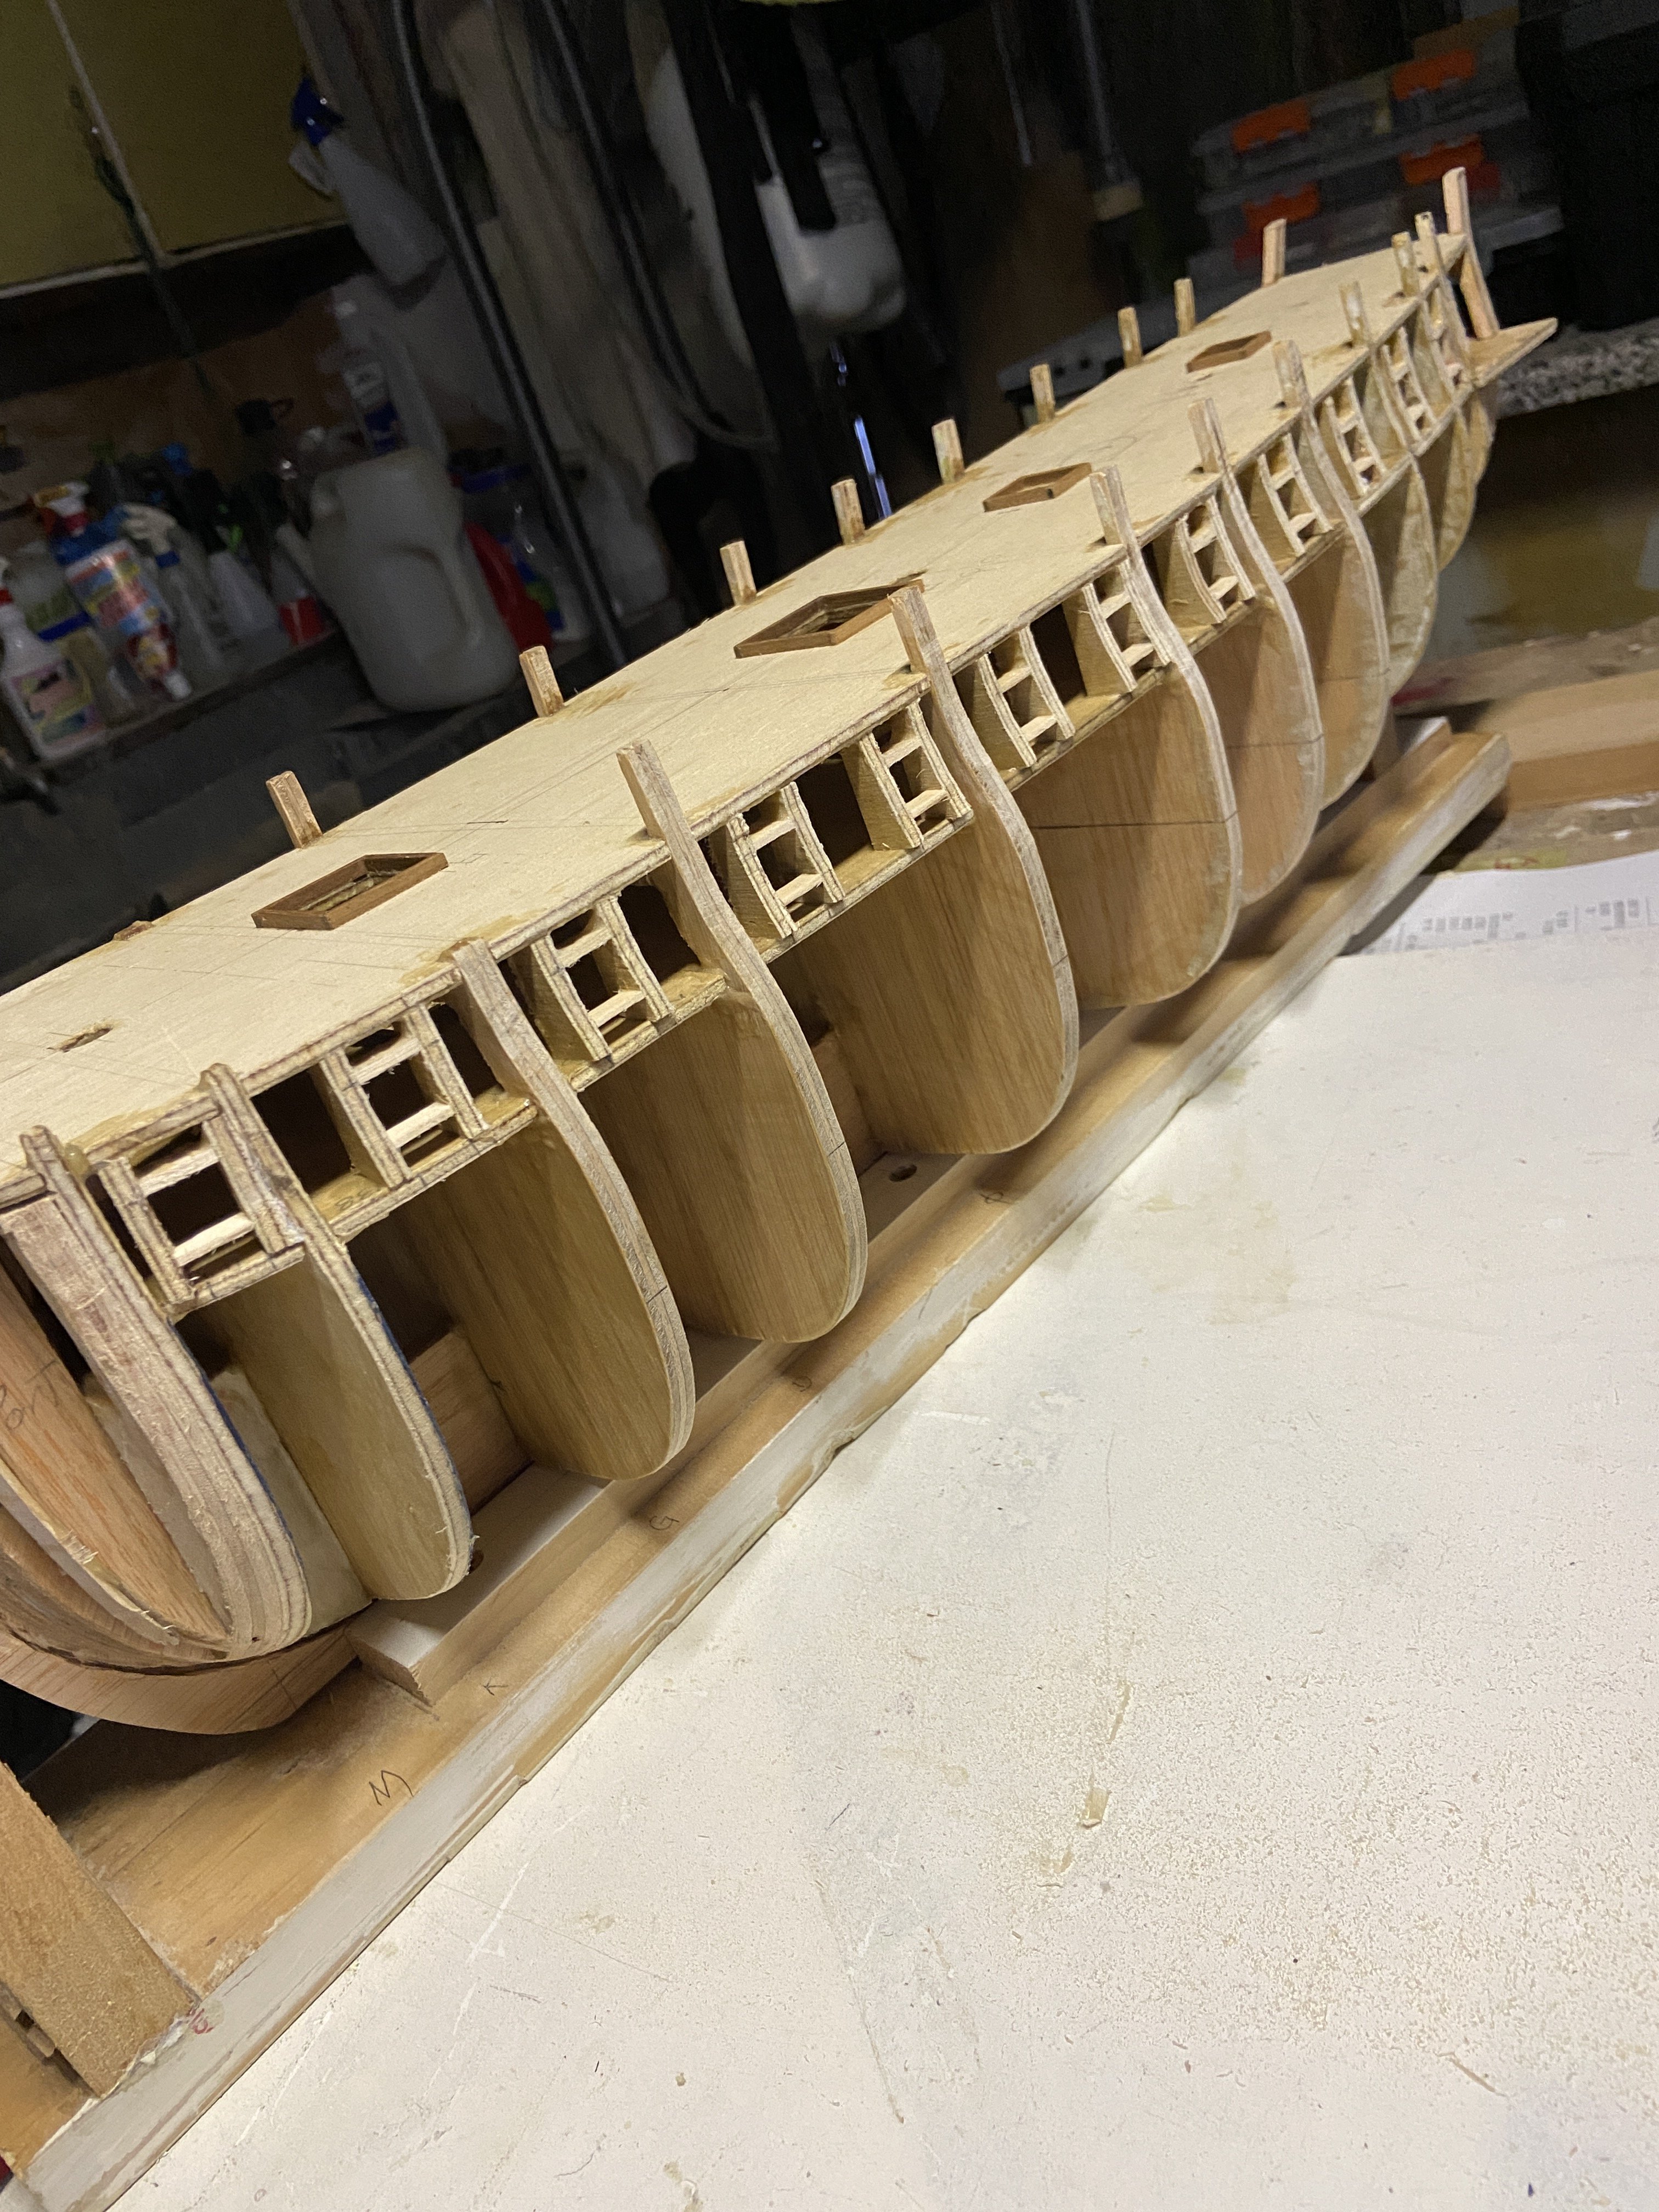
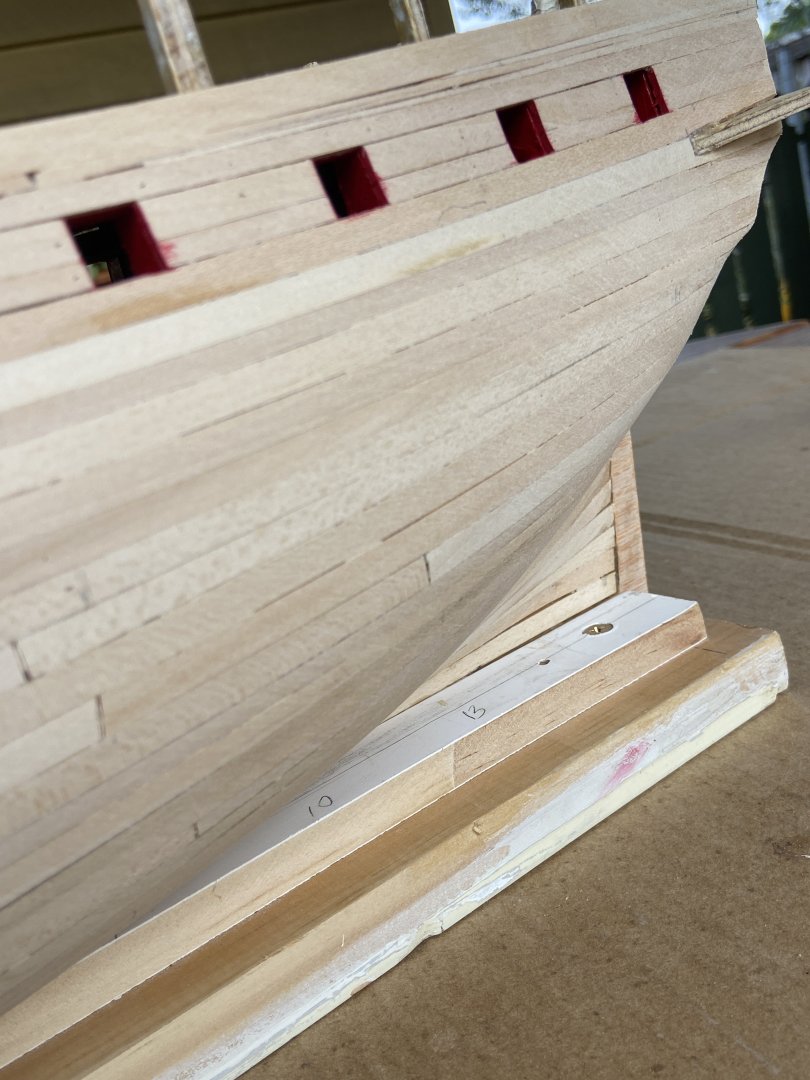
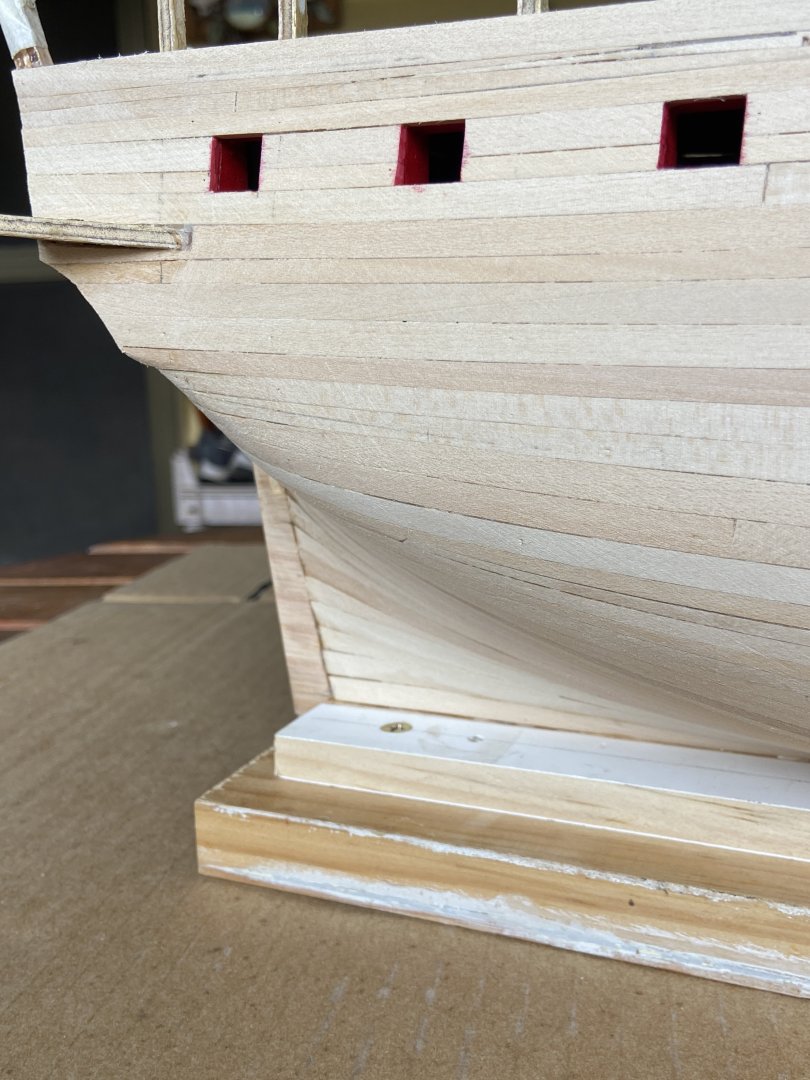
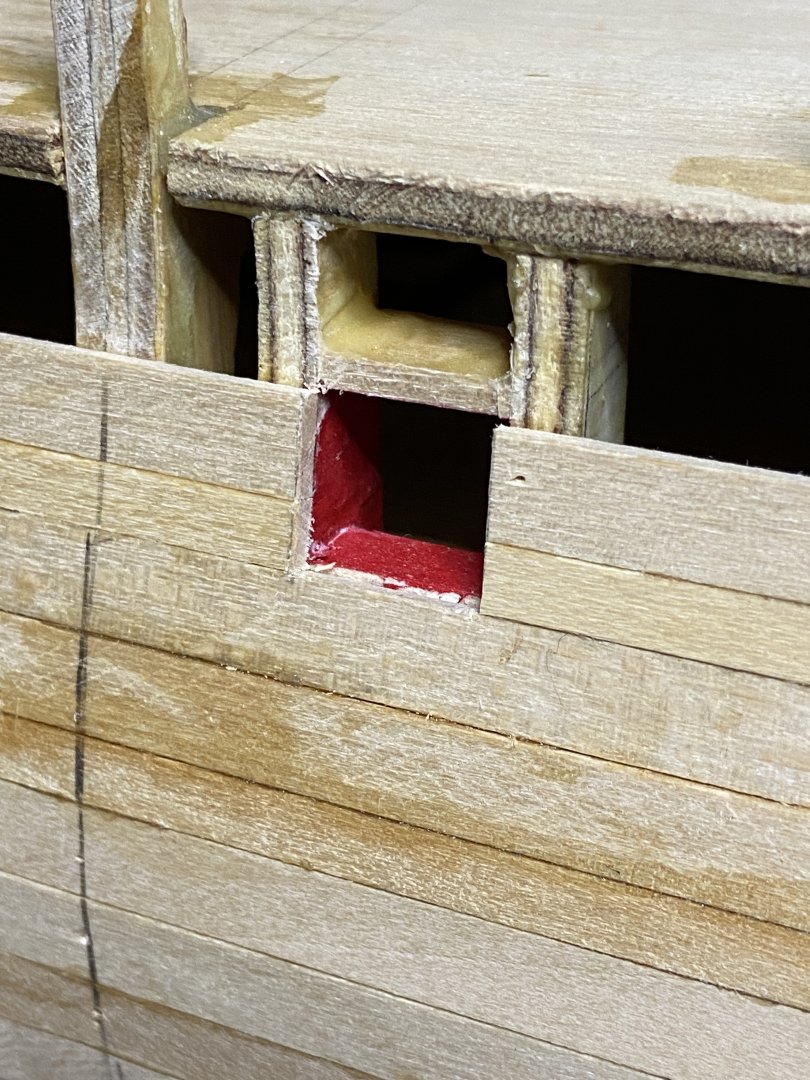
A bit of an update from the Shipyard. Since last post of the actual hull, the gun ports have come to light. The side planking has been brought up level with the upper deck. The front/bow planking has been raised to where the Gunwale rises from the ships side to the Bowsprit area. Probably best to return to the hull bottom and finish off the planking(1st layer). 1 of the 12 per side Gun Ports cut into the first planking layer. Slowly The front/bow planking has been raised to where the Gunwale rises from the ships side to the Bowsprit area.
-
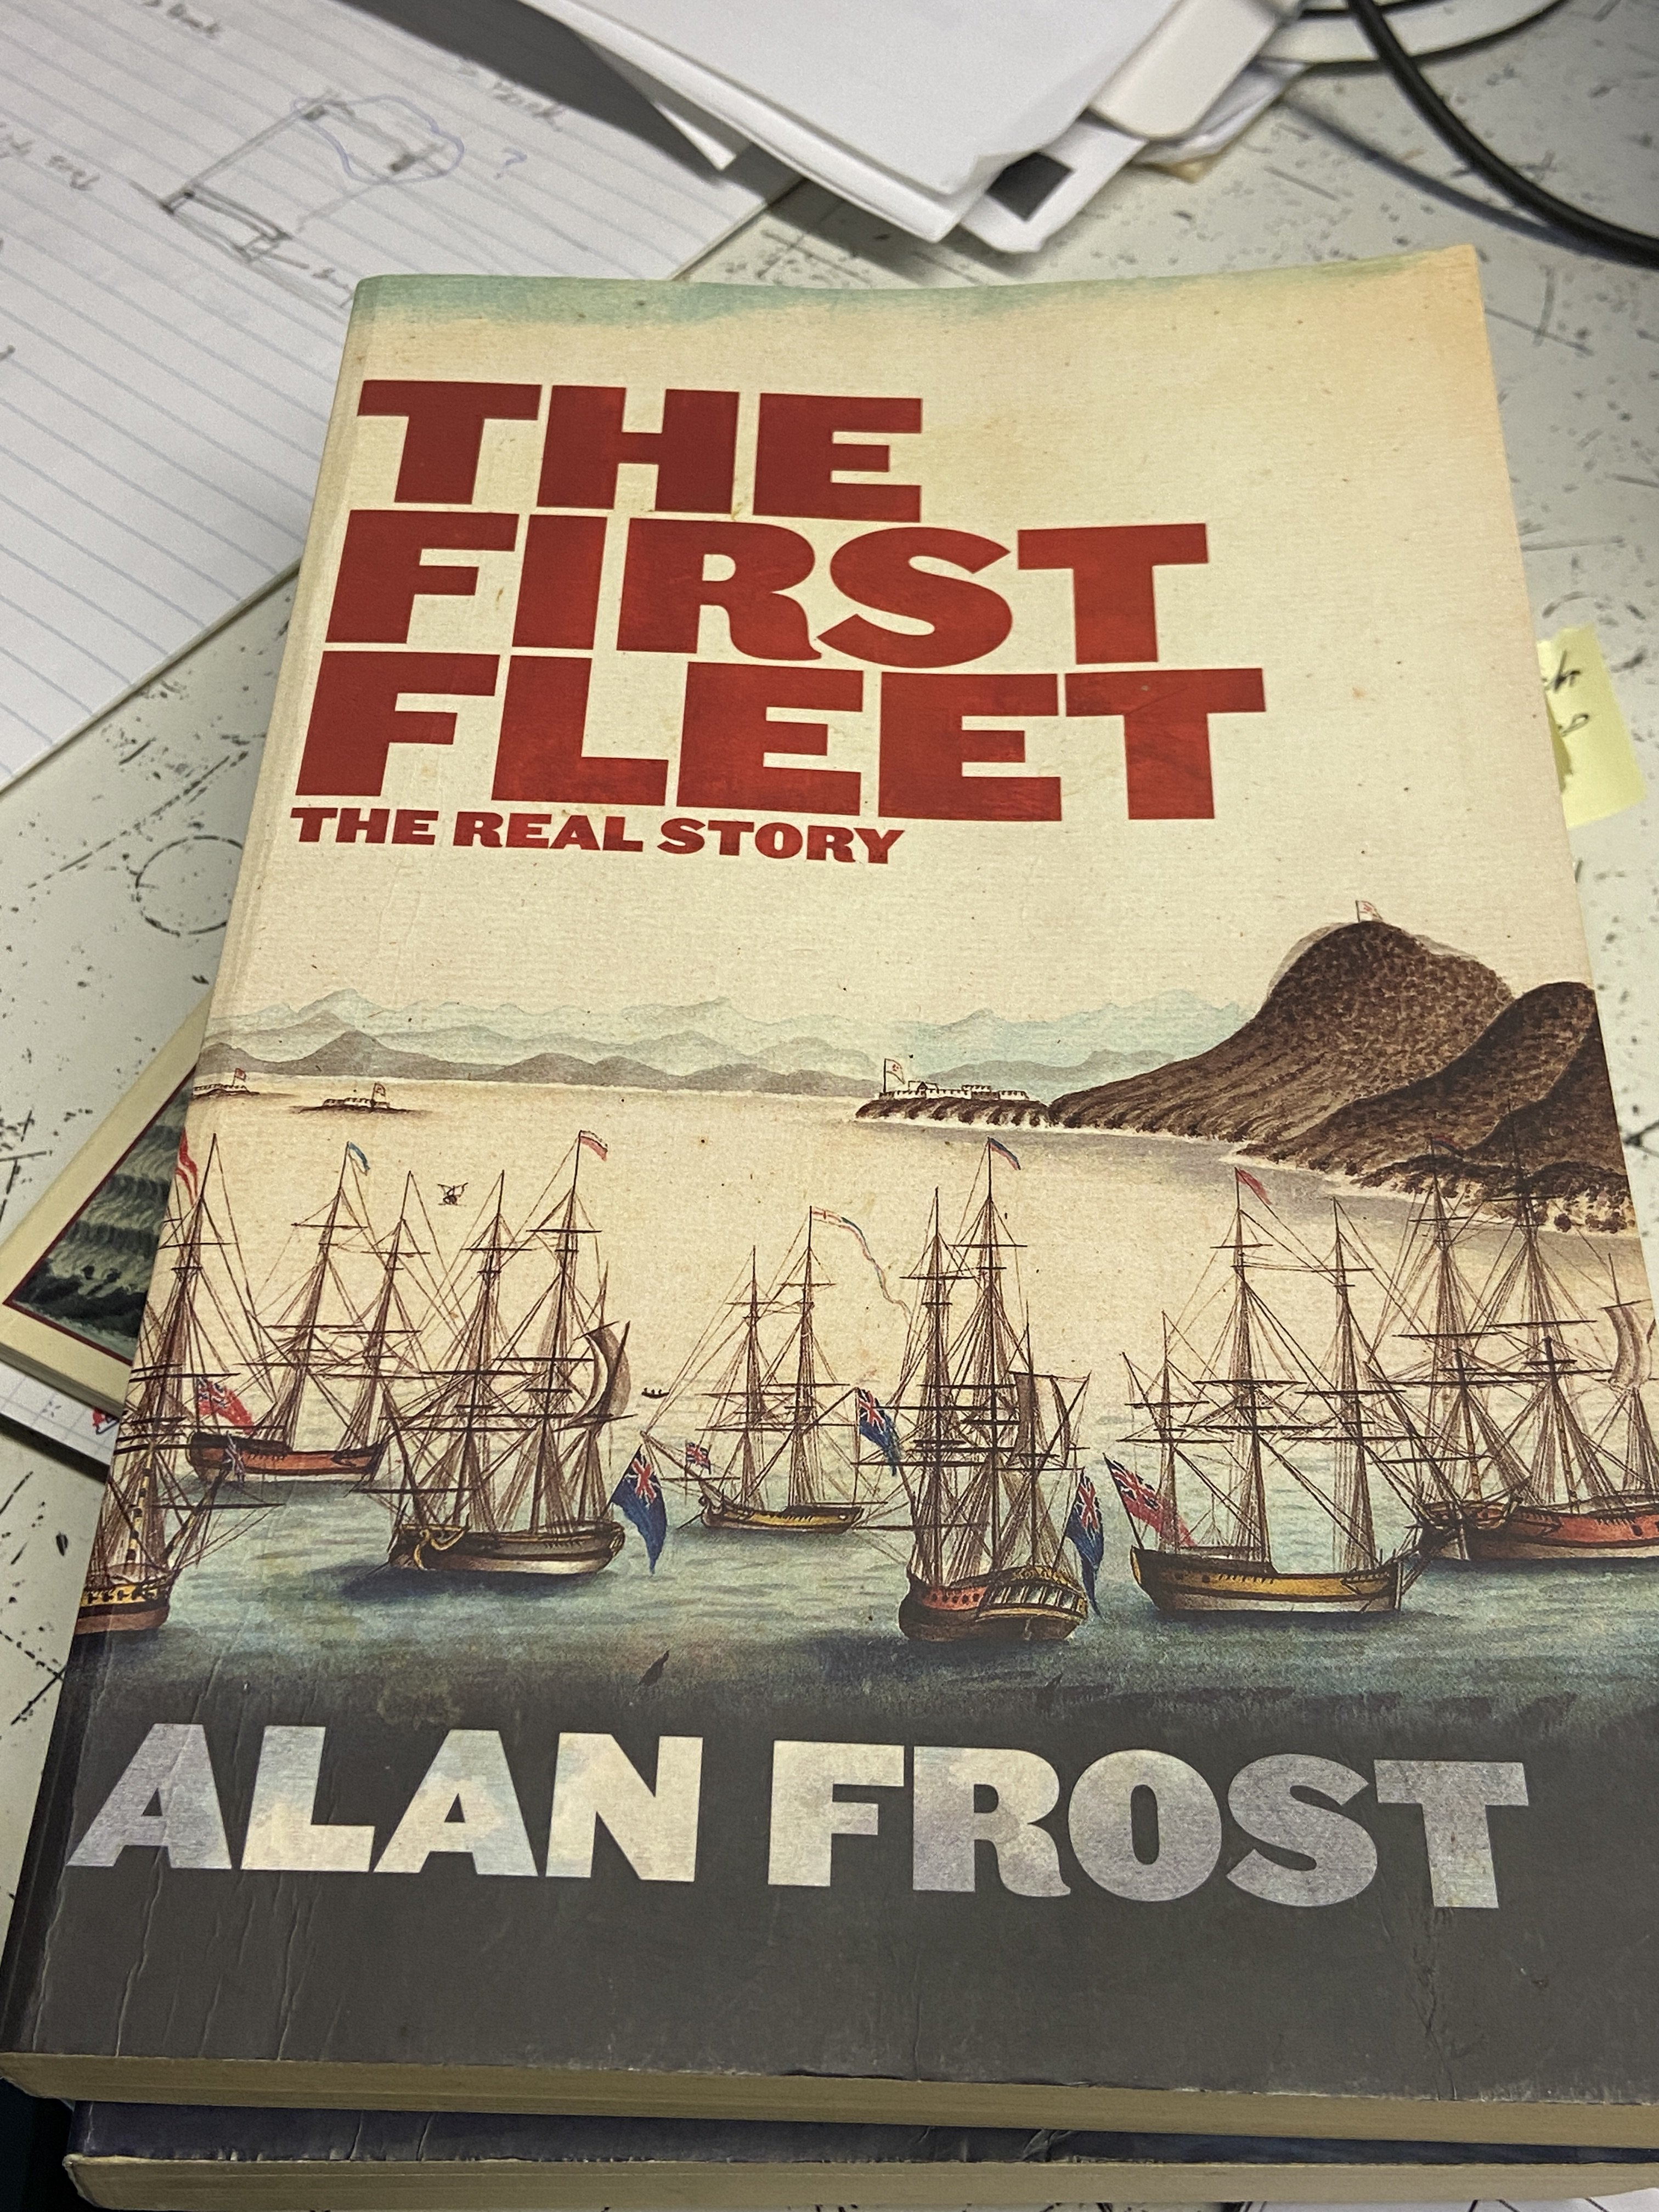
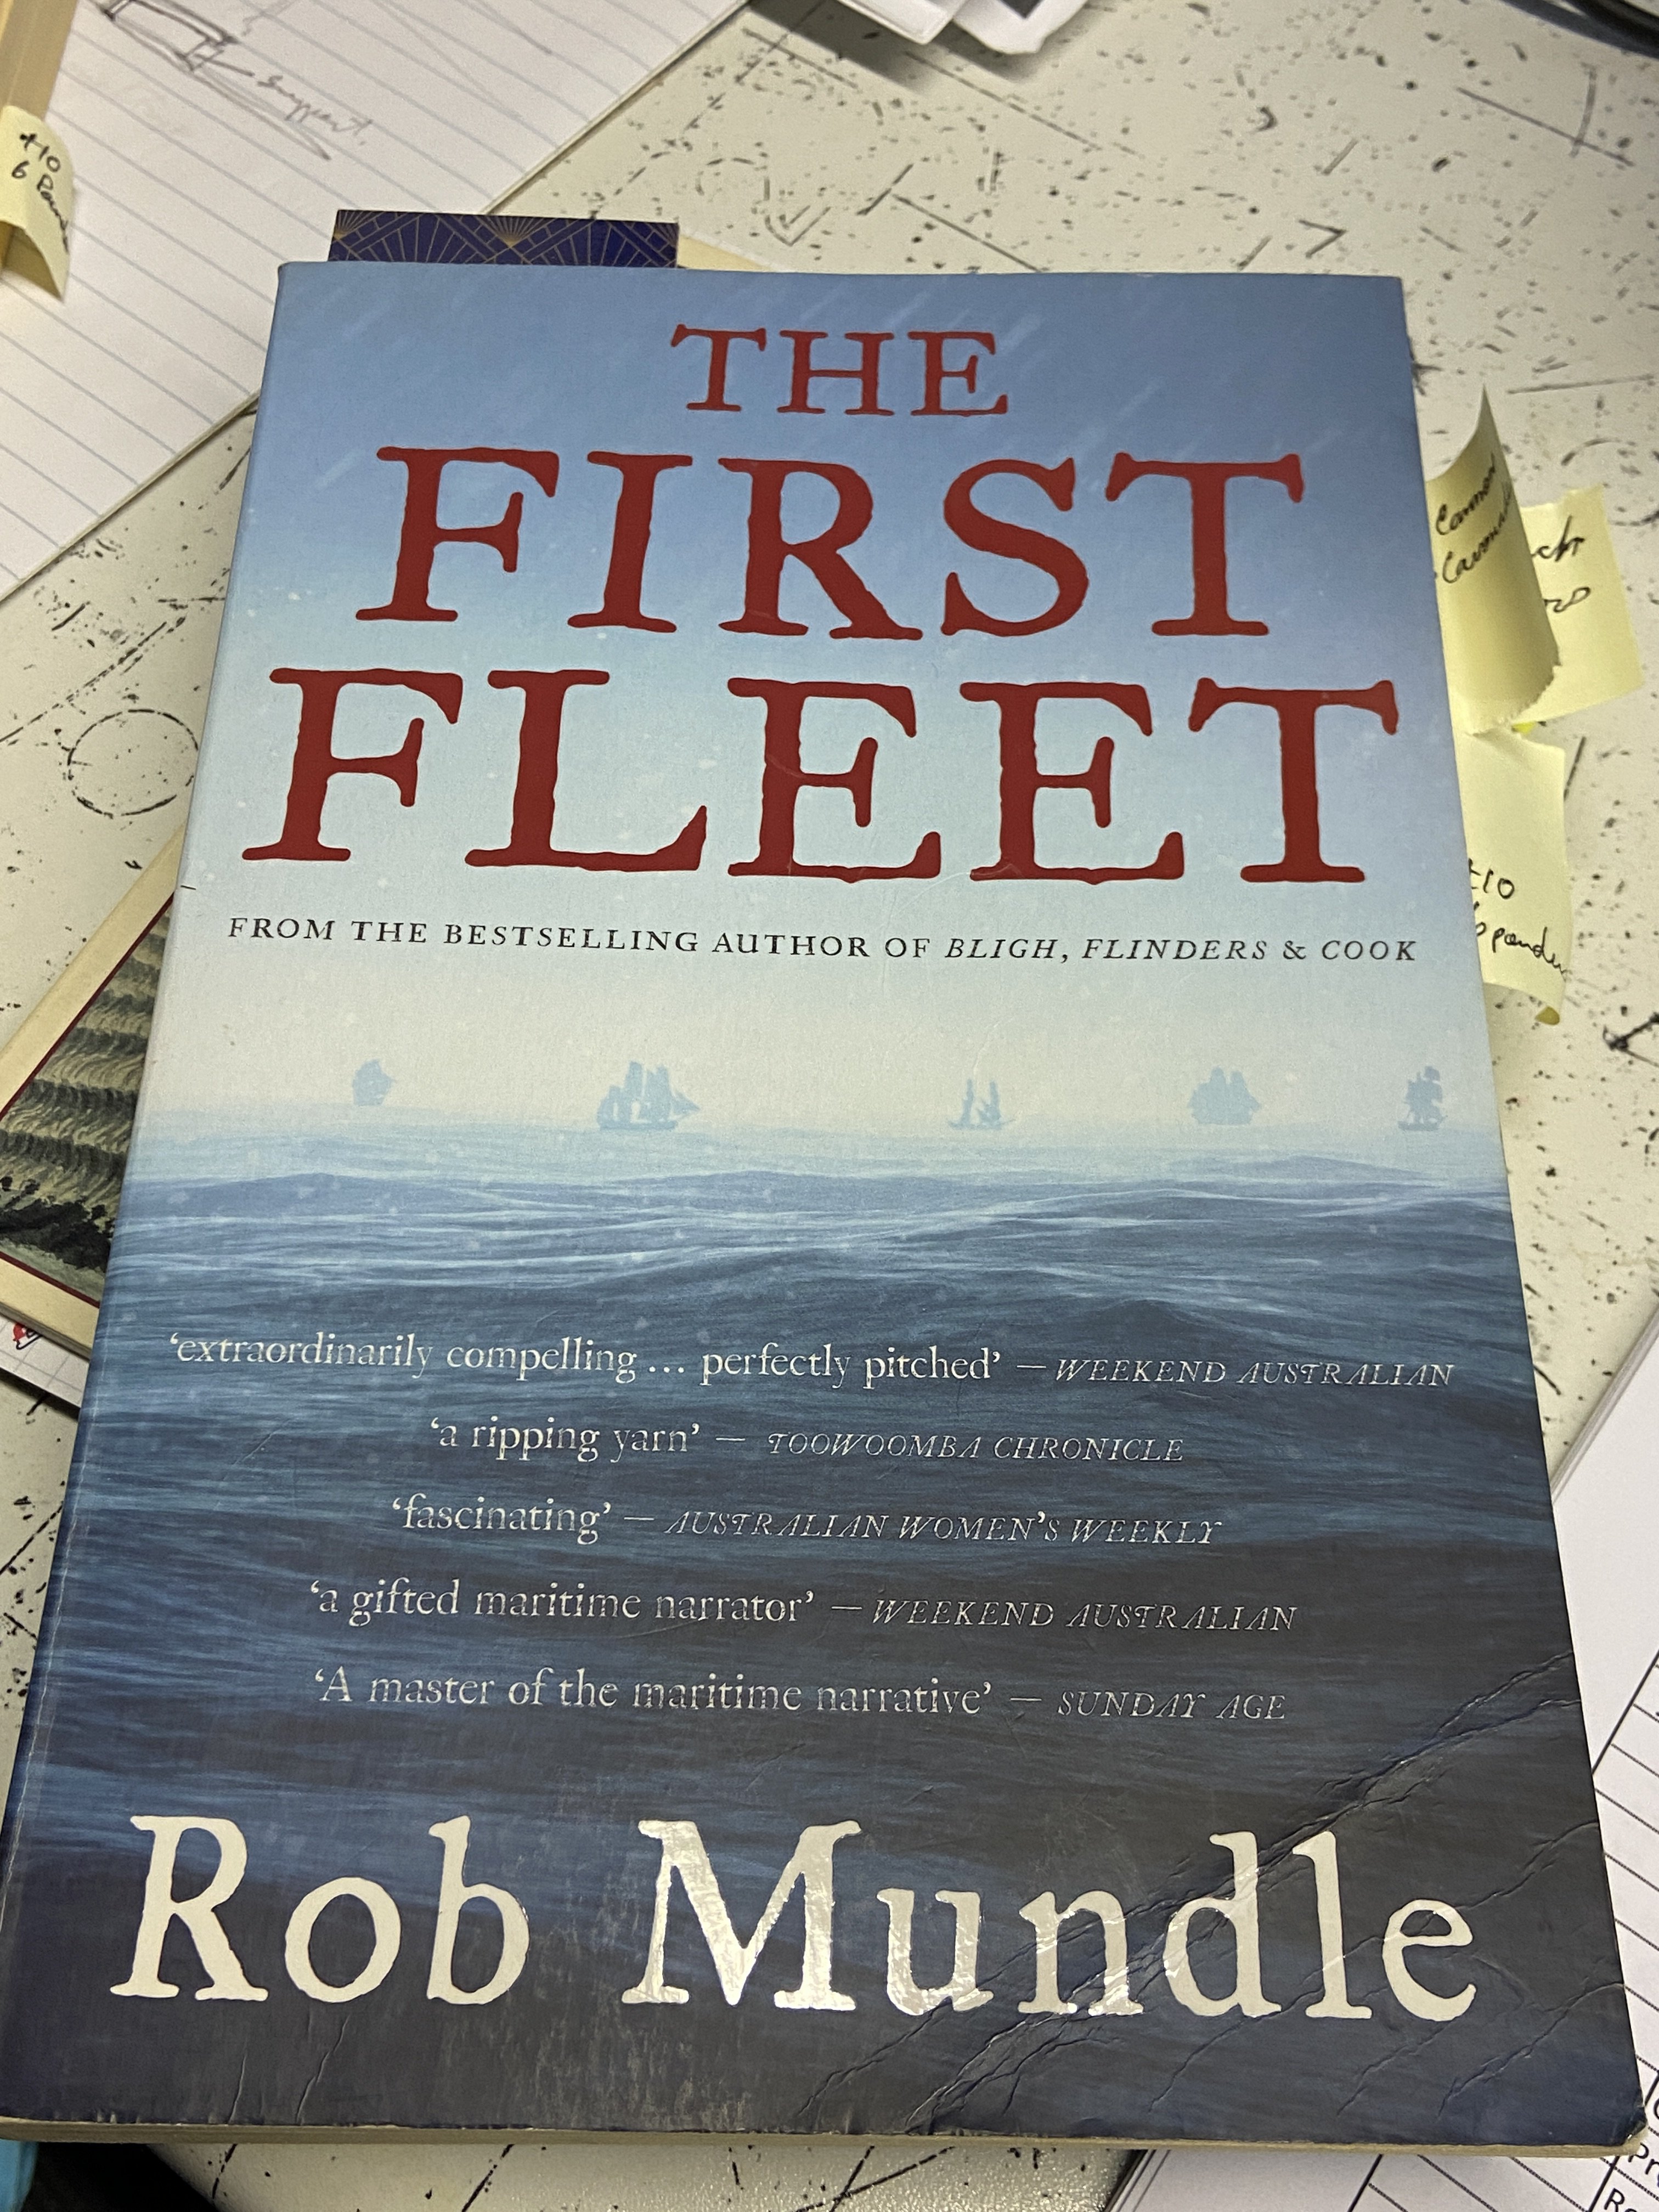
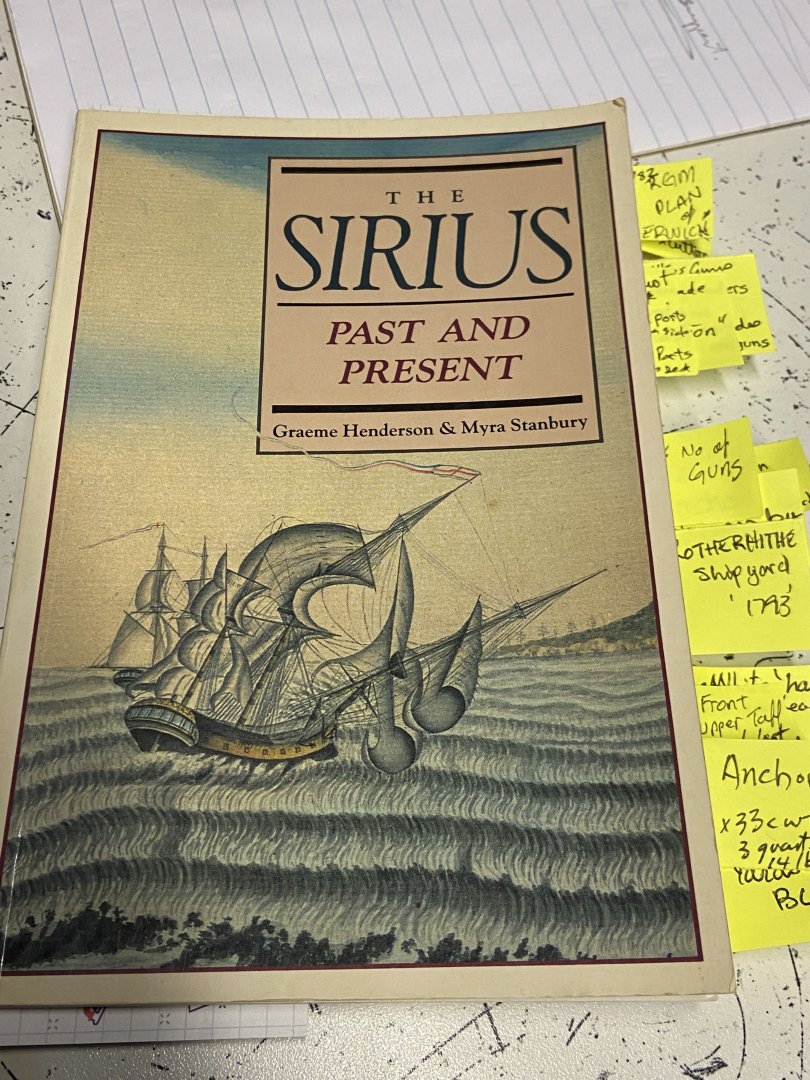
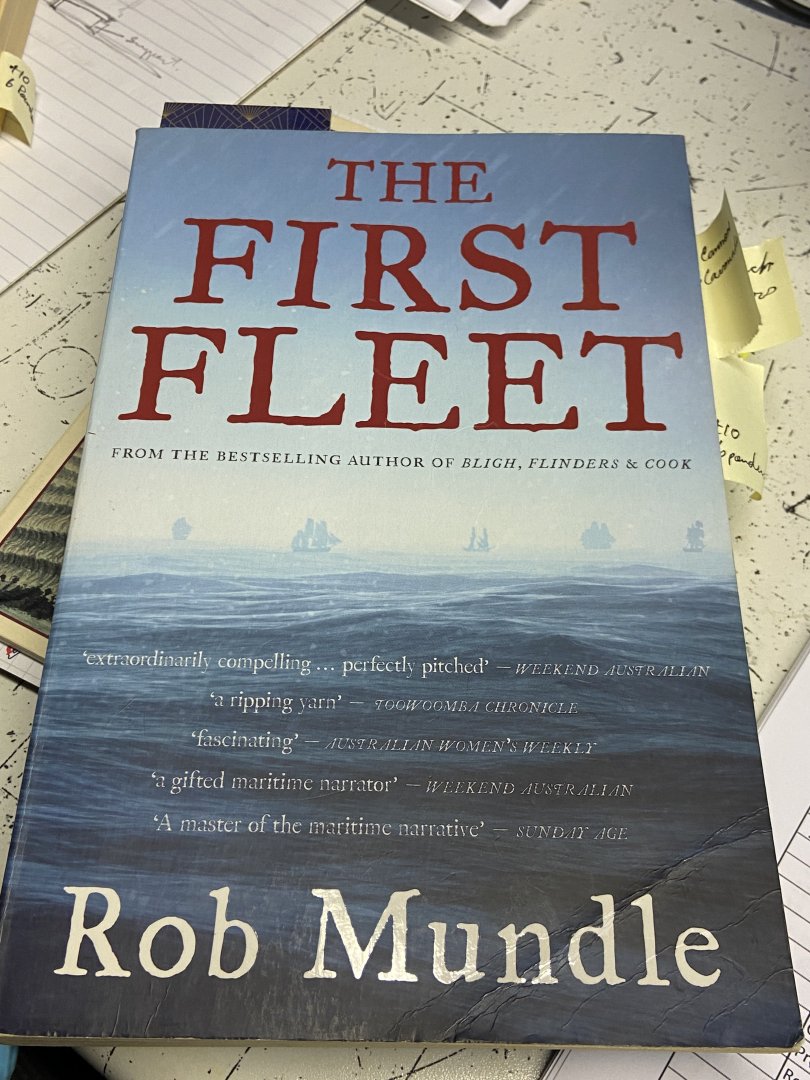
Re: "The First Fleet" books. Alan Frost first published 2011 Rob Mundle 2014 They are pretty much the same. Both tell the story/need for lowering the numbers of convicted/felons in London/England, and the threat of the French establishing a colony/base in the pacific. Although both books go into the background of the Sirius, previously the Berwick, neither really delves into the finer details of the ship's details. I preferred Alan's book. I found the "The Sirius Past & Present" has more details on the Sirius than the other two. I'm presently into another book "The Investigator" Matthew Flinders voyage from England to circumnavigate/map Australia(as now called) proving it was a Continent.
-
Reference Materials. 3 books I have read to date, I have tagged relevant details of the ship, attempting to gather as much details as possible of the ship itself. Much has been written of the journey of the Sirius to Australia(1787), until her ending at Norfolk Island(1790). Many journals of those on board, accounts of daily life, happening on board and port visits. Not a lot on the actual ship itself(that I have not found to date). The

-
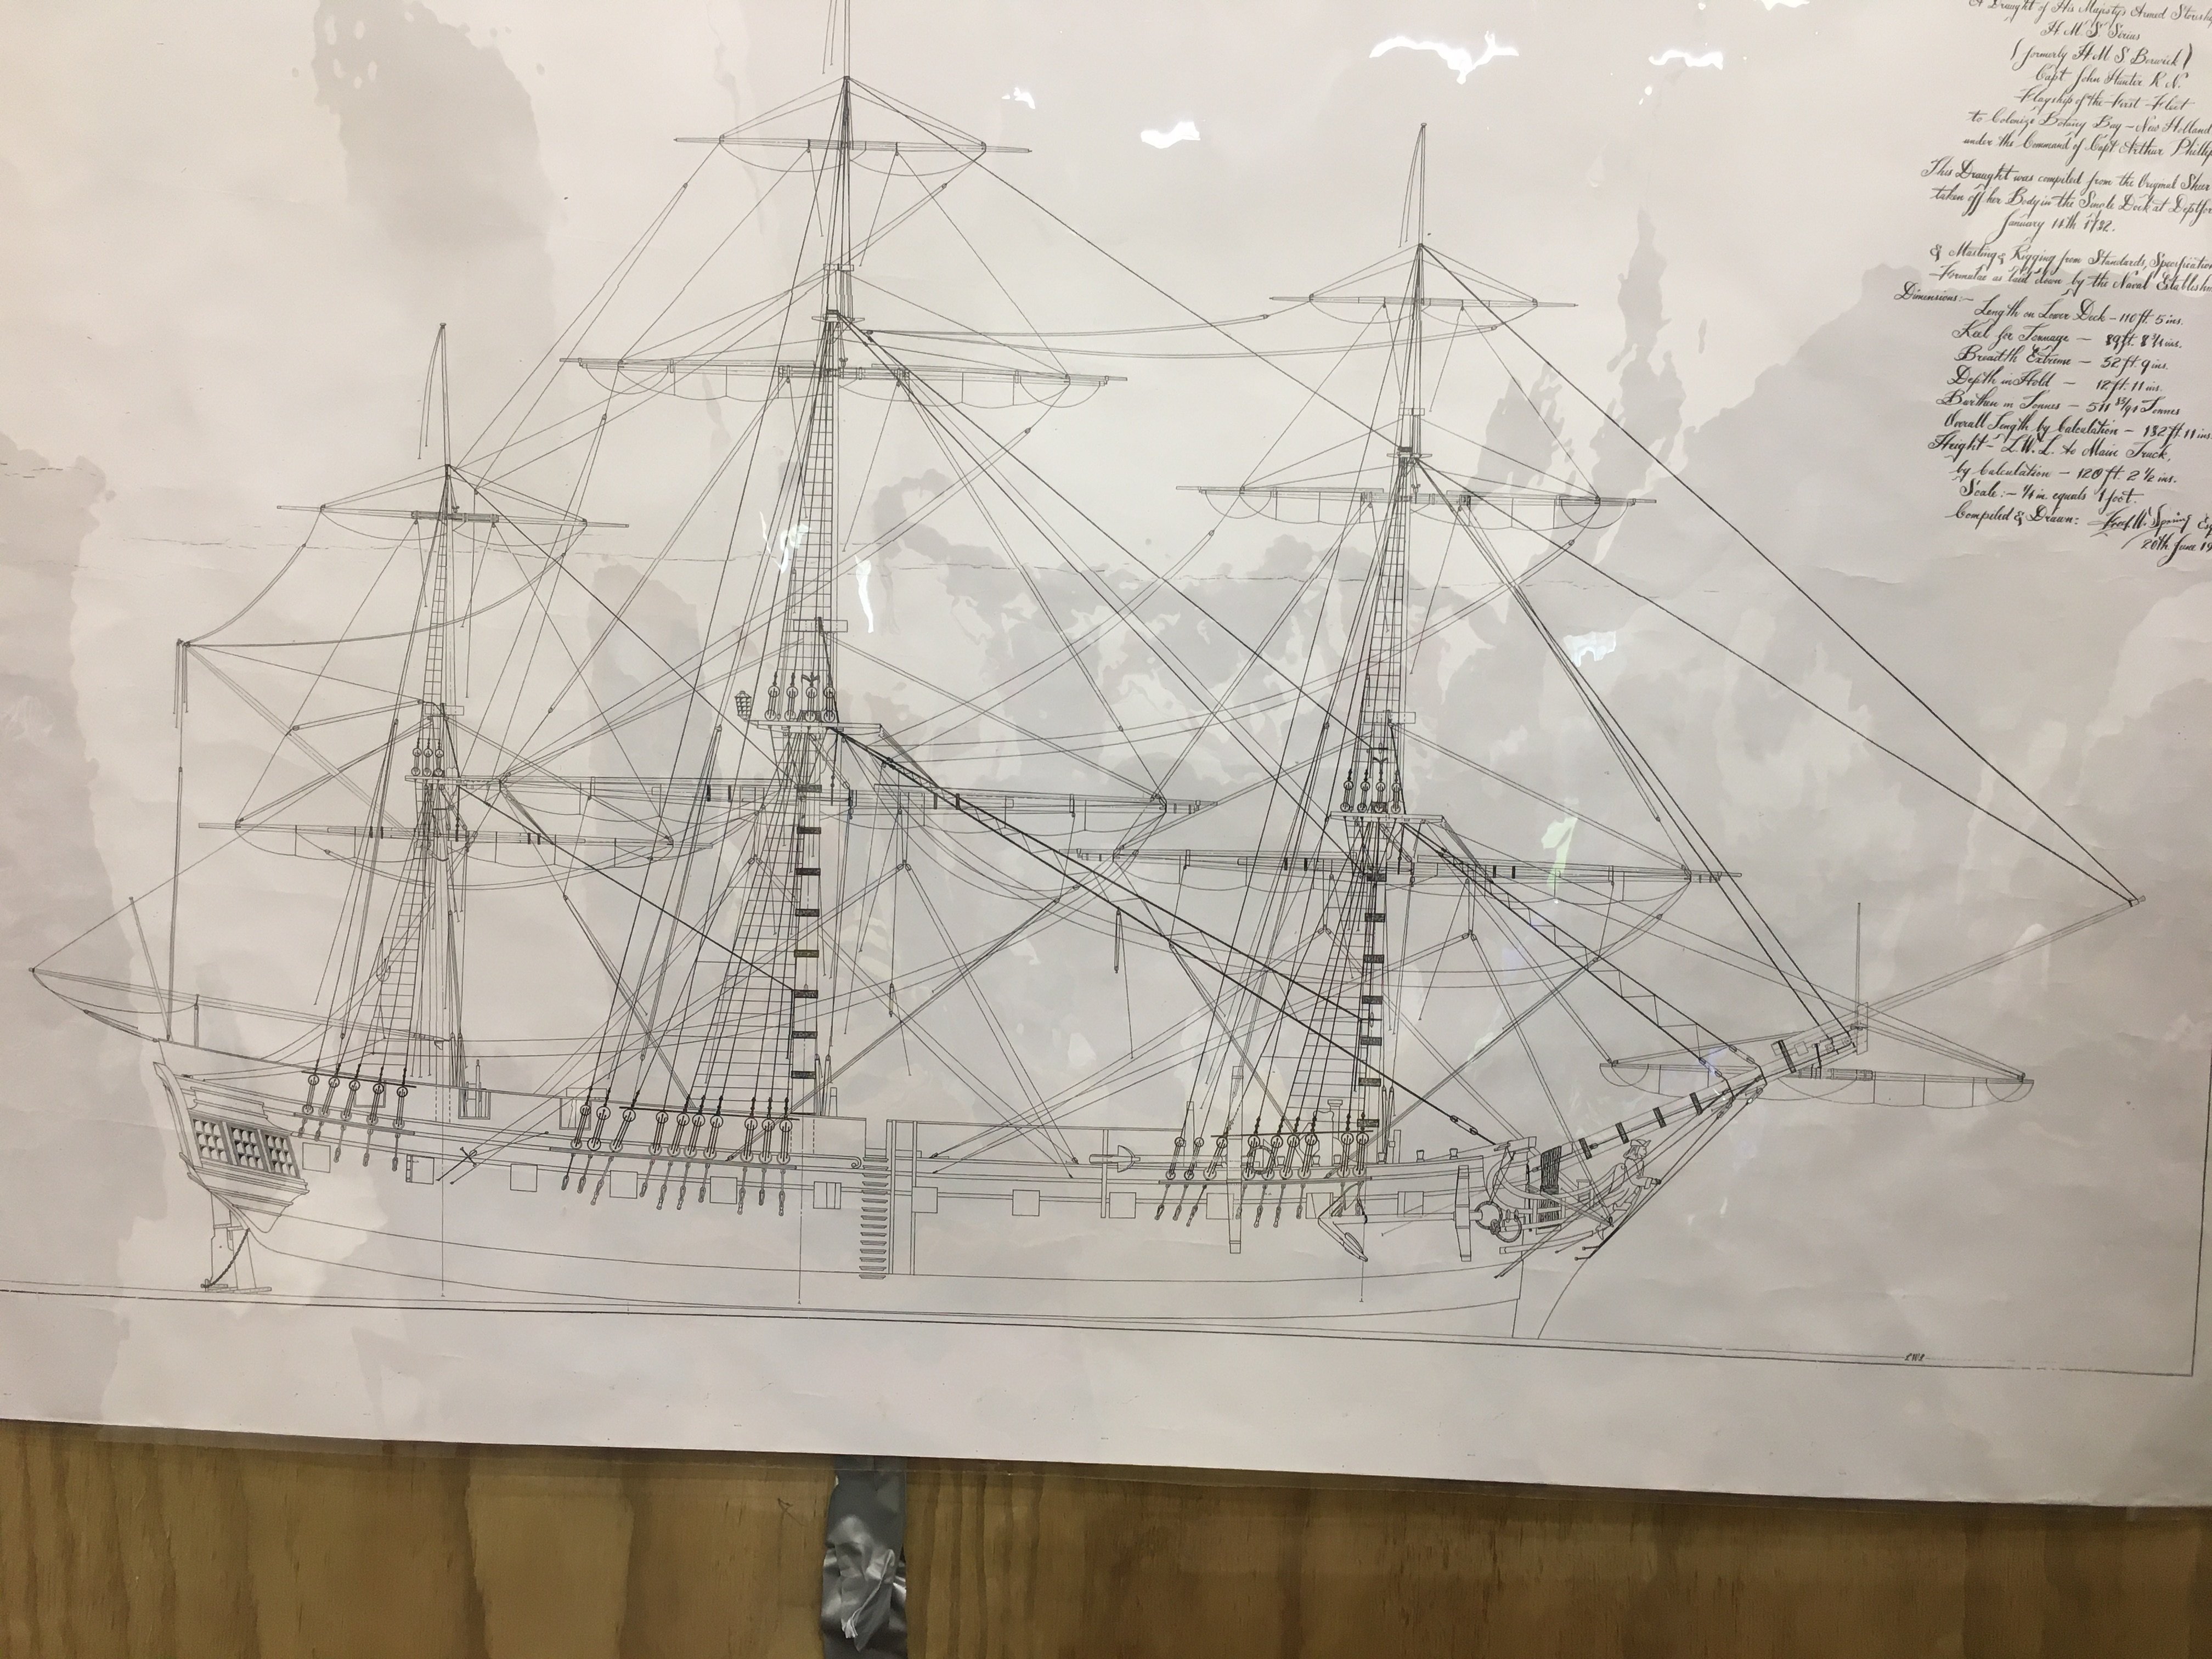
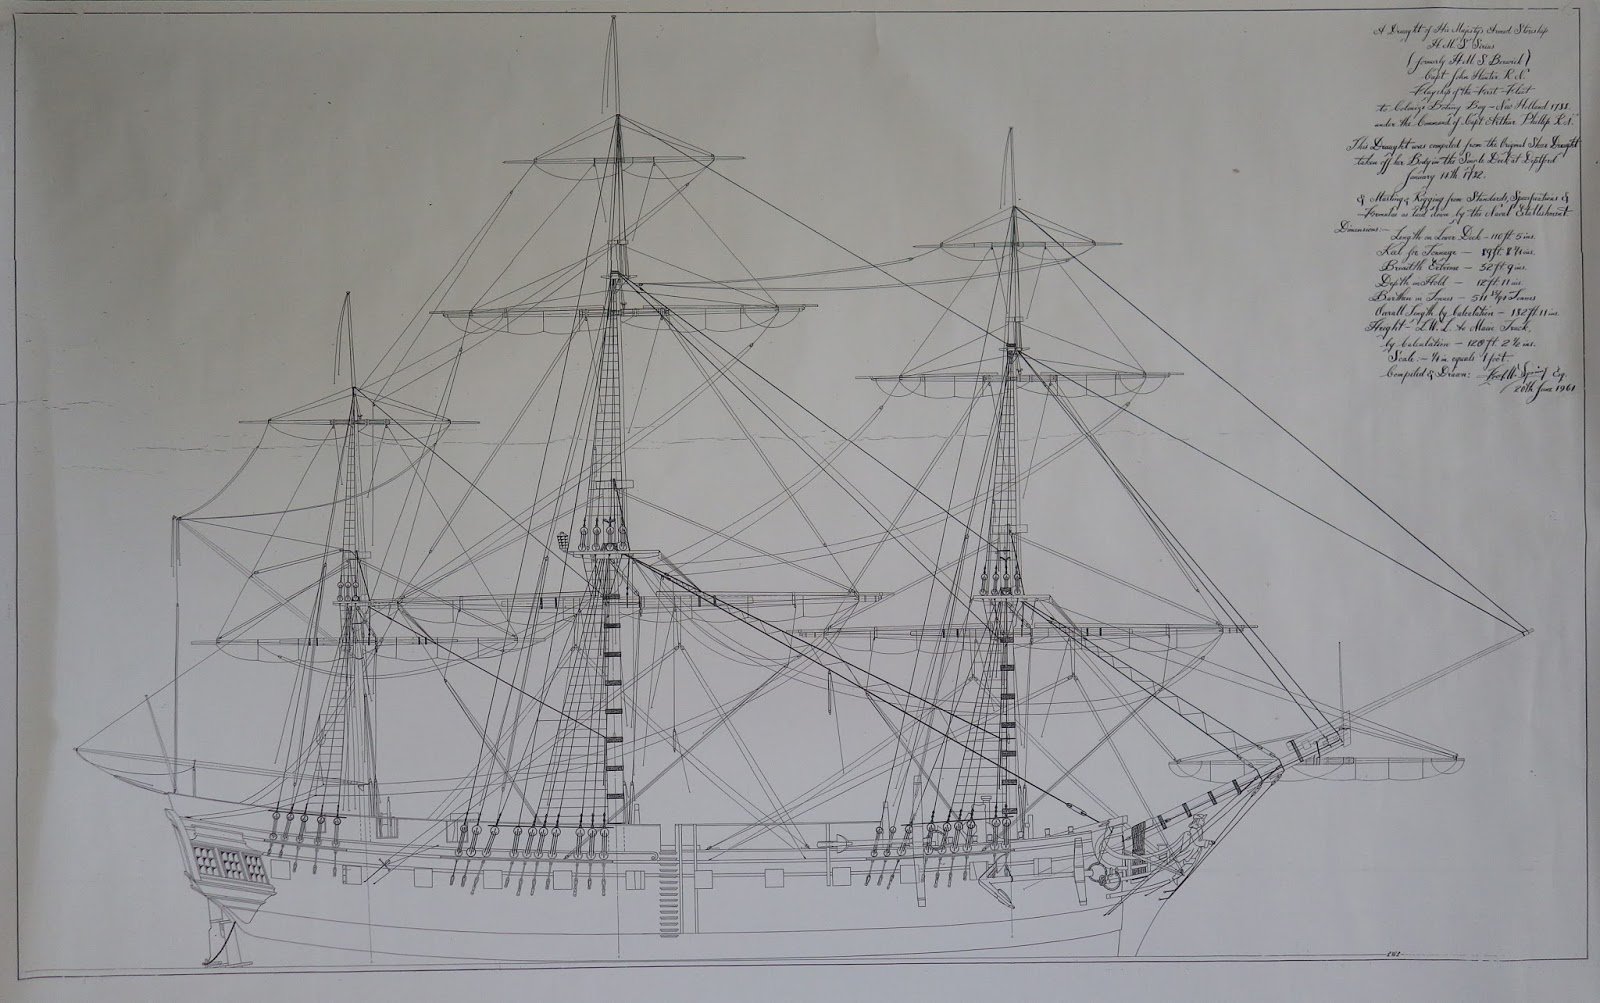
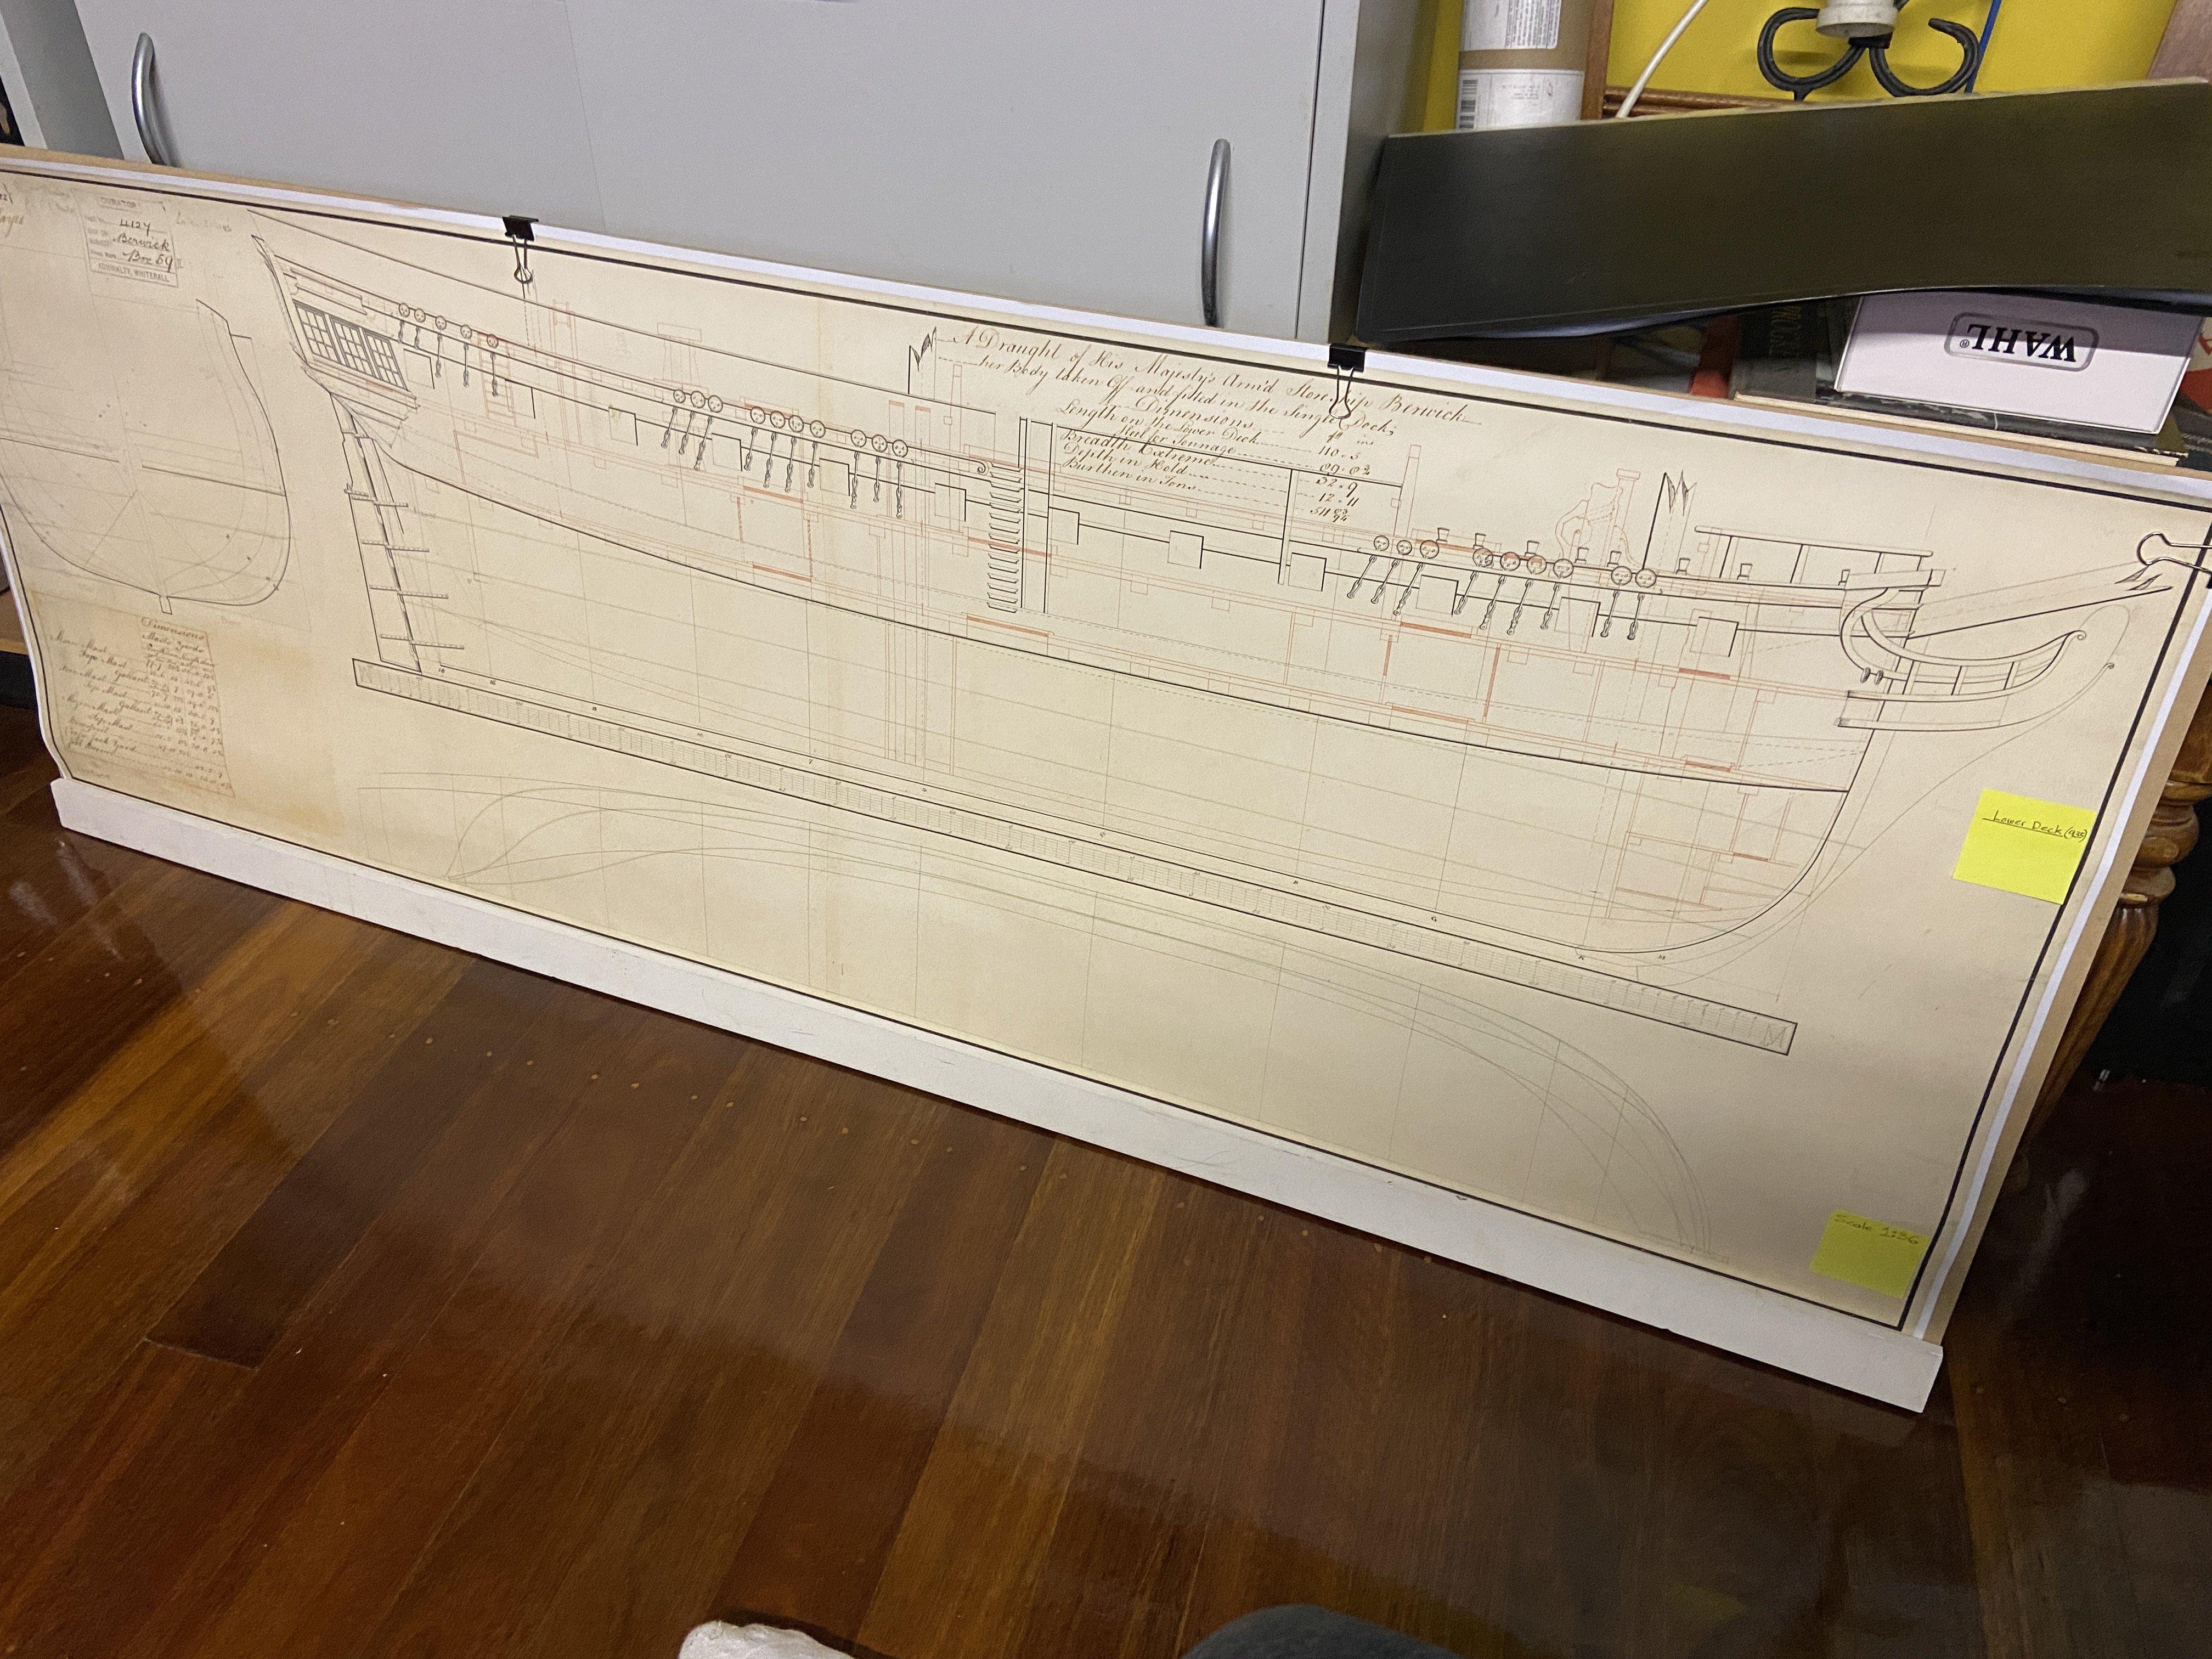
A quick Photo. I do believe I have neglected to show the plan I purchased of the "Berwick (1781) - Technical Drawing" ZAZ5405 held at the Royal Museums Greenwich. The plan does show good detail of the hull's starboard side, the upper & mid decks, along with the half frames(to the left), and hull lines at the bottom. No detail of the Taffrail, gun openings, though just the top edge. More than adequate to get the hull into shape.

-
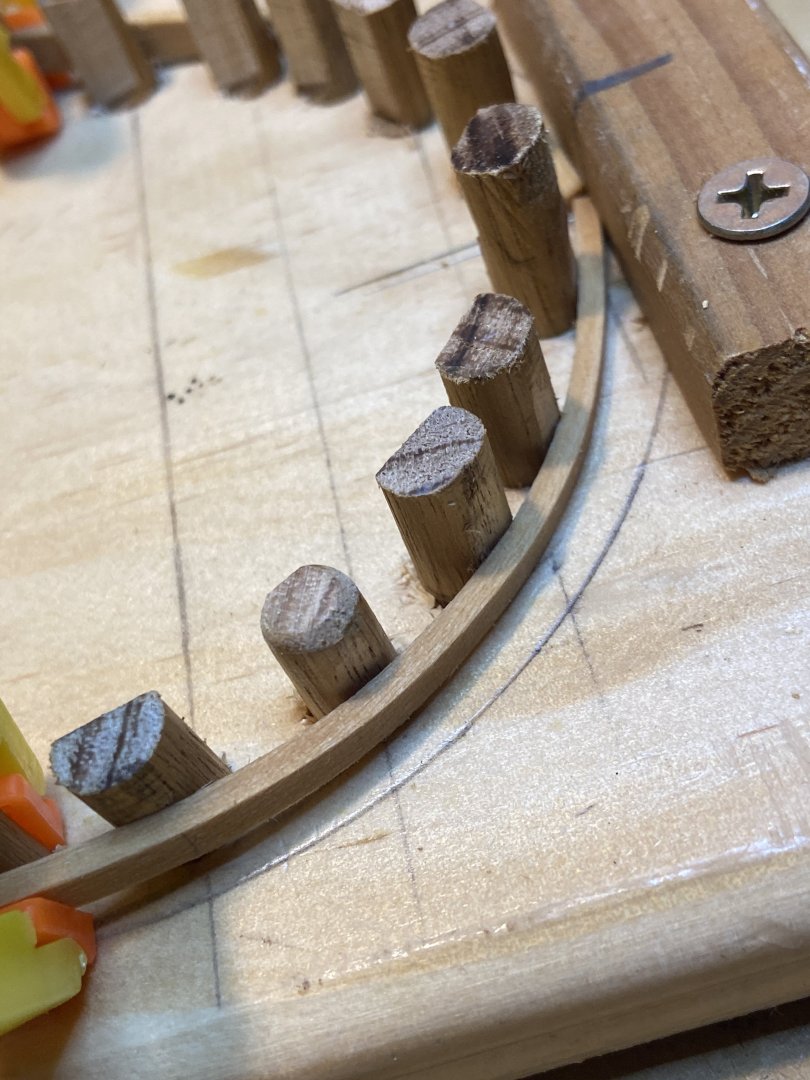
Back in the Shipyard after a cold snap has started in Brisbane. I have continued to add on more of the first plank layer. Progress slow, having to pre-bend the "bluff" bow planks, and run then down to side to the stern. I'm adding 4mm wide planks where the frames curve, wider 6mm planks on the flat'ish areas. The Bluff Bow. Brings back memories of when I did the same on the Endeavour many moons ago. Cannot have enough of these little clamps. I use them to hopefully pinch the planks together, ending up with a smooth joint. If not, some sanding work to do later. The Transon planked. I made this little Jig to shape/bend the planks after soaking in hot water, gently bending each around the posts. Fast forward after a few more planks have been added. Not all the planks worked out(bend well) on the bow. Not enough fairing on the frame edges. I'll try better on the next run moving towards the keel. I/m not going to hide and errors on this build. Nothing a bit of sanding will fix. May cut the gun/port holes that have been covered over next. Bit of a break from planking


-
Hi Steve, Thanks for checking in on the build. I do have a number of pictures of the HMAS Sirius from the Powerhouse Web Site. I have Steels "Standing_Running_Rigging 500 Tons 24 Guns TABLES", unless their is another set closer to the tad under 512 tons the HMS Sirius(Berwick) was rated at. It's another long part-time build for me.
-
Hi John, Yes... the first was important to decide where to start. Whether I am right or not, below the side ports it was.
-
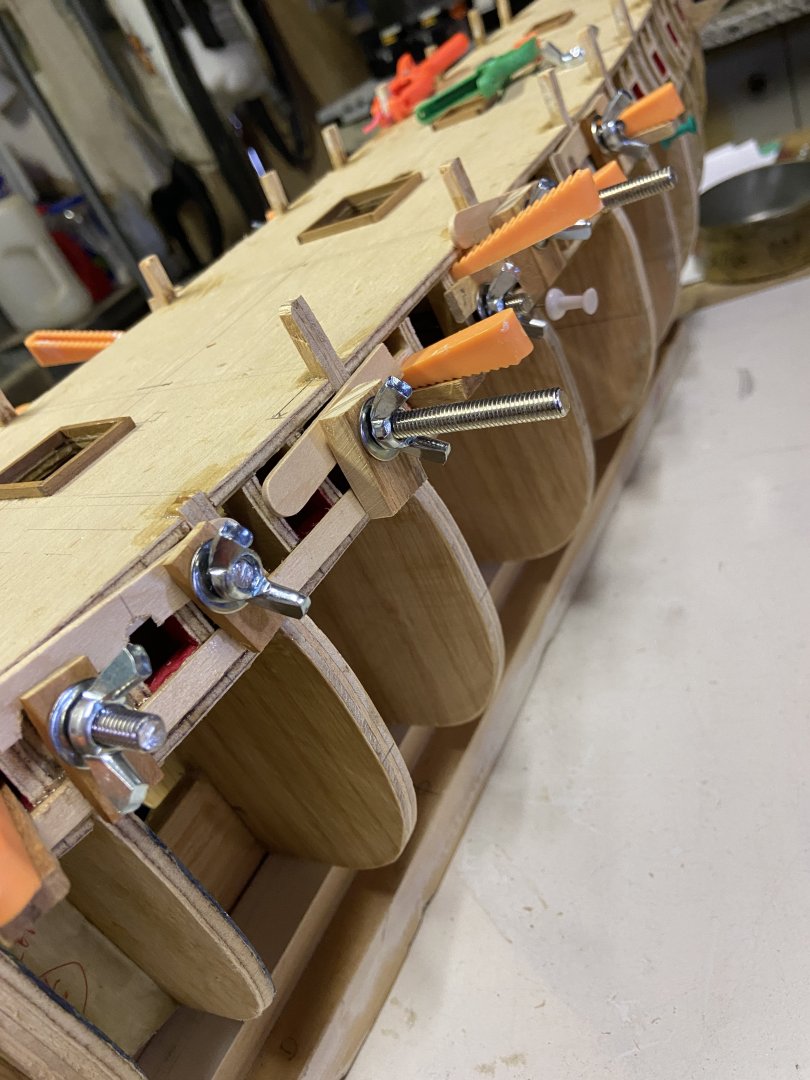
My shipyard had been shut down for a few weeks, whilst I was on holidays. Not a lot of progress, just a few 1st layer planks to either side of the hull. The first plank I added was just below the gun ports, aligning the top of the plank level with the bottom of the gun port. I made up some rods & wingnuts, with a tapered wedge to pull the plank in to get full contact to shape of the frame. Well that was/is the aim. Close up of the rod/nuts & wedges, packers, whatever I could lay my hands on to pull the plank flush to the frame/s. 2 planks per side now on. This is going to take some time..................

-
Hi Jim Lad, Good to see you checking in on my new adventure in the Shipyard. I do not have "The Nagle Journal". I just had a quick look on the Internet. Might see if I can pick up a second-hand copy. I've got a bit of reading/research to do, however another piece of reference does not go astray.
-
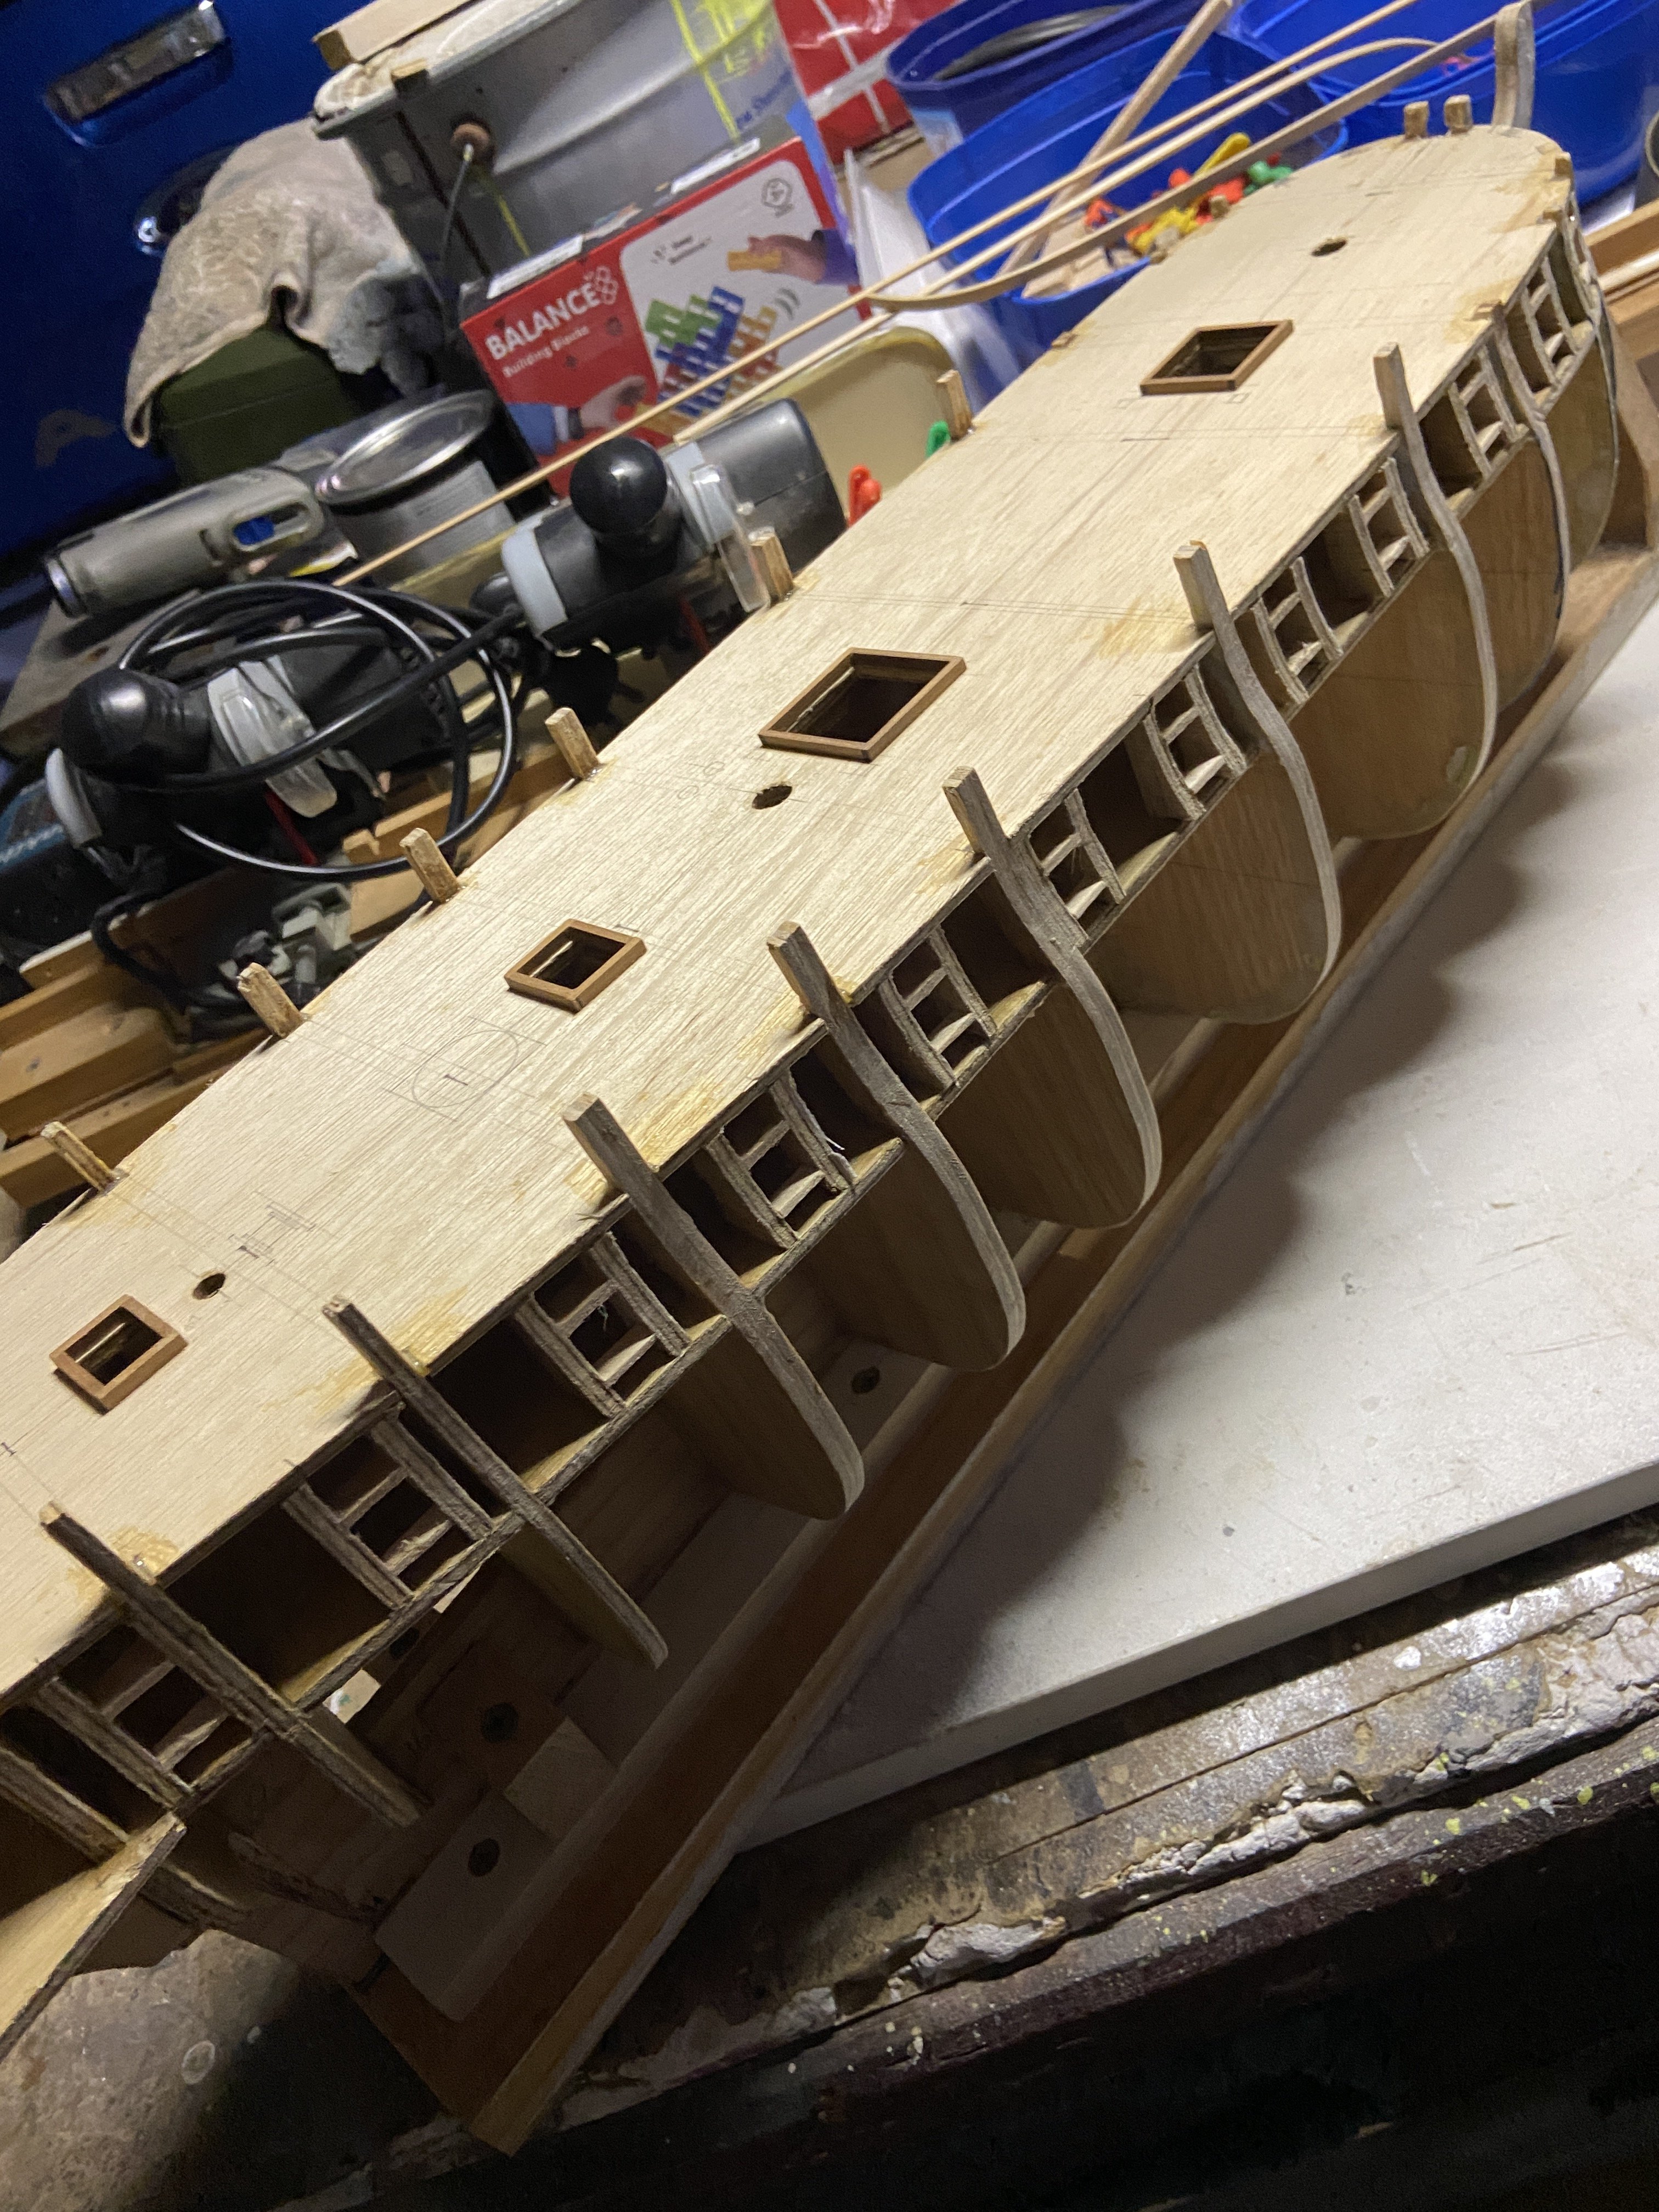
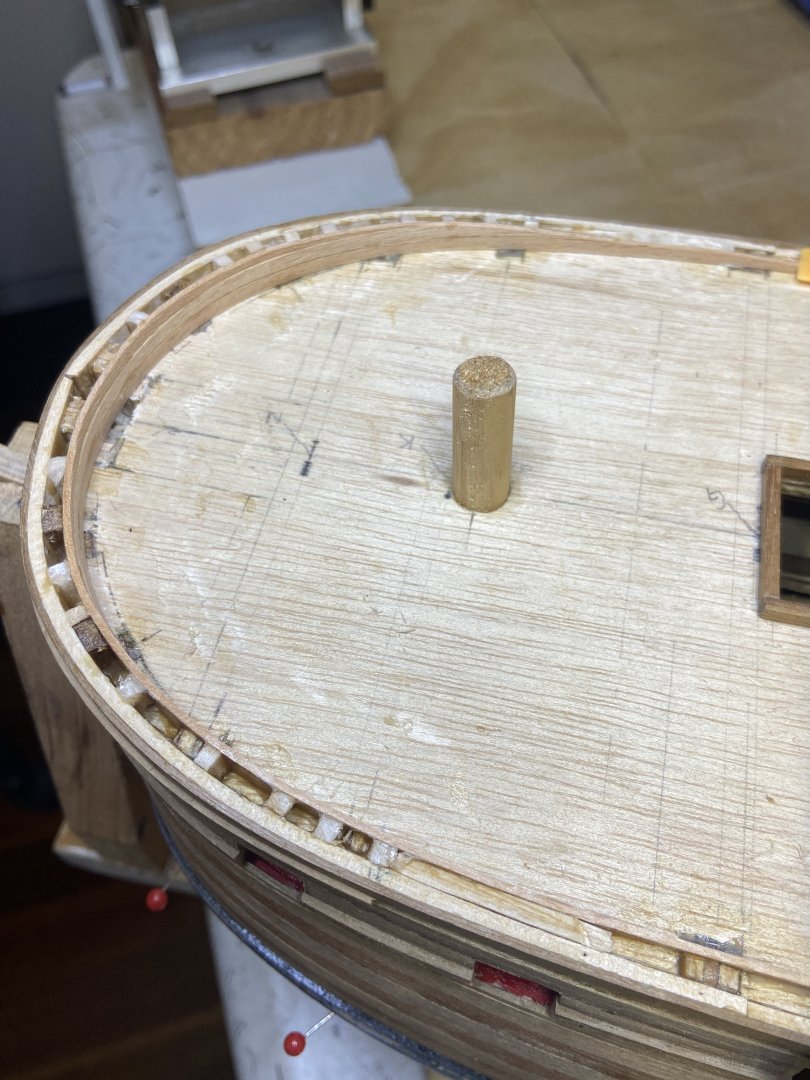
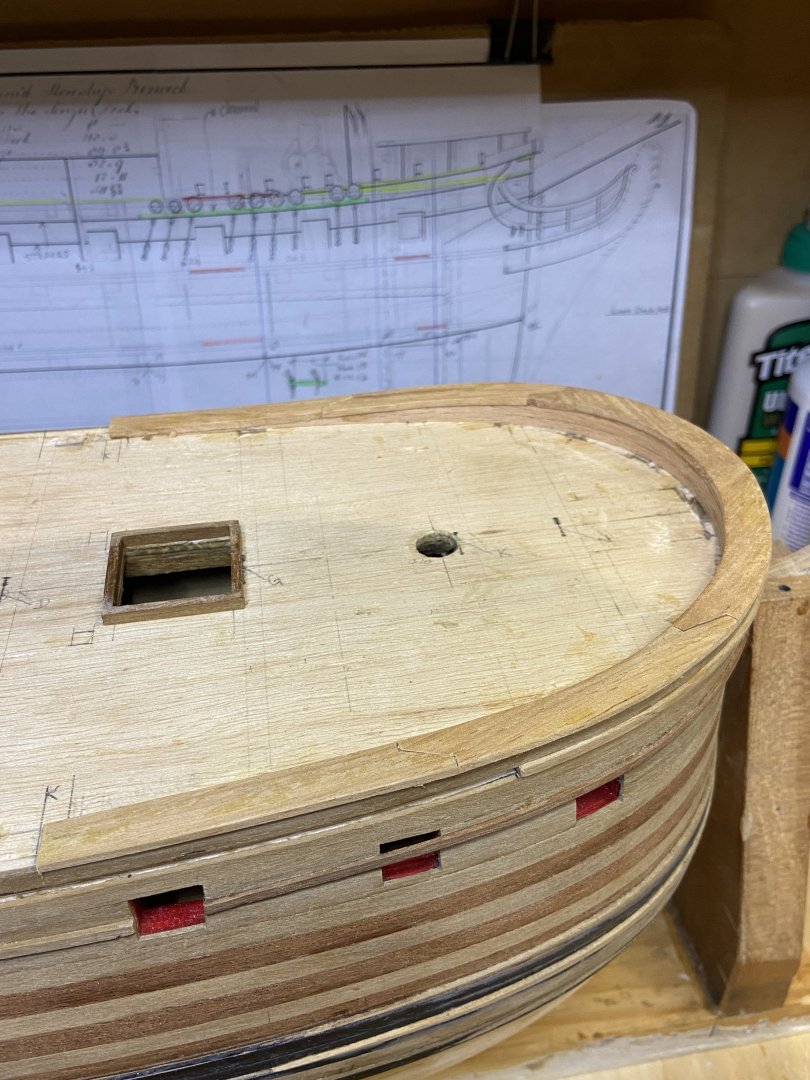
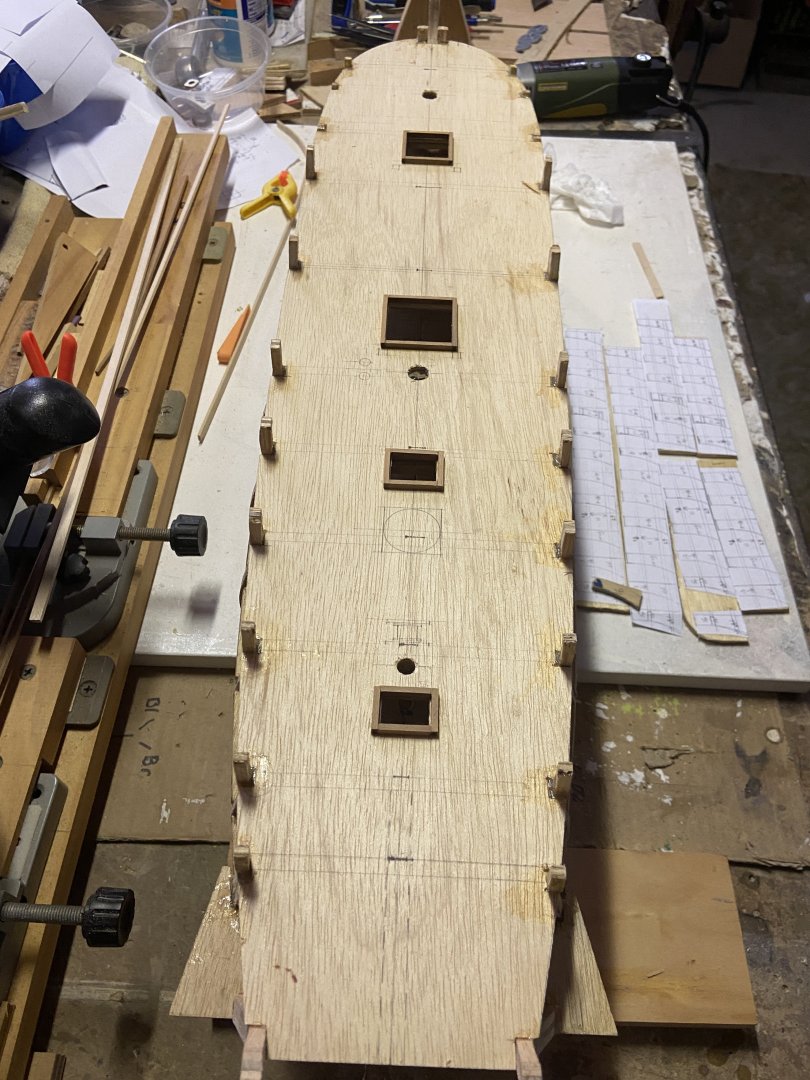
Back in the Shipyard. Progress has been somewhat slow. The shipwrights have been crafting the hull portholes for the cannons. 12 per side on the middle deck. I decided to frame and square off each porthole to aid the location & I'm in no hurry. So why not add extra frames and sill/heads in now. A view of where the Deck is at, with Hatches framed around, masts holes located, generally looking very straight. The Sirius(Berwick) had a flat upper deck to carry long lengths of timber on the Baltic Trade Route. I also added in some extra Bow framing to aid in the line of the forward planking. Not faired yet. Off for a 3 week holiday, so no work on the Sirius for a while.


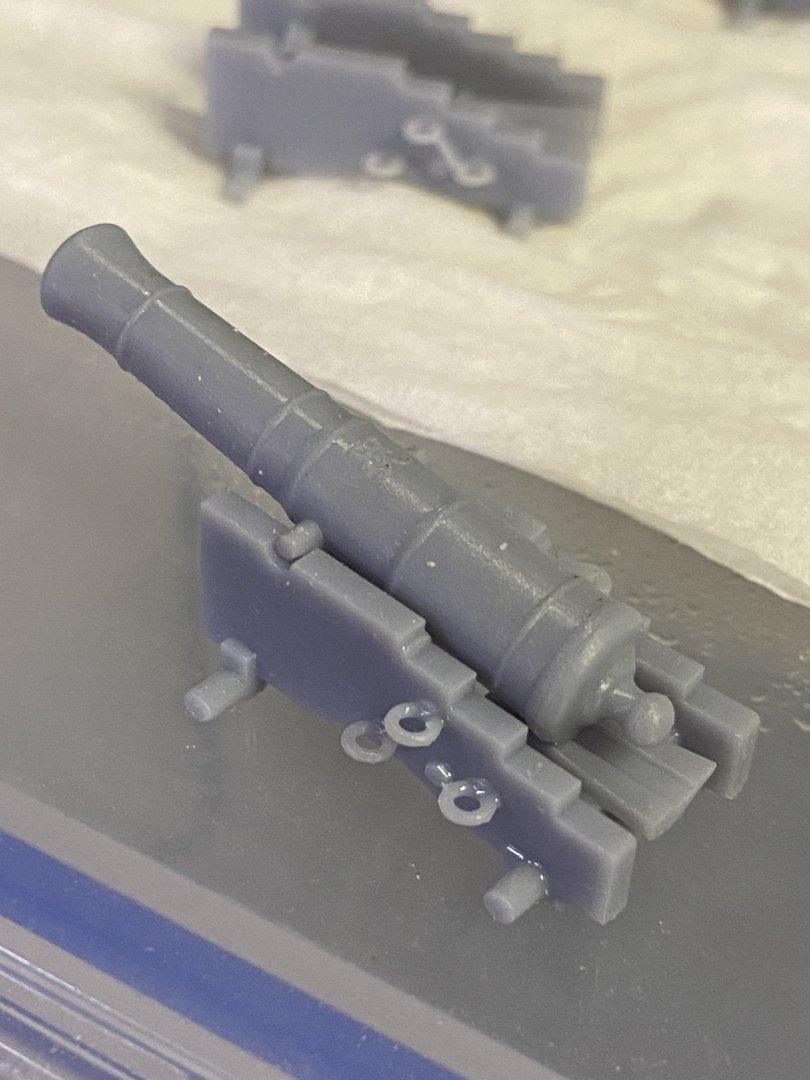
-
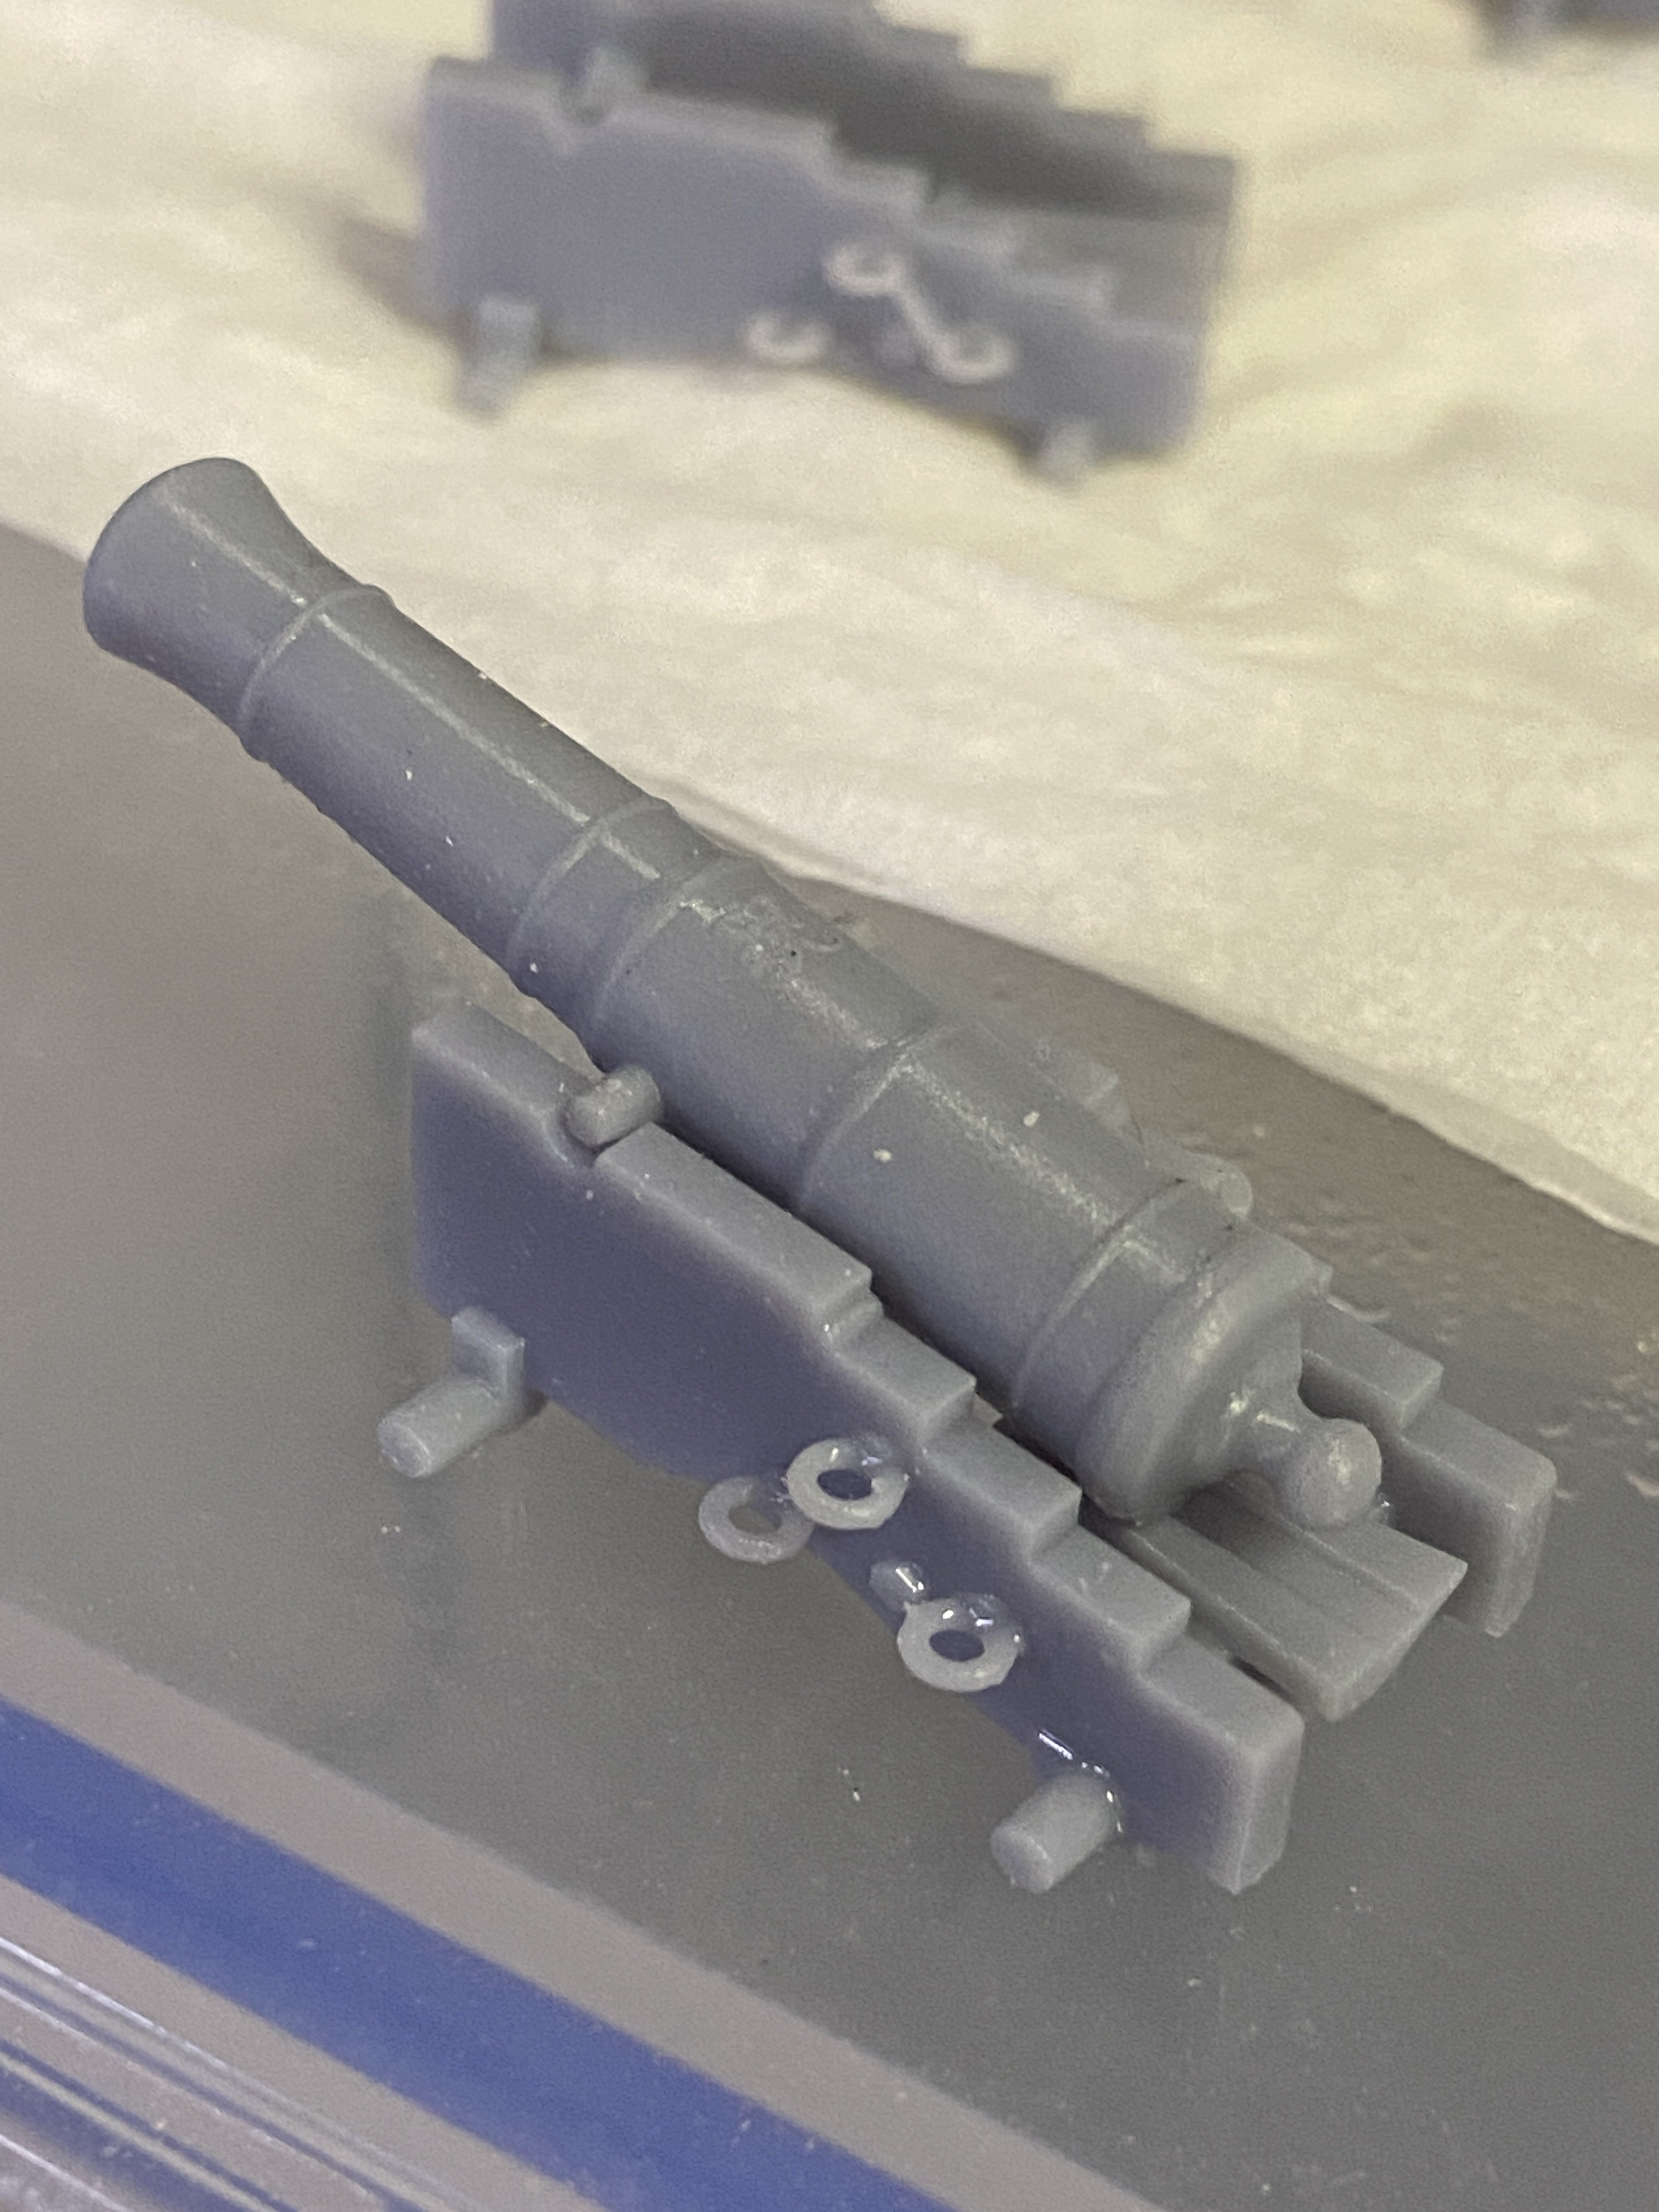
Back in the Shipyard. Whilst waiting for the 2 Pack Resin to dry on the hull construction(many times). Research on the MHS Sirius shows some conflict from several sources as to the number and size of guns she carried. http://www.hmssirius.com.au/the-early-years.html Refitted as an armed storeship: The Berwick was purchased by the Navy before she was completed and fitted out as an armed storeship. As Navy property, these types of ships were despatched to various parts of the world for iron, copper, pitch, hemp, tar and timber. Timber was the main cargo carried, which was required to meet the Navy’s immense needs. These storeships had to be armed as prize-takers, pirates and enemy ships also patrolled the shipping routes. "The Berwick was then refitted. Her hull was coppered to guard against worm infestation which was prevalent in tropical waters, masts and yards replaced, ballast was adjusted to compensate for the addition of guns and accommodation quarters refurbished. The guns recommended were twenty two to twenty four 9-pounders on the middle deck and six 4-pounders and four 18-pound carronades on the upper deck. However it is not known for sure if this particular arrangement was met. Commissioned as HMS Sirius" Orders came through in October 1786 for the Berwick to be outfitted for foreign service and she was duly commissioned as HMS Sirius, a 6th Rate ship of the Line. Her status had now changed from armed storeship to armed escort requiring changes to the type and number of guns she carried. It was now set down that she should carry four 6-pounders, six 18-pound carronades and eight swivel guns. It is interesting to note that, officially, carronades did not figure in the ratings so an extra ten six-pounders were put on board(DR Note: stored in the hull ?). A few sources simply state "When completed she carried 10 guns, four 6-pounder long guns, and six 18-pounder carronades" Probably work on showing: four 6-pounders, six 18-pound carronades and eight swivel guns That brings me to what can I do to enhance the detail for this build. I have been trying my hand in 3D Printing for some months now. mainly small figures for my sons to paint. Being a design draftsman in my first trade(paid employment), I still like to "design things". Below are the 2 types of armament mentioned above I have created/printed (still somewhat work in progress) Will see how they paint up for use on the ship's fit-out. PS: The 6-pounder cannon was sourced on this Web Site: Cheers Dave R