HOLIDAY DONATION DRIVE - SUPPORT MSW - DO YOUR PART TO KEEP THIS GREAT FORUM GOING! (Only 20 donations so far - C'mon guys!)
×


DaveRow
-
Posts
691 -
Joined
-
Last visited
Content Type
Profiles
Forums
Gallery
Events
Everything posted by DaveRow
-
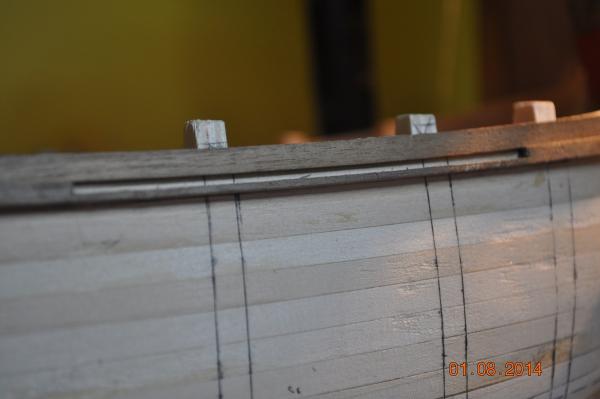
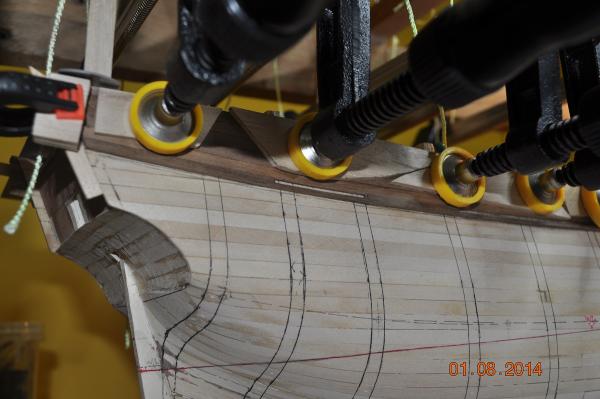
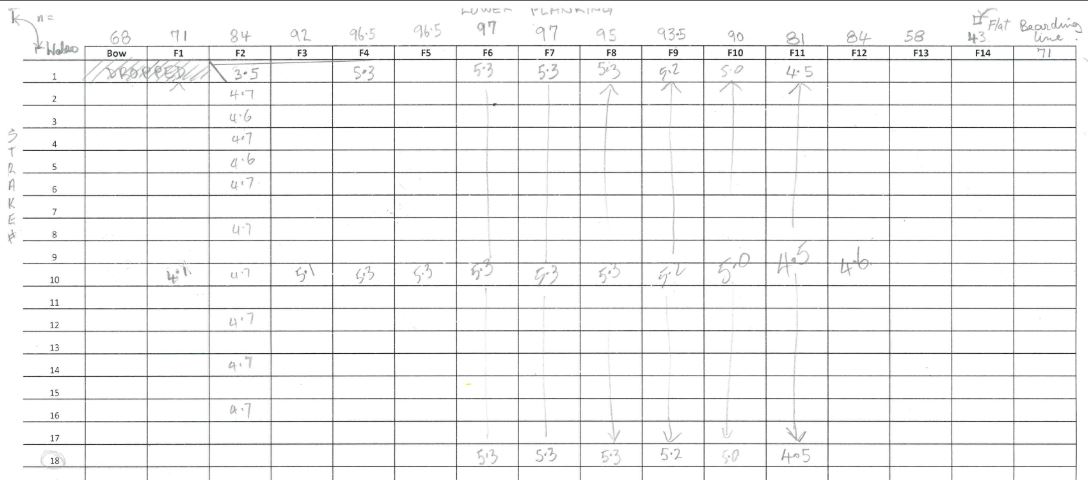
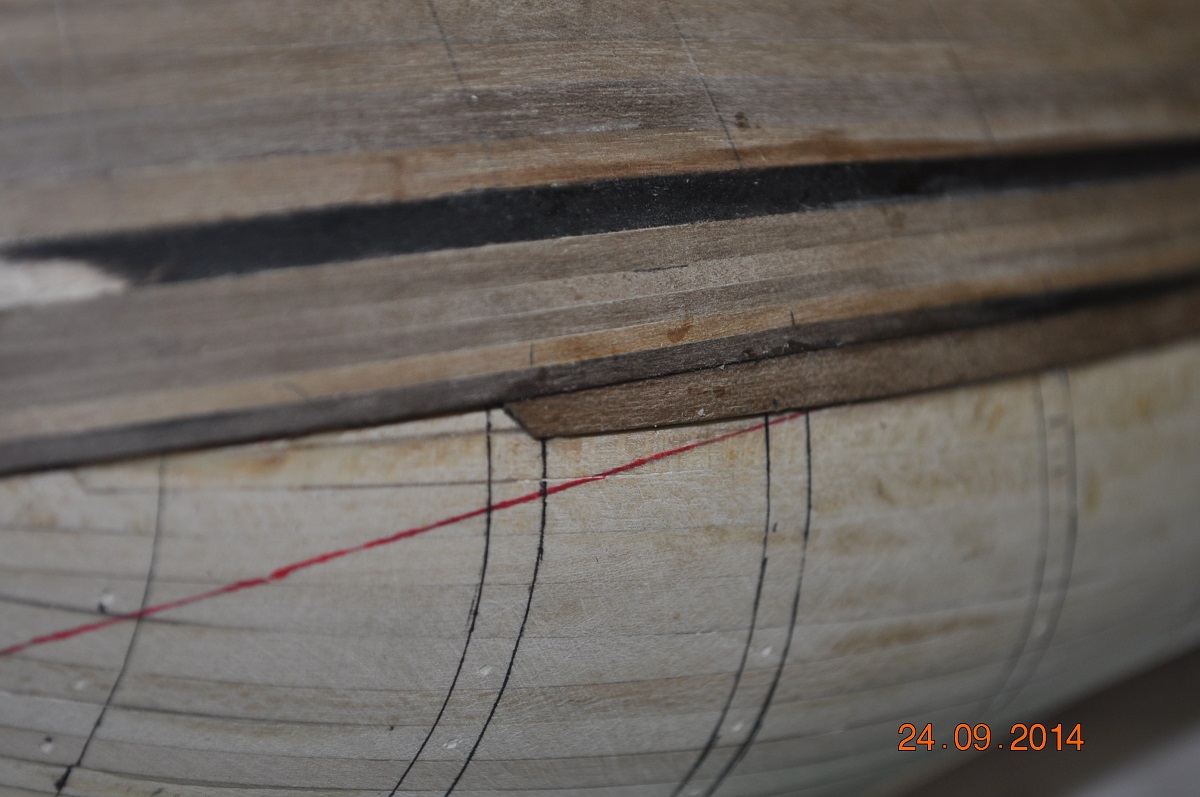
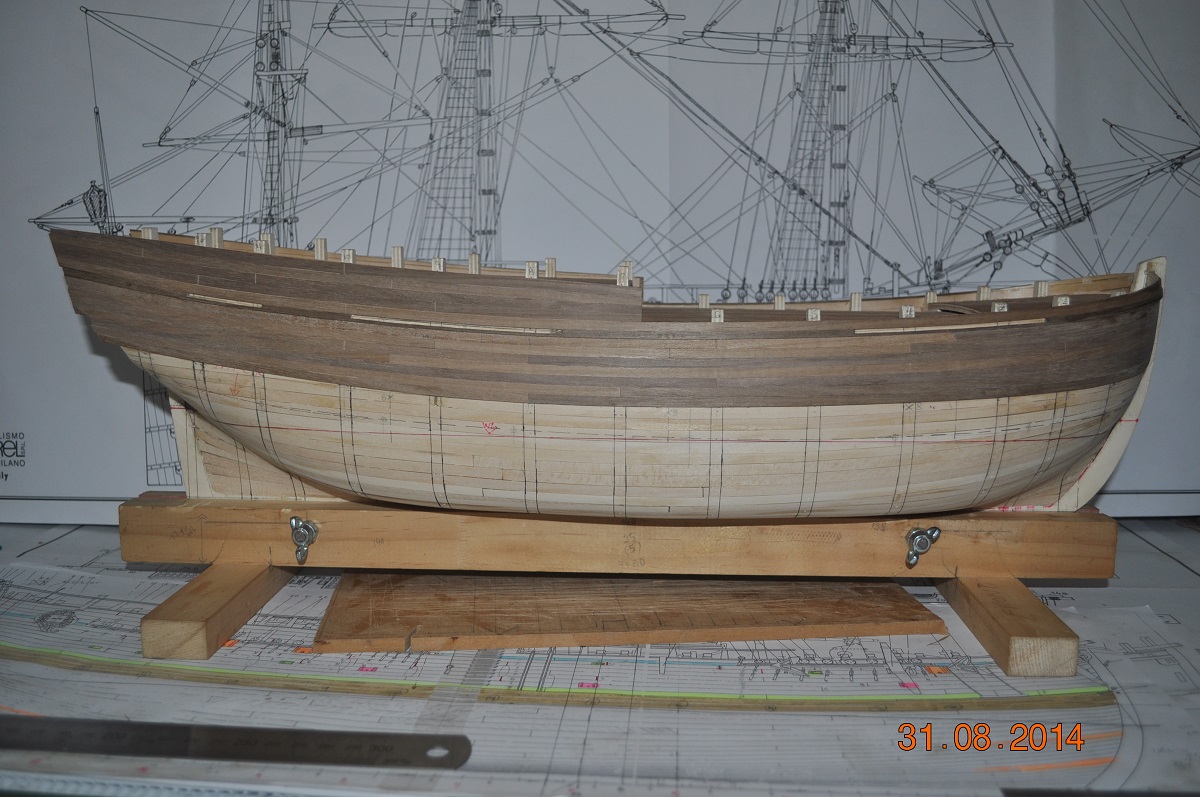
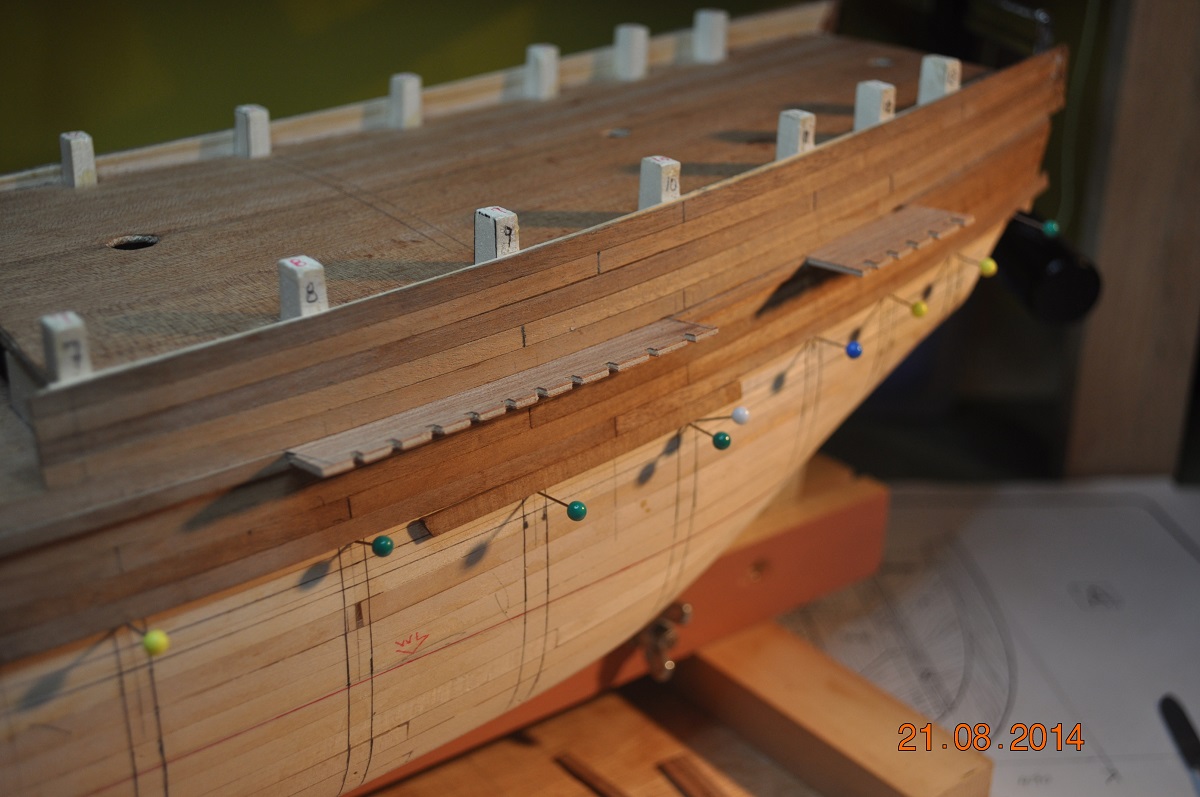
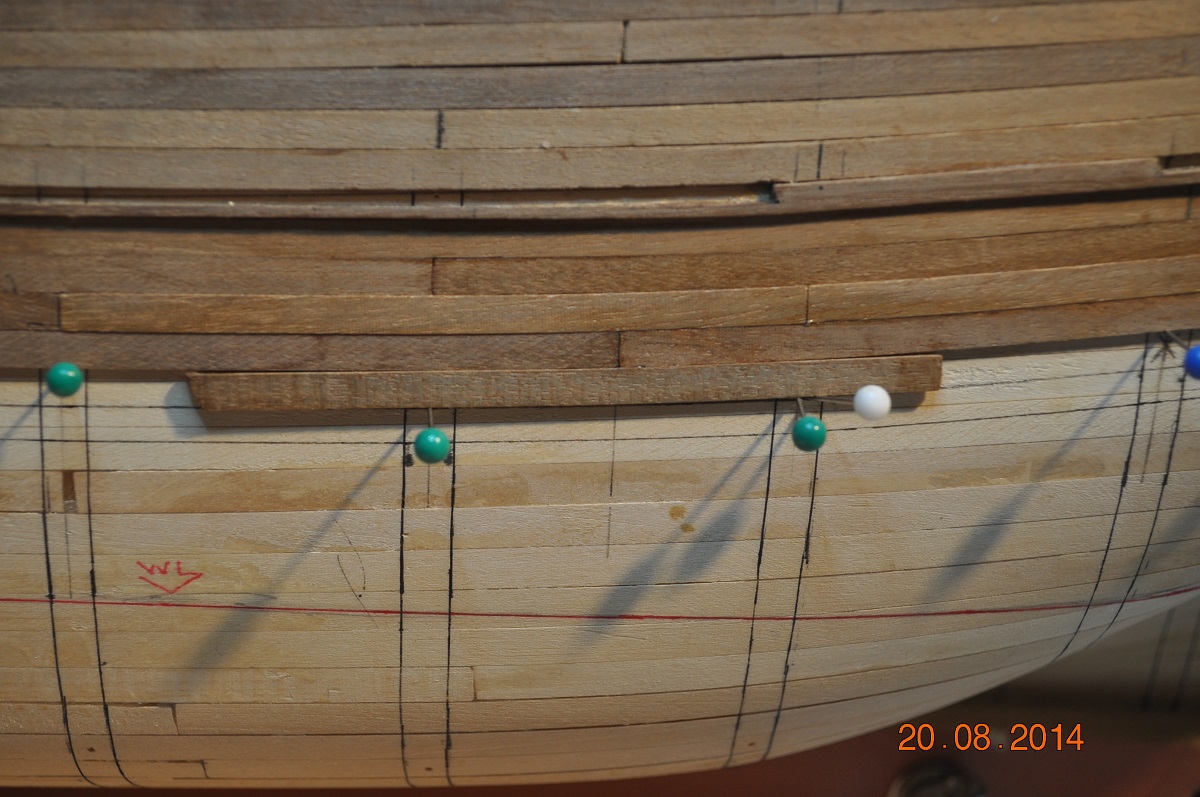
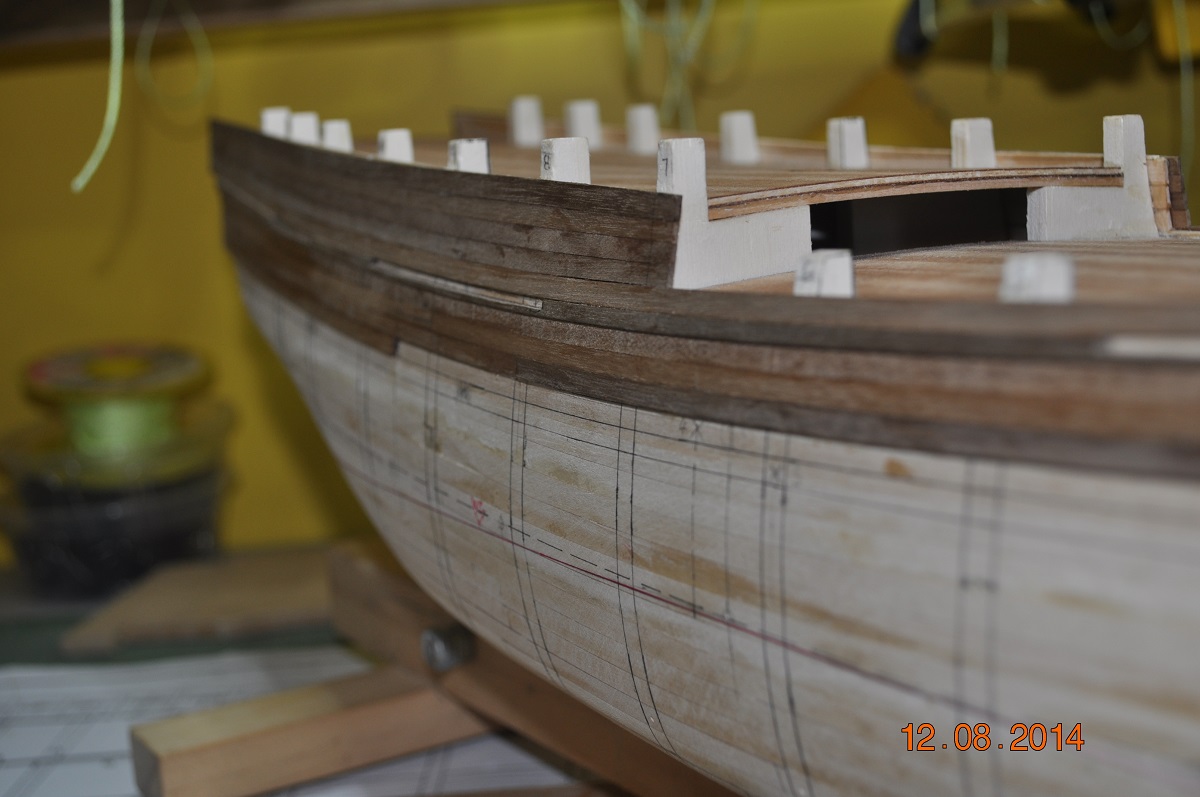
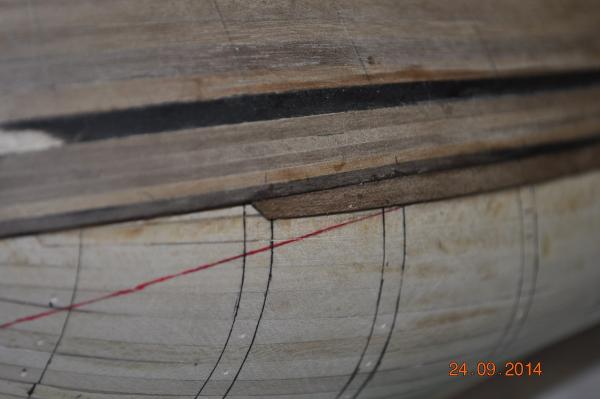
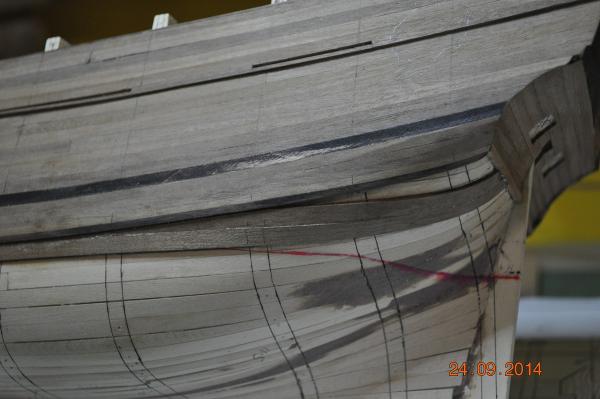
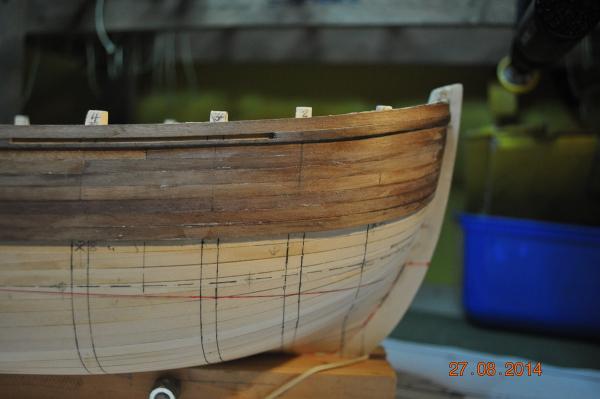
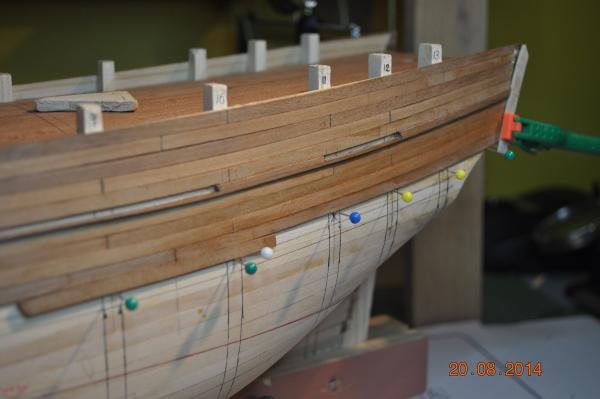
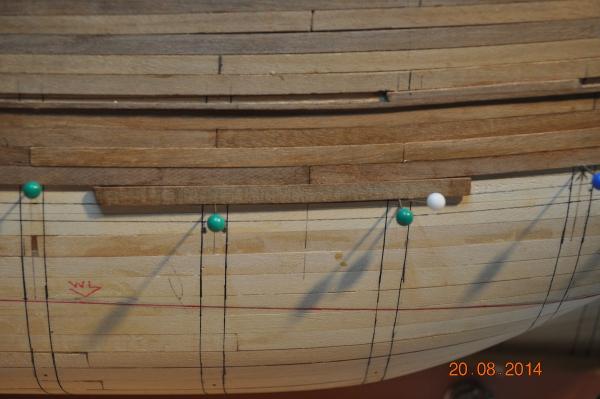
 I started the planking below the Wales. I am using the supplied planks form the kit 5.3mm x 1mm From what I have read, it is best to follow the natural lay of the plank on the frames or 1st layer of planks. I have read through the article "Simple Hull Planking Techniques for Beginners" from the MSW. Great article to explain what goes on in planking. So I created a graph of measurements from the wales to the keel. I'd have to say it is work in progress, because as soon as I laid a plank down naturally, I have dropped plank at the bow(see Pic blow). So recalc. the width of planks to the bow, and I may have more dropped planks ? Interesting how this goes. At the stern, I had kicked the Wales up so I didn't need to wrap them around the kick in the hull so much. The line matches the AOTS. When wrapping the first plank under the wale laterally, it was getting very tight to follow the wale(bend it). So I started it to lay naturally some 4 to 5 stations back from the stern. I could of(should of ?) gone for a Stealer ? I wasn't sure as the planks aren't fanning out. Anyhow, I elected to let the plank lay naturally and am adding a few planks in between the wales and the first plank. The Pic below shows what is going on. And I just realised I have forgot to taper the Stern and Bow from the bearding line to the edge to maintain a 5mm keel width. More shaping to do. Hope it will look ok when all done.
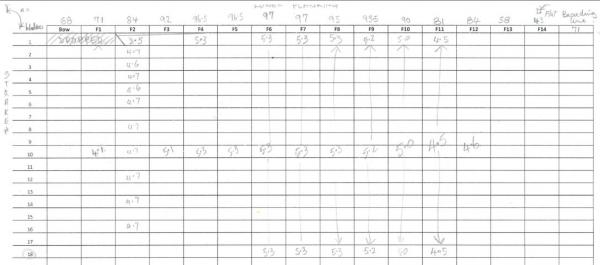
-
Great recreation Steve. Keep to good work up.
-
Hi Shipmates. This is a bit of a test actually to see if a pdf file I created - how it shows up in a log. And the file is a part listing of rigging from David Steels "The Elements and Practice of Rigging & Seamanship, 1794 by David Steel". It is actually the first few pages of a Table for 400 to 450 Ton Ships. What I wanted to do is work out how many blocks and sizes to order for my Endeavour build. I selected the 400/450 as closest. So if this works you might be able to open the pdf file and see the contents. If it does open: I recalculate from the imperial measurements to metric, then tabulate by block size the number per rigging location. I have done the Bowsprit and Fore-Mast so far. The Endeavour may not have all the rigging listed ? I haven't got that far so far. Makes an interesting activity while glue dries. Dave David Steel Rigging_v1.pdf
-
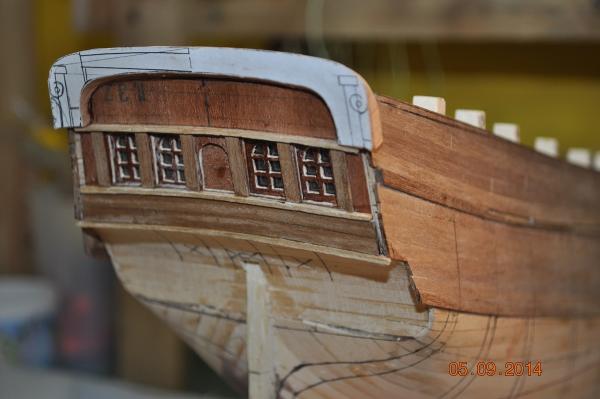
At the shipyard, been a bit slow on the actual boat. Fitted the lower planking on the Stern. Pic below. Have otherwise been working on the Stern window fitment piece. Added the top curved planking - fitted neatly across under the Taffrail. The fake central window needs a fix, the arch not central. Wales at the Stern. I've left the wales go past the stern planks(see Pic). I was going to trim/sand them back, however it not only(in view only) looks ok, but may of been practical to go this way to protect the stern edge ? Does this attract any comments shipmates ? Next is to plank below the wales to the keel. The thought of getting into this, well I keep finding other things to do, sidestepping the planking. I find myself constantly going through the build logs of the Endeavour builds, many of you guys are way ahead in the builds, great work.

-
Coming together very well Ron. Are the Binnacle and the Rudder Bridge kit pieces or did you make from scratch ? Dave
-
Port and Starboard Wales finally on. Took me while to decide how to make up the width with the timbers from the kit. The upper hull planking is 1.0mm thick. The wales: decided on a 1.5mm top plank, then 5 planks 2mm thick. So the wales ended up with 2 x 0.5mm steps over the top edges. I decided to blacken the edges of the top and bottom planks with the aim to give a sharp edge(hopefully not to cut in later on) to the change in colour/clear. Might do some planks across the stern next, before talking the lower hull planking. Slow going Cheers shipmates Dave


- 869 replies
-
- 11
-

-
Great looking ship there Greg. Looks good with the sun on her. Dave
-
Hi Greg, Just found your log, a went through every page. Very inspirational and fantastic photo diary. Lots of top ideas for us beginners to learn from, my Endeavour being a first time build, need all the ideas and tips as I can get I reckon. Keep the spirit(bundy ?) up.
-
More blocks, more blocks and more blocks hey Greg. When will it end ! Looking really great. Your Endeavour log will come in really handy when I get to the rigging etc. I'm plodding along on the planking. Keep the excellent work shipmate.
-
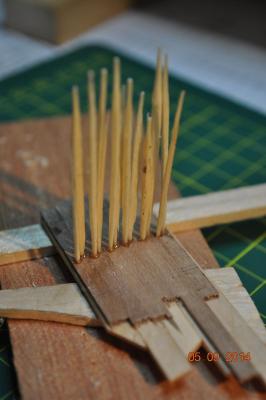
So I have been pondering on the Tree Nails on the hull - how to do them and to get a finish look I'd be happy with. Made a test set of planks and glued a row of sharpened plain match sticks in. 0.7mm holes. I'll see how they finish off when cut flush and test a few stains on the end grain to see how they come up.
-
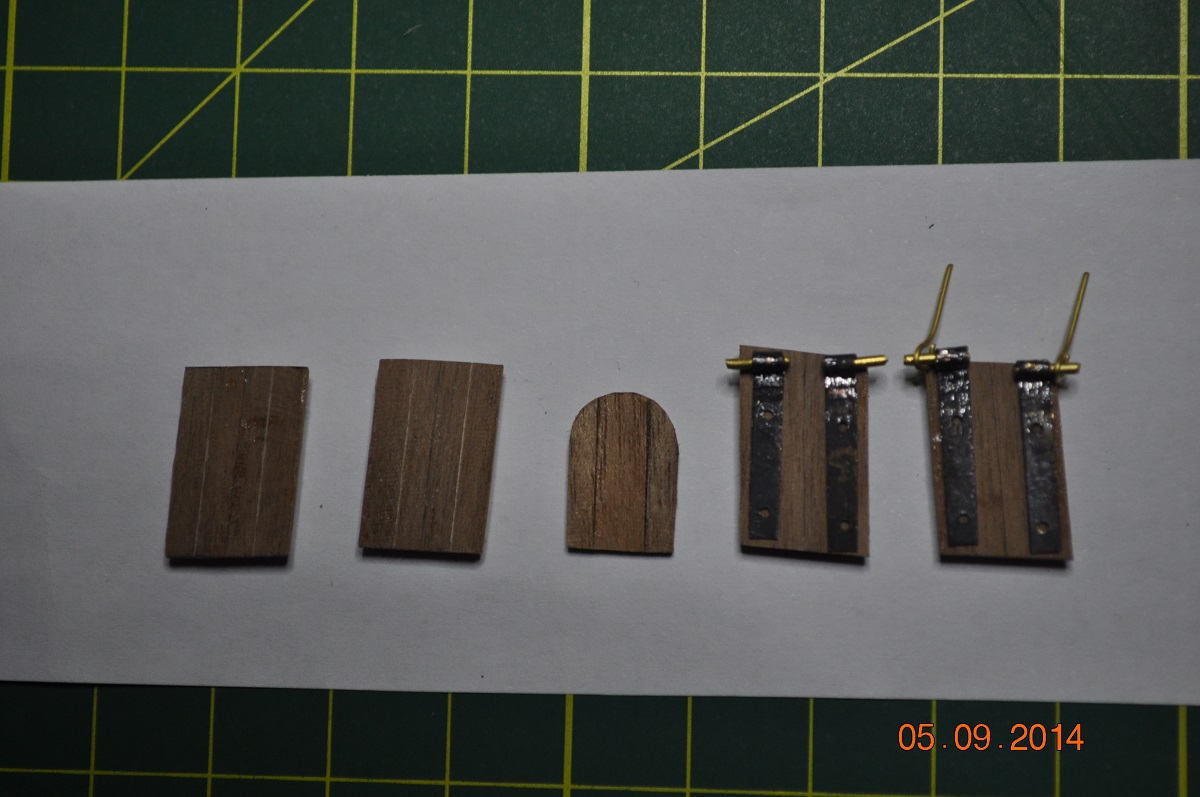
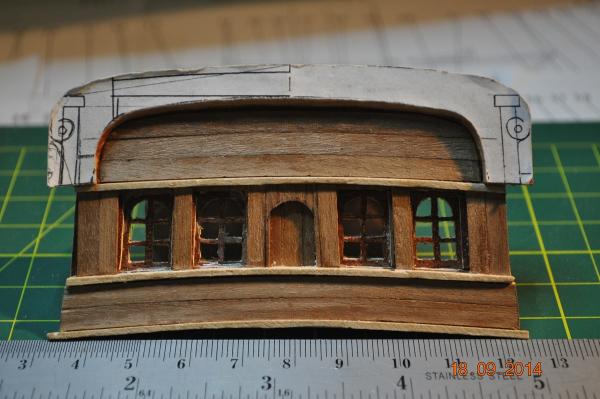
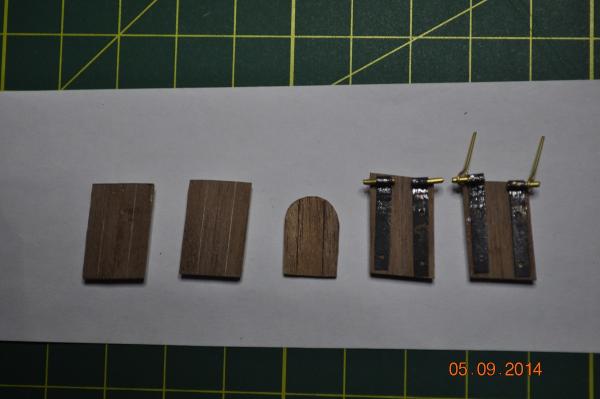
I wasn't at all happy with the kit stern detail. 5 metal windows - no way. Decided to build from scratch the stern including windows, Taffarel etc. based around the AOTS details. Progress so far in the picture - with a lot more to do(scrolls, figurines etc) I have made the 4 Dead-light window hatches as well(not fitted). I have made some hinges, but a wee bit too wide and plan to grid them narrower. Now that I put them on the hatch, looks like I'll be changing the pin angle?
-
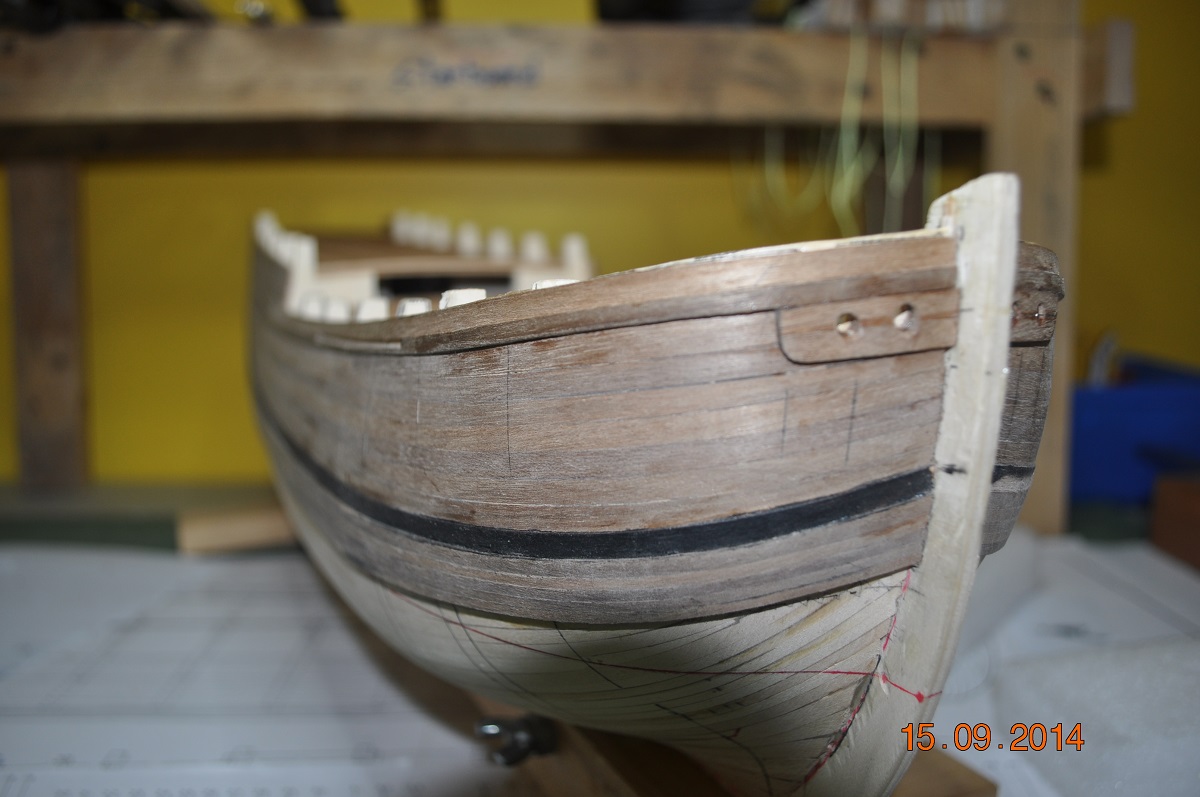
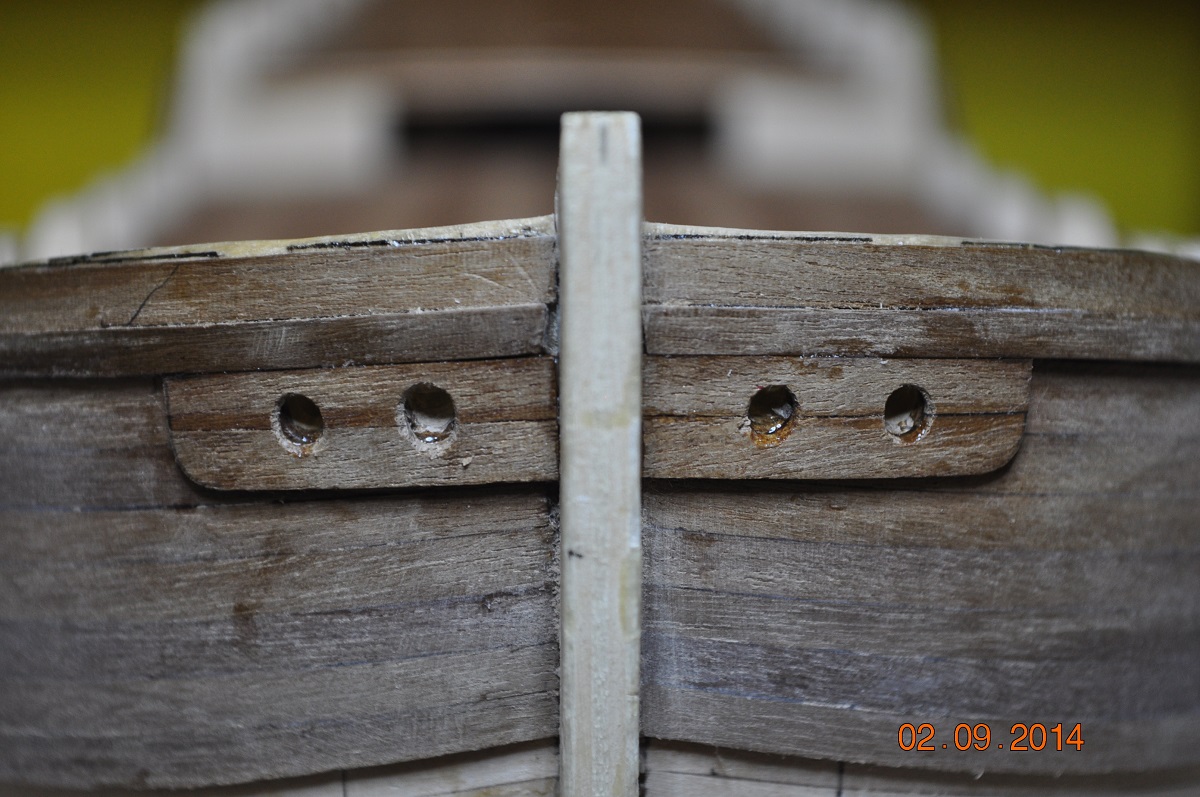
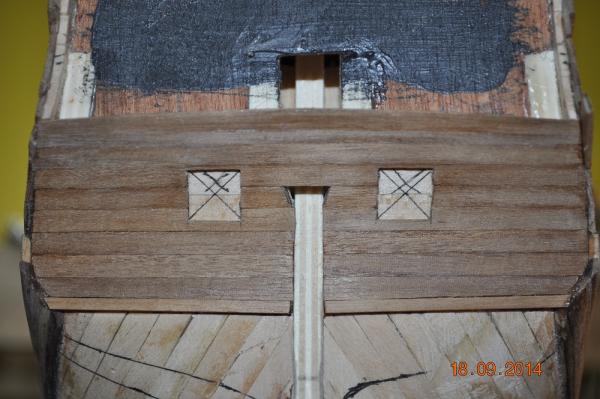
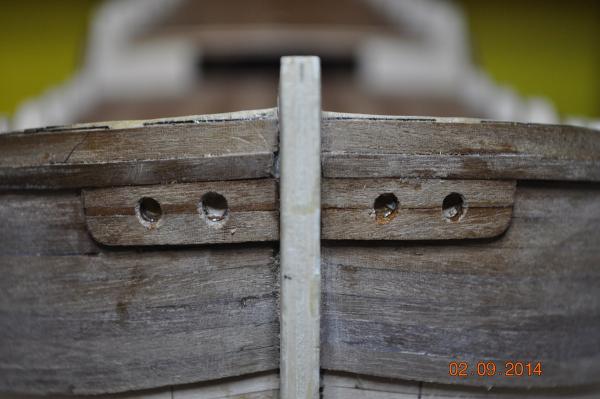
Hi Shipmates, Planking on hold for a bit, as my left shoulder muscles are traumatised heaps - lifting too much. So added the Naval Hoods at the bow. That pushed me a bit with the arm problem. I glued 2 planks, then bent to the bow shape, trimmed and glued in place. I am not sure if I brought the bow high enough up, as the holes only just make it through to the deck, even drilled up a ~ 30deg. angle. Too late to change - will live with it.
-
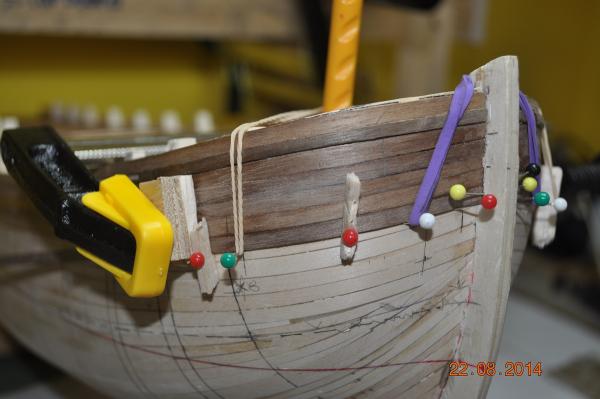
Thanks fellow shipmates; Udok, Mirabell61 & shopaholic. Trying my best to get those planks fitting snug. Wrapping and holding a plank in place around the bluff bow is a challenge. I actually did each as a 2 stage process. First pre bend the plank to the shape of the hull line, glue it from the stem to frame 2, let it dry(Picture below) Then glue the rest back to the rear. joint. Takes time eh !
-
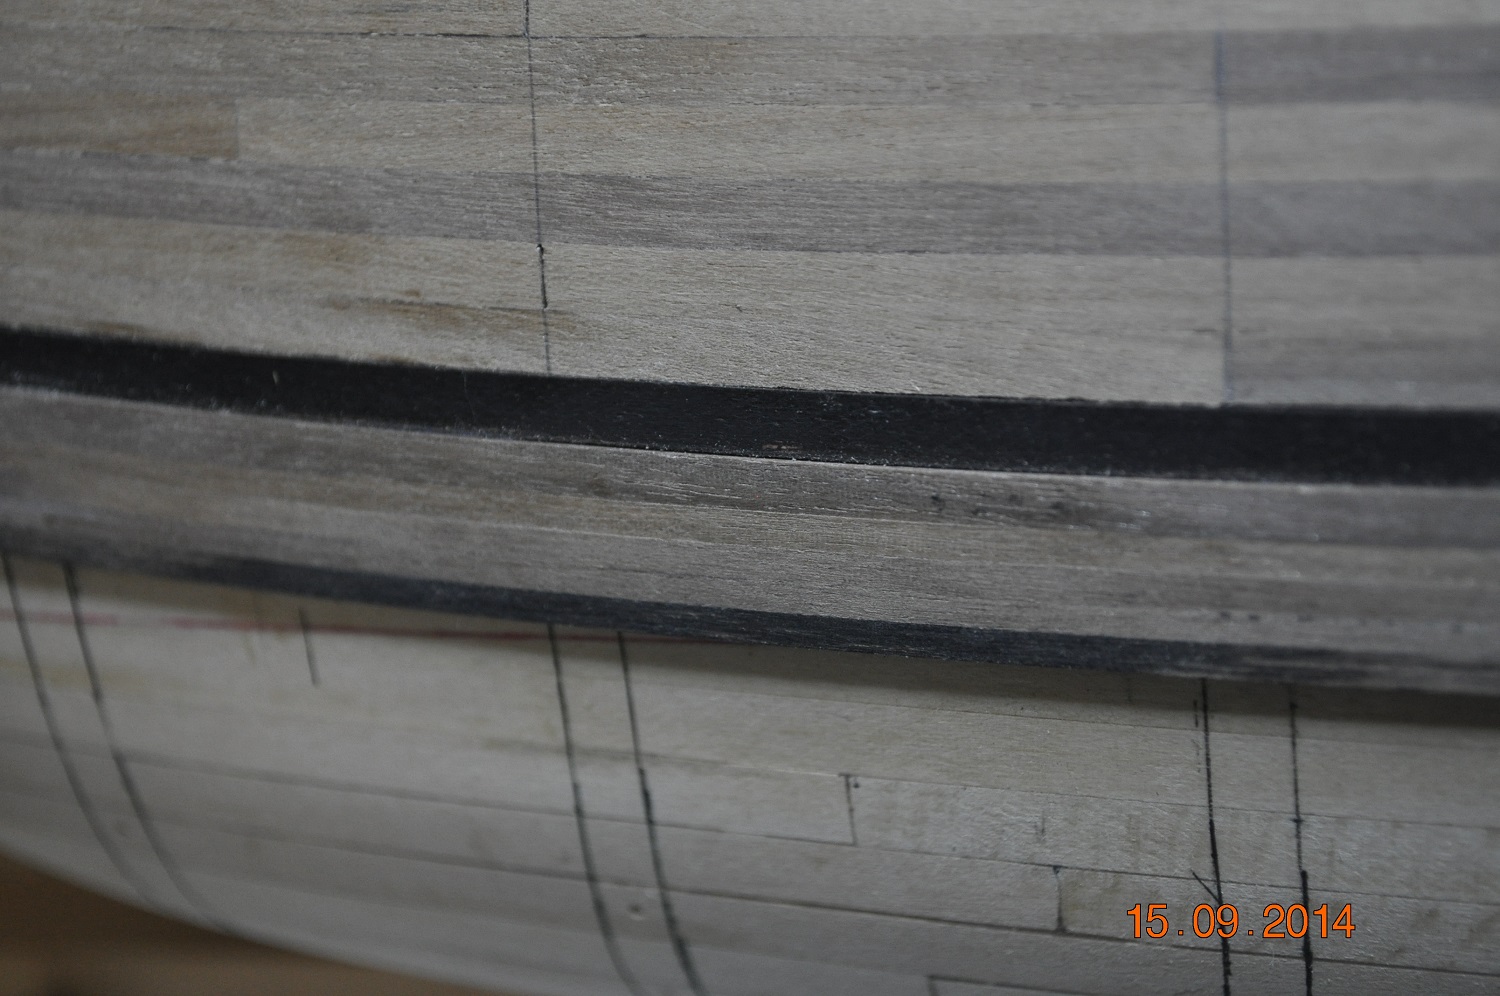
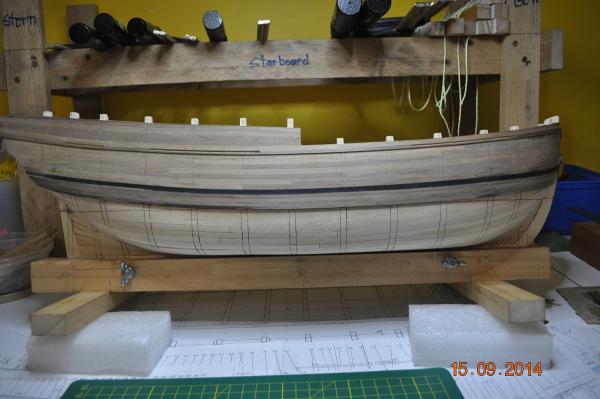
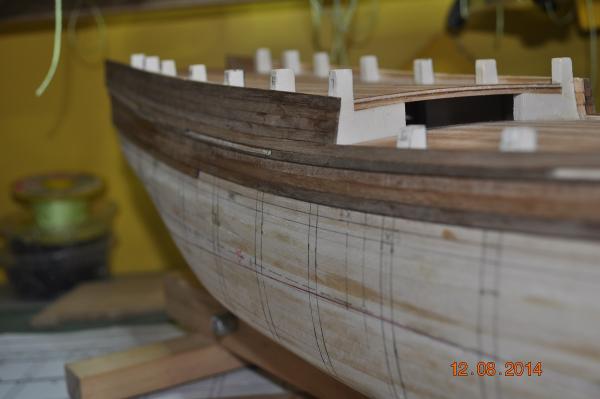
My boatyard has completed 2nd layer planking(1mm) down to the wales - both sides. Picture - close up of the Starboard Bow is before a slight sand. Picture - Starboard side after I lightly sanded the planking. Came up pretty good I thought considering. Didn't pay any attention to position of light or dark planks, random as they came out of the stock. I did physically break each plank run at least once(1), and other breaks I will score the plank to indicate a join. Hope that is sufficient to indicate the joints. Joints bit add hock > at the start went a bit haywire, then started a 4 way pattern. Next task is to add the wales ! 1 x 1.5mm thick plank(thickstuff above the wales) then a series of 2mm to make up a 12mm wide band for the wales. So this will provide a 2 steps on the top of the wale and 2mm to 1mm step below. I've decided my boatyard will follow the AOTS by Marquardt as close as it can.

-
Hi Ron, Nice colours and the deck coming up really good look. My build of the hull(Corel Kit) is a bit different, but in the end the 2nd planking is what shows up. just onto the top side planking and wales next. keep going !
-
I bet you're glad that's done and dusted Greg. Going to look great on the model.
-
Hi Greg, Fantastic workmanship. Your attention to details astounds me. Something for us all to aspire too. For me, back to the 2nd layer of planking on the Endeavour, very, very long way to go...
-
Looking good Udo. I am also building the Endeavour. I am onto the 2nd layer planks, above the wales. My first layer - had several planks that split when bending at the bow. I'll keep on eye on your log. Cheers Dave
-
As Greg stated the Parkin Book is a 2 Volume Set, Book and 15 Plans in a case. I was interested to see the details in Parkin's plans and inside the book. I confer with Greg, that the AotS is more detailed. As a resource, I hope it allows some good reading alongside the ship build.
-
A couple of members have asked whether this is my first wooden ship build. Honestly it is. However, I am a design draftsman, attention to detail is part of my trade. I also spent nearly 30 years sailing on many types of sailing vessels, fixing and modifying many of them. I have also completely rebuilt our family house - and yes it is out of timber. See where I get it from... !! Hi Pat, Yes I plan to add the tree nails and pins - good idea me think, all to lock in the 2nd plank layer to substrata. Have been reading up on how it make them tree nails, and install(wow something to test out for me - a while off to get something working). Thanks for the tip on the capping strips, I plan to construct new channels as the kit ones have too many holes along the length and from ply ? I prefer to us solid timber for these. or I could glue on a slightly thicker capping strip around the edges ? fake it ? something to mull over. Back to planking ! slow going down to the Wales. I think I should of started from the wales and went upwards. !
-
Research Materials: I managed to source and purchase a First Edition 1997 including all 15 plans of "H.M. Bark Endeavour: her Place in Australian History" by Ray Parkin. Thanks Pat for guiding me to find this book. Need to set some time aside to do some reading.
-
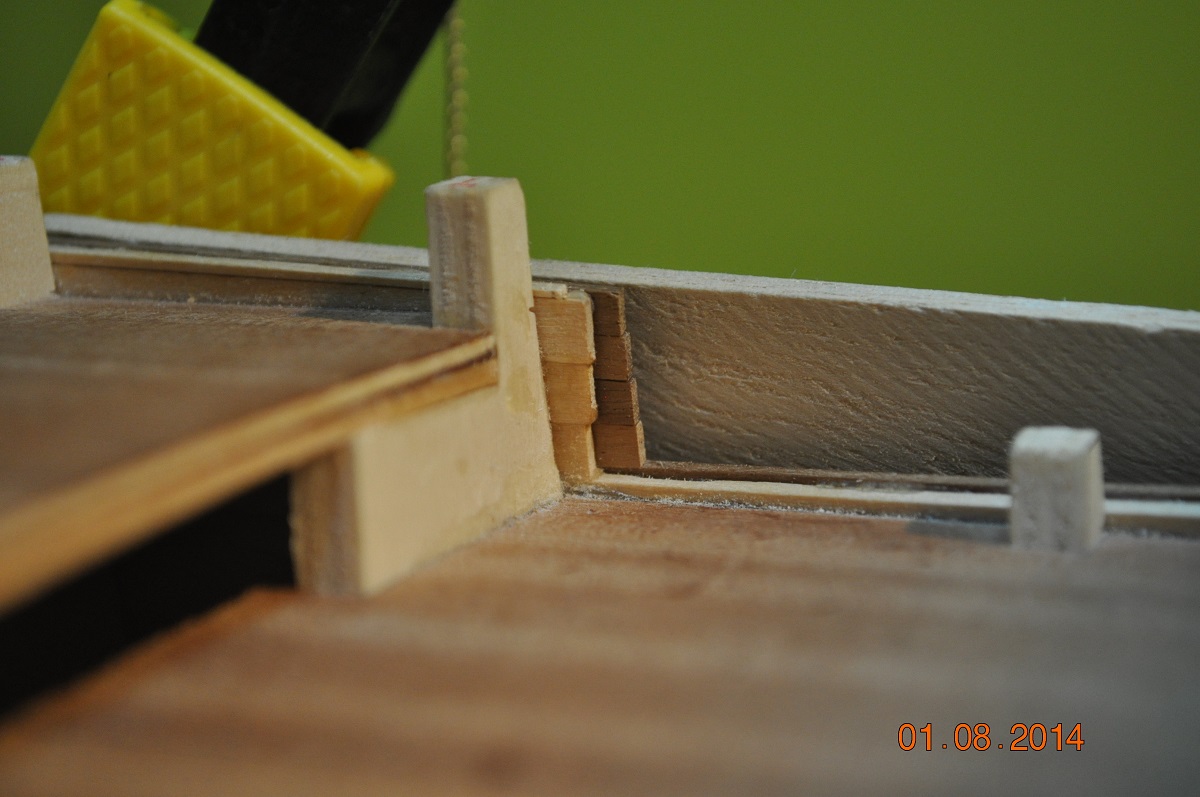
Planking update - this will seem to go on forever. Second layer: Now I have not done a lot of research to how to add plans onto a first layer. At the moment I am getting away with gluing and holding each on the side with drawing pins. On the bends is another matter and I either use my contraption(that help hold the cramps in place) or craps to hold the plank in place while the glue dries. Speaking of glue; I am using a 2 part Epoxy called "Compset 121 Gel". Gives me a 30min wet time then goes off semi-hard in 1 hour, but fully rigid in ~12 hours. I got it from a boat builder mate who uses it on full size boats. Works very well and the whole boat to date is glued/held with this glue. A pic. of how I use a small length of plank below a glued plank joint to get a good line for the next row below. Channel Slots: I created 3 slots in the Sheer Strake(rail) for the side channels. Picture below of how each will slide in. When glued each should hold really well. It works for me !!

- 869 replies
-
- 10
-
-
Thank you all for your kind words. I have had a good look and the logs on some of your builds, the details you guys go too ! Wow it encourages me to do great things. Planking 2nd Layer Pic: Progress to date, slow going on these, trying my best to get no gaps and no chines (ha, very hard). Thank god for sandpaper. An hour or so a day, usually enough to fit a plank and glue in place, leave 12hrs to dry. This is my first wooden model build. As a kid I remember assembling dozens of plastic model kits. Dabbled in some real size boat building somewhat during my yachting days(some time ago now). I'll hunt the Ray Parkin's book down. Thanks for that tip Pat.
-
Fixing errors: I extended the 2nd planking through to provide the cover to the Quarterdeck steps. I am going slow. I check between the kit plans(and build notes) and the detailed diagrams in Marquardt's Endeavour book. The more I delve into the Anatomy book, I realise I will be building the Endeavour to Marquardt's details. Much better than the Corel plans and basic details.

-
Planking 2nd layer: I was game and glued 5 planks to the aft deck side in one go. After this I only do 1 at a time. Too nerve racking wondering if the planks were compressed enough so no gaps ! Picture of a slot for the channels(3 off per side) in the Sheer Strake.