-
Posts
691 -
Joined
-
Last visited
Content Type
Profiles
Forums
Gallery
Events
Everything posted by DaveRow
-
Another update to the Shipyard. I decided to add the Mid Deck in as planned from the cut-out in each of the frames. This will all me the option to possibly mount a couple of Caronades on this deck ! The ply frames all look a little untidy atm. I'll sand them up, and apply a sealer to all inner surfaces. Next to make sure I've got all the work/cuts and surfaces done before the Top Deck goes on. Cheers Dave Row
-
The Shipyard has made a little progress. From the RMG Technical Drawing I created a Keel and frame sections onto paper at 1:60 scale. These were transferred(glued) onto Ply and in process of cutting out: - the Keel is cut from 7mm Marine ply. - the 11 frame sections cut from 4mm & 7mm Marine ply(6 mid ship frames from 7mm ply, 5 bow_stern frames from 4mm ply) - a few extra frame shapes cut for extra strength to the bow - still to develop the stern ply shapes. A lot cutting, sanding, and preparation for squaring all items up on the keel. More details to follow. Dave Row
-
Hello to all the Ship Builder's around the world. Time for me to drop anchor and build another ship "HMS Sirius" (approval from the Admiral has been gained) after nearly 5 years away from the Shipyard. This will be my first Scratch build of a wooden ship. The first being a Kit of the HMB Endeavour (build log on this site). The Sirius has held much interest to me, it is part of the Colonization story of Australia - my birth country. This ship is going to be somewhat interesting to construct. Details of the ship is lacking, but this does not deter me to take on the task. To my knowledge, no Kit or AOTS book is available. However, in saying this I have gathered material & information over the past 5 years to which I will refer to during the build process. The one defining piece of material (which I now have) is the "Berwick (1781) - Technical Drawing" ZAZ5405 held at the Royal Museums Greenwich. The plan, as I was informed: "As far as is known, ZAZ5405 is the only original drawing we hold of the ship you are planning to model". She was built in 1780 for trade with the Baltic States. She had a displacement of 511 tons. Originally, she was named the HMS Berwick, an armed store ship, but prior to its departure for NSW she underwent refitting to be a 6th rate at the Deptford Yard and in 1786 renamed the "Sirius" - after the major star in the Southern sky. She carried 16 guns. Sirius was selected to be the flag ship for the first Fleet (11 ships) - the fleet that carried the troops and convicts to Sydney. She was commanded by Captain John Hunter. The fleet left Portsmouth on 13 May 1787, and arrived at Port Jackson on 26 January 1788. Sirius carried most if not all of the first fleet's administrators including the Governor Arthur Phillip and Major Robert Ross commander of the marines responsible for guarding the convicts in the colony. On 19 March 1790 Sirius was wrecked on the reef at Norfolk Island while landing stores. With the settlement still on the brink of starvation this was a major catastrophe as it left the colonists with only one ship. So, into the shipyard I go. Dave Row
-
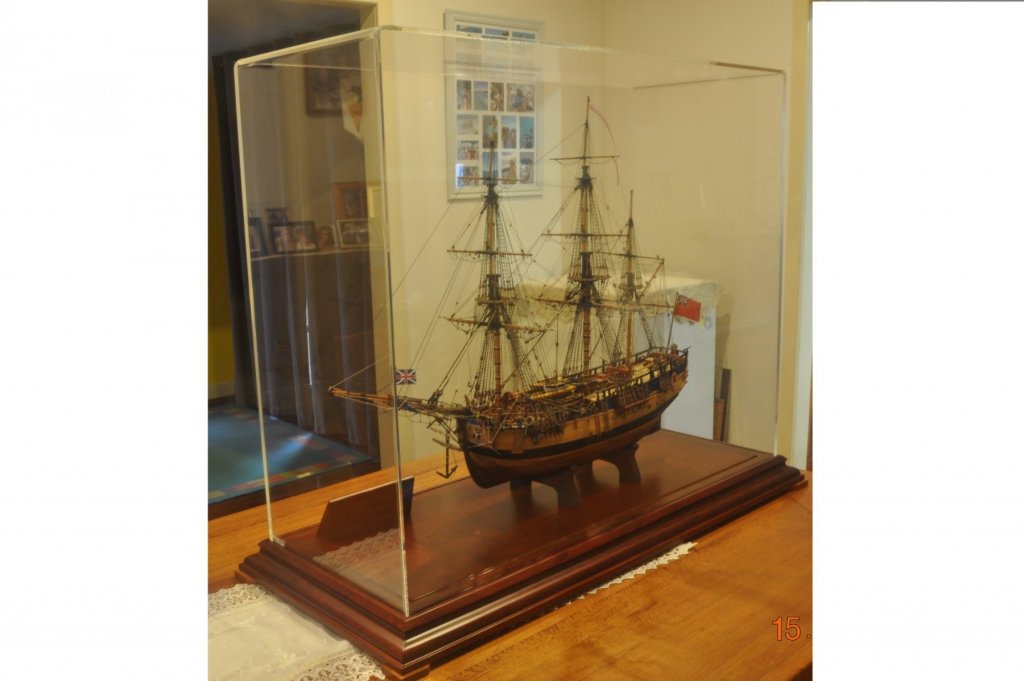
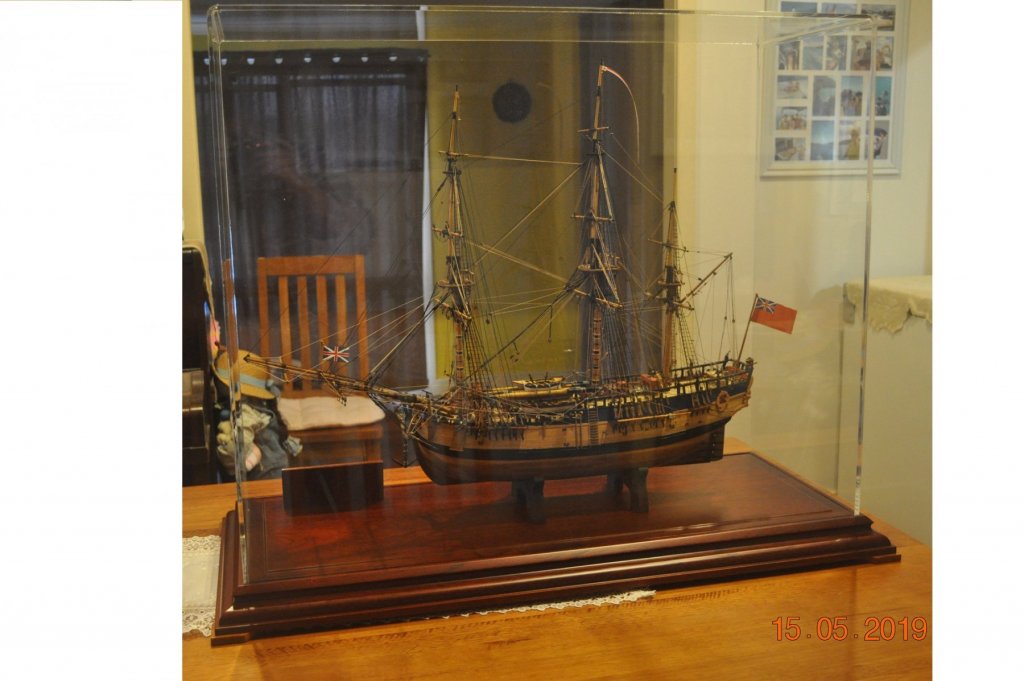
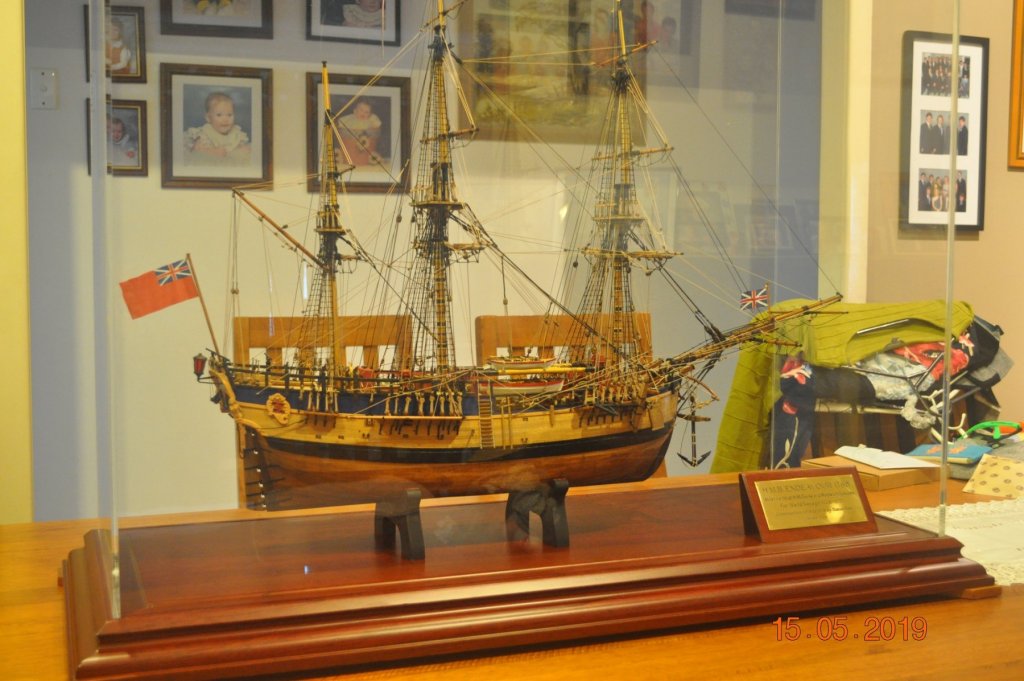
Shipyard Closing Down Well for a time being to refurbish the Entertainment Room for the Display Case to reside. And to explain, the Admiral, as my next project wants me to repaint a room and refurnish appropriately with a side bench_table for the display case to reside on. A few pictures of the Endeavour taking centre spot in the display case. Queensland Western Red Cedar Base with a Acrylic Case over. I learnt so, so much over the 5 year period constructing the H.M.B. Endeavour. I must say thanks to all those who followed the build, those who I/we shared information, and the general encouragement during the period. It would be a lonely life constructing a model without this fantastic Web Site "The NRG Model Ship World" and the members on it. To those other fellas currently constructing the H.M.B. Endeavour, good luck with the rest of build. Enjoy the final home run as I did. That's all Folks....
-
Hi John, Industrial Plastics Pty Ltd They were over at Murarrie, however moved end of January to new location. May of kept their phone no. 1300 465 888 projects@industrialplastics.com.au I emailed them for new location as well.
-

HMCSS Victoria 1855 by BANYAN - 1:72
DaveRow replied to BANYAN's topic in - Build logs for subjects built 1851 - 1900
Enjoy the UK holiday Pat. Well earned break from the shipyard.- 993 replies
-
- gun dispatch vessel
- victoria
-
(and 2 more)
Tagged with:
-
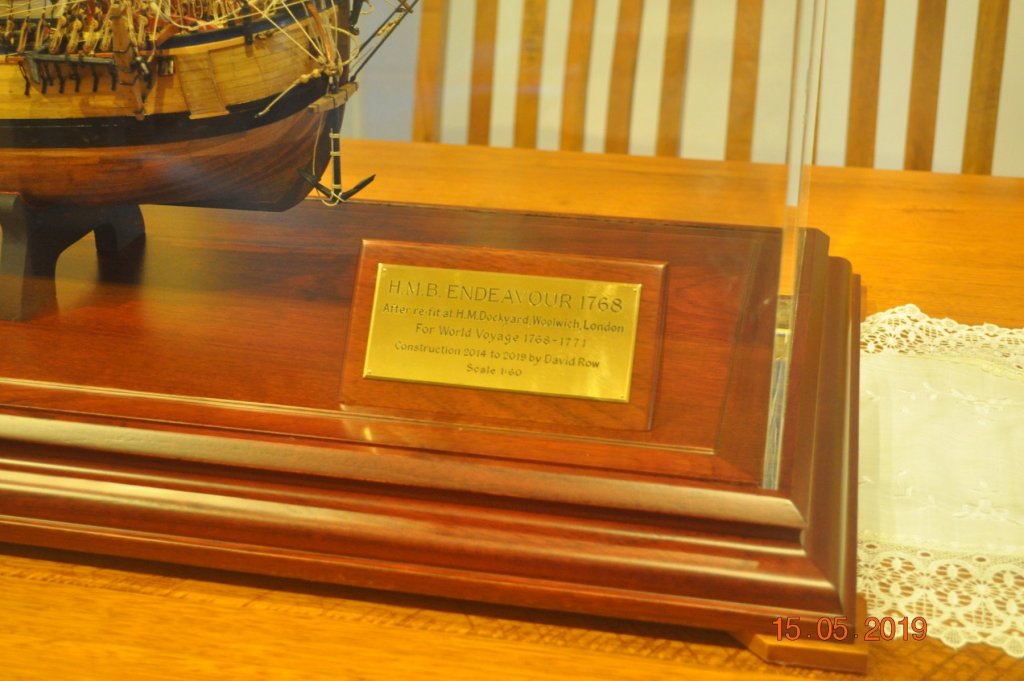
Shipyard Update Display Case - Base Below is picture of the base to mount the Endeavour on. I had a plaque engraved and located on the corner on the base. Next step to clean dust off the model, a final check over and Place the acrylic case over the top and lock it in place. Nearly finished.
-
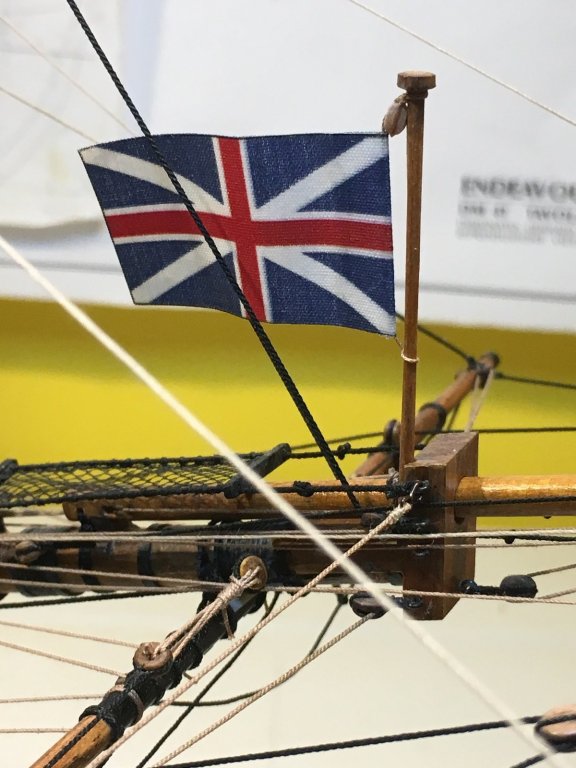
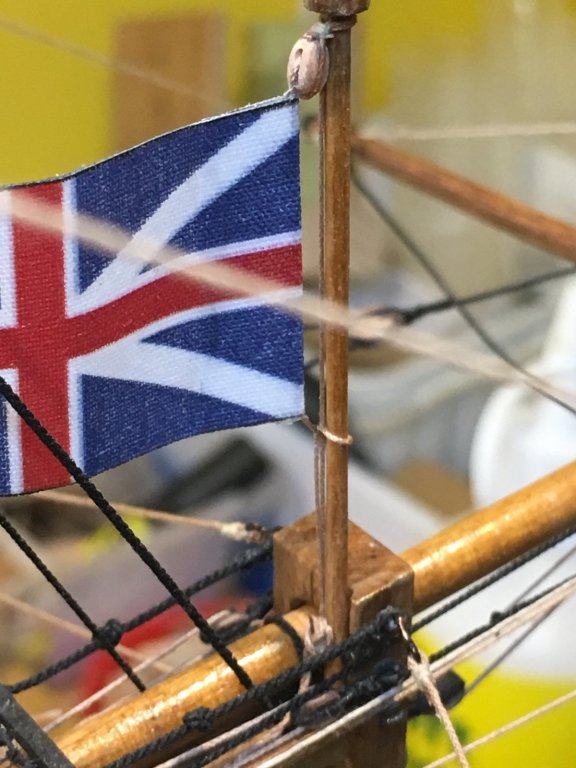
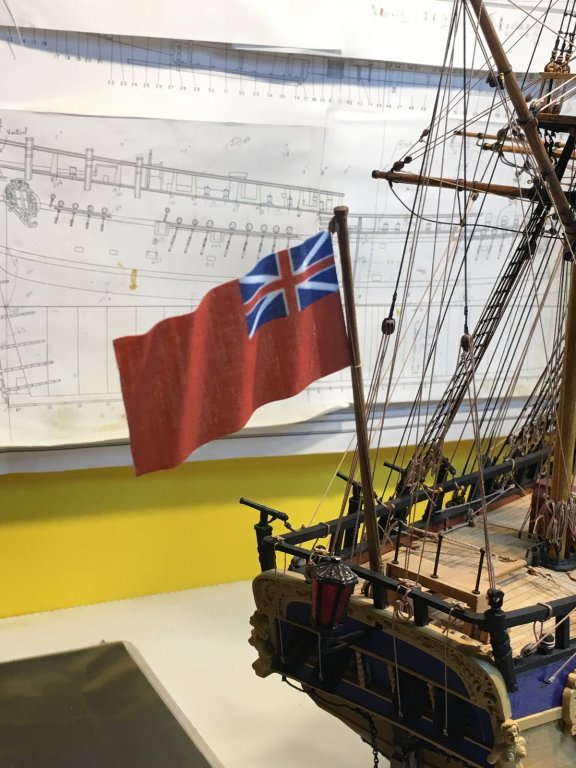
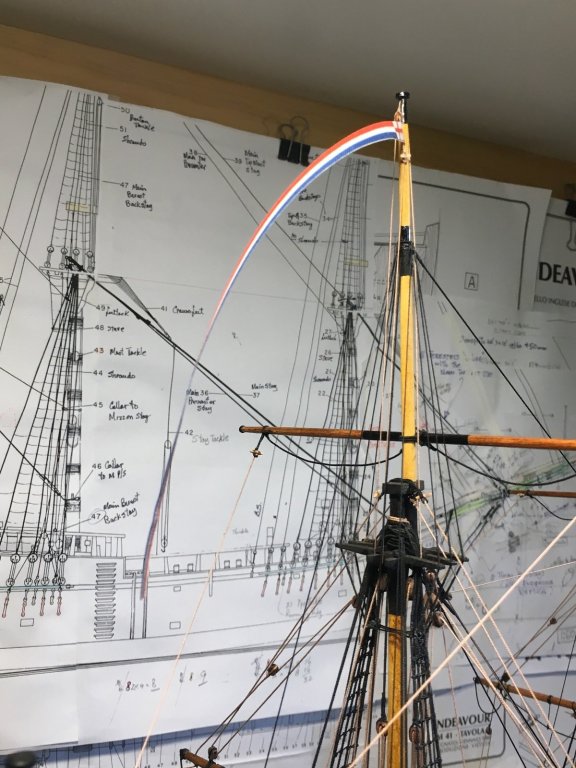
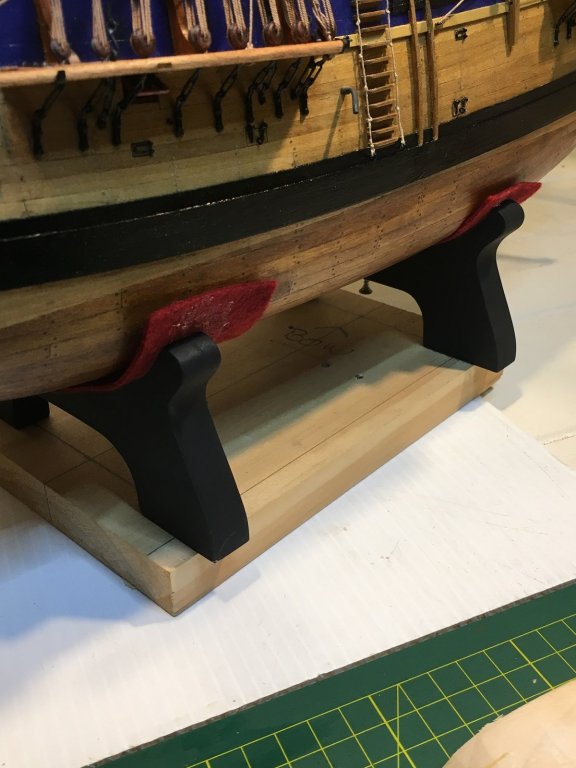
Shipyard Update Flags and Felt on the cradle frames Added Flags to the boat over the last couple of days. Put halyards on each. Bowsprit: Union Jack Stern: Red Ensign. On Main Top-Gallant Mast: Tri-Colour Pennant Felt added to the cradle frames: I am keeping the 2 x black cradle frames to mount on the Display Case Base. Still to trim the felt then screw these two frames into the keel. You can just see the screw in the middle of the stern frame. So close to finishing this build, I can feel the calm and solitude when she's done. Soon to be replaced with "what next".
-
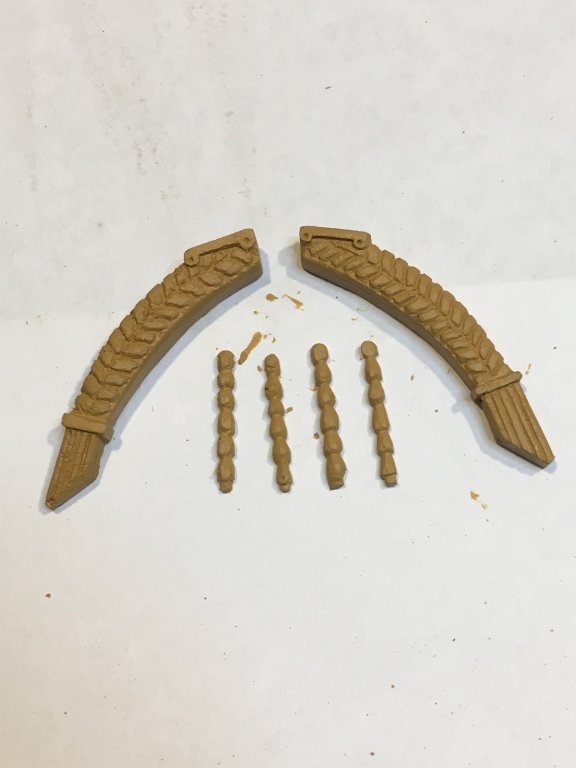
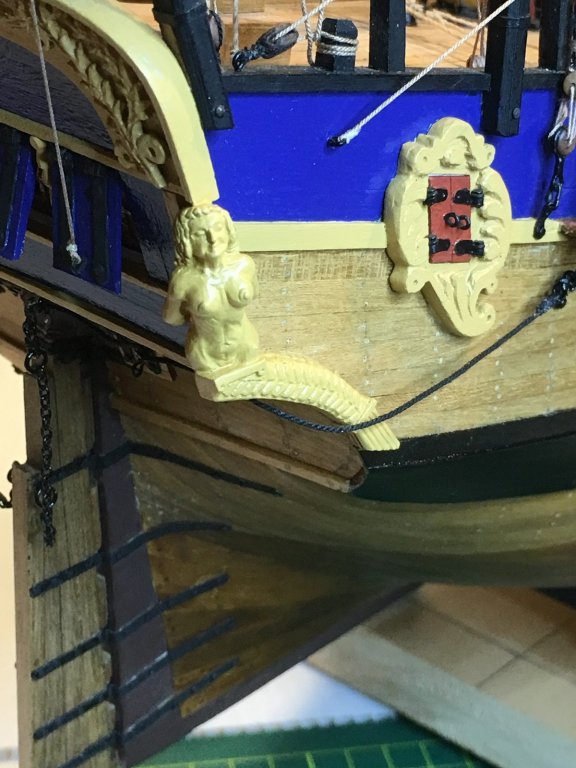
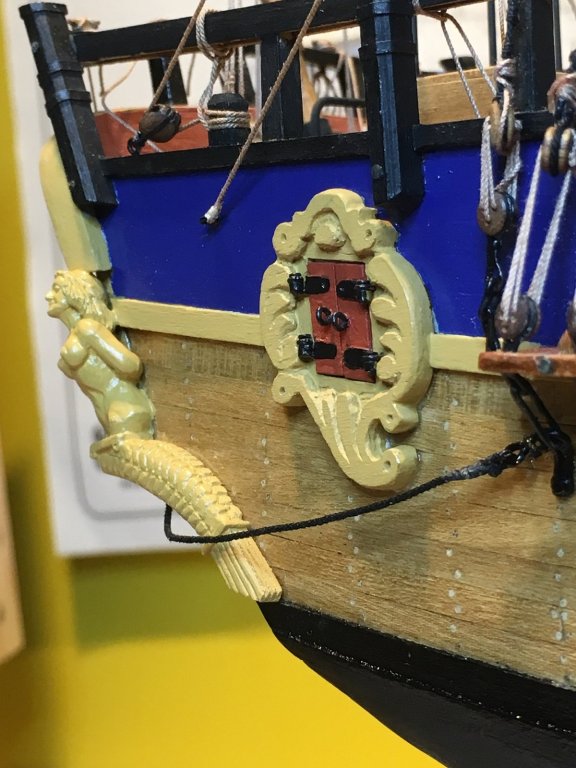
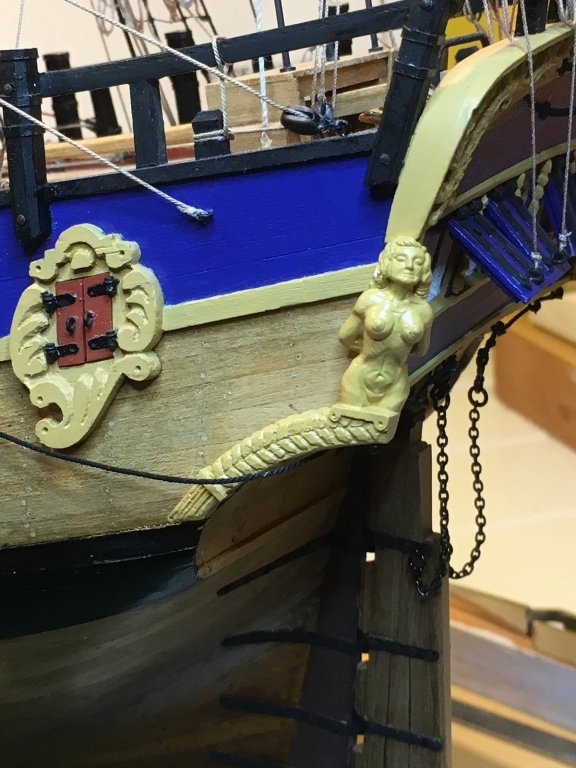
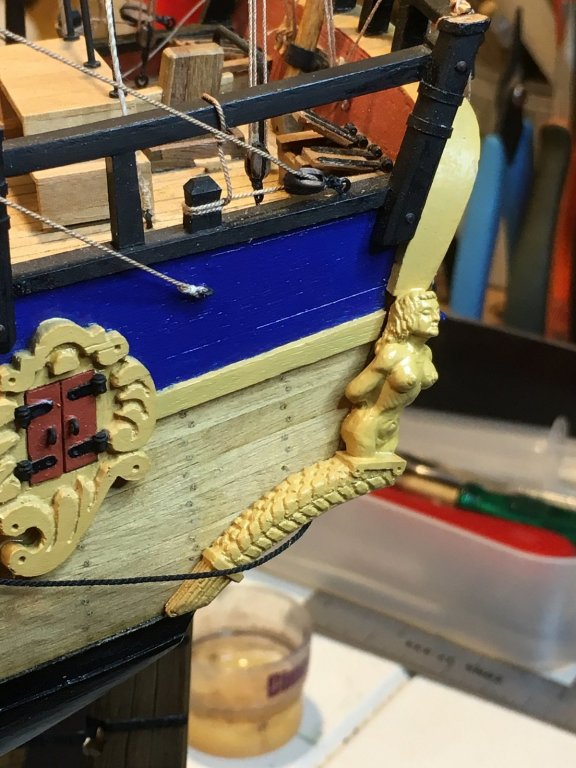
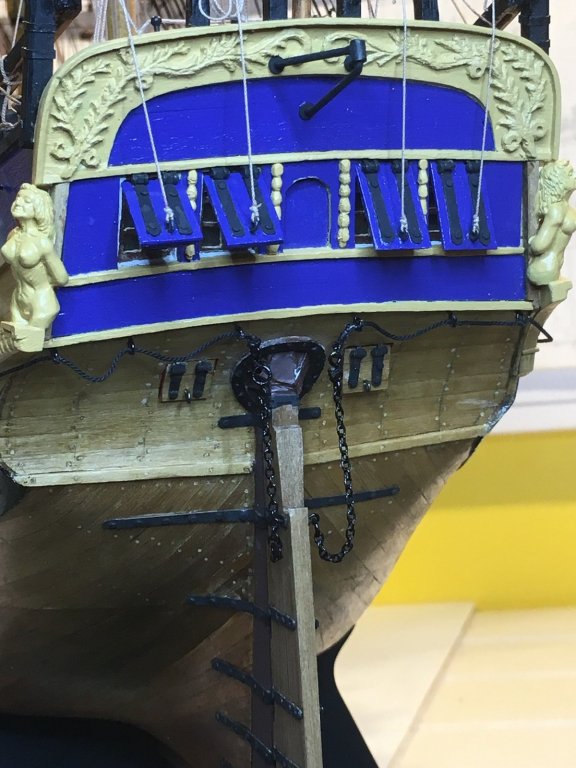
Shipyard Update Stern Figurines, Counter and Window Decorations. I have been procrastinating about how to do these for months(probably years). But the time came to make a decision, as my kit did not have these items included. After an attempt to engrave a figurine(failed) I bashed 2 cast figurines I had bought a couple of years ago(basically cut the legs off) I hand crafted from Pear Wood the Counter decorations under the figurines, and the Window Mullion Deco's. Many hours to decide on the overall shape and cut the patterns in. As an amateur at carving, fairly happy with the outcome. So how did they end up. Counter decorations for under the figurines, ready for fitting. Starboard Figurine Port Figurine Window Mullion decorations (4 off) Note: I do realise the Figurines are short in height and not ideal. The height restriction came about by the Taffarel being turned down either side(P&S) too far ?, thus shortening the height(length) for the Figurines to fit into. Now looking at it, I could of cut into the rail and raised the Figurines up. All a bit too late I'm afraid, as the shipyard is closing down on this build very soon. Not much to go now to finish off what started in April 2014 as a Birthday Present.
-
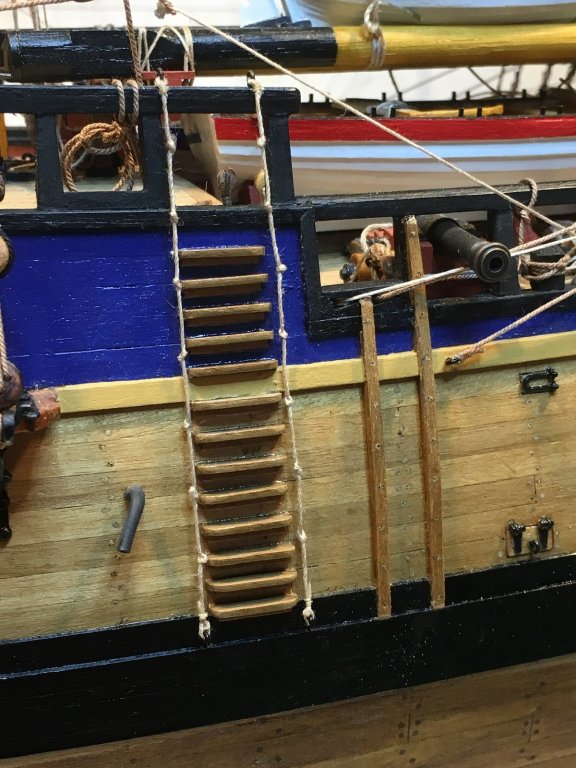
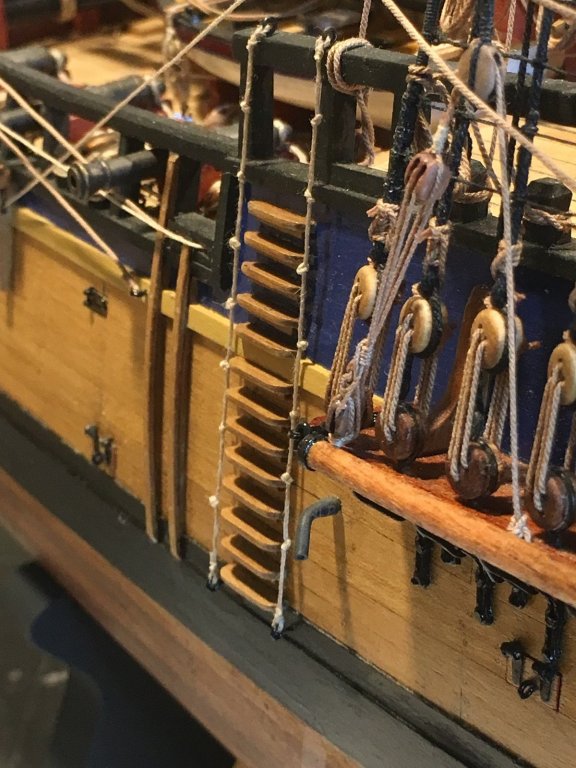
Shipyard Update Gangway Ropes Made the Gangway Ropes off line and tied to either side, as per pictures below. Starboard Ropes Above Port Ropes above
-
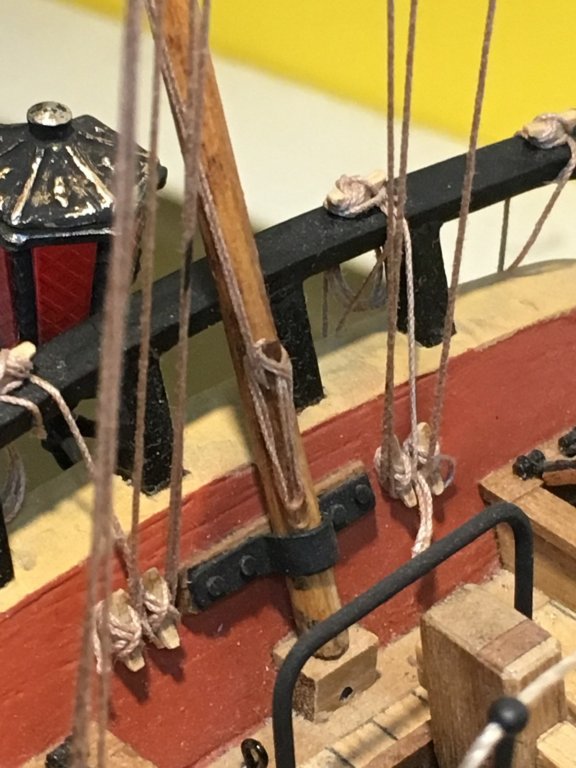
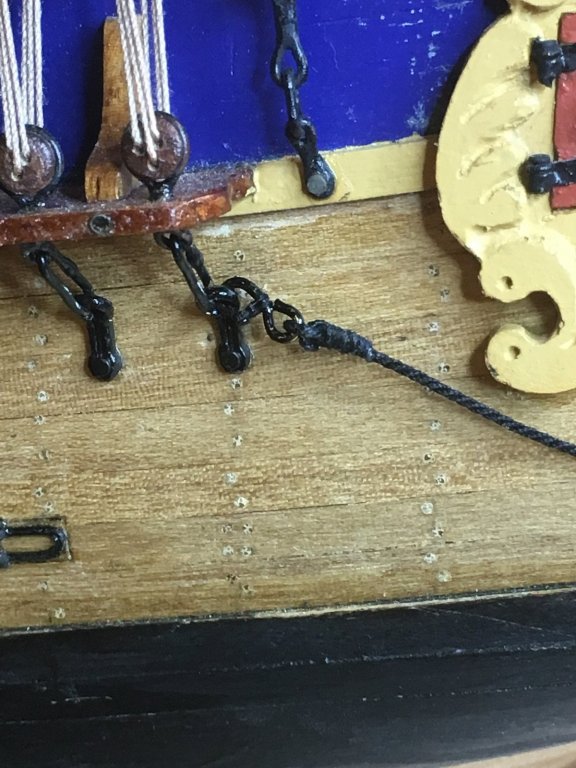
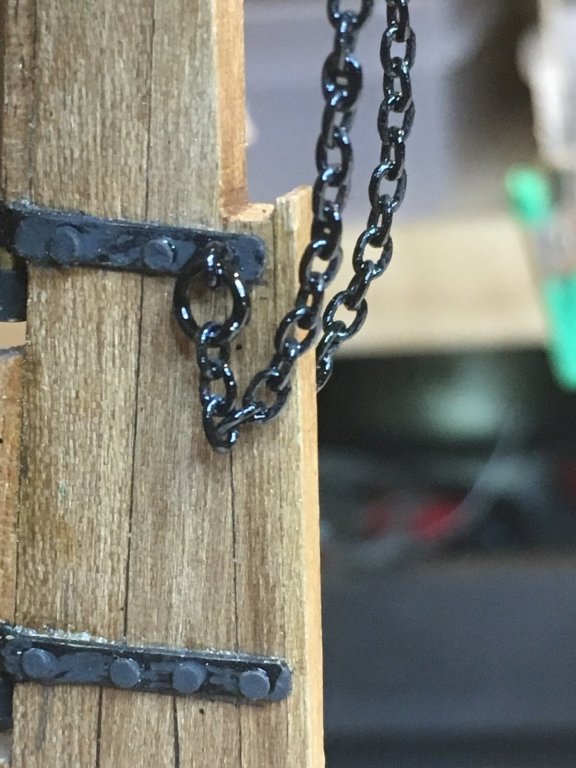
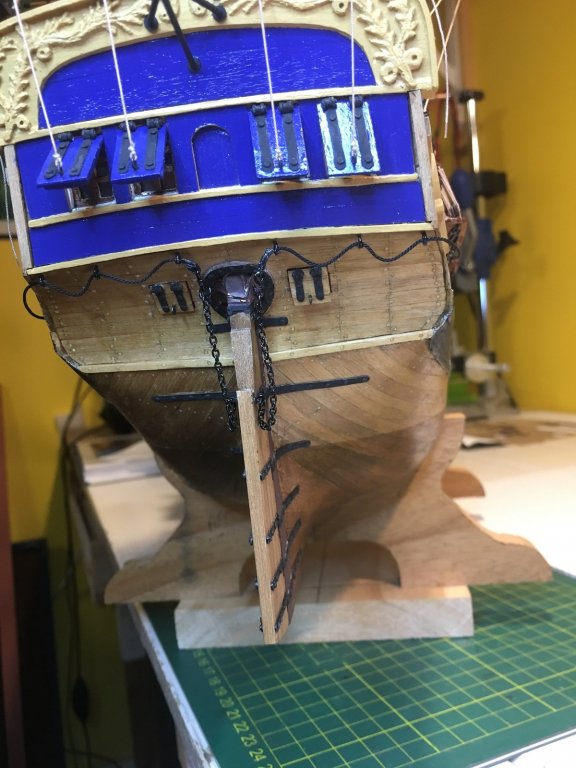
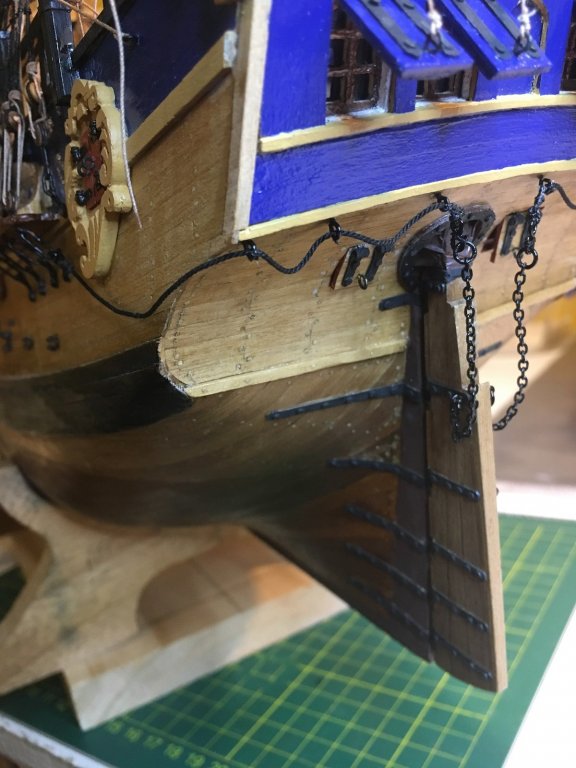
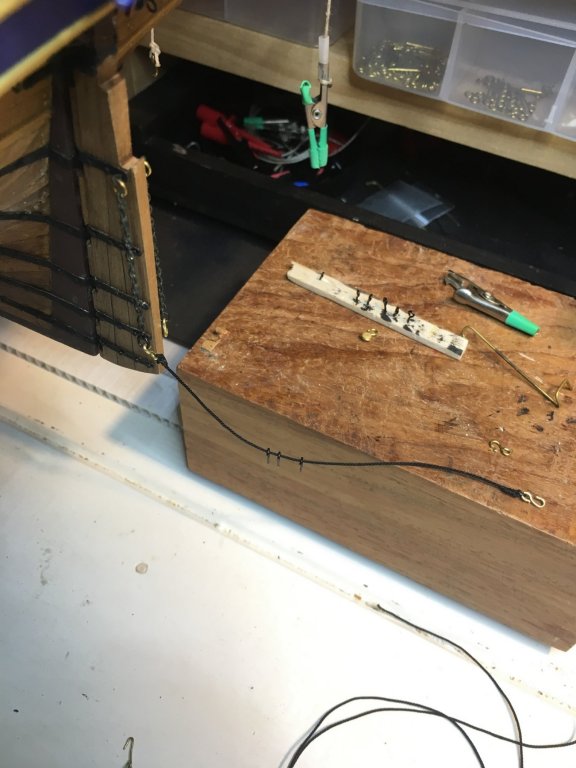
Back in the Shipyard Had a really nice trip to the USA. NYC, Washington, New Orleans and Aloha Island - Hawaii. So back to finish of this build. Added the Rudder Pendants according to James Lees “The Masting and Rigging of English Ships of War” Section on Rudder Pendants "Chains were shackled to eyes in the rudder, coming up each side of the rudder to under the transom. To the end of the chains large rings were fitted and into these rings were hooked the rudder pendants. These Pendants had a thimble in each end with the hooks set round the thimbles. The hooks were moused. The pendants were seized to eyes or hooks set under the transom – one by the side of the rudder post, one half way along, and one under the quarter gallery. The end of the pendants were seized to the aft end of the Mizzen channels." So below are a few pictures of the pendants attached to the stern. I wasn't sure if I should use a "Ships of War" detail on the Endeavour. But it all makes sense to have a means to secure and retrieve if the Rudder went adrift from the Gudgeon. I know the replica has a chain/rope from either side of the rudder, going up onto the transom top rail. This configuration I believe looks more realistic. I attached the end hook to the mizzen channel anchor point, assuming it was a solid point to take the load "if the rudder went astray" The chain with "that big ring" Another pic, the pendant running down the port side. Little prep shot laying out the pendant before attaching to the stern. One of the last things is do, is create the stern quarter figures. My kit didn't come with such figures, so scratch build.
-
Will be on shore leave in a few days. The Admiral and I are off to the Big Apple to watch some of the St Patrick's Day March on 16th March. Apparently it goes for 6hrs and we're not standing for that long in the 0 deg, but sure will be spectacular to watch. Afterwards, heading south(to warm up) via Washington, New Orleans, over the pacific via Hawaii too, what become famous through the lyrics from the band "Men At Work" The Land Down Under.
-
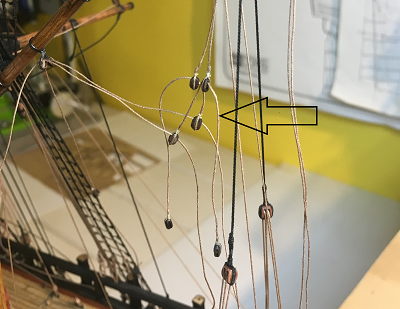
In the Shipyard Back onto the boat itself. Completed adding the Brails to the Gaff off the Mizzen. AoTS page 106 and 115 for ref. The ropes added were: Fancy Lines Port & Starboard(P&S) Throat Brails P&S Middle Brails P&S Peak Brails P&S A short rope(splitter) to the end of the Fancy line. Above: All the ends Brail ends pulled up to their respective 3mm blocks. The Fancy line connects to the Middle & Throat Brails. This is achieved via a short line(with a block each end) > arrow pointing to the rope, which splits the Fancy line in 2, with each end block for the respective Middle and Throat Brails. What mouth full, and I hope a reader understand how it all works, as it took me a while to work it all out. The Middle Brail comes down through a block seized on the back Mizzen shroud, and run down to cleat on the shroud. The Peak Brail I ran down through a block and tied off on rail. The Fancy lines(P&S) run up through the end of the Gaff and down to tie off on stern cleats. Another item ticked off.
-

HMCSS Victoria 1855 by BANYAN - 1:72
DaveRow replied to BANYAN's topic in - Build logs for subjects built 1851 - 1900
Hi Pat, No idea about the funnel question you posted. The rigging screws for that scale come up great. Keep up the good work...- 993 replies
-
- gun dispatch vessel
- victoria
-
(and 2 more)
Tagged with:
-
Back in the Shipyard Not much has ben happening of late on the actual Boat. I finally sourced more small link chain today to finish off the Anchors on either side of the Bow. However the Display Case is taking shape. A good mate of mine(you need a good mate like this) started on the base for the Display Case. Below are some pictures of the base under construction. Above: The base is made of several pieces of timbers. The large middle piece is 1 solid piece of 32mm thick, raised up 3mm to an outer rectangular piece to make up the inner width of the case. A 20mm deep "slot" has been routed on the outer edge for the case to sit over. Below the case is in the slot. Above: An outer stepped section(2 pieces glued together) will be glued in the position shown around the base, to cover the slot, base and bottom of the Acrylic Case. But not before the next step below is done. Above: We wanted the Case to be held in position to stop it being lifted up. The above sketch shows 1 of 4 bolts which run in a tapped epoxy plug, for the bolt to turn in. Each is accessible from underneath the base in a slot cut into the side of the main block of timber. When all assembled, no-one will be the wiser to all the work that went into the base(by my good mate Rhys) Smick eh!
About us
Modelshipworld - Advancing Ship Modeling through Research
SSL Secured
Your security is important for us so this Website is SSL-Secured
NRG Mailing Address
Nautical Research Guild
237 South Lincoln Street
Westmont IL, 60559-1917
Model Ship World ® and the MSW logo are Registered Trademarks, and belong to the Nautical Research Guild (United States Patent and Trademark Office: No. 6,929,264 & No. 6,929,274, registered Dec. 20, 2022)
Helpful Links
About the NRG
If you enjoy building ship models that are historically accurate as well as beautiful, then The Nautical Research Guild (NRG) is just right for you.
The Guild is a non-profit educational organization whose mission is to “Advance Ship Modeling Through Research”. We provide support to our members in their efforts to raise the quality of their model ships.
The Nautical Research Guild has published our world-renowned quarterly magazine, The Nautical Research Journal, since 1955. The pages of the Journal are full of articles by accomplished ship modelers who show you how they create those exquisite details on their models, and by maritime historians who show you the correct details to build. The Journal is available in both print and digital editions. Go to the NRG web site (www.thenrg.org) to download a complimentary digital copy of the Journal. The NRG also publishes plan sets, books and compilations of back issues of the Journal and the former Ships in Scale and Model Ship Builder magazines.


.jpg.a5d47d37bfe72a0d55d3c60ab01f7fe4.jpg)
