JSGerson
-
Posts
2,637 -
Joined
-
Last visited
Content Type
Profiles
Forums
Gallery
Events
Everything posted by JSGerson
-
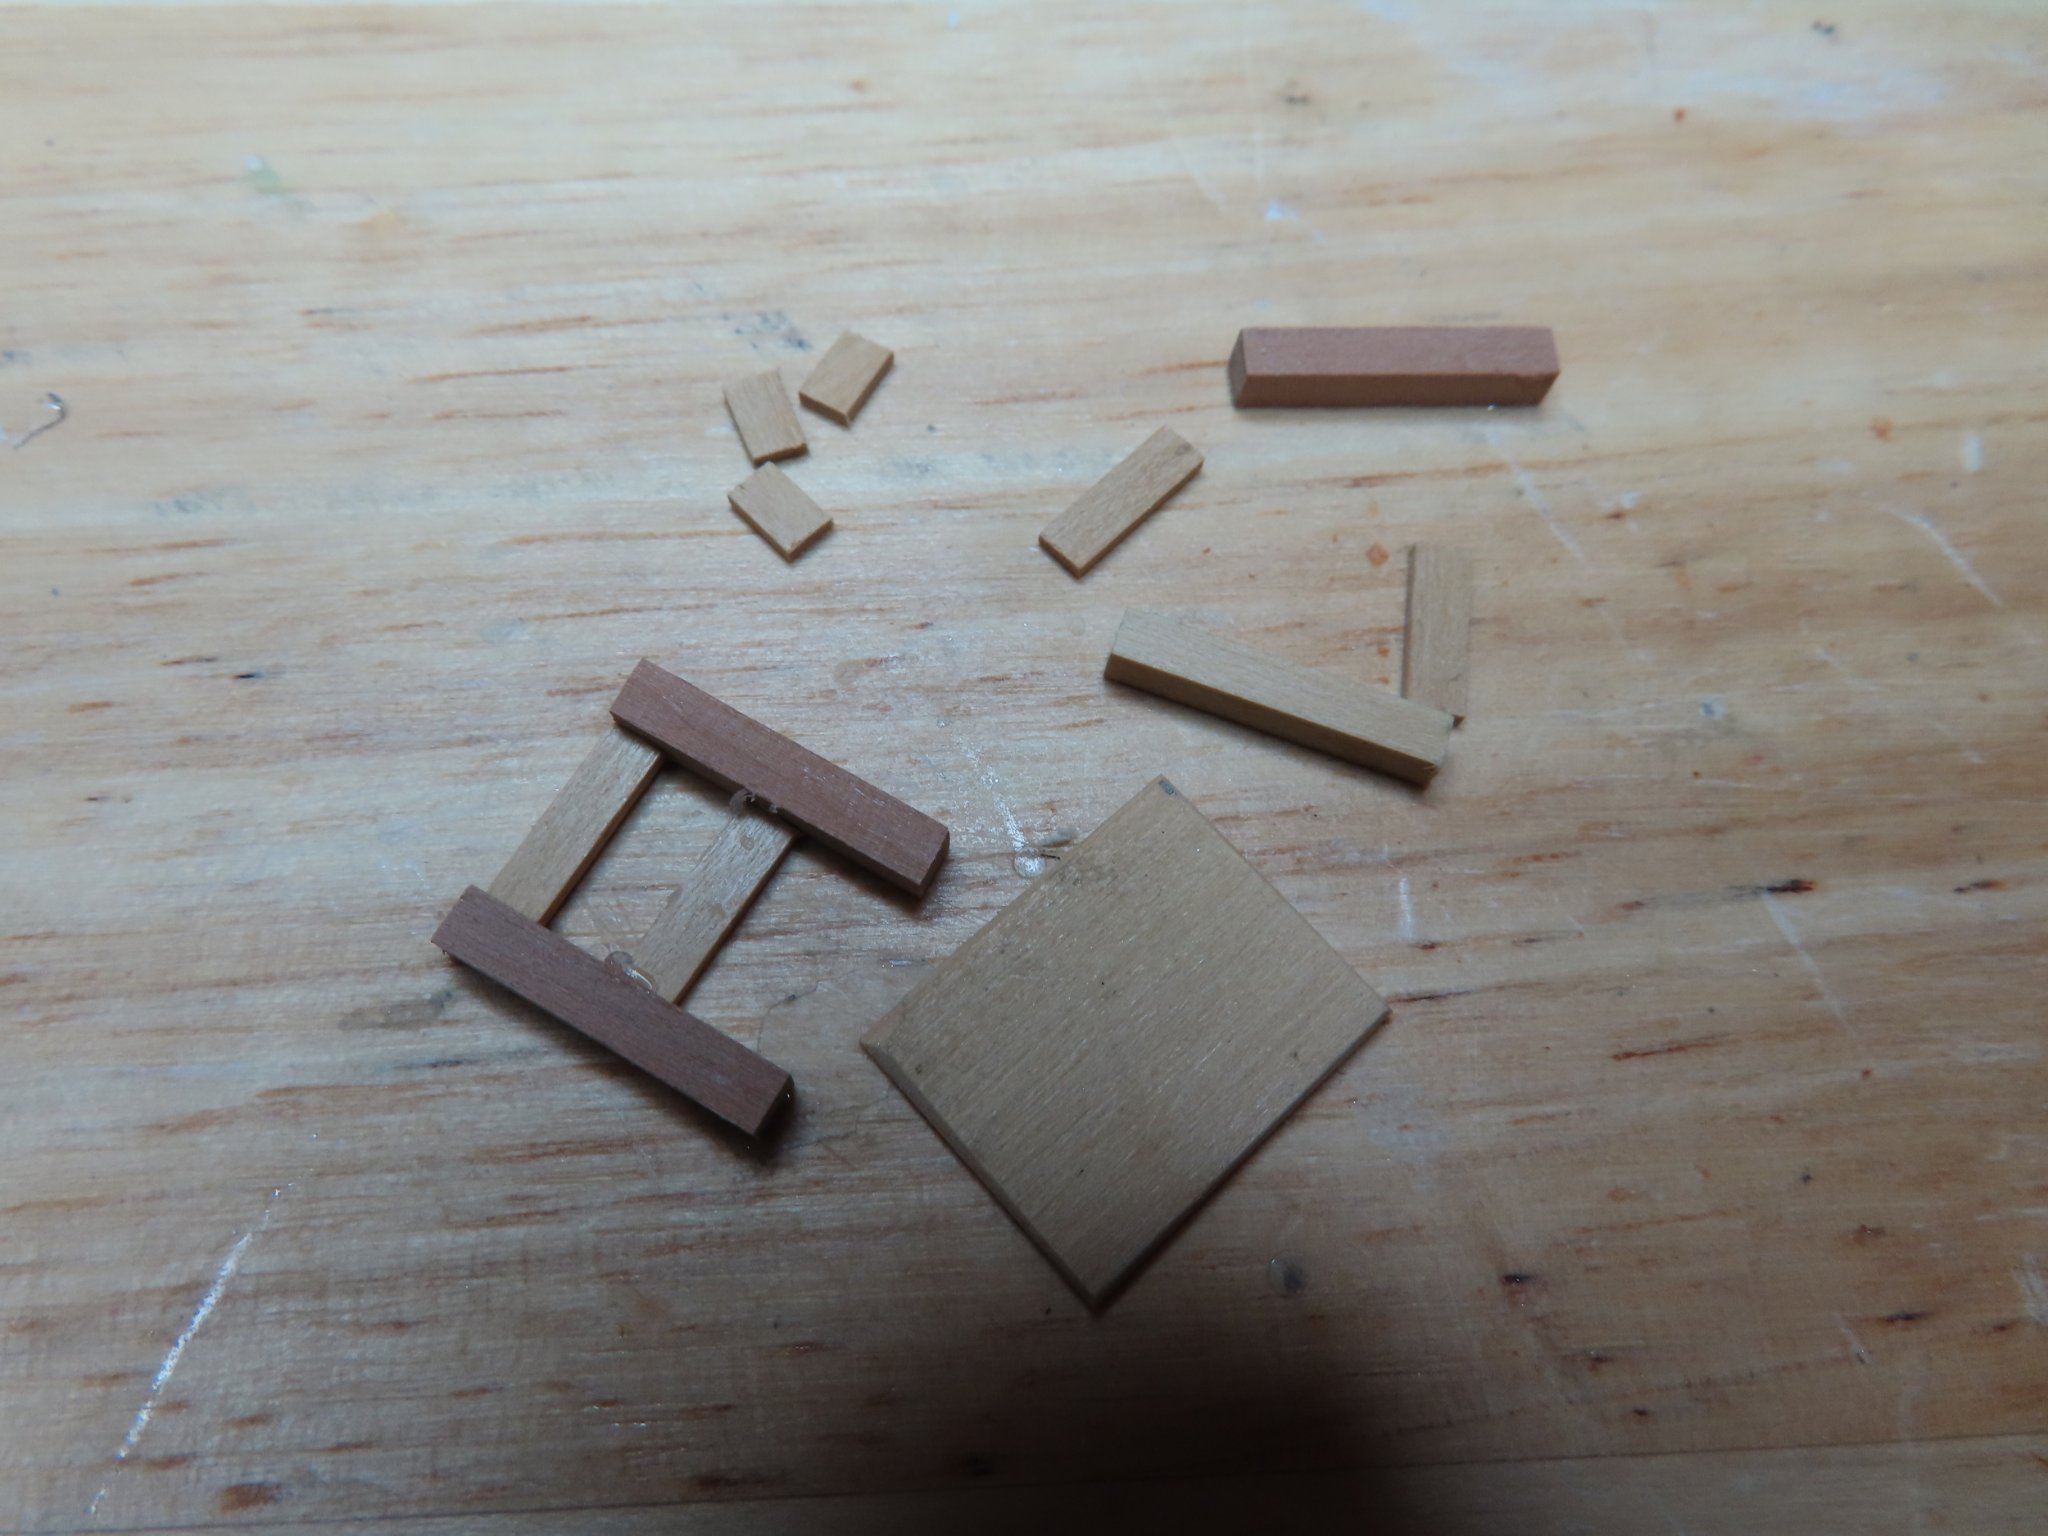
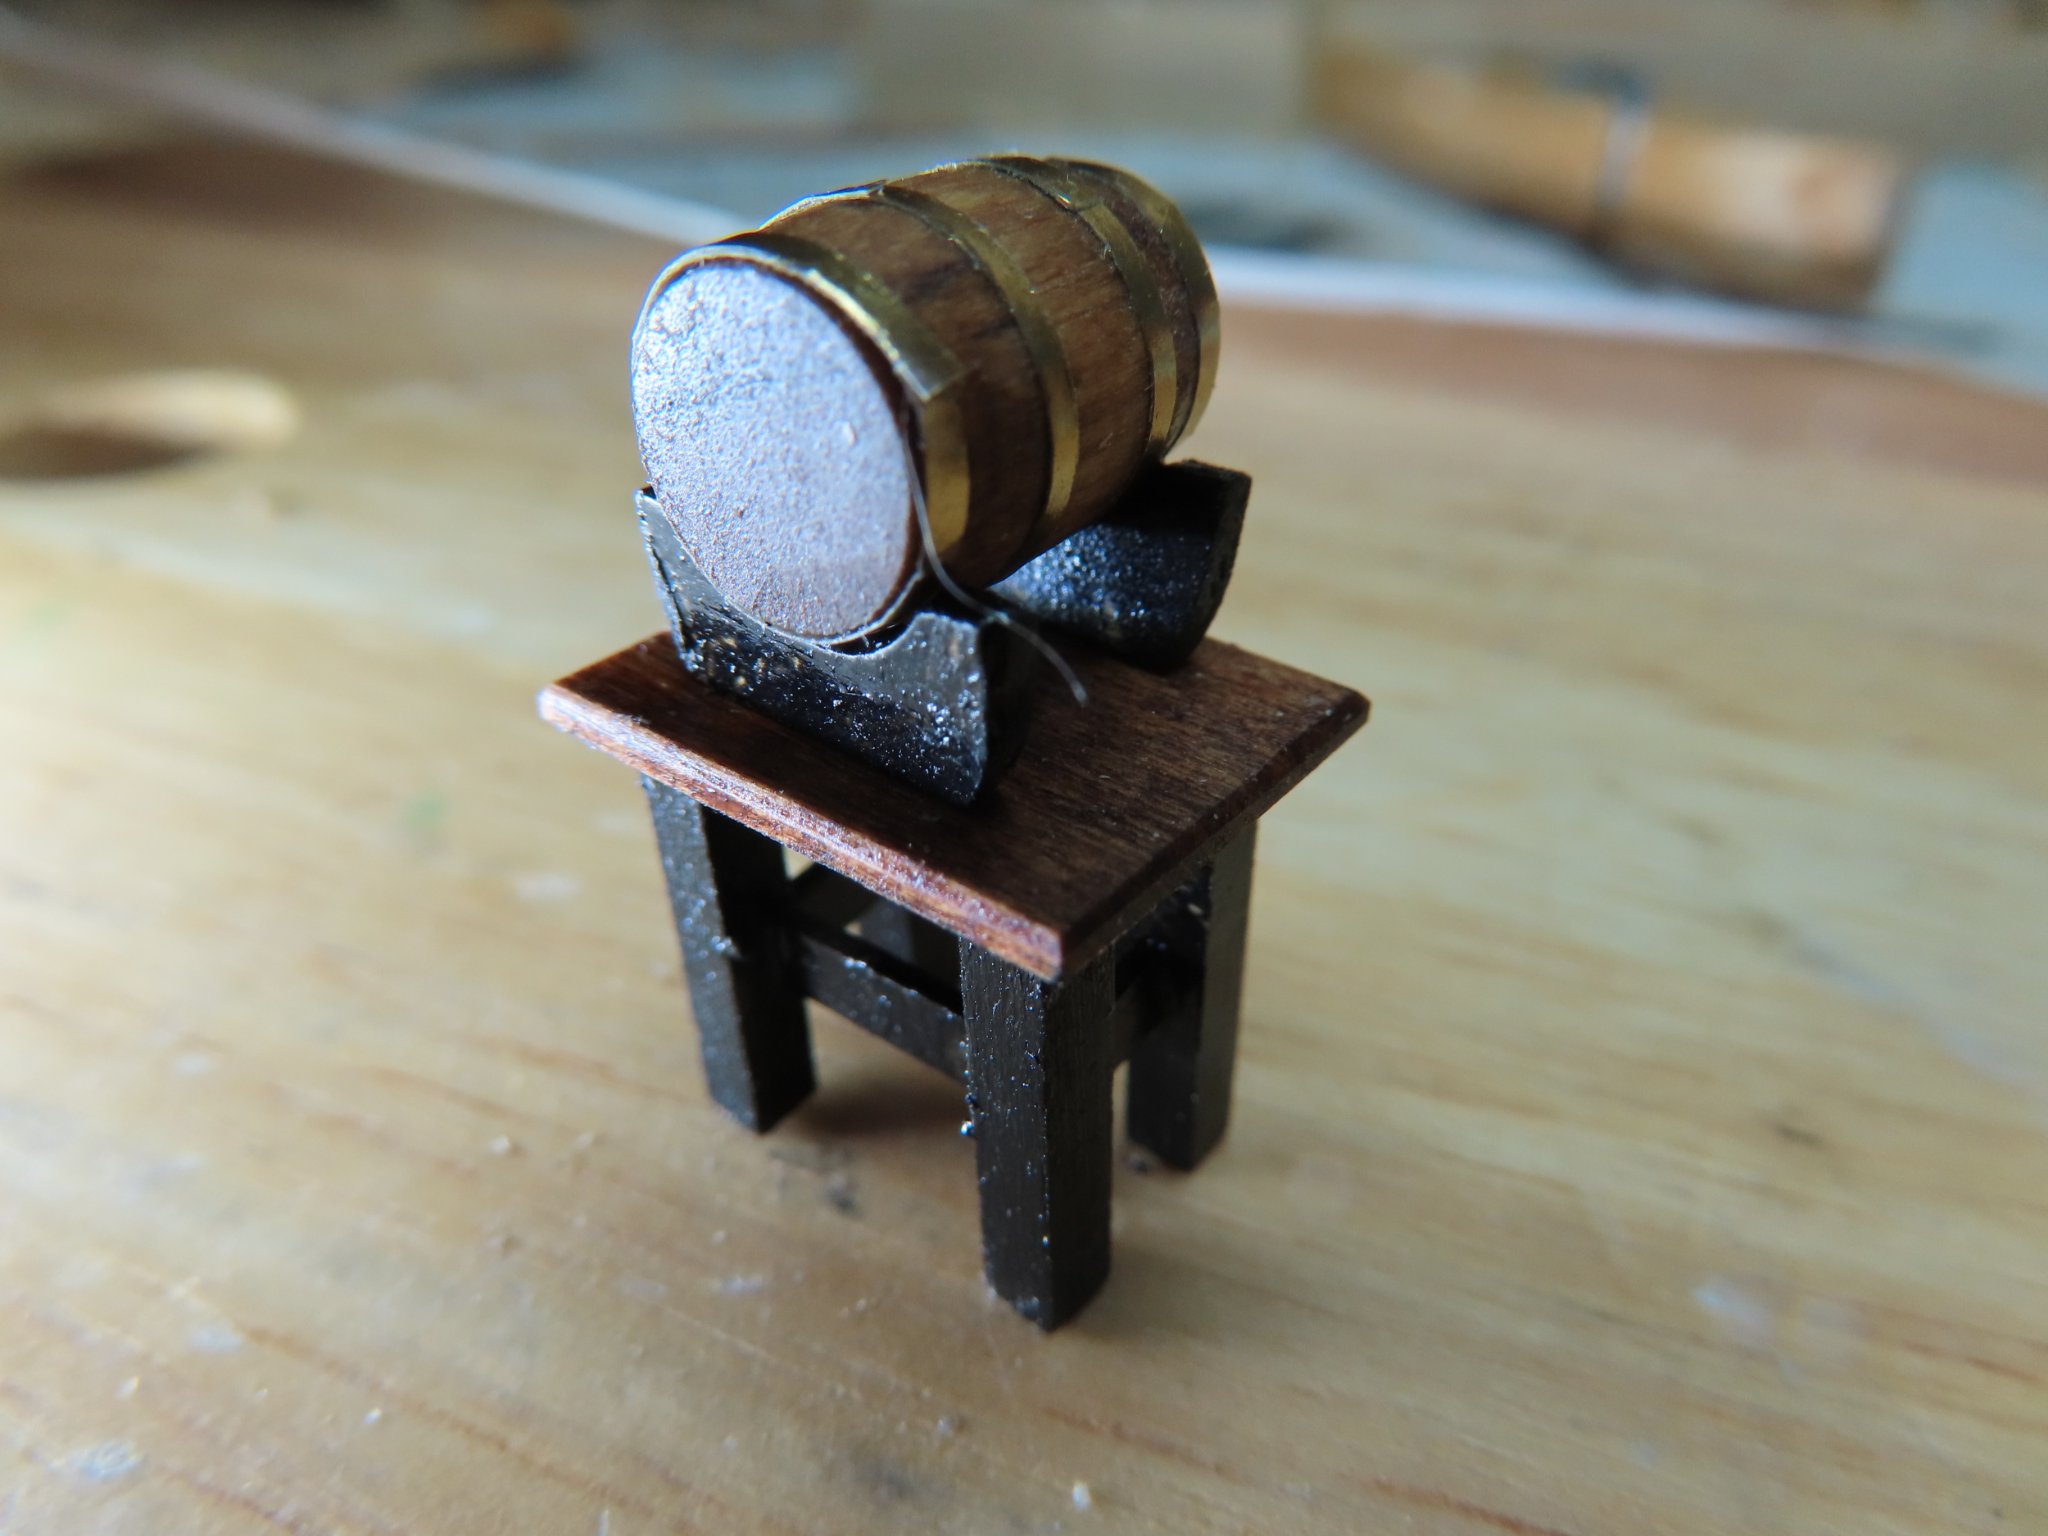
 The table was also fabricated from boxwood. Pieces were cut, shaped, and assembled. I gave the table top a light color stain and painted the support structure gloss black.


-
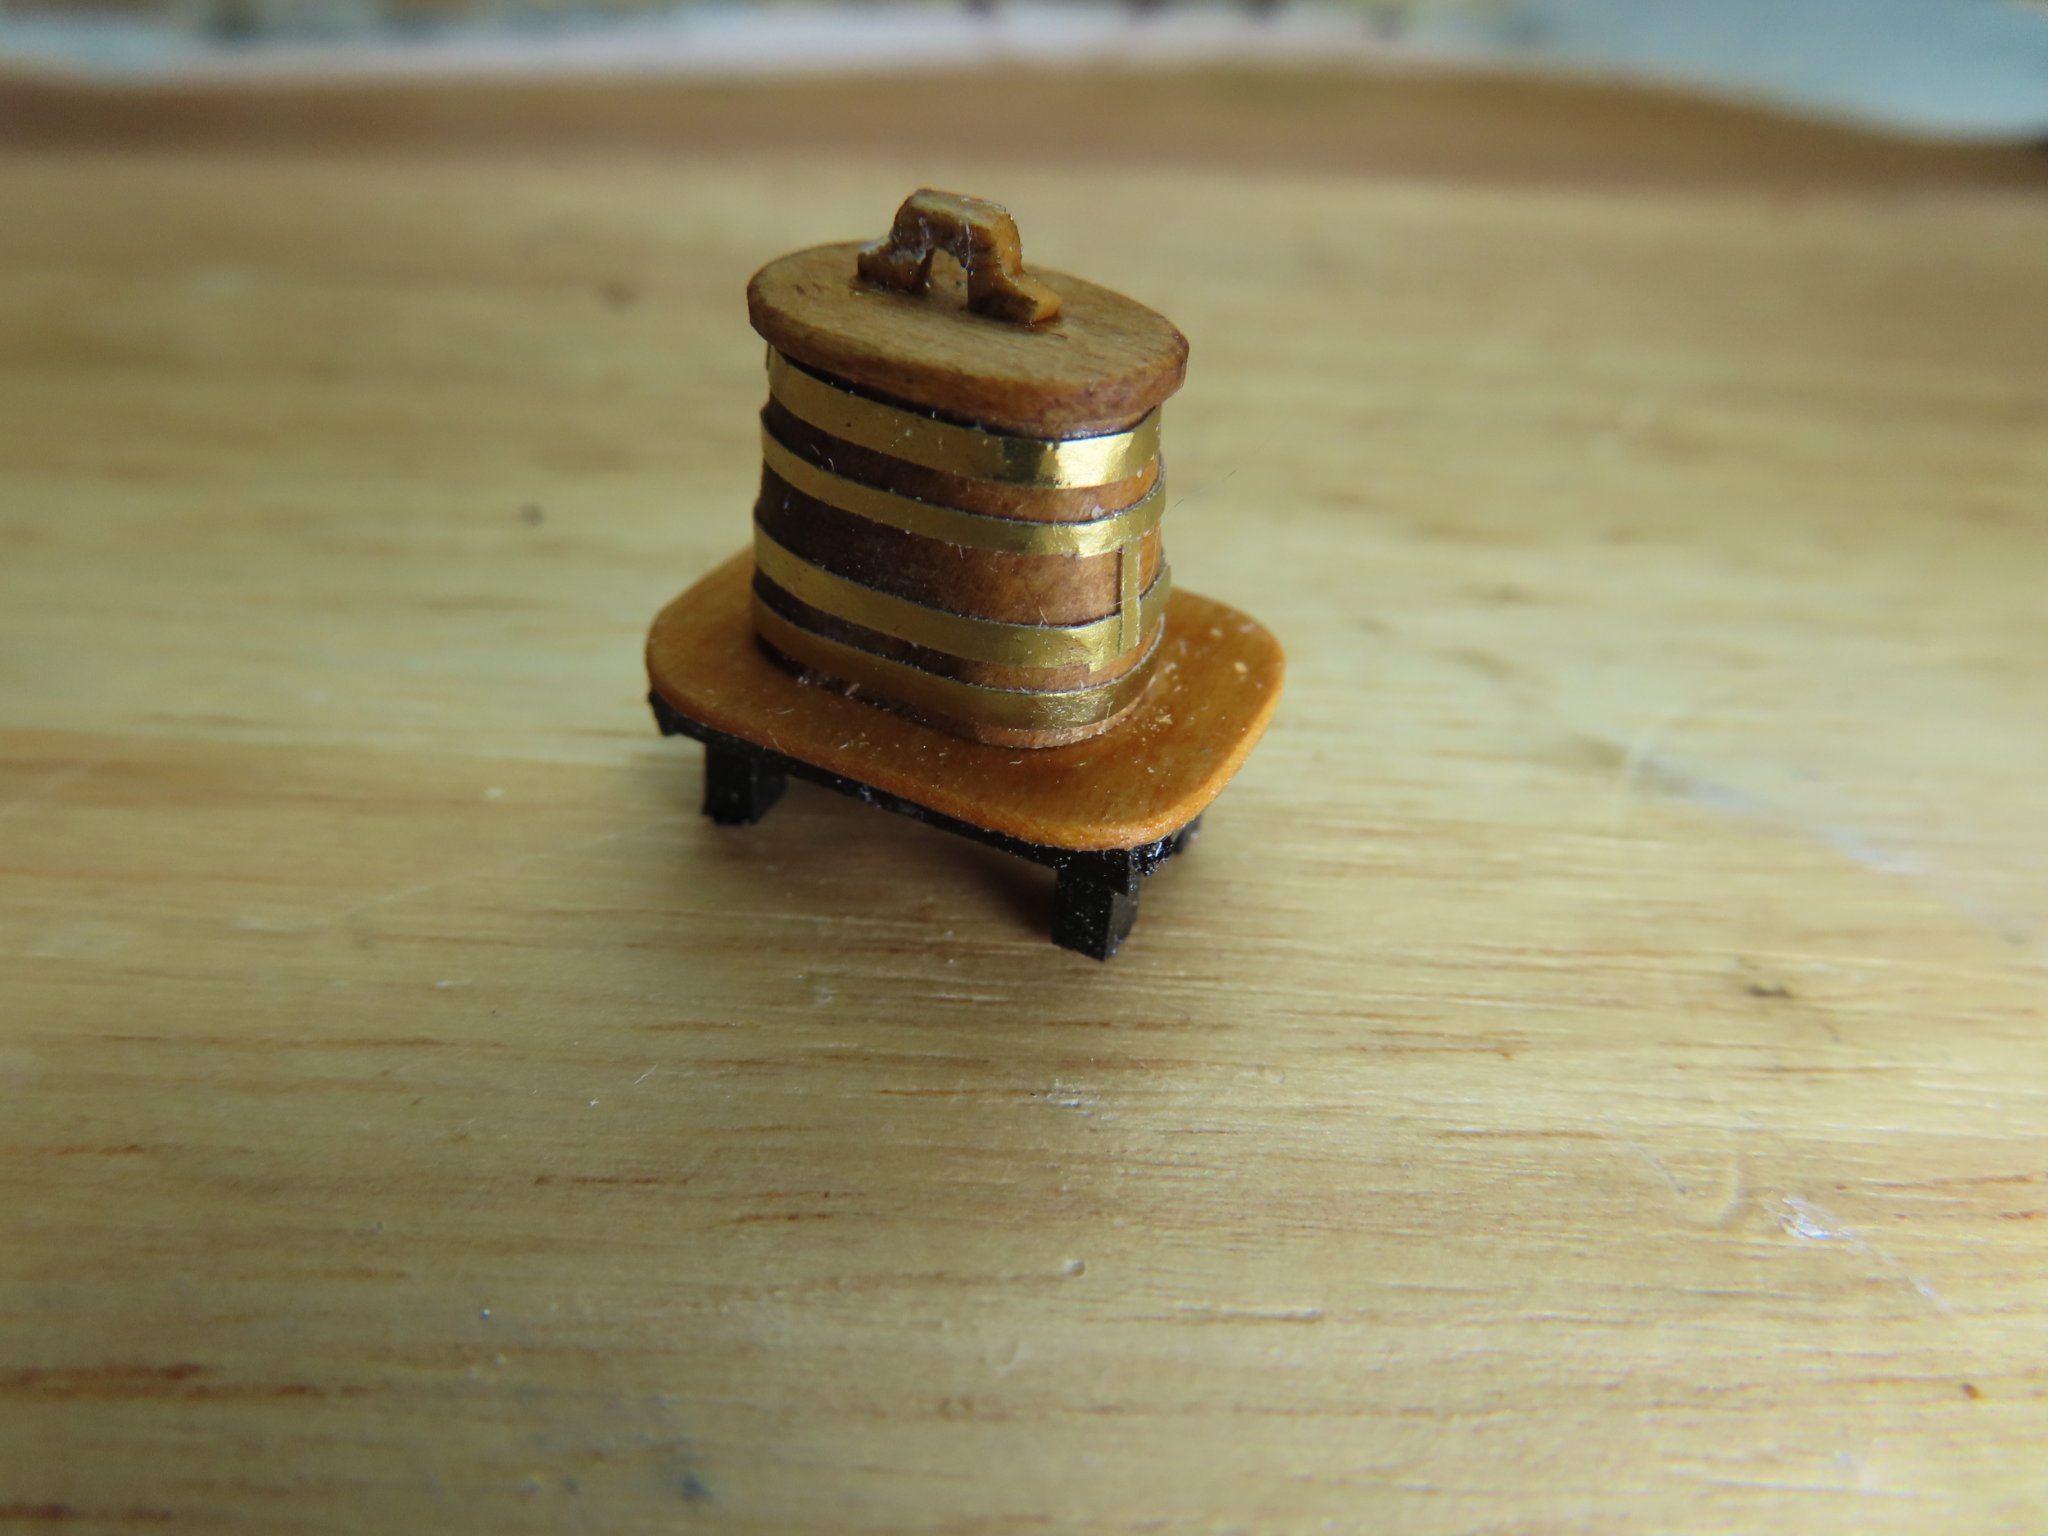
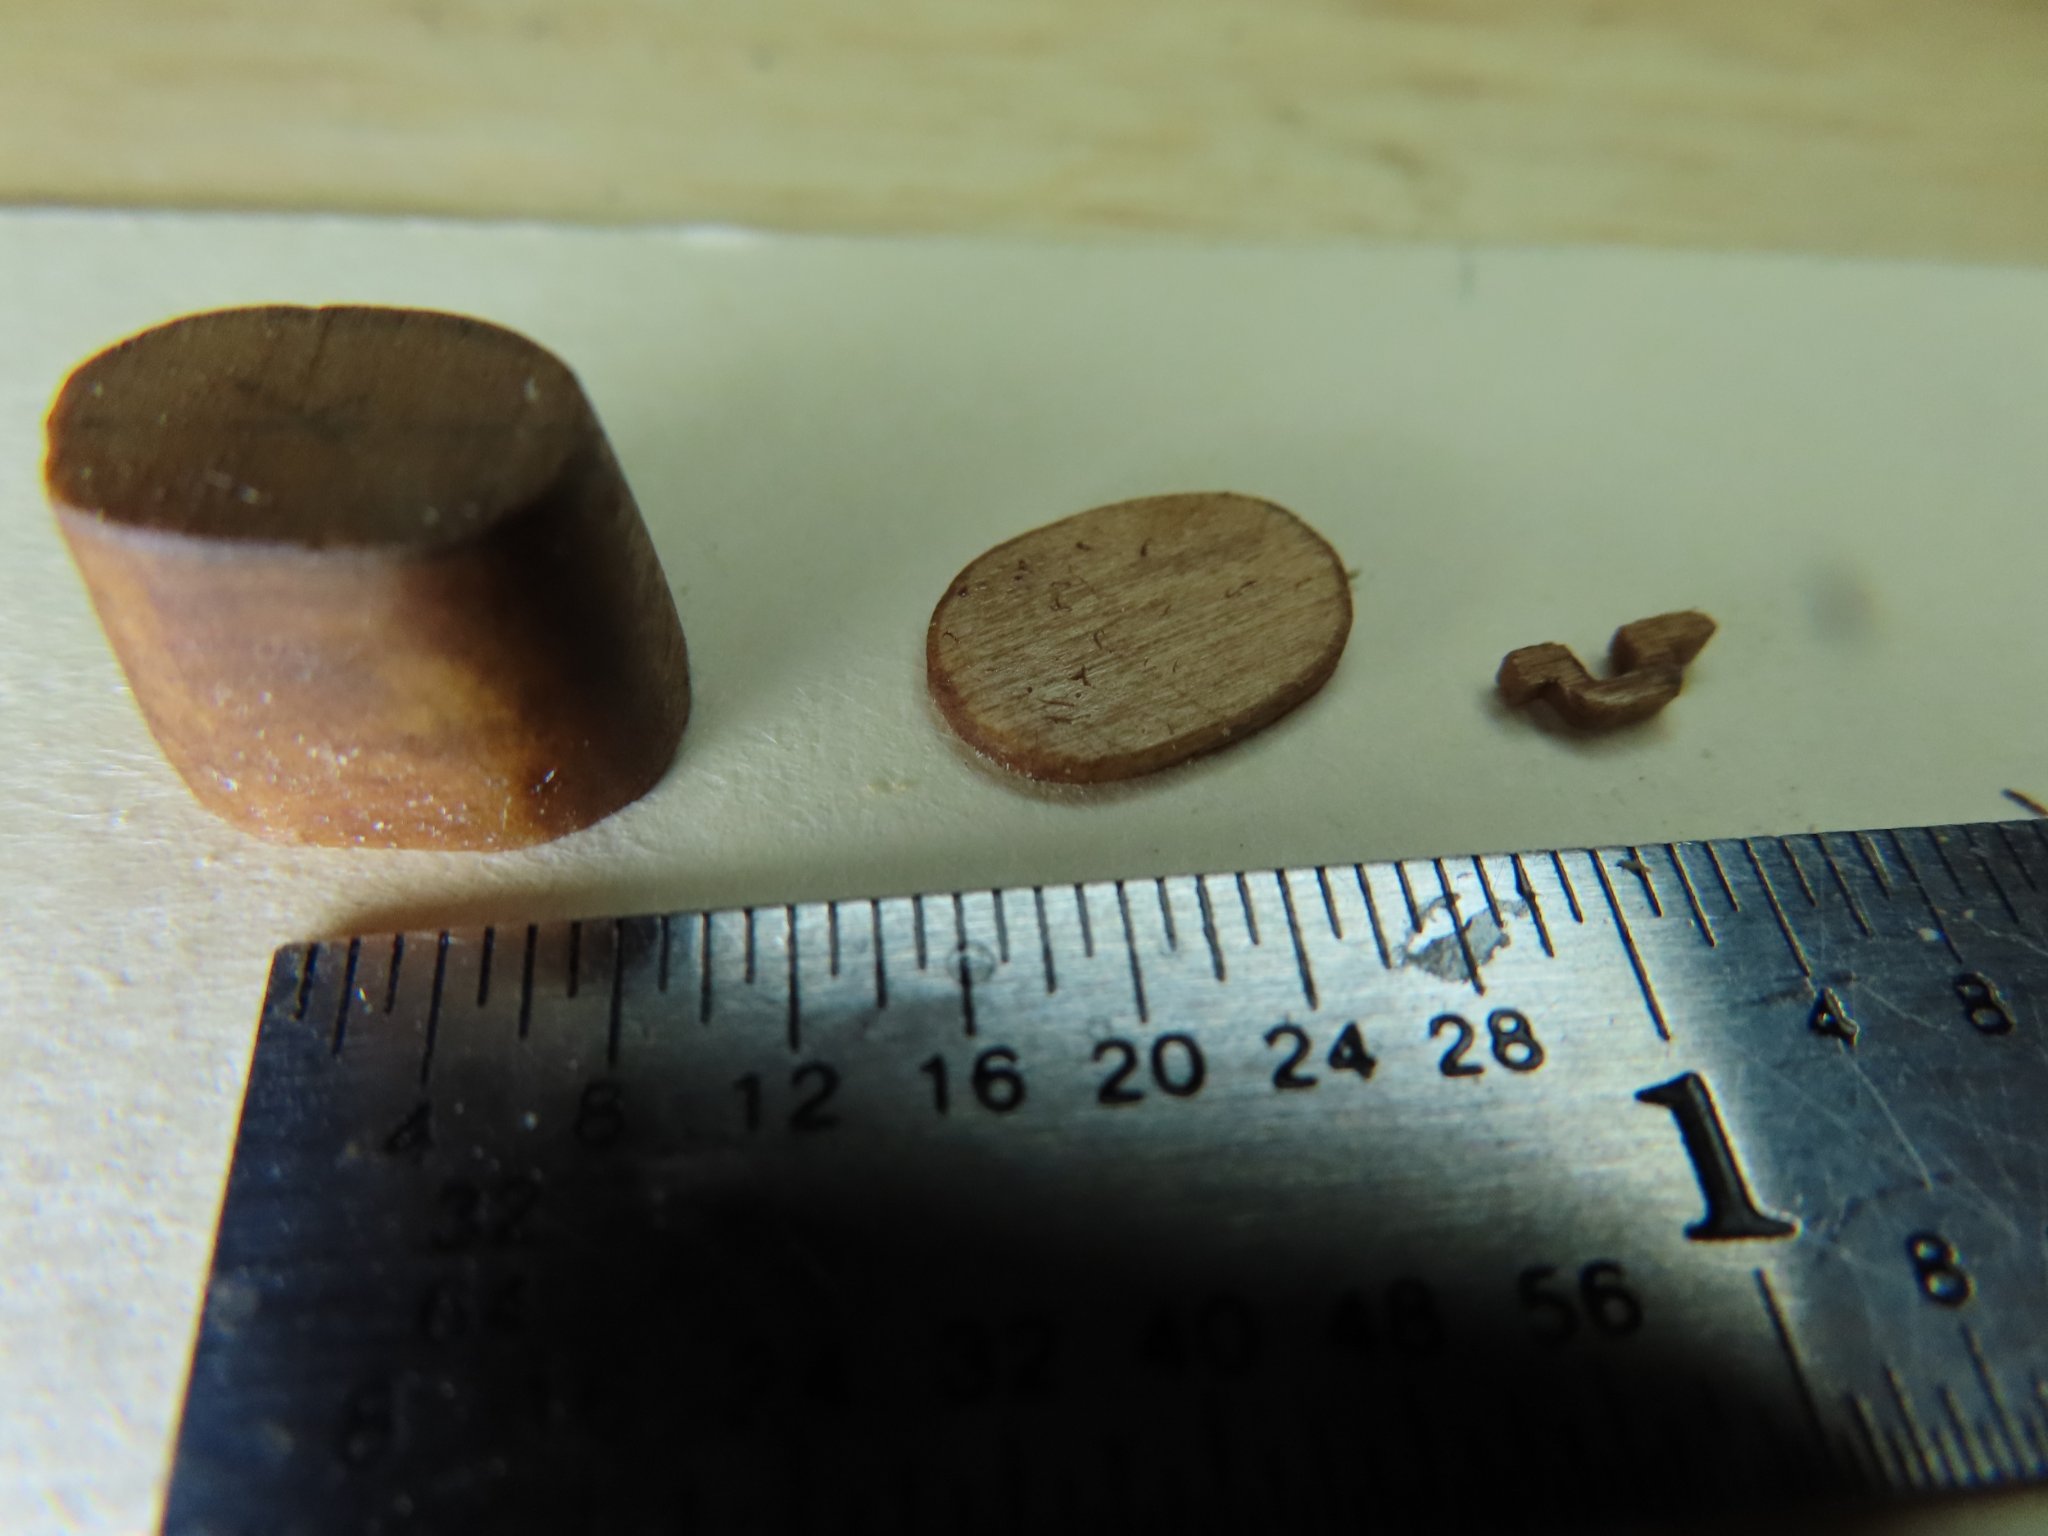
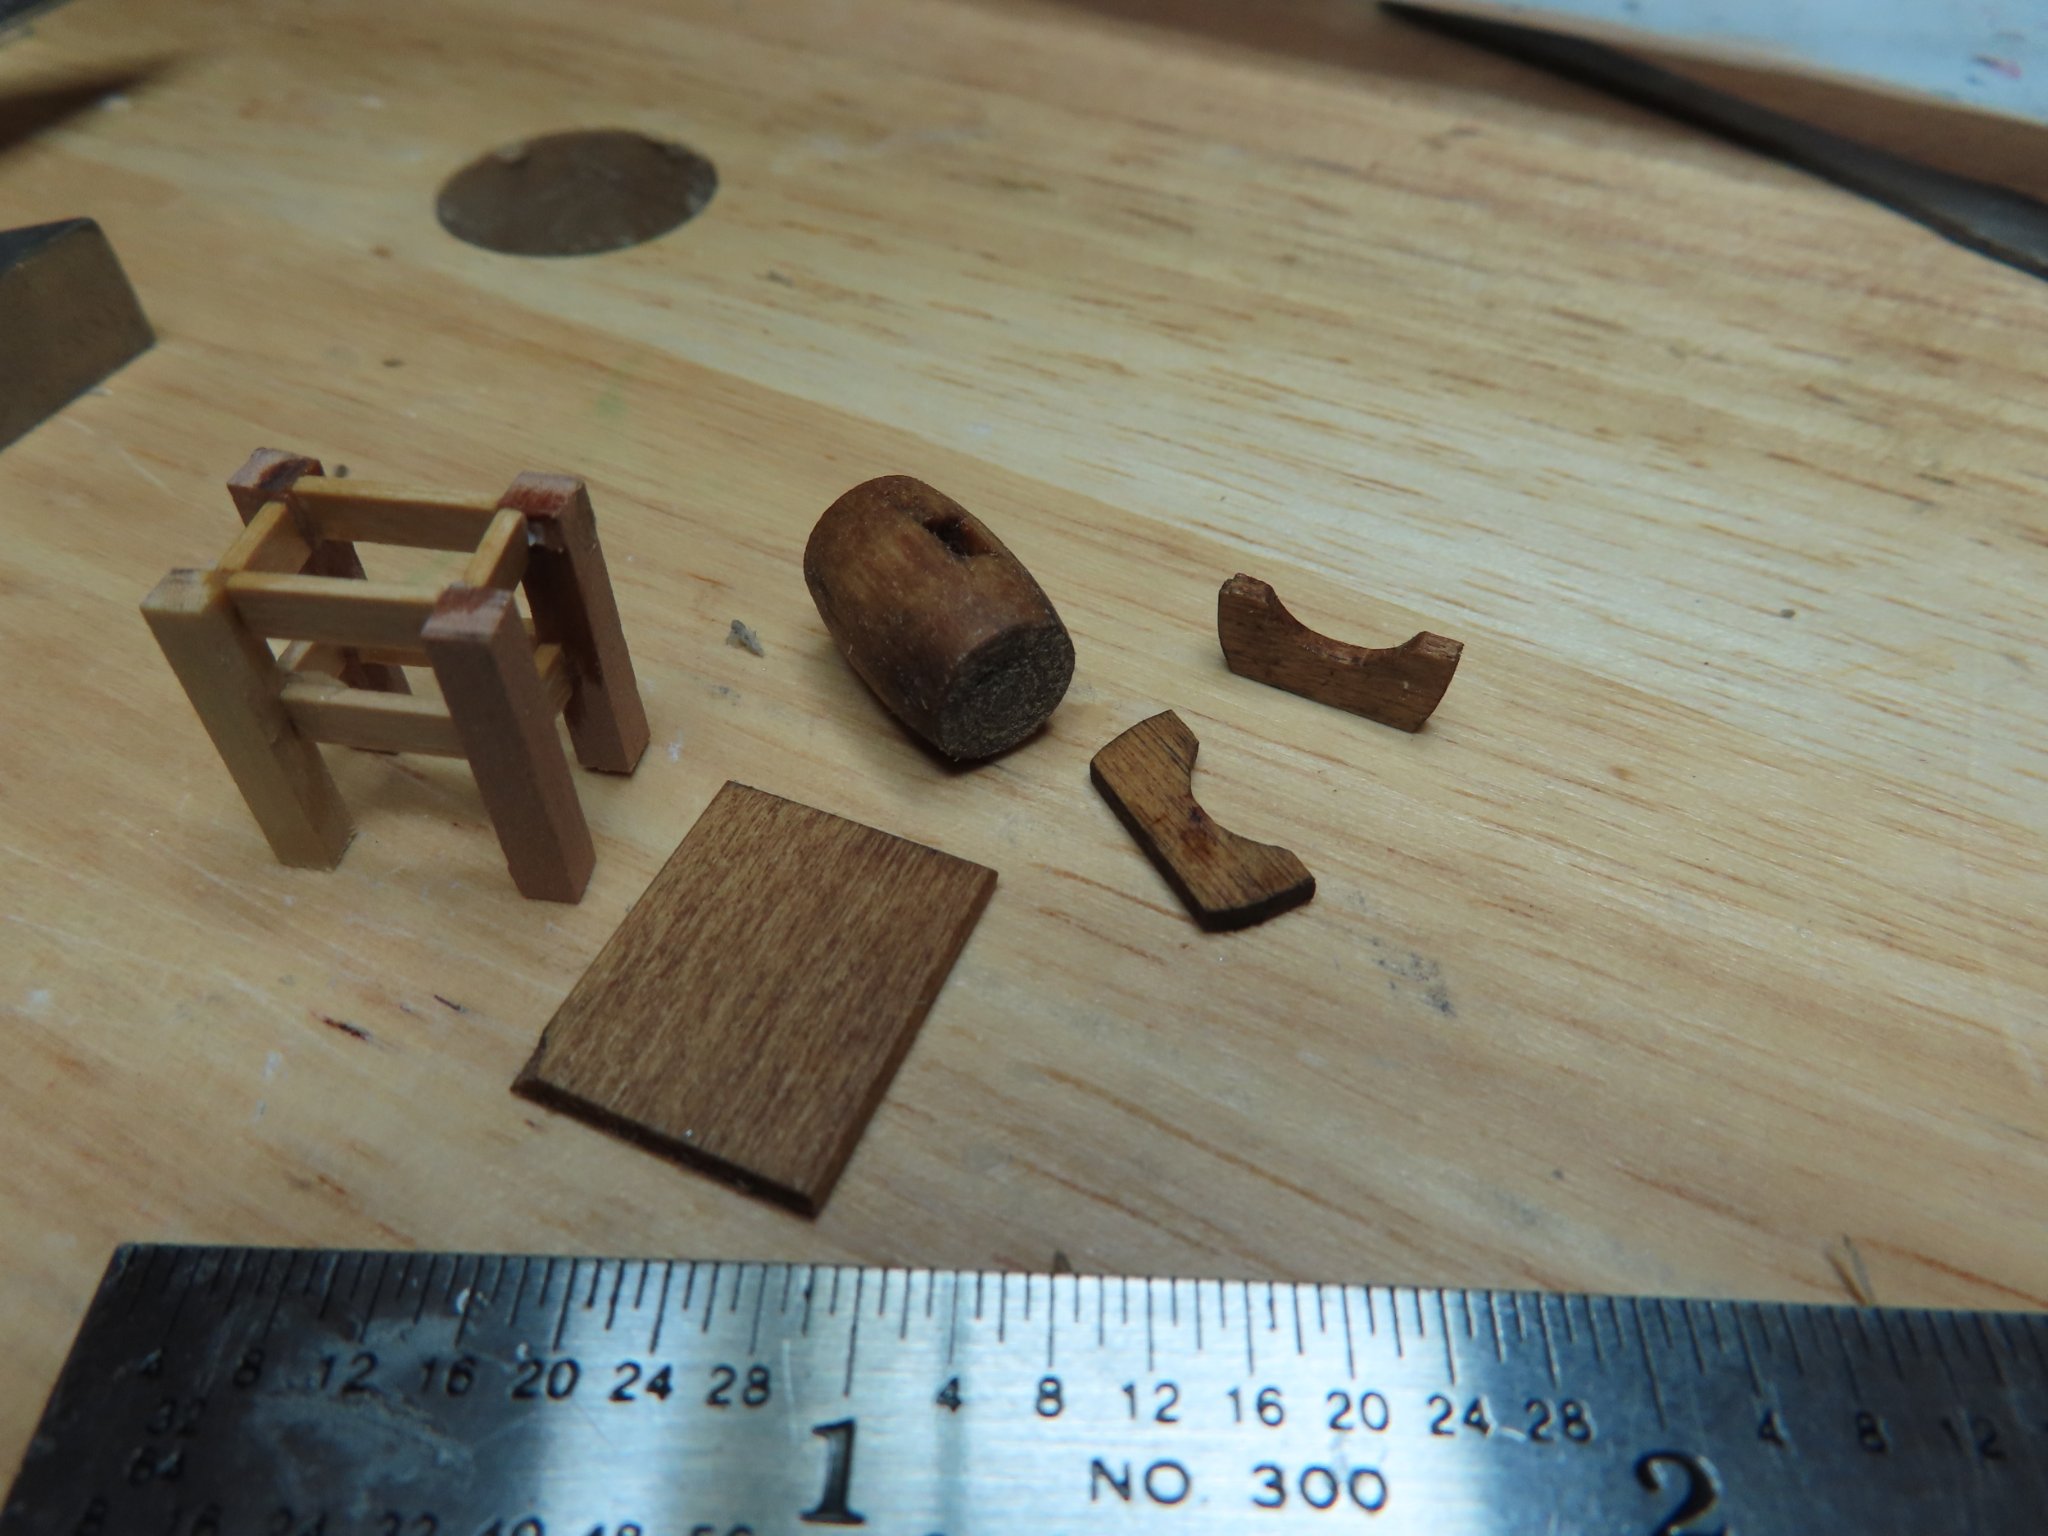
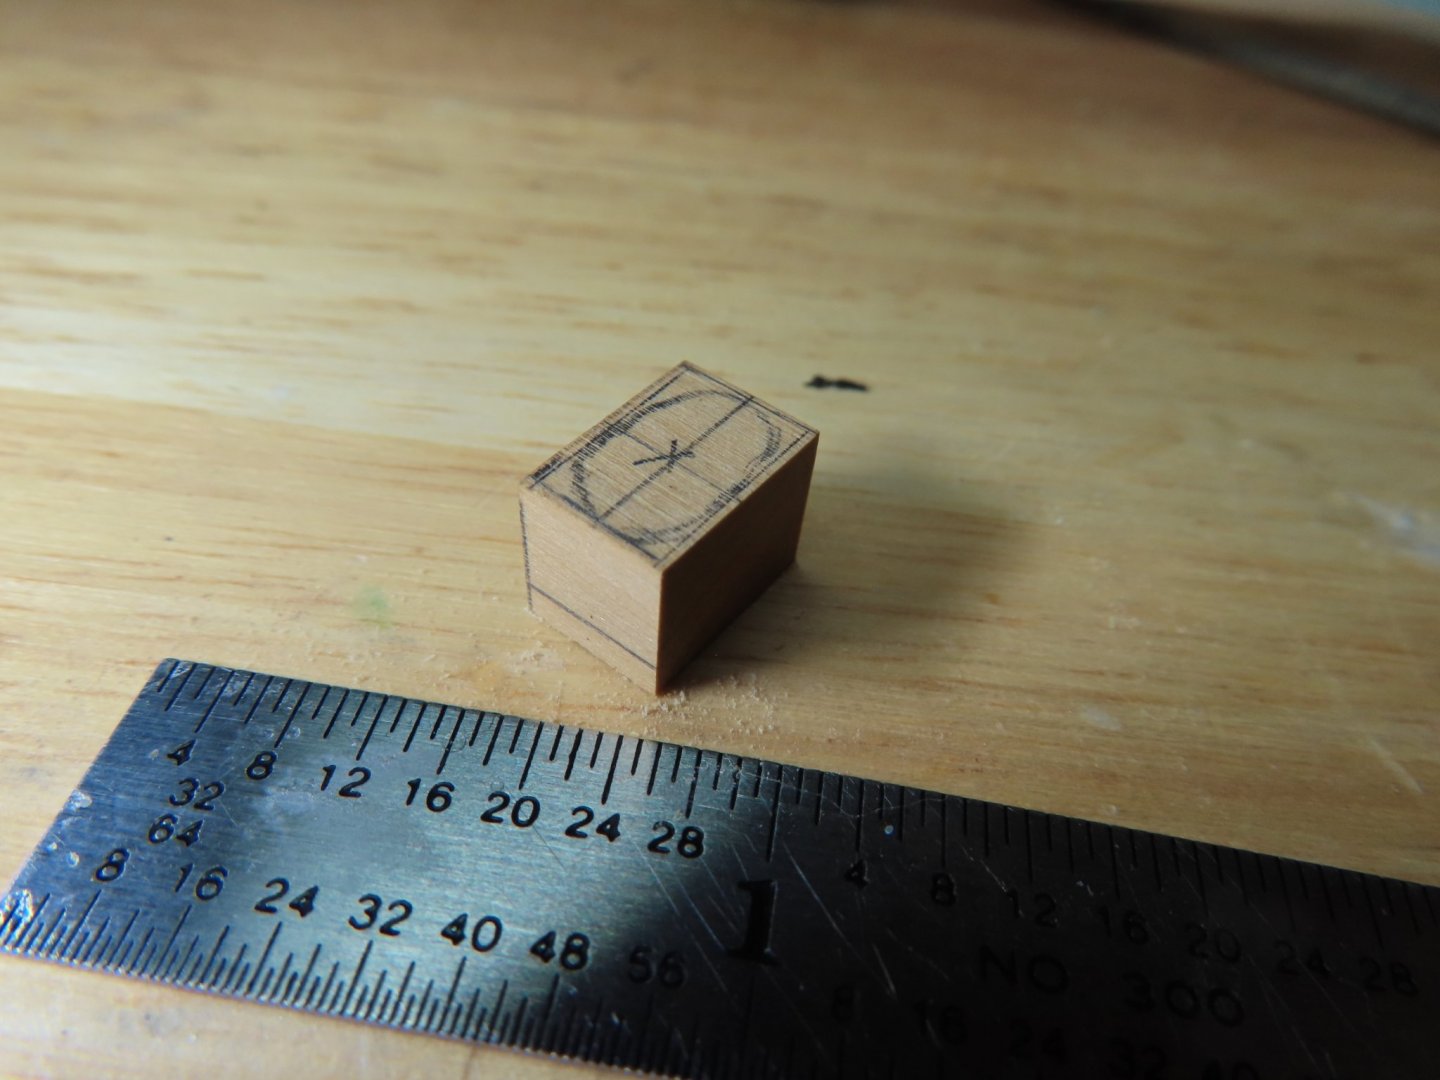
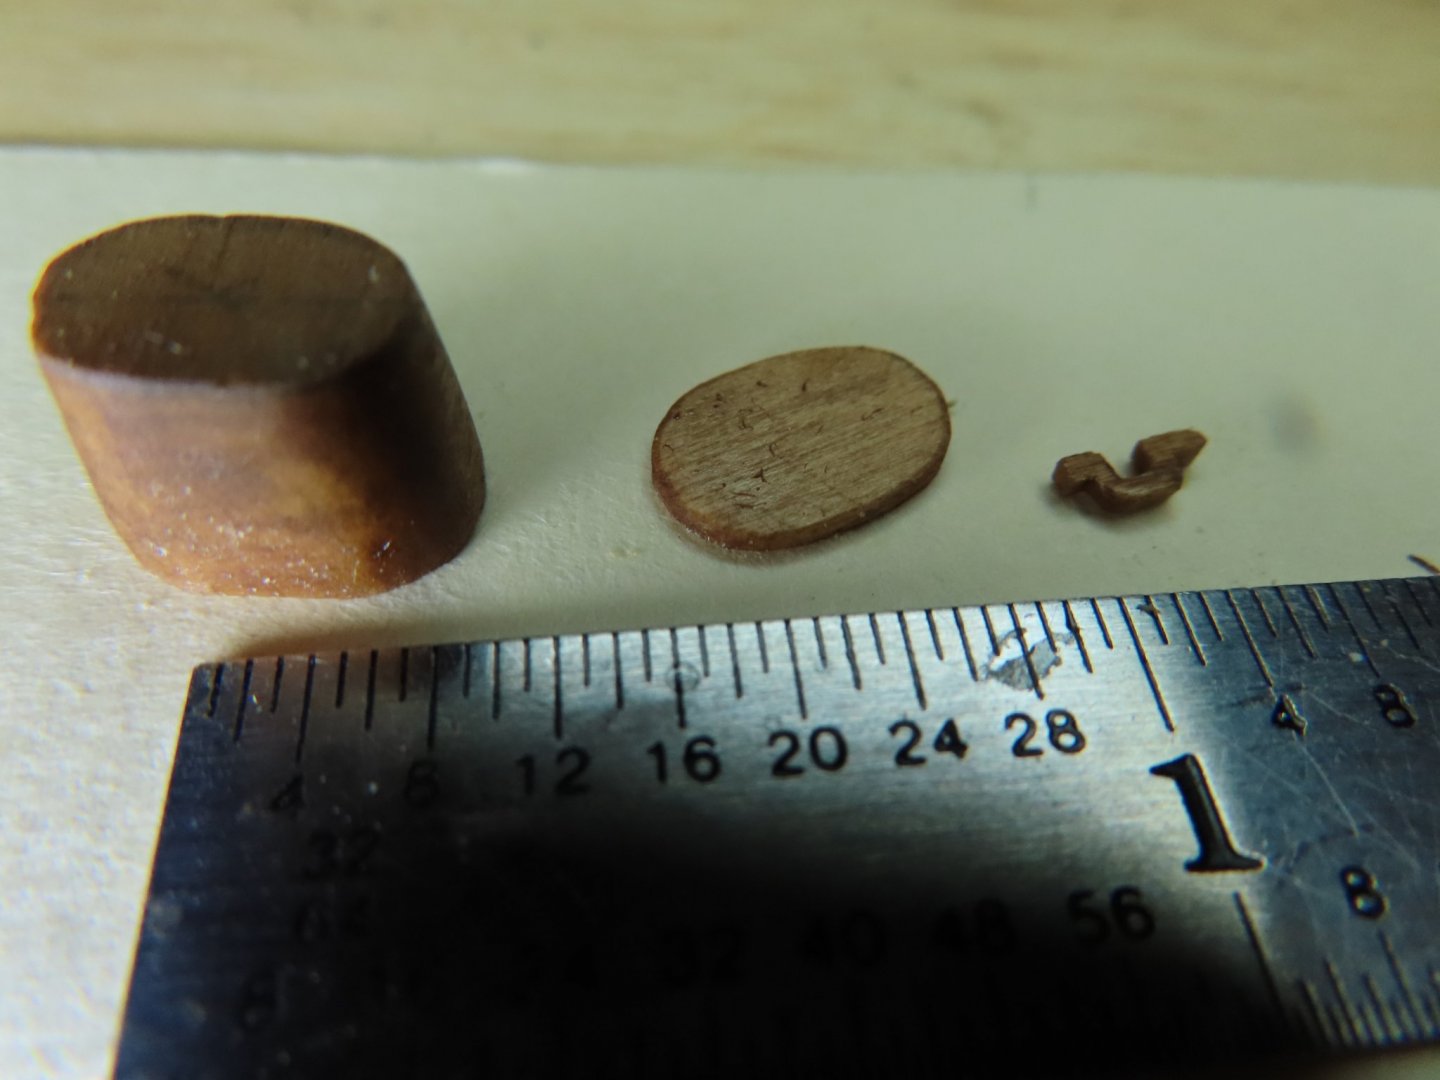
The Grog Tub and Table I had no plans for either the grog tub or its table. This was strictly eyeball stuff based on pictures. Constructed like the harness cask, I used a piece of 3/8” x 3/8” x 3/8” boxwood and shaped it. The lid was a separate piece. I took my best shot carving the lid handle, but I think its too big. I just couldn’t make it any smaller

-
The last bit of the cask was its base. I noticed that this cask sat in a pan for some reason. The base of the pan was carved from 1/64 spruce plywood. The rim was a strip of card stock CA’d to the plywood. To do this, the plywood was lying on a piece of wax paper while I liberality applied the CA as I worked my way around the plywood edge. The card stock soaked up the glue which gave it stiffness. The wax paper easily peeled off the construct. The pan was painted flat black. The pan in turn sat on two layers of dunnage which was a few pieces of scrap wood and stained.
-
I did not have any plans for the lid, so I winged it. I scored a line into the lid to simulated where the lid would swing open. If you look really close, you may notice there are too sets of hinges on the harness cask, one set for each side as the lid opens from ether side. I chose not to have a double hinge due to scaling limits. I used a couple of pieces of eyebolt “legs” wire. Every time I snipped off piece of excess eyebolt, I kept the scrap for situations such as this one. The tiny pieces of wire made the hinge more realistic. Next, I added the brass bands and hinges.

-
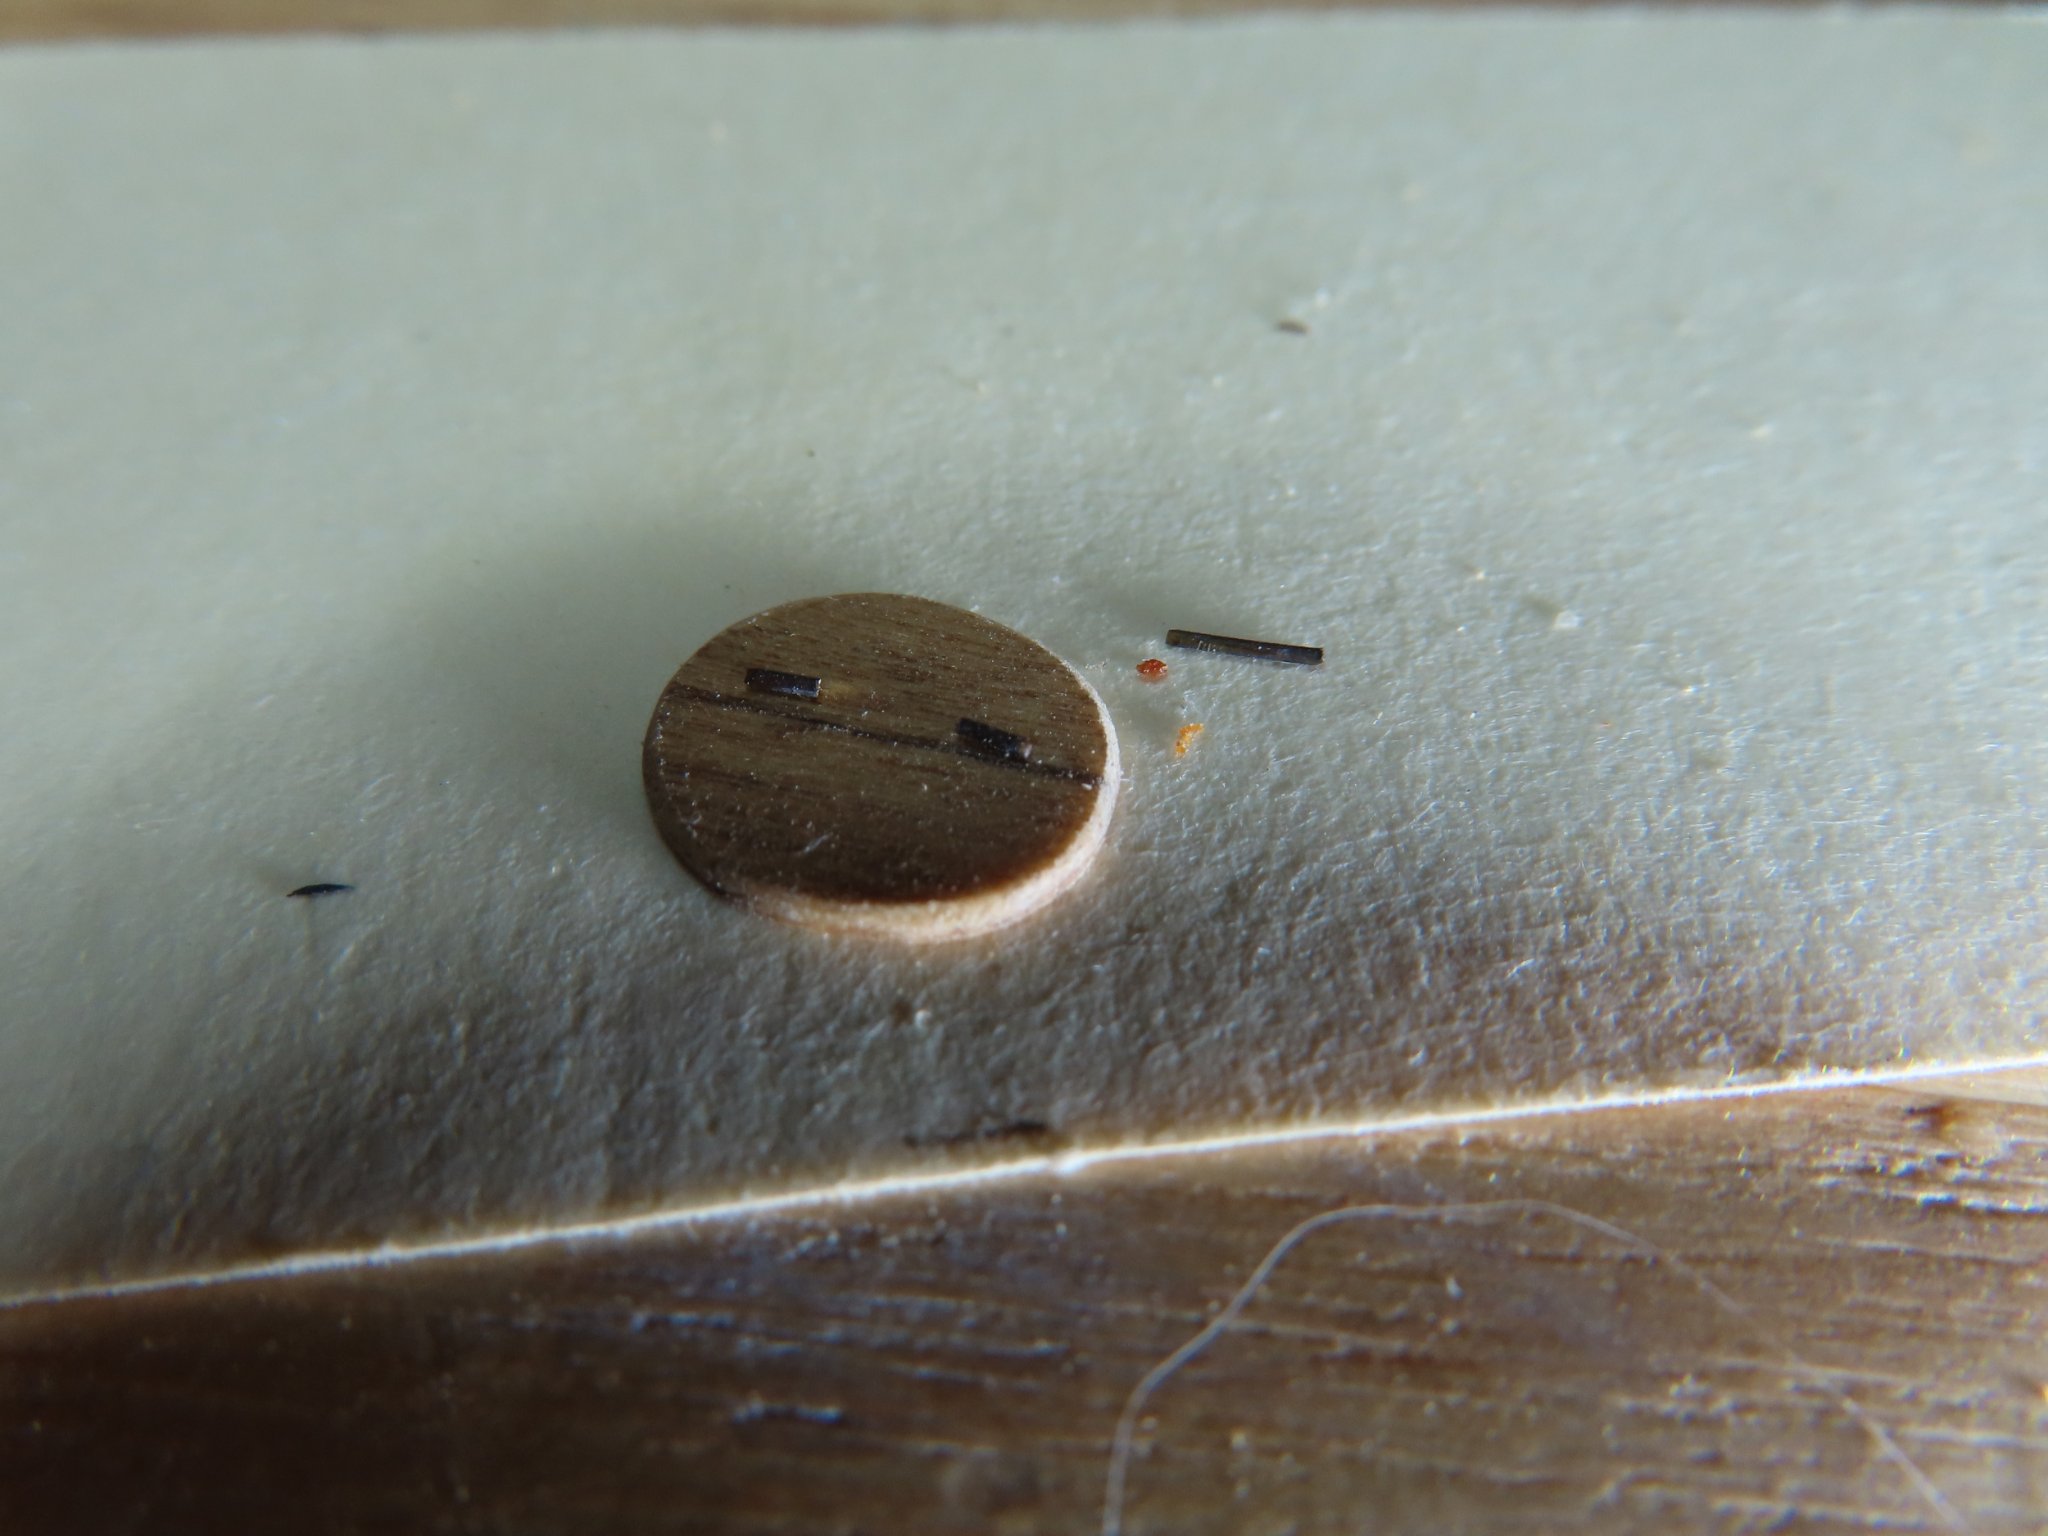
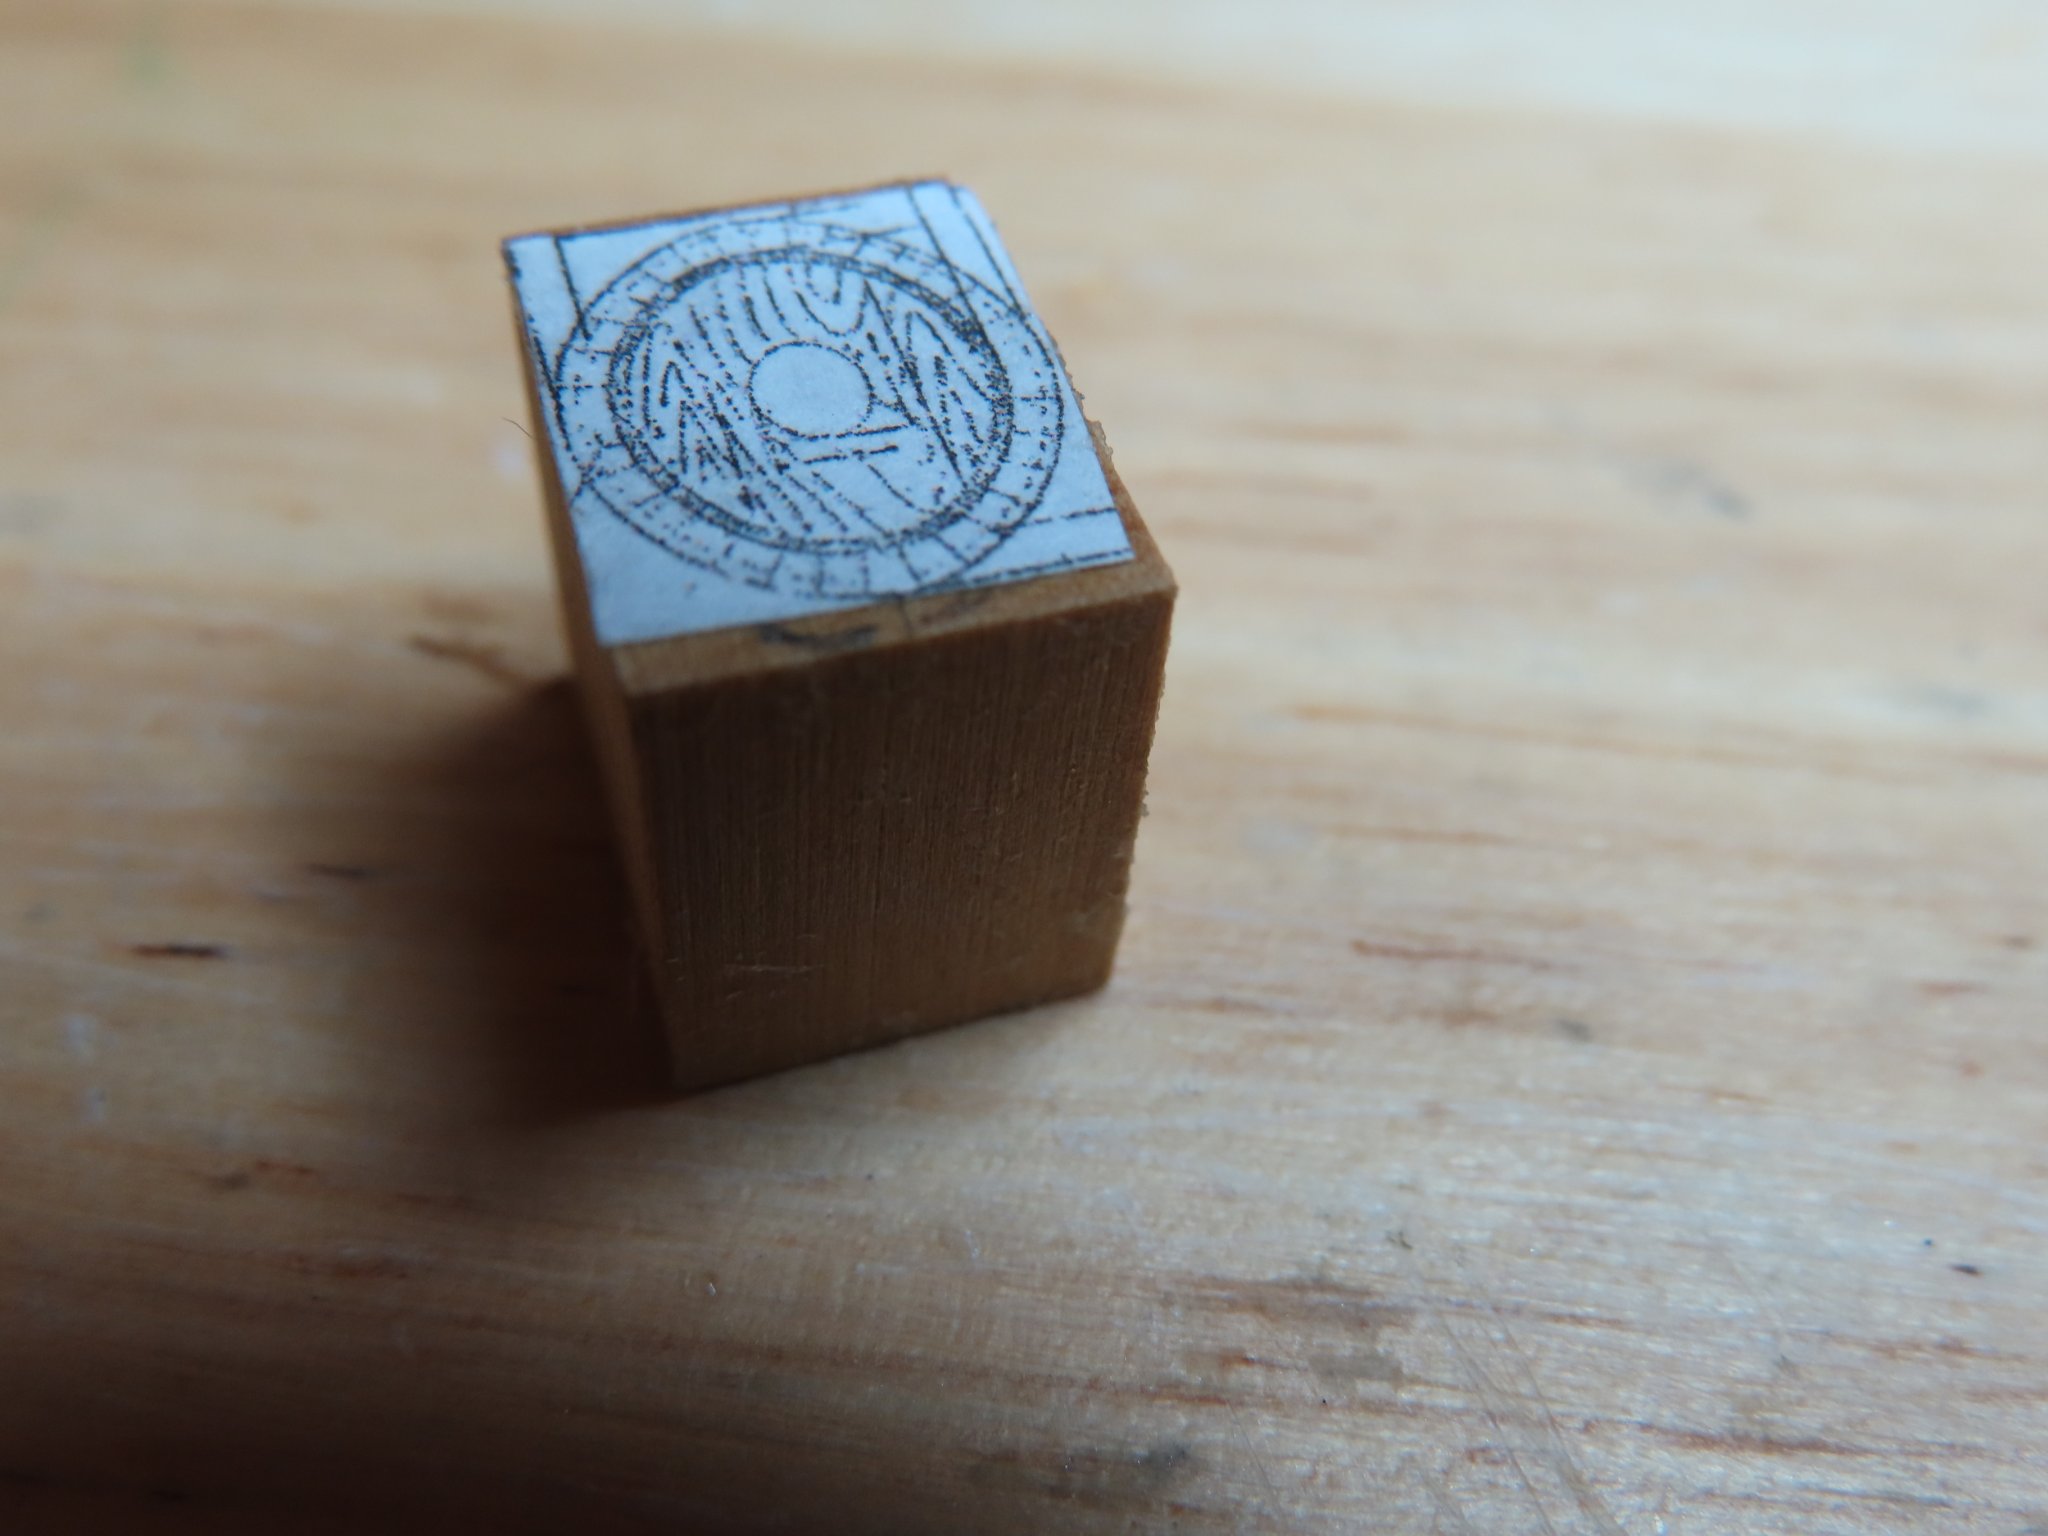
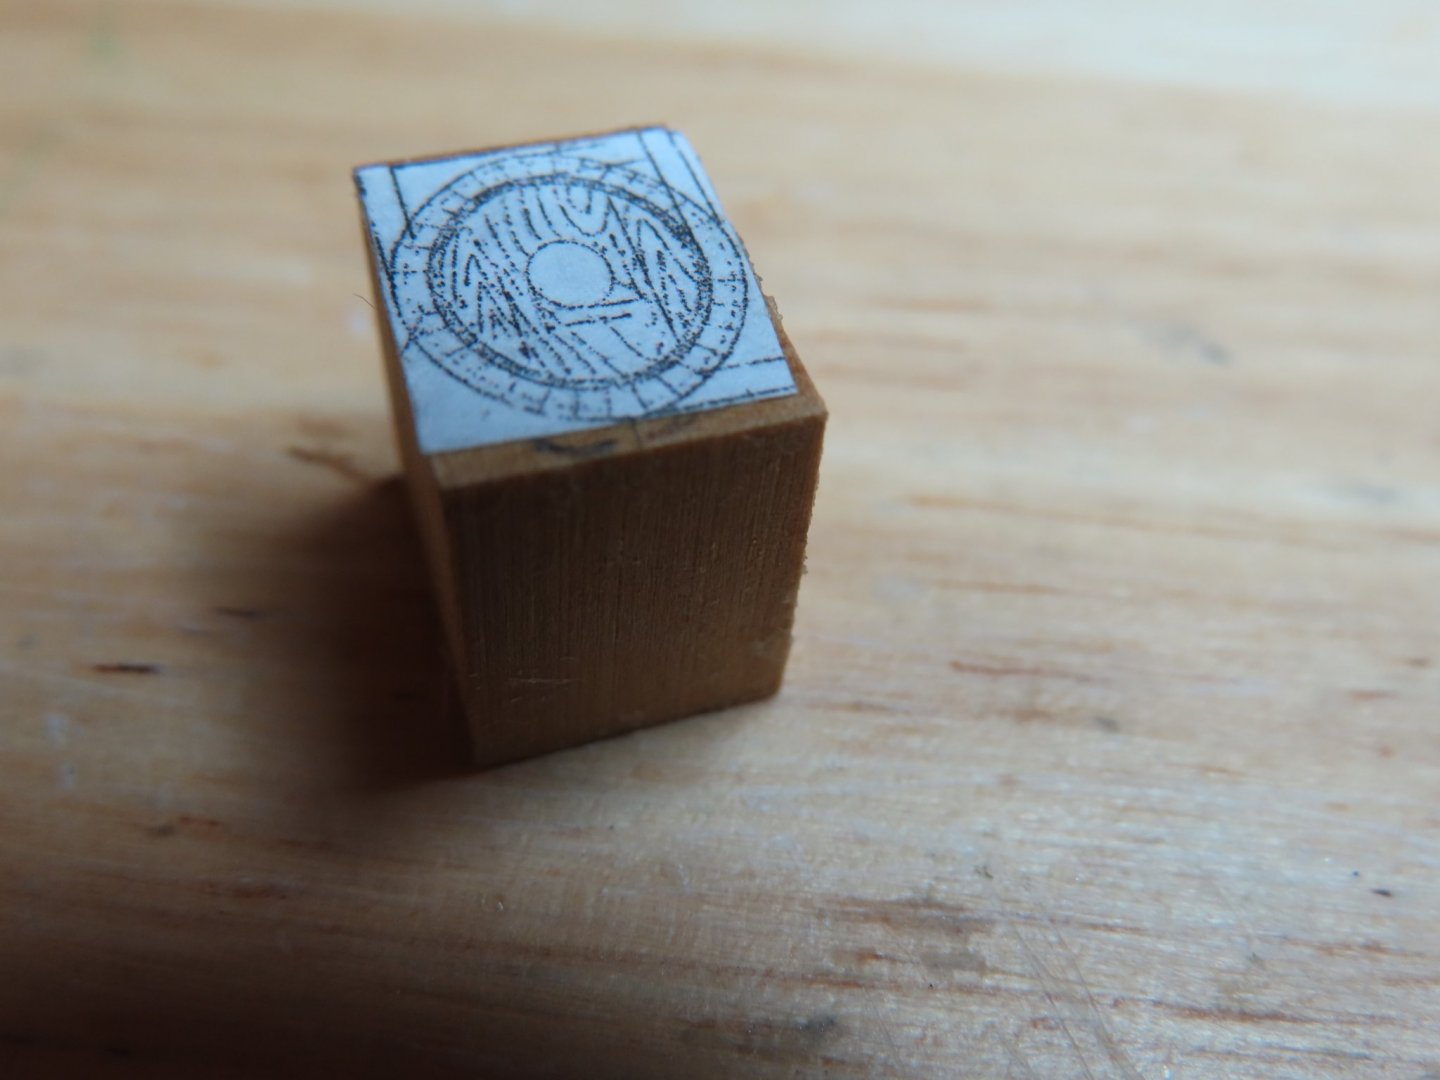
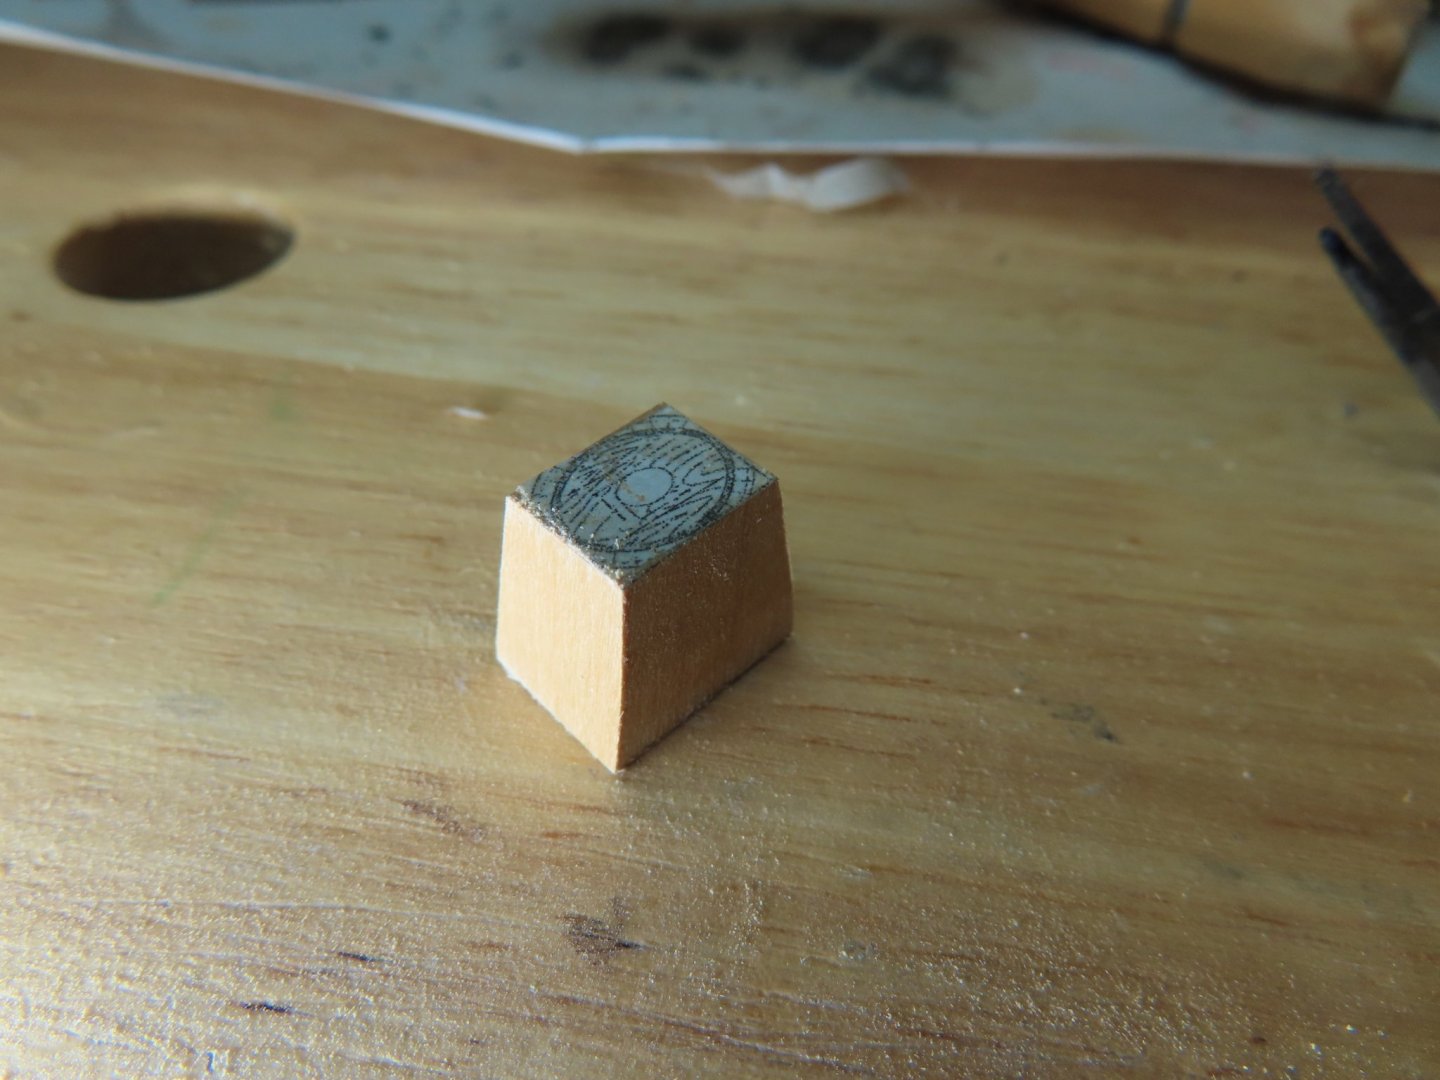
The plan was used as a template, by gluing a scaled version onto a piece of boxwood with rubber cement. The top side image was trimmed so I wouldn’t confuse top from bottom. The sides were angled in to match the template and then sanded and filed to the final cask shape. The lid was fabricated separately.


-
Harness Cask As I mentioned in my earlier post, I based my harness cask on a plan of a version of the grog tub not shown on the actual ship (that I know of). The obvious difference is that the grog cask plan shows a circular opening in its top while the actual harness cask has a hinged top.


-
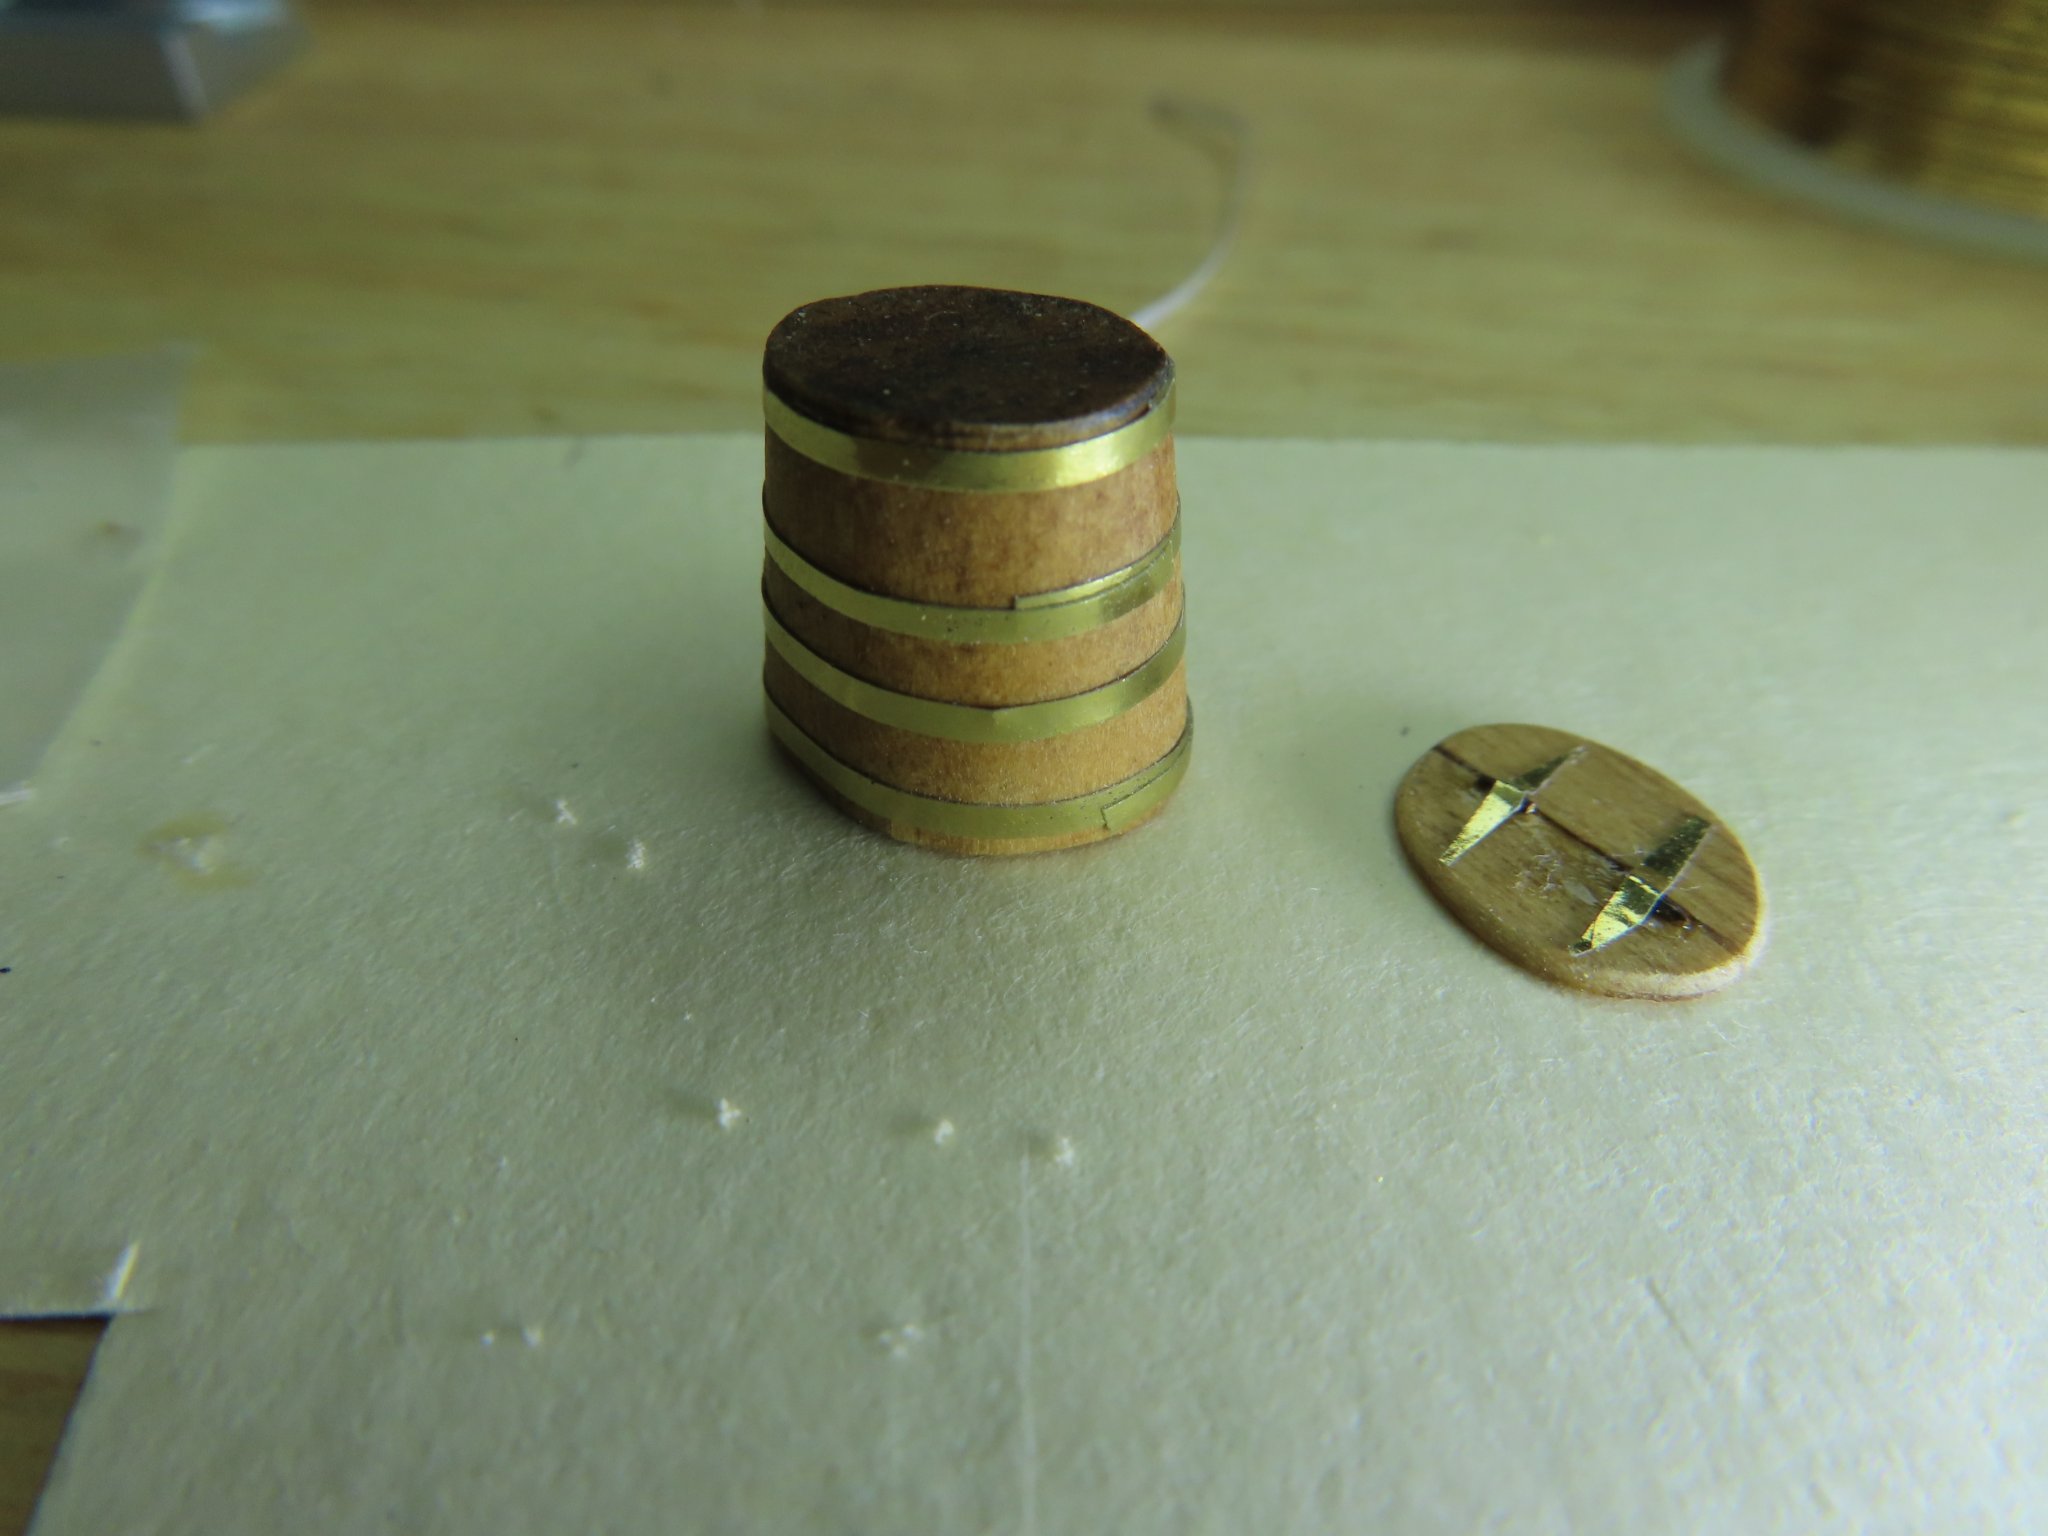
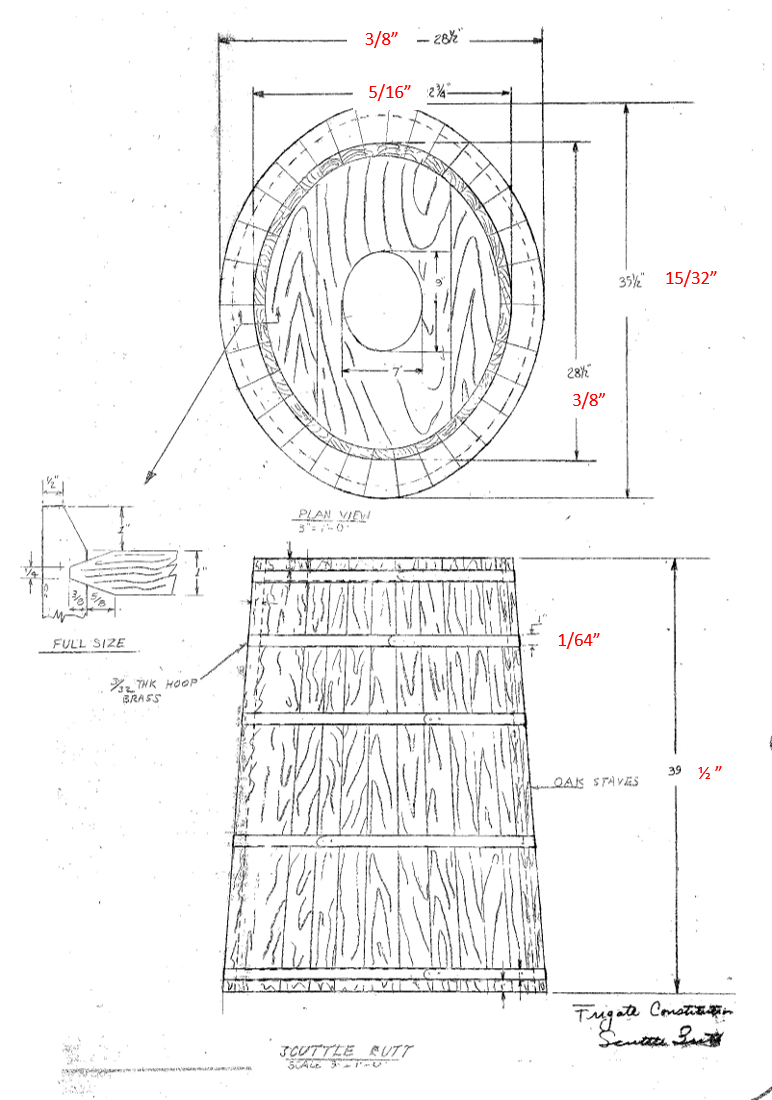
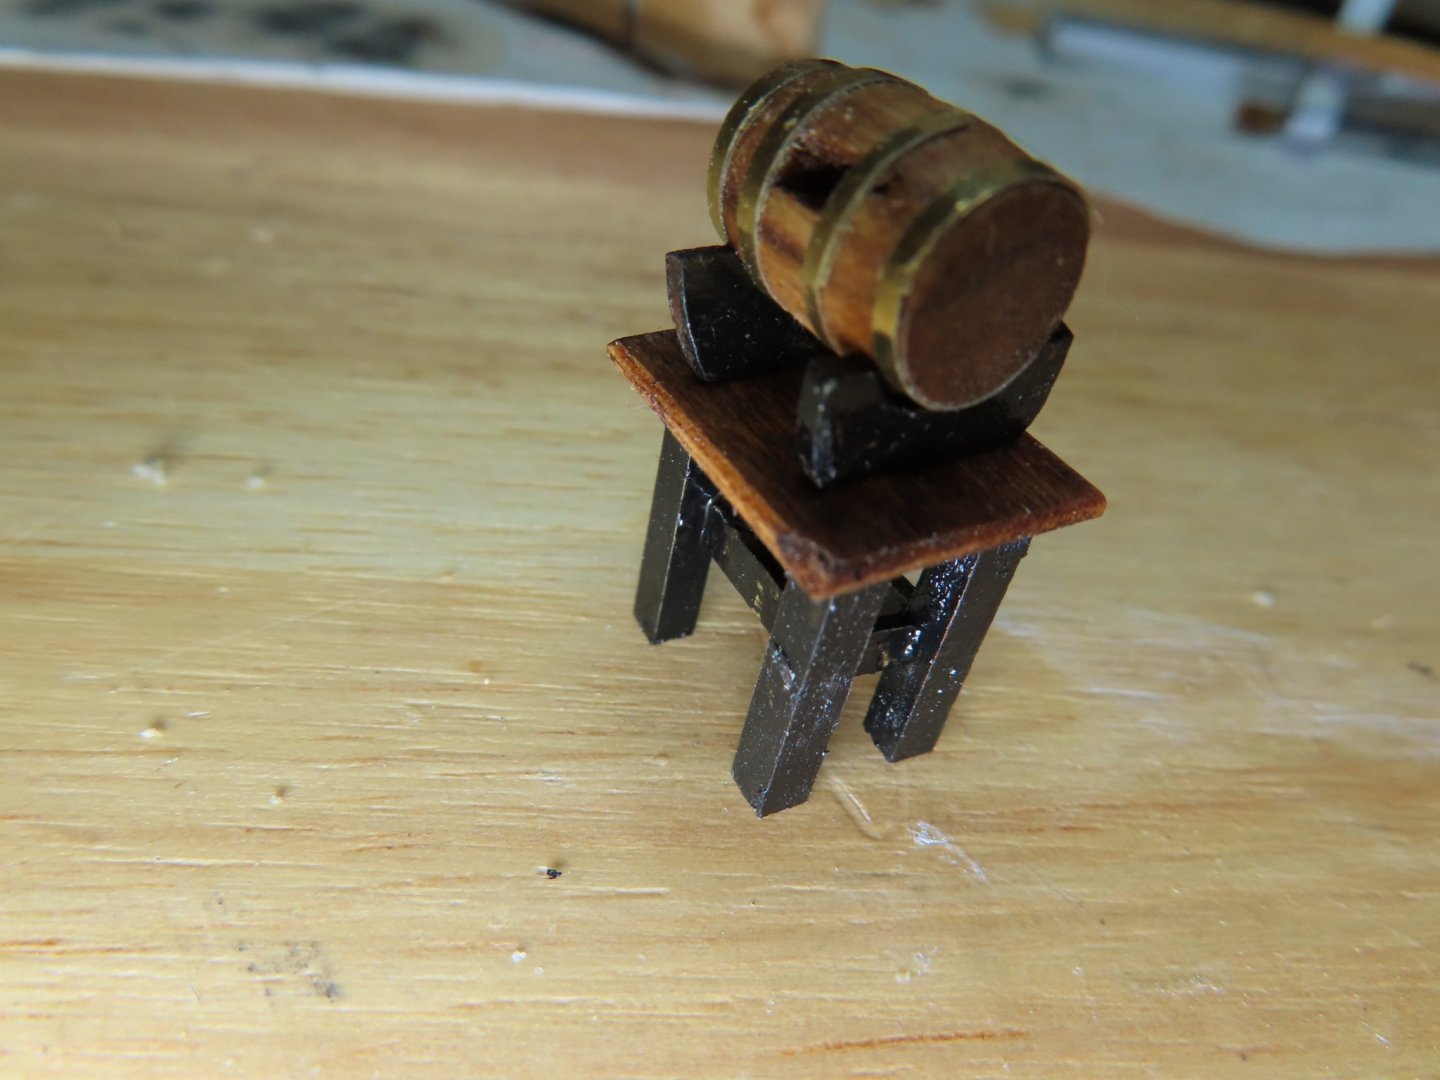
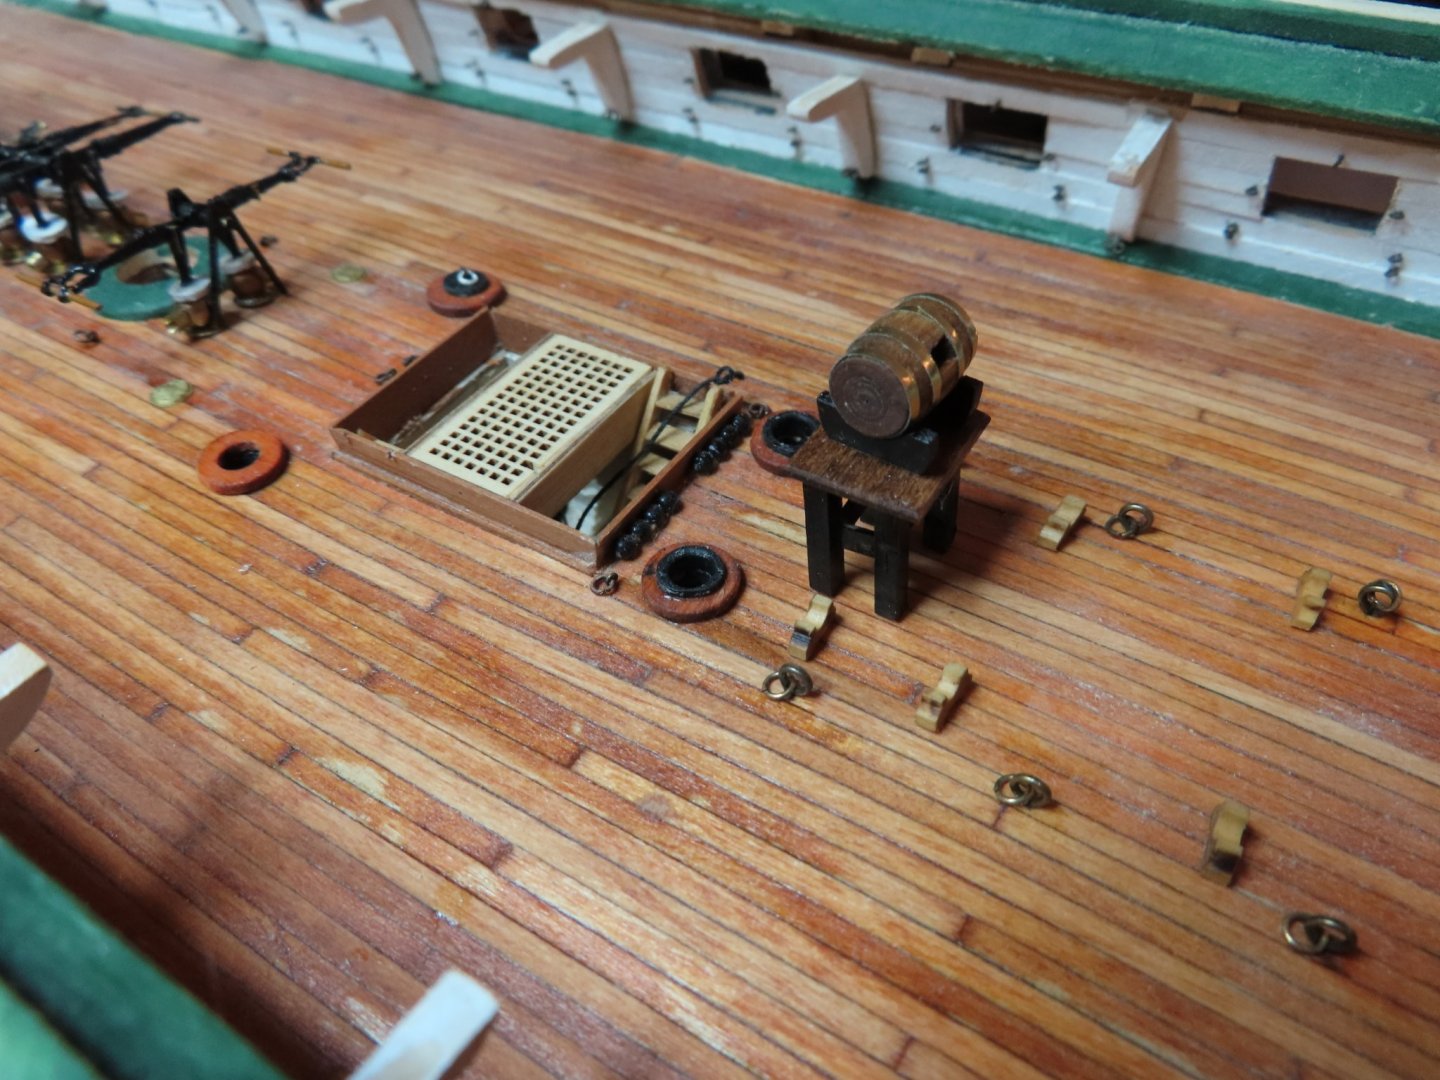
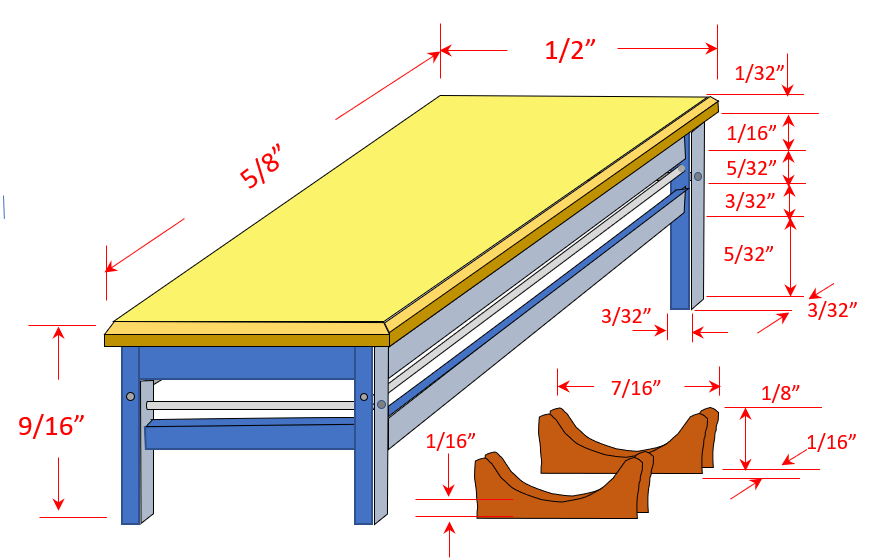
I did not have any plans for the scuttlebutt table or the barrel stand, so their dimensions were guesstimated and came up with the following plan. It was just a matter of making the boxwood pieces and assembling them. The tabletop was stained Minwax Mahogany 225. I initially tried to stain the table structure with Minwax Ebony 2718, but the stain was too transparent, so it was painted with gloss enamel black. Brass tape was used for the brass barrel bands. This was the same kind of tape I used for the copper cladding on the stove pan. You may have noticed that the images show there are six brass bands on the scuttlebutt whereas I have only four. That was a matter of practical necessity because I could not cut the tape any narrower with consistent precision.


-
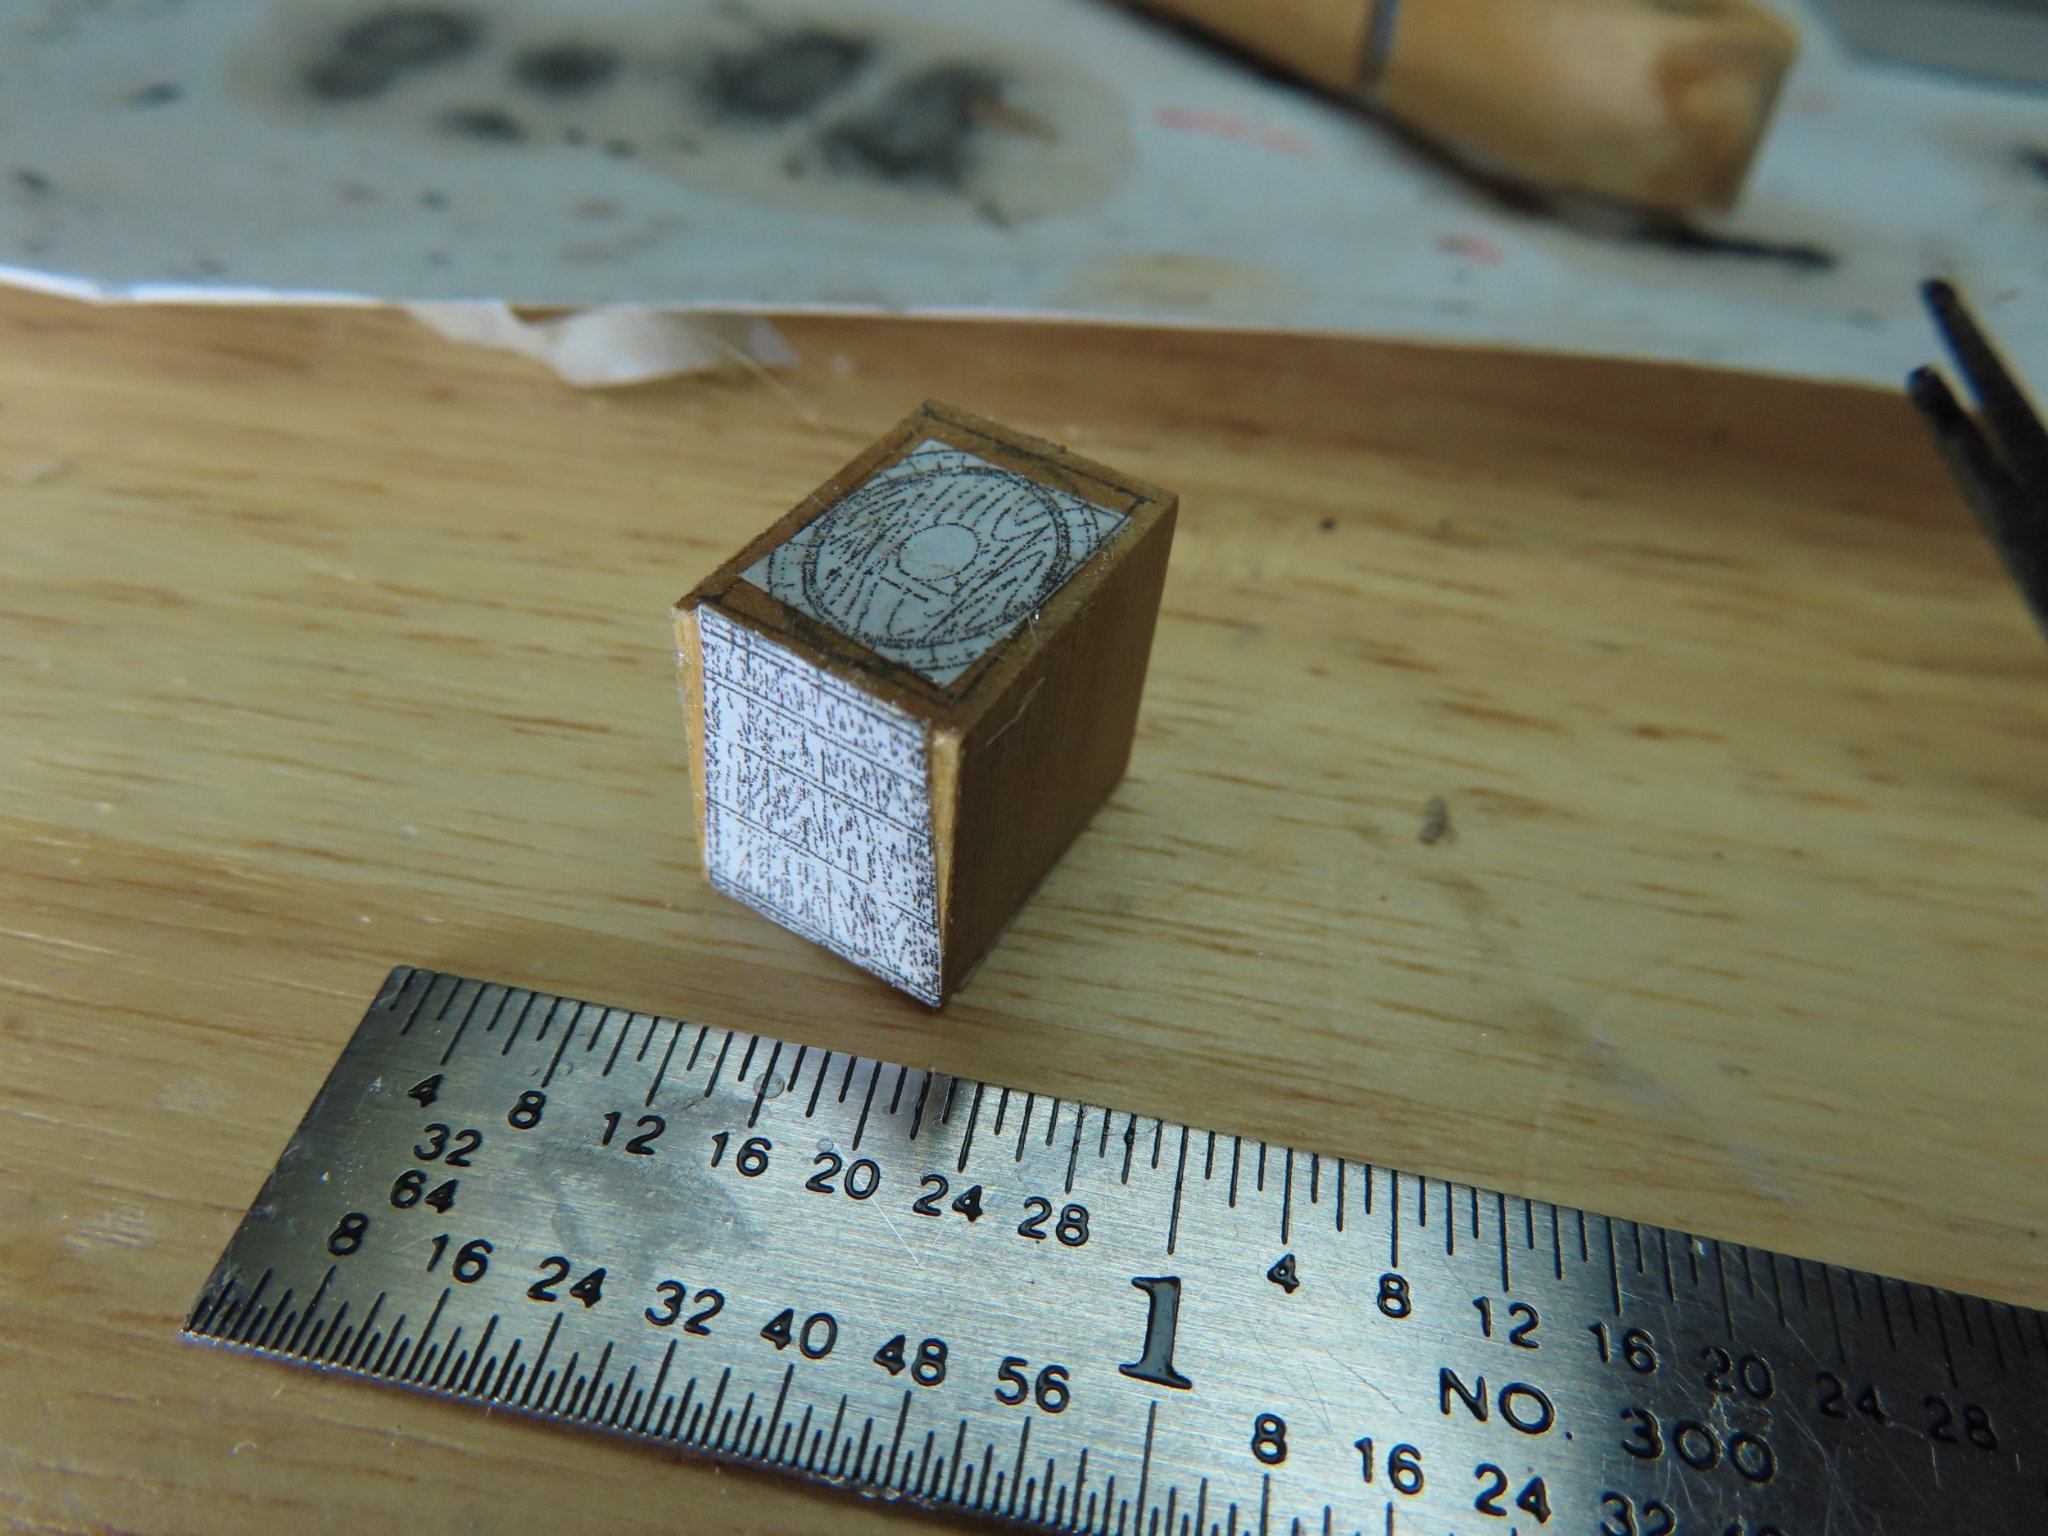
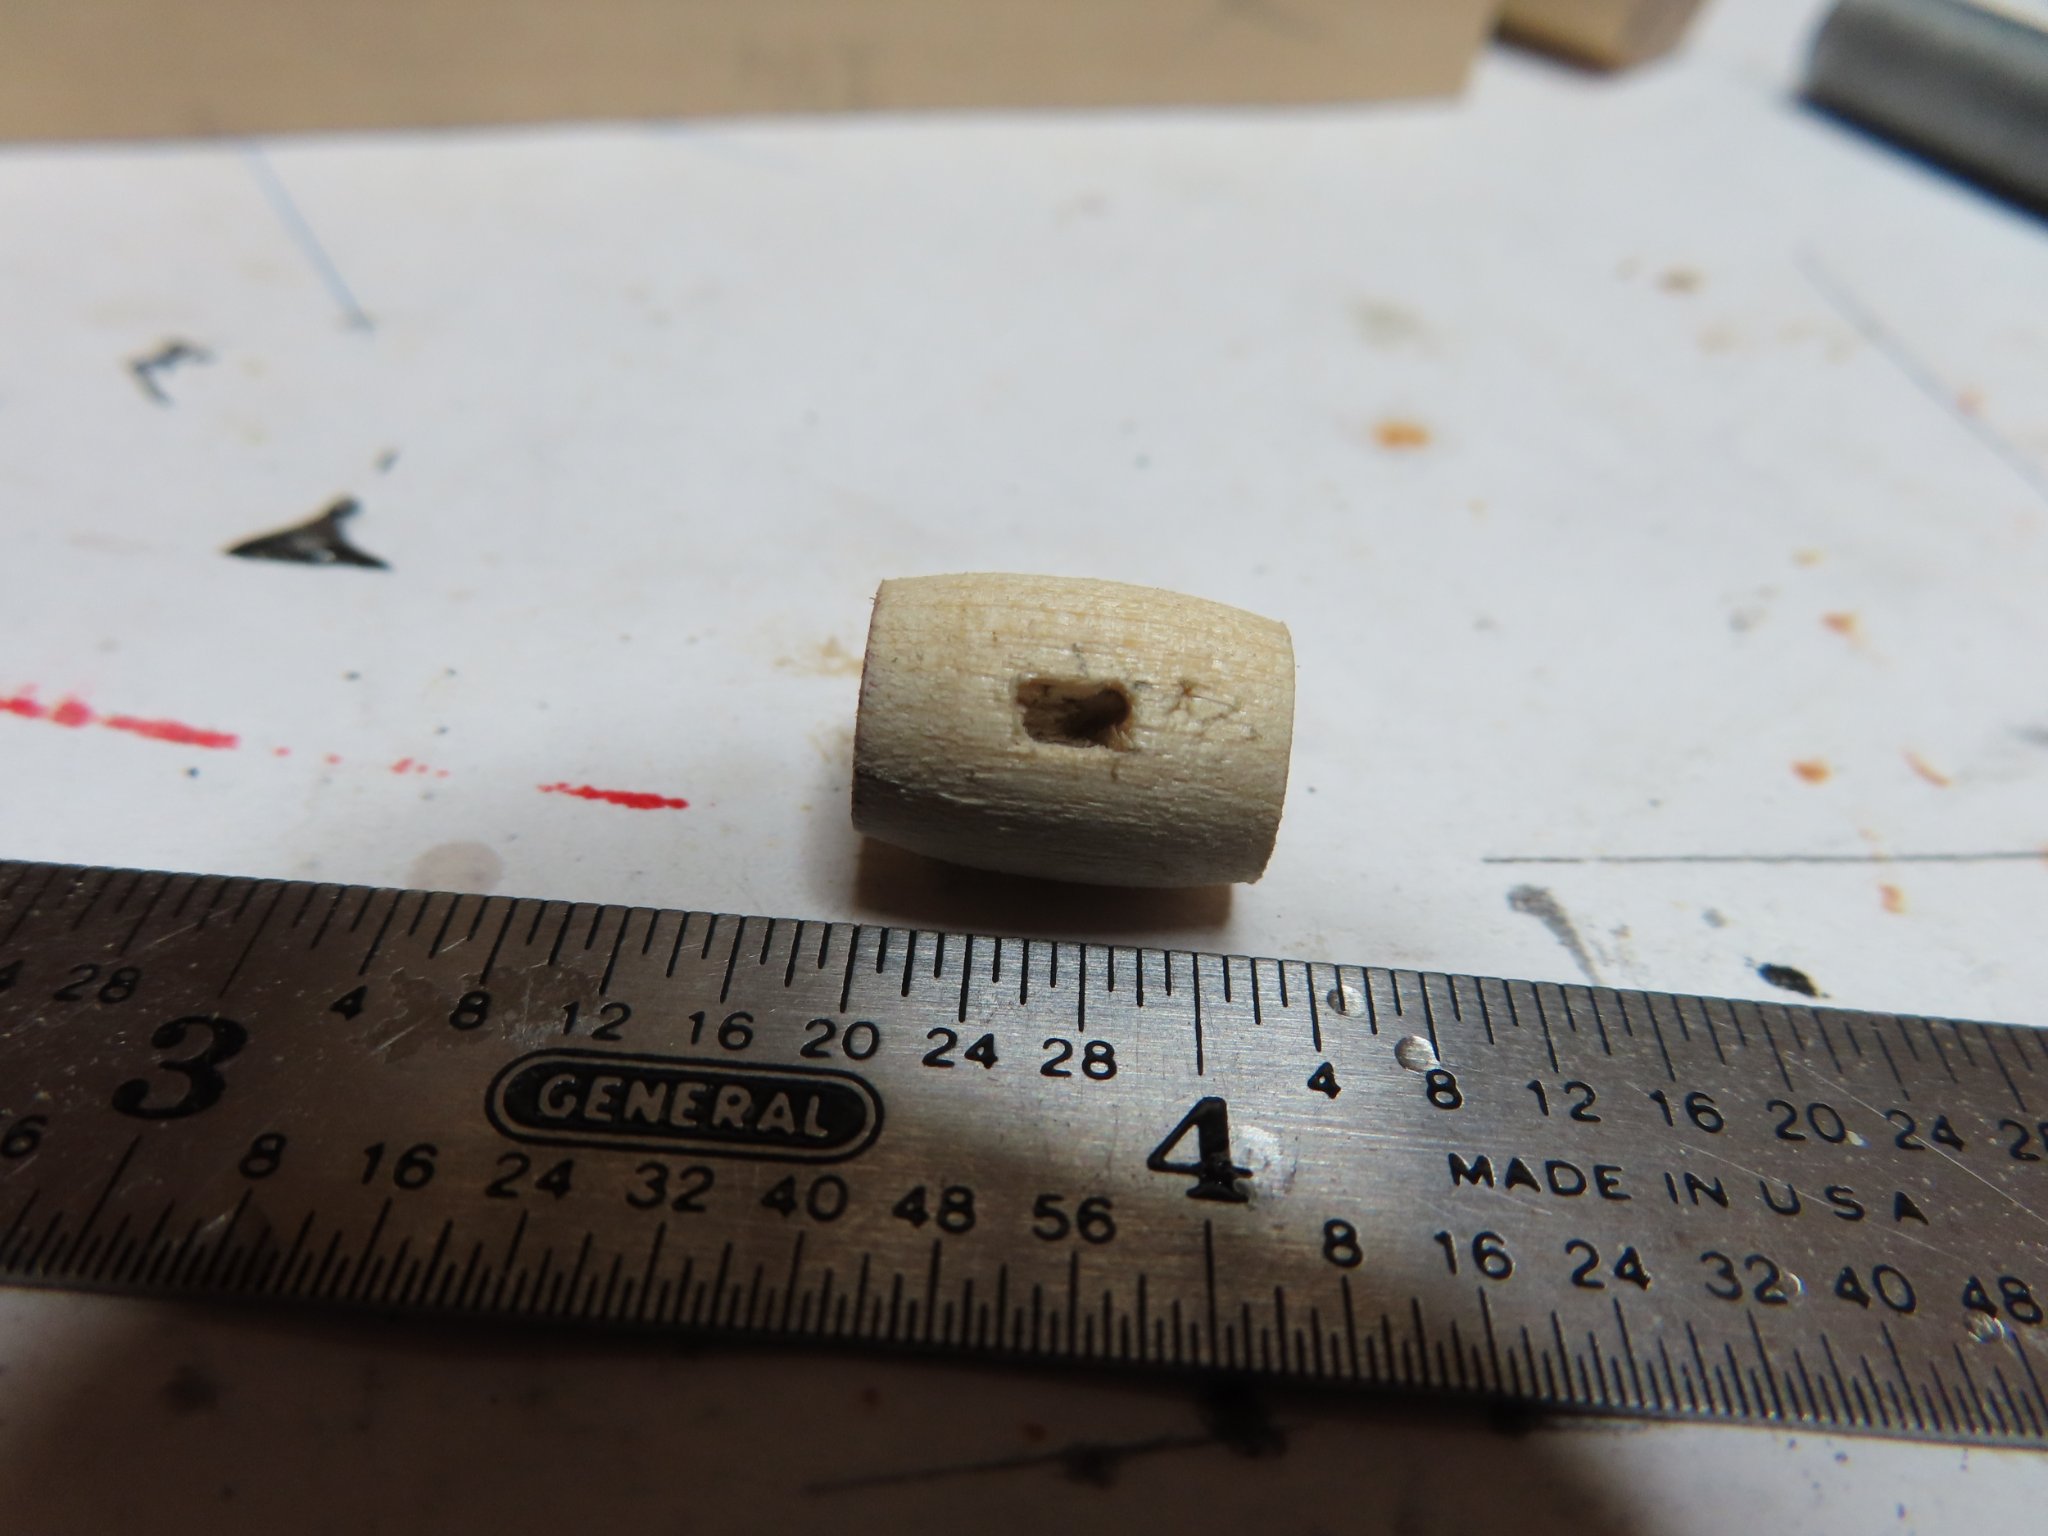
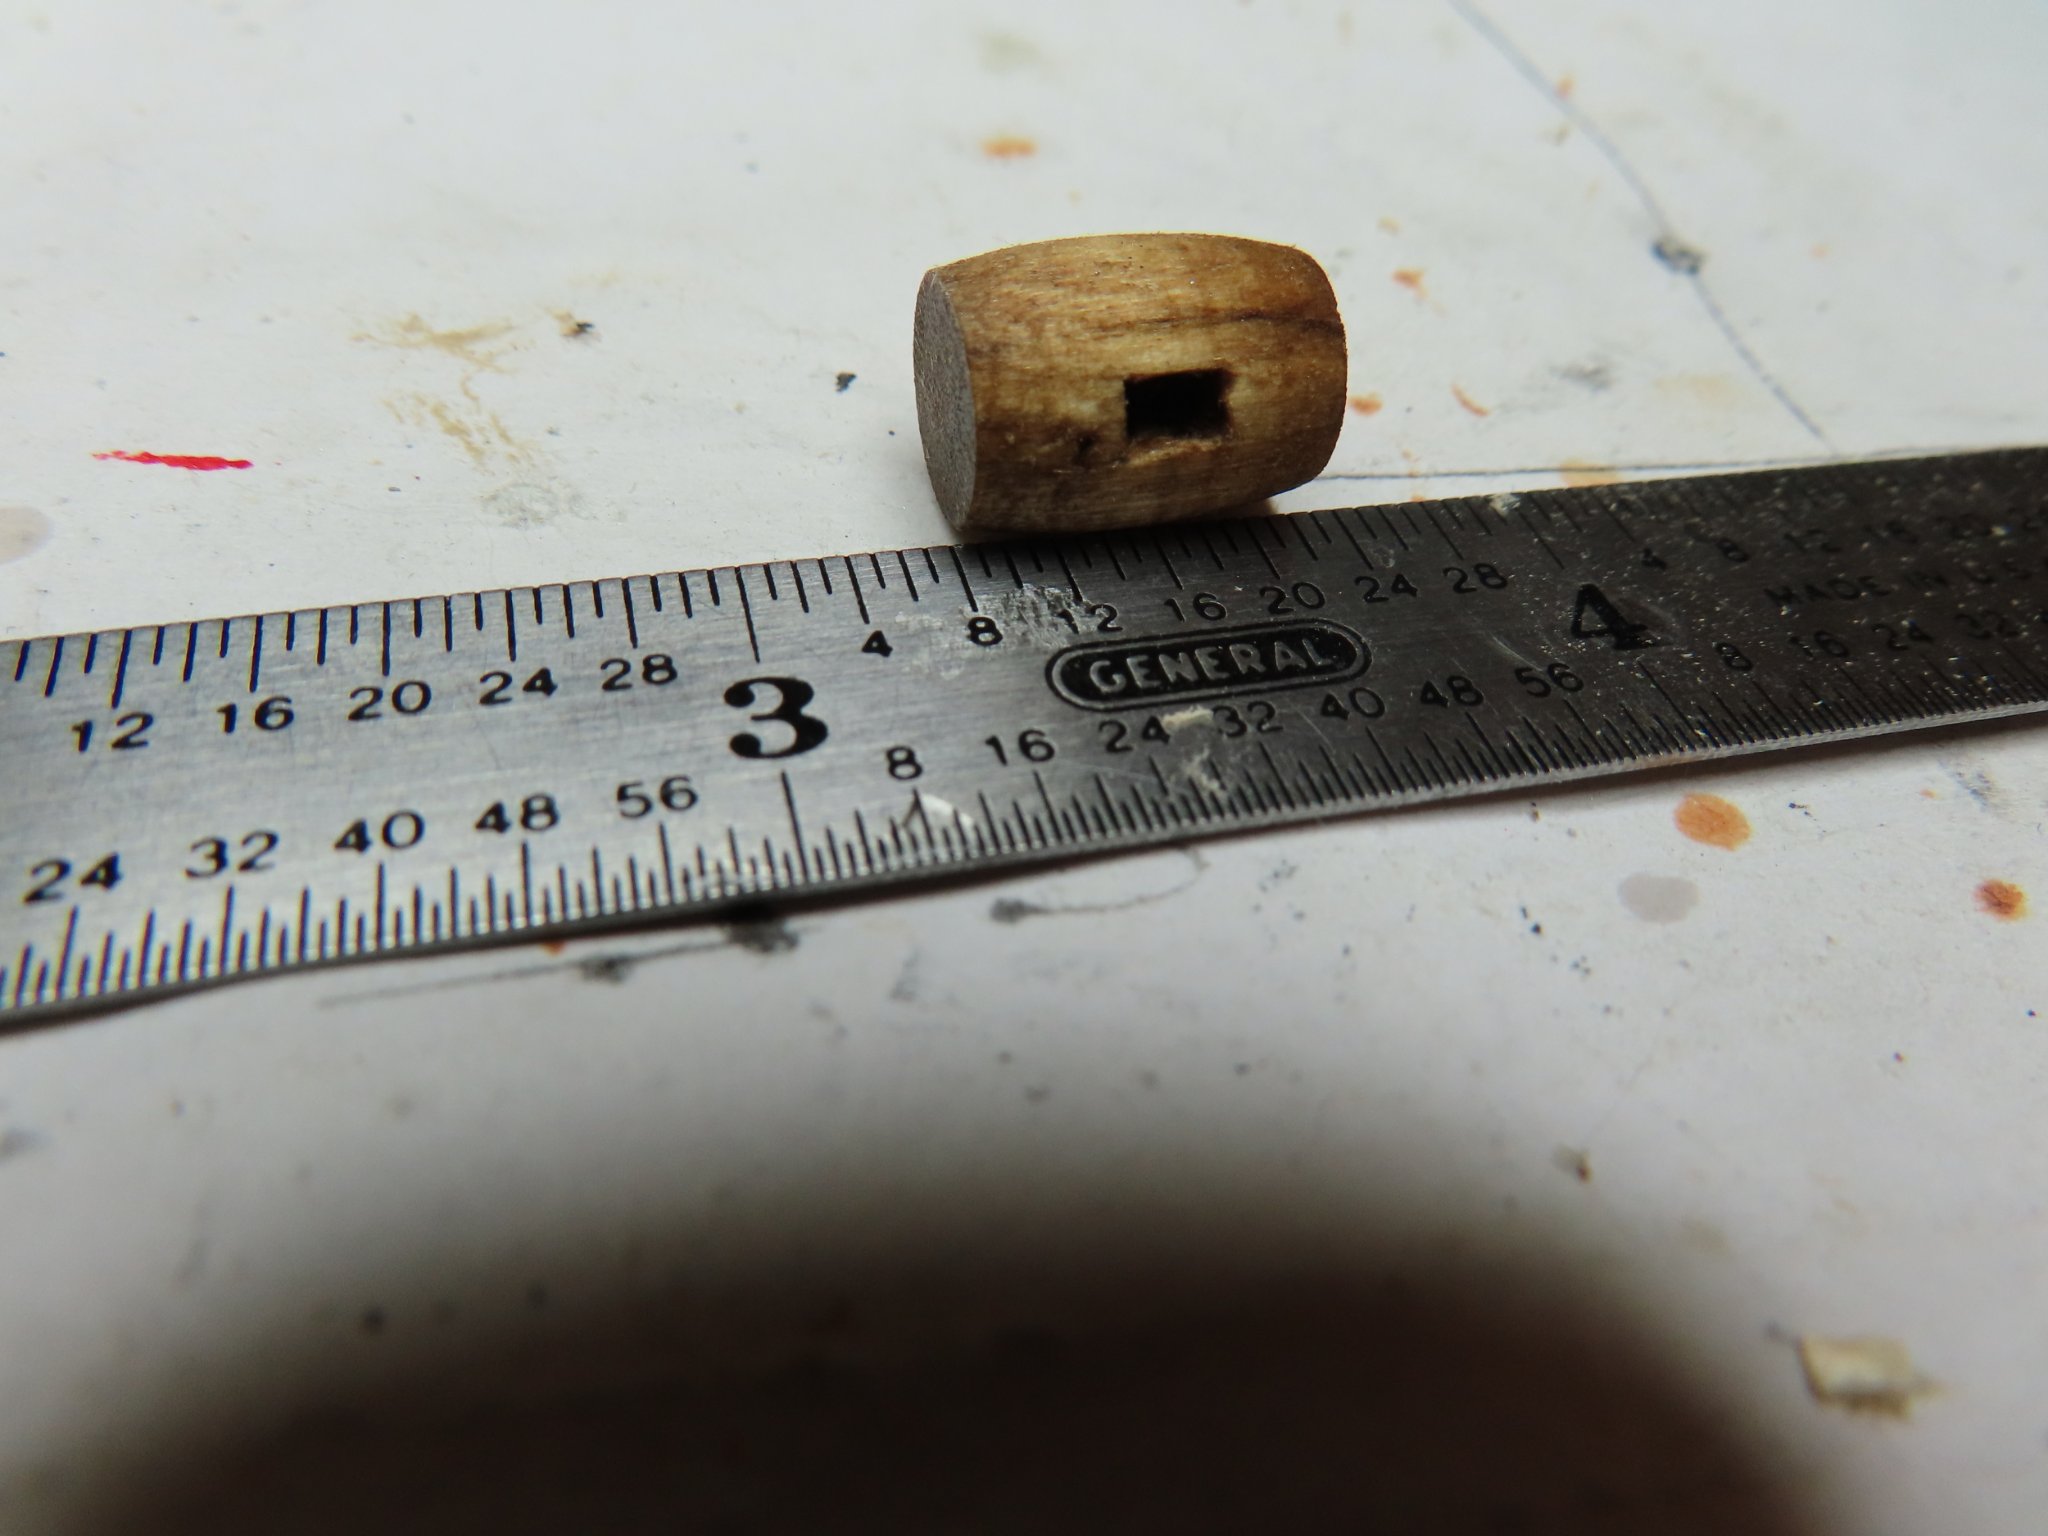
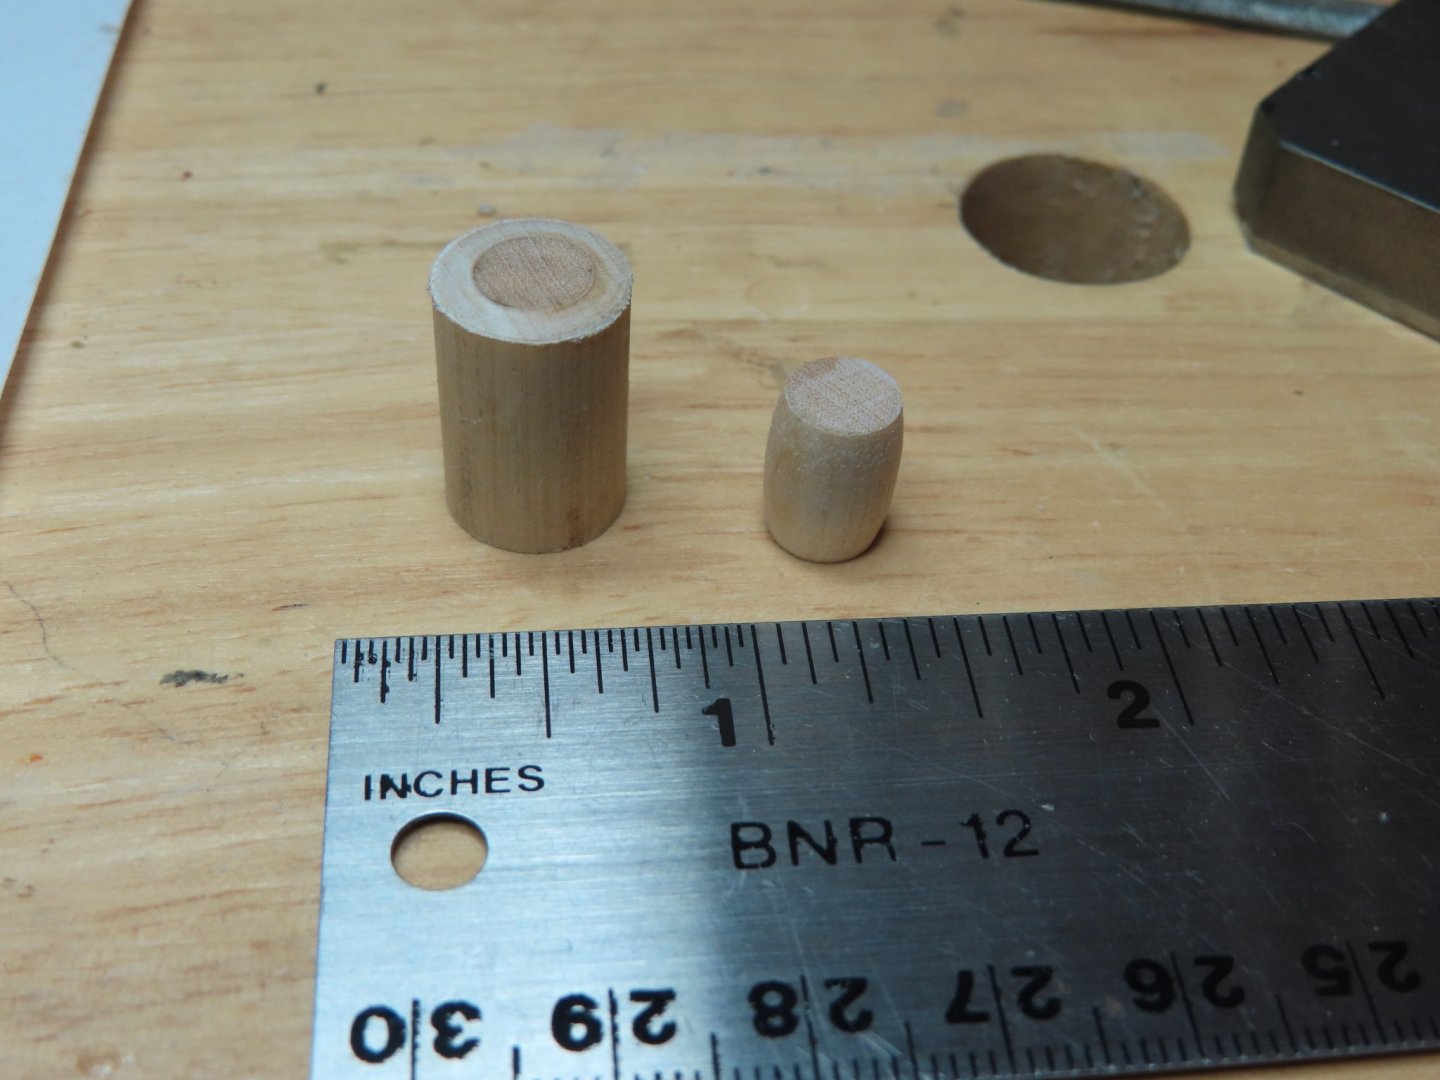
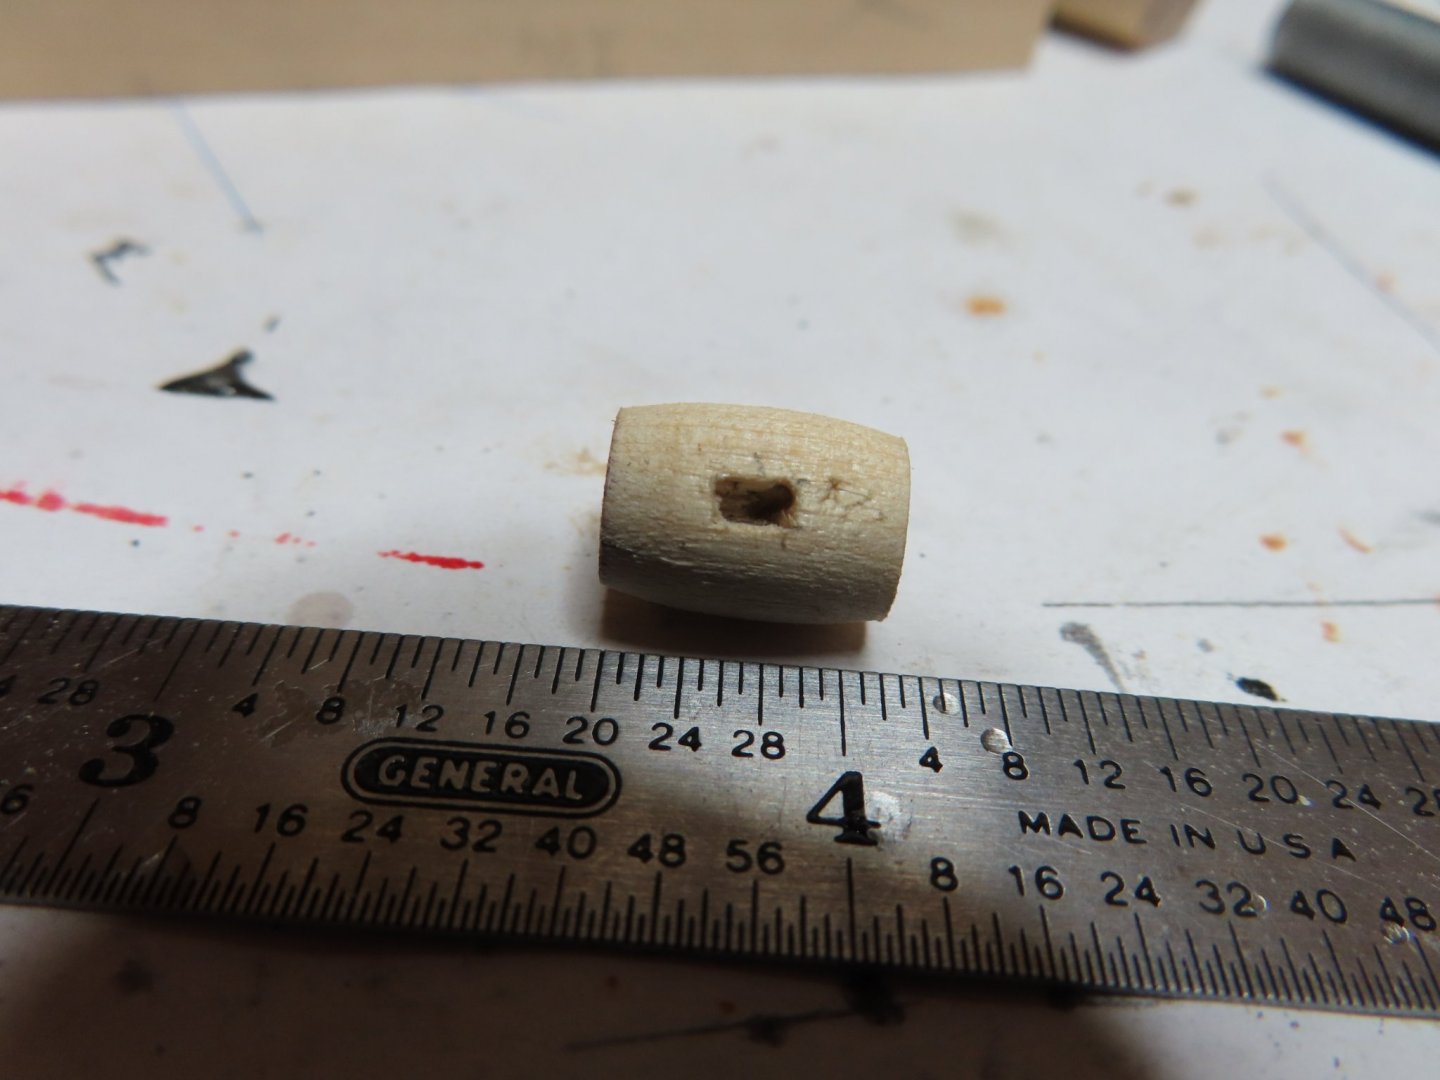
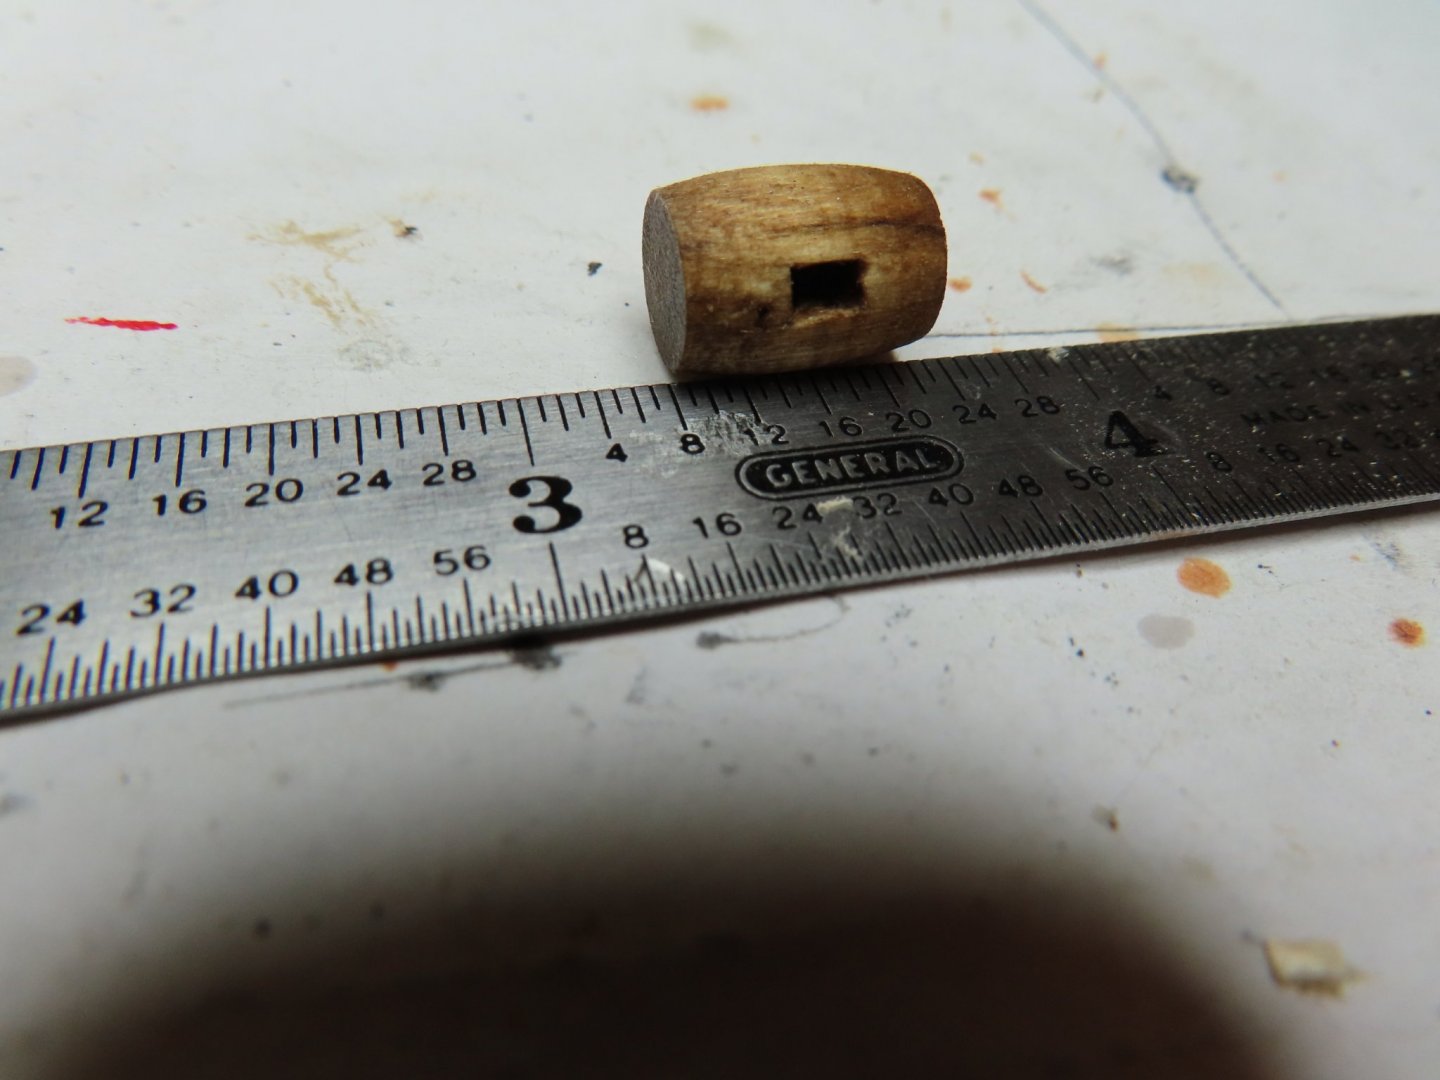
I have a simple tabletop Micro-Mark wood lathe that I have hardly used and have not much skill with. With this I made my very first wooden barrel using a short length of ½” dia. dowel. The barrel was cut, shaped, and then sliced off the dowel with the Byrnes saw. Surprisingly, I did it right on the first try! That is not my usual experience. The square hole was cut and then the barrel was stained with Minwax Early American 230.
-
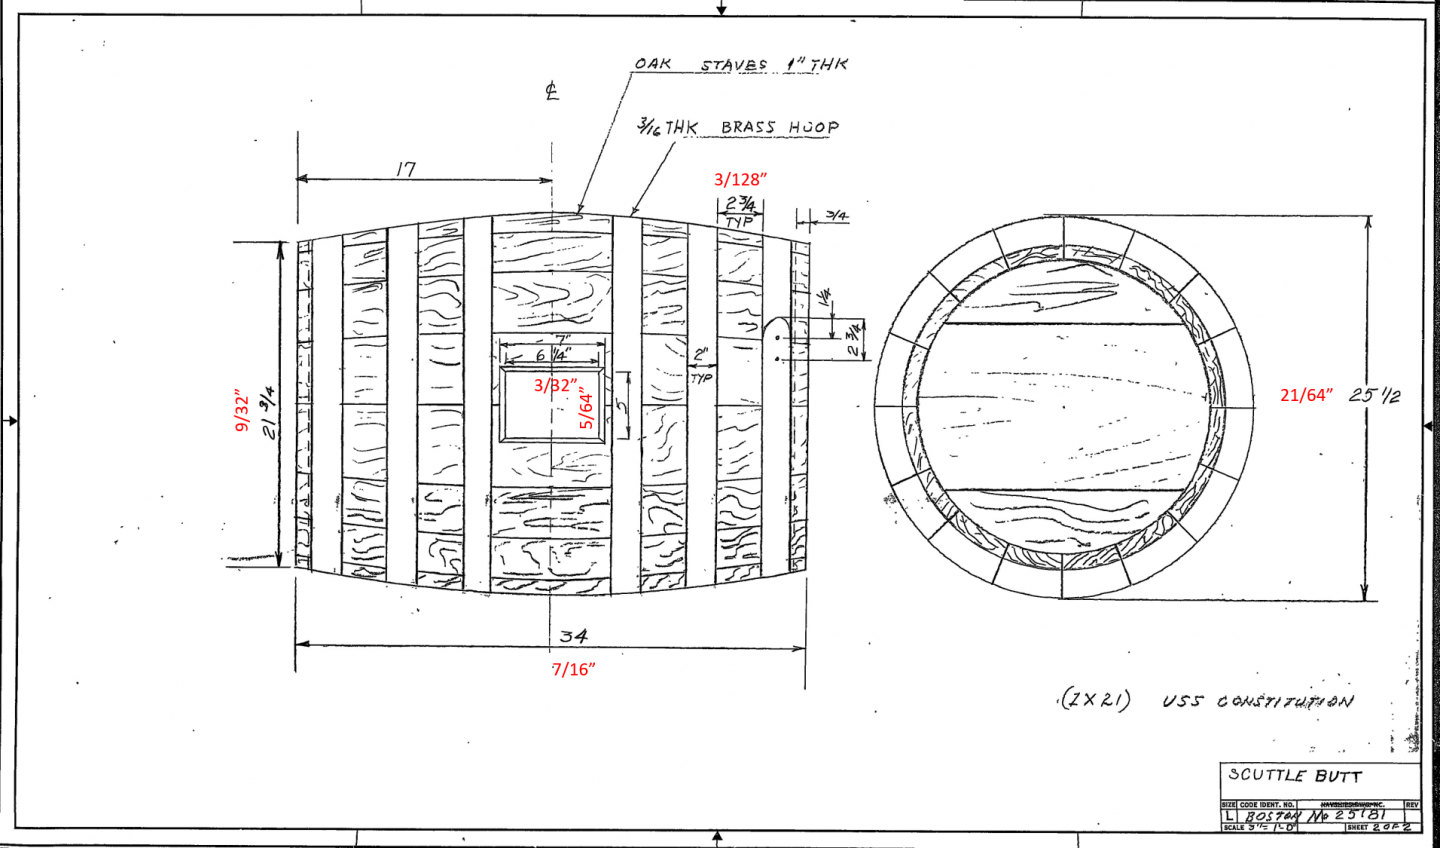
Scuttlebutt and Scuttlebutt Table I found the US Navy plans for the scuttlebutt, but surprisingly, there were two types. The first one is the one you see on the ship today. It’s the barrel on its side with a square opening. The other, is an upright cask, oval in cross section, almost identical to today’s harness cask. I’ll using that plan as a guide when I make harness cask. The US Navy plan below has my working dimensions (in red) for the fabrication of the scale barrel. (BTW usedtosail, the name's Gerson,... Jonathan Gerson, but I'll take the compliment anyways 8-) )
-
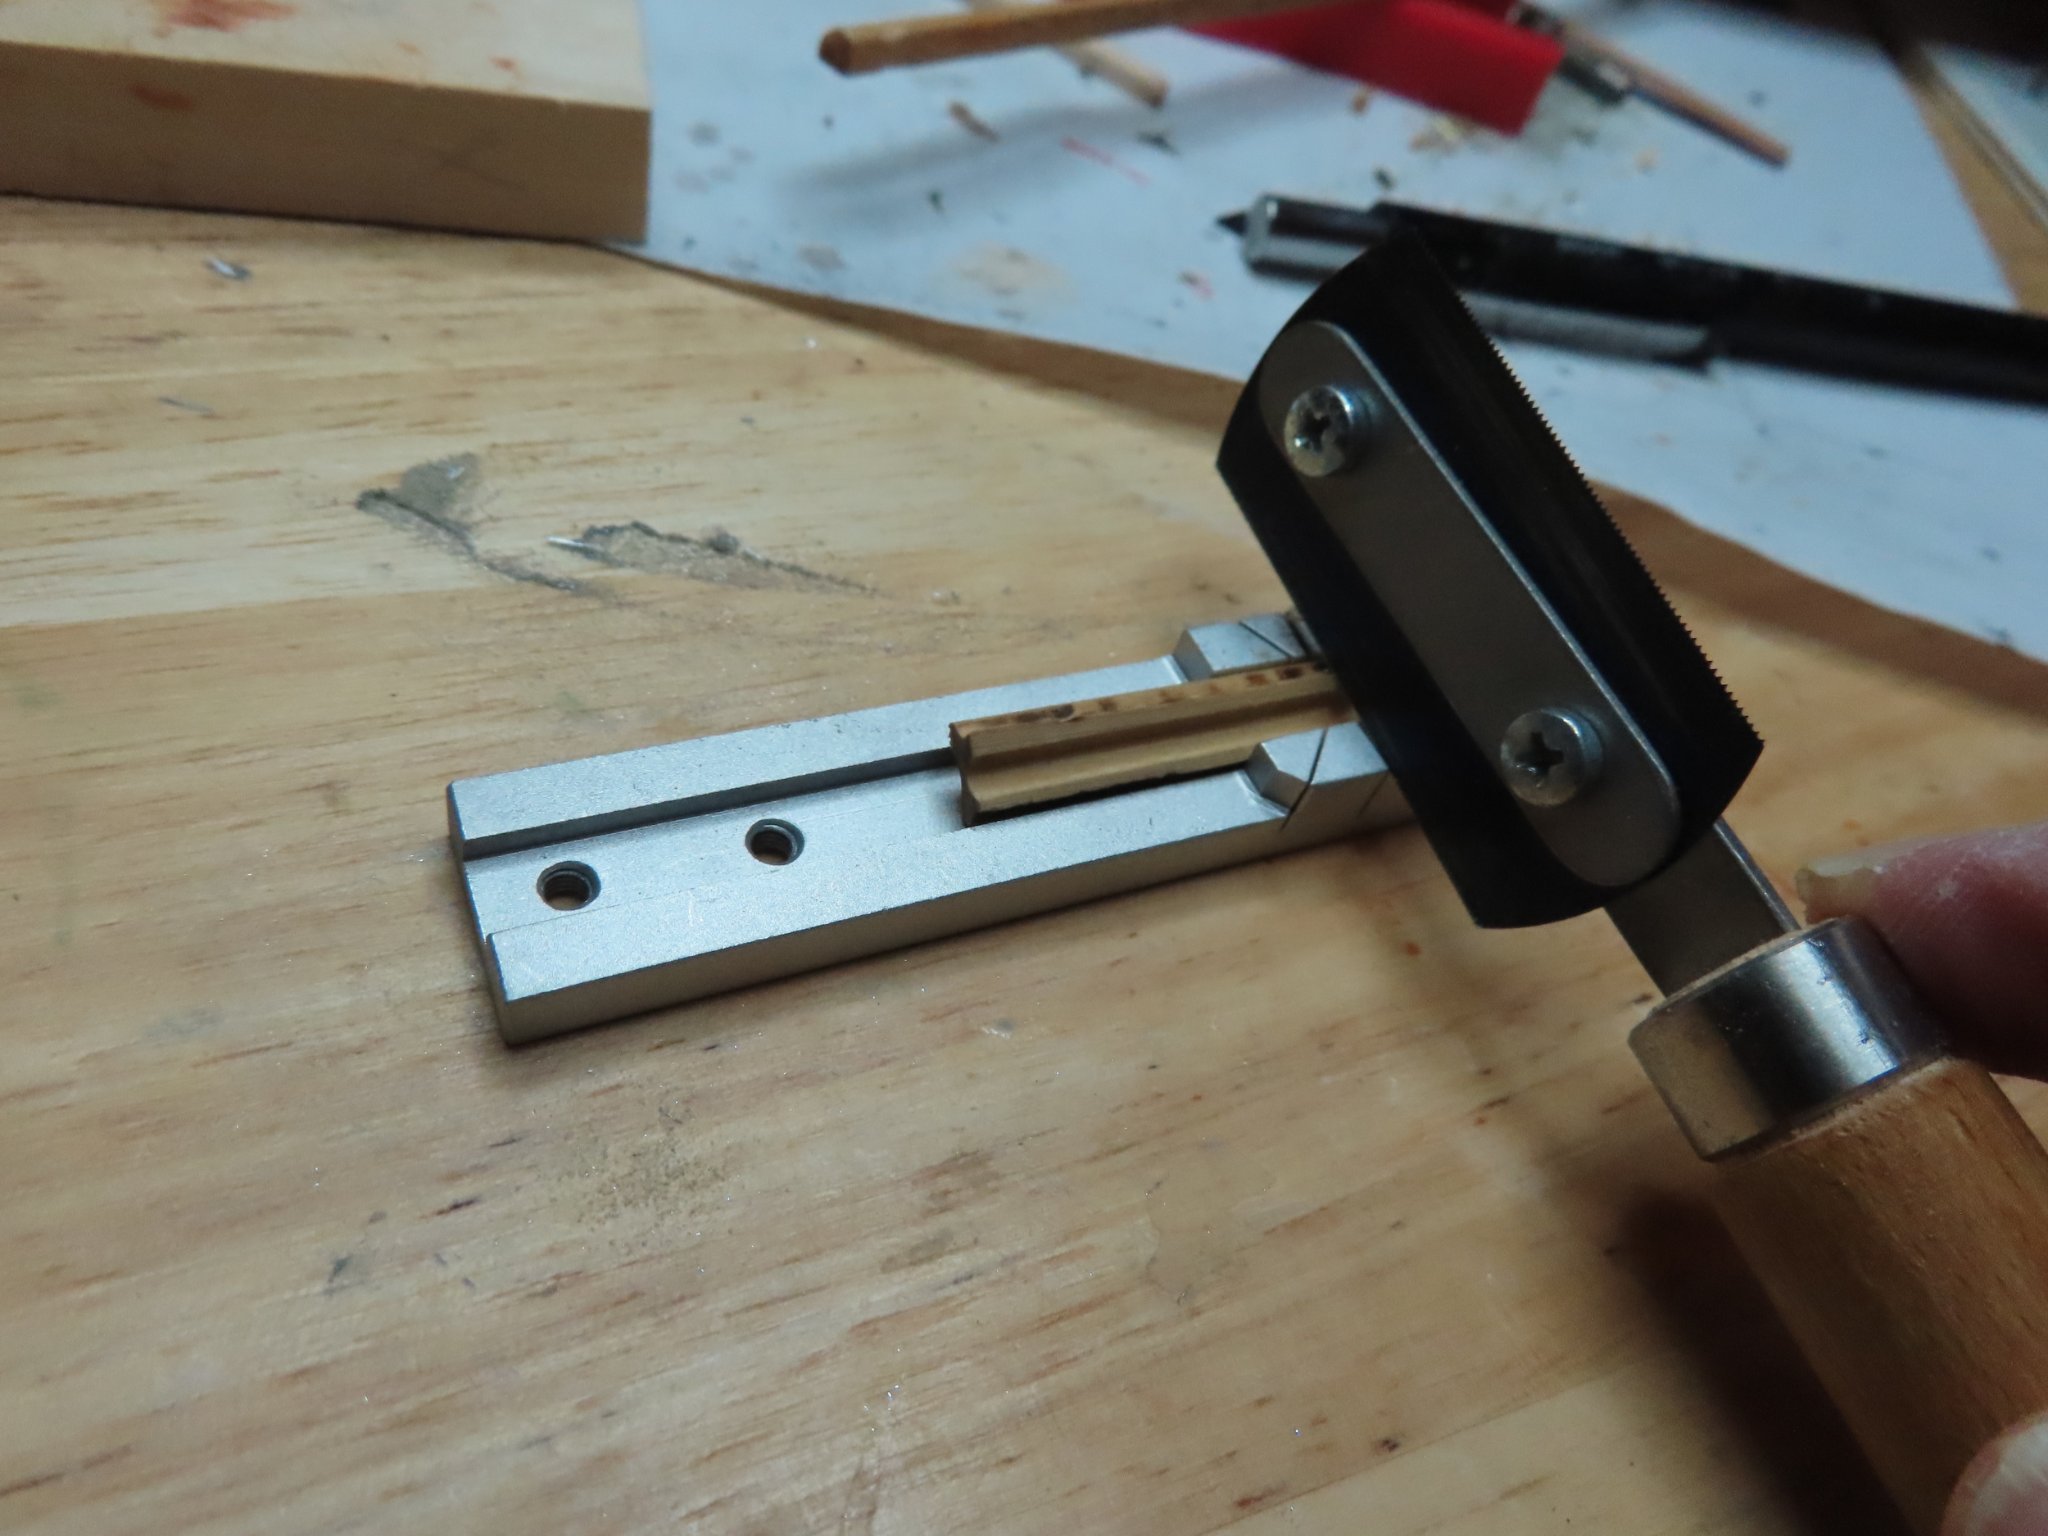
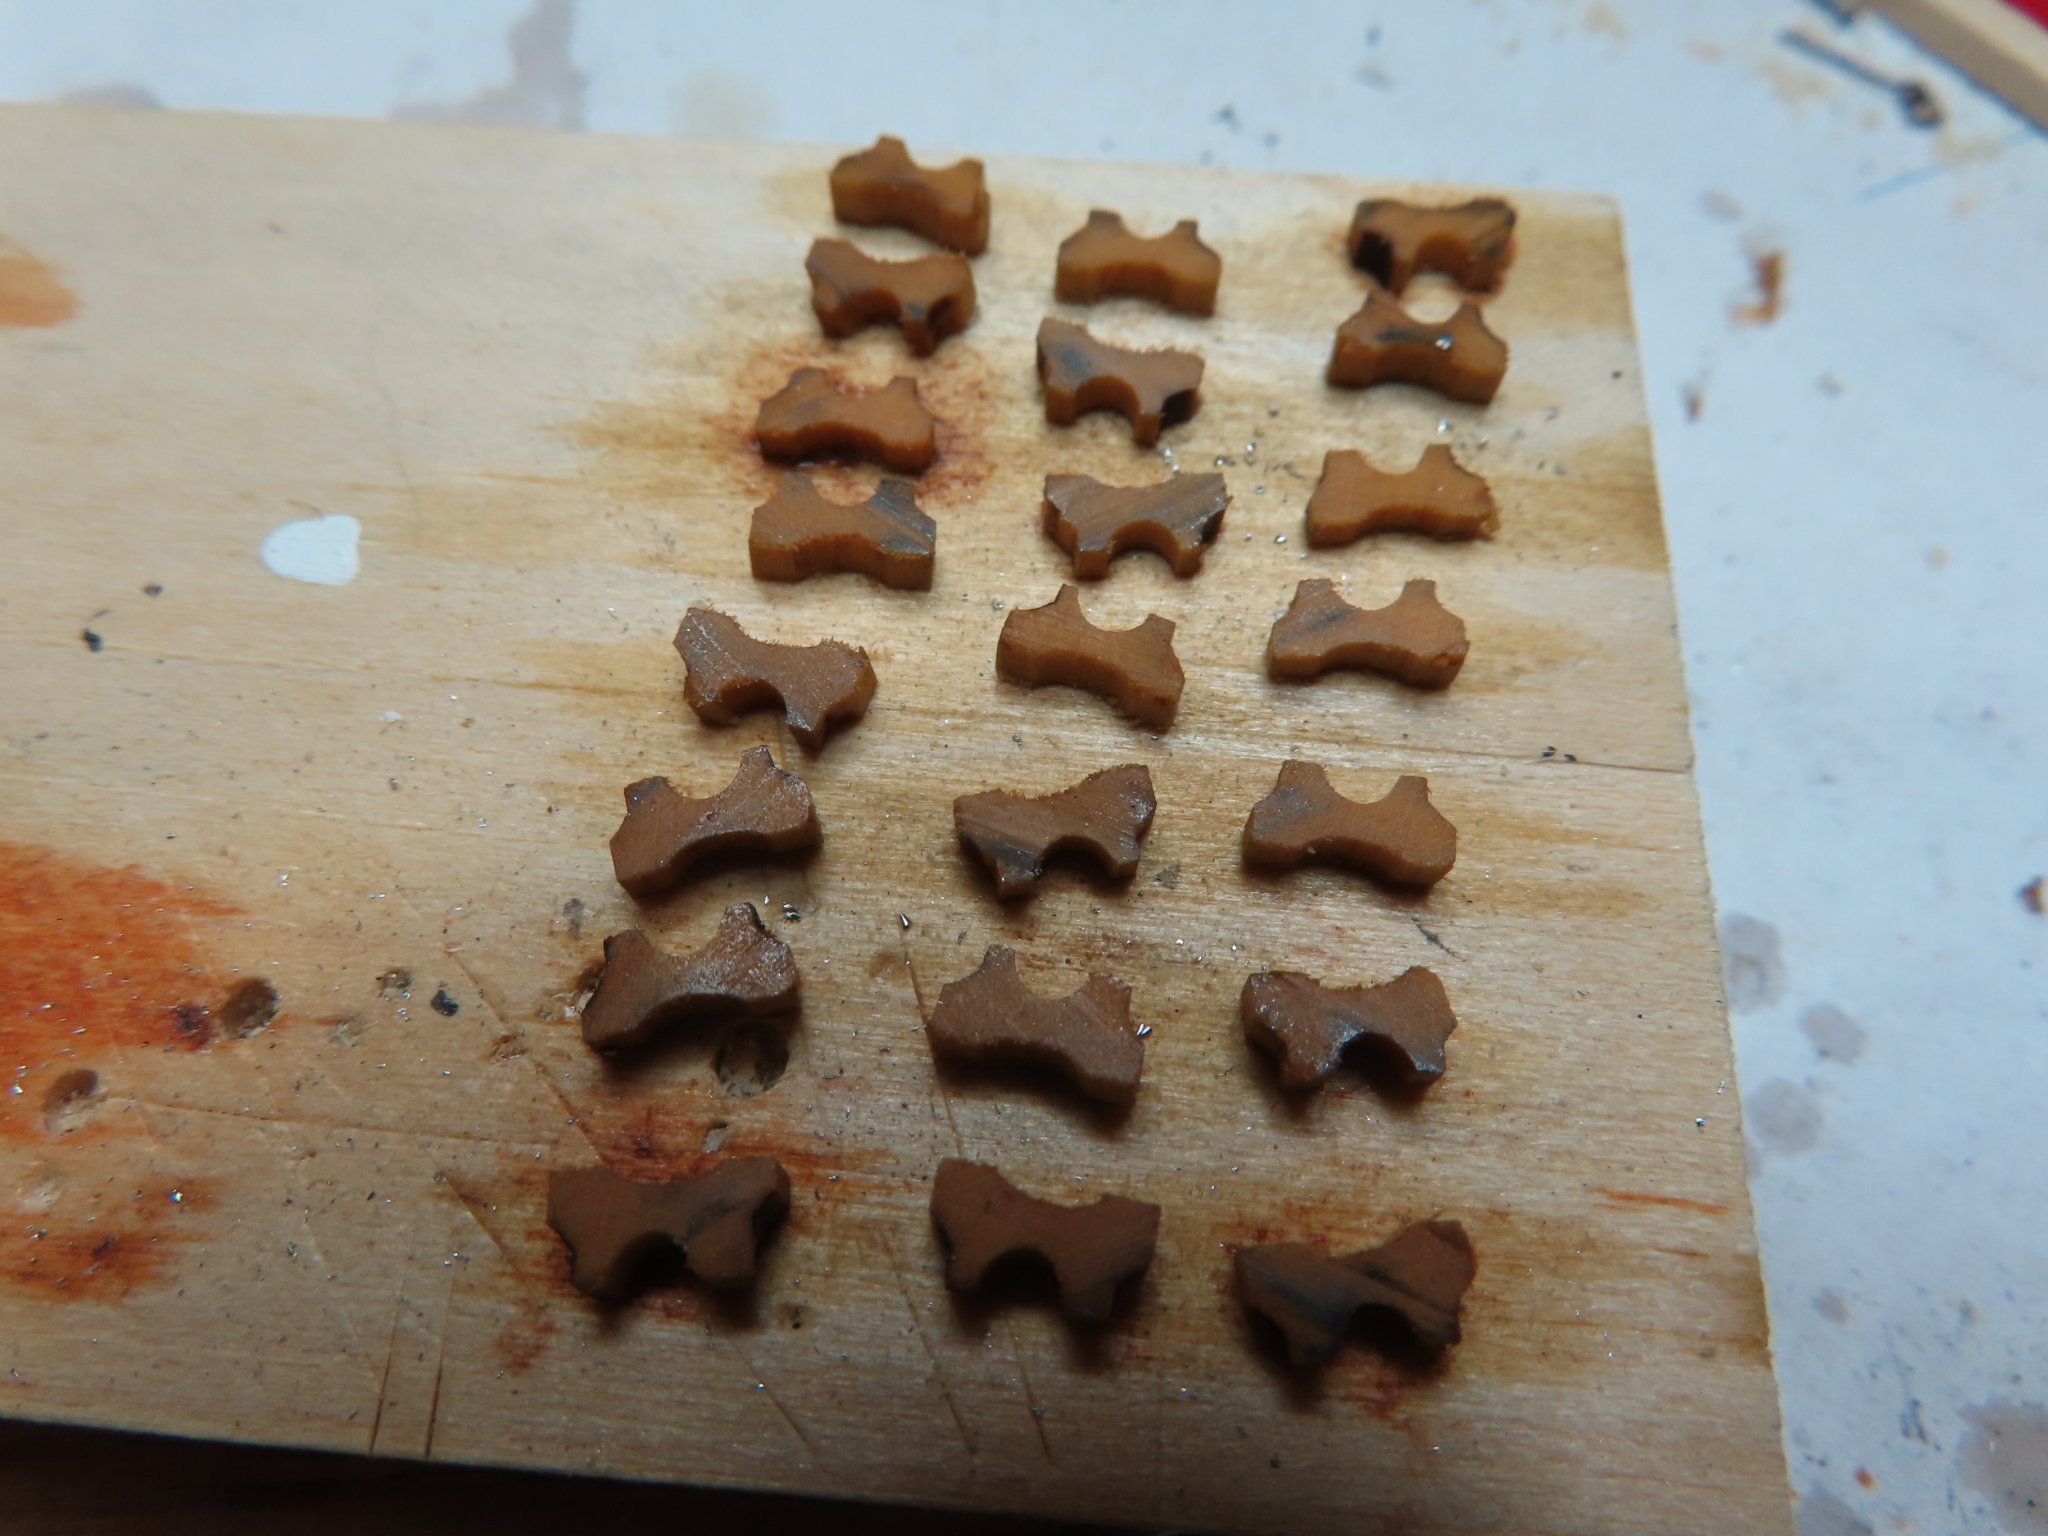
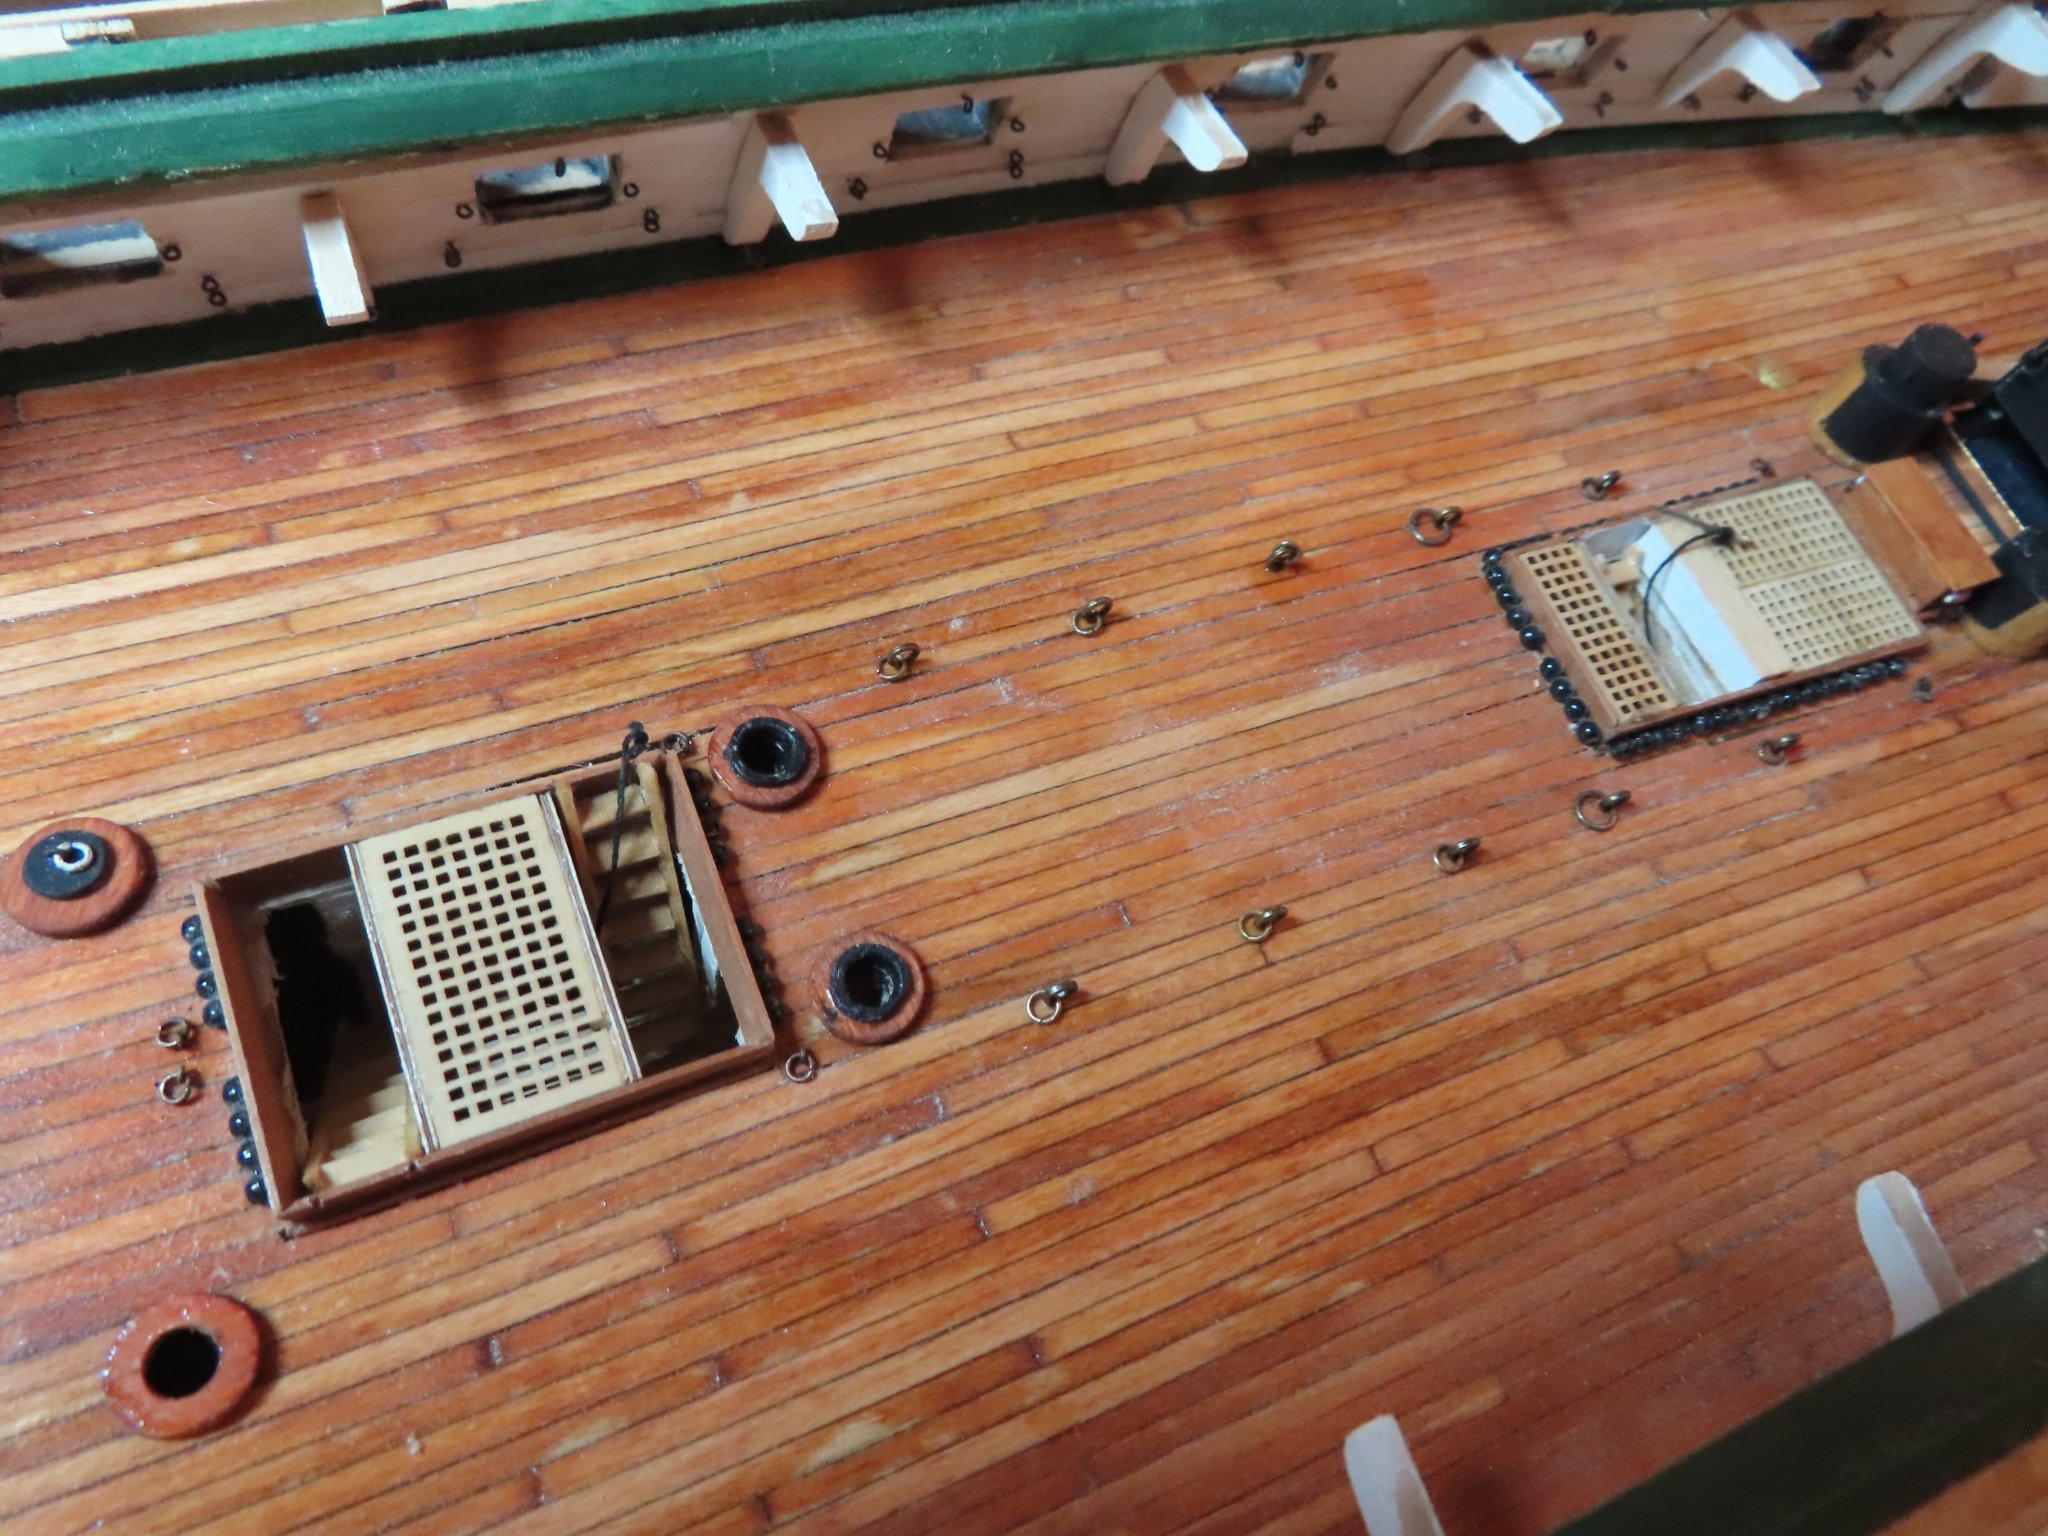
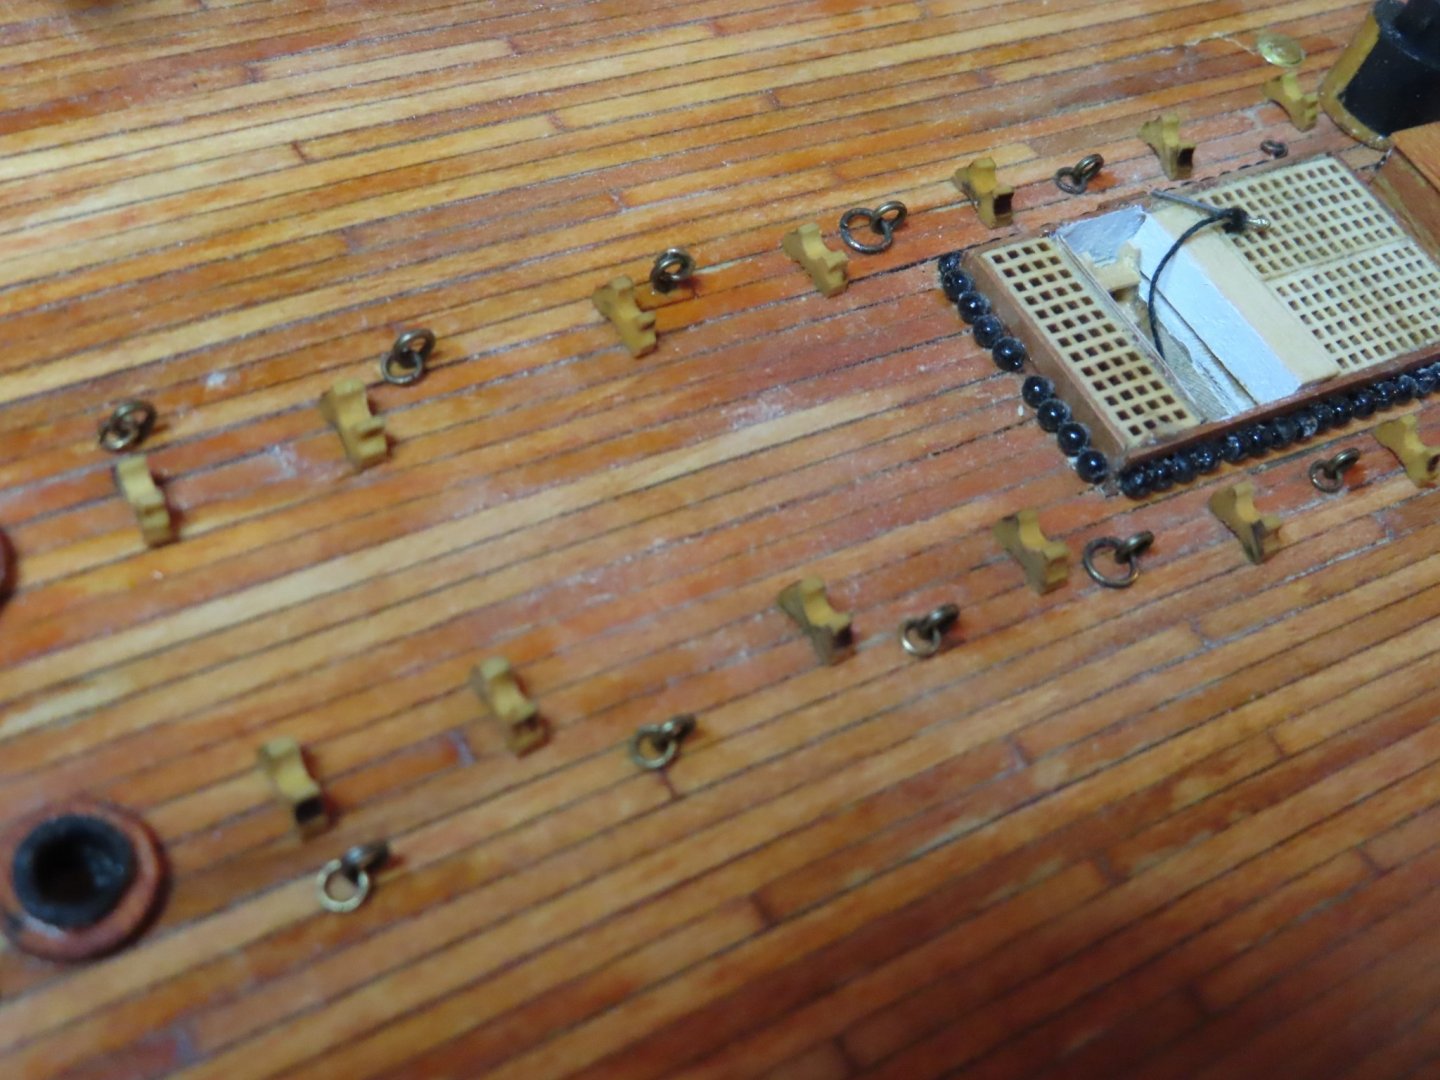
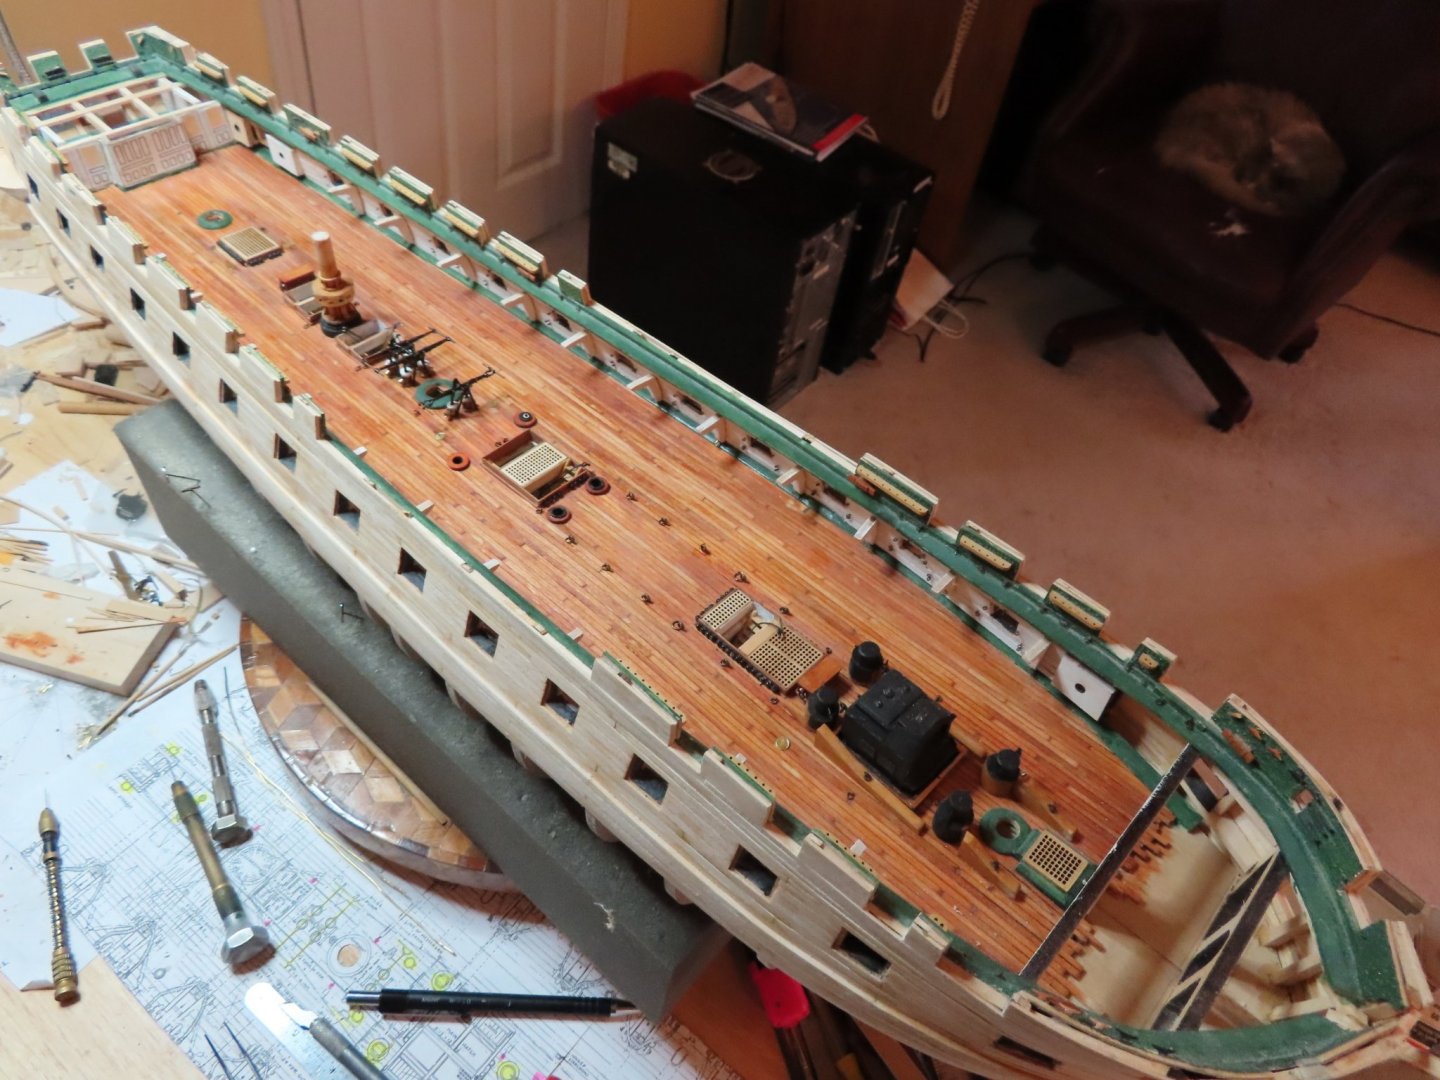
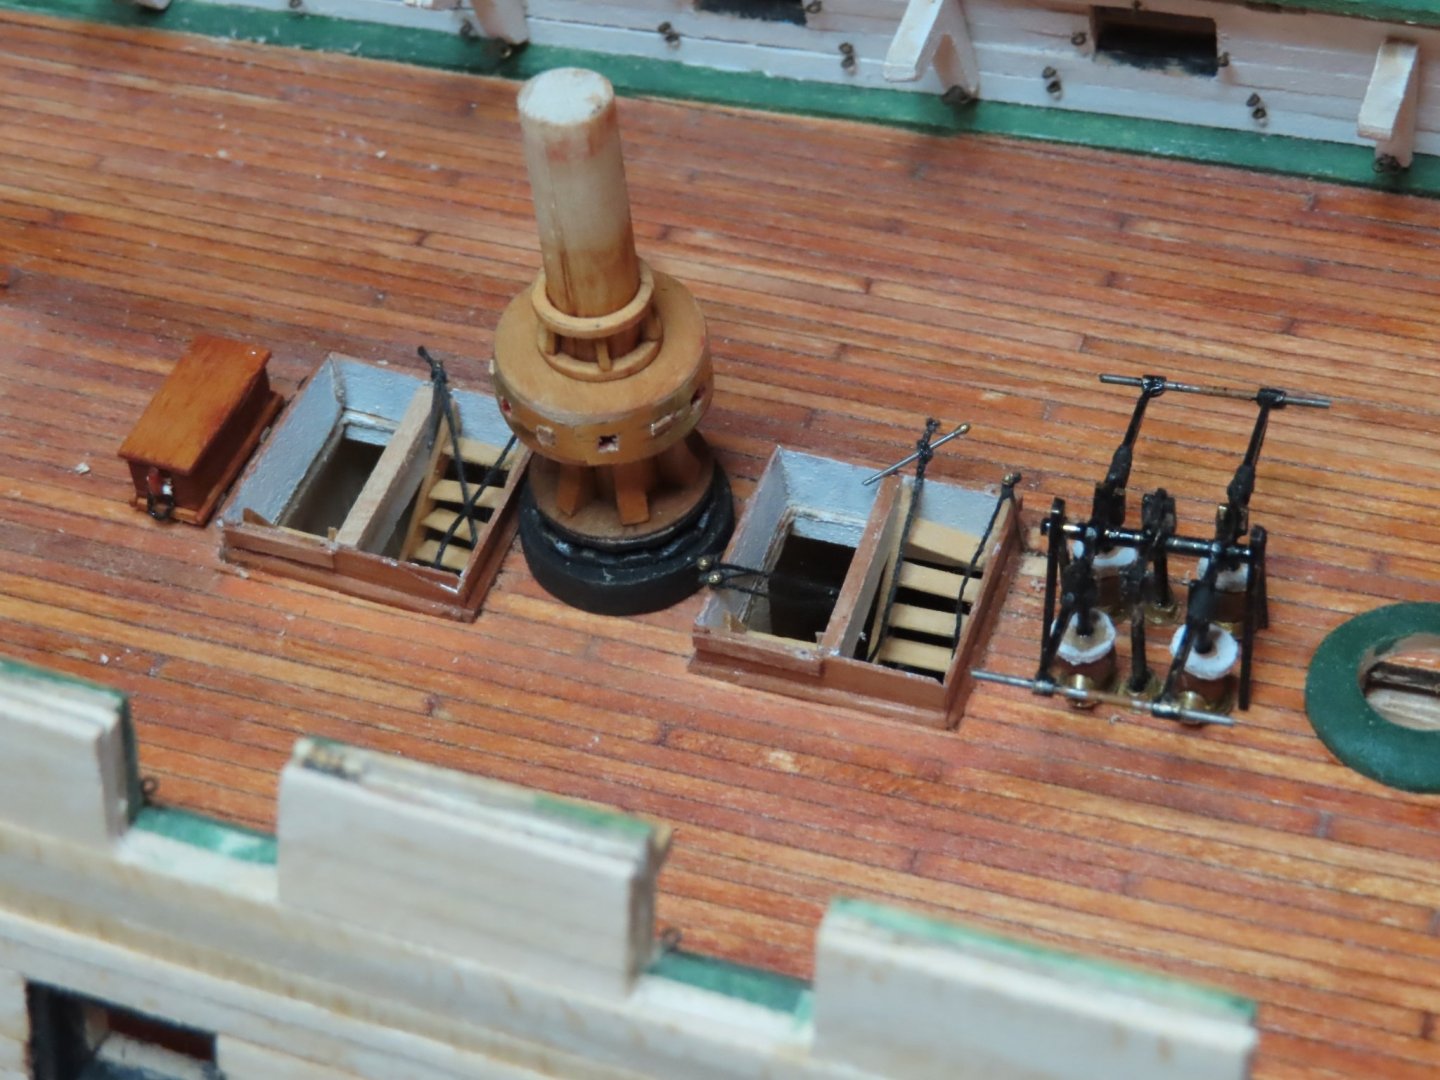
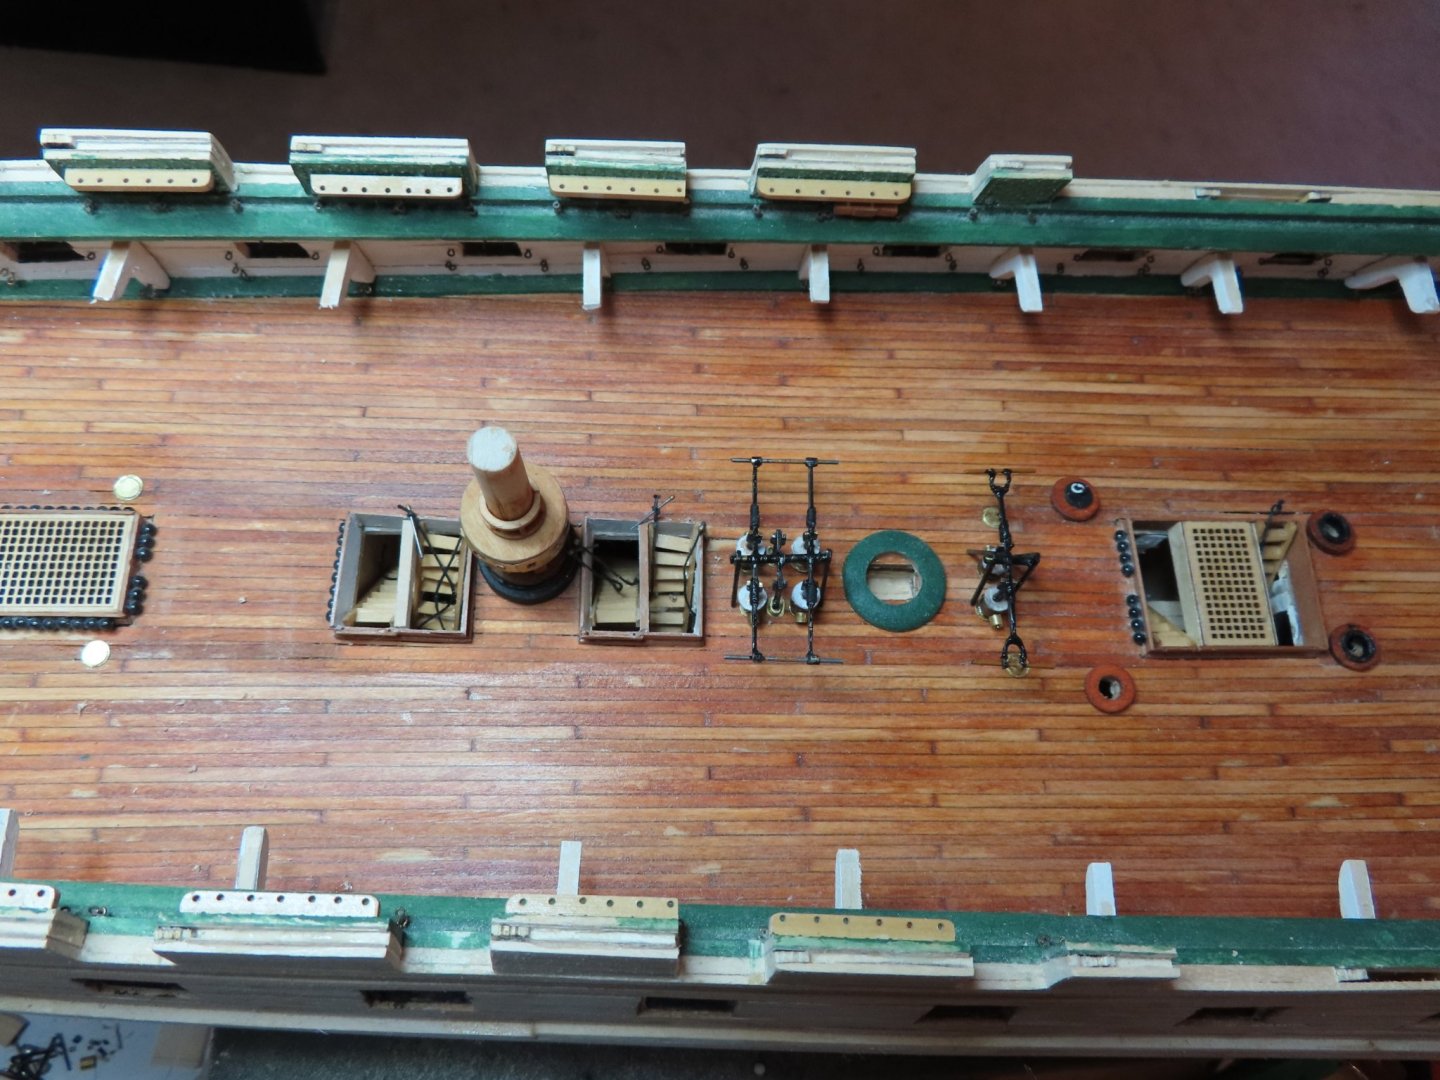
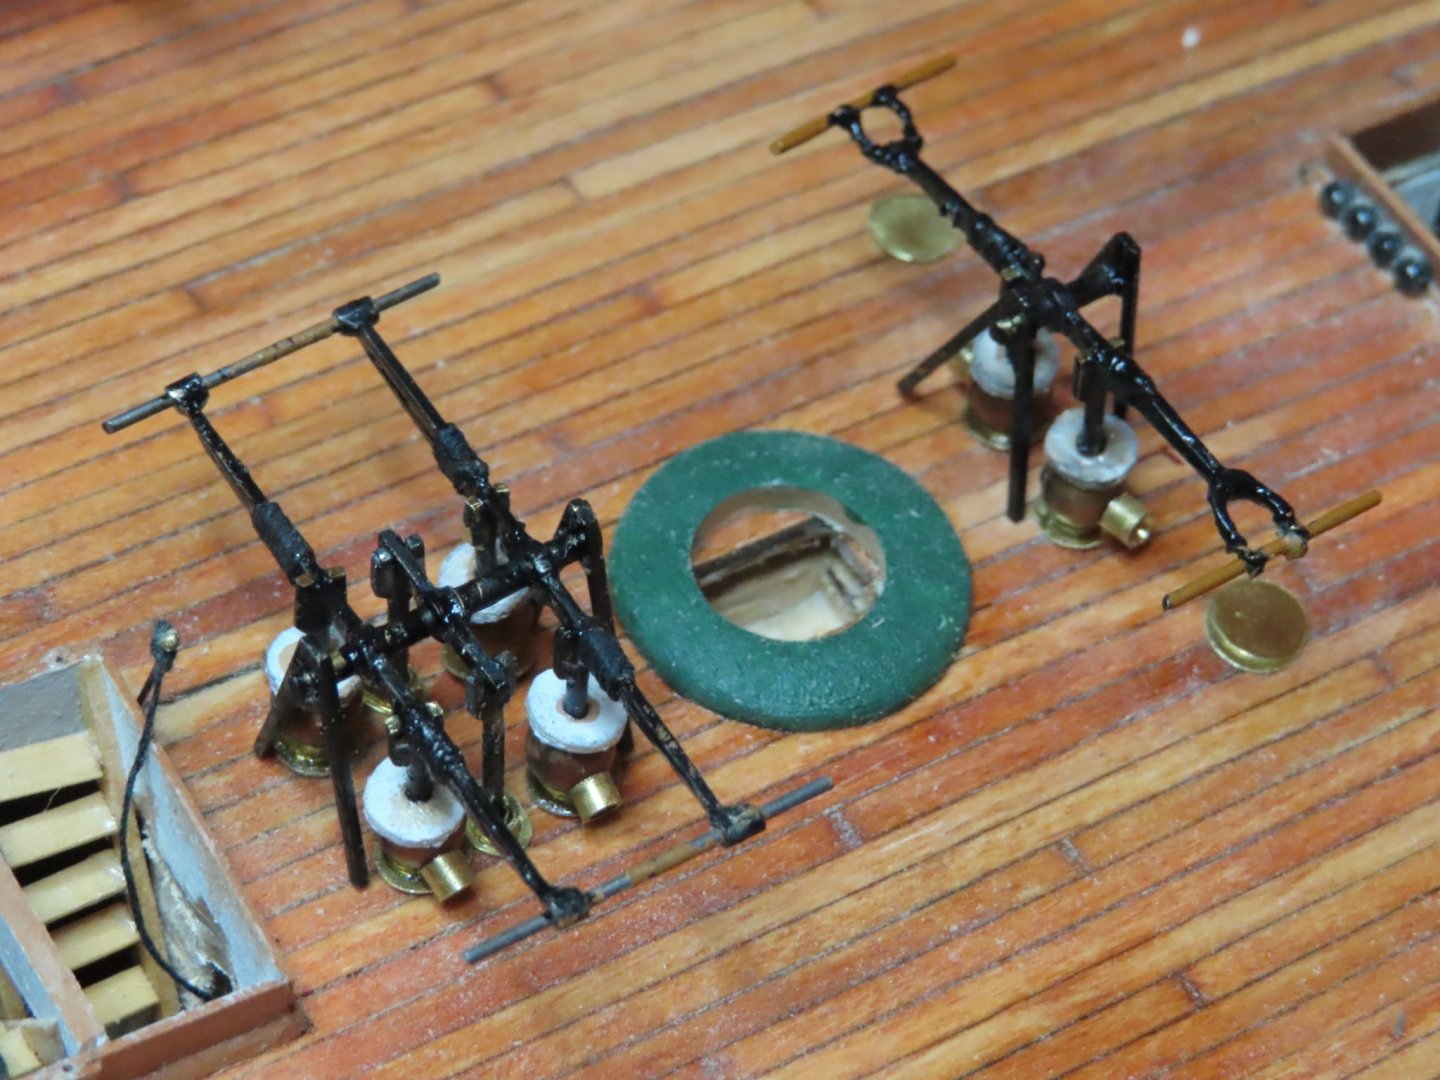
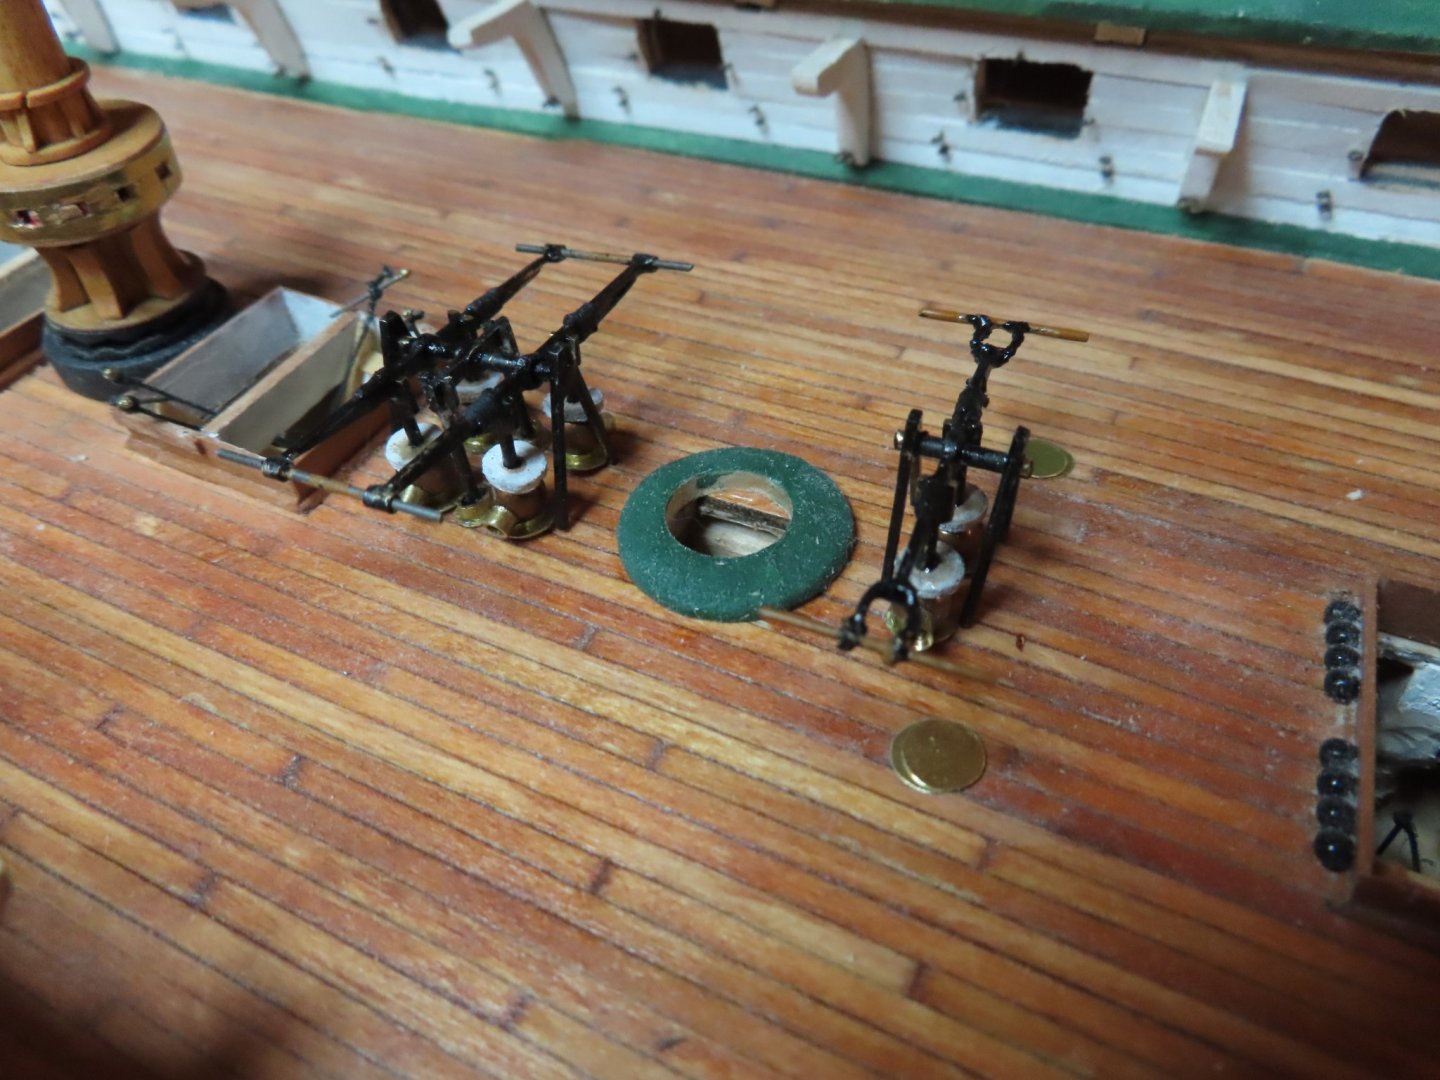
The shaped wood stock was then sliced like a loaf of bread into twenty 1/16” slices and stained with Minwax Golden Pecan. Due to the B&W photos, I didn’t know the color of the guides. I assumed they were of natural wood finish as paint would have just worn off from the sliding chain. The last two images below show the guides on the deck as a dry fit. These will be glued into place before I move on.


-
The set up worked fairly decently using what cutters and grinding bits that I had, the end result was close enough to what I wanted, but not anywhere near to the exactitude of my original plan. But then it didn’t need to be.
-
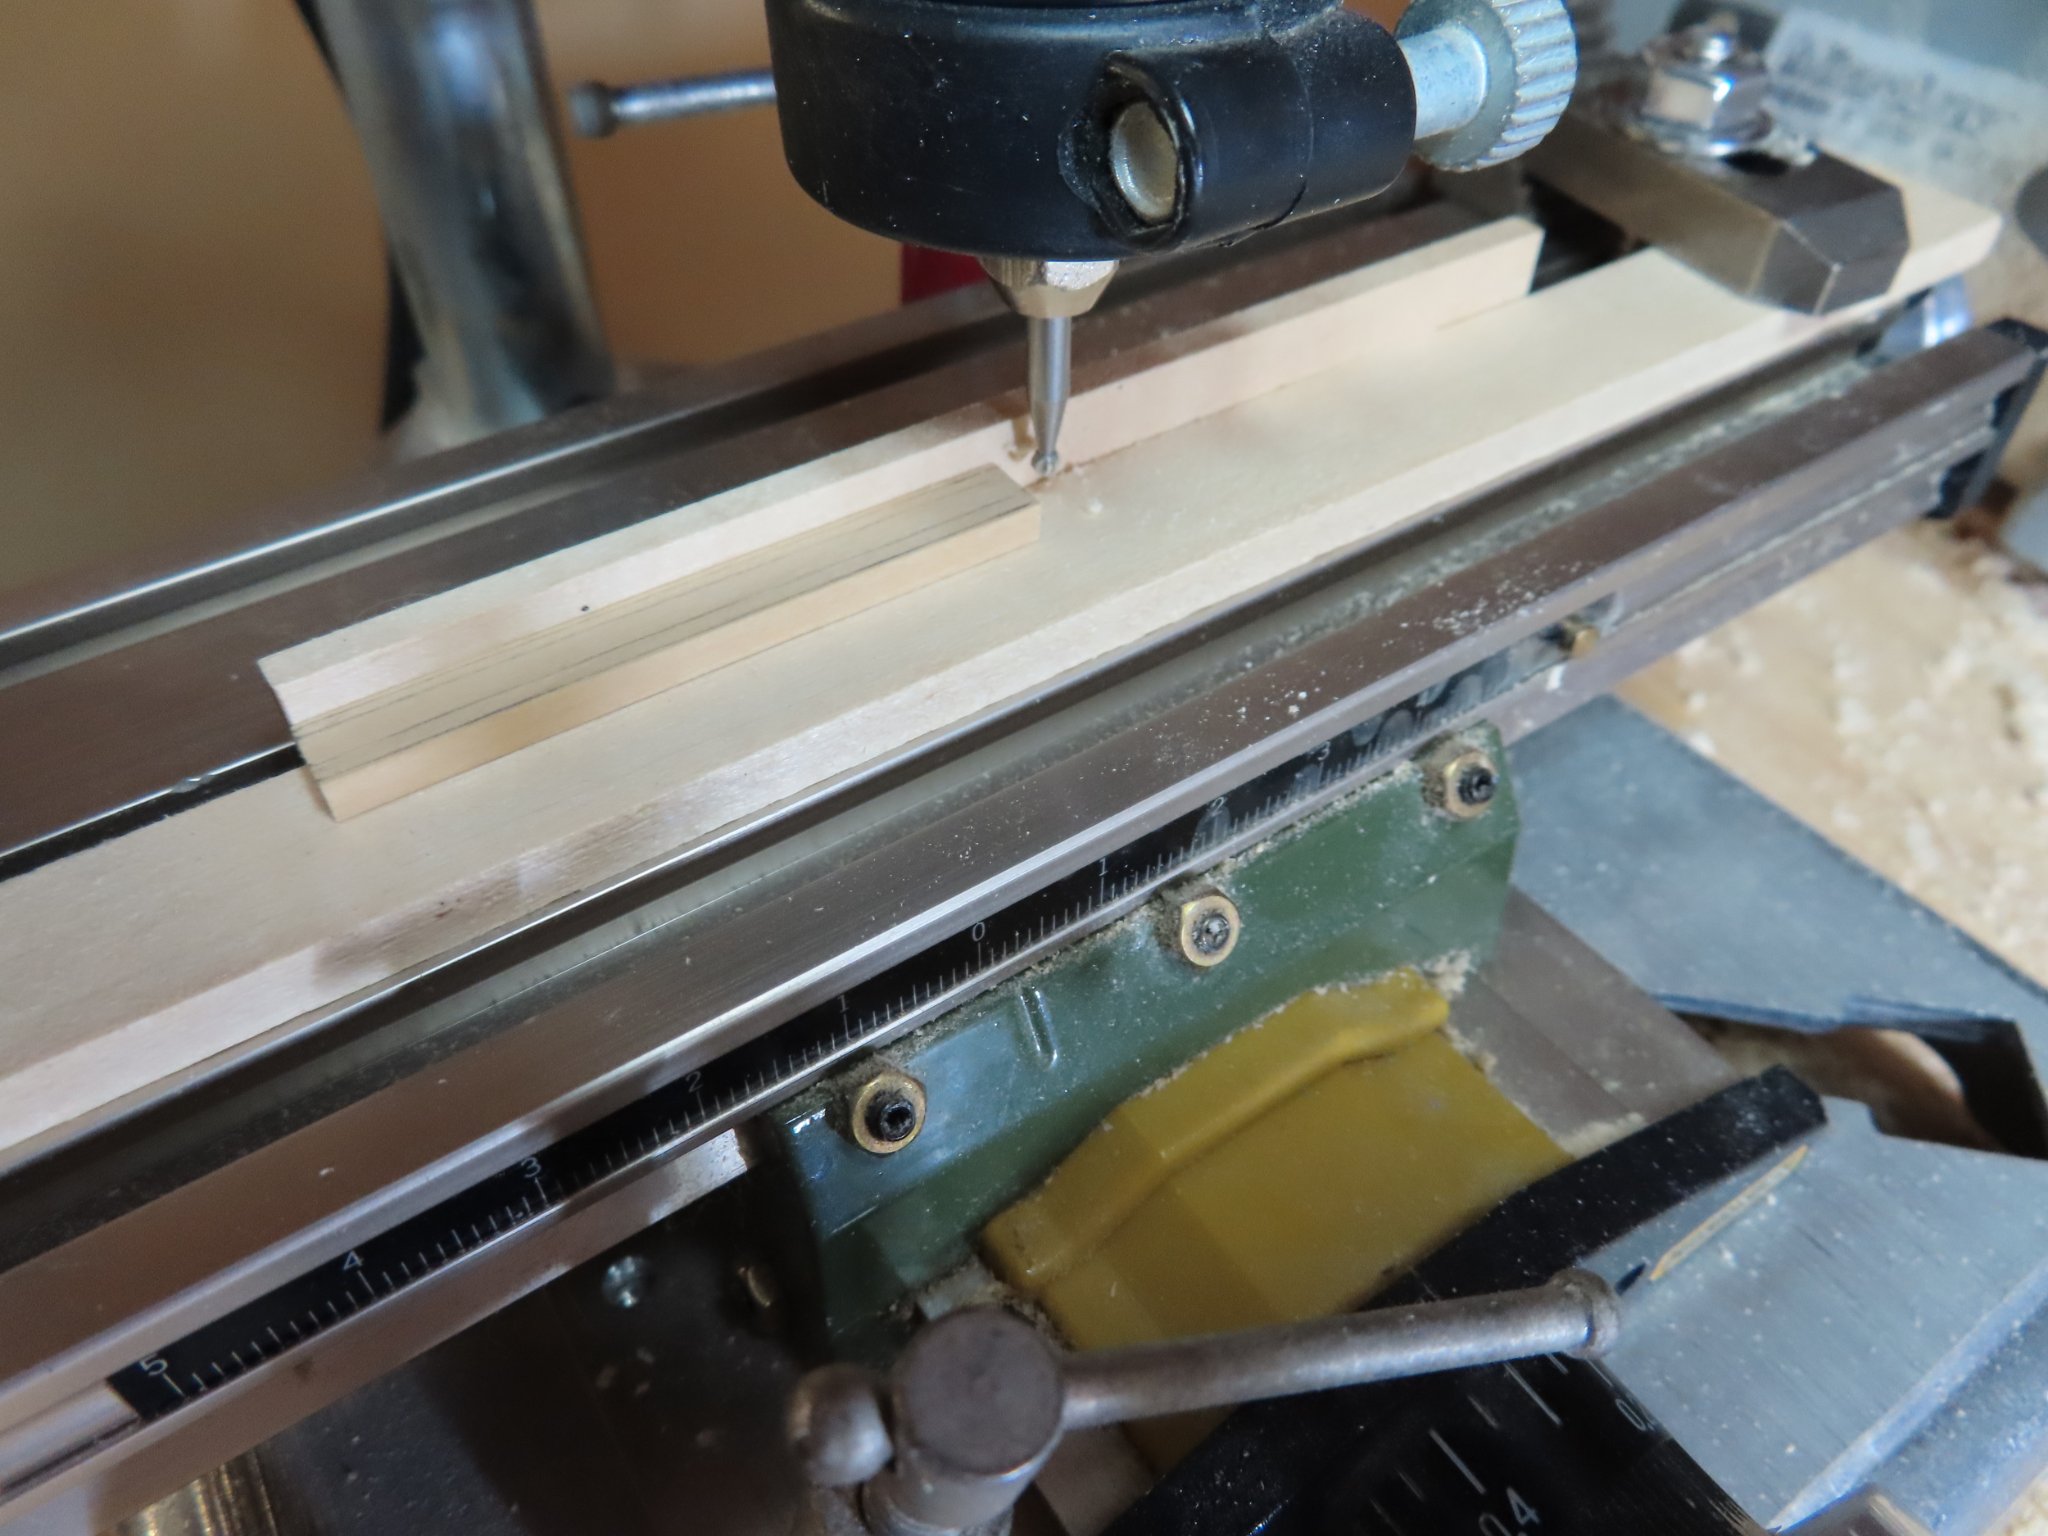
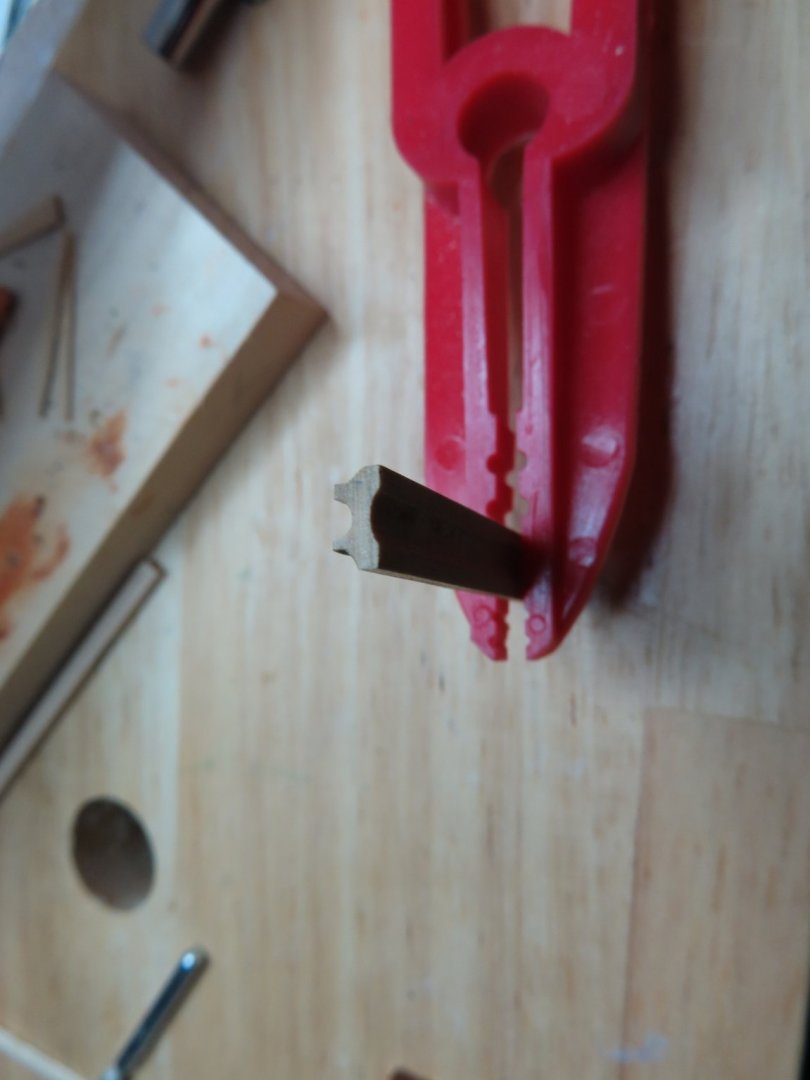
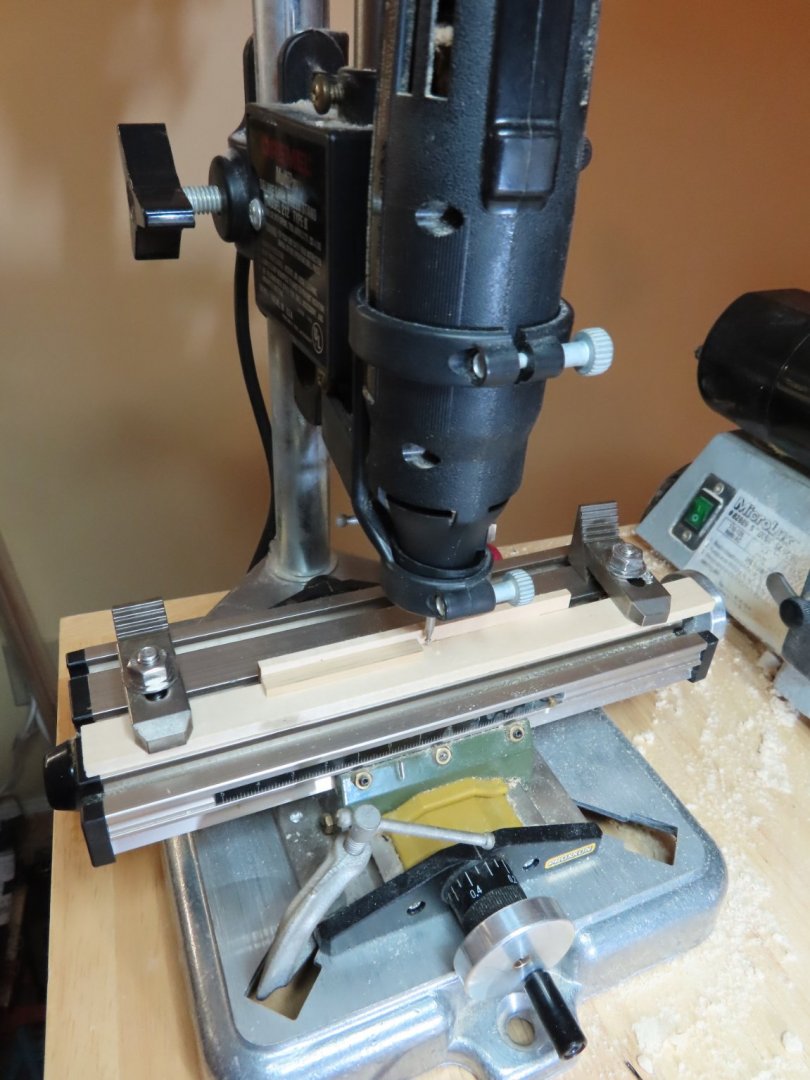
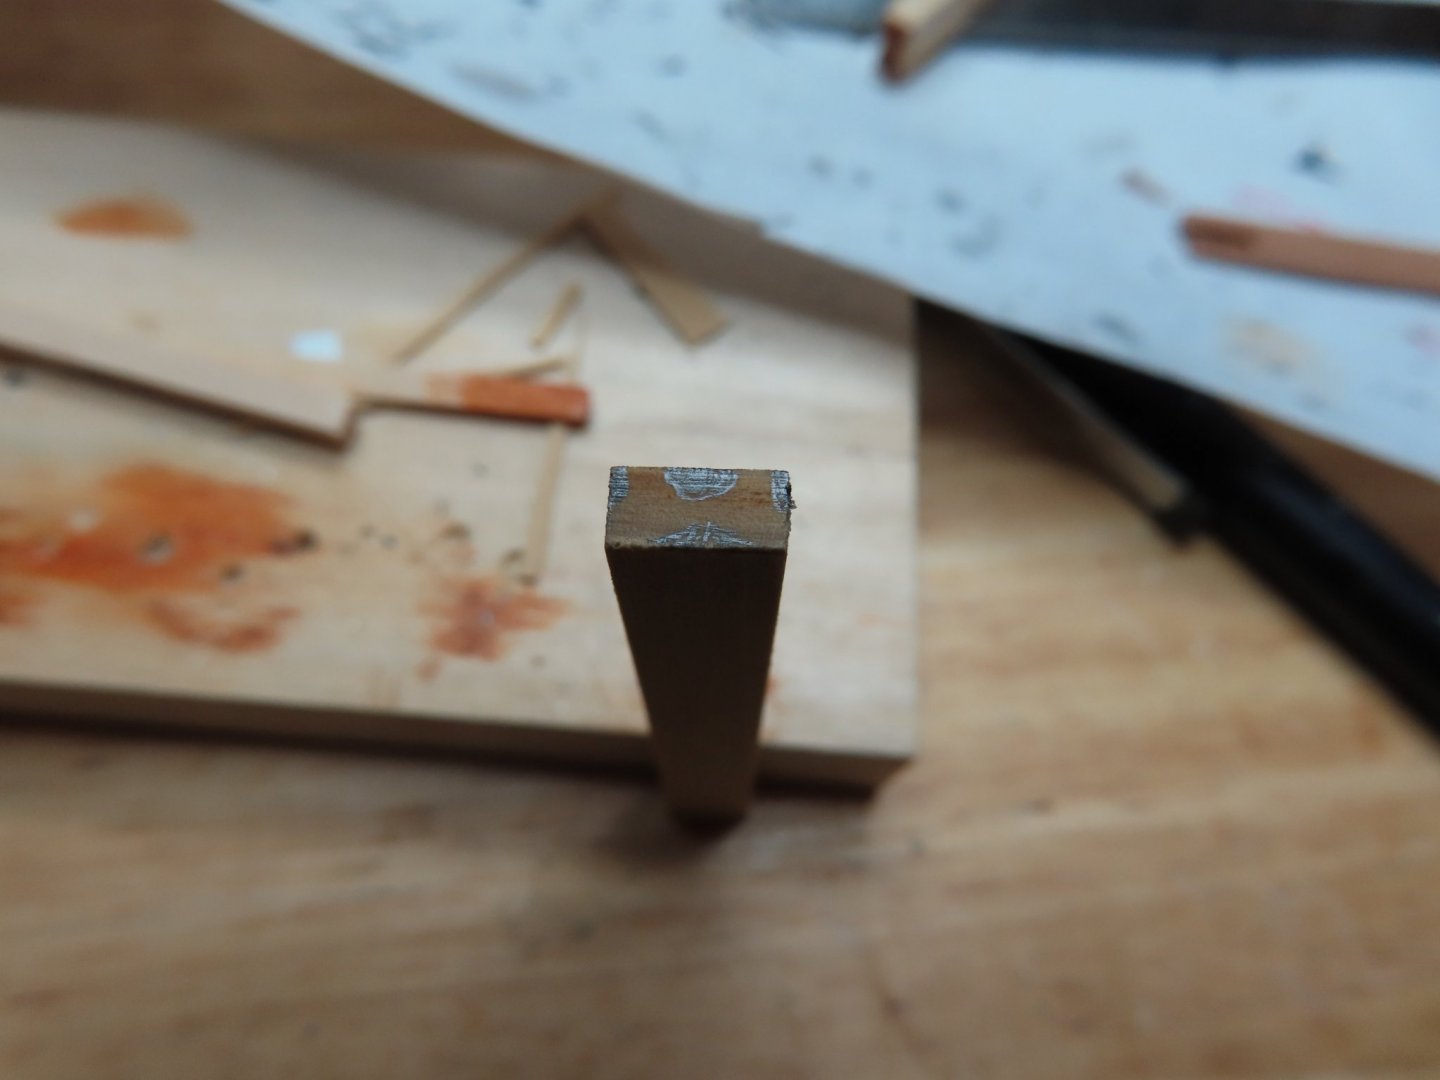
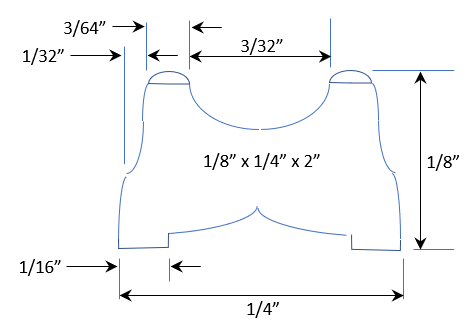
Then using my Dremel drill press accessory, a jig was constructed so I could slide a piece of wood under a cutting bit of the drill. A piece of 1/8” x ¼” x 2” boxwood was the material of choice to be shaped. To aid in the setups, I sketched a profile of the guide on the end of the wood stock.

-
Using the arrangement drawing, I measured as best I could the width and length of the guides and guesstimate the height from which I form a plan.
-
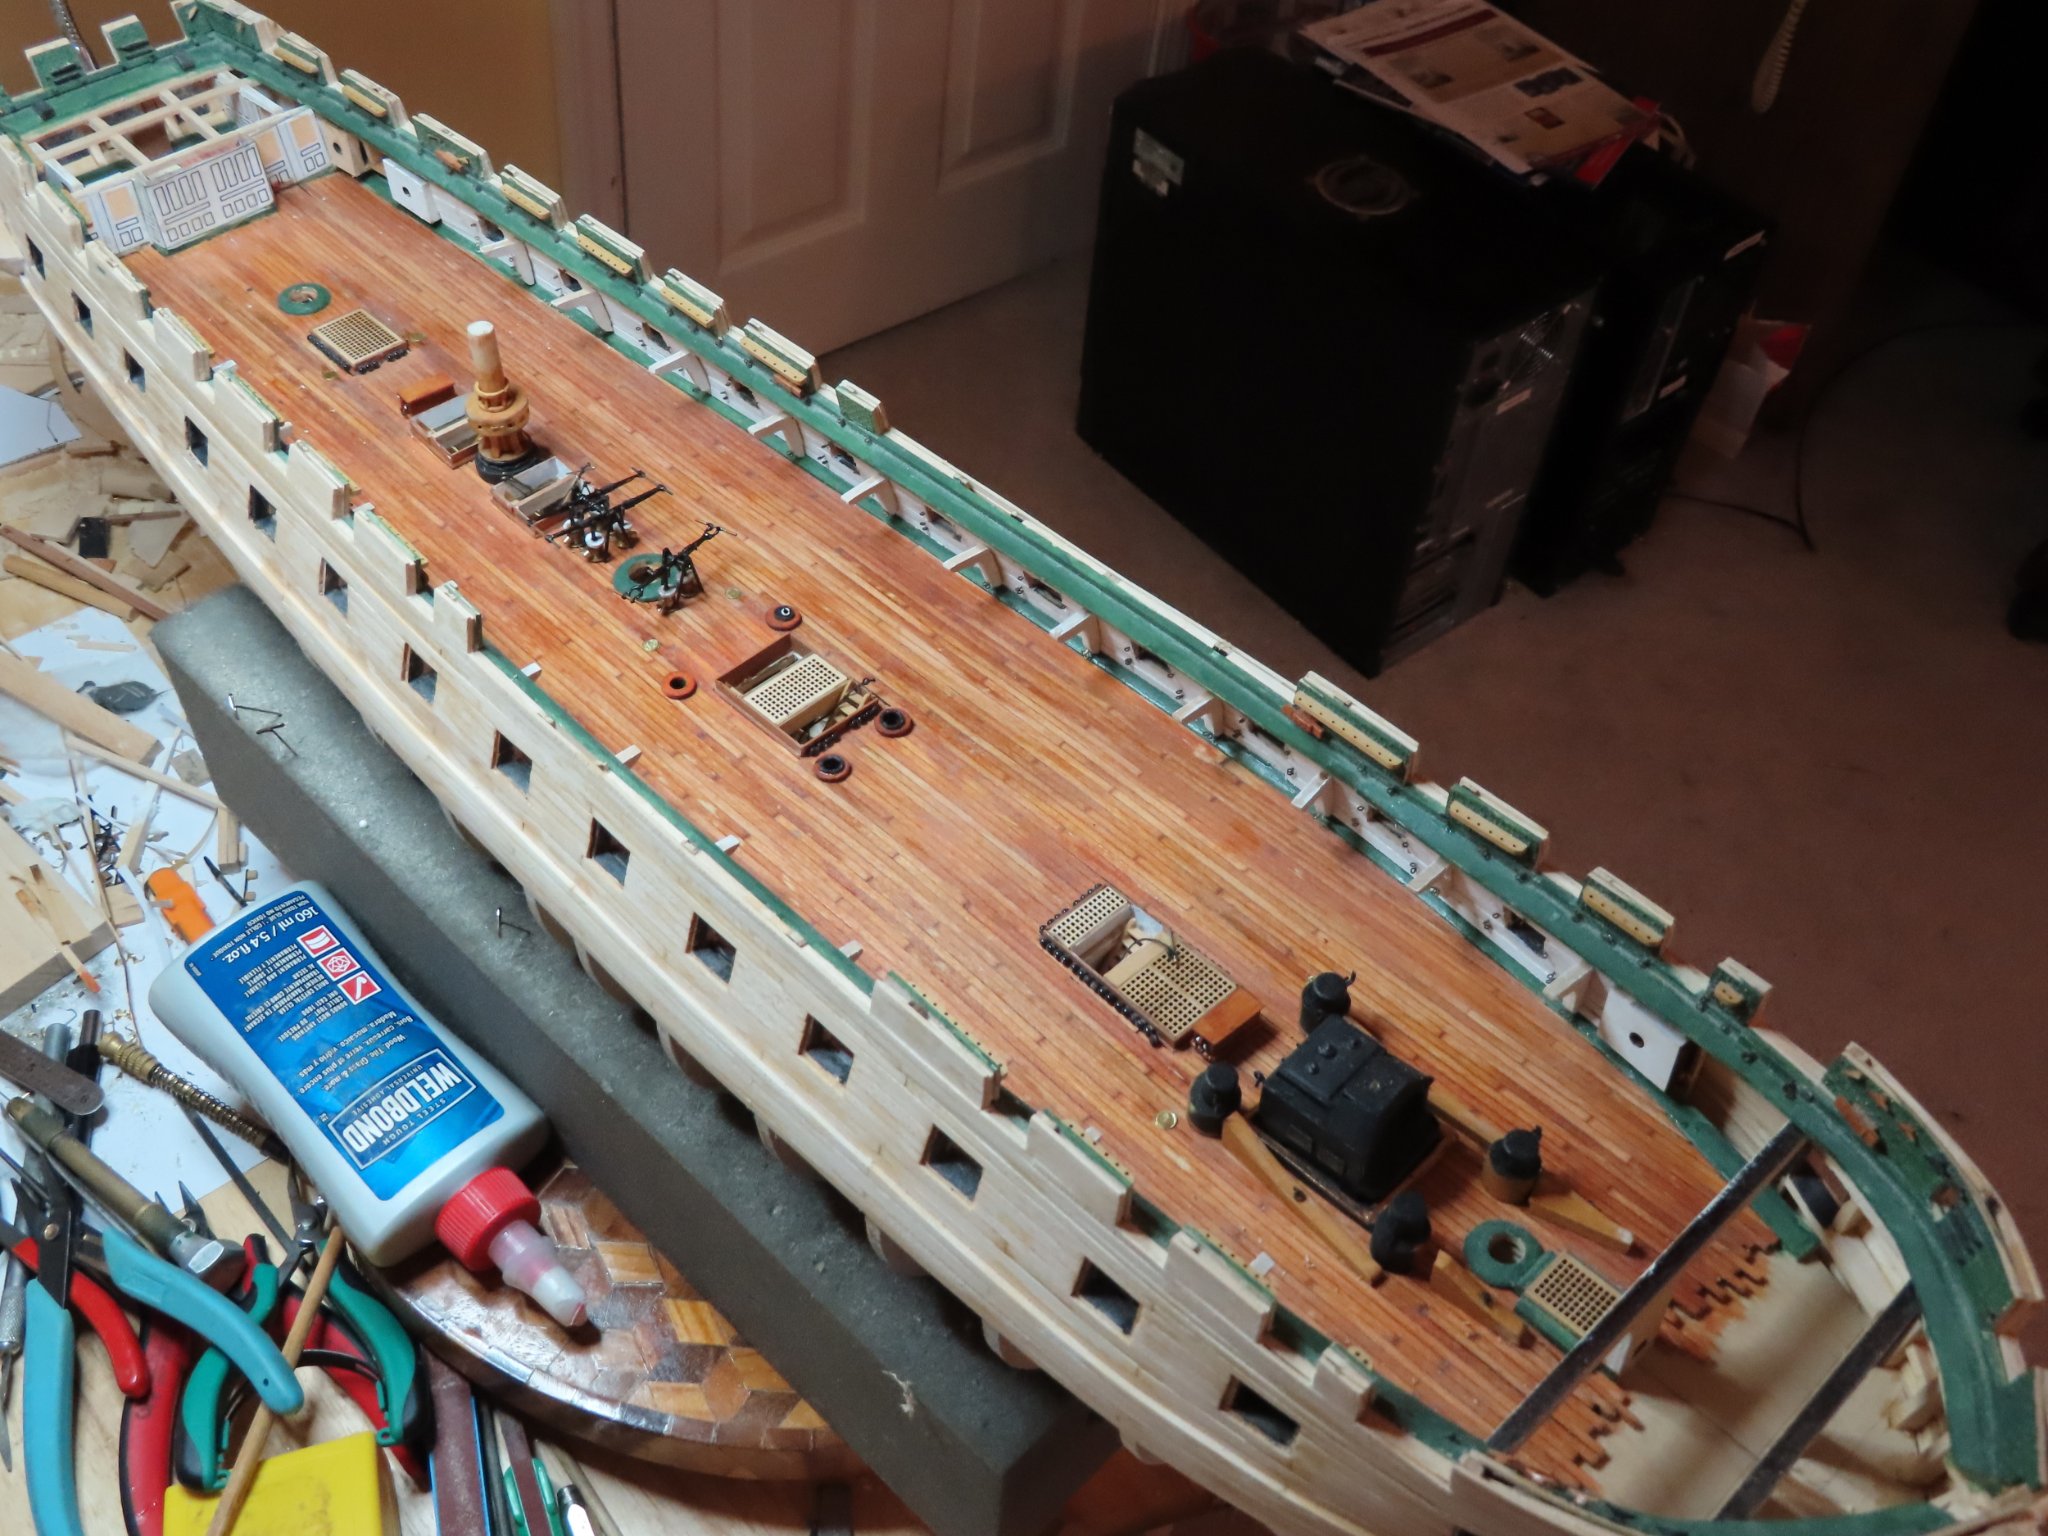
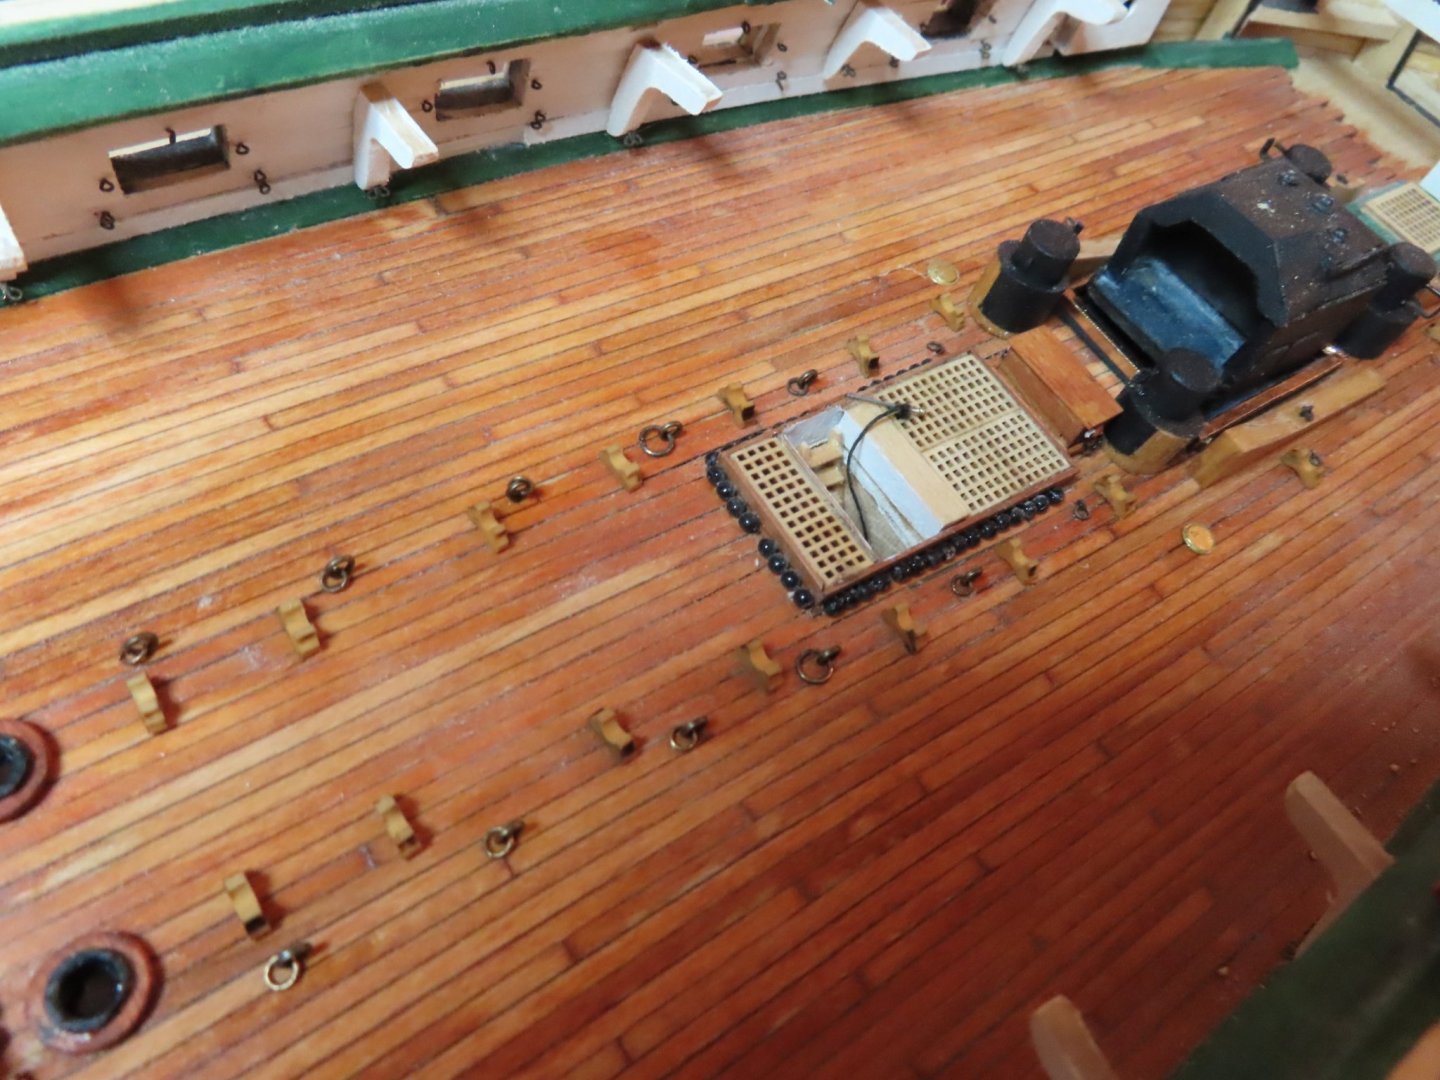
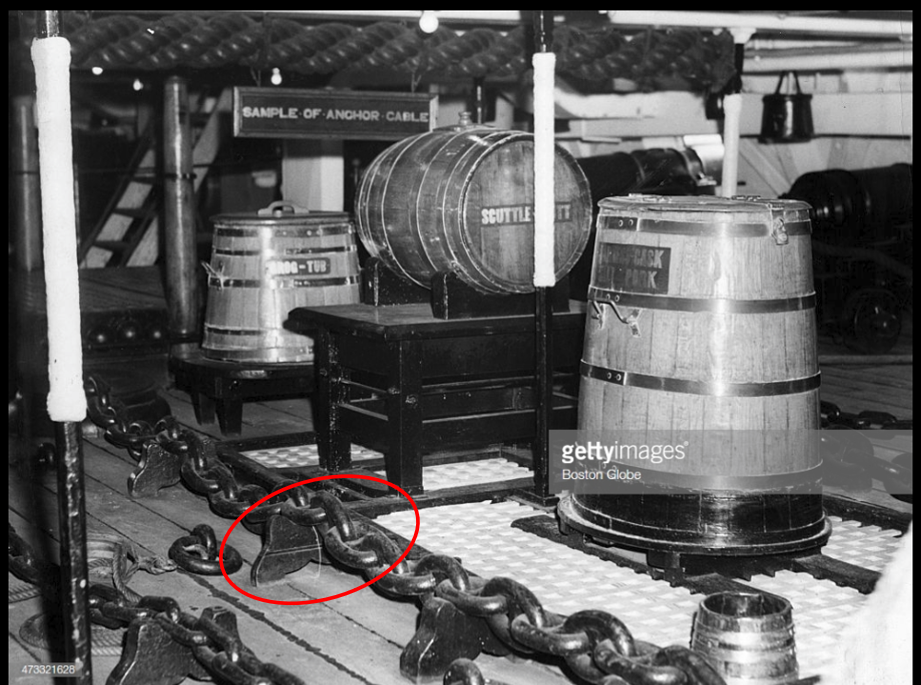
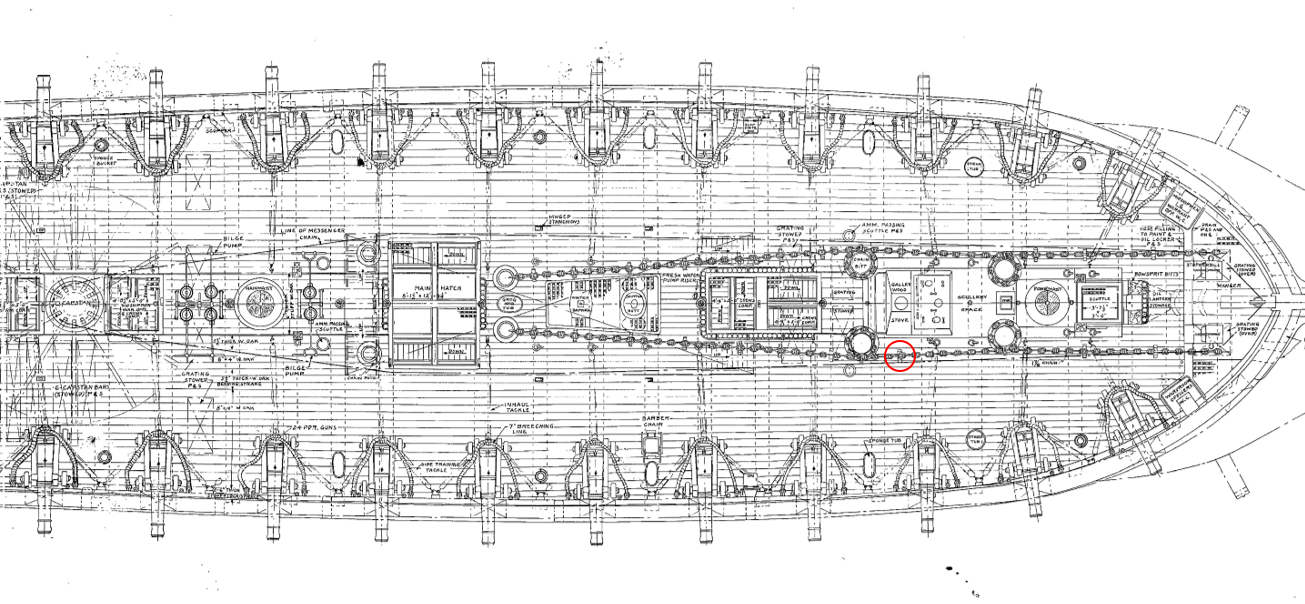
Gun Deck Anchor Chain Guides I was going to work on the scuttlebutt, grog tub, and harness cask, but in the process of doing my research to figure out what their dimensions were, I ran across an old B&W photo showing all three of those items, but it also showed something else that I could not identify earlier while working on the deck eyebolts and rings. Indicated on the 1931 US Navy arrangement plans (Note, they are not shown on the 1927 arrangement plans), was something that appeared to be under the anchor chain, but I didn’t know what they were (example in red circle). The B&W photo cleared that up They were, for lack of a proper technical term, chain guides. So, that is what I worked on. As I count, there are 11 pairs of them, but only 10 pairs will be potentially visible on my model. Presently, on the actual ship, they don’t exist. I suspect they were removed, like many of the eyebolt and rings, due to tripping hazards for the tourists. Also, the anchors and their chains and ropes are not present on the ship either.
-
Gun Deck Eye Bolts and Rings Eye bolts and rings for the gun train tackle (pulls the gun back from gun port) and the messenger and anchor lines were added to the gun deck.

-
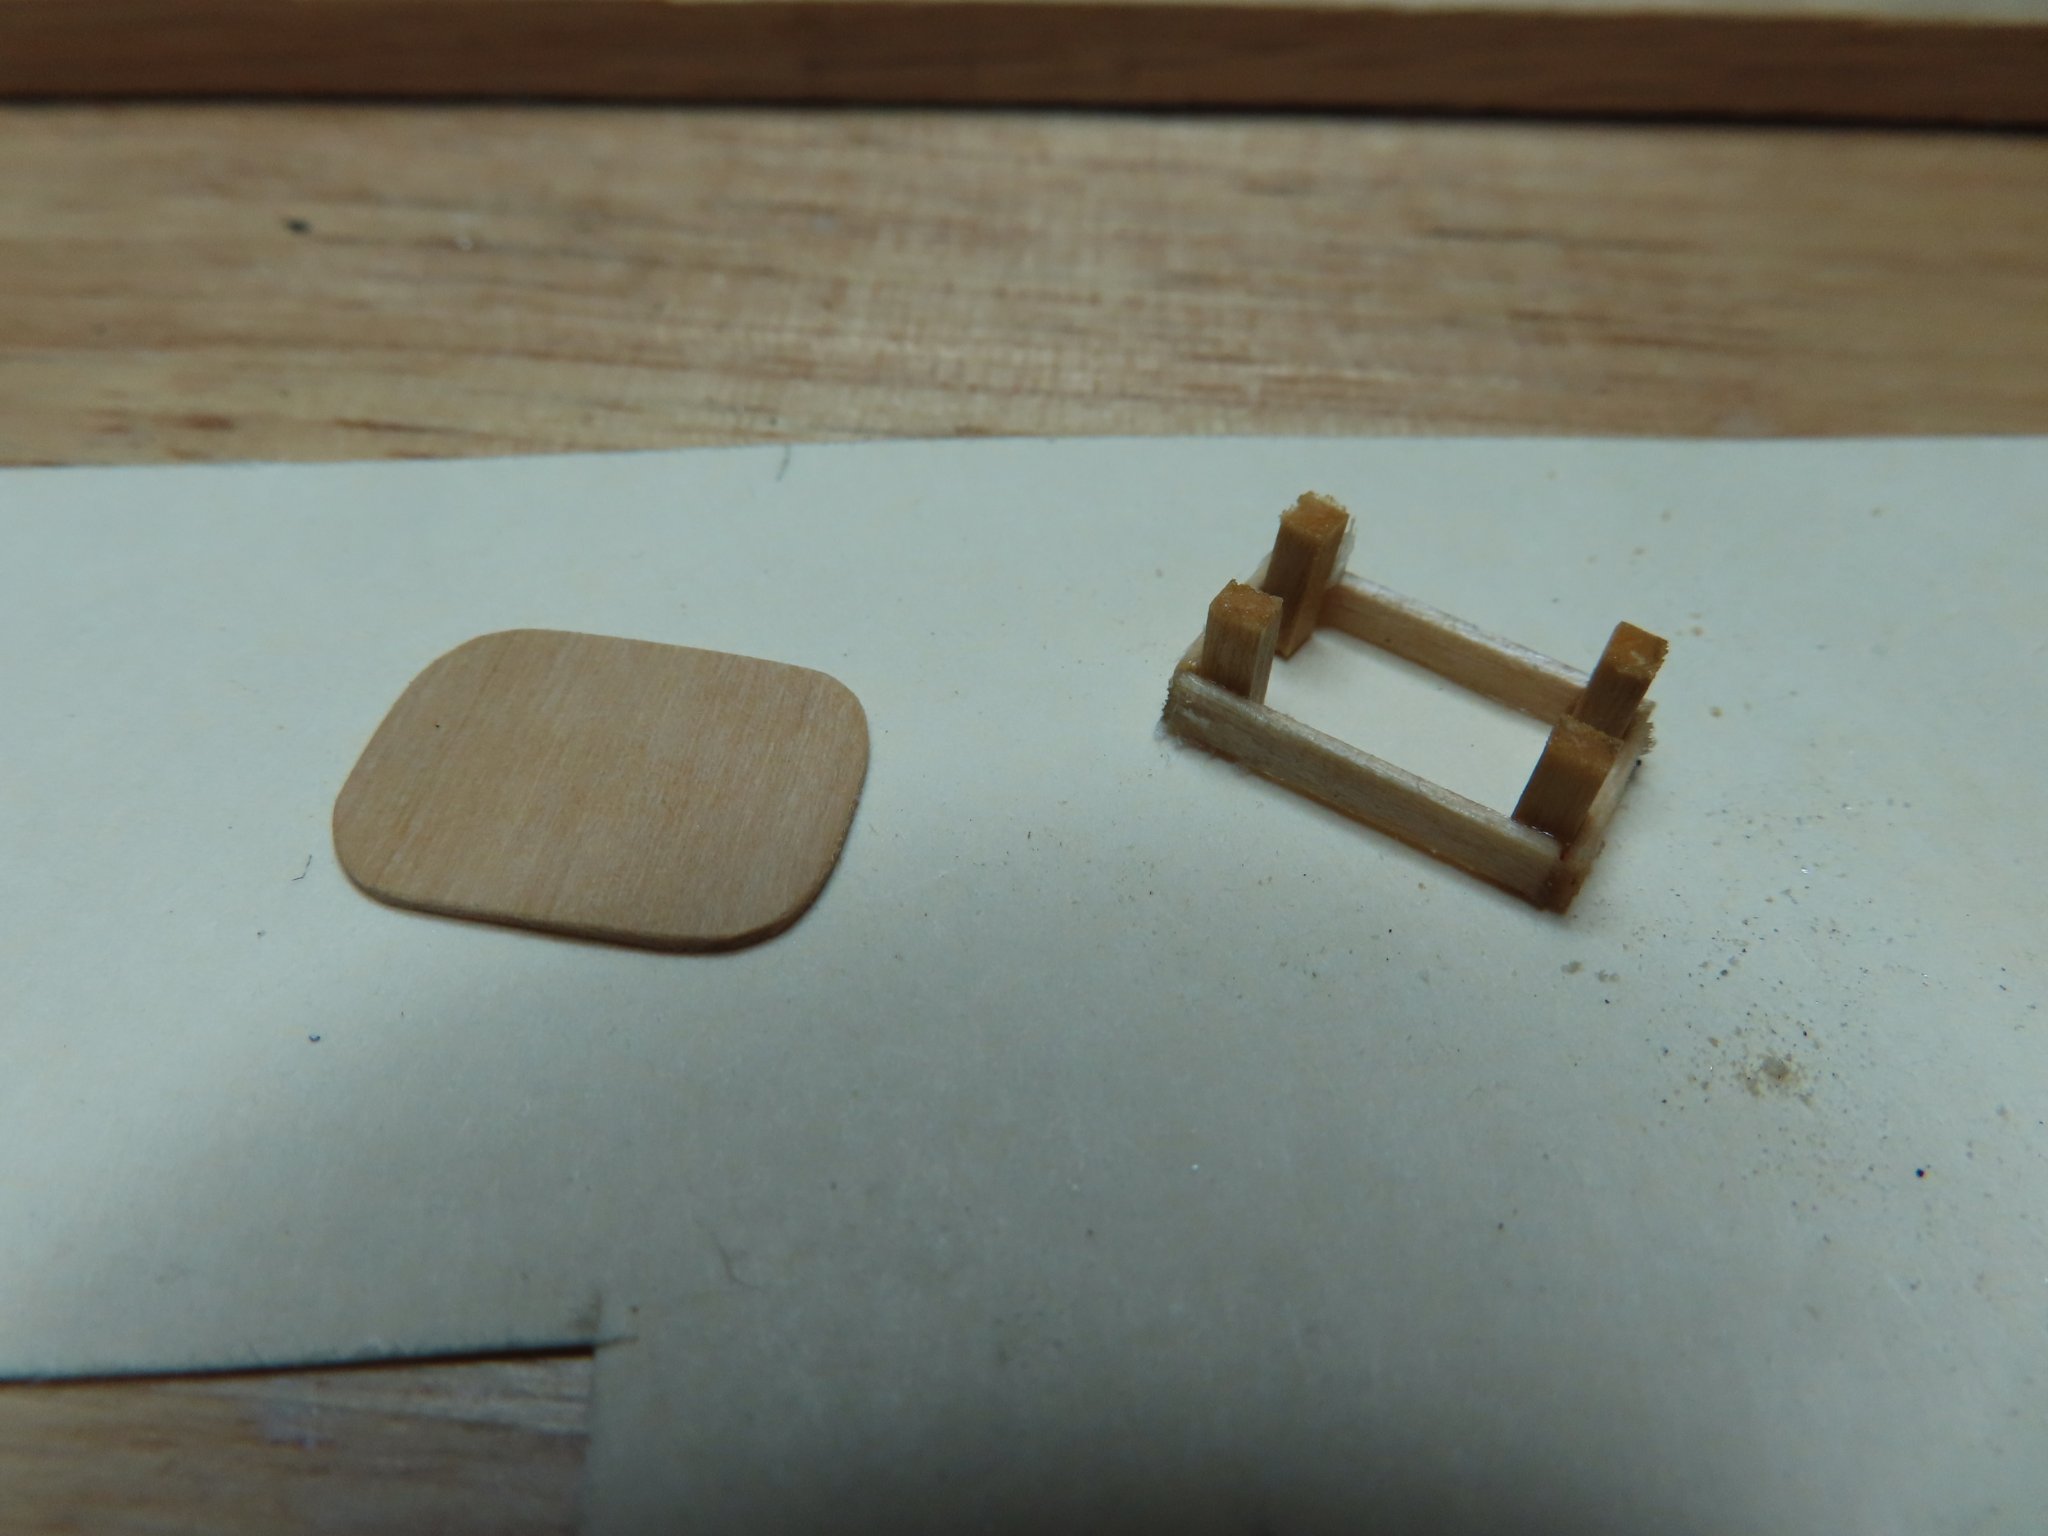
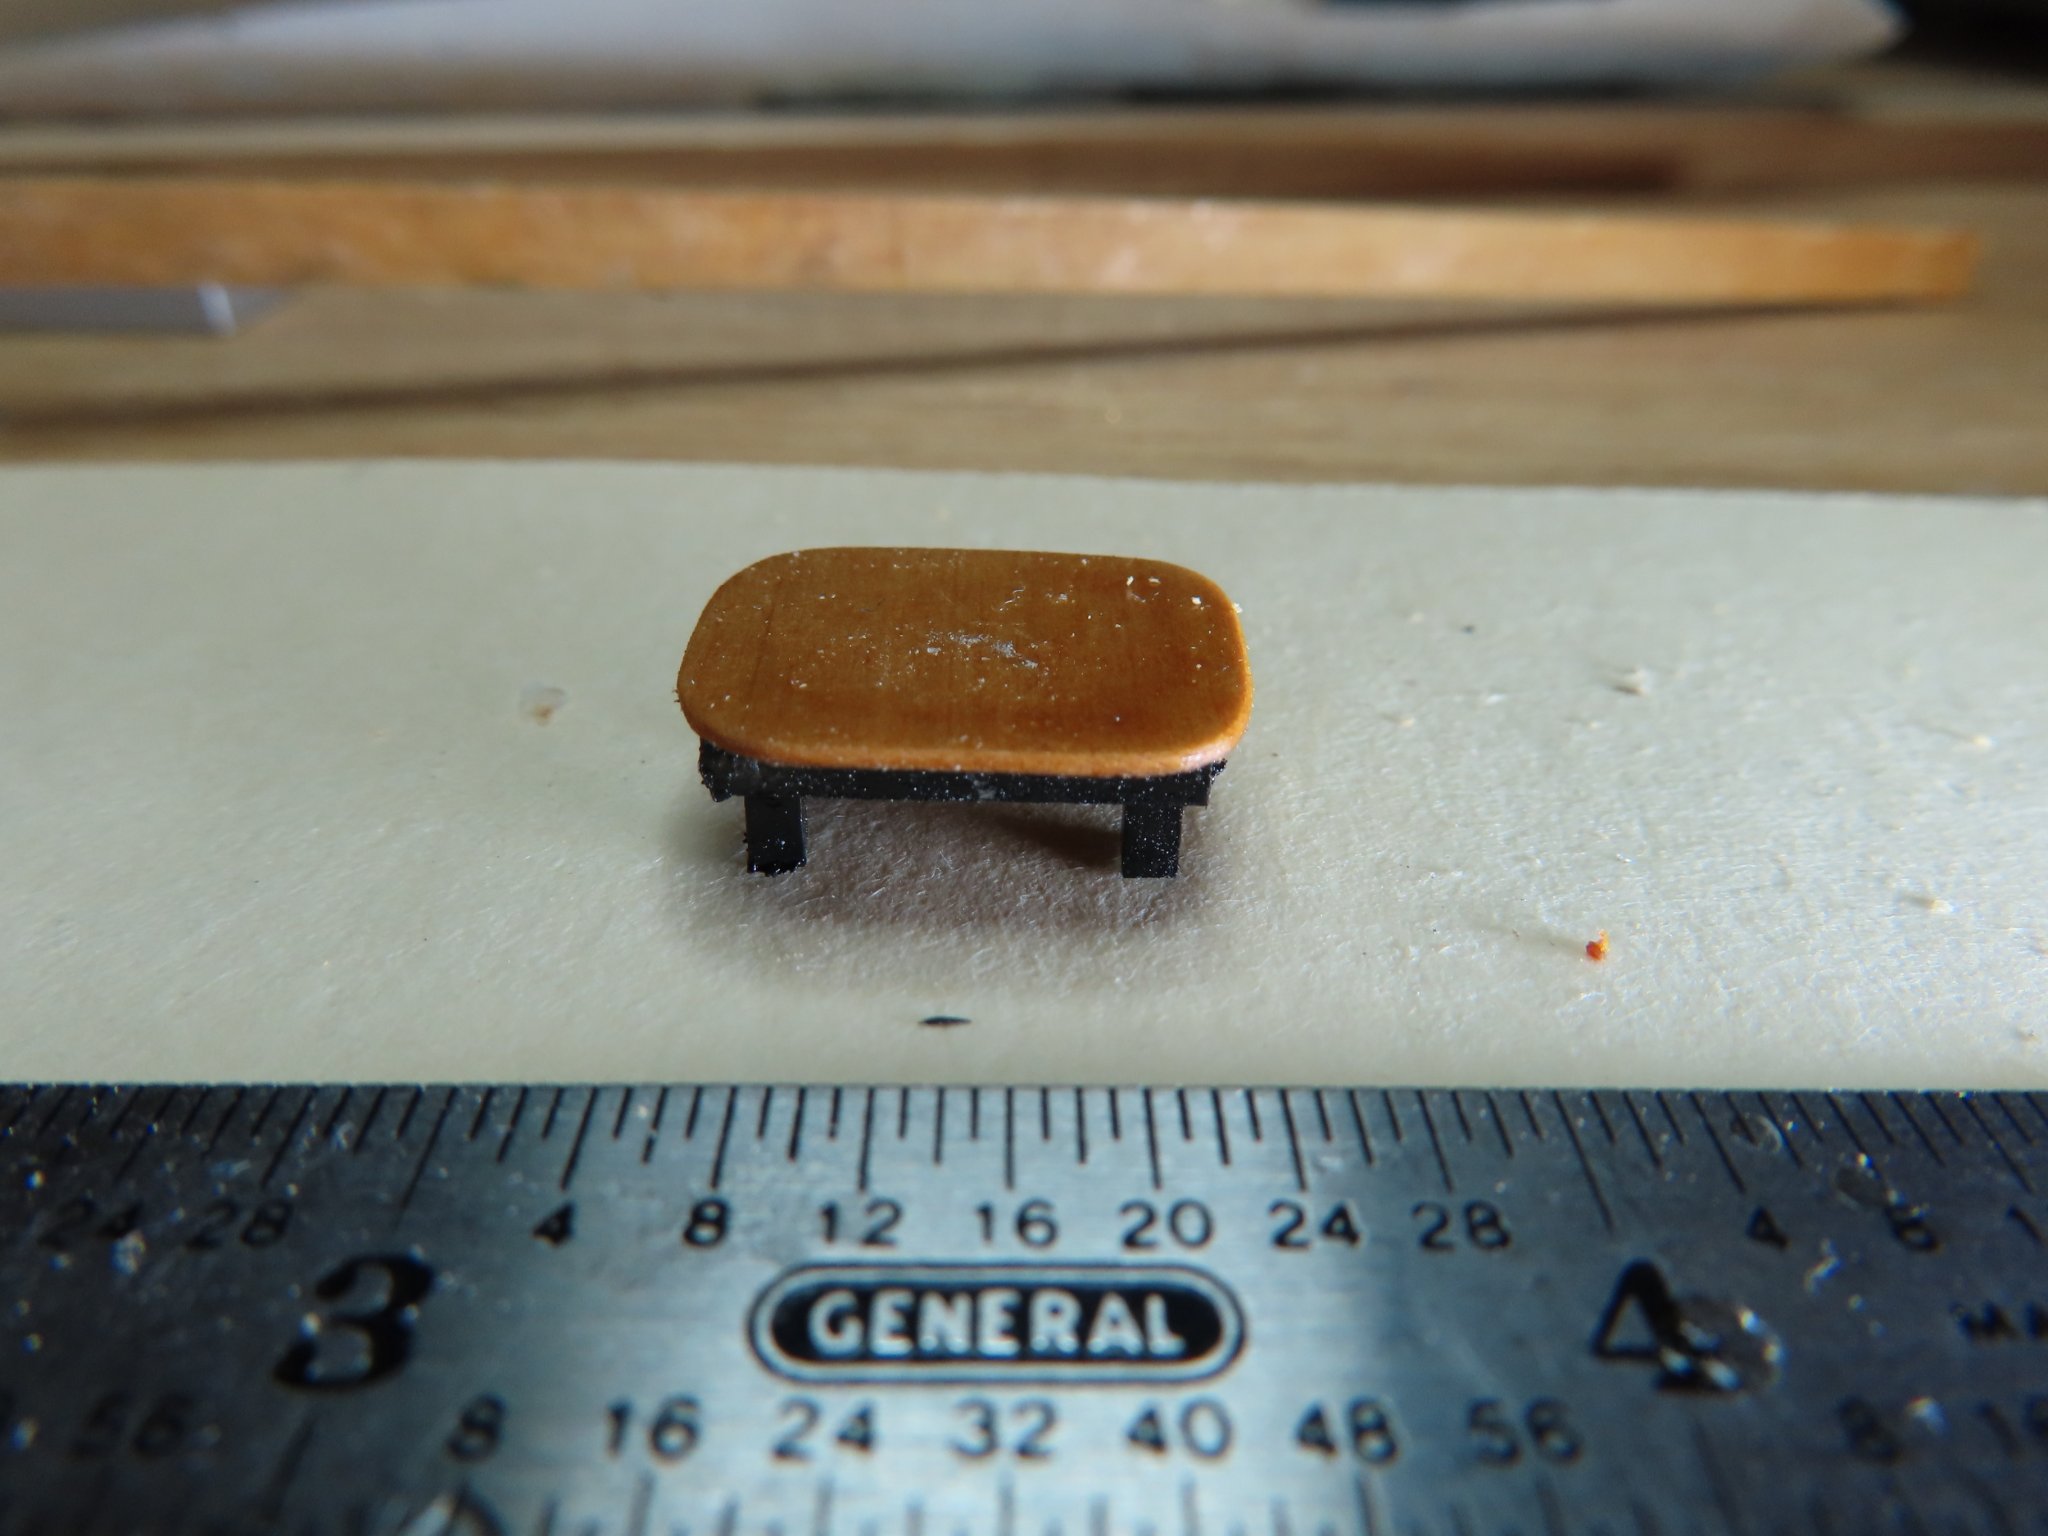
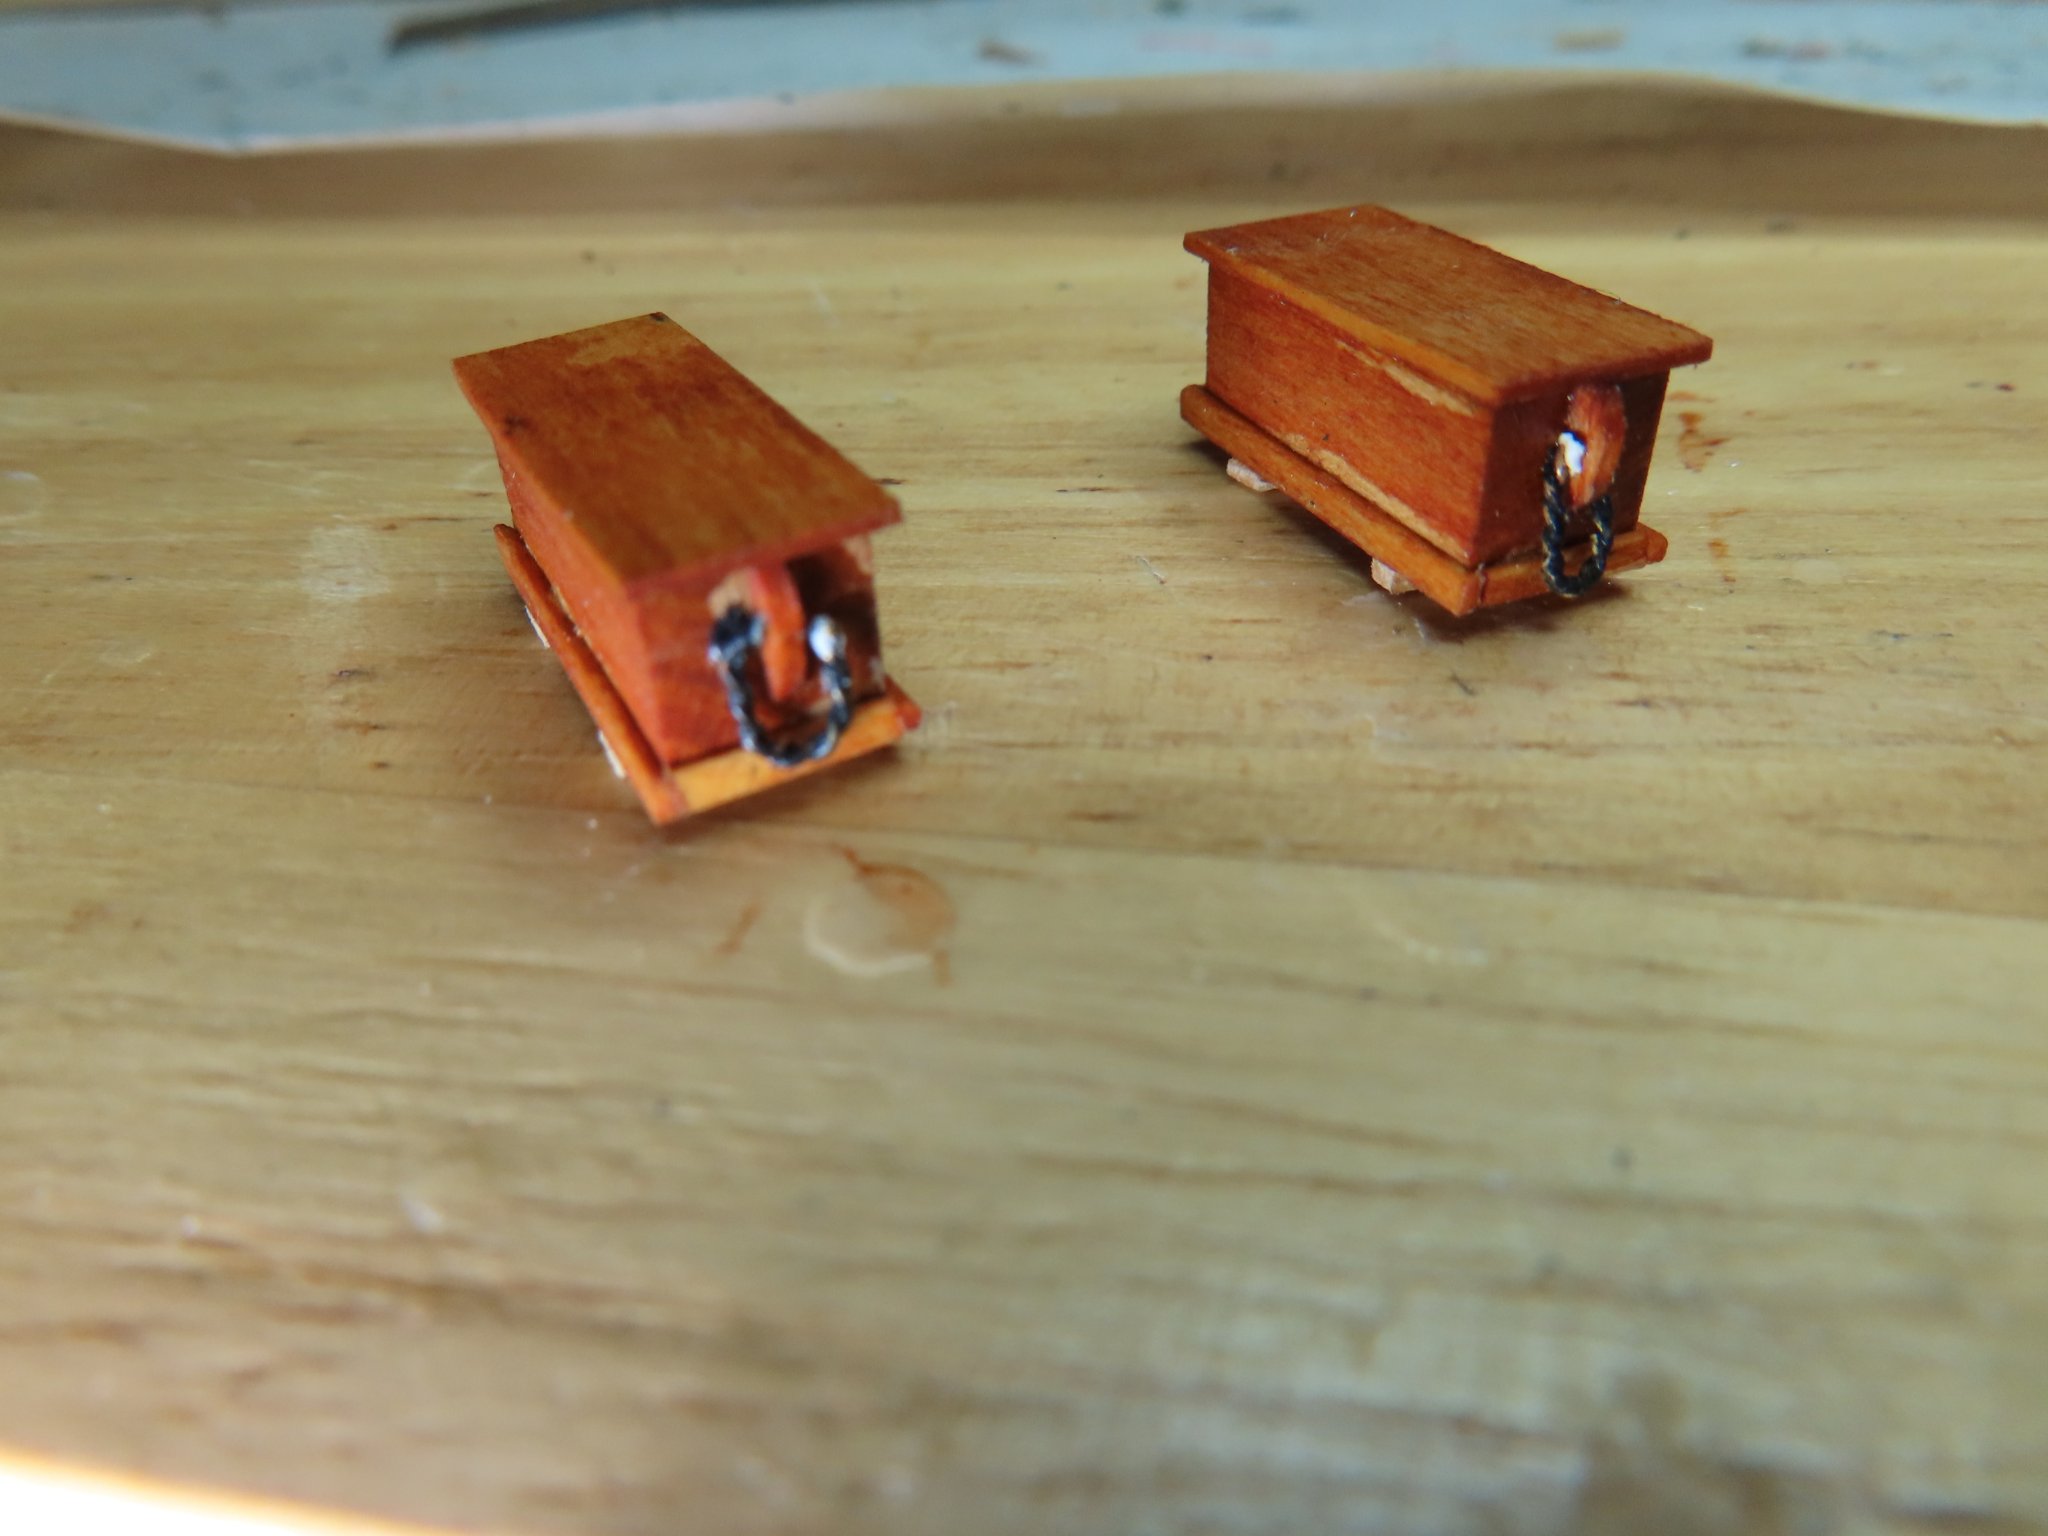
They were relatively easy to make due to their simply construction. The hardest part were the baseboards and the handles due to their delicateness and tiny size. The handles consisted of a vertical arced shape piece of wood with a loop of rope passing through its center. Those pieces of wood worked out to be about 5/32” long, 1/32” wide at its widest point, and 3/64” thick. I could barely hold them, let alone shape them. I had two choices for materials to use as the handle rope, left-over twisted brass wire I used for the construction of the bilge pump handles or thread. The thread at these short lengths and scale, is very stiff and does not hang naturally. The twisted wire on the other hand looks like rope and can be shaped to drape properly with little effort. So, twisted wire it was. The completed sea chests:


-
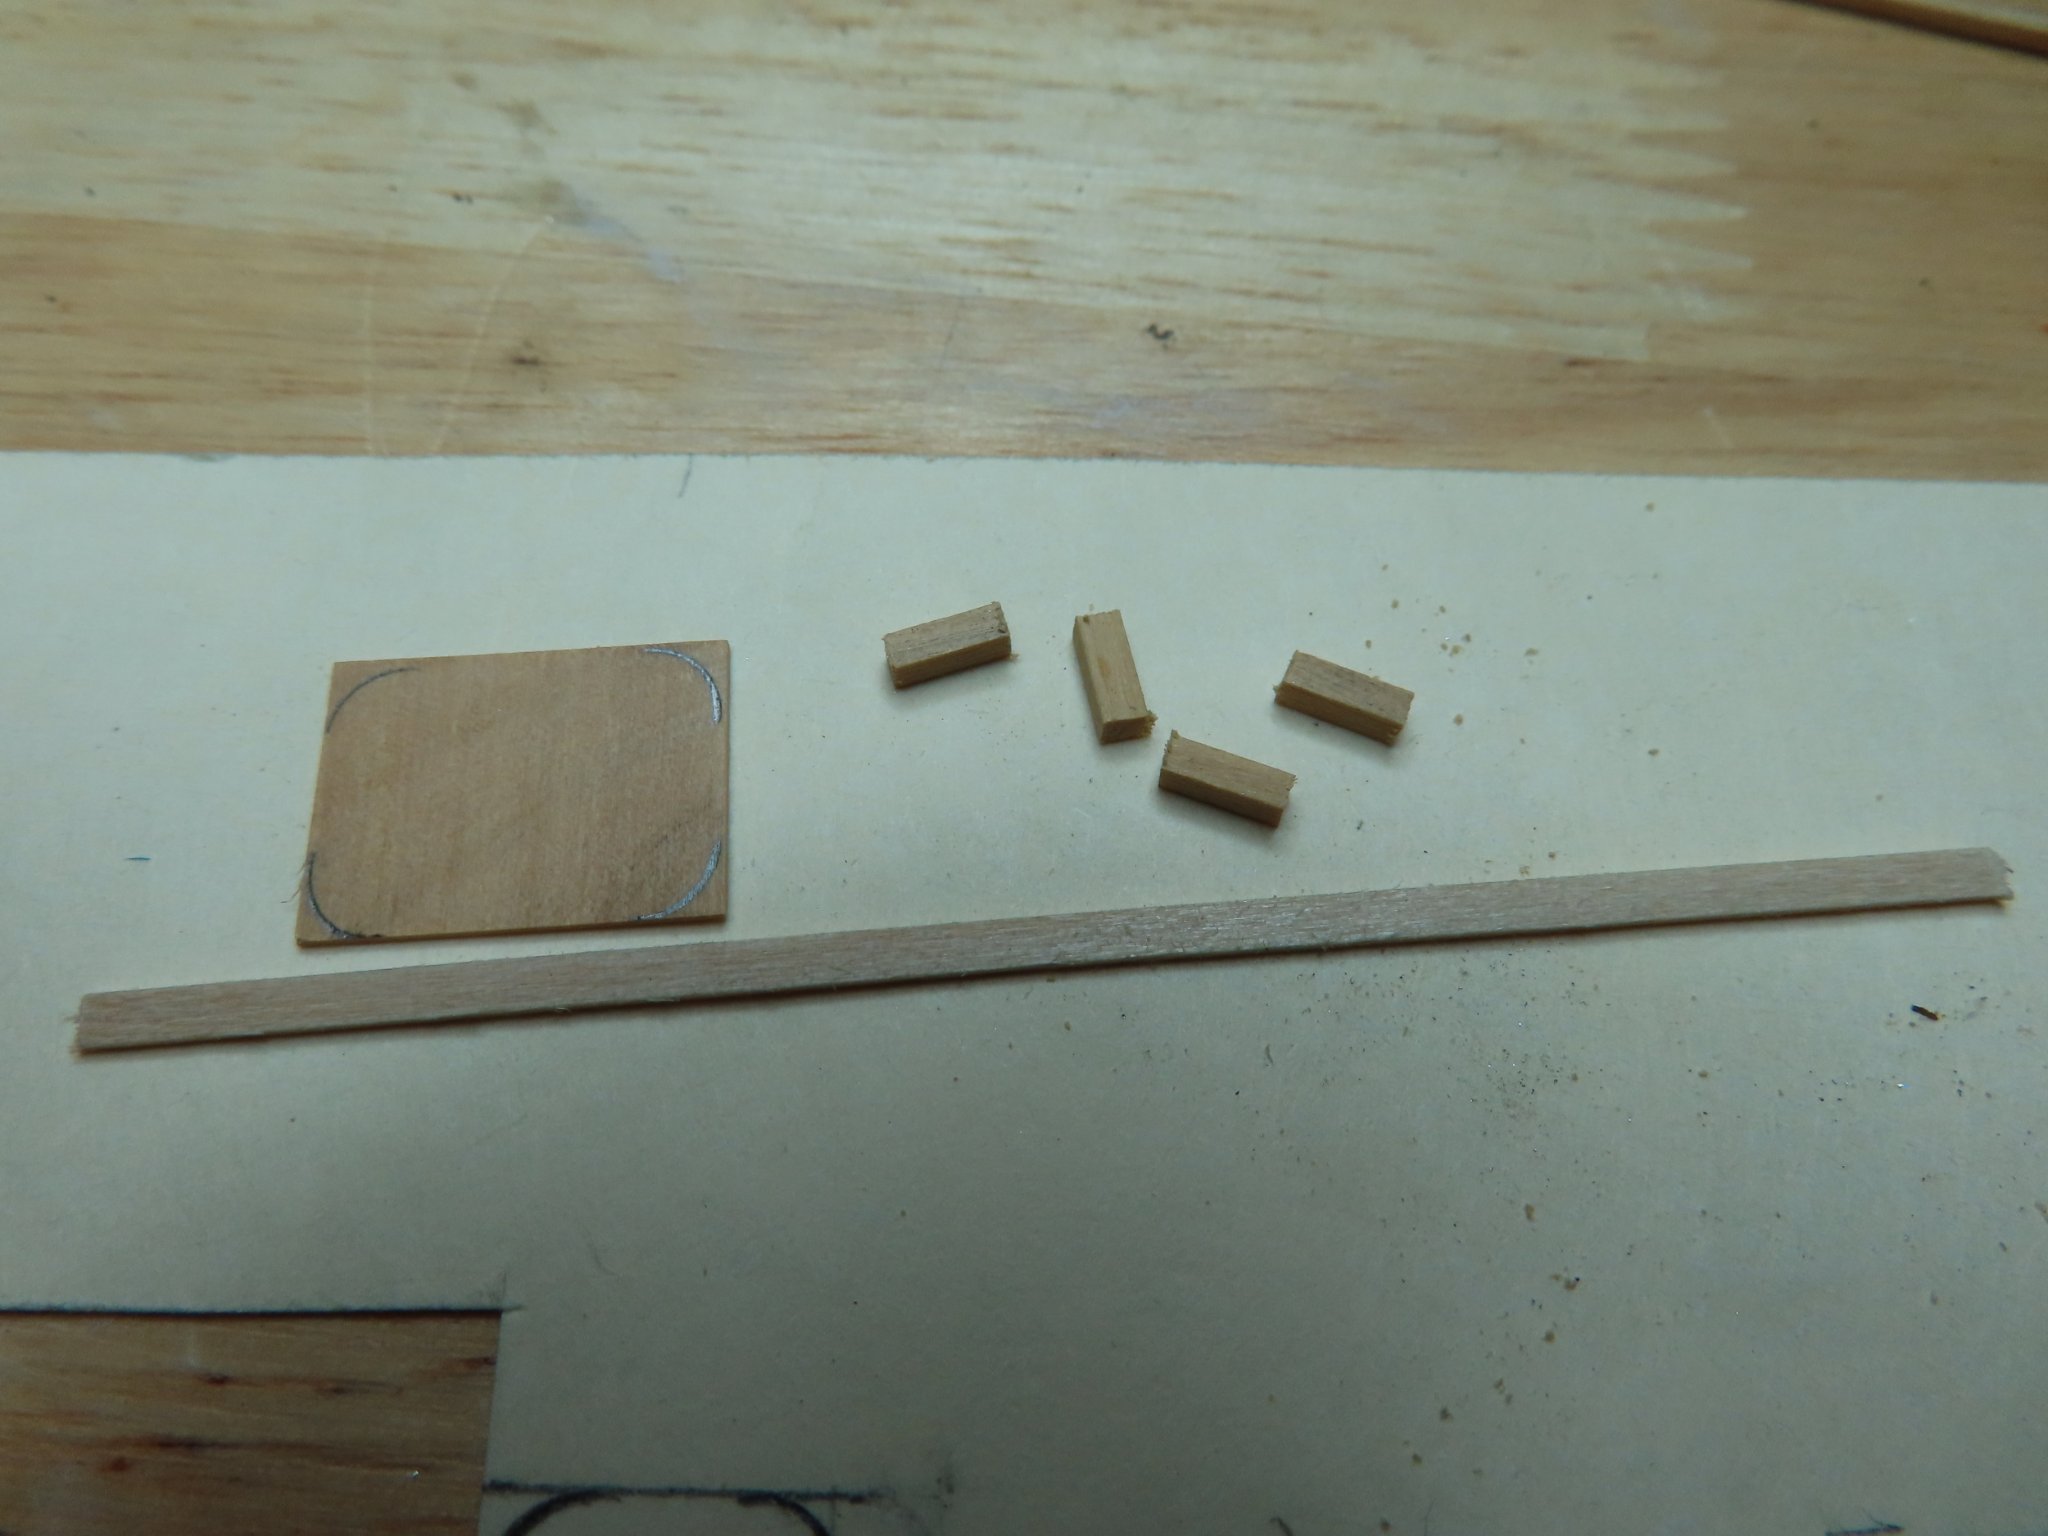
Because the sea chests have a natural wood finish, they were made from boxwood. Below is an image of my starting materials.


-
My basic plan was as follows:
-
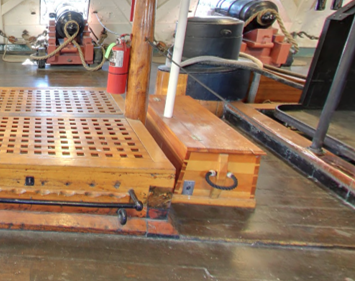
Gun Deck Sea Chests This next gun deck item I will call “Sea Chests” for lack of a more accurate term, I couldn’t find any plans or diagrams, so size and shape are my best guess; there are two of them as far as I know. One is near the stove and the other is near the capstan. They appear to be built as part of the ship because at least one of them appears to have vertical structure going through it.

-
I'm impressed by your workmanship and not to mention your shop. Very nice work so far. Your opening statement was "Building out of the box." Are you planning not to deviate from the kit or do you have any surprises in store for us?. BTW, welcome aboard to the Conny builders. Jon
-
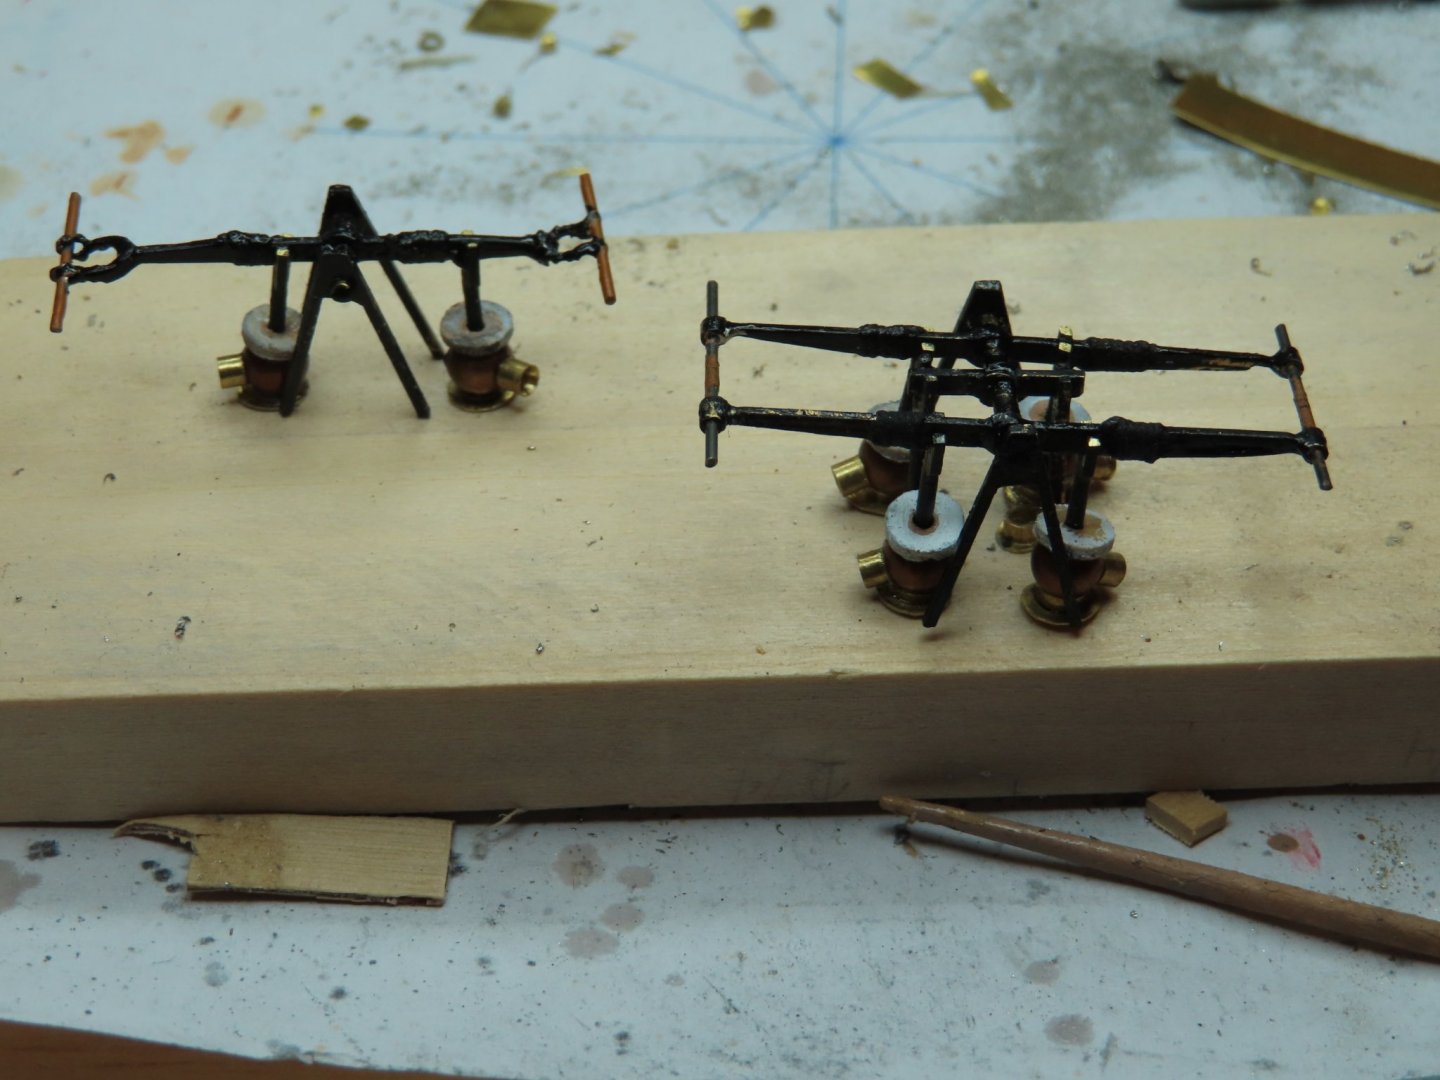
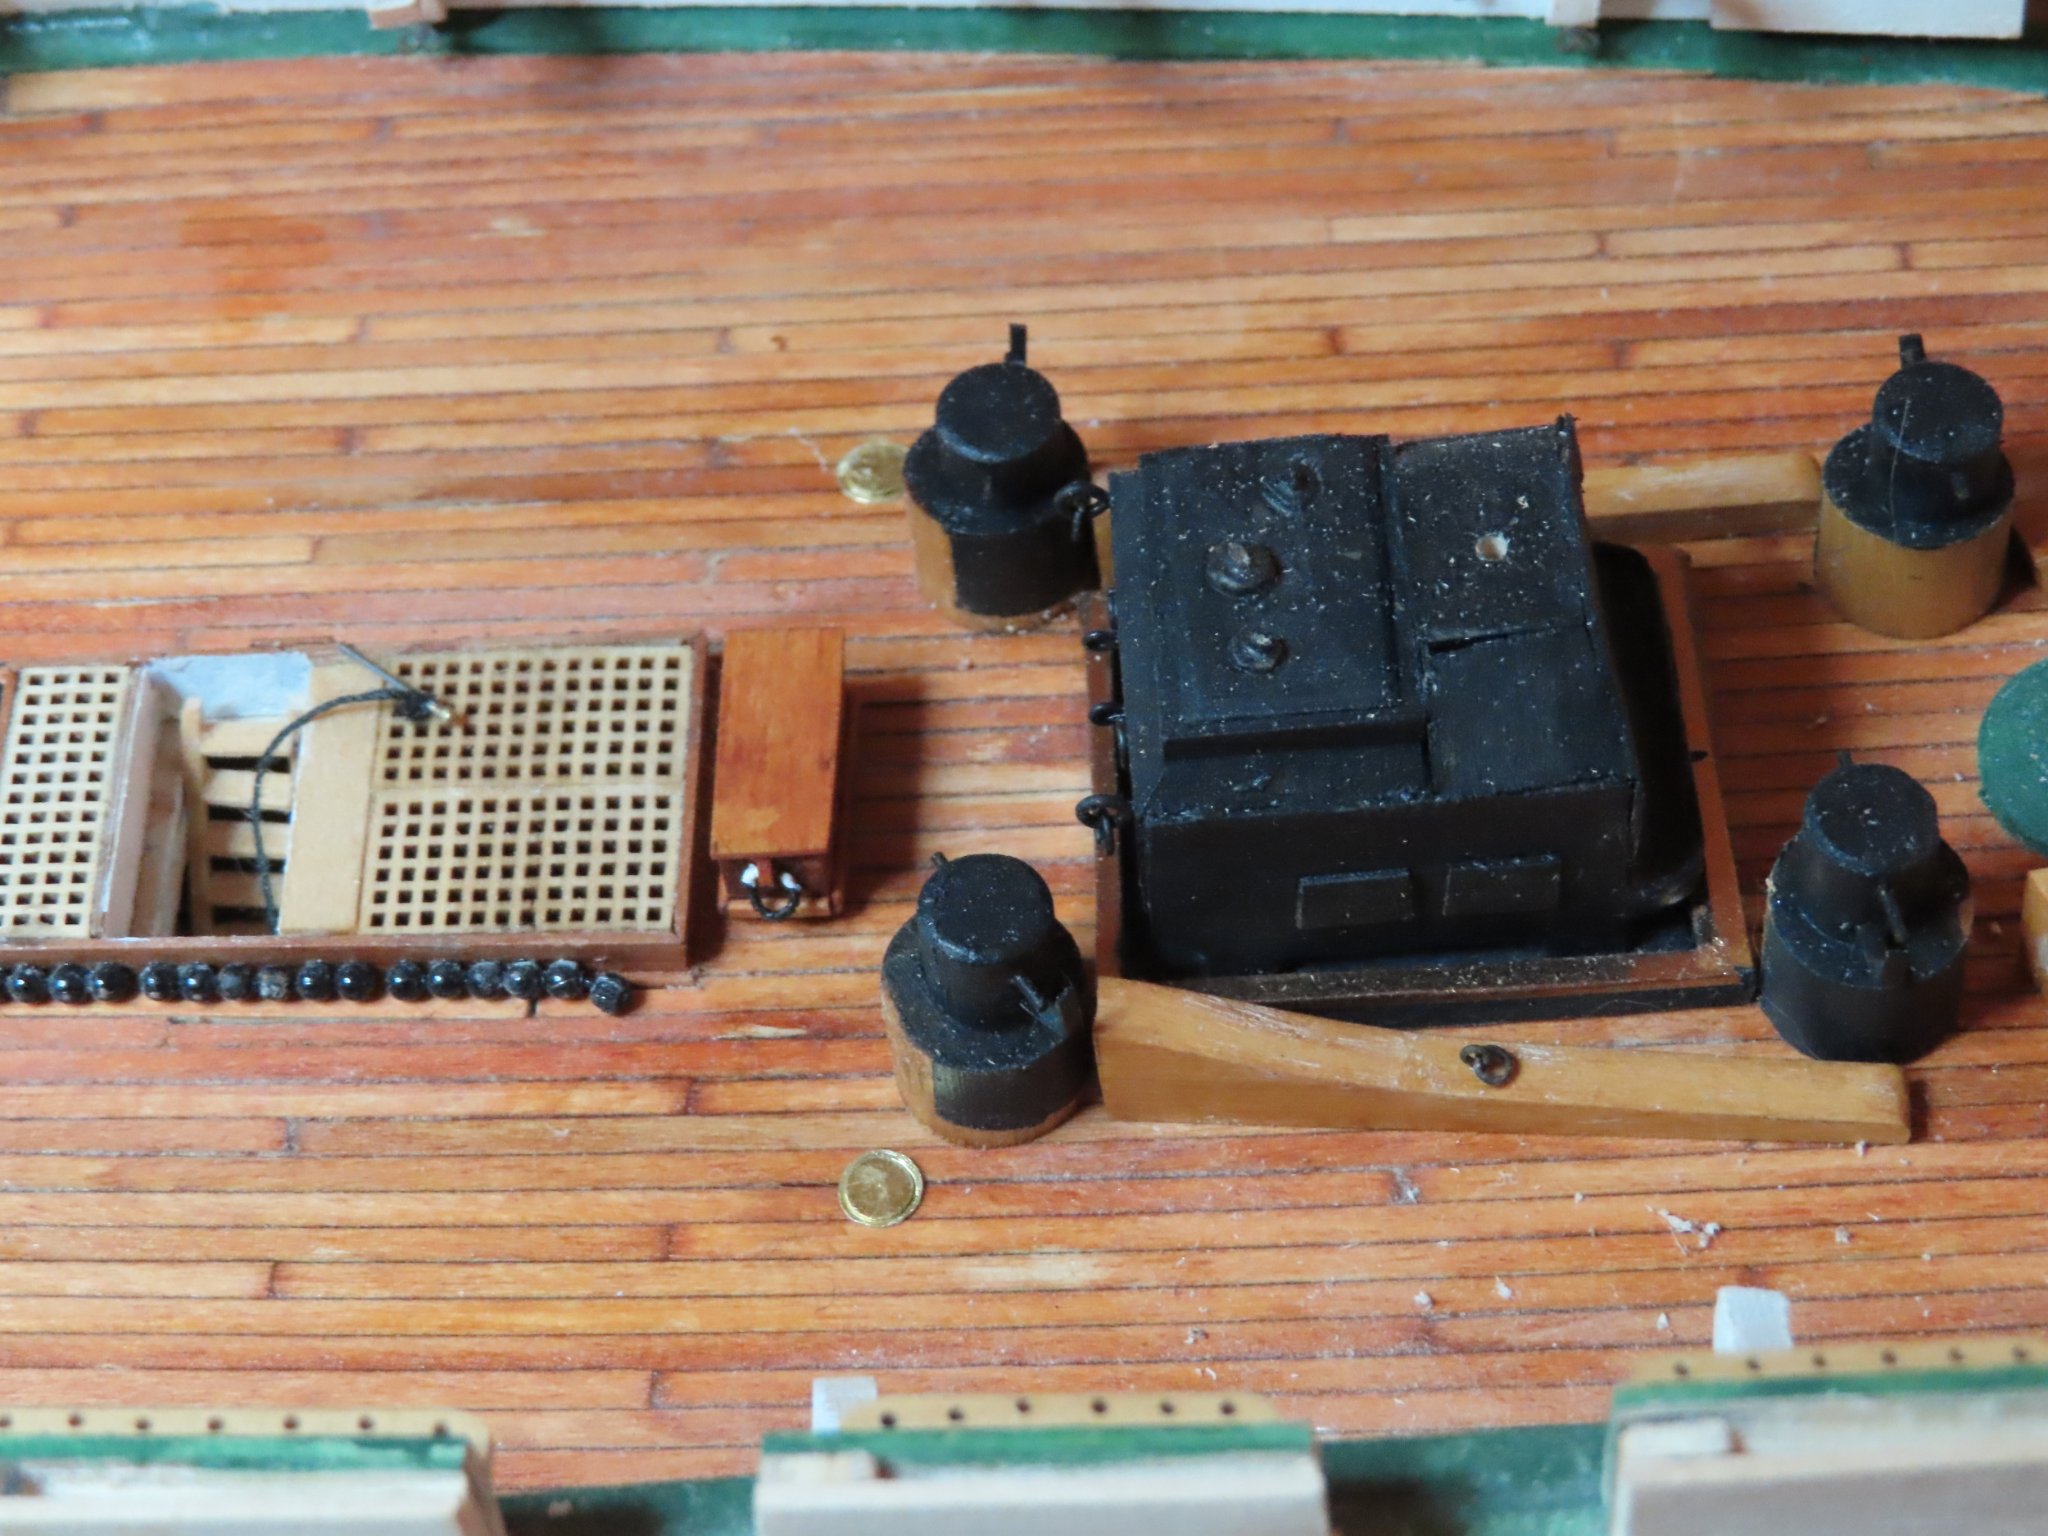
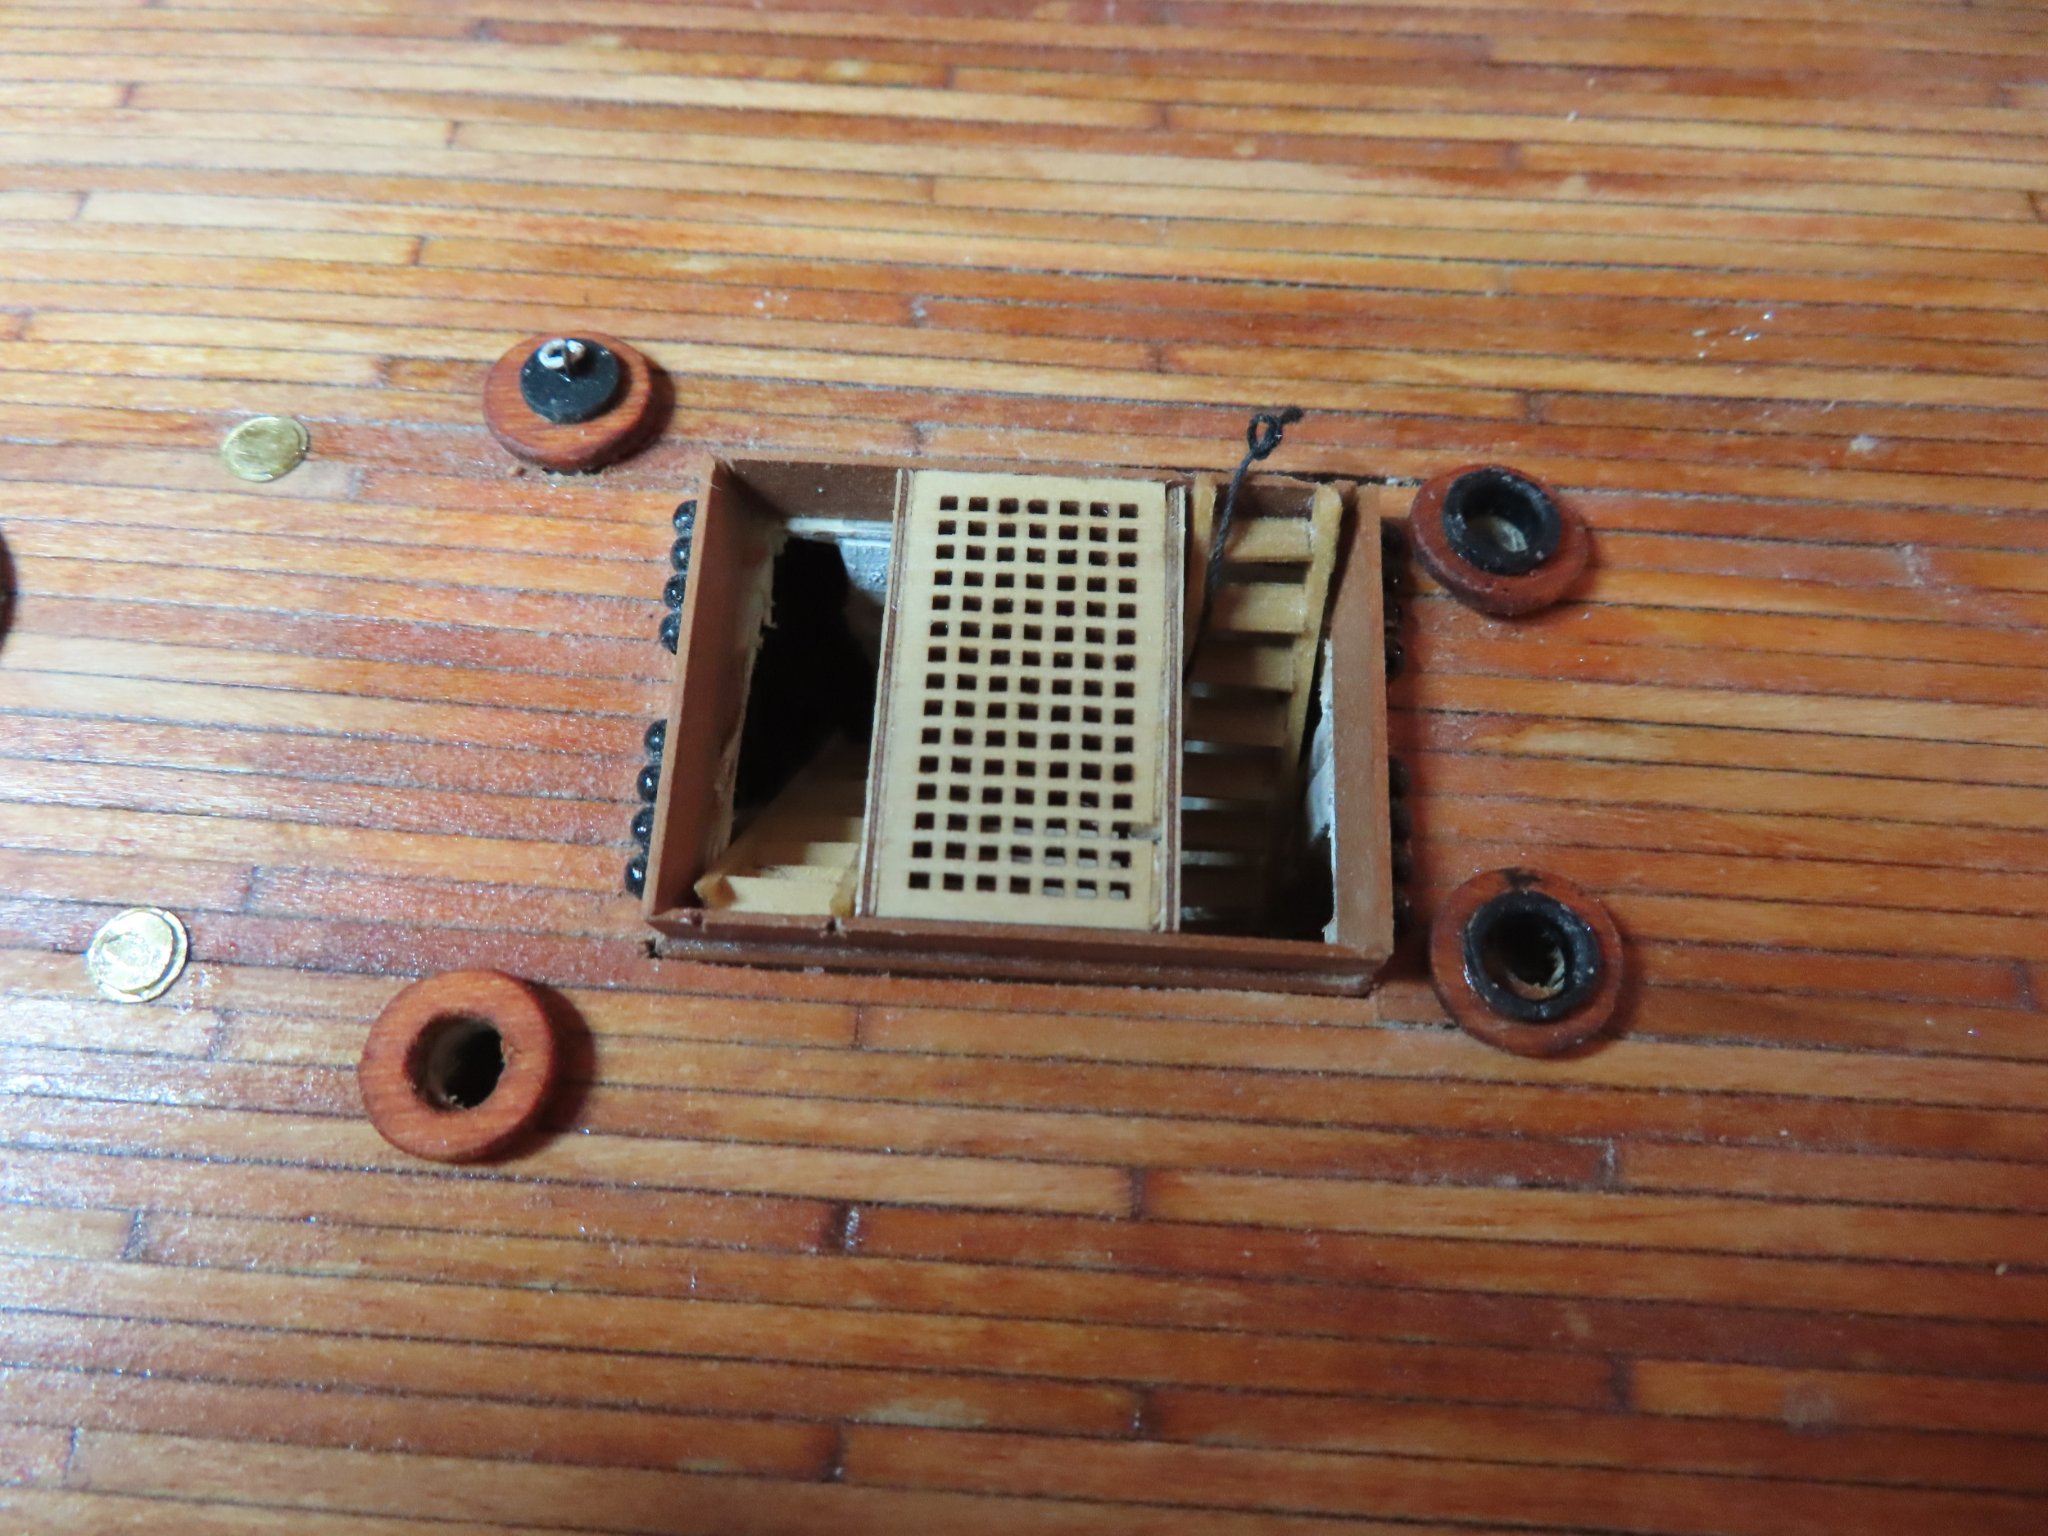
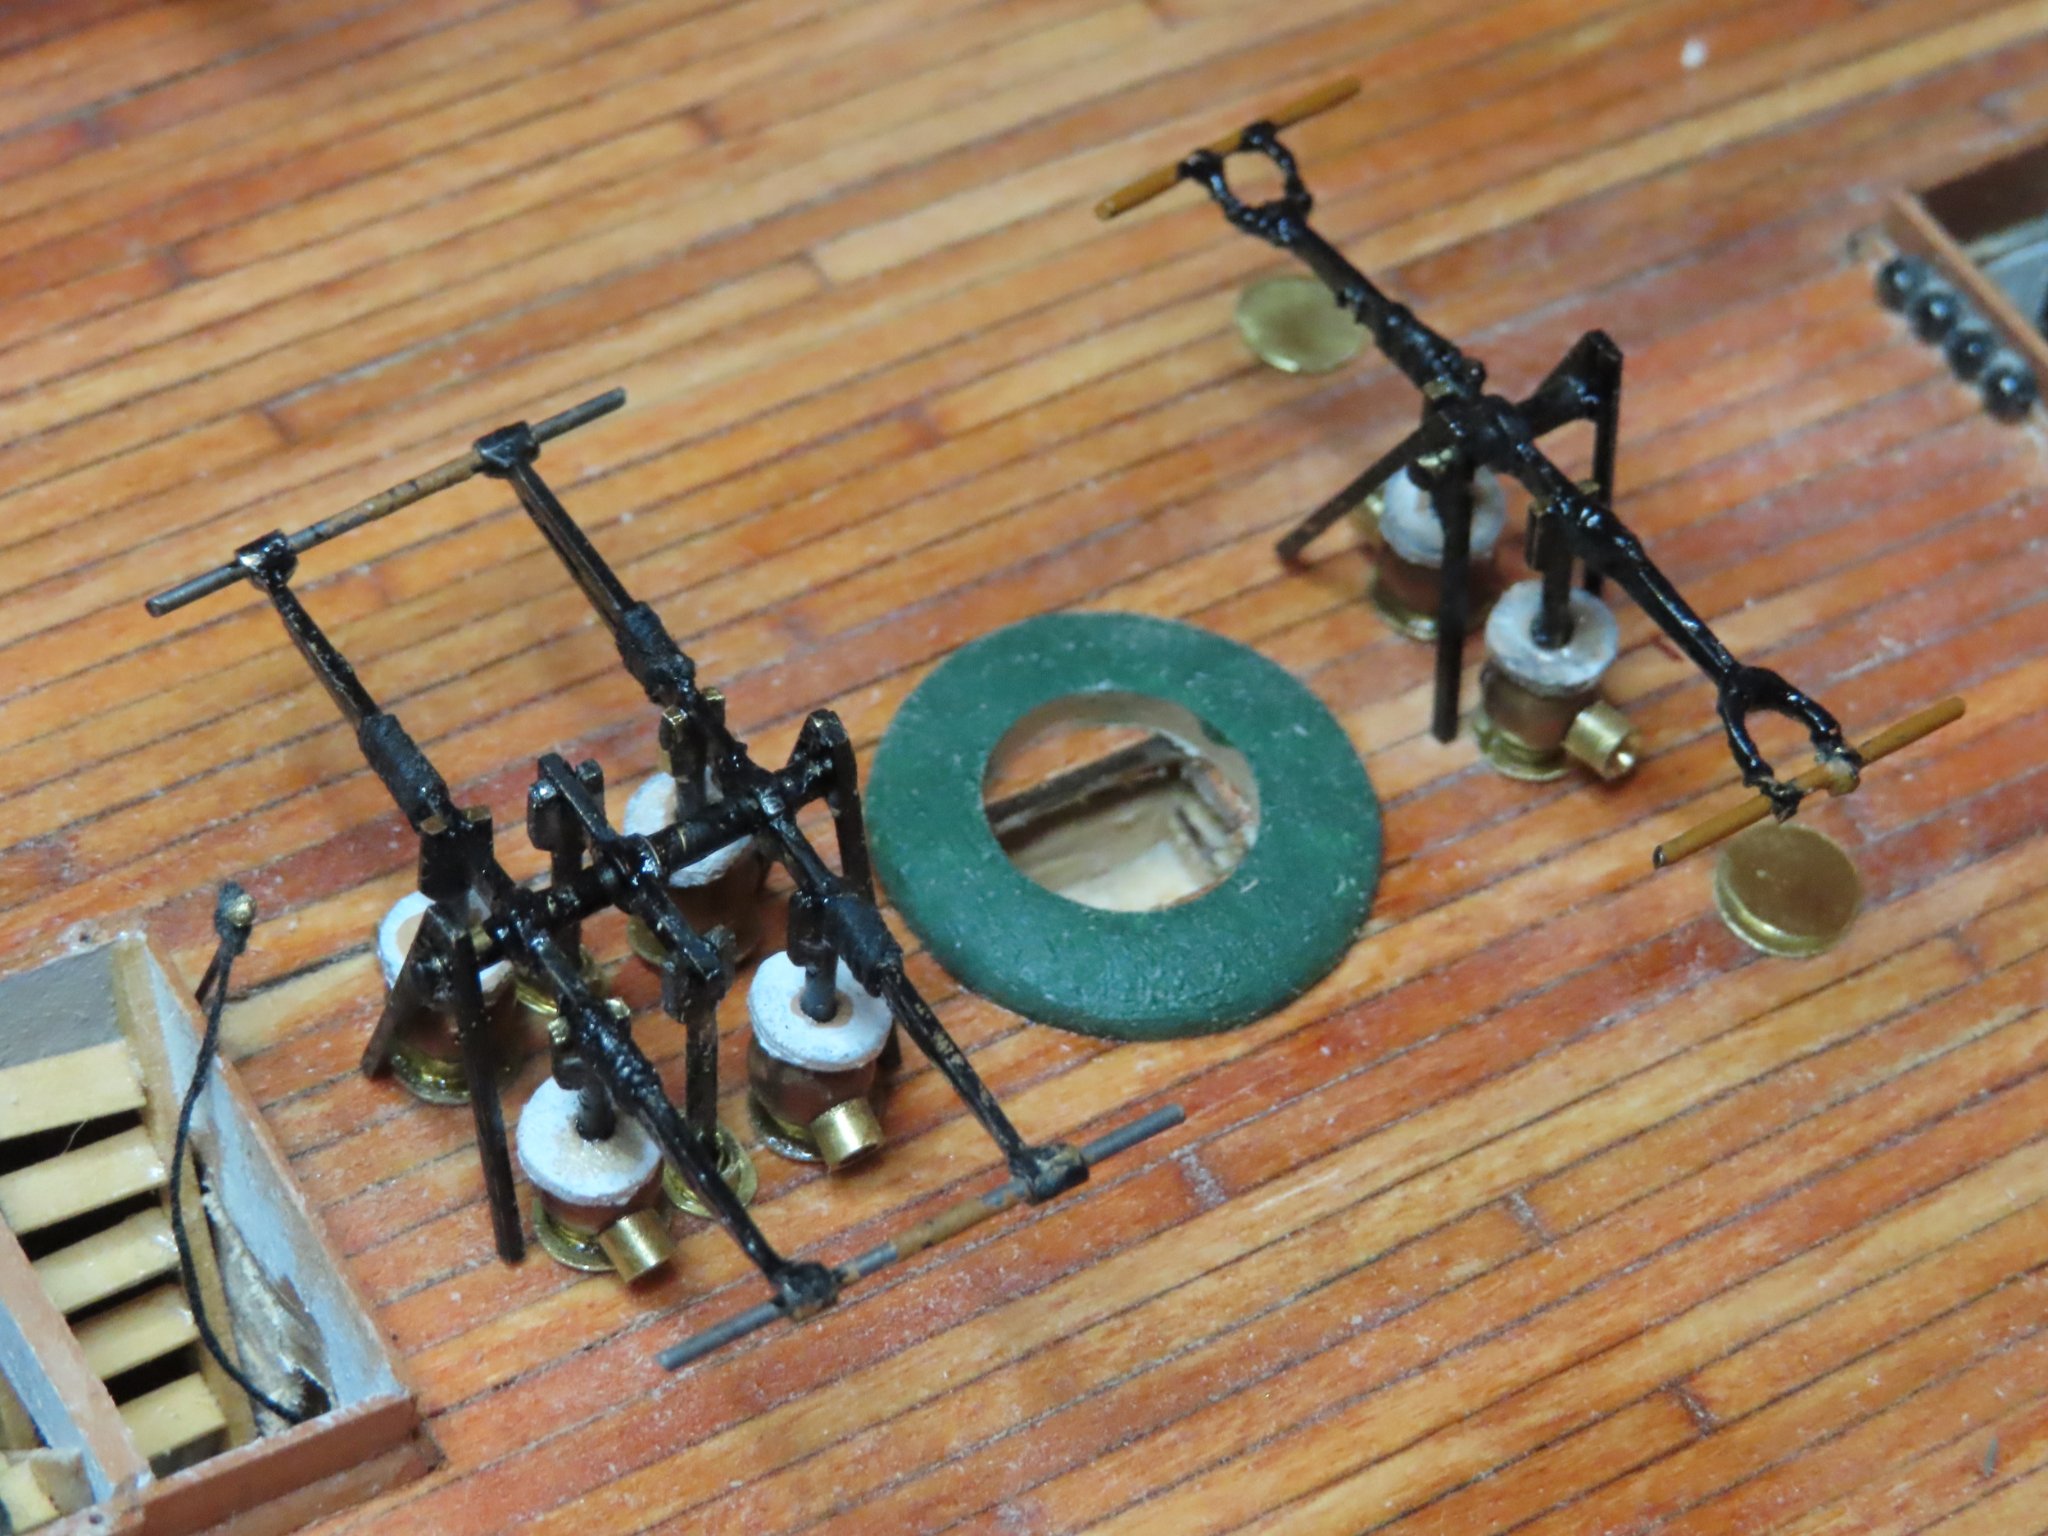
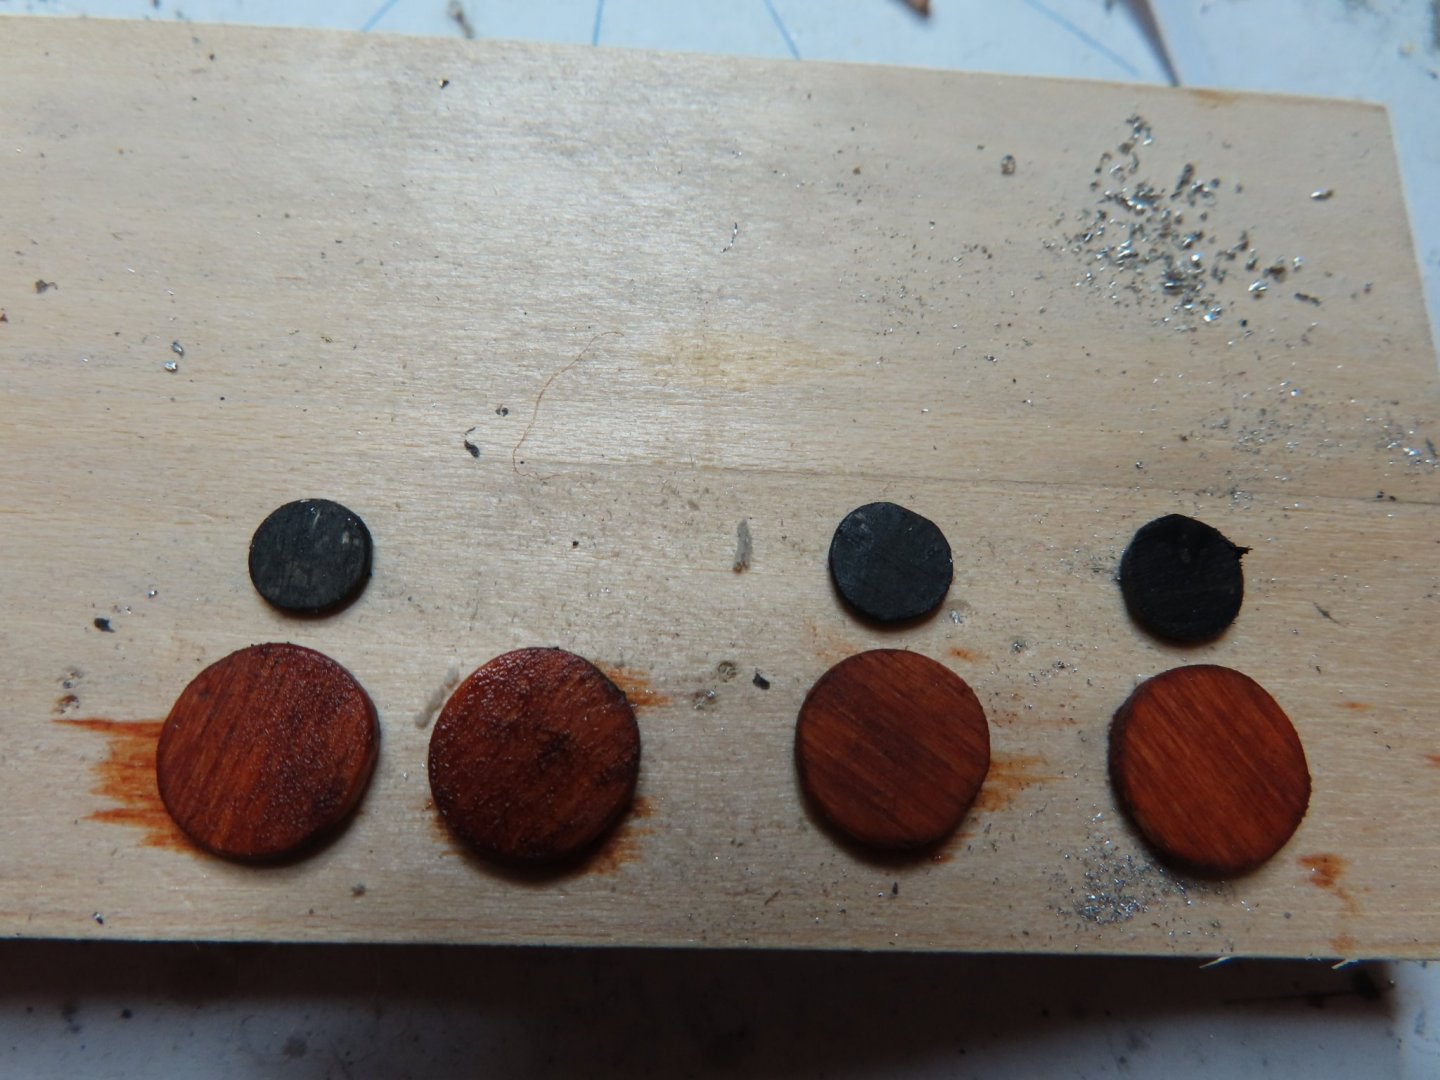
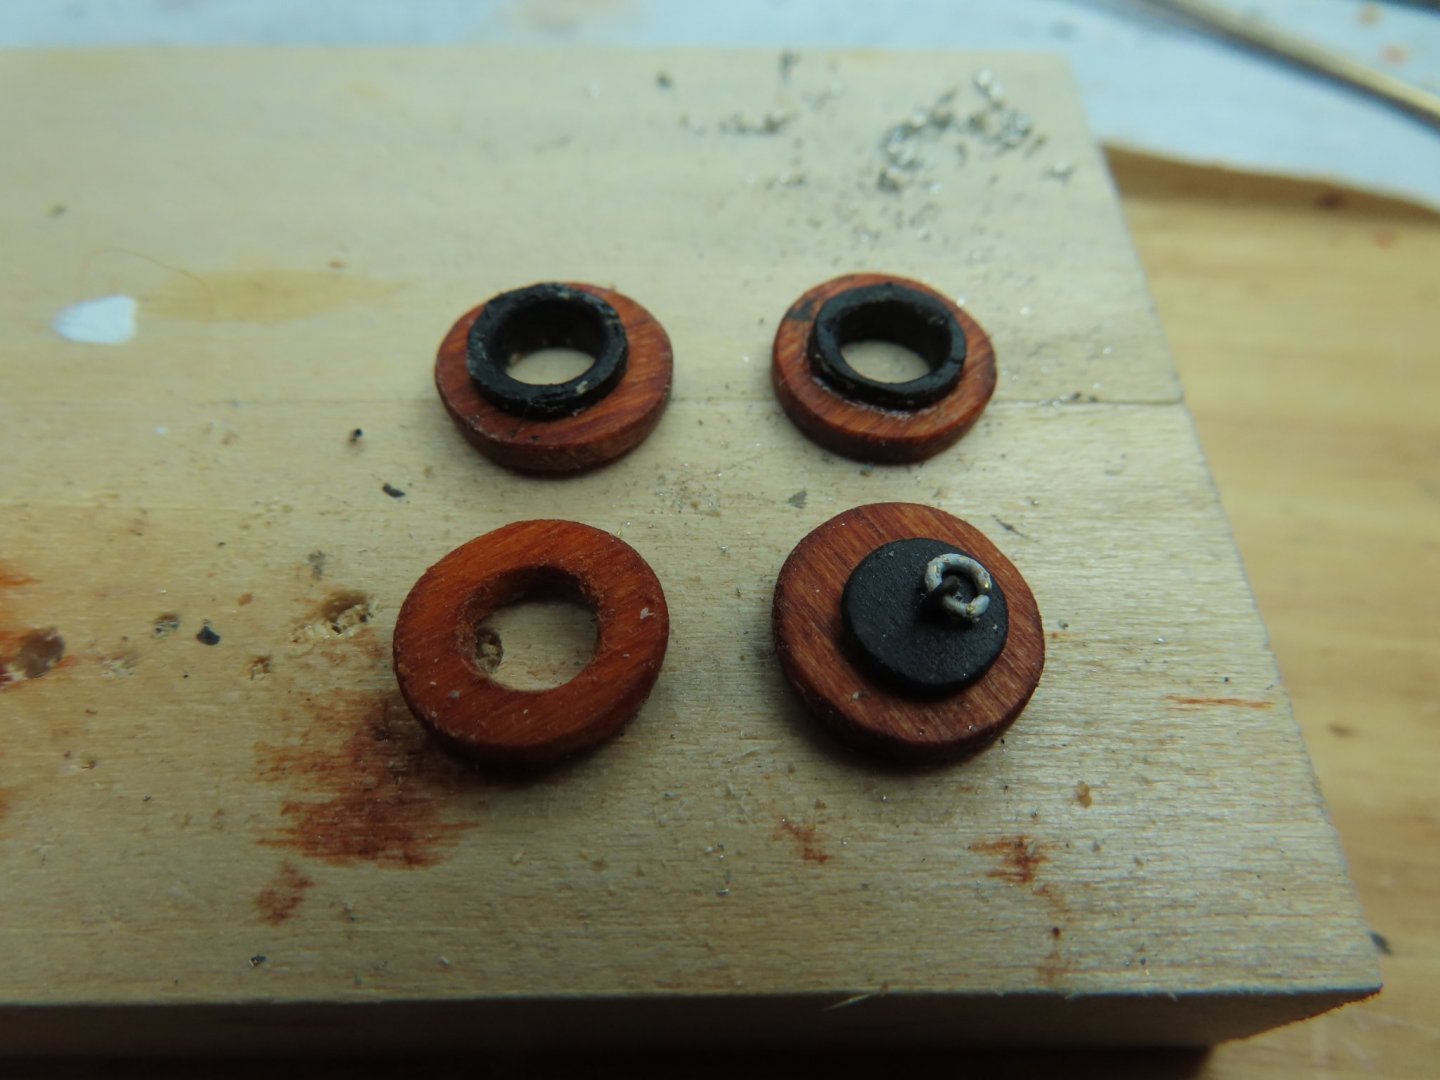
The pots which made from discs I carved out of basswood and 1/32” plywood. One rope pot has a cap on it and the remaining pots were left open to receive either rope or chain. 3/16” holes were drilled very carefully into the discs and the gun deck.

-
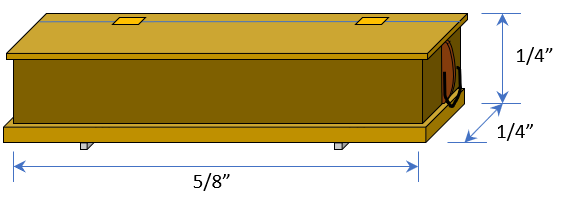
Chain and Rope Pots (Pipes) There wasn’t much that I could find in the US Navy plans about these chain pots or pipes. This where the anchor chains and ropes are funneled through the gun deck to their storage areas. The arrangement plans call them “pots” but the labels on the actual item on the ship call them “pipes”. I did find a rudimentary drawing which I believe is for the forward chain pot (labeled Hawse Pipe on the ship). The scale dimensions were determined by actual dimensions on other parts of the drawing (not shown). They appear to be the same size as the aft pots which to be used for the anchor hemp rope, but don’t have the extra shoulder.

.jpg.82886ebbb1564de6ea68fa2cdea29b08.jpg)
-
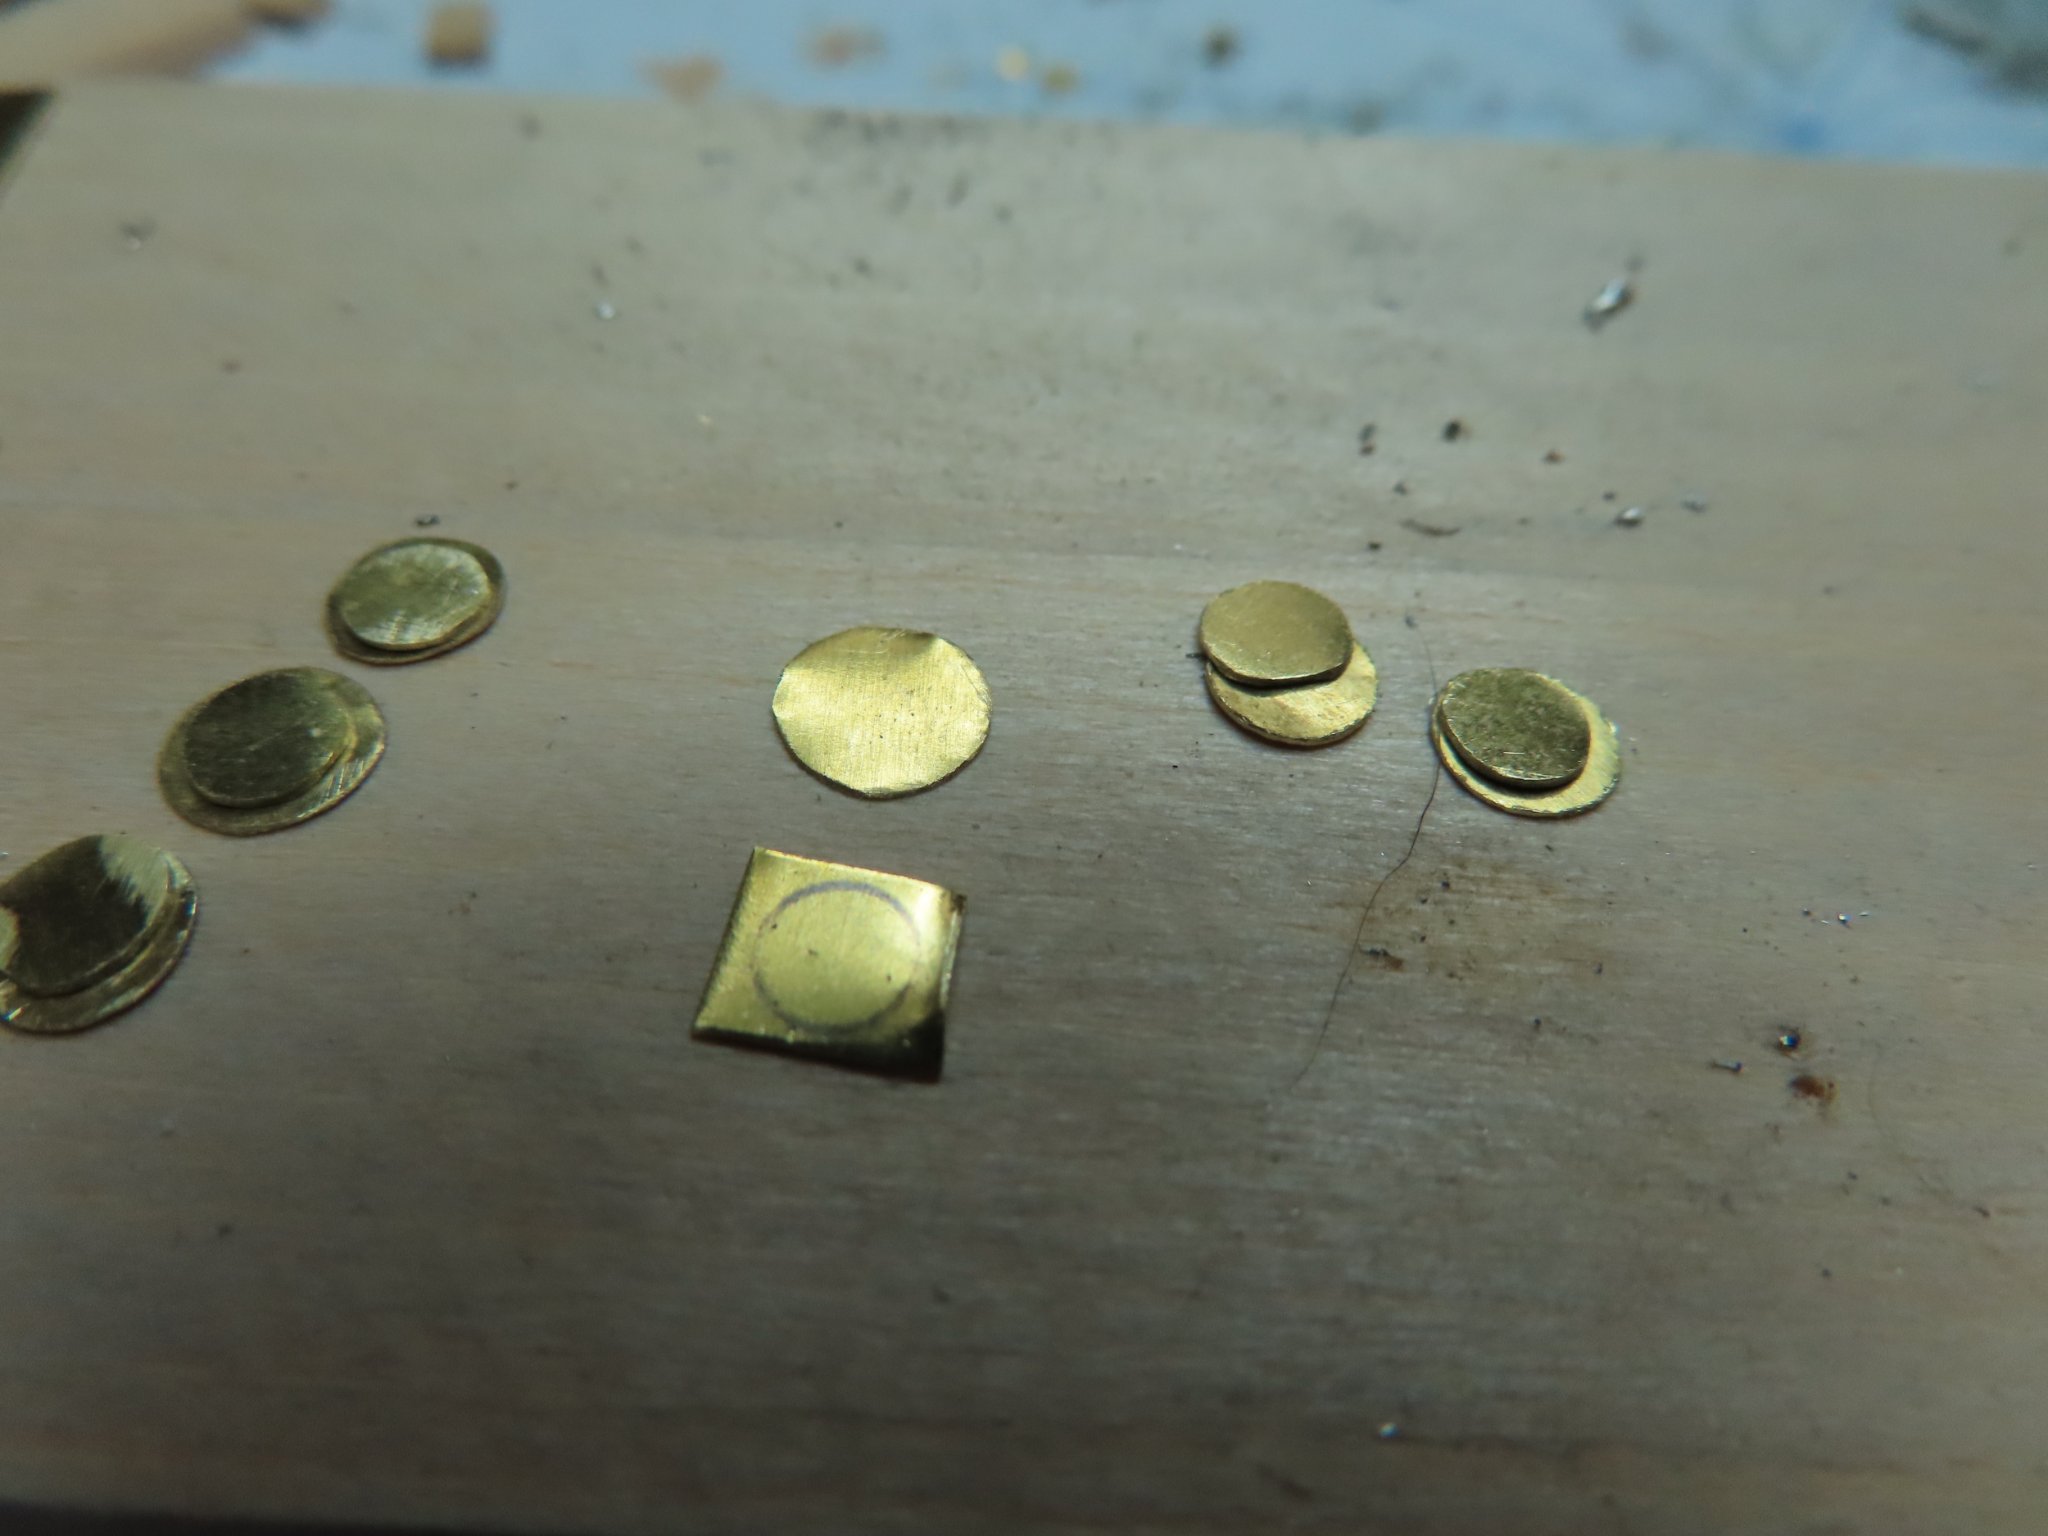
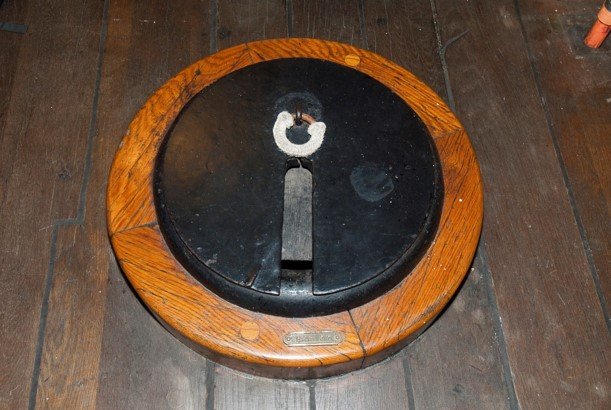
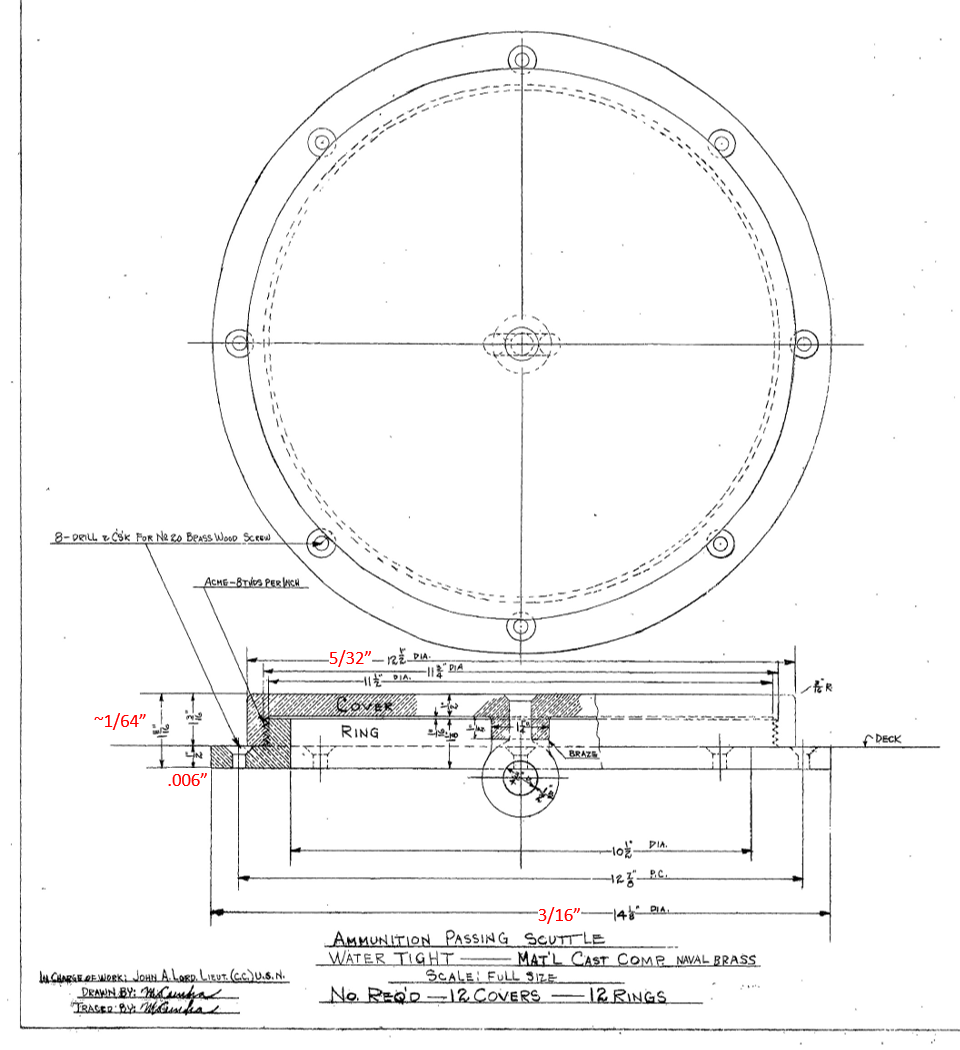
In my last post I mentioned that I made some brass discs to represent the gun ammo scuttle. Here is what I based that on. Below is the US Navy plan for the scuttle with my scale dimensions in red as well as the actual scuttle images. In the end I did glue them into place.


-
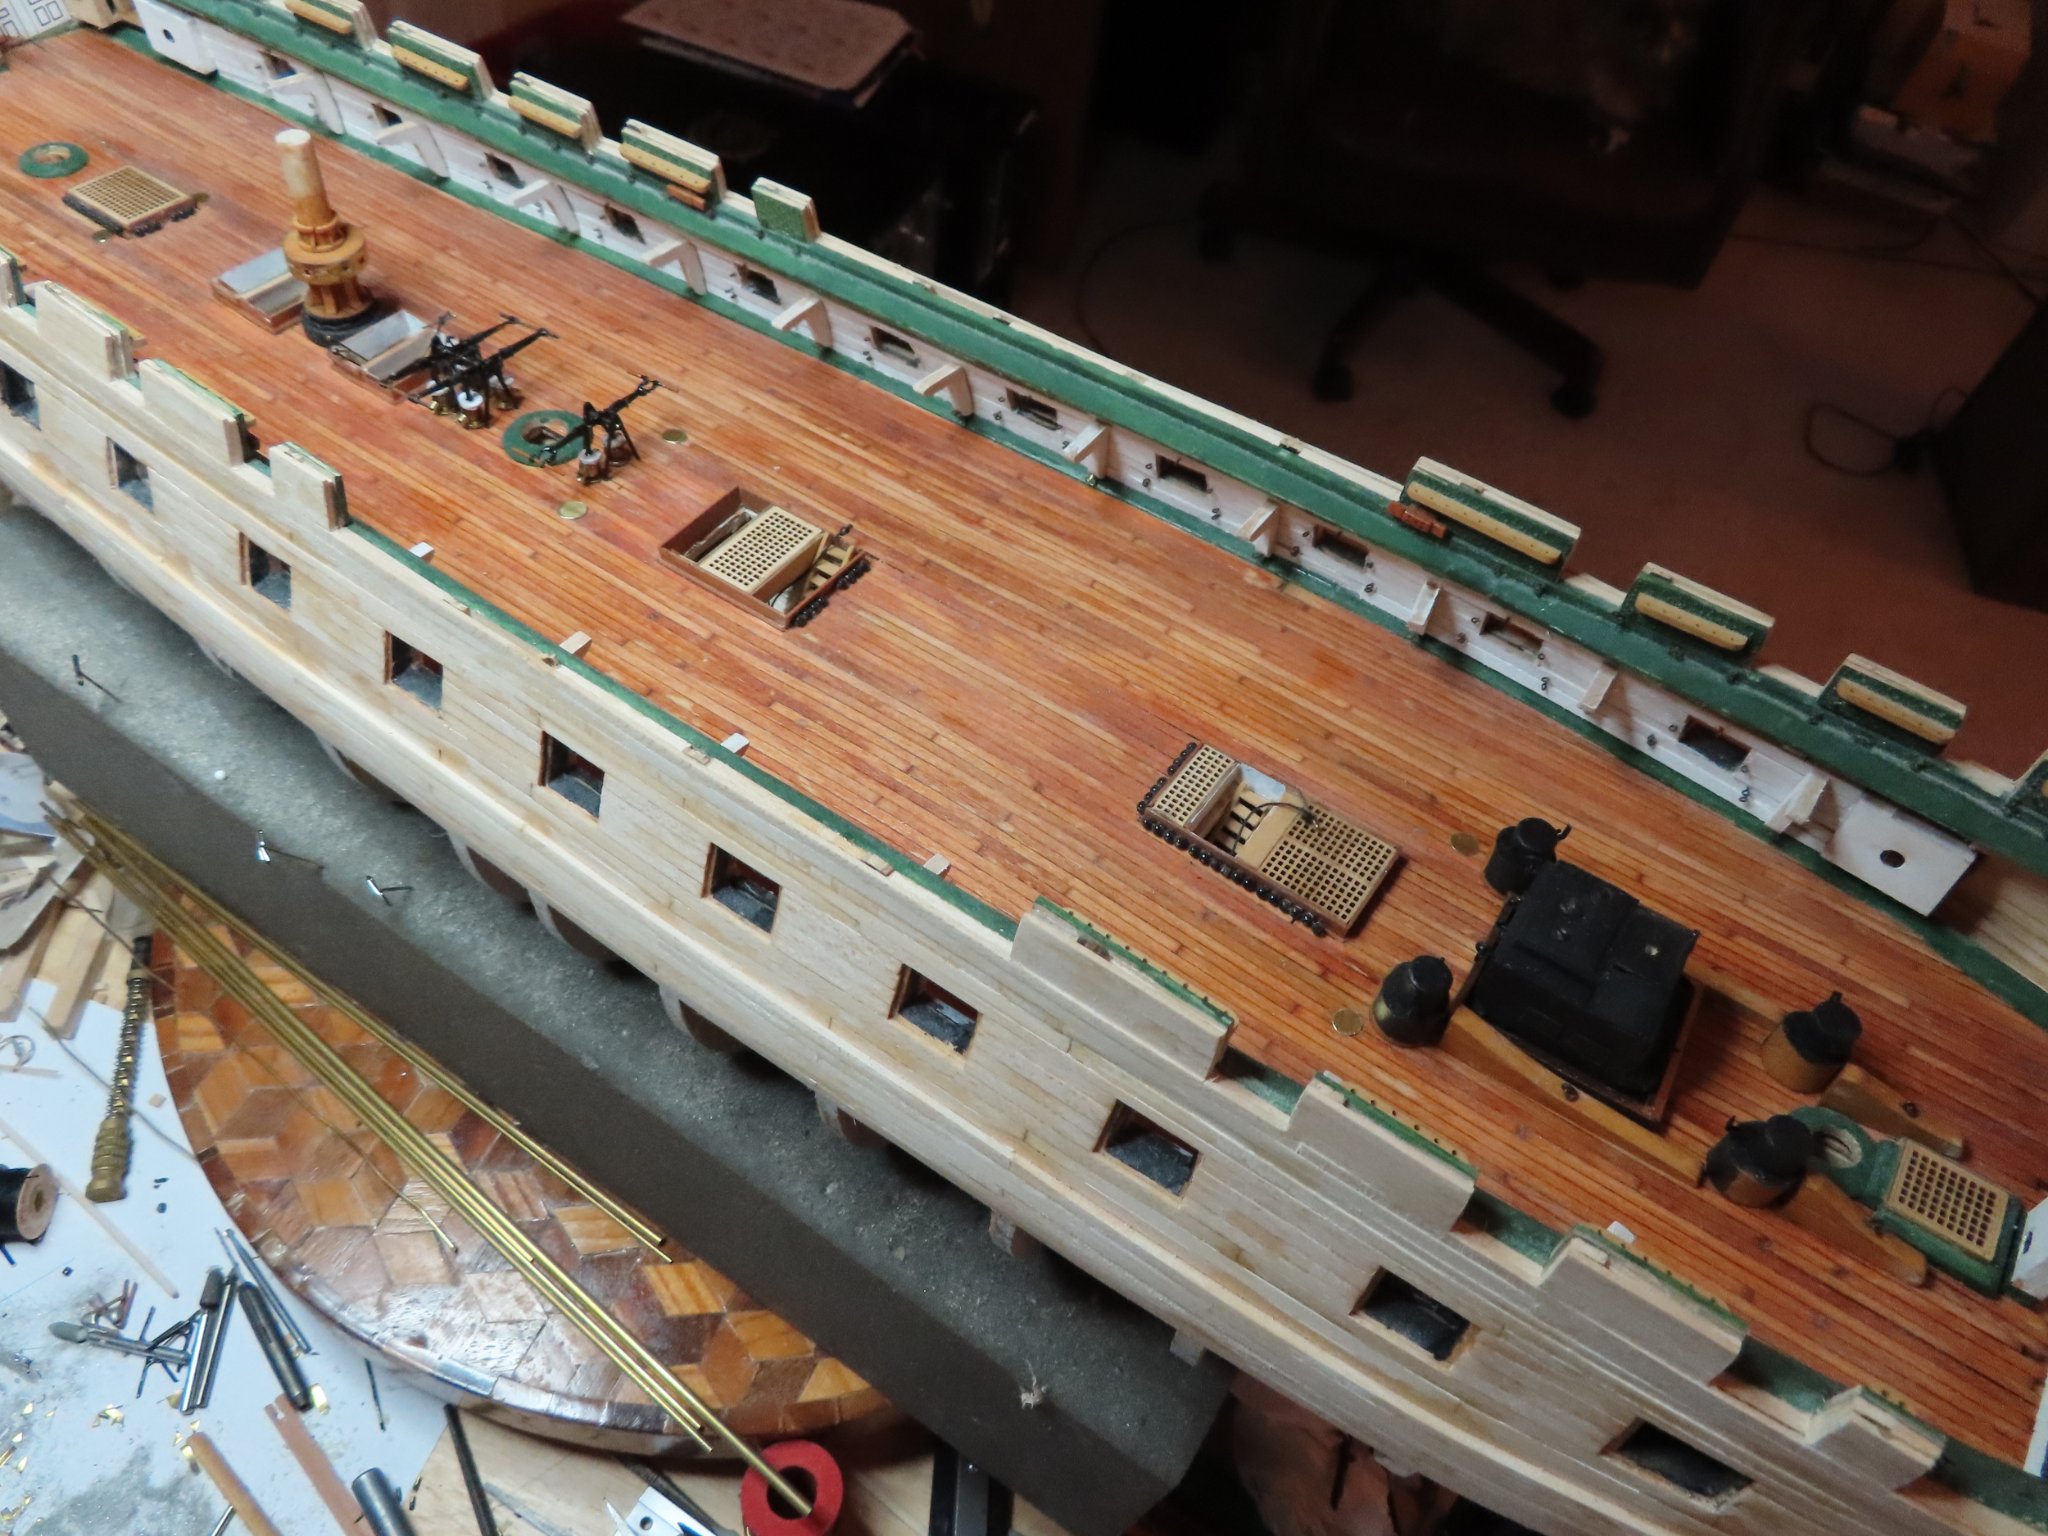
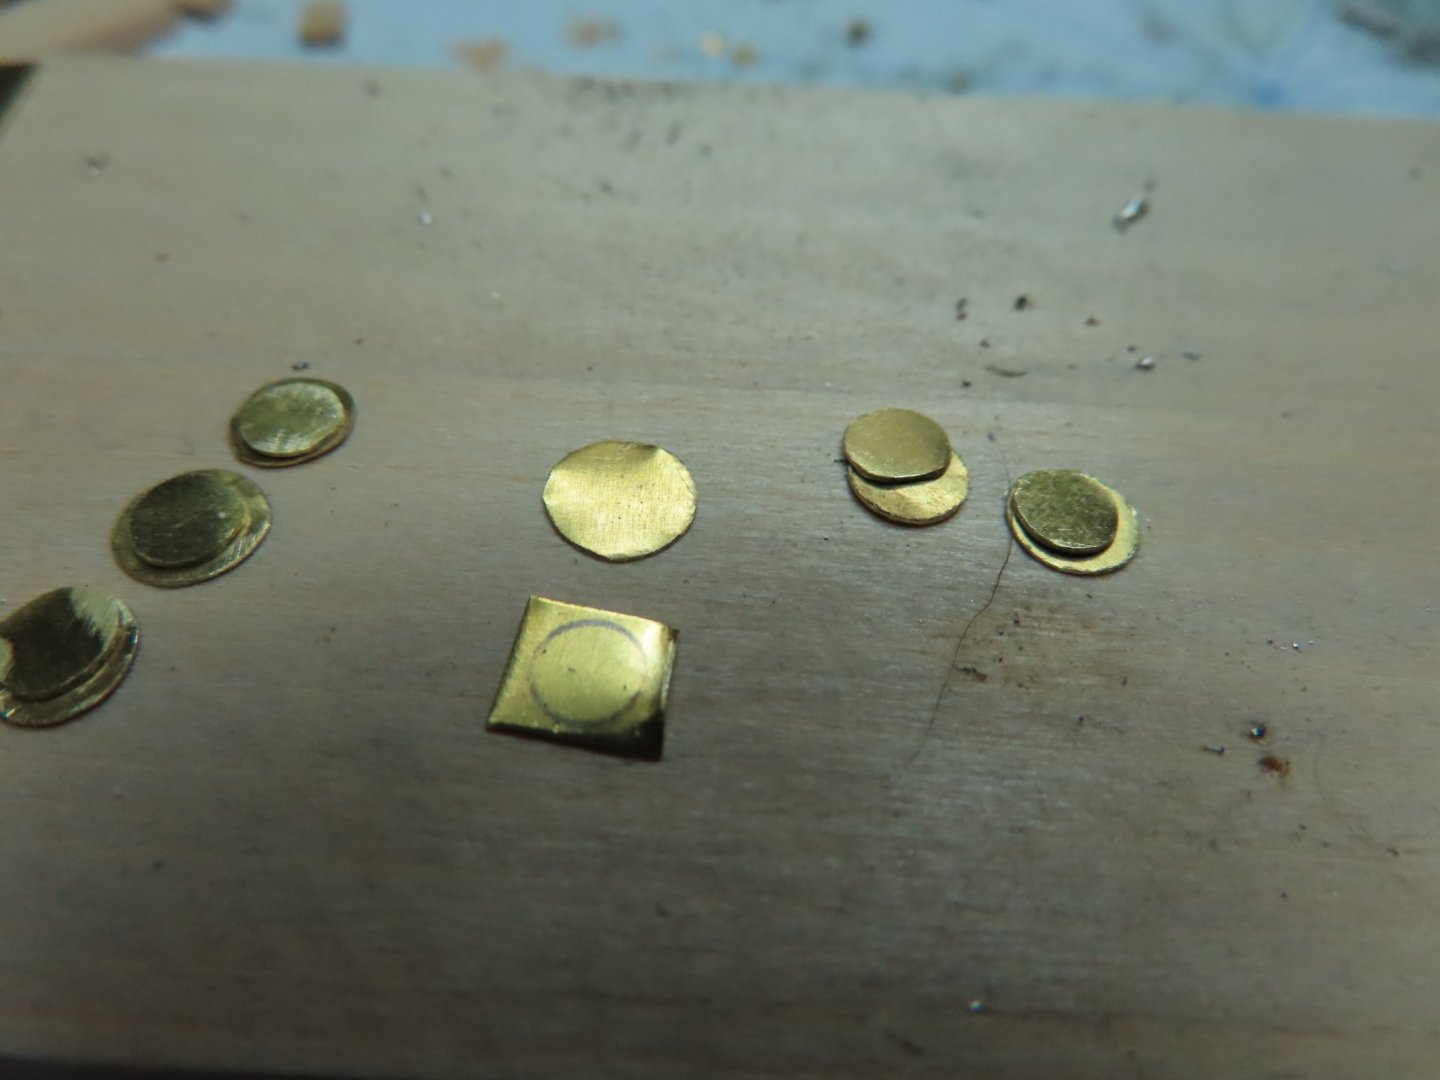
Finally, the bilge pump pieces are glued together without any more major mishaps! Before I even added the touch-up paint, I had to see what they looked like on the deck, I also fabricated and placed some brass discs on the deck to represent the ammo scuttles. Nothing however is glued down to the deck and I don’t plan to until I finish creating all the deck furnishings including the guns and gun rigging.

-
After re-drilling the holes in the spheres, a bit wider and deeper, shortening the pump rods to their proper lengths, and with some trial and error, I think I got it. Here is an early dry fit test. The pieces must now be glued together, and paint added to worn areas during the adjustment and constant re-assembly process.