HOLIDAY DONATION DRIVE - SUPPORT MSW - DO YOUR PART TO KEEP THIS GREAT FORUM GOING! (89 donations so far out of 49,000 members - C'mon guys!)
×

Siggi52
-
Posts
1,155 -
Joined
-
Last visited
Content Type
Profiles
Forums
Gallery
Events
Everything posted by Siggi52
-
 Ha, I just realised that I forgot the the openings for the fore and mizzen mast 😐 That means, extra work for tomorrow
 -
Thank you Albert, and also all others for your likes And another small update. The planks between the binding starkes are installed
-
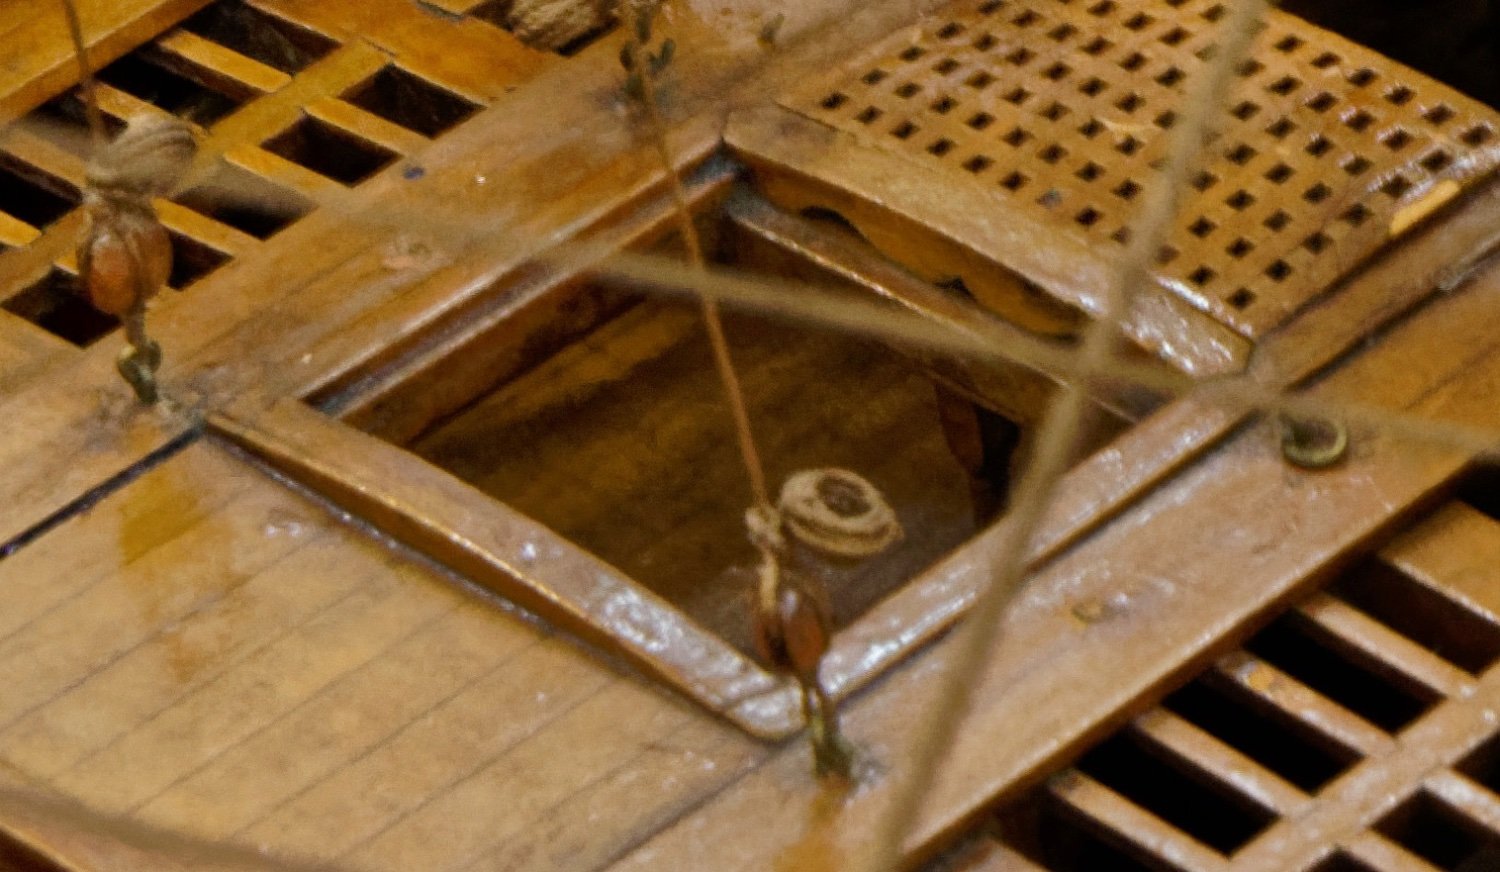
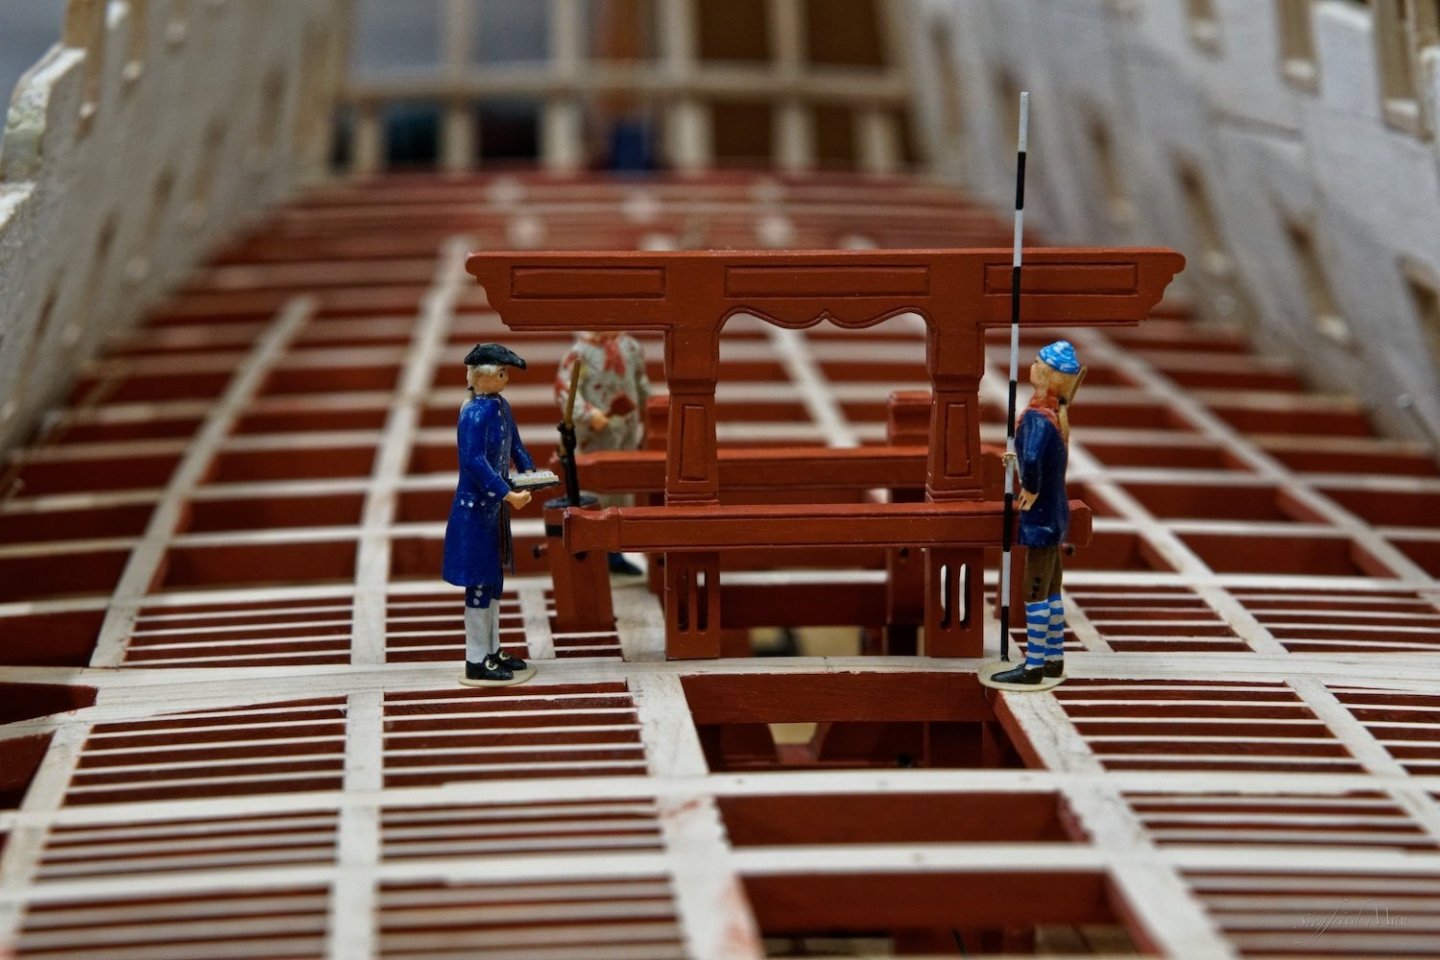
Good morning, Mark, I think, in bad weather they put the grating in and sealed all with a tarp. Then is only the back ladder way open and there is may be also a lantern. Jaager, may be you are right. My first thought on this was, when they rigged up the capstan with bars, as at most early models, they closed the ladder way and removed the rails. Ok, mostly the ladder way are open and also when the capstan is't rigged, I did't find any rails. And as Druxey mentioned, there are more dangerous things at a ship, then the ladder ways. The rails are nowhere mentioned. In my Falconer 1769 edition only for the officers stairs. And also at the models, where there is no extra ladder way for the officers to the quarter deck there the two ladders at the sides have rails! For the gangway over the waist Falconer mentioned: „It is fenced on the outside by several small iron pillars, and a rope extended from one to the other, and sometimes with a netting, to prevent any one from falling off into the sea“ And also for the gangway at the ships side he mentioned rails, but not for the ladder ways. And again, these gangway are for the officers! All others have to climb over the railing. Before we find nothing written down, or a model with these rails, all others is speculation. But it is not too late, before I'm not installing the quarter deck, I could install these rails.
-
Druxey, there you are right, and also that the coamings are a little higher then the deck is. That, and that the sailors know there ship. They worked there day and night and then, Keith, I think they find there way. And at the deck below is at least a lantern shining. I don't think that at the gun or orlop deck is absolutely darkness at night. Such a ship never sleeps. But the question is, did they have hand rails, or not? If yes I think, at one or the other model you would see them. I did't find any.
-
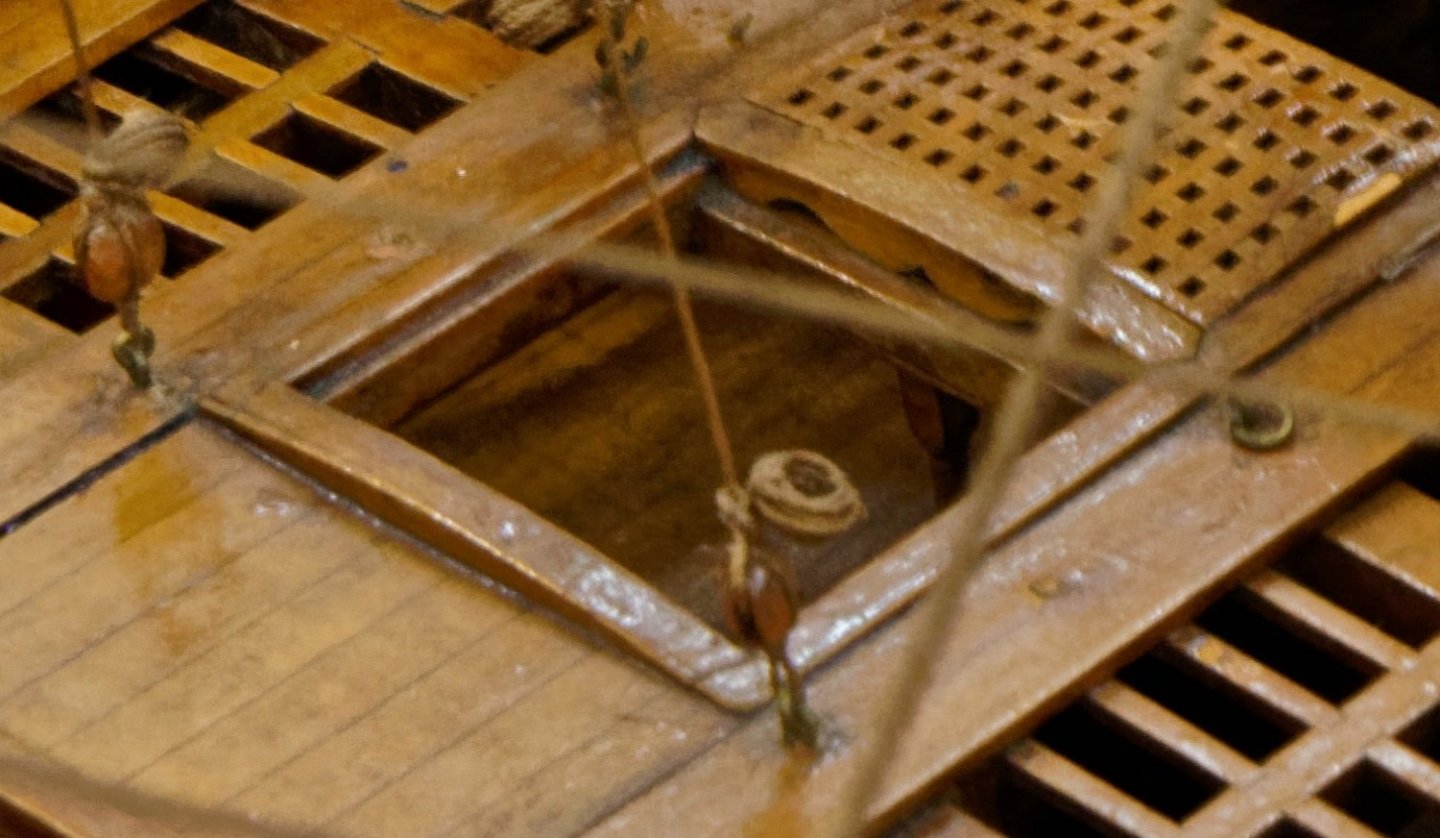
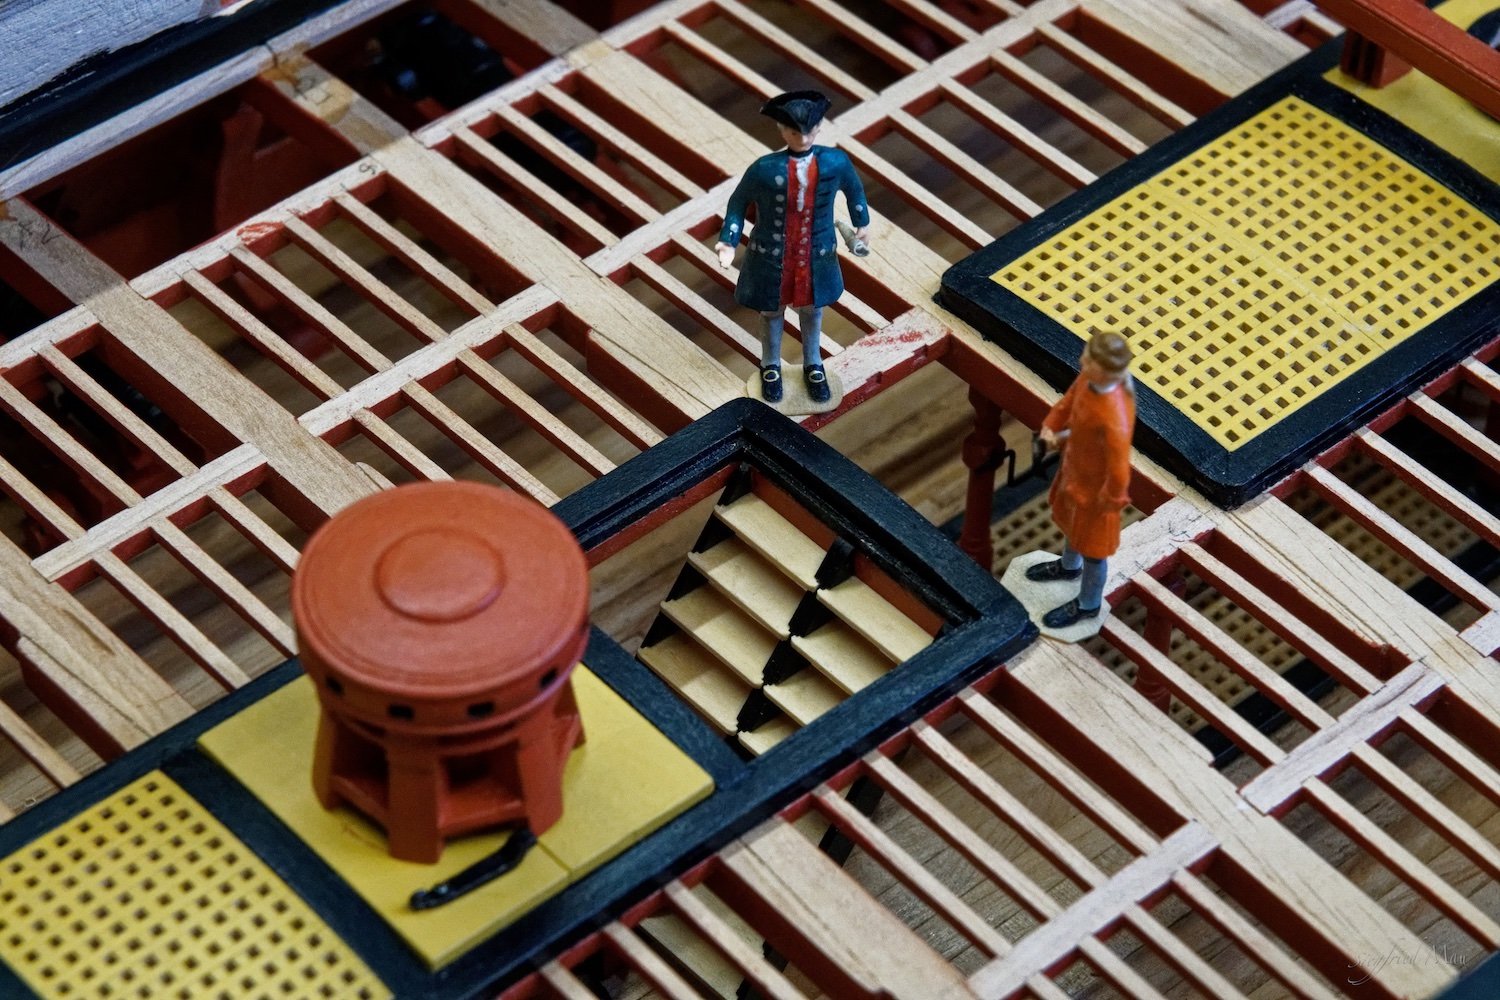
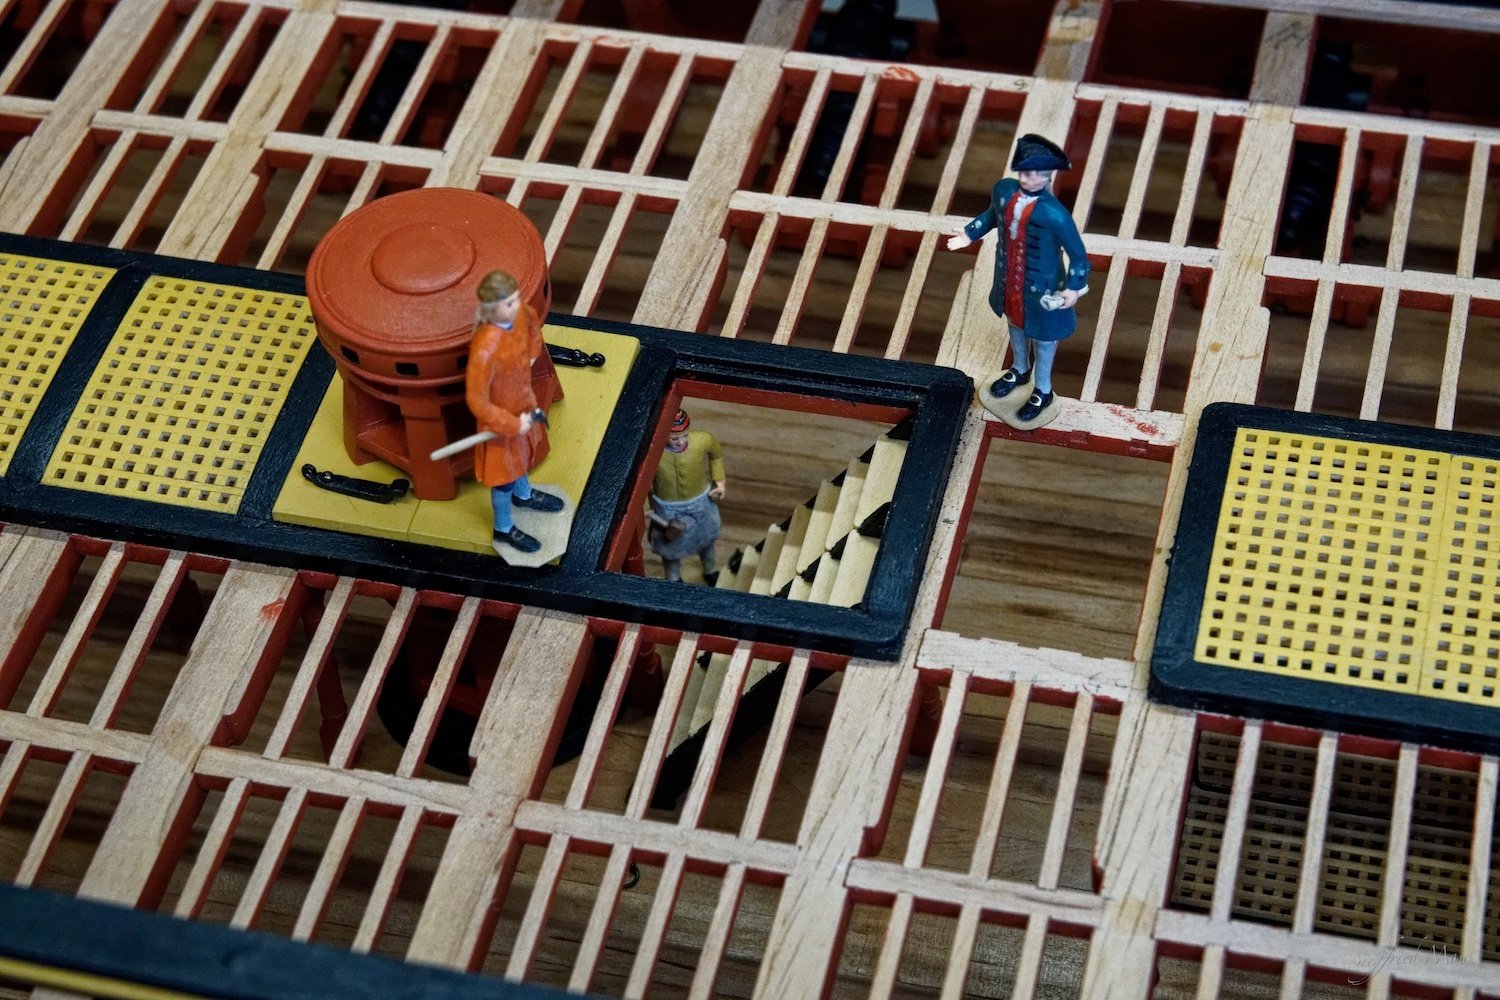
Hello, today I looked also through all the pictures in the gallery for historical models, no handrails. What druxey at the end said is may be right. All ladder ways are behind, or in front of capstans. So nobody would stumble into them as an accident. And also at night it would't be absolutely dark, somewhere is always a moon, star or lantern, so they did't need these handrails really. Also at these small ways, left and right over the waist, no rails. Only the Royal William from 1719, SLR0222, had there rails. The only handrail I found, except those for the officers, was at the Mod. No 34 Vol II, of the Rogers collection, and there from the gun deck down to the orlop deck. Between the capstan and mizzen mast. But with these models I'm not sure if there is all really historical correct. That would be the next question, should I left these rails I had build at the gun deck? It is not too late to plug them out. Question over question. I think I did't build them at the upper gun deck, but leave them at the gun deck. At many models they did't even build the ladders, there is only the row of gratings. So would it look, when the capstan is in use.
-
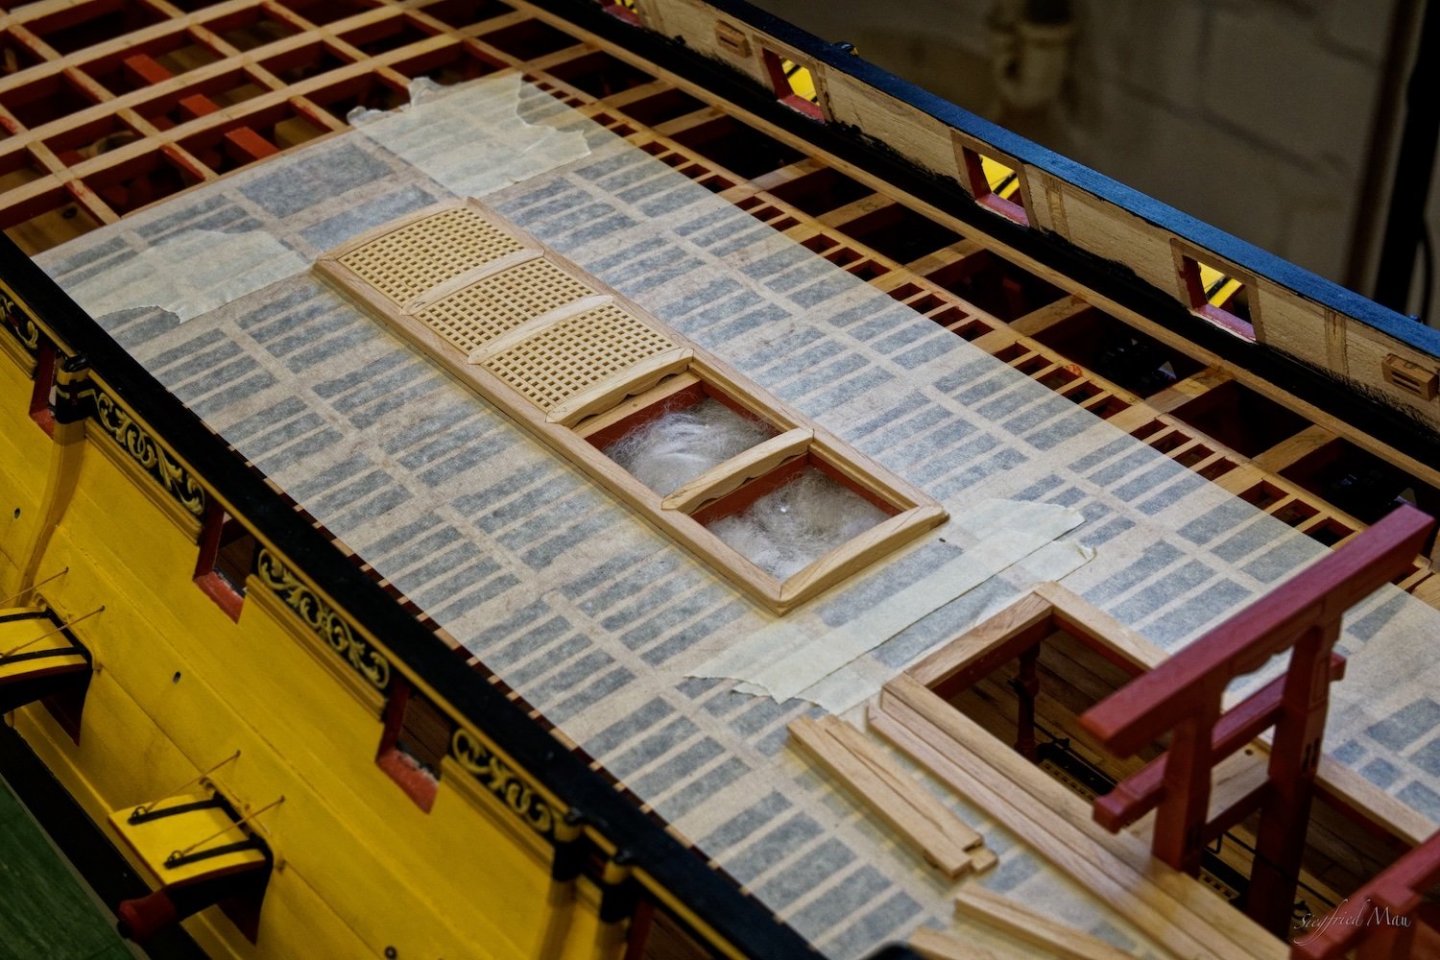
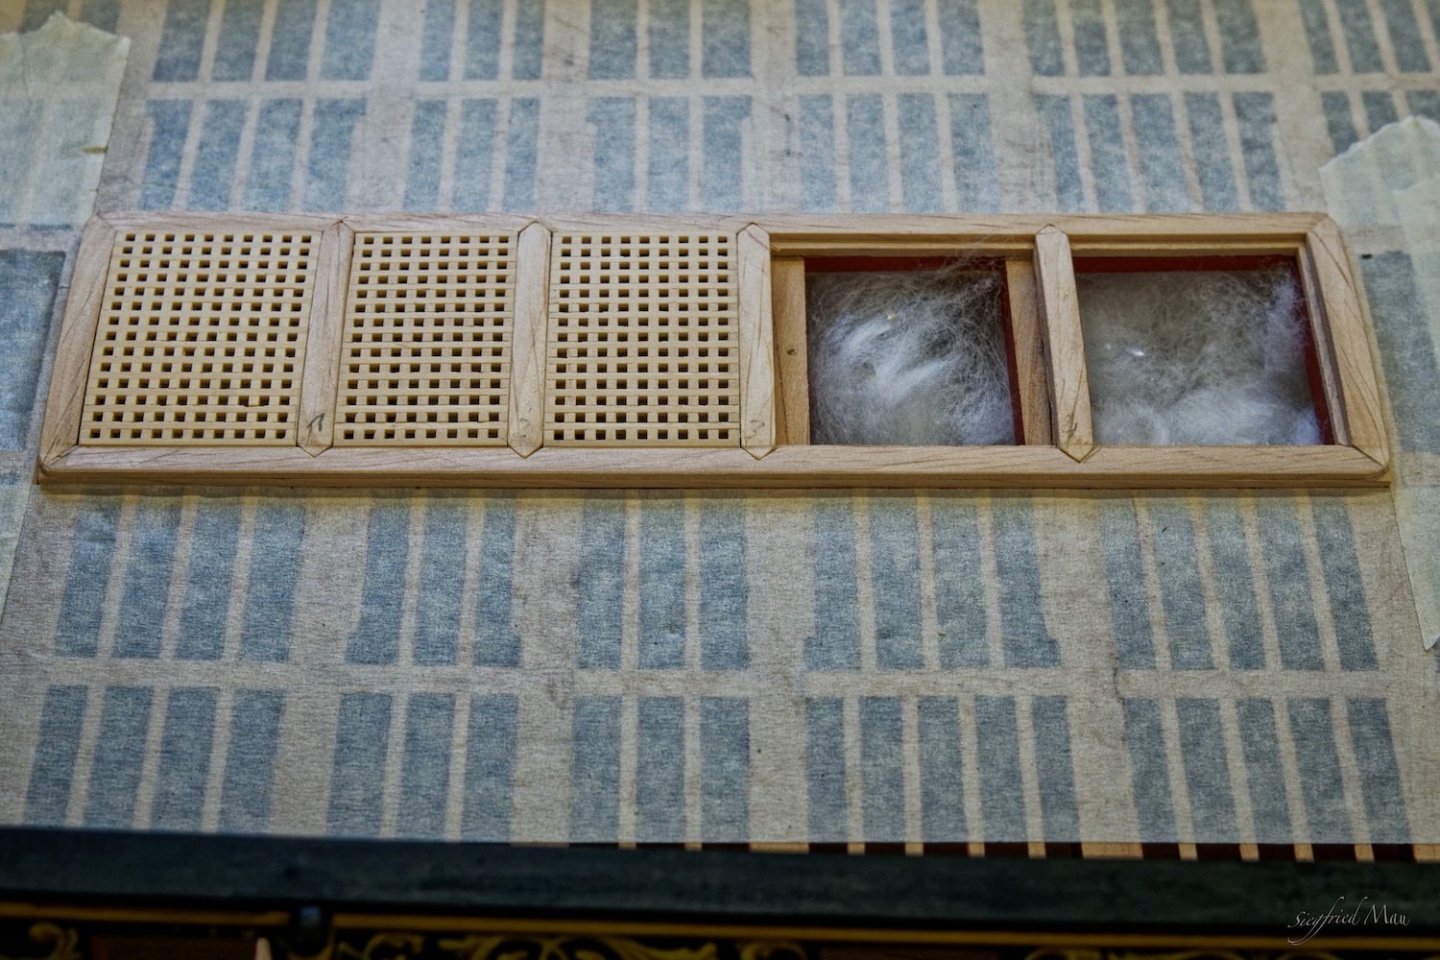
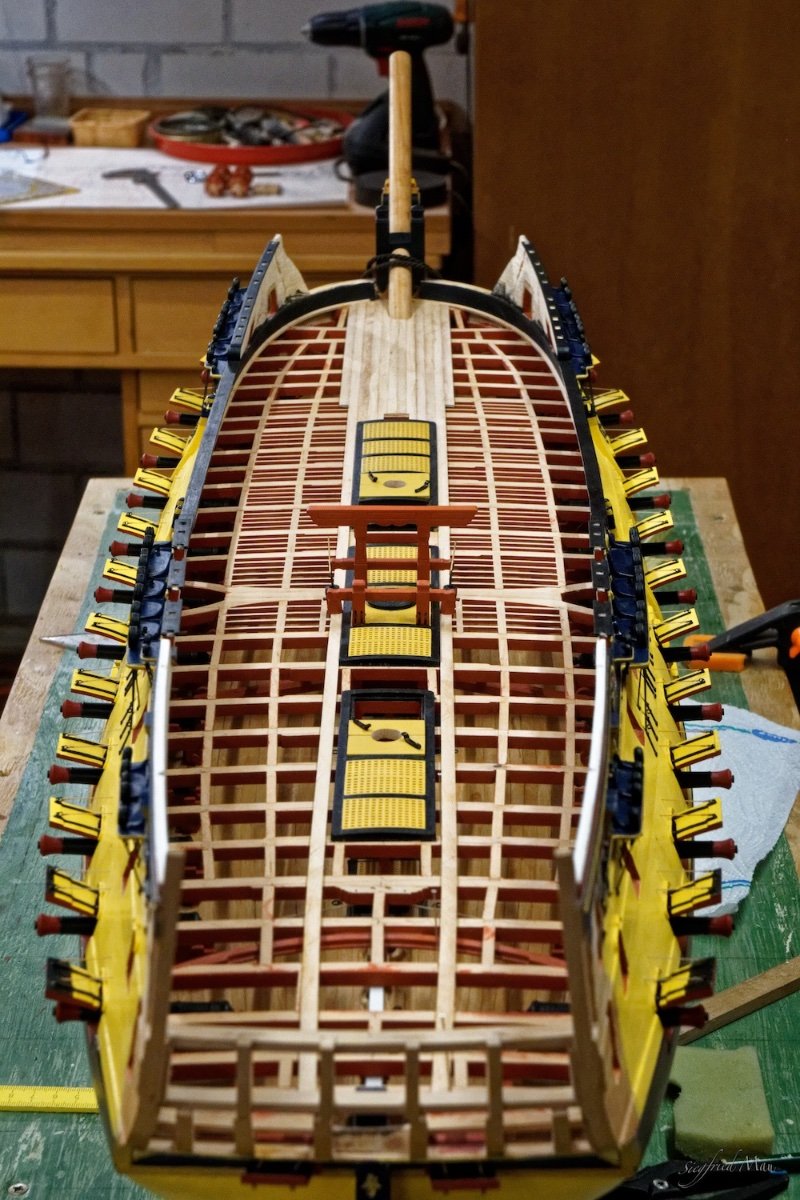
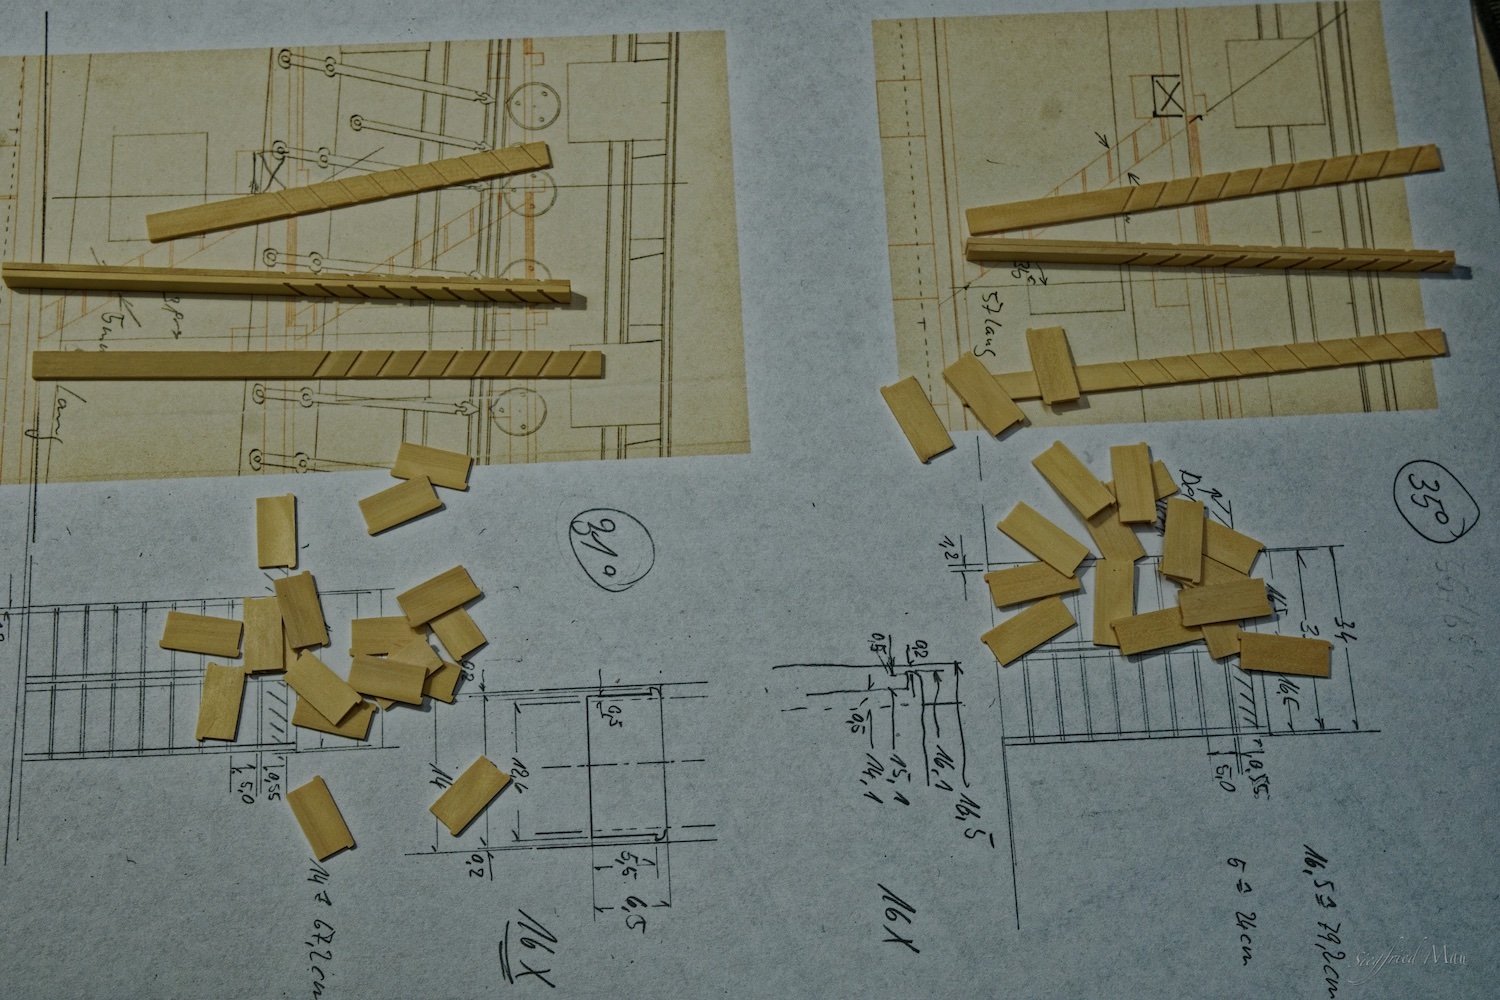
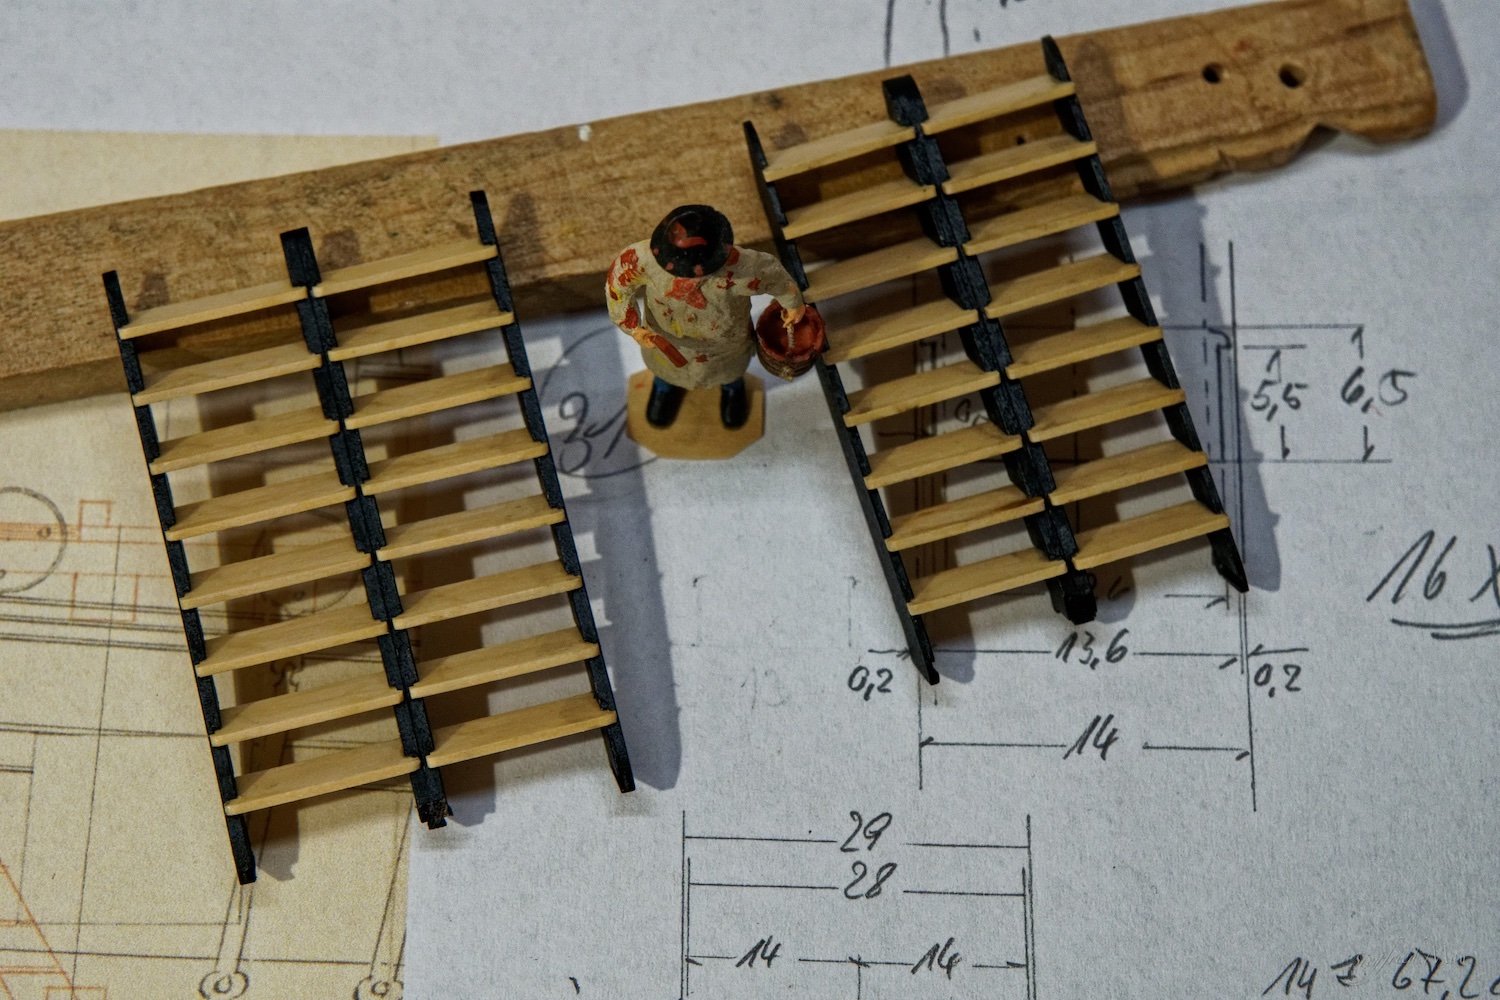
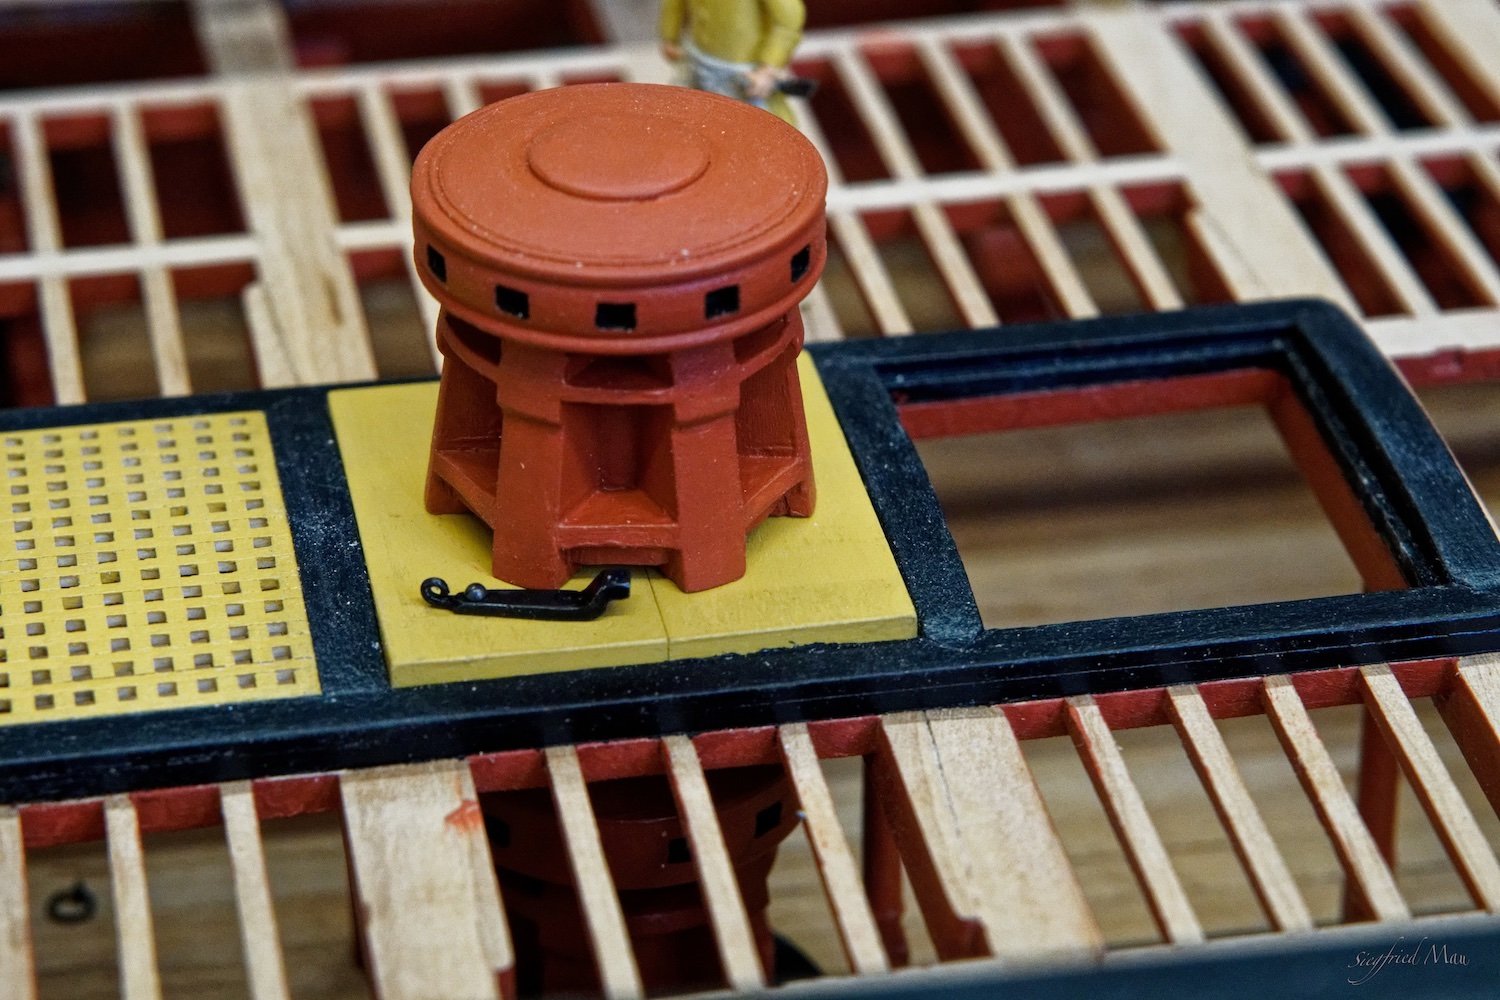
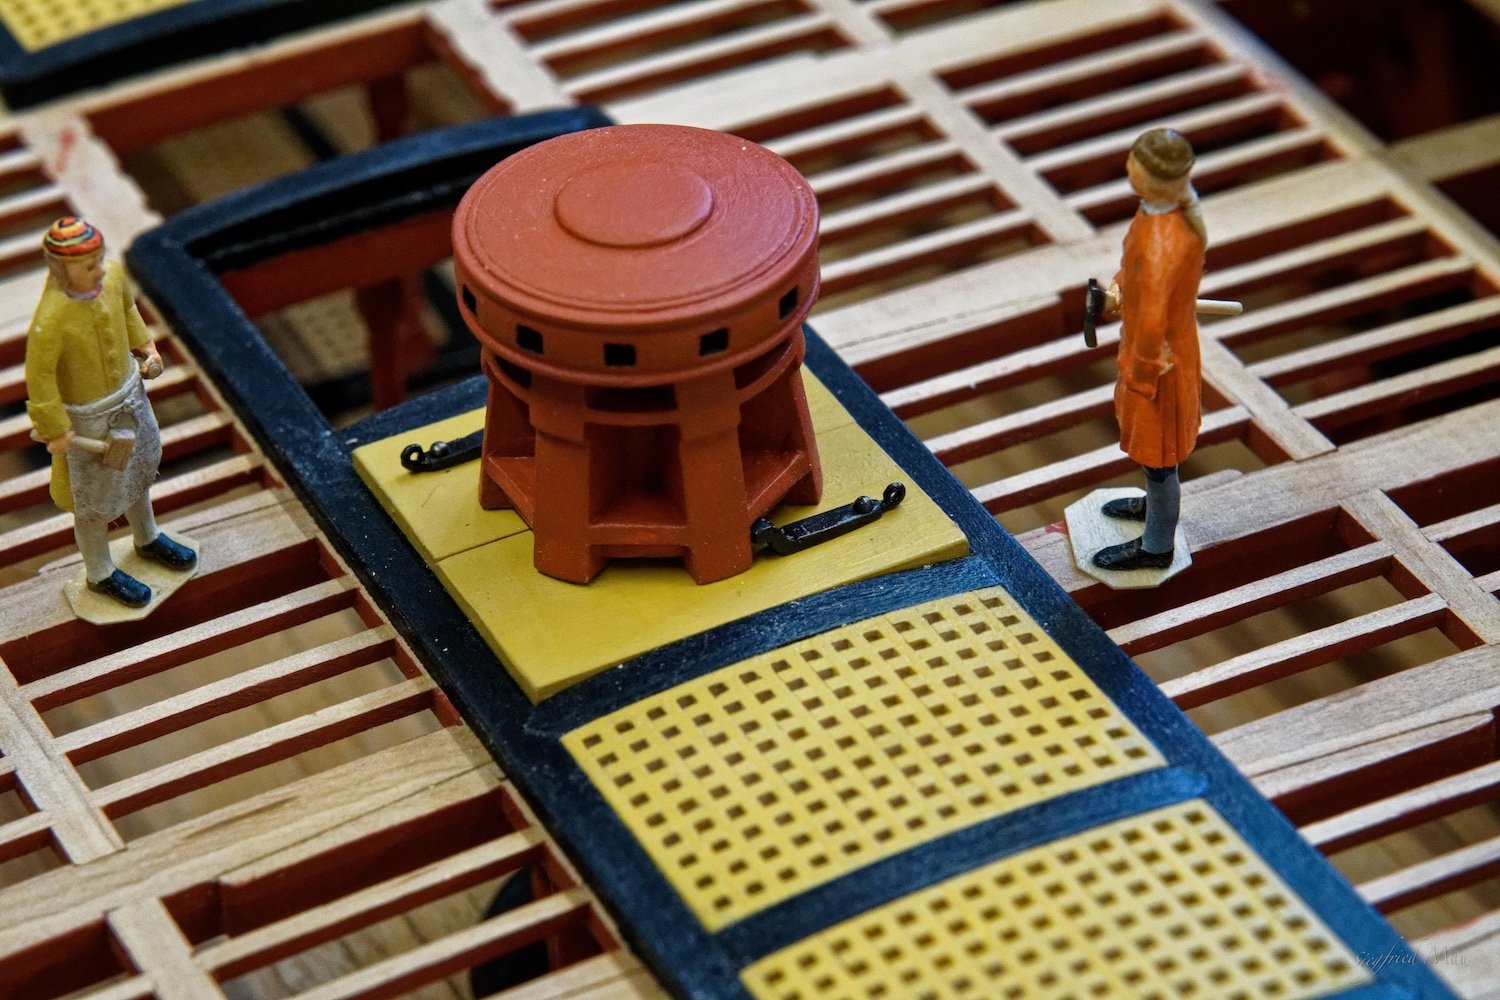
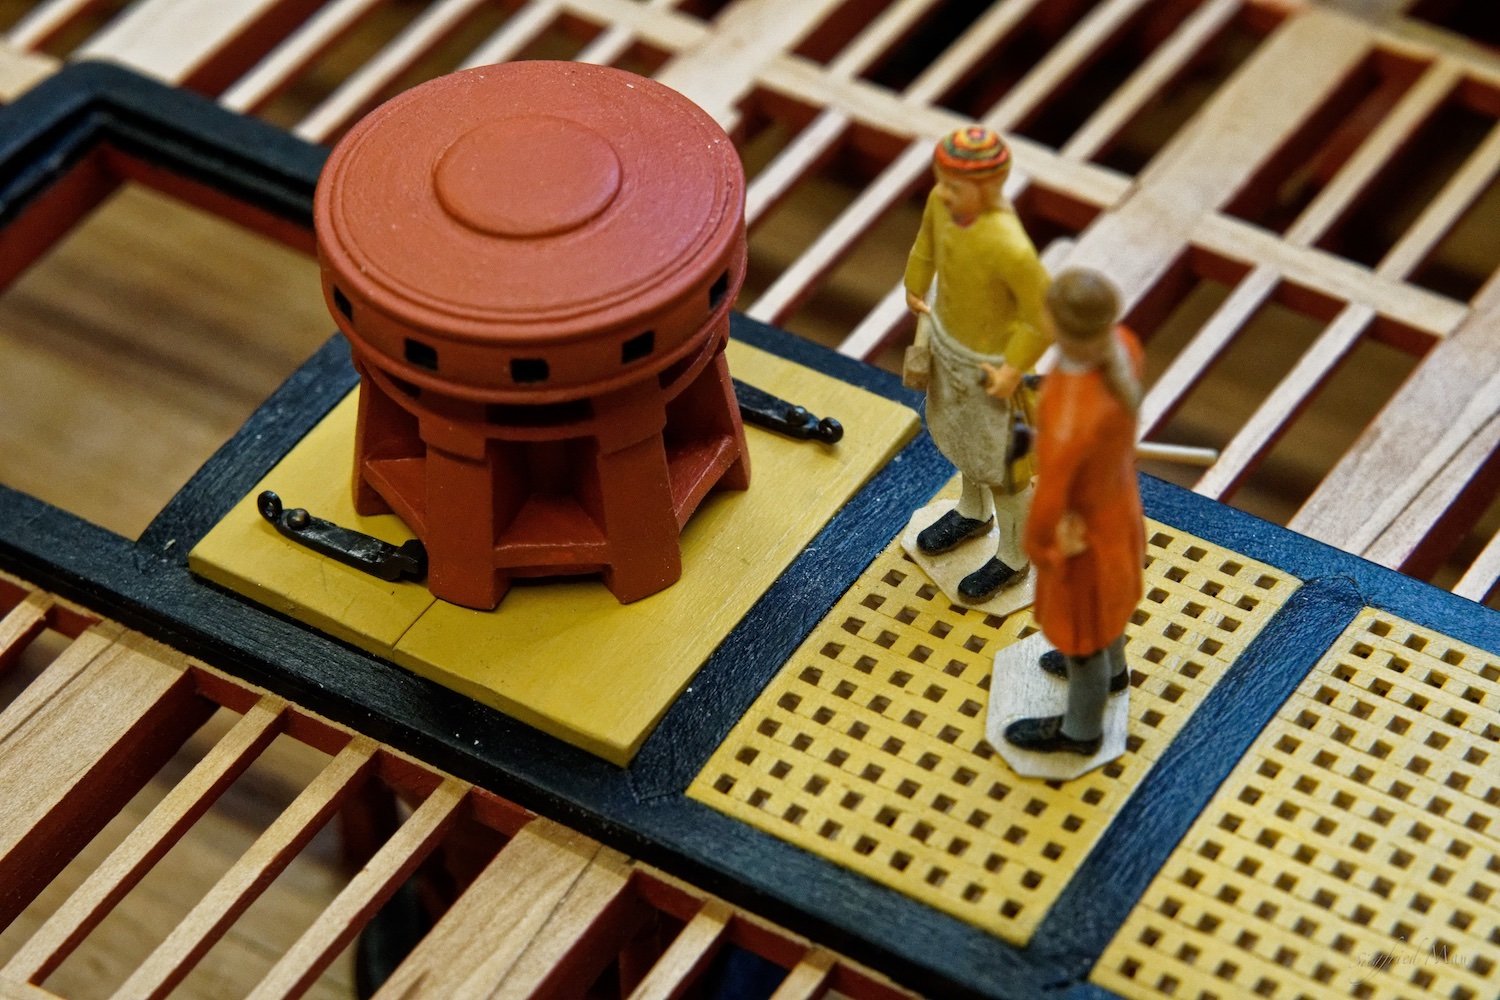
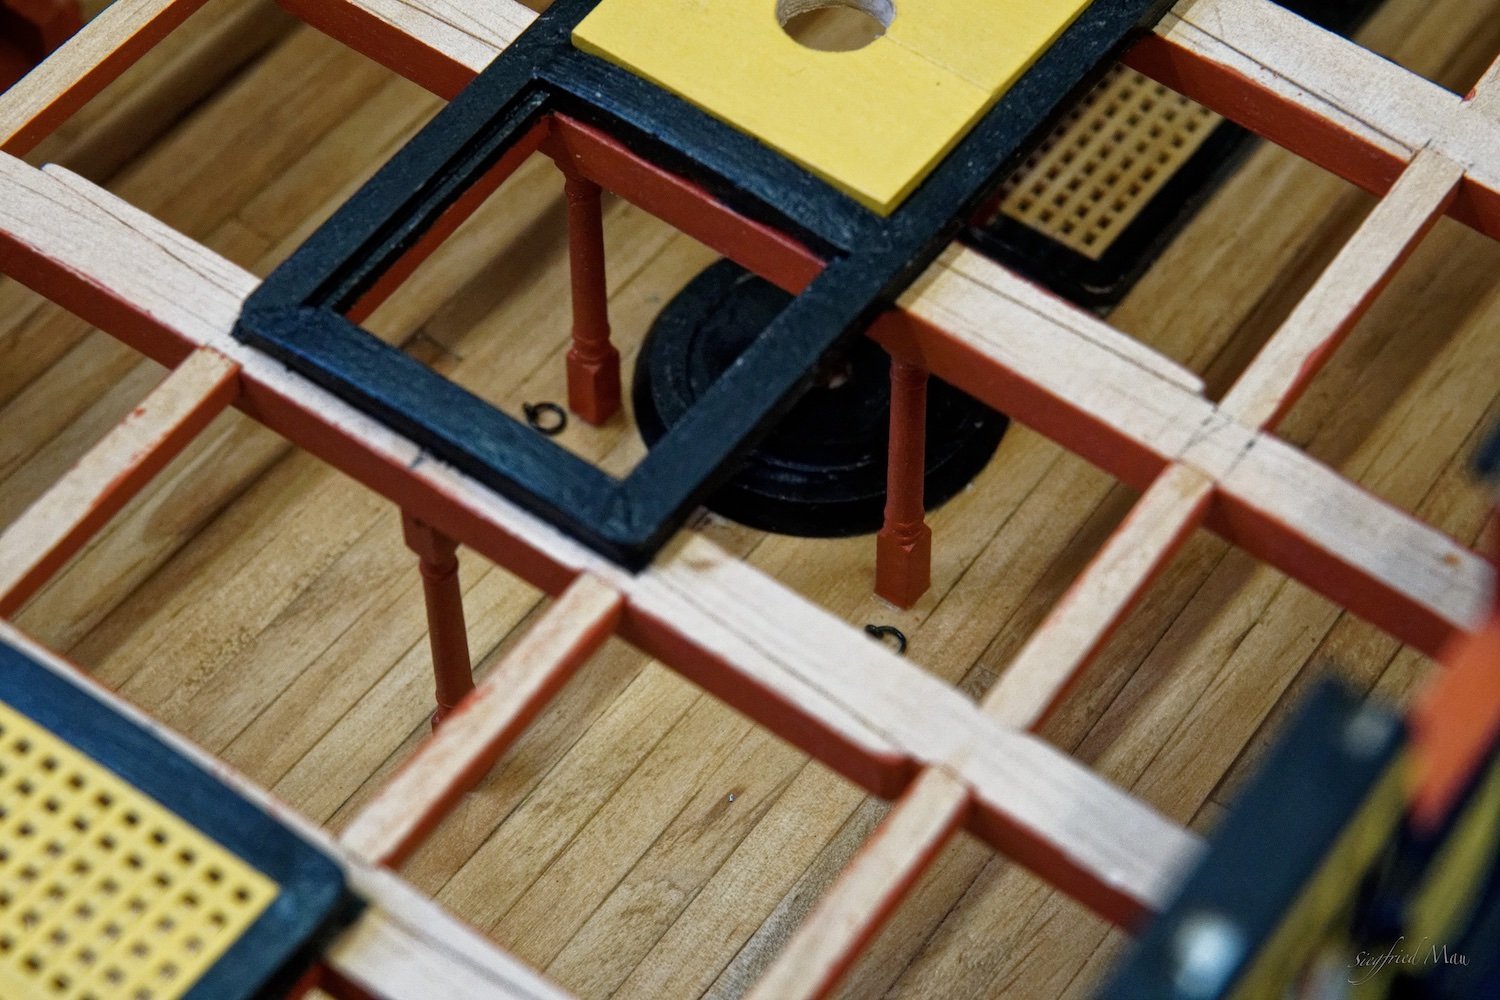
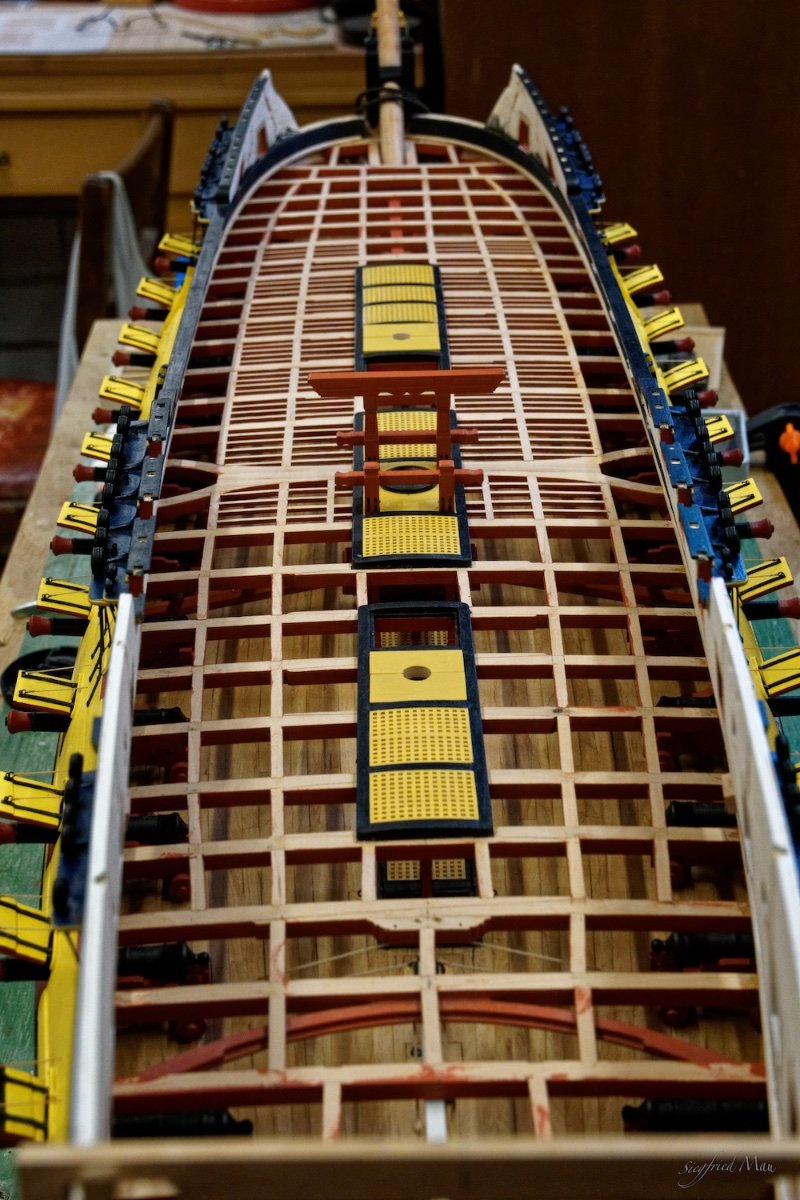
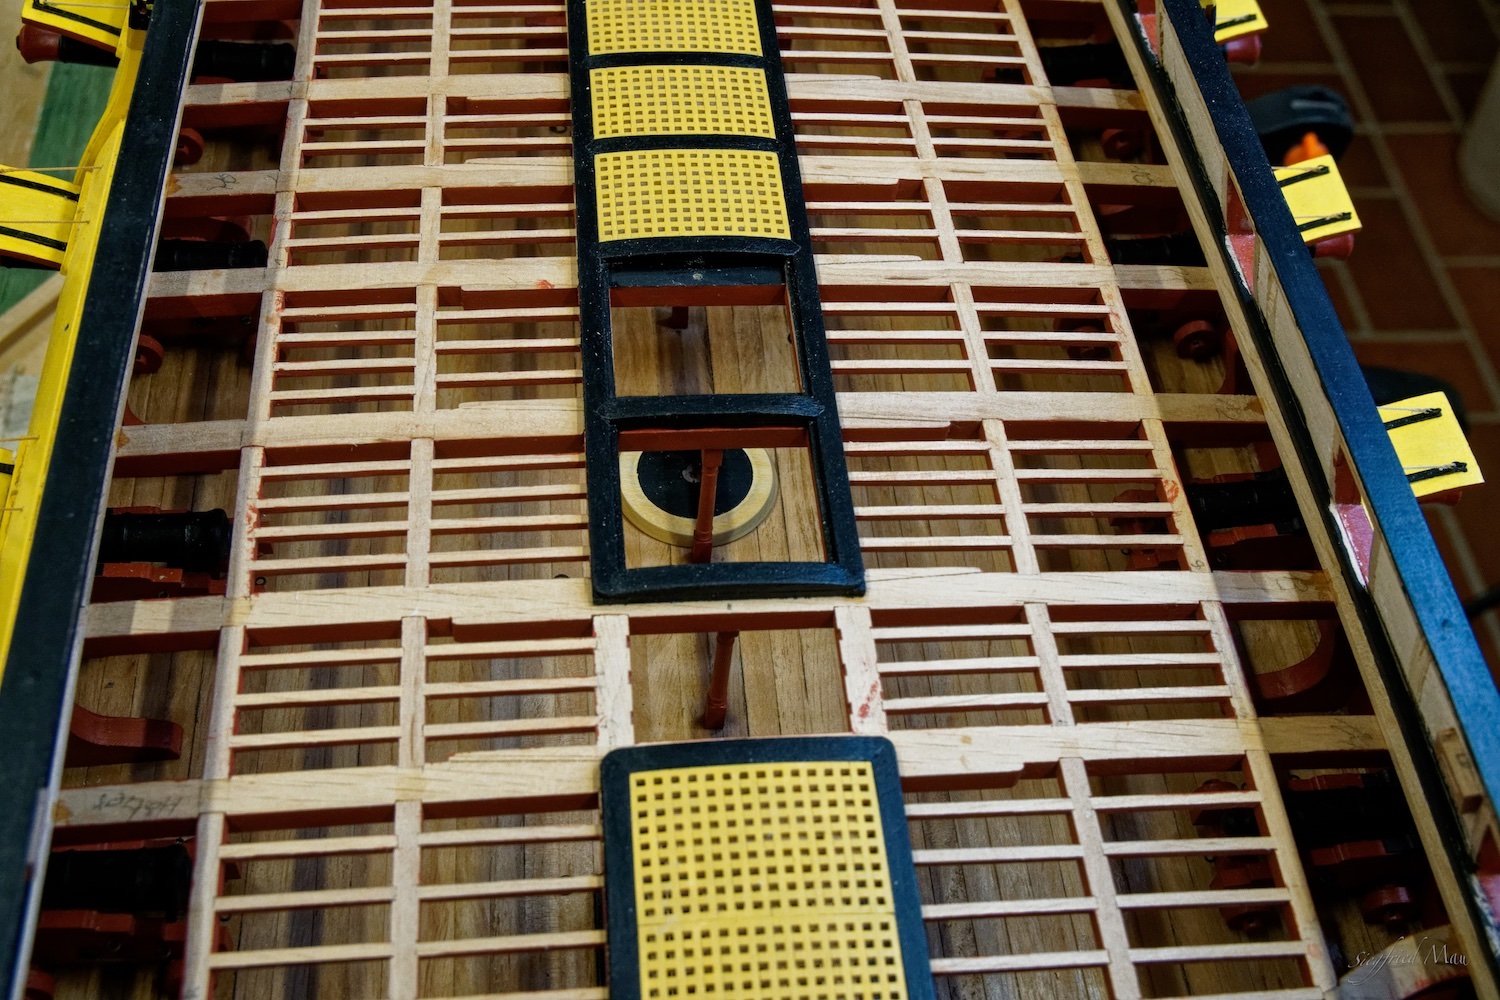
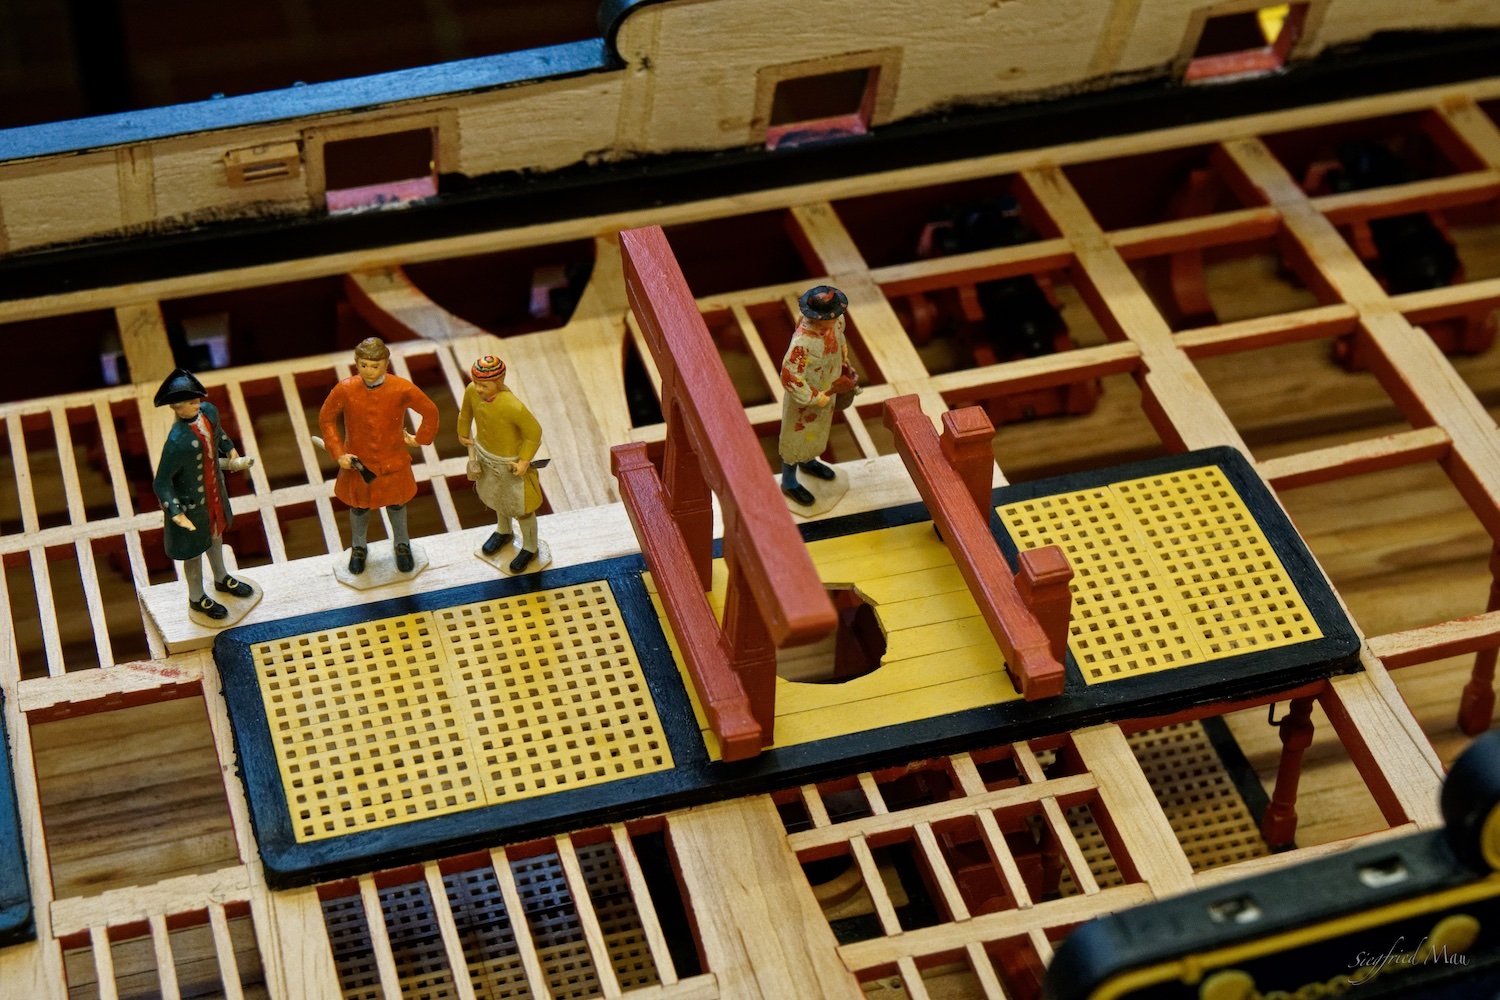
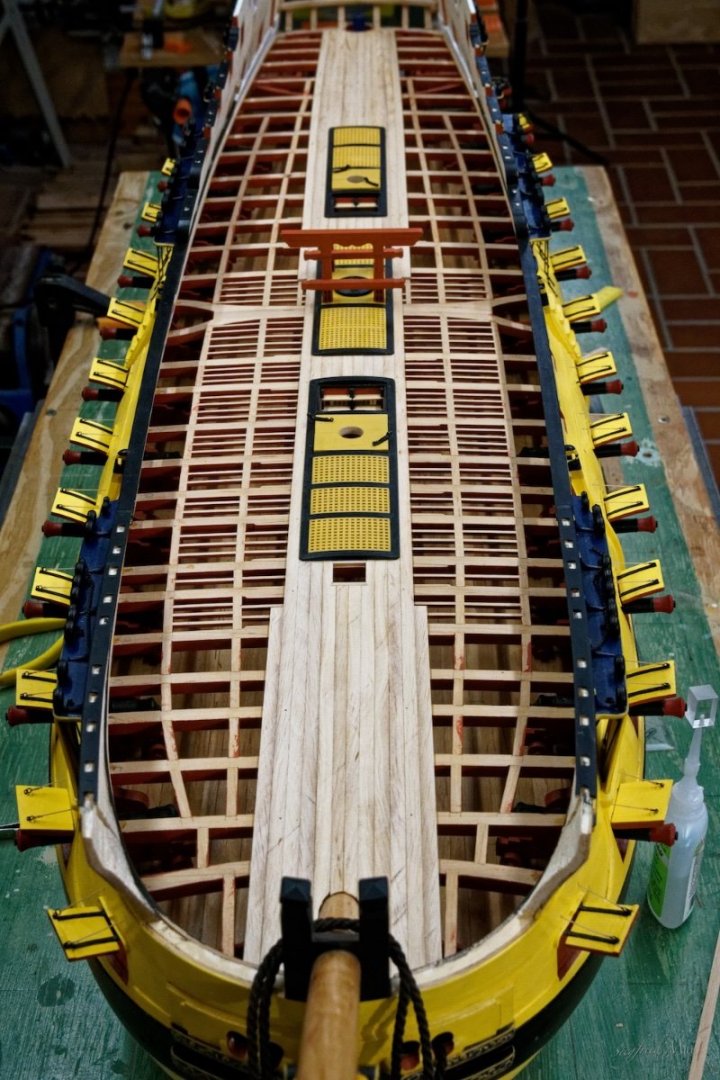
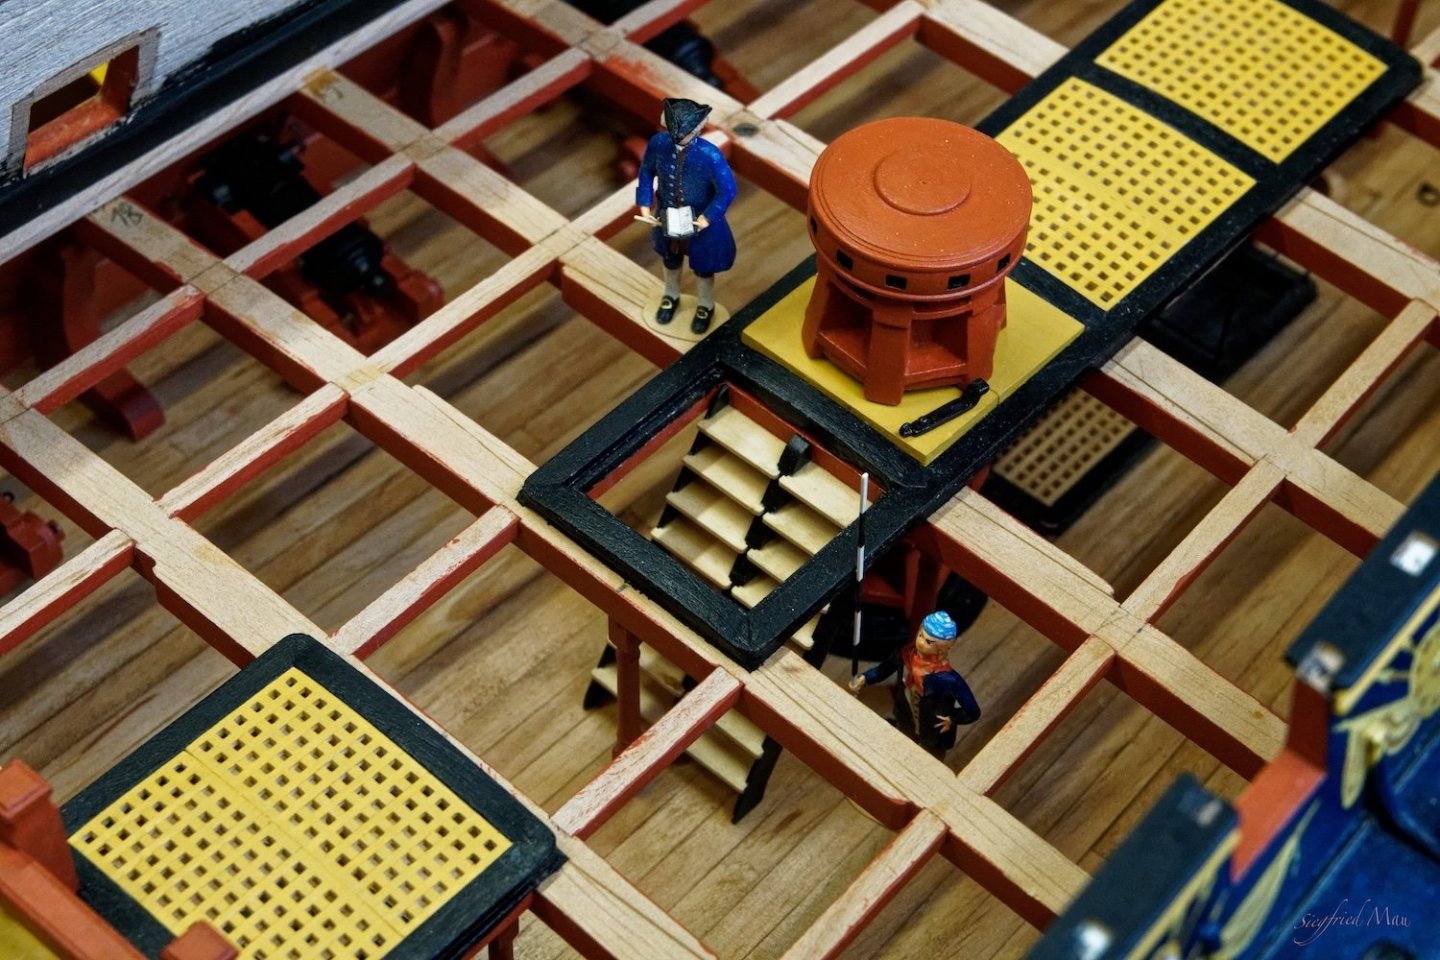
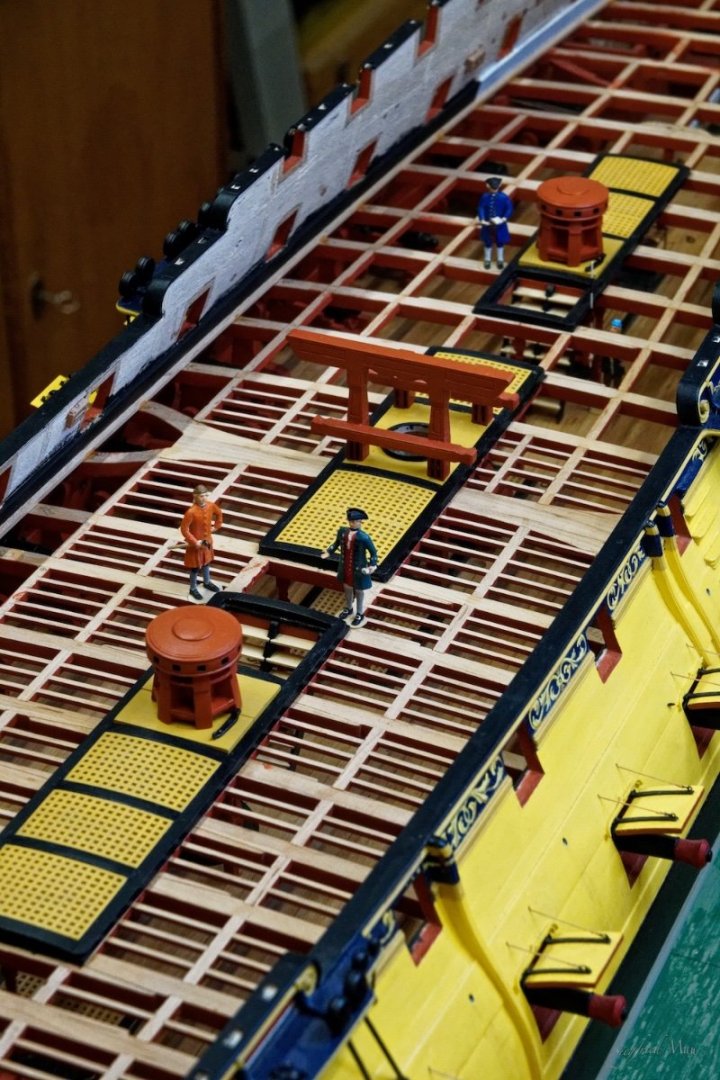
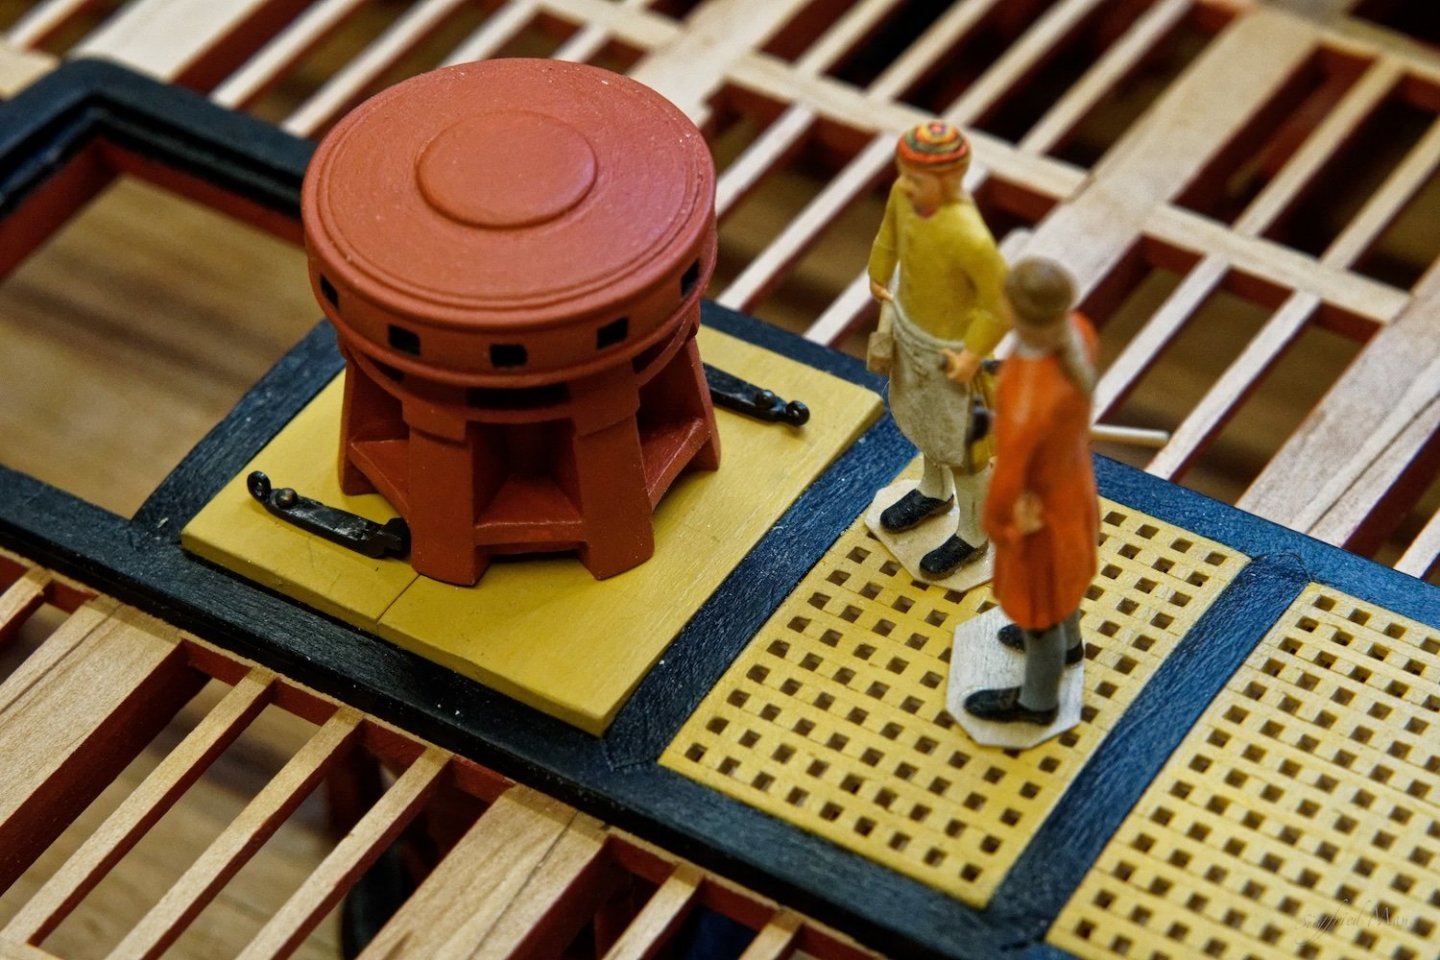
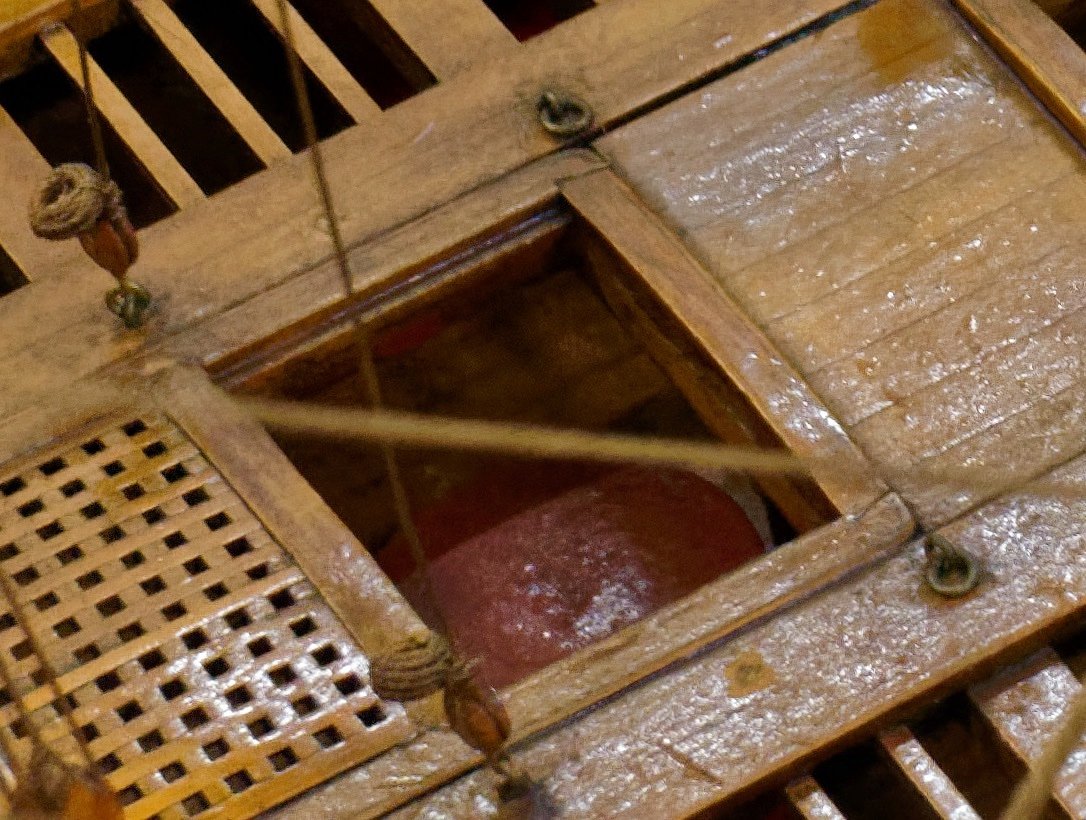
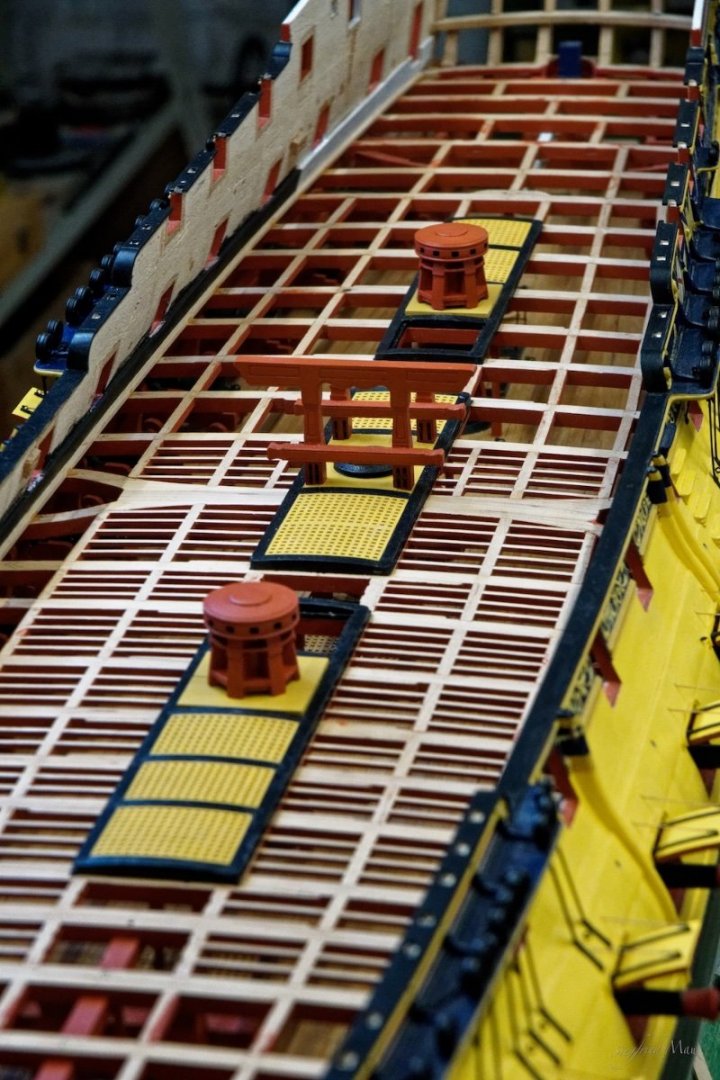
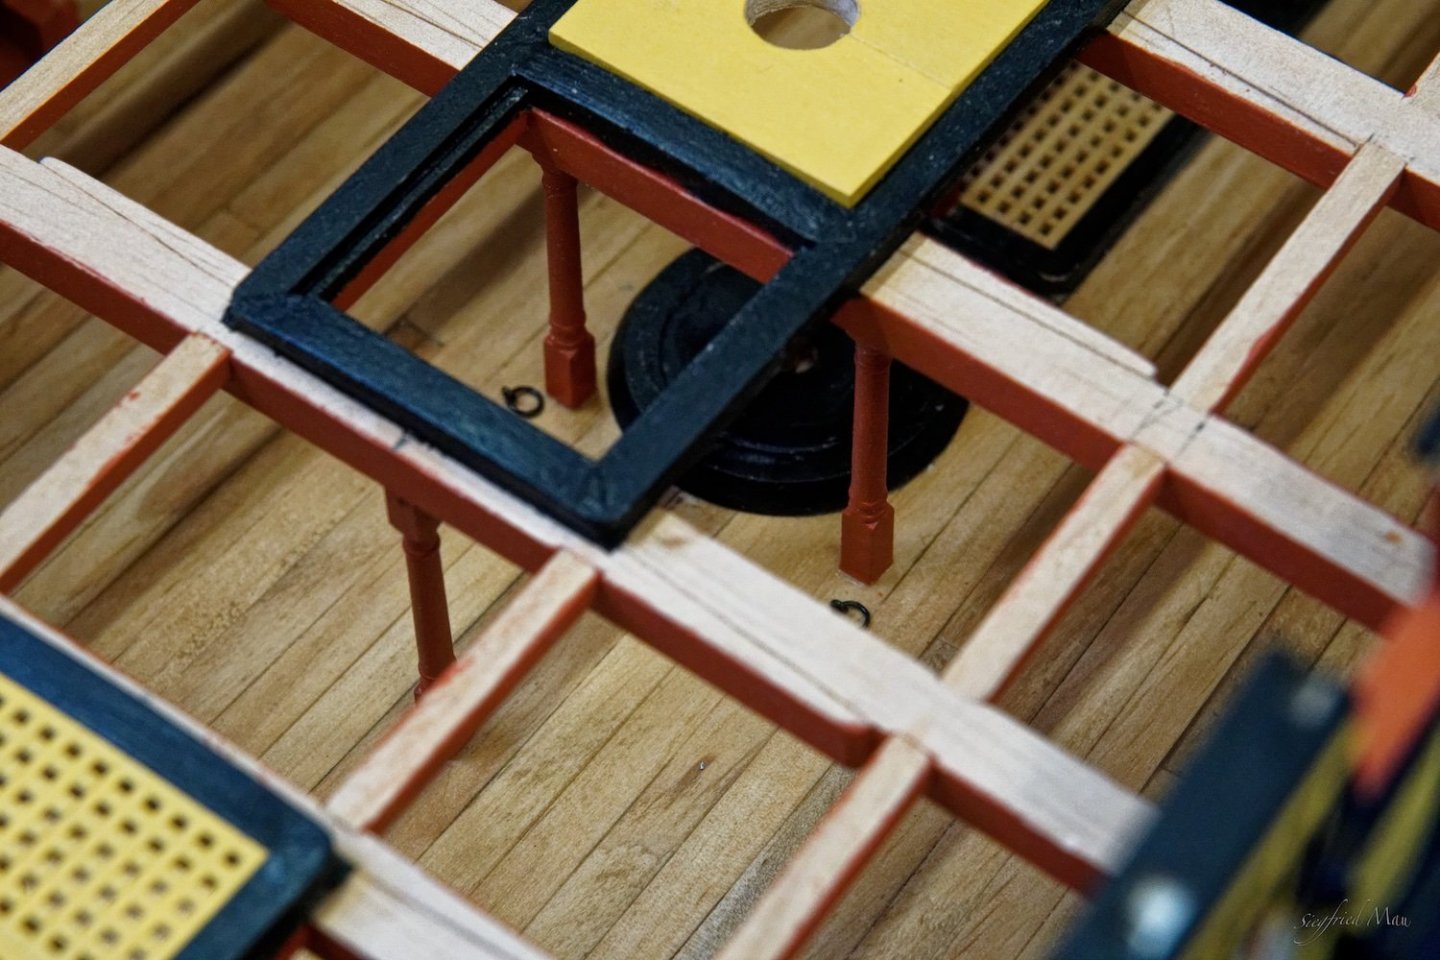
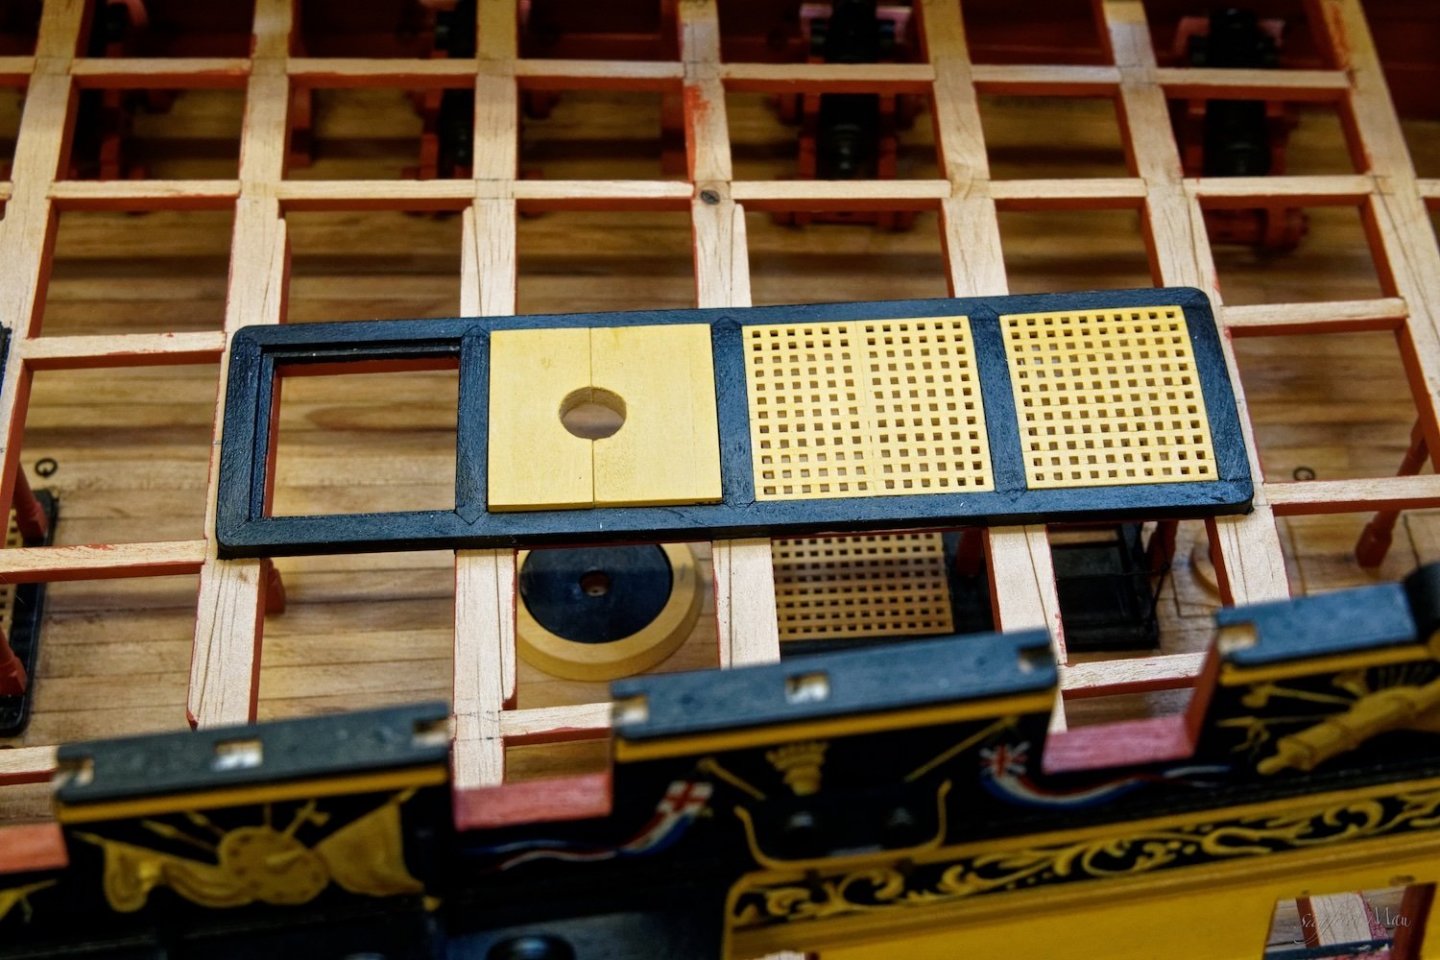
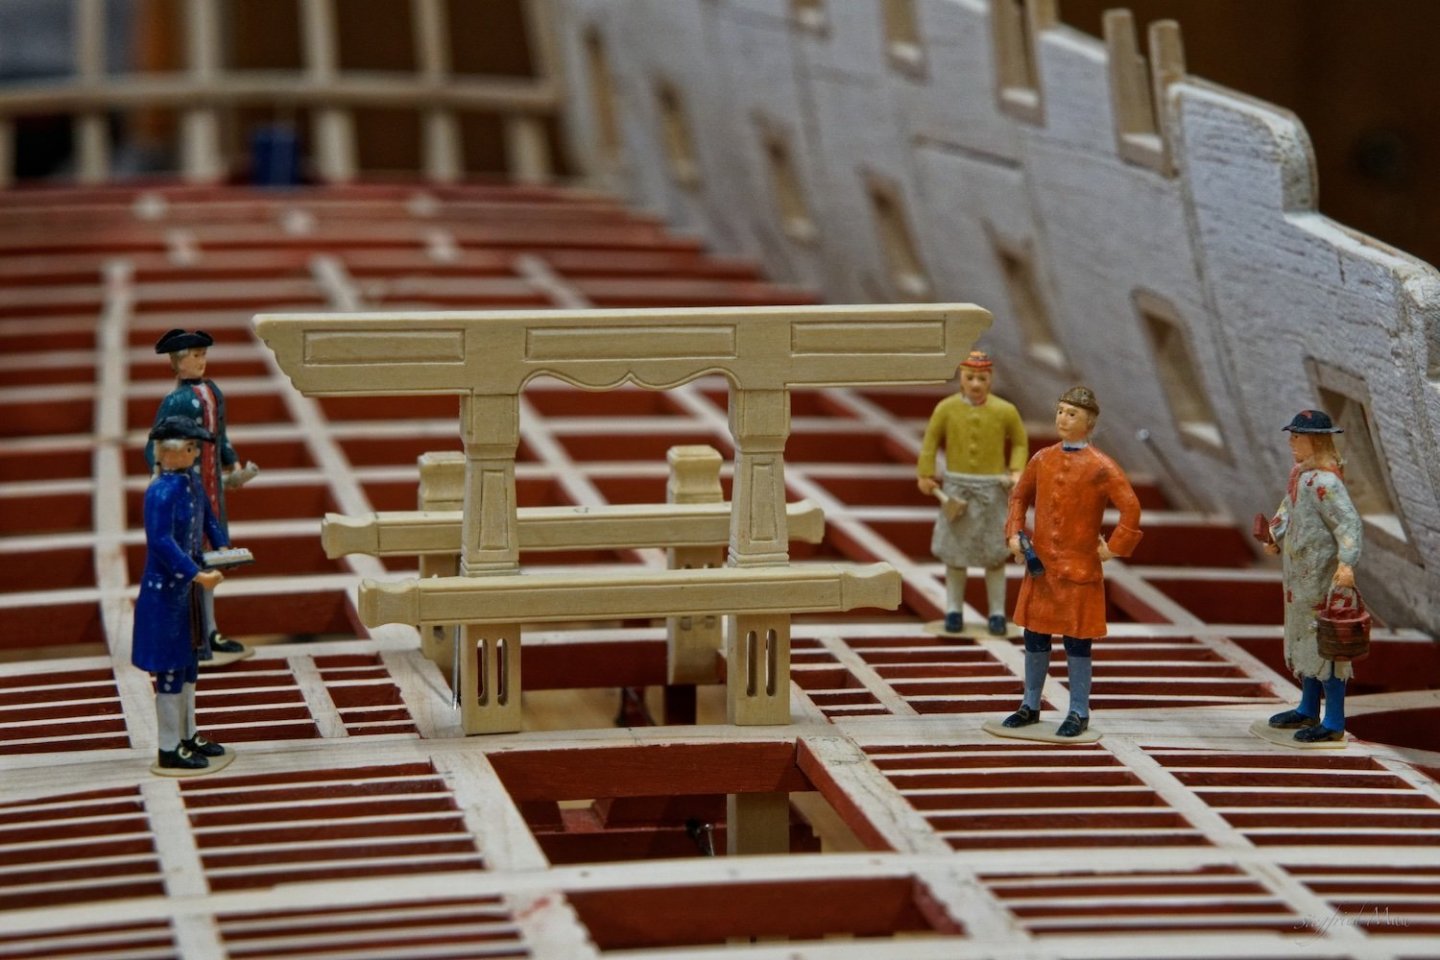
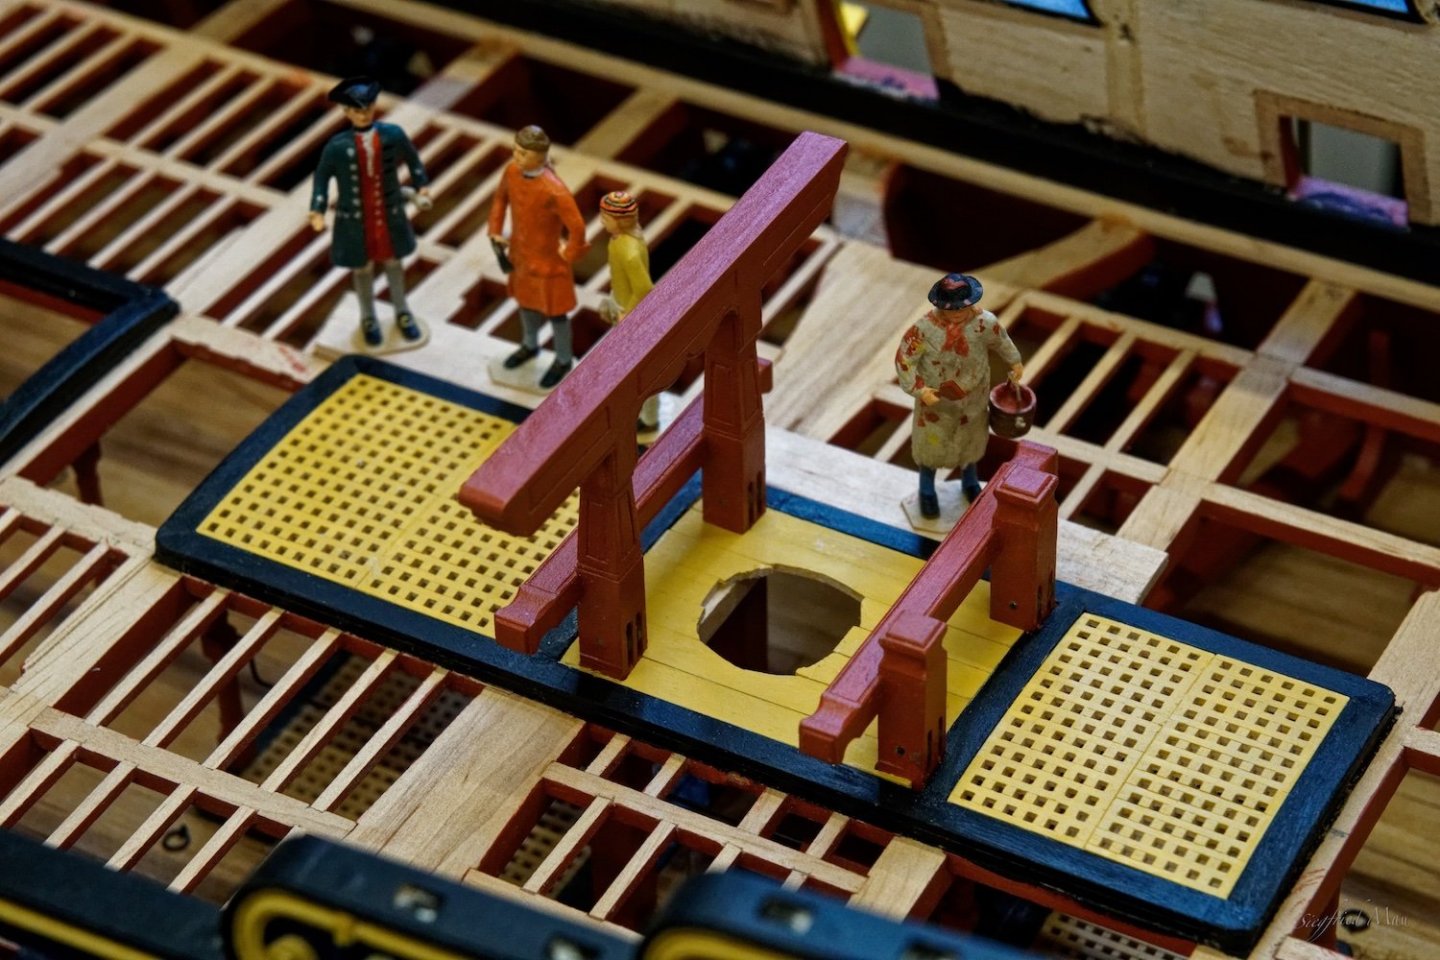
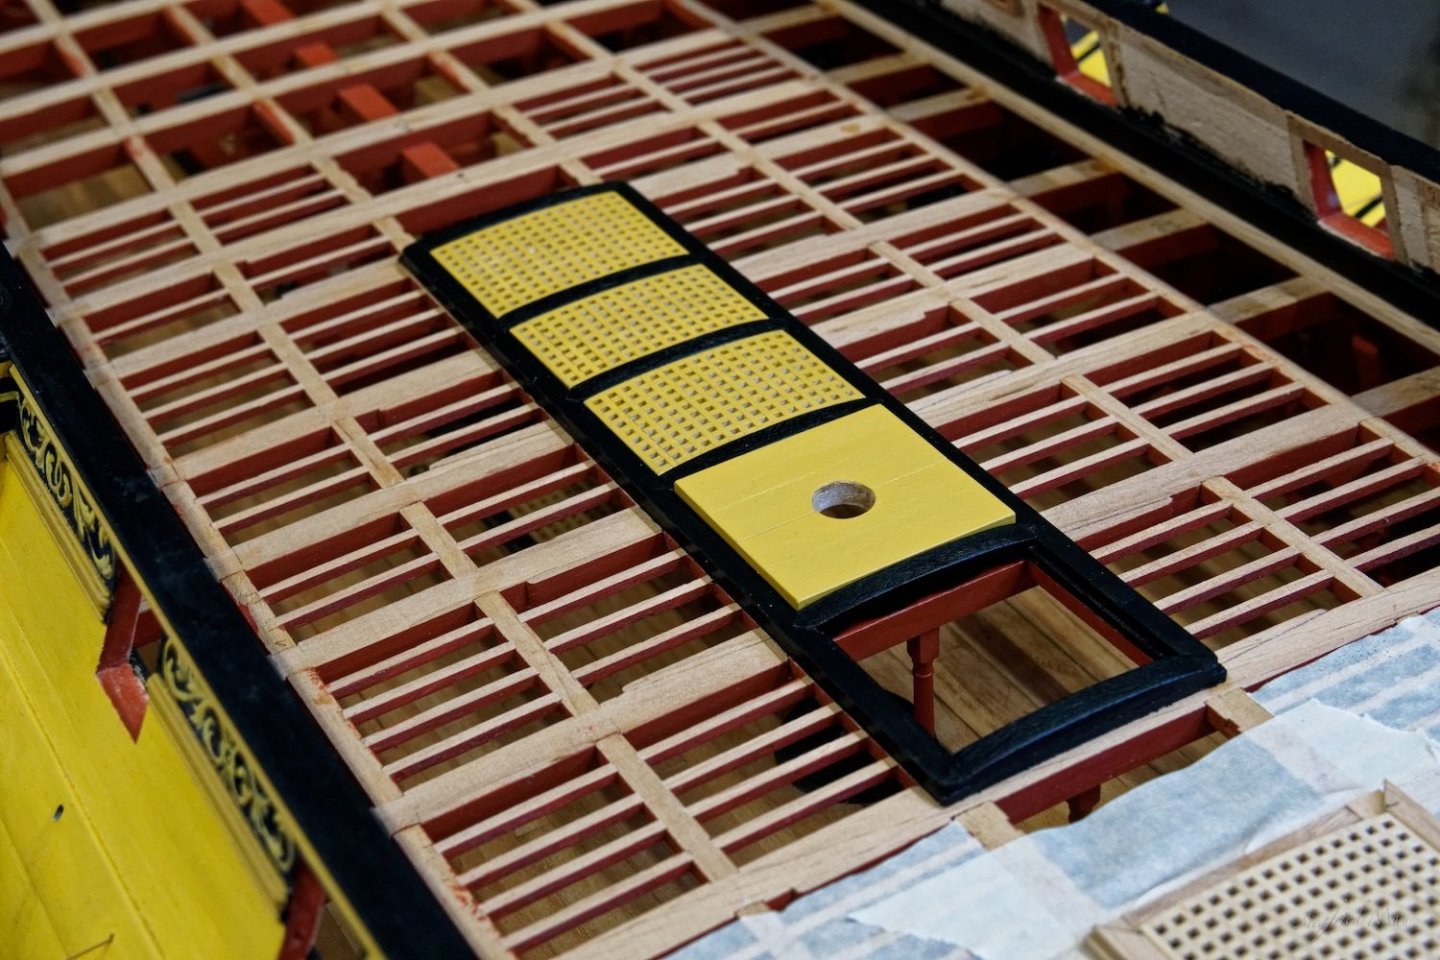
Hello, the ladders are ready! That means also, the gun deck is ready 😃 But one after the other, here are the parts of the puzzle And here the puzzle is completed And here the carpenters have them installed, the shipwright is very pleased. and all together in the totale. I'm wondering that I never saw a model with rails around, at least, the ladder way in the waist. Did't they had there none? And there are also no holes for them, so I think that they may not had them. Only the ladder way for the officers up to the quarter deck have rails. The next thing then is planking the upper gun deck


-
Hello, thank you druxey, I have so my problems with names, even in German. I don't think that these pawls where the normality, so mostly you see the two pawls side by side, one for each direction and without these rings at the end. So I think, that when they stop turning around, one man in the middle push the pawl in and „then“ the others could relax. But at least I have also the pawls for the back capstan installed. The next things then are the ladders.
-
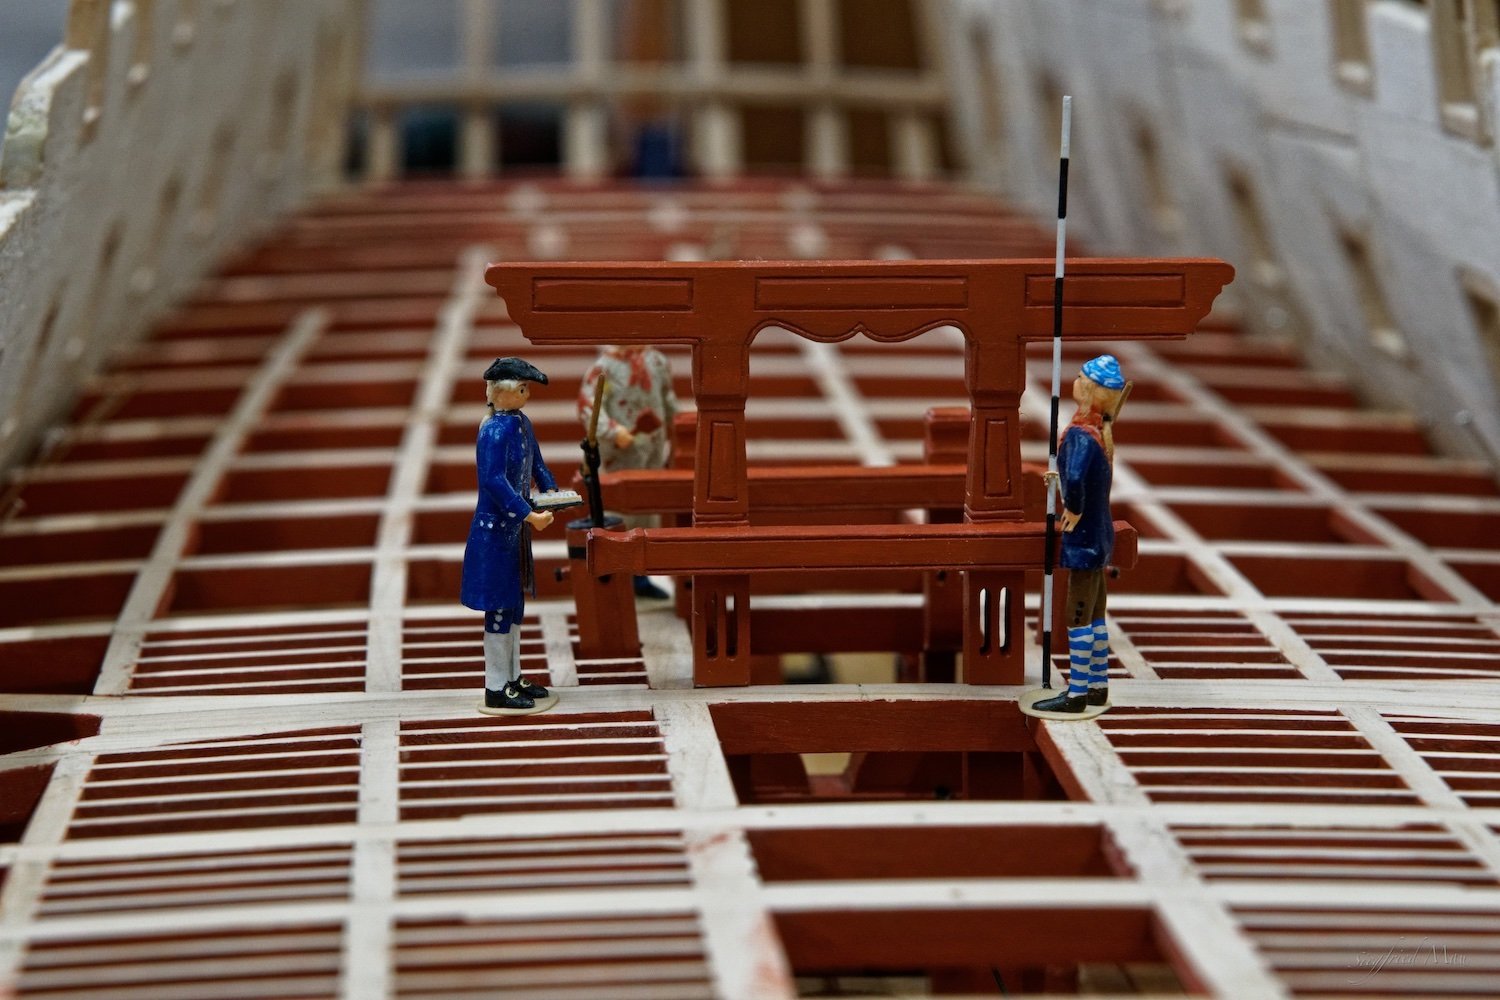
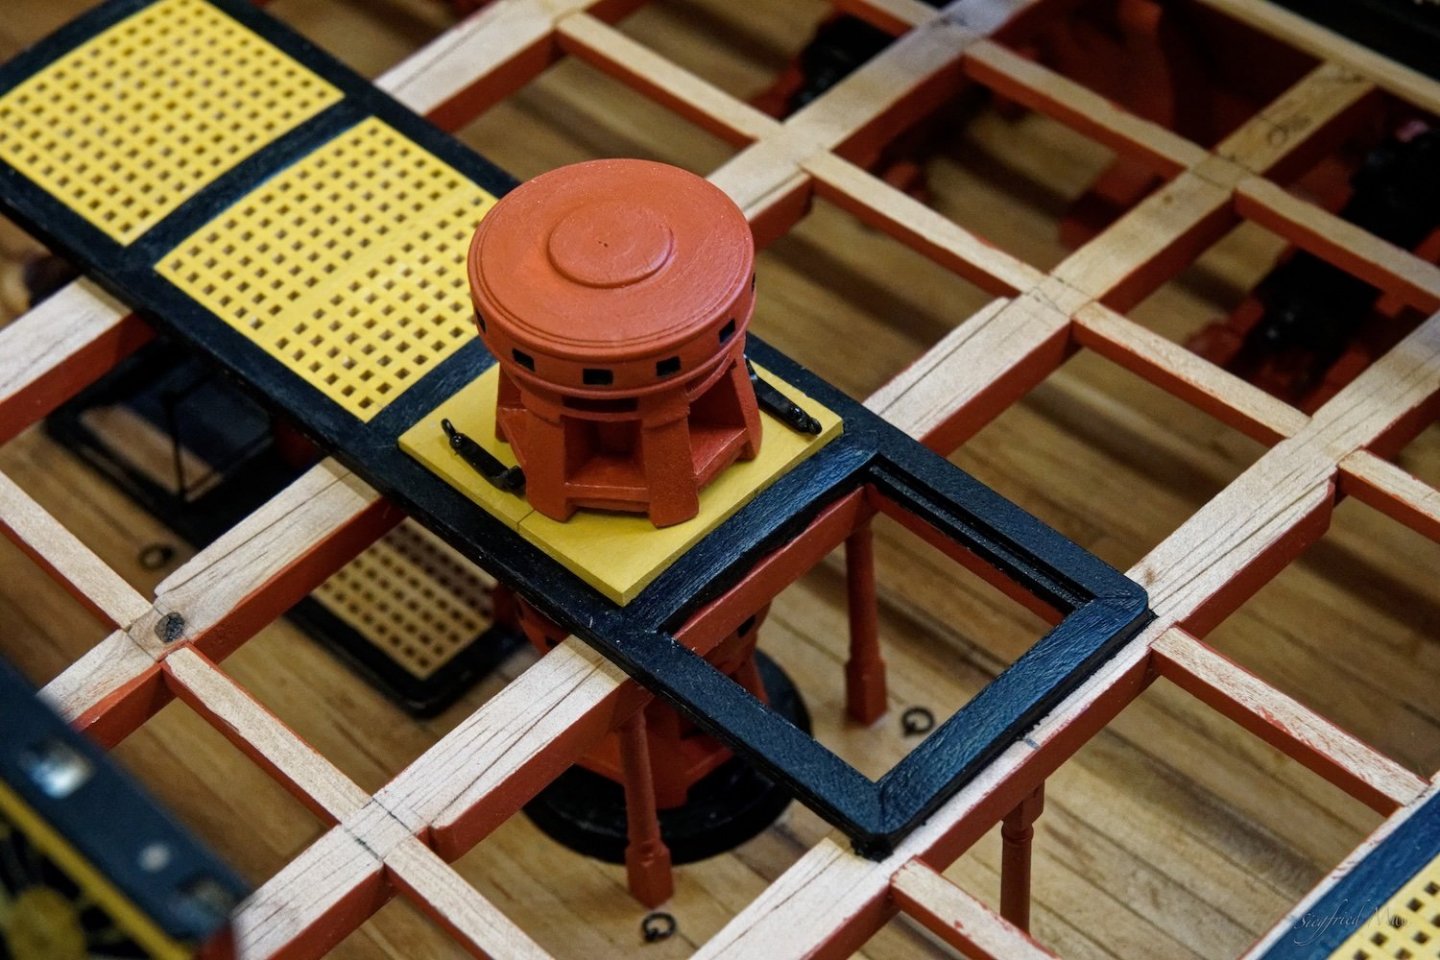
Hello and thank you for your likes and comments, today the carpenters set the stoppers for the first capstan in. This art of stopper I found at that little 60 gunner I saw at Chatham too. SLR0472 With these stoppers you cold work in both directions with both stoppers. Interesting is also that eye at there ends. Here I think you could set the stoppers, with a rope, from outside of that bunch of men working there rounds here. These pieces of wood under the lower chocks prevent that the stopper would escape into the nirvana under the capstan. Only the upper capstans had them at the drawing for the Dorsetshire. So I think, that the lower capstans had no stoppers.


-
Hello Allanyed, that is something I made may be wrong. But I really did't know what is right. At the Centurion model they build it this way. Why I build it with the 45° angle I can't say now.
-
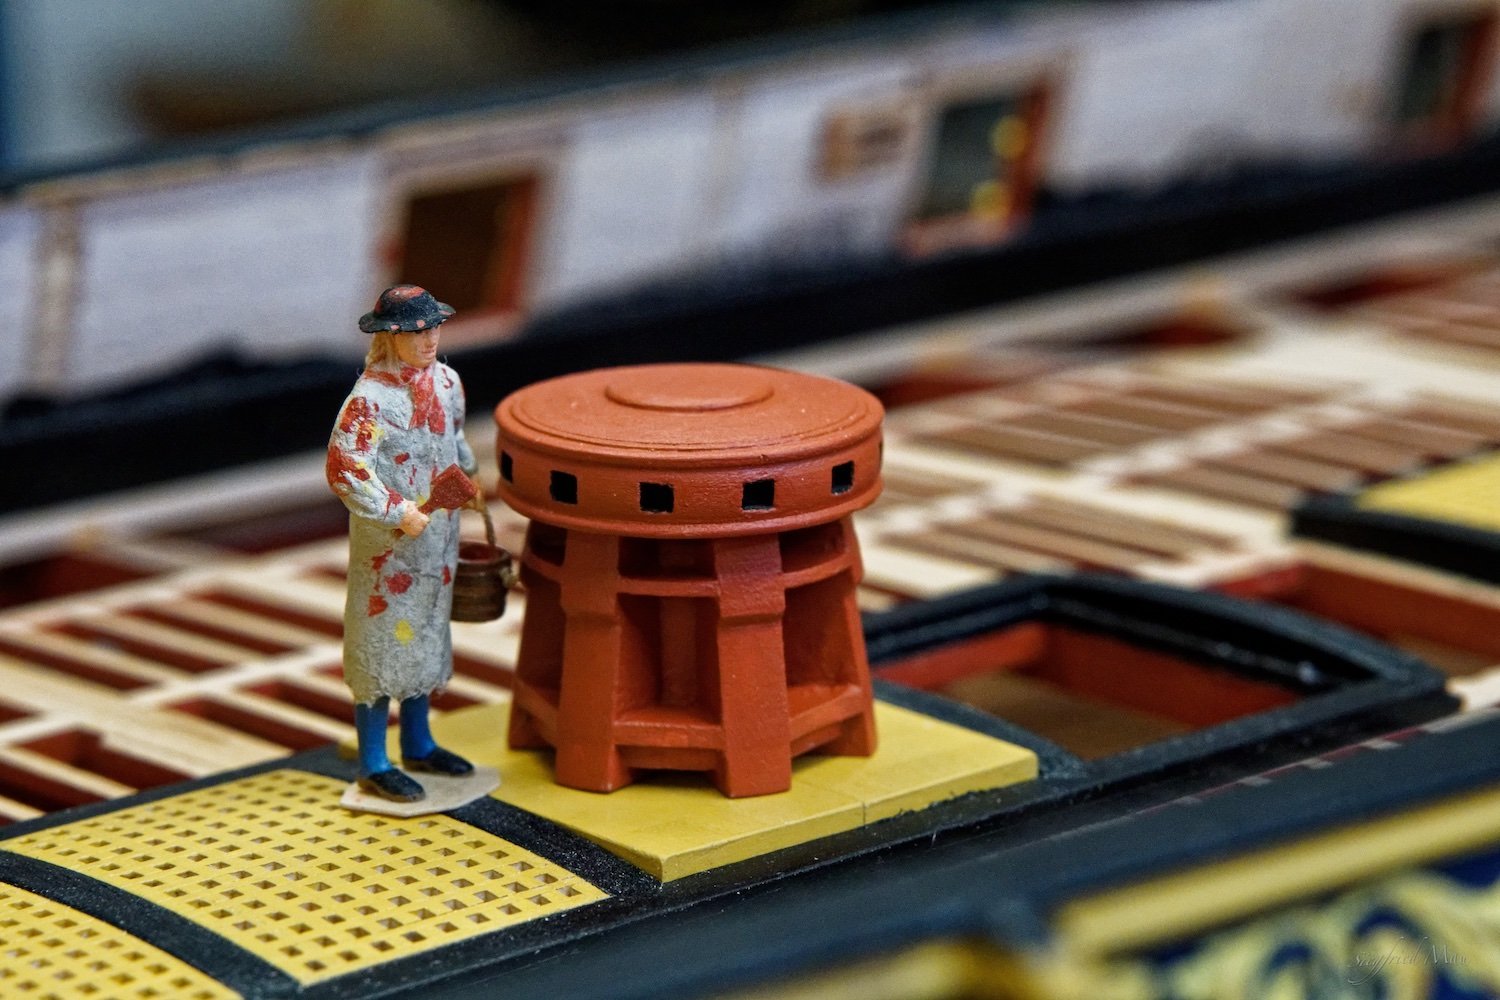
Thank you Chuck and scrubby427 and also all others for your likes When I took the pictures from above, all men where zack - gone. But later I found the hero of the day, the painter, and asked him to pose for a photo 😏

-
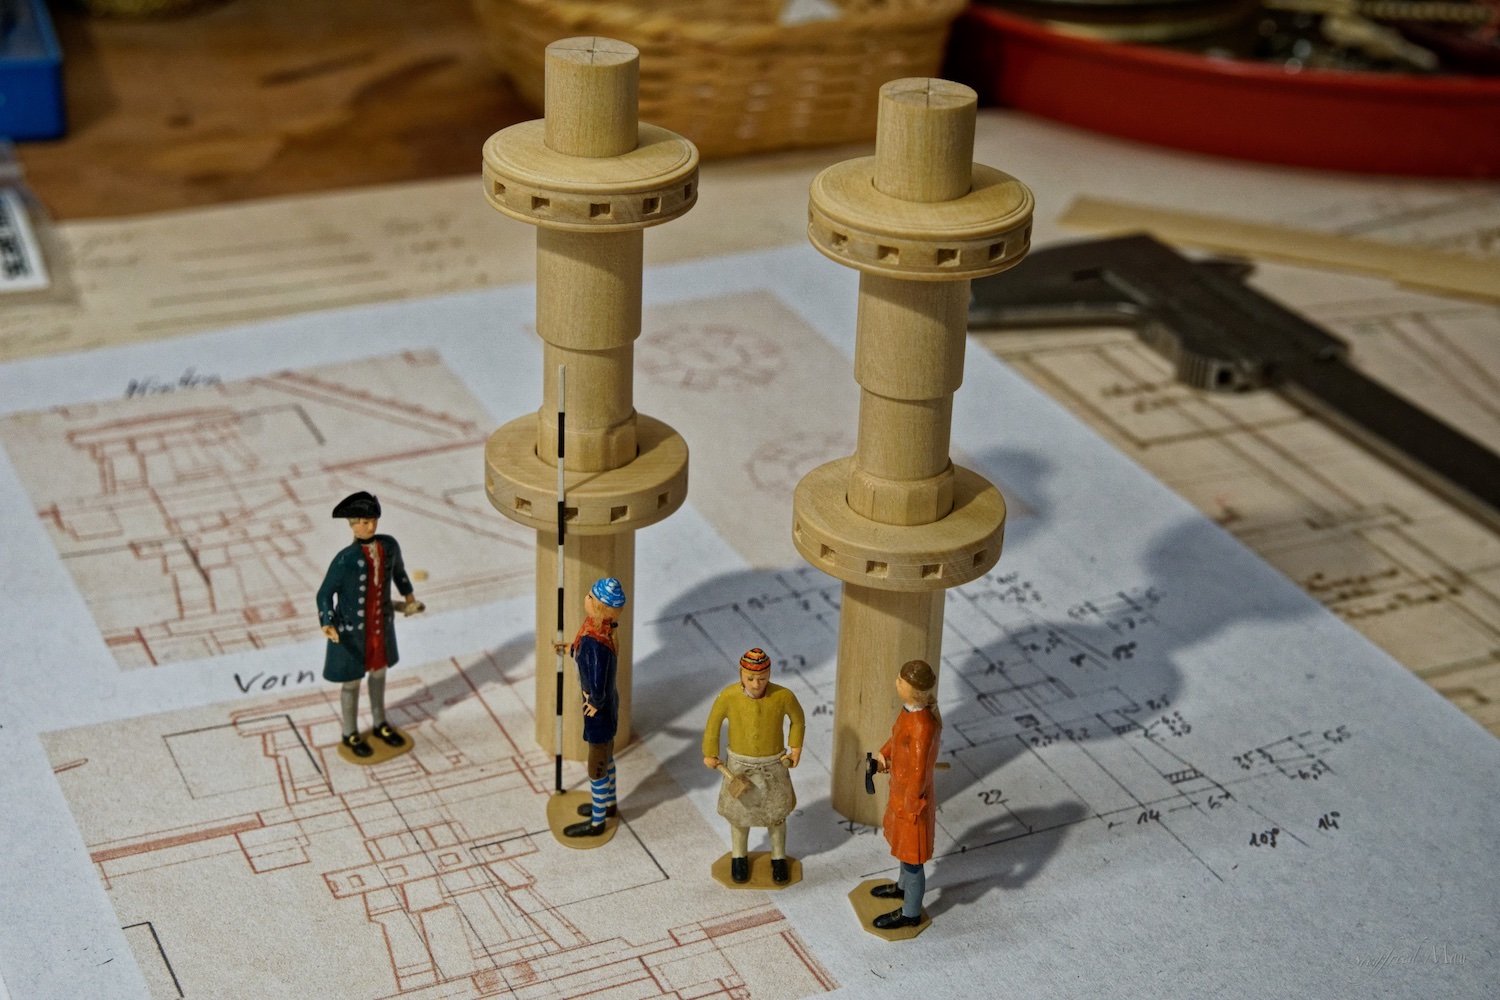
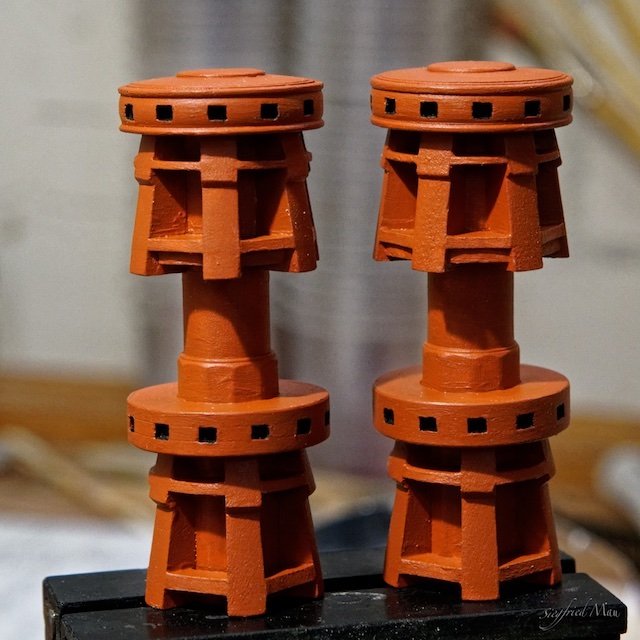
Hello and many thanks for your nice comments and likes, this was the day of the painter, and a real laborious one. But now the capstans are more or less ready. The next weeks I let the paint dry and then I will see if I must smooth the surfaces, and paint again, or not.


-
Hello and thank you all for your likes and comments today we worked again on the capstans

-
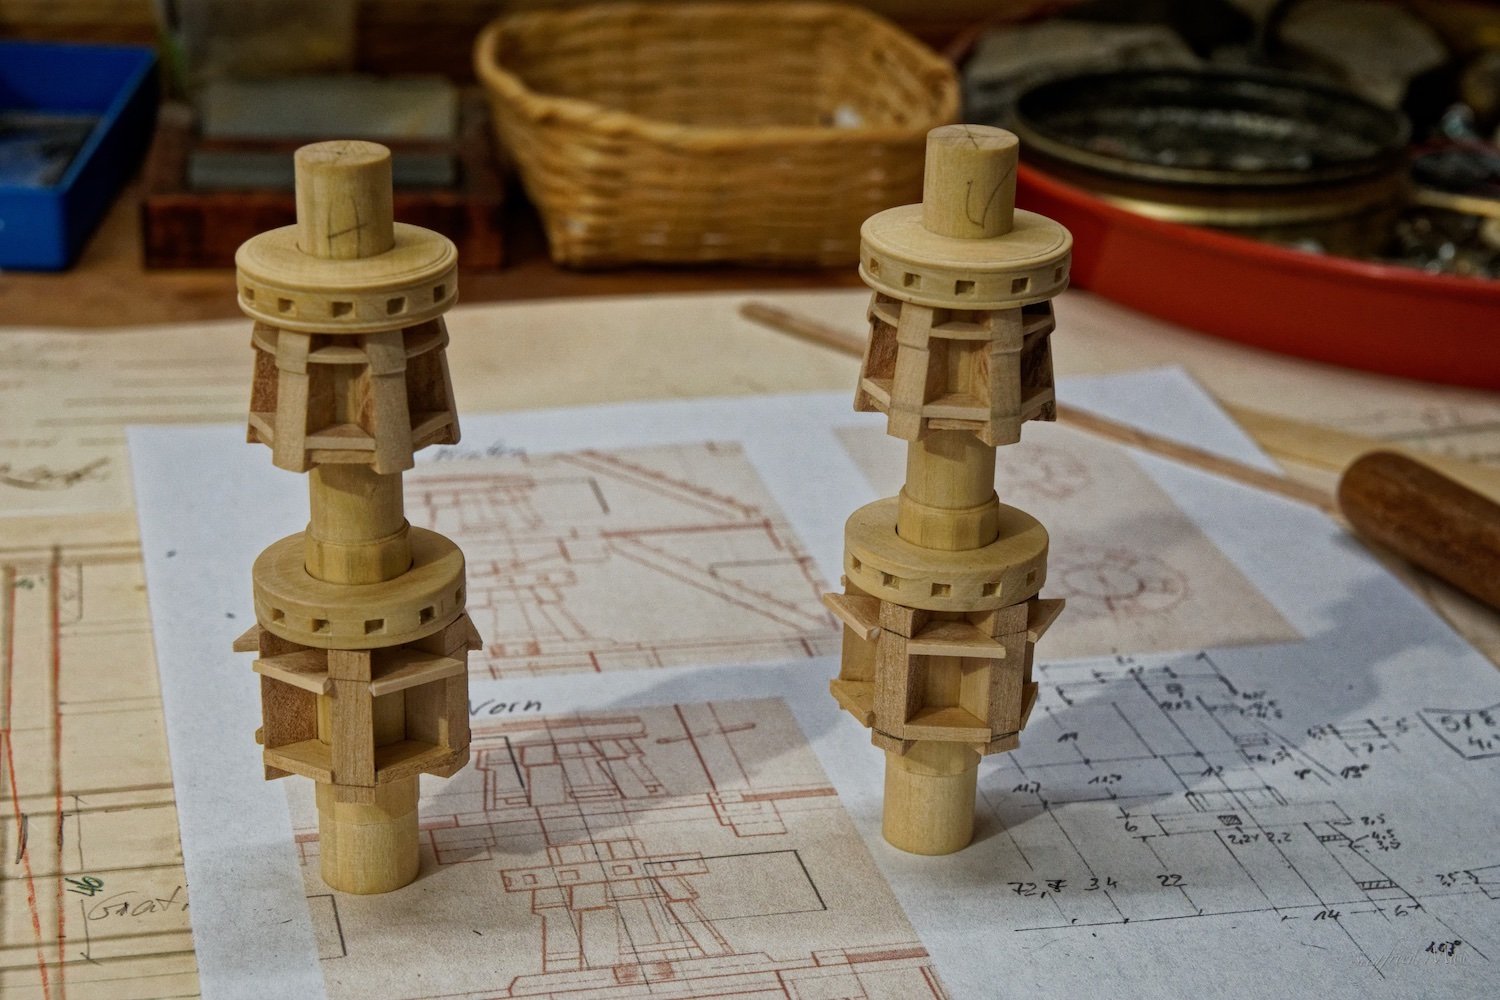
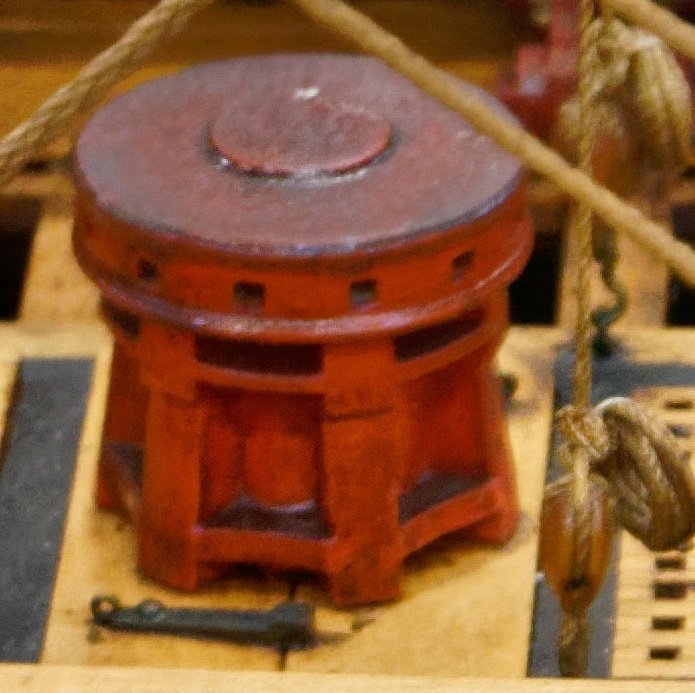
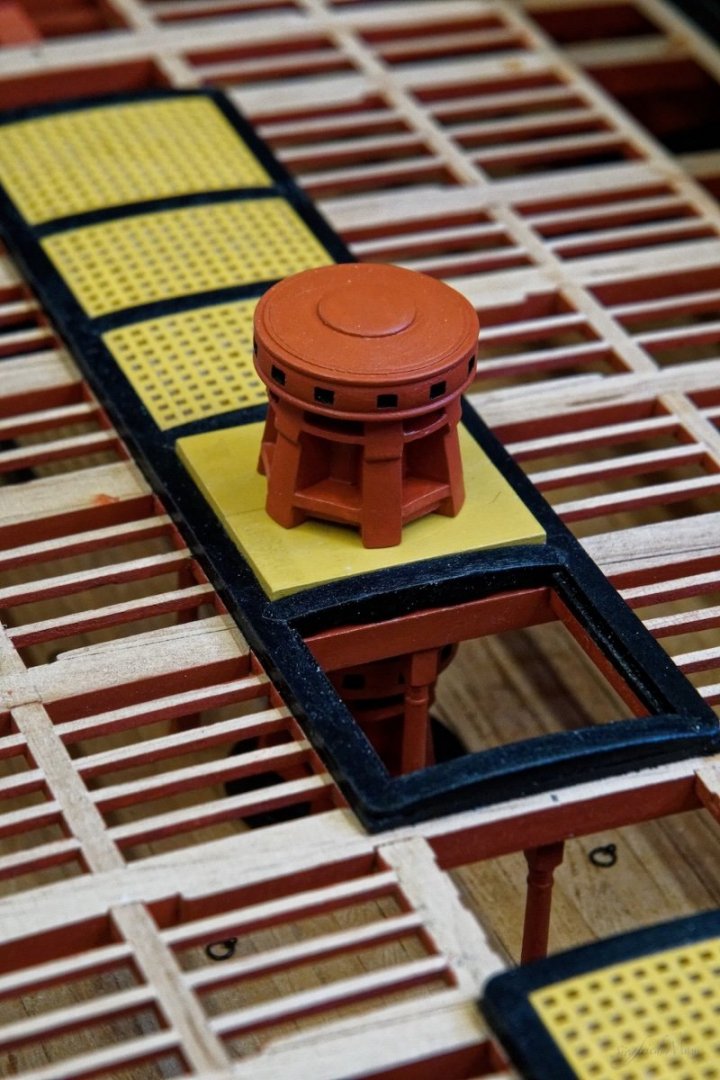
Hello, at least I finished the gratings, ladderways and capstan partners. Also the new stanchions in front of the capstans are installed and the last days I turned the axles and drumheads for the capstans.


-
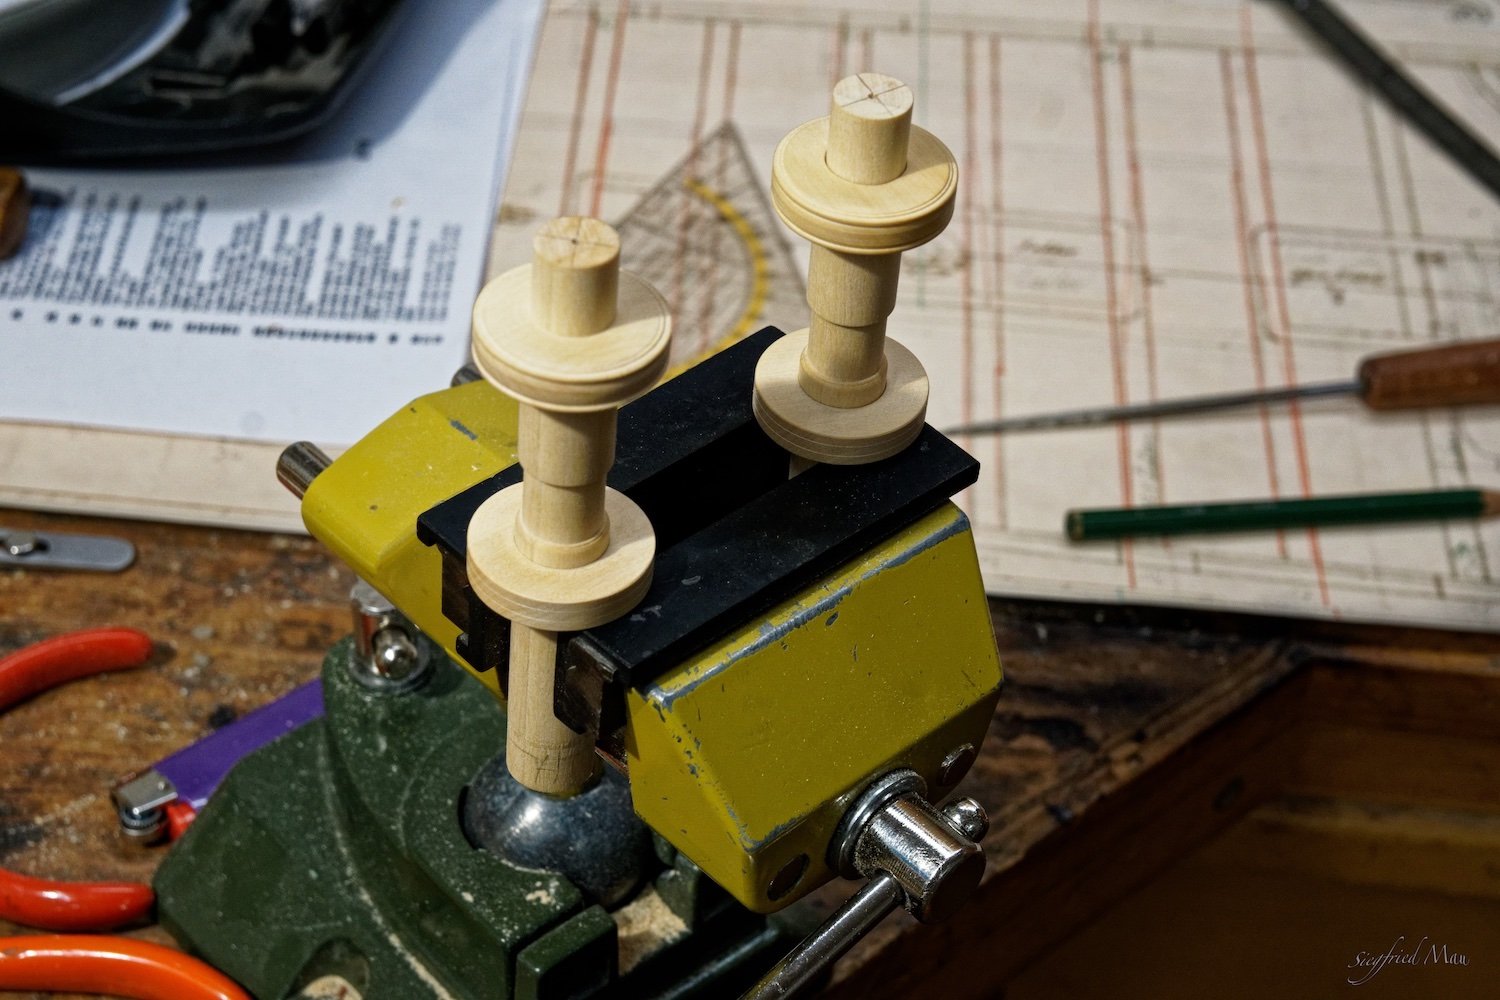
Hello, I finished now also the last gratings at the upper gun deck. But when I started to plan the capstans, I realises that I had build the bases for them too small. 😬 I made the upper flat 24 mm Ø, and I don't know why. The capstans at the Dorsetshire, at the plans for the Tiger they are not drawn, have at there bases a diameter of 28 mm! And at the most plans I looked at, the capstans have nearly the same measurements there. The stanchions at the front of them came out without any damages, and what a wonder, I had left over two extra 😃 So today I turned two rings to enlarge these bases, as you may see at the pictures.

-
Thank you Greg, I can't really remember what I used, but mostly a scraper, small chisels and files. It's now over 2 years ago, that I build them. But it was't an easy job, that can I remember very well. But I thought, when they did it in the 18. century, why should I not do it 😉
-
Hello, today the man from the Admiralty came, but we had this part ready in time. 😃

-
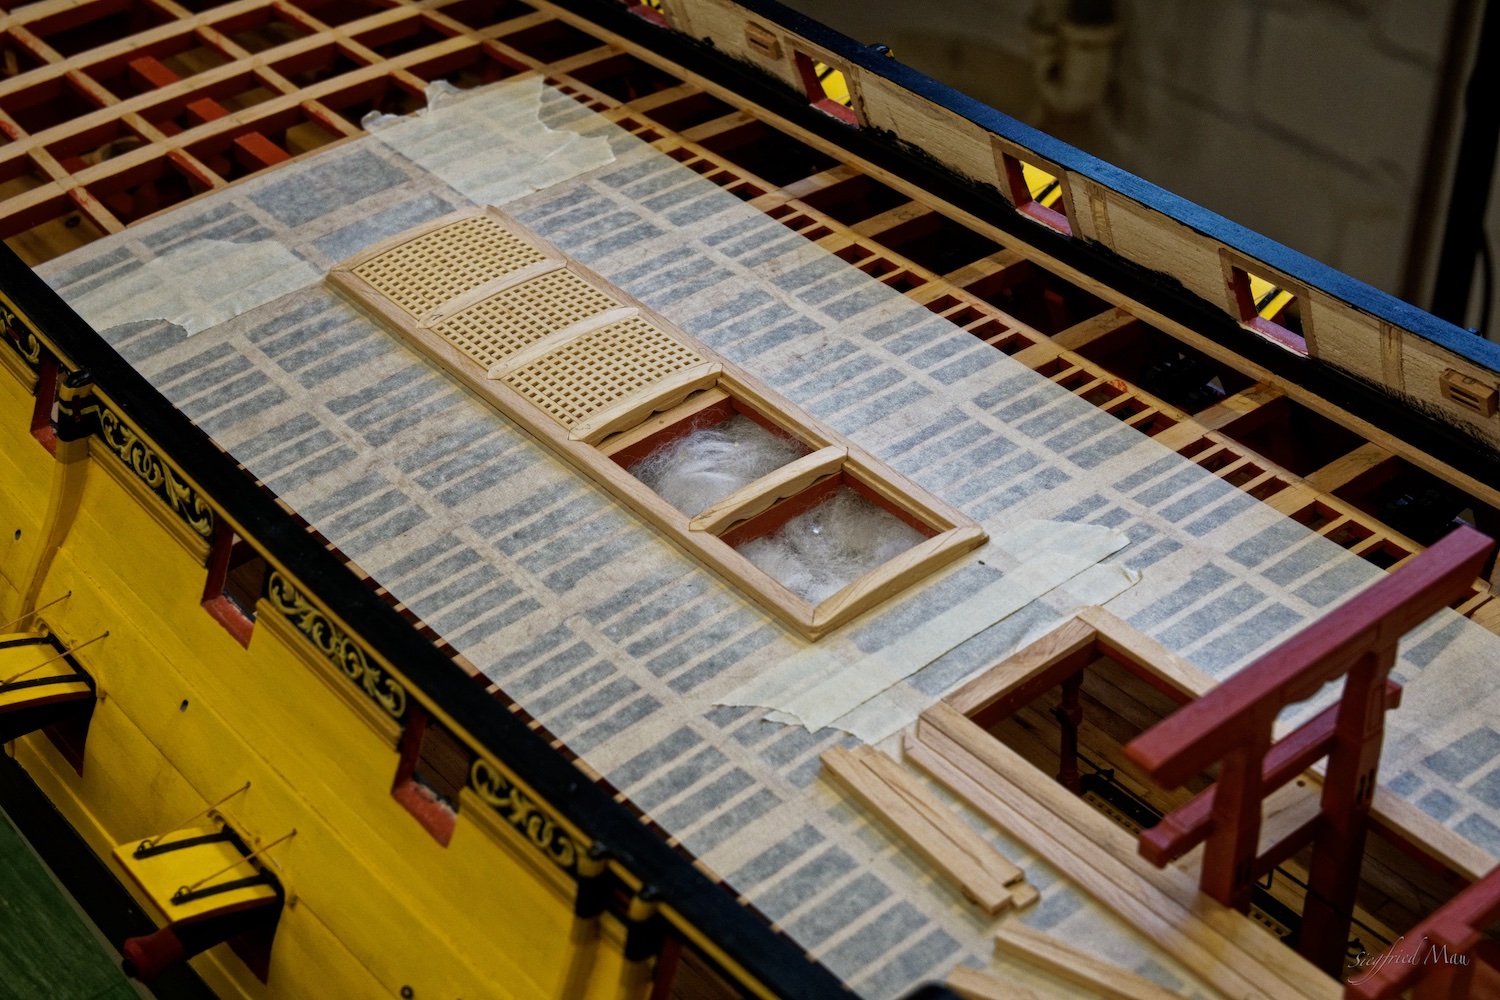
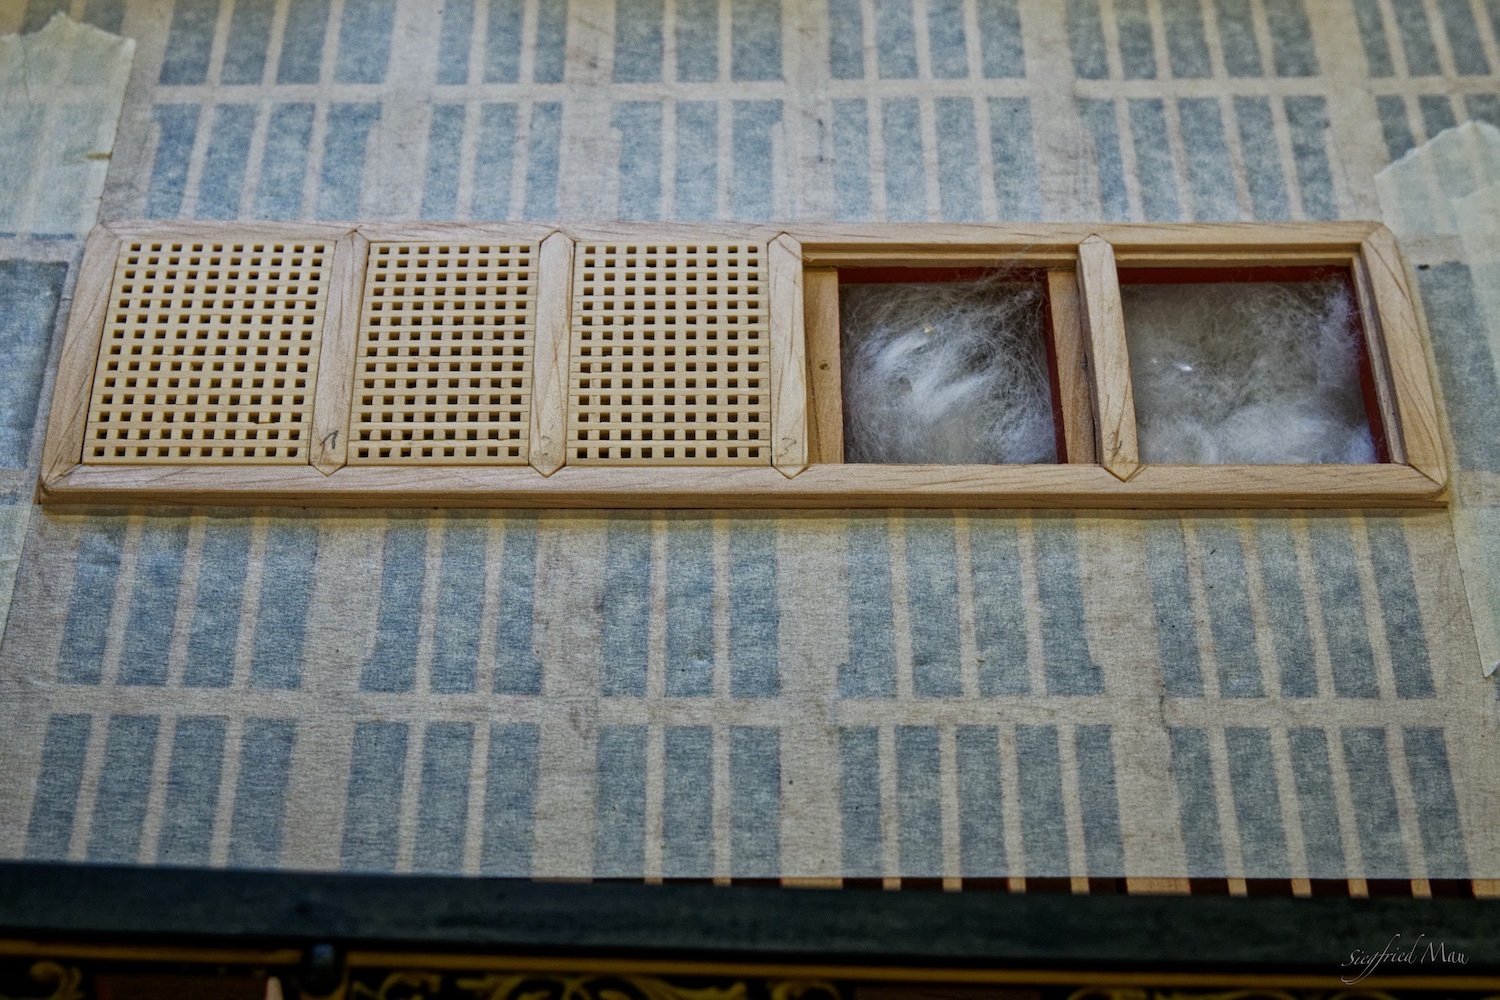
Hello, and thank you for your likes and Mark for your explanation. Today the men from the shipyard finished the second group of gratings. But the shipwright discovered already some things they have to repair tomorrow

-
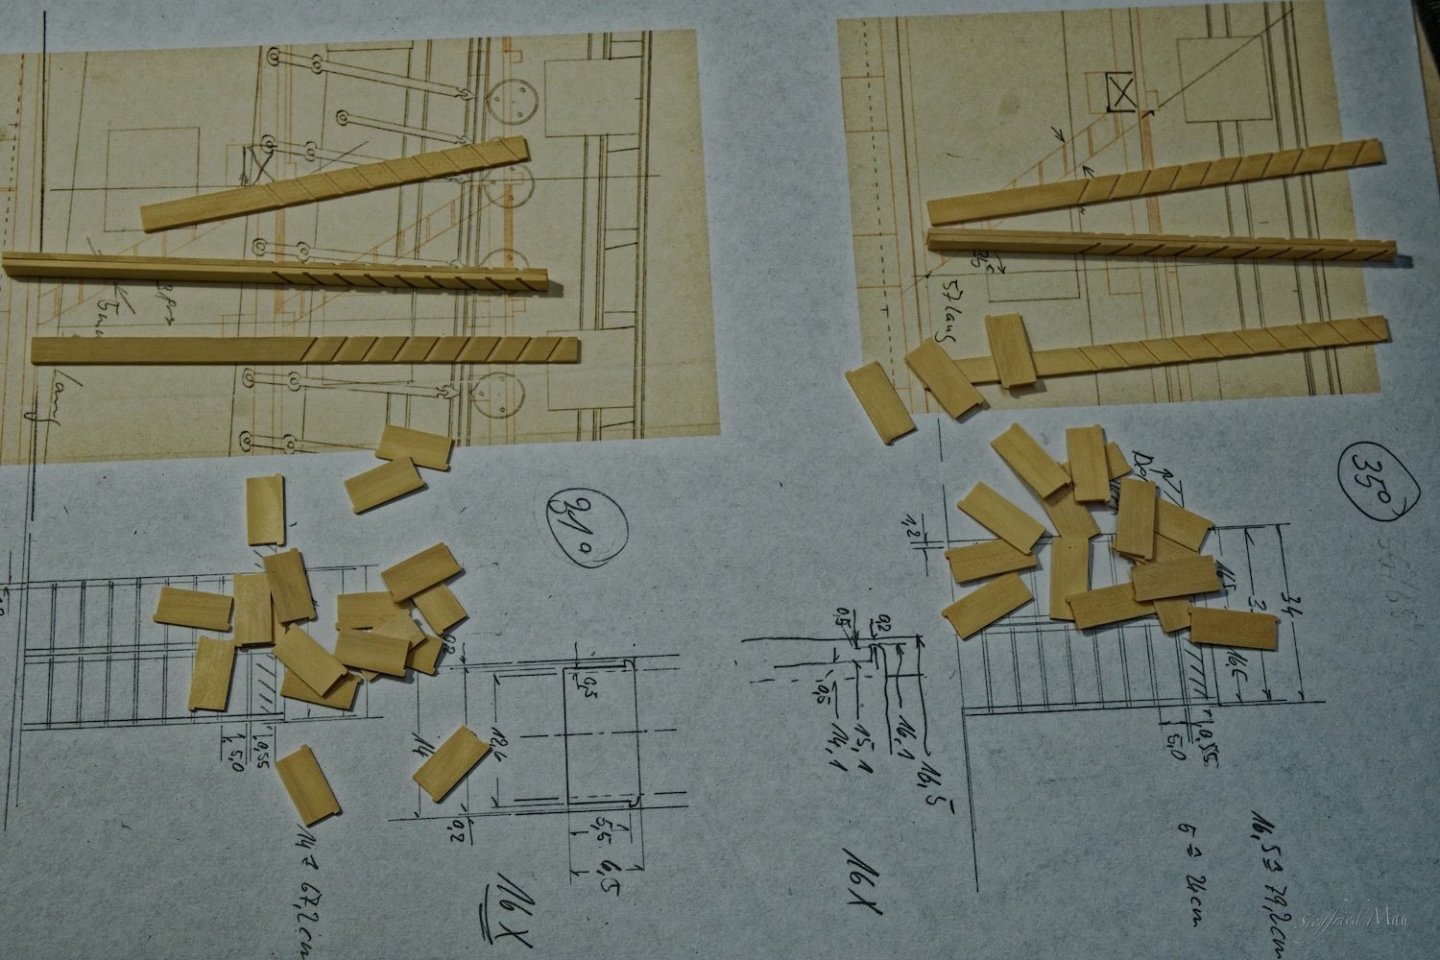
Hello, and many thanks for your efforts Mark. Alexander found in Goodwin's book English Man of War, 1719 establishment list, under gun deck and plank, page 249 binding strakes. The same for the middle deck, under Flat, page 252 and for the upper gun deck also under flat the next page. What is the difference between plank and flat? That means, I have to build them, but as you already said, I do not inlet them. I have also a little upgrade at the shipyard

-
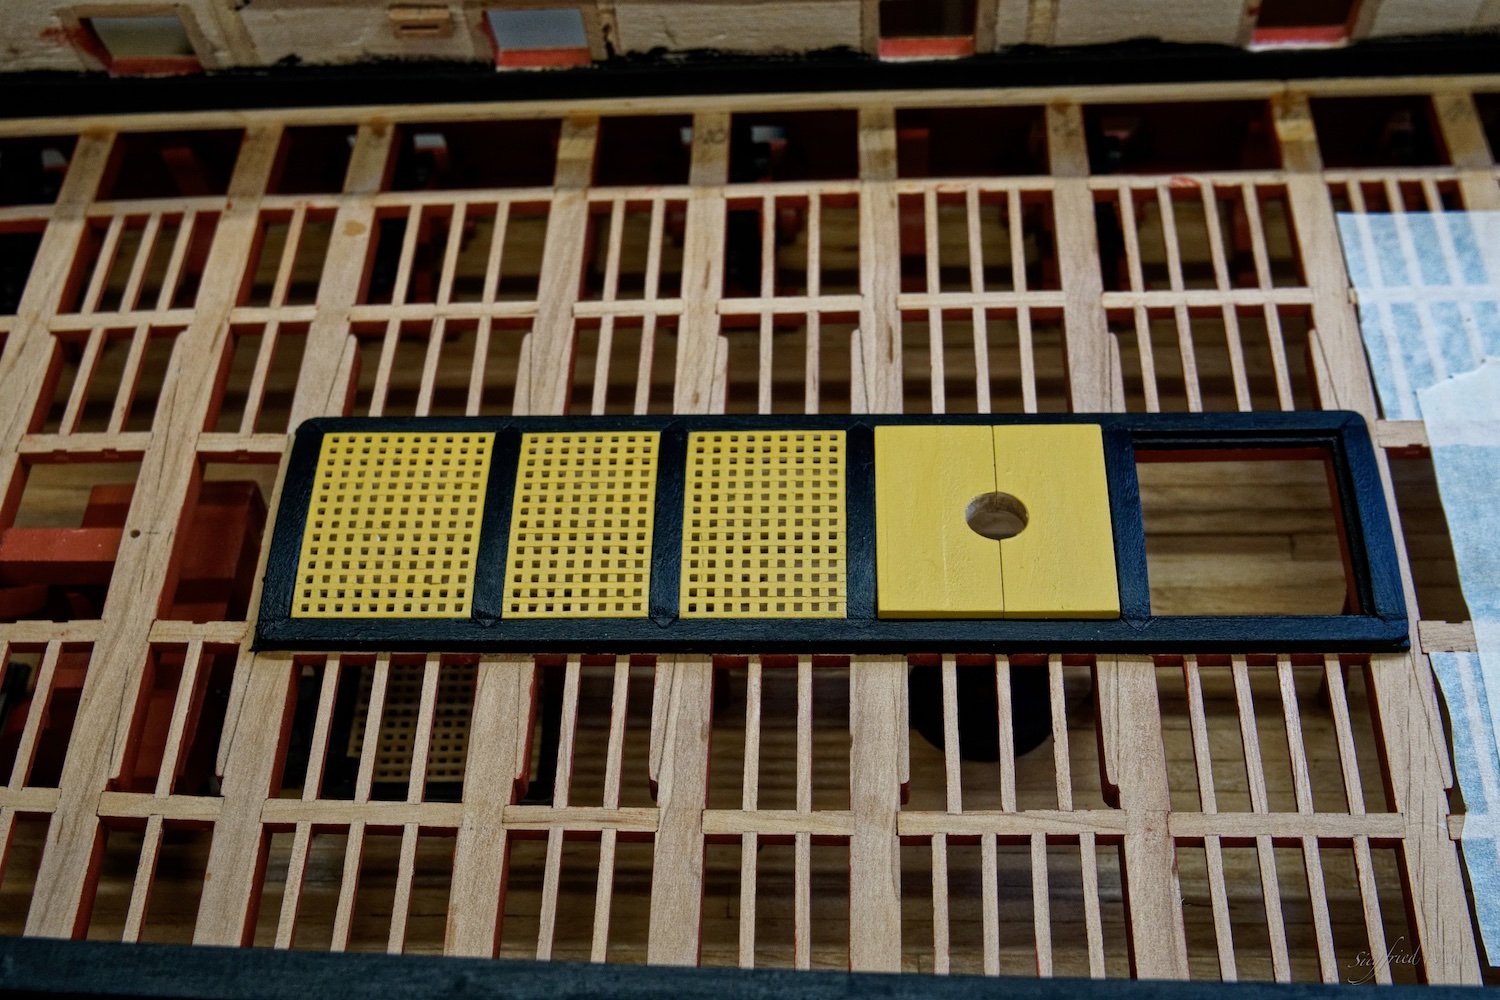
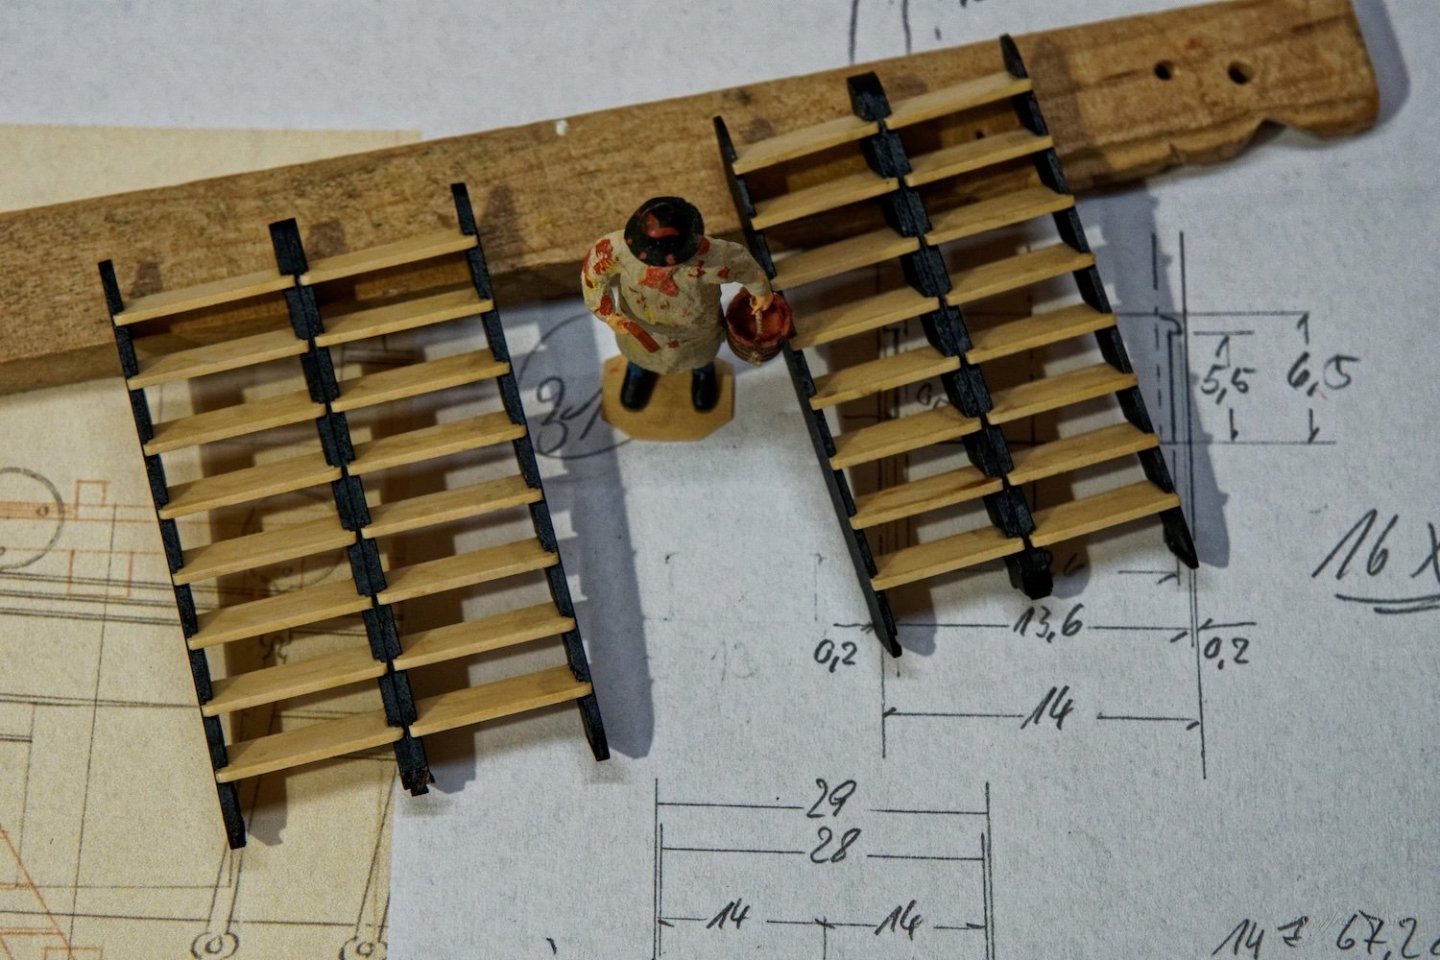
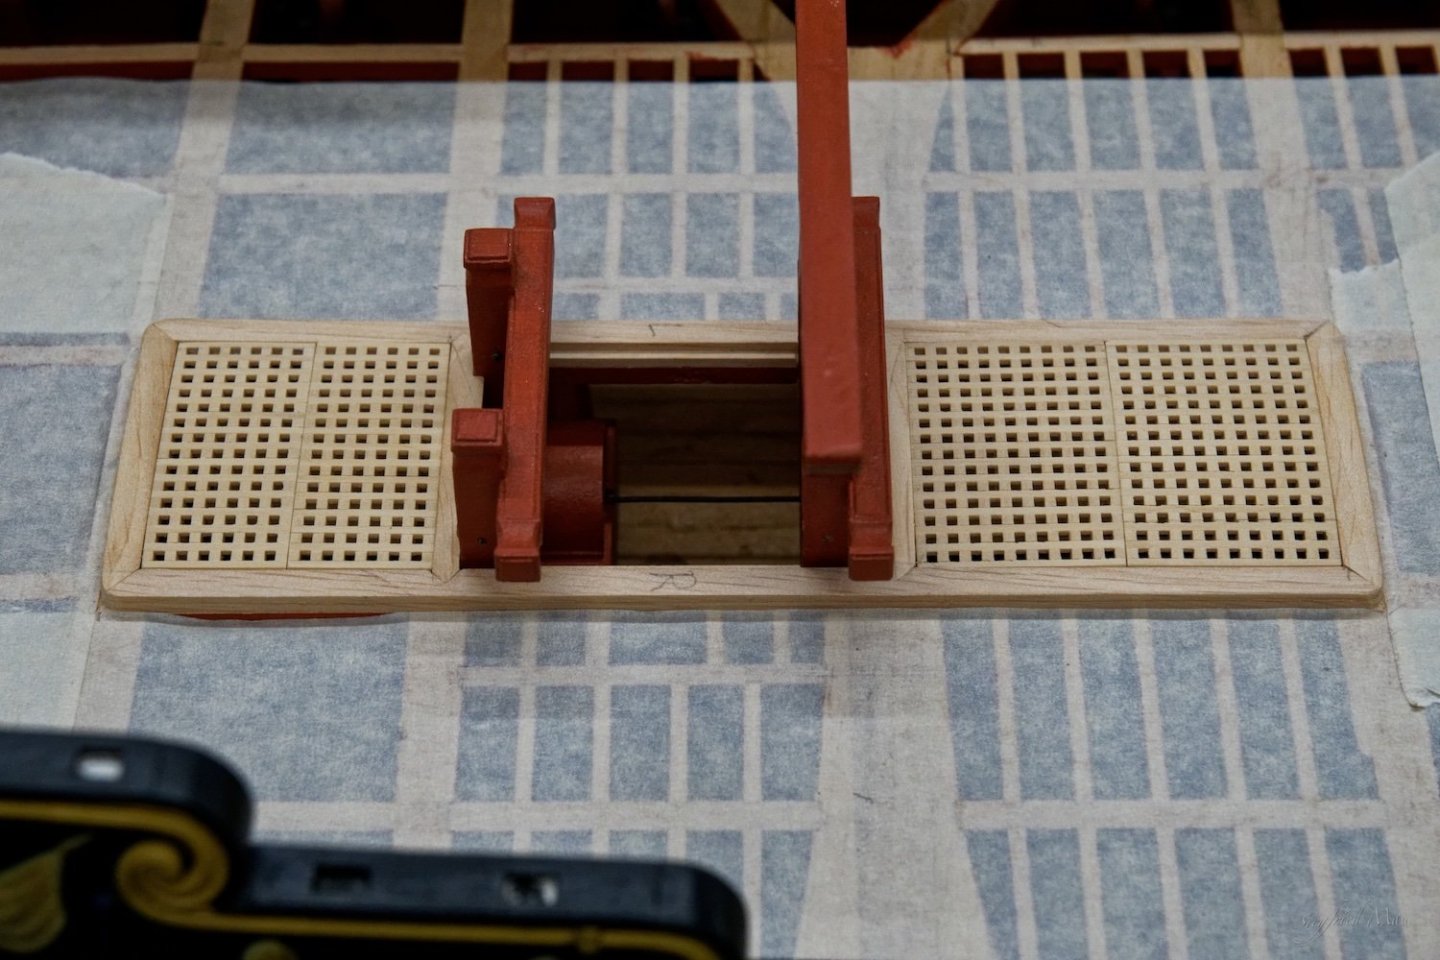
Hello, Jaager, I think I did't need such a sliding table for my saw and yes, I have my fingers all the time in view and away from the blade So, the first set of gratings is so far ready. But from these curves under the beam you did't see very much 😐

-
Good morning Mark, and many thanks for your efforts. Yesterday I read a lot, and came to the solution, to omit the binding strakes. You say, that you did't have contracts from the time of 1702 to 1755. That was the time of the establishment, and in the lists are no binding strakes mentioned. And may be, as you say, it was left to the shipwright. I think, when Anson became the 1. Lord of the Admiralty(1751) and Slade and Batly were the Surveyors of the Navy (1755), they reintroduced the binding strake.
-
Many thanks Mark, then I build them as planks on top of the beams, the full breath of the planks from stem to stern.
-
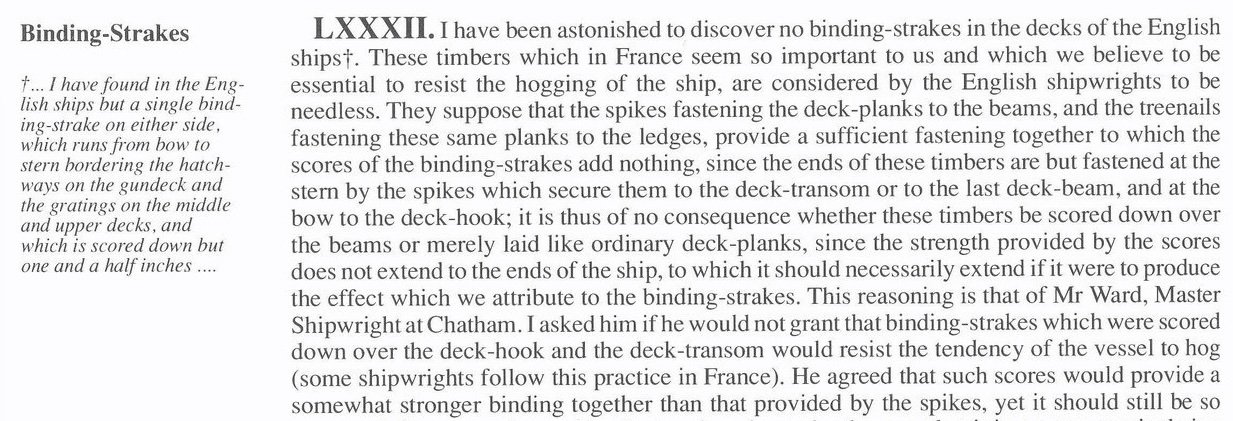
Hello and thank you for your comments, Mark, are that really binding strakes? I know that they may have the same function even if they are only nailed on top of the beams. Falconer, Lavery and even Goodwin did't mention them. In the 1815 edition of Falconer they are mentioned and of corse in Boudriot book about the 74 gunner from 1780. A colleagues in a German forum has posted this from: "18th CENTURY SHIPBUILDING - Remarks on the Navies of the English & Dutch" von Blaise Ollivier? That should be from 1737, but who did write the note to the left, and when? Druxey, that is the only source I have. But I thought to get them out it would be helpful to have some room under them. Also for airing the surface of the beams there. Chuck, thank you too
-
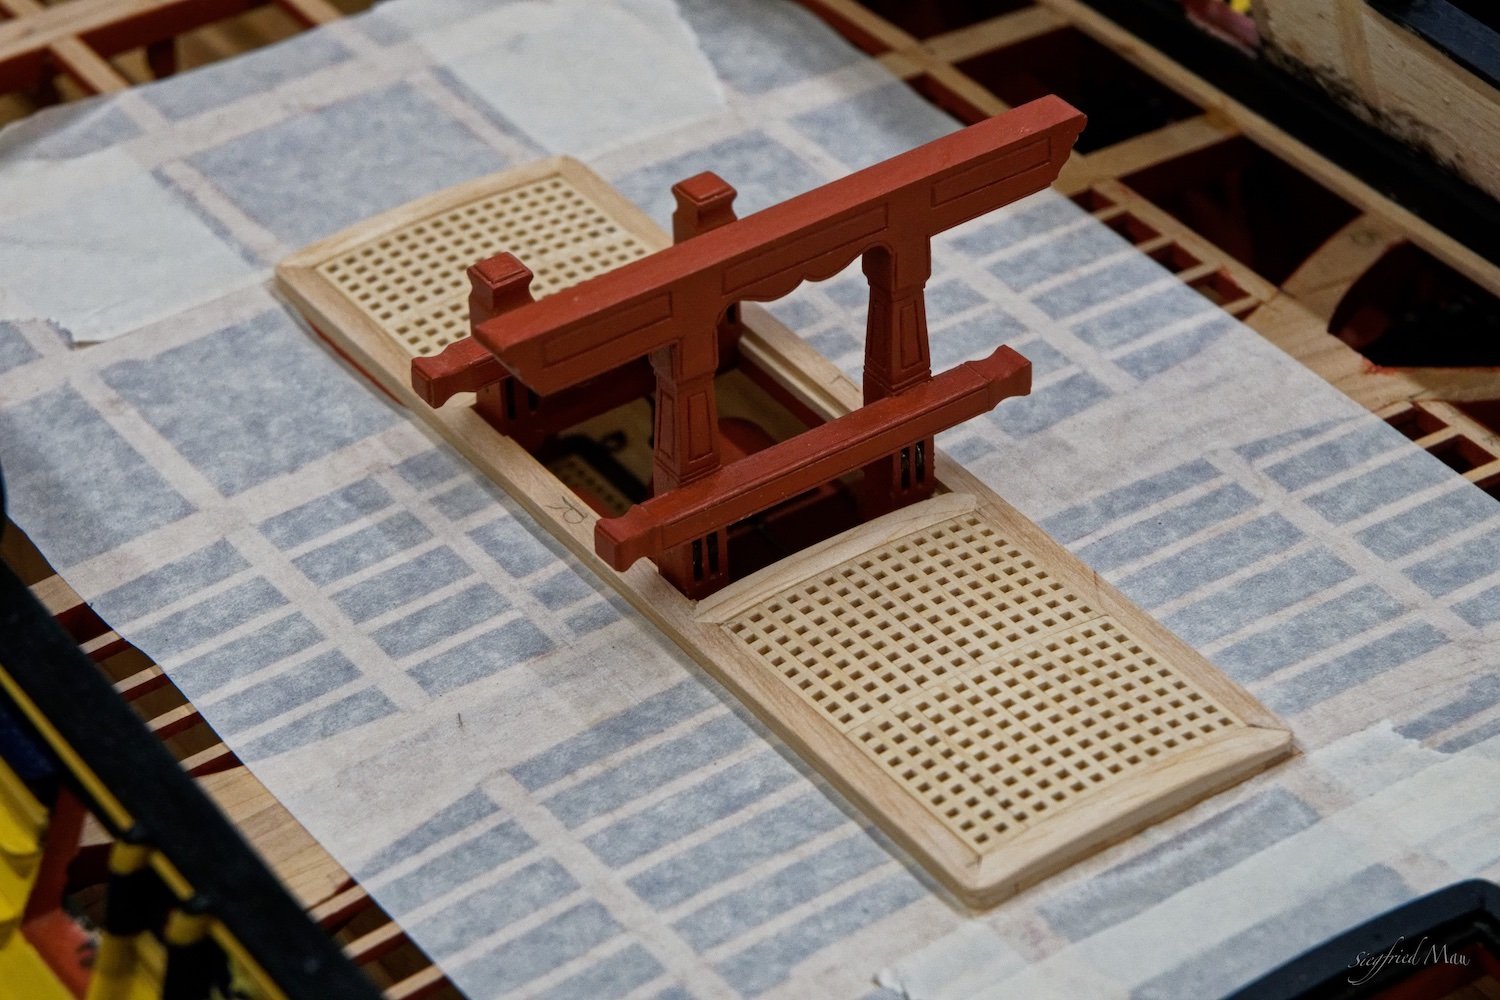
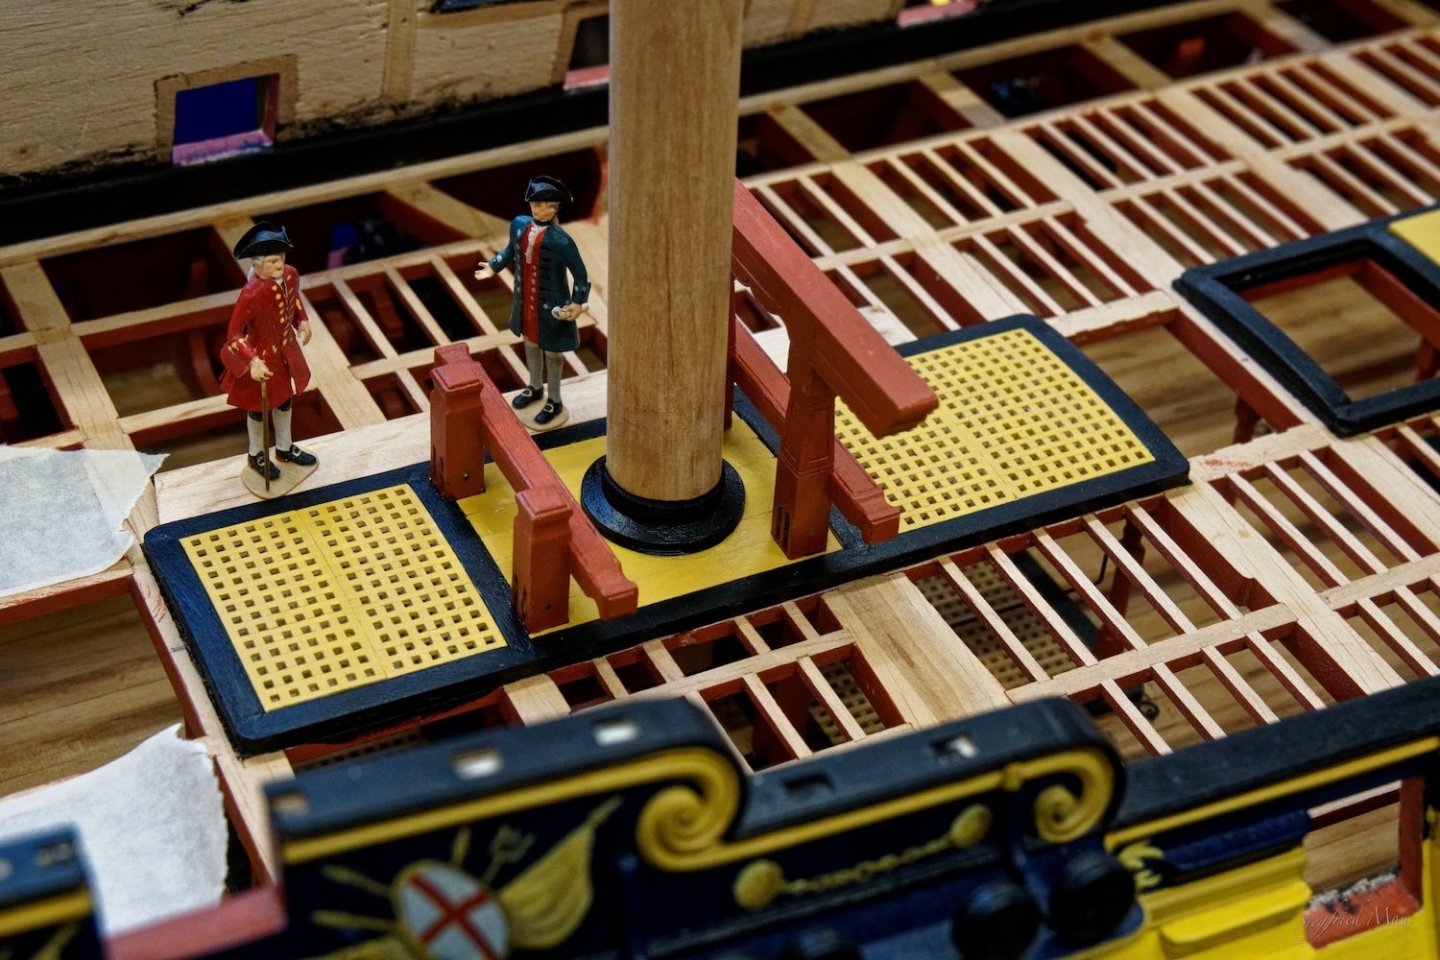
Hello, and many thanks Gary So, the first arrangement of gratings is ready. Left is only painting, but I think that is something for tomorrow. To the right comes later a capstan and a ladder way And before anybody cries, oh that is not authentic, here the Centurion 😉