Siggi52
-
Posts
1,156 -
Joined
-
Last visited
Content Type
Profiles
Forums
Gallery
Events
Everything posted by Siggi52
-
 Hello JJ, Tiger is well and waiting for me to take action again. I started carefully and repaired some things from the spring. The last fall went into a sunny and mild fall and I bought me a pedelec to cruise through the near and far neighbourhood. And because my meniscus did't protest, also for shopping to the next town. So my car had mostly holiday 😉 But to stay with the subject of this forum. If there weren't the supporters for the cathead! But at least I haven't any more excuses not to start, so I will start at the shipyard very soon.
-
Good morning, and thank you for your interest in my blog Because the summer is gone here now totally (12°C, 53°F yesterday) , I will be back at the shipyard soon.
-
Thank you Keith, that with the rum is a good idea 🤪 and Gary, I would't have the stamina to build a model like yours. So you are also an inspiration for me not to give up, thank you.
-
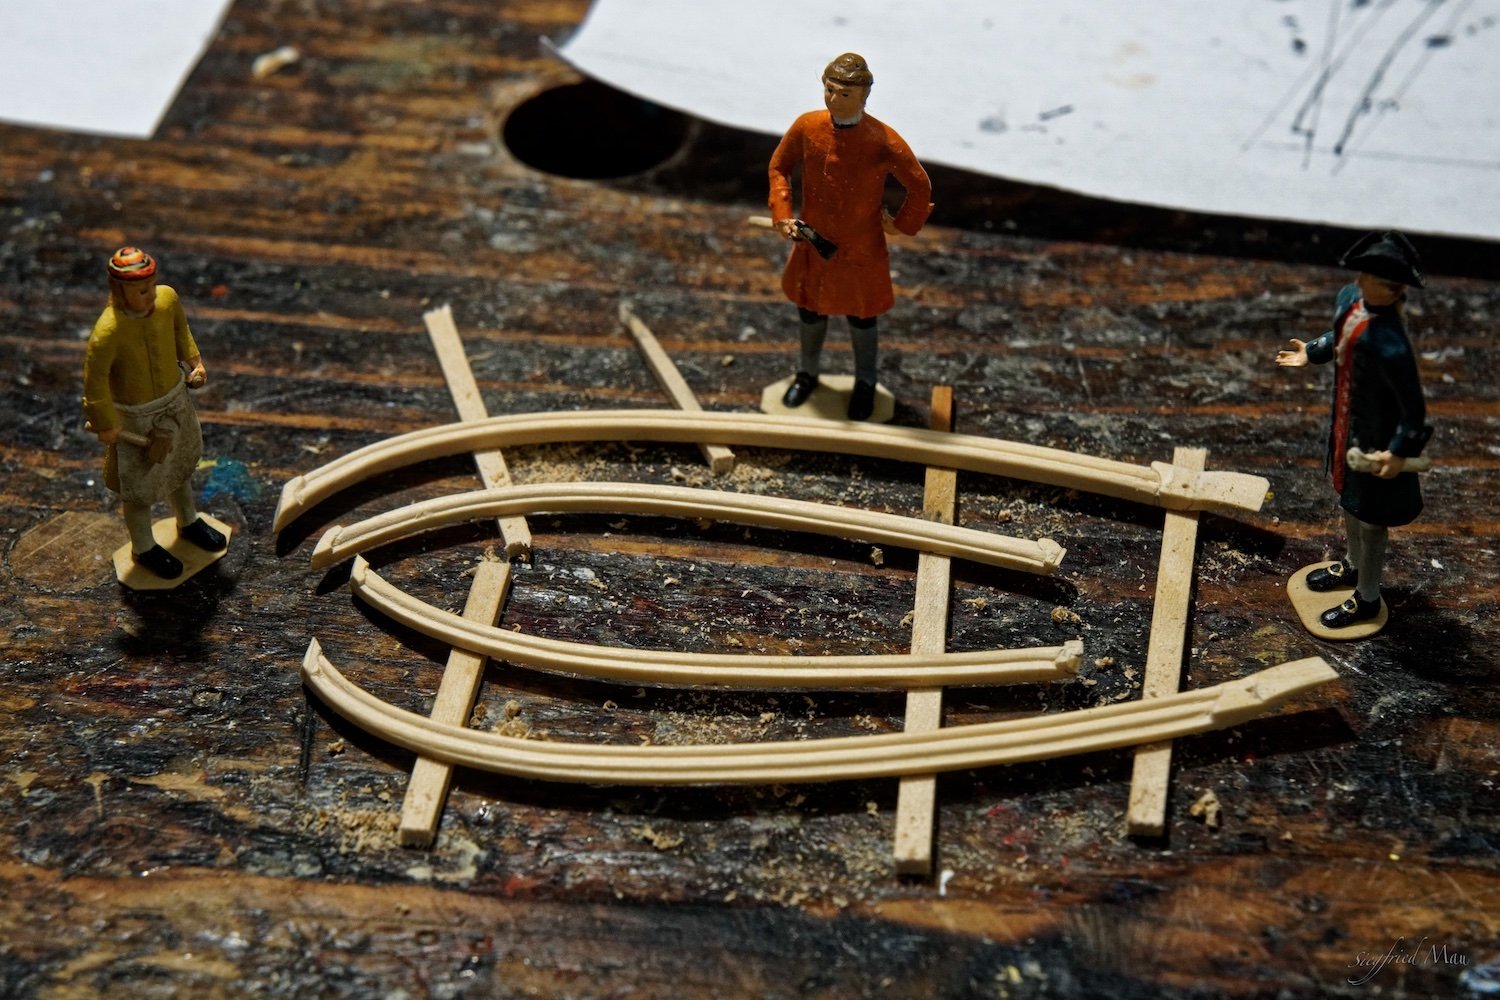
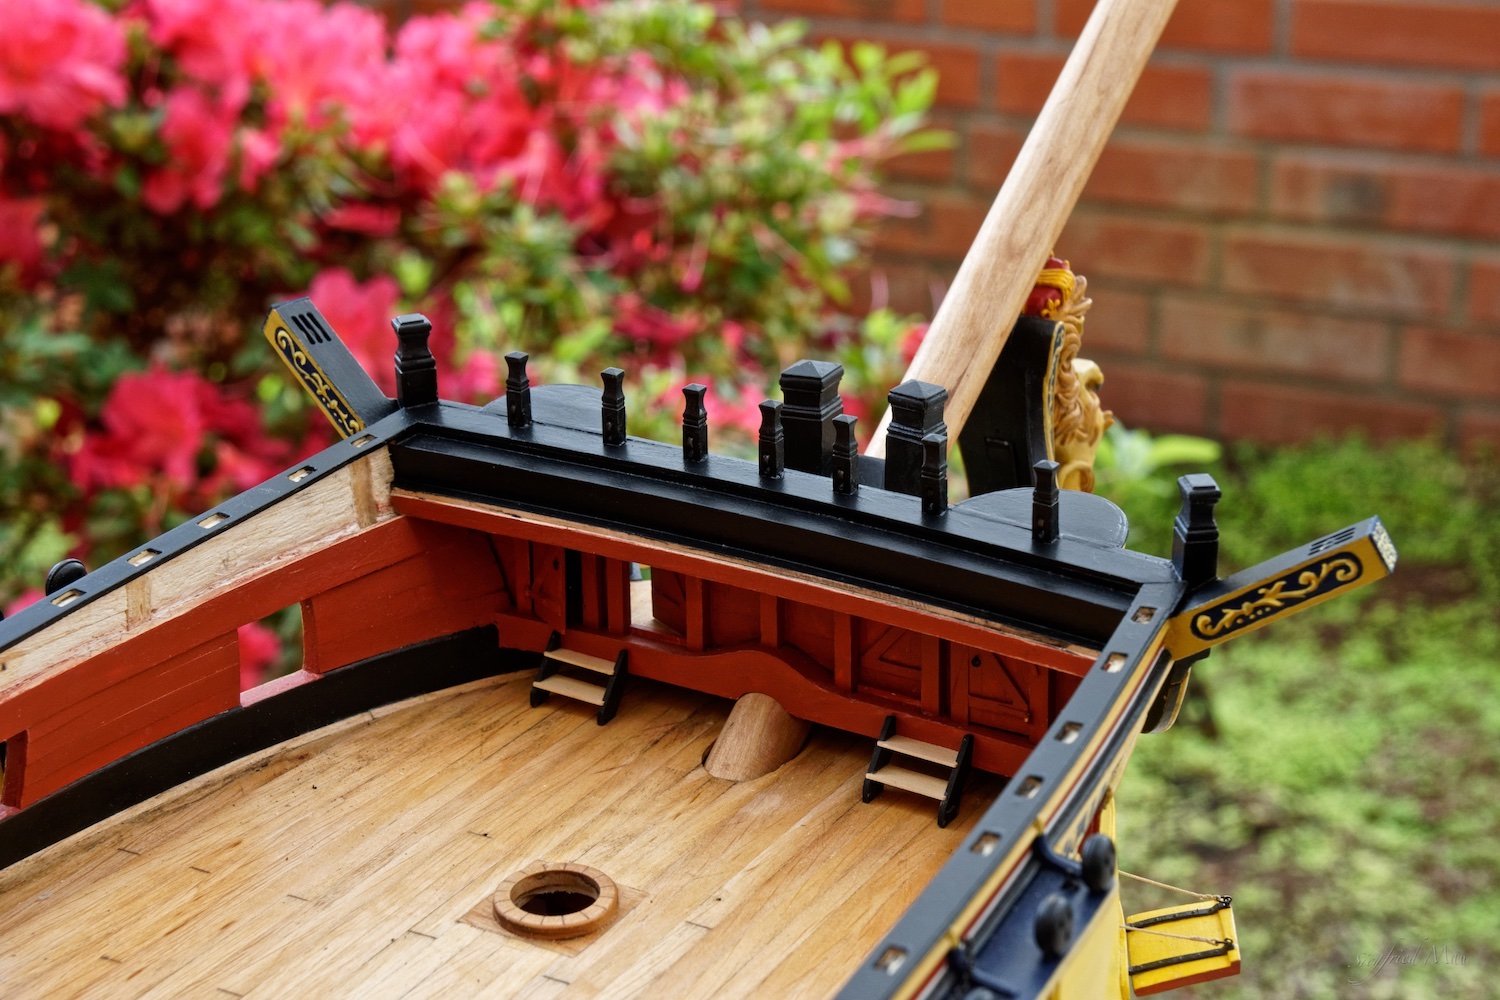
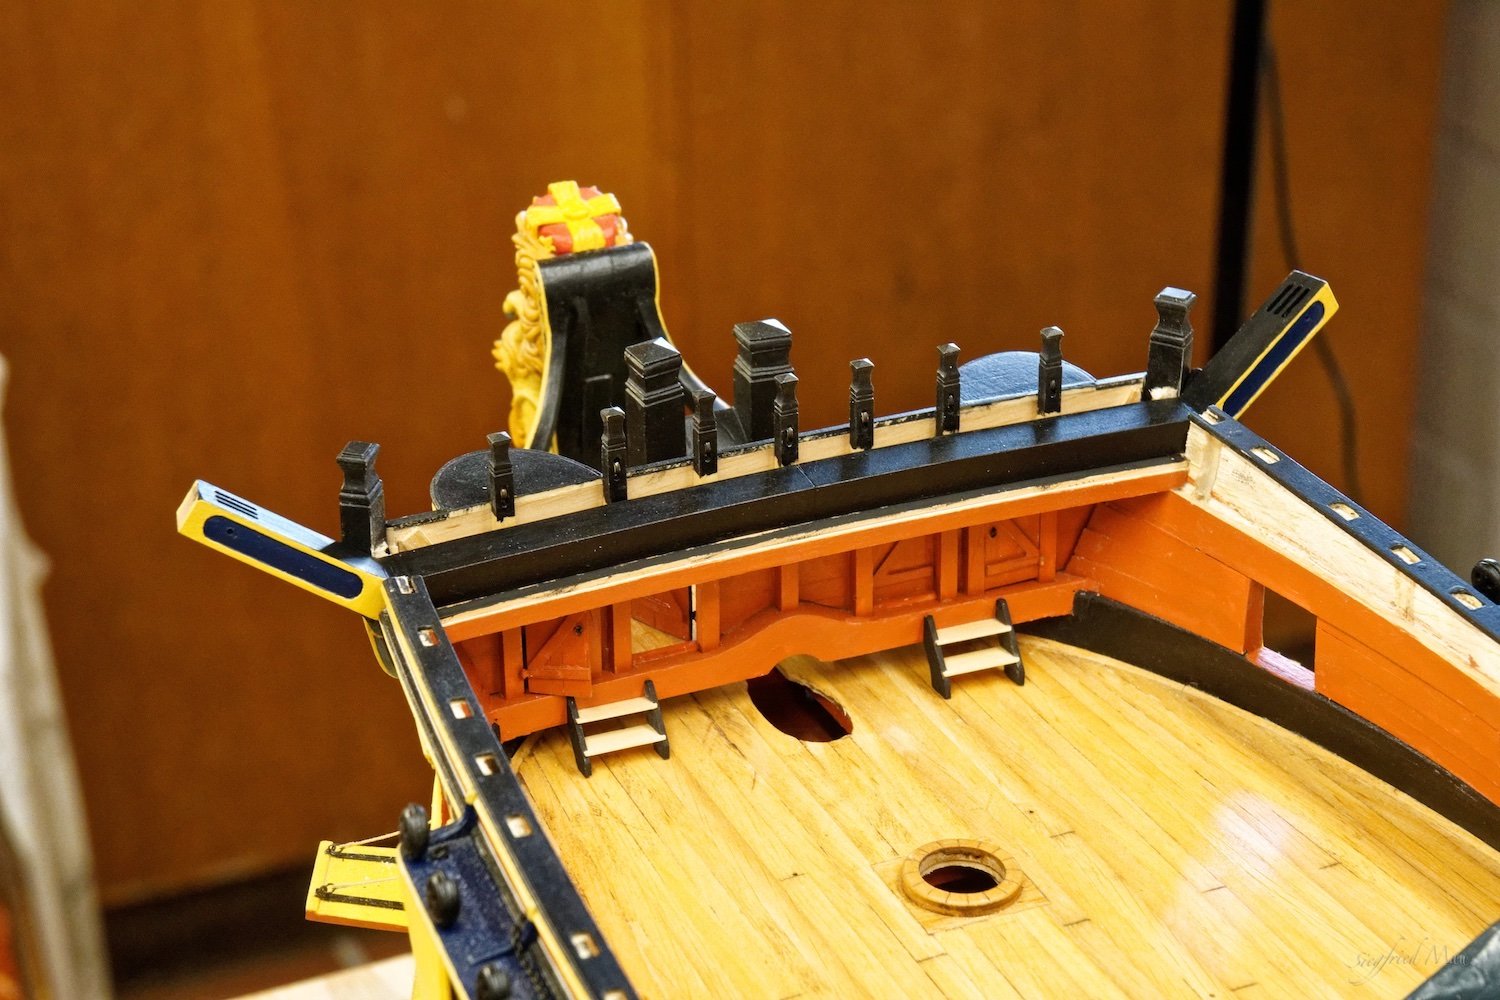
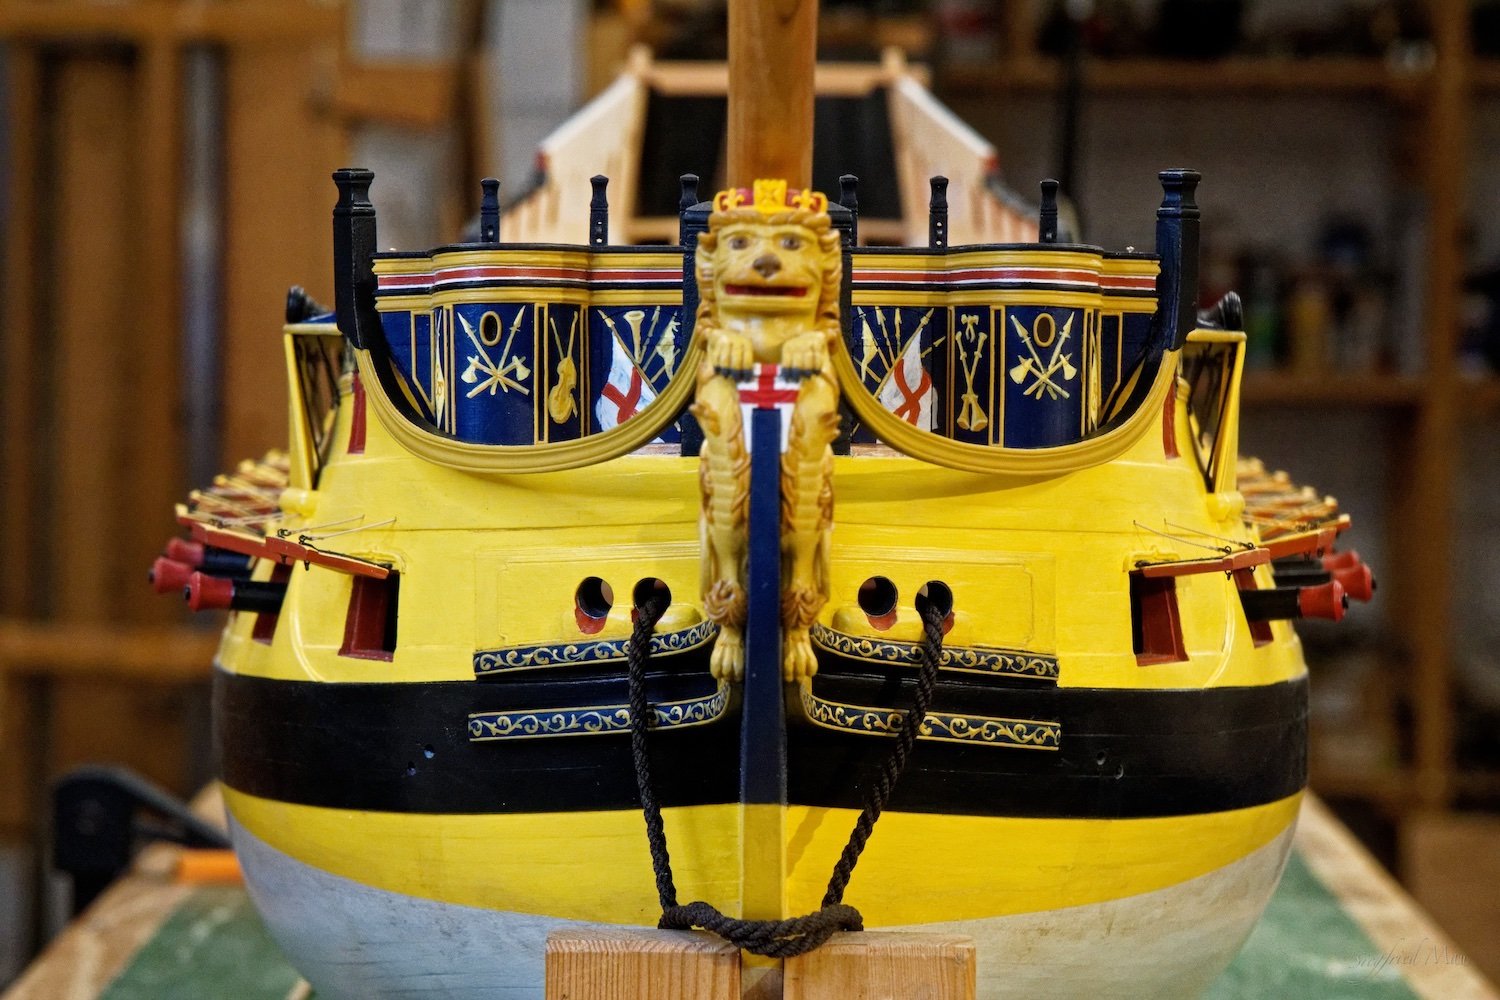
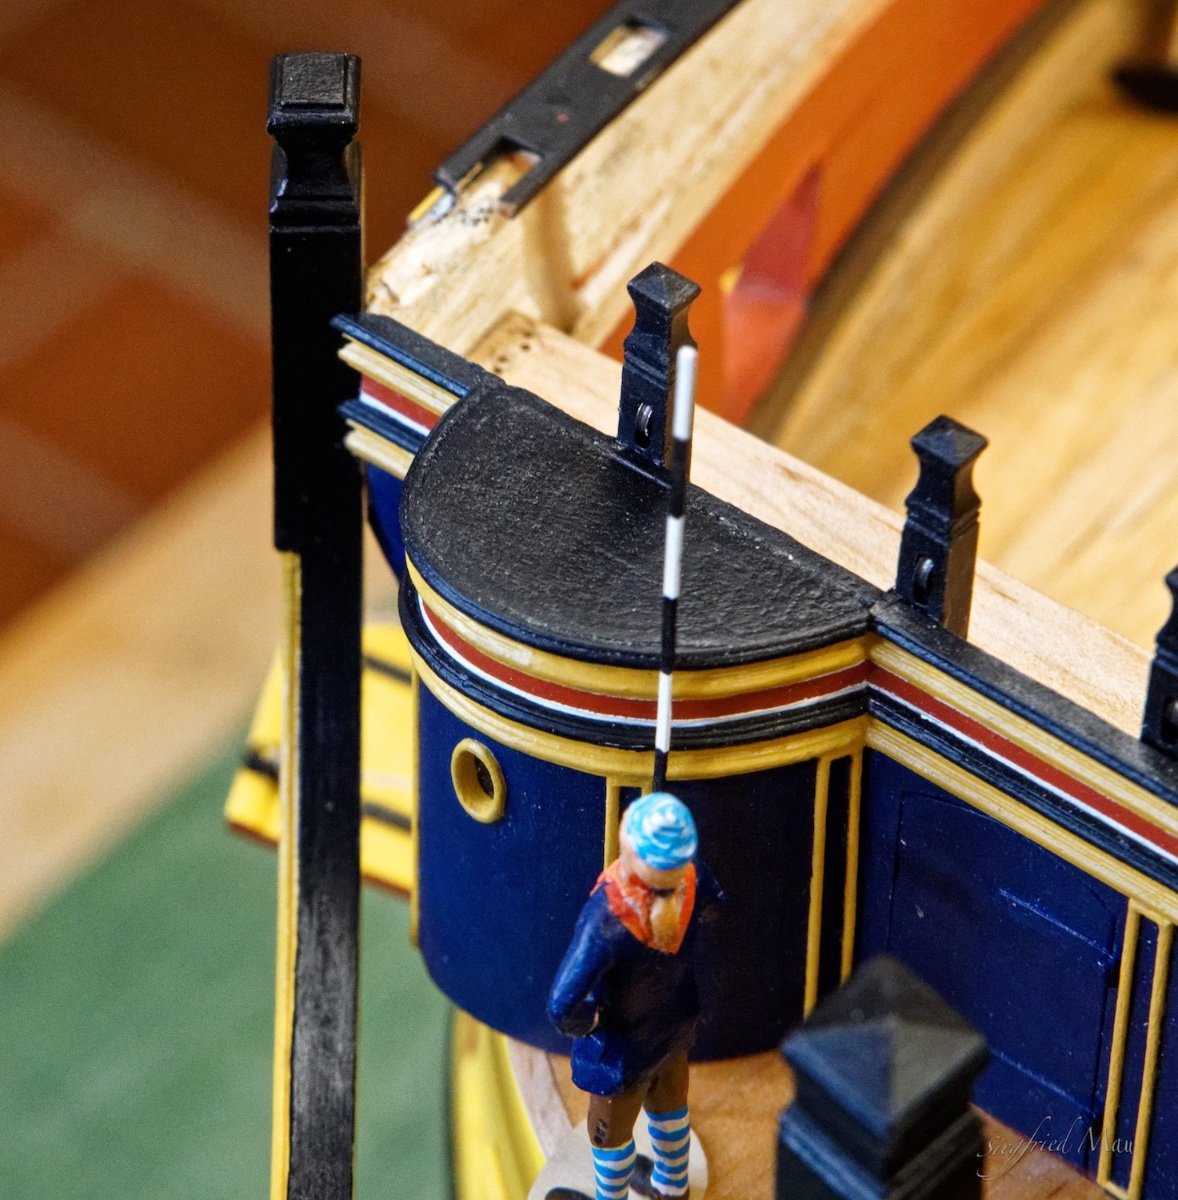
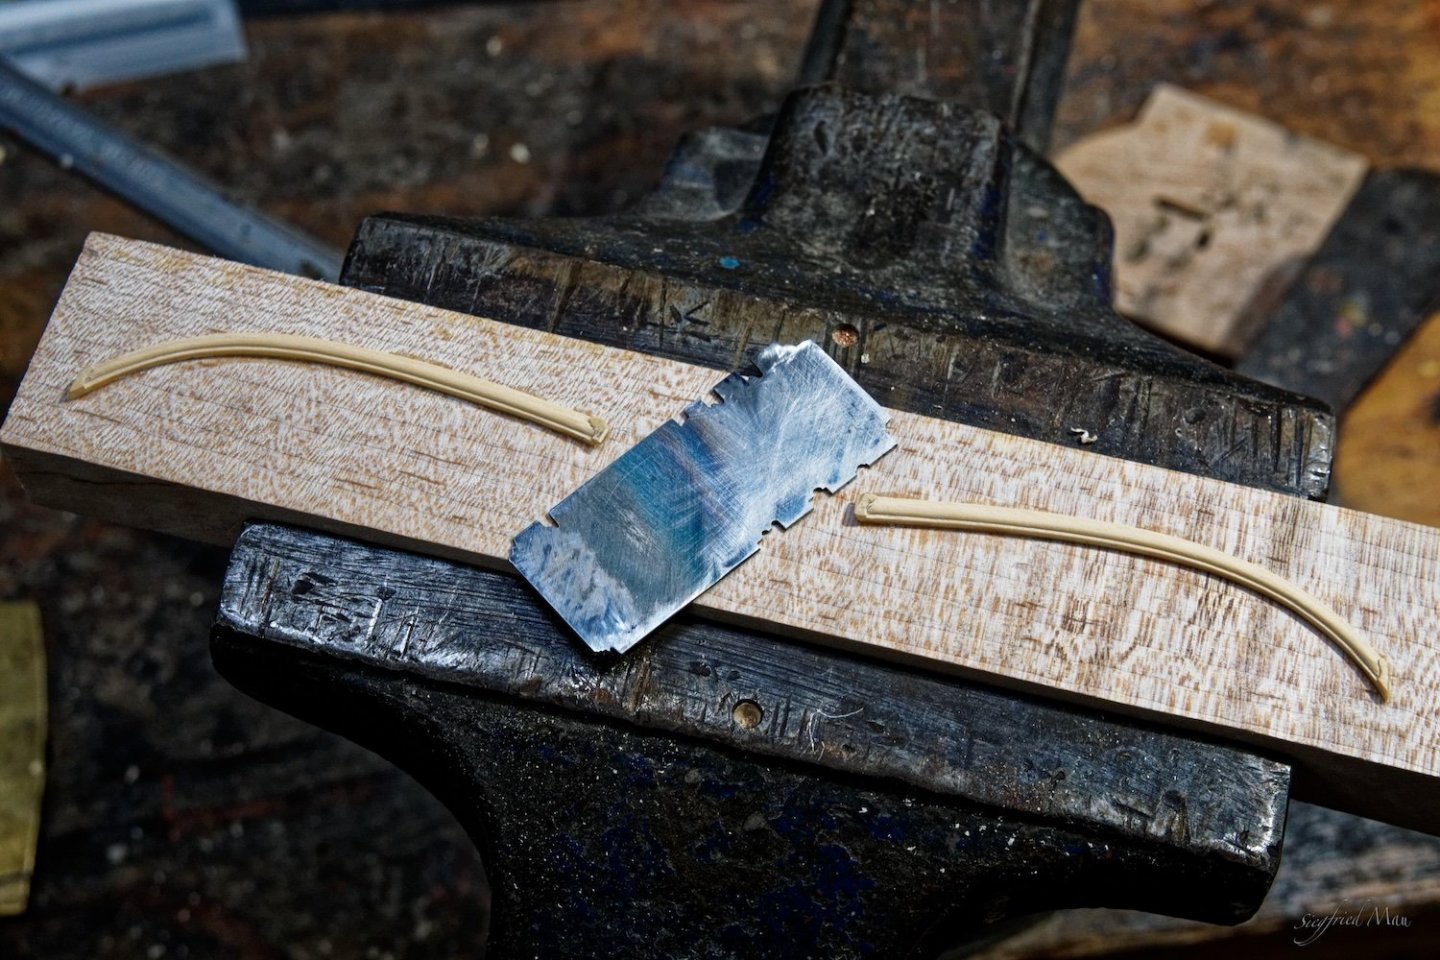
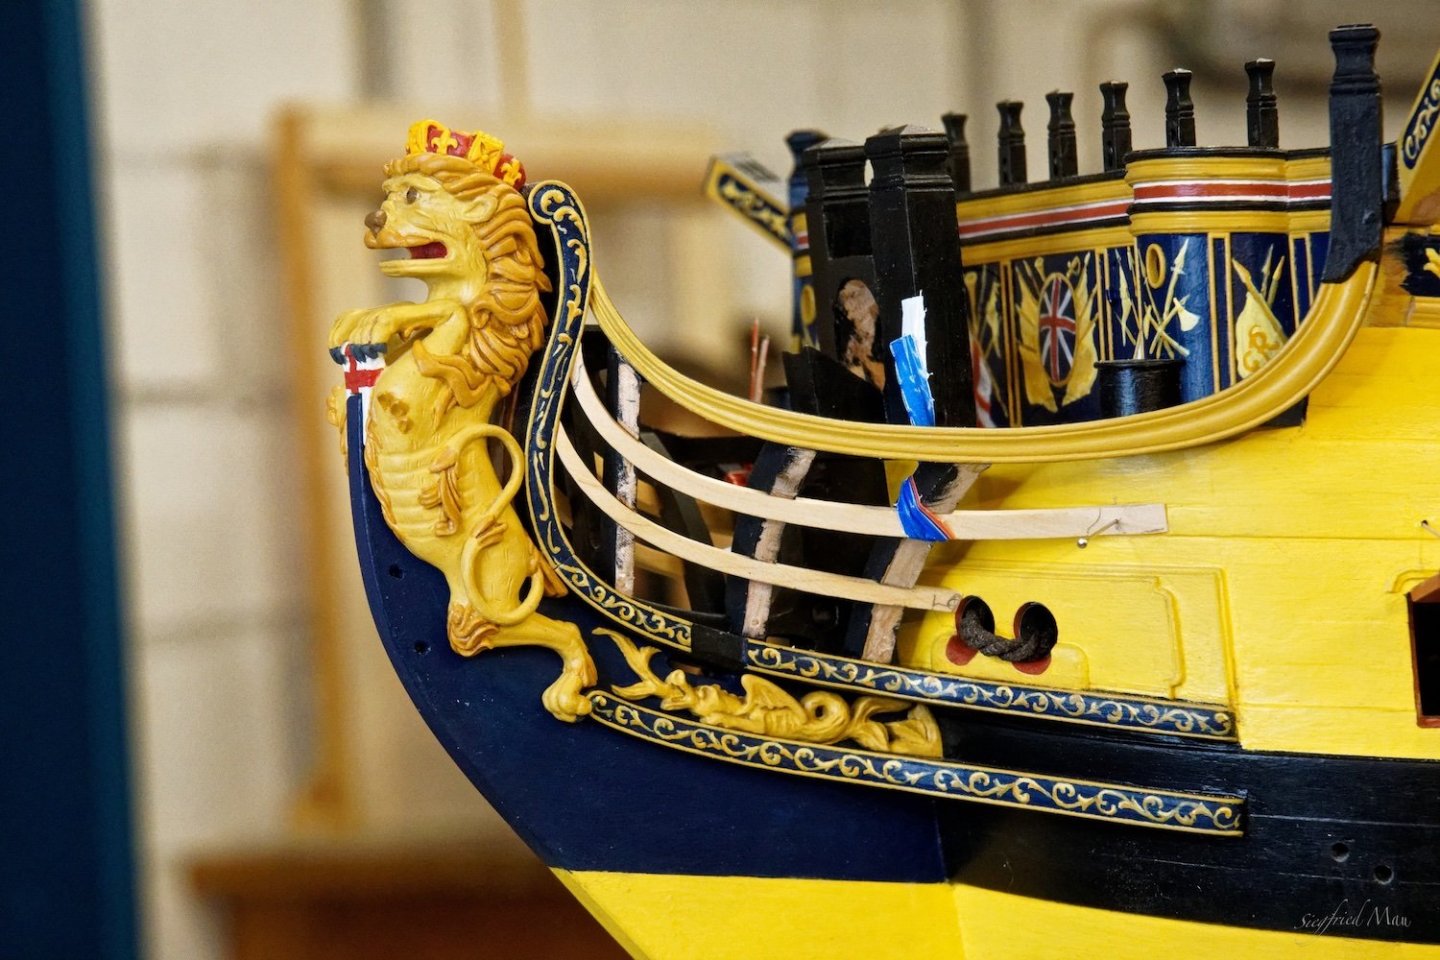
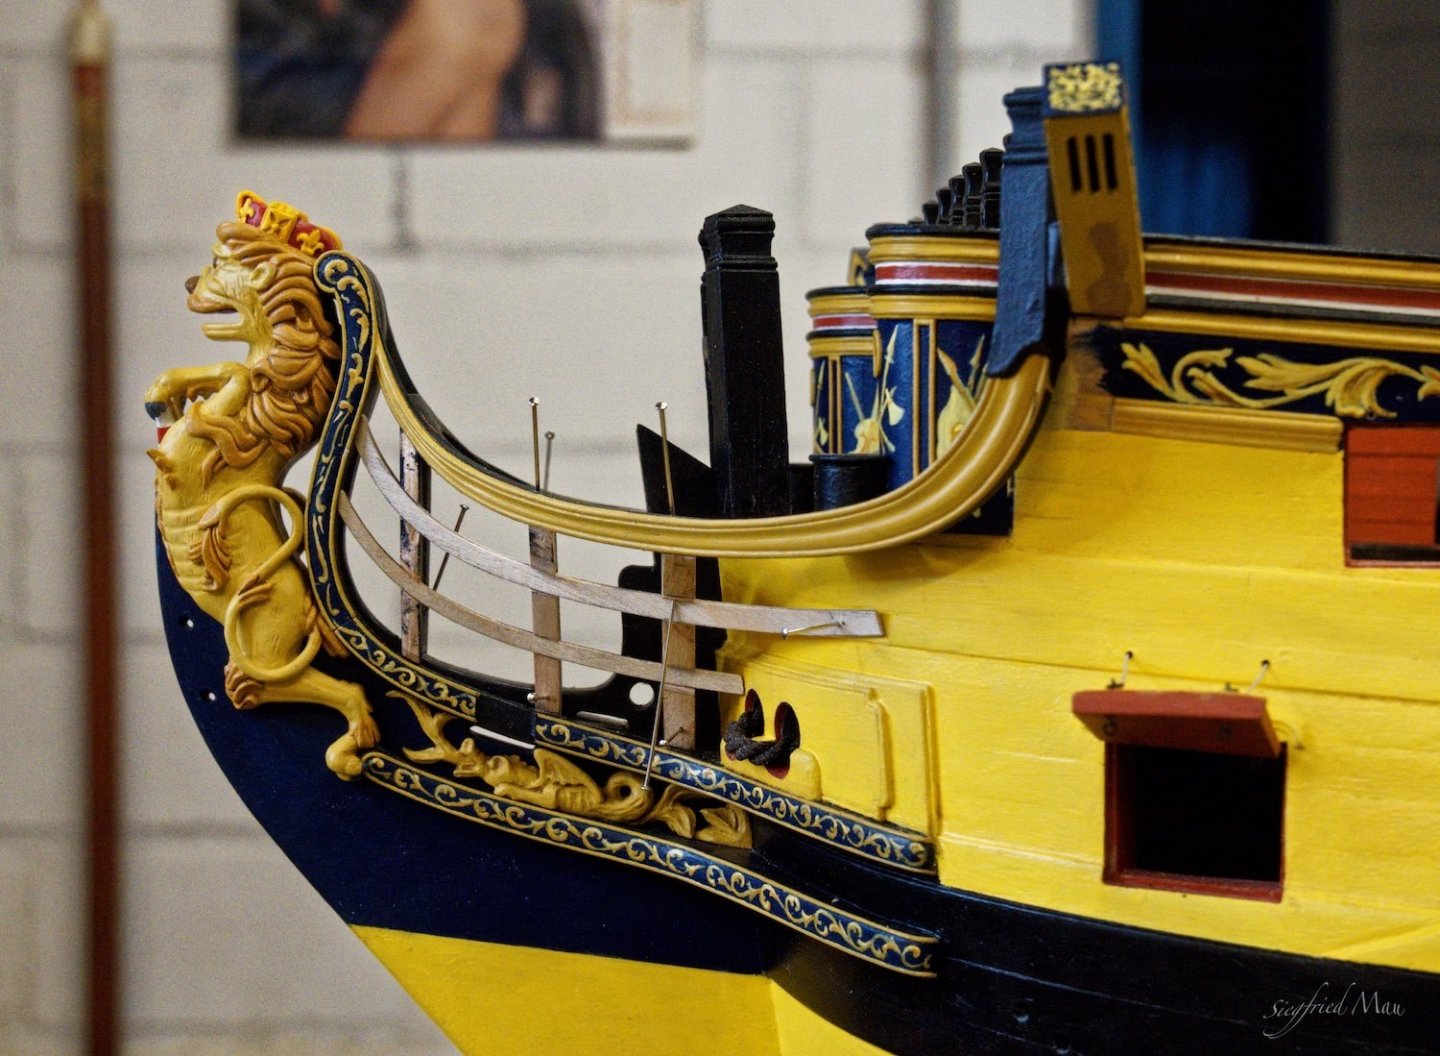
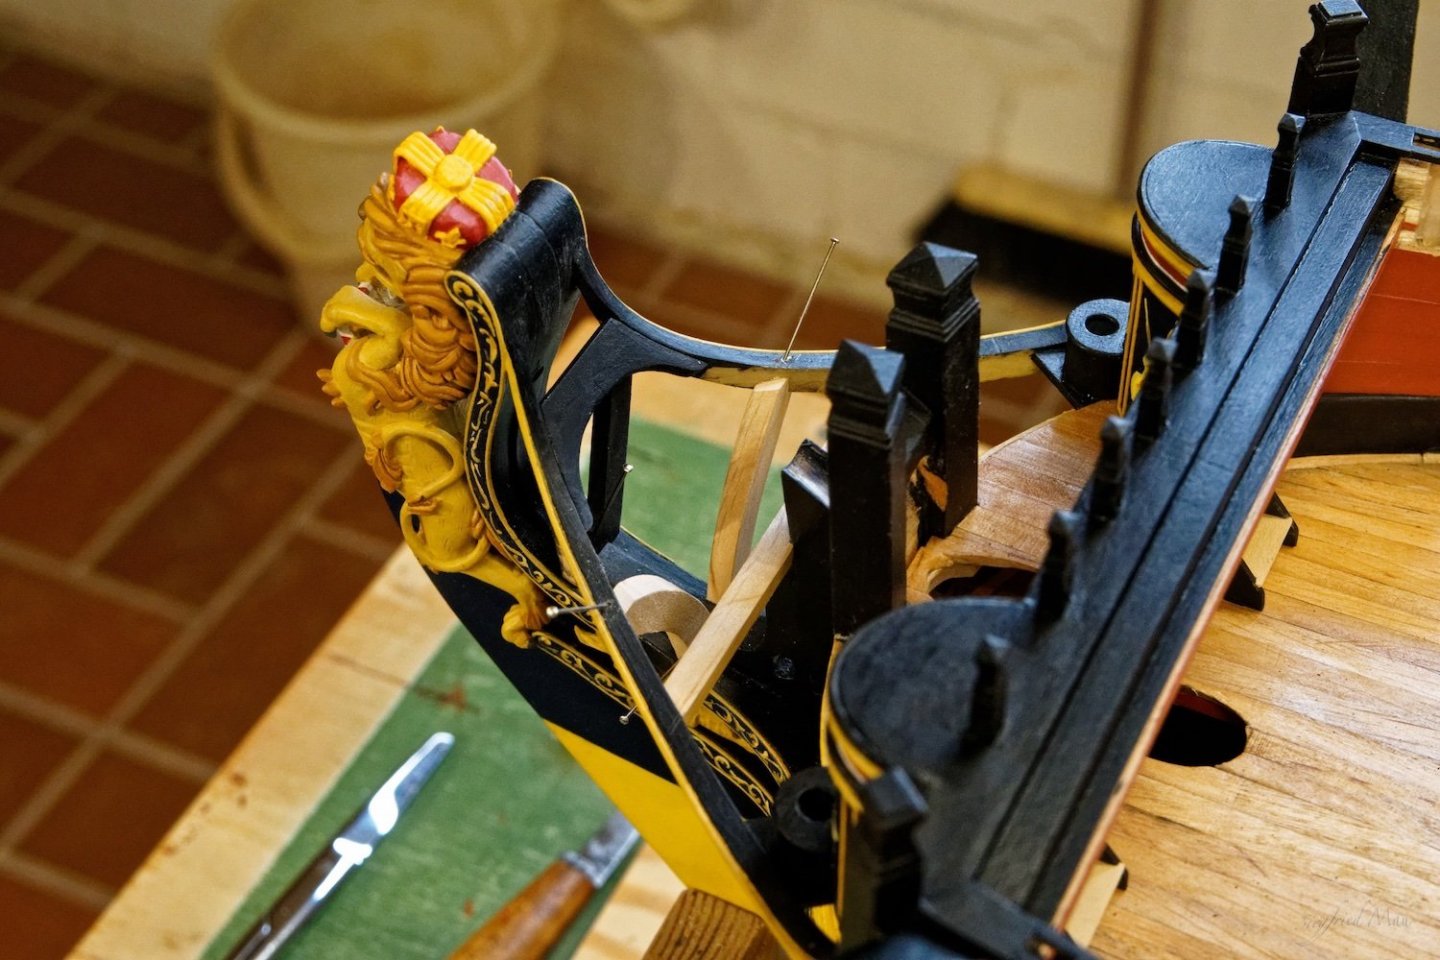
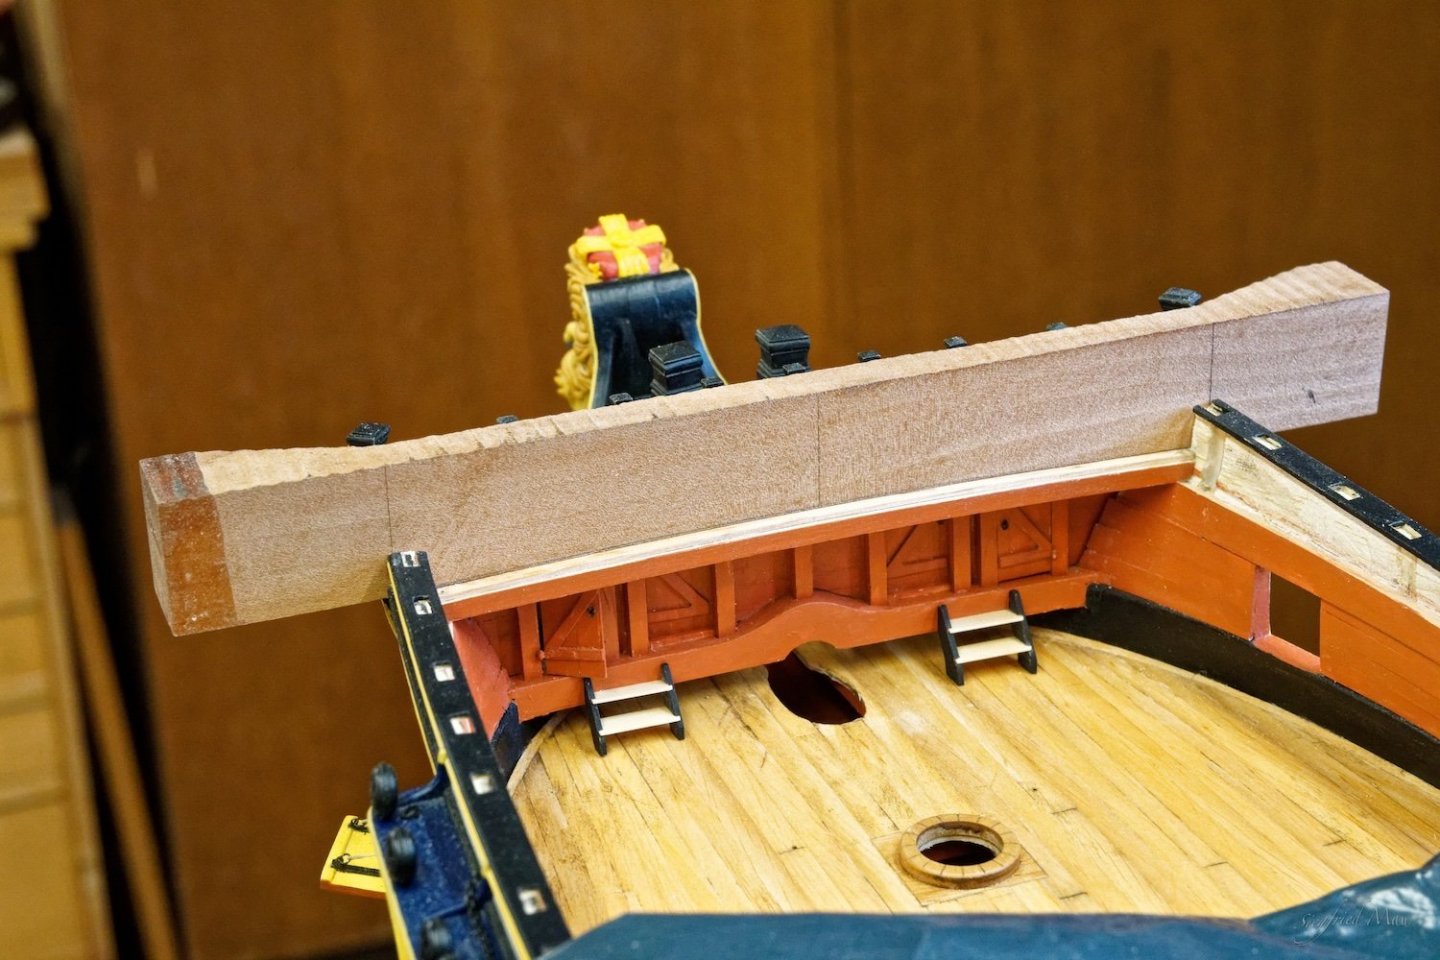
Hello, it is done, the rails are ready. That was more work then expected and not so easy to do. The next things at my list, are the supporter knees for the cathead

-
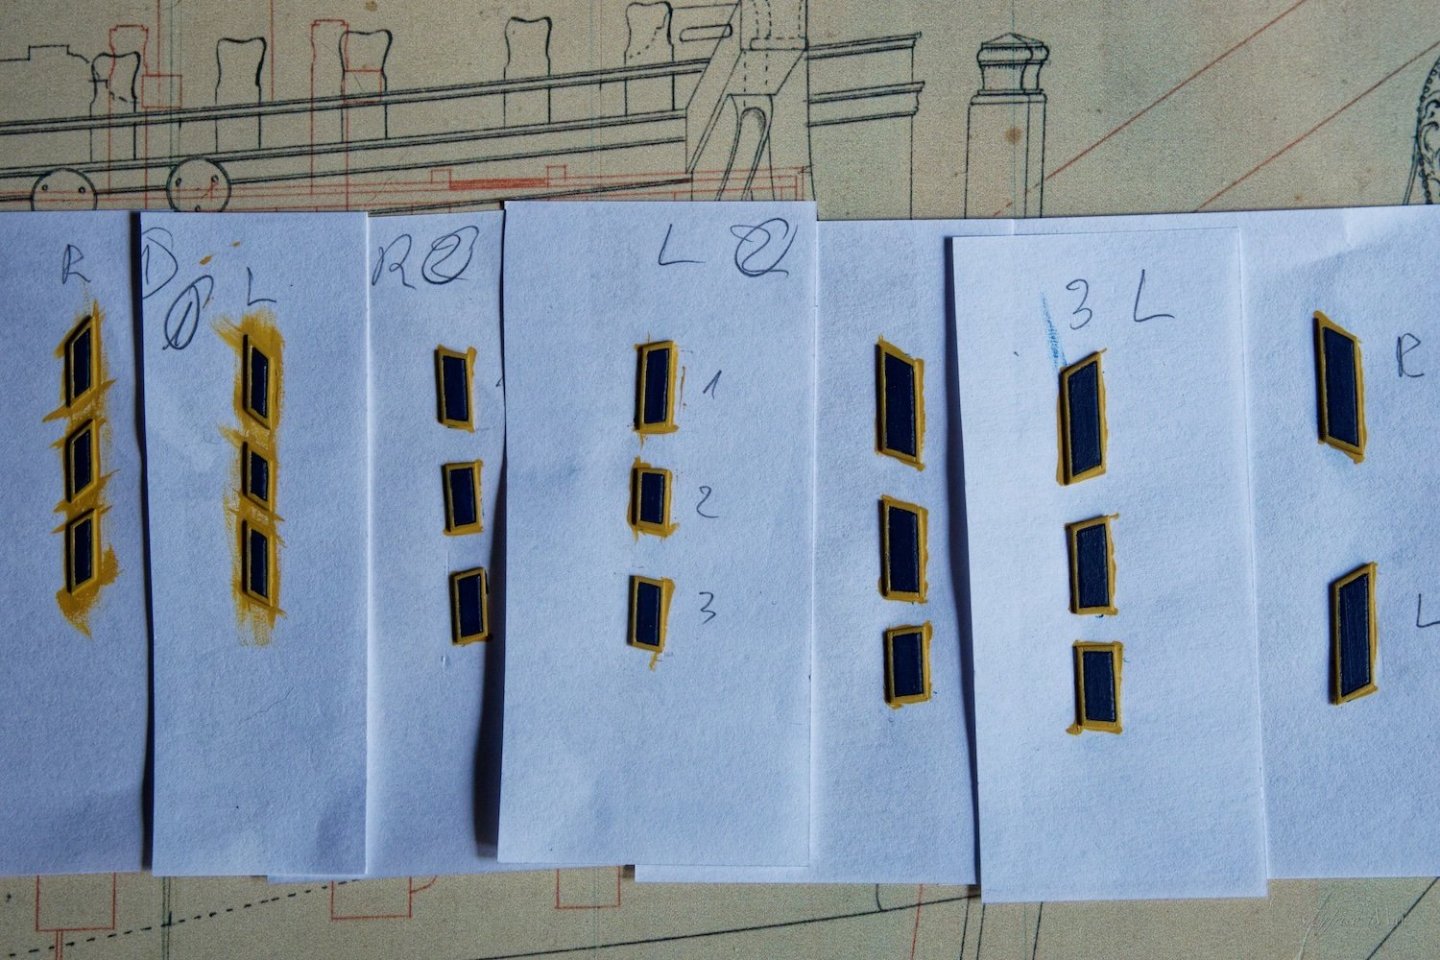
Hello, thank you for your comments and likes I made at least the covers for the stanchions and the last two stanchions. Boy, that where nasty little beasts 🤨 After one afternoon I had one ready! For the second one I needed only 2,5 hours. But now they are ready and build in. When the special artist is in the right mood, he will paint the next time the decoration for the covers.


-
I'm sorry Allan, I thought that I had answered your question already this morning, but I think I was't really wake and did't submit my reply. So the templates are 0,8 mm birch plywood. Thank you also Keith and all others for your likes, I'm overwhelmed.
-
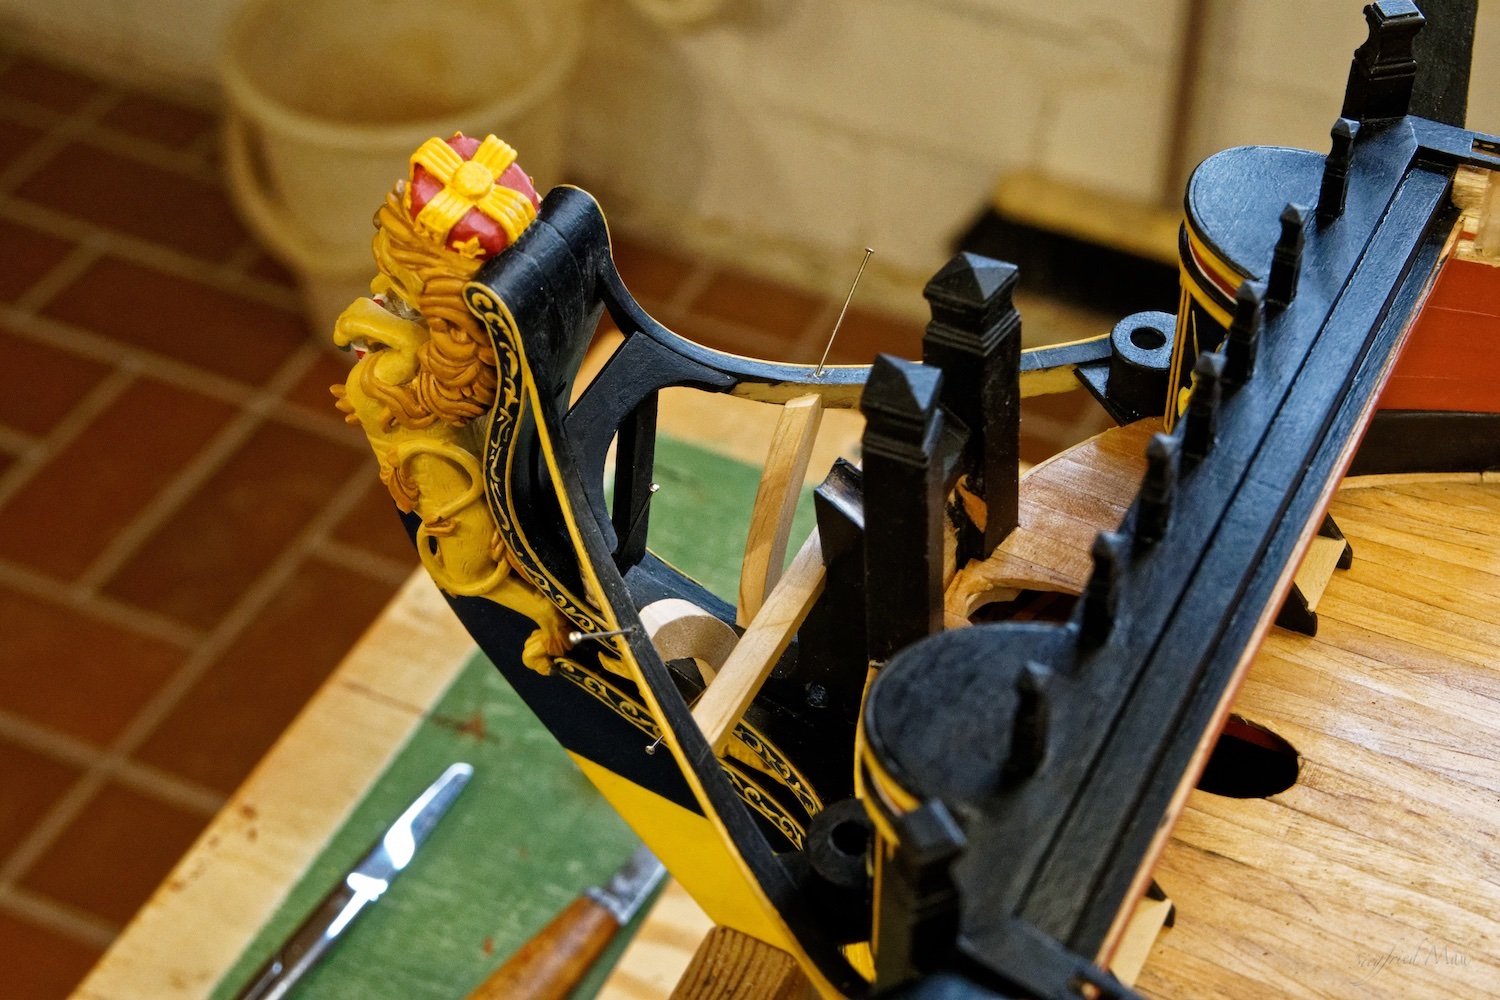
Hello, it is done! The rails are now hard and fast. Now are only the short stanchions at the end of the upper rails and the painted covers for the stanchions left.


-
Hello, the carpenters where busy today and made the mouldings at the rails. I will ask the painter, if he will paint them this evening. I think for an extra beer it could work 😉

-
Hello, thank you Gary and all others for your likes, today only a short update, I cut out the rails and fitted them in. The stanchions now are also fast installed. The next step would be to give these rails there contours.
-
Hello, yes, they are tricky Druxey. But I think, now I got it. The forth version of the upper rail and the stanchion to the right looks more like a piece of plywood. But some fine tuning here and there and a lot of paint and it is't to be distinguish with a good head. We will see how it looks with the real rails.

-
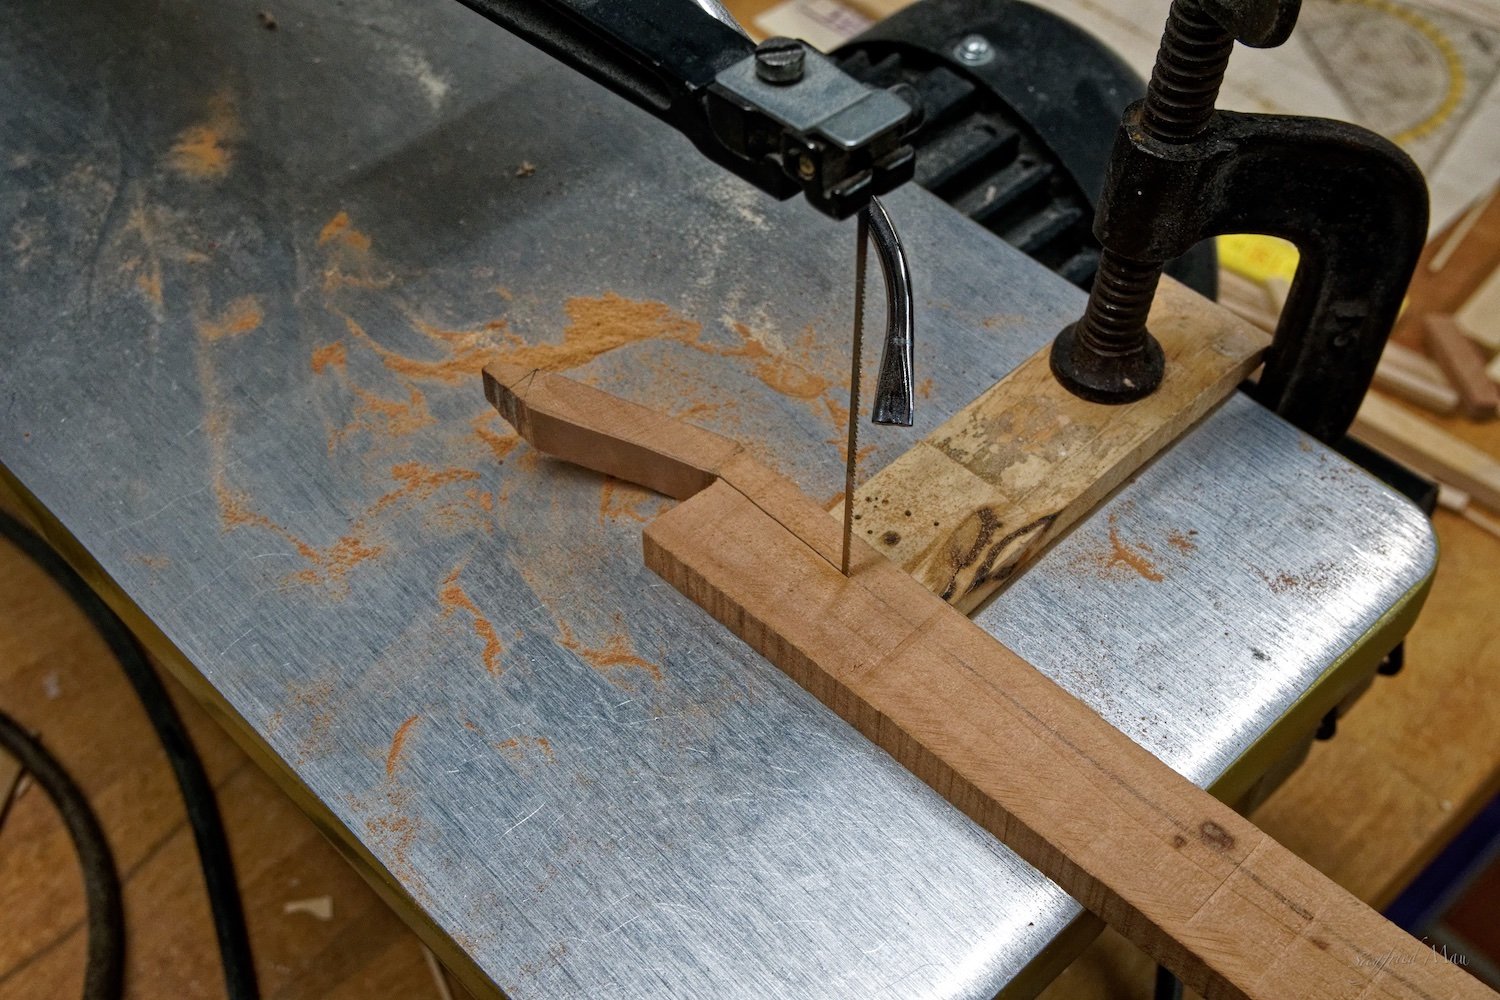
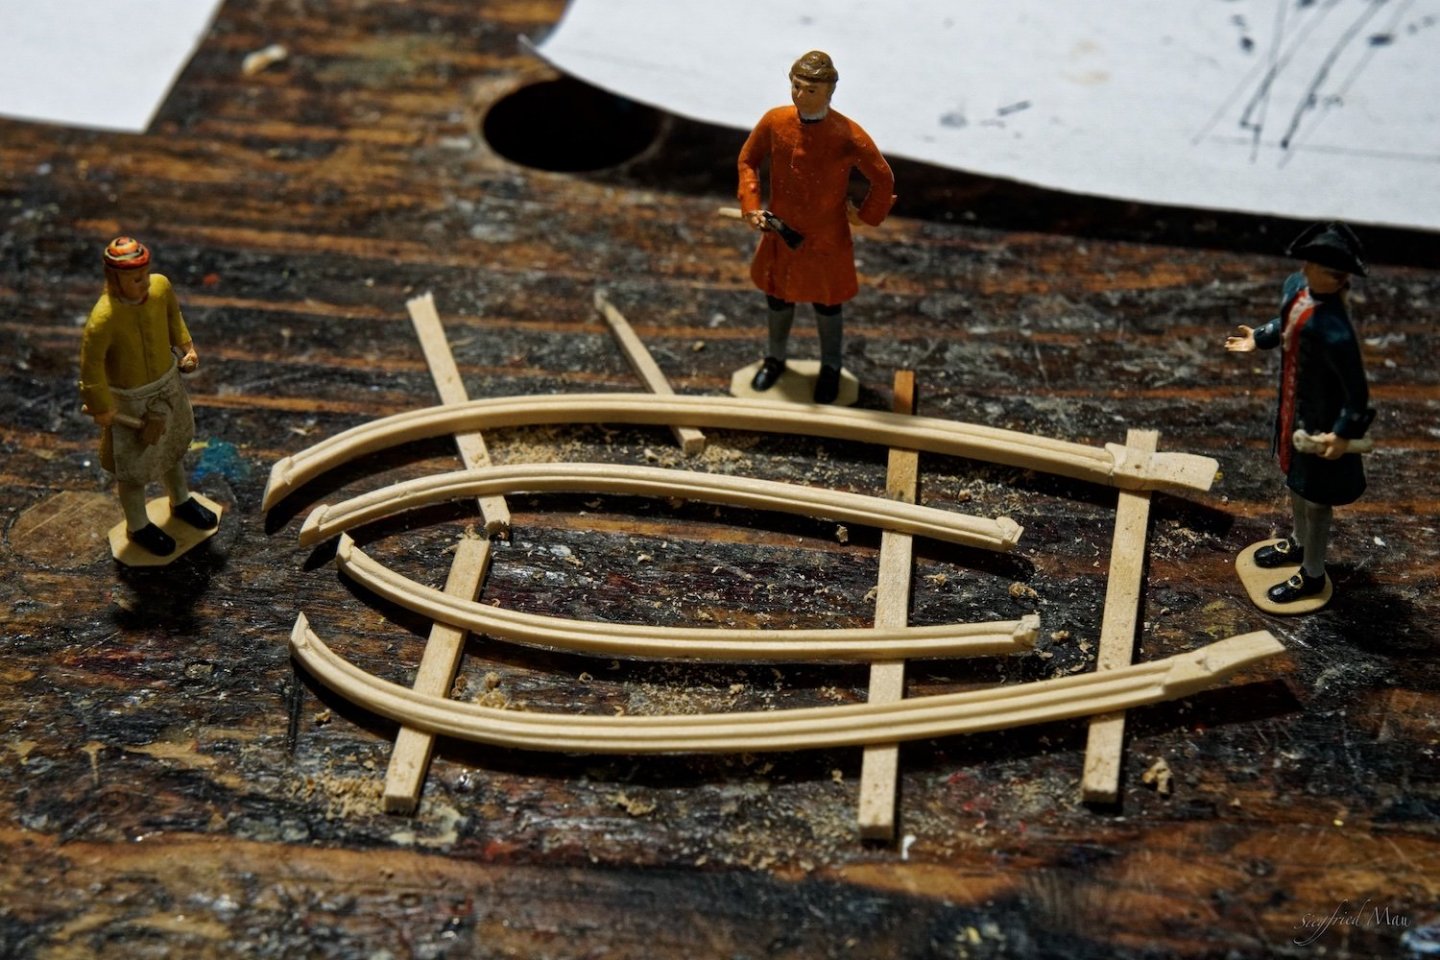
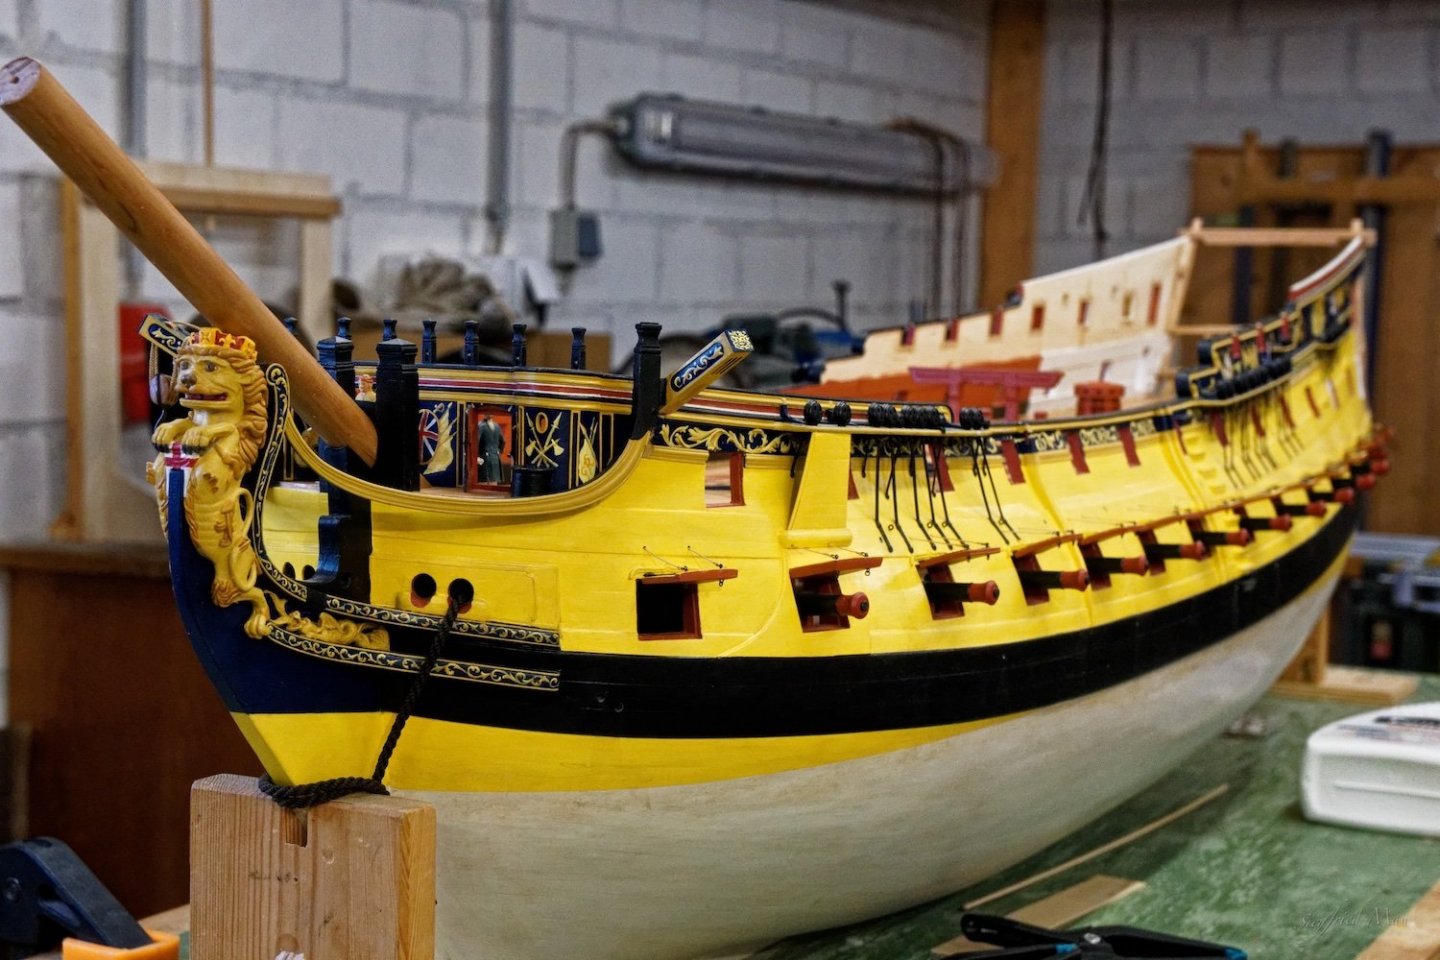
Hello, today I was for some time back at the yard and I tried to fit the rails into the stanchions. The rails are just templates to see how they fit and what I have to change. And at least you see at a picture the most faults. But I think, this version will do it.
-
Michael, that is at least a good alternative to ship models. But you should plan more then one day for that. It is huge, and the International Maritimes Museum is not far away.
-
Thank you Albert and Michael, and also all others for your likes. Michael did you like to see the Reeperbahn in Hamburg? 😉 But there are also great museums with ship models, and at least the Peking. At the moment I'm puzzling out how the stanchions and rails might fit together, puh. But also the garden needs my attention, so it may take some time.
-
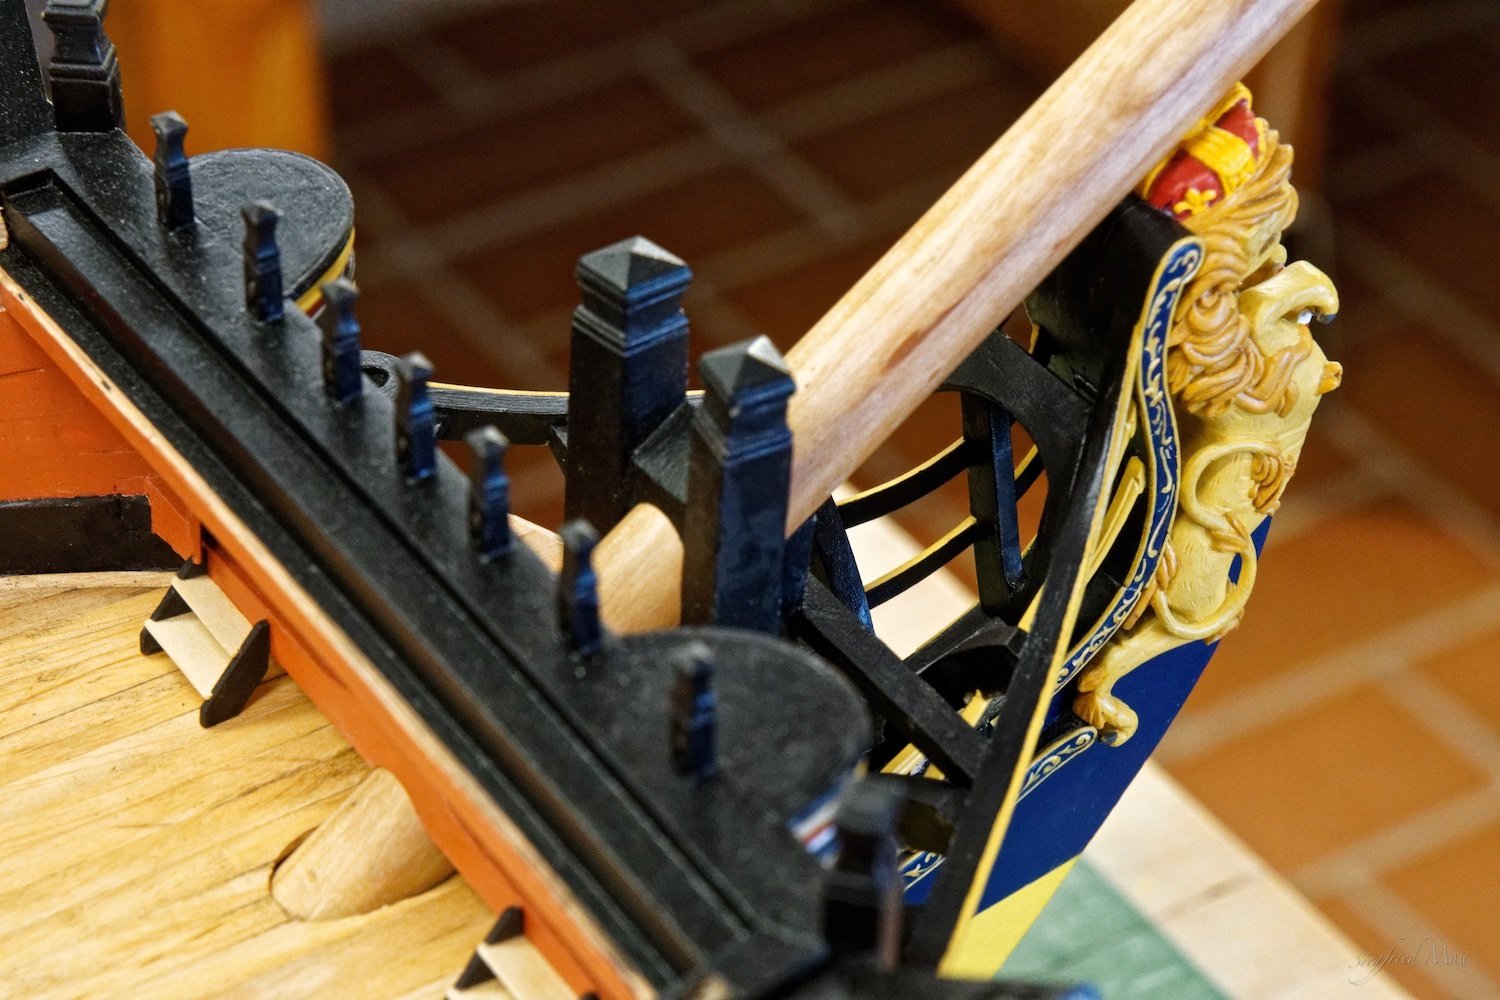
Hello, we are back at the yard and I'm busy with the stanchions for the head rails. 😰

-
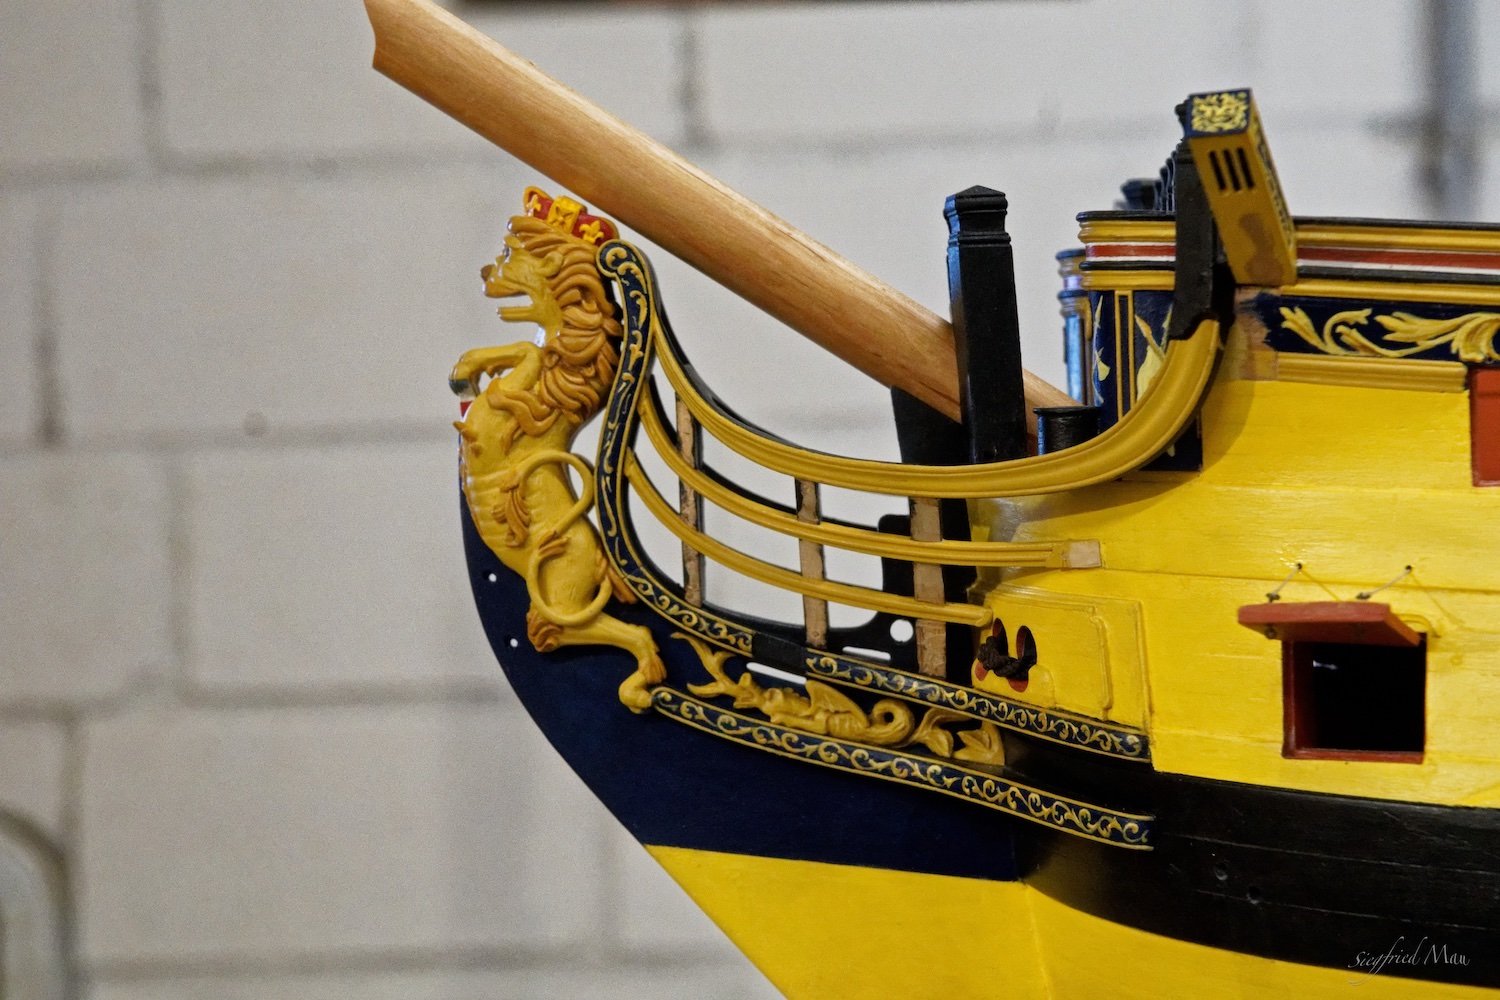
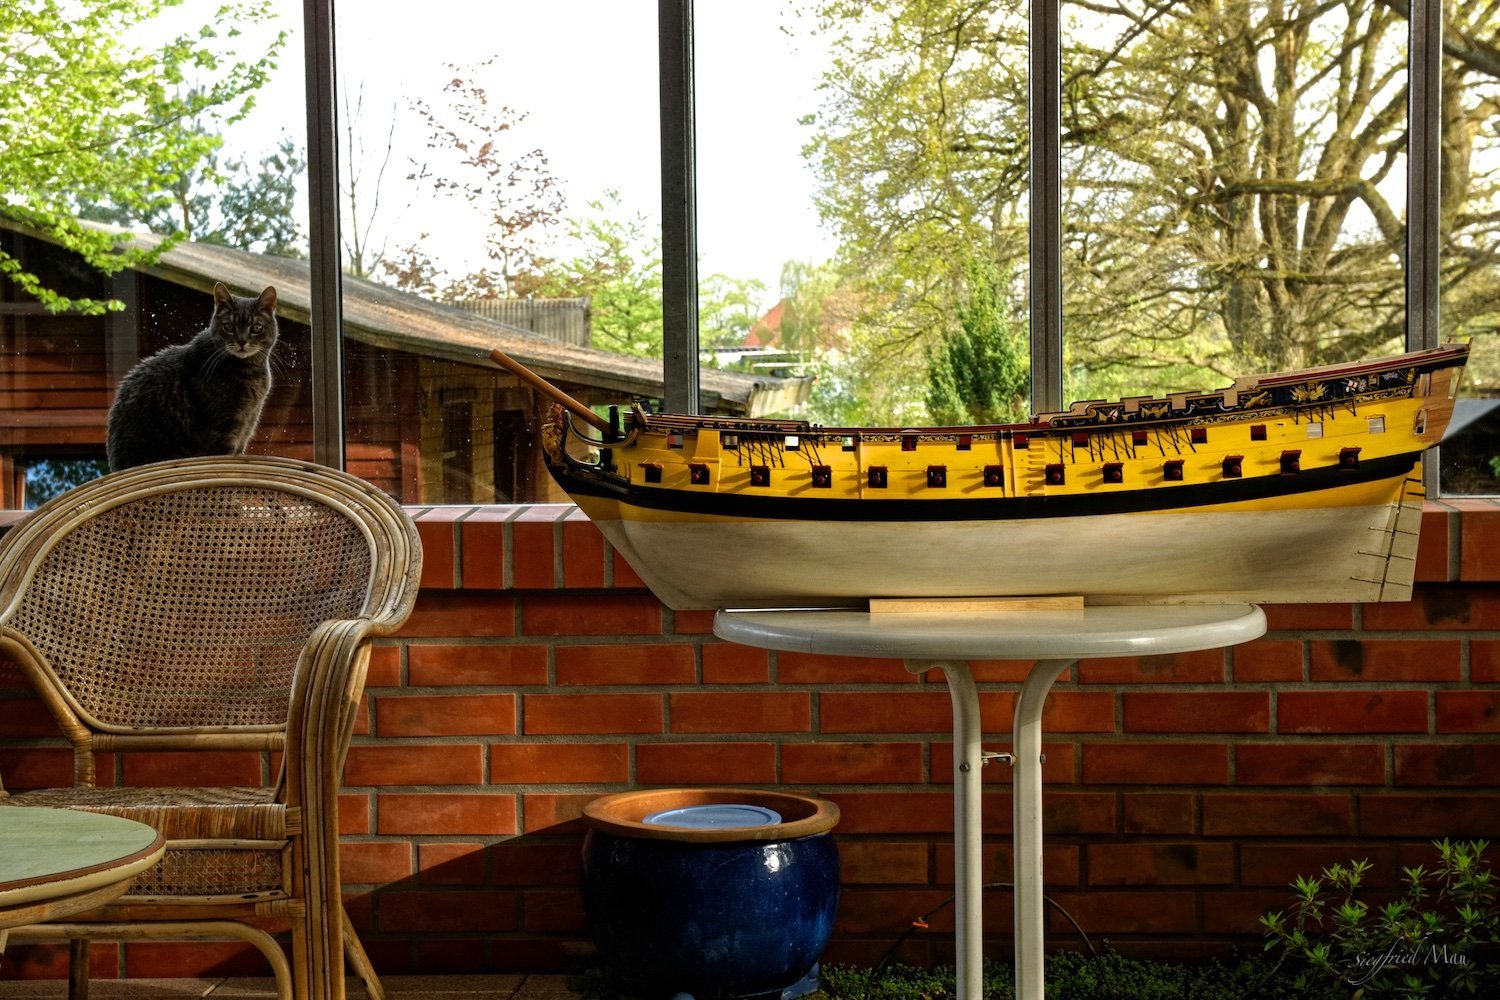
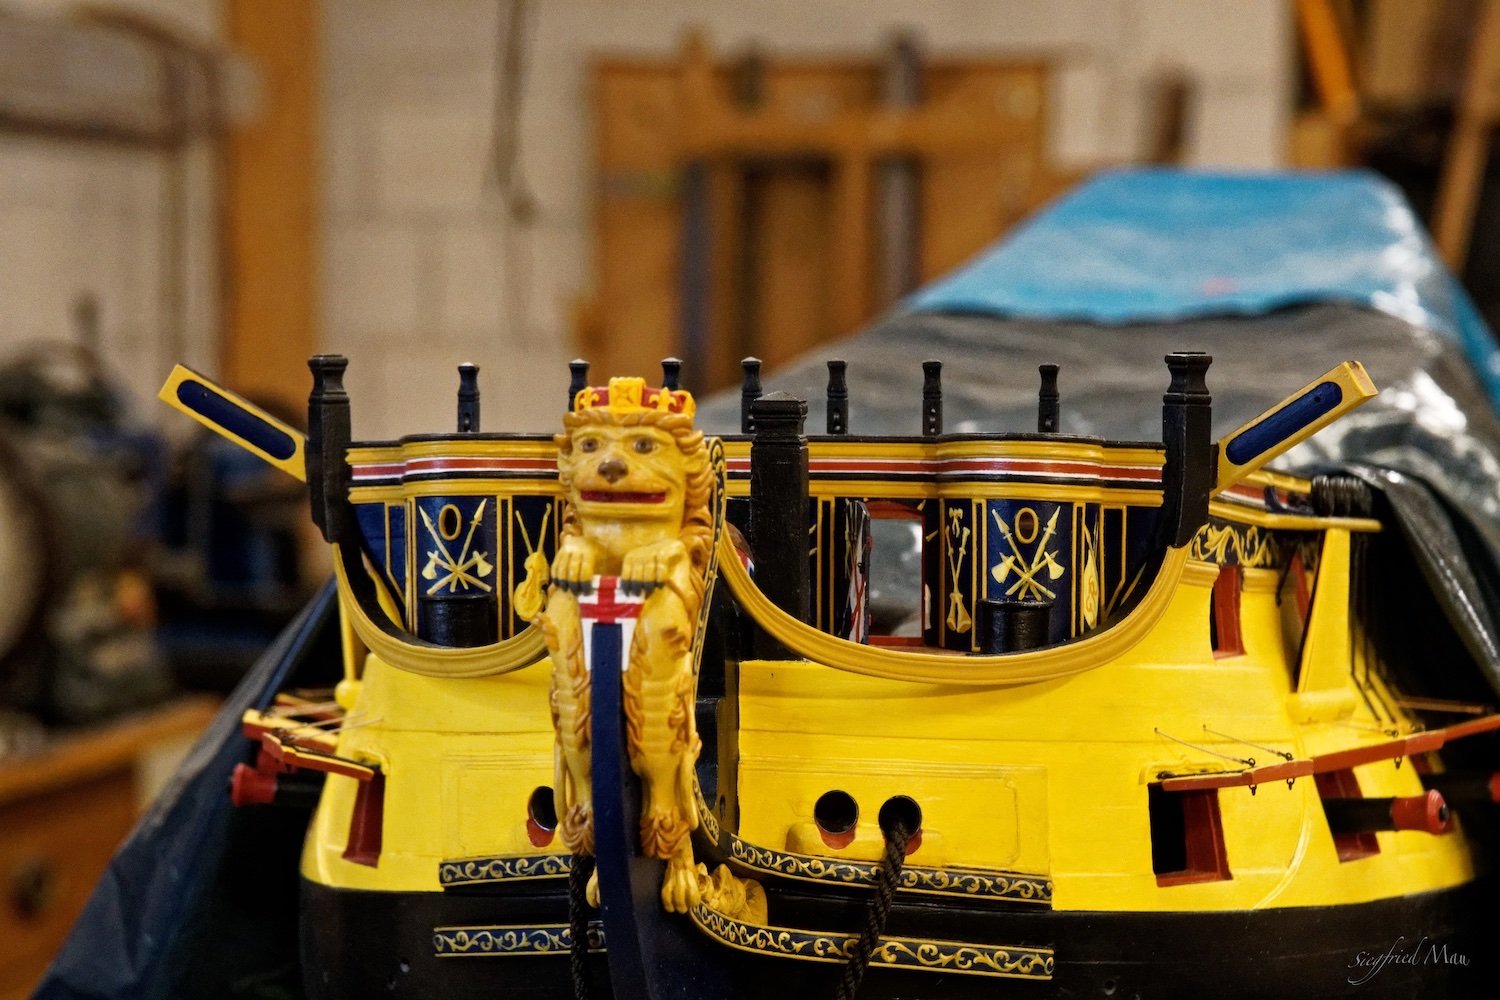
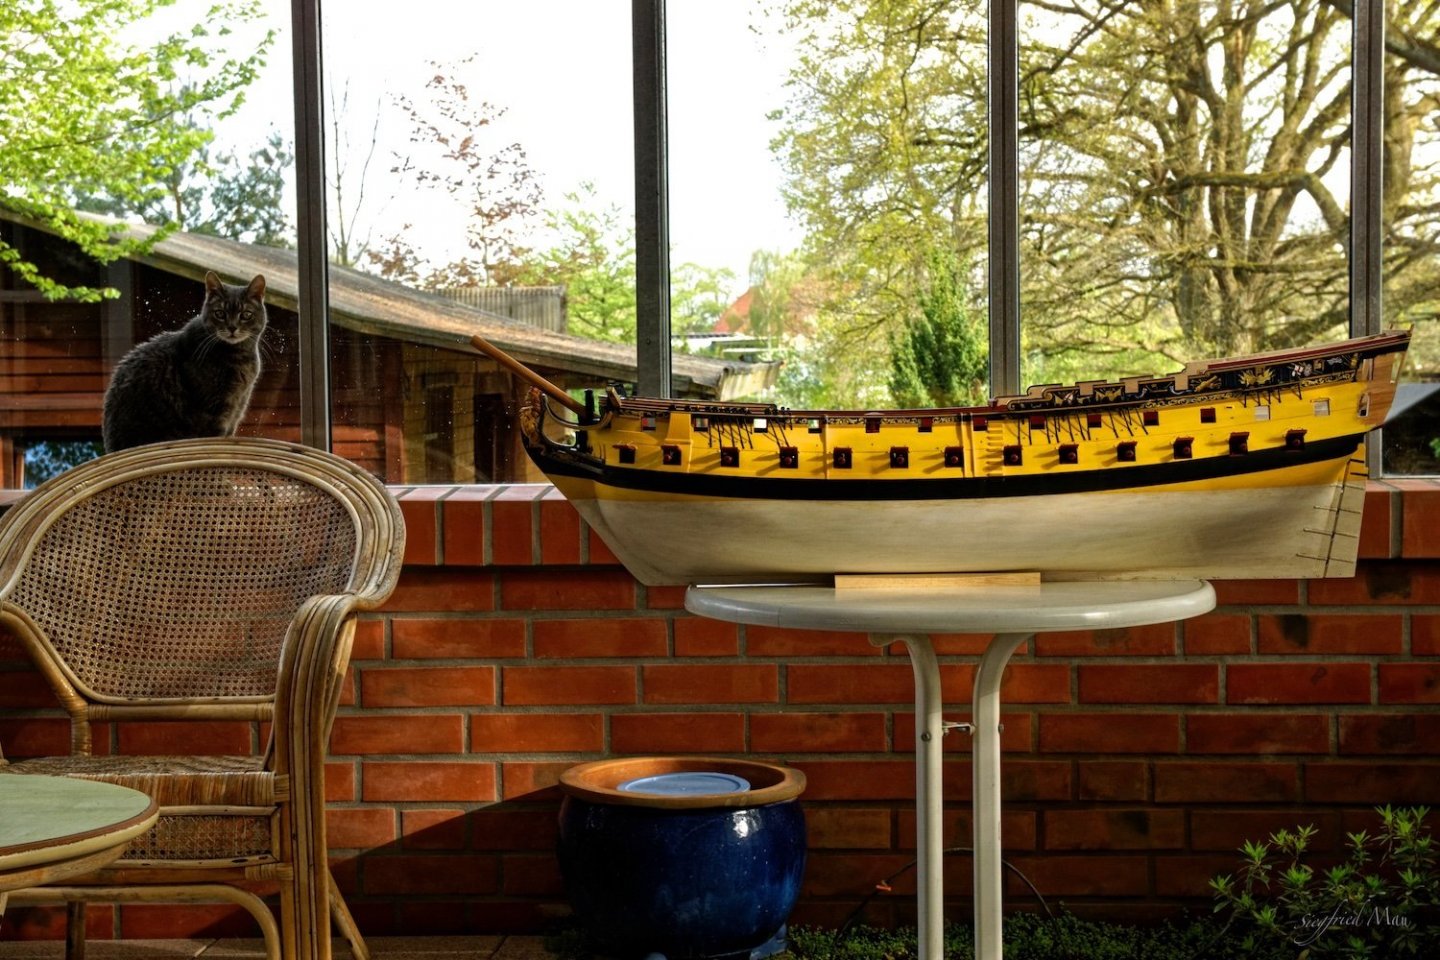
Hello, the Tiger and I decided to have a brake at the yard and enjoy the beautiful spring here. To the left you see the real Tiger, my model for tigers and lions. 😉
-
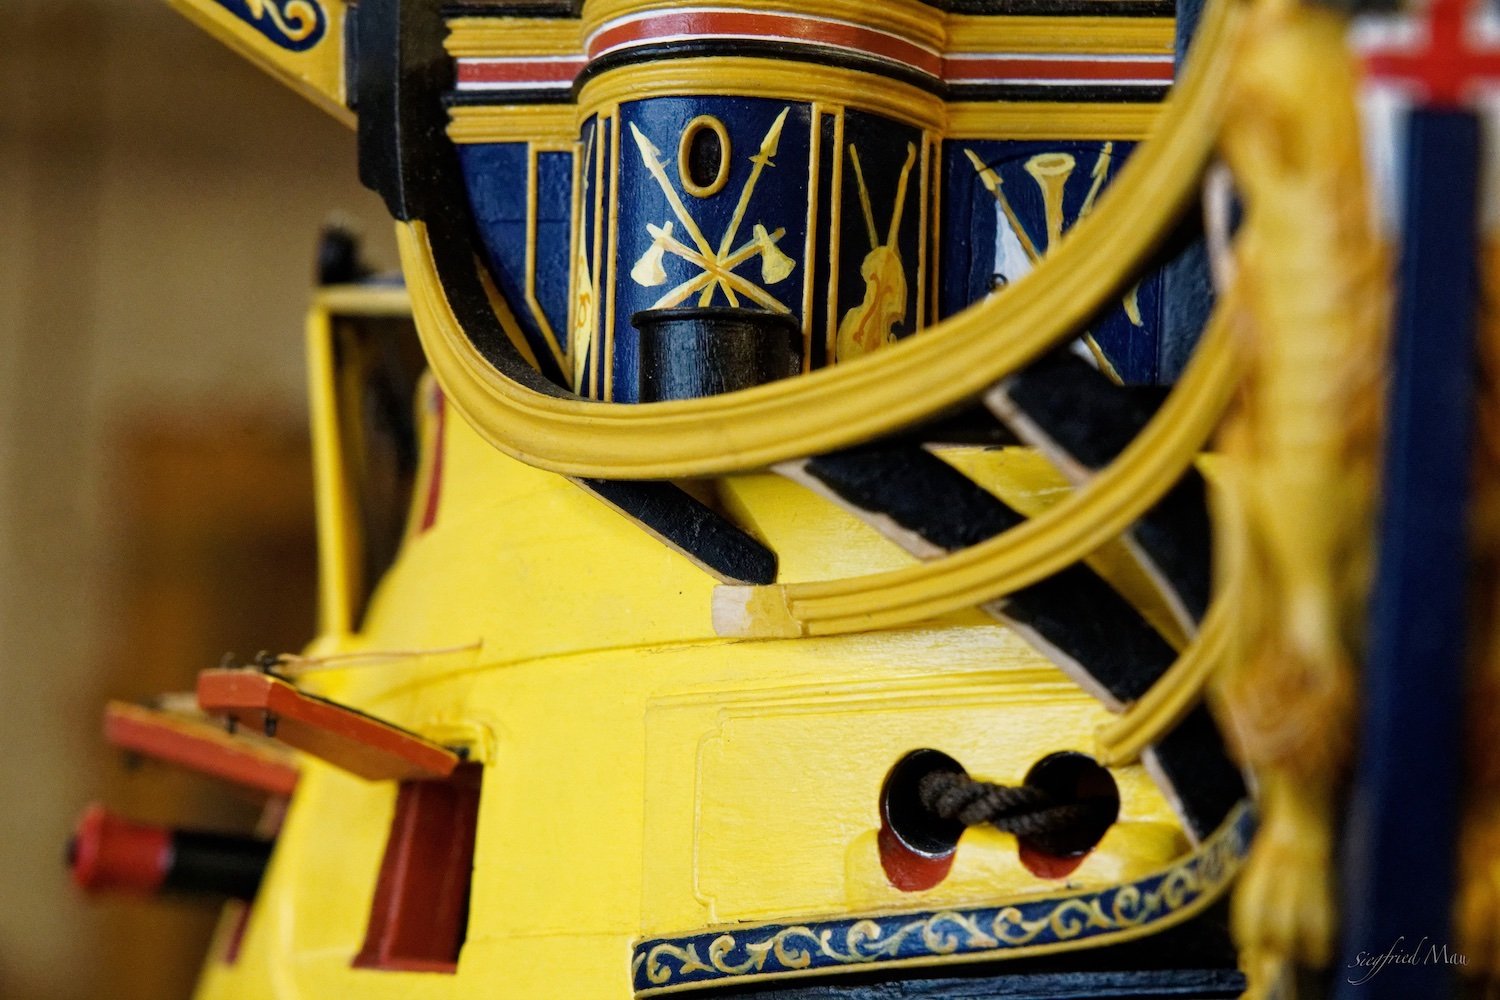
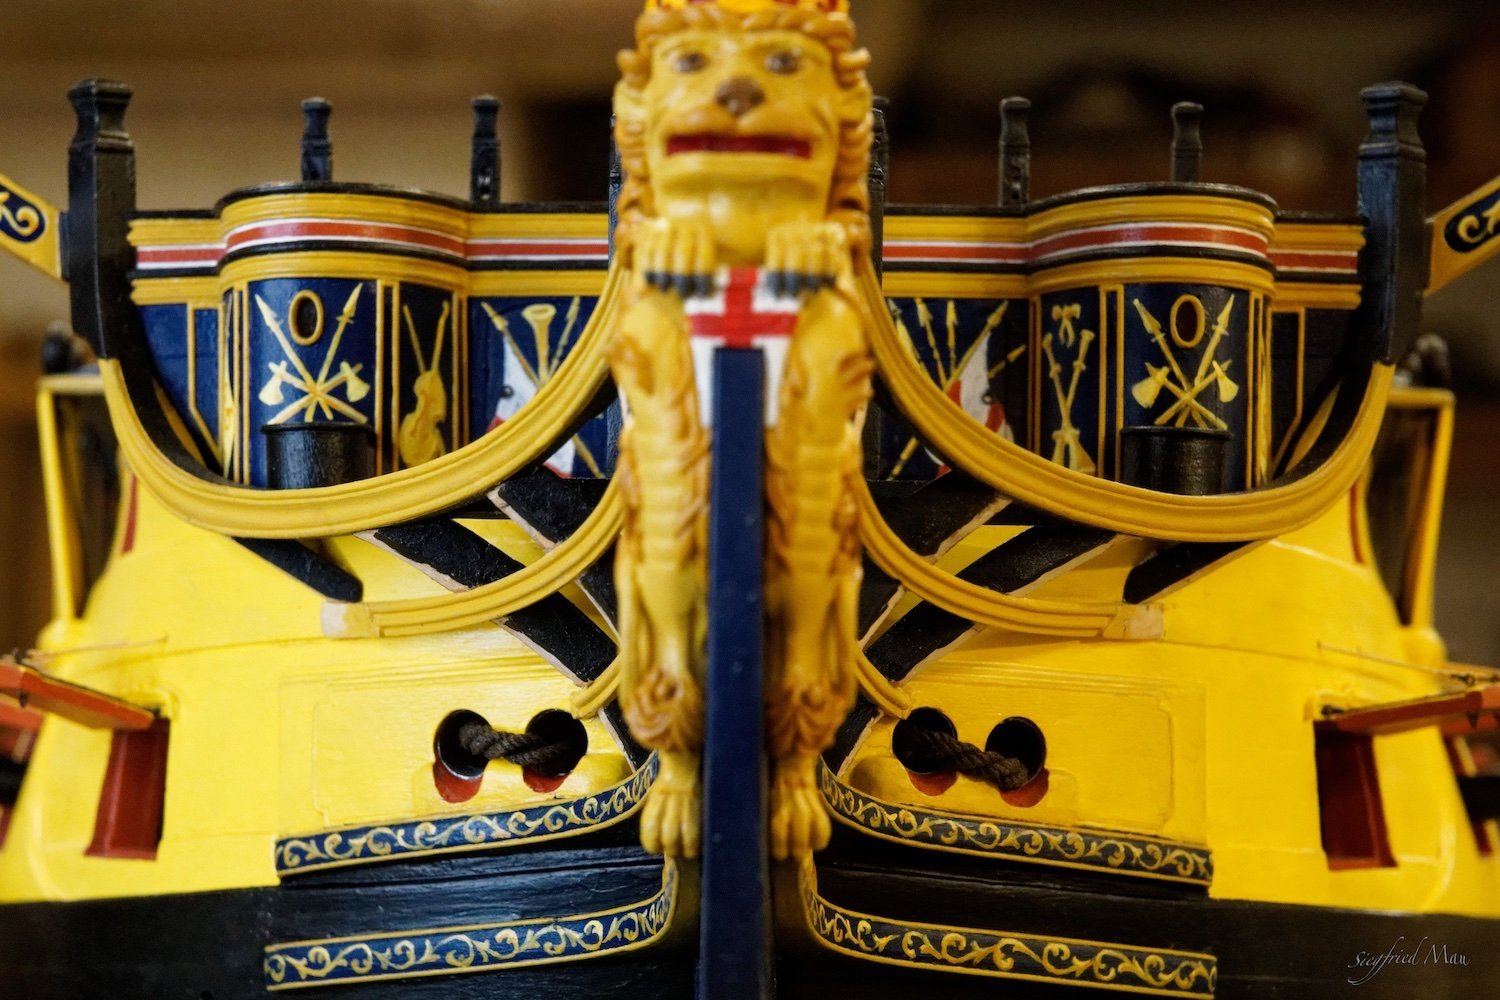
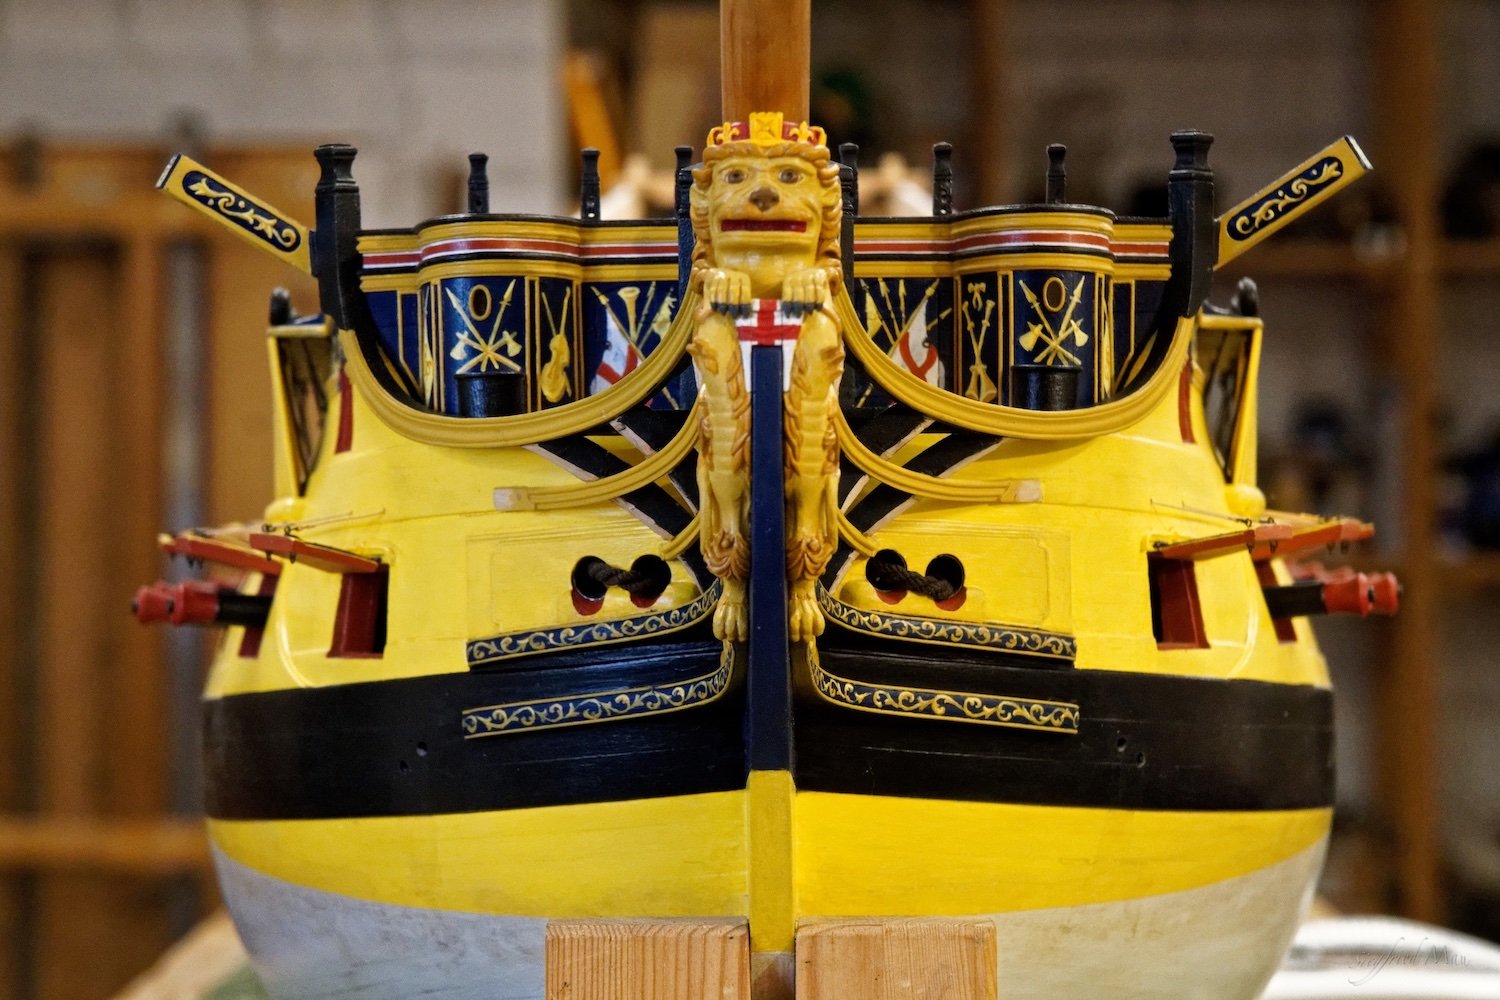
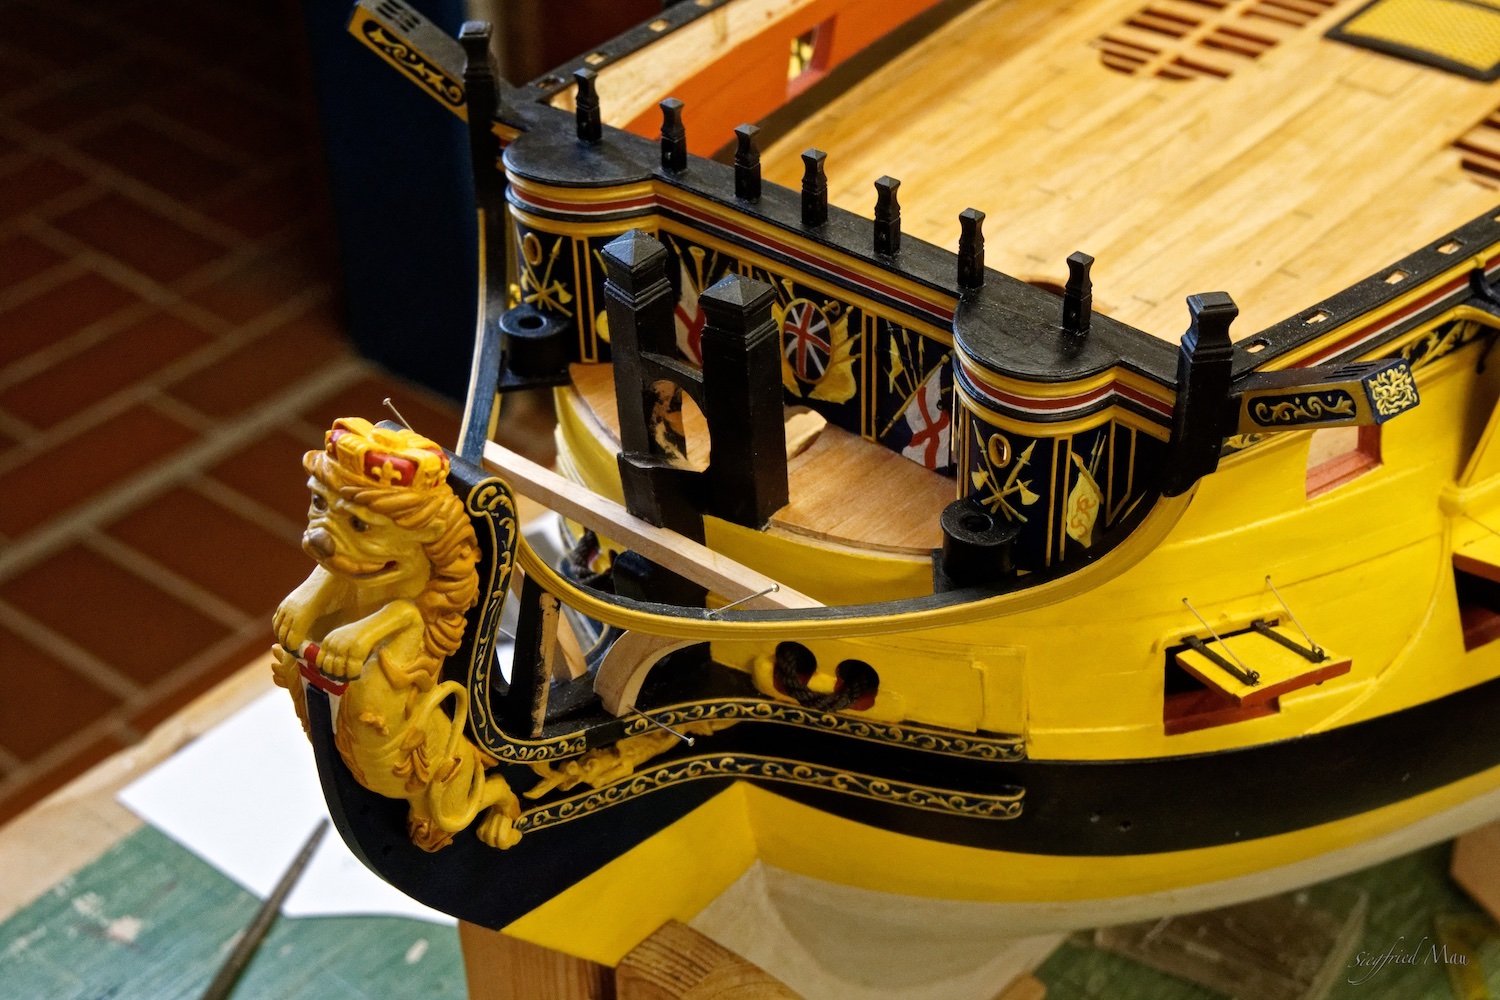
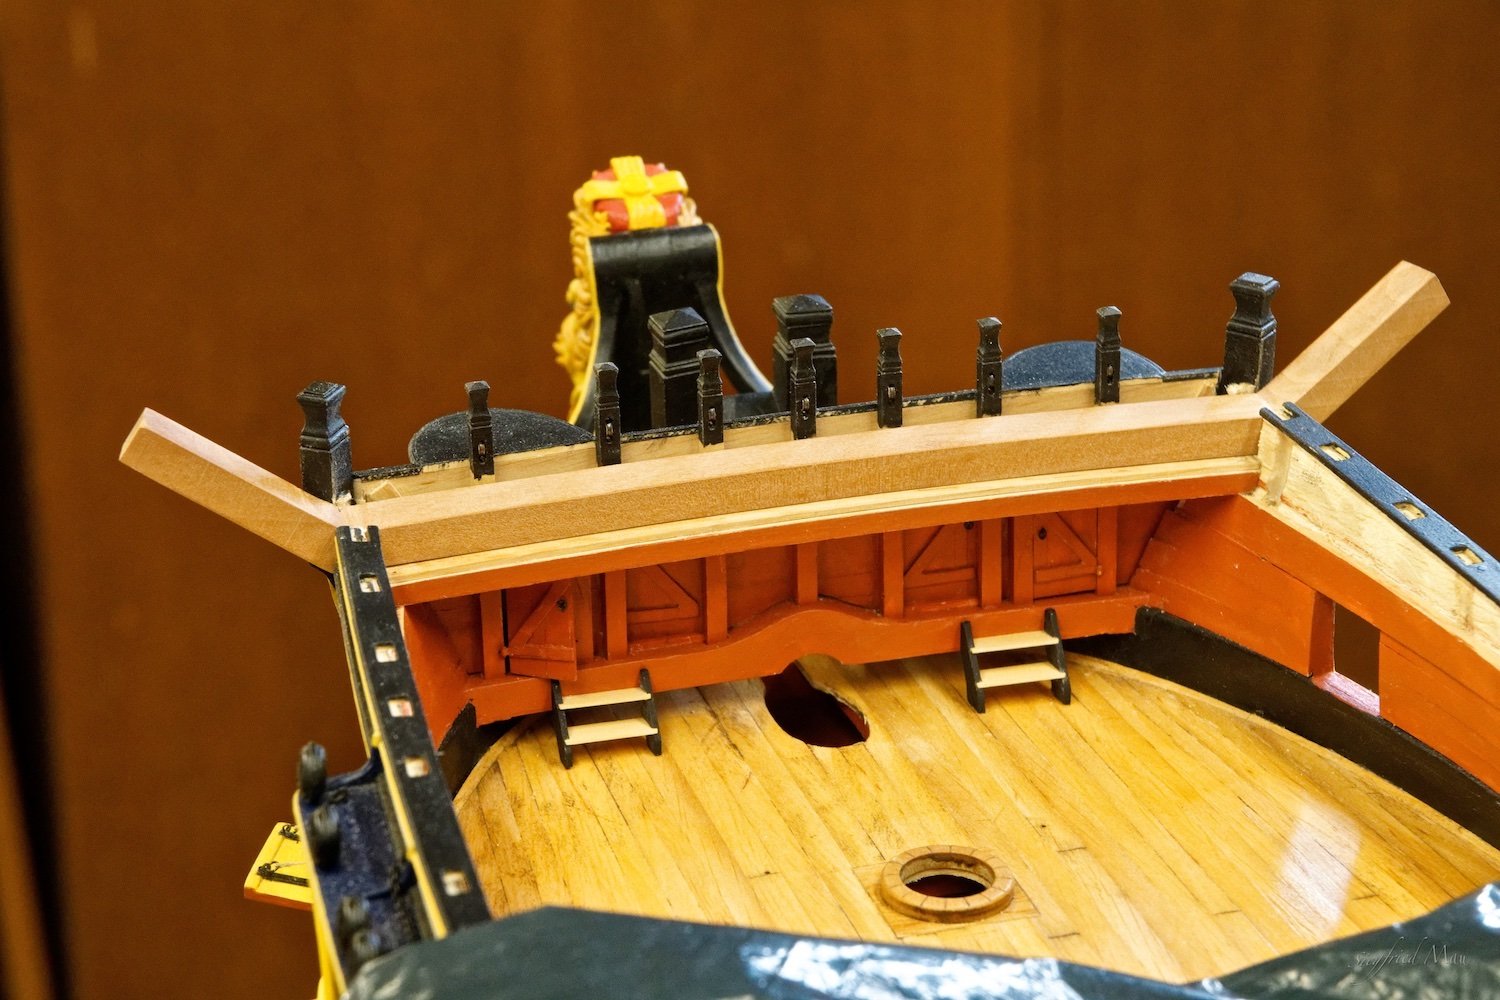
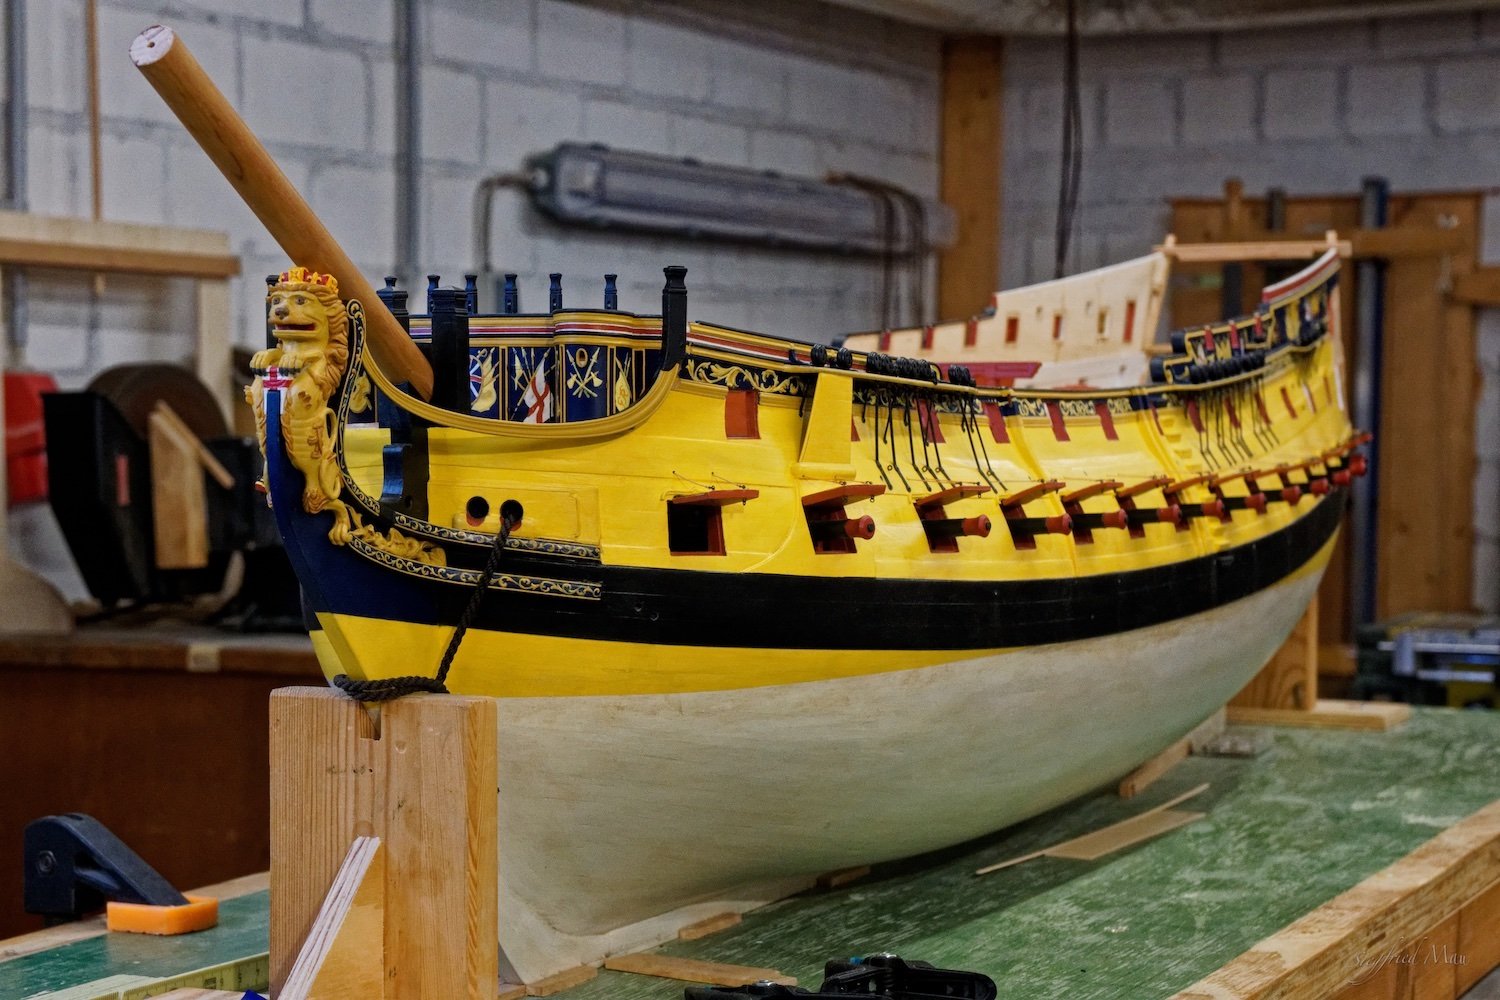
Hello and many thanks for your nice comments and likes. the last days I finished the drift rail here at the fore castel. I took her out of the basement, so that the paint could dry better. Since I changed there my light system to LED, is that a problem. The next days I would first build the rest of the head rails and then the cat head supporter. So it may take some time before you hear again from me.

-
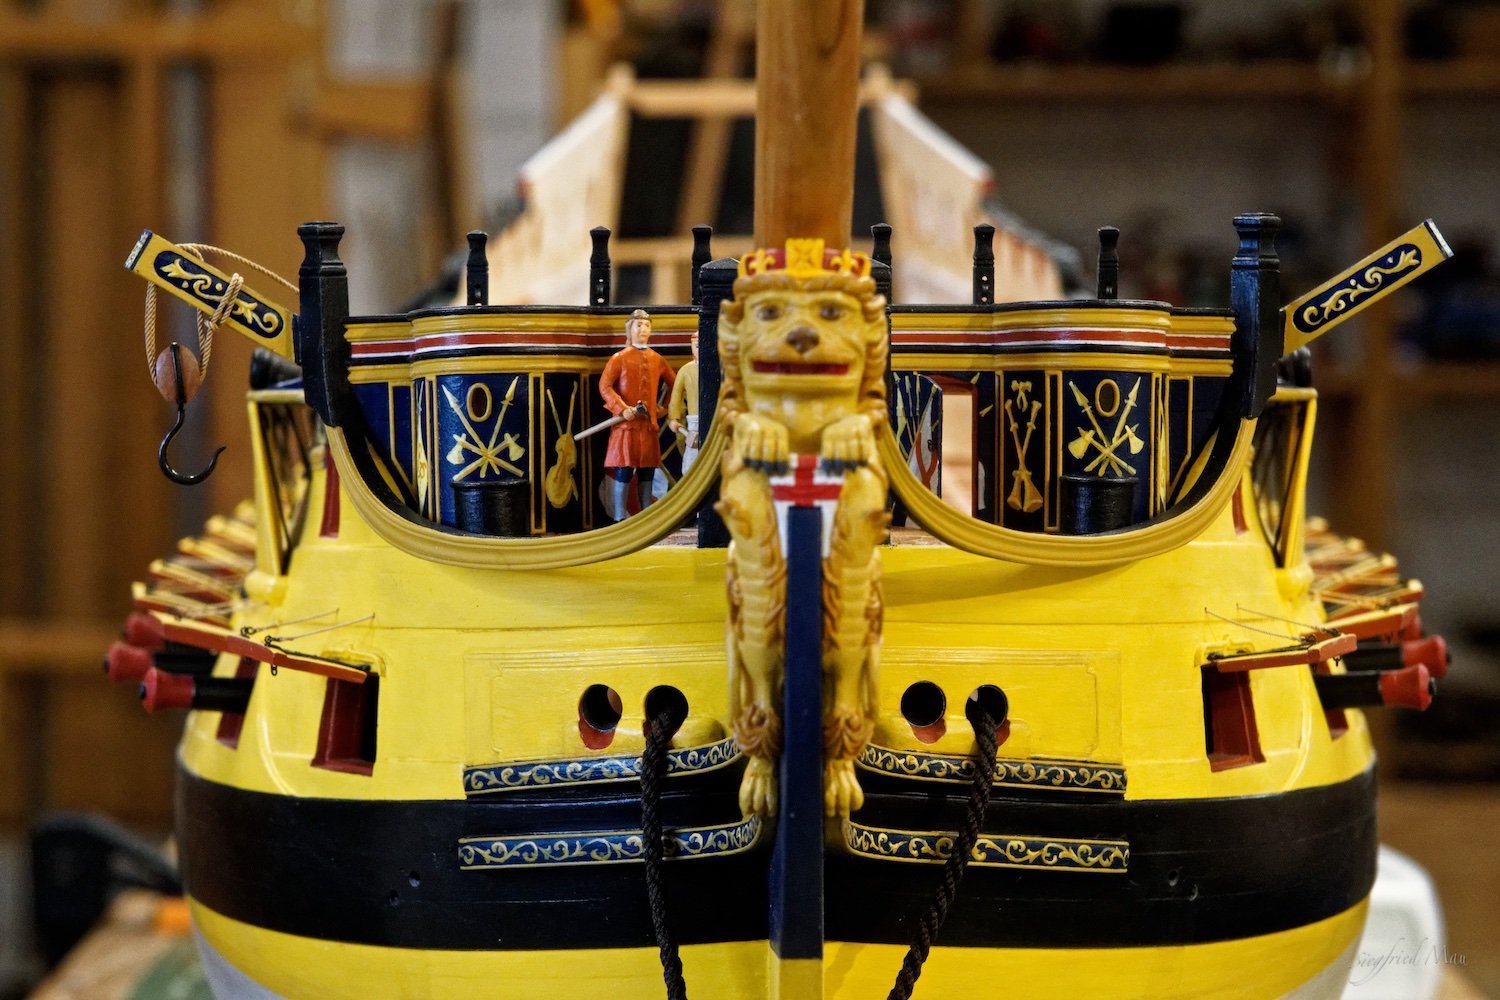
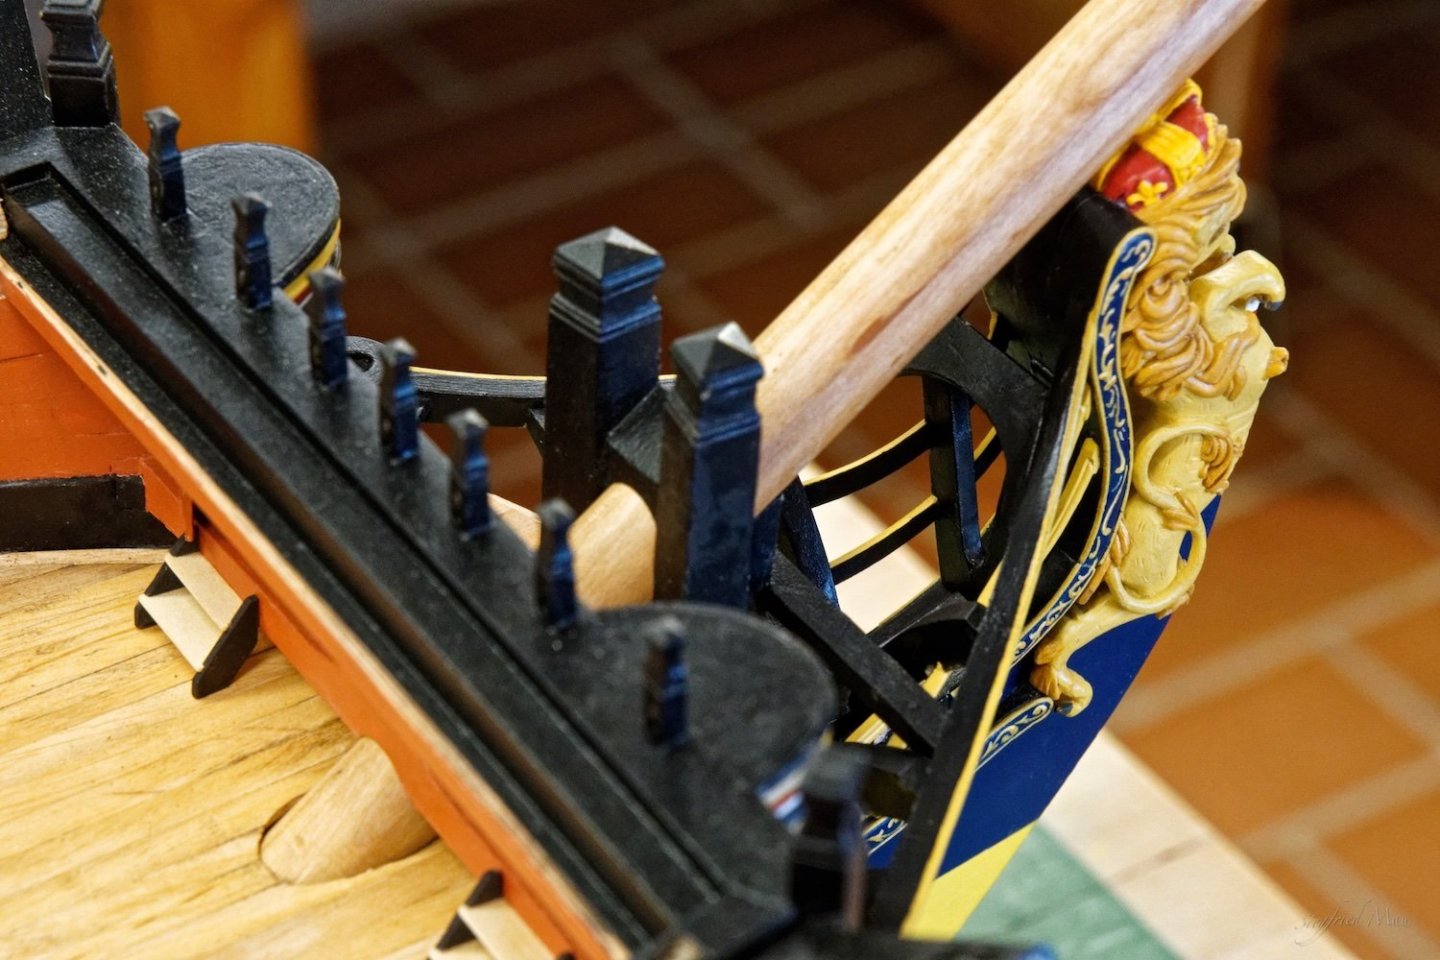
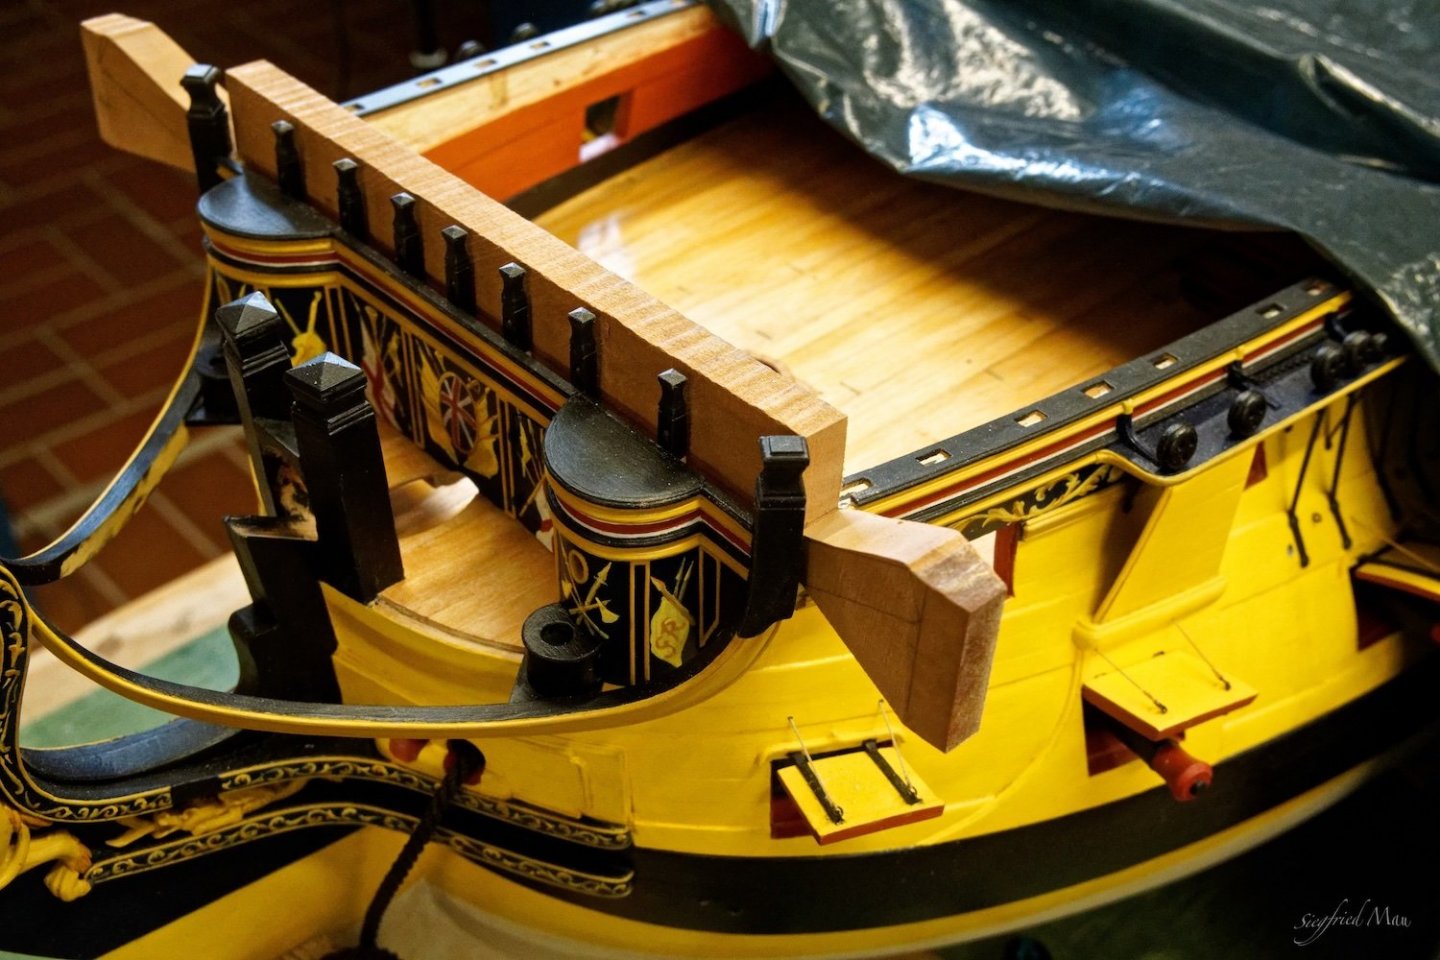
Hello, except for his knee, the cat head is now ready. The knees comes then together with the rest of the head rails. But before that I would build the rest drift rails around the beakhead bulkhead.


-
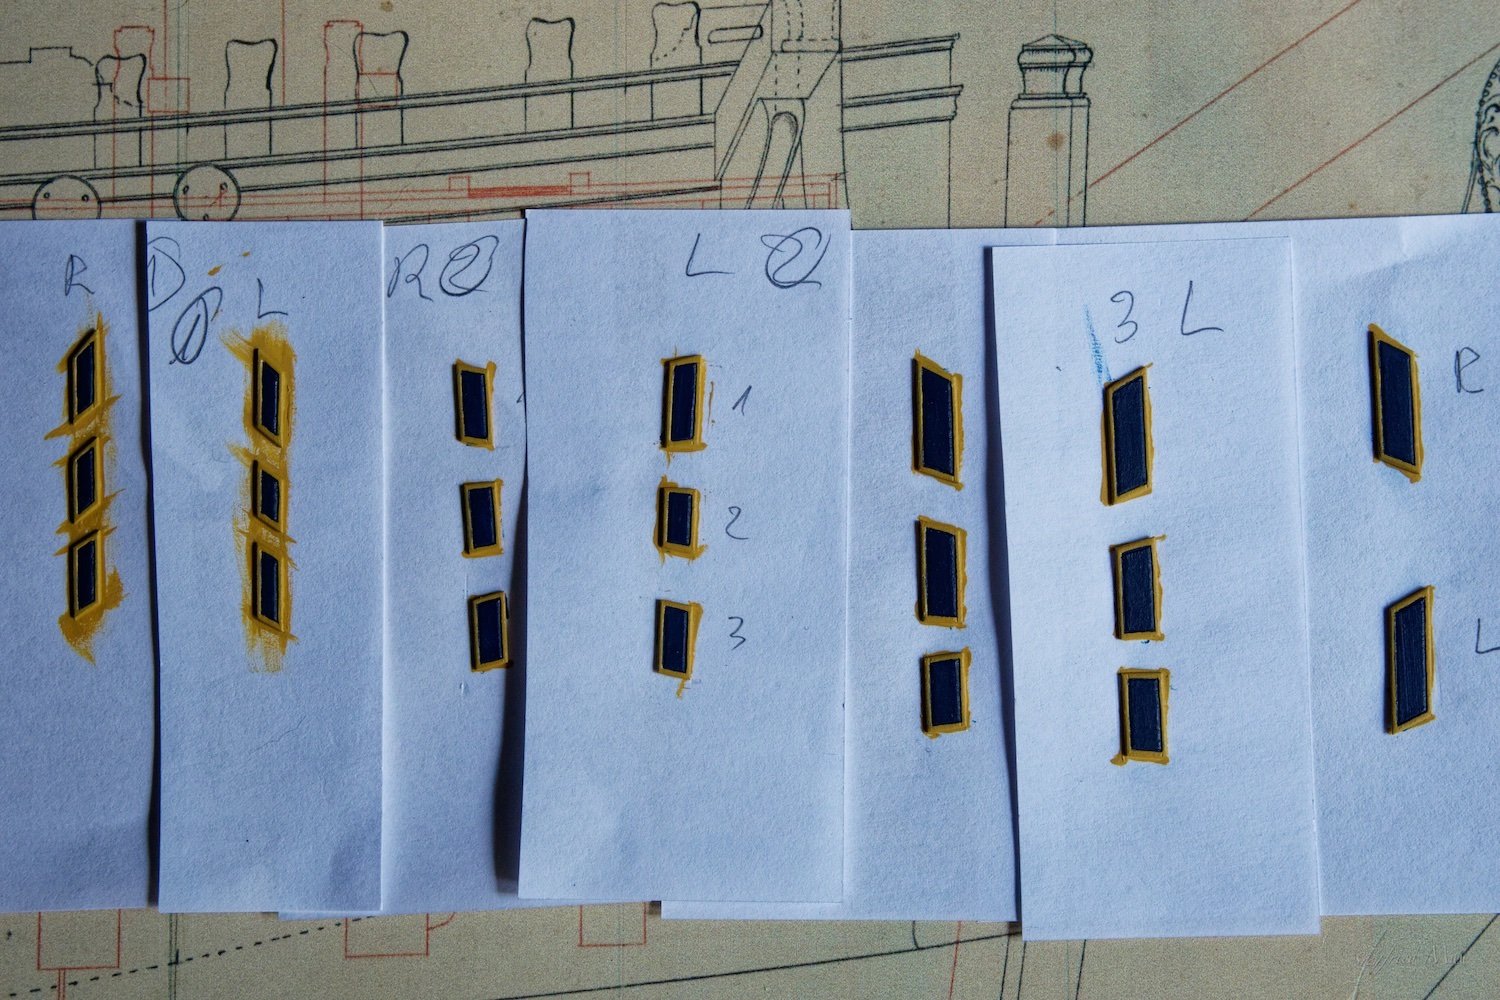
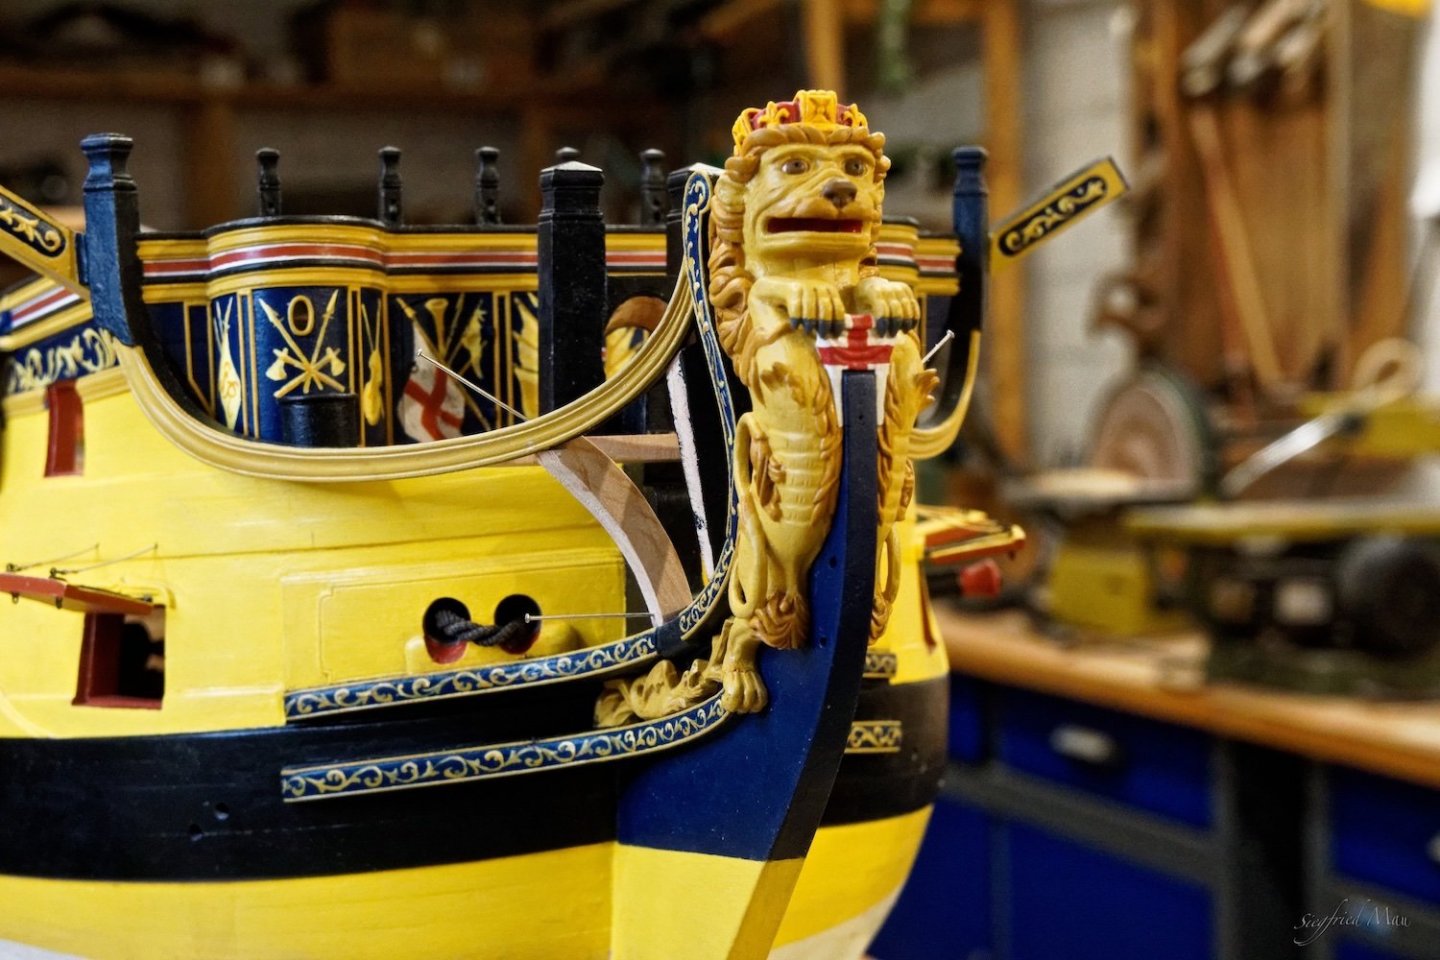
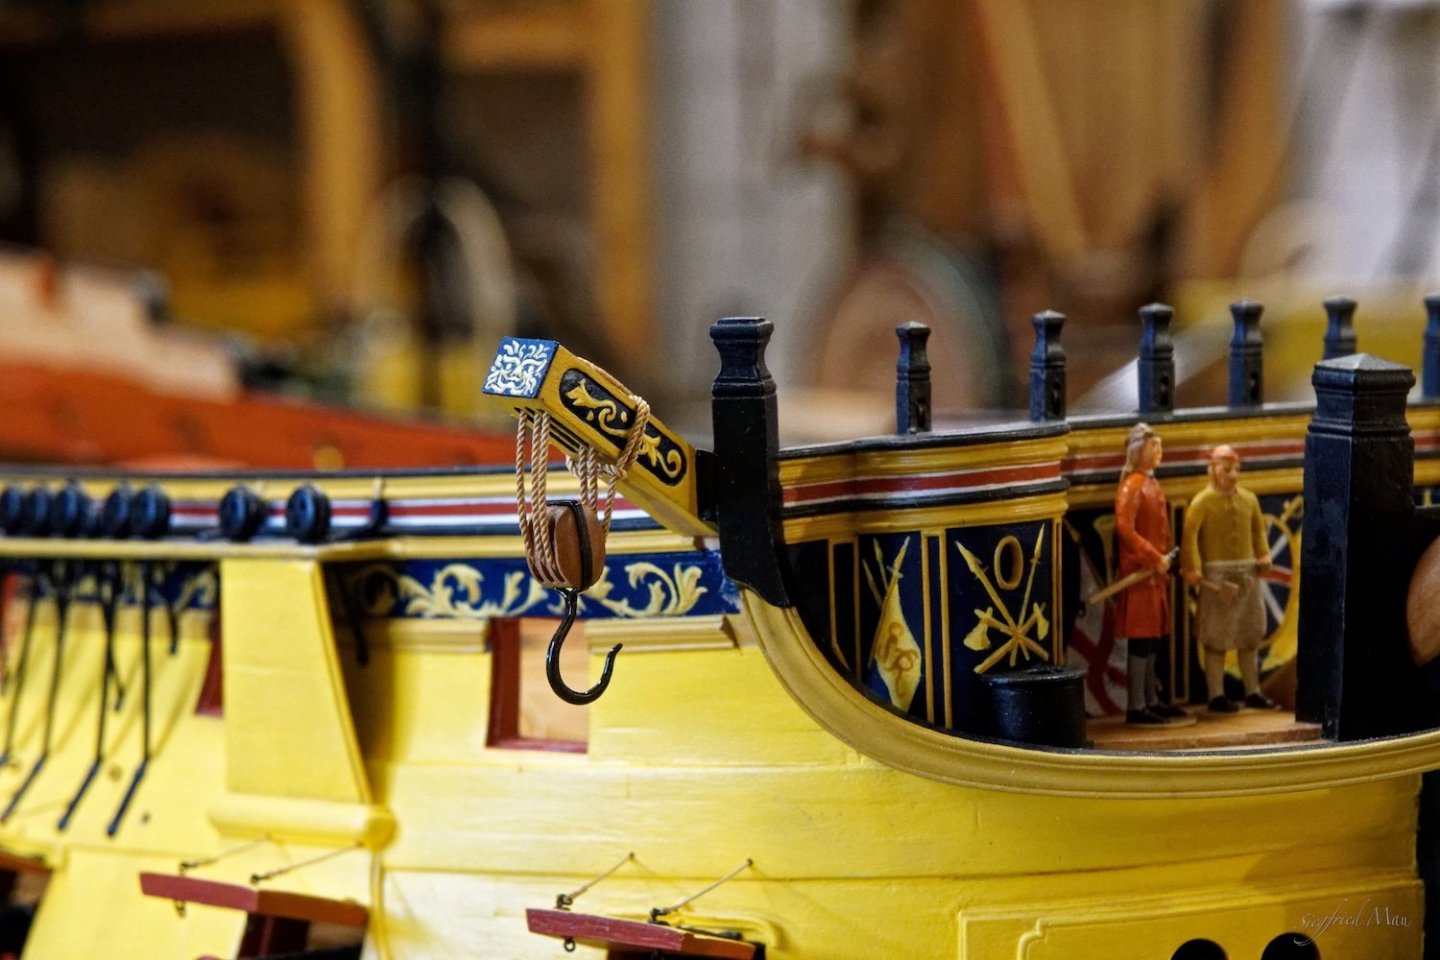
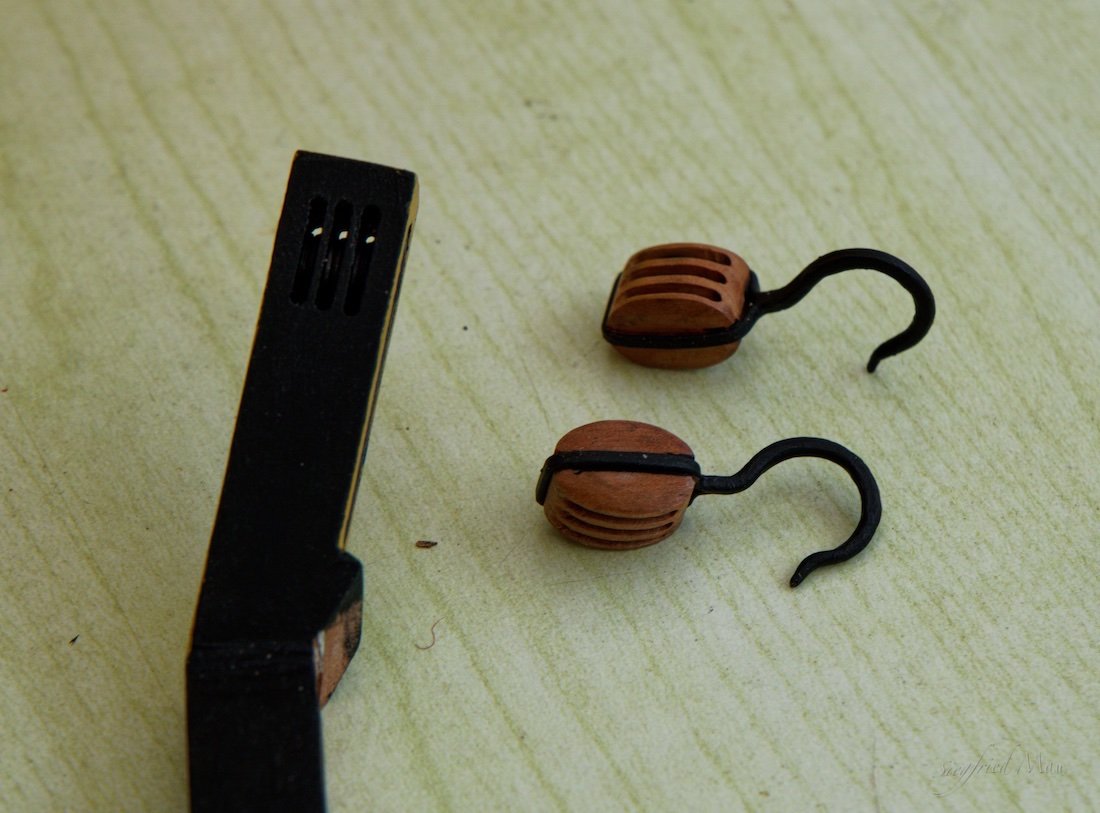
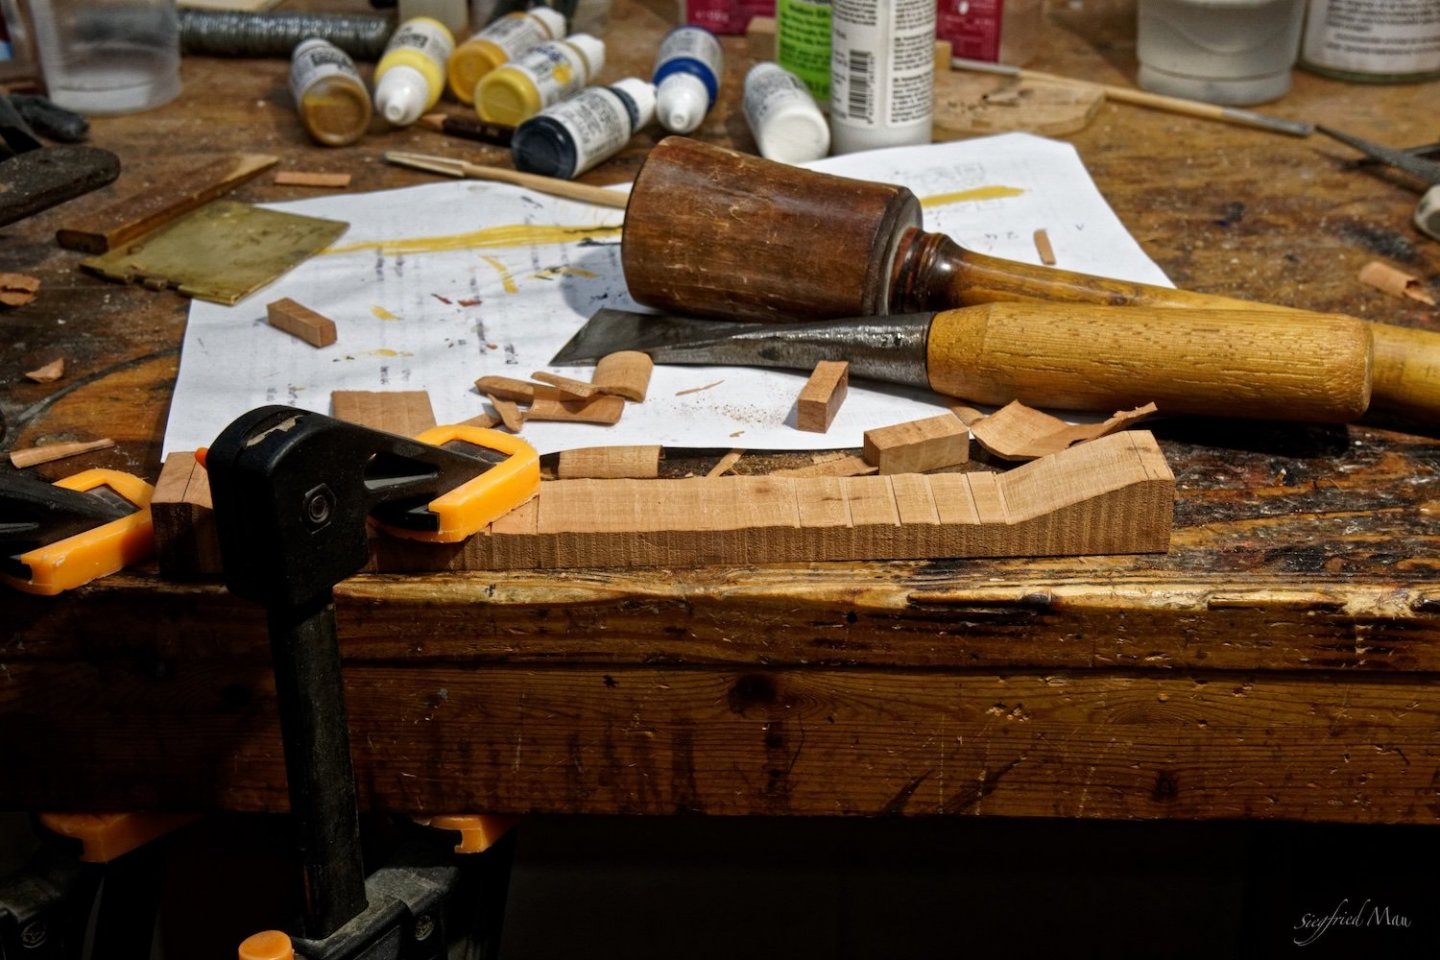
Many thanks Mark, Keith and all others for there likes today I have build the sheaves and finished the cat blocks I started yesterday. So I think, tomorrow I must paint again scrolls 😒
-
Thank you Druxey, the steps should be for both doors. The door to the round house and to the beakhead. I don't know if that is correct, but I had these steps.
-
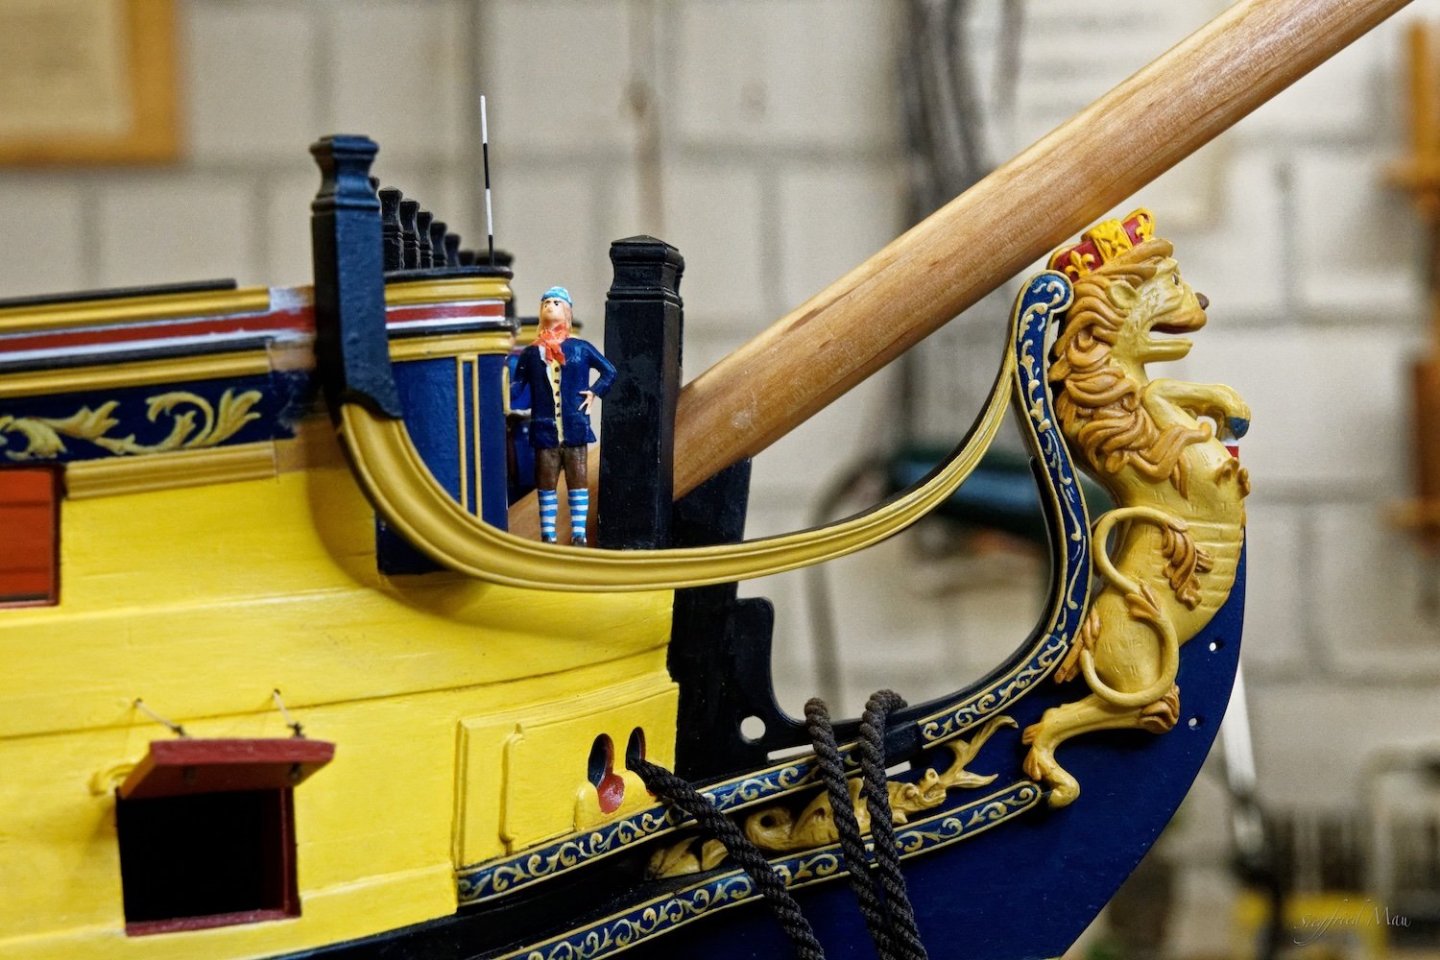
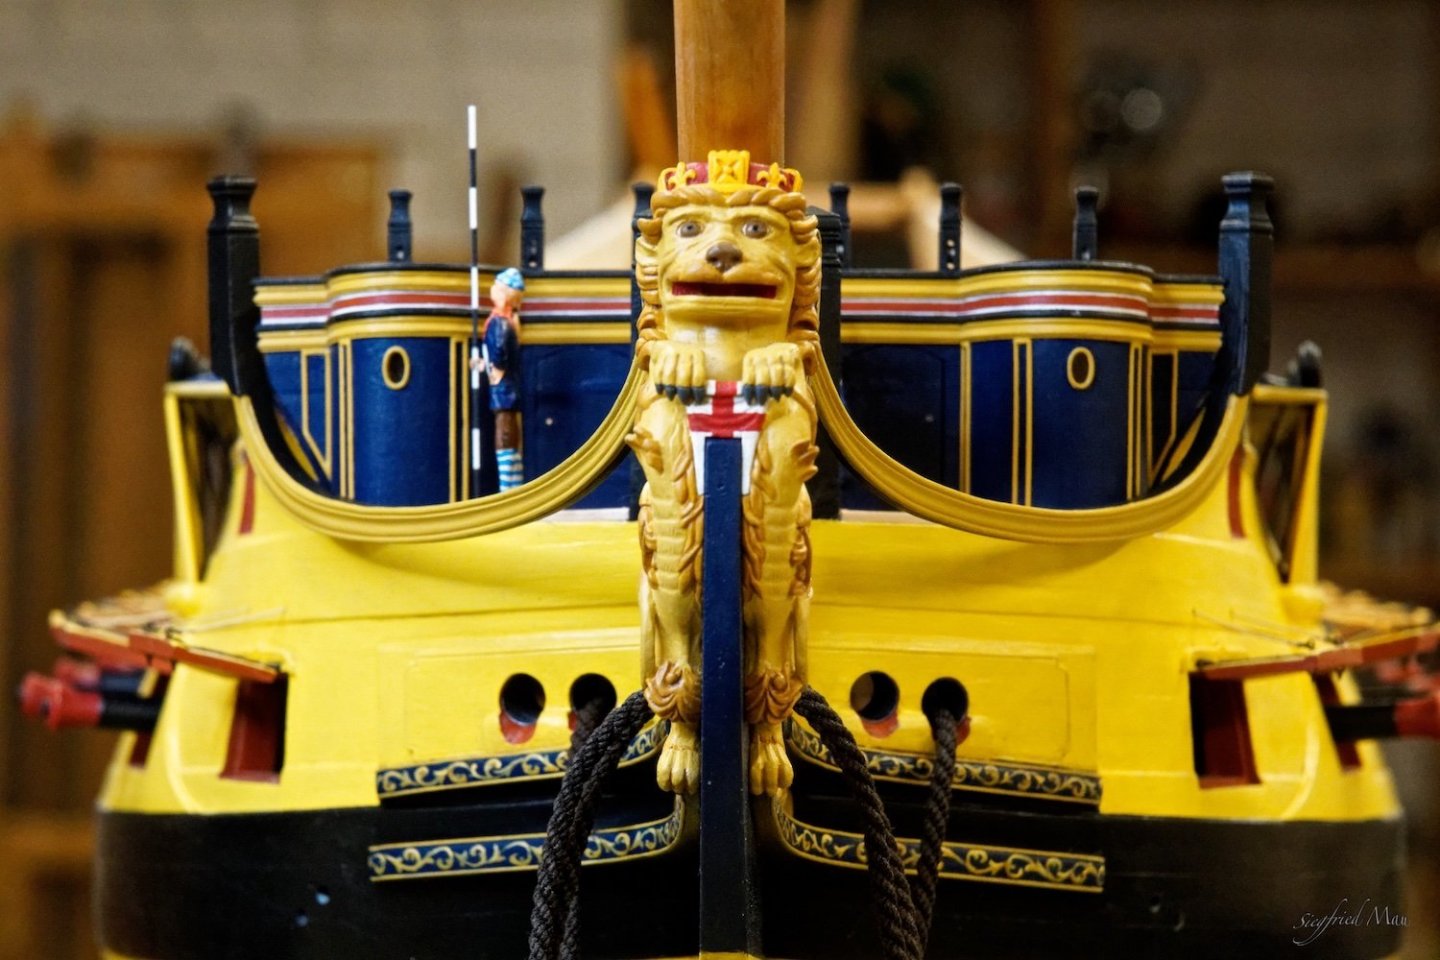
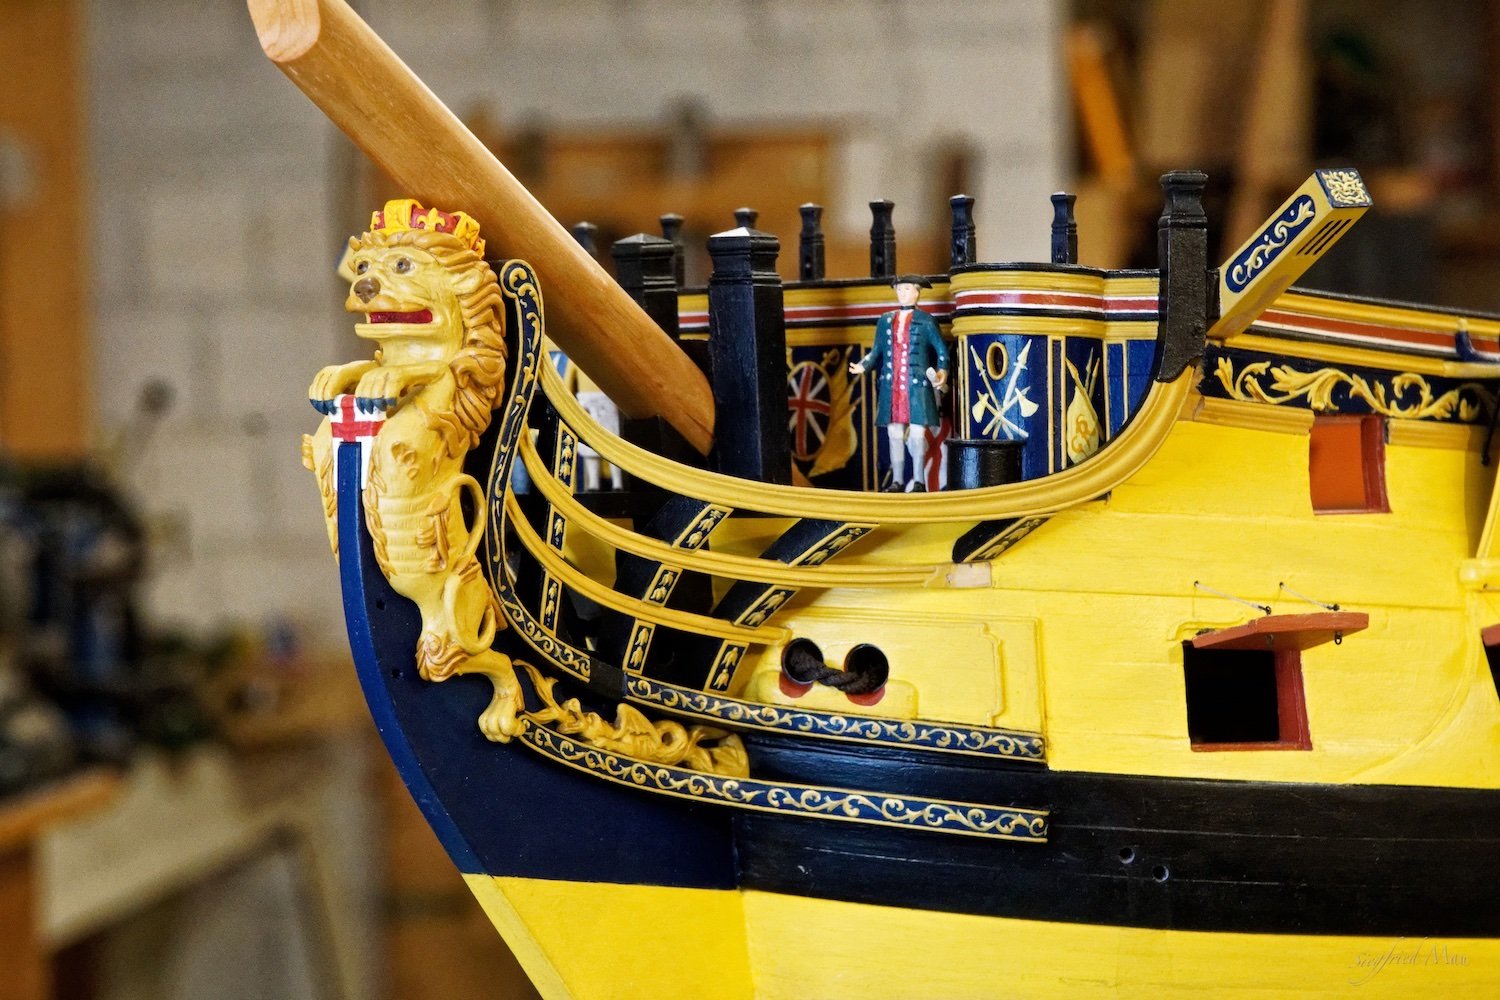
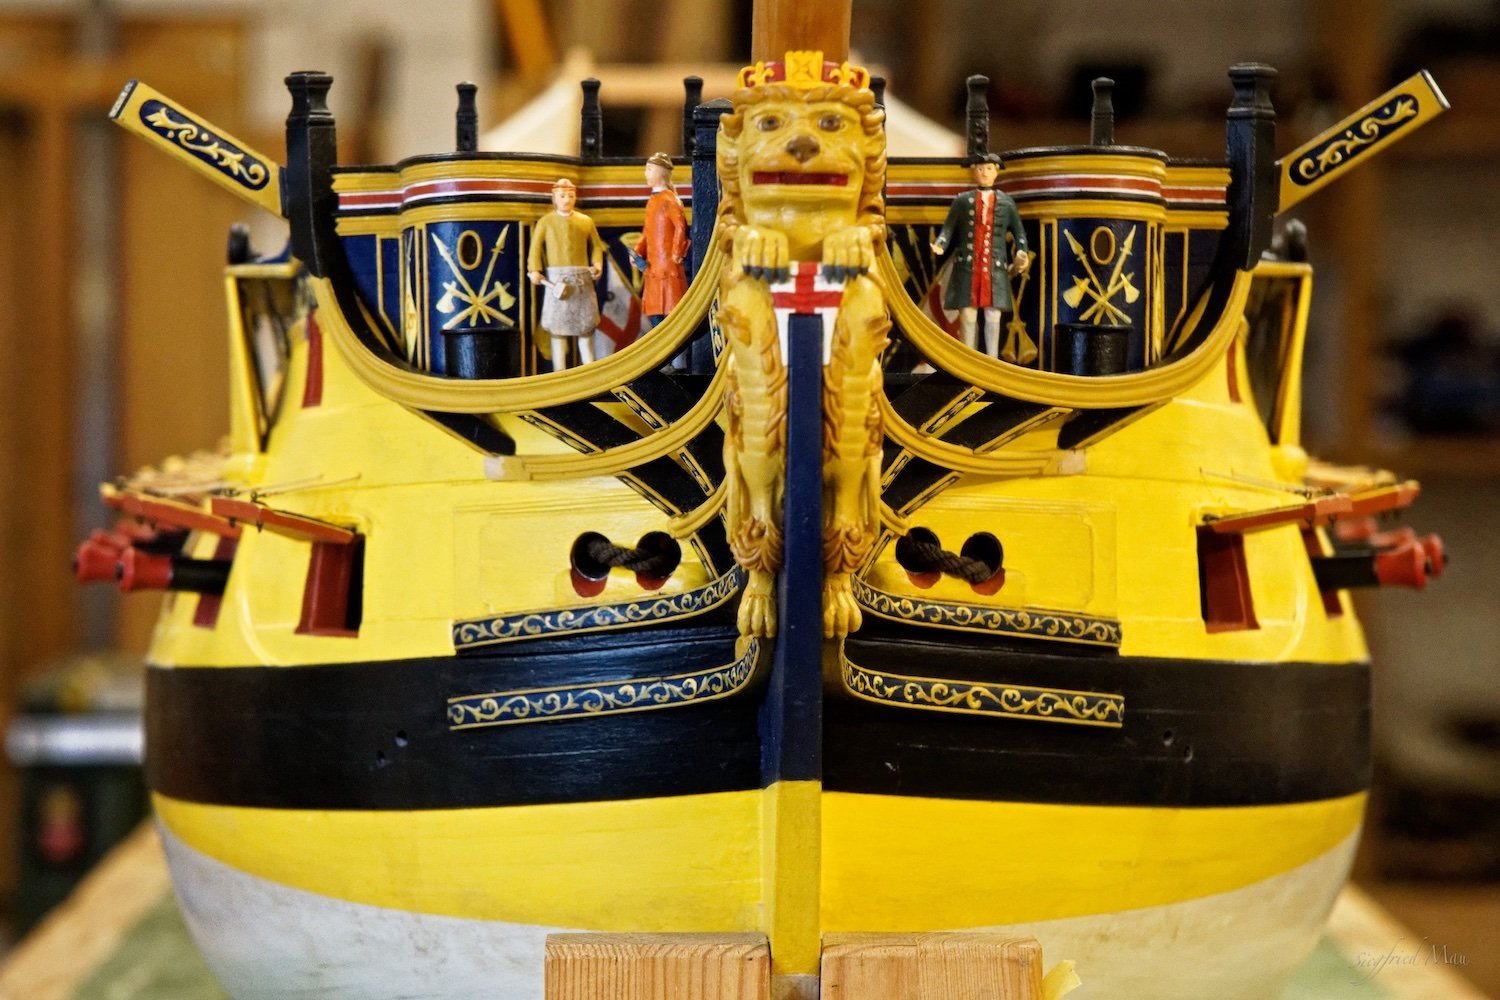
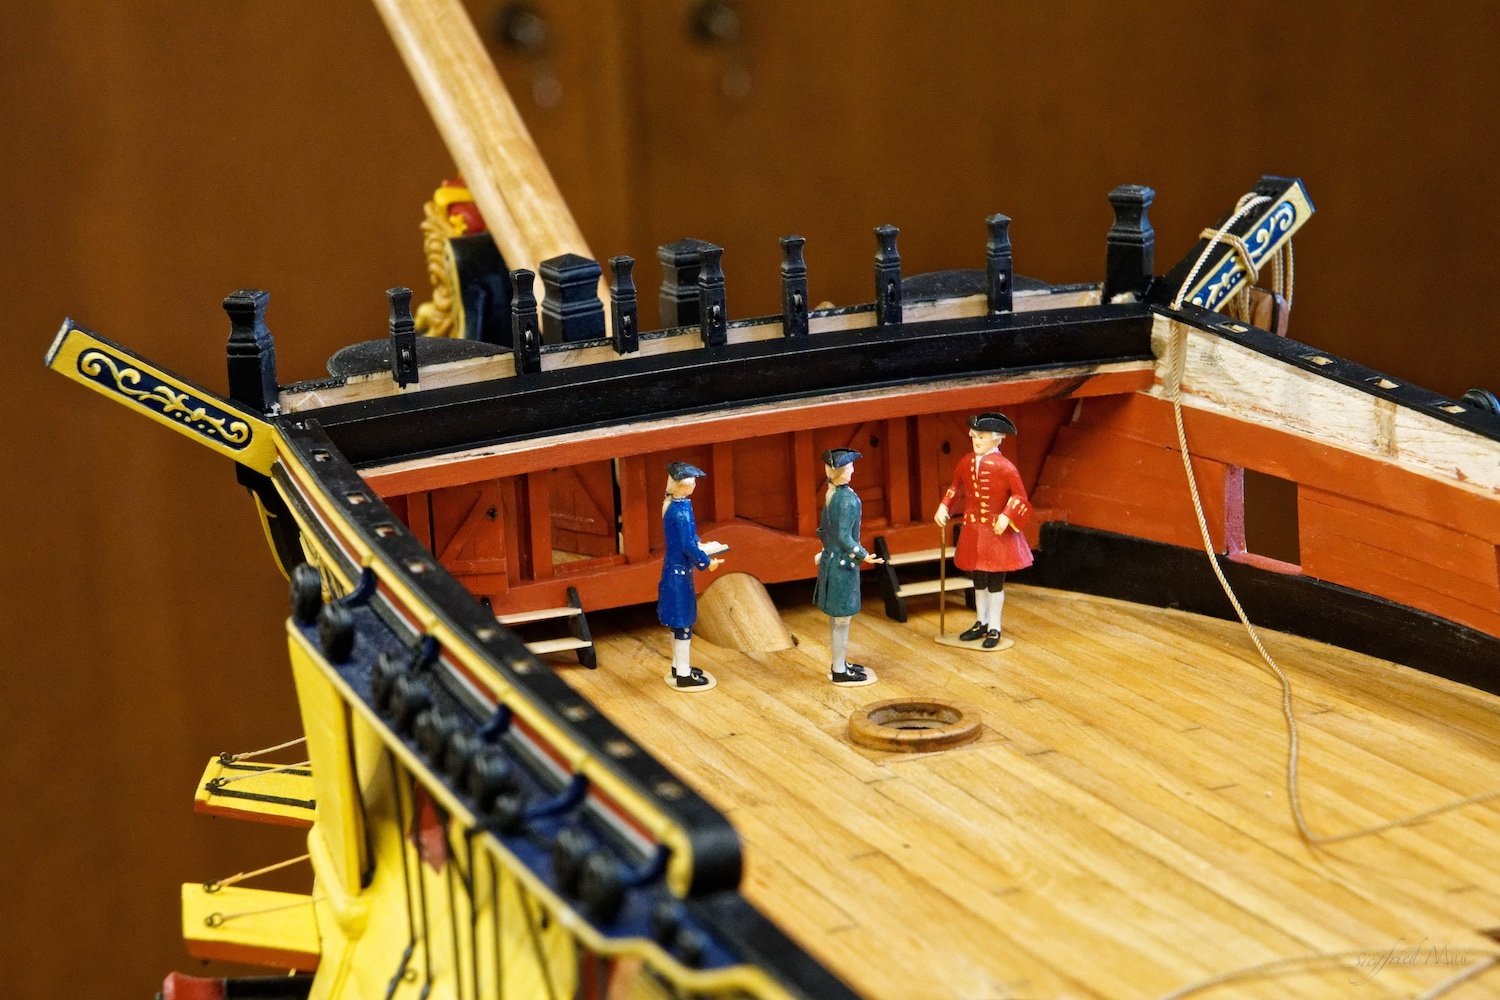
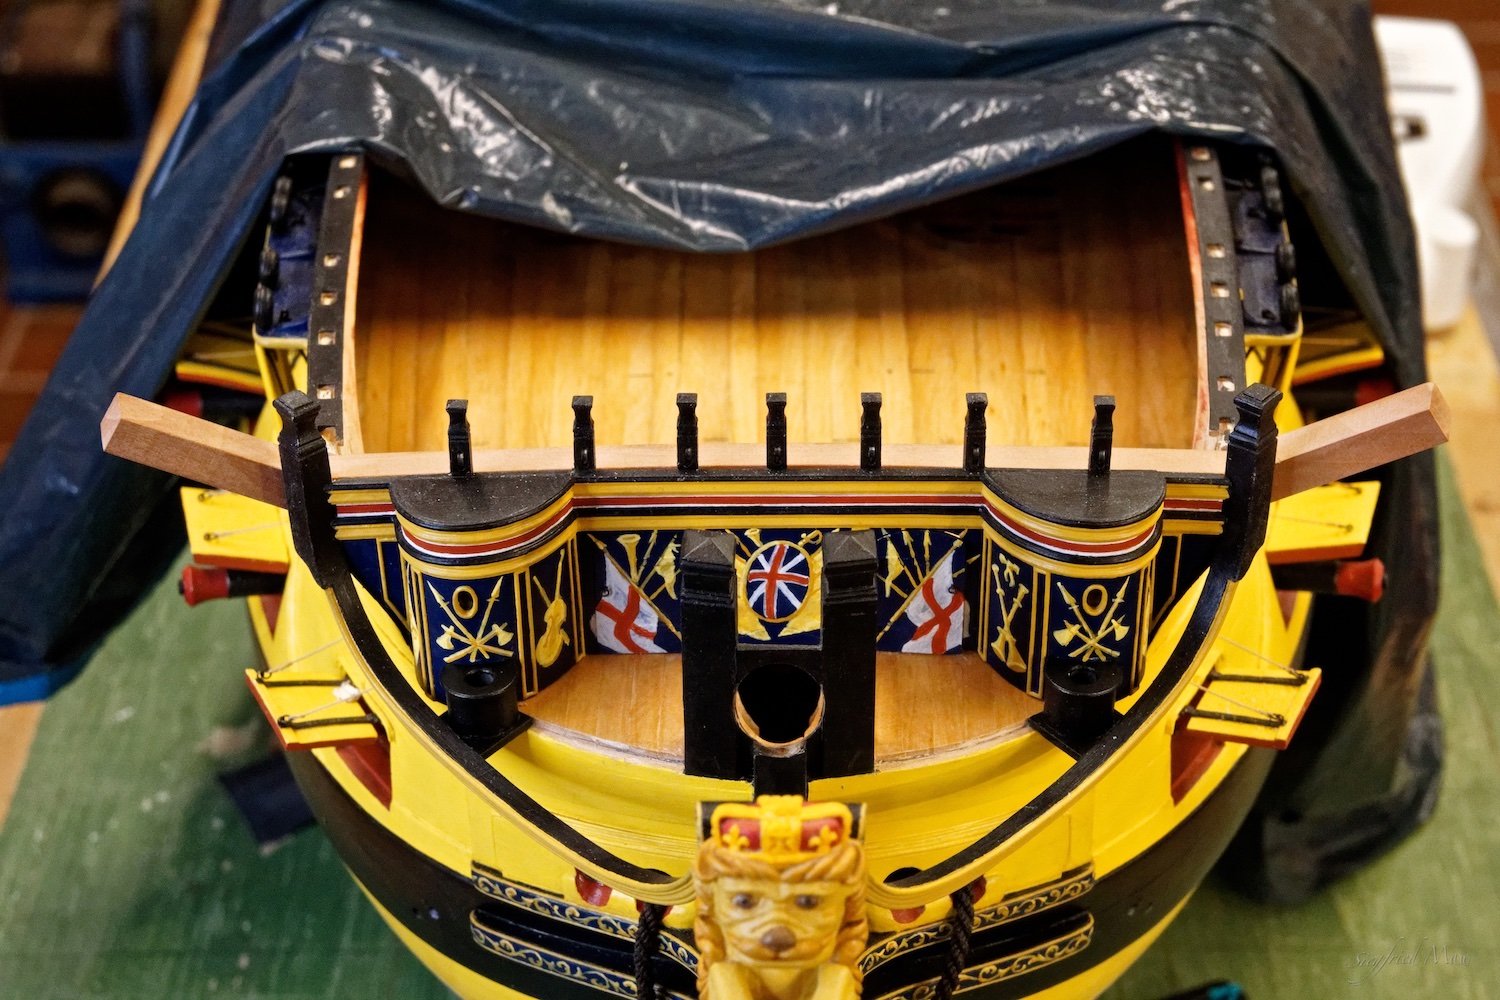
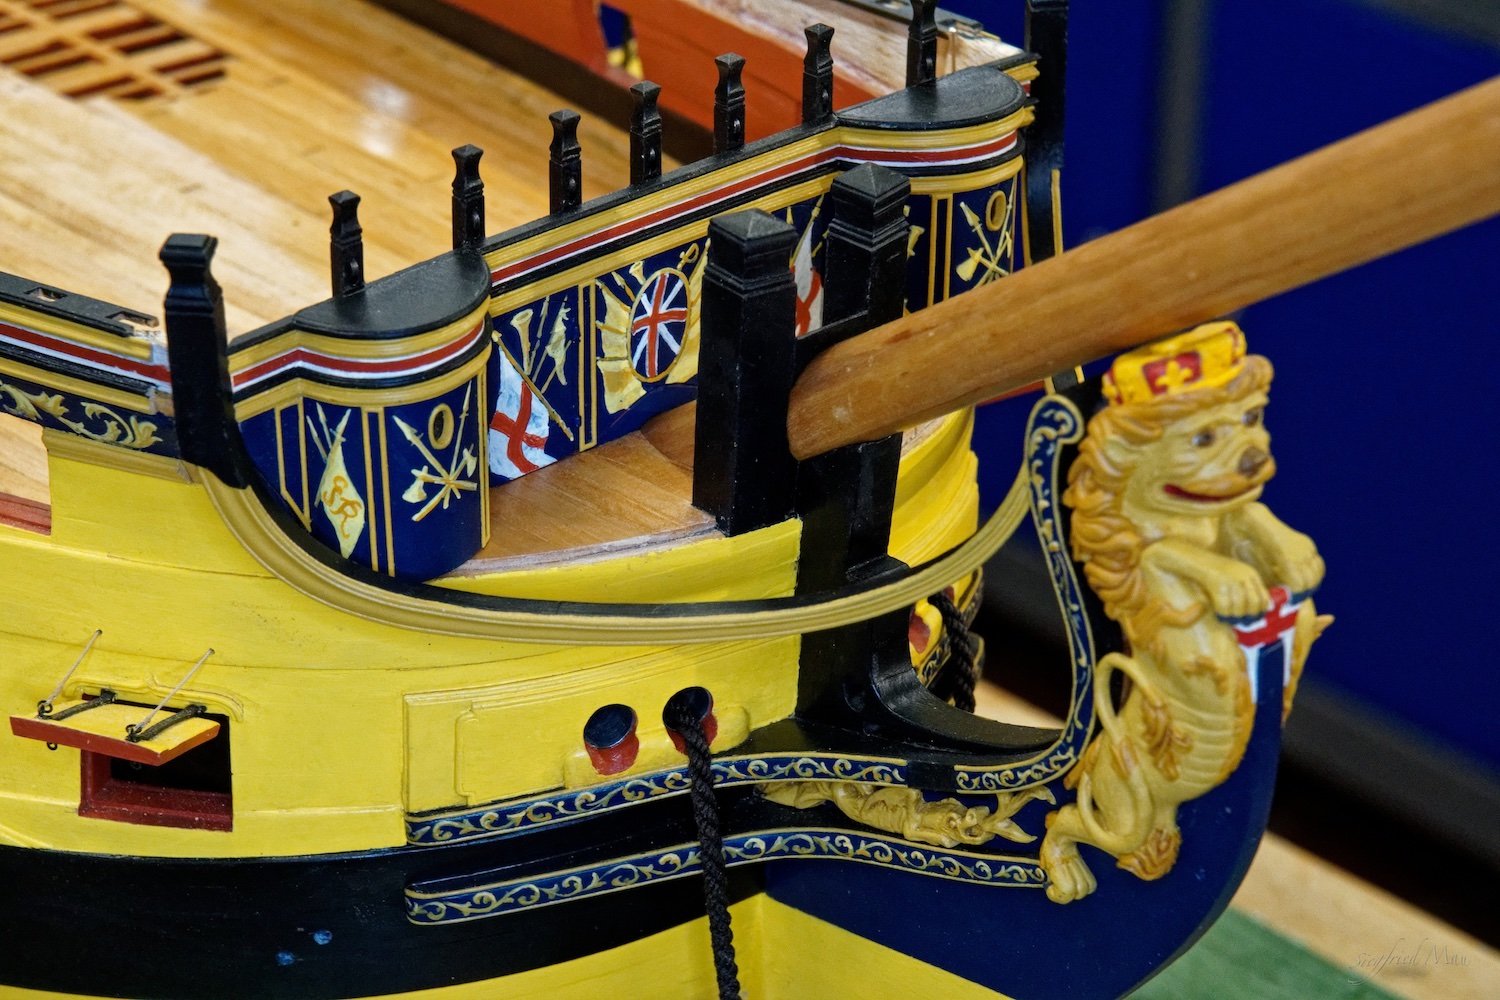
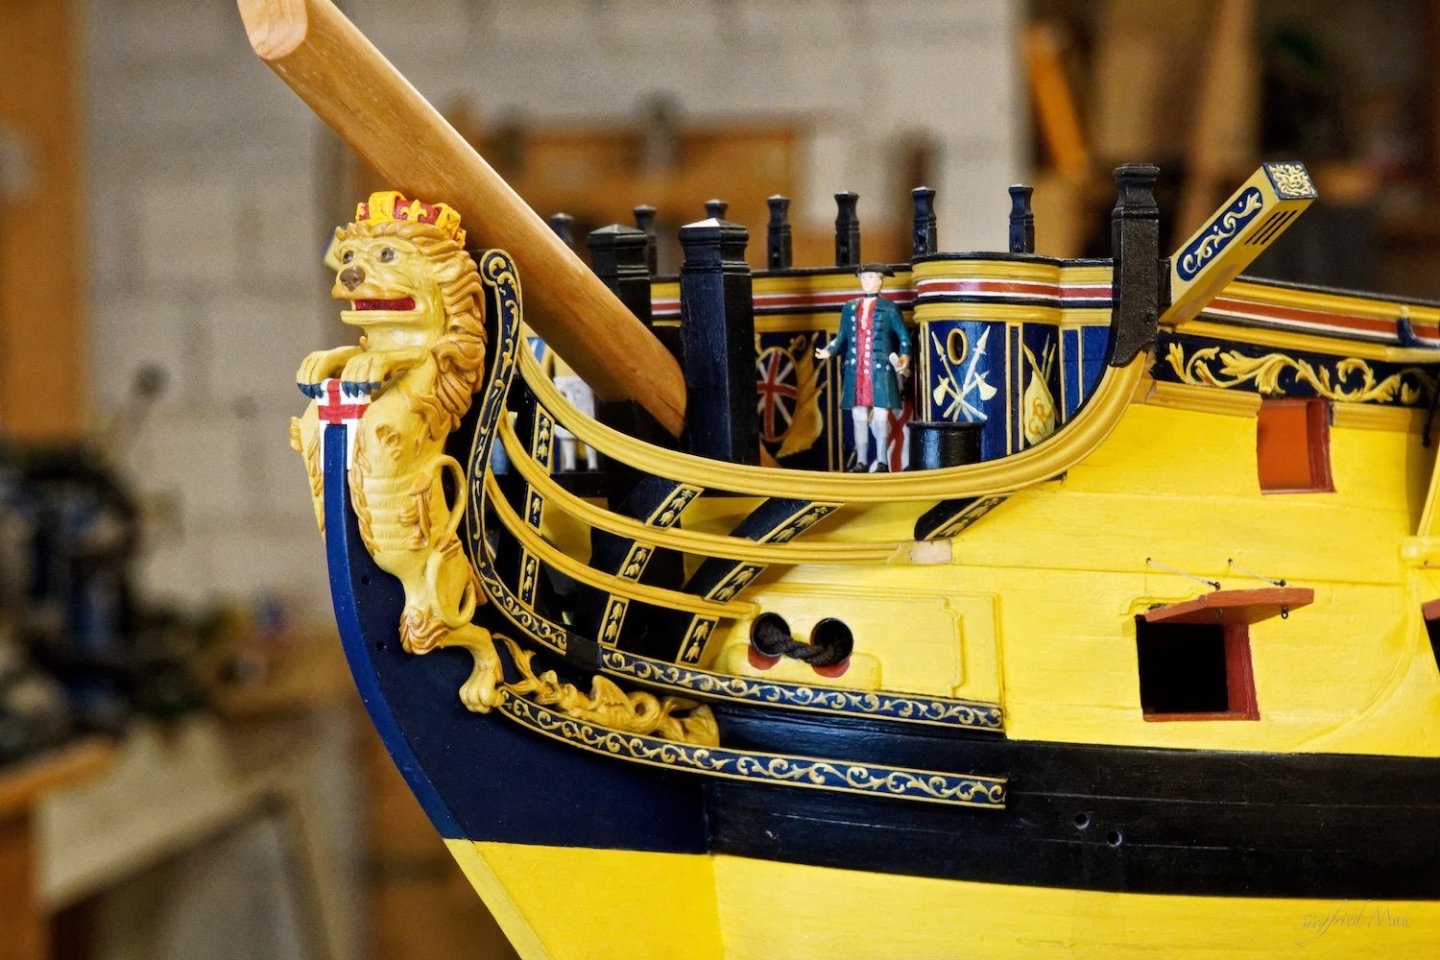
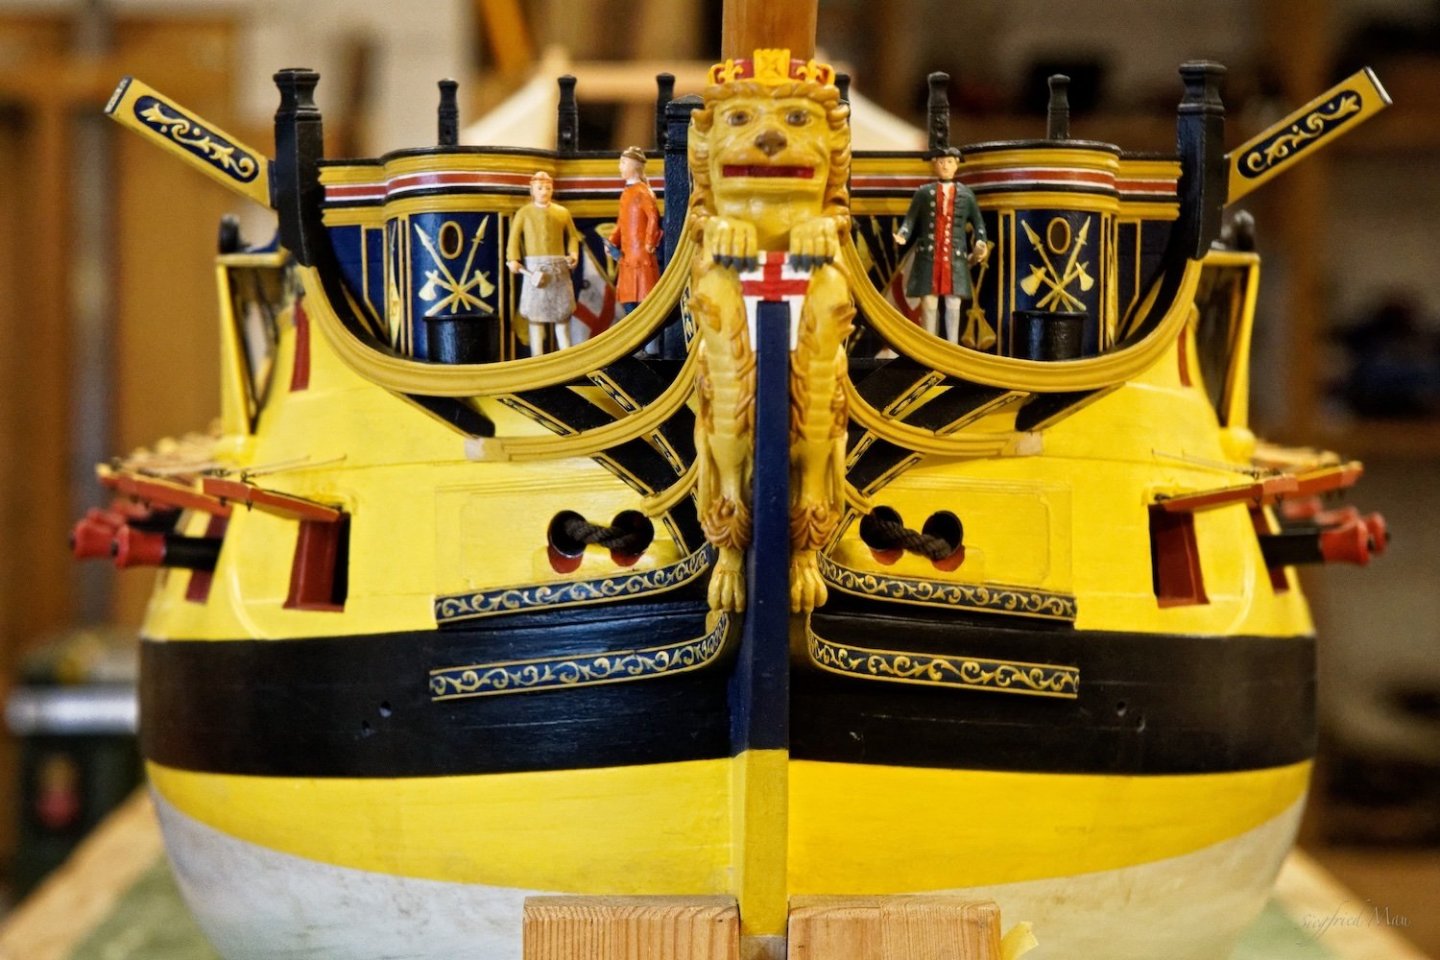
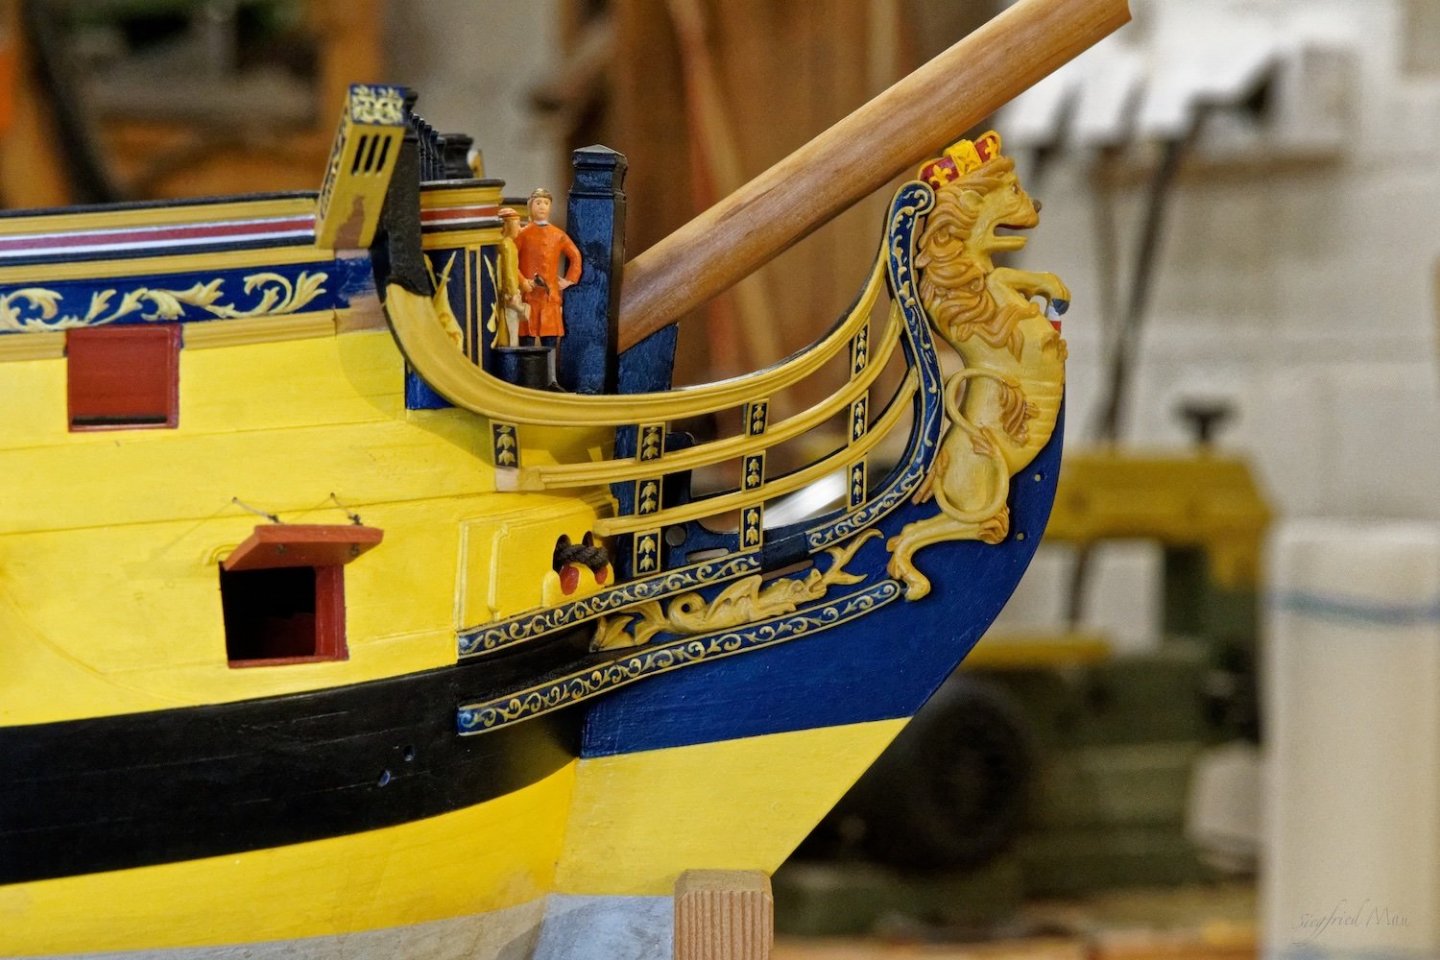
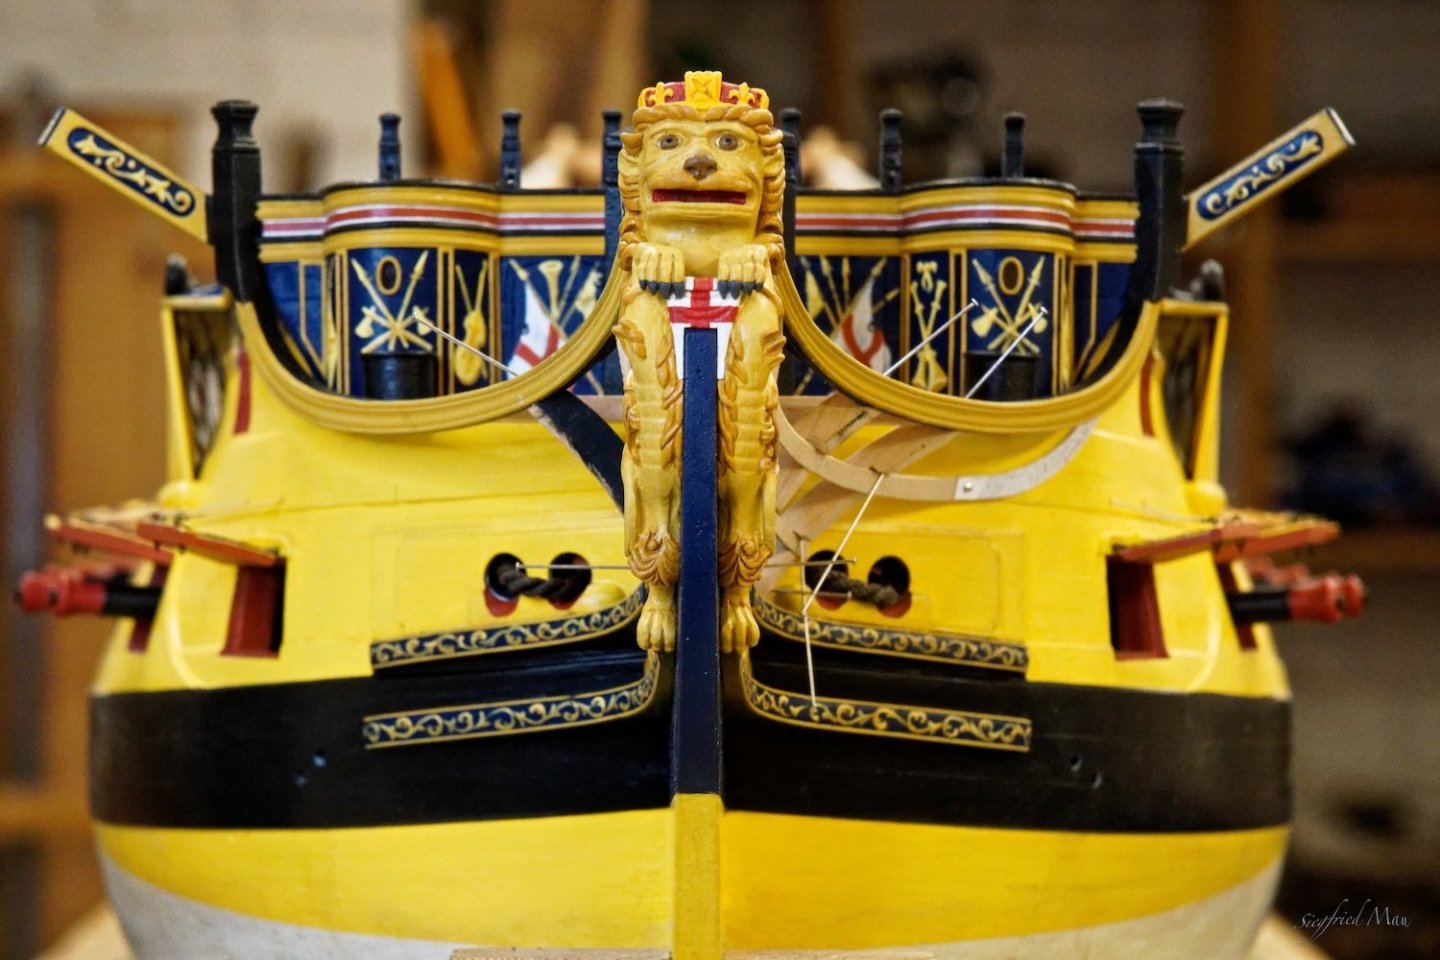
Hello and many, many thanks for your likes and comments. My garden took at least a lot of my attention the last week, so the shipyard had to pause a little. The beakhead bulkhead is now fast installed and yesterday I build the seats of ease in front of the round houses. Today I started with the cat-hats and -tails. I think, the pictures speak for themselves.


-
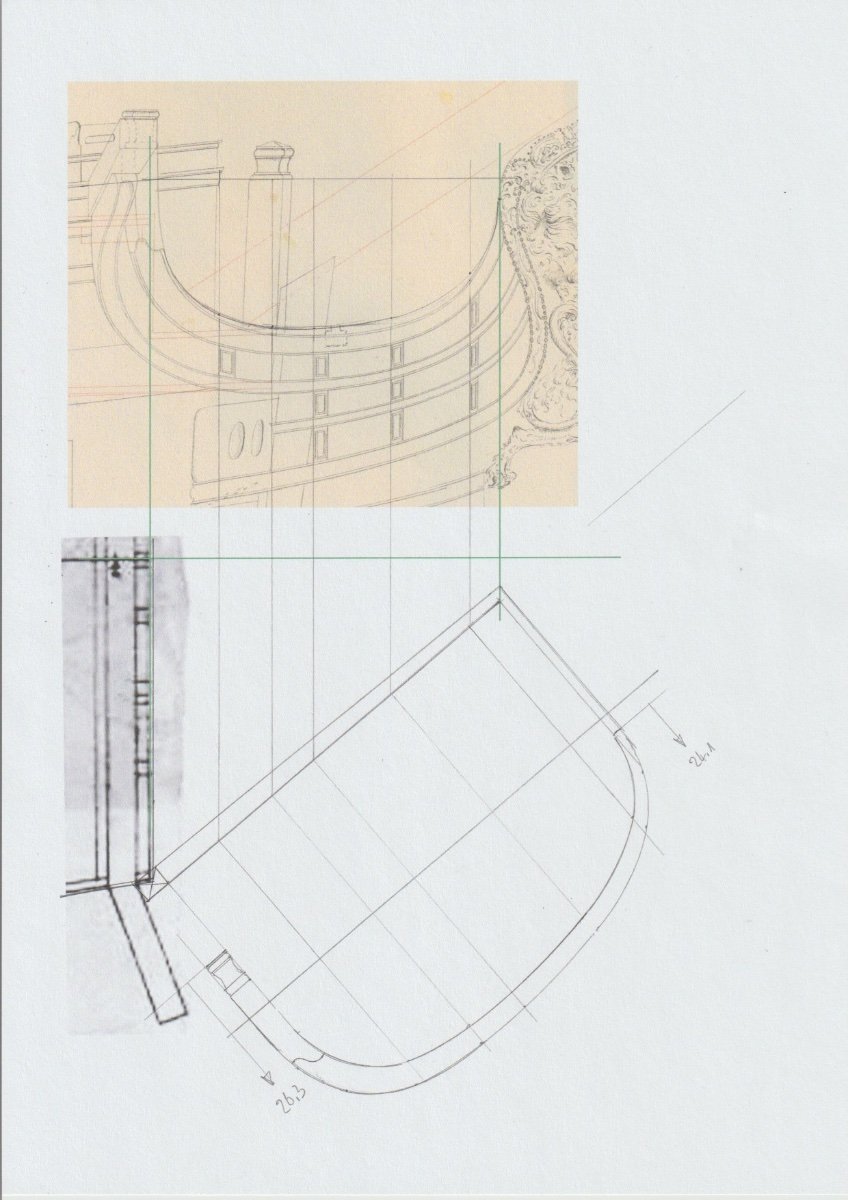
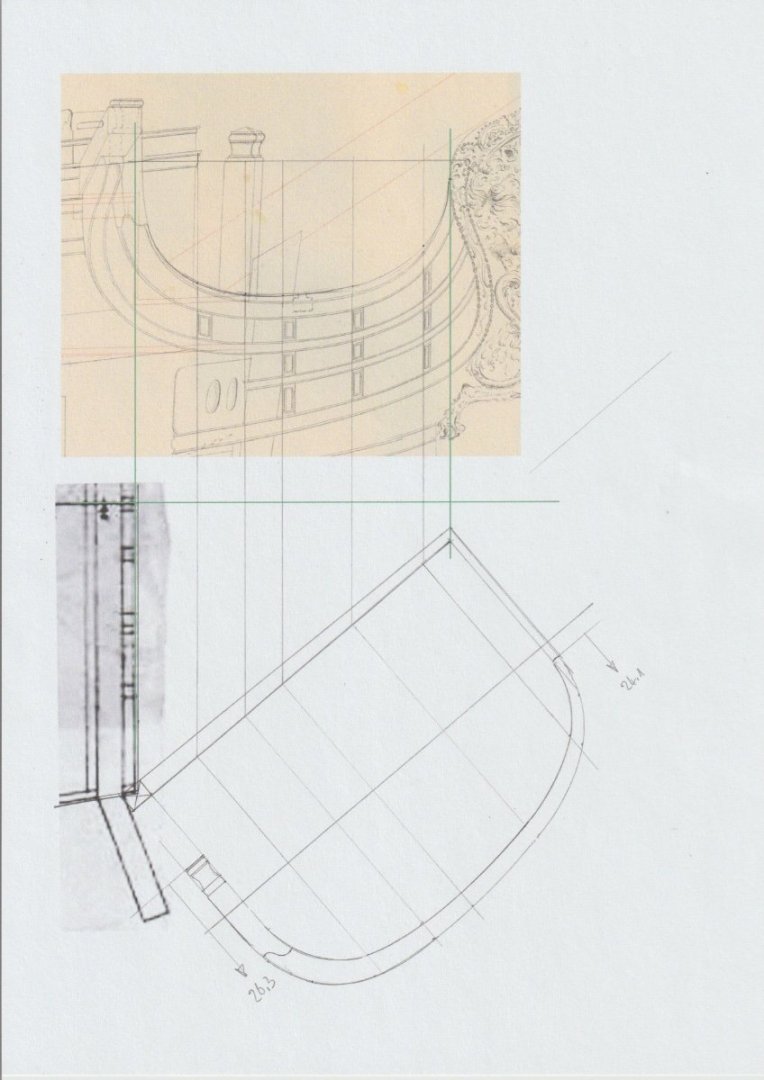
Hello Gary, I did't had there a special angle, as you could see at my drawing. The green lines are the given measurements, and then I draw the main head rail from the edge of the fore castle to the edge of the hair pice. And then you have the angle and the length of the rail too. The rest is measure. Sorry my english, but I hope you could follow.
-
Hello, no the workers are busy at the yard 😉 and after fine tuning the rails for some hours, I decided that it's ok. And that is the result I would say, here would nobody would have an easy seat. So the seat of ease has to be in front of the round house and I have to change the decoration there.