HOLIDAY DONATION DRIVE - SUPPORT MSW - DO YOUR PART TO KEEP THIS GREAT FORUM GOING! (83 donations so far out of 49,000 members - C'mon guys!)
×

Siggi52
-
Posts
1,155 -
Joined
-
Last visited
Content Type
Profiles
Forums
Gallery
Events
Everything posted by Siggi52
-
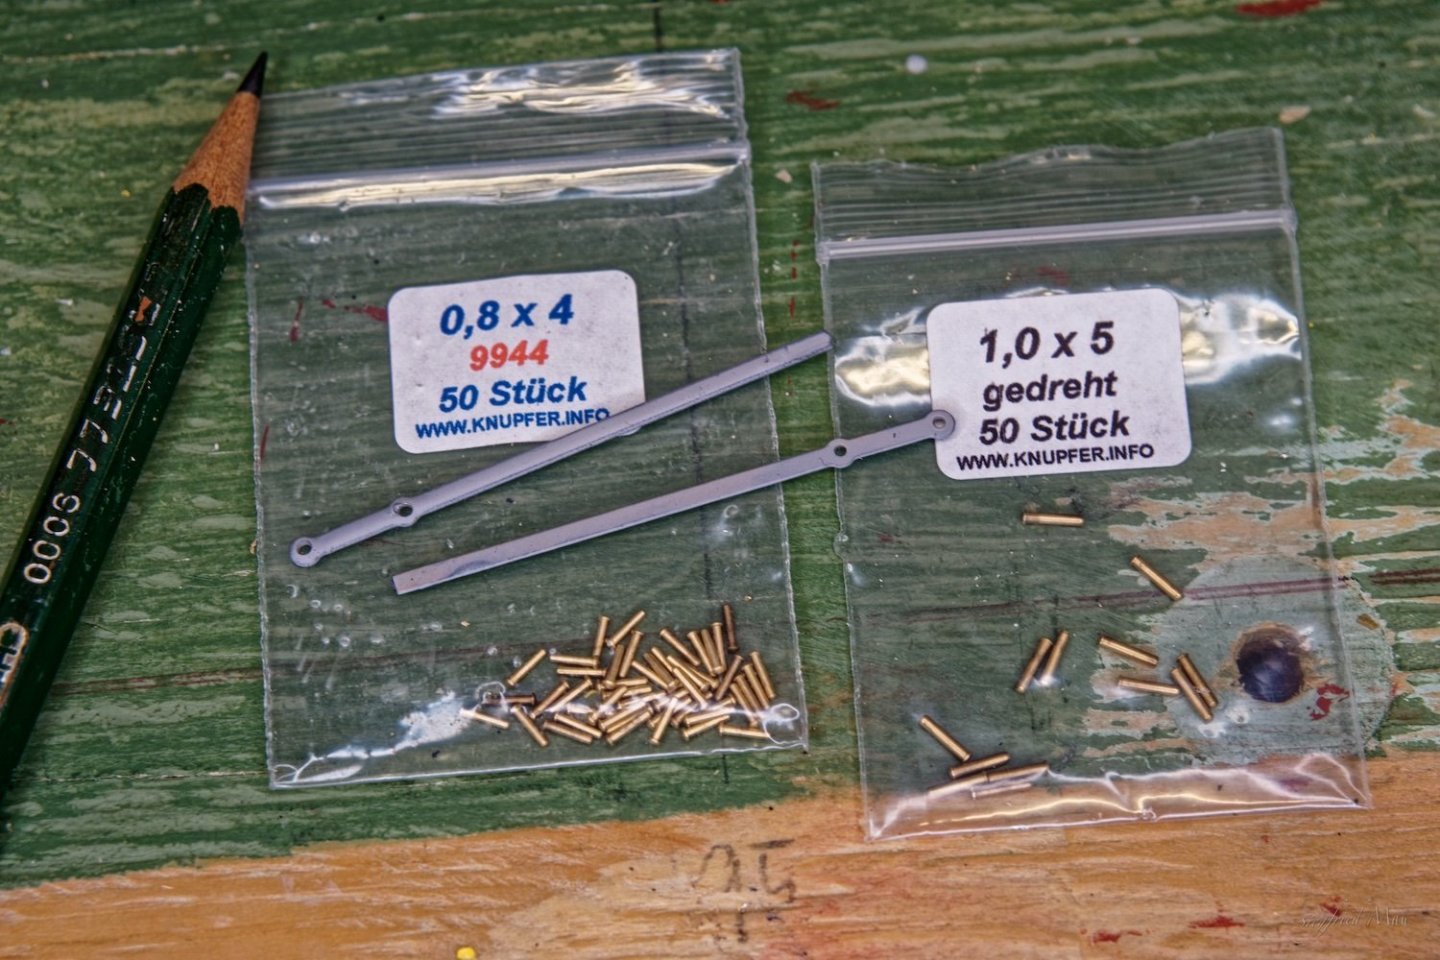
 Hello and many thanks for your nice comments and likes. I'm overwhelmed 😮 I finished the fore mast port side and started with the main mast. And that are the bolts who hold the chain plates in place. But today wasn't my day. So I stoped working. There where a 0,8mm bold should fit, I tried a 1mm bold and for the 1mm bold I drilled 0,8mm holes! And all ready with CA saturated 😬
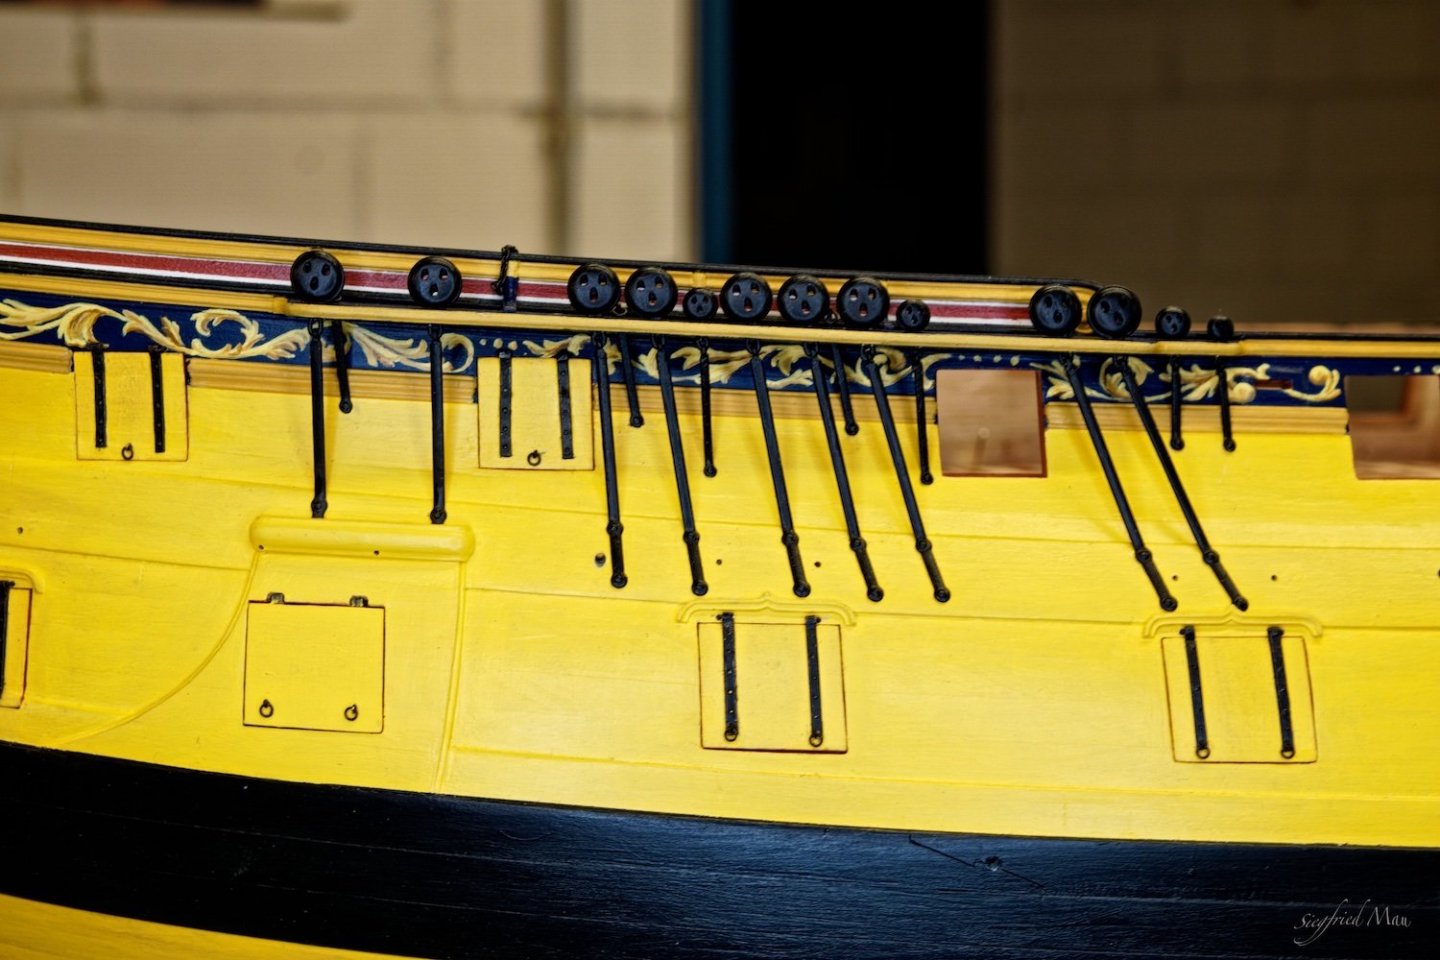
-
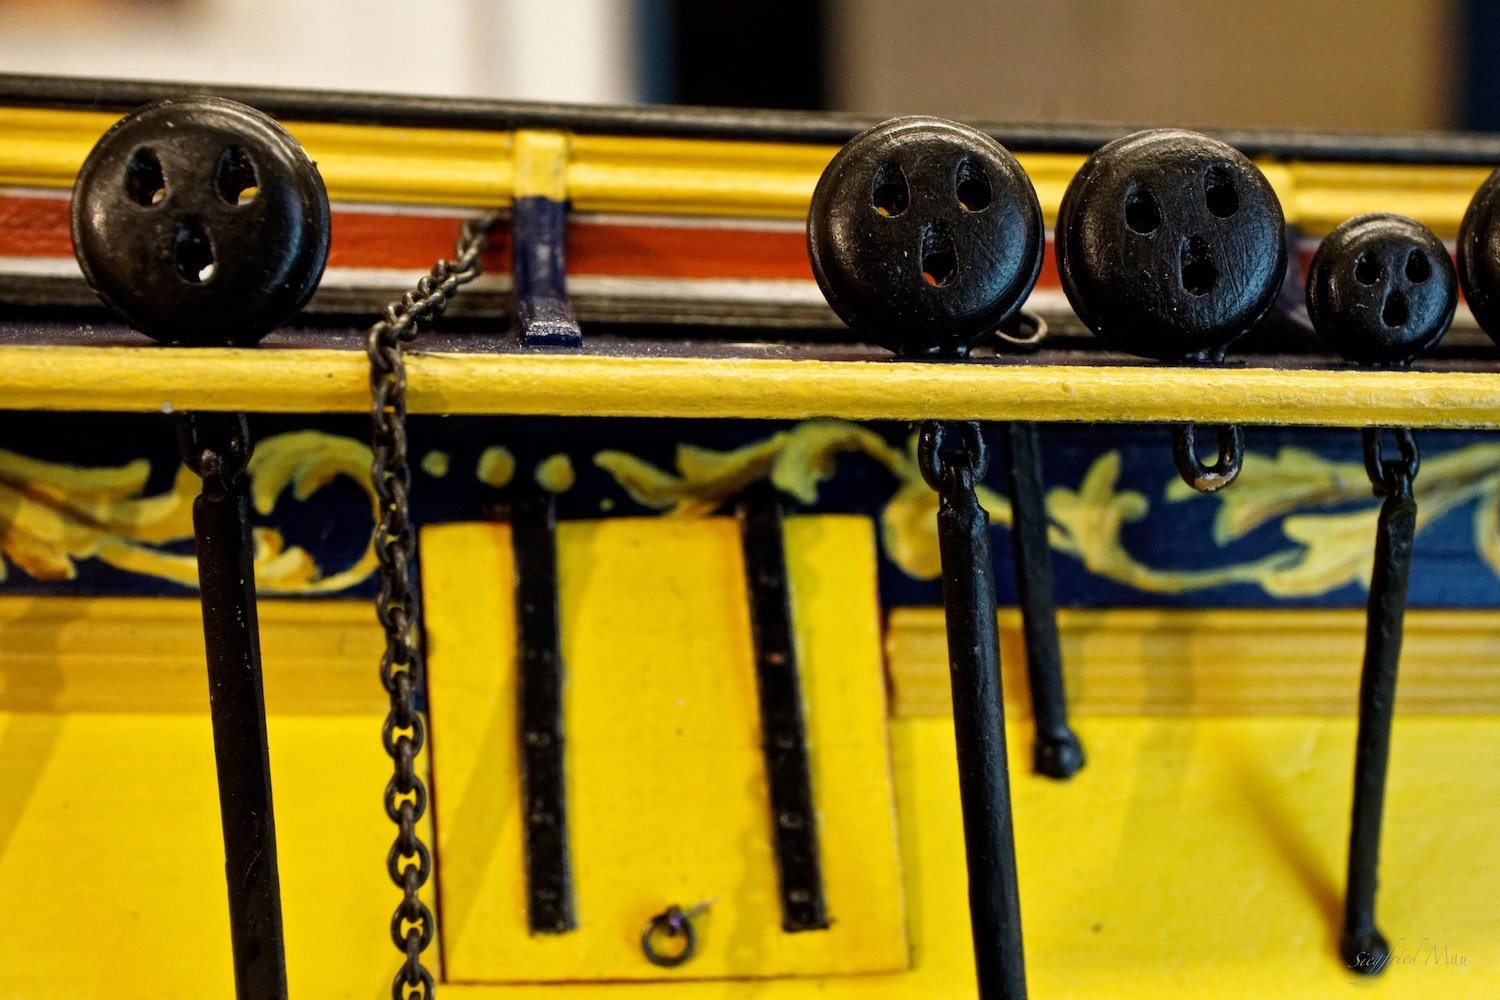
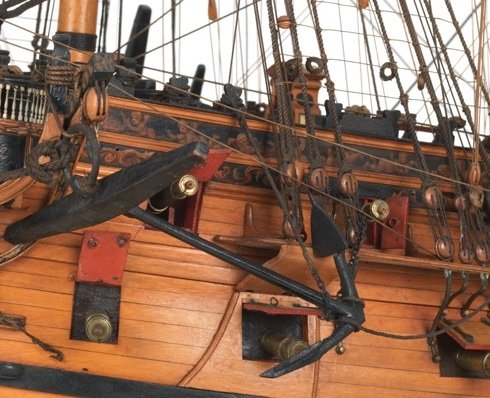
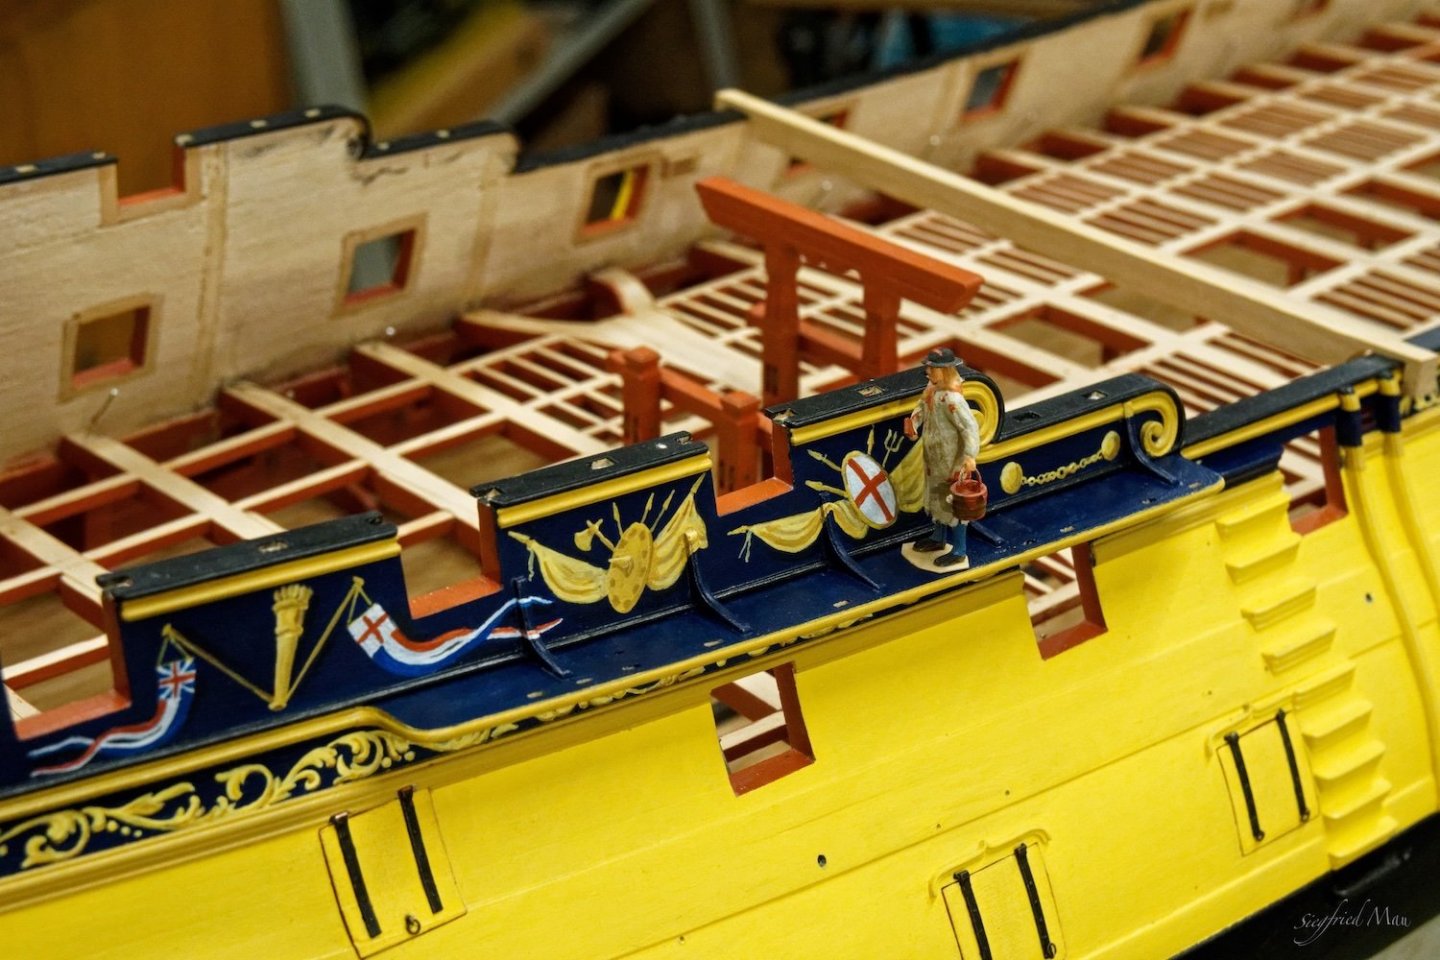
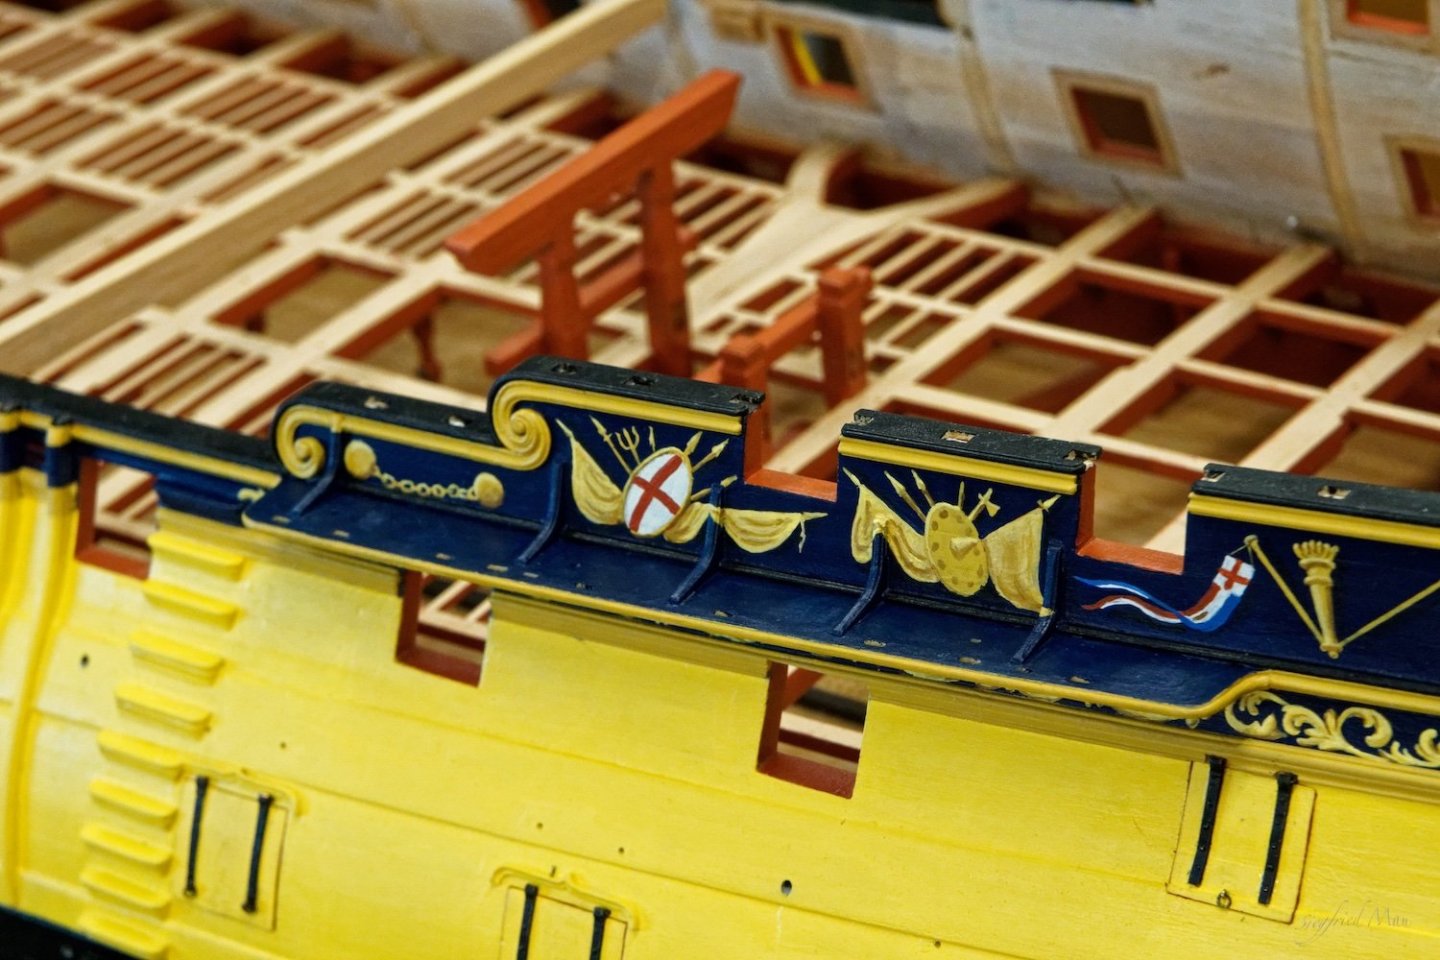
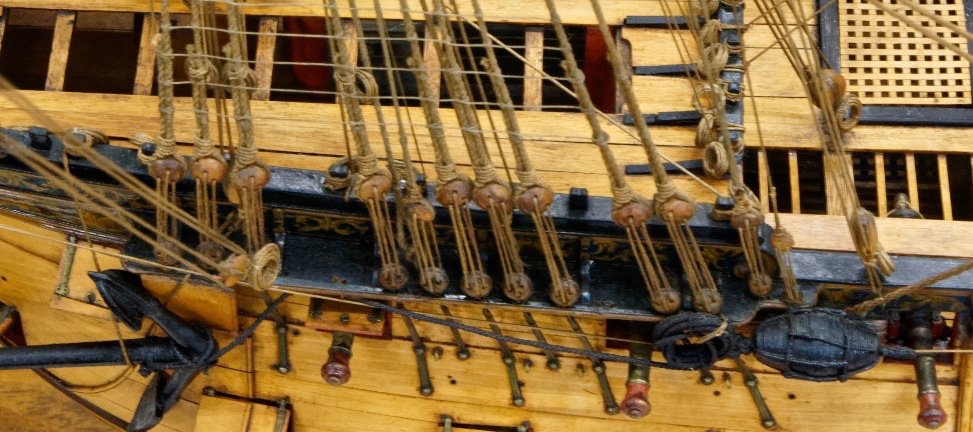
Thank you Keith and also Jaager, the chain-Painter chain holds the anchors like in this picture. According to the 1719 list of establishment the chain should be 15 feet long. But I think, because the channels moved up, it could be at least shorter. But that I will see later.
-
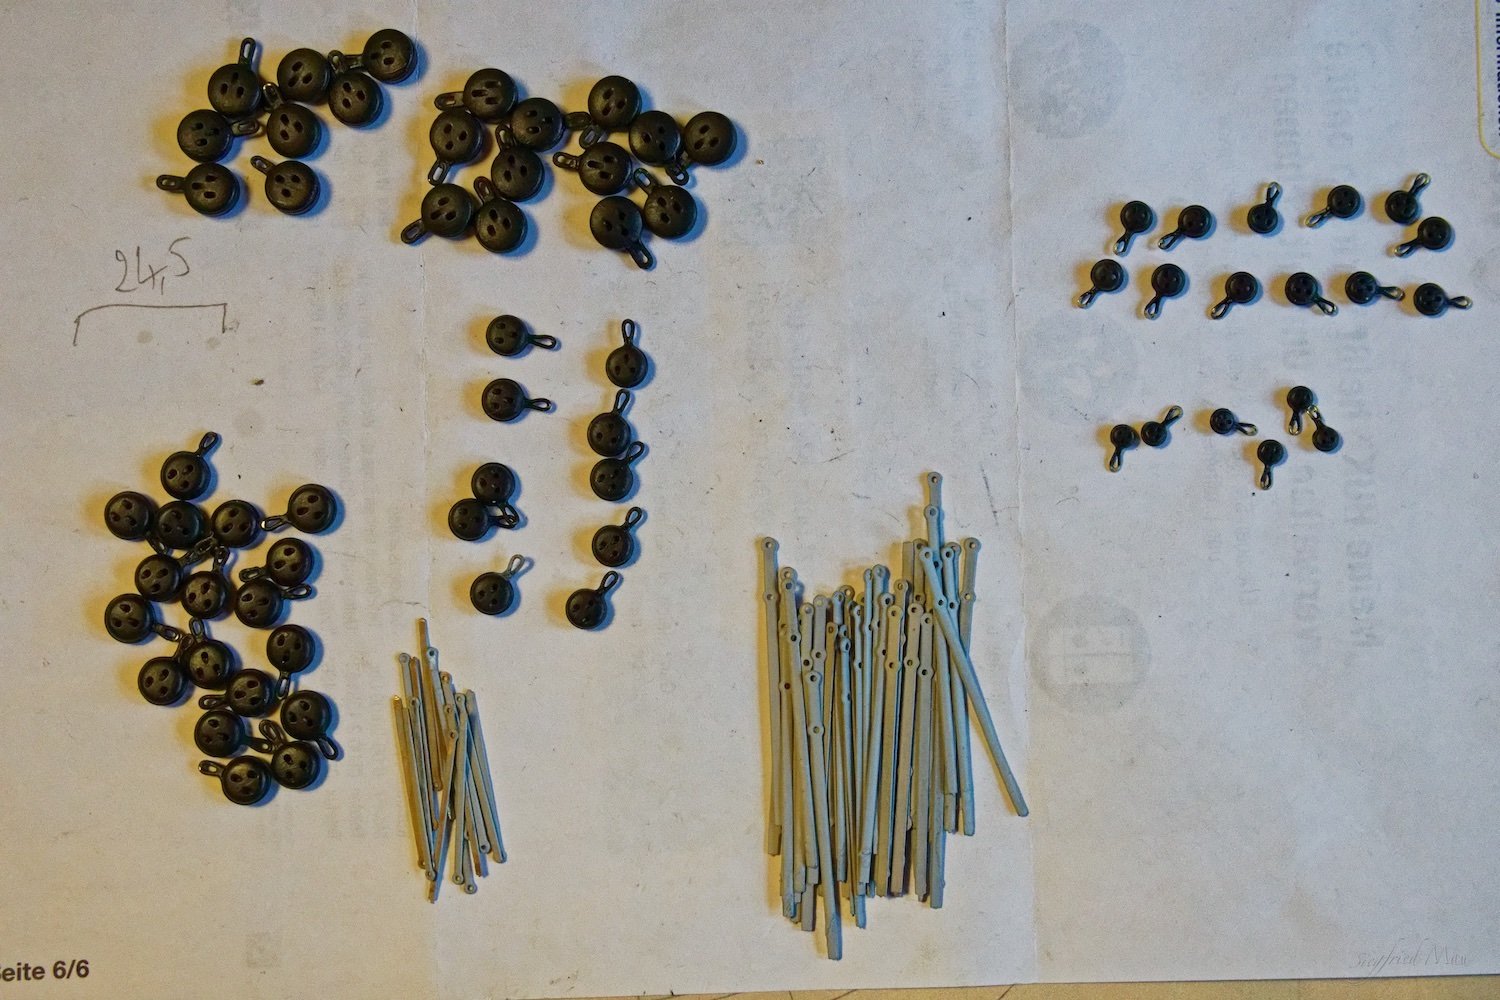
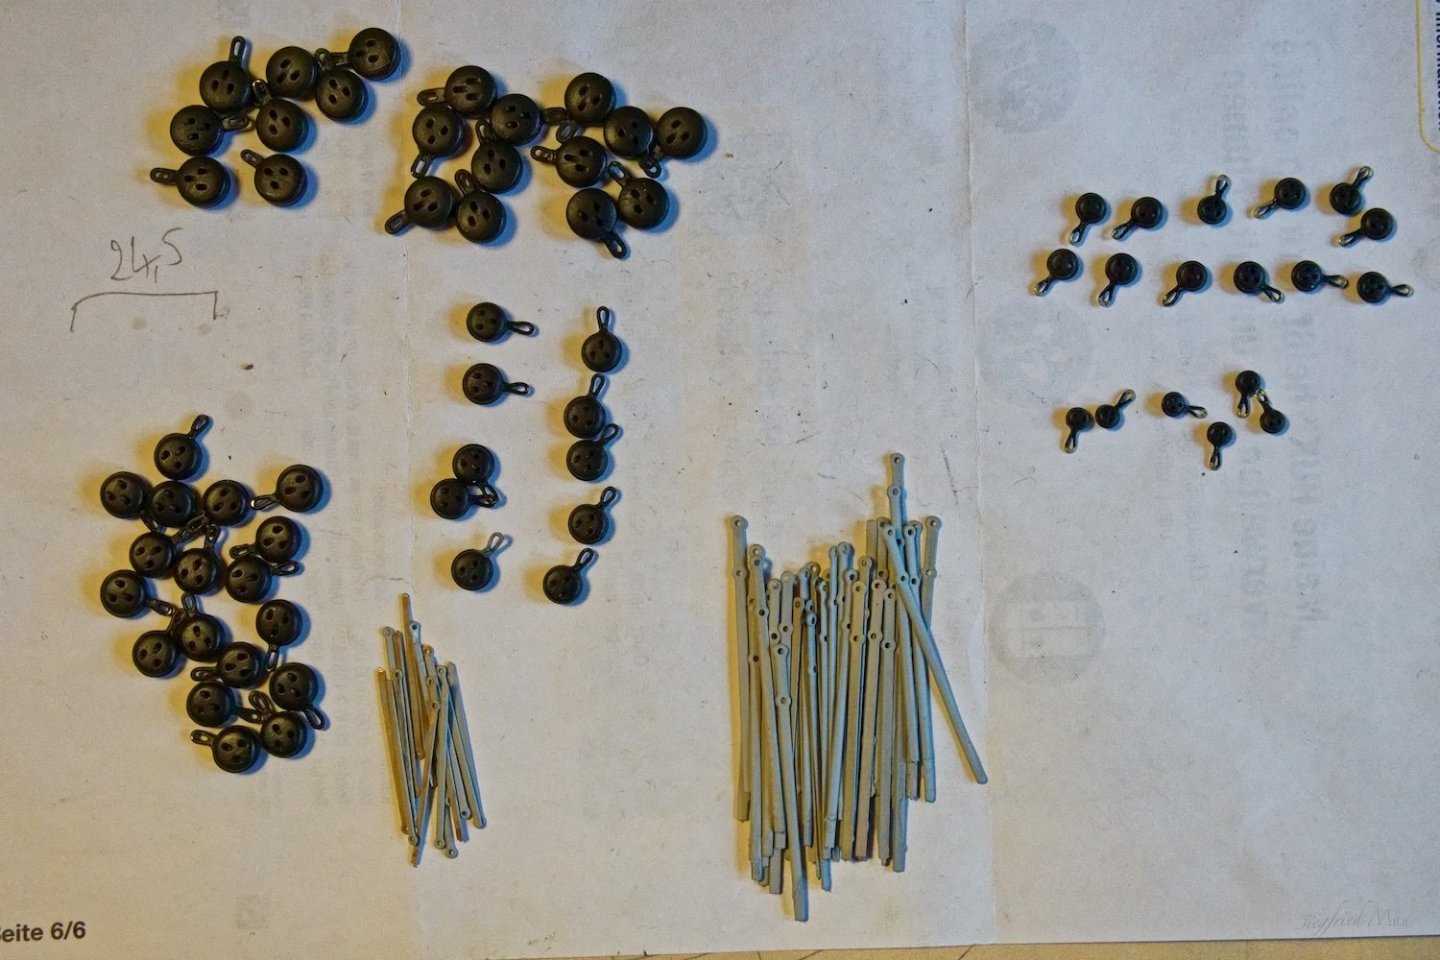
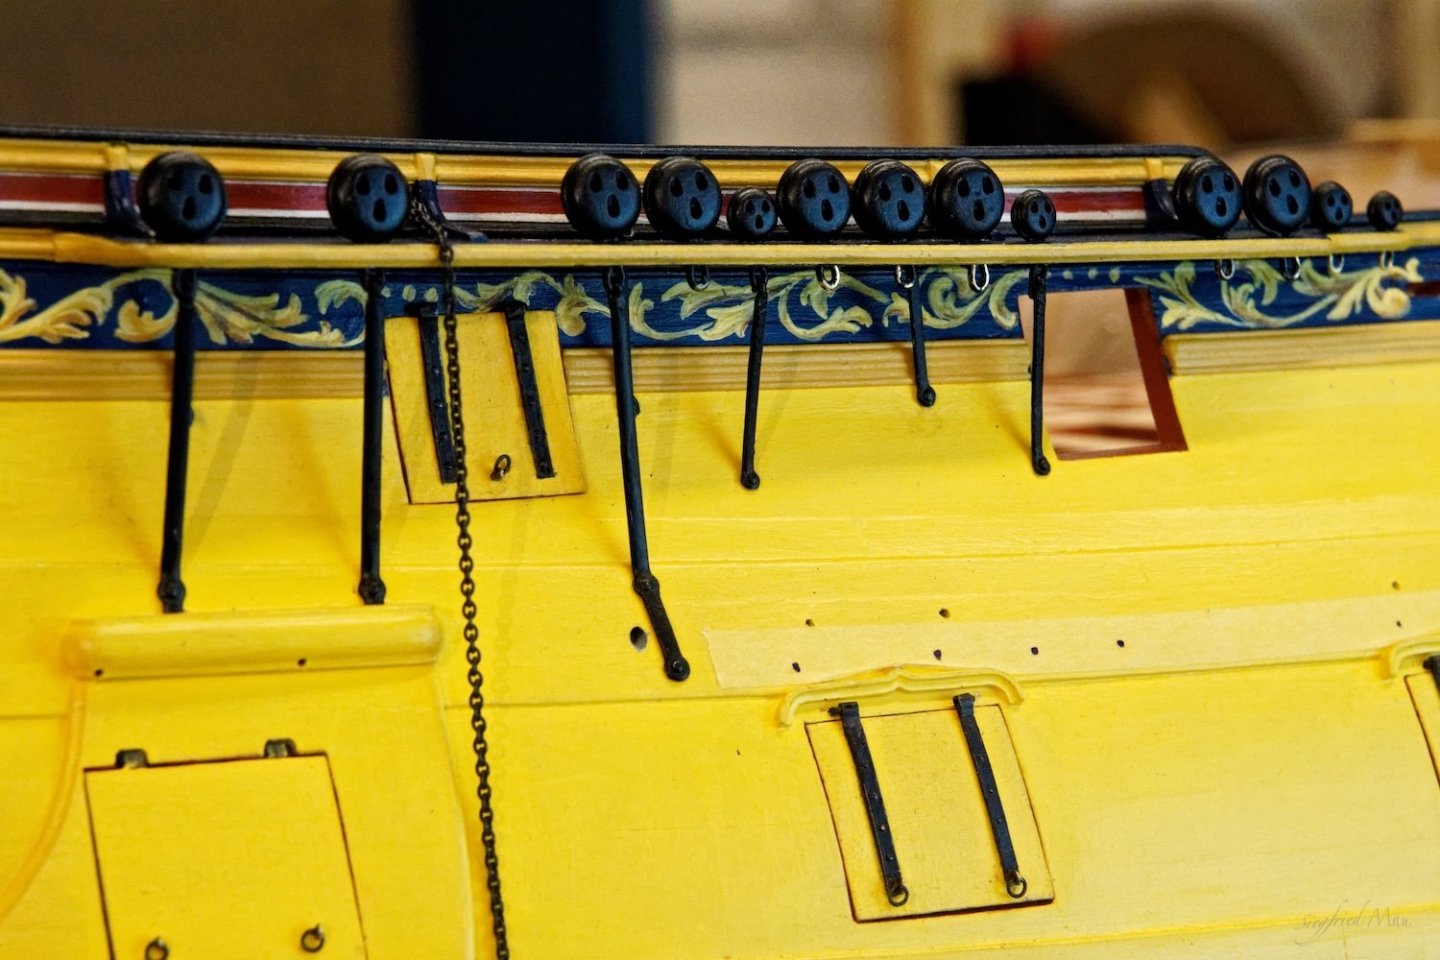
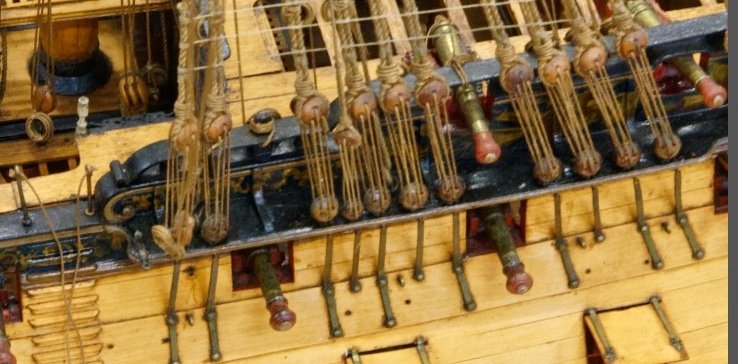
Hello, all the deadeyes and the first chainplates are installed. It takes so long, because the paint doesn't dry really good now. Here are all parts together And there some of them now I did install also the chain-painter chain. What a funny name! I hope it will fit later with the anchor And the whole ship. So for the next weeks I think, I'm busy to install the rest of them.


-
Hello Marc, I use always „ZAP-A-GAB, Medium CA+“ and have good results with it. It fills open spaces and did't bond immediately.
-
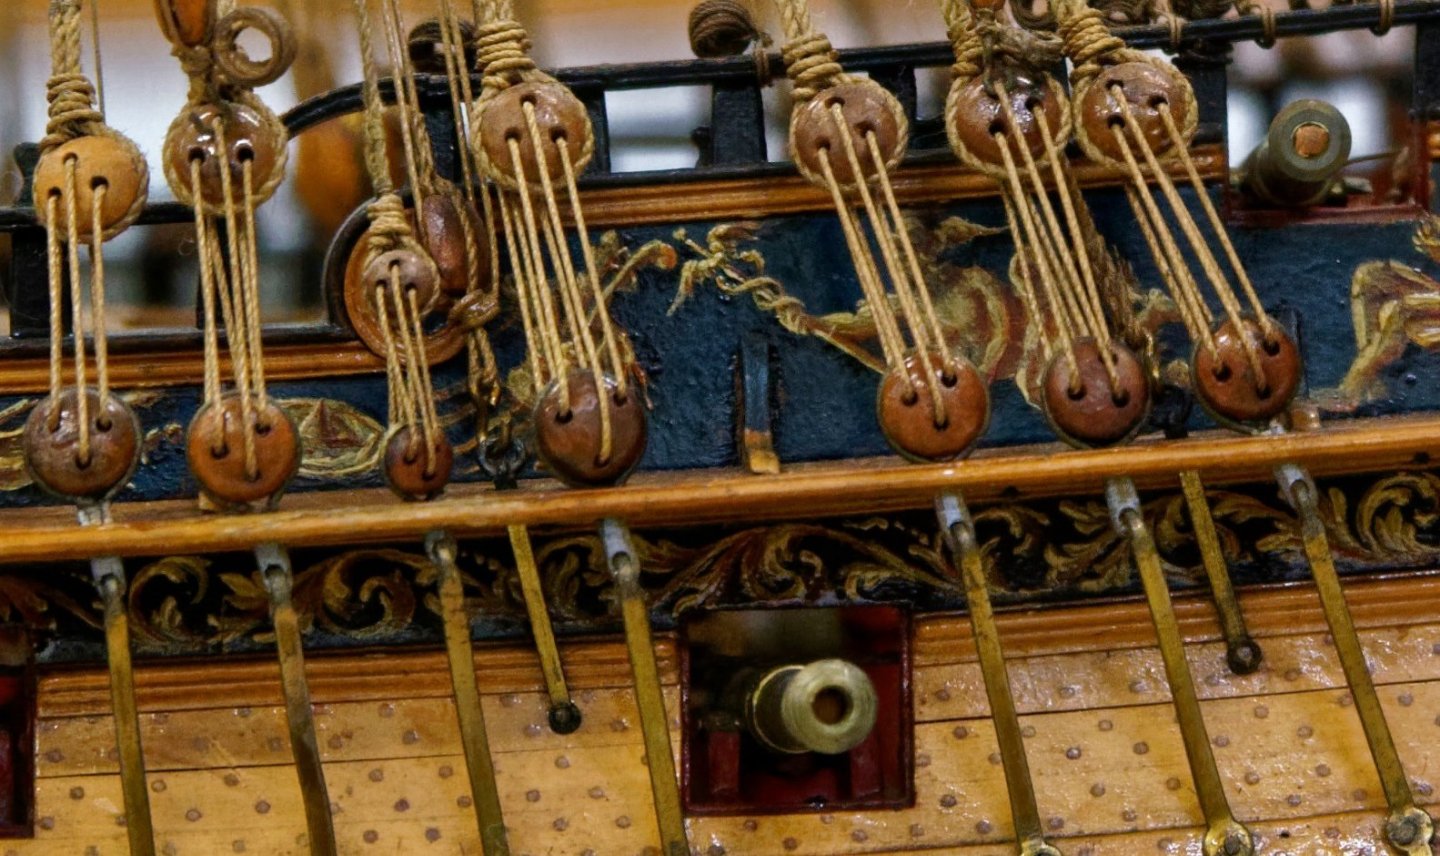
Hello, a short update When I'm building the first deadeyes, I had only the pictures from the Centurion in my head 😐 They build the straps filled with tin! Over night I was thinking about this and thought that this is't right. So the next morning I changed it. The „new“ deadeyes, above, look now much more correct. The one to the left are those for the fore mast, I build yesterday. Today I changed my strategy from soldering them, to glueing them. Here the first one for the mizzen mast. That is at least much easier 🙂
-
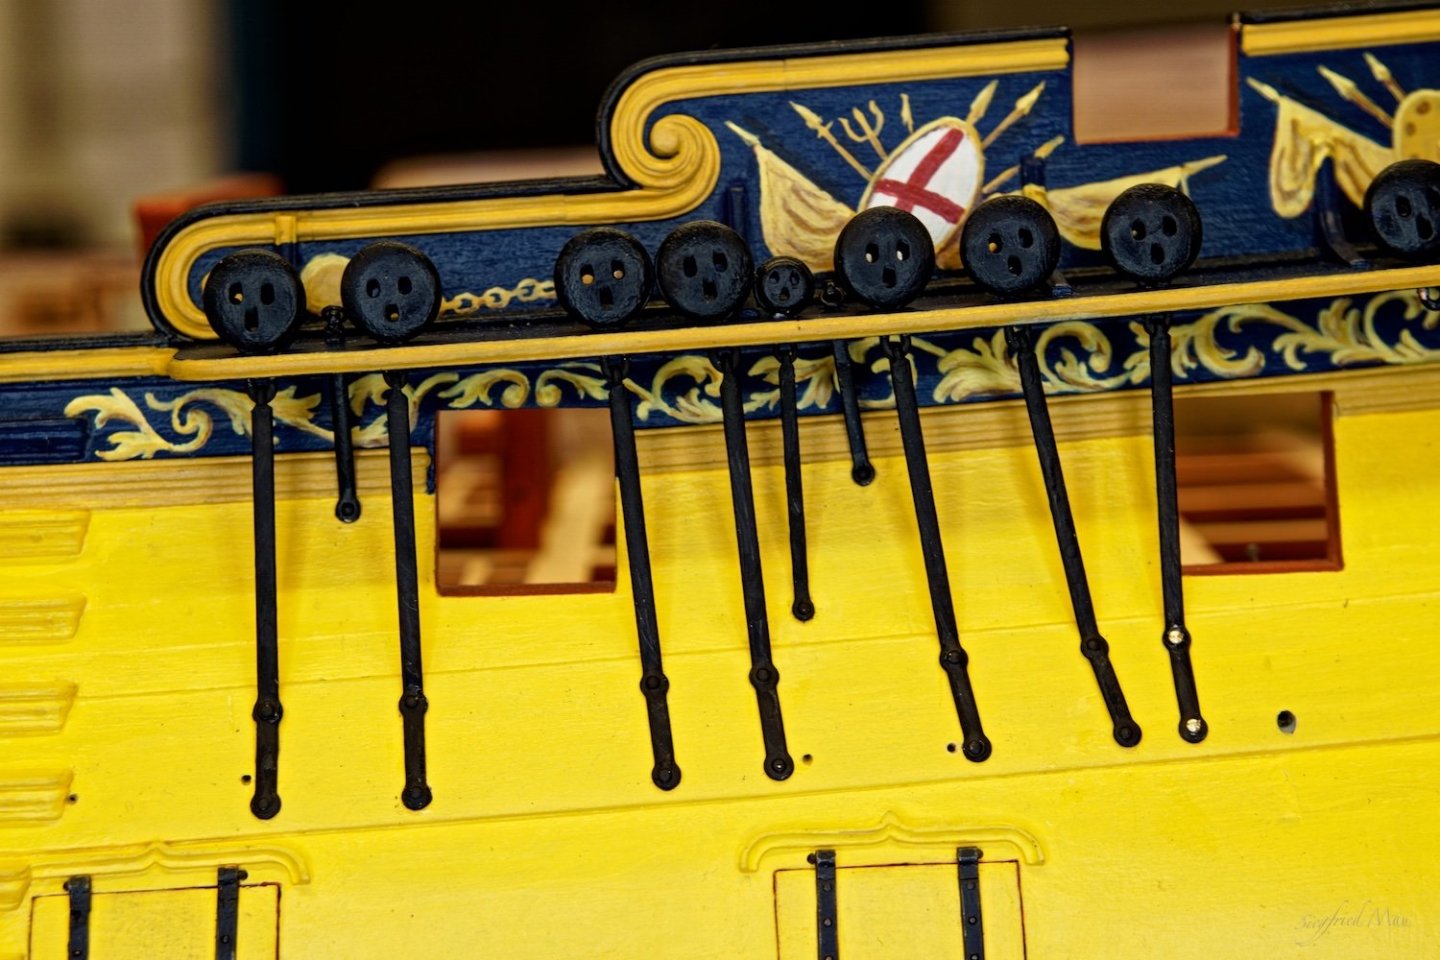
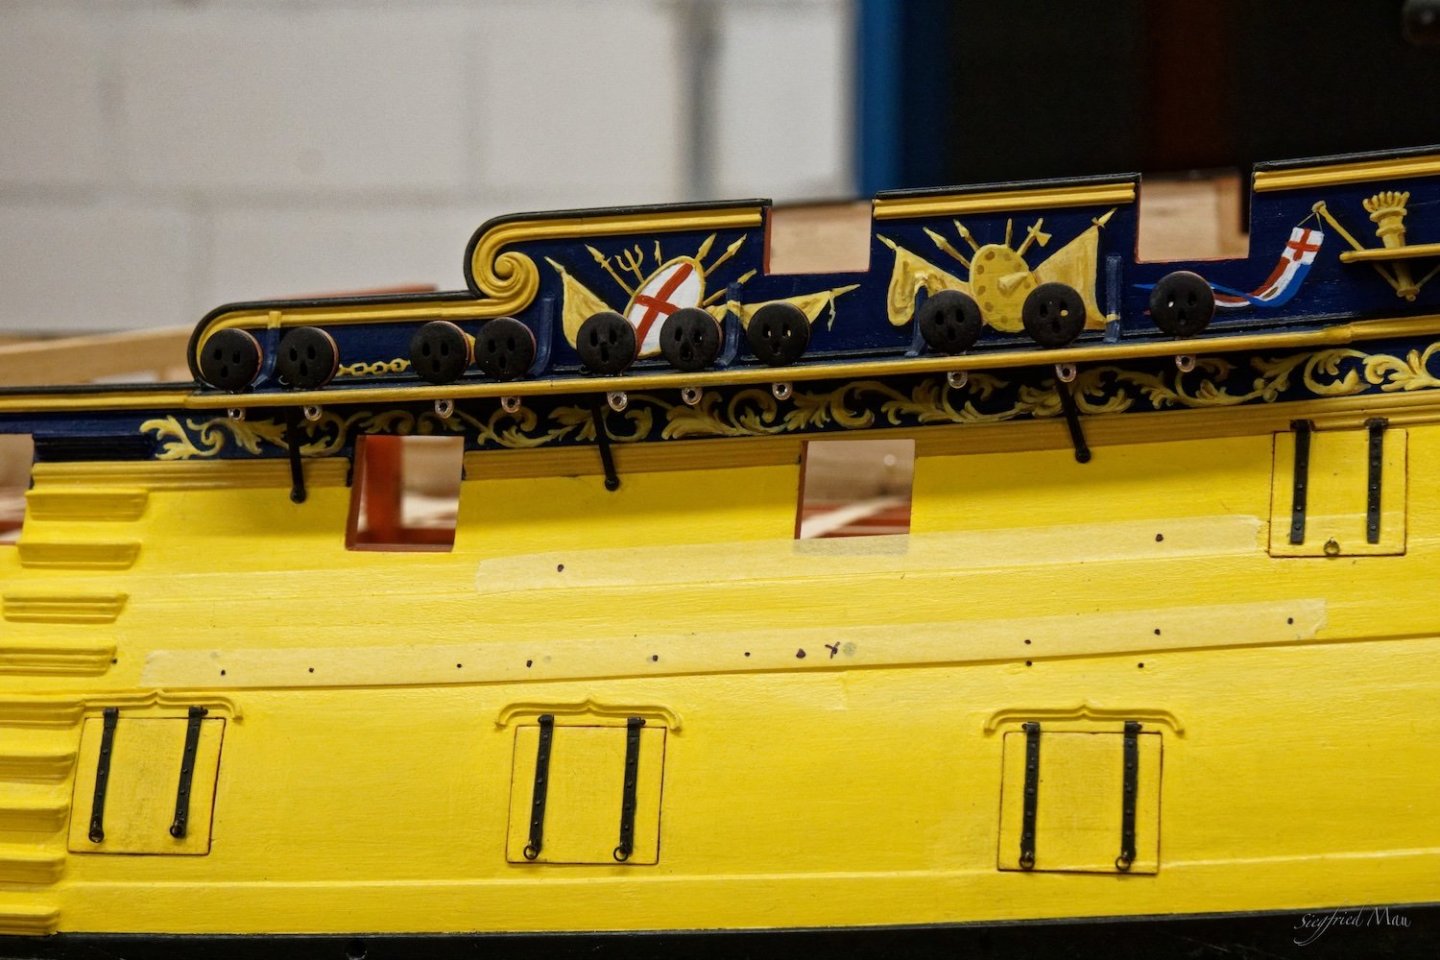
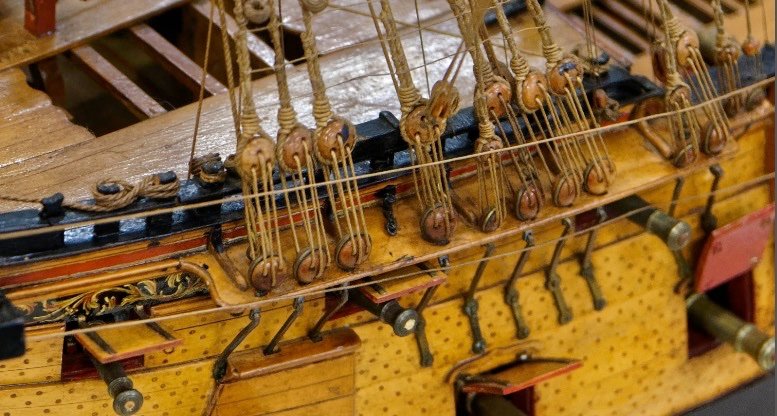
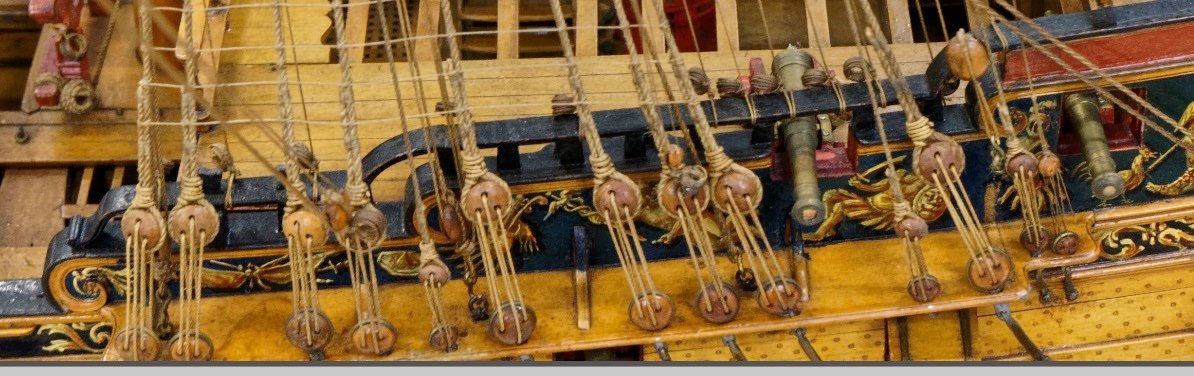
Hello, today I finished the first deadeyes, or put them straps on. After clearing how to do it and wich dimensions and which material, it worked really fine. I forged the strap around the deadeyes flat, because the had a broad groove. These are 9 mm deadeyes, I got from Poland. Others I have from the US, and Canada. So they are really international. The copper wire is 1 mm in diameter. And here the first test sitting So, if you did't hear the next time anything from me, I'm busy with the rest of them 🙂
-
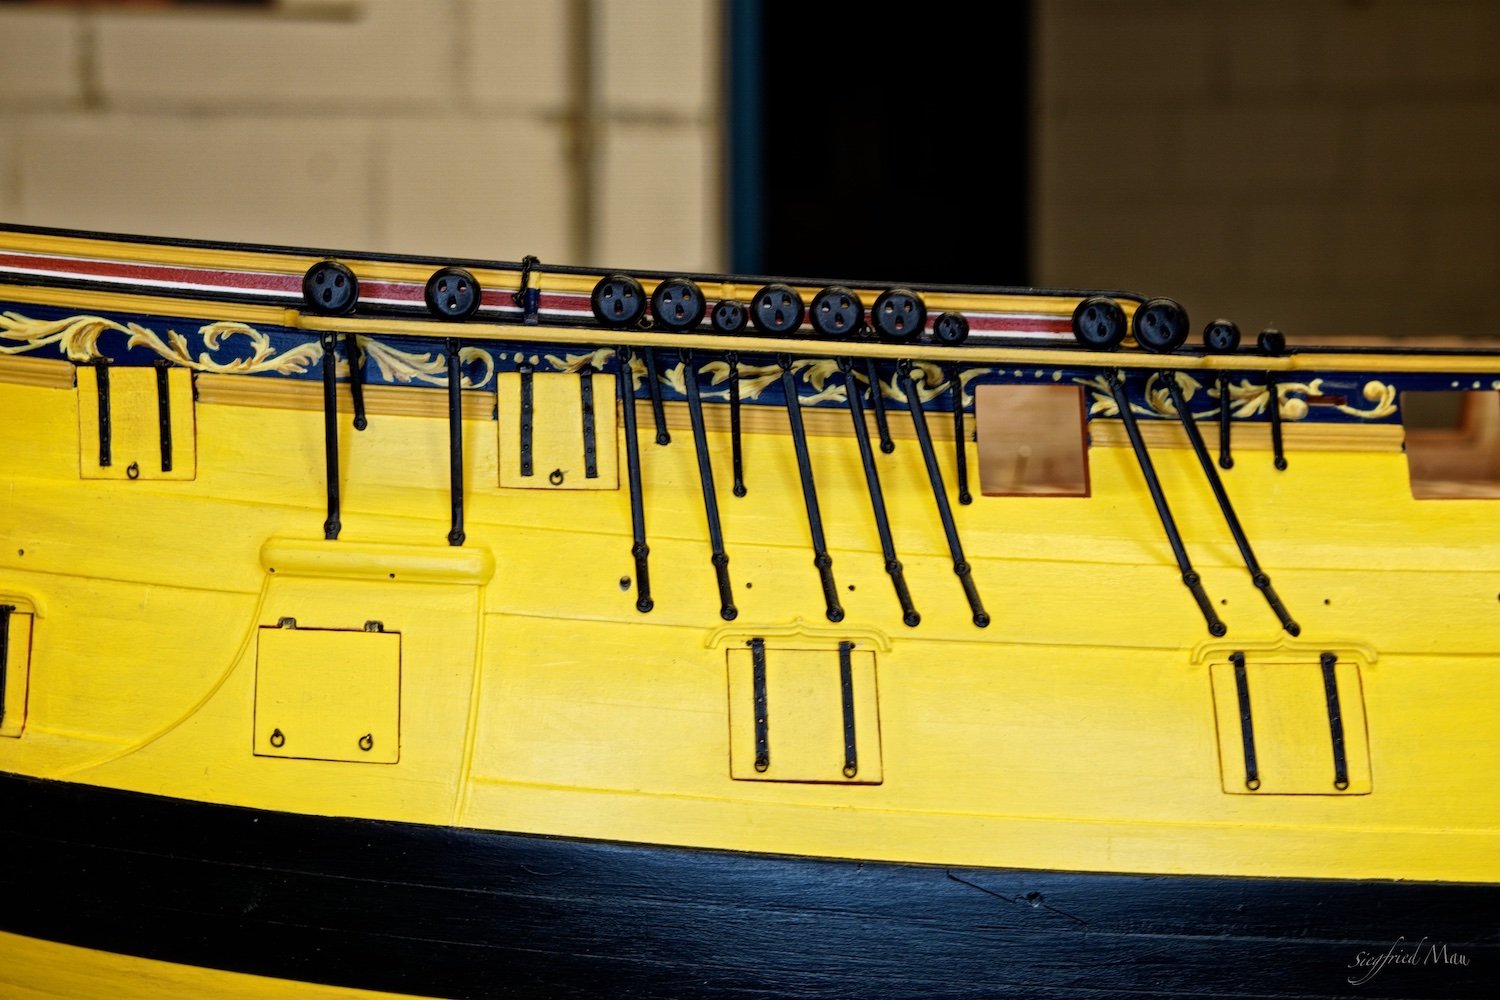
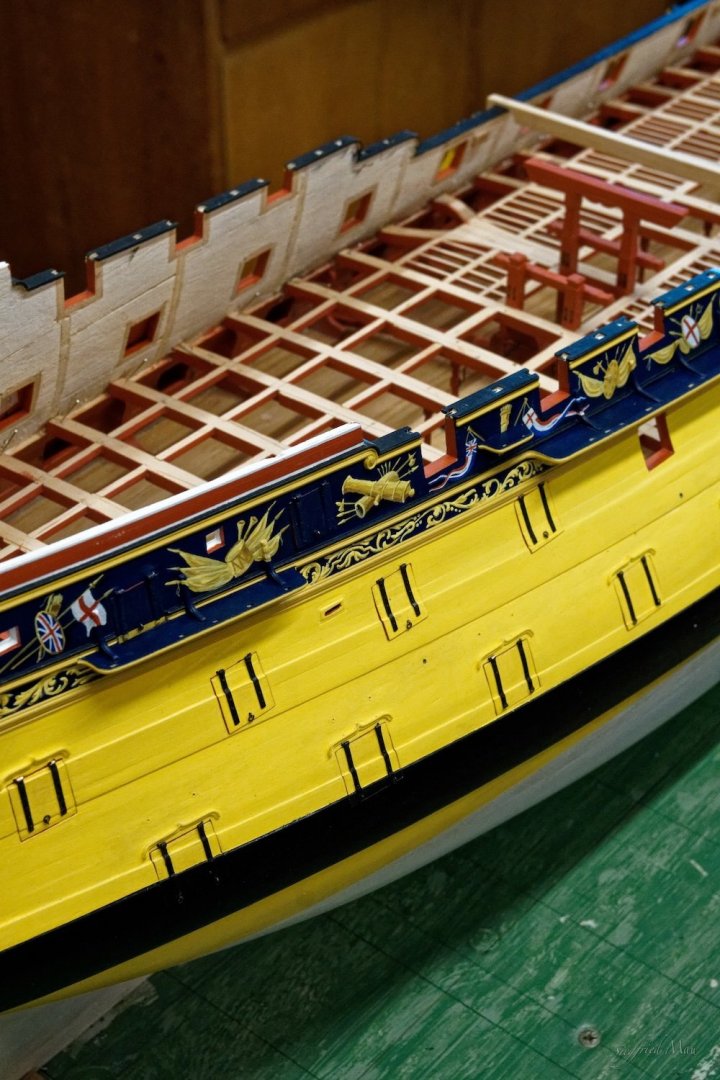
Hello and thank you all for your nice comments and likes, they are very appreciated today I installed the first parts to the fore and main channels. Don't ask me how there name is 😟 They are in the second row. Next, in the first row, the deadeyes are to be done.


-
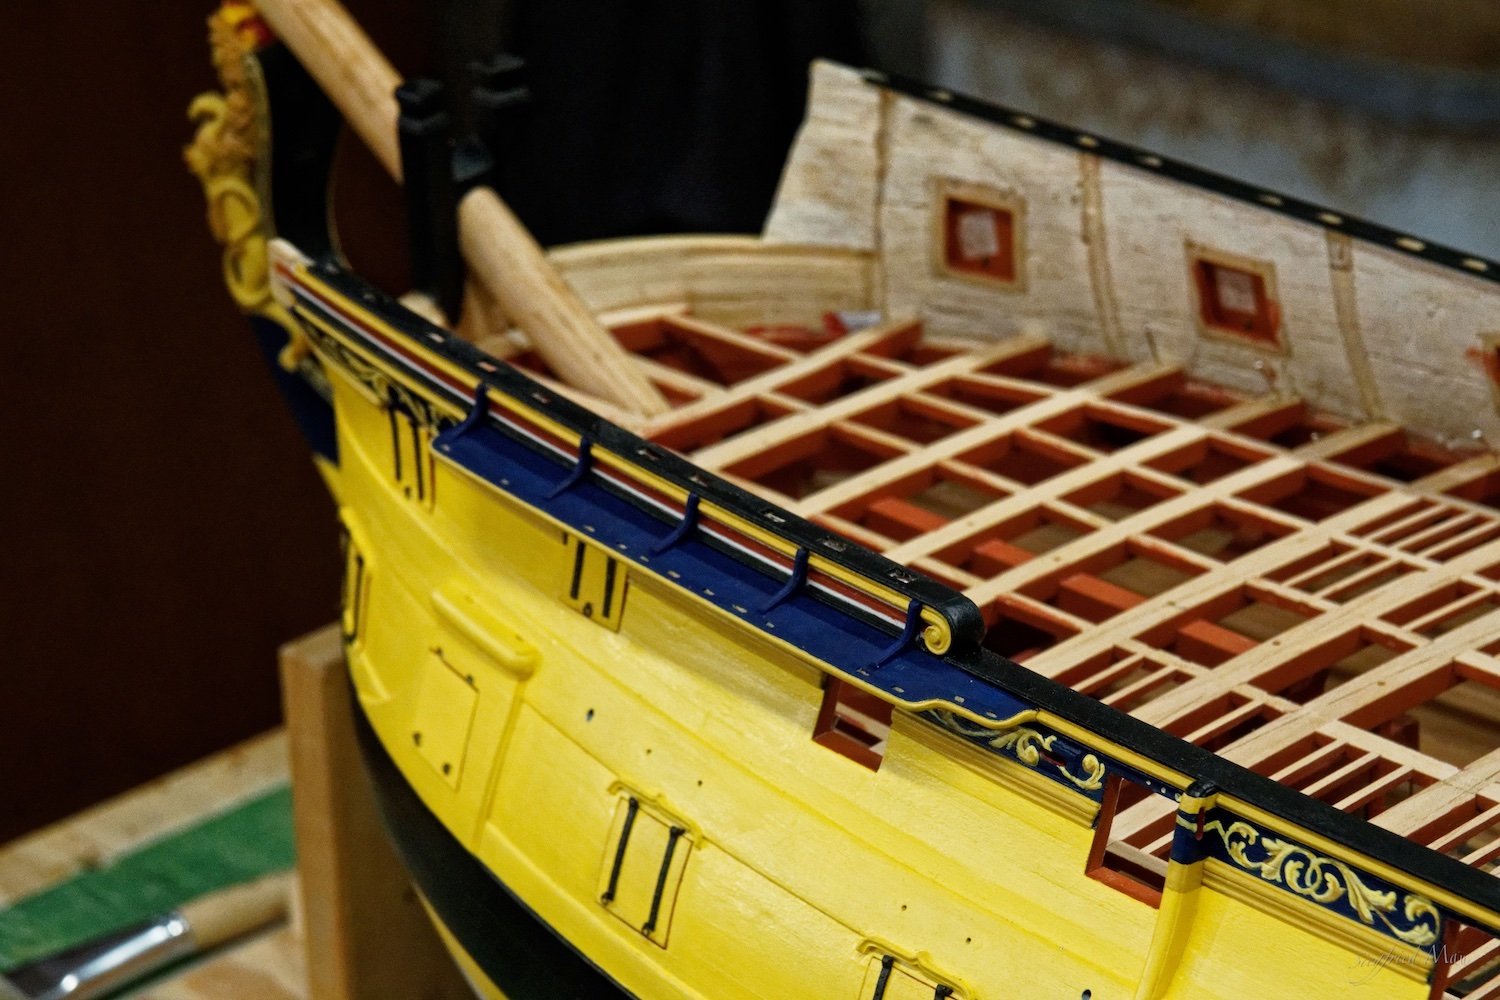
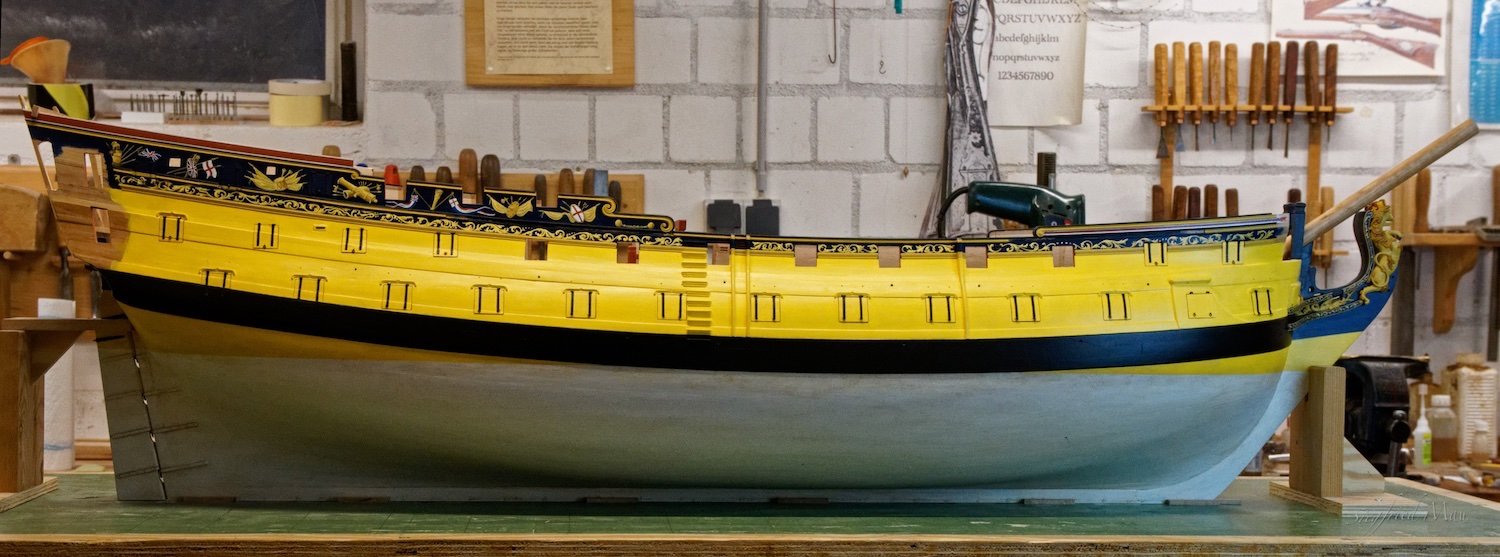
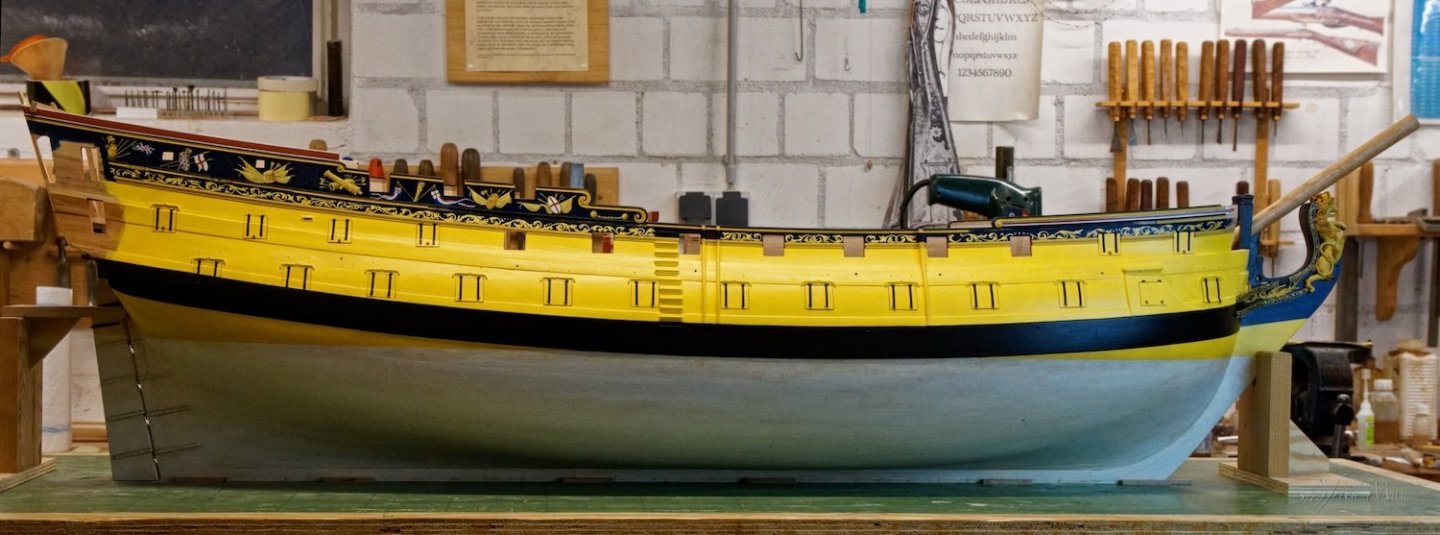
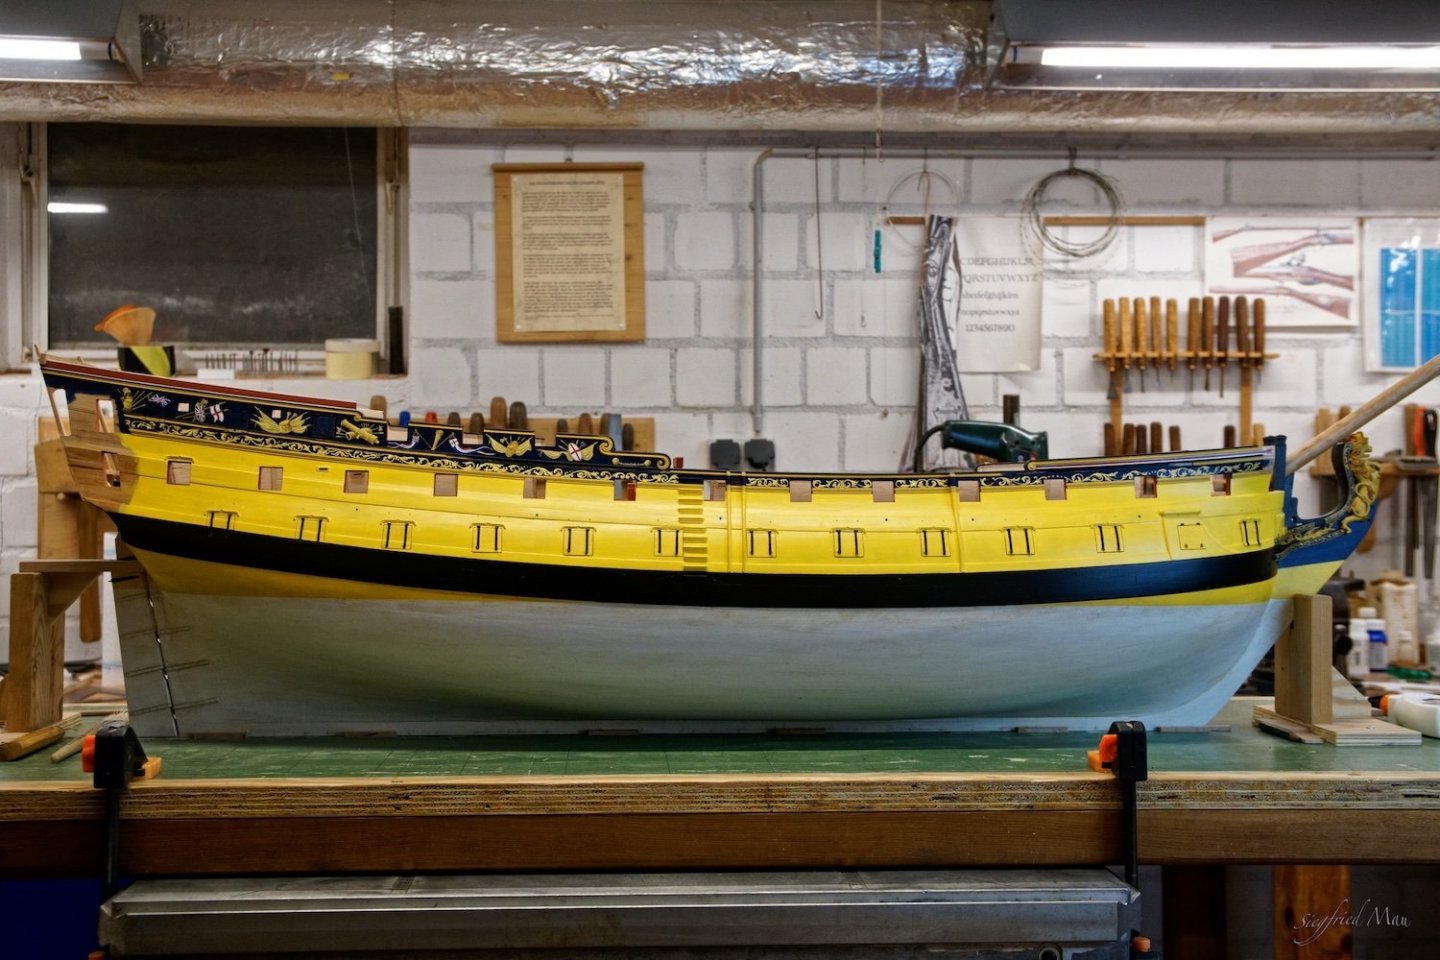
Hello, now this chapter is also finished. All channels are ready and installed. The next time the smith has to build in the deadeyes.


-
Hello, today the carpenters finished the mizzen channels. The painter started to paint the ocker outlining and tomorrow he will do the rest, so that the carpenters could install the channels.
-
Good morning, i'm overwhelmed about the nice comments, and thank you also for all the likes. The next things to do are the channels for the mizzen and the stools for the main mast stay's.
-
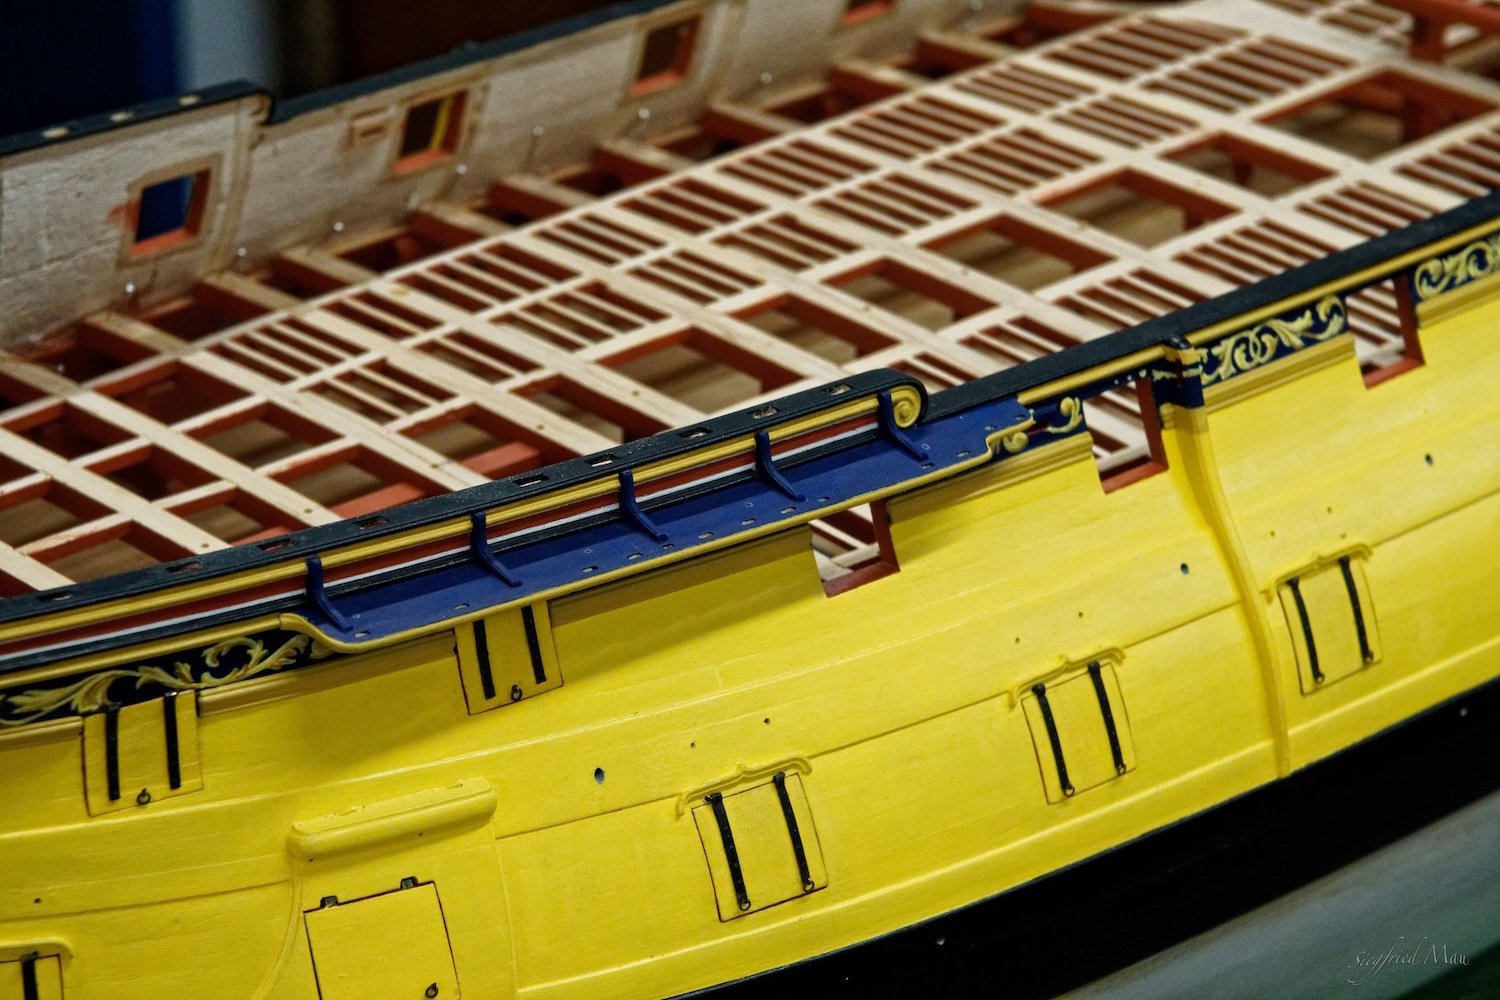
Hello, now also the main channels are ready. Ok, the artist has some small repairs to paint 😉, but now he is ready
-
Hello, now the fore channel of the star board side is also ready. So during the next days I will build the main channels. That may take a little time, because my garden needs now a lot of attention. Collecting all these leaves that fall down 😐


-
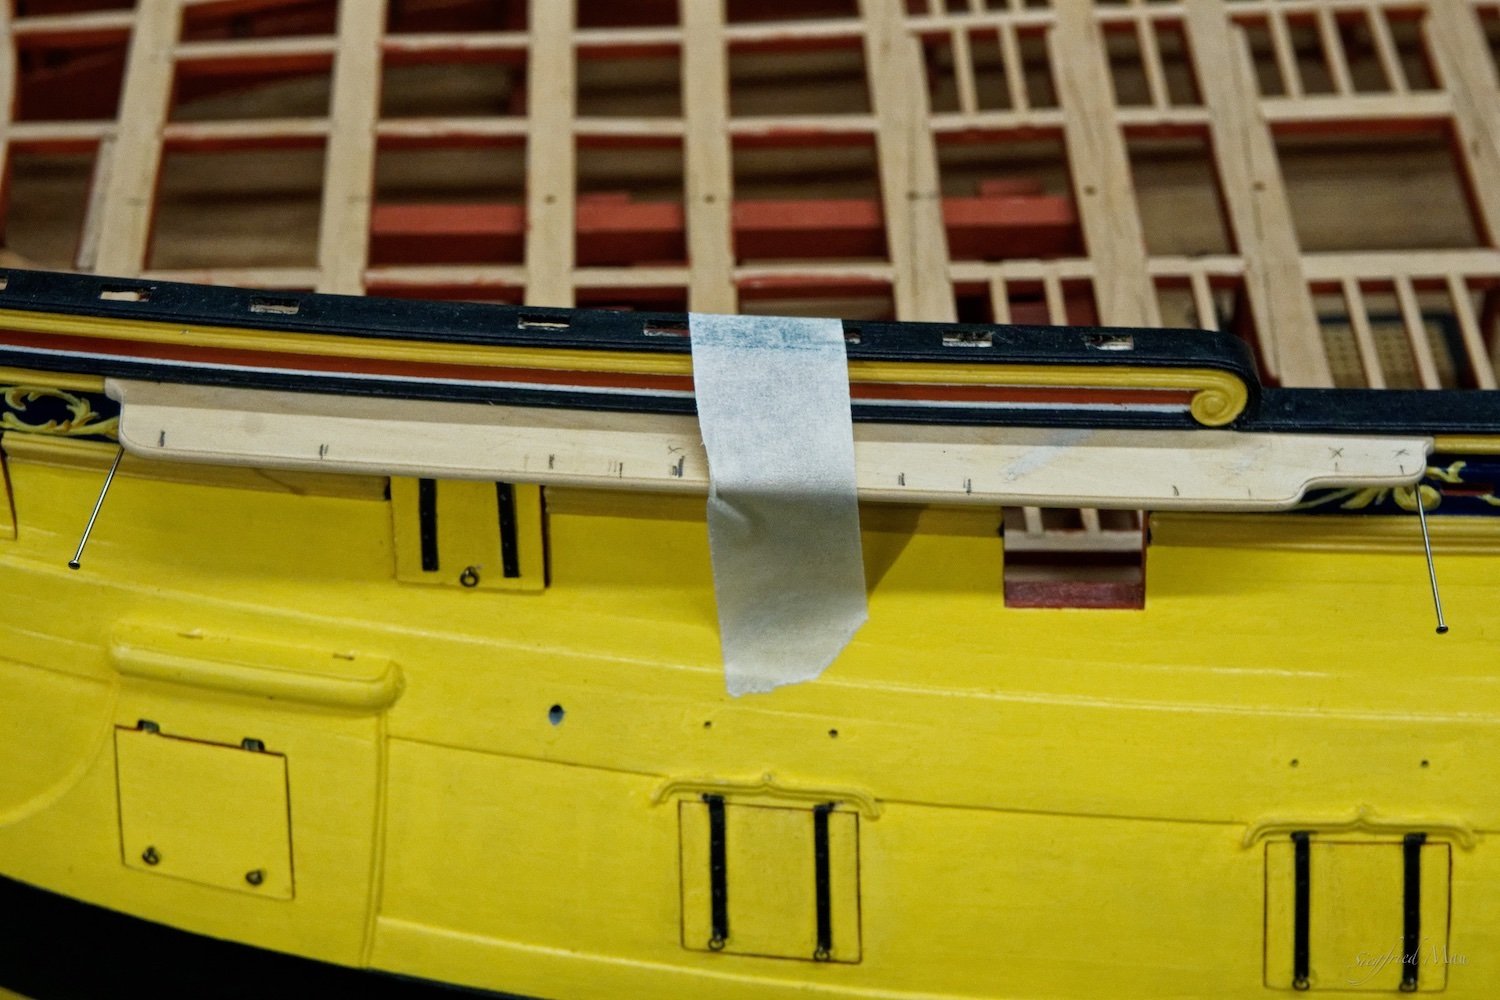
Hello and thank you for your comments and likes Yes Chuck, I used a scraper for the mouldings, but also carving tools. Today I installed the first channel, but not fast at all. That was more work as expected, but at least I got it. The next will go faster. The shipwright spend a grog for that and I think the water is hot 😃


-
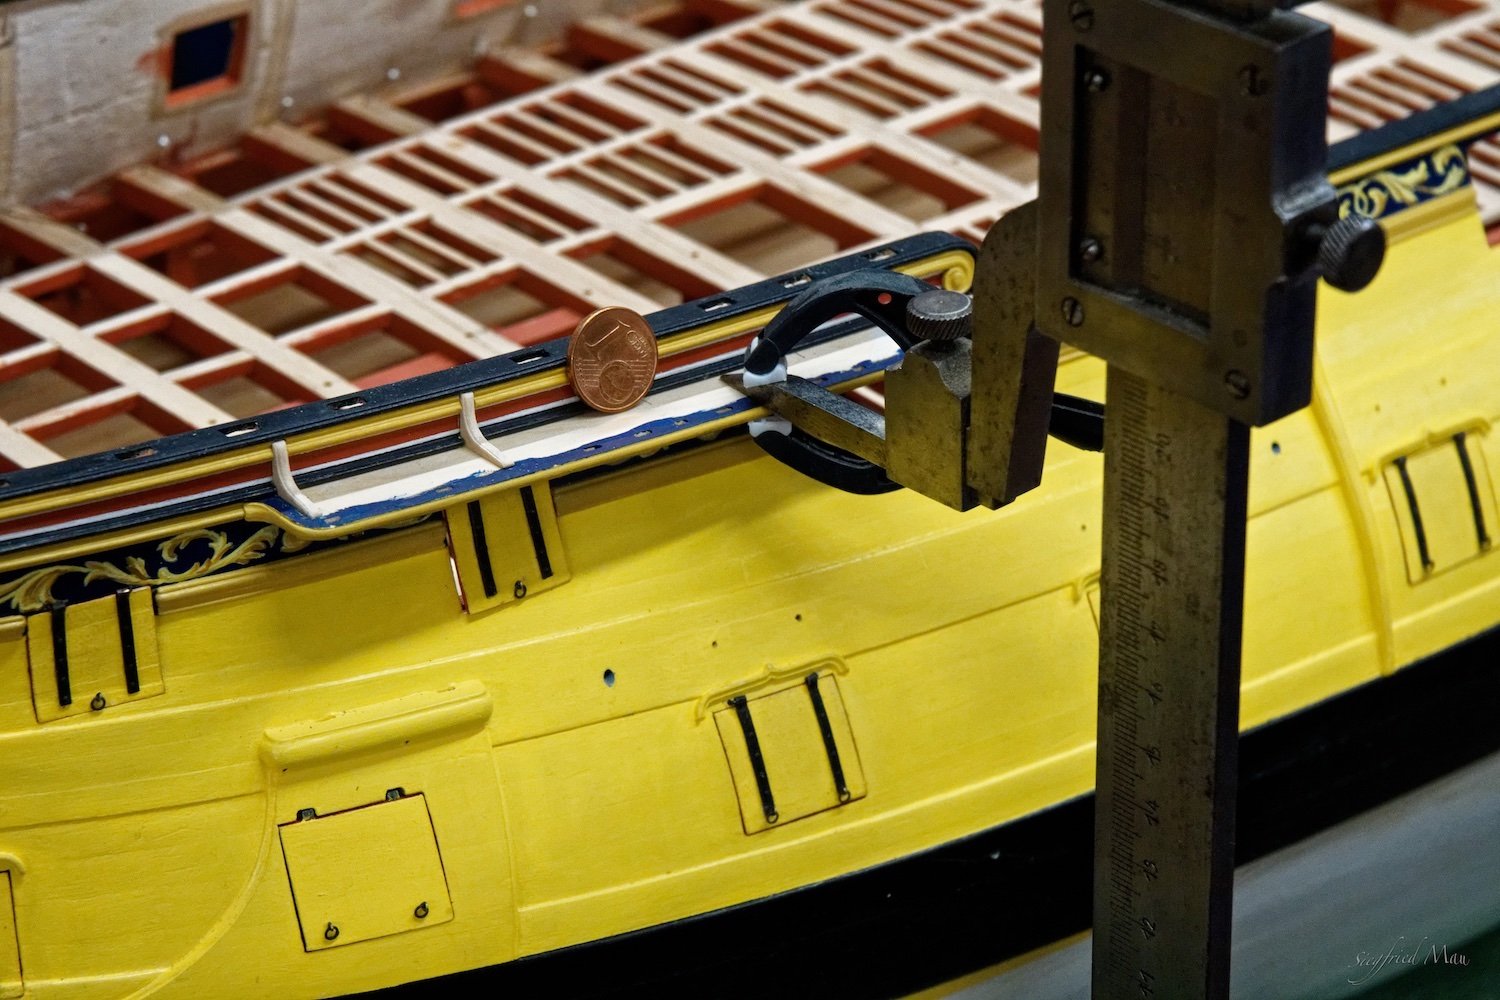
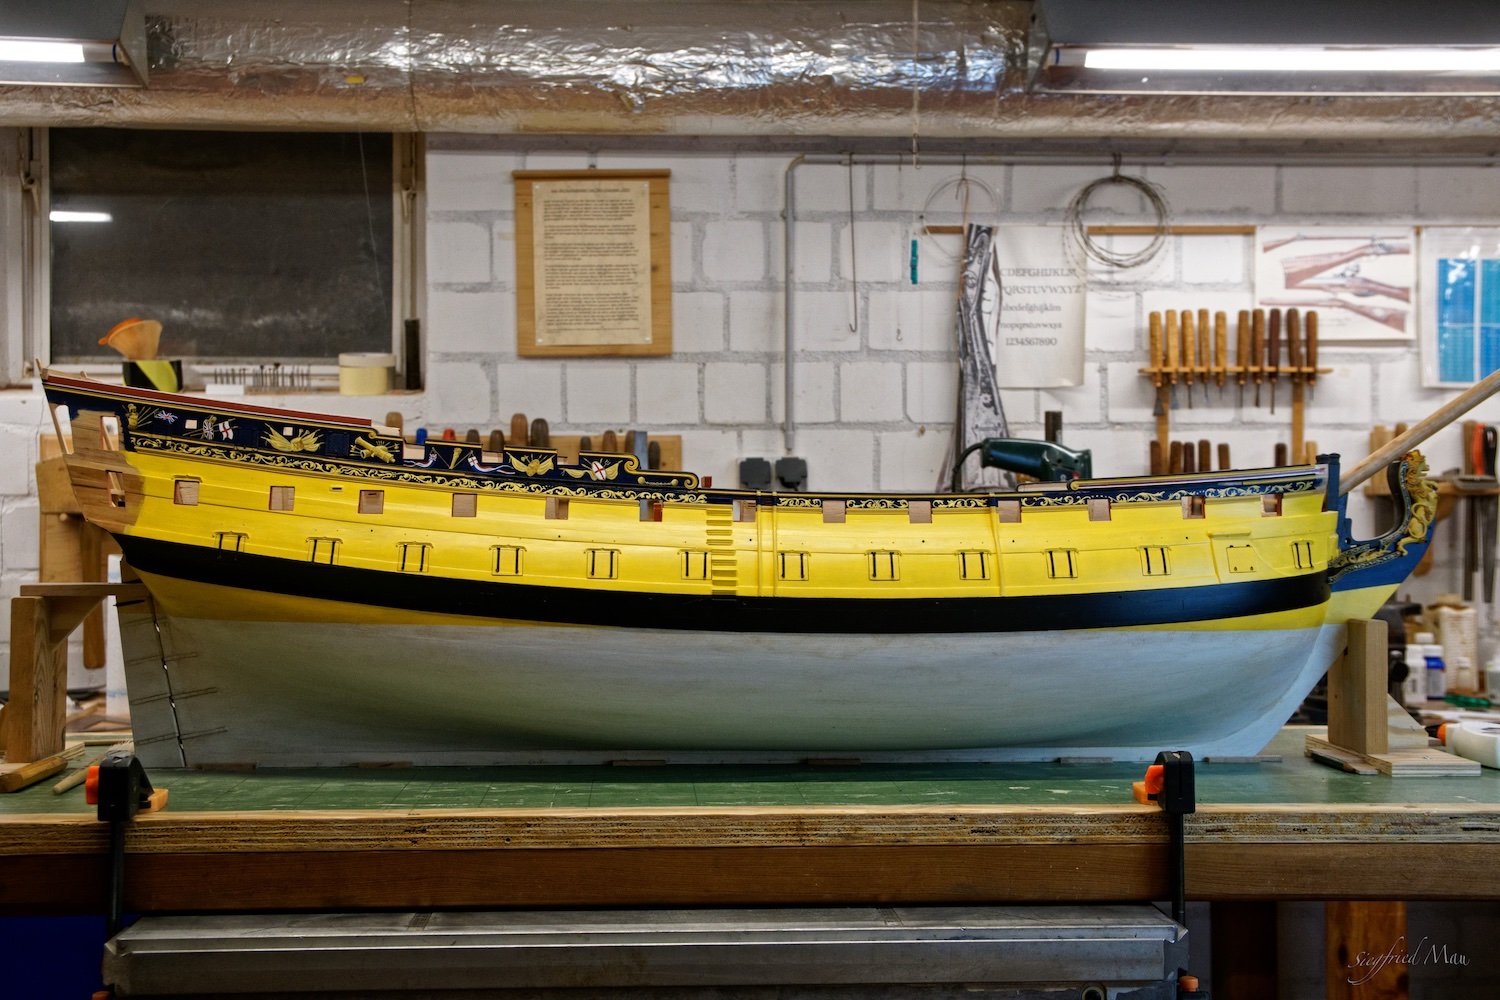
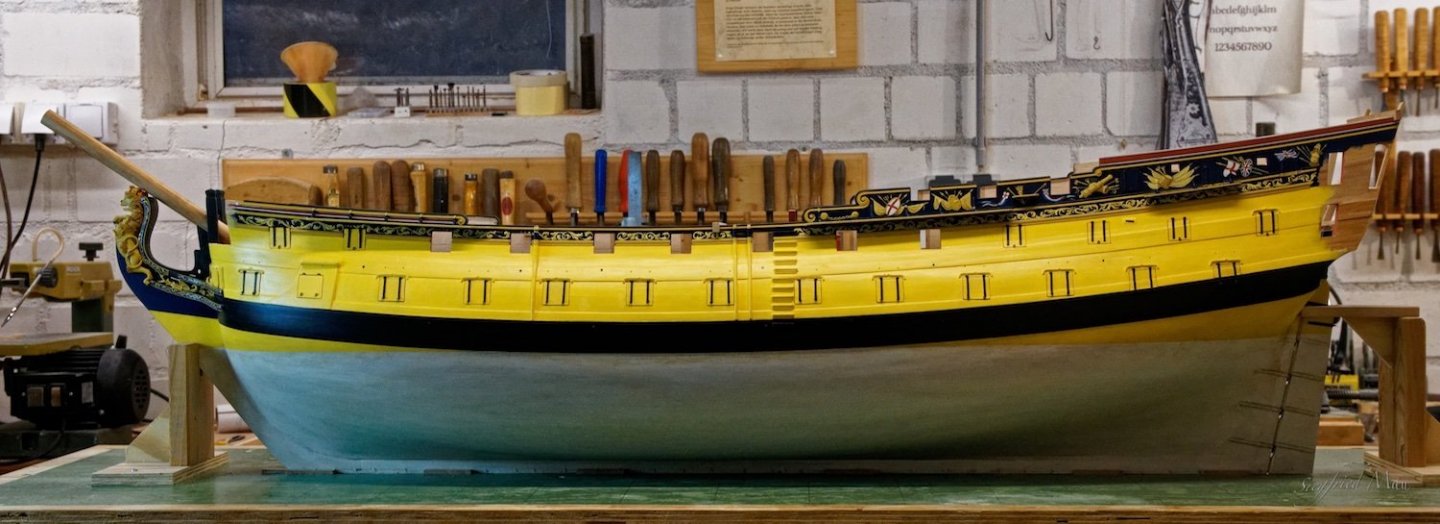
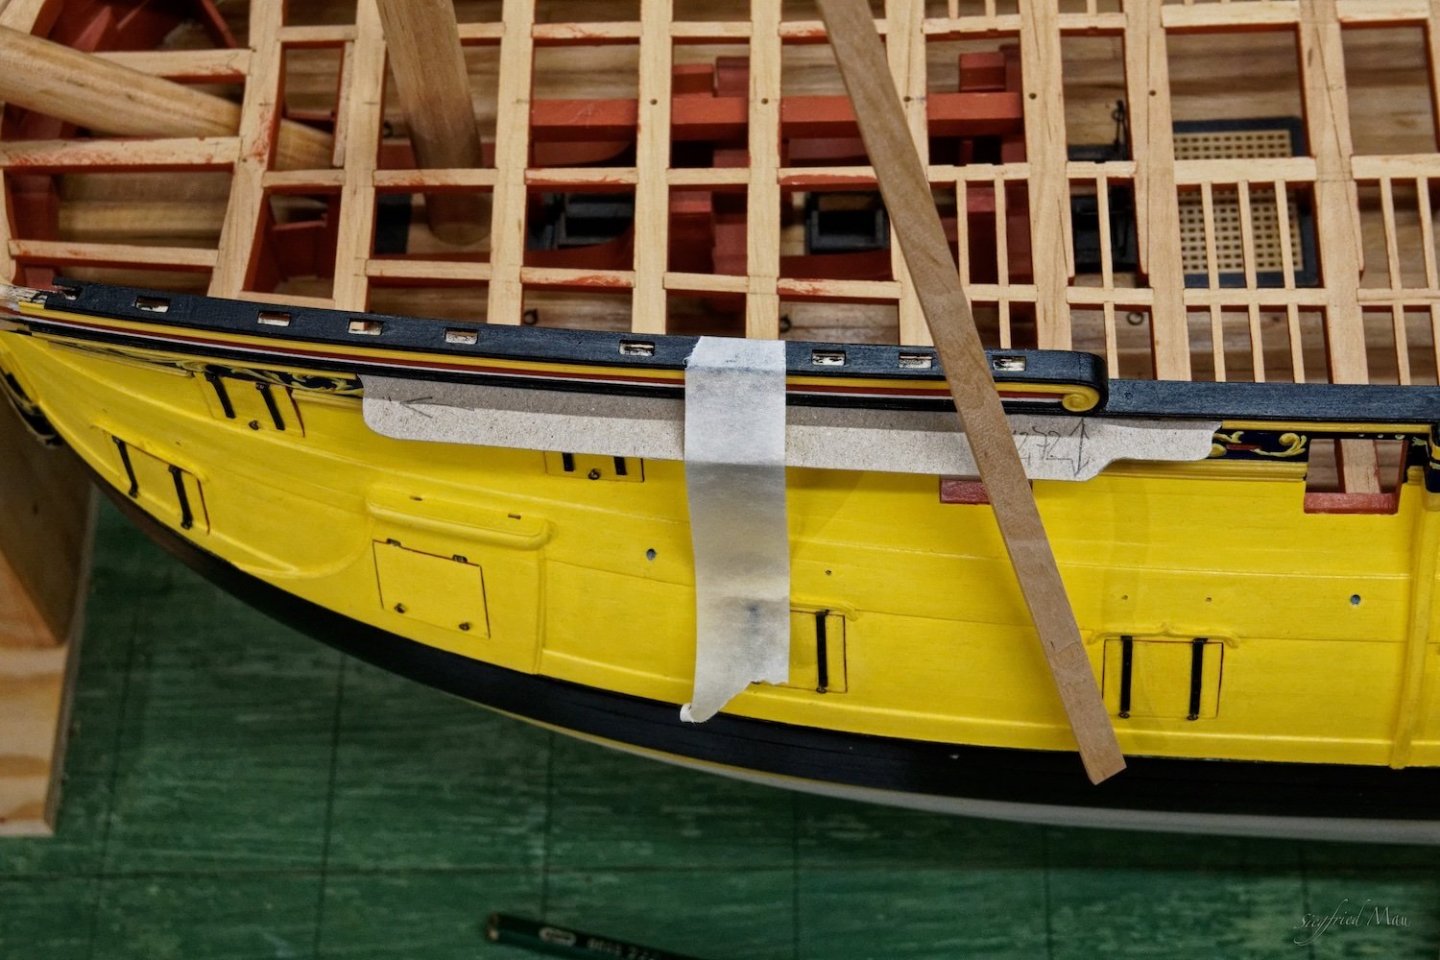
Hello, and many thanks for your likes Finally, sawdust again! The fore channels are mostly ready

-
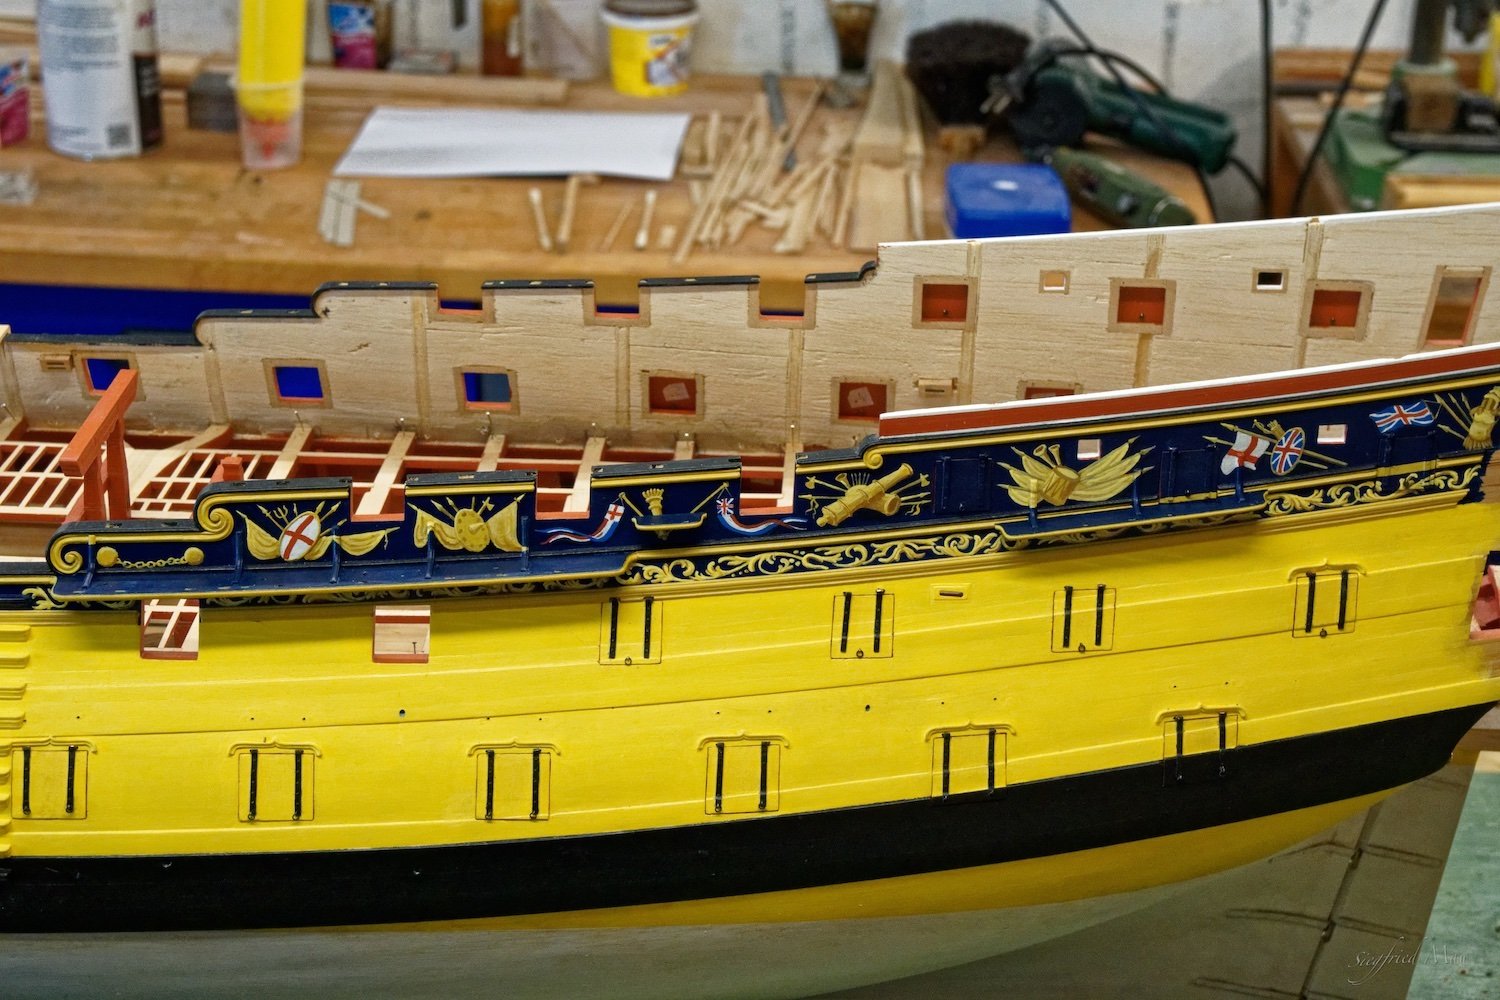
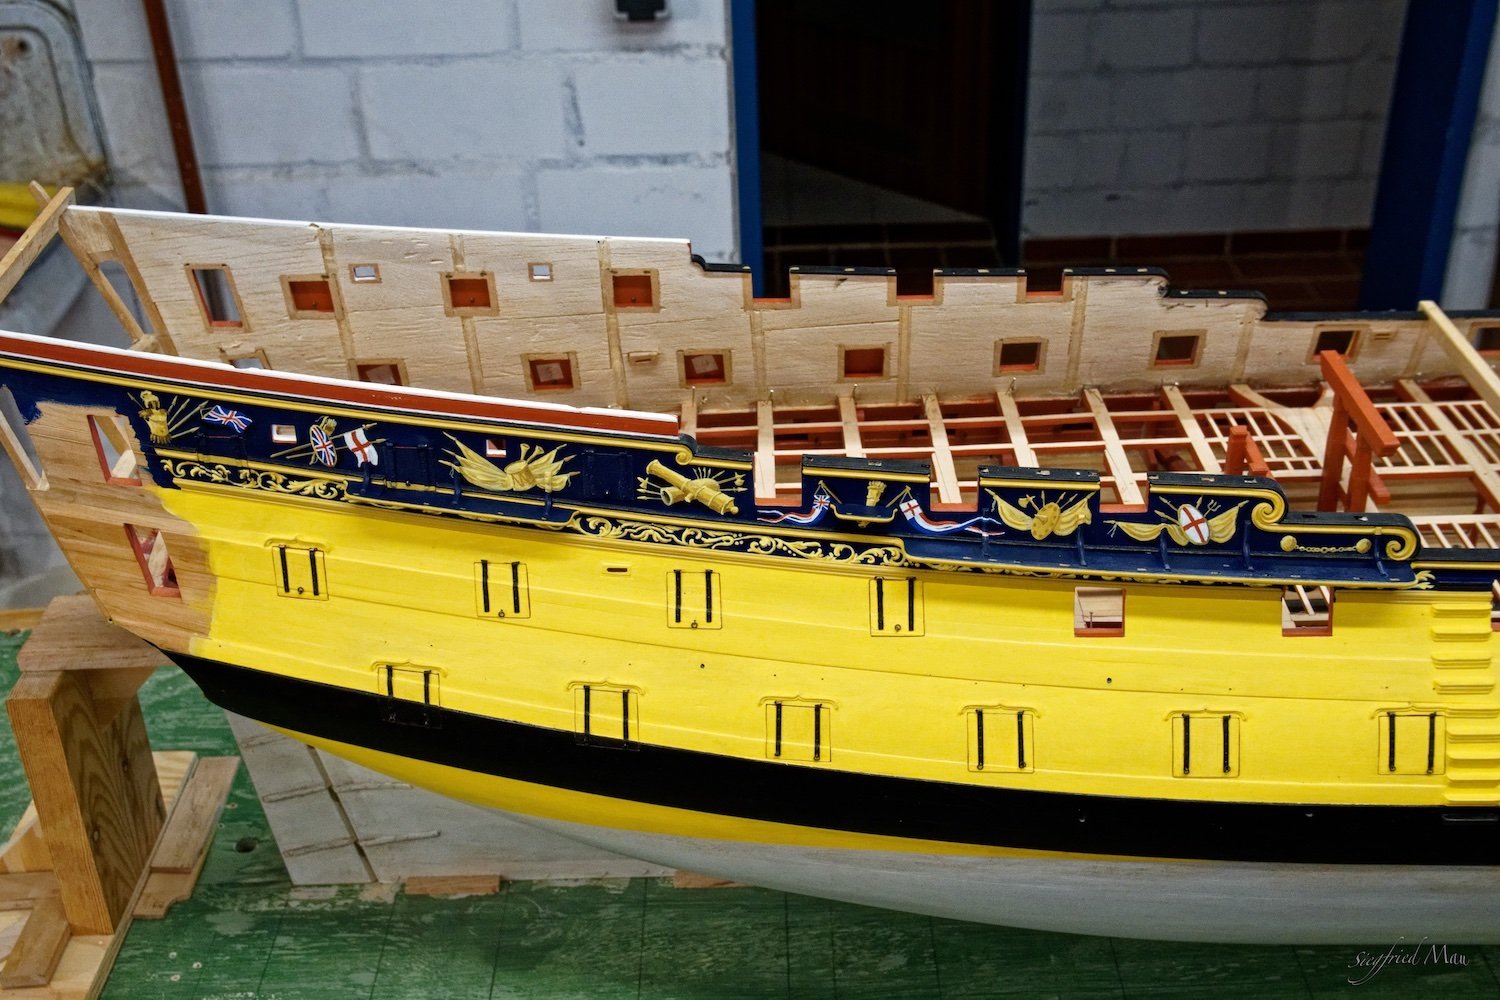
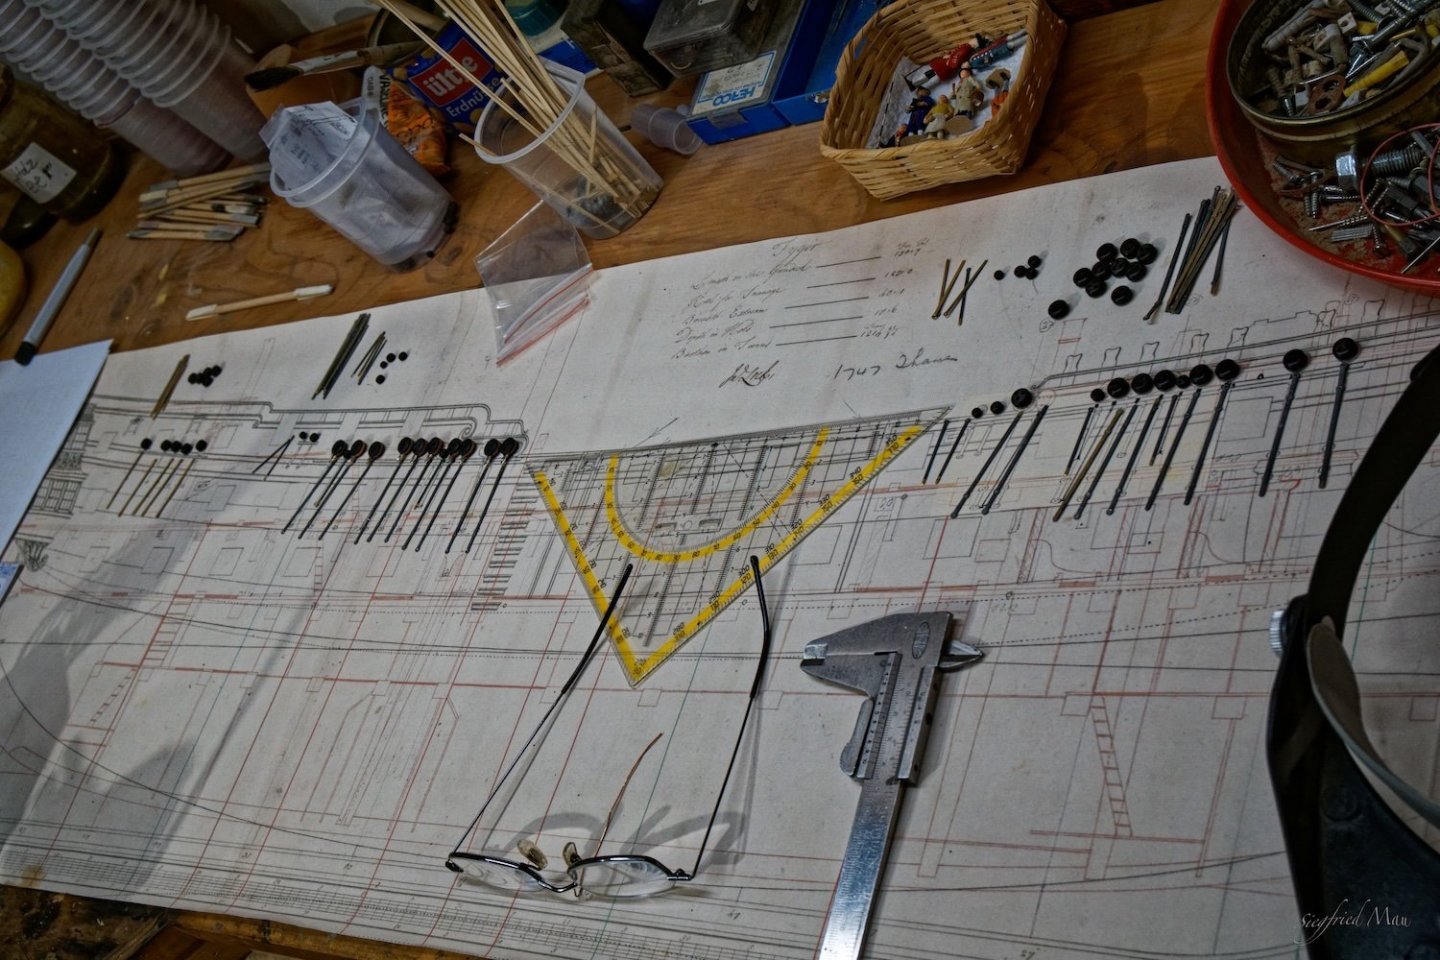
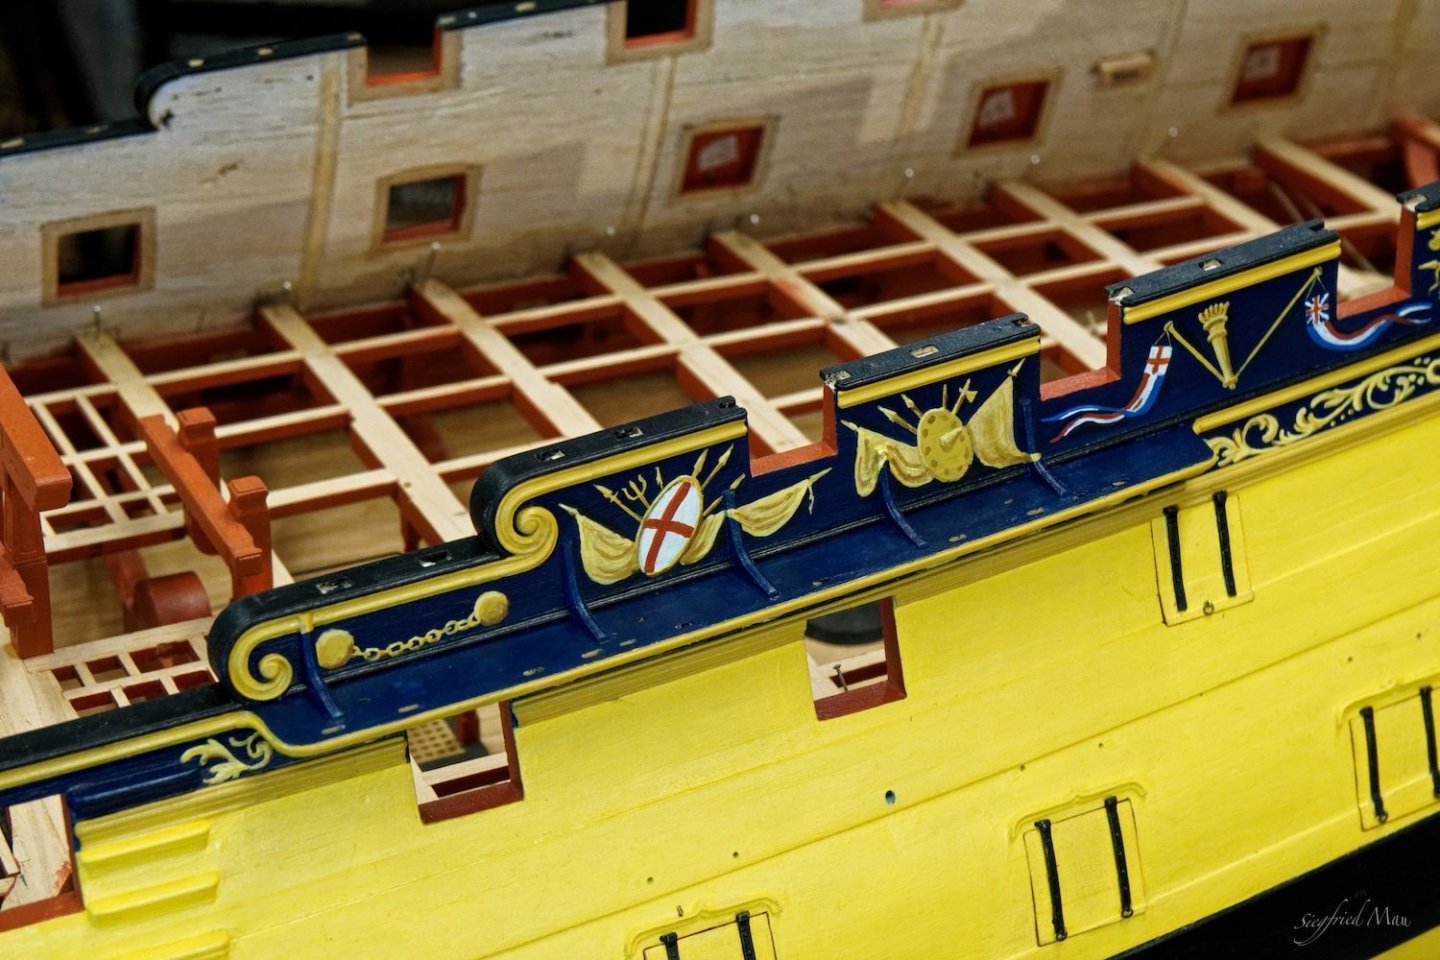
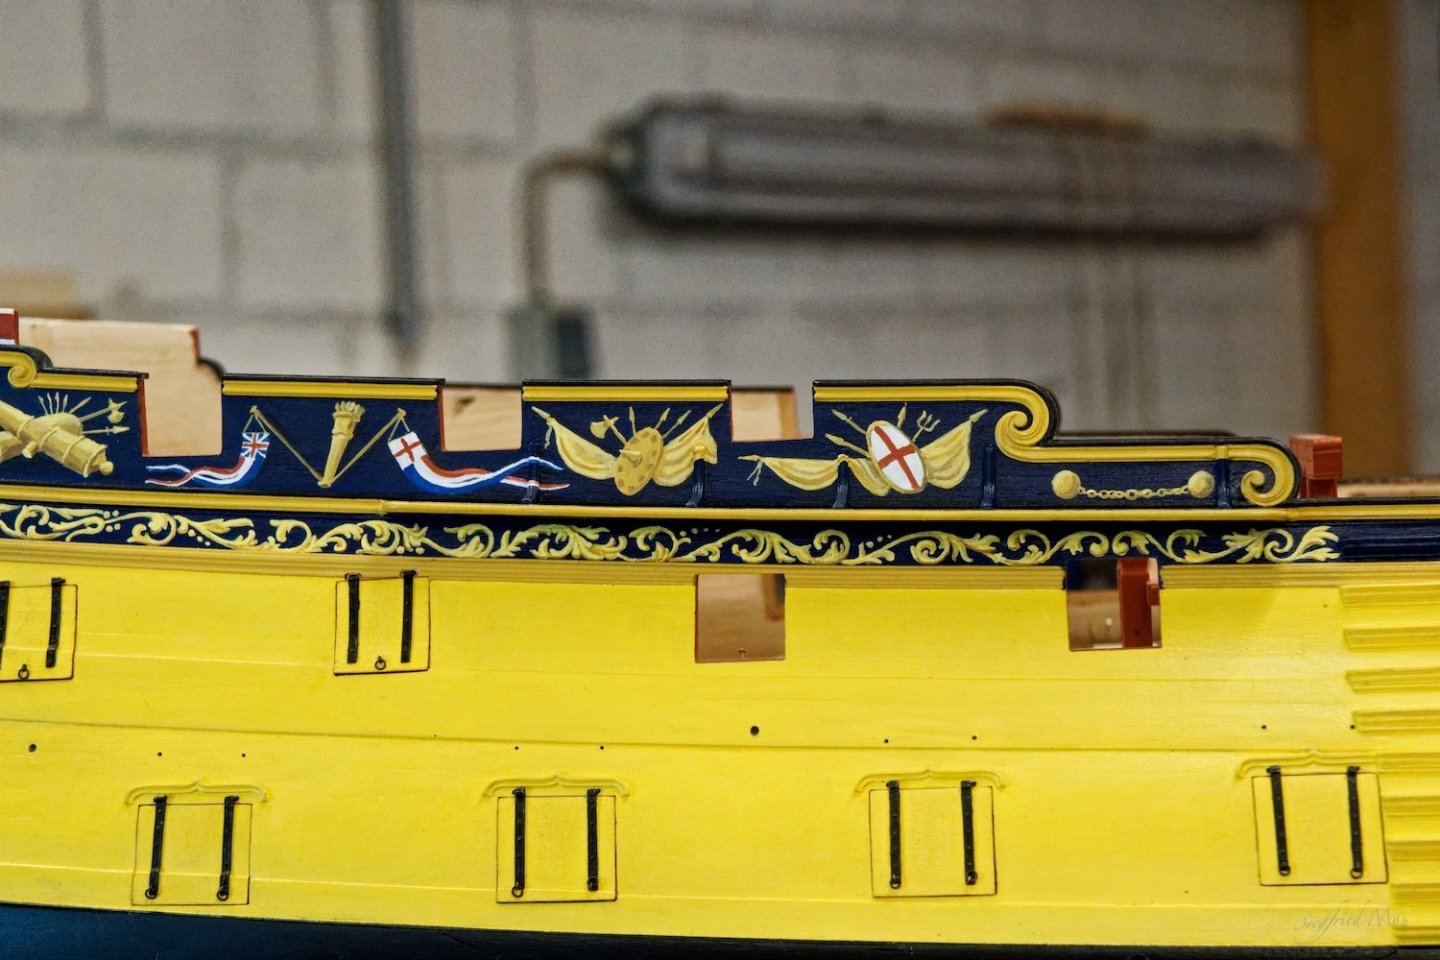
Good morning, before I start television yesterday evening, I had a look into the 2. volume of the Rogers Collection. And there it was, in 1719 the channels had a lower position and therefor an other form. Jaager you where right with your first though. In this case the fore channels where broader in front and the main channels at the aft end to get sure that the shrouds are clear with the ships side. The real Centurion was build that way, but the model was build in 1747 and the modellers build it in the way that was used then. The channels over the ports of the upper gun deck. The channels are now parallel to the ships side, or as the centurion shows a little narrower in the front or back. In this case I take the measurements from the establishment list only for the largest width of them.

-
Hello and thank for your likes, @ Jaager, thank you for your efforts. I don't think that your first thought is the solution. You would't see it at any model. Your second thought is may be the solution, but why did they give the wide only for the middle part of the ship. I think that the given measurements are the widest part of the channels. If that is true also in 1745 is an other question. The mizzen channels are parallel to the ships side, there is given only a wide for the whole thing. I found a drawing in Lavery's Ship of the Line I, the Centurion at page 71-72 That is what I thought was the meaning with design. To follow the lines of the ship. Ok, I would made the channels at the main mast to the aft end at least 4,8mm, so narrower then in the front. The measurements are from the drawing. This are the fore and main channels from the Centurion. That model was build ca. 1745, and her the same from the 60 gunner with no name I'm sorry, but I haven't better pictures. I did't know at that time that it would be important. But with a little good will you could see that the fore channels are to the front narrower and the same for the main channels to the back. I made some channels to look how much space is from the shrouds to the ships side, and I think there is much space. Even when the shrouds come in a little more. Here the channels have the same wide in the front and back. So I think I could made them to the front/back a little narrower to get that arch and follow the ships lines.

-
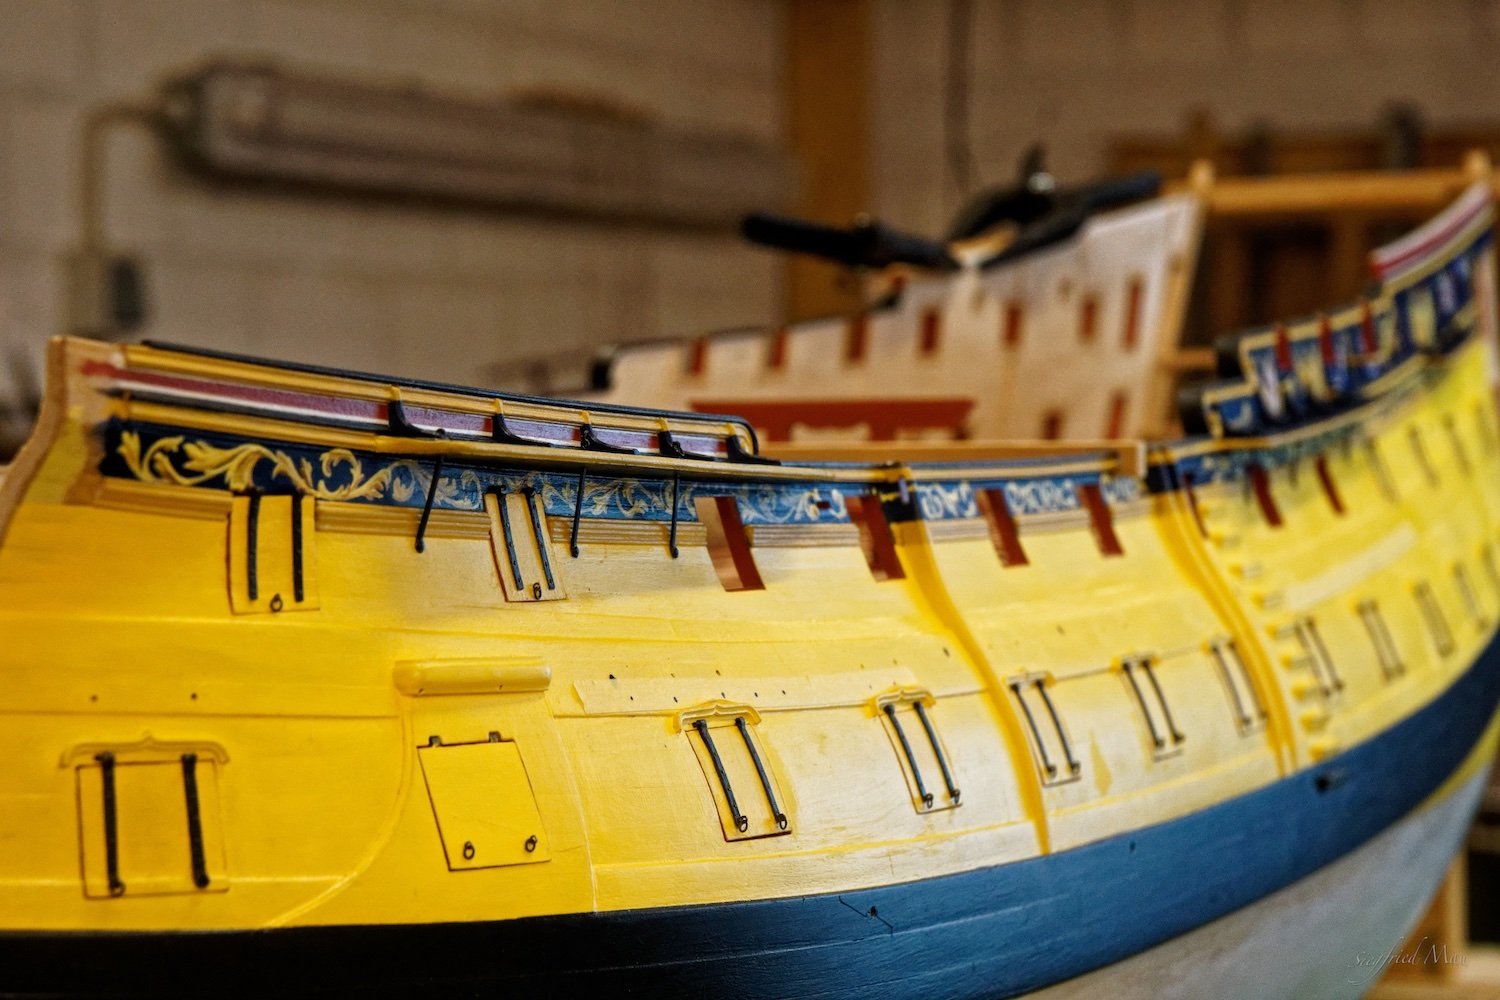
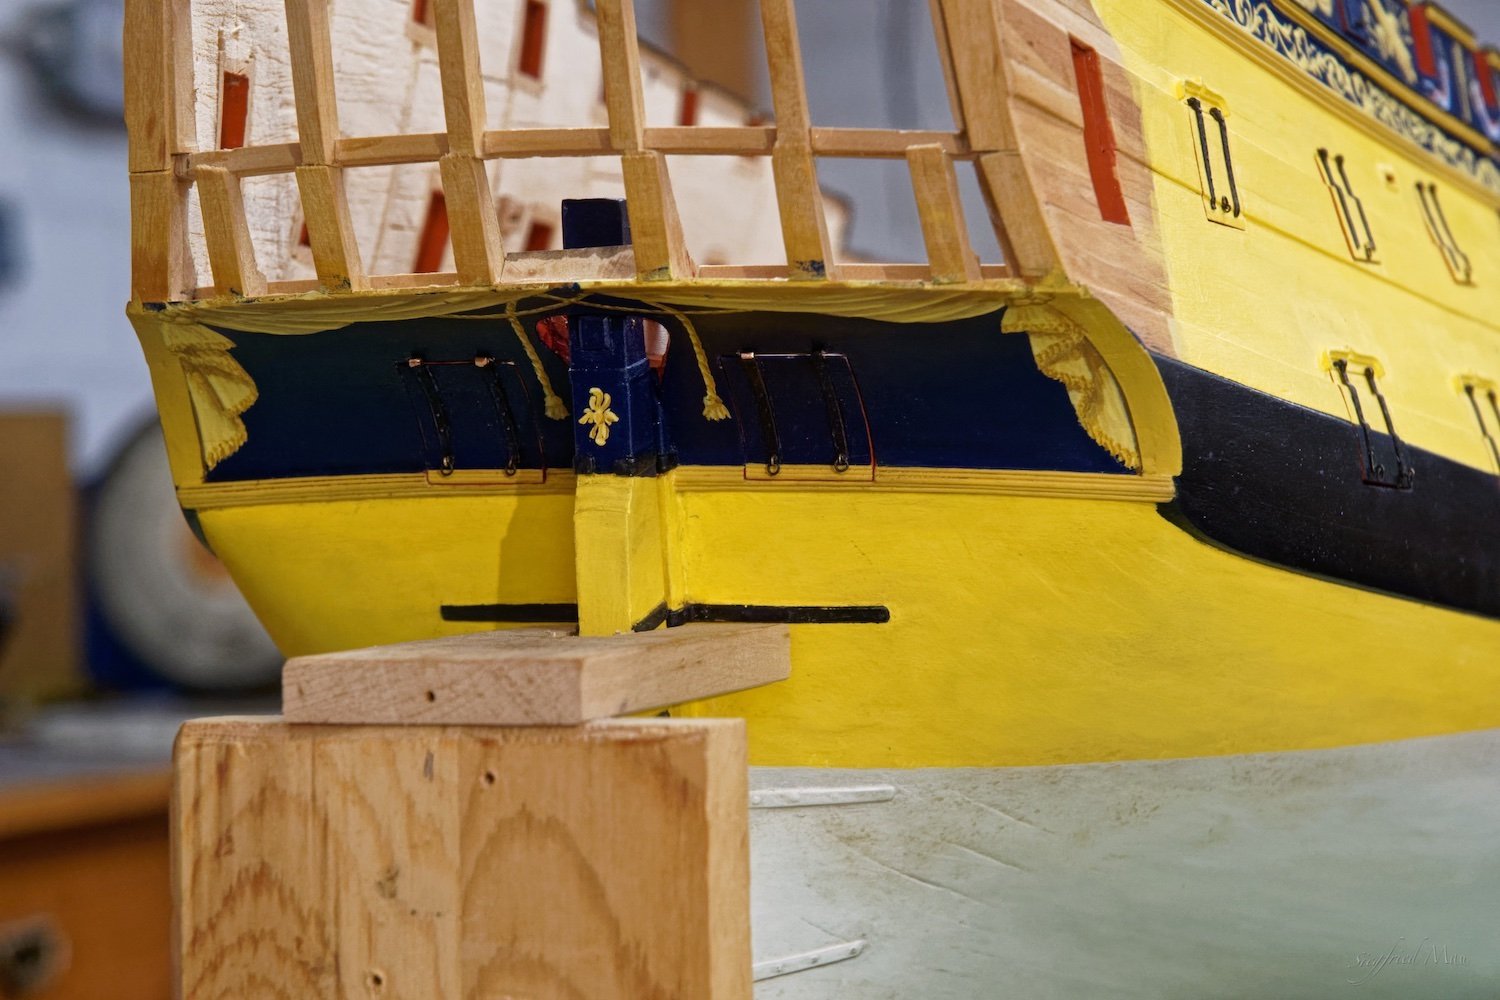
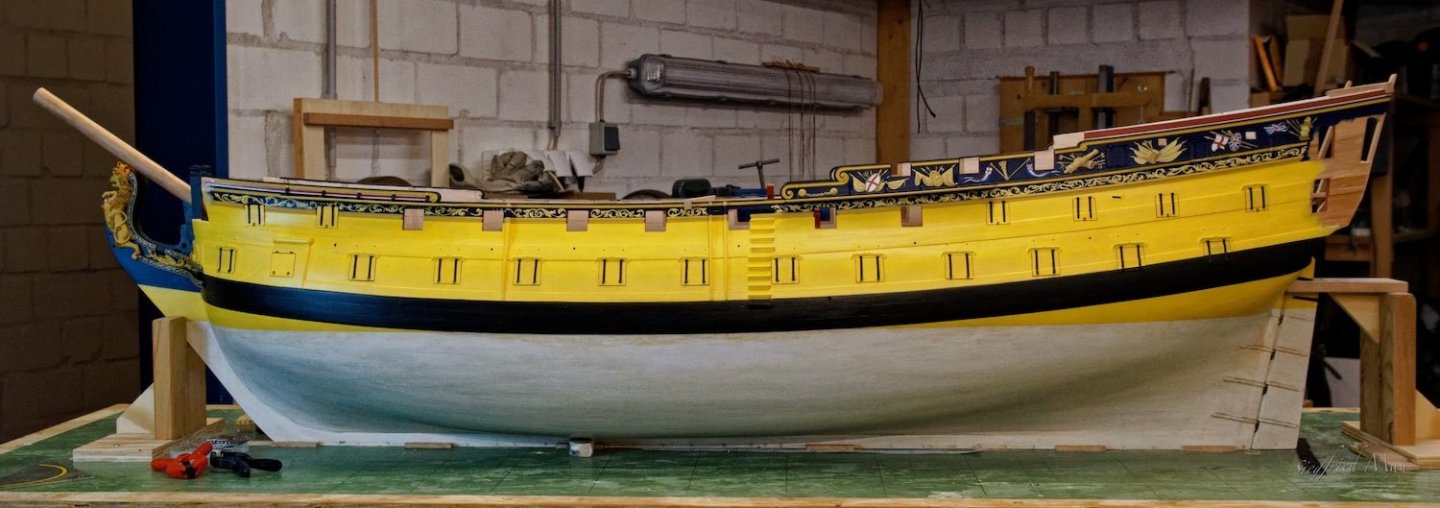
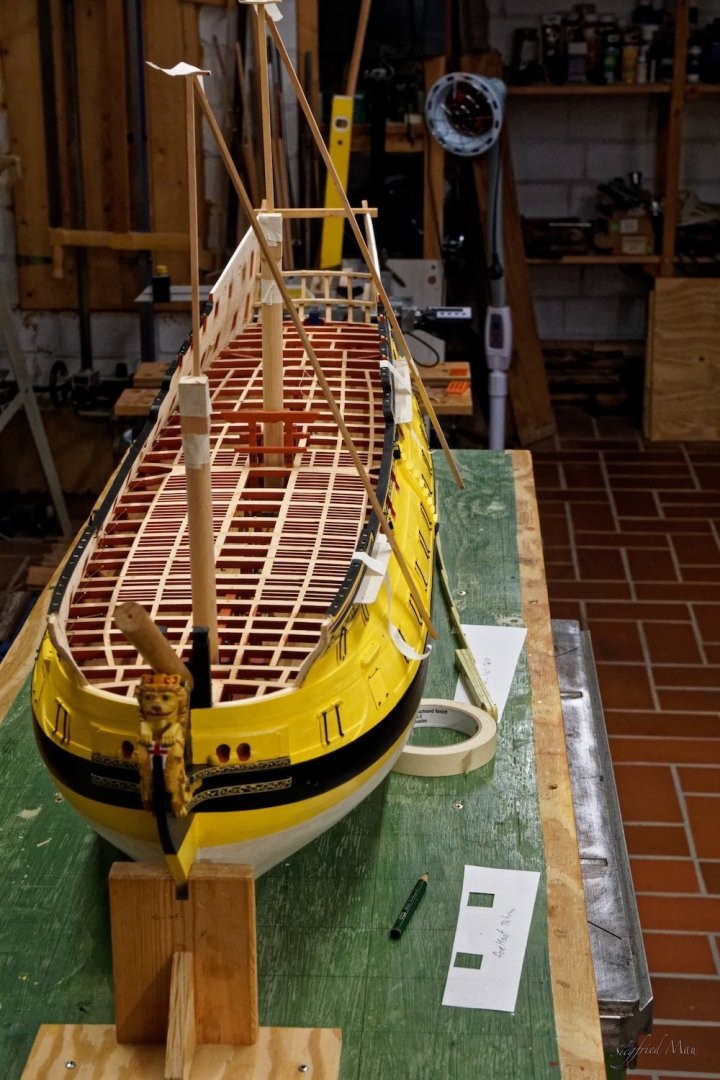
Hello, now it is done, all port lids are at there place 😅, but not fast at all. The next thing to do are the channels. And here I have a question. In the 1719 establishment list is for the main channels a breath at the fore most end given and for the fore channels a breath at the after end. Fore the mizzen just a breath. But for all, so that the shrouds are clear of the gunnell (?) From the pictures I have that could be, but I'm not really sure, at least for the fore channels. For the main channels I would say the picture show it, but not very much. Here the channels getting narrower at the end, because the stays going up more vertical and therefor clearer from the ships side. Why the fore channels should be broader at the end is not very logical for me. Here the last stays have nearly no ship sides. They are behind the castel at the ships waist. But may be it's only kind of design?

-
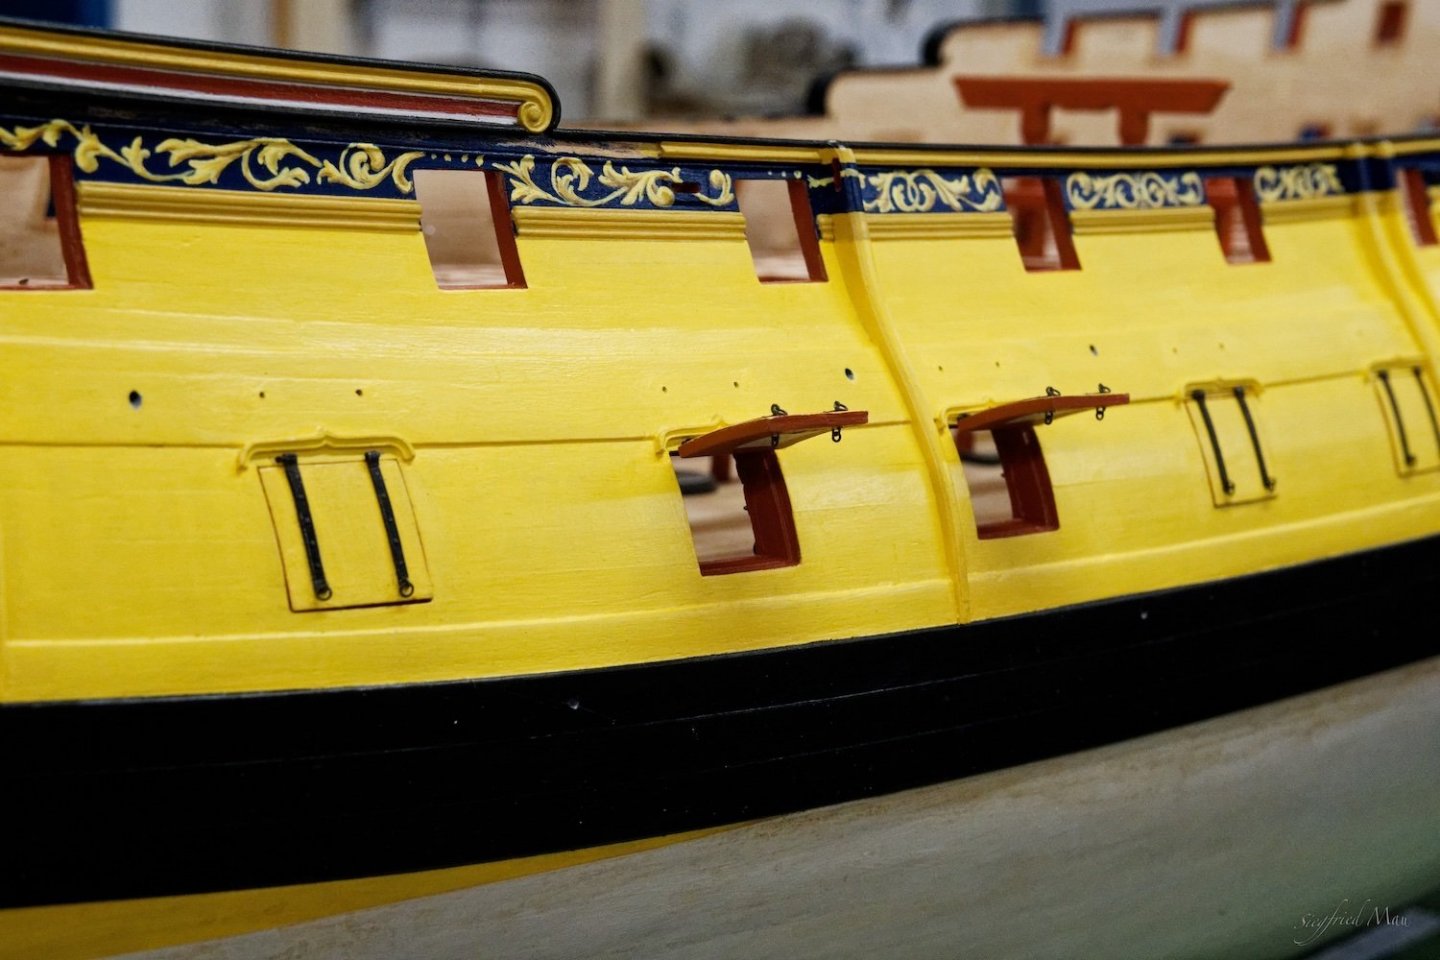
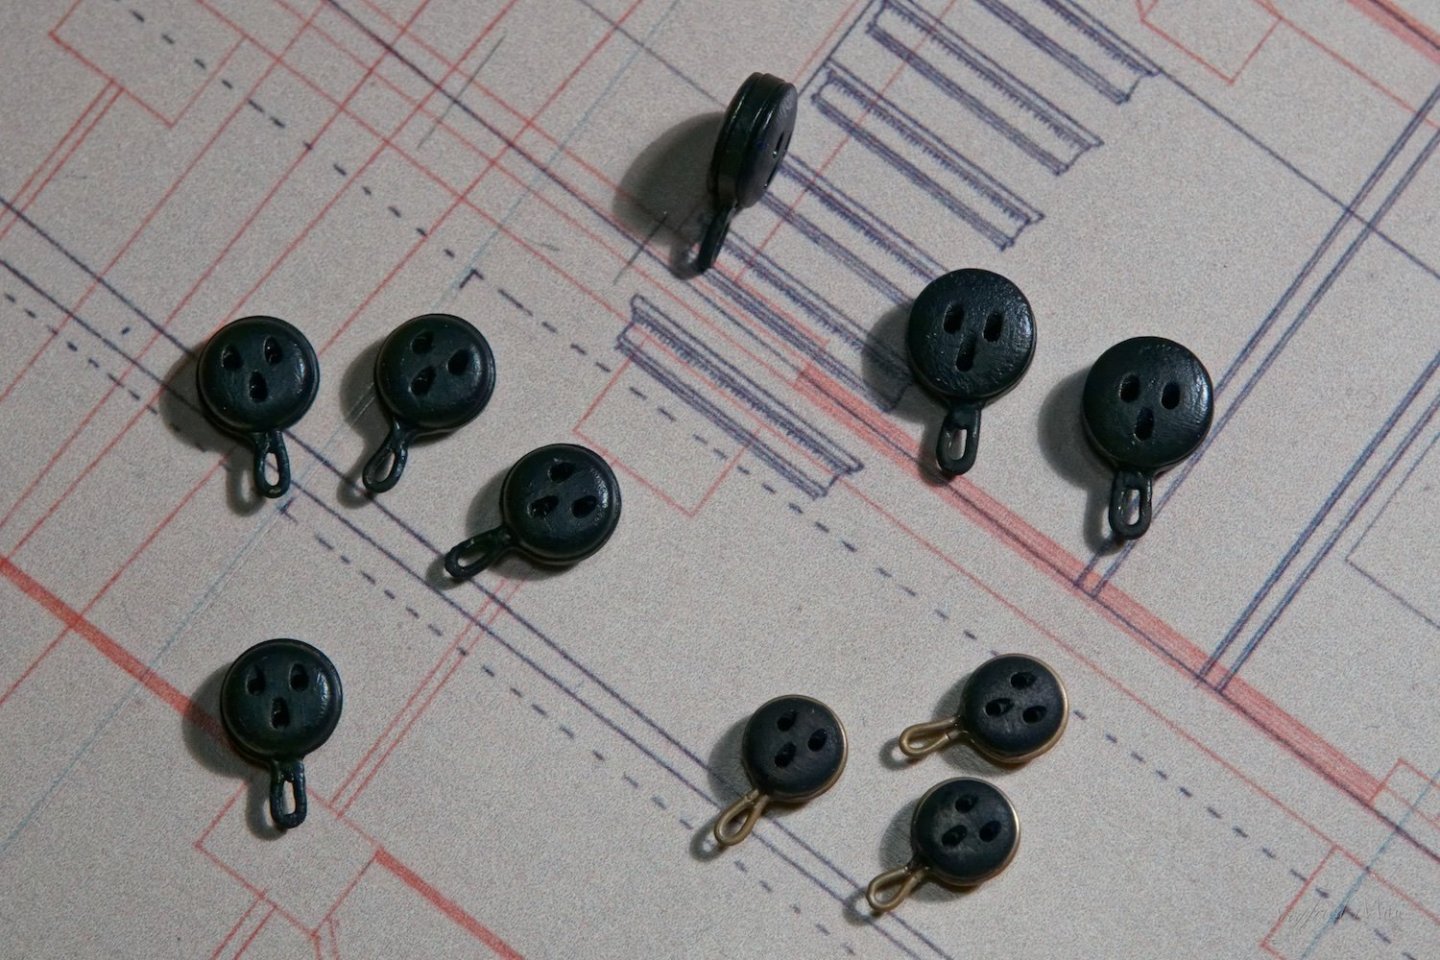
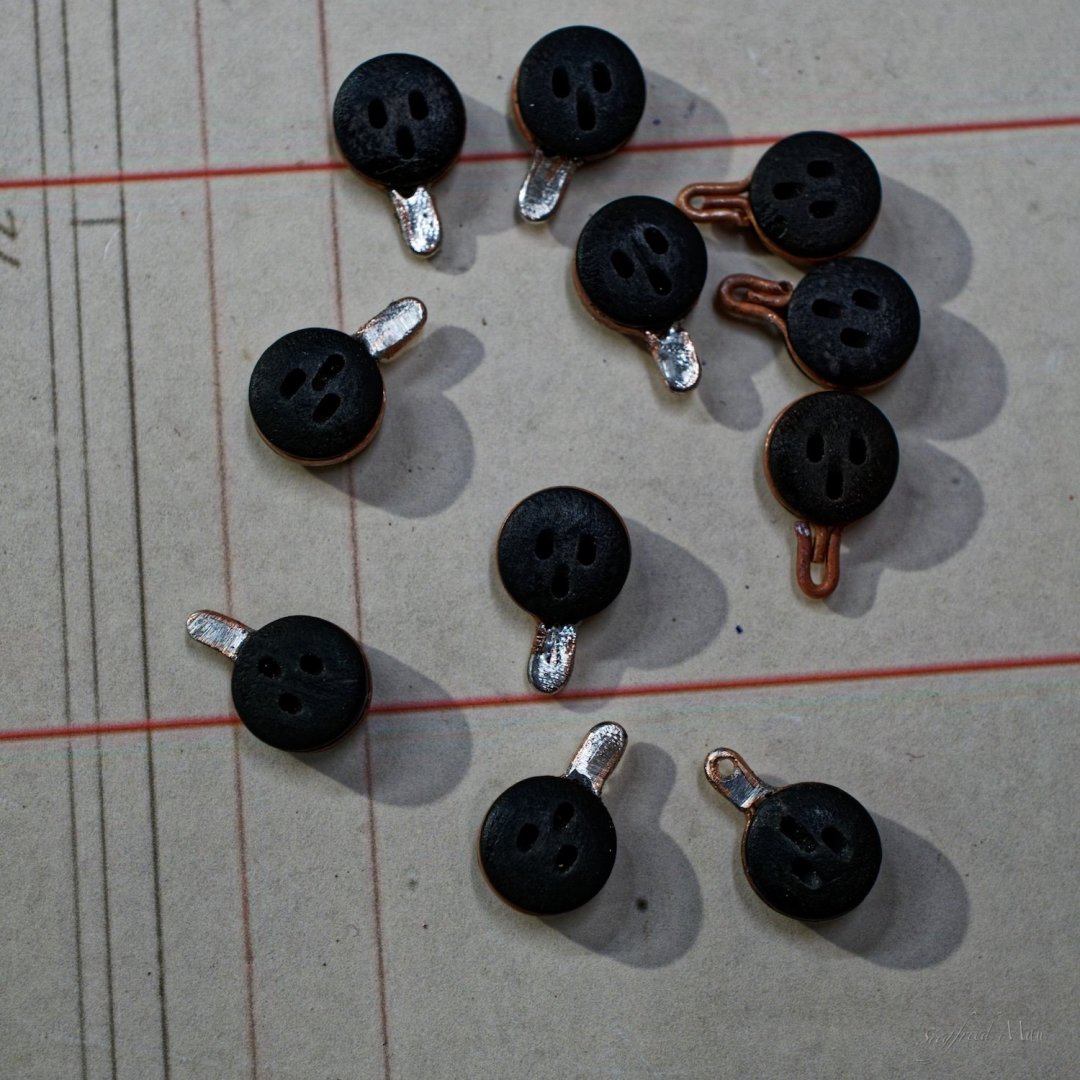
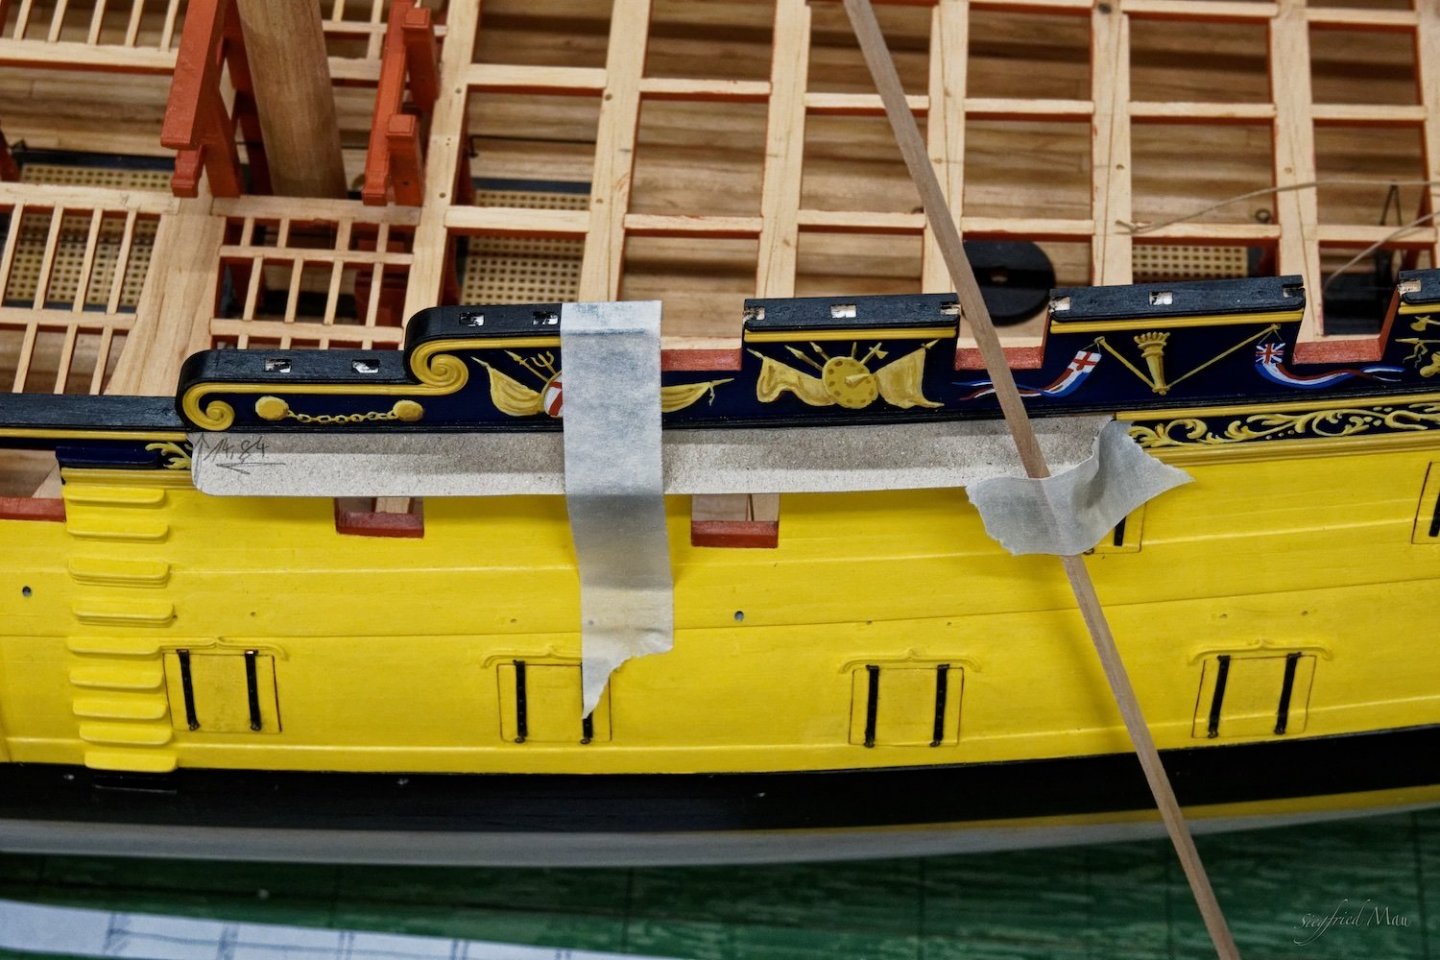
Hello, now the lids at the gun deck, at the star board side, are also ready 🙂 Now with more experience I also repaired some of the hooks for the rings at the inside of the lids at the port side. The rings have a inner diameter of 1 mm and the wire is 0,4 mm thick and you may have seen at my last post that some hooks are much larger then these.

-
Hello, now the port lids at the port side have there rings. But the lids are nor fast installed, that will come after I have the channels ready.