HOLIDAY DONATION DRIVE - SUPPORT MSW - DO YOUR PART TO KEEP THIS GREAT FORUM GOING! (89 donations so far out of 49,000 members - C'mon guys!)
×

Siggi52
-
Posts
1,155 -
Joined
-
Last visited
Content Type
Profiles
Forums
Gallery
Events
Everything posted by Siggi52
-
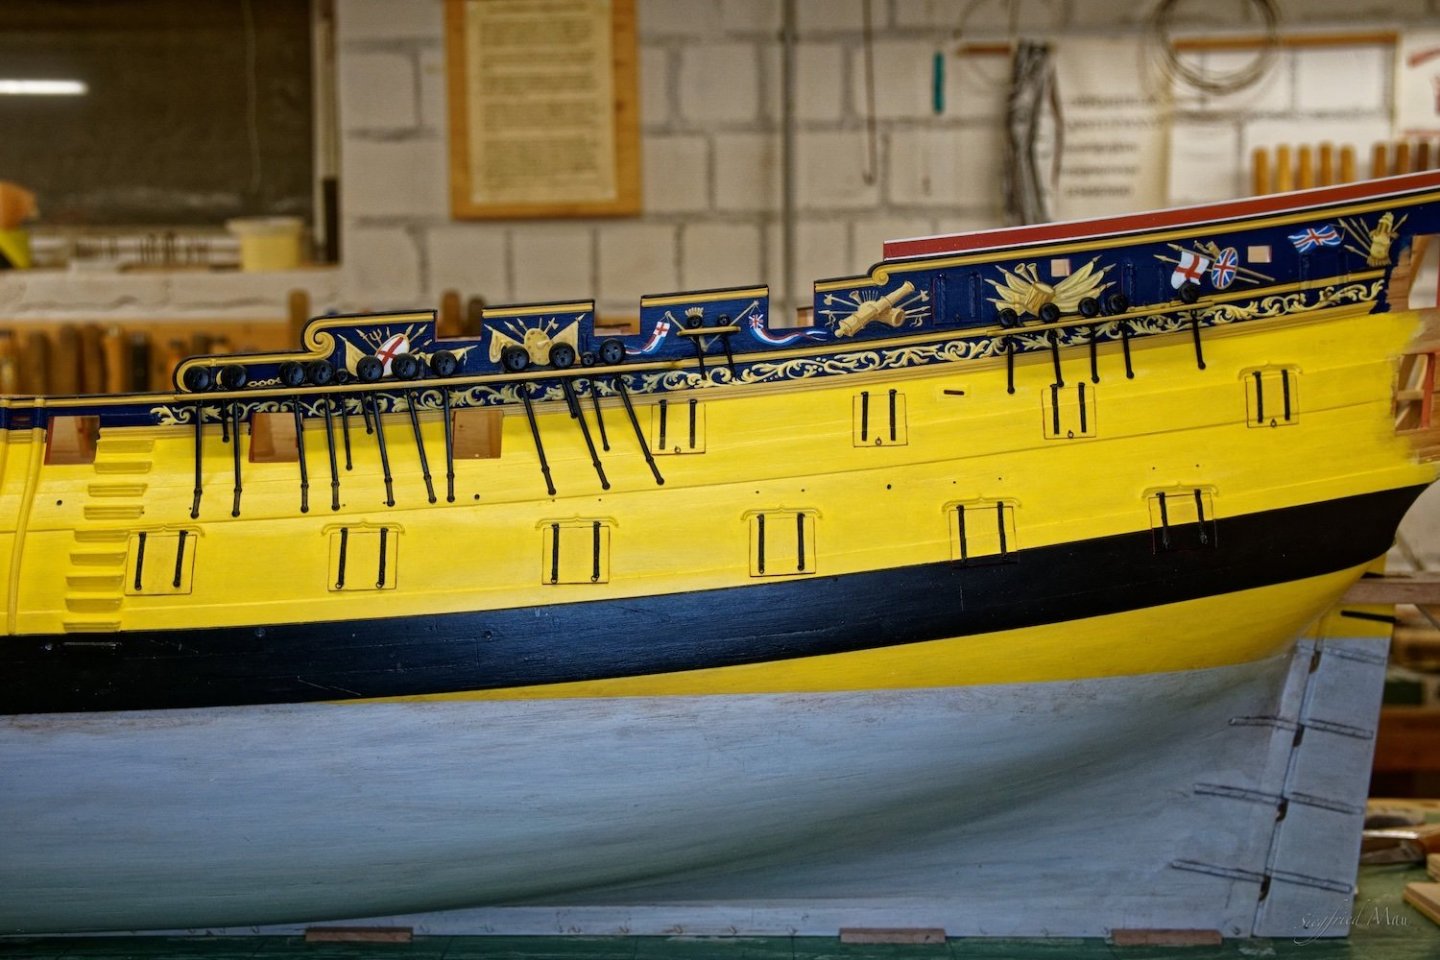
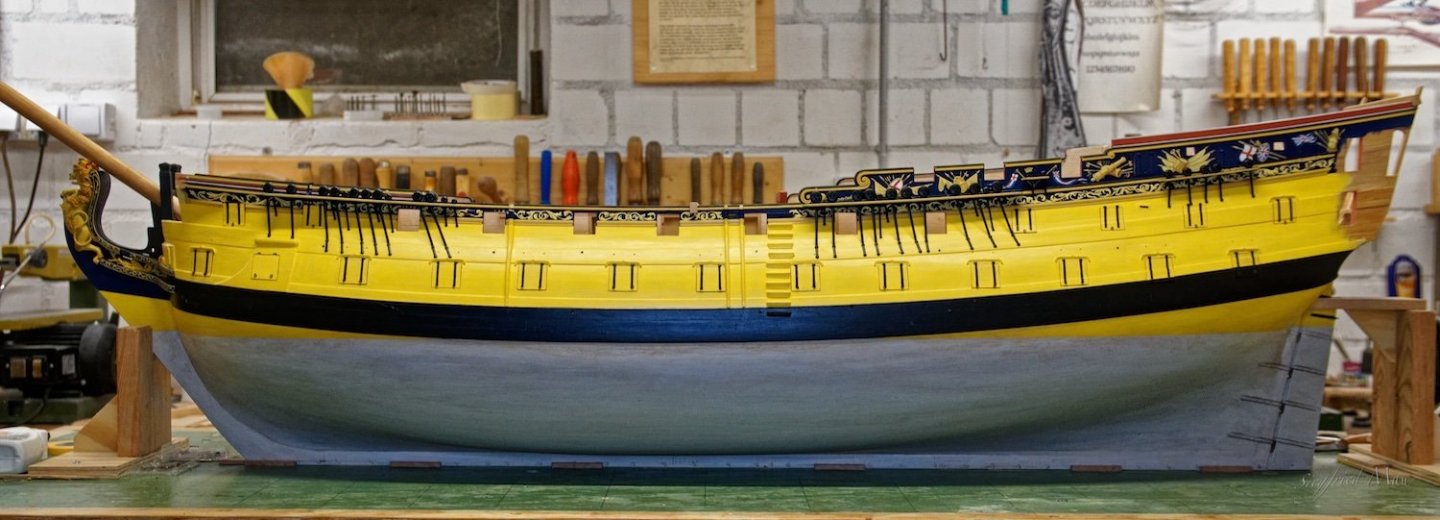
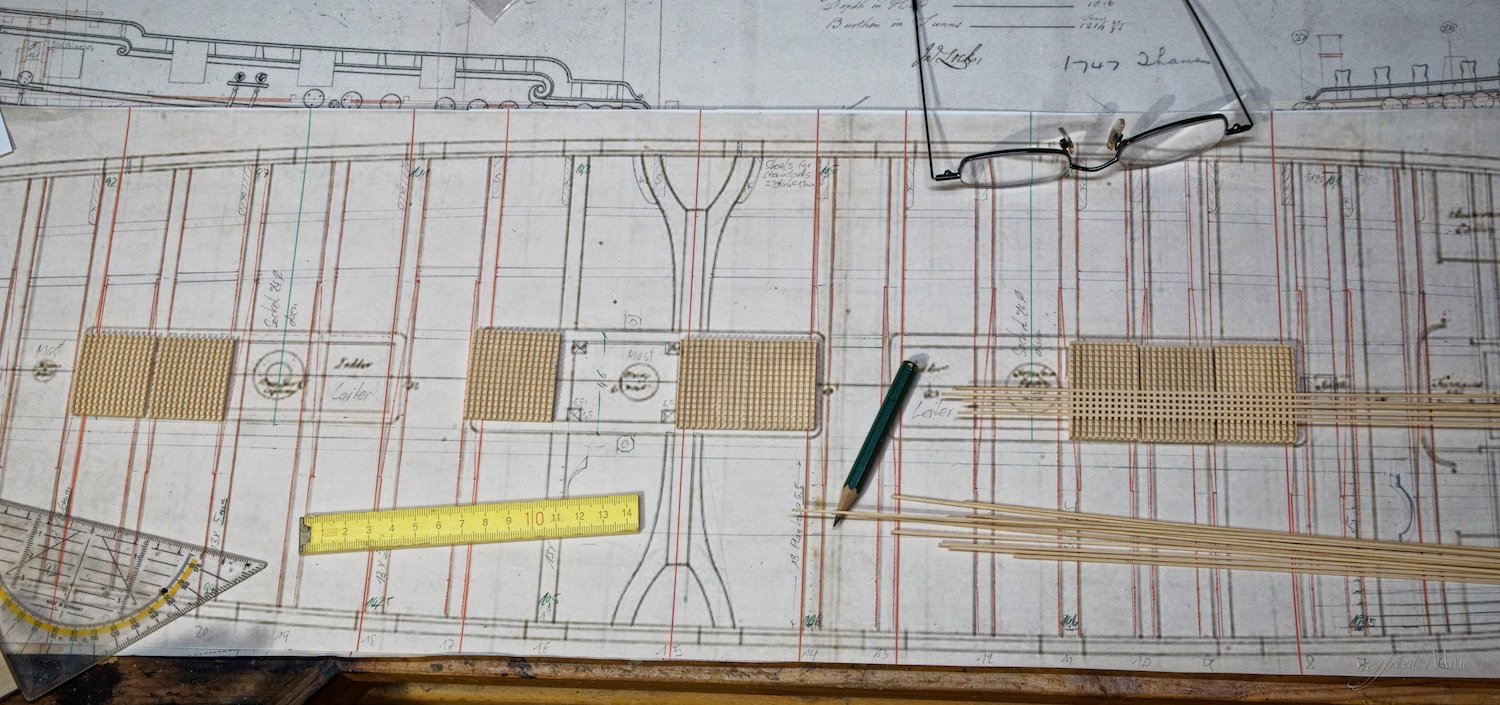
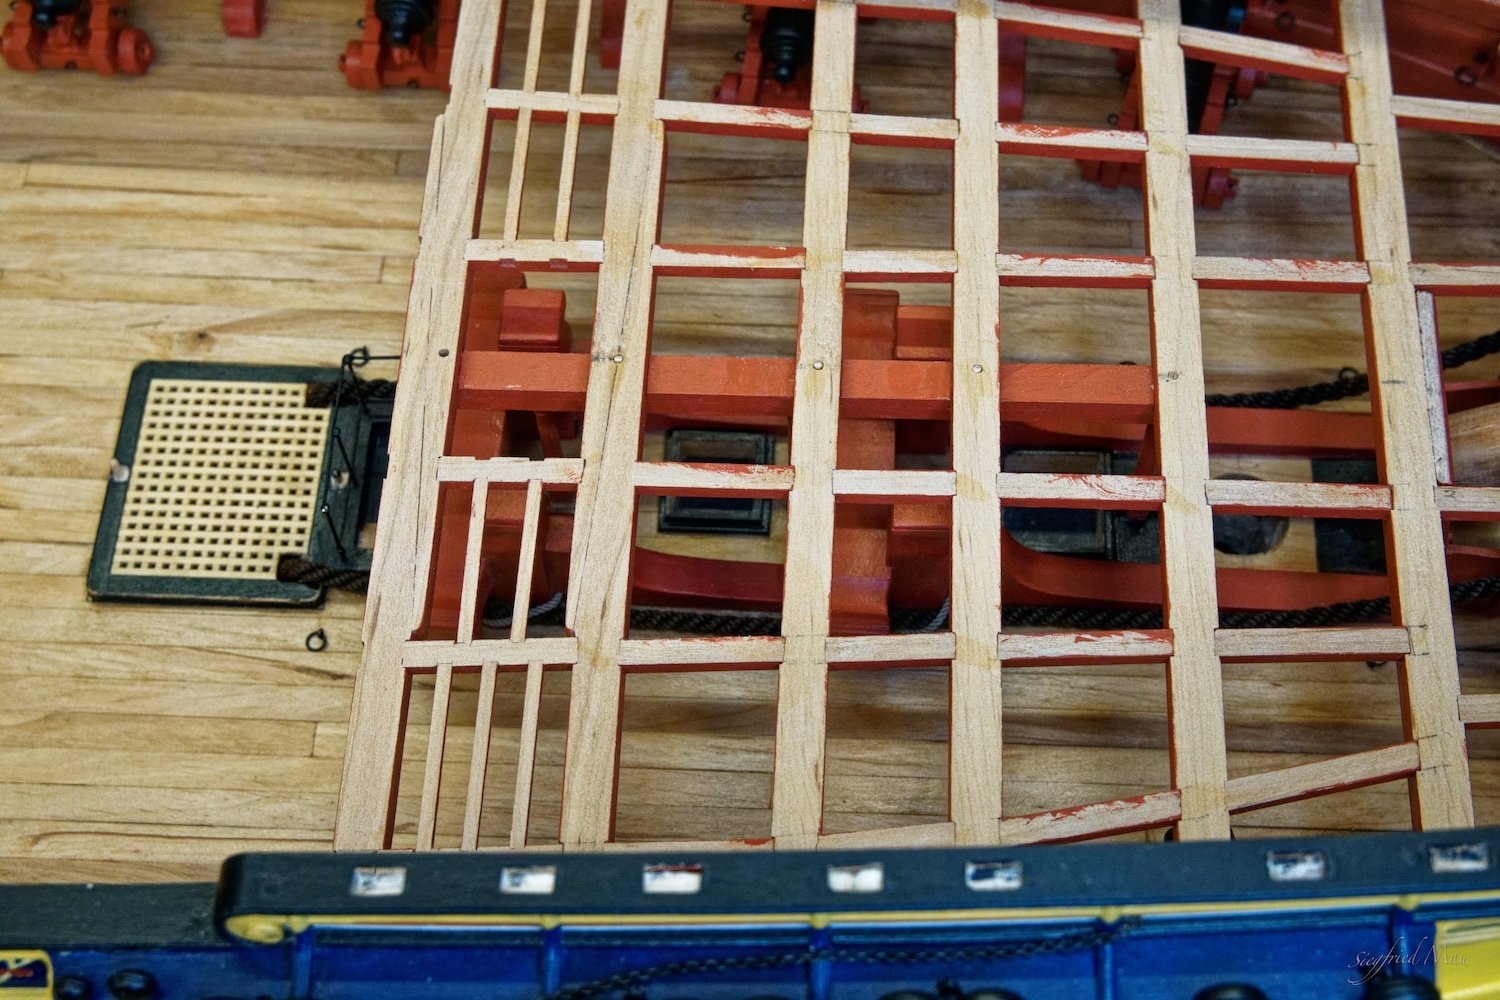
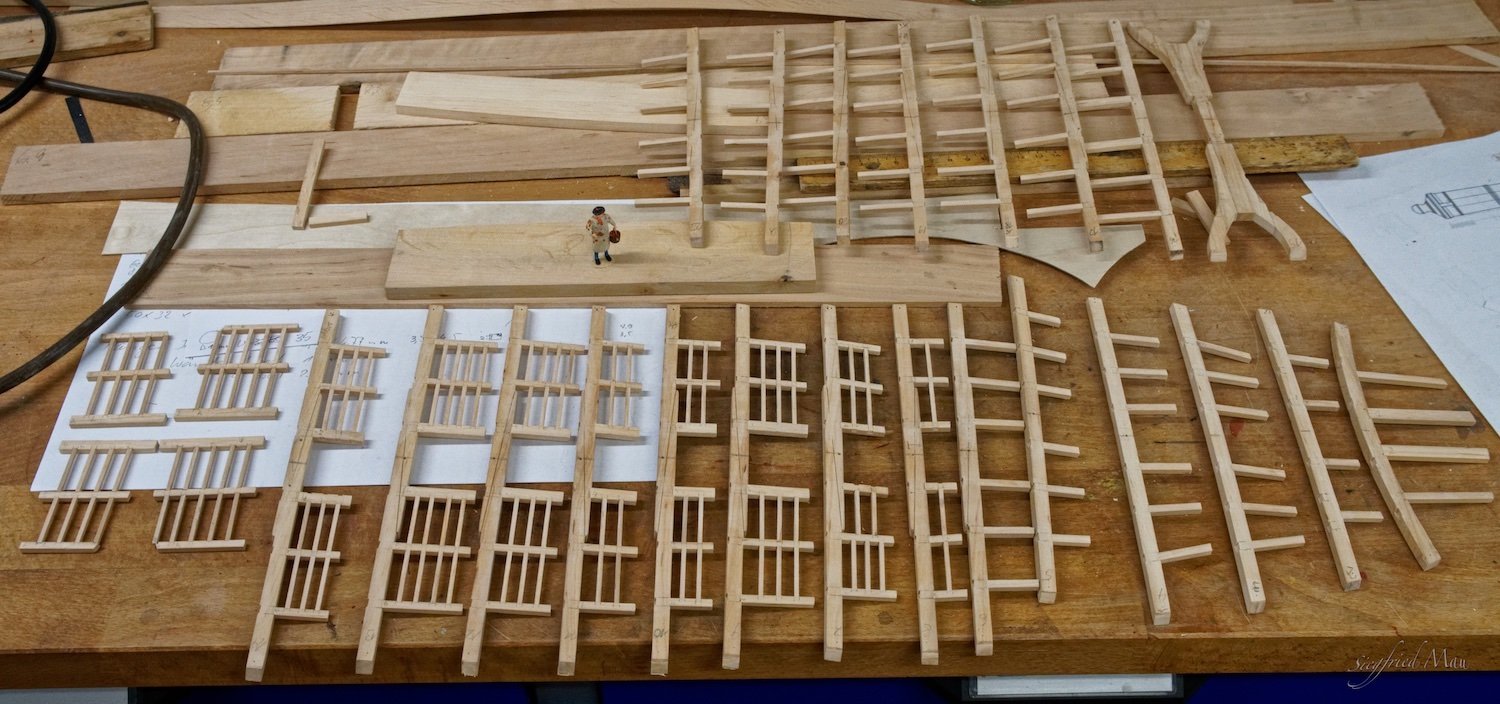
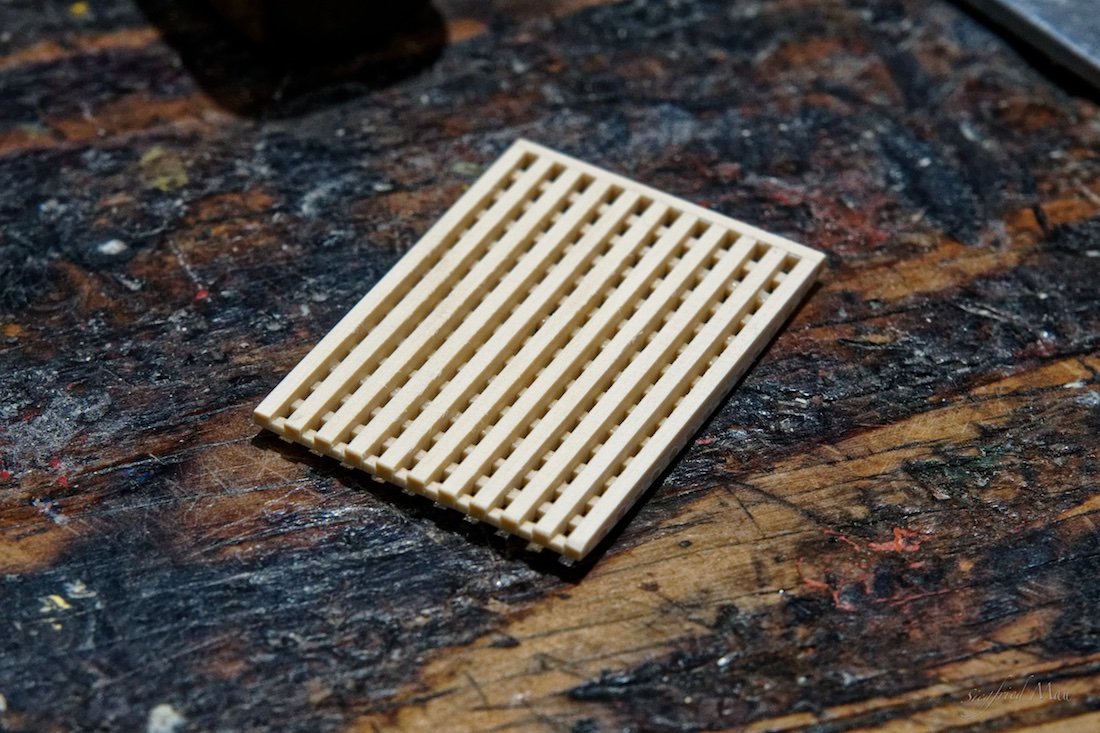
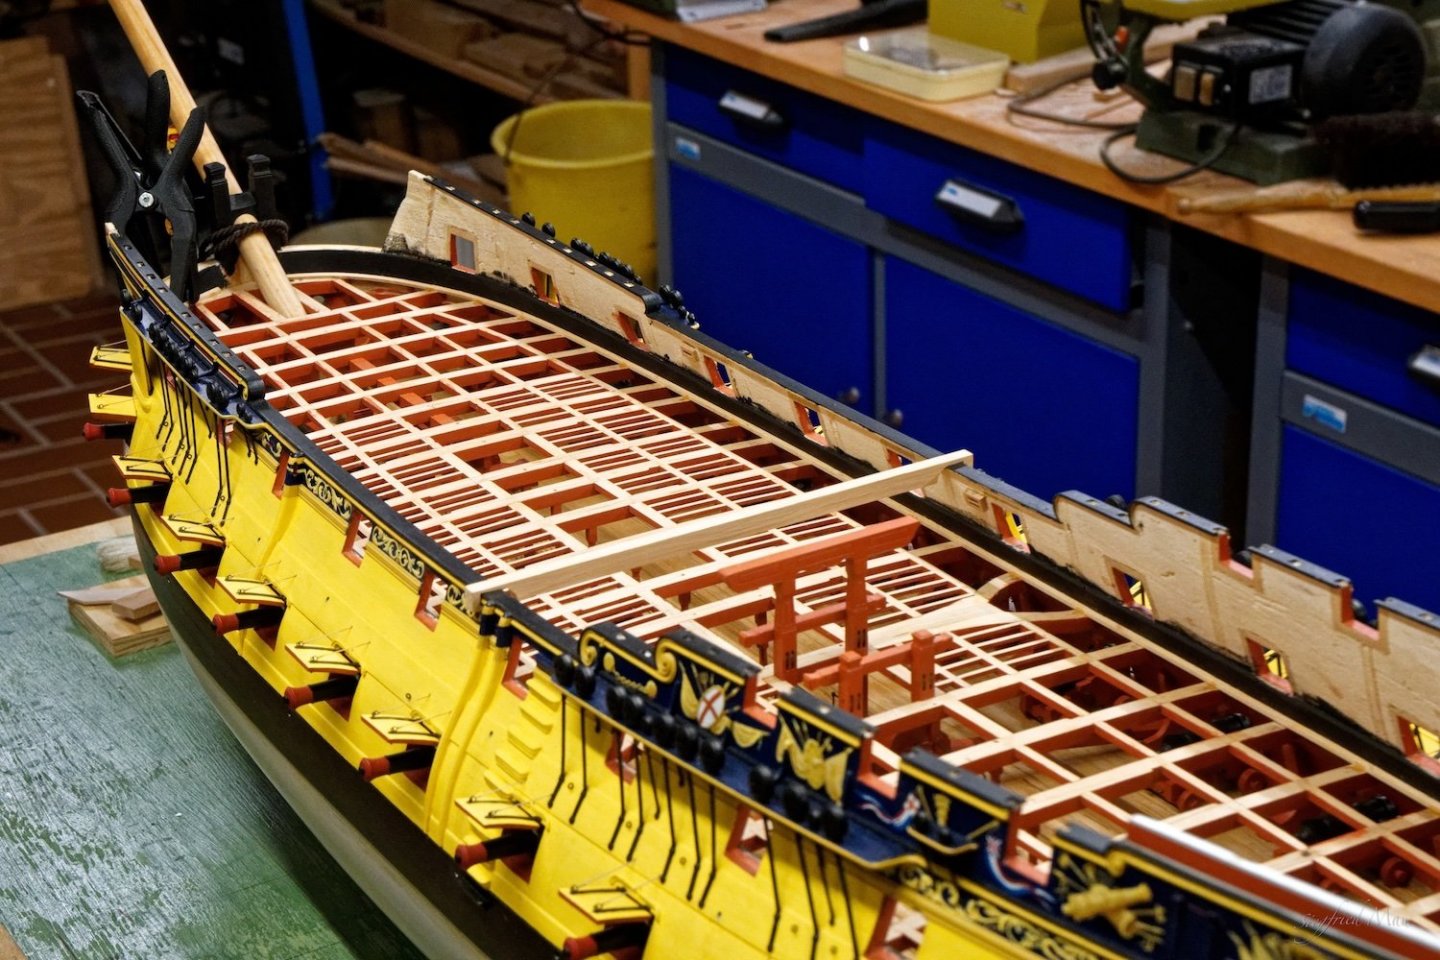
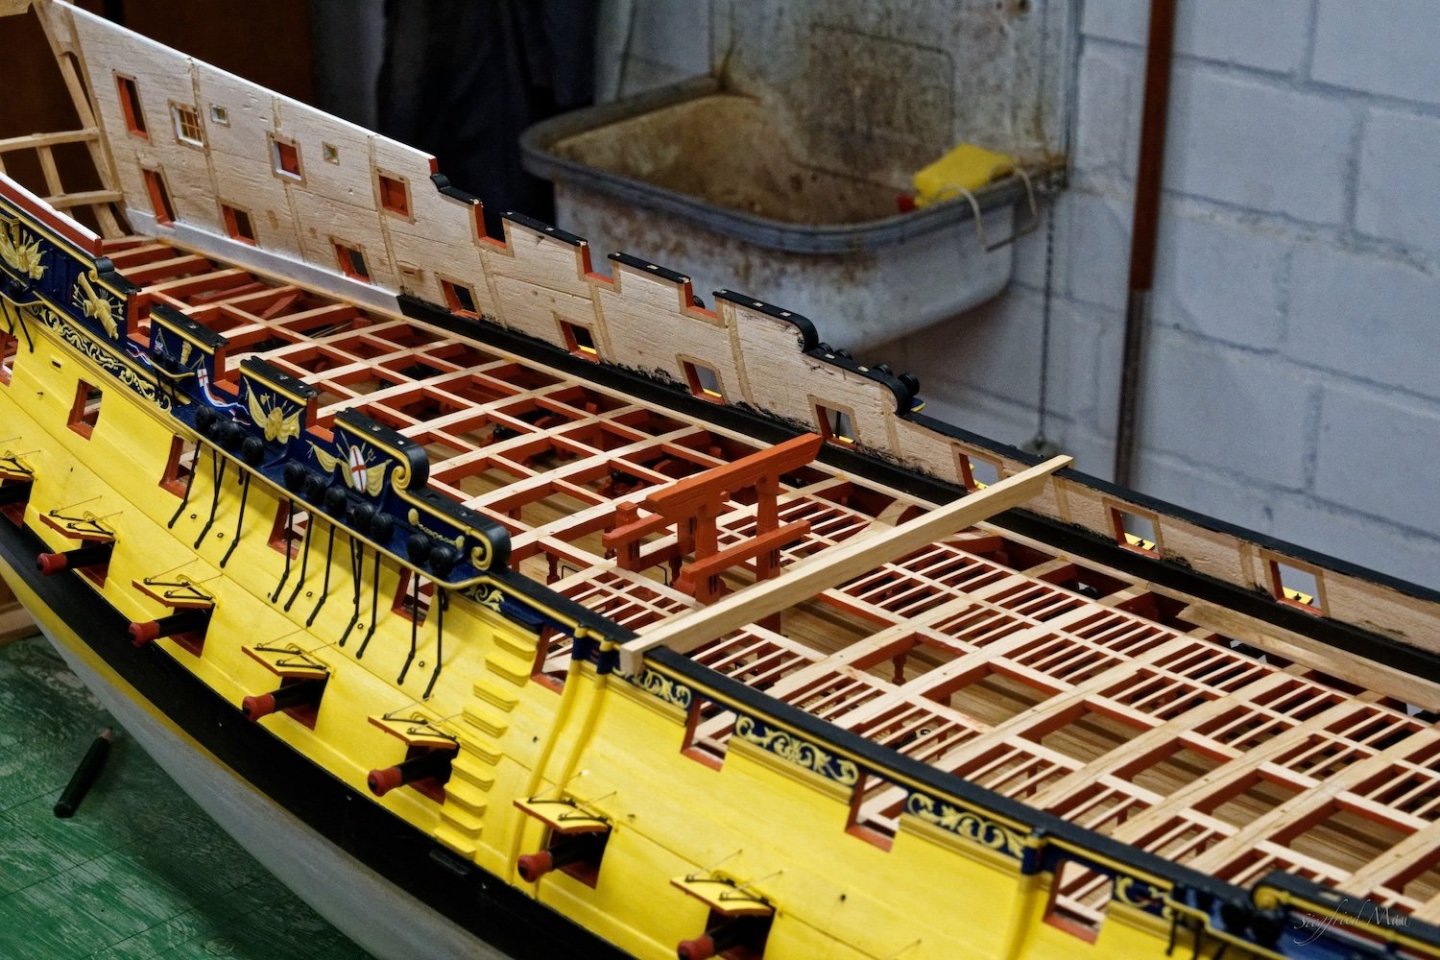
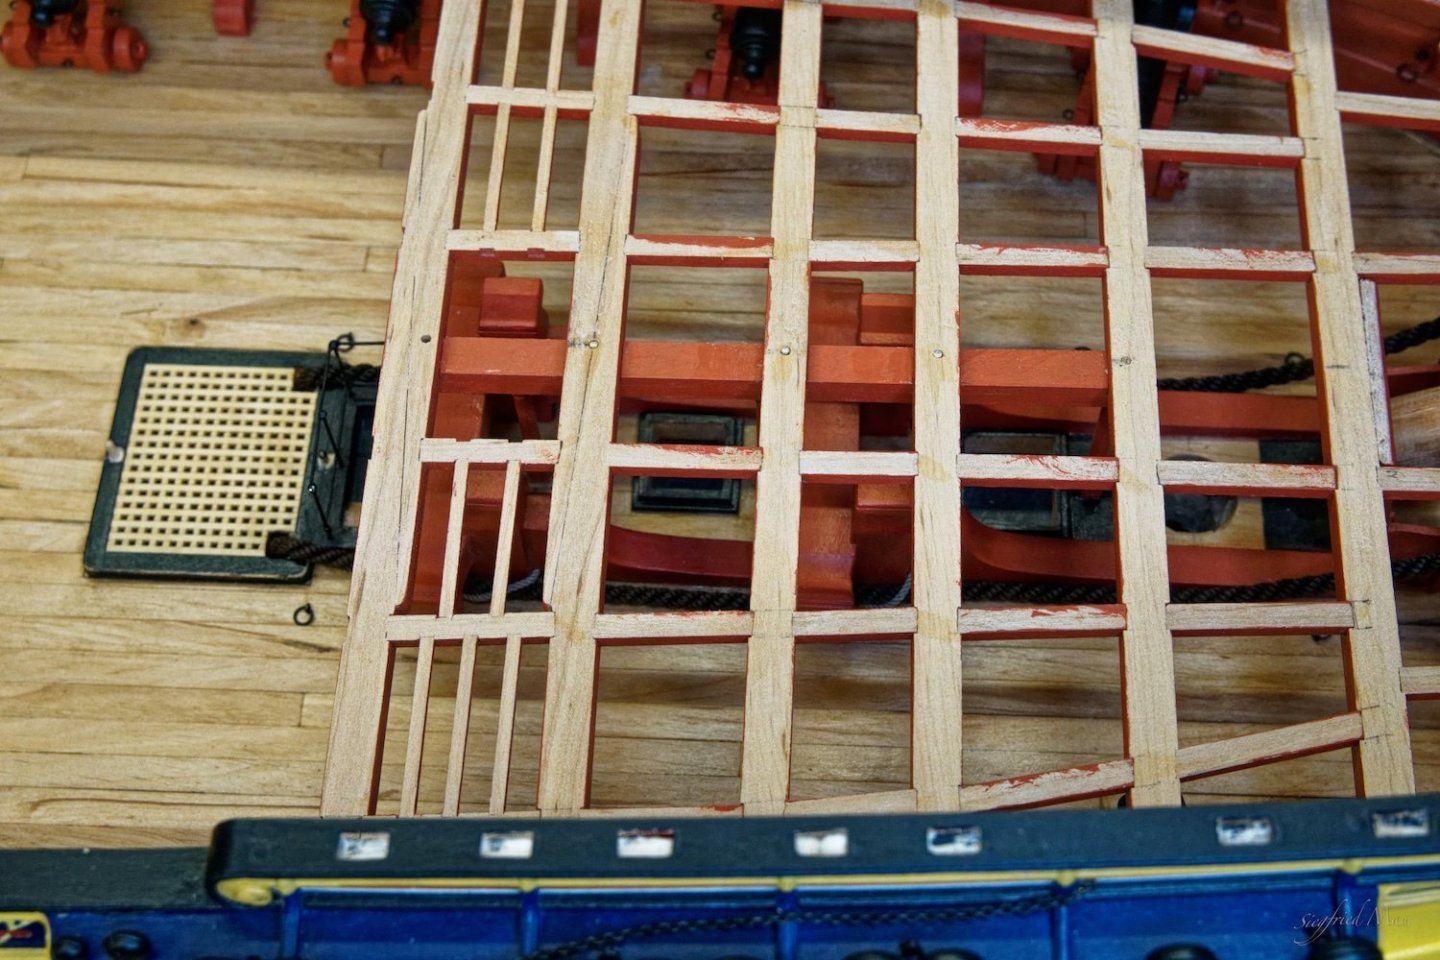
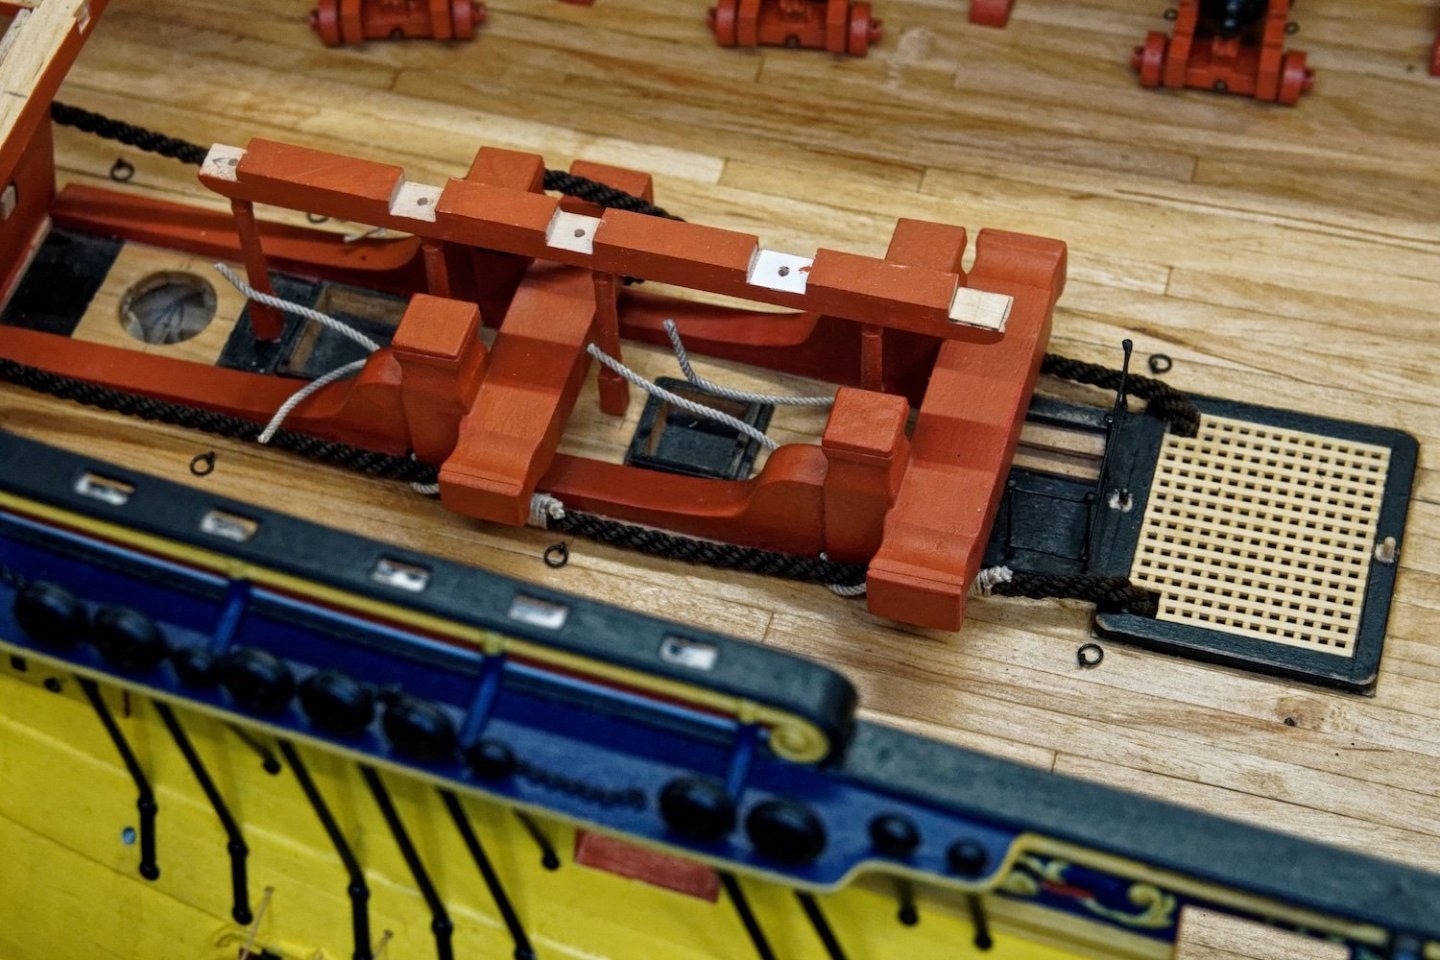
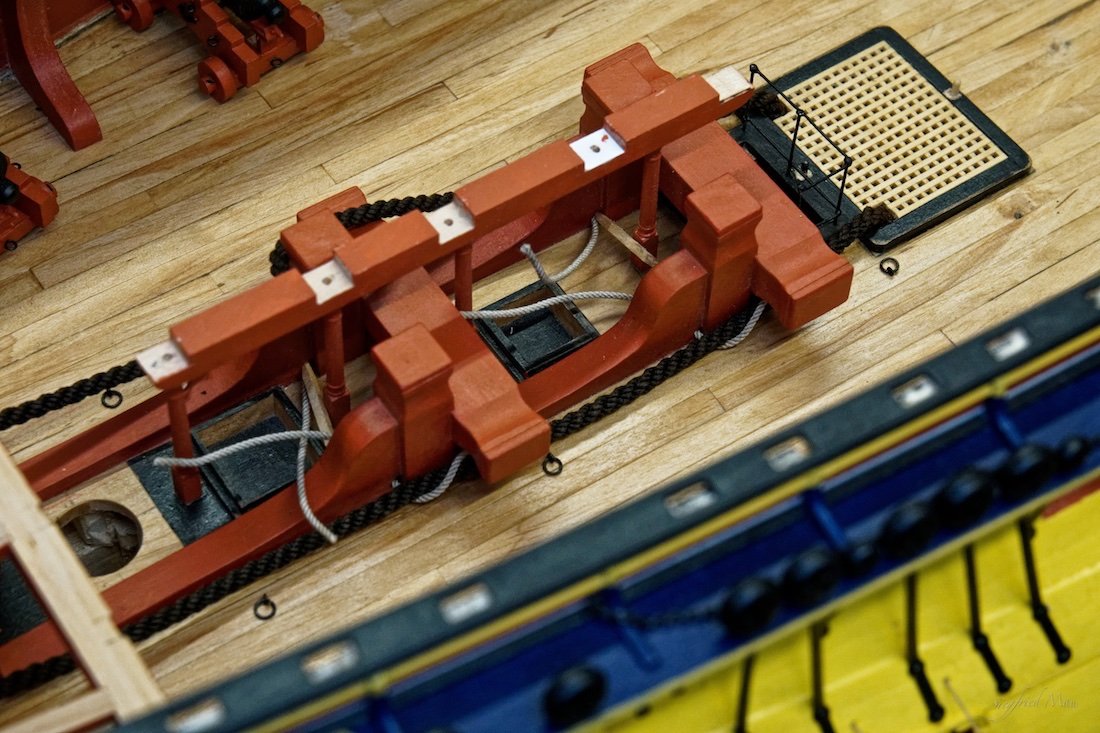
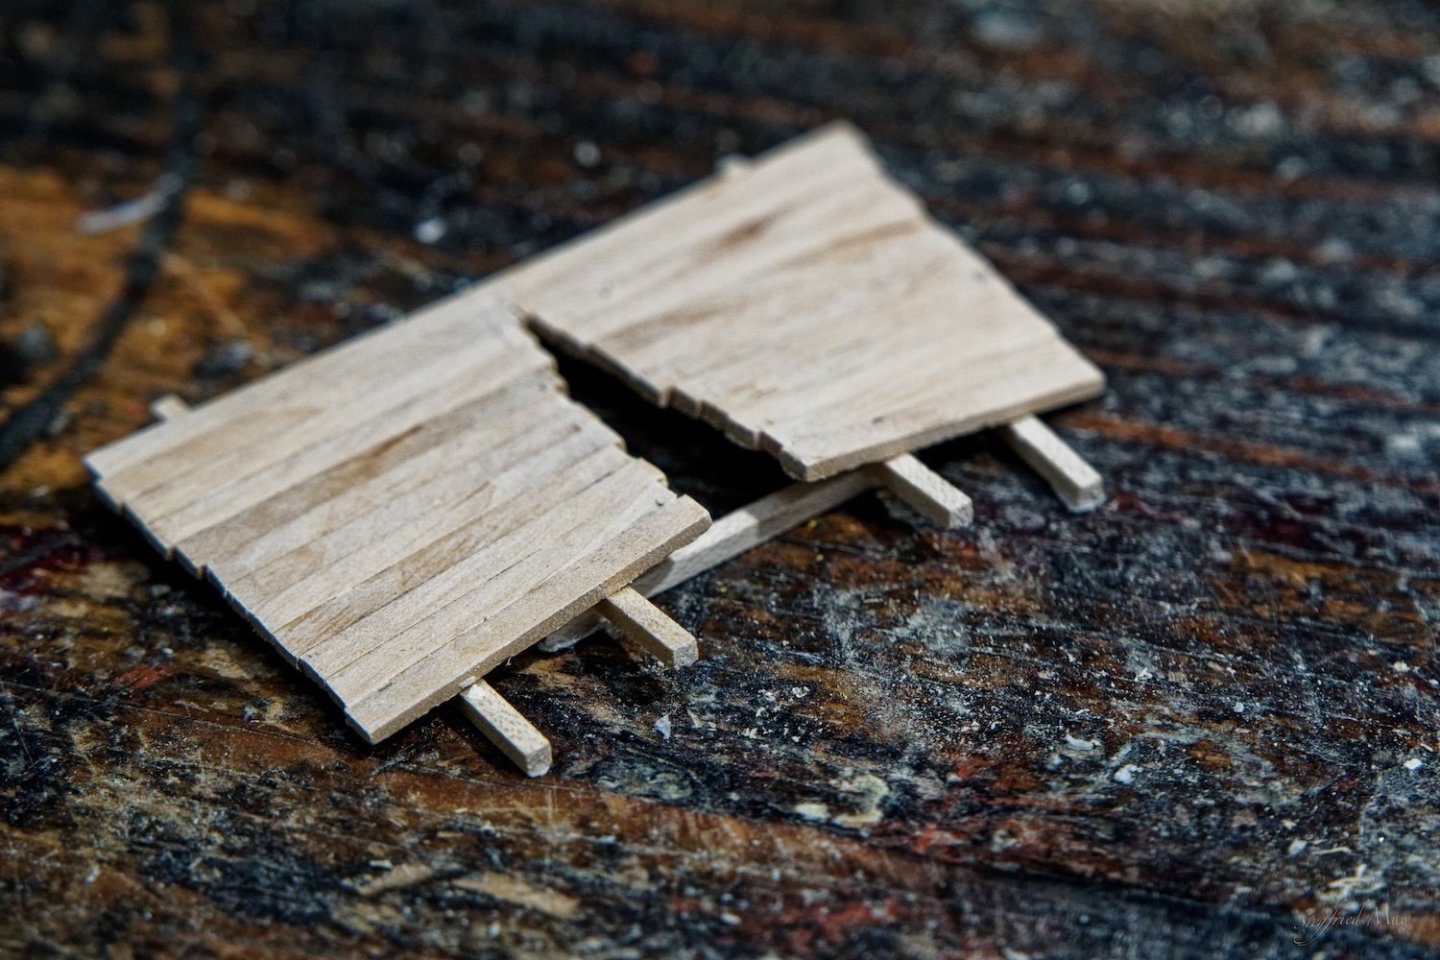
 Hello, today I finished these gratings. And my question is also answered, I found pictures of a 70 gunner 1730 and of the Ajax 1767. Both are models where the upper part could be taken away, and they show at the underside of the upper gun deck these two planks.
-
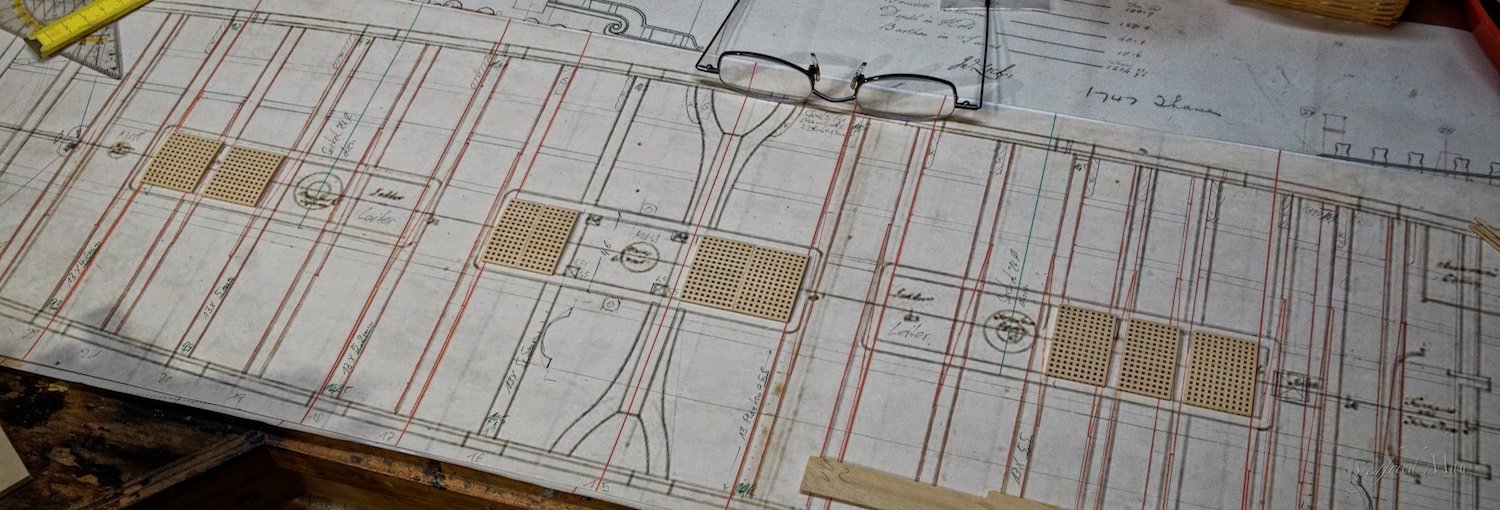
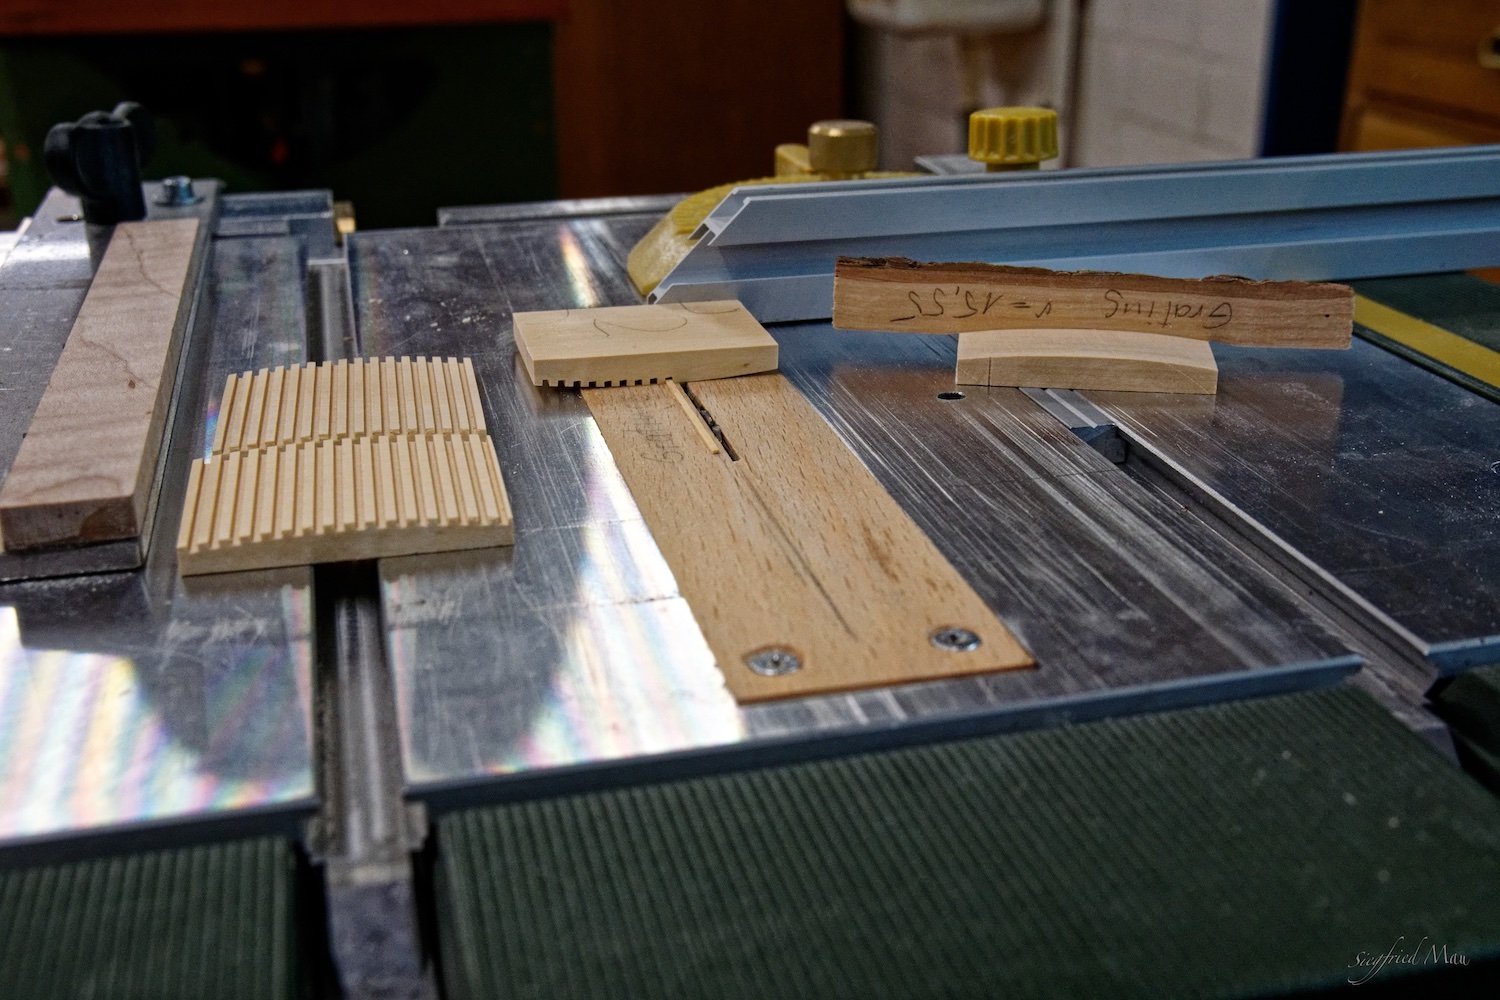
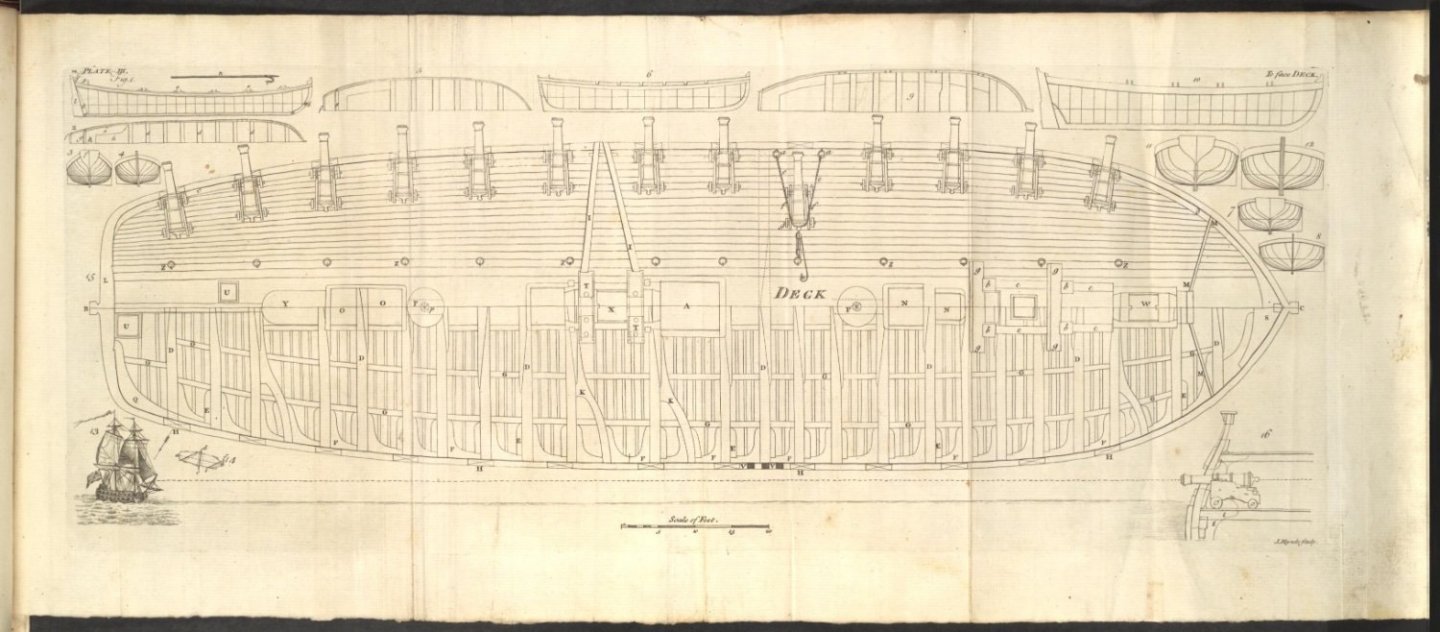
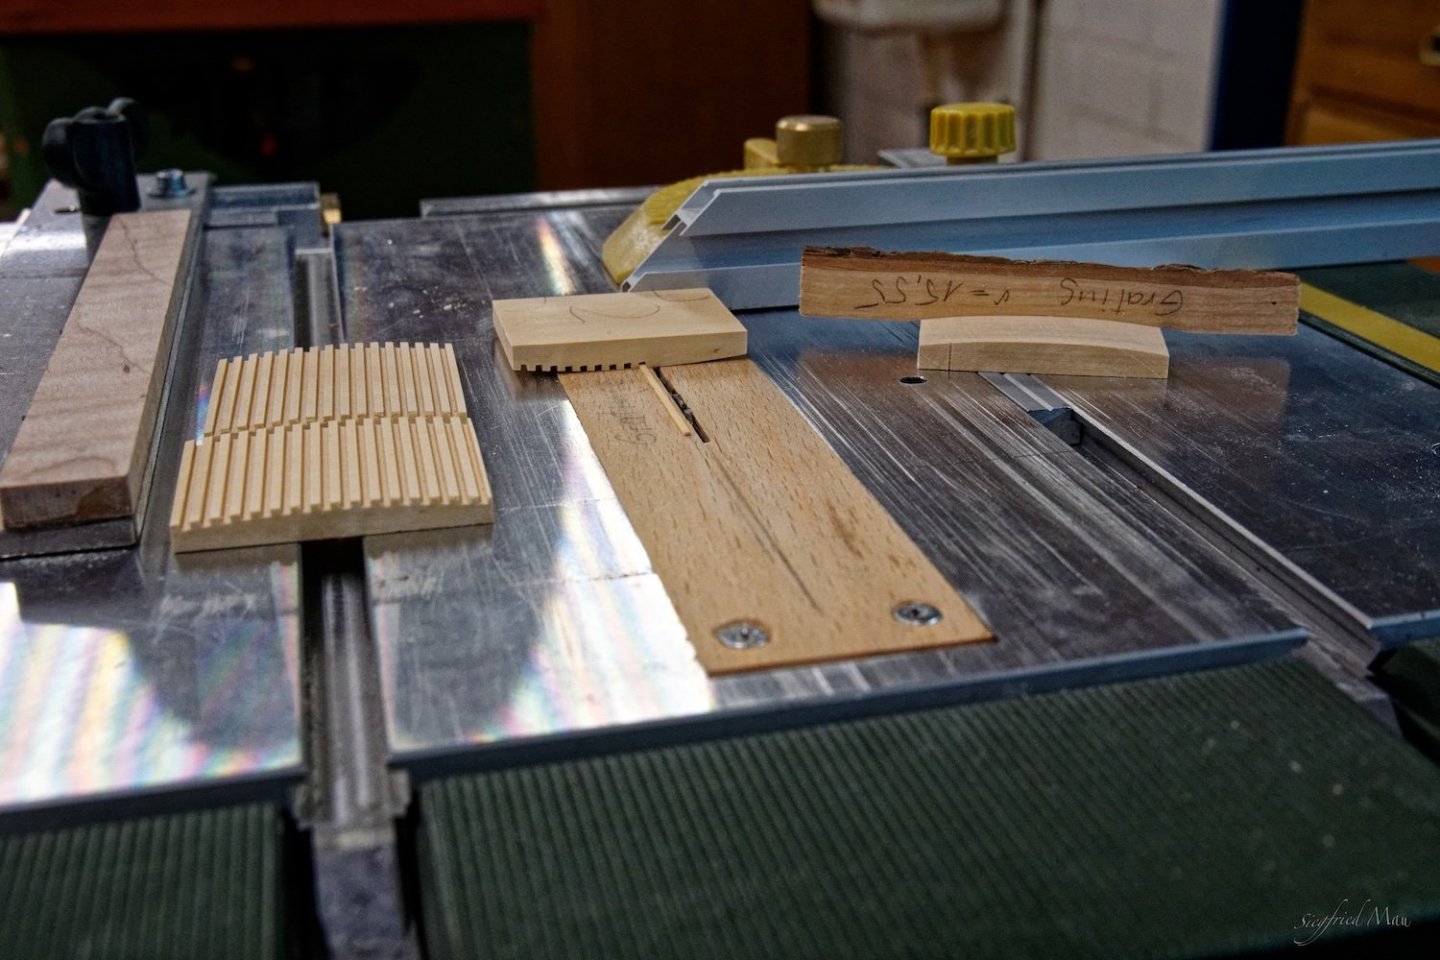
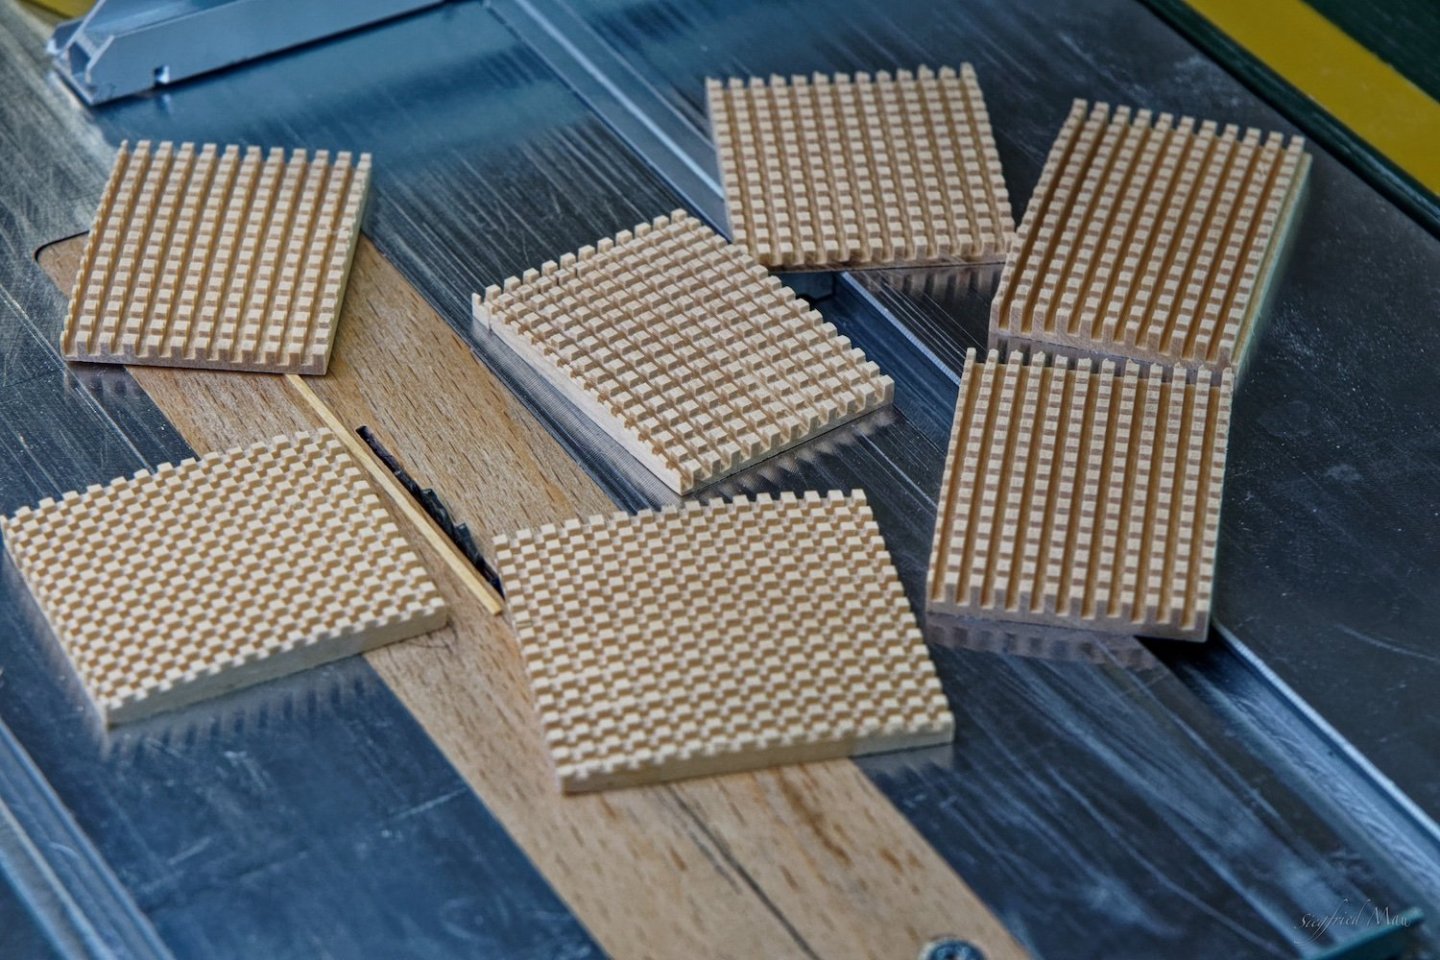
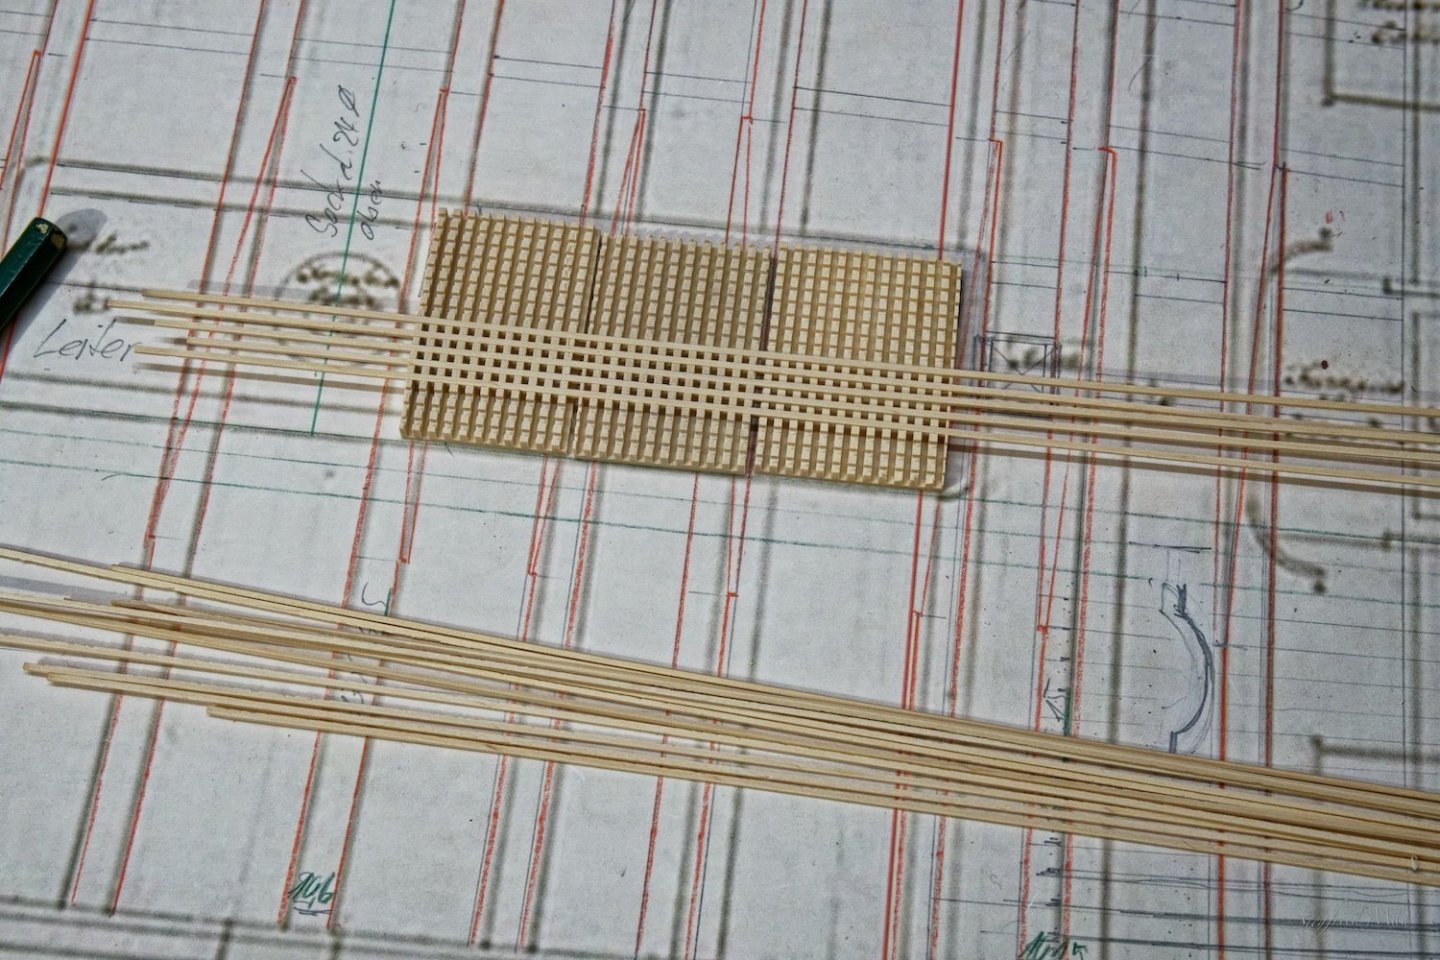
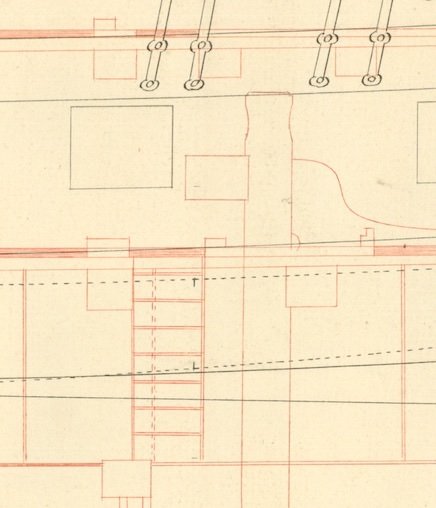
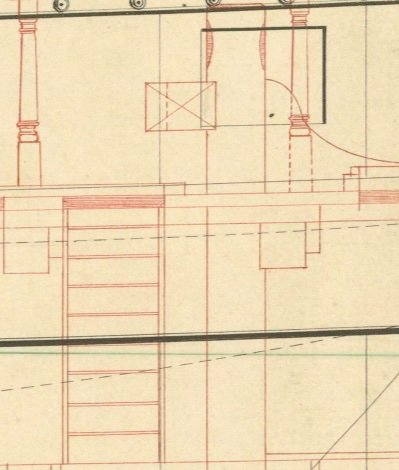
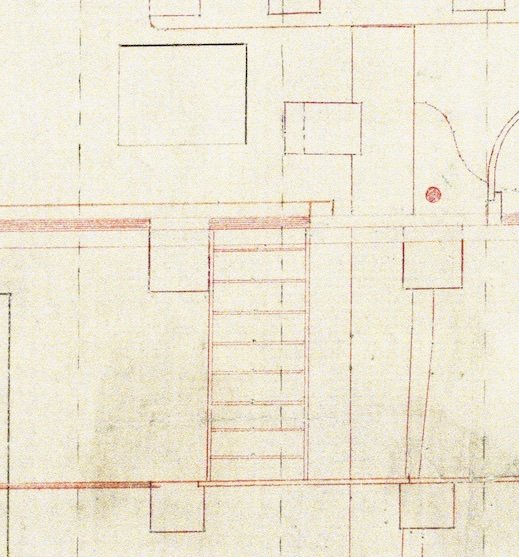
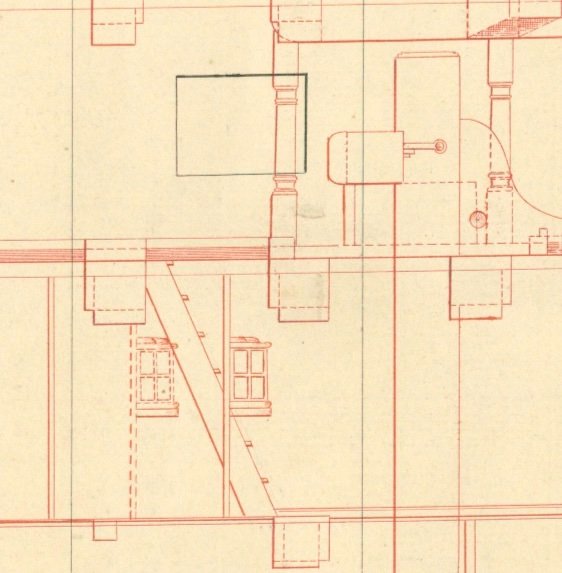
Hello, today I started building the gratings. To show you how I did it, here some pictures. I think the pictures explain how I work. It is important, to cut first the grooves transverse to the grain. Otherwise you would have later a large puzzle. I leave them over night so, that they may straighten out a little more and glue the battens tomorrow in. After that, I grind the back away, and they are ready. But at least I have a question. At Falconers deck plan (gun deck) you could see to the left and right of the gratings and ladder ways two planks, who are going more or less straight through the ship. Those with the rings for the canons, Z. Was that also at the upper gun deck so? At the models you see mostly only the waist.

-
I really don't know that Joe. But why not, may be in an other version? The carpenter on board has sometimes also something to build or to repair.
-
Thank you Keith, we are all boosted and I hope save! The boss spend sometimes a brandy, for disinfection. 😃 Druxey, I got out of this without any destruction. But I have to work this way, because how should I install the canons when the upper deck is ready? Not to speak of the paint work with all the ports open. But this was at least the most dangerous work, and it is done. 😰
-
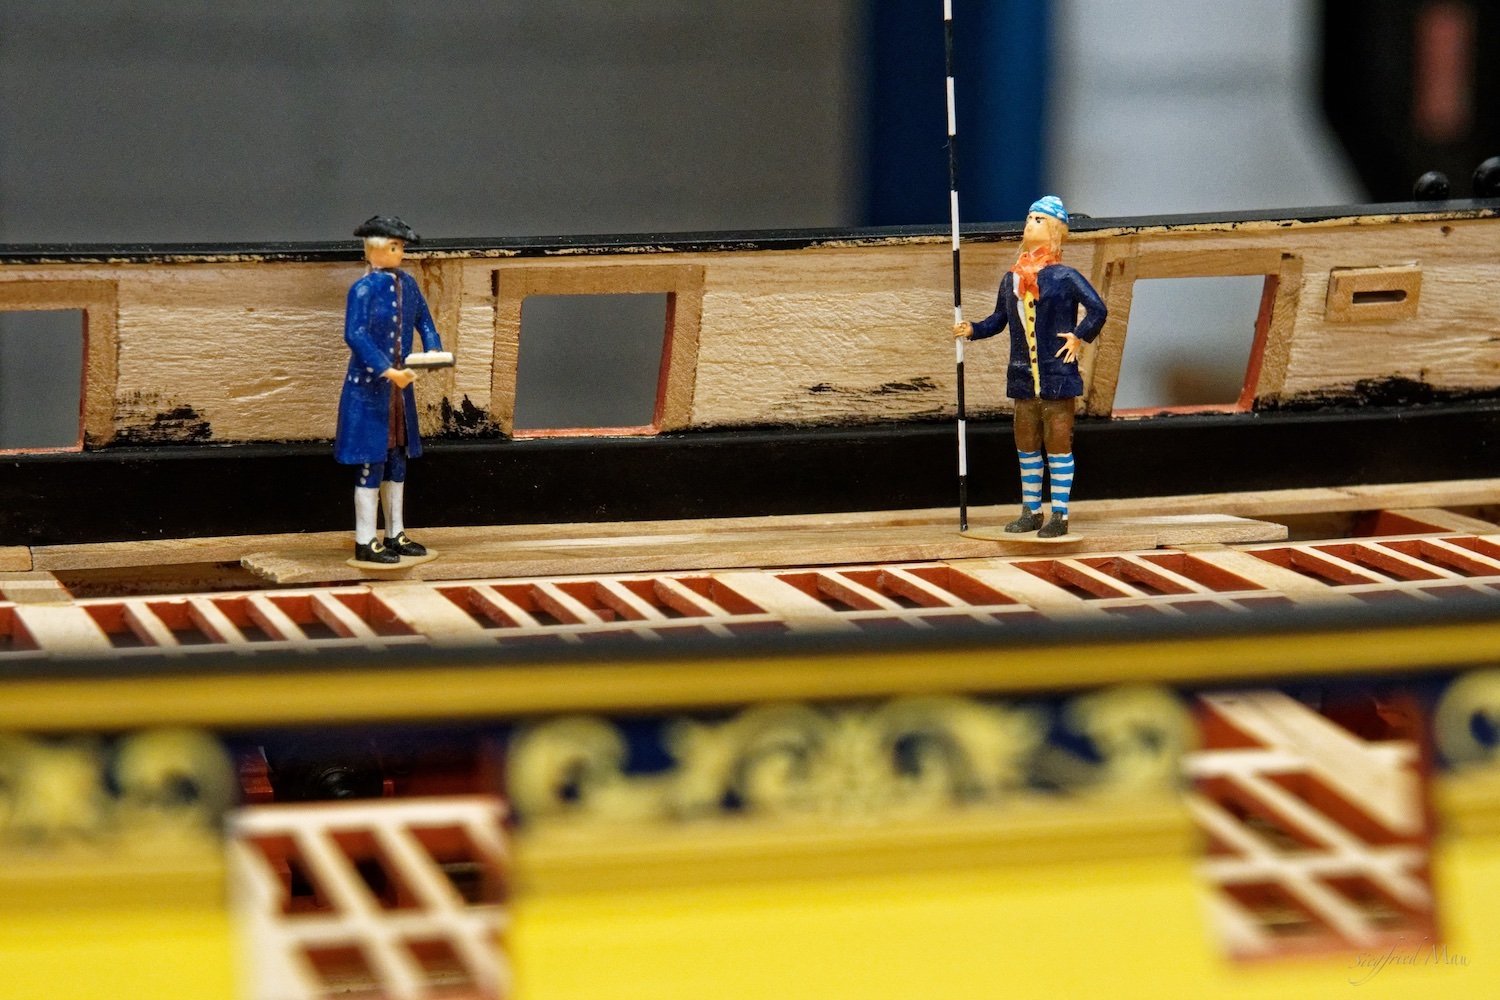
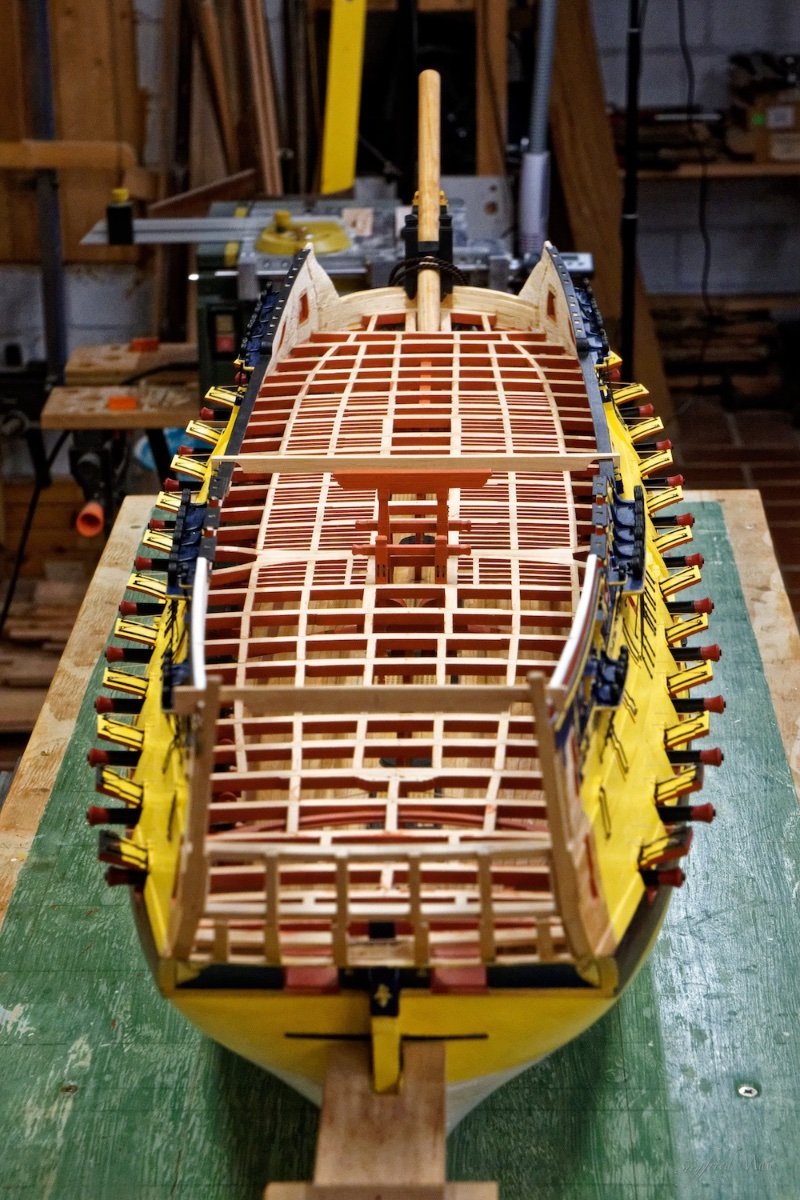
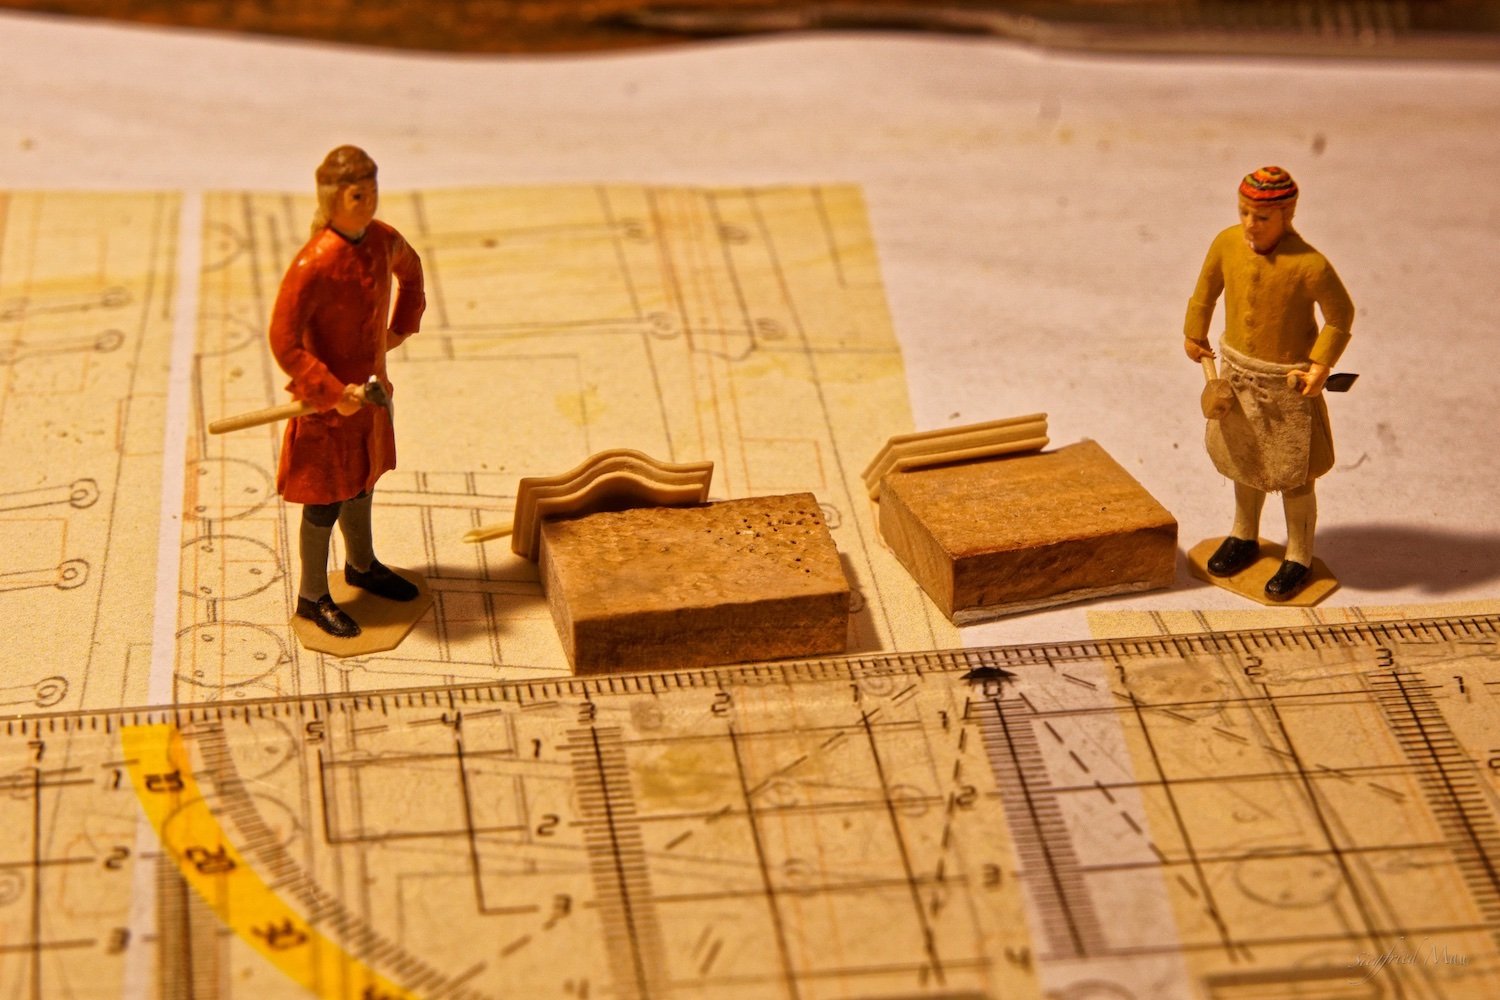
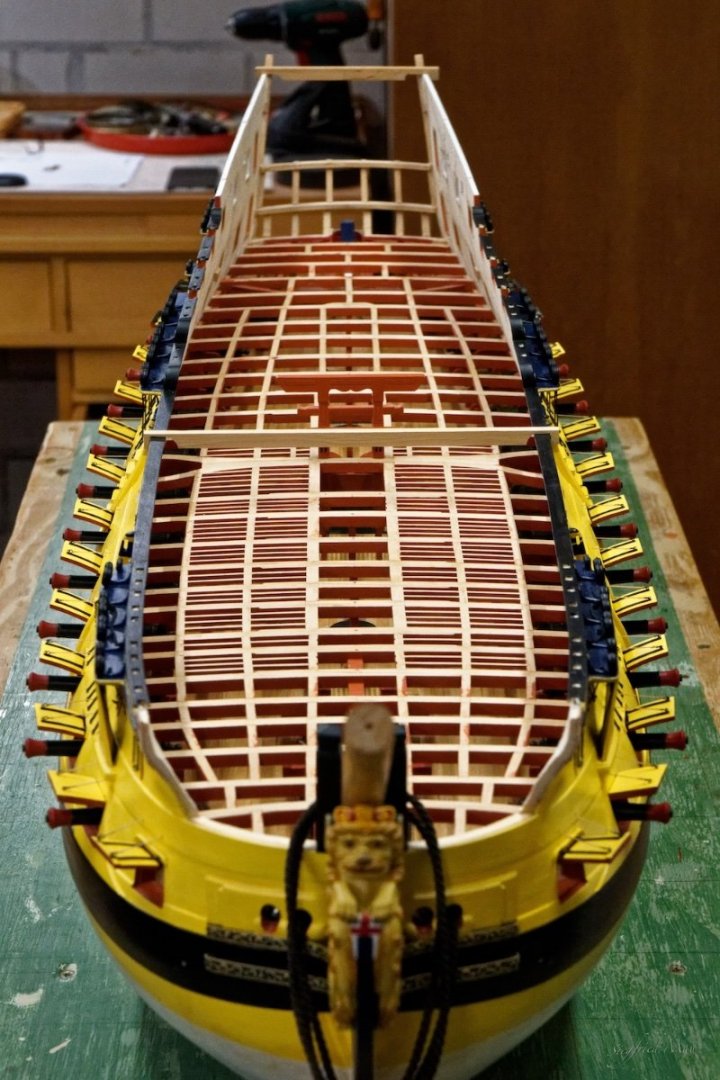
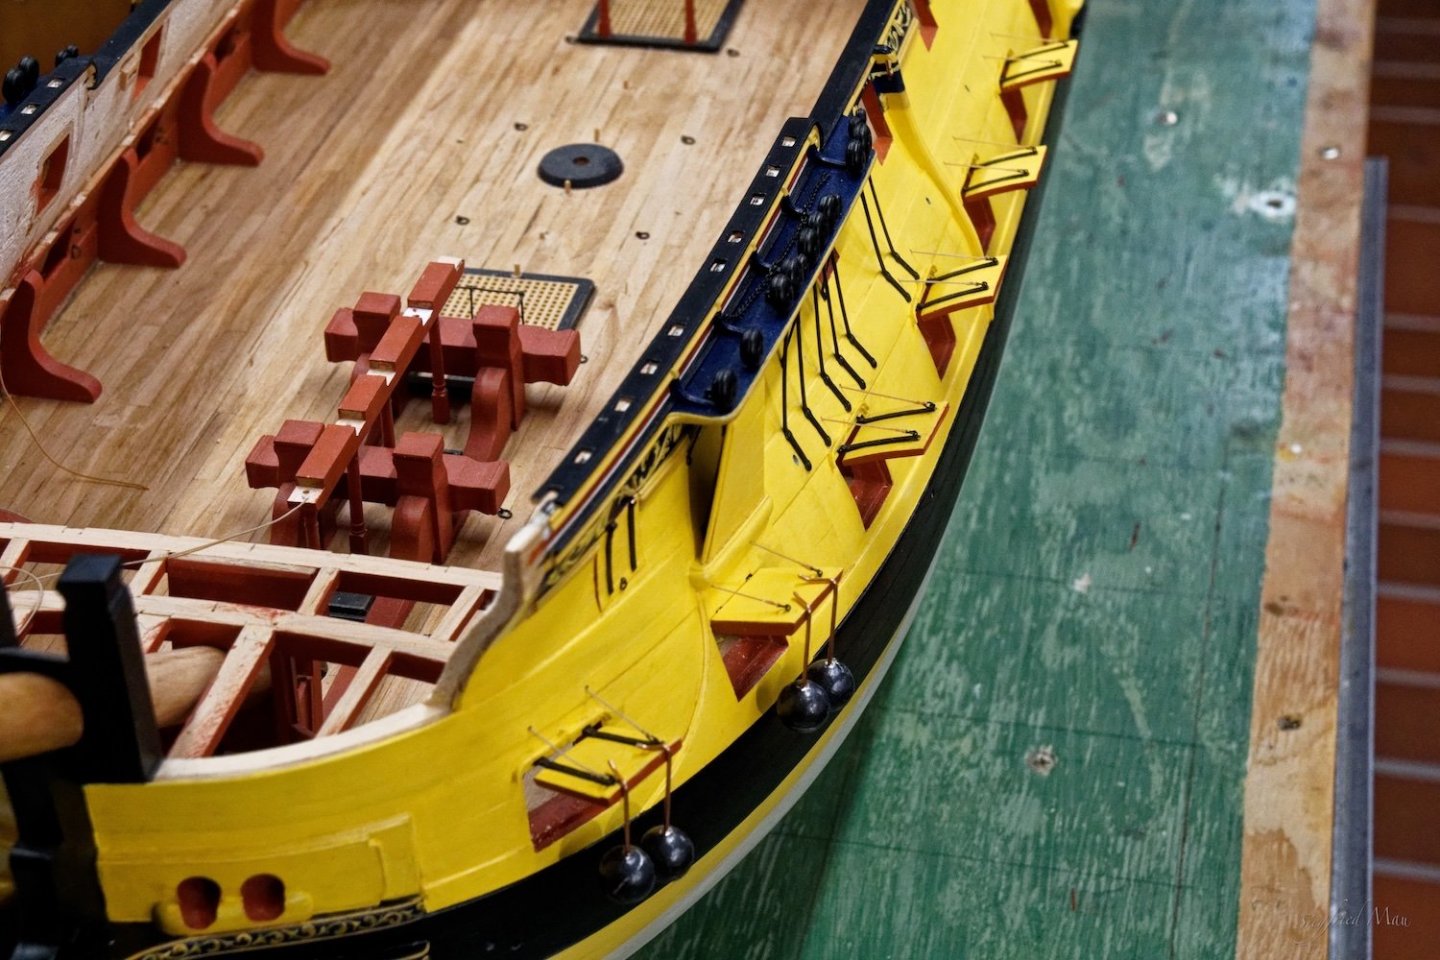
Hello, not that you forget me, here a small update. I build in the spirketting for the upper gun deck. and today the waterways followed These guys are controlling all. They are standing on a 3 inch (1,6 mm) plank. The planks later have the same size. And that is, what the carpenters have to do the next weeks, planking the deck.


-
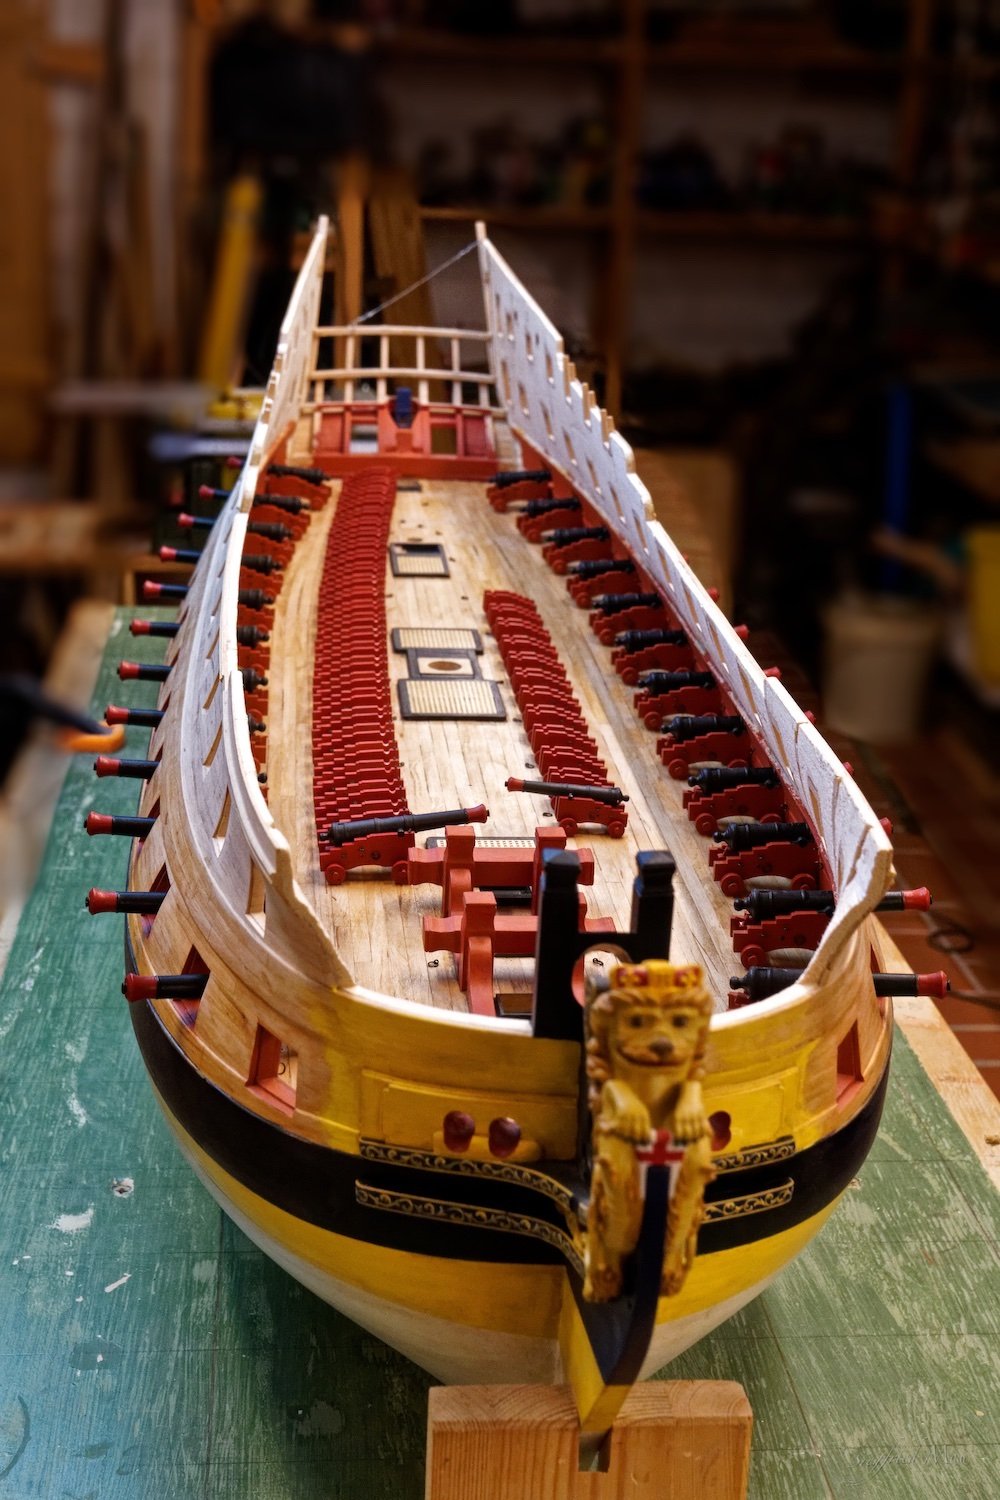
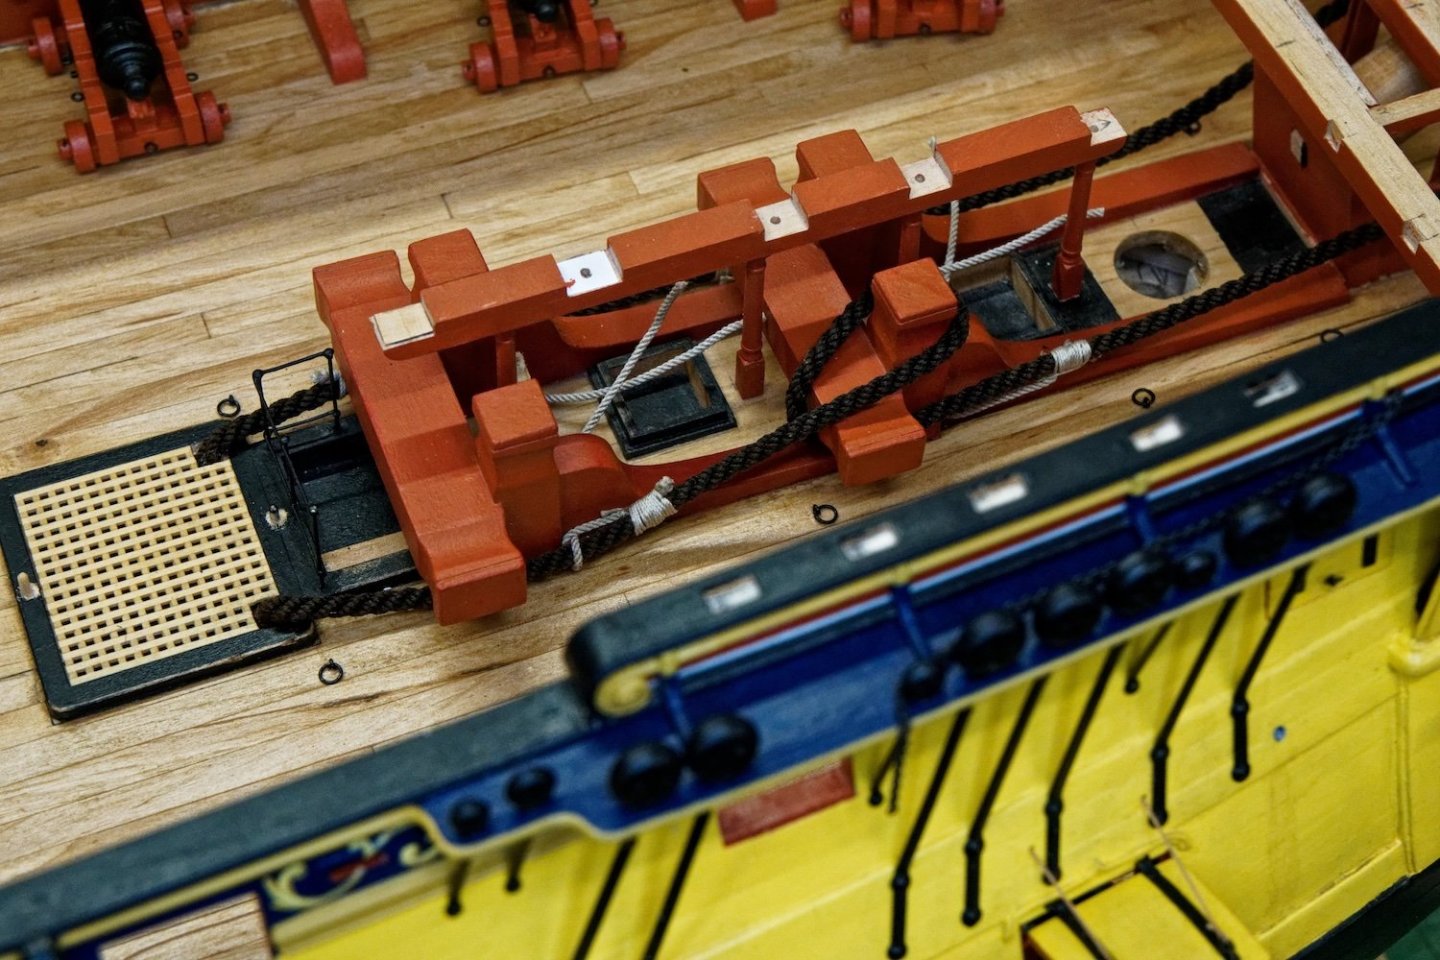
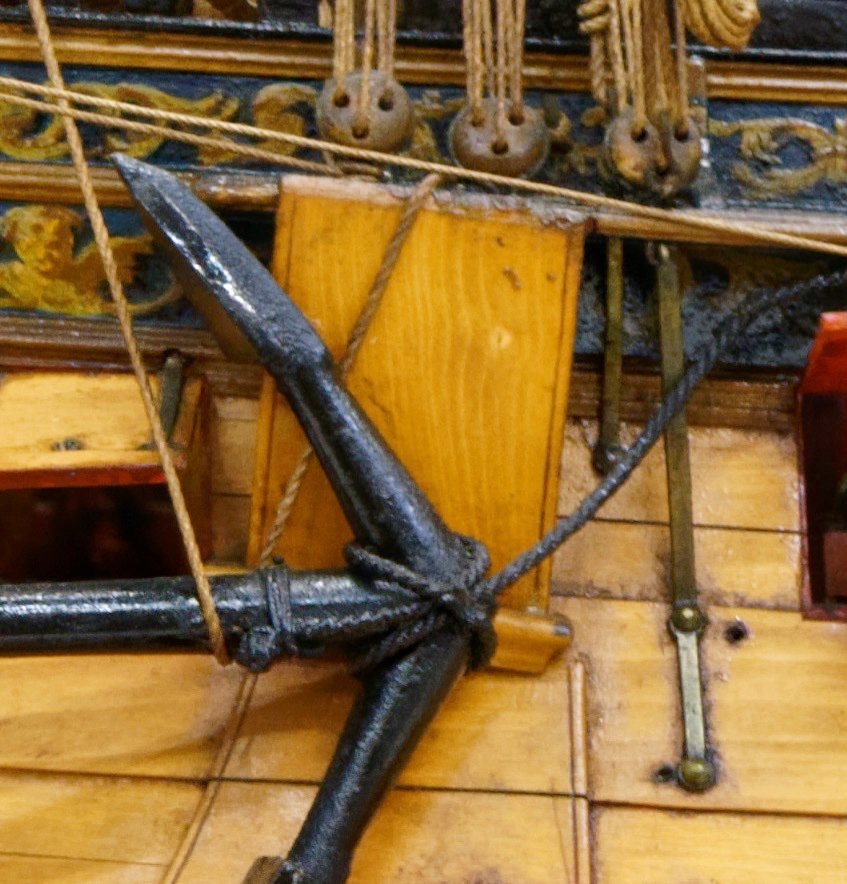
Hello and thank you for your comments and likes, today was a great day, because I finished the gun Deck. More or les, because there are the capstans and ladder-ways who will follow later. I decided to build the anchors all on board, so the anchor cable did't go over the riding bits. I'm sorry but the crew had there breakfast break, so they are not at the pictures 😉

-
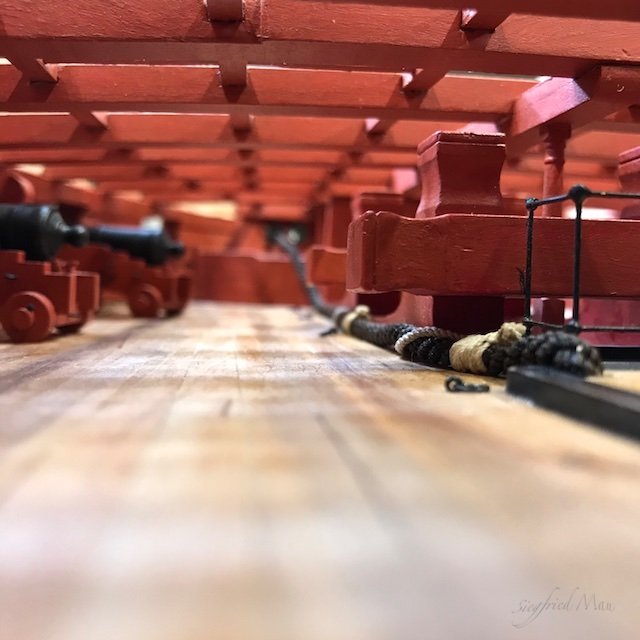
Hello, today I puzzled how to lay out the anchor cable at the deck. First, must a cable when not in use go over the bits? I build that at the port side. At the starboard side I would say, the anchor is out and the cable goes over one bit. Falconer says, only at a heavy sea the second bit was also in use and more stoppers. I secured the cables with two stoppers. All is not hard and fast, so if someone of you have other suggestions, please let me know. At least, most of this you would't see later 😐 I had some trouble with the uploading of two pictures! That is the reason, why one picture is now smaller.

-
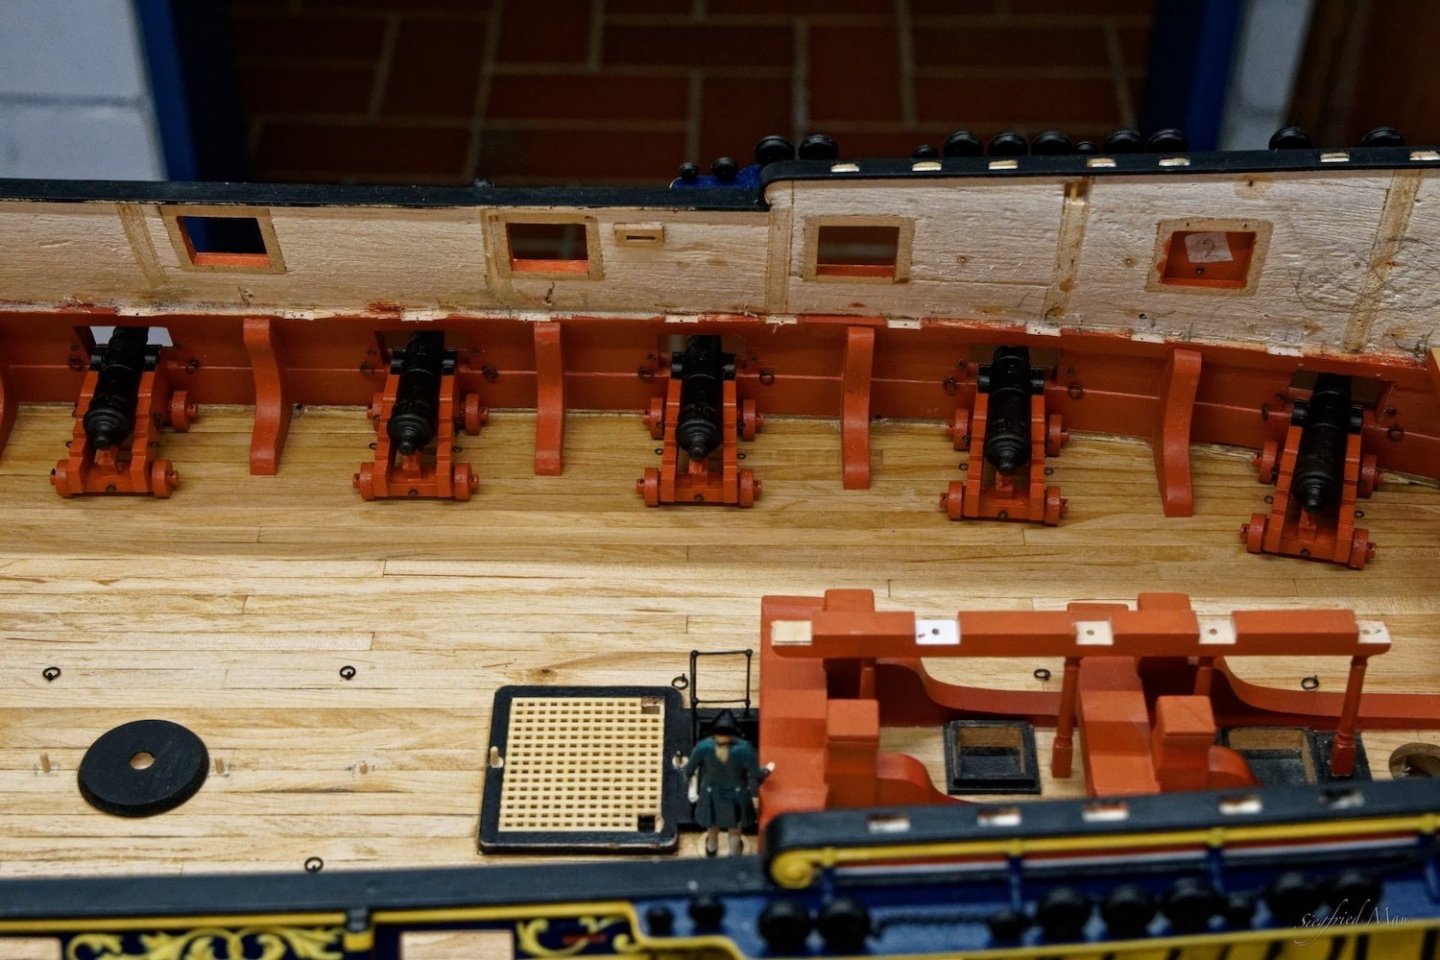
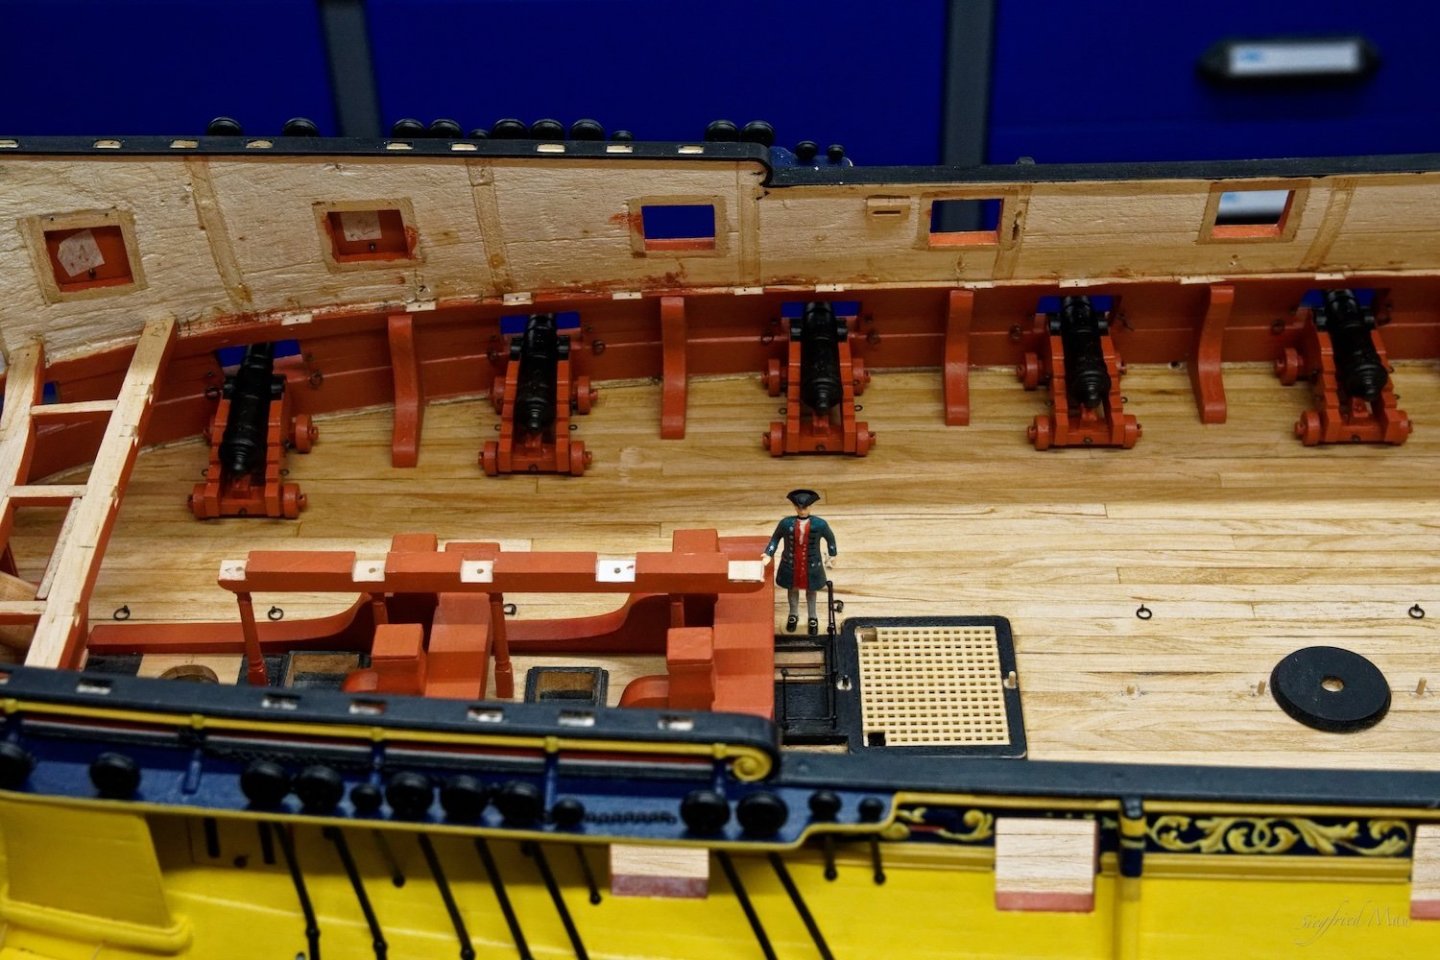
Hello, so, the deck is scrubbed and I made a first sample sitting for the cannons. The question is here, should they be perpendicular with the axis of the ship (pic.1), or with the outside of the walls? (pic.2) I tend for the later variation. You could see both at the contemporary models. And JJ, the shipwright stands before the ladder way. So it is't so tight.

-
Hello JJ, I leave it so as it was designed. I don't think that it is a mistake. You find that at many plans. Here the Tiger 1747 Standard 1782 Dragon 1760 Or even not Essex 1741 Ipswich 1730

-
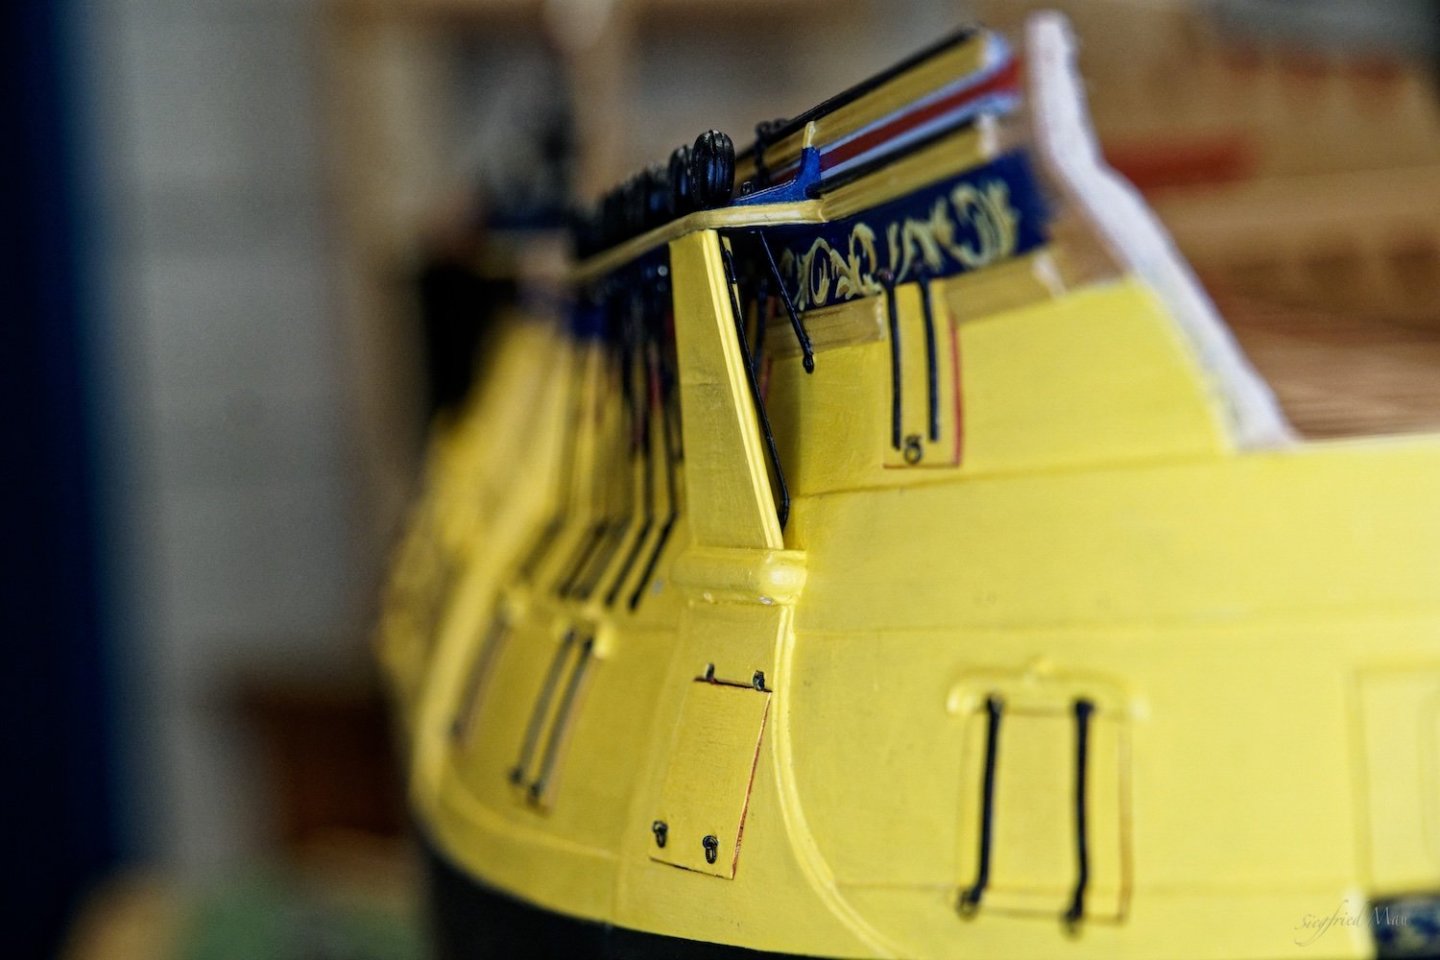
Hello and many thanks for al the likes, and now back again at the gun deck. Today I opened the port lids at the port side. The weights are bullets cal.45, if someone may ask.

-
Hello, it is done! That was more work as expected. The next, and for the next time last thing to do outside of the hull, would be to rig up the gun port lids at the gun deck.


-
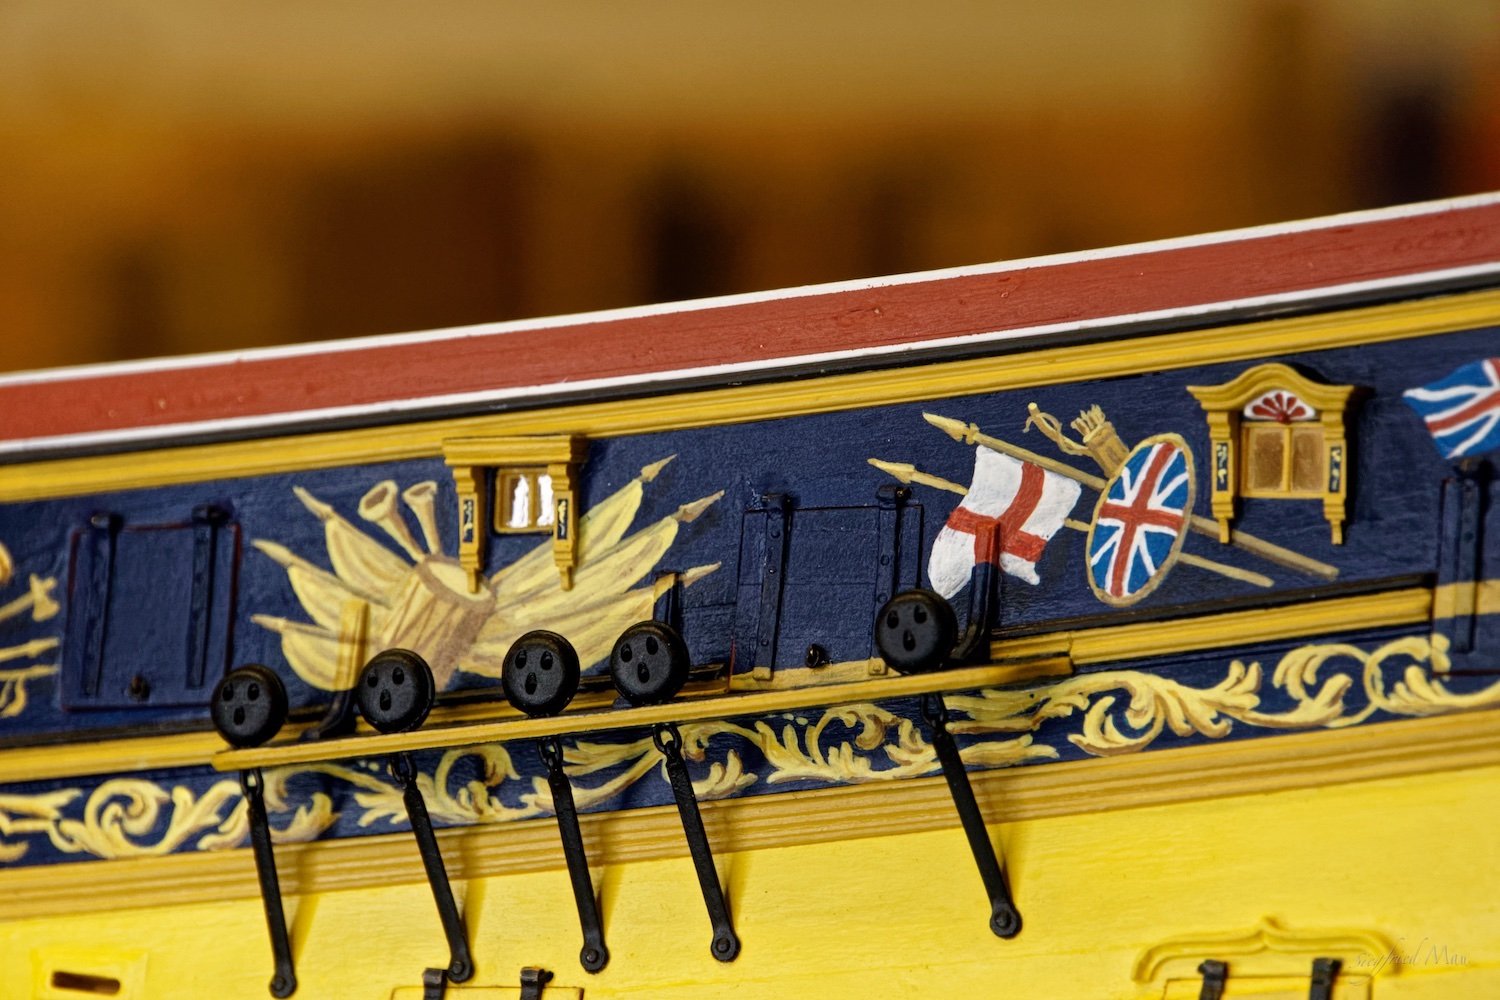
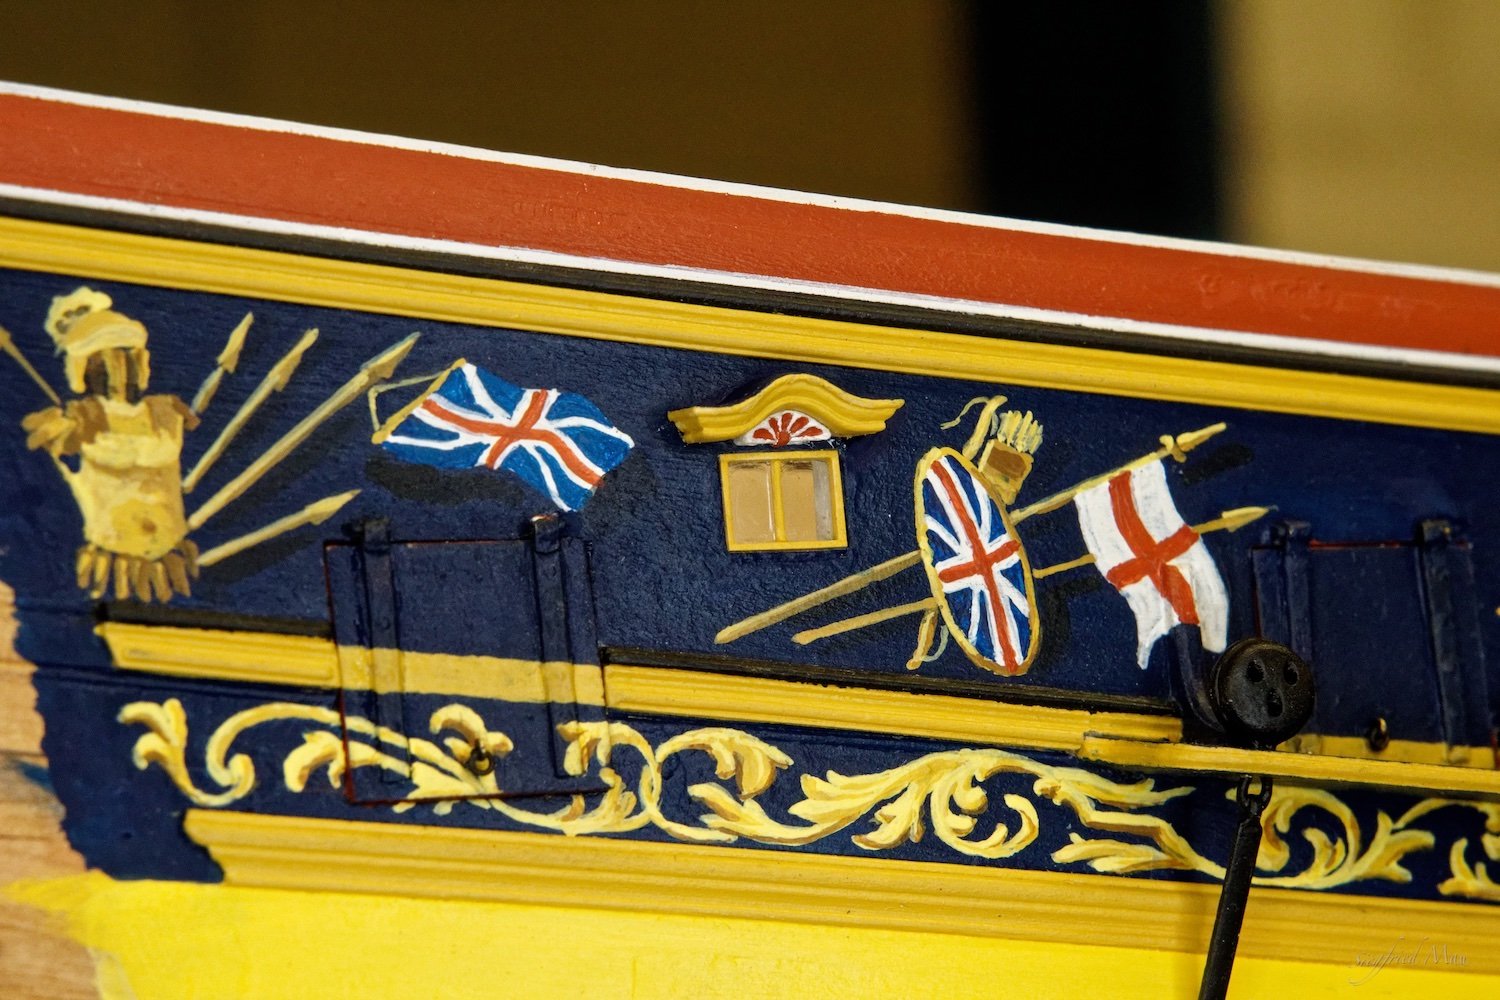
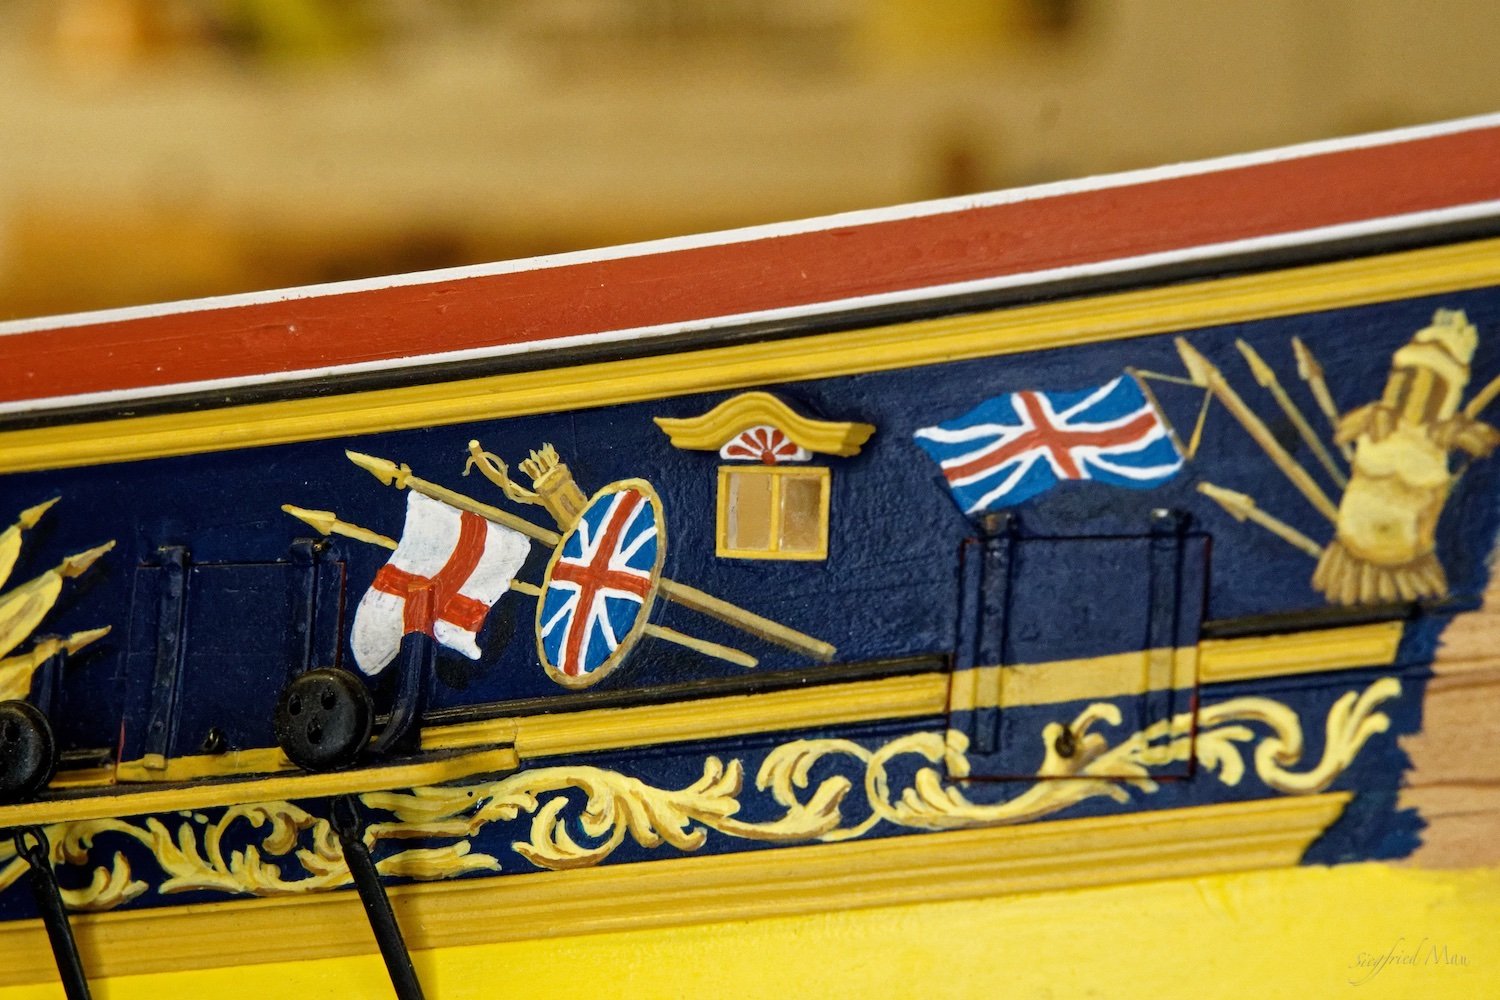
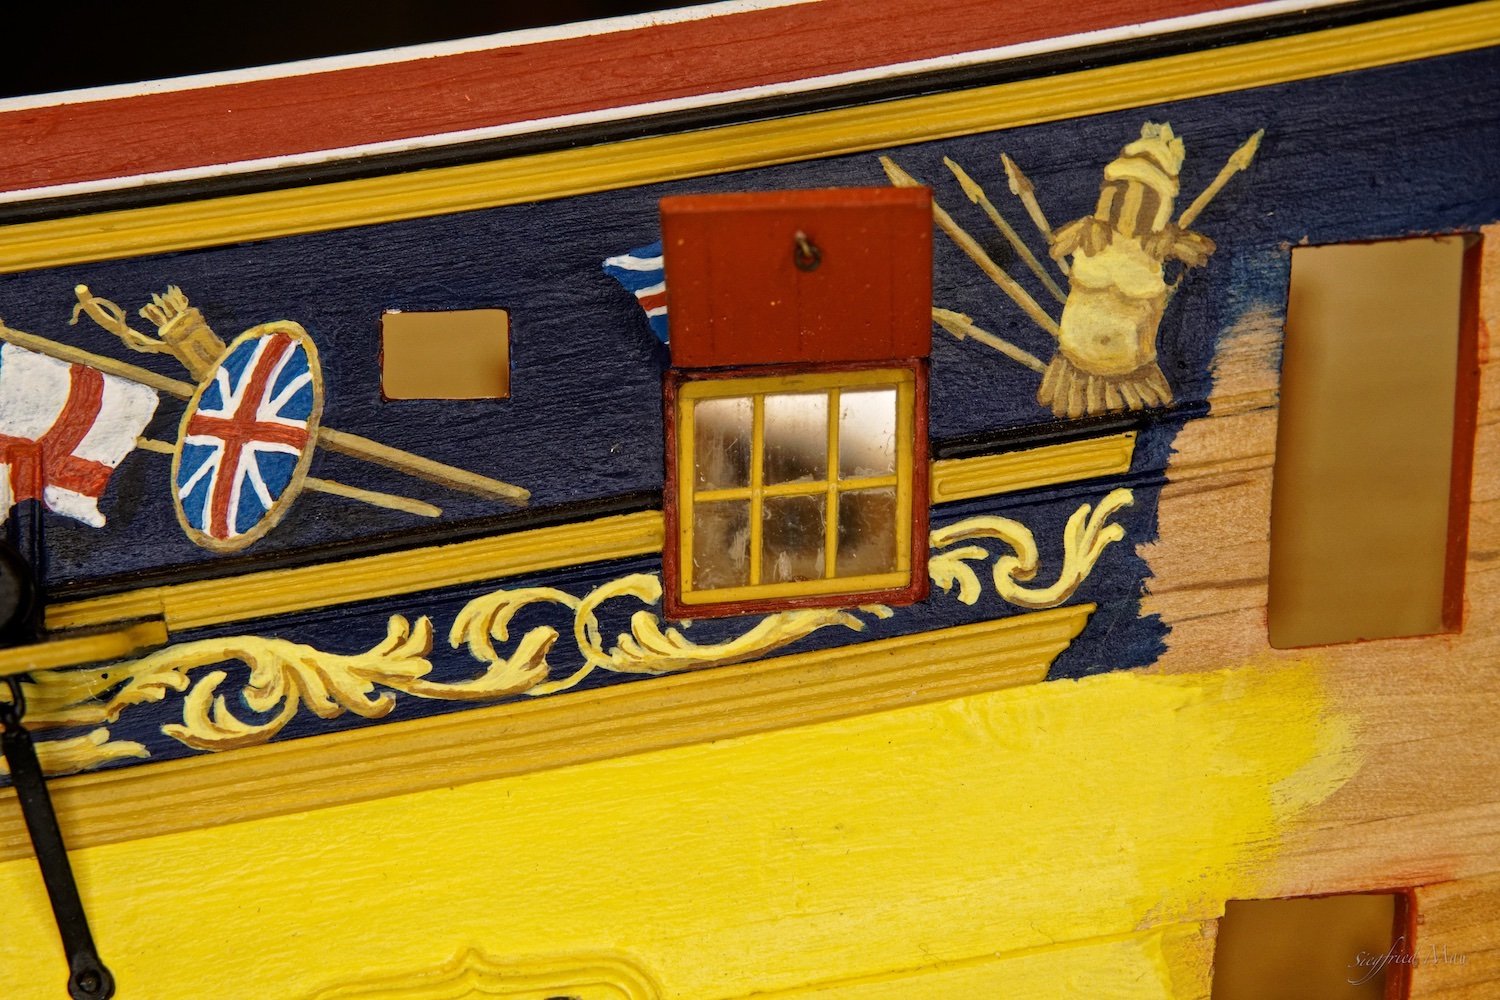
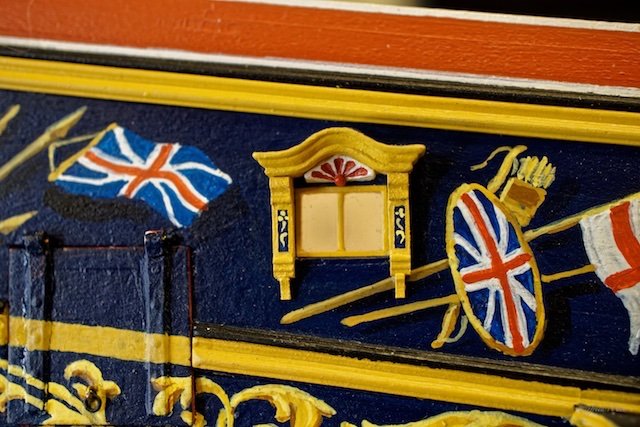
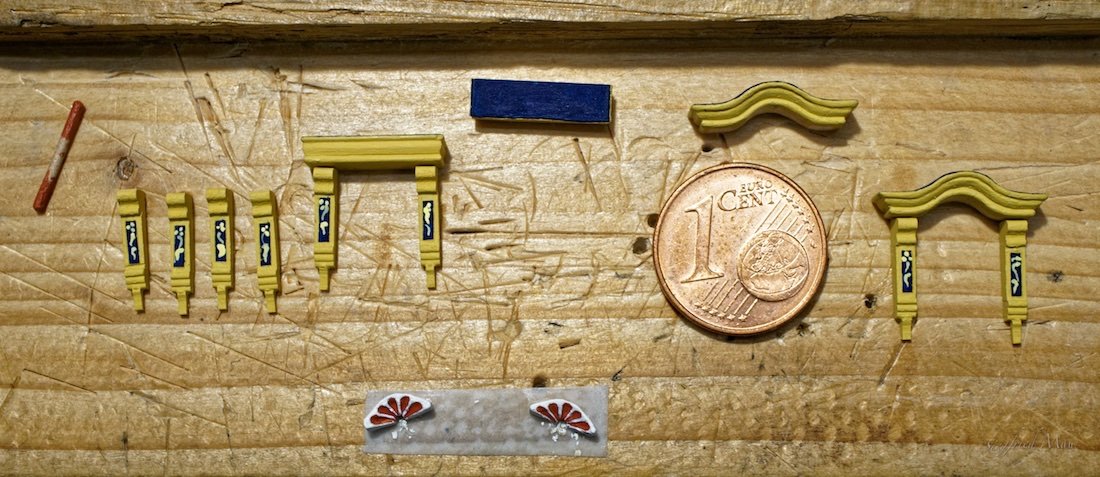
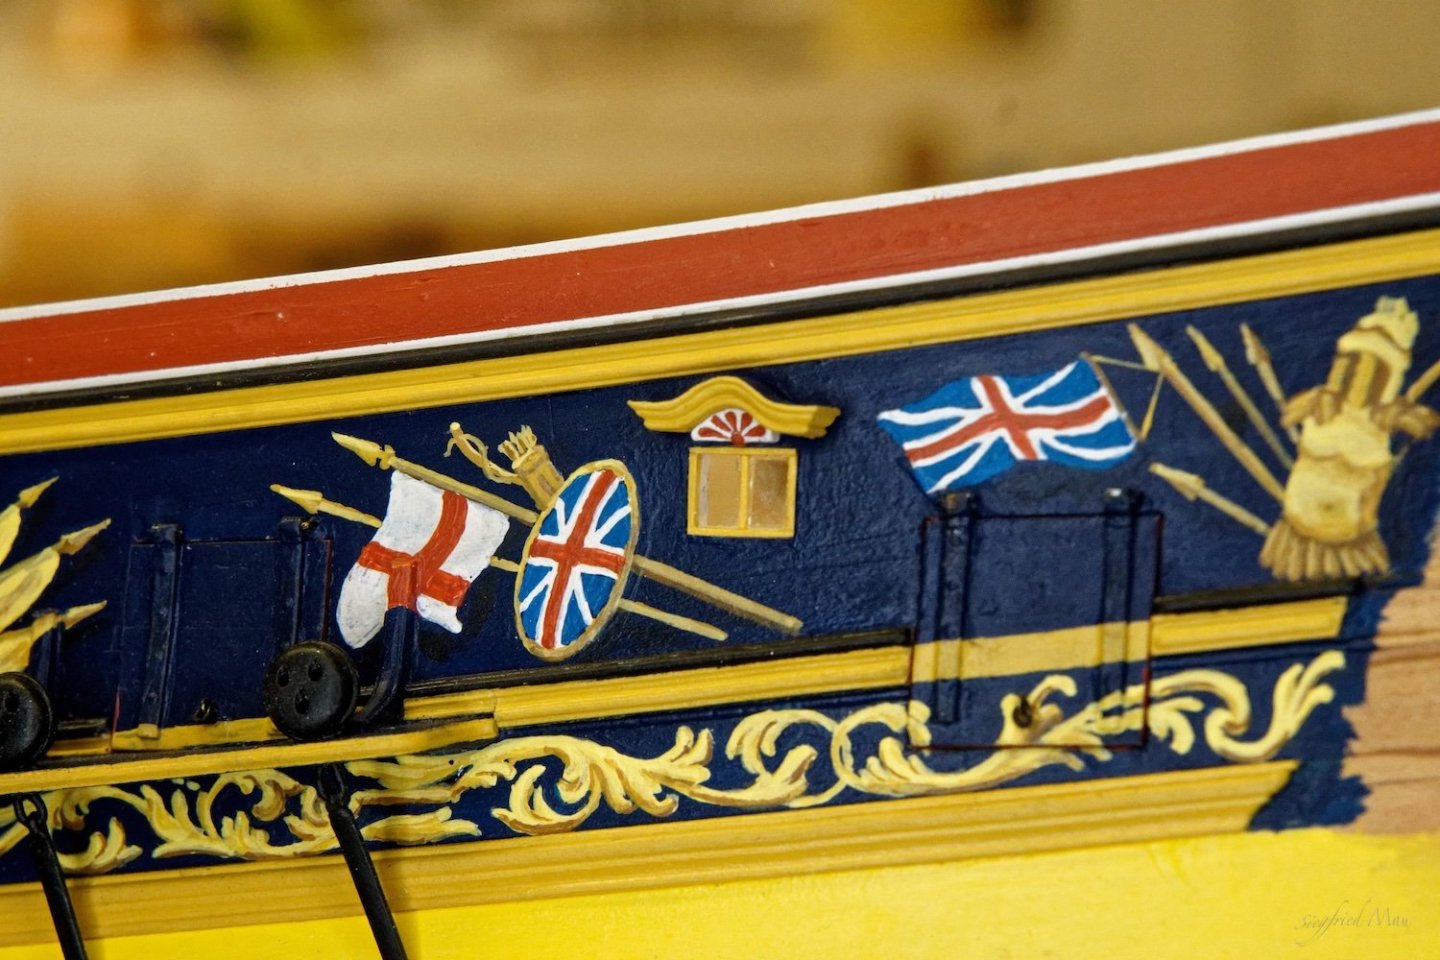
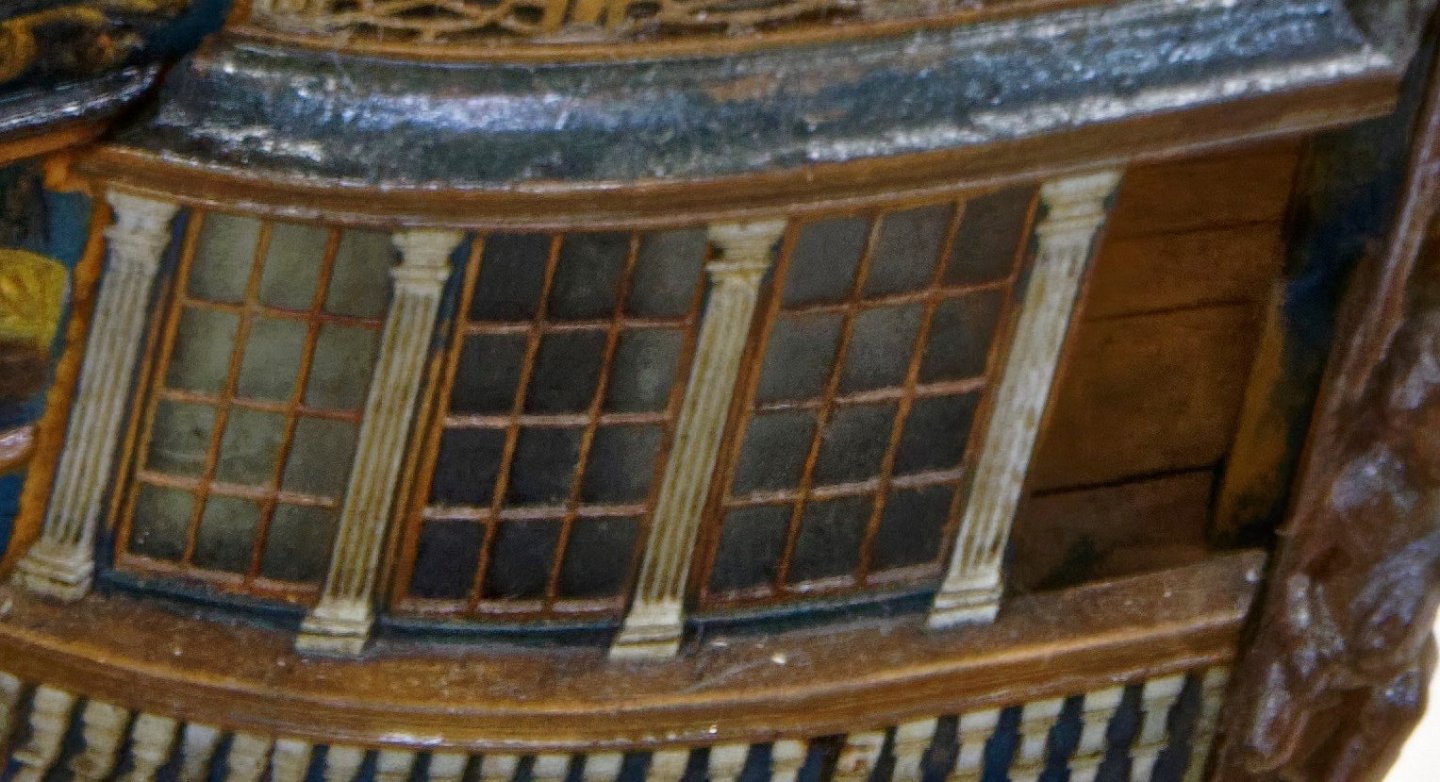
Hello, and thank you Albert That was not for the first time, but when I look long enough at the pictures it is not unusual that I'm back in my shop and tear down what I had build before. So also here. It is terrible what you could see all at pictures 😬 Now the window borders 2.0 At least I carved only these red and white half circles new, but I also build the pillars and painted them the last days.
-
Hello and many thanks for your comments and likes The carpenters started with the window borders. Are that also rigols?


-
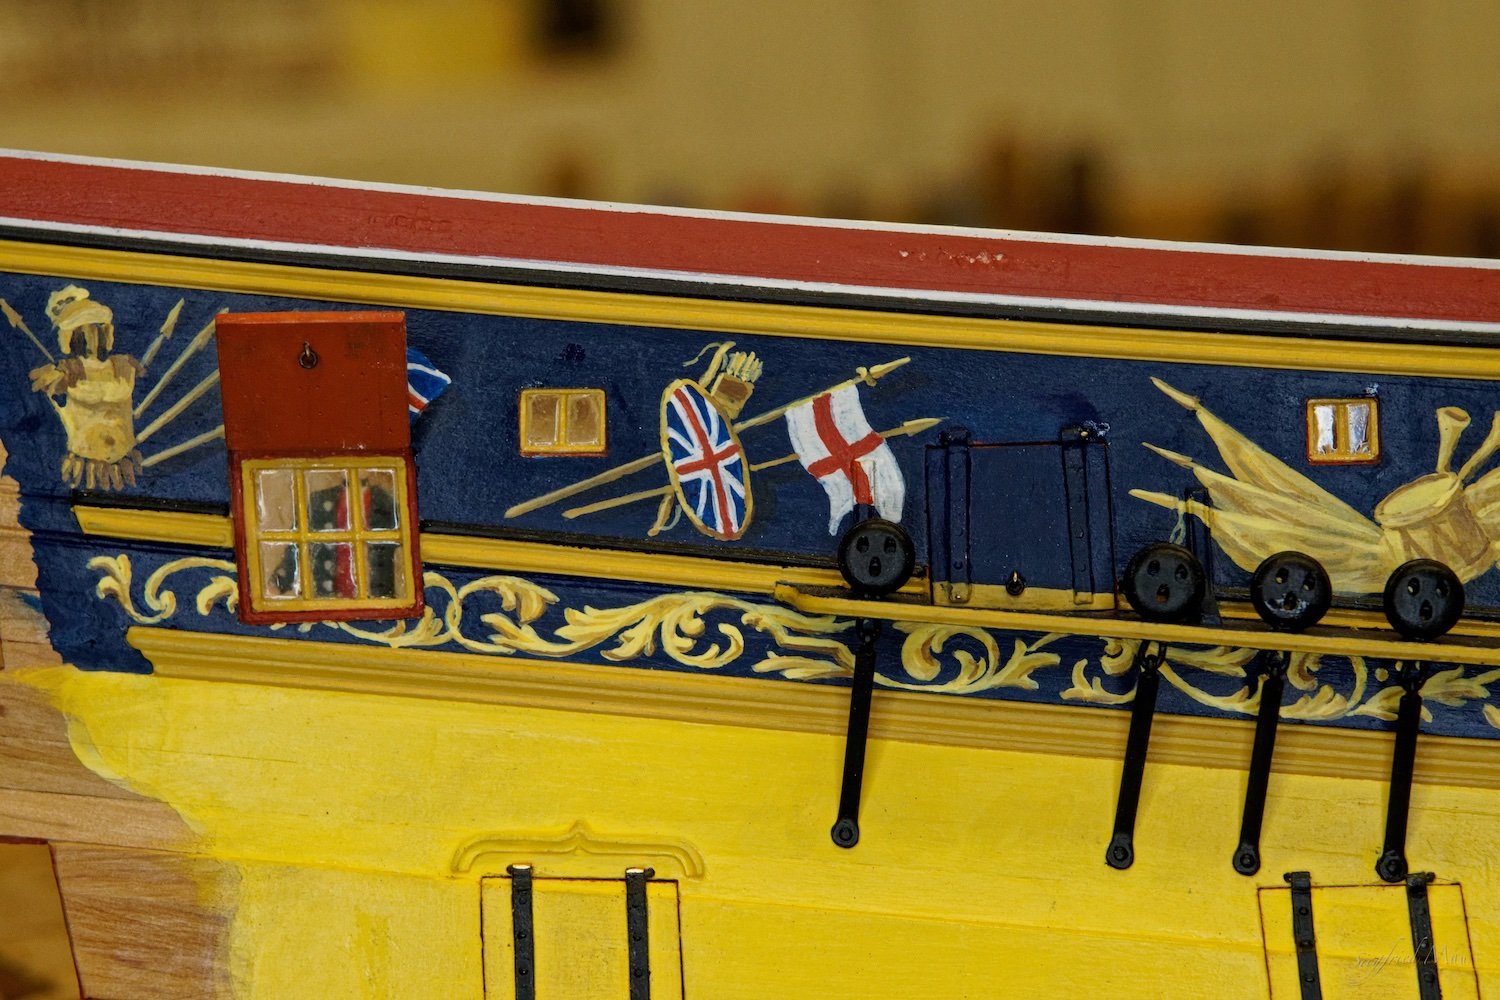
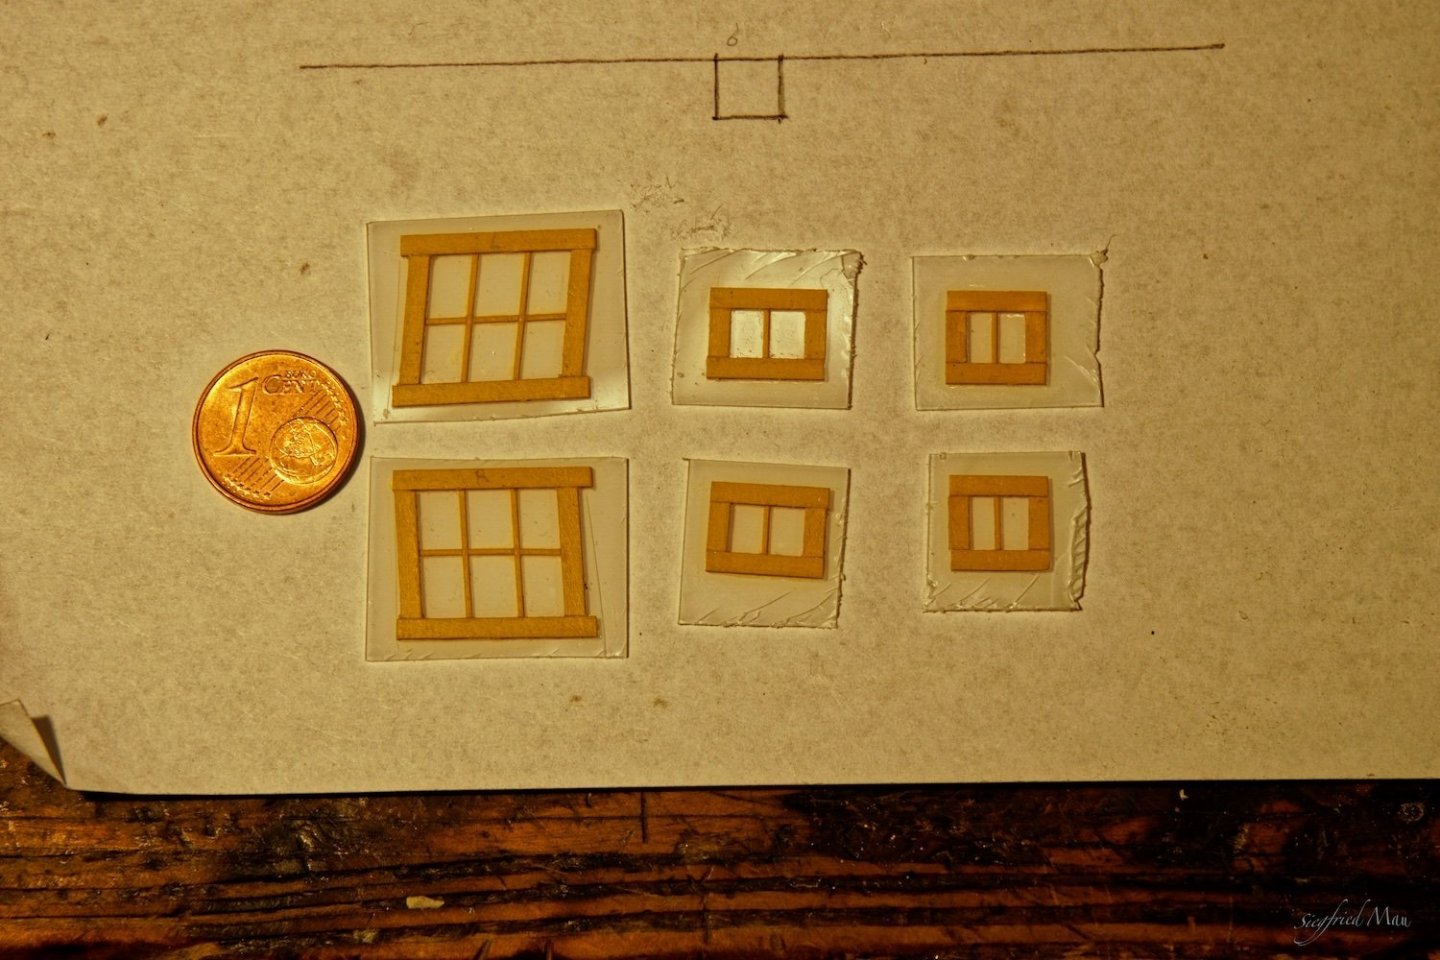
Hello, it is done, the windows are ready and build in. The lacquer at the acrylic glas may dry a little more and then I hope they look a little more even.

-
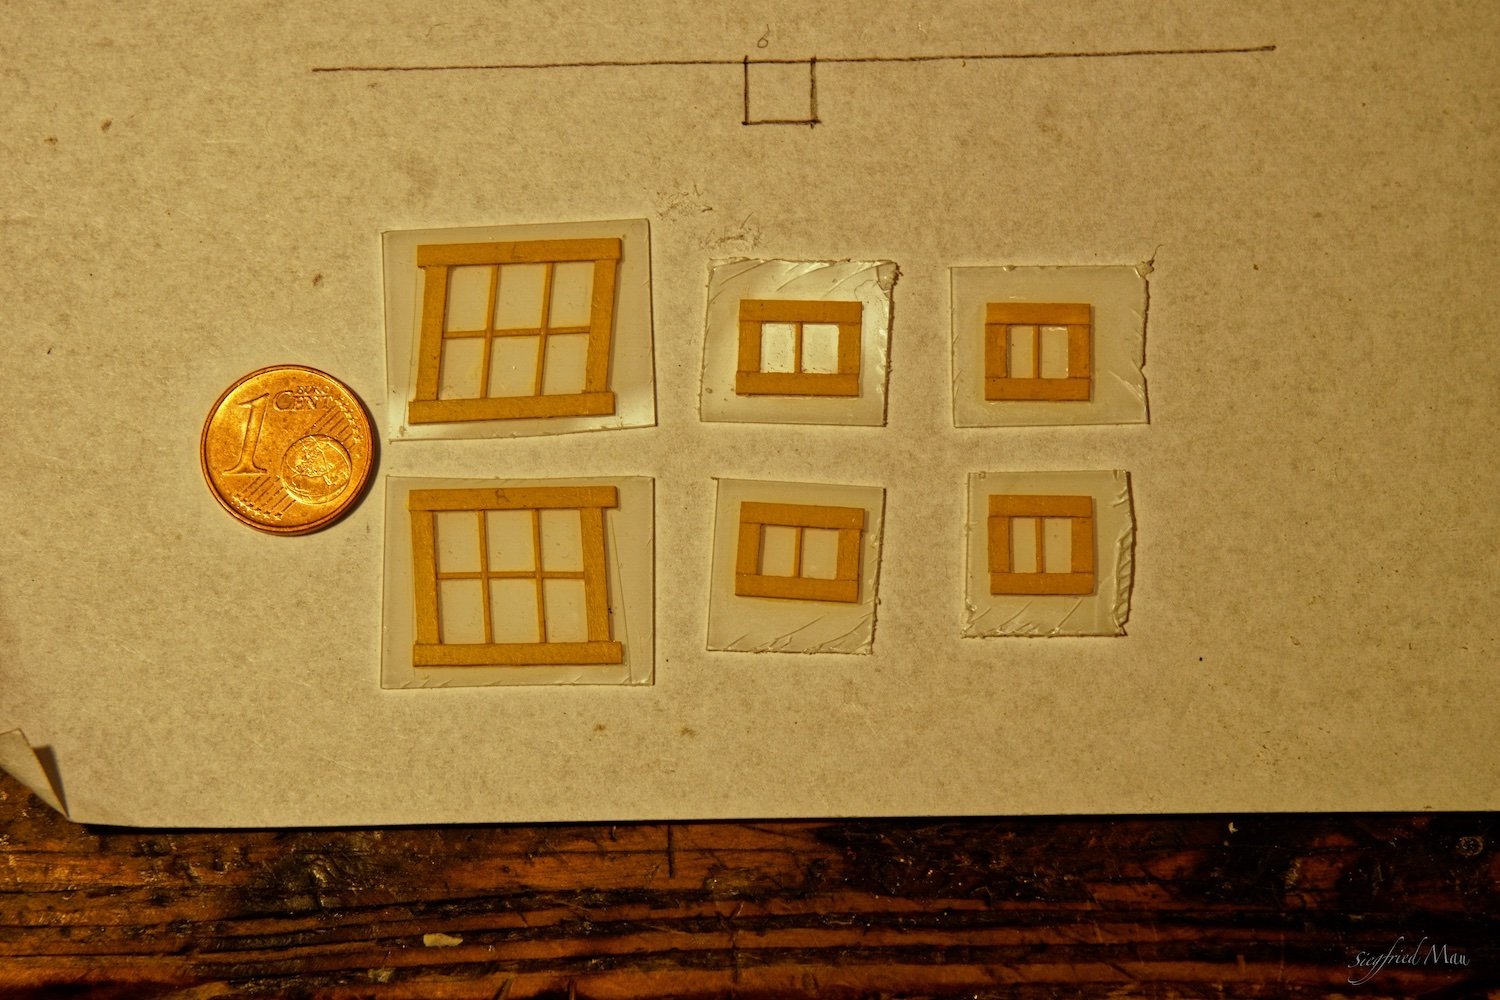
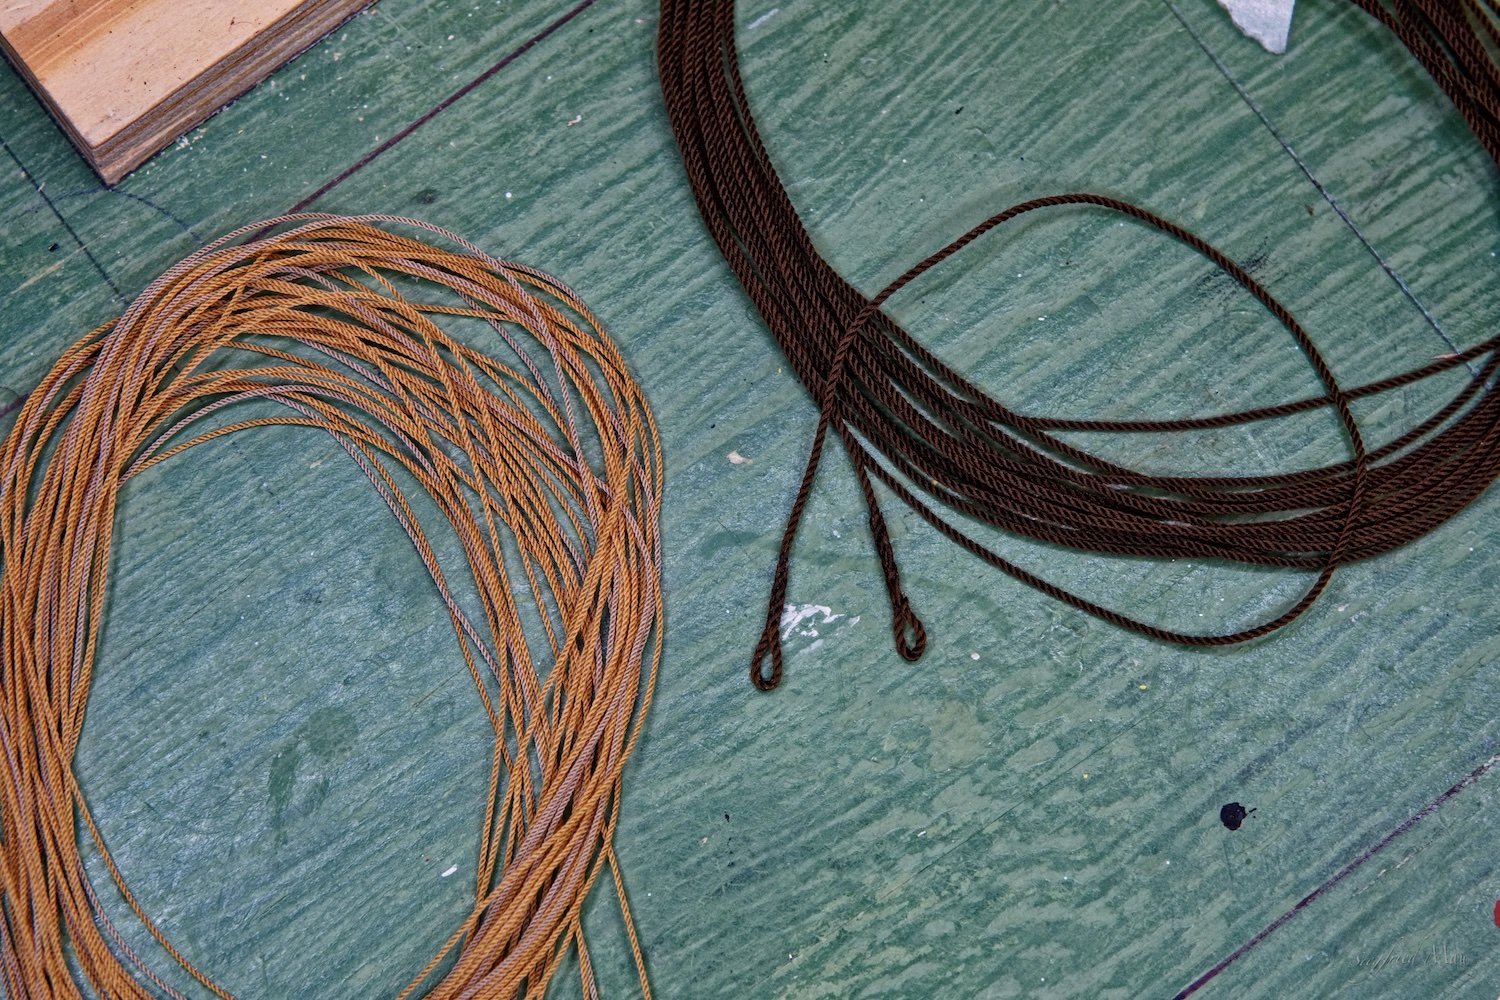
Hello and many thanks for your comments and likes Håkan, splicing is't wich work. I did it in real life many times before and here it is only a little smaller 😉 Today I tried one rope at the model, they are too short and too thin ☹️ So I have the chance for two other splices. The two window are out now and the new ones more or les ready. They have to dry properly, and then I will give them a thin coat of clear lacquer. So that the glas would't look too plain. I worked this time a little more accurate and it looked much better. I made the windows for the Dragon from mica. So I know, it is not easy to work with it. But it is clear and plain. And I know also glas from the 18th century. It's not so plain like the glas today, but it is not blind. From looking trough it, you could get sea sick. I think, the mica at the contemporary models are also coated with glue ore lacquer and over the last 200 years it is getting blind and wavy. This is the 60 gunner 1:60 I saw in Chatham. And that at that scale! So tomorrow more about windows, I hope.
-
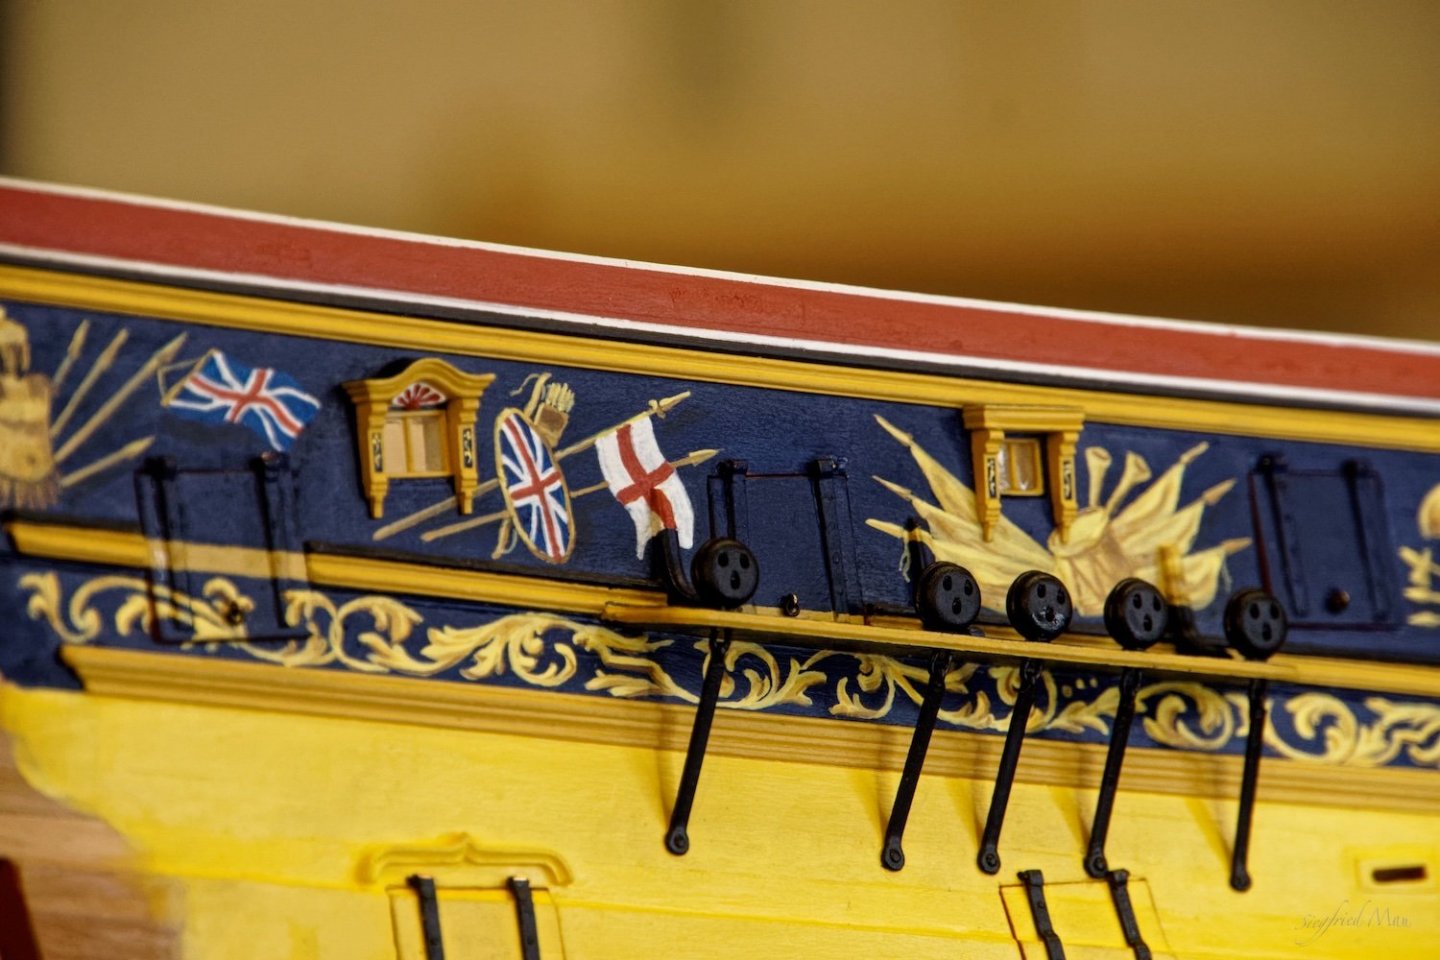
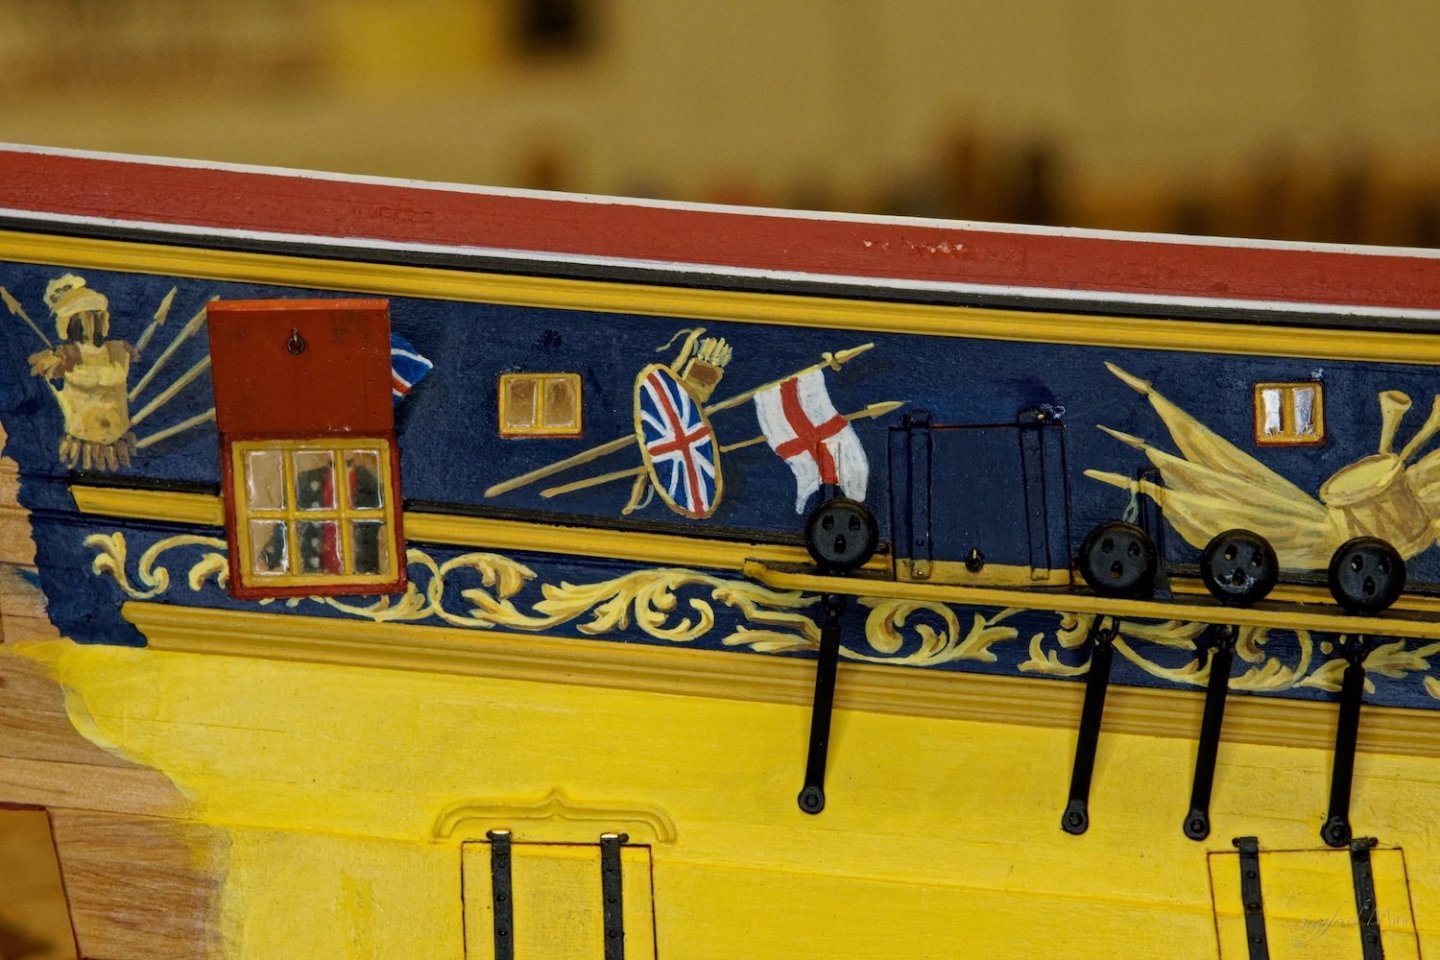
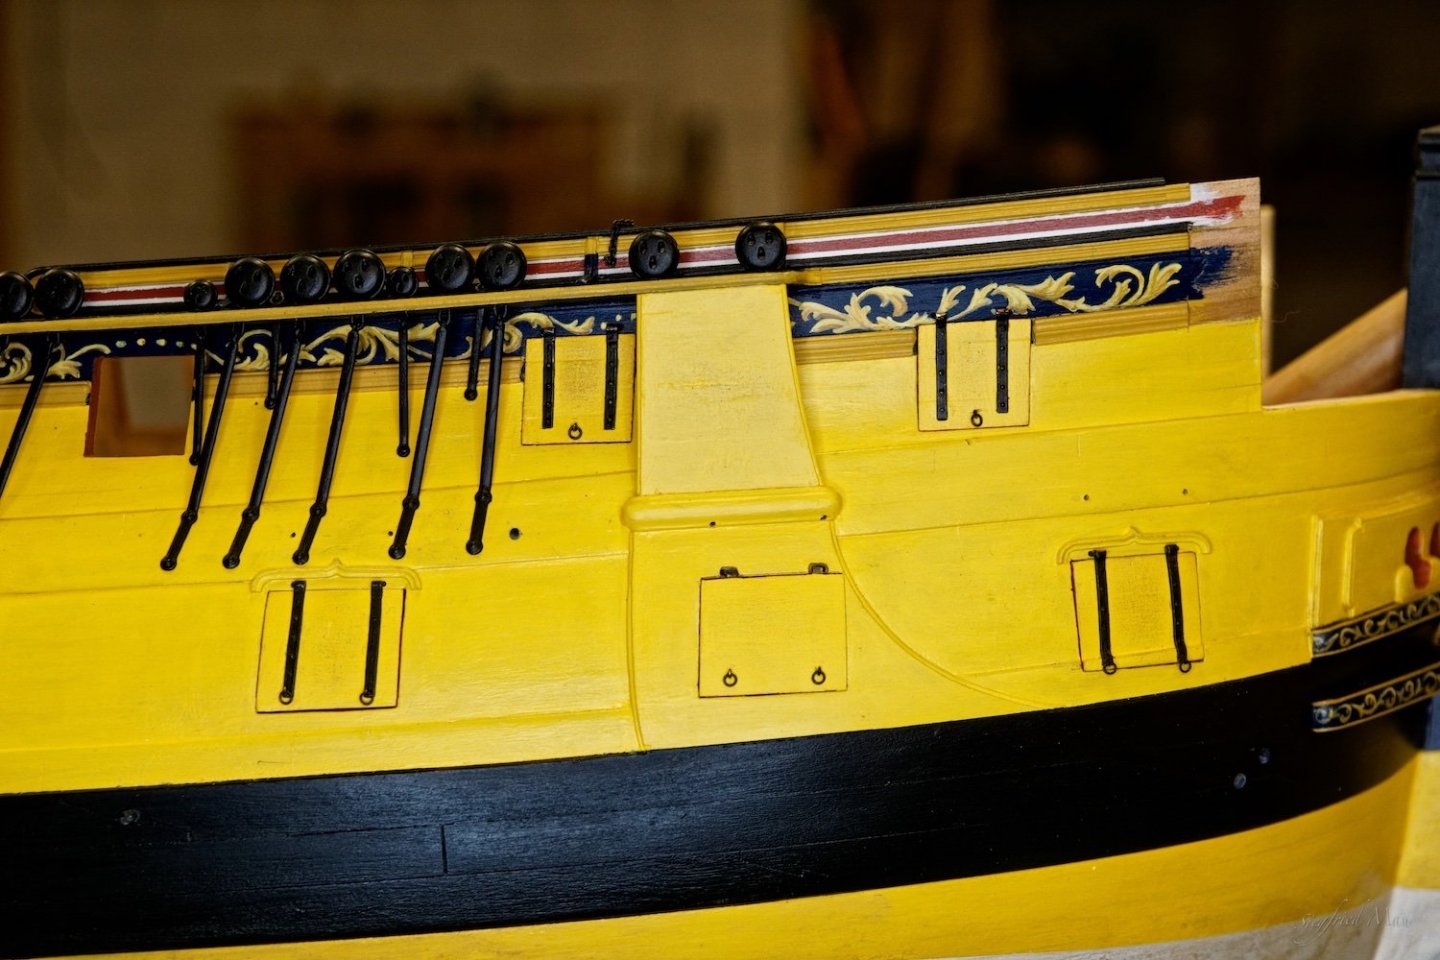
Hello and thank you for your likes, during the paint at the billboard dried, I made the ropes for the gun port lids. And because I had the ropewalk set up, I made also the ropes for the gammoning. Here I tried also same splices en miniature. The right one was the first, but the second is, I think ok. And here the first windows. The smaller ones I have to rebuild, because they separated when I tried to cut them to the right size. The larger one, for the captains gun port, did it well. The only thing is, that the glue made the acrylic glas blind. I don't really know what to do with them. I glued the wood to the acrylic glas with the glue for acrylic, but that solved also the paint from the frames ☹️


-
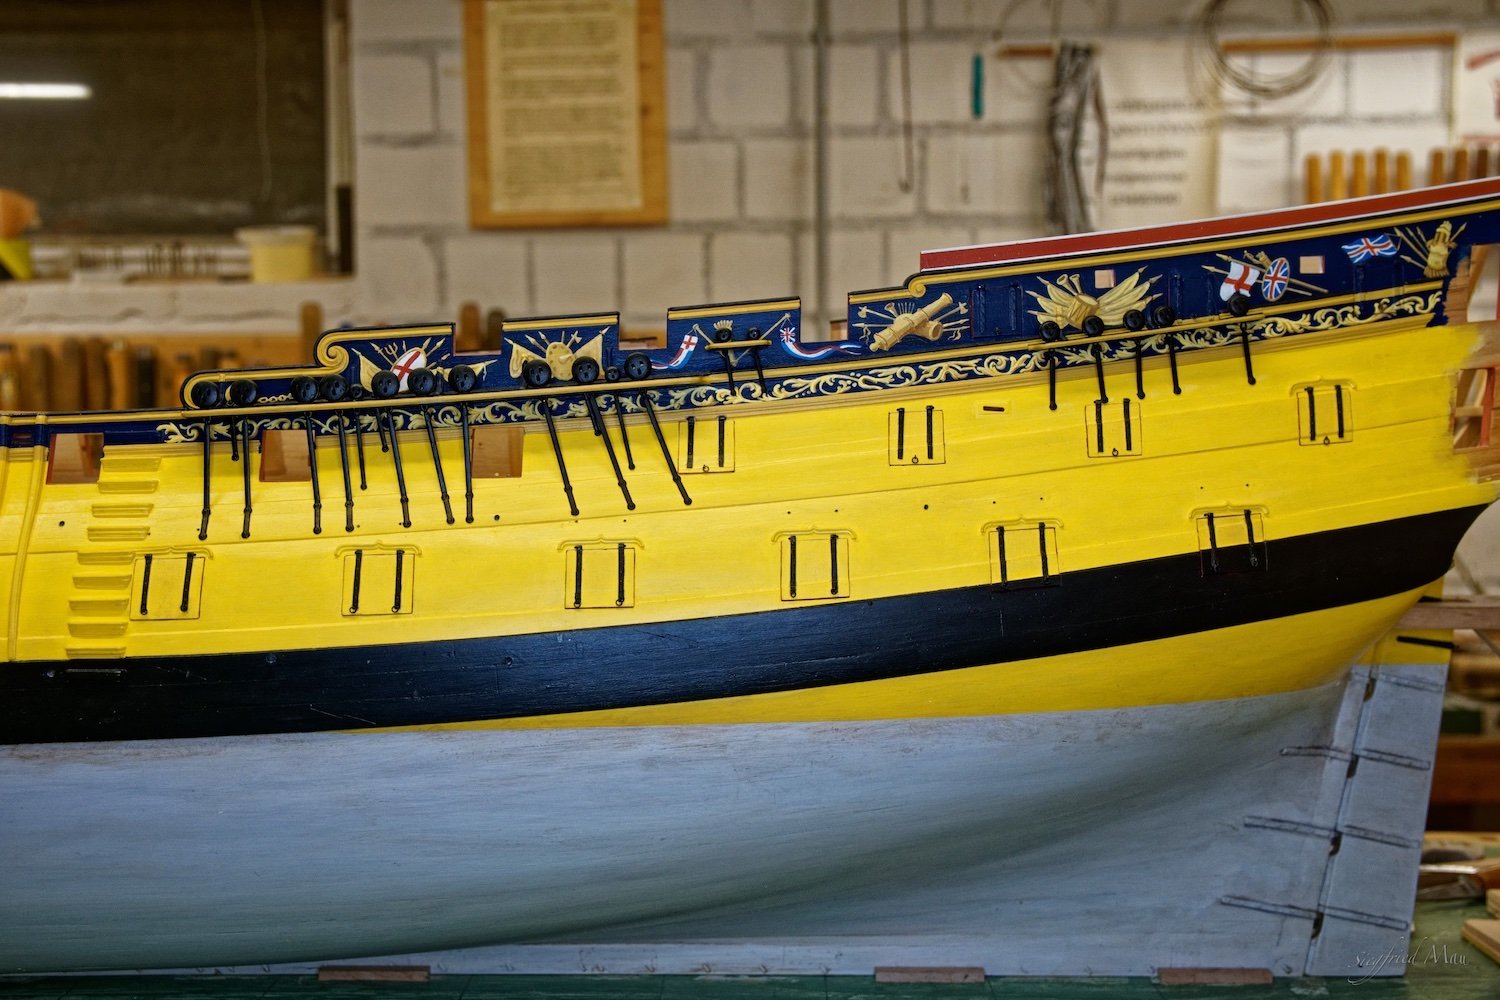
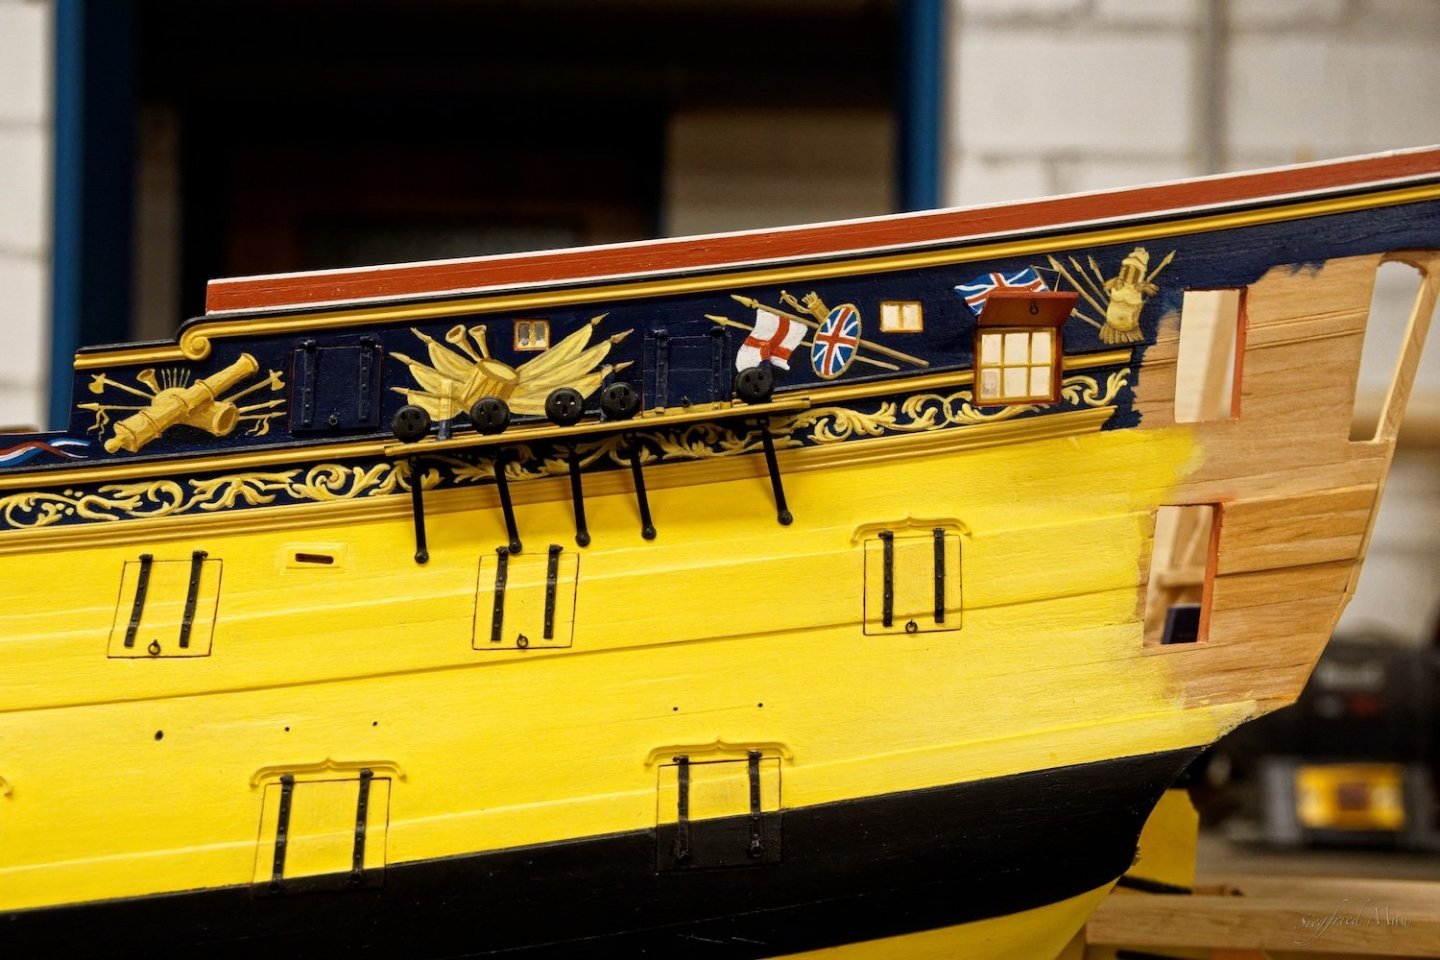
Hello, the billboards are now also ready. It was't easy because they are twisted a little. The pictures with them ready where not sharp, so I delated them. The next things at my to do list are the windows at the quarter deck. 🤭 That means tiny carving, but one time I have to do it.
-
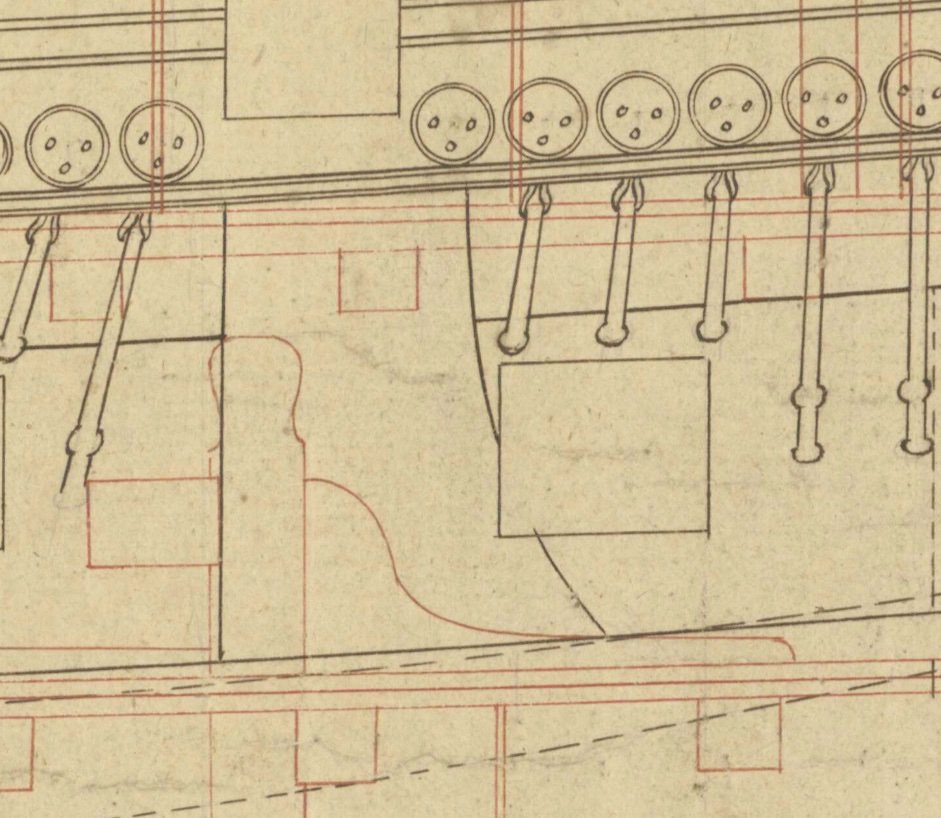
Good morning, I must say, most of the billboards where parallel sided, but not all. The Yarmouth 1745 and the Royal Oak 1741 for example The whole lining is following a curve and I think I should do it also with the Tiger so. Because the channel is set back a little and I found no ship of this time with only at one side of the bolster a free space. The Tiger 1747 For a sailer to loot water depth is't there much space. It would be the most dangerous working place at the ship. The ruler is to scale in feet.
-
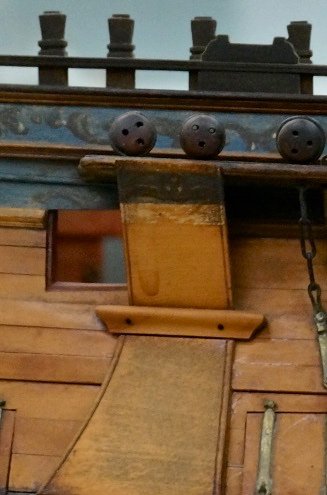
I did't find pictures where there is room enough, that there could someone stand. At later ships, like the Bellona, yes. There is the bolster extrem long forward. But even at her sister ship, the Superb, it would't work. There is't enough headroom I would say. Here a picture from the Centurion. That part is there missing, but the notches in the channel indicate its place. And here the other 60 gunner from that period. I don't think that there anyone could stand. But at least, they are both parallel sided! The not so parallel sided one are from ships, where the channels are lower and yes some had also this bolster. When I build that part like version #3, then is there a space 4mm deep and 6 mm long. Means 192 X 28,8mm. That is't really convenient to stand. I sleep it over and will see tomorrow what I do.
-
Thank you Druxey, that makes sense. I will look in my books again. For now I found within my pictures only ships with the channels low, and they did't have this bolster
-
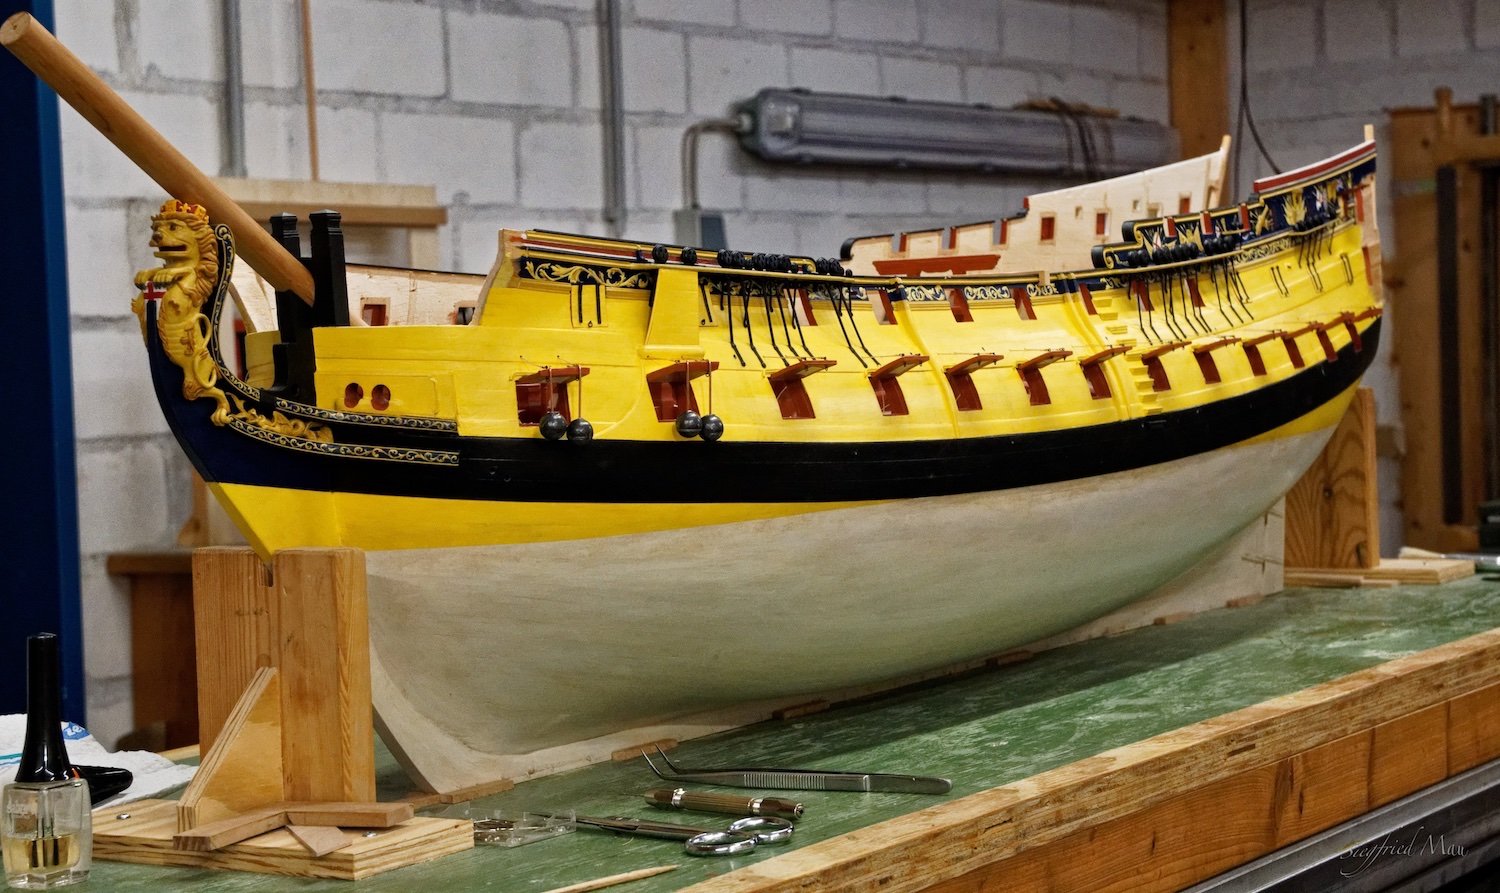
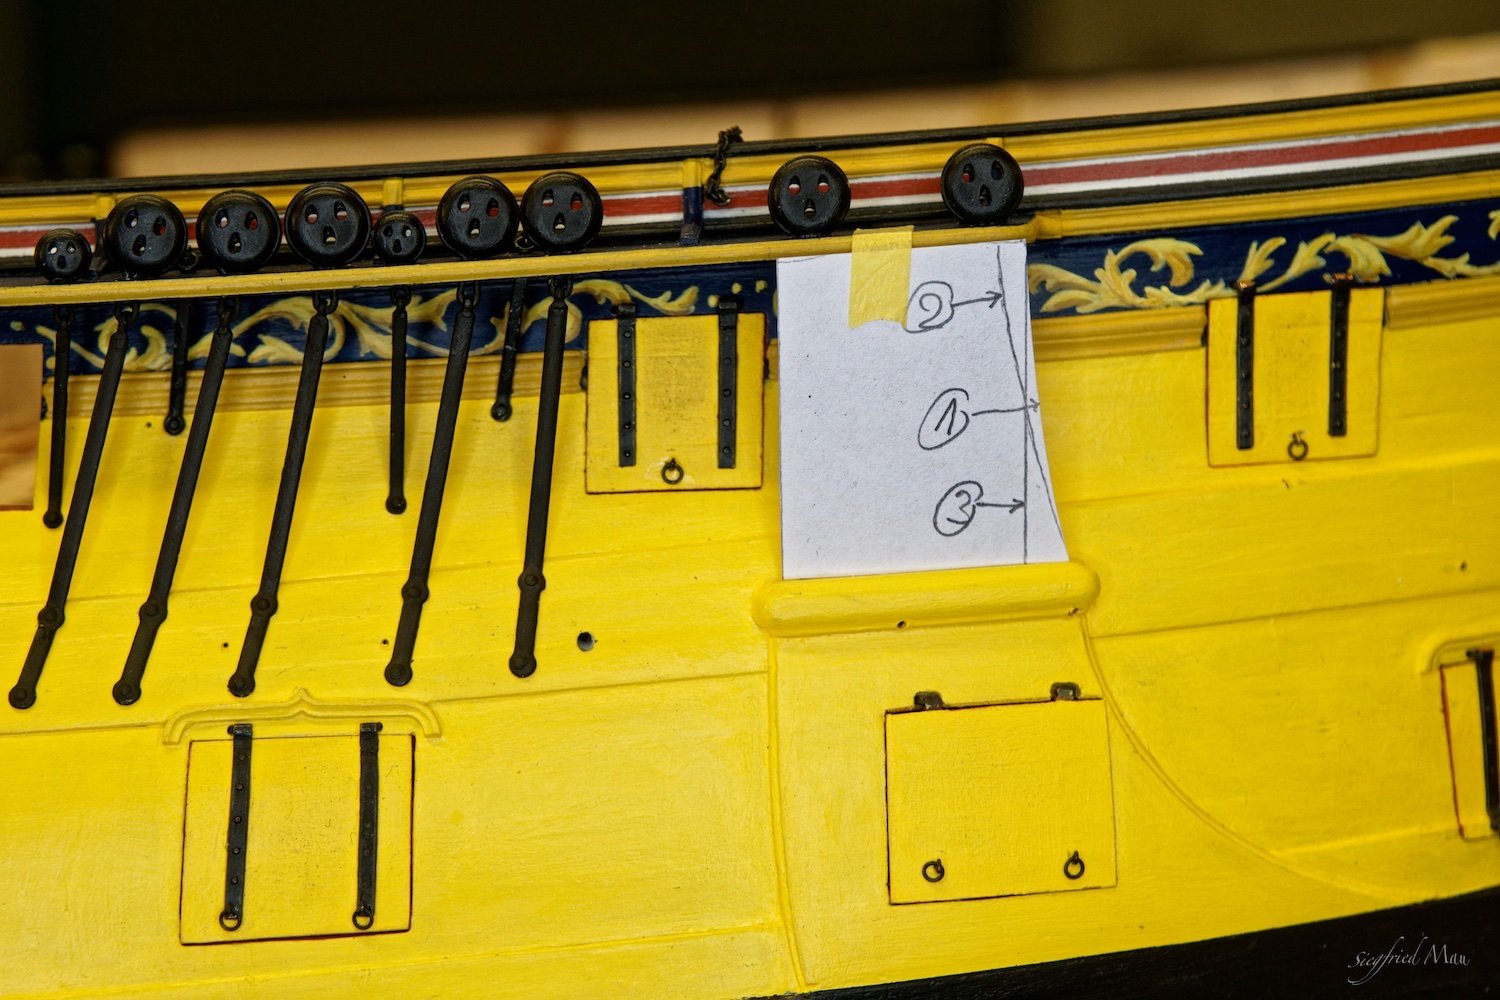
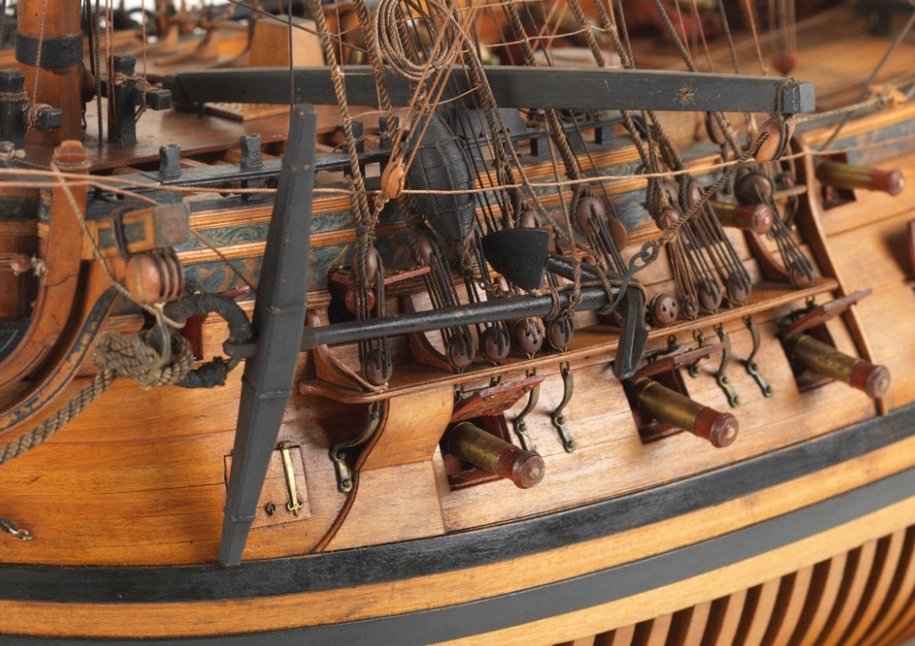
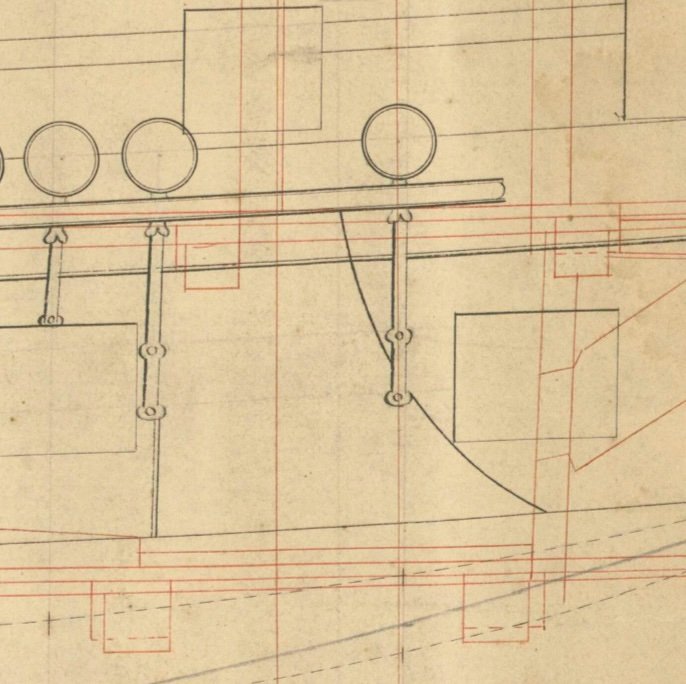
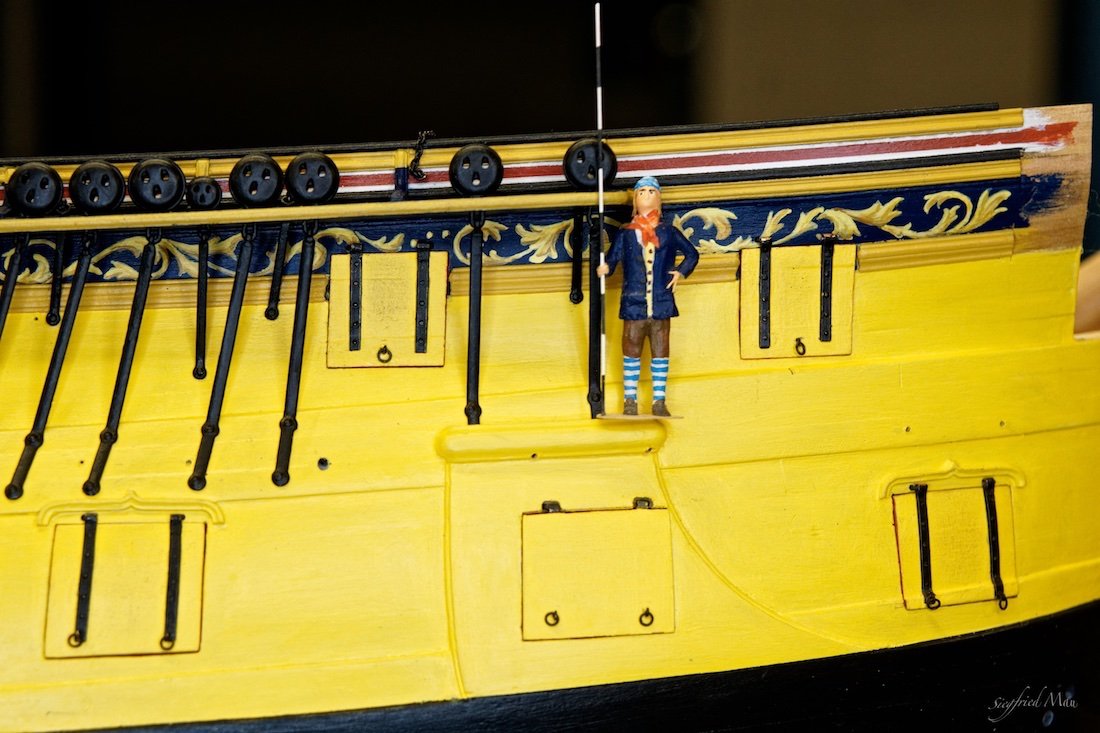
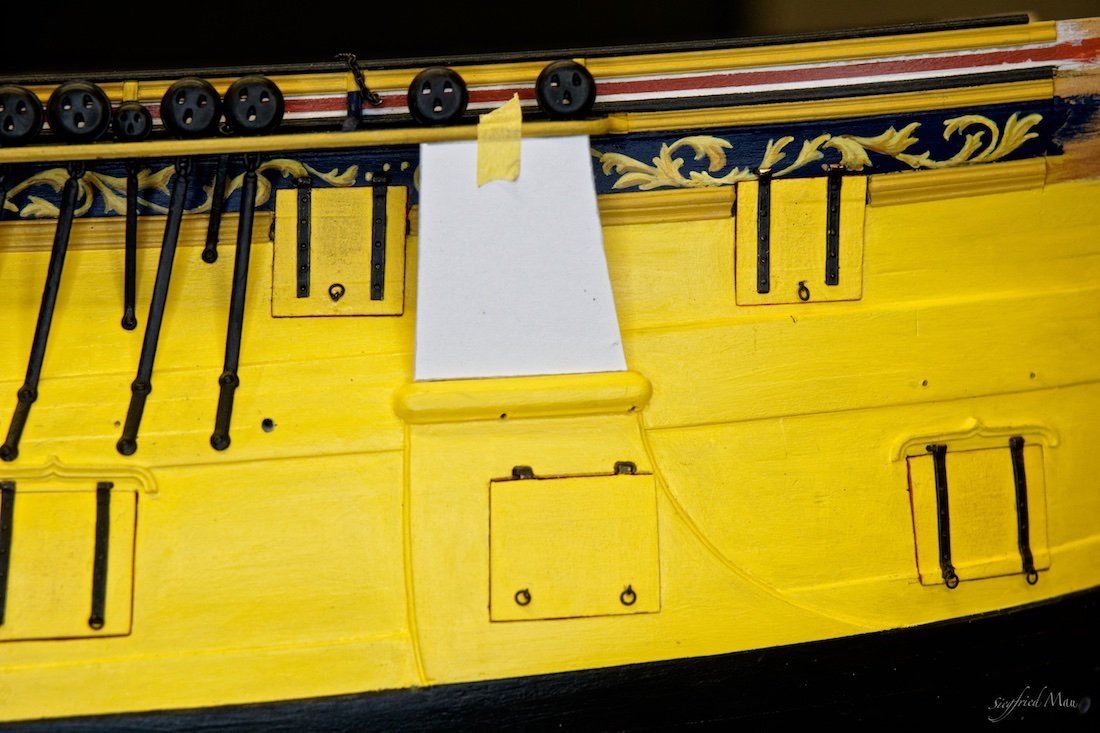
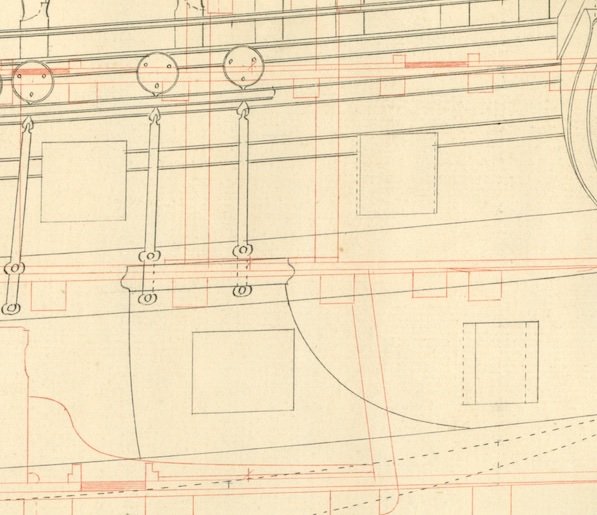
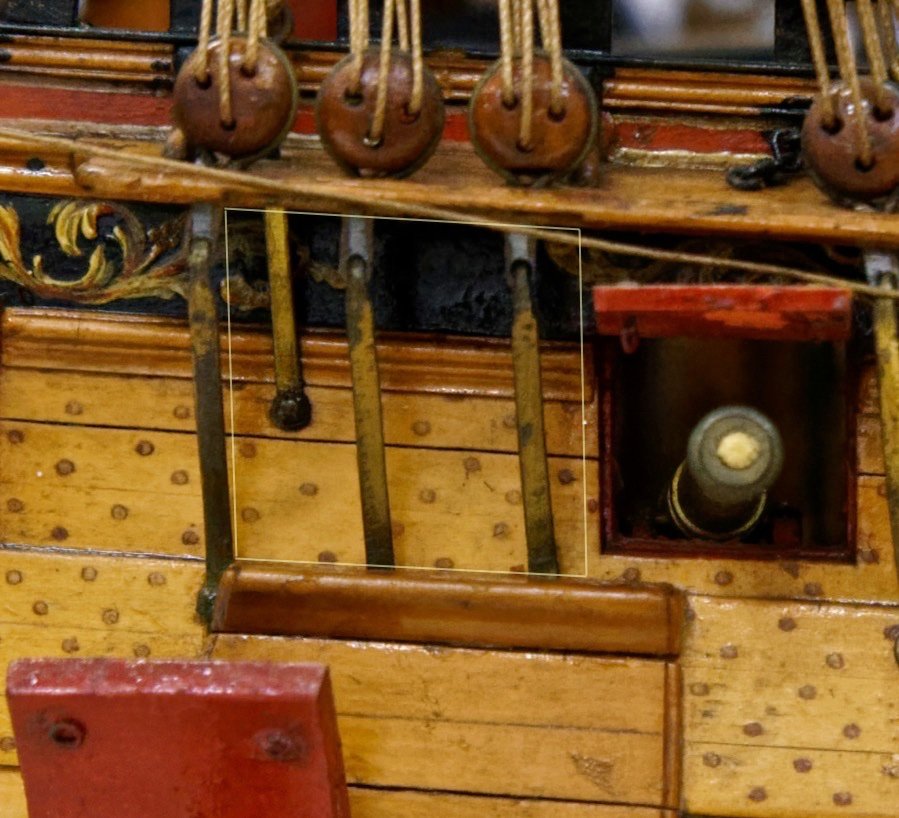
Hello and thank you for all your likes Today I finished the chain plates at the star board side. I see it every time at the pictures, but the underwater ship is't so dirty. That is mostly noise in the picture. The next thing would be, finishing the anchor lining. There I have 3 opportunities After Goodwin the upper part should be parallel lined, but I found also models where it is't so. I would let the lining end under the channel, not in front of it, and prefer the curve #2. At these older ships the channels where mostly set at the waist rail, later below it, and I would't brake that line. At the models you see it sometimes so, or so.

-
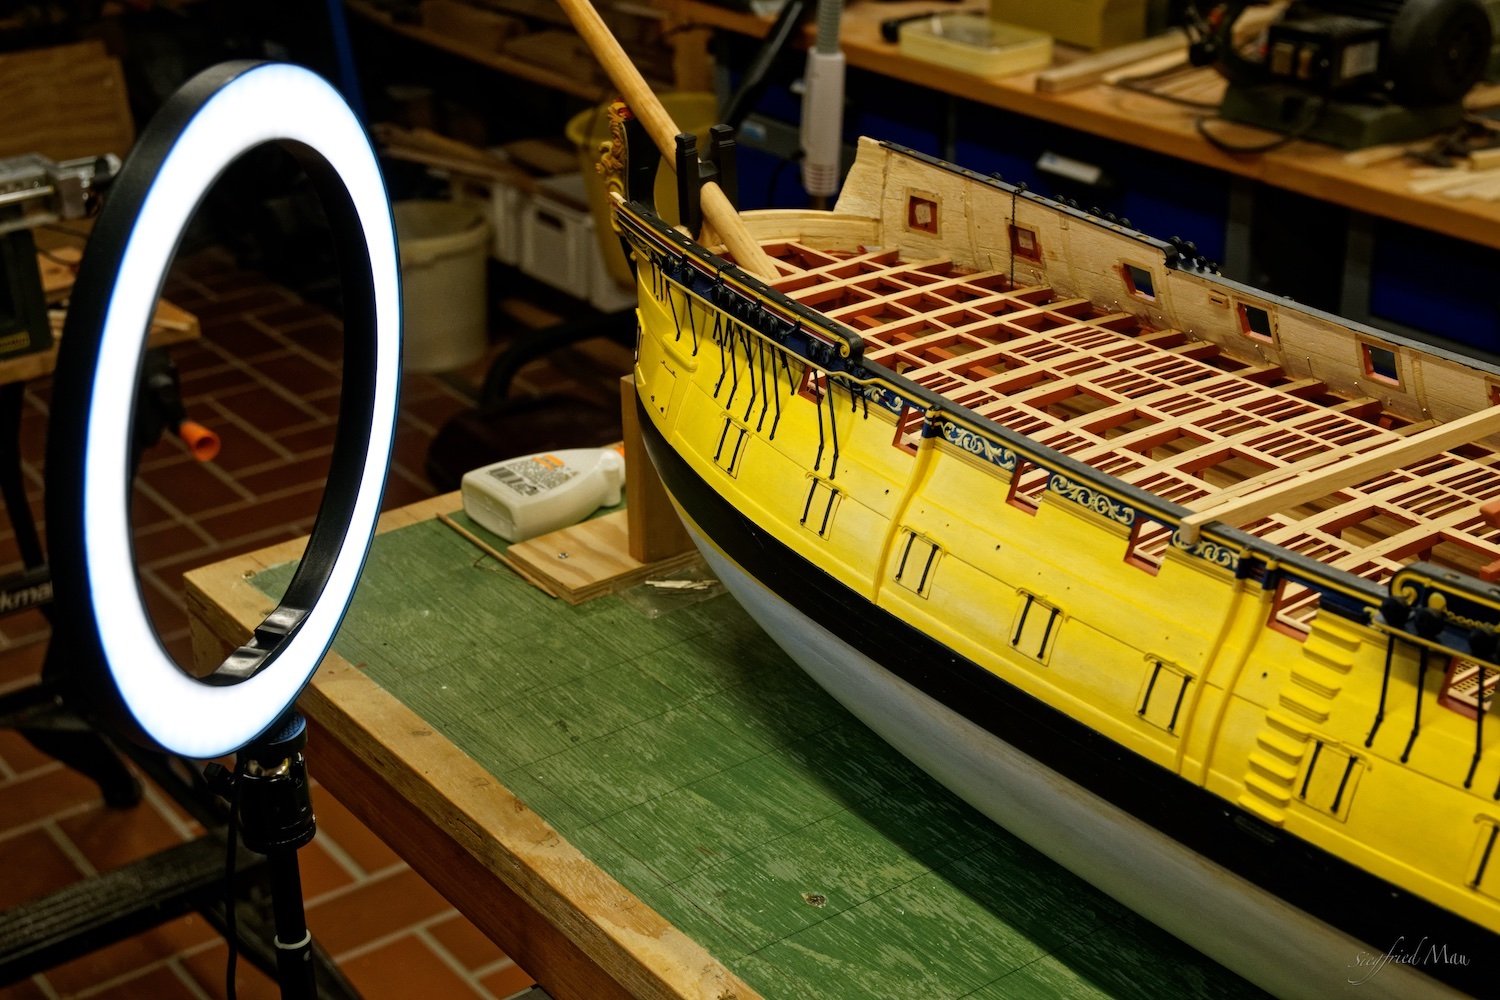
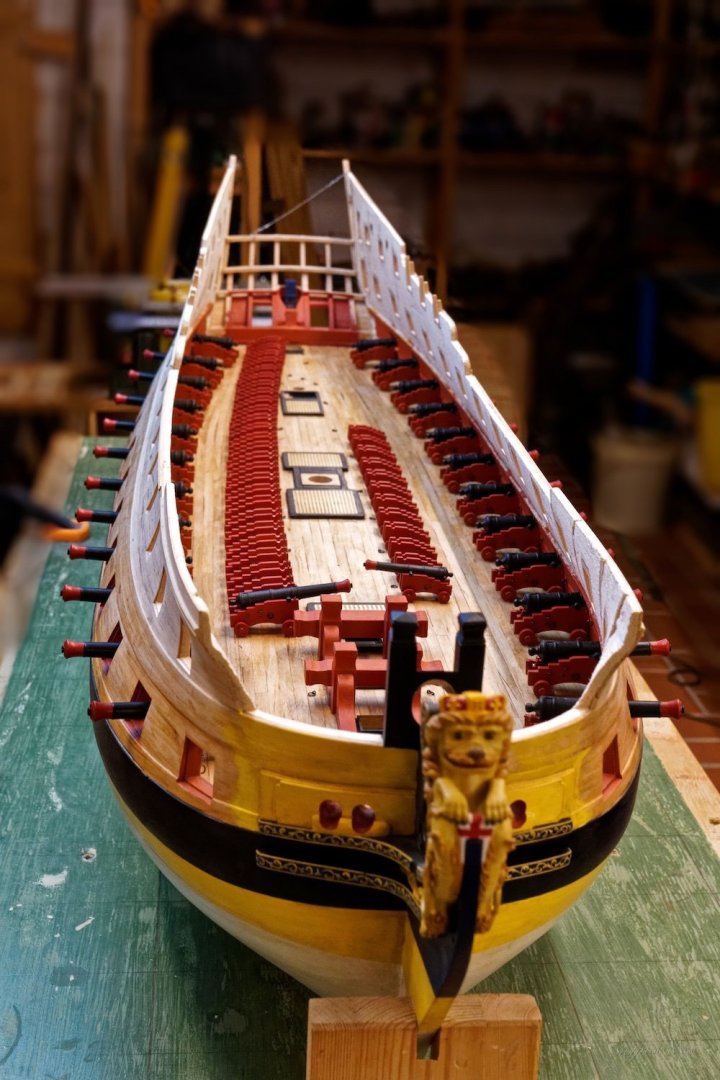
Good morning Håkan, the cannons, also those for the gun deck, are ready. The beams for the upper gun deck are til now not all permanently installed. With the lightning and taking pictures I have no problems. I have LED lightning already in my shop. The only disadvantage with LED's is, that they did't have UV-A radiation. So the paint did't harden really good.

-
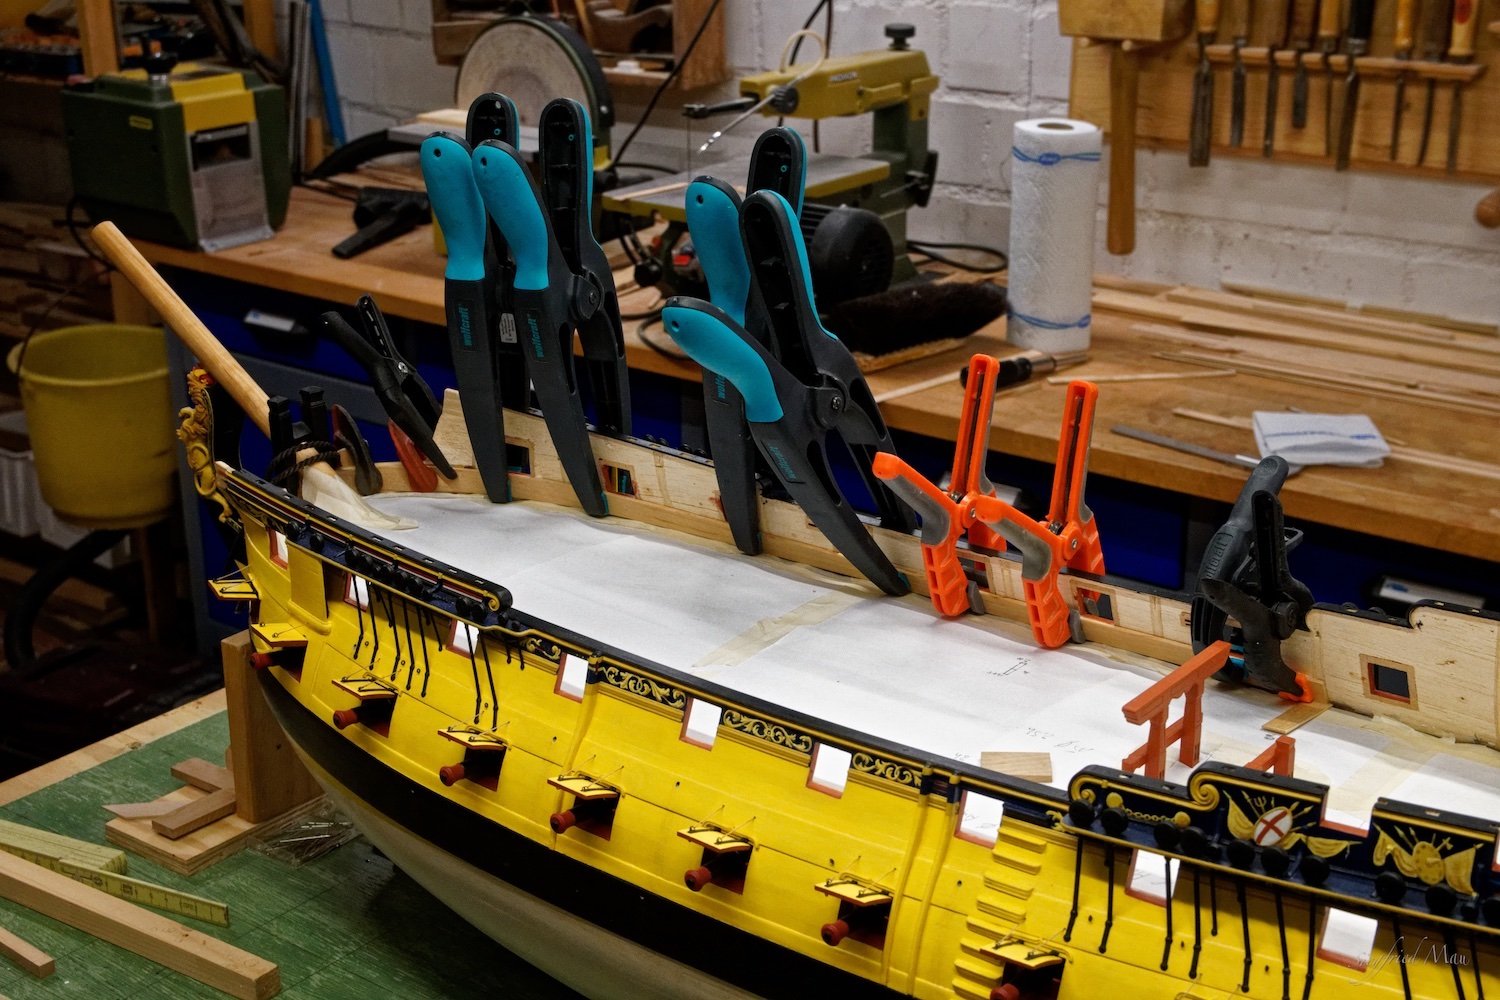
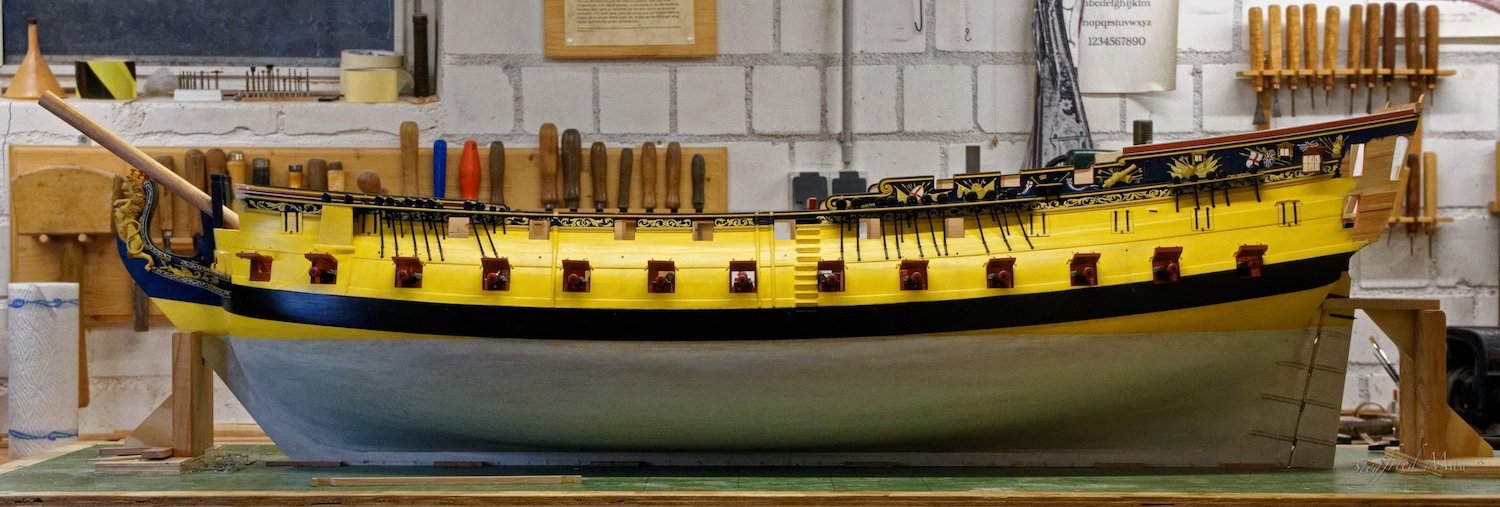
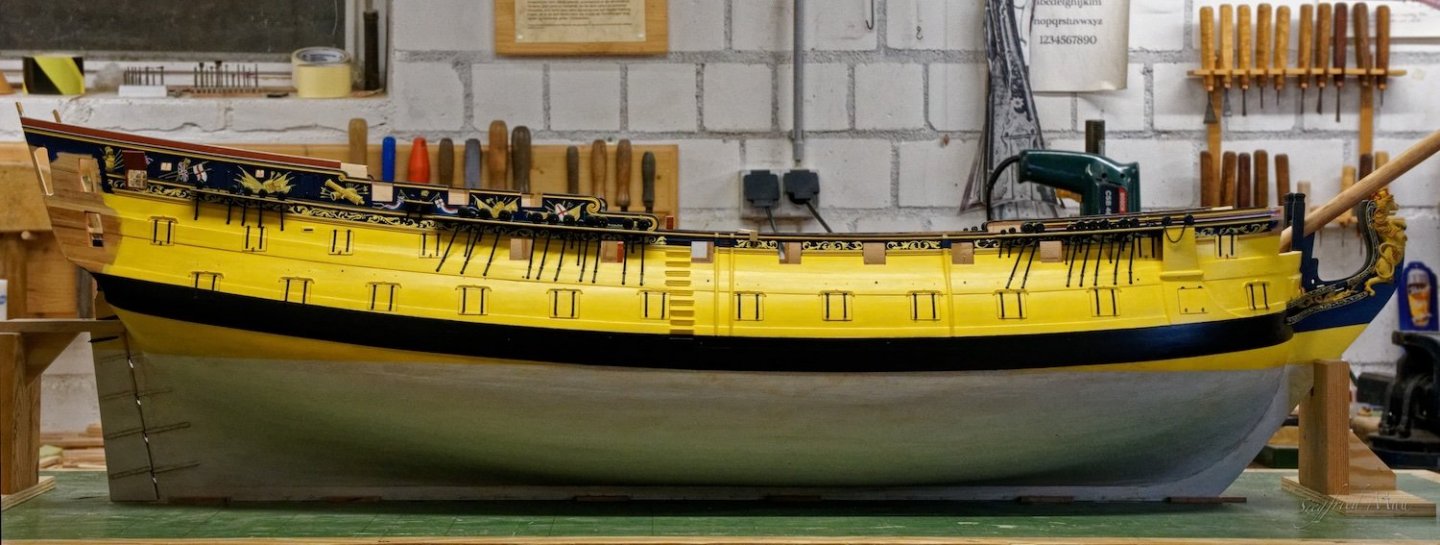
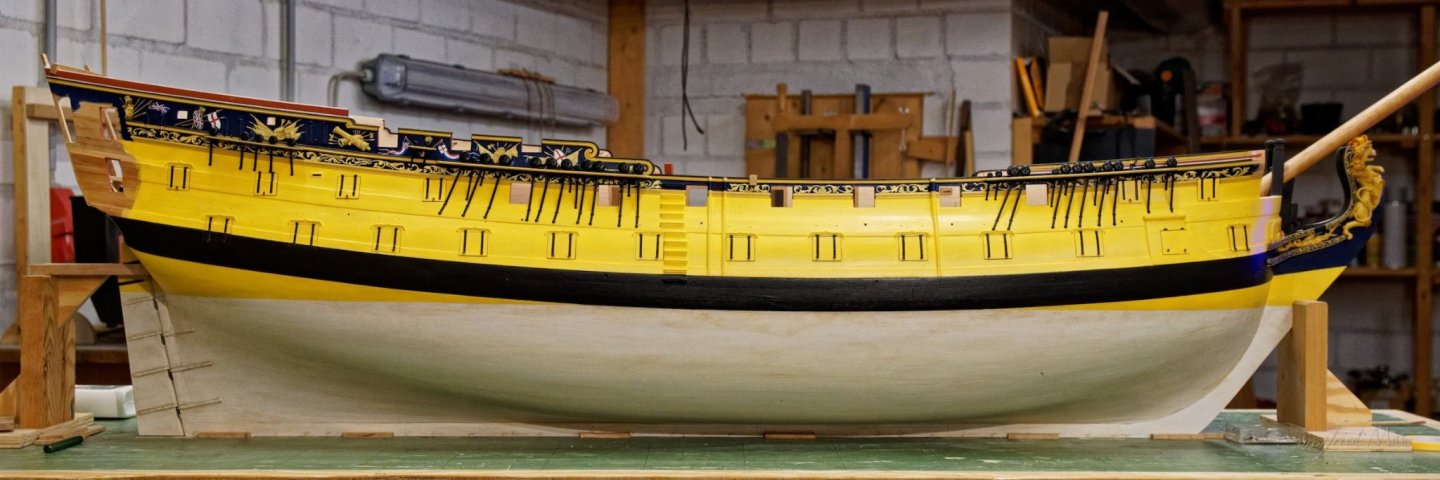
Hello, it is done, the port side is ready! And I got a new toy, an LED ring lamp. She is good for working , and taking pictures through it. But that I think only at a short distance. You could dim in 10 stages and change the white temperature from cold, white to warm. And she is amazingly light.