HOLIDAY DONATION DRIVE - SUPPORT MSW - DO YOUR PART TO KEEP THIS GREAT FORUM GOING! (89 donations so far out of 49,000 members - C'mon guys!)
×

Siggi52
-
Posts
1,155 -
Joined
-
Last visited
Content Type
Profiles
Forums
Gallery
Events
Everything posted by Siggi52
-
 Hello Gary, I do not understand your question fully, but in front of the main mast the hanging knees are in front of the beam, behind the main mast they are behind the beam. That is what I could tell you, depending of the plan from the 1745 establishment and the Dorsetshire plan.
 -
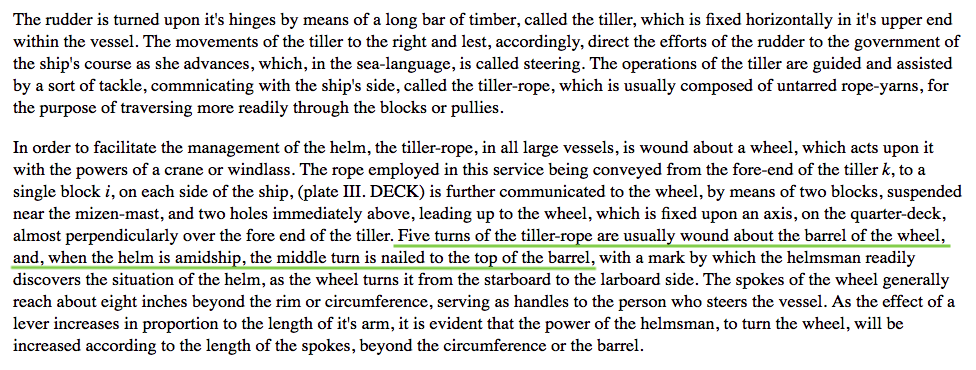
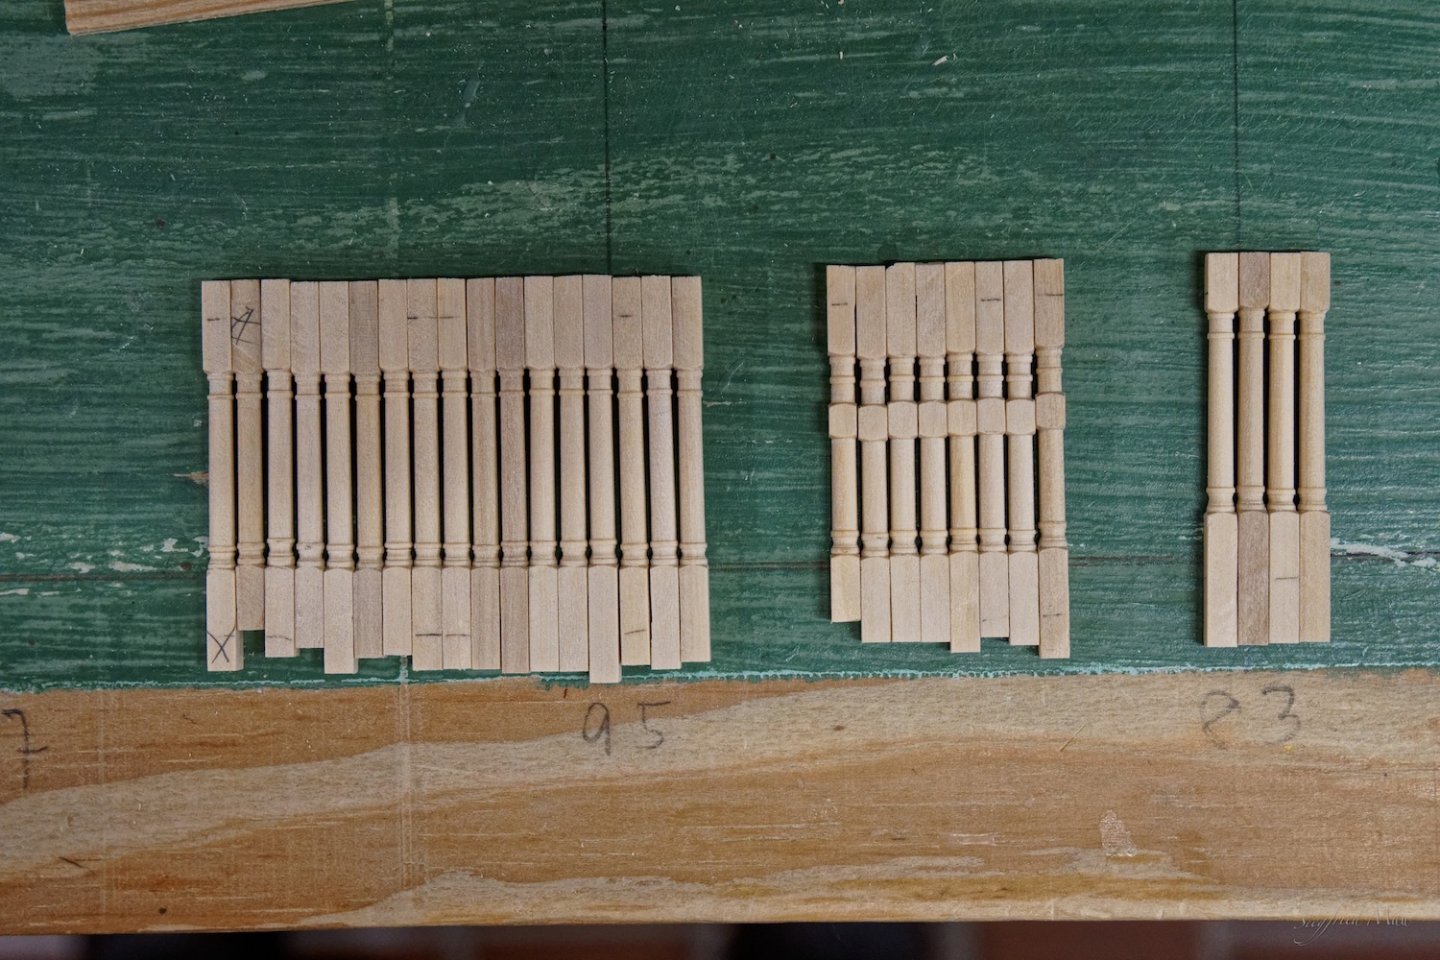
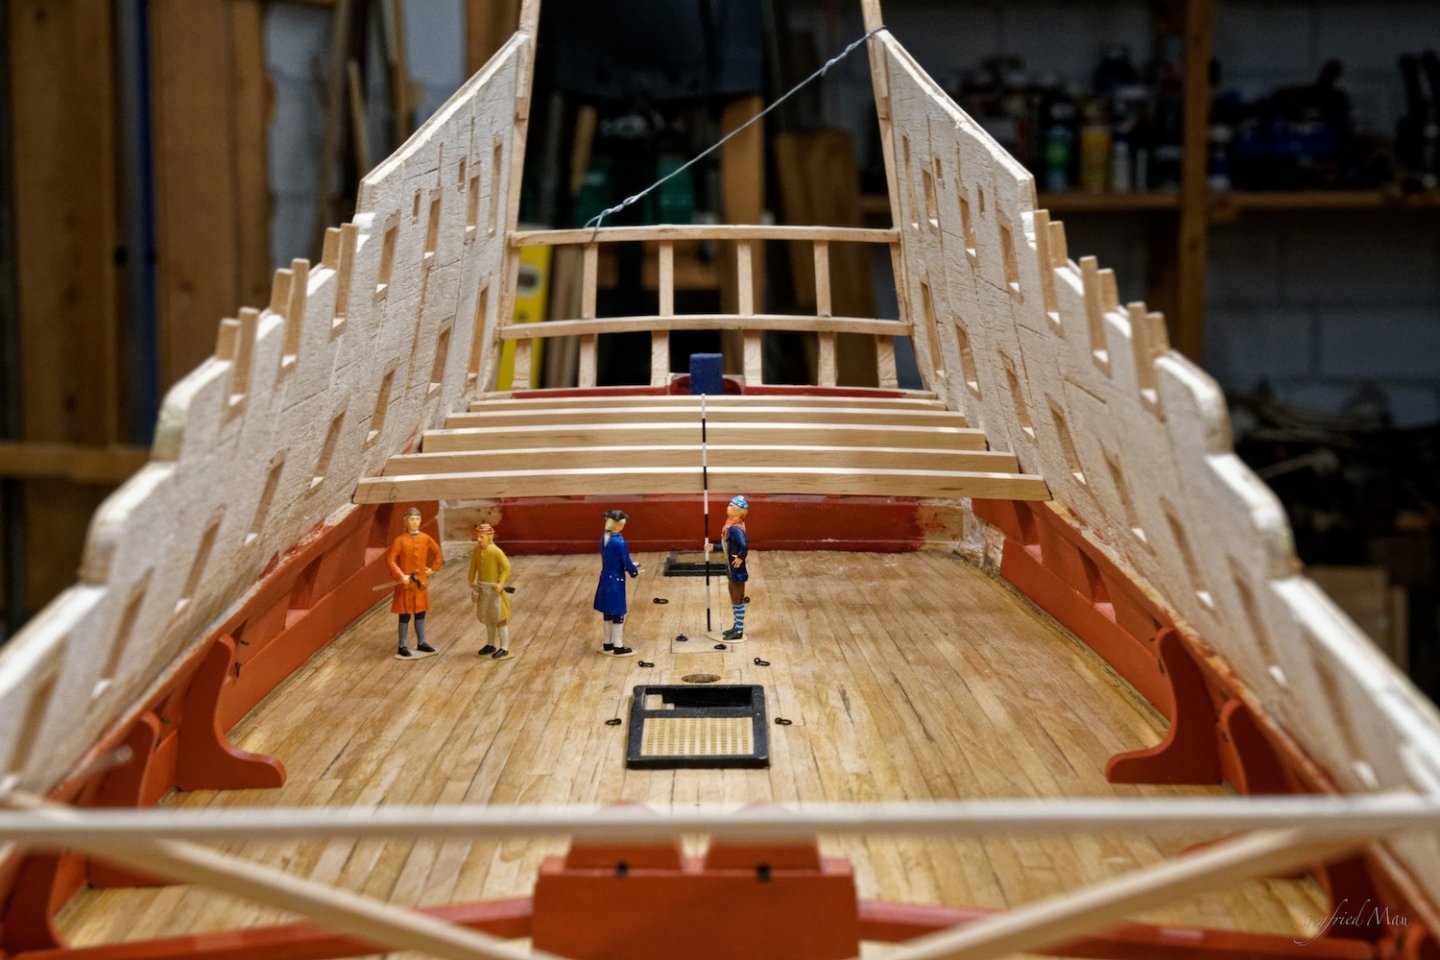
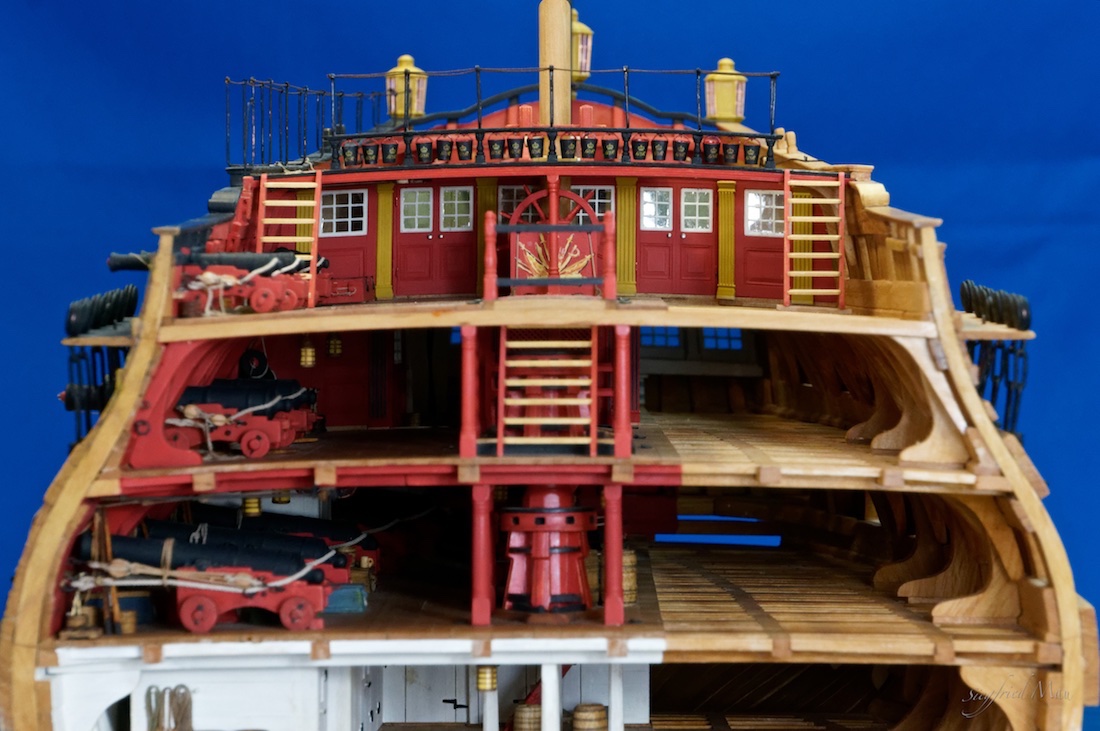
Hello, today only a short update. I turned the pillars for the gun deck. They are all turned manually.
-
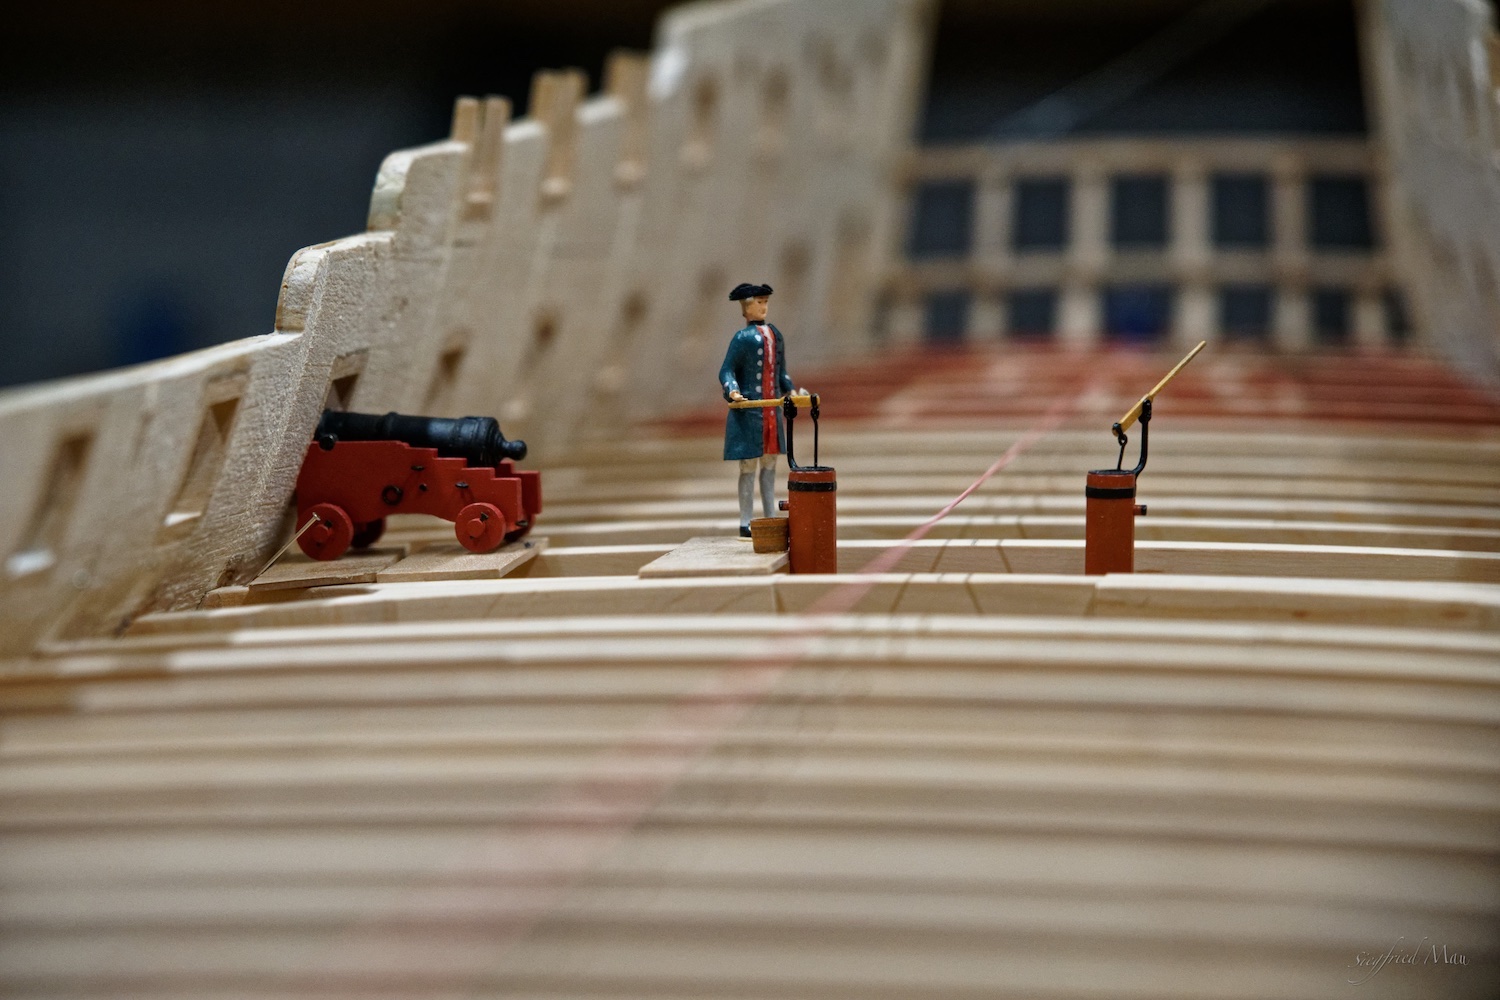
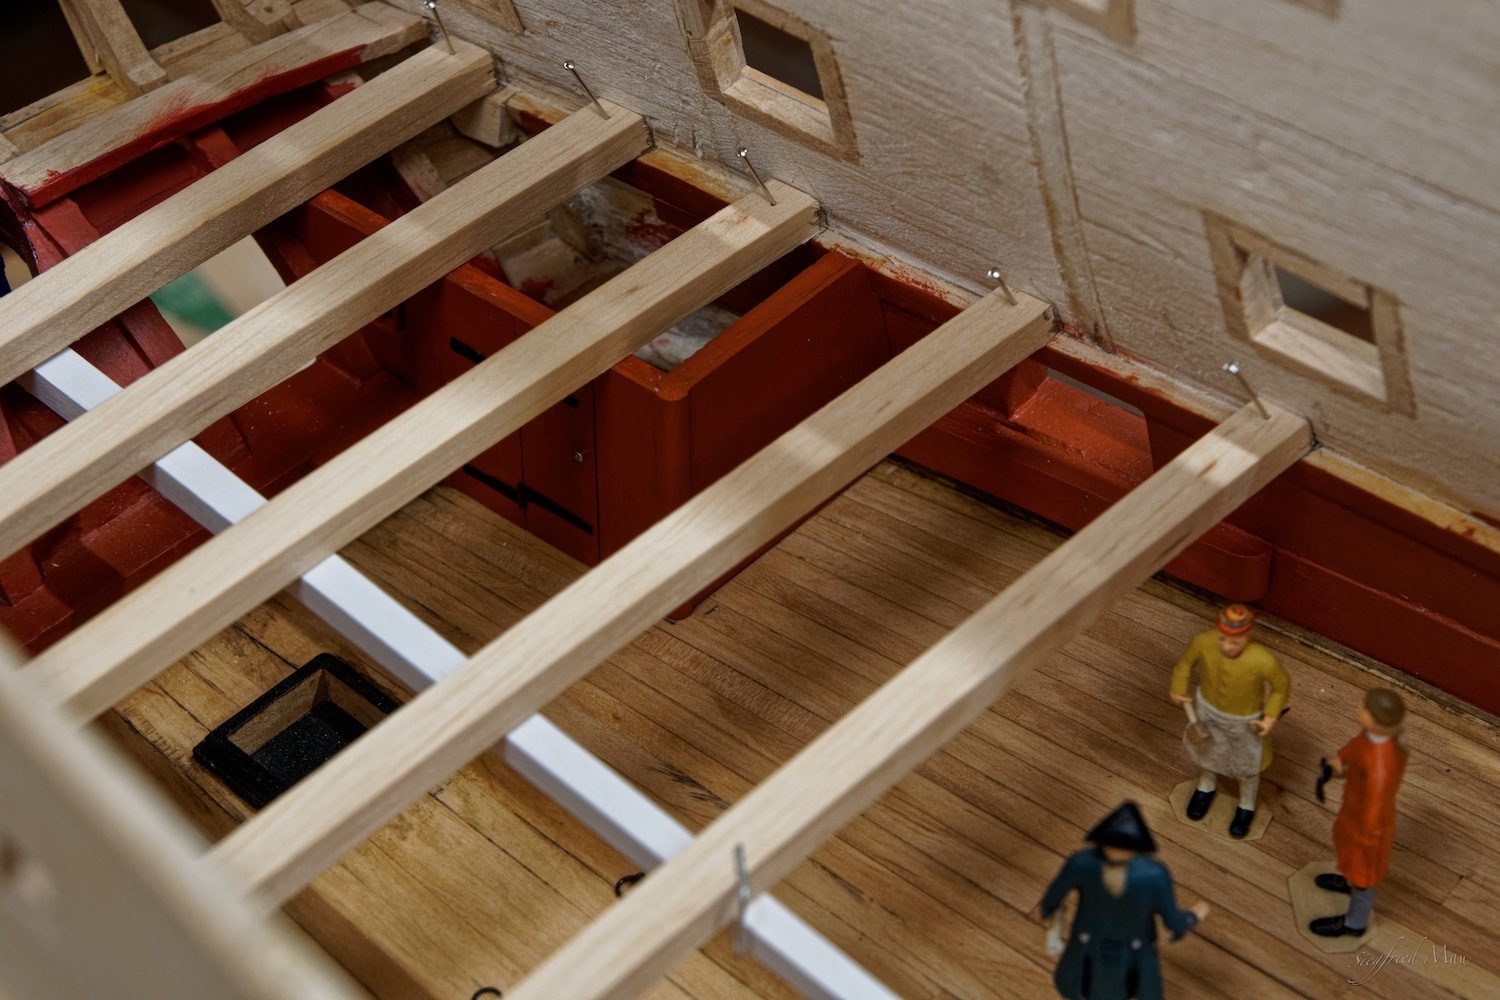
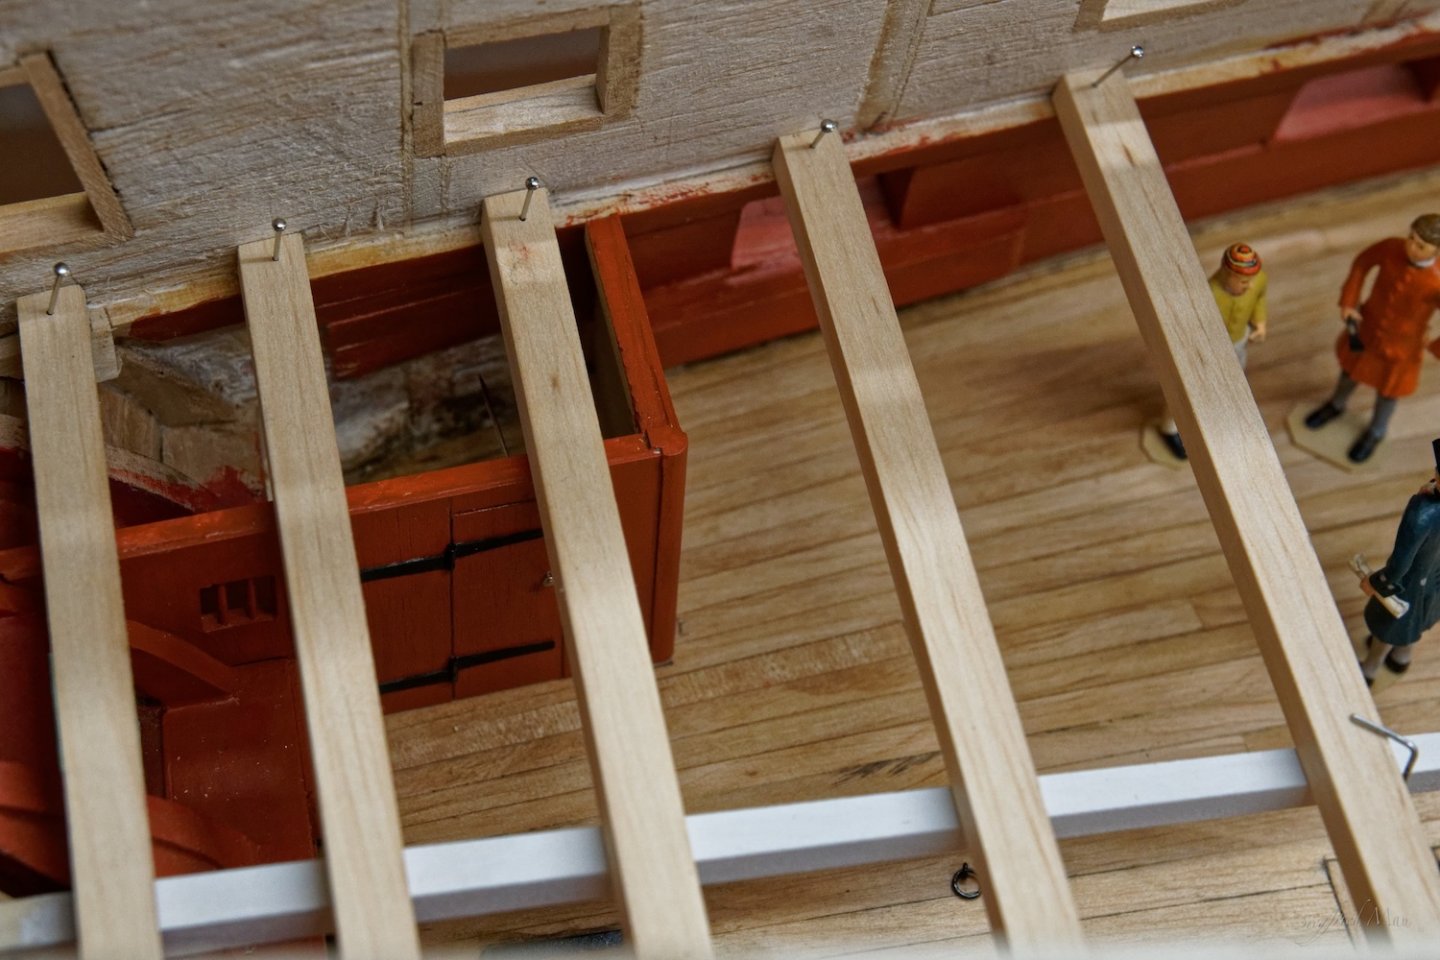
Hello, today only a small update. Because some of the beams where to high, I had to level them all to the right high. The shipwright is now testing the elm-tree pump and also with the cannons seams to be all ok. The next thing to build are the carlings for all those beams. 😟

-
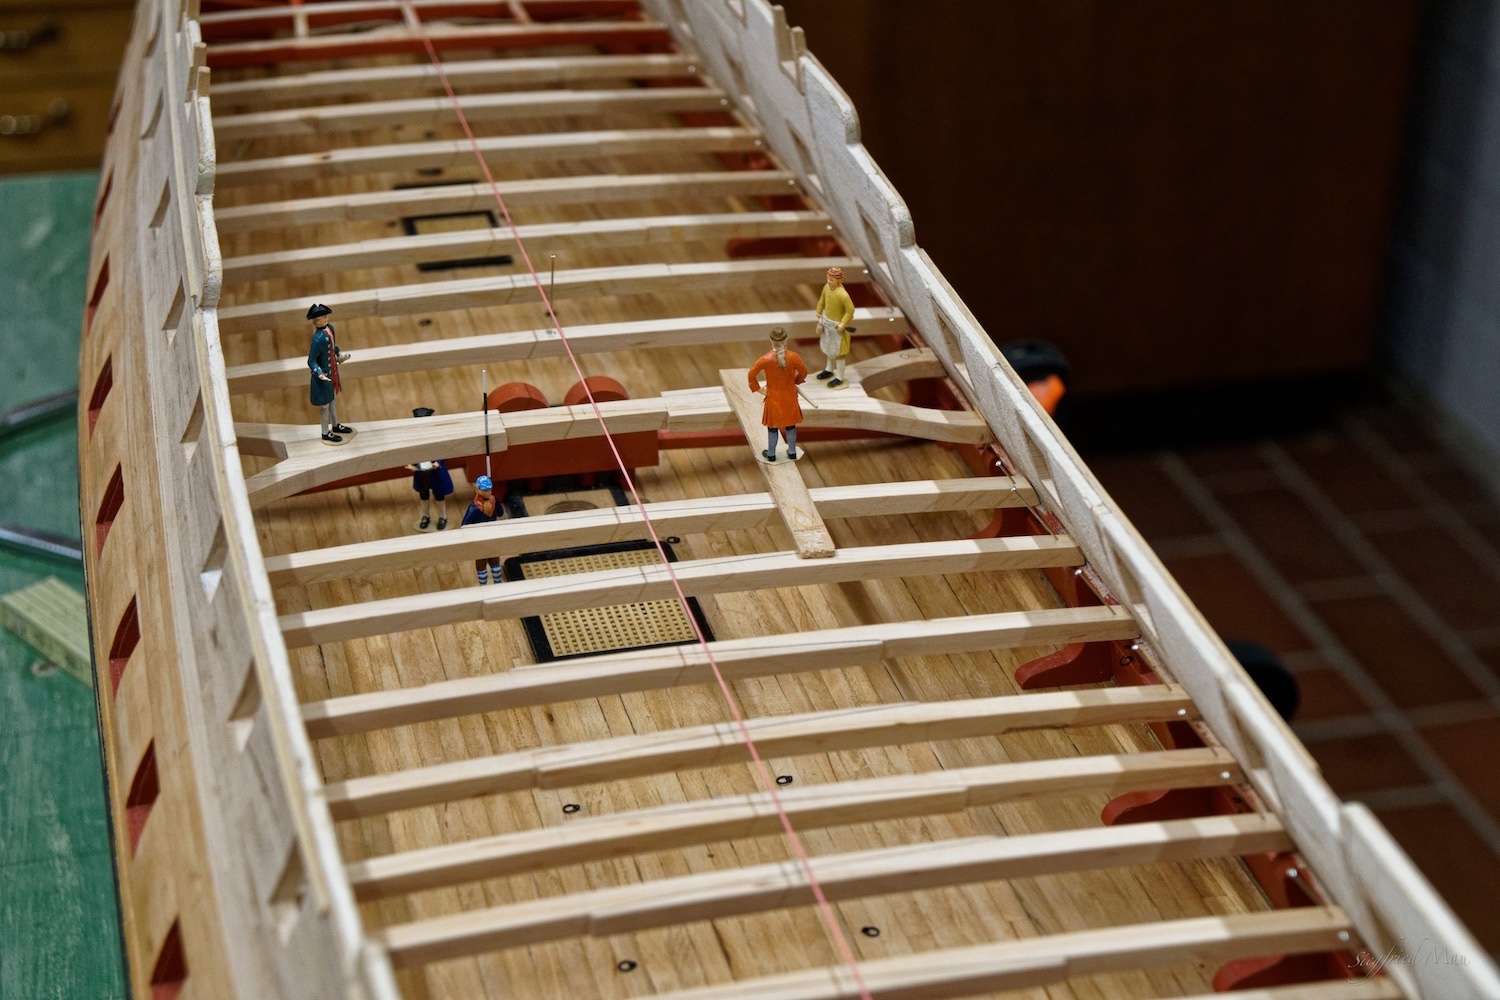
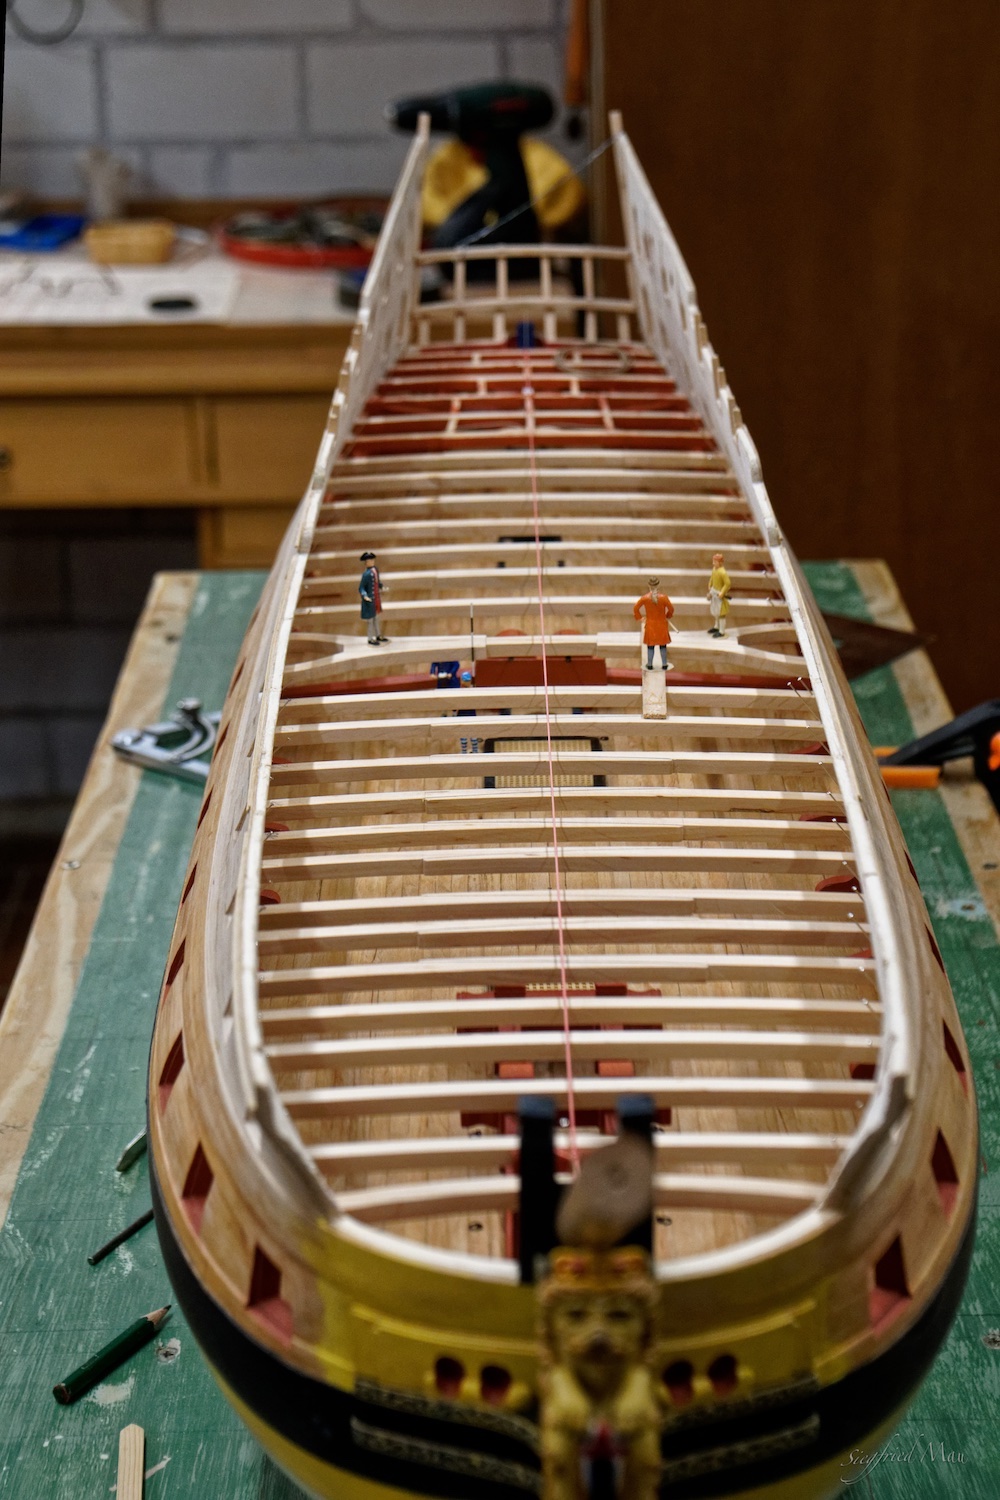
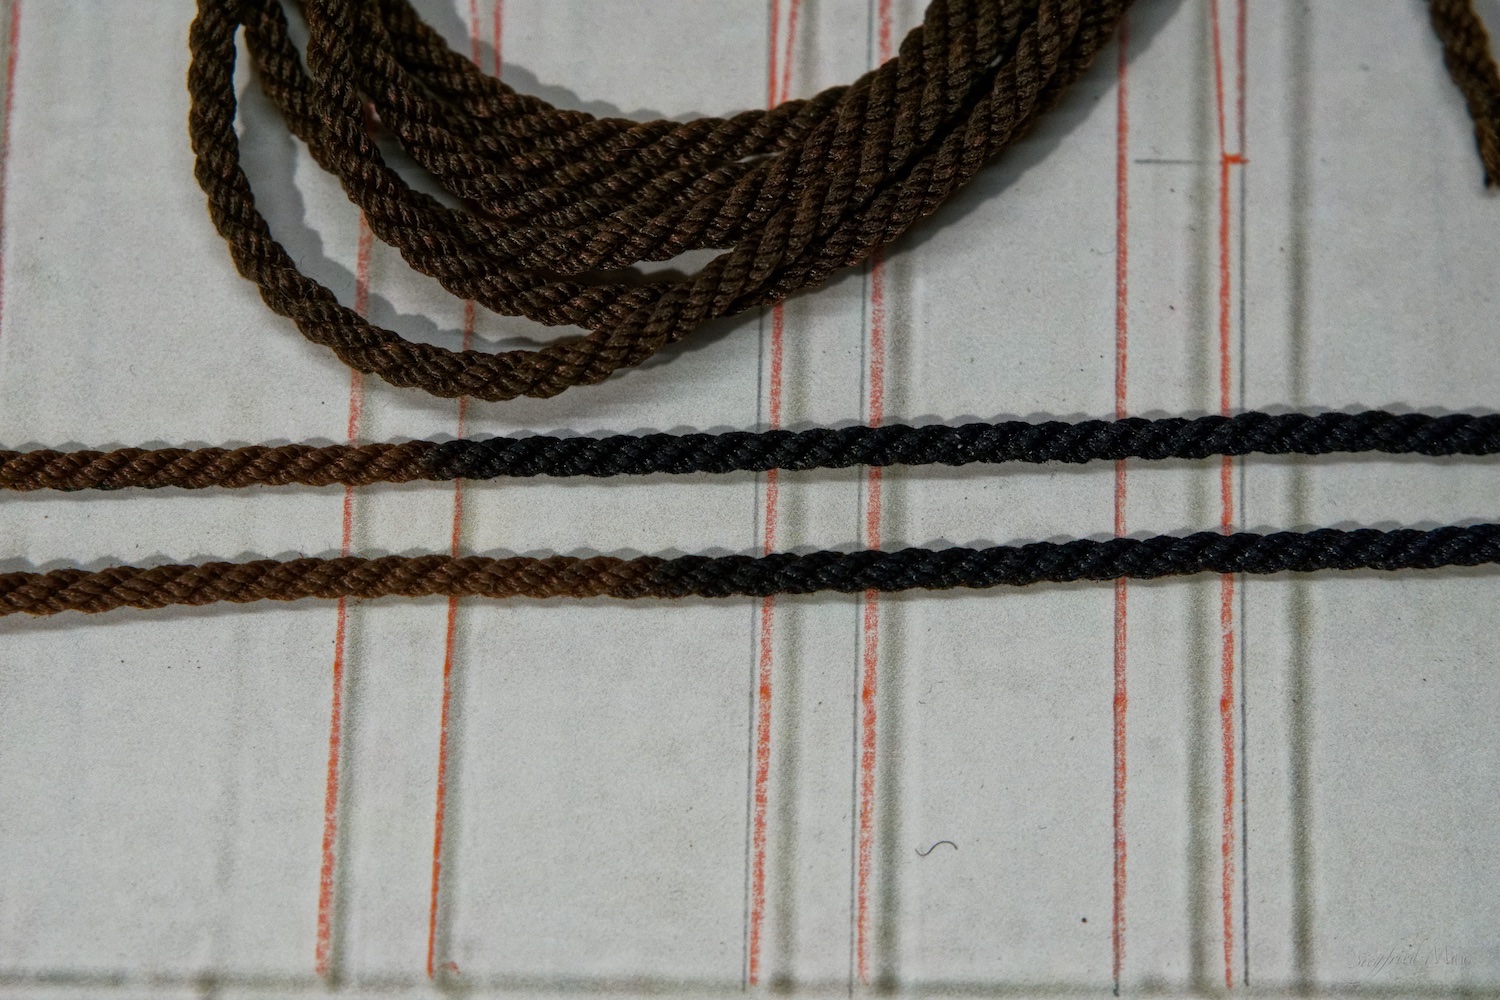
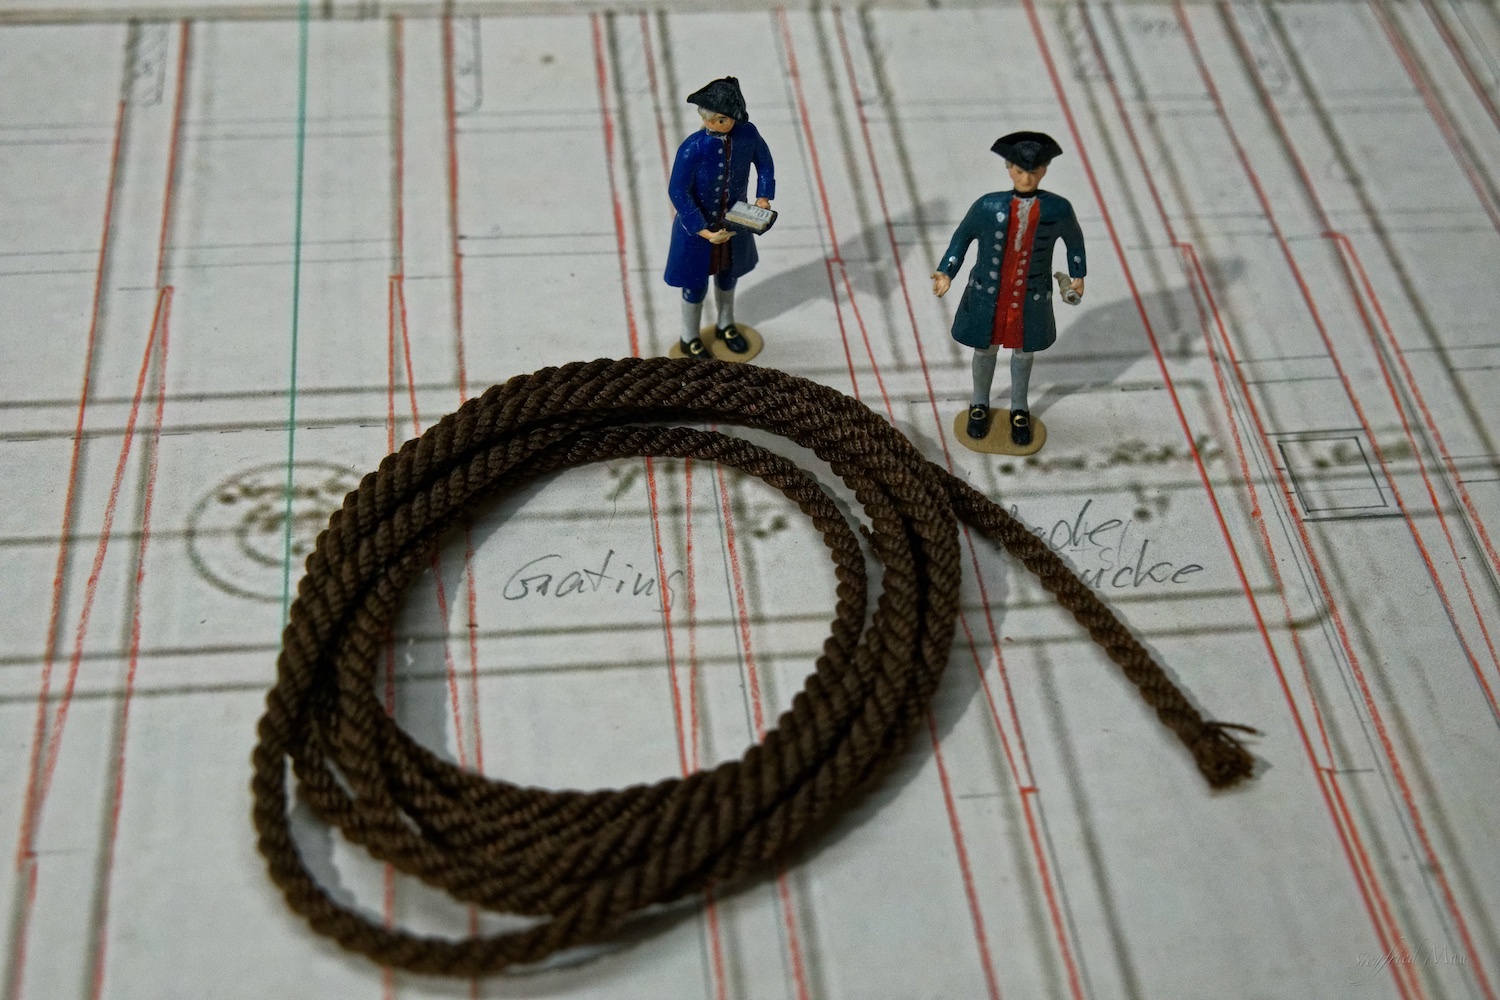
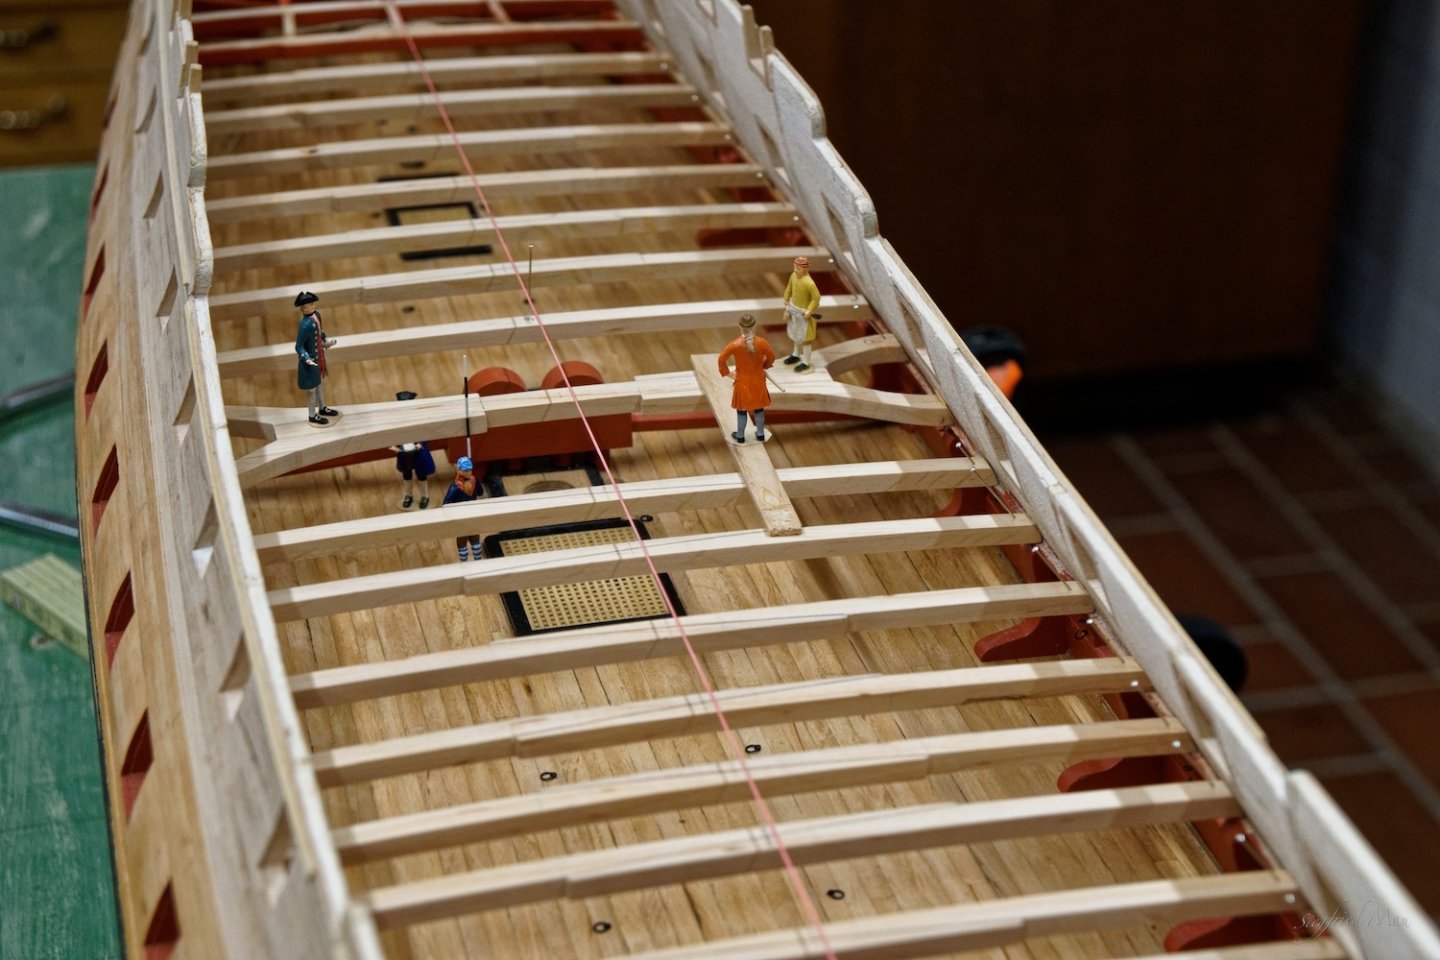
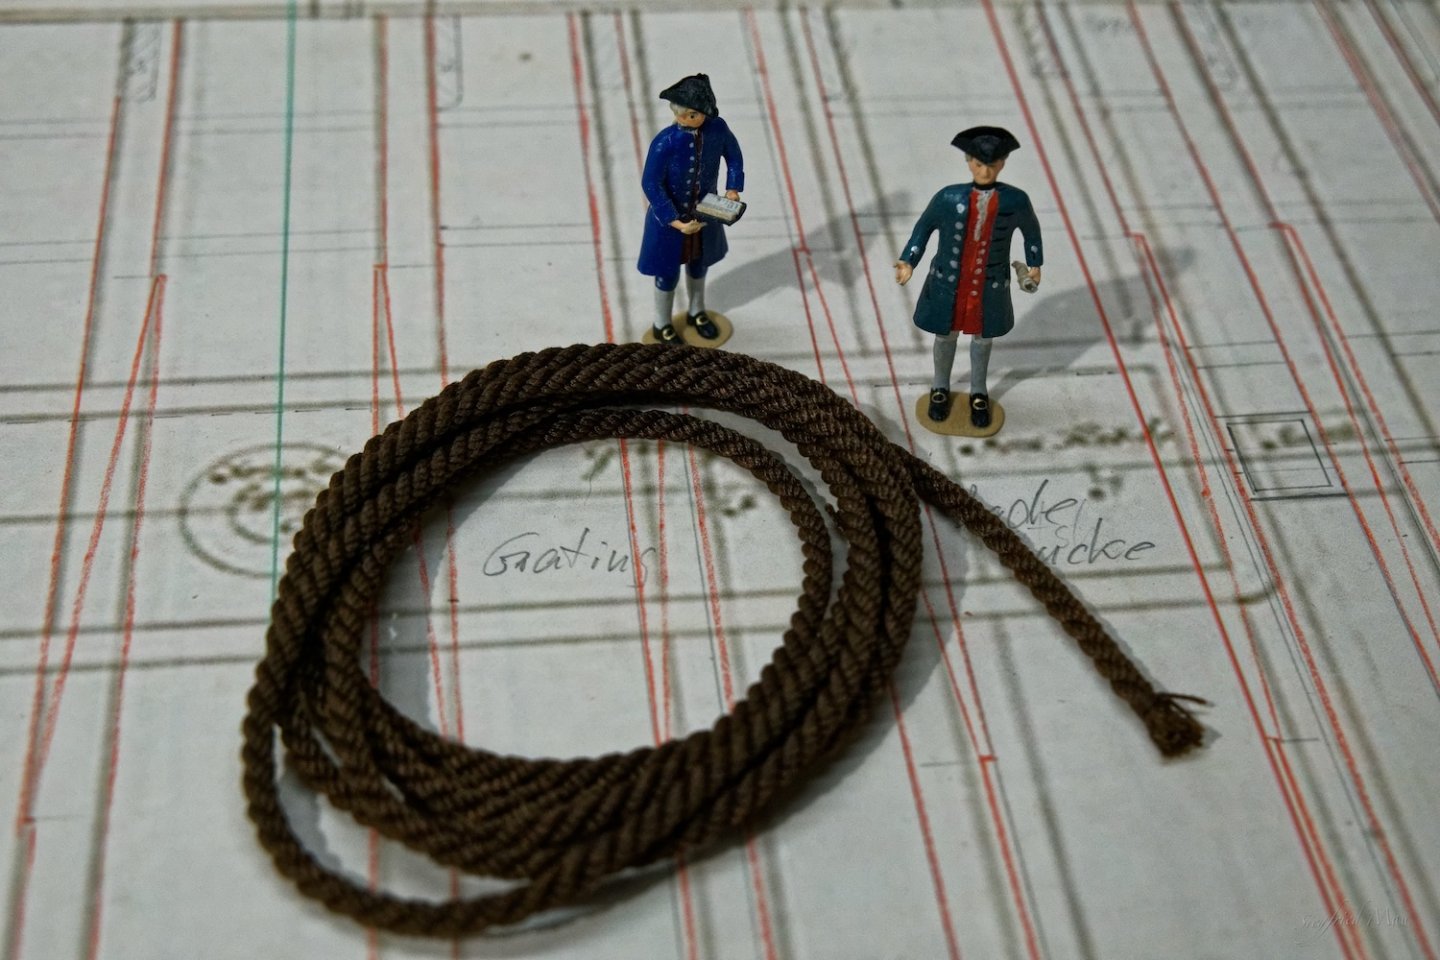
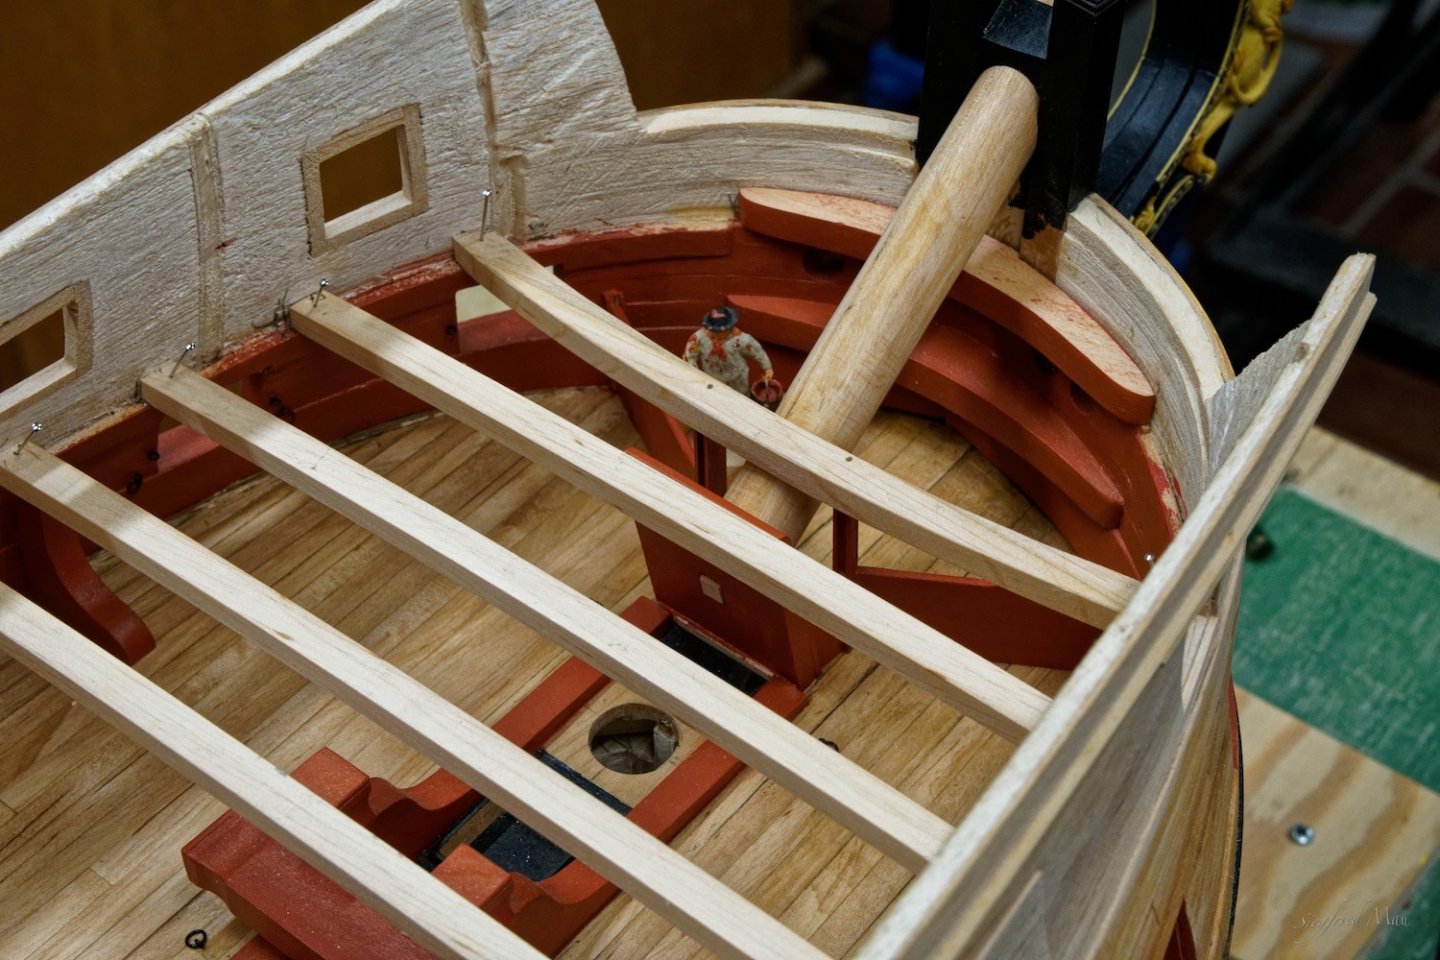
Hello, and many thanks for your comments and likes. Today was a great day, because we laid all beams of the upper gun deck. The shipwright was very pleased, and spend a brandy! 😊 From the ropewalk came the anchor cable. For this I used dark brown yarn, but made also an experiment and tarring a cable. That looks very interesting. That tar diluted with benzine is now dry, that one diluted with turpentine is still sticky. But they are both black now, as at the contemporary models.


-
Hello, now the Rudder is ready. Because there was no protest or other solutions, I build it the way I think it is right. At least it's not an unknown praxis. Ruder2.mov

-
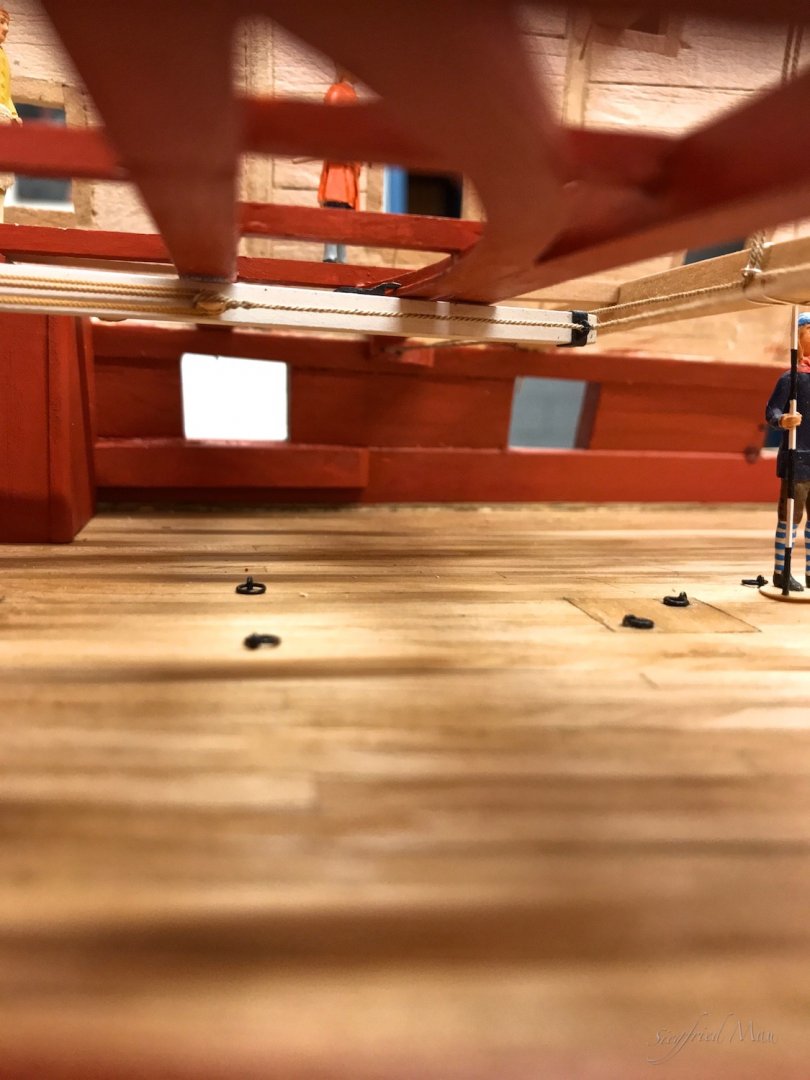
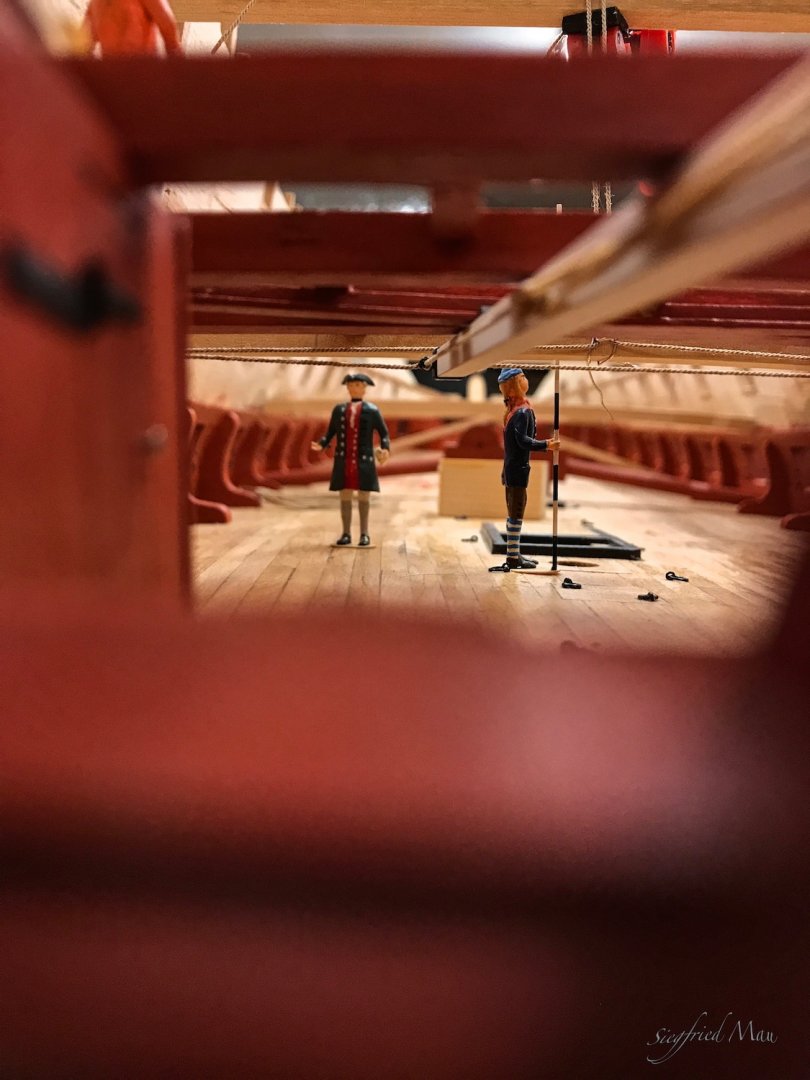
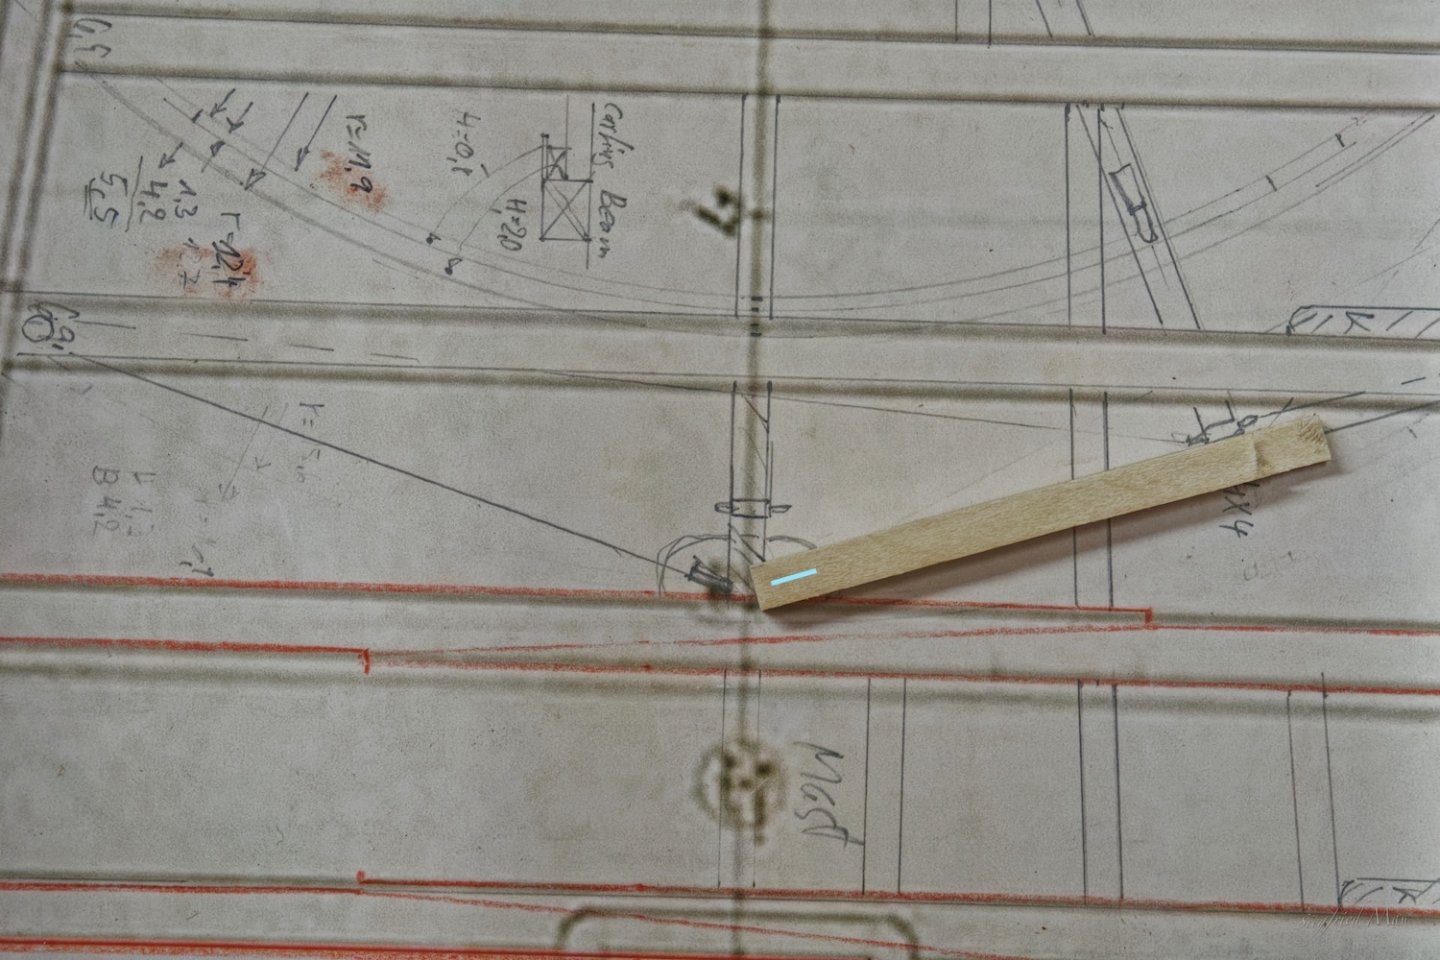
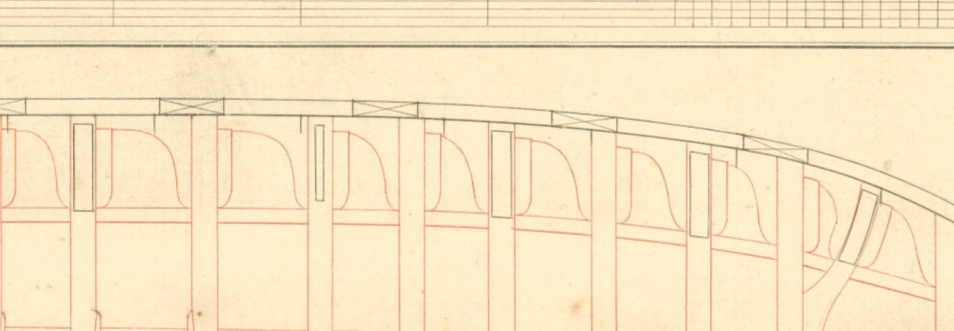
Hello and many thanks for your comments and likes the last week I was not very busy at the shipyard but I got the tiller and most of it's components finished. The sweep, flush with the beams, as the 1719 establishment asked for. And here all parts are together, and it works! 😅 I don't think to build also the ledges here, most of this you would't see when the ship is ready. So far, so good but how to get the ropes up? The wheels are behind the mizzen mast, so I should have the sheaves direkt behind the beam. In the middle of the beam is a carling and I could build between this and the next carlings to the outside diagonal carlings with the sheaves in the middle (blue line), or build like the French there a block with the sheaves and support it with the carling. At least is this the same as at the side of the ship. I don't know, but prefer the last method.


-
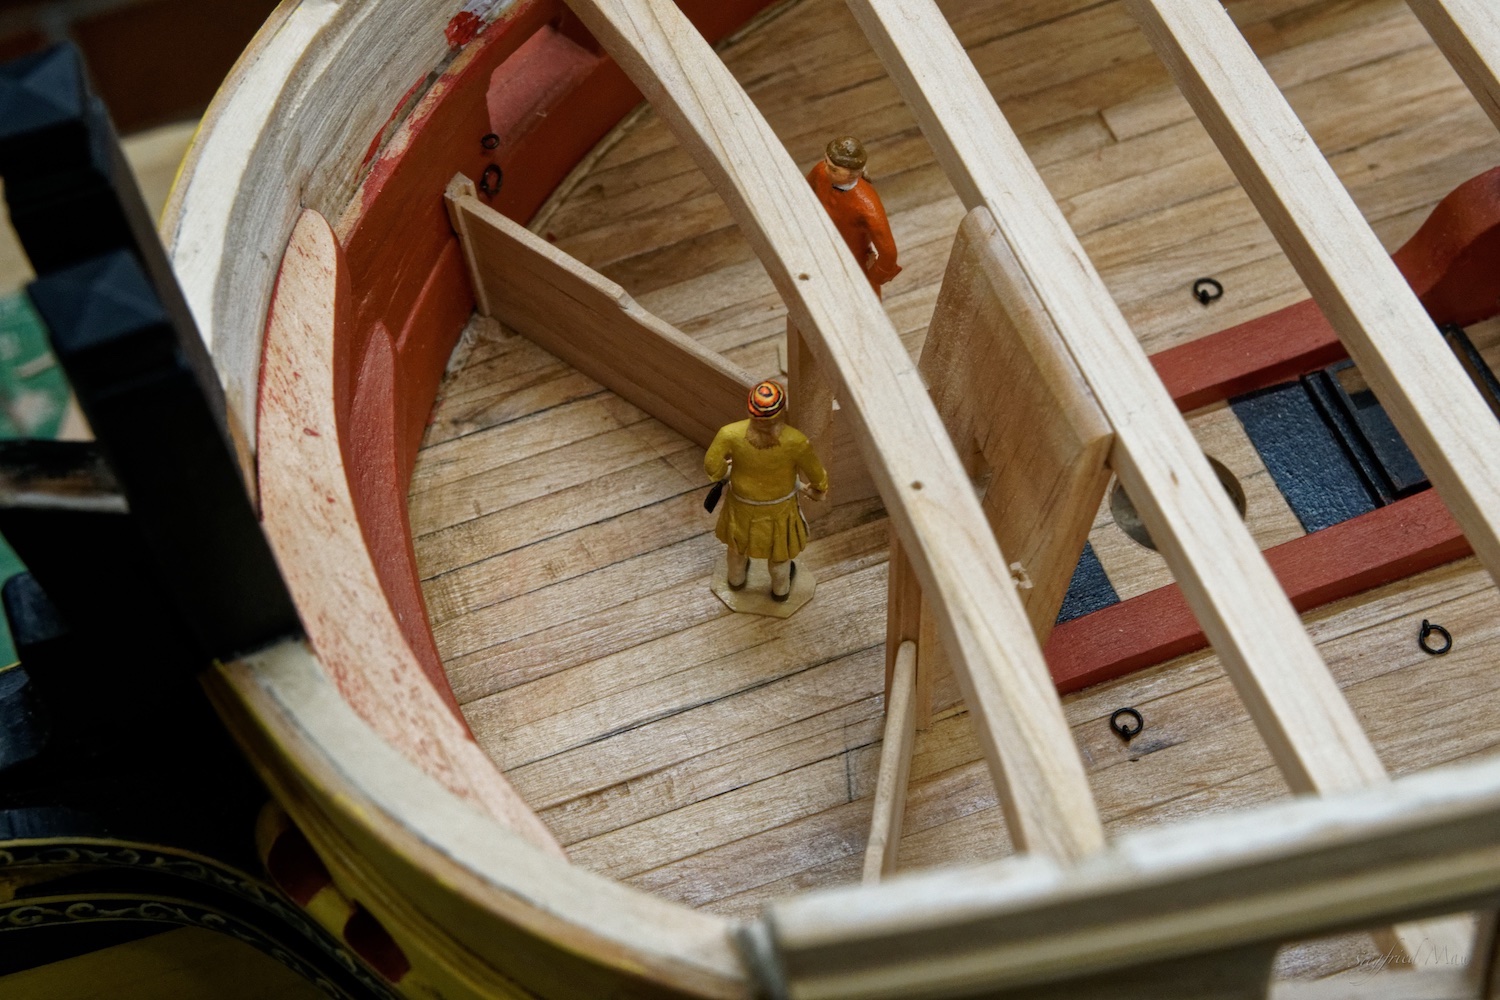
Hello, this time only a short update. The crew finished the cabins at the stern and the knees for the transom. The tiller is also in the raw ready. so the next time the crew has to build the rest of the beams.

-
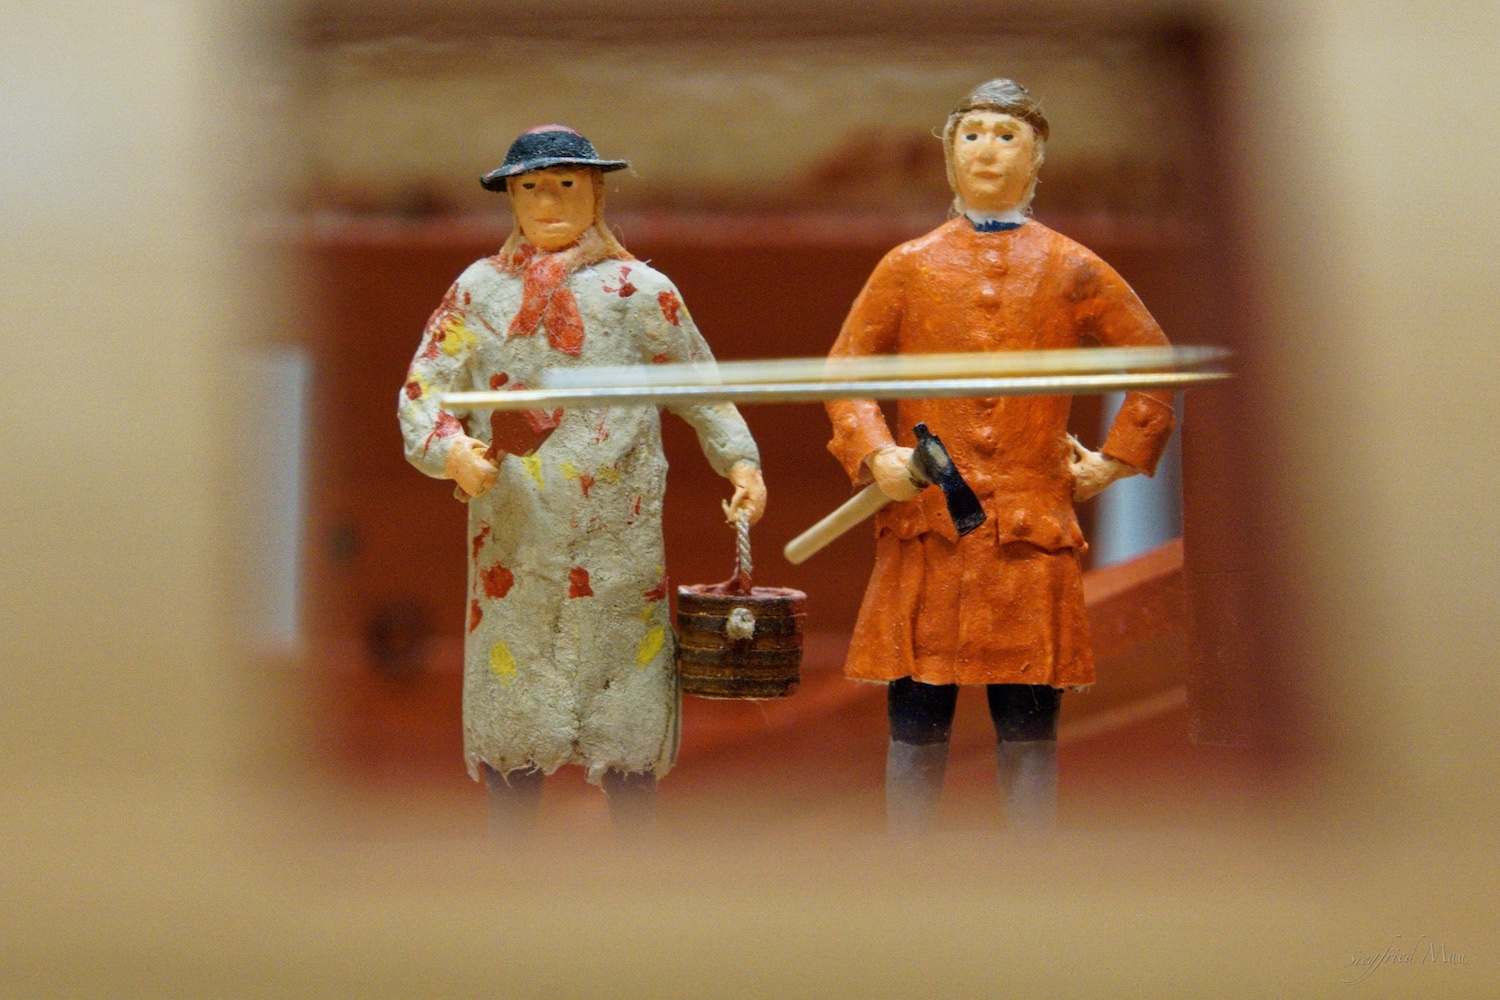
Hello, today the carpenters build the step for the bowsprit and the manger. The painter painted it afterwards. I think, he has to wait until the paint dries to get out there 😁 The next thing would be to build the cabins for the gunner and his neighbour in the back of the ship.


-
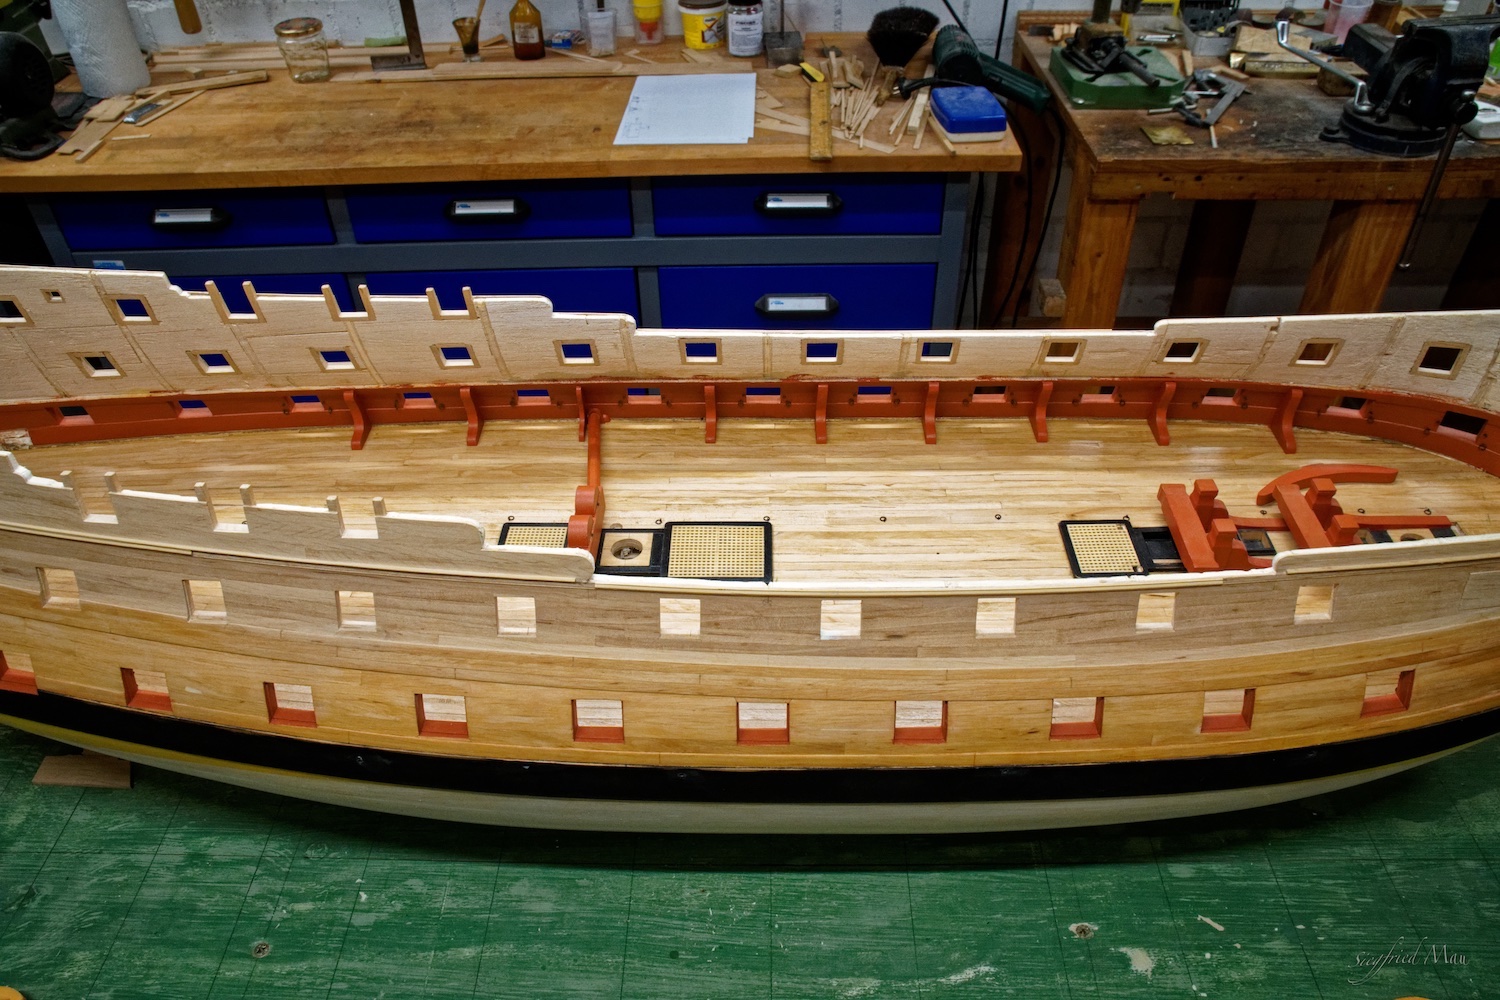
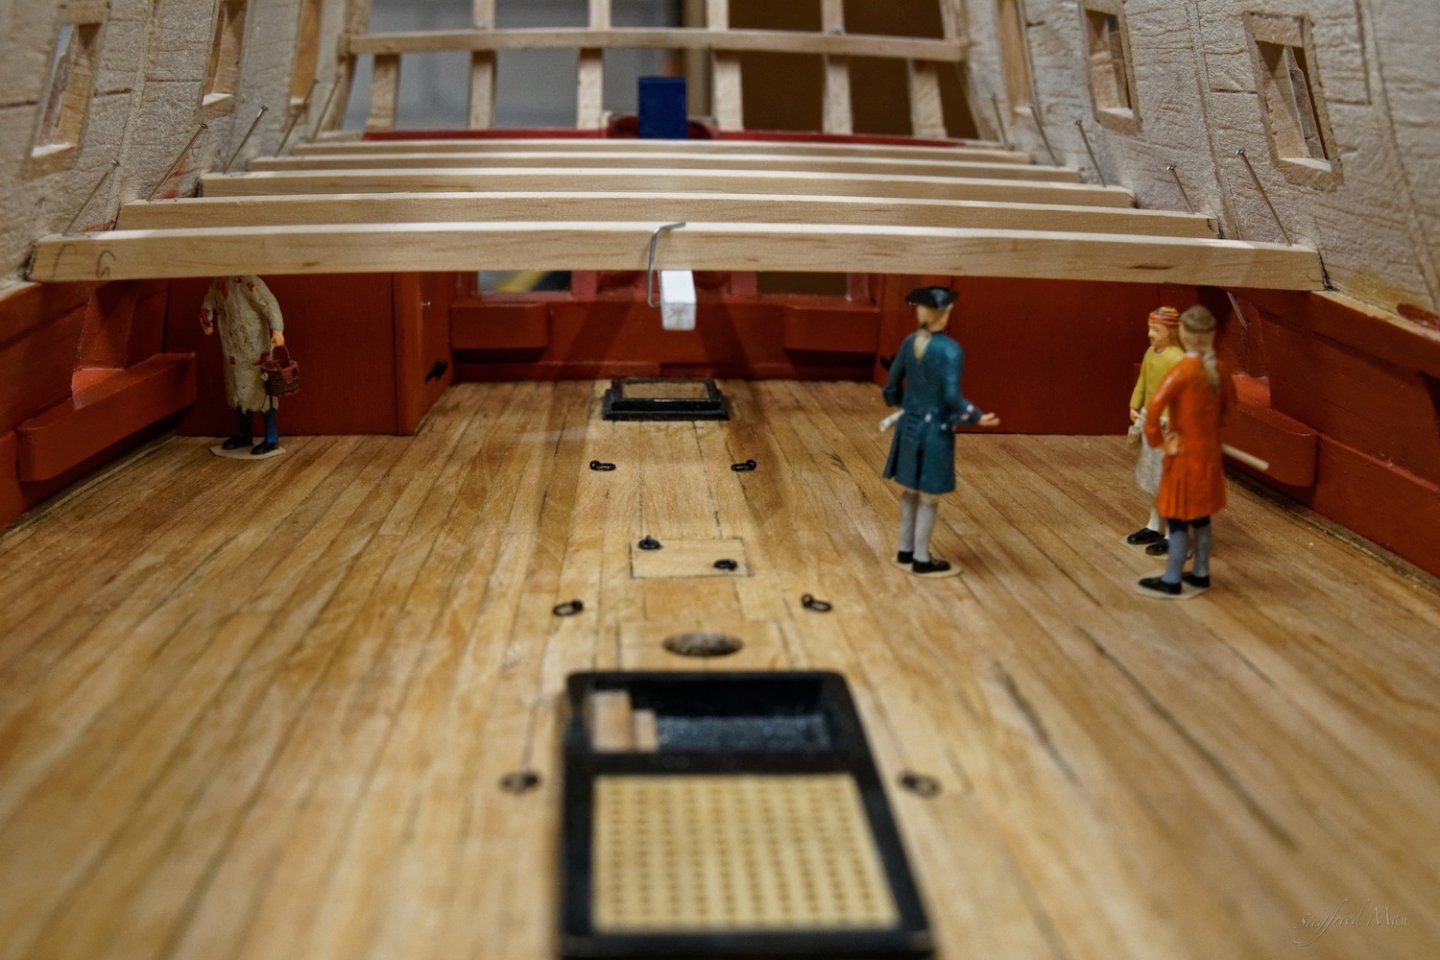
Hello, and many thanks for your likes. Today the carpenters where extremely busy. They build all the beams who are made from one peace of wood. This ship is smaller and has lower decks. Here you can see the beams are only 5f 11,5in above the deck.
-
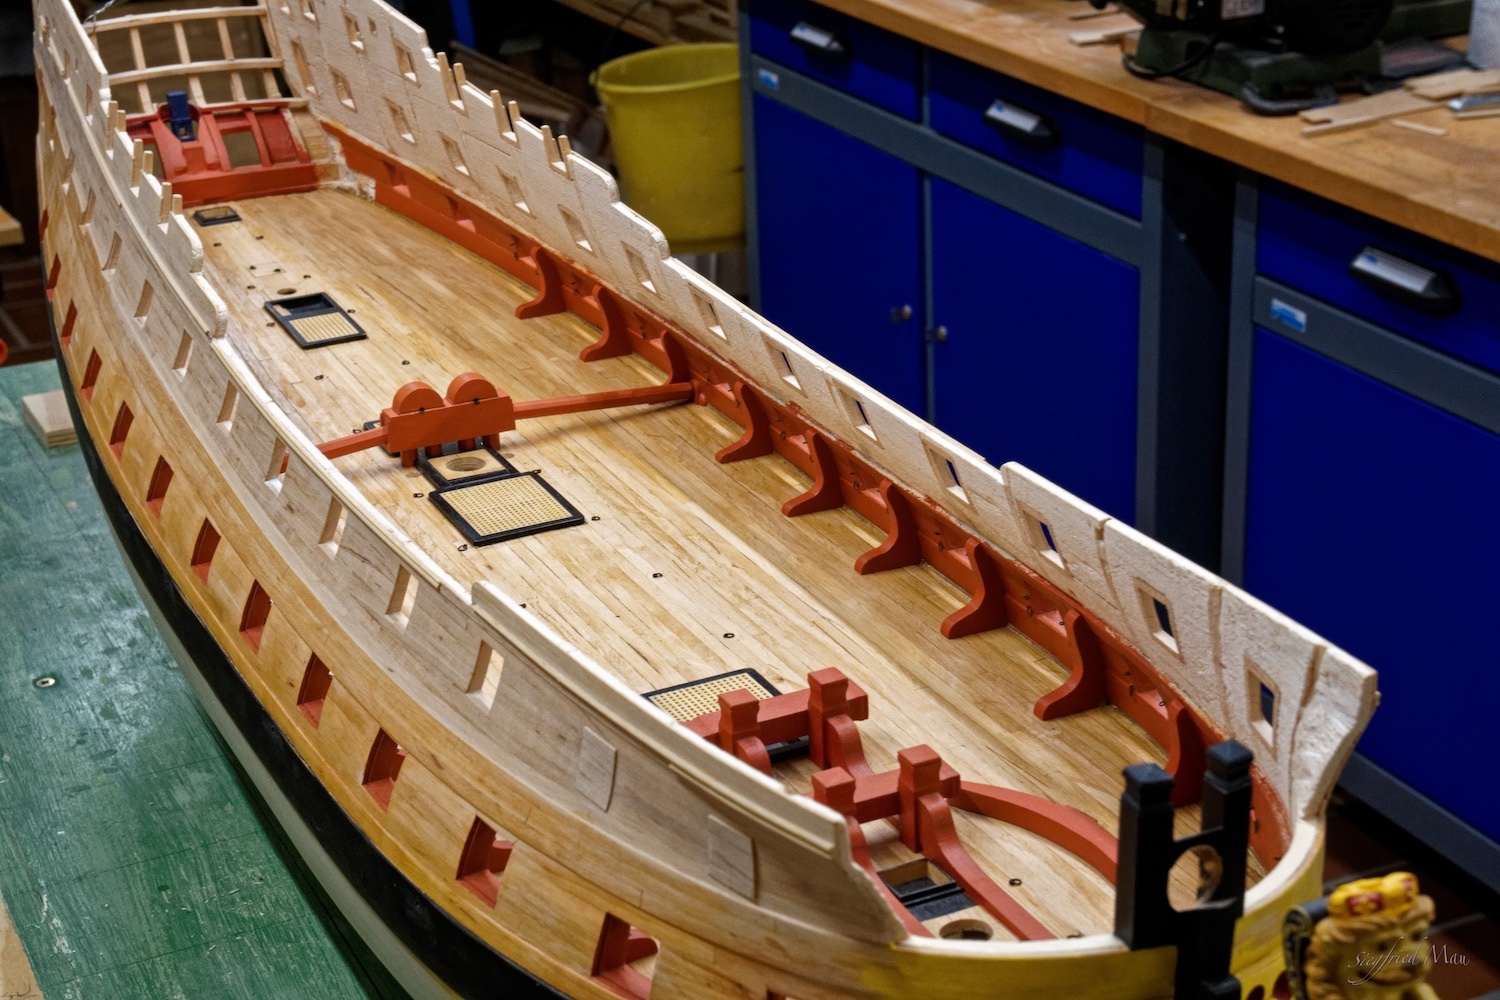
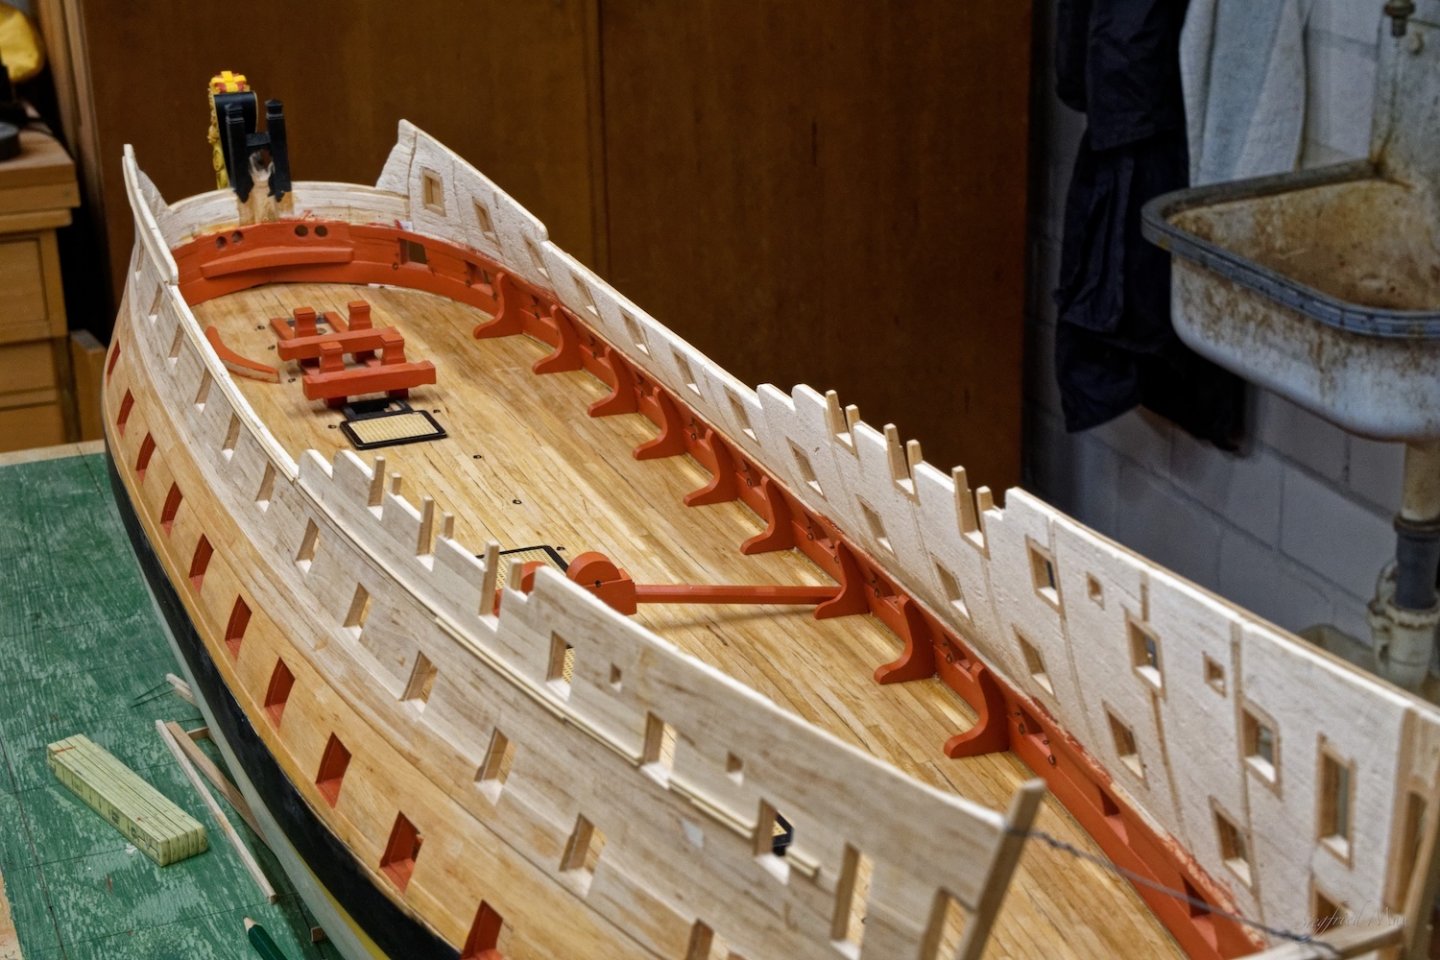
Hello, it is done, the standards for the gun deck are in place and also the scuppers are bored and painted. As next I would build the beams for the upper gun deck. I would't install them permanent, but I would have as much done at the gun deck as I can, before starting and finishing the outside of the hull.


-
Hello, it seams so, that this is not a theme of much interest or knowledge. Yesterday and today I searched more about the list's of establishments. The 1719 list is the most complete list with two modifications who deal only with the length and breath of the ships. Also the list of 1745 and her modifications, deal only with the dimensions of the ships, not with the interior. When I looked at the information about the Dorsetshire (1757) I learned, that she was build to the 1745 list of establishment, as a 70 gunner but carried only 64 guns. Interesting is, that the master shipwright was Peirson Lock of Portsmouth. The Tiger was build at the shipyard of Thomas Stanton & Wells, Rotherhithe. But the plan was made by a John Lock, Woolwich, later master shipwright at Chatham. That all brought me to the result to use the plan of the Dorsetshire as a reference for the Tiger. She was build 28 years after 1719, but only 10 years before the Dorsetshire. May be it was right in 1719 to have only 2 pairs of standards at the gun deck. But that did't tell us, that the shipwrights saw it the same way. They had a lot of freedom in those days. All plans of the sister ships of the Tiger looked a little different. So, there is a lot of work in front of me. But because we have the next month a partial look down, it would be ok. All is better then building gun ports 😉
-
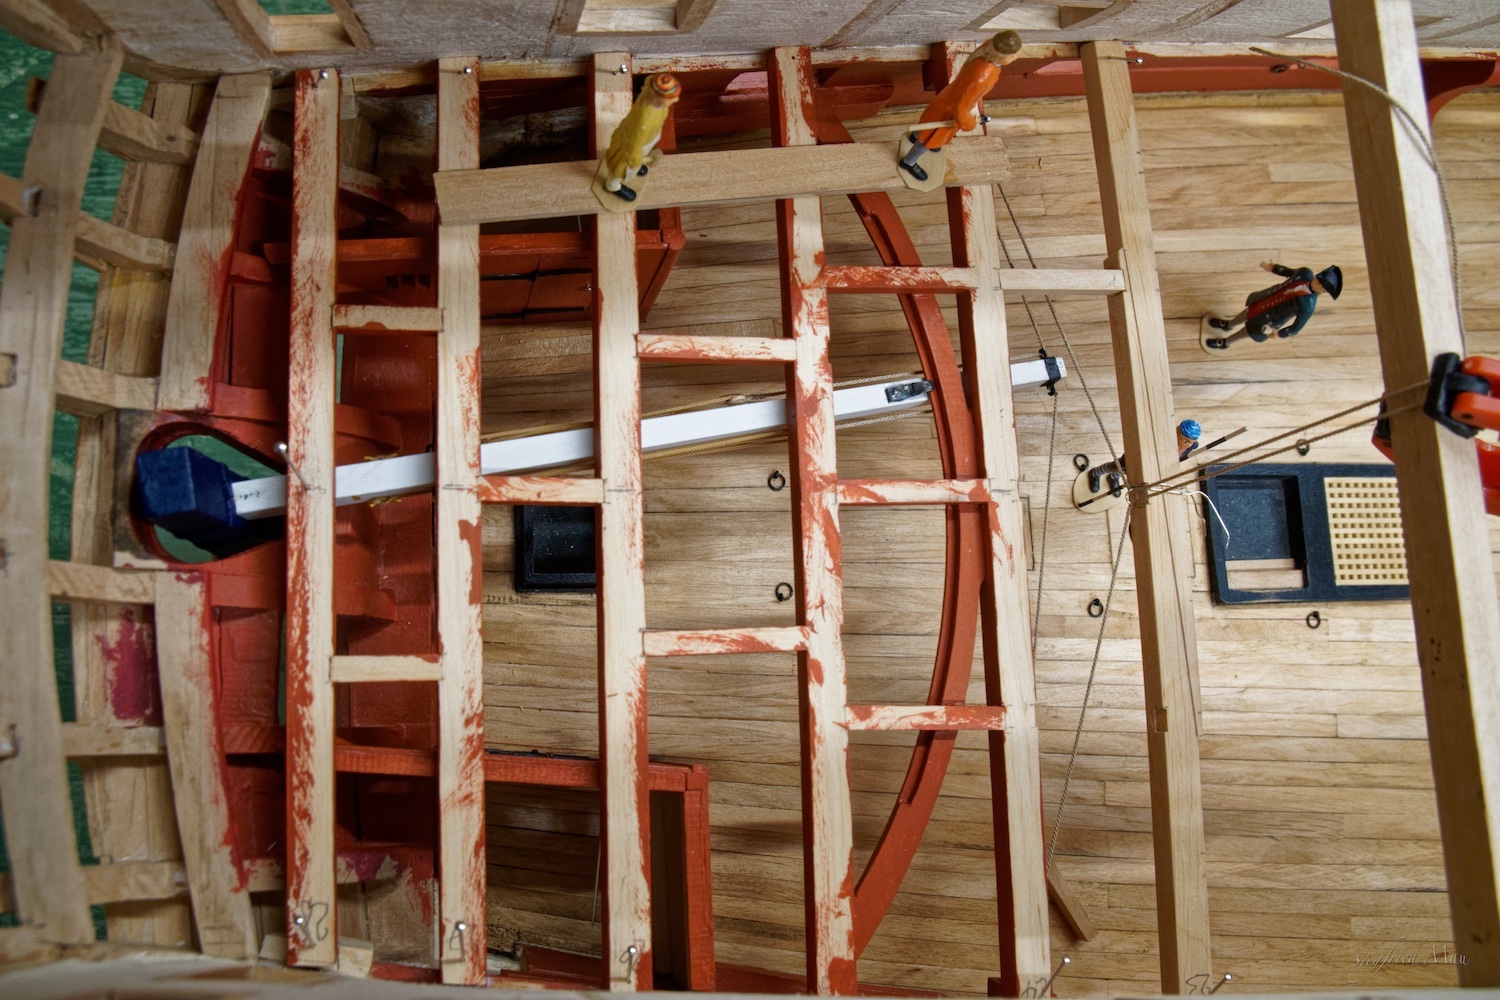
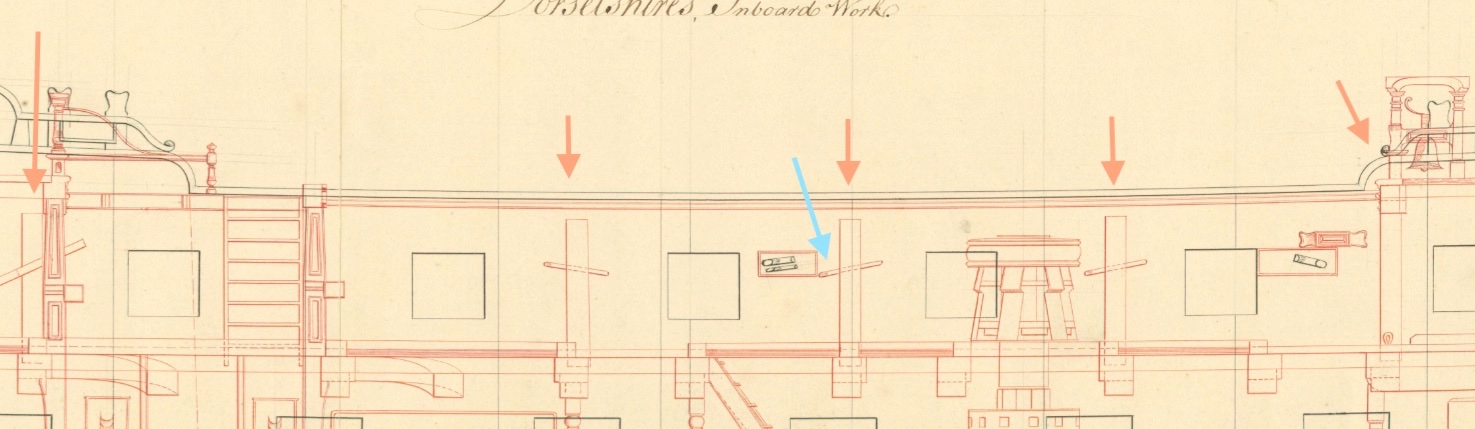
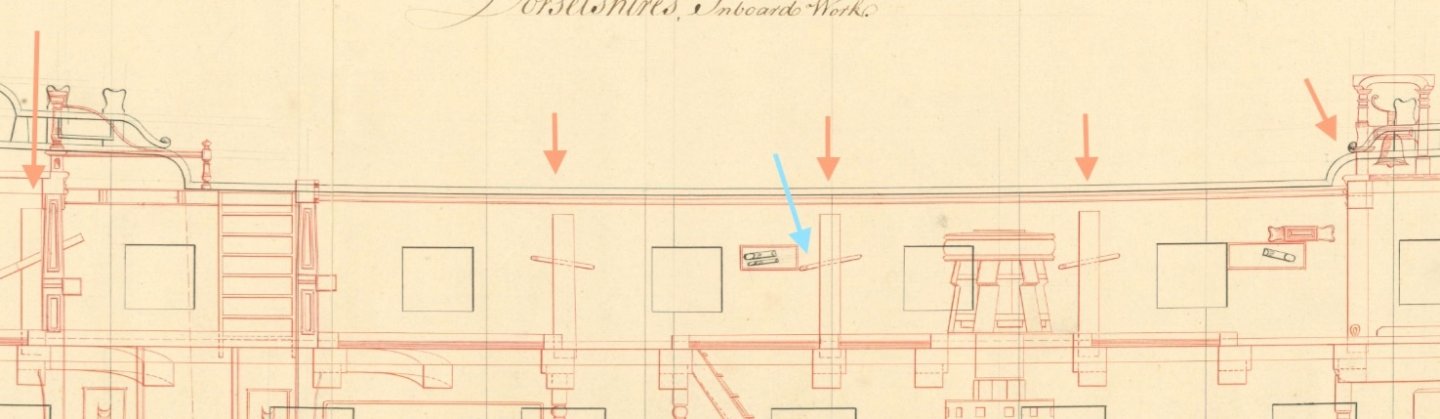
Many thanks Gary, for my Dragon I build them also like you have build yours. But now there should be only 2 pairs of standards at the gun deck. Ok, I think that would't be a problem, I do not build them. At least you would't see them. The question is , how would the iron version look like? But for the upper gun deck I think I should build them. As always is here the plan for the Dorsetshire (1757) a great source. Where I made the brown arrows I think that that are the standards. But what are these things behind them, (blue arrow) cleats? Like this at the Medway? Or did they bore holes through the standards and set them in? Just some round peaces of wood. So with only 3 pairs of standards I have the choice to set them evenly in the middle of the waist. If someone has more information about that, you are welcome. At the moment I have to make decisions only for the gun deck. This is the gun deck of the Dorsetshire. Here are some standards thinner then the other. Are that the iron one?
-
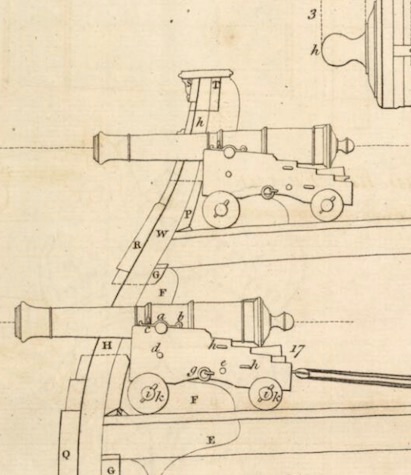
Hello Gary, the standards are at every side of the ship and there normally in the middle where the ship is strait. At the picture from Falconer they are behind the cannons. „ F“ for the lower cannon. And then between the cannons at every second beam.
-
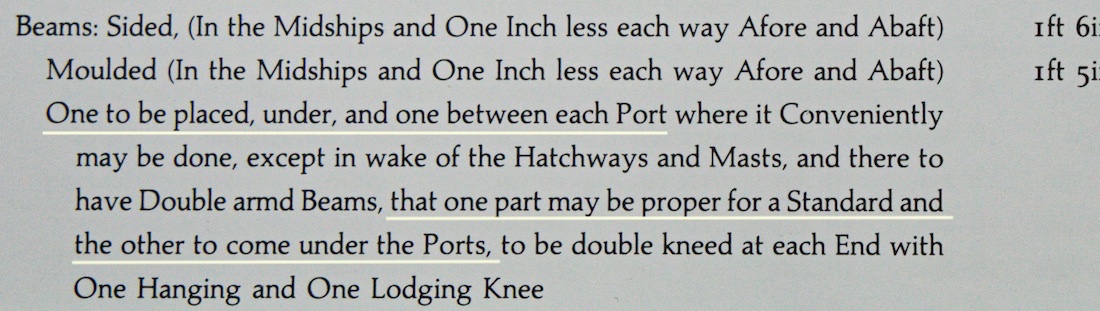
Hello, I'm sorry that I did't mention that the elm-tree pumps at the moment are not to be permanent installed. This morning I gave them a coat of lacquer and after that they went to a save place. But I have a question about the standards used in a ship. In the 1719 establishment list is there something unclear, or I did't understand it. All I could find about this, I found in Goodwin's Constructions and fitting...., and what he writes there (at page 108-109) is even more confusing: By the end of the third quarter of the eighteenth century the number of standards had been reduced, and they where found only on lower decks. Falconer describe them short, and at his plate VII you could see one. Lavery in his Ship of the Lines II, only mention them. In his Bellona book he has a picture with lots of standards at both gun decks, Page 46, B27. I think it's the Berwick plan from 1775. Because in the 1745 establishment list they did't deal with such things, I have to look in the 1719 list. There I found this about the beams and for the Gun Deck this and here for the Upper Gun Deck Far to the right you found what is for the 60 gunners. They listed for the gun deck 2 pairs of standards, one of them from iron! For the upper gun deck 3 pairs, none of iron. So at least I did't know what to do. In 1775 a 70 (?) gunner has 9 pairs of standards at the gun deck and a 70 gunner up to 1760 only 3 pairs? And Goodwin wrote that they reduced them.


-
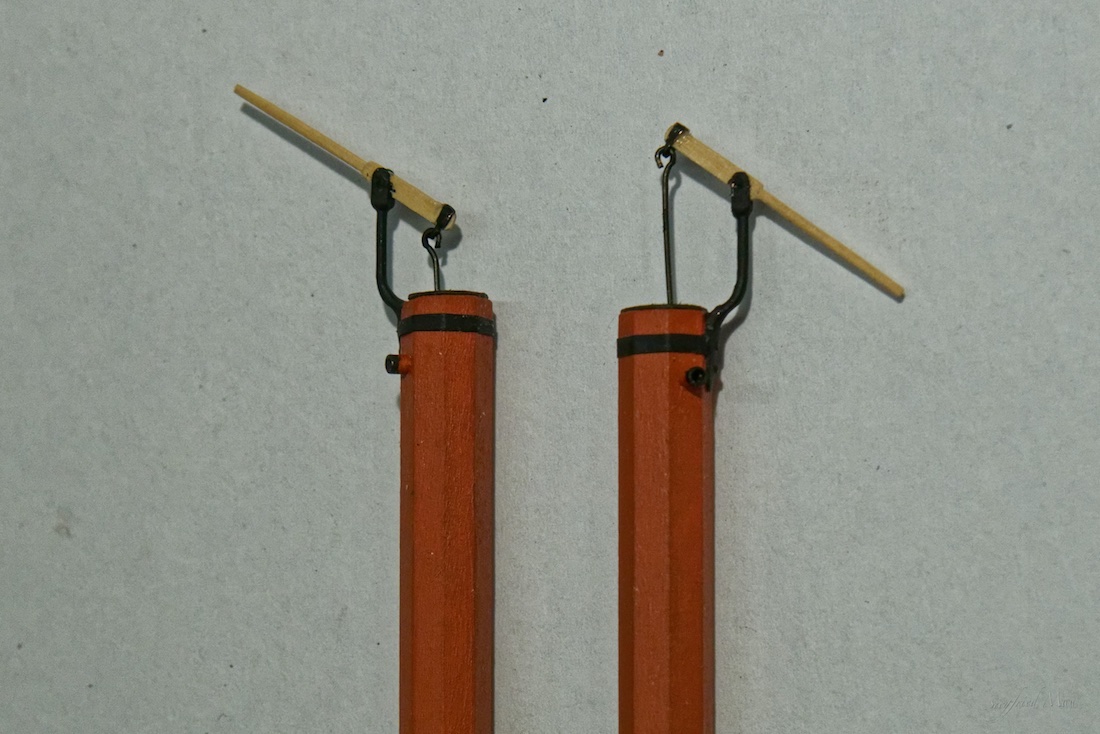
Hello Druxey, the elm-tree pumps are for the upper gun deck and I made them also a little longer. Better then a little shorter 😇
-
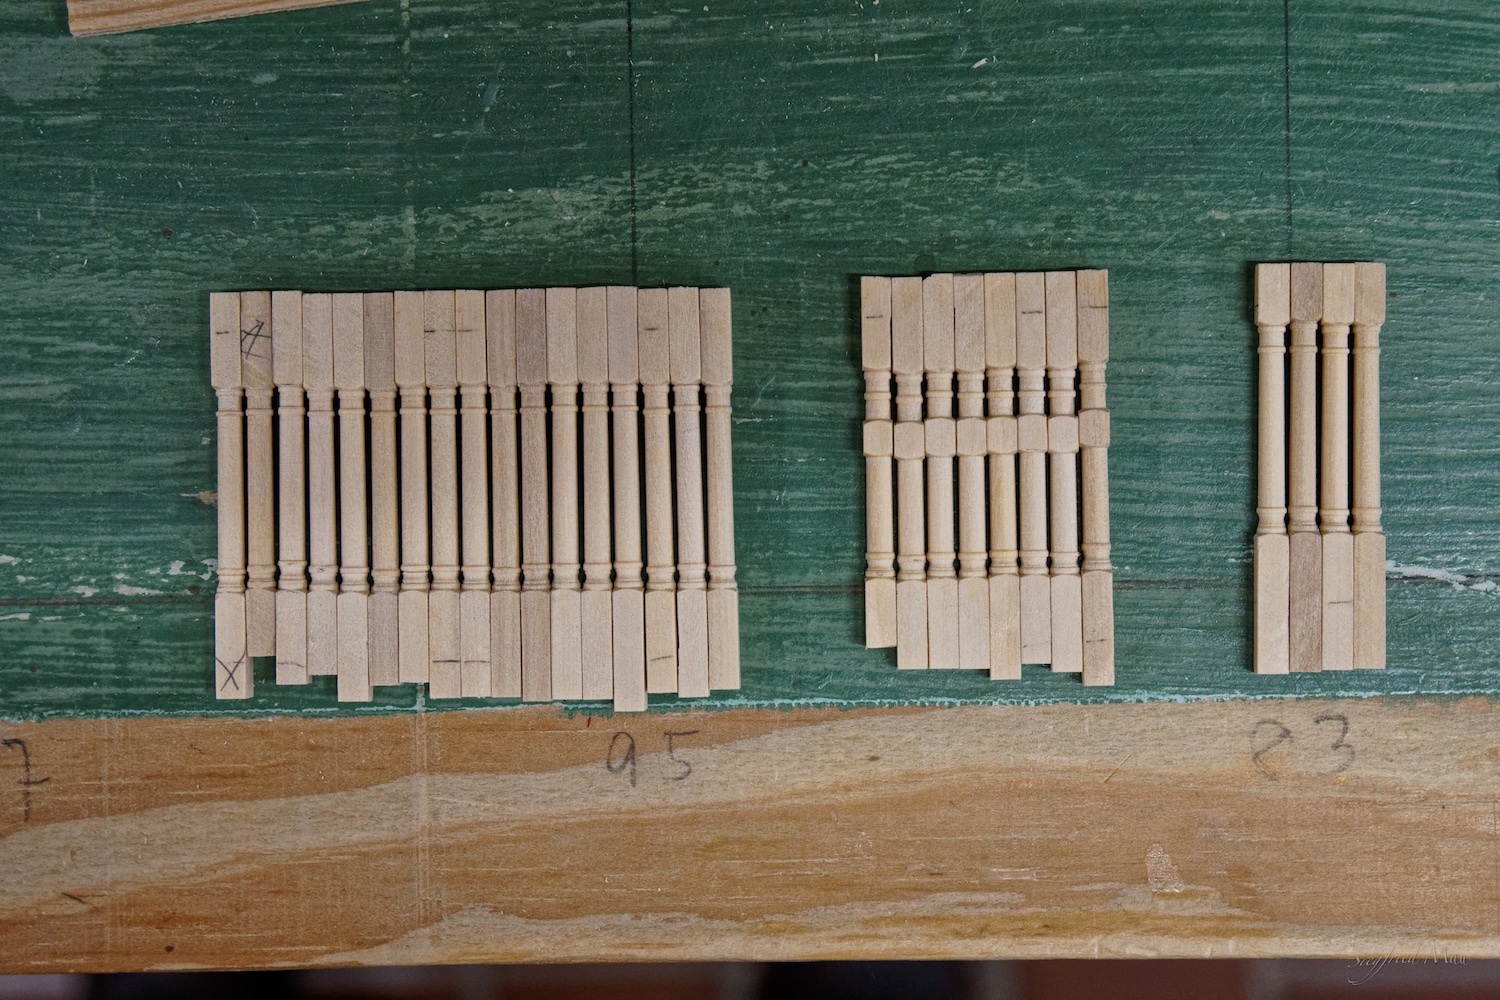
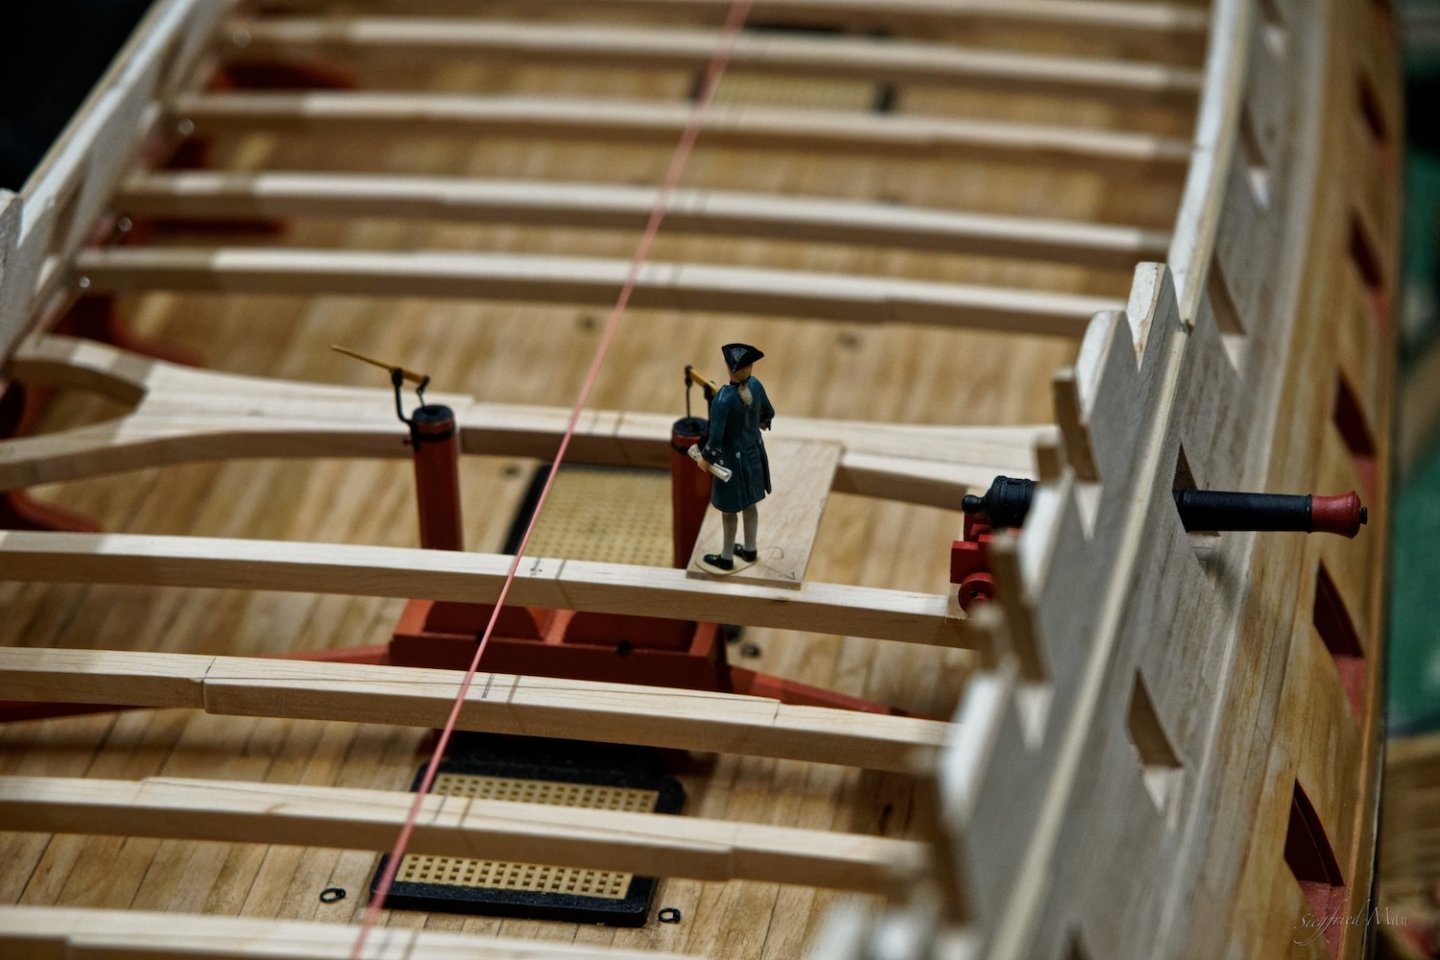
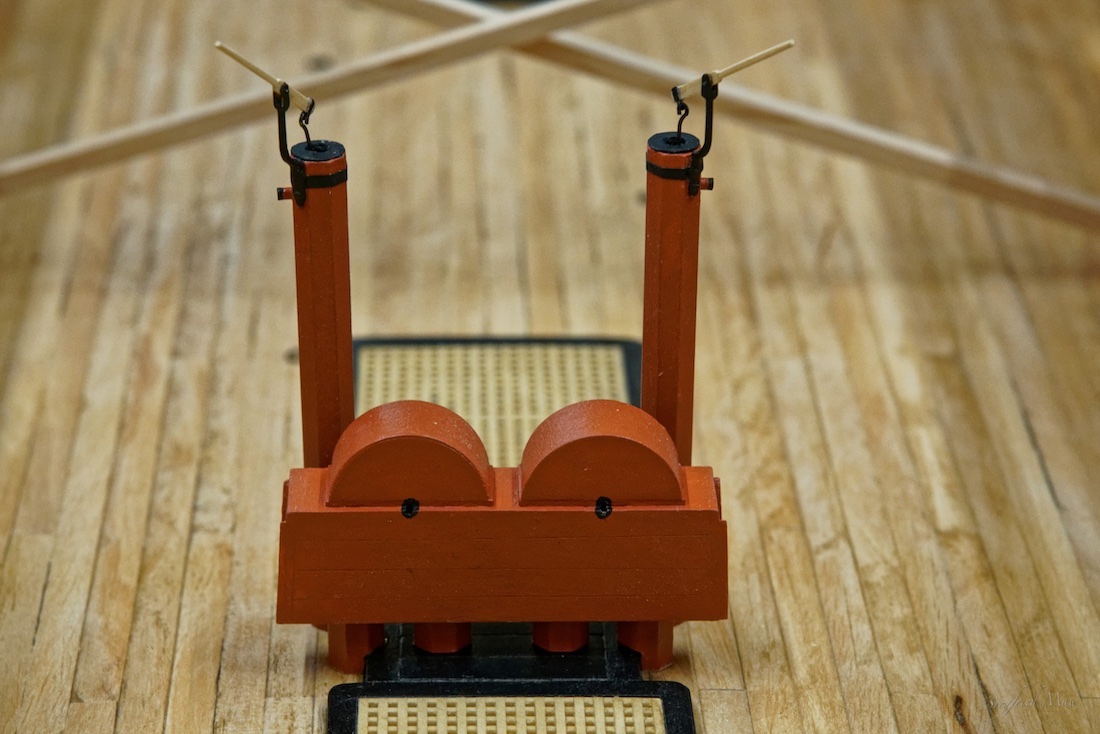
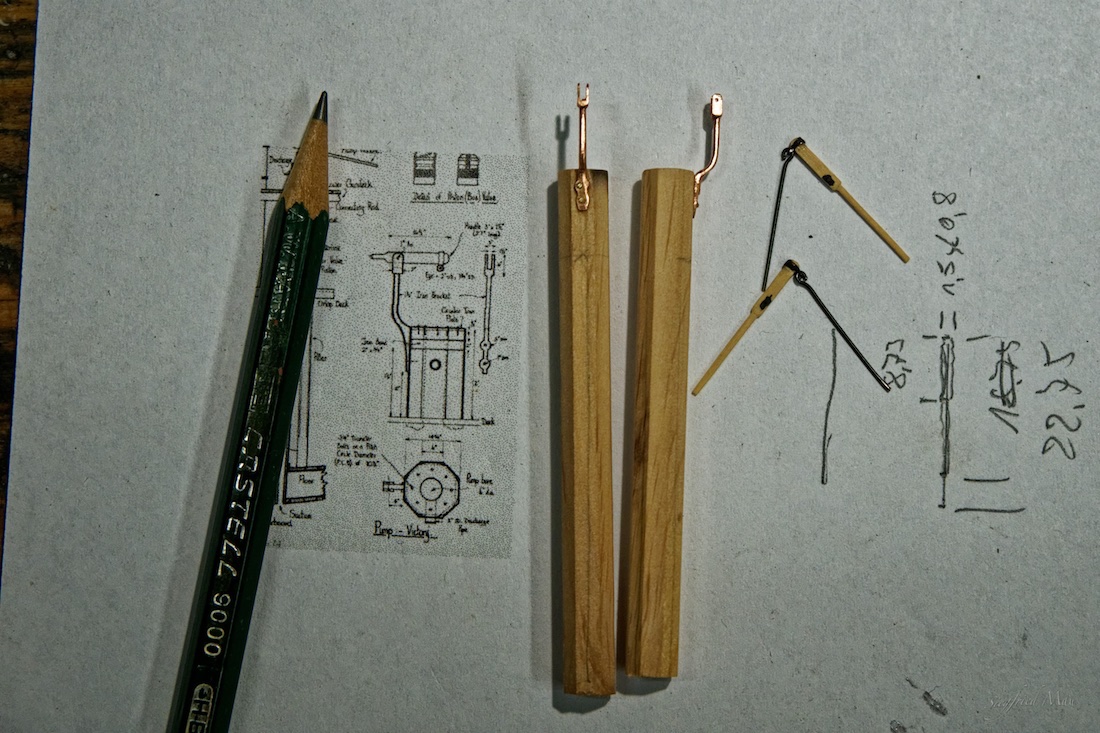
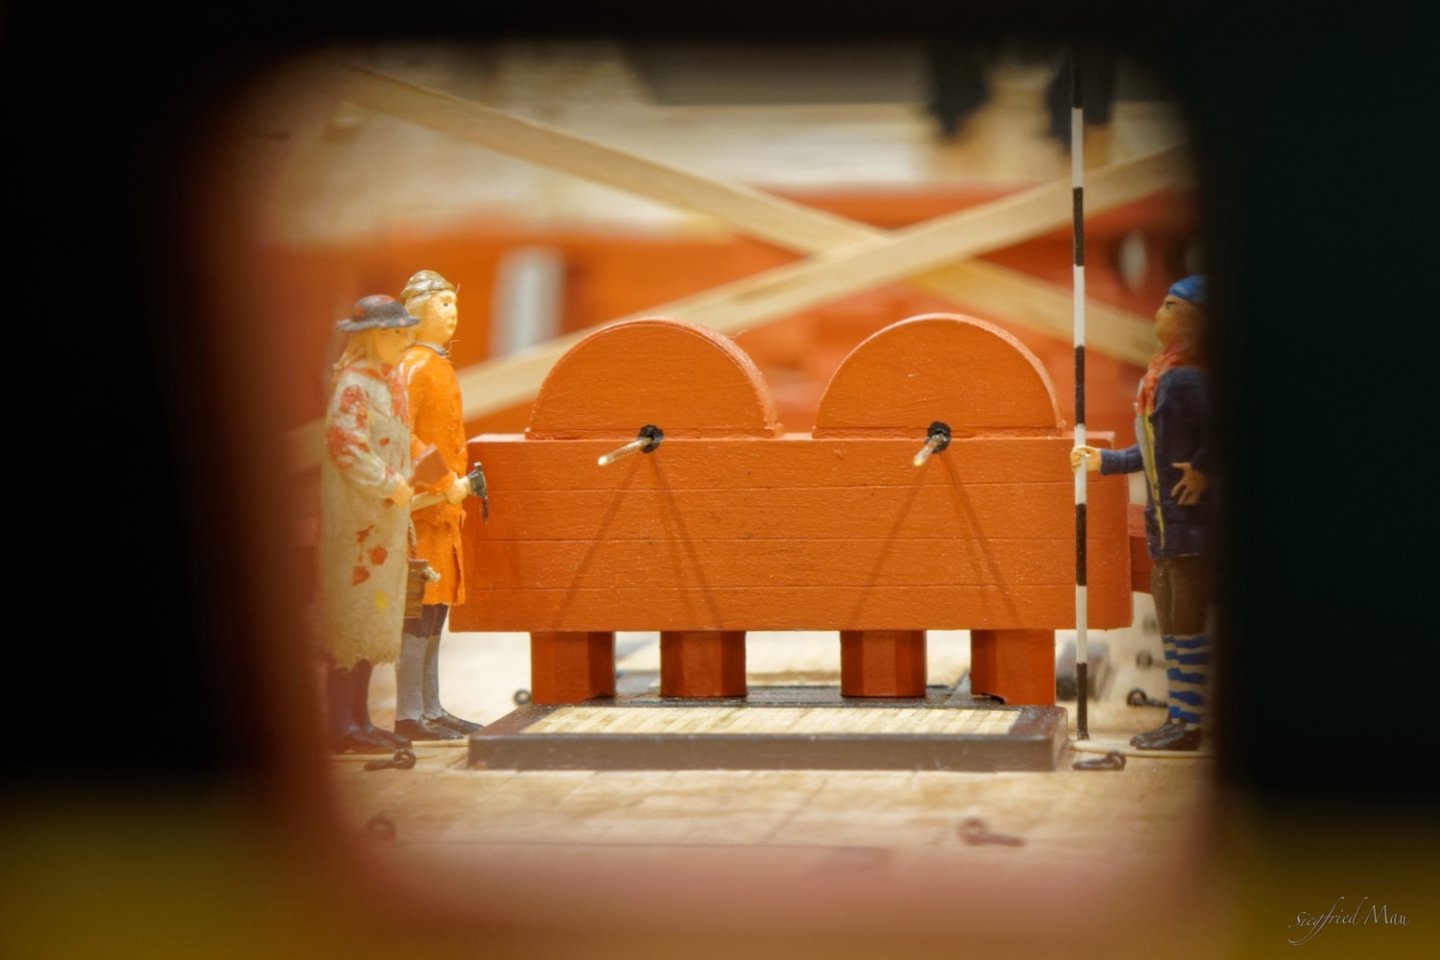
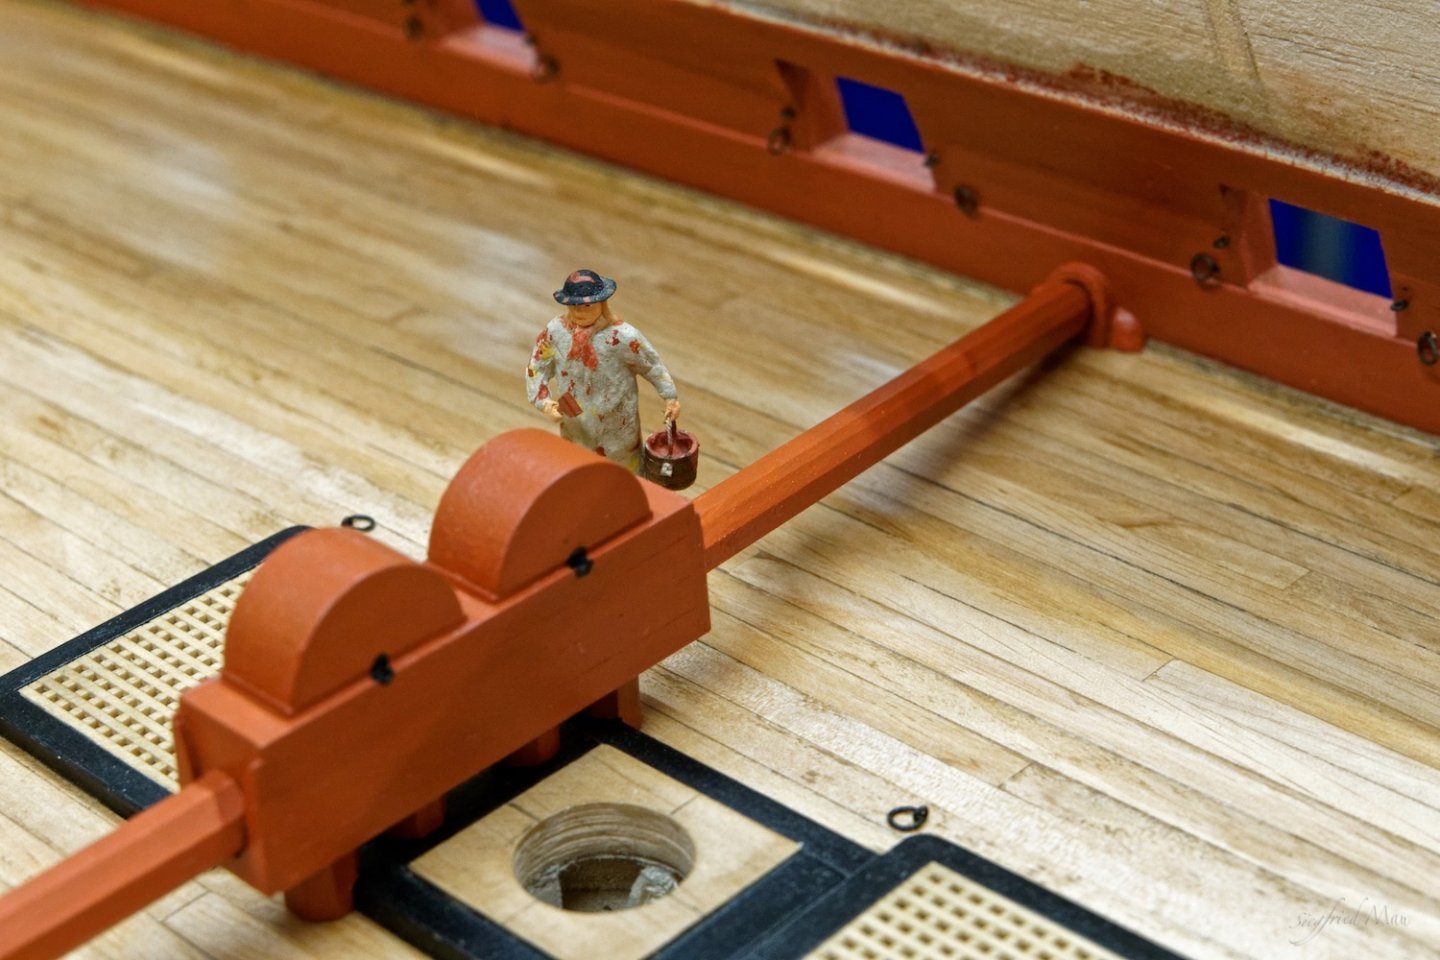
Hello, now I have also the elm-tree pumps ready. I build them after Goodwin's description of the Victory pumps. I think, that these pumps are so old that there is nothing newer in this version than in the middle of the 18. century. It was a little tricky to build these fine parts, but at least it worked. And here they are in position and ready to pump 😉
-
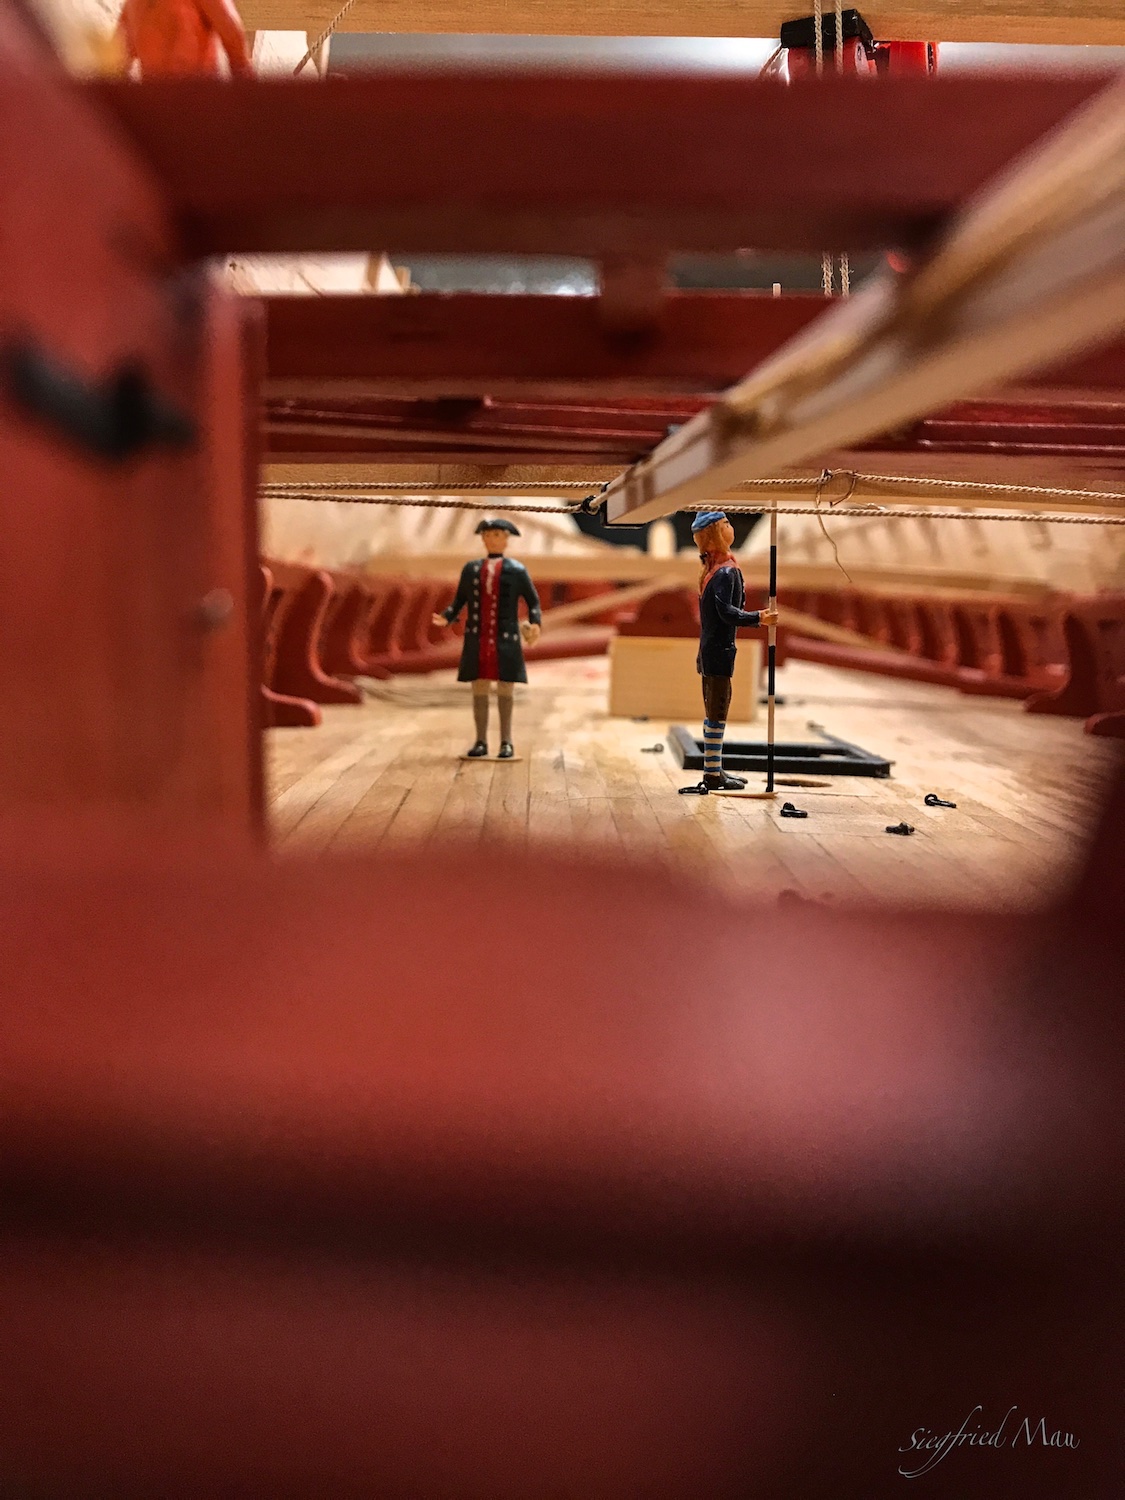
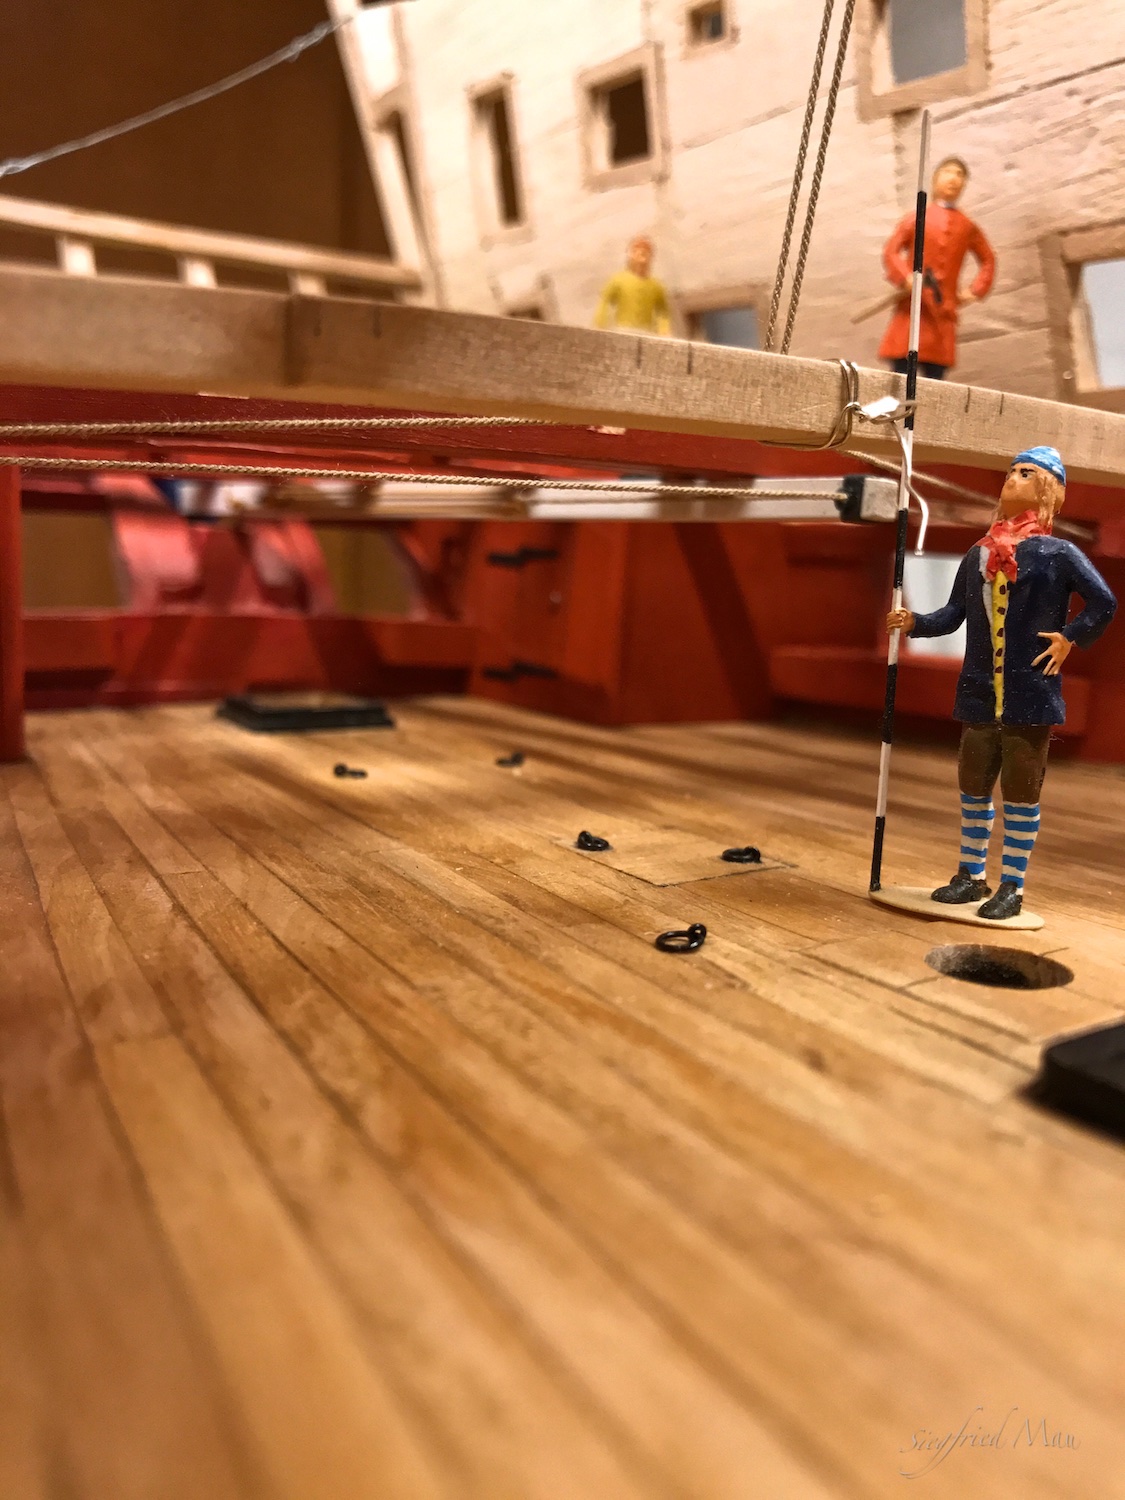
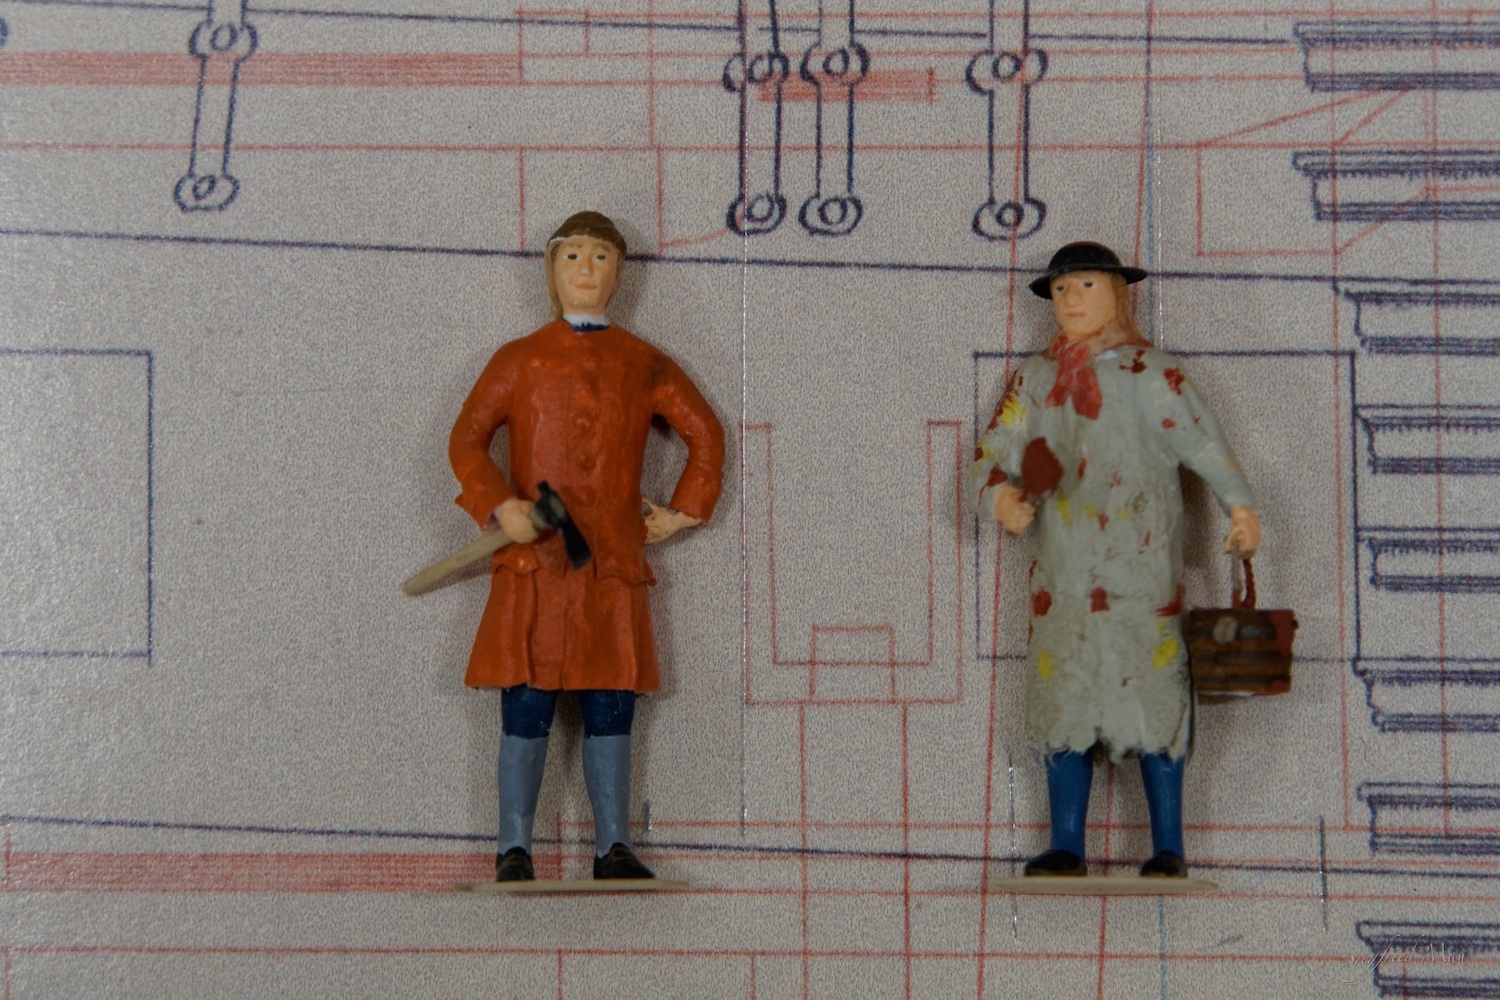
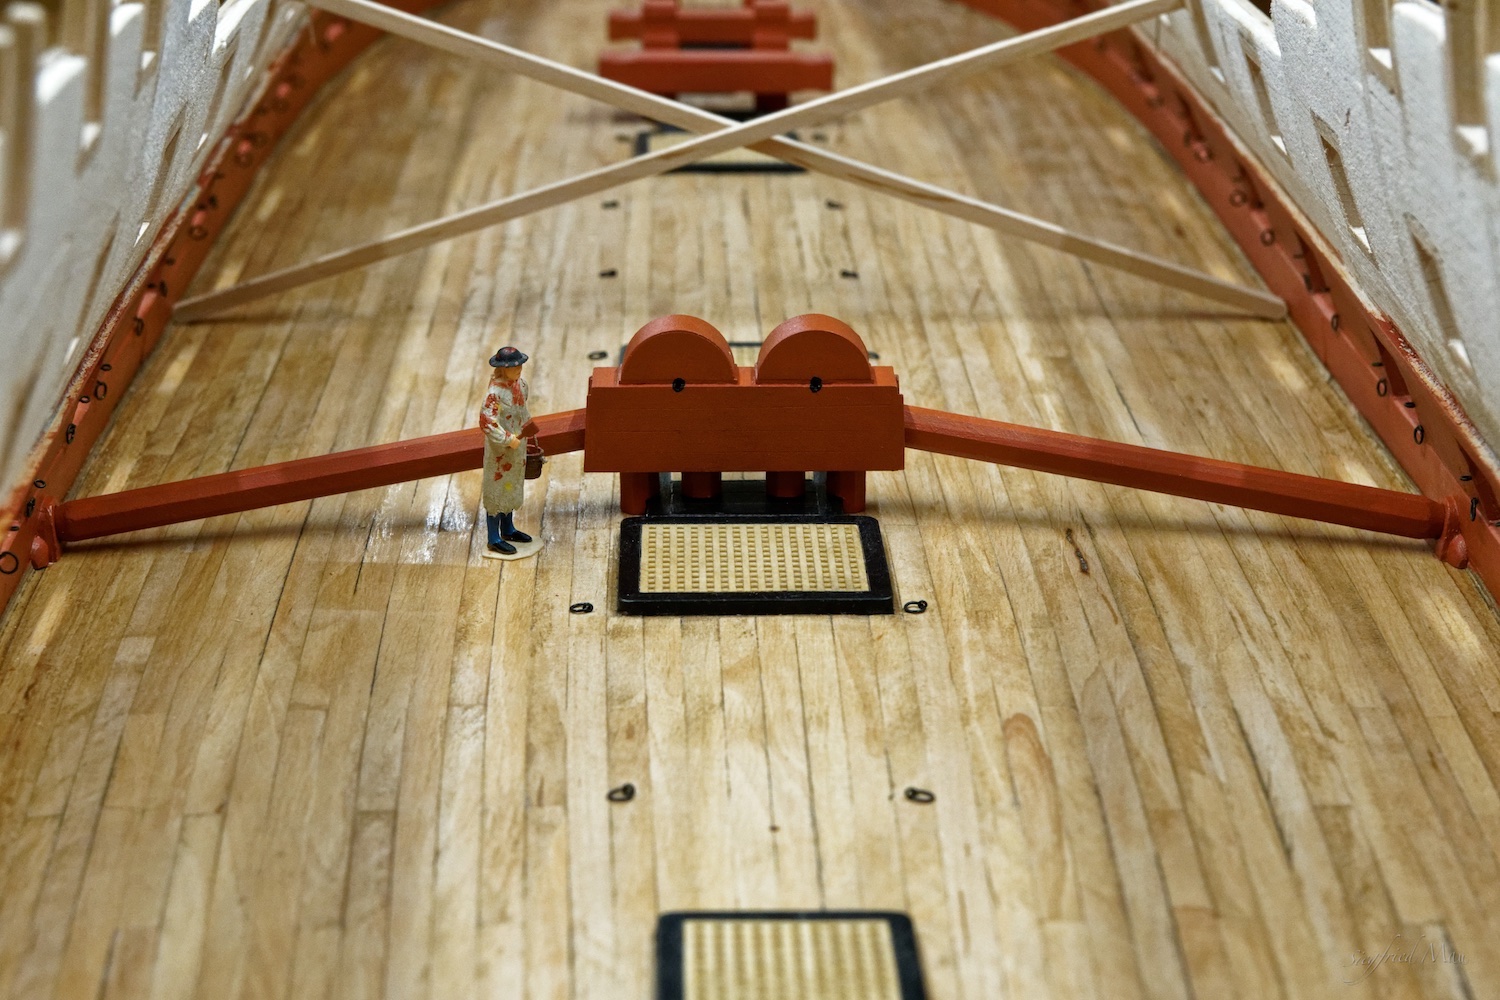
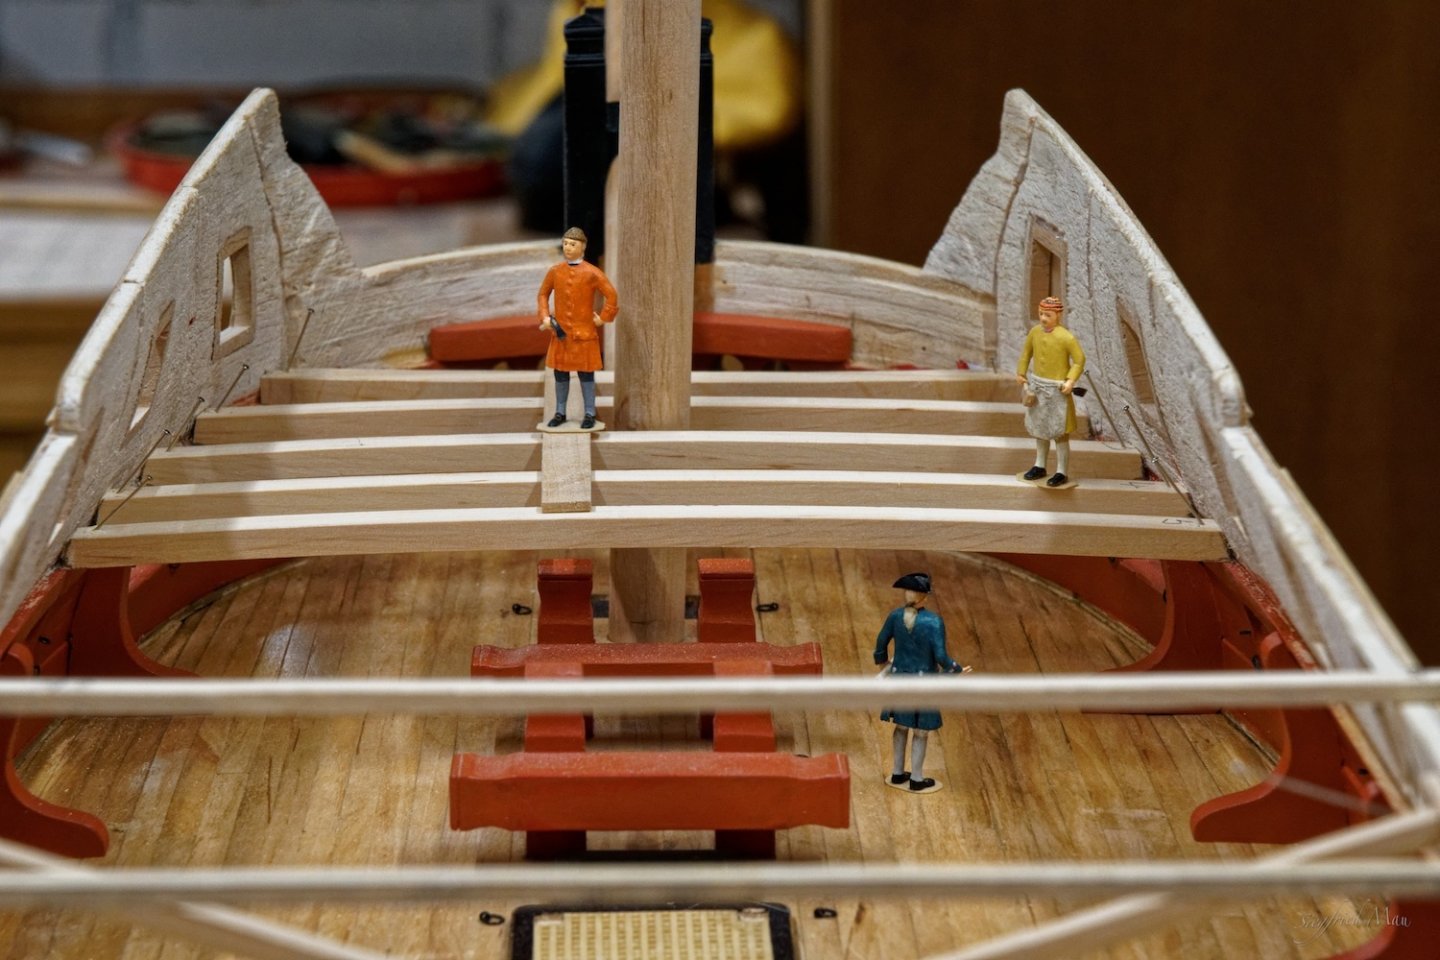
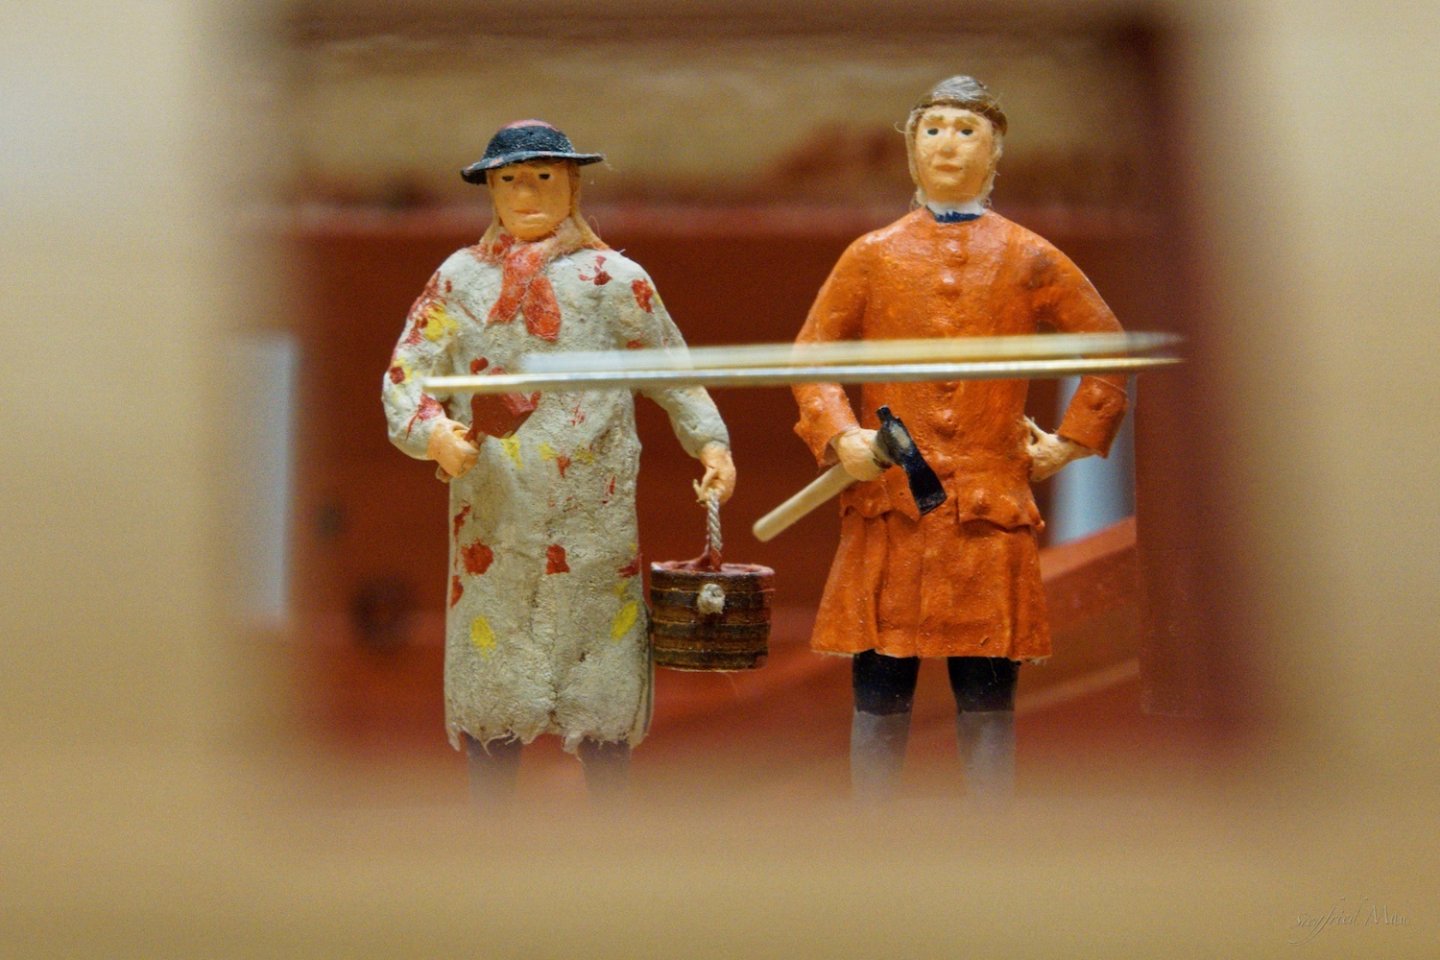
Hello, and many thanks for your comments and likes. Mark, I think that it's the perspective. These pumps are huge, but not so much. If you look at the drawing, I think it fits. The painter is 1,70m and the carpenter 1.80m (6 feet) high. The axle is at 3f 10in.

-
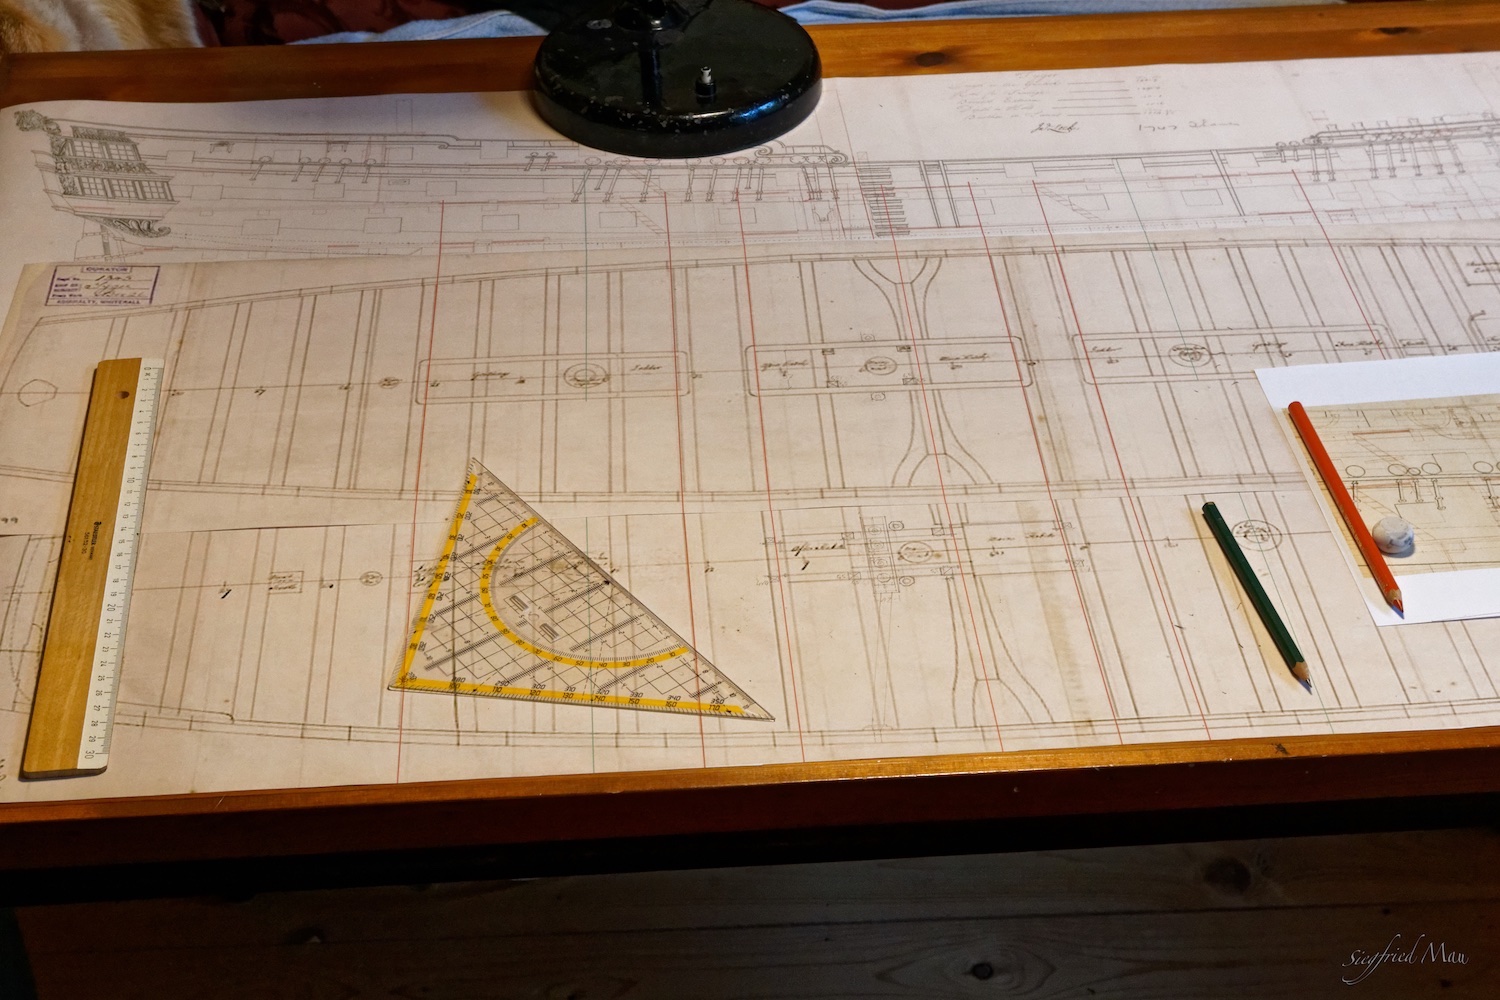
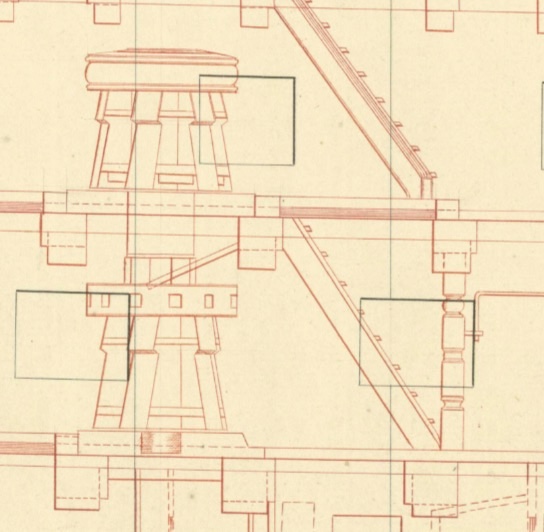
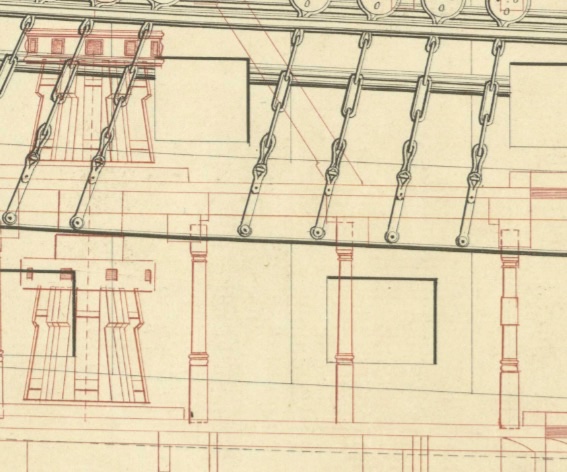
Hello again, after such a long time, I'm back at the ship yard. The wether outside is dark and rainy, so I did't mis anything in the basement. First I started with the plans. When I was ready drawing the pumps, I thought it would be a good idea just to build them. Here are the plans, I draw the red lines to mark the hatch ways at each plan. Because the sheer plan is not always identical with the decks plans, I have to stay with the sheer plan. And here are the chain pumps, here in white and here fresh painted The next project would be the elm pumps.


-
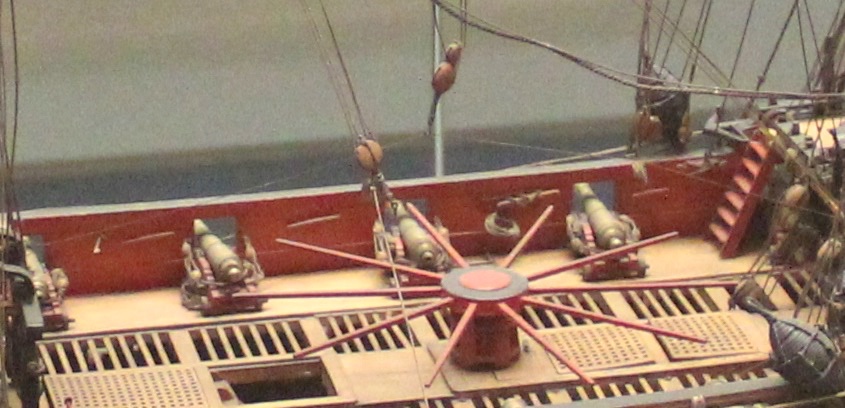
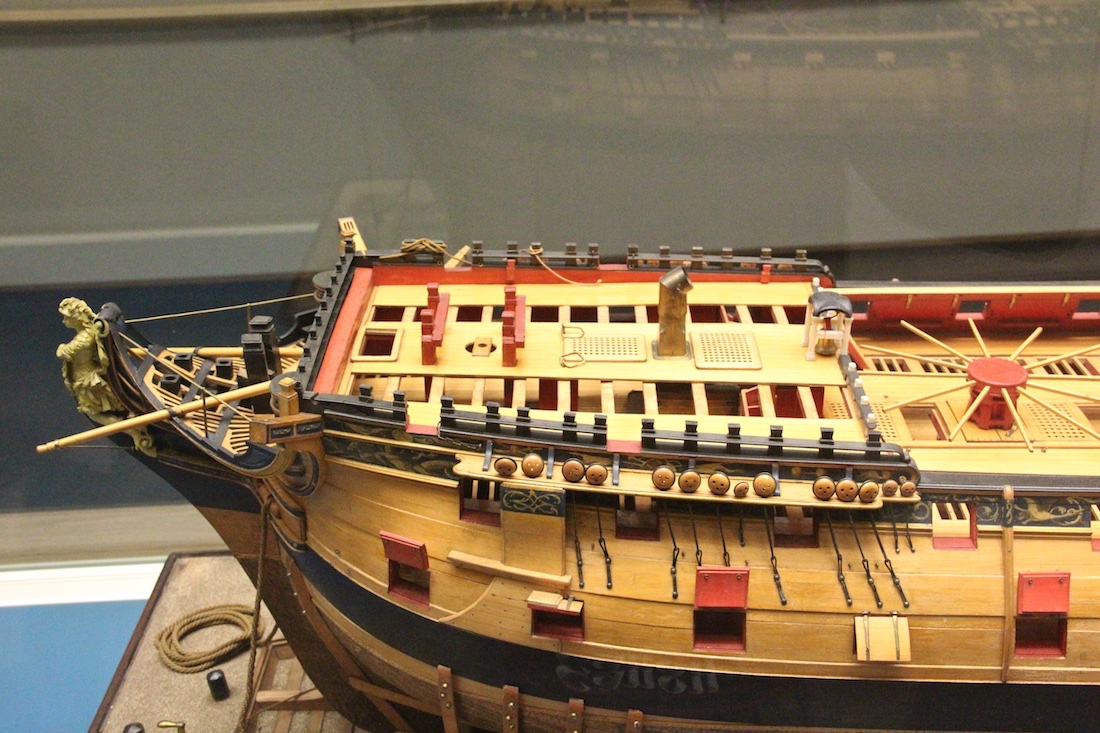
Good morning Mark, if the question is, how something is build, I would mostly agree with Goodwin. Because he has researched how something was done. Lavery is interesting with the historical background. Dafi wrote about this: and I would agree with him. I remember a film where girls on one of these training hulks run the capstan and had to jump always over the cannons. In real these had to be removed also with the pillars, before you could use the capstan. To remove the pillars they had a jack to lift the deck beam a little, to take the pillars out. So, fighting and using the capstan together would not work. One other thing, the drum of the lower capstan is plain. That is something I found now out. I don't know if that is always so, but I found it on many plans. Here fore example the Dorsetshire and Standart 1782, note the nice turned pillars!
-
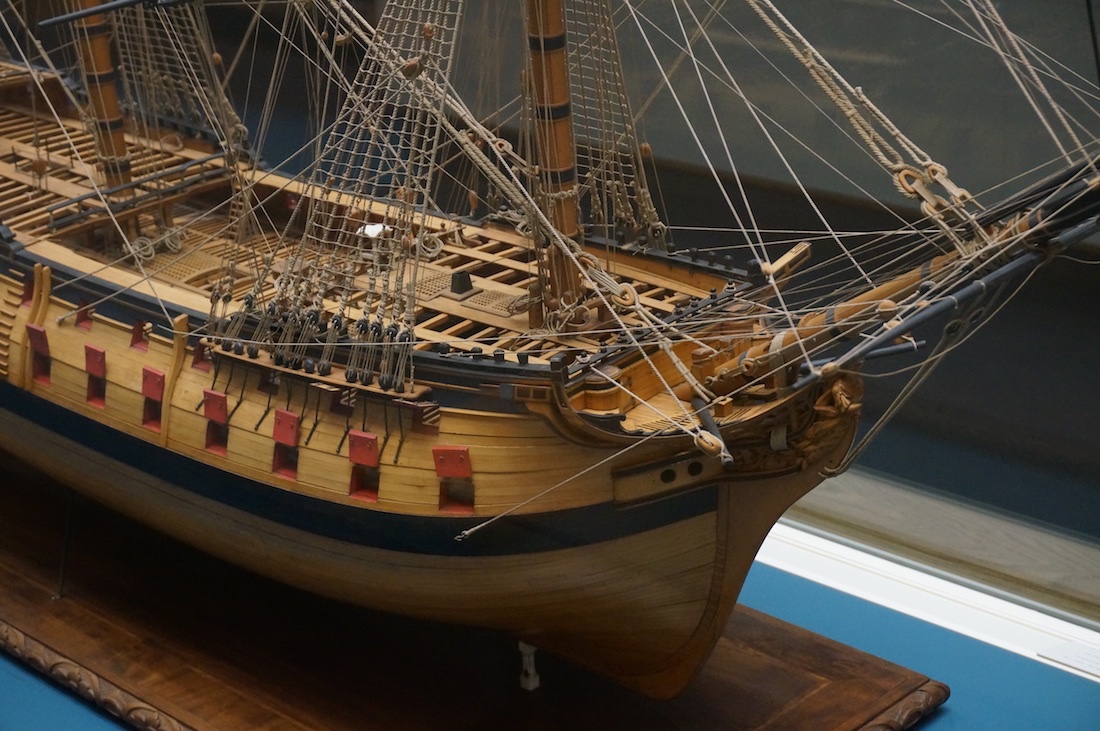
Hello Mark, that looks all very good to me. But because I had not searched much for the fore part of the ships, but only the aft for the Dragon I could't help you there much. At leat some pictures of the forecastle and the chimney. Bellona and the model who is known as Thunderer, but I believe is the Dragon. What I can say about the pillars at the upper gun deck is, that they had them only under every second beam. That is what I found out during my first visit at Greenwich. At the quarter deck where almost no pillars. At least one in front of the wheels. But I have no written record about this, only what I found researching the models where you could look inside. The first Bellona model has at least under every Beam a pillar, even at the quarter deck! I know no model with that future. I think they did this to stabilize the model better.
-
Hello Gary, in Goodwin's book, english man of war, is a picture of Victories bow sprit and his step at page 174. It looks like you had already build it.
-
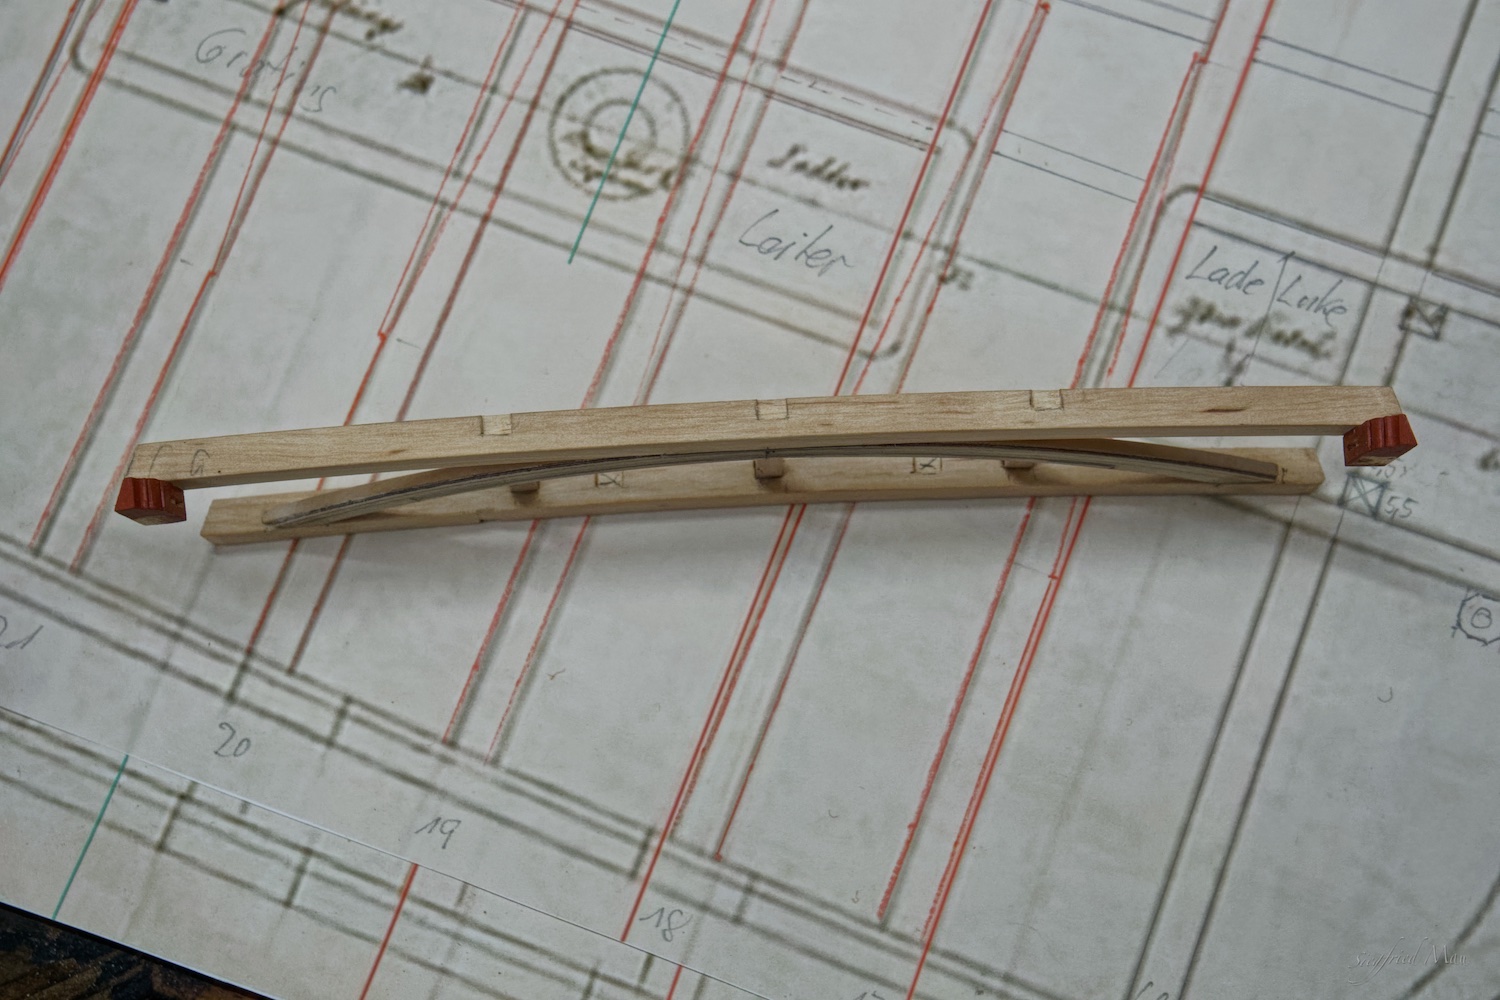
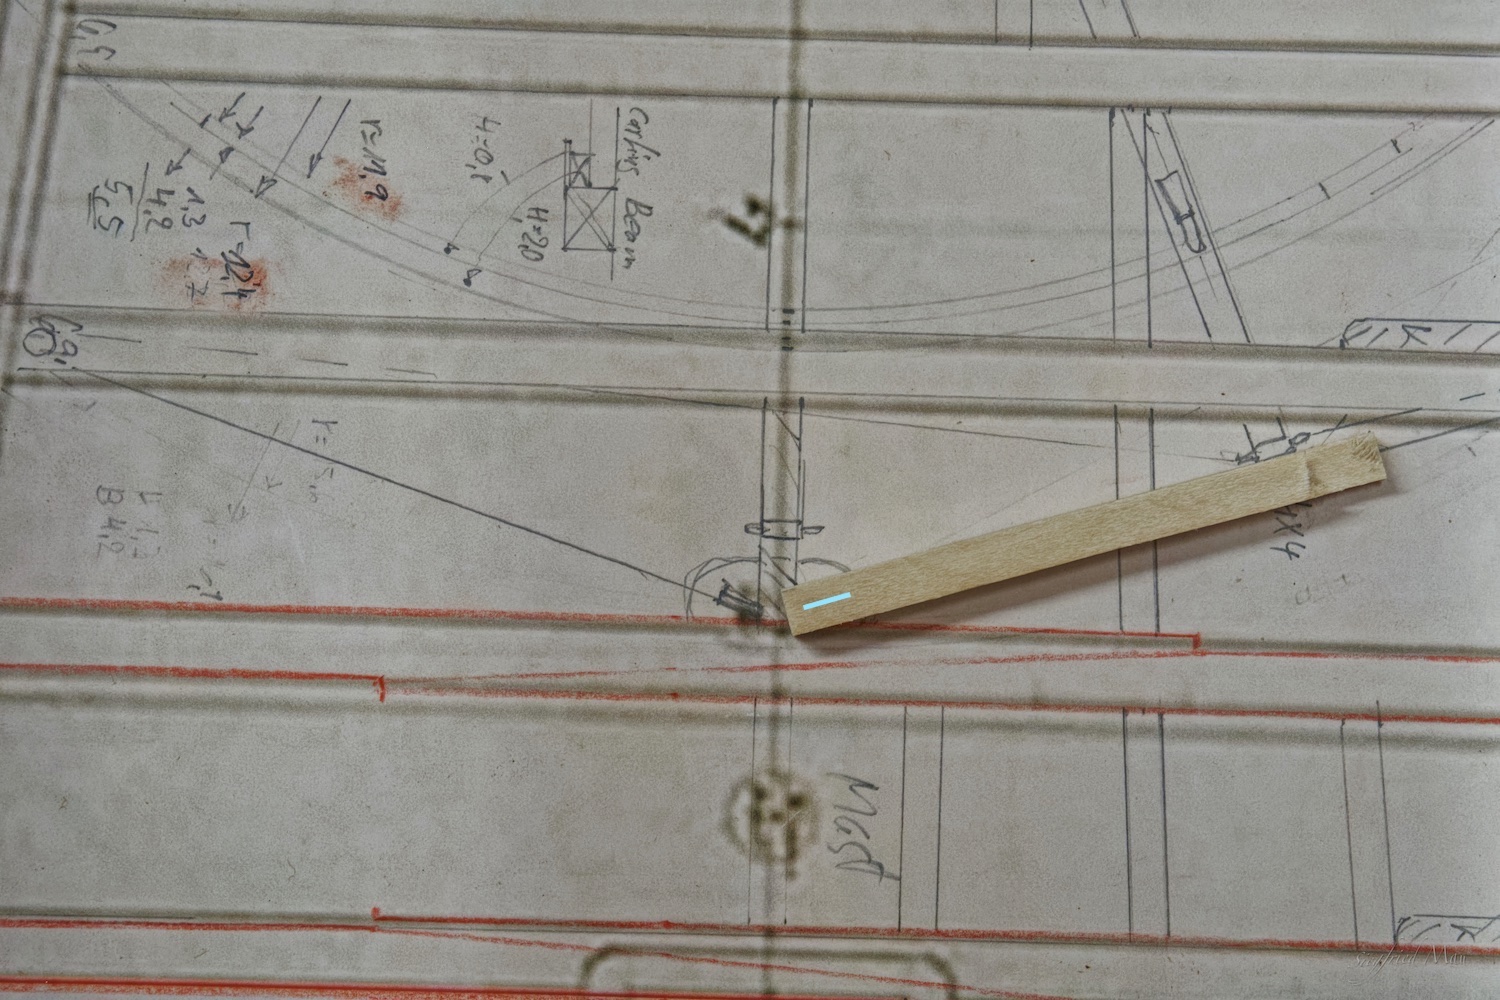
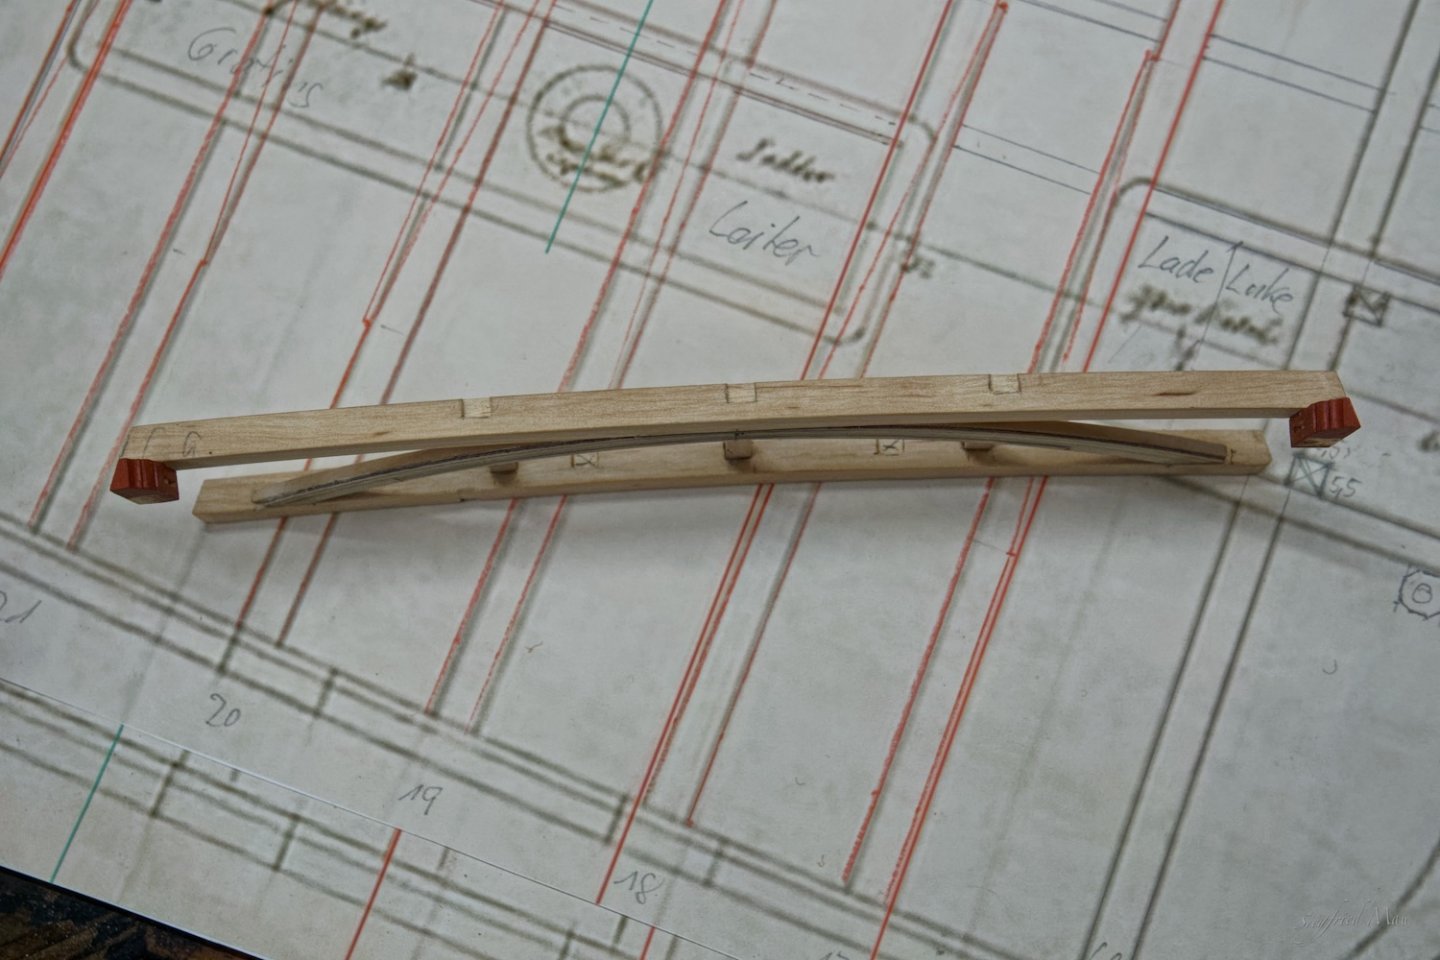
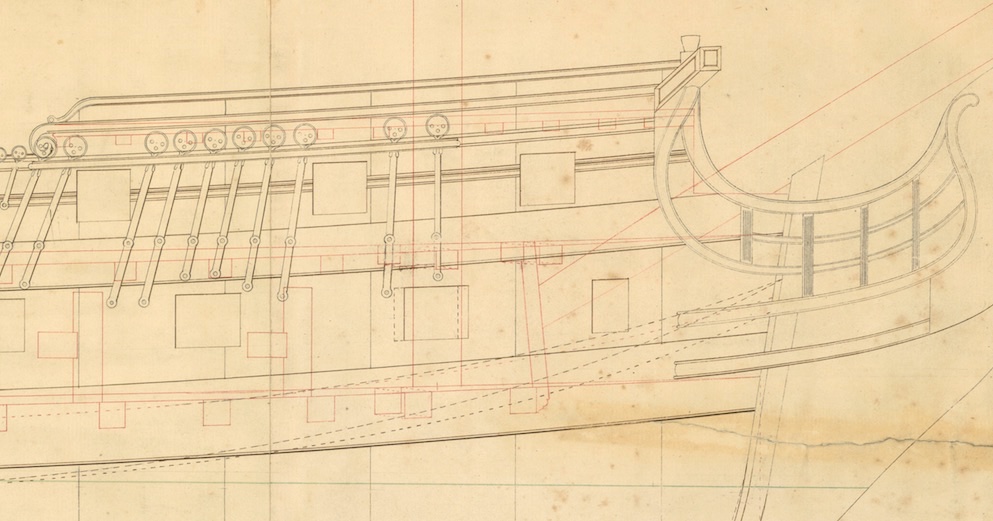
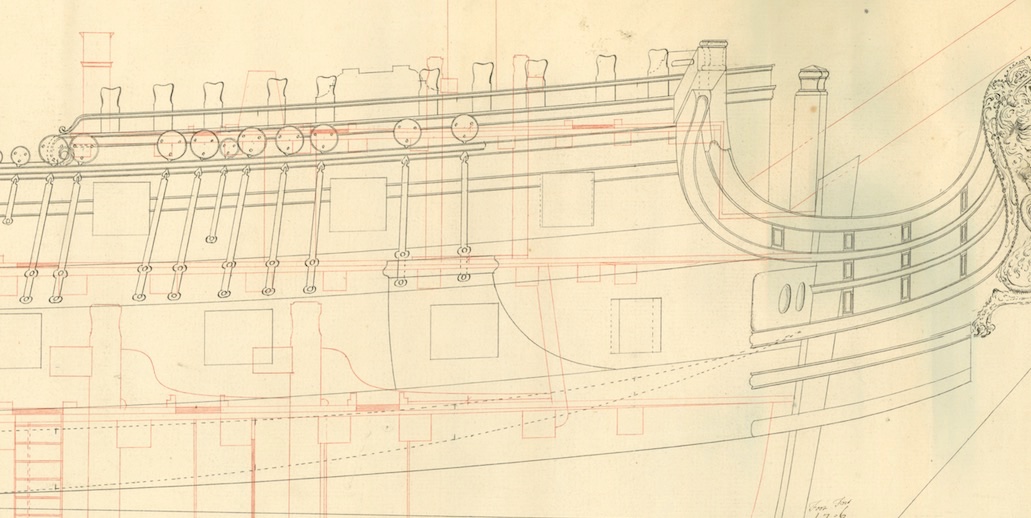
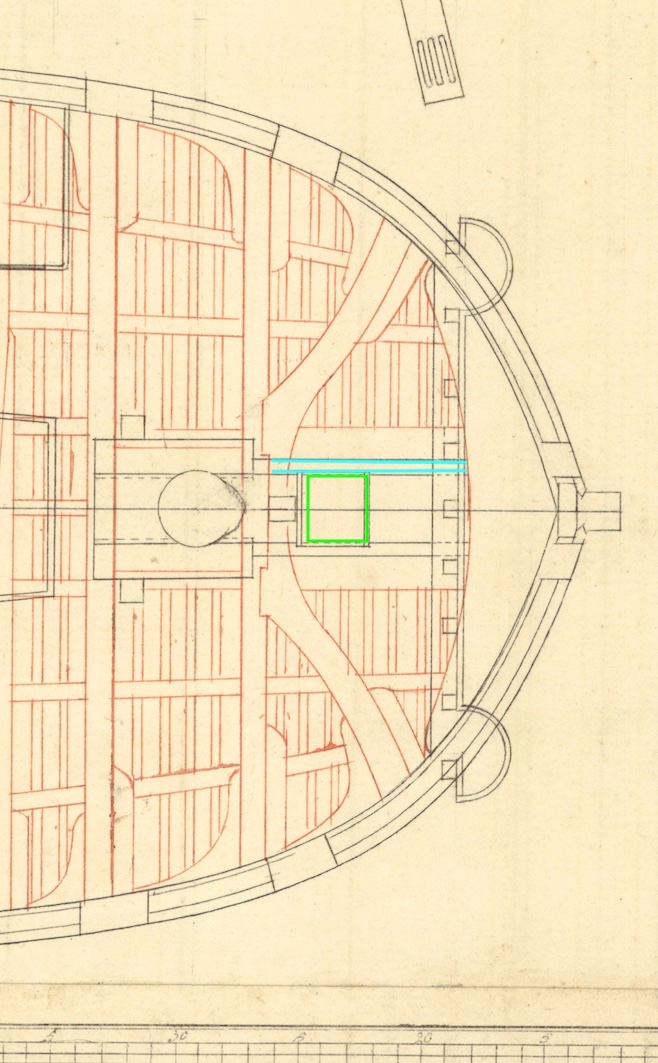
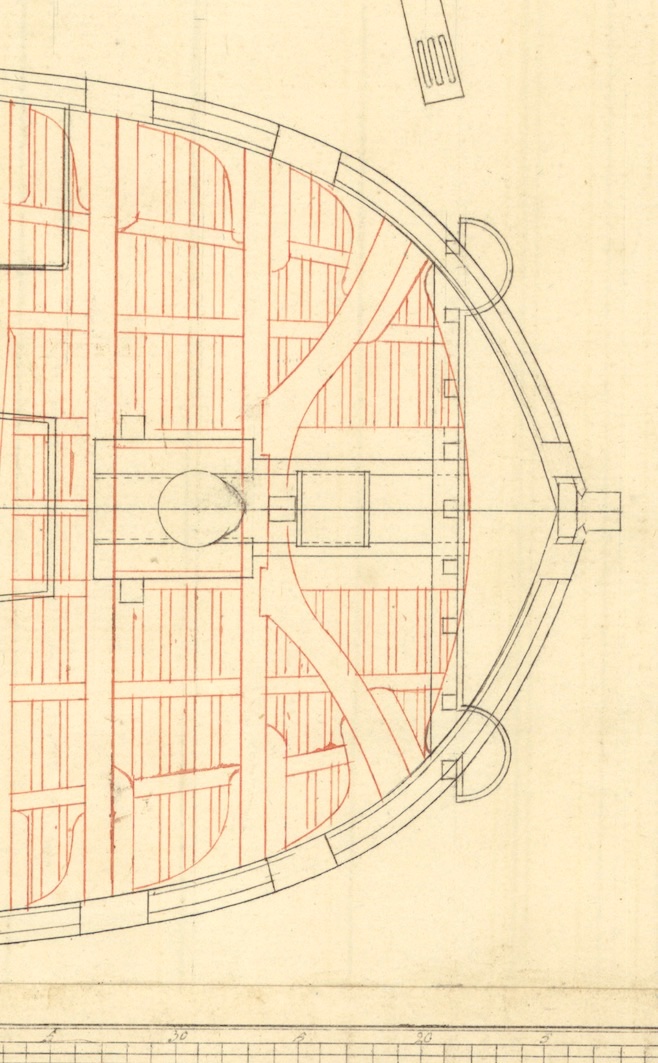
Hello Gary, at least, I puzzled also over that plan and together with the sheer plan it is much more confusing. It is not a of a existing ship, it's the plan for the 1745 establishment. May be you find there something. Goodwin and also Lavery have it printed in there books. Below is the plan of Tiger, build also after this establishment. One thought, could it be that the blue lines are the carlings and that green square is the foot fore the bow sprit? Than may be the four (or at least two) broader planks are the one through which the bow sprit goes, with an opening that fits the bow sprit. Like the those around the mast. Sorry my english 🤔
-
Good morning Gary, that is really great modelling what you did. I can not really help you with your question, but send you a picture of the plan for the 1745 establishment. It's for a 60 gunner, so the ship is a little smaller than yours. I think, in front of the bow sprit you did not need planks, because there would't walk any one and below is the manger. In the back the planks endet around the bowsprit. I don't think that you need there any ledges to support them, or at least one as you have build it already. But that is only a guess. I hope that I could help a little.
-
Hello Mark, some notes from Falconer and Boudriot's, the 74 gun ship, Vol 2 page 135. First what Falconer under Helm wrote and Boudriot I deleted the picture, because of copyright and so on So at least you could turn the wheel only 2,5 or 3,5 turns to one or the other side. For the Dragon I made also 7 turns at the wheel, I think that is what Goodwin wrote. At Page 136 he wrote also something about the sliding foot assembly. May be you find by Falconer more about this.