


alangr4
-
Posts
172 -
Joined
-
Last visited
Content Type
Profiles
Forums
Gallery
Events
Posts posted by alangr4
-
-
-
Hi Pops
Welcome aboard and thank you for your kind thoughts.
I am a bit of a "newbie" in this space as well. Being labelled a "lurker" forced me to bite the bullet and become a member and I haven't looked back. Great fun and every day I learn something new.
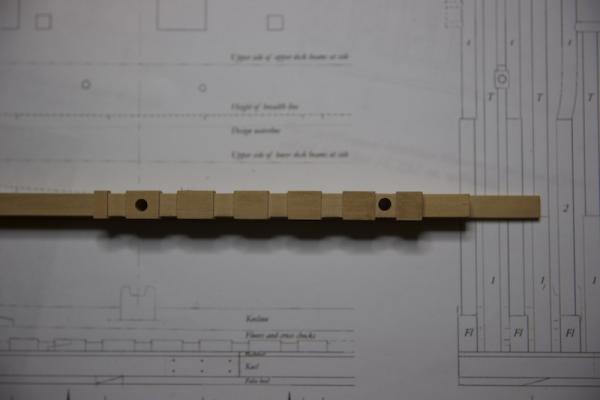
The term rising wood refers to heavy oak timbers that sat on top of the keel and supported the hull frames.
It is the notched timber that I had three or four attempts at before I was comfortable. You can see the pics above.
EdT refers to a wonderful modeller who has several logs on this site. His current log is on a clipper called Young America and is a terrific log to learn from. Equally, his other logs covering Naiad and Victory are also still available to look at on this site. He has also written two wonderful books called the Naiad Frigate Volumes 1 and 2 which are available through Seawatch Books. I usually dial in to Ed's logs at least once per day. If you use the search button and dial in EdT details of his logs will come up.
In building the Naiad, Ed invested in a rail system which he bought from Rockler a US online company to build a jig for the construction of Naiad. It helped him in a variety of ways including taking measurements inside the hull. He is also using this system in his current build of Young America.
I have bought elements of this system but the freight costs to Australia are horrendous. The freight costs are several times the cost of the goods. I had wondered whether this might assist in this particular build but as Greg and Ben correctly point out it is probably overkill.
Greg and Ben are also wonderful modellers. Greg is the gentleman who came up with the idea of this cross section and is very generous with his time in assisting me with my build. The cross section is available through the Admiralty Models web site and there is heaps of information there as well of pics of the finished product. For me it is proving a "gentle" introduction to the world of scratch building and unfortunately has got me absolutely hooked on scratch building in the future.
Ben has gone before me with this particular build and has overcome all the hurdles that currently confront me. He is also very generous with his time and advice. He has further scratch builds underway which are coming together wonderfully and you can see his log on the site.
Good luck with your build of the Long Boat. I will watch your progress with interest.
Thank you again for your kind thoughts and enjoy this site. It is fantastic.
Regards
Alan
-
Hmmmmm Ed. You have got me thinking on these shots. If you have managed to squeeze a PowerShot down the well, how I cannot imagine, I wonder how a Gopro would go?
You know you are almost singlehandedly lifting the US economy with your projects. You have had me investing in US wood, knurled brass, anodised steel, your books of course..... And now you have me thinking Gopros. All delivered by FedEx.
The Admiral is not going to be pleased.
Just keep those pictures coming. Great stuff but the wallet lightens every time I open up your logs!
Alan
-
Simply stunning Ed. Fantastic job.
How did you manage the last picture? You can almost see the cargo being loaded.
Alan
-
-
Many thanks for the thumbs up.
I went out today and bought the baseboard for the next stage of construction and will start working on the jig shortly.
Have wondered whether to also adopt EdT's Rolls Royce jig utilising the Rockler T track system - any thoughts anyone?
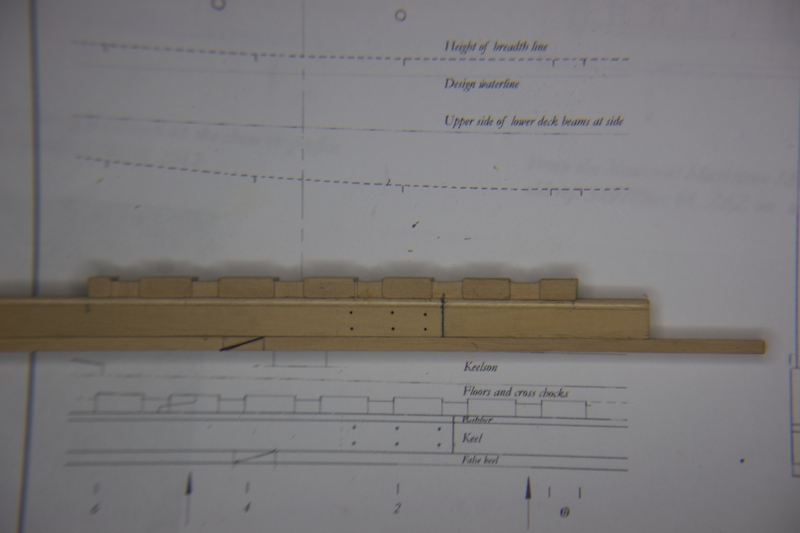
Meanwhile the bolt holes have been drilled out and tapped. Hmmmmmm!
A smidgin off on the right.
Lesson 2: Don't do this at night! Idiot!!
Anyhow if the collective give this a 5 /10 I shall continue.
Jig and setting up the base board tomorrow.
Cheers
Alan
-
Looking good Ben.
Wonderful workbench and matching vise!
I see the chisel but what sort of plane are you using?
Alan
-
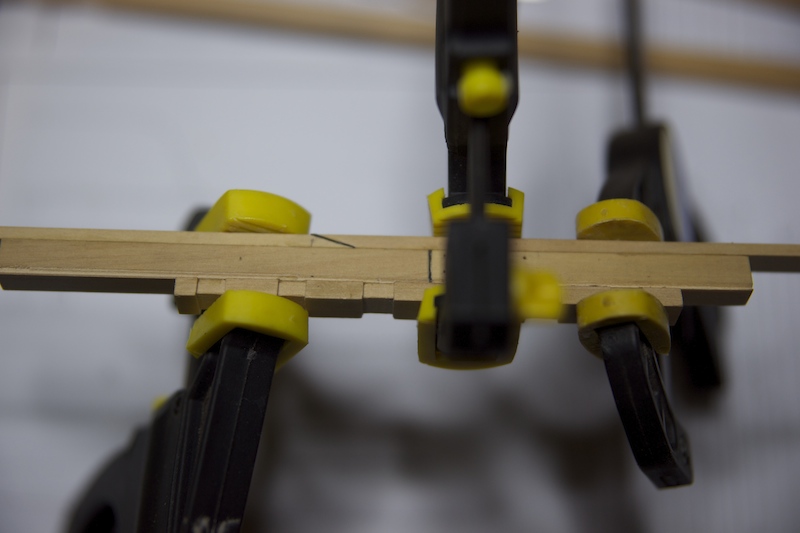
Well, the rising wood was attached last night to the keel and left overnight to cure.
I am comfortable with the result although the acid test will be the MSW community's tick of approval or not. The isoprol stands at the ready just in case the collective thumbs turn down!
Will look to drill out the bolt holes later today and start the hunt for a suitable block of 12x12 for the building board.

As we move to the next stage of the build, namely the frames, realise now the importance of securing the disc sander. For the moment though will take a leaf out of David Antscherl's wonderful TFFM Vol 1 book and look to create a series of anchored sanding blocks.
Cheers for now.
Alan
-
Pen and Sword has just released a book written by C A Pengelly on HMS Bellerophon (Billy Ruffian to its crew).
Just running off copies of the front cover to place strategically around the house for the Admiral to notice.
Alan
-
Thanks Gentlemen for your comments.
Druxey/David B: agree wholeheartedly.
Unfortunately I haven't figured out a way yet of covering up the booboos without at least 10,000 members watching.
Doesn't say I'm not working on a solution for this.
- The edit tool is quite nice on this web site!!!
On to raising the frames.
Thanks again
Alan
-
-
A terrific little project Rob. Wonderful framing.
Alan
-
Thanks for all the feedback on the disc sander vis a vis the thickness sander. V much appreciated.
I shall start saving up my shekels.
Cheers
Alan
-
Thanks Druxey
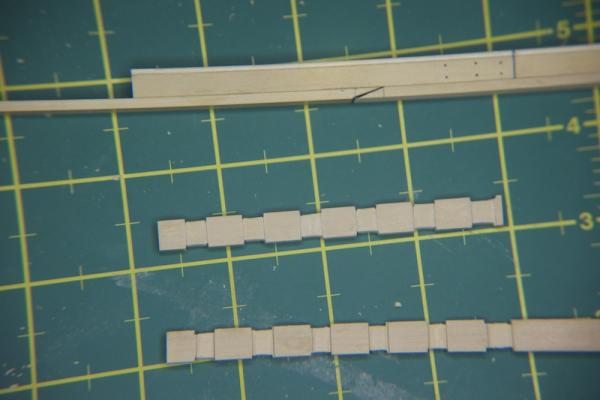
In the cold light of day, I am not totally happy with the depths of my cuts with the Byrnes. A smidgin deeper than I should have gone.
Given I still have a bit of wood left I'll have a third attempt.
Do you, Ben, Greg, Rusty or anybody else reading this log have a view on the pros and cons of Jim's disc sander and thickness sander? As I move rapidly to the dark side (as Rusty would say) is it a question of either or both?
Cheers
Alan
-
Thanks Ben. I haven't got either the disc sander or the plank planer. Wondering which one I would get more use out of.
I had been looking at a couple of larger commercial models marketed here in Oz but Jim's stuff is pretty special.
Alan -
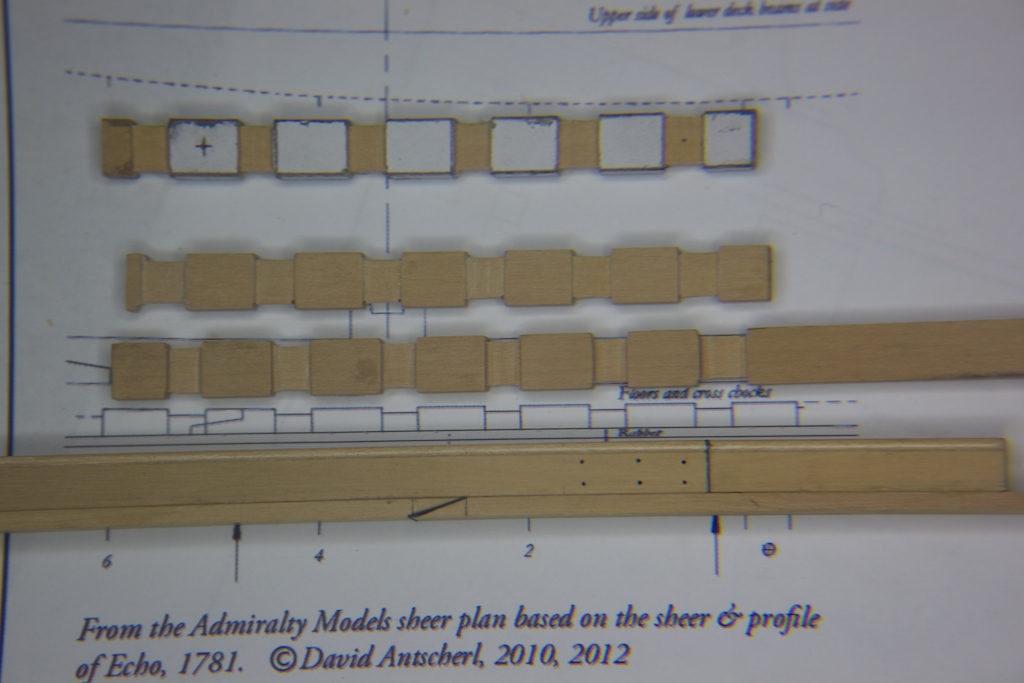
Well that was fun!
Thanks Ben, Druxey and Greg for encouraging me to take that little detour.
I agree that the Byrnes gives you much more control (with a bit more practice) to get a better handle and control on the depth of the cuts. a couple of pics of the result and a comparison with the bespoke.
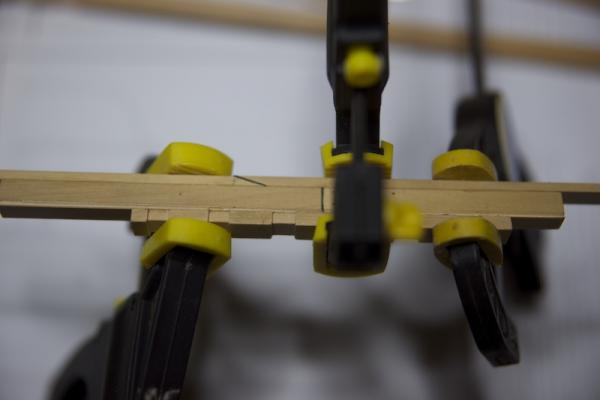
Will return to do a glue up of the rising wood to the keel shortly.
Cheers
Alan
-
Wow Rusty when you go the dark side you don't do it by halves do you!
Looks like kits have lost you forever.
An amazing build and beautifully constructed. Still can't get over the pics of the workouts you gave the Sherline Lathe. Great stuff.
What's next for the dark side we all wonder?
Alan
-
-
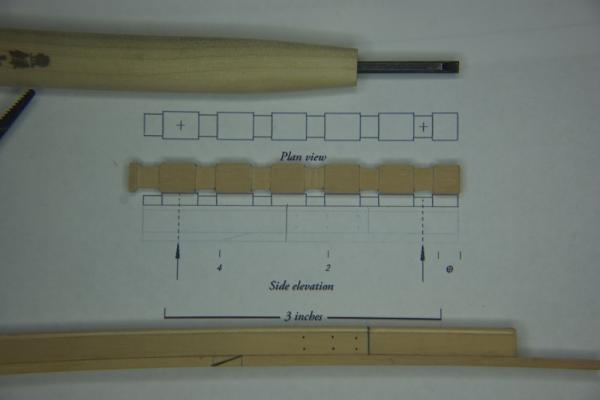
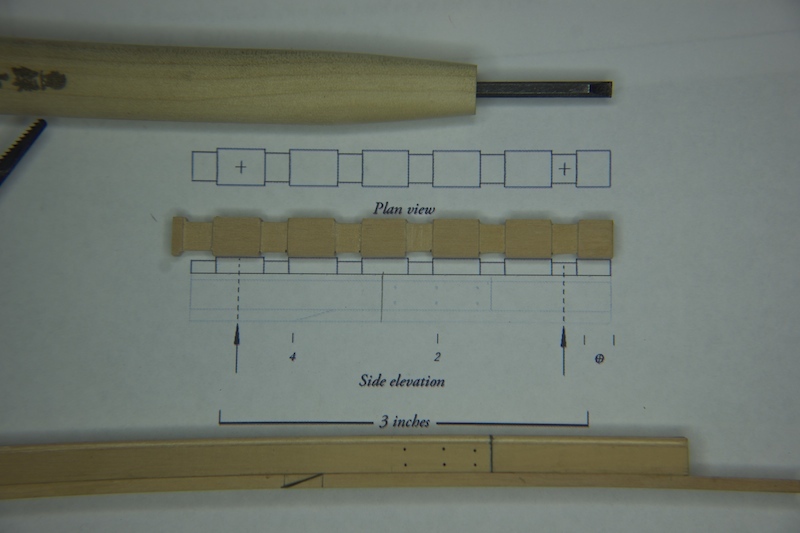
Many thanks for the advice Greg. Have applied the templates and will take a run at it tomorrow.
Am I "nibbling" with the Byrnes?
Regards
Alan
-
Looks wonderful Remco.
Did you apply the wales as one strake the length of Kingfisher? Is the thickness the same the length of the vessel?
Cheers
Alan
-
Thanks Ben . I had the same thought sleeping on it overnight. It would be good practice especially as Druxey has thrown one of his famous curved balls across the Pacific noting there is a right way around and a wrong way around.
Many thanks Druxey. I'll go back and study the plans again. I thought I had the positioning about right in a dry fit last night but it would be good to see if I can get closer with a Byrne's edition.
I have found the 3" scale on the plan a really helpful reference point especially when one is running the plans off the printer.
Regards
Alan
-
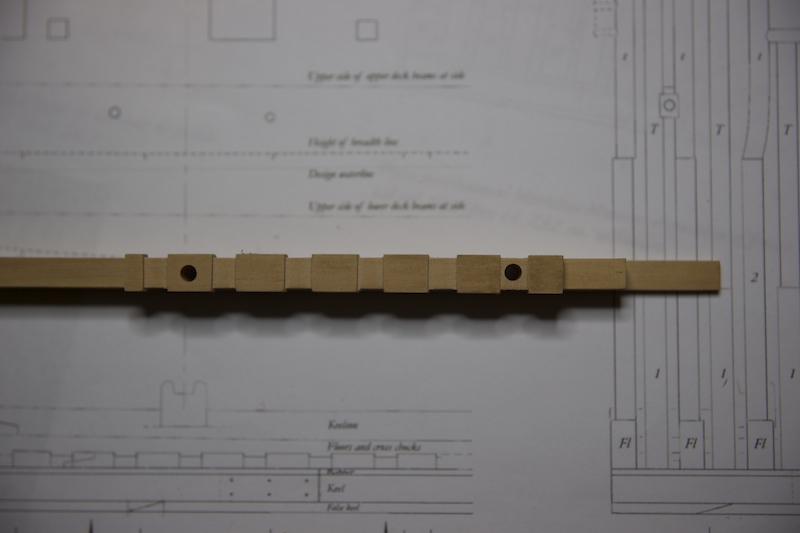
Well the rising wood took a bit longer than planned but I think has come out okay. I decided not to use the Byrne's Mill for this> Timidity got the better of me. Instead, I used a small Tamiya saw and a 3mm Japanese chisel and just took my time.
This was not something to rush.
A v light sand to tidy up and remove the template.
Looking to glue up tomorrow.
Cheers for now.
Alan
-
Hi Dan. Have just come across your build log. Absolutely awesome and happening here in Oz.
There is several days worth of reading and digesting in front of the fire. Will watch your progress from here with much interest.
Well done.
Alan
-
Inspirational Ed. The precision of those knees is awesome! How many decks did YA have?
Alan


Echo by alangr4 - cross-section - in memory of Eli (31.1.14-3.2.14)
in - Build logs for subjects built 1751 - 1800
Posted
Thanks Grant. I was in Fyshwick today at Total Tools. Drew a blank on Rockler but the store is worth checking out.
Alan