theoracle09
-
Posts
152 -
Joined
-
Last visited
Content Type
Profiles
Forums
Gallery
Events
Everything posted by theoracle09
-
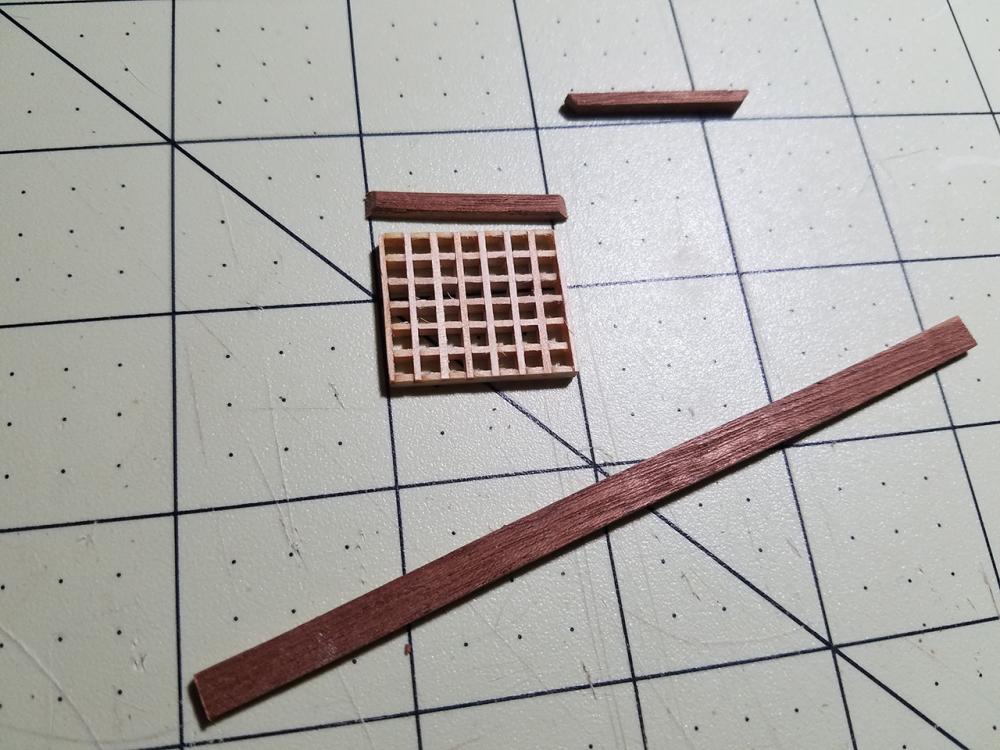
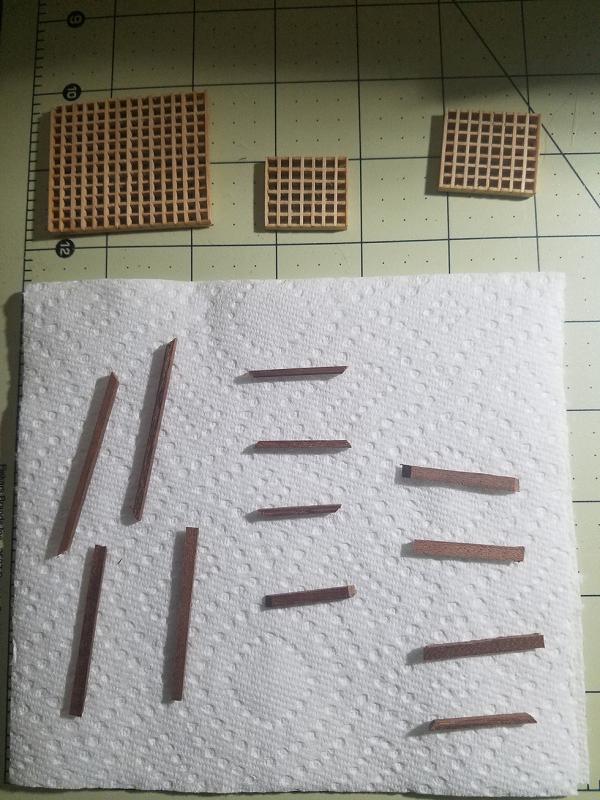
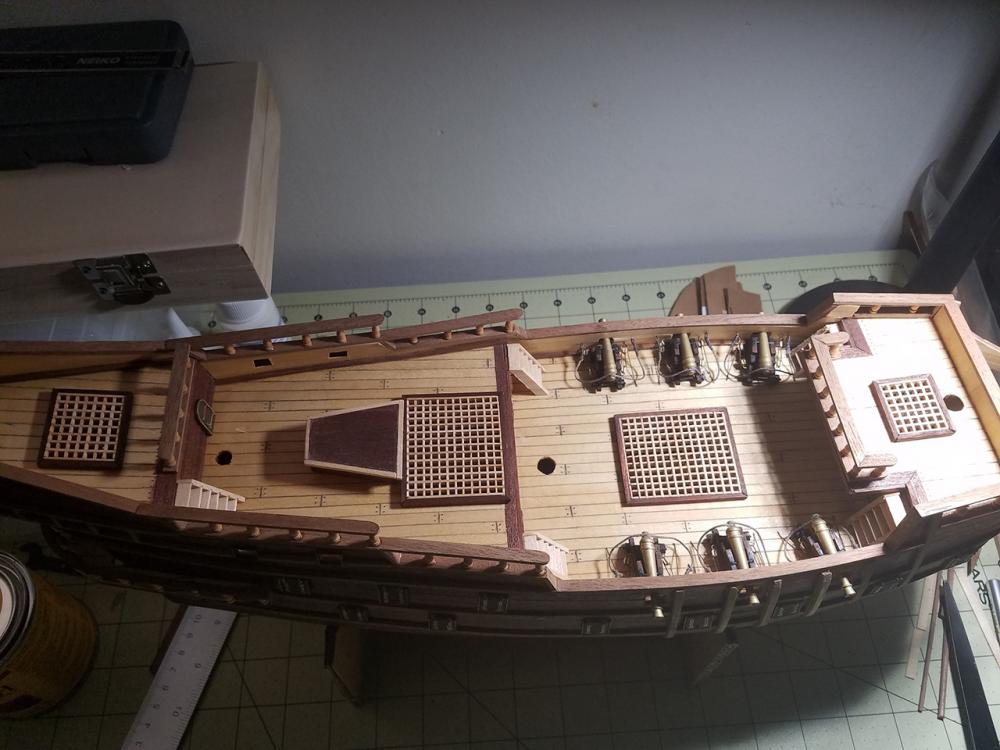
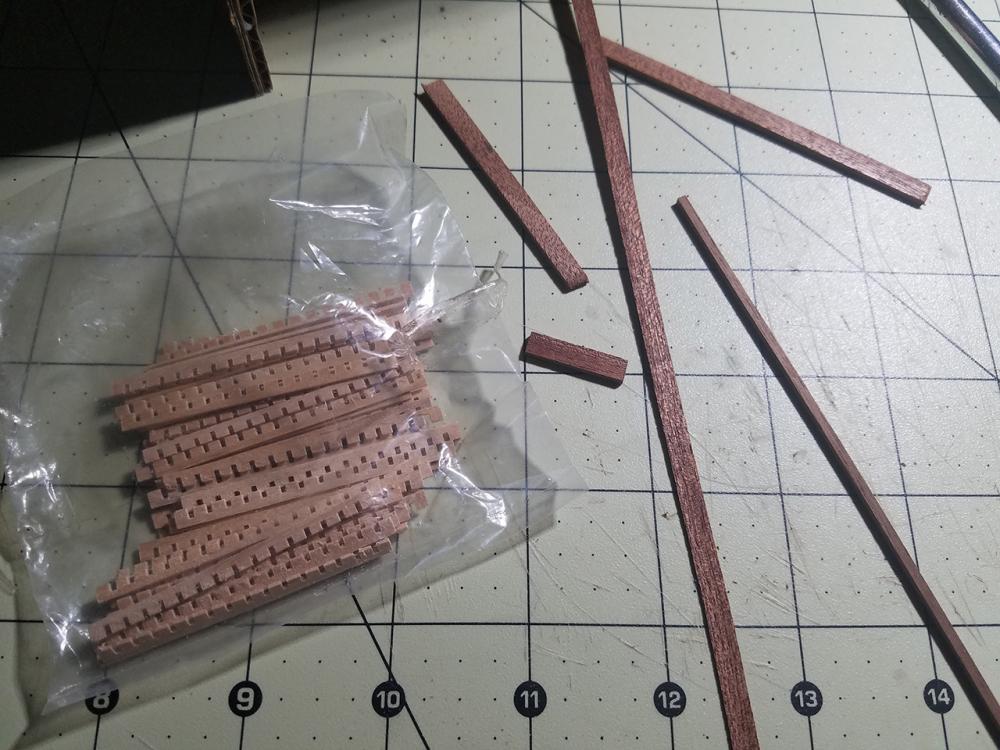
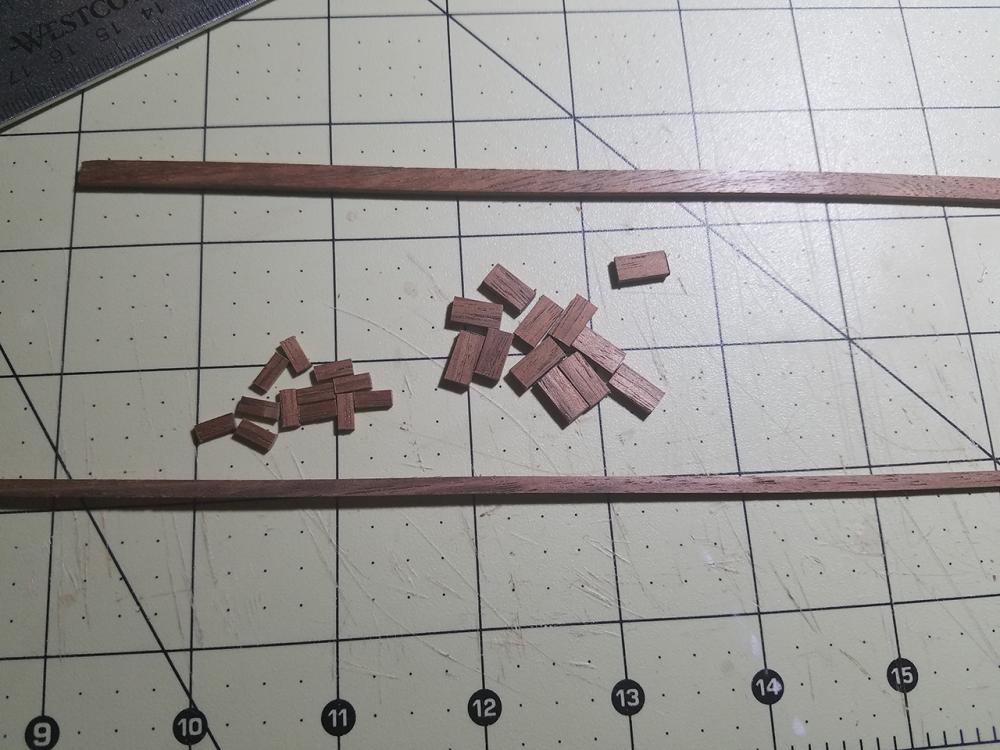
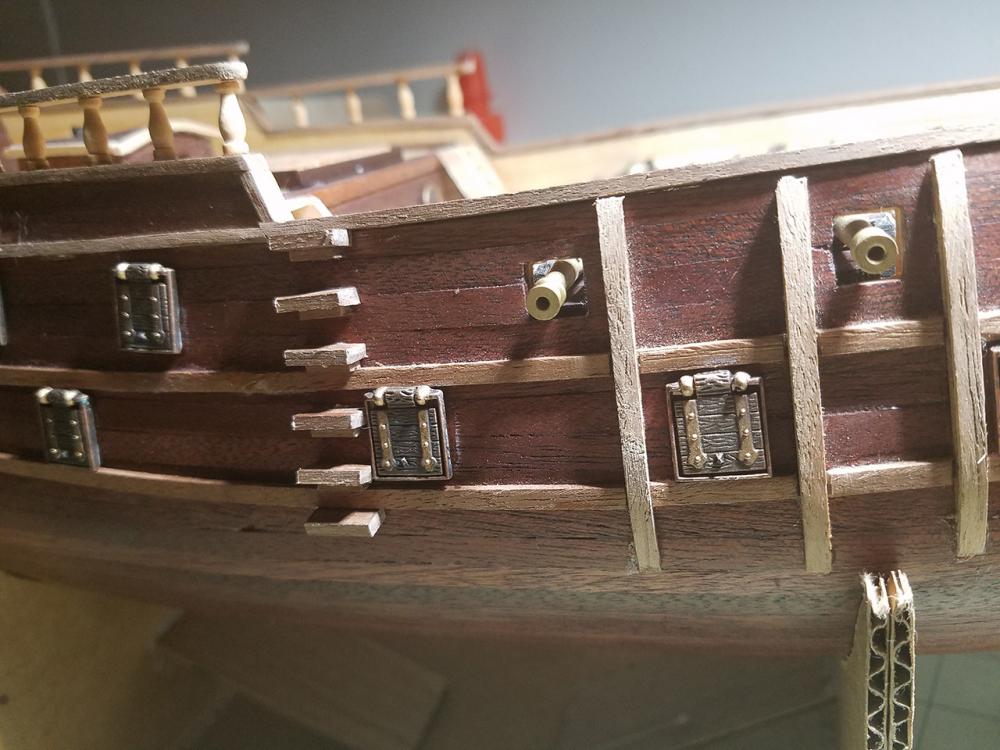
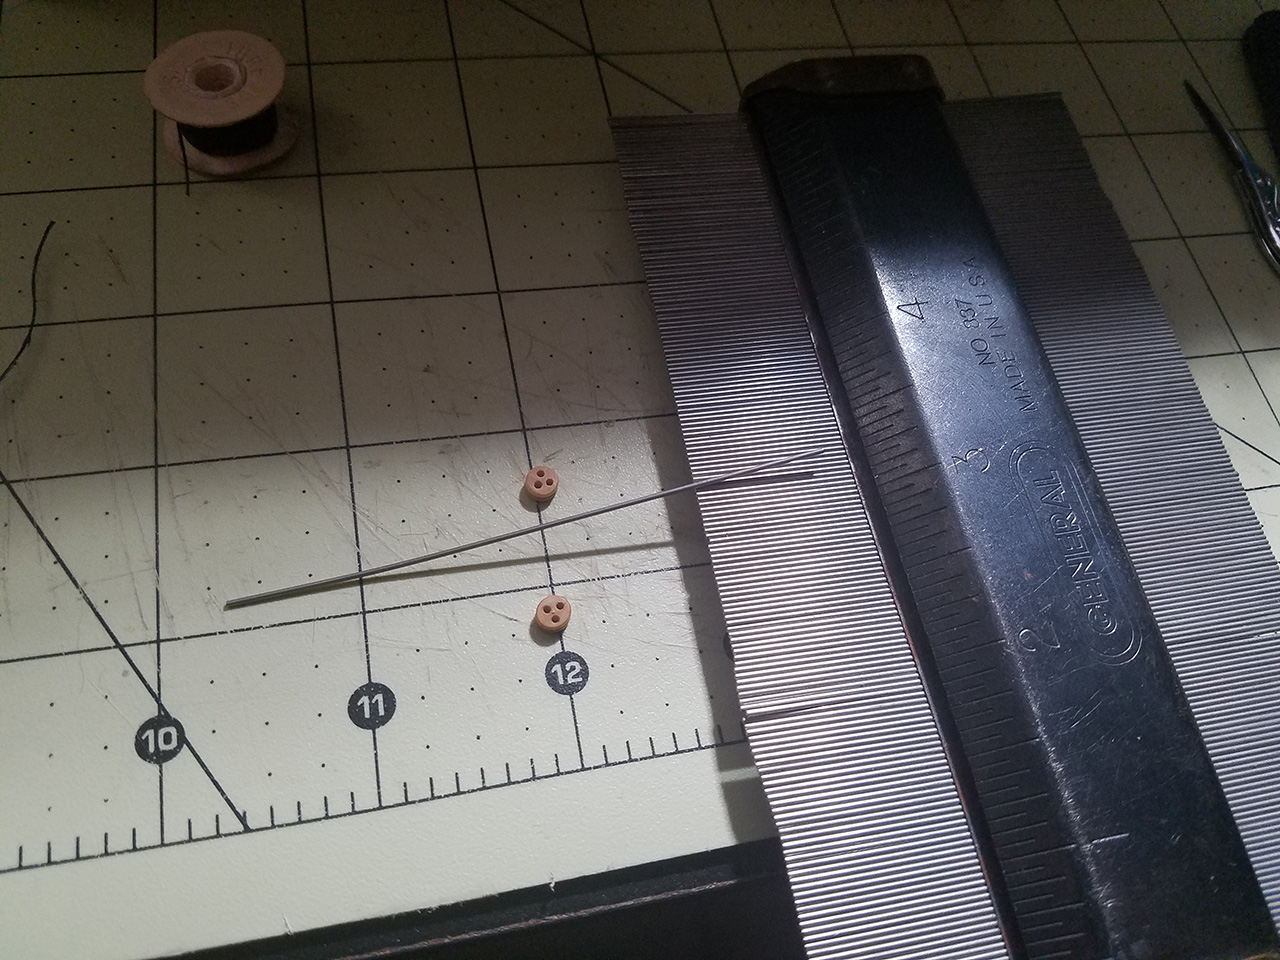
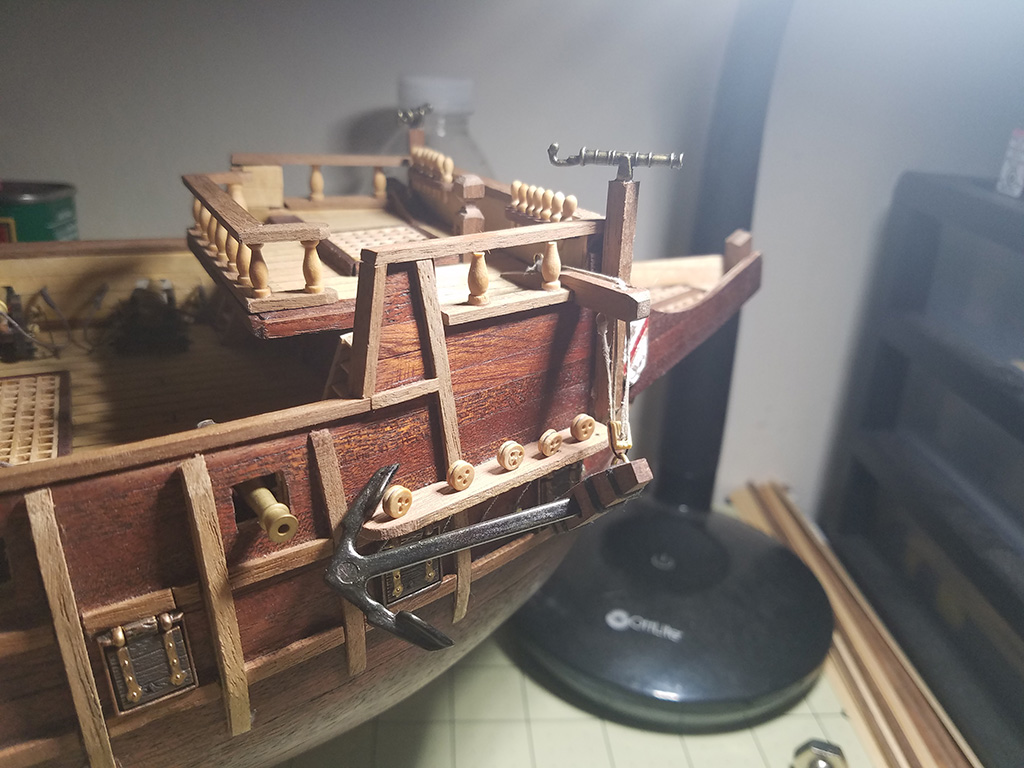
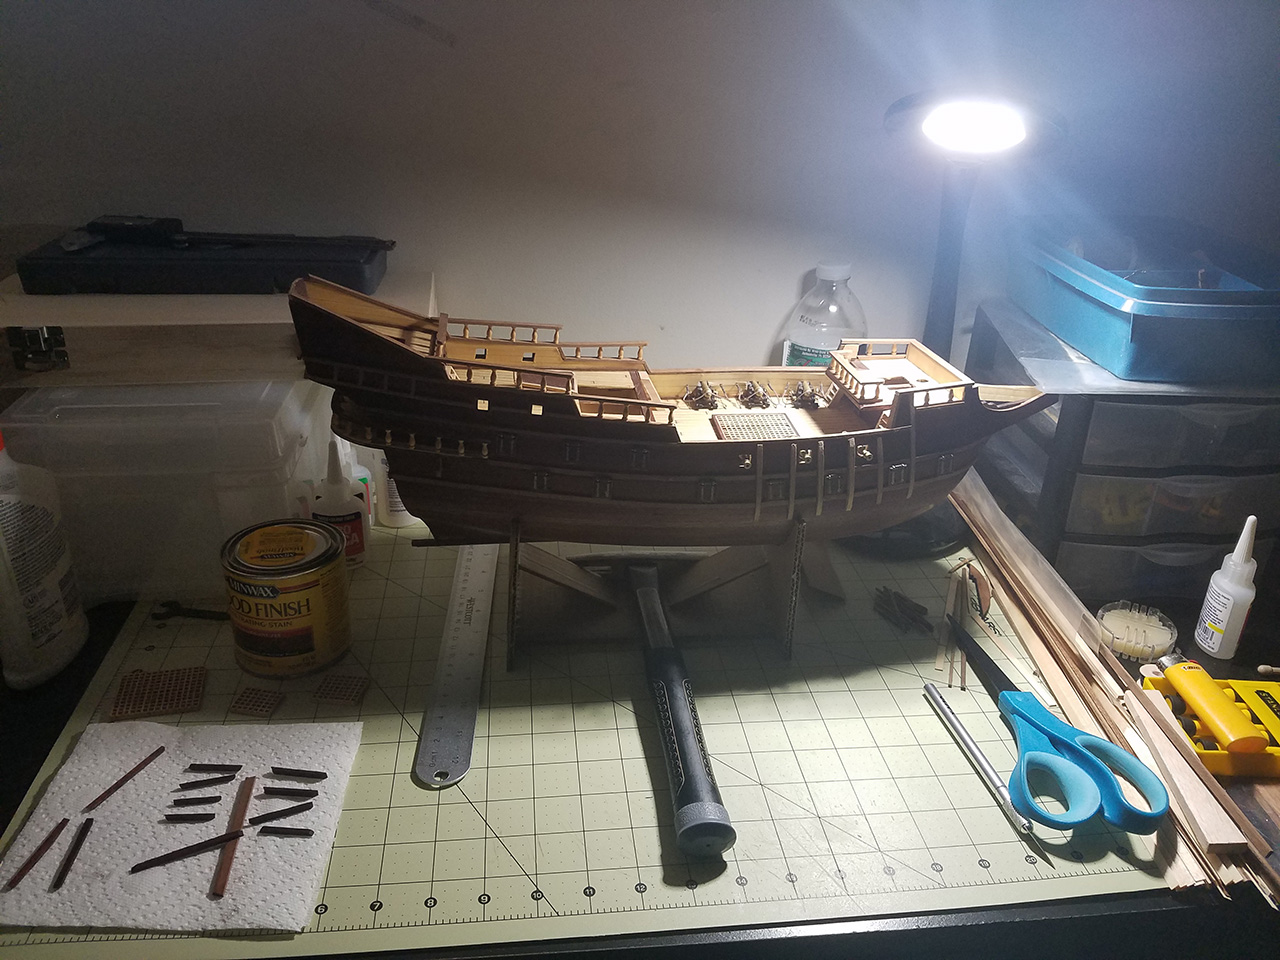
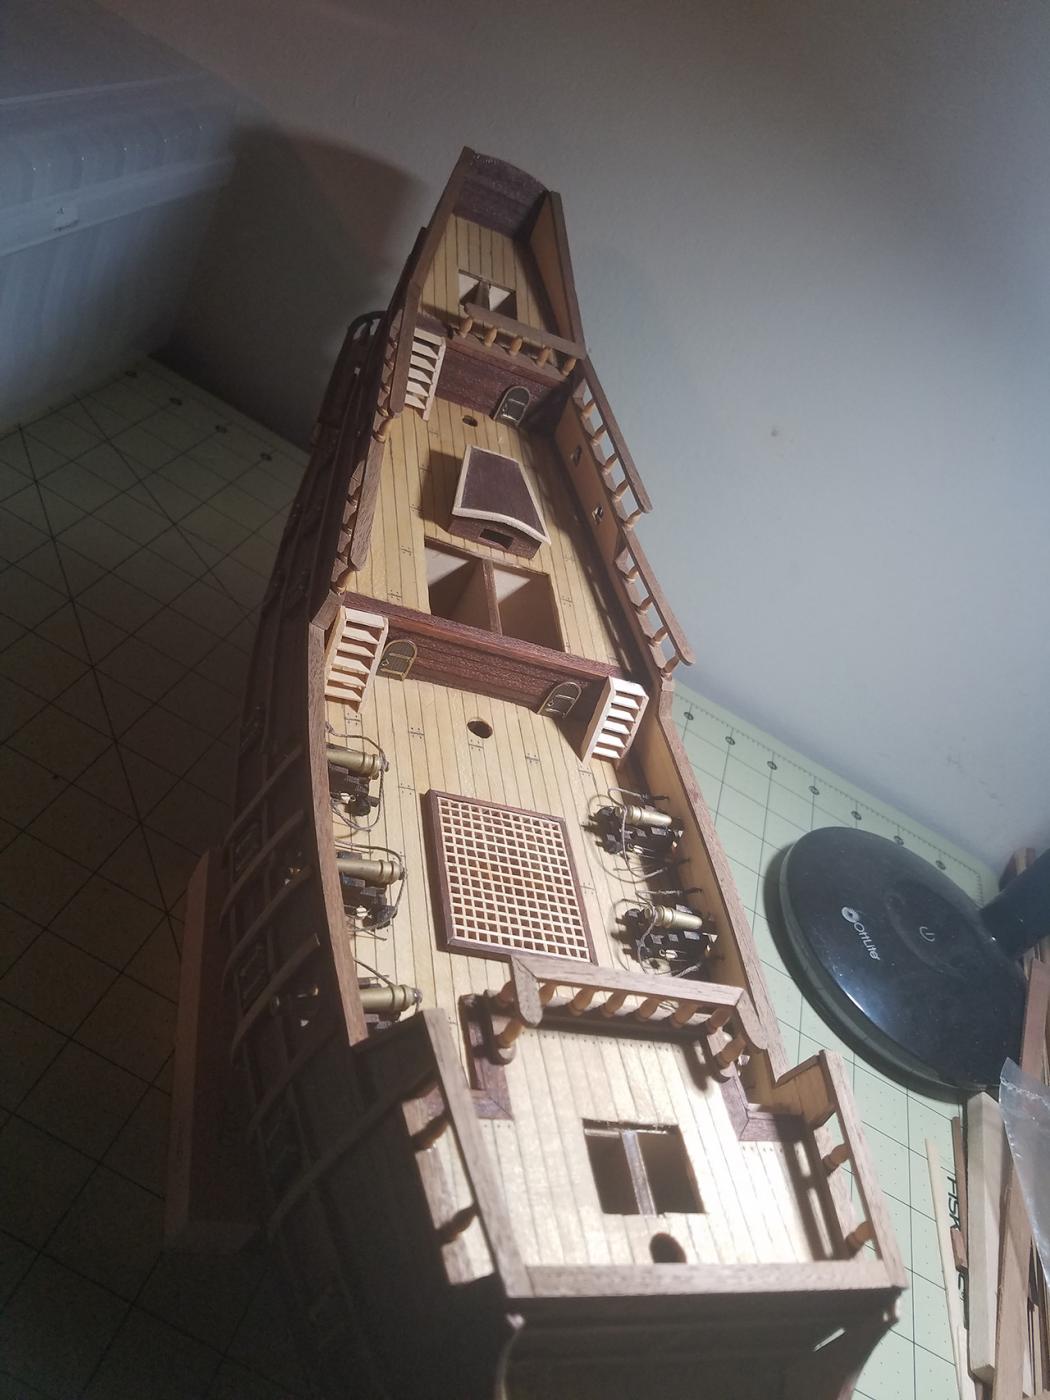
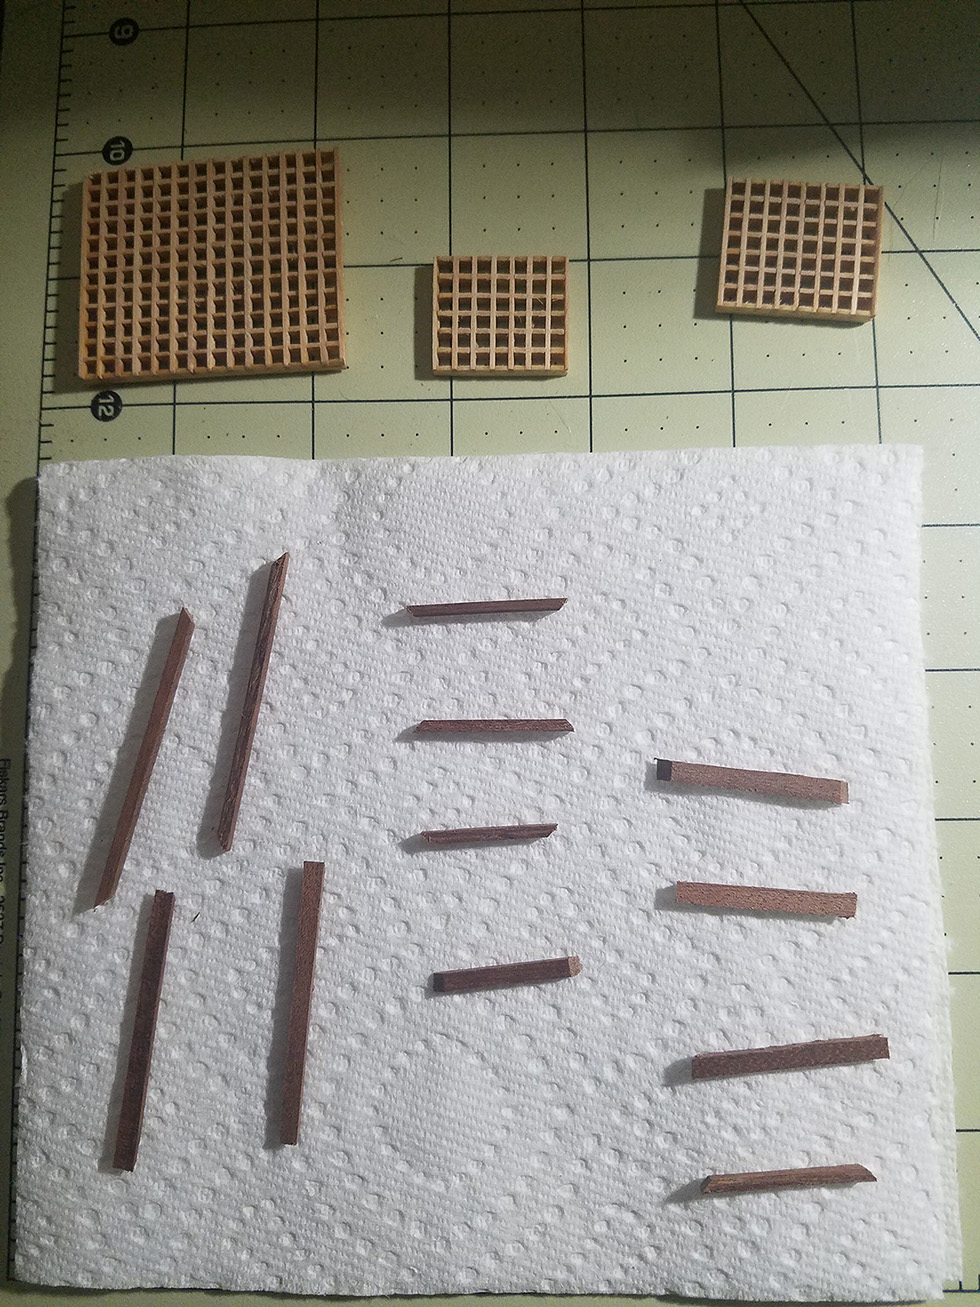
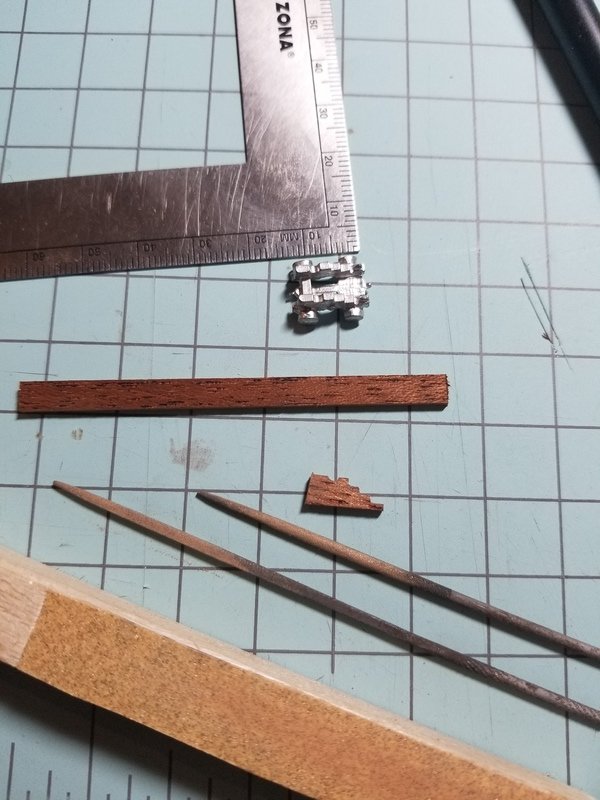
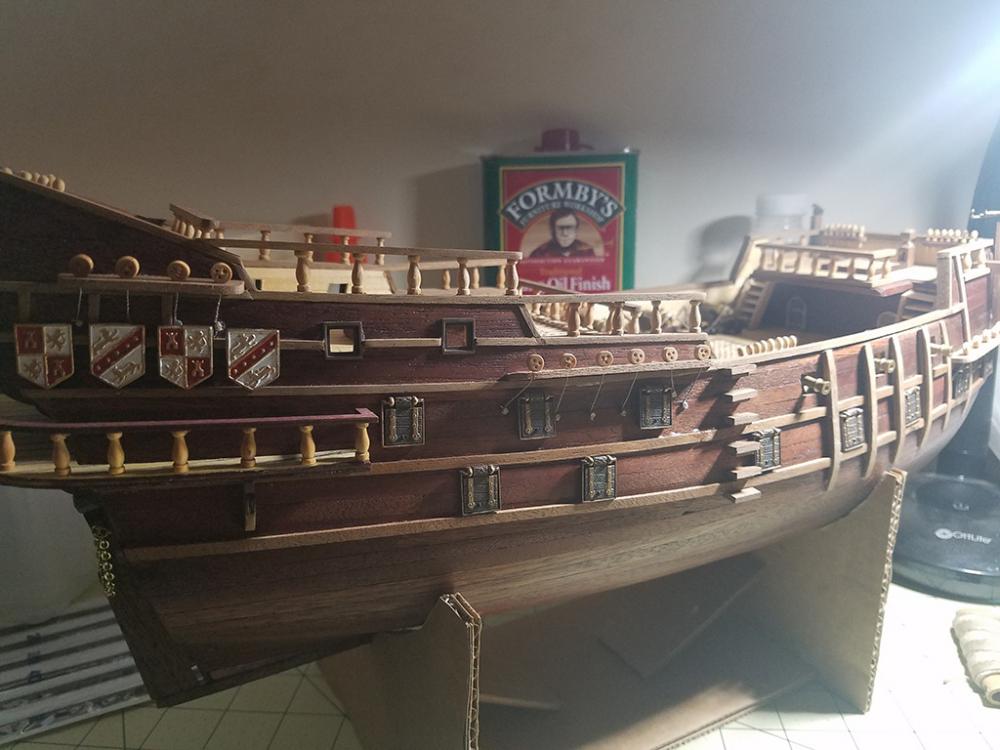
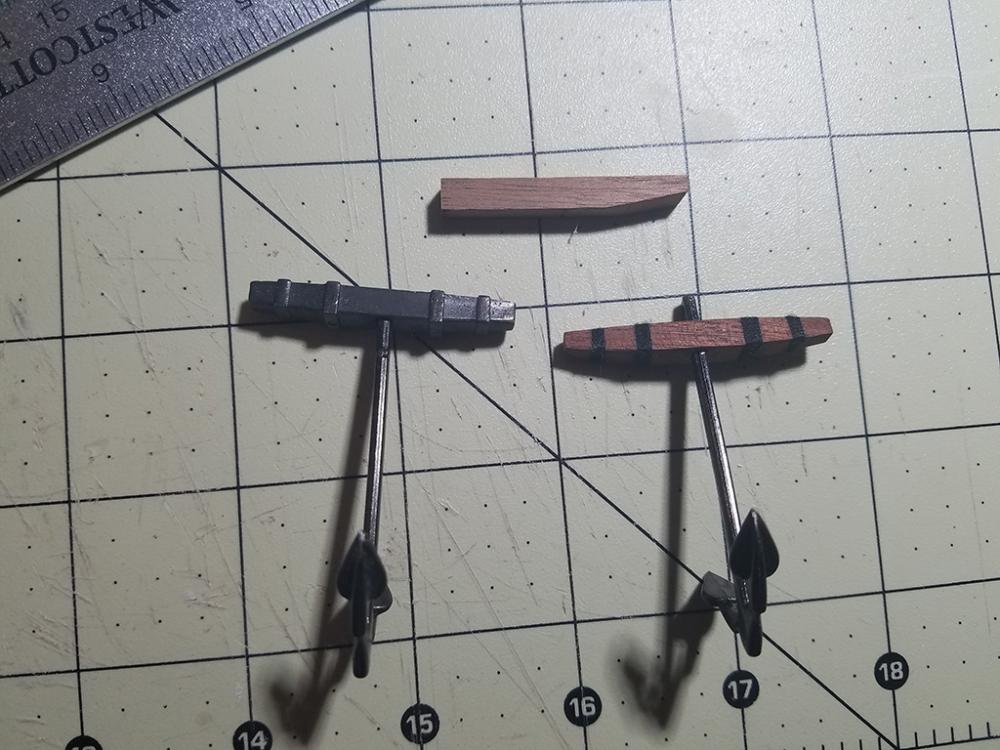
 Small update this evening. Finished the cap rail on the transom, and sanded the entire cap rail down on both sides using 150g sandpaper. I got rid of most of the bubbling and cracking, but there are two spots in particular that I may need to glue down, or try to cut off with a sharp blade. I'm still not sure what to do with it. I've also decided that I'm going to build all 4 of the cannon carriages from spare mahogany strips from the San Fran. This is 10+ year old wood, and it seems to be holding up well if not a little brittle. Painting the metal carriages just isn't sitting right with me, so I don't mind. In the bottom pic, I show one of the metal carriages, a strip of mahogany, and the finished product. I just cut it down to size, then use hand files to shape it. Took about 20 minutes to make 1 side, but meh, it'll look way better. I also plan on rigging the cannons just like I did the San Fran, and will need the carriages to be made of wood so I can install some eyebolts to make that happen.
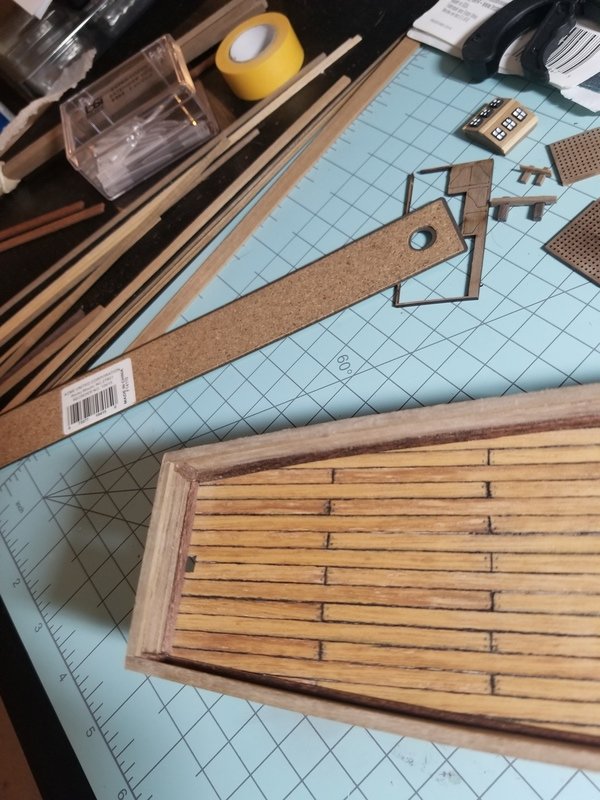
-
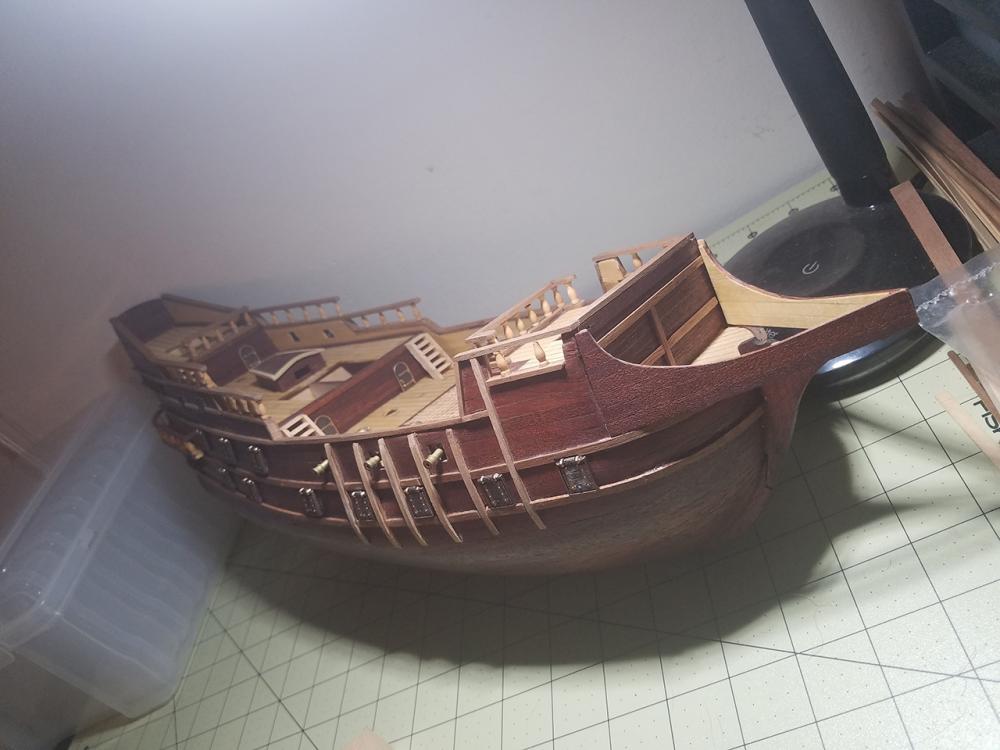
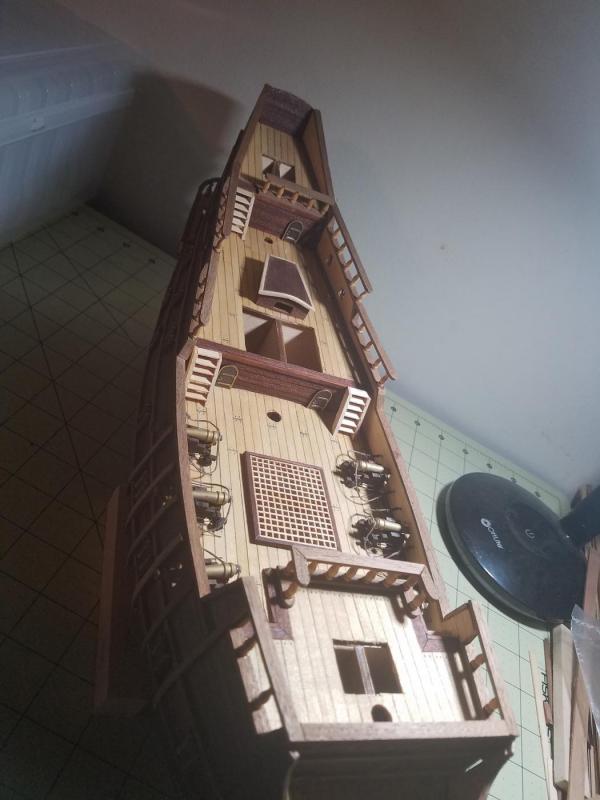
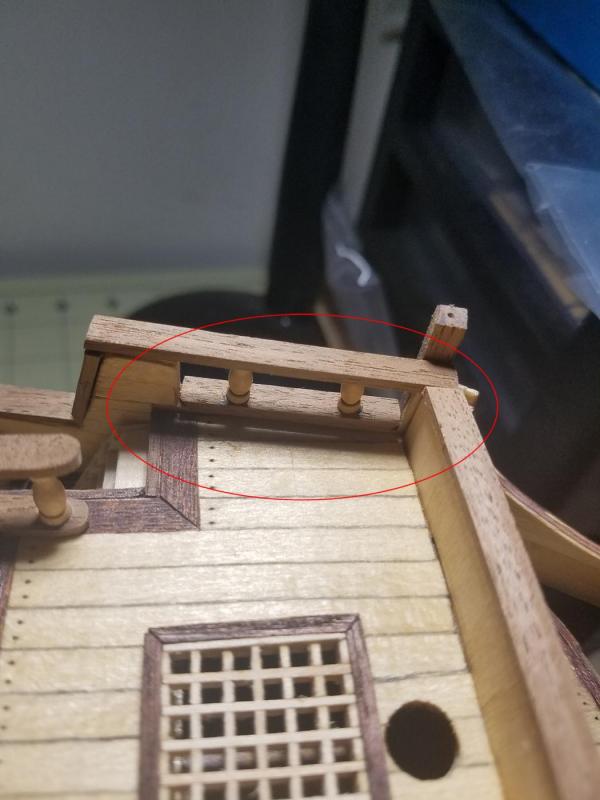
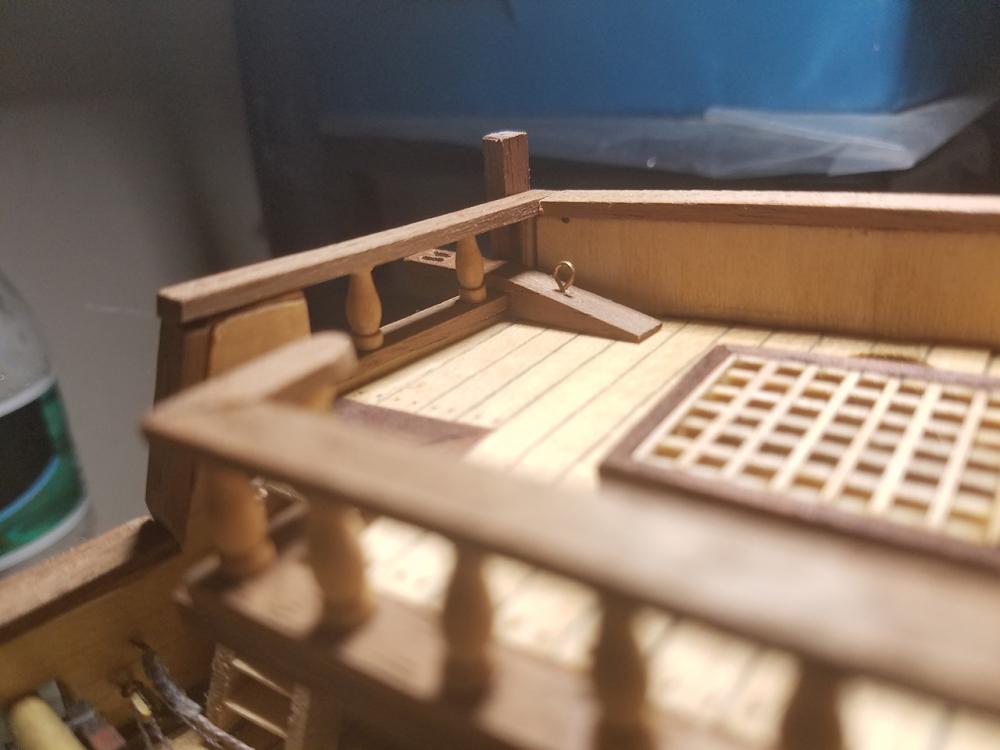
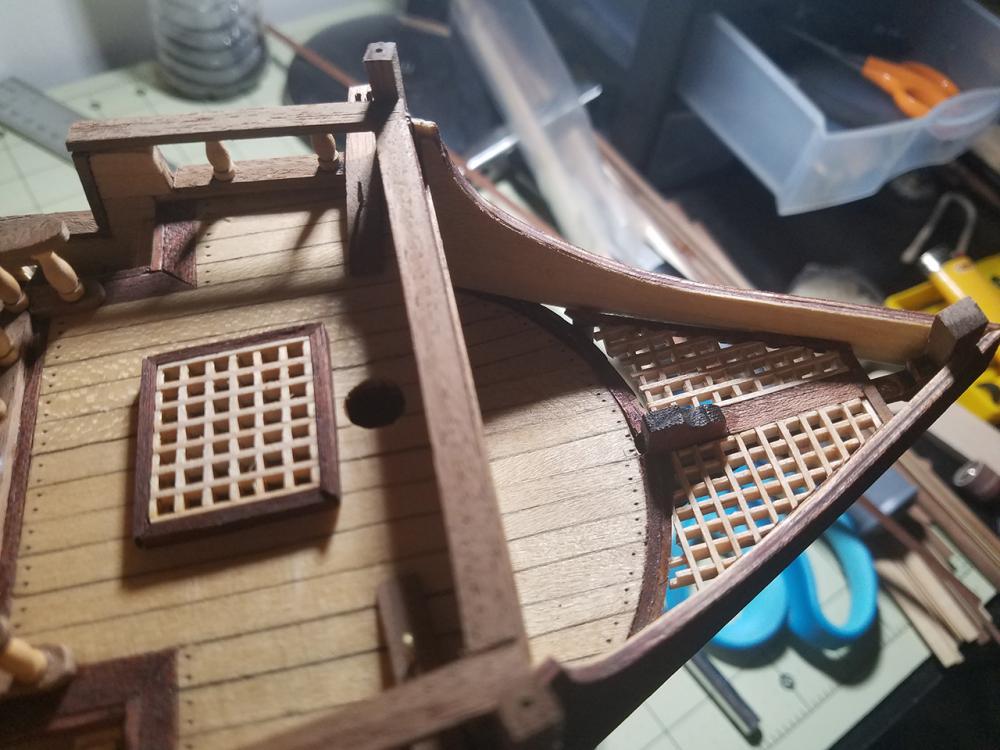
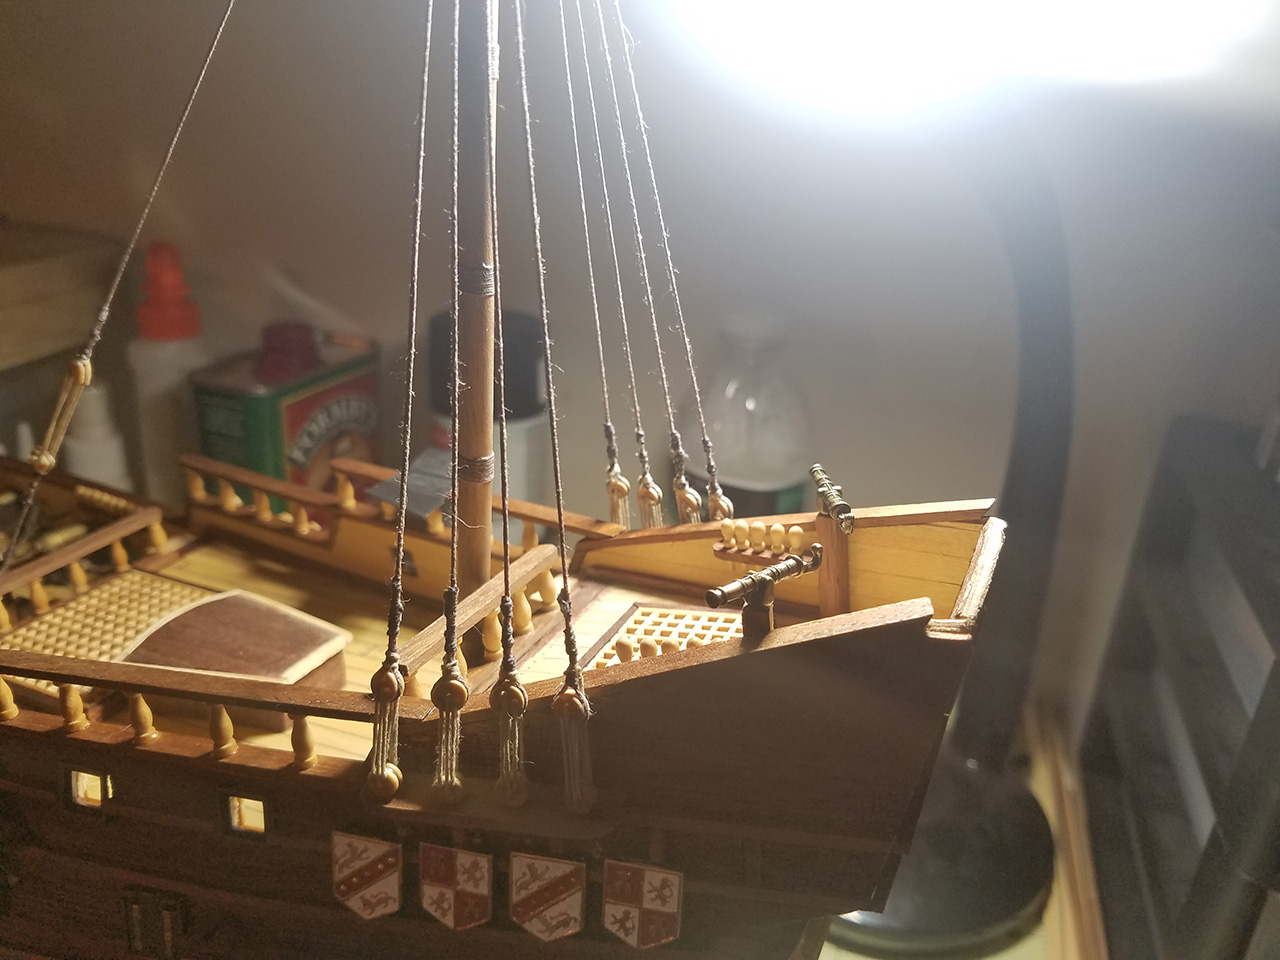
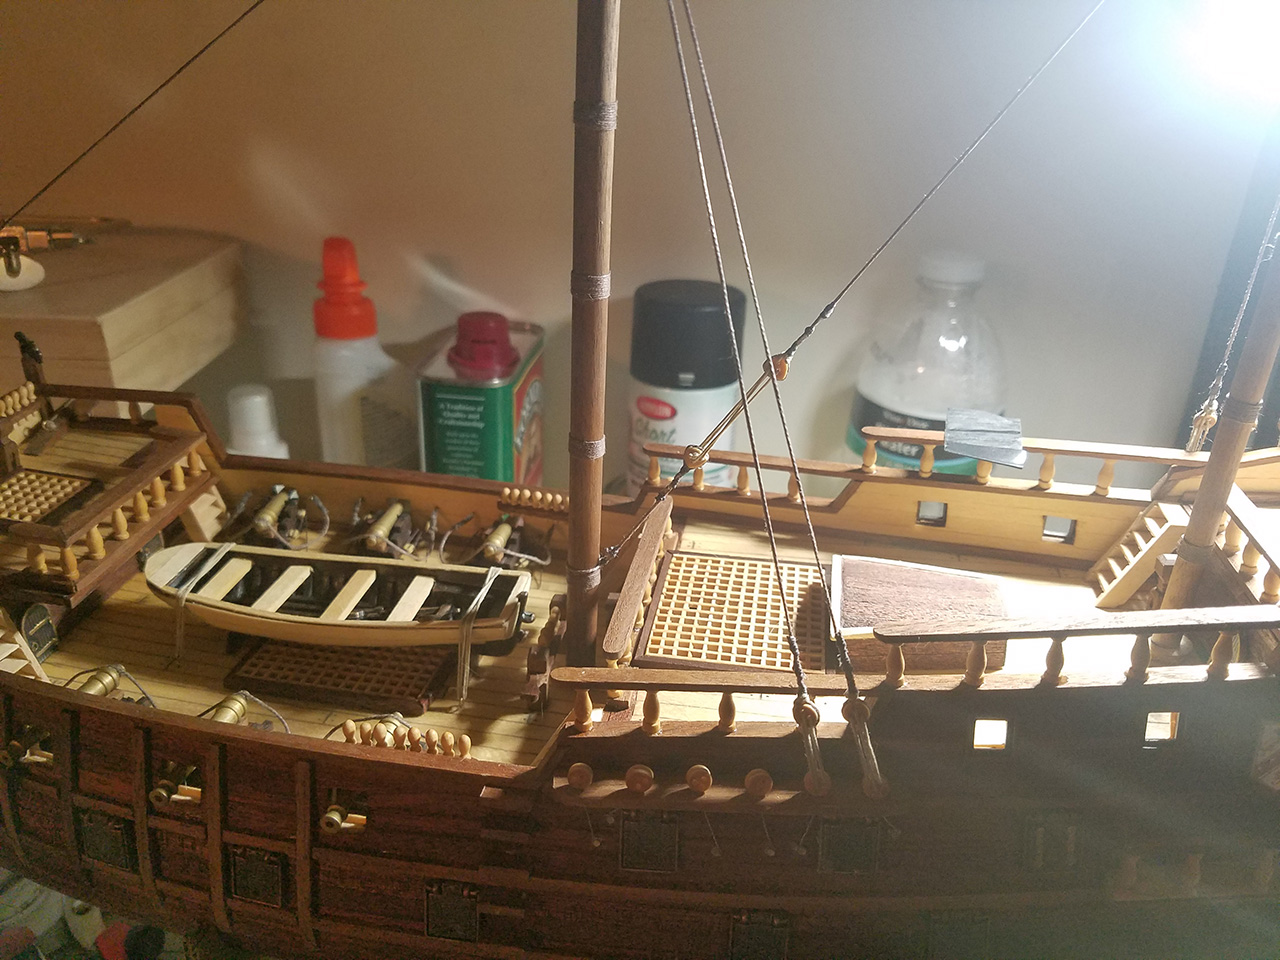
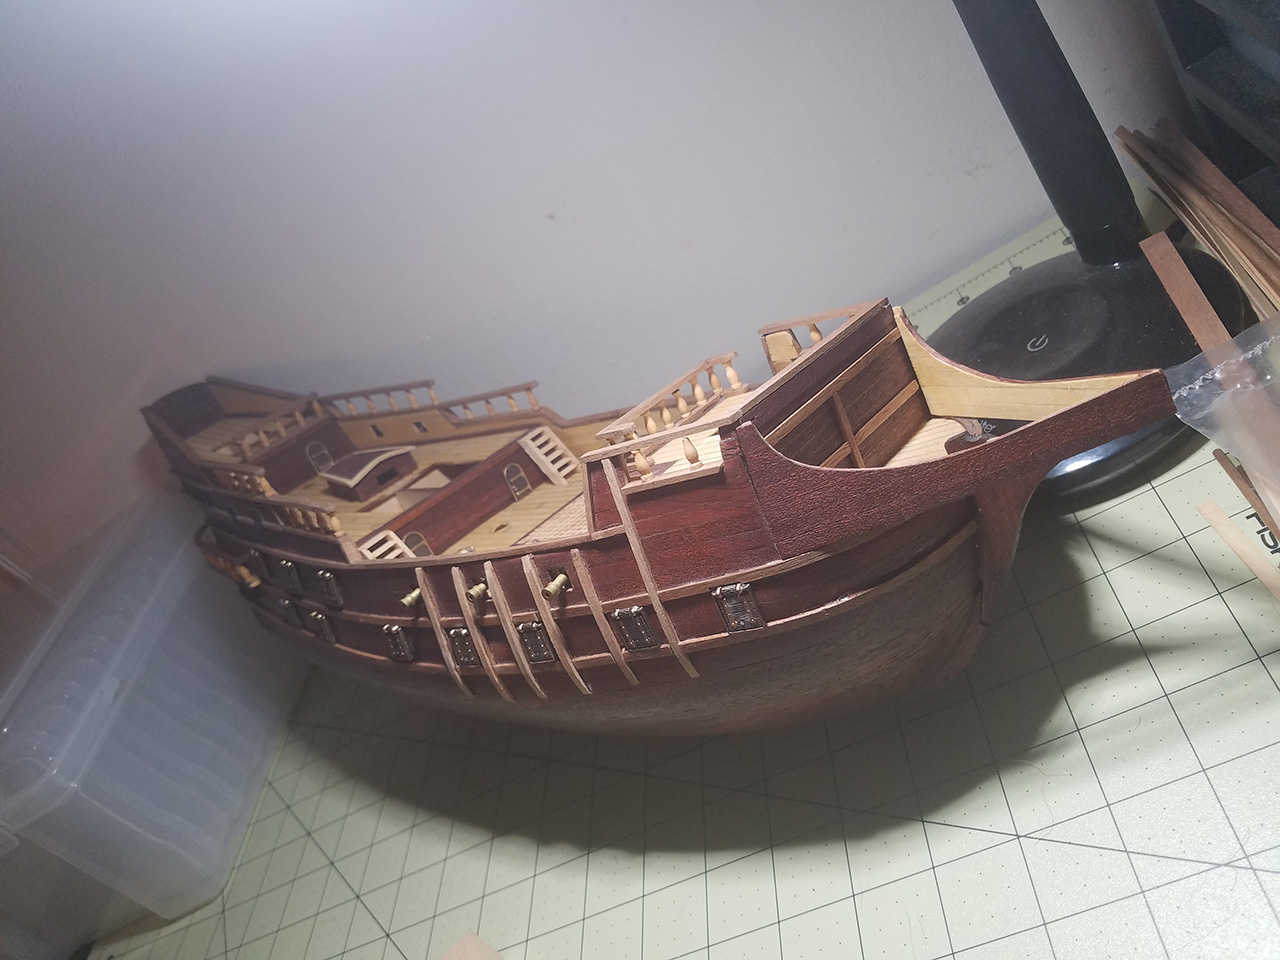
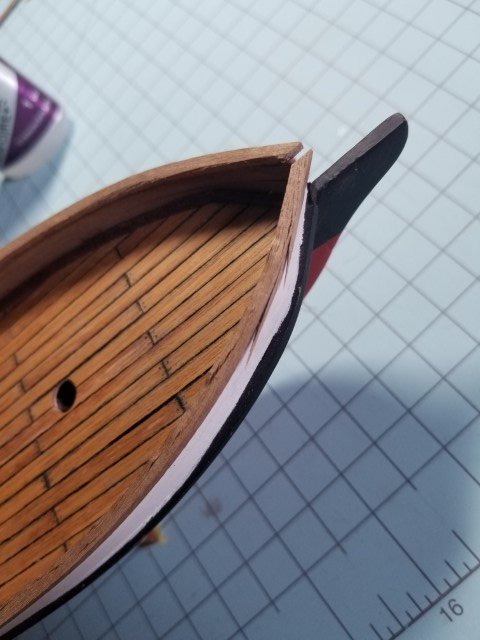
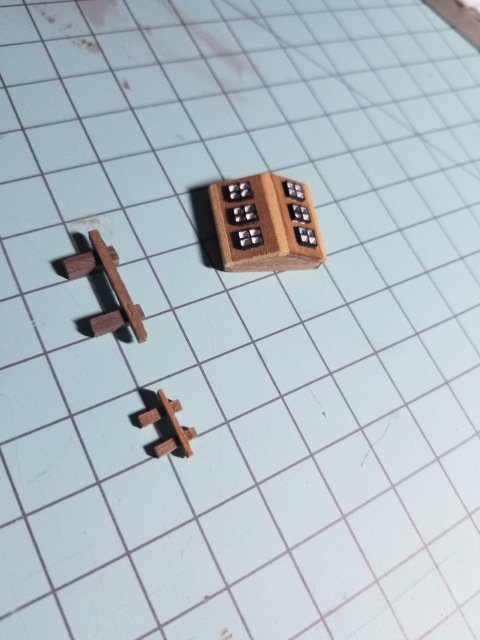
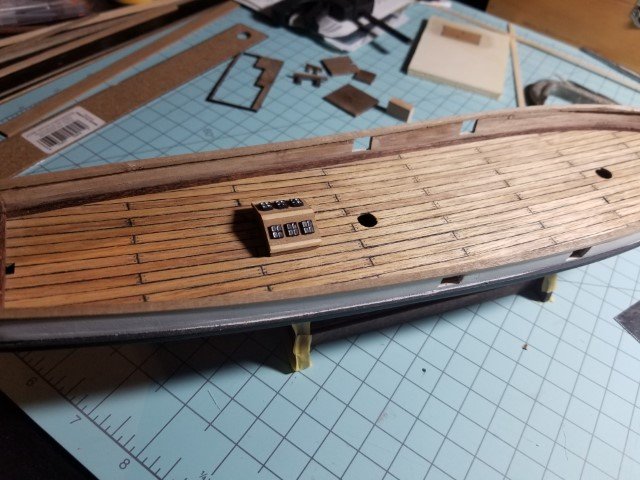
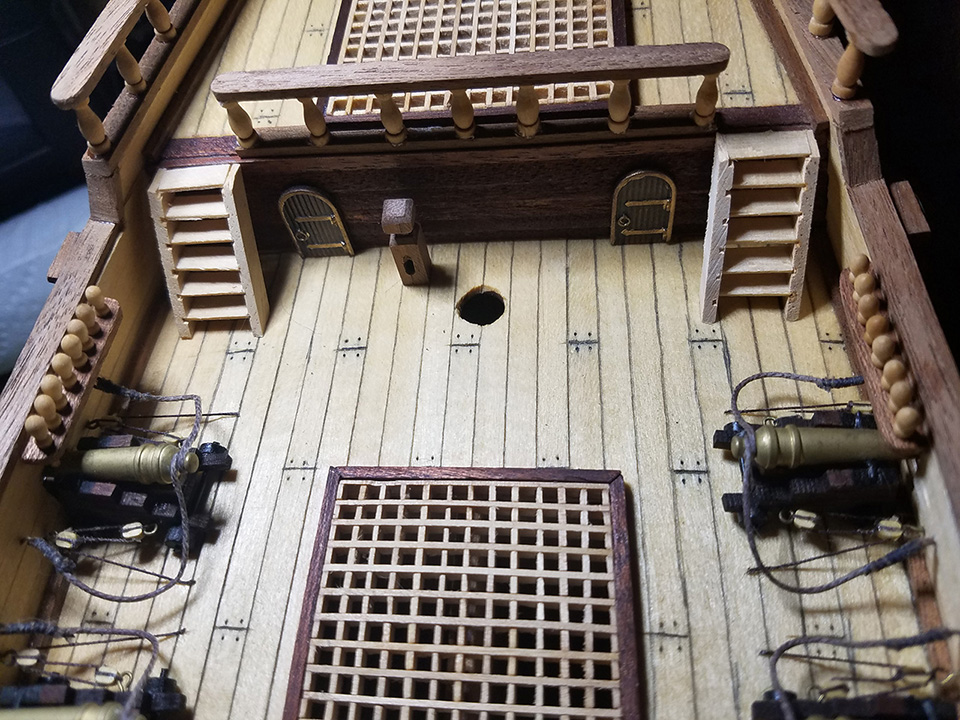
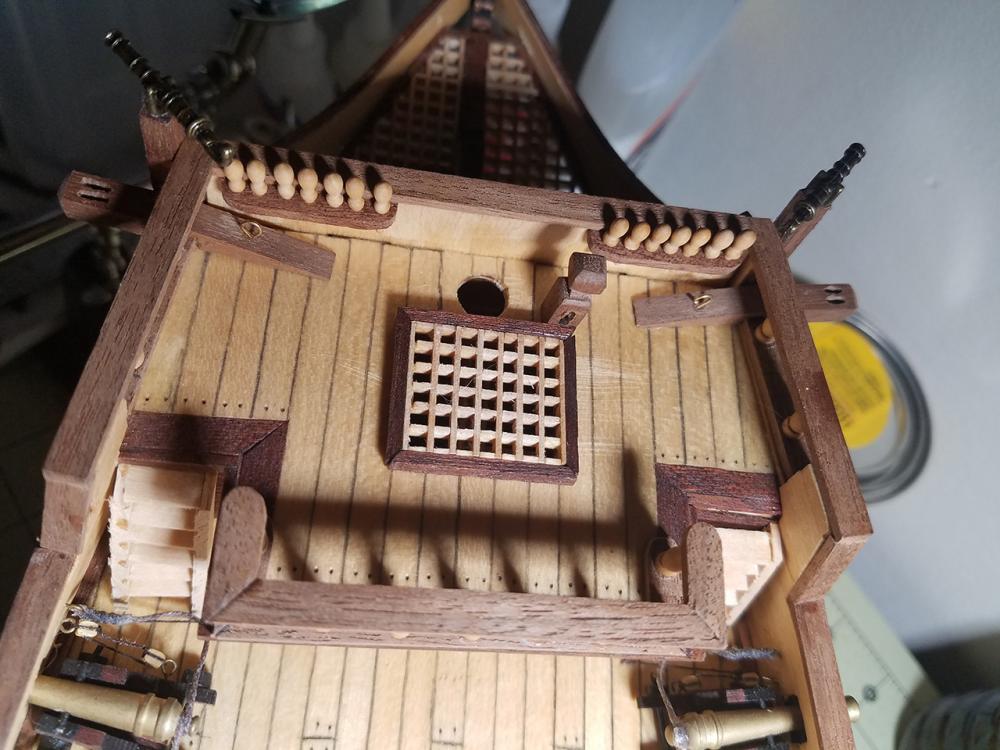
After a few days of pondering the bulwarks cap, I decided to give it another shot with the brittle kit-supplied walnut. It came out alright, but there's some clean-up that needs to happen from it cracking and bubbling in multiple spots. I used Chuck's method of bending with a hair dryer, and took it really slow. Bend a bit, apply heat, bend some more, apply some more heat, etc. until it laid in the shape I needed it to. It was still incredibly springy, and pulled my bow apart a bit. I was able to get it glued and clamped, and left it over night. It's holding, for now. I'm a bit worried about drilling the bowsprit hole, because it might come apart when I remove that material. We'll see how that goes, though. You can see the gap here, and also the cracks in the bulwarks cap. I haven't cleaned that up yet...if anyone has any suggestions, I'm all ears. Bulwarks is complete. Glued the bow together and clamped over night. It's holding. You can see the splintering on the starboard side really well here. Completed the bowsprit block and another rack. The rack (the bigger of the two) requires two shaped "legs" we'll call them made from 2x10 material. This material is so brittle, every time I try and shape it it breaks apart. I'm either not including it, or I'll use something else. I haven't decided yet. I also finished the skylight. Again, material was NOT supplied to build it per kit plans, so I took some spare 2x2mm basswood from another kit a while back and just created something I thought would look nice. I used the walnut strips from the second planking to plank the sides, just to spice it up a bit. The little windows were kit supplied laser cut from ply, so I painted them to add some finer detail. Not glued in yet, but just wanted to see what it looked like on the deck.
-
I realized I didn't have the bulwarks cap, but the kit provides a different sized wood. I'm not sure what else it'd be used for. Instead, I opted to soak some 2x4 mahogany planks and get them bent around the bow. It was a disaster, so I removed them and am just going to re-evaluate what I'm doing. I then tried to use a 2x3mm walnut strake, which broke. I may be able to salvage it, but I'm not really sure at this point. I've put it down for the day and will look at it tomorrow, maybe. Anyway, the bulwarks has been planks with the walnut strips. The kit didn't come with the 2x2 walnut strips I was supposed to use for the bulwark / deck junction, so I cut them down from 2x3 planking material and stained them red mahogany. I also built up some deck fittings, but didn't grab pics of them. Lastly, I ordered all new blocks from Syren to replace the cheap kit blocks, along with some 2.5mm blocks to rig the cannons with.
-
Been working steadily through the day today, and will have an update post tonight when I call it quits. However. I have to say I'll never build another Mamoli kit again. I'm missing quite a few pieces of wood that the plans call for, which is forcing me to scratch build a big portion of the deck fittings. It's been a frustrating experience to say the least.
-
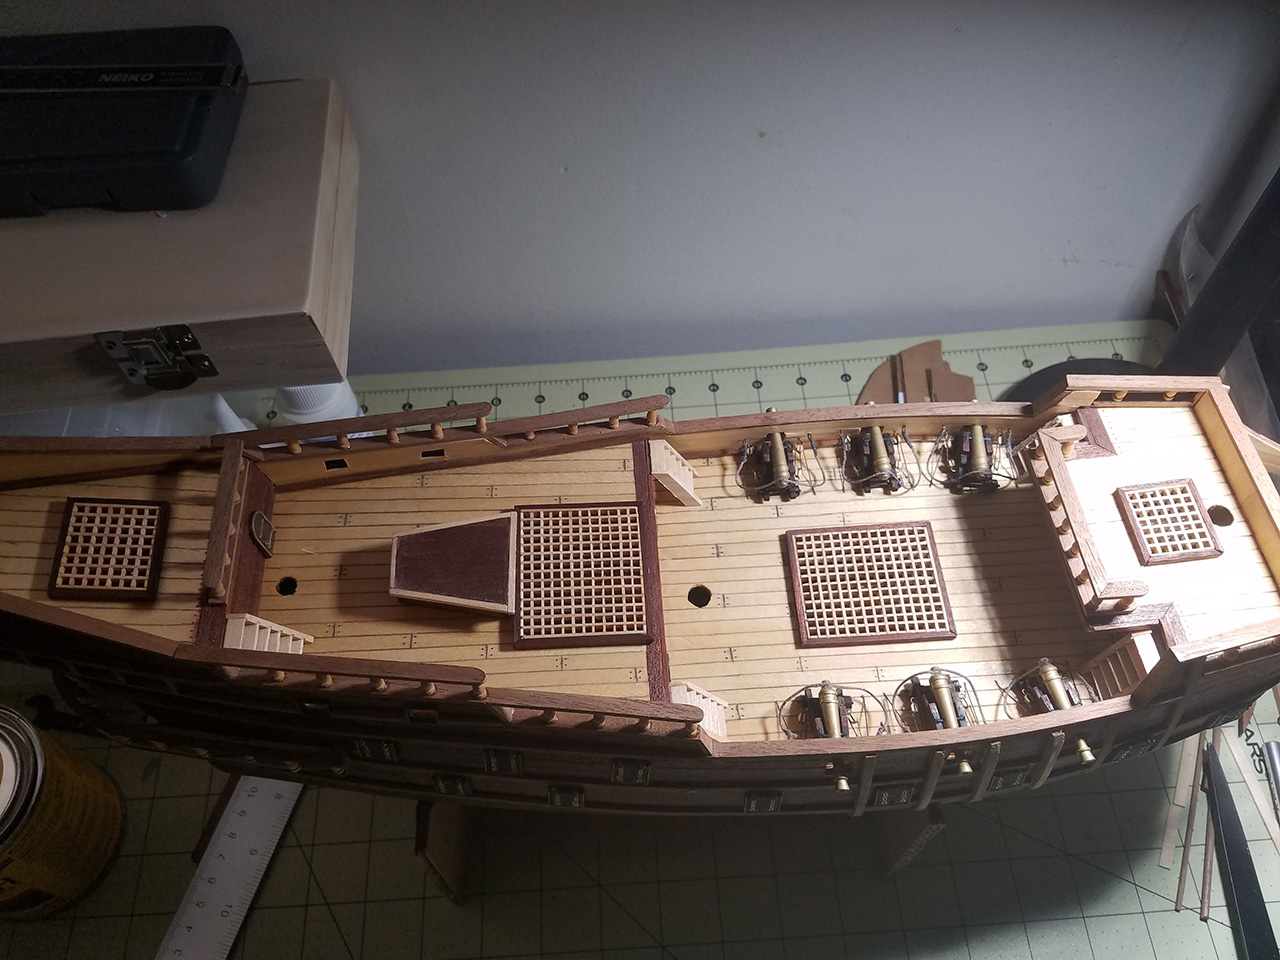
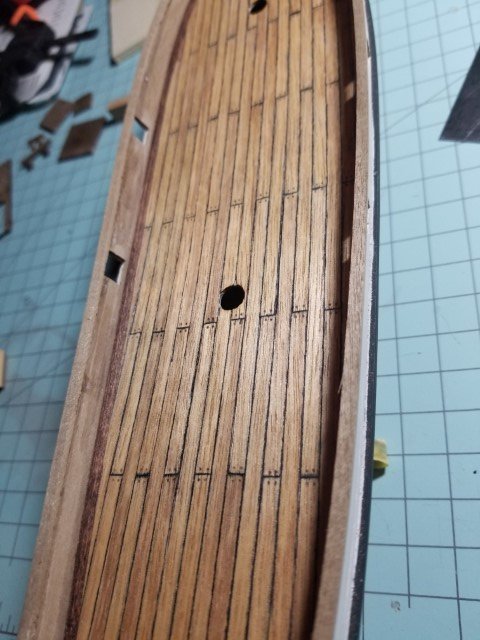
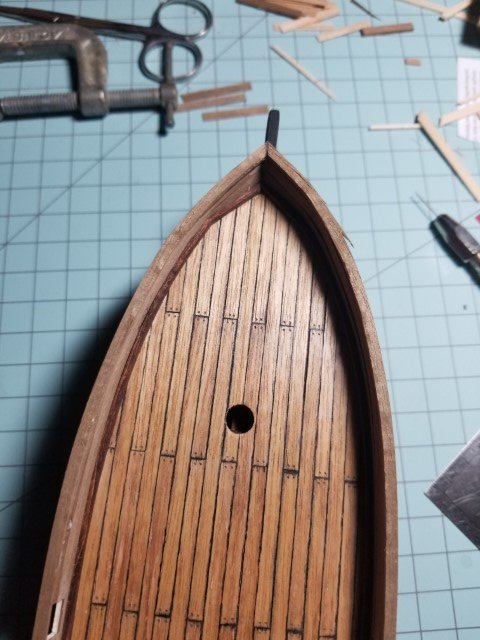
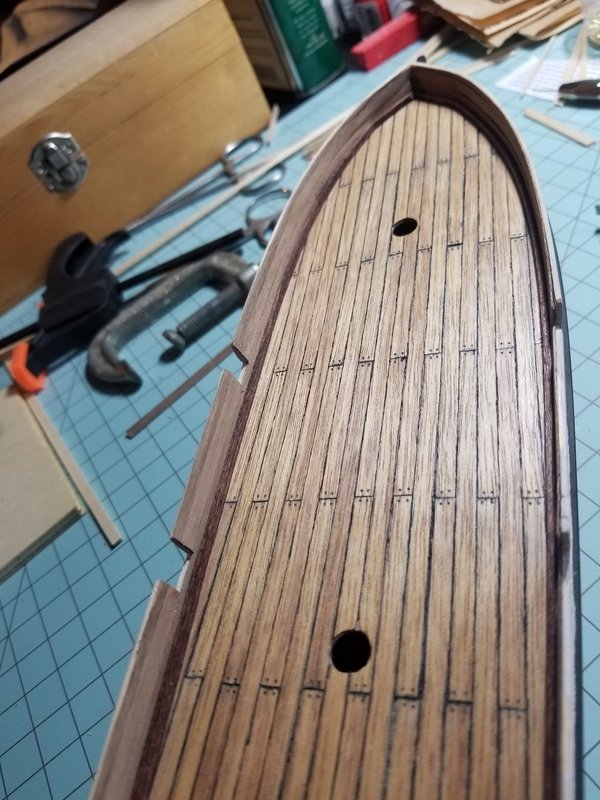
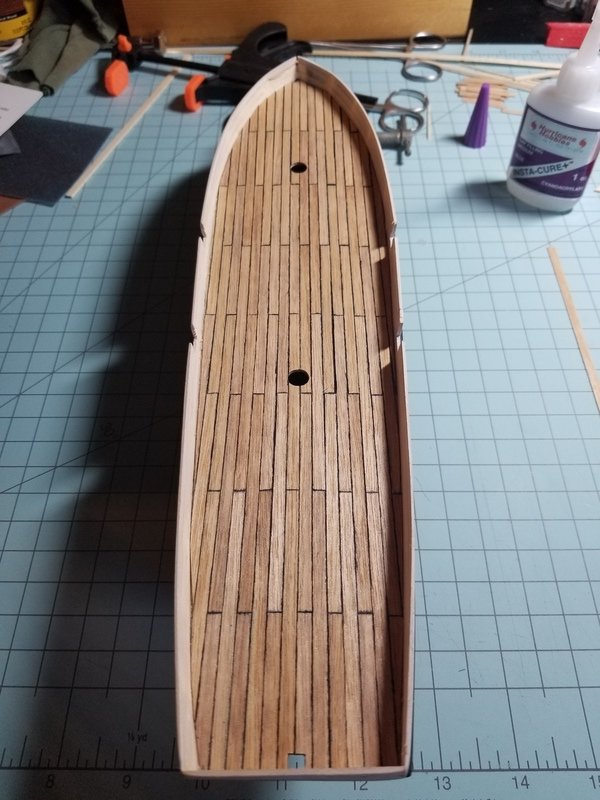
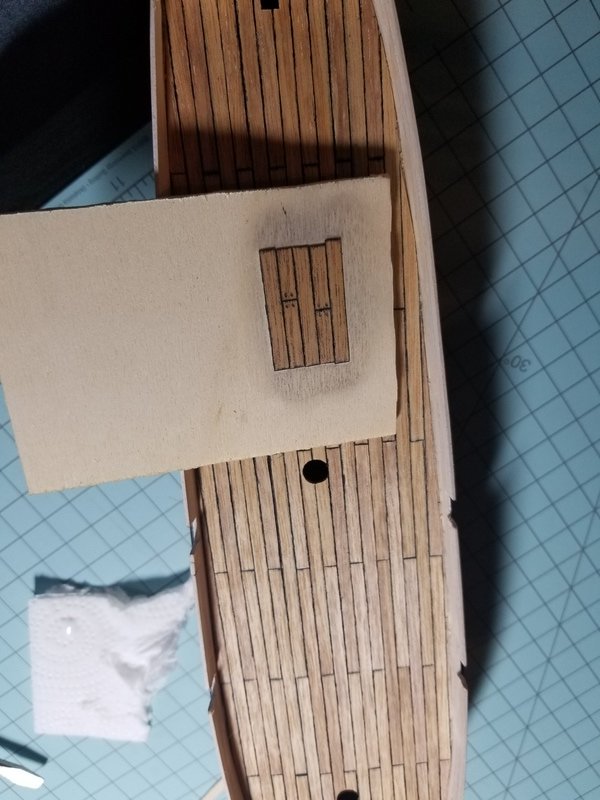
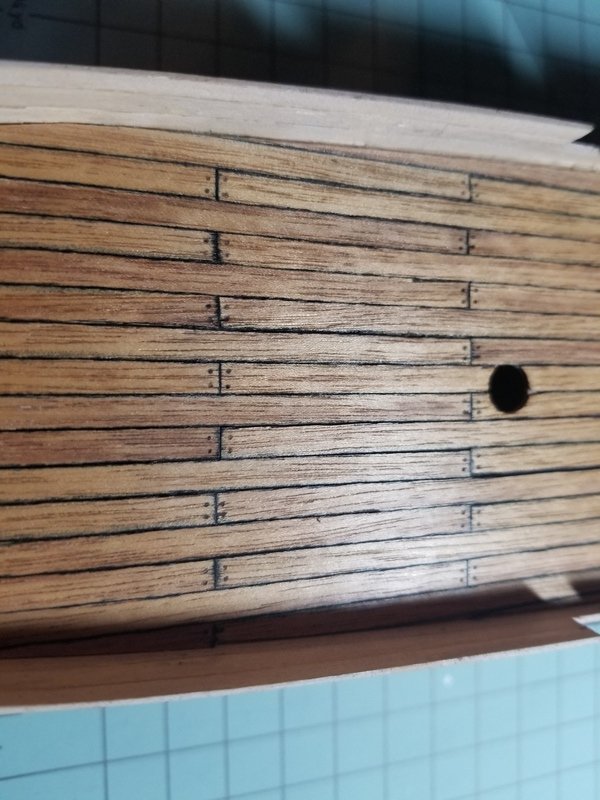
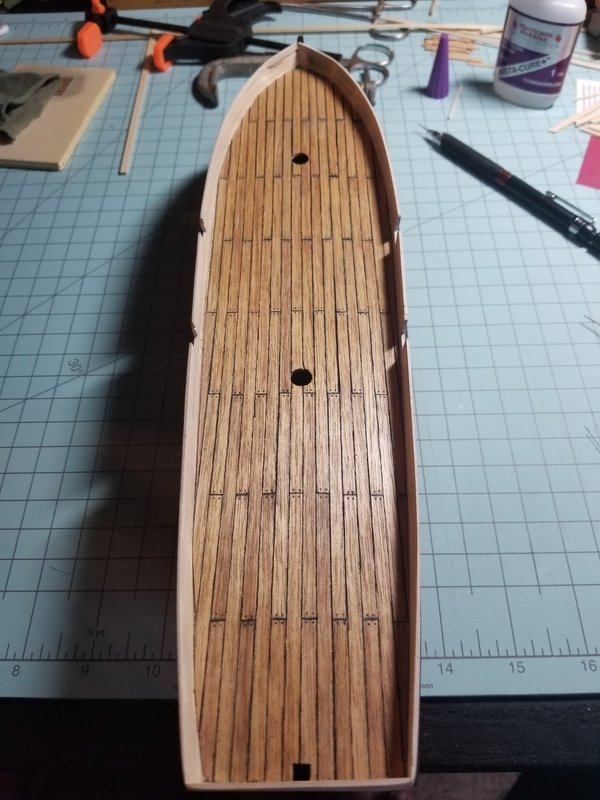
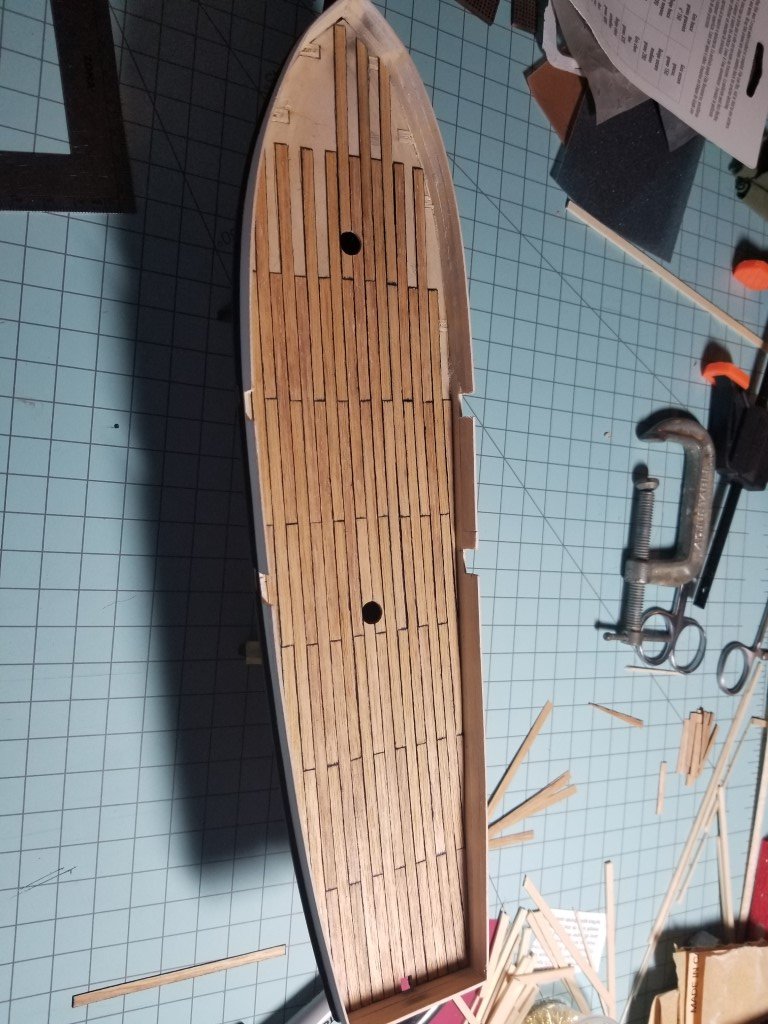
Hi everyone. I finished the planking tonight on the deck and added the treenails details as well. I'm super happy with how this turned out! I think she's really coming along now. After finishing the deck planks, I wanted to test how the sharpie would react to the tung oil. I set up a little mock deck and tried a few different ways of getting the sawdust to "stick" in the holes. Regular CA produced some unwanted artifacts, so I decided to use elmers white glue rubbed into the holes and then sanding. It turned out well. Every hole was manually drilled with a pin vise. It took a while, and my hand was tired after the fact, but it was well worth it. After drilling each hole, I rubbed it clean with a spare clean rag. Then I used white glue to fill each hole, and before it dried I used 400g sand paper to fill the hole with dust. Then I rubbed tung oil over the entire deck. Not the most perfect result, but, I'm incredibly happy with the result. On the San Fran, I just used a mechanical pencil to "fake" the result. With the sharpie, and drilling each hold by hand, I think I have a more authentic result. I'm going to let the tung oil dry over night before I move forward.
-
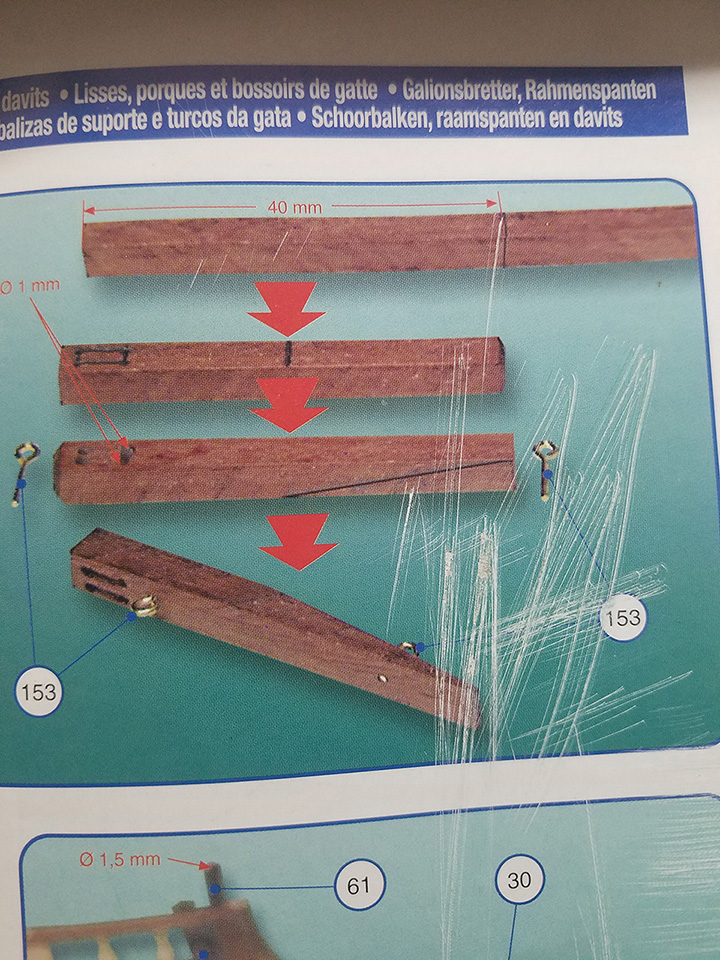
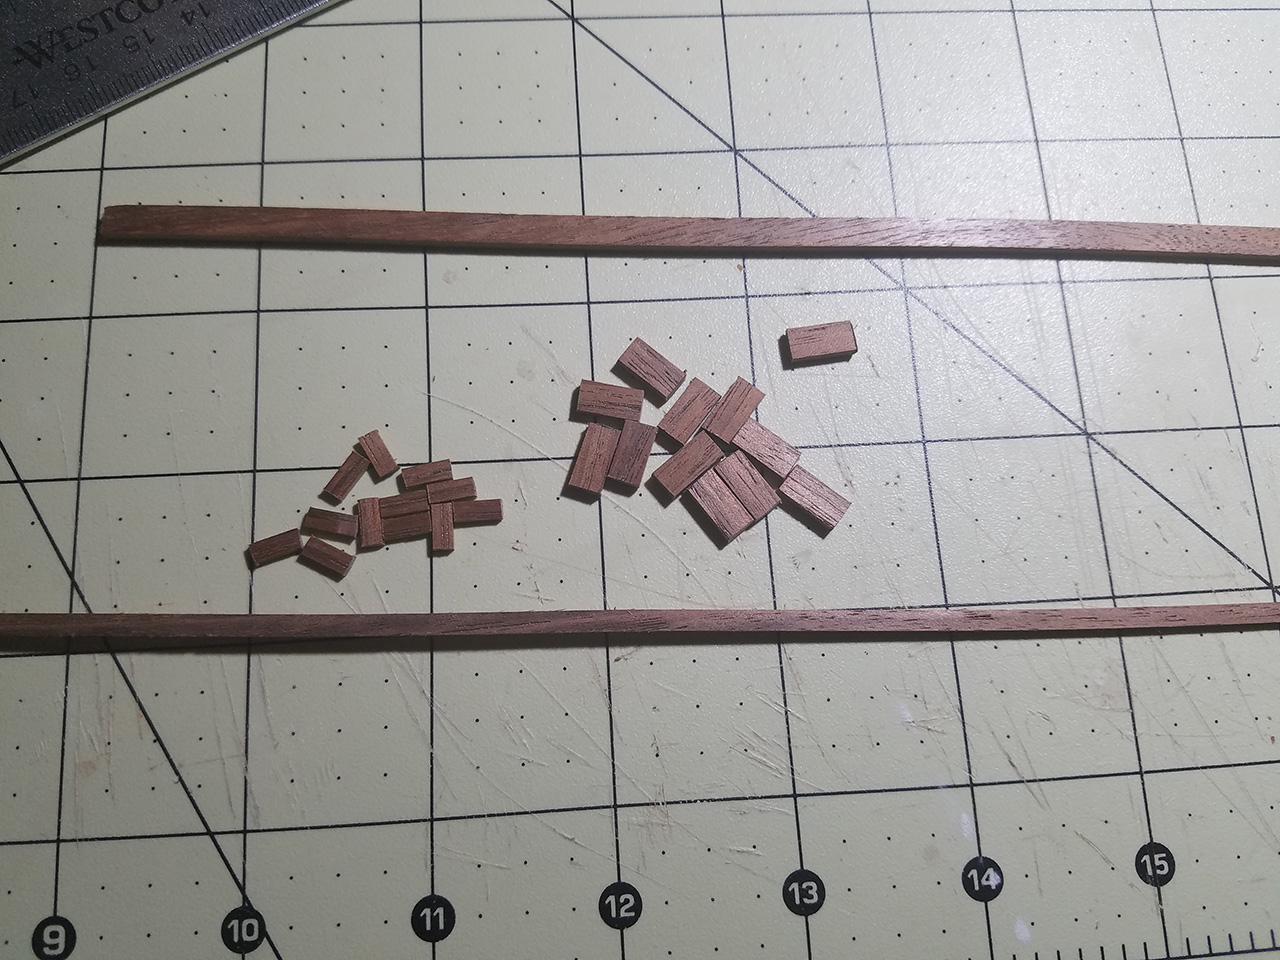
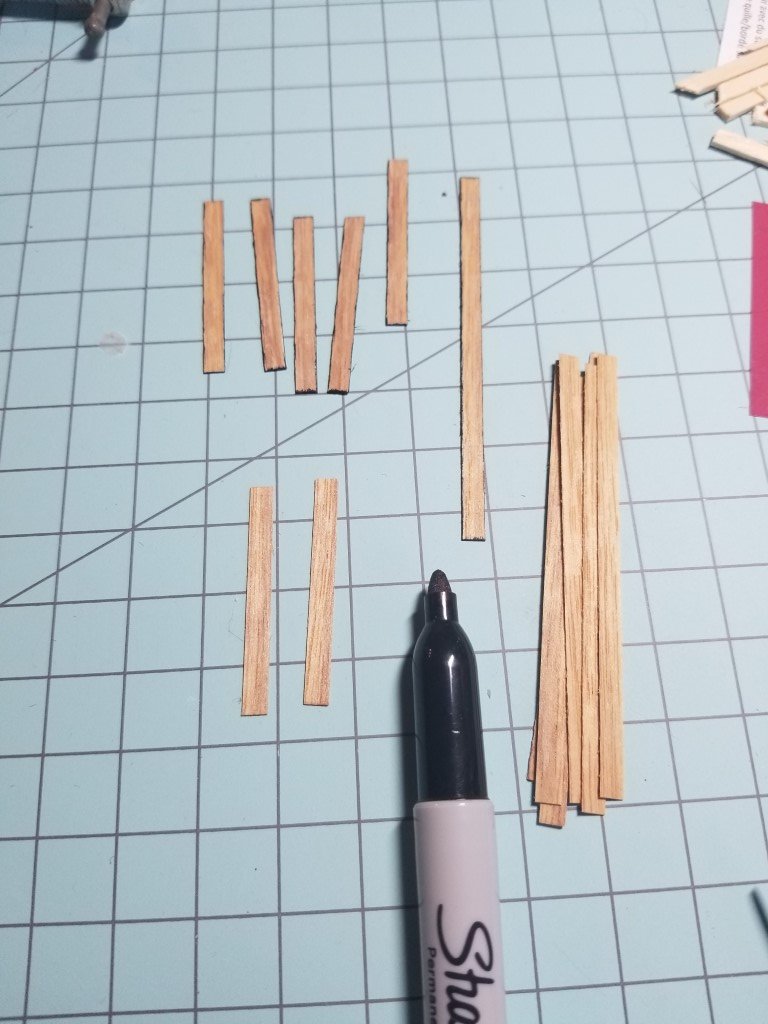
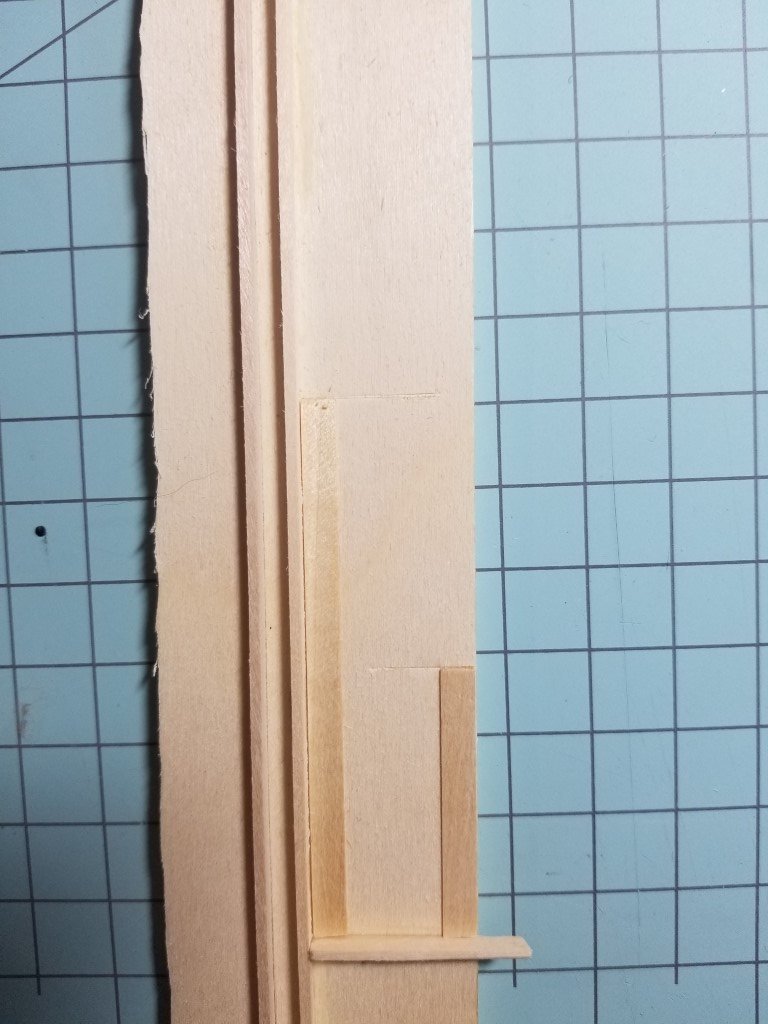
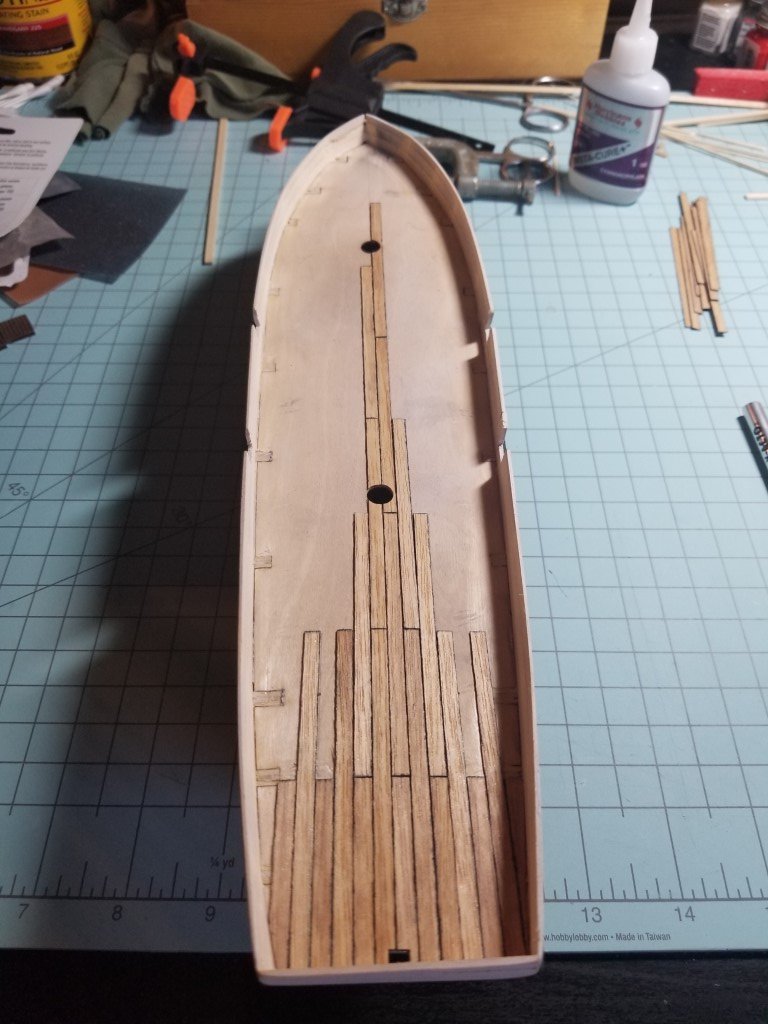
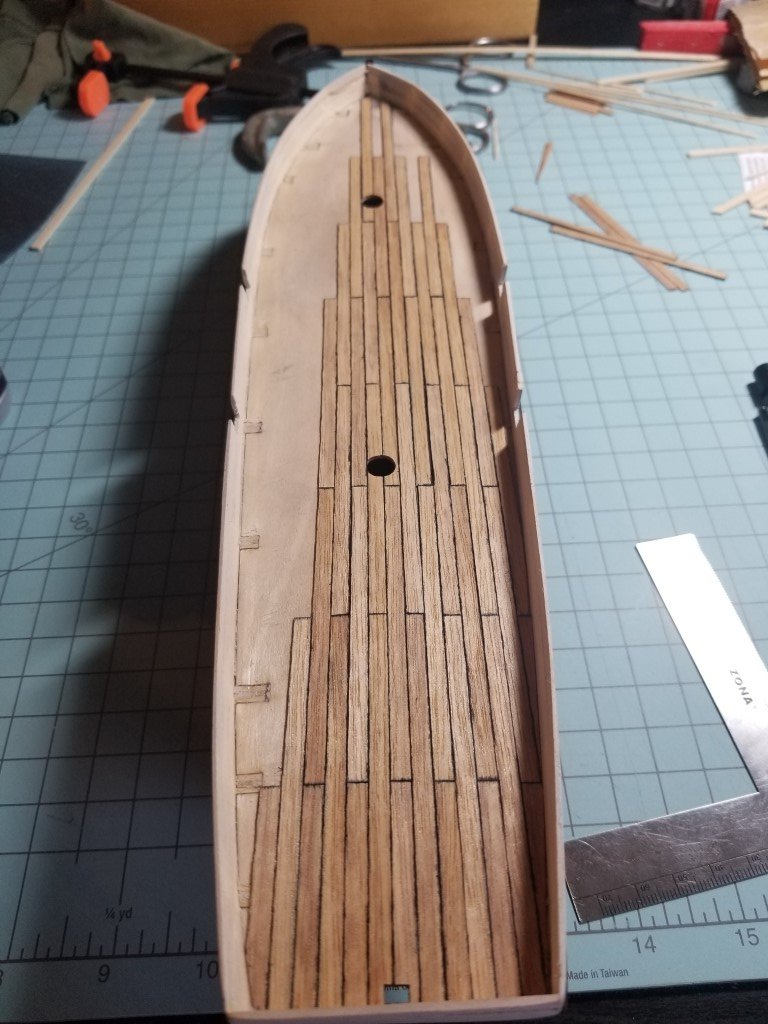
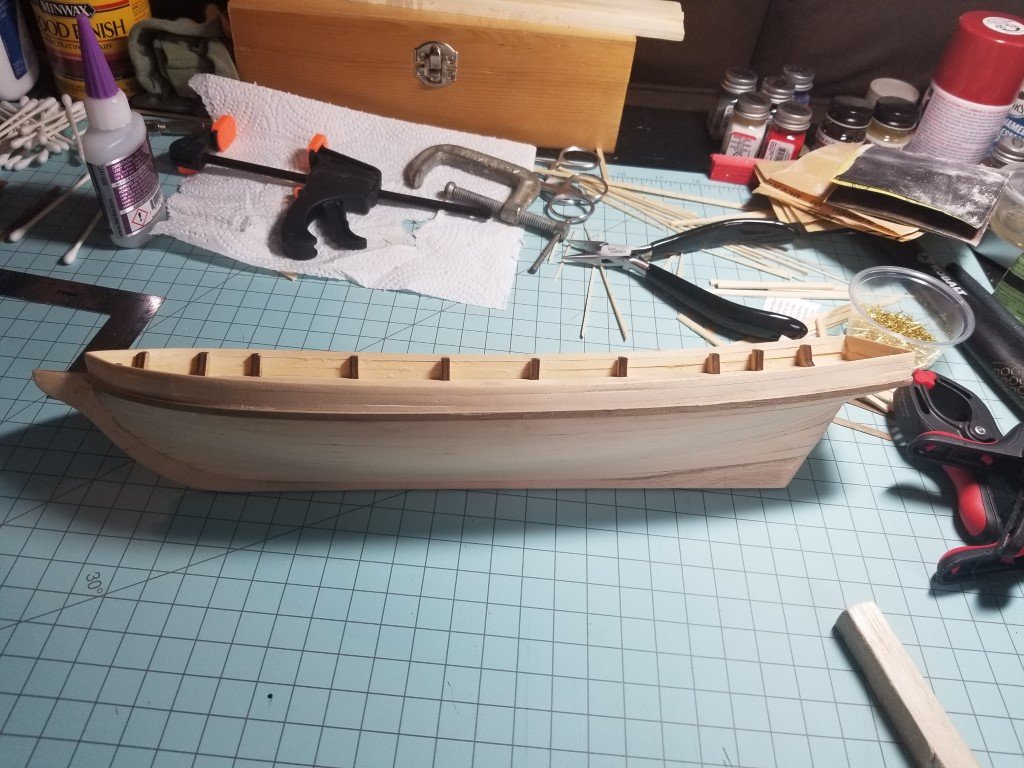
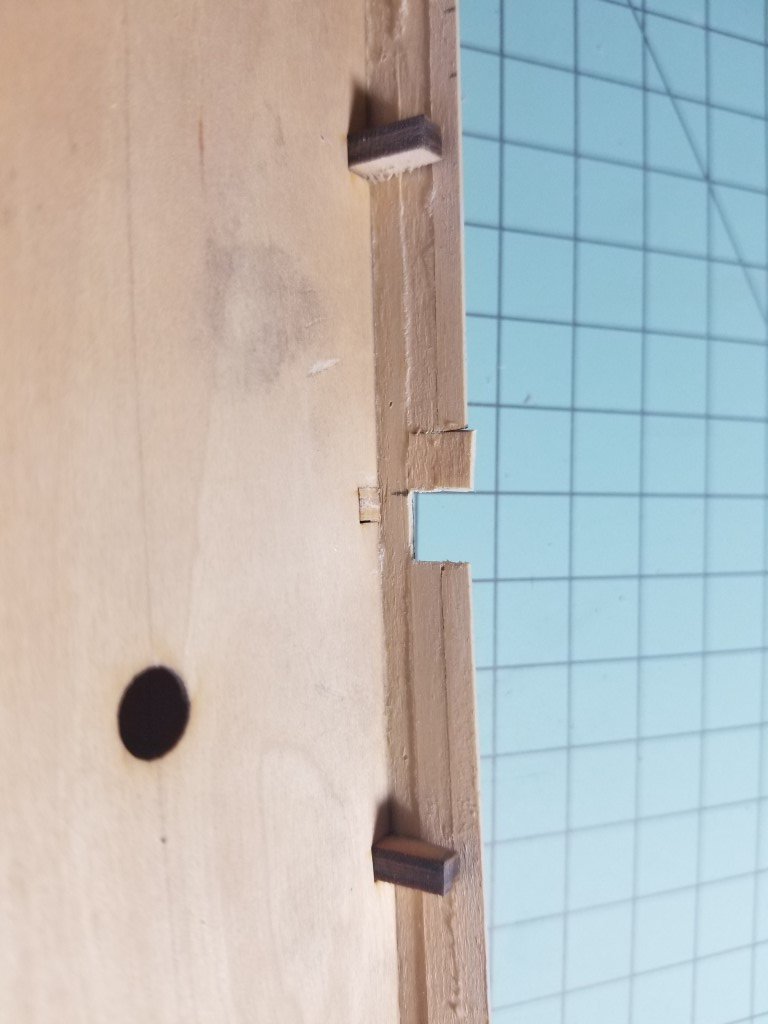
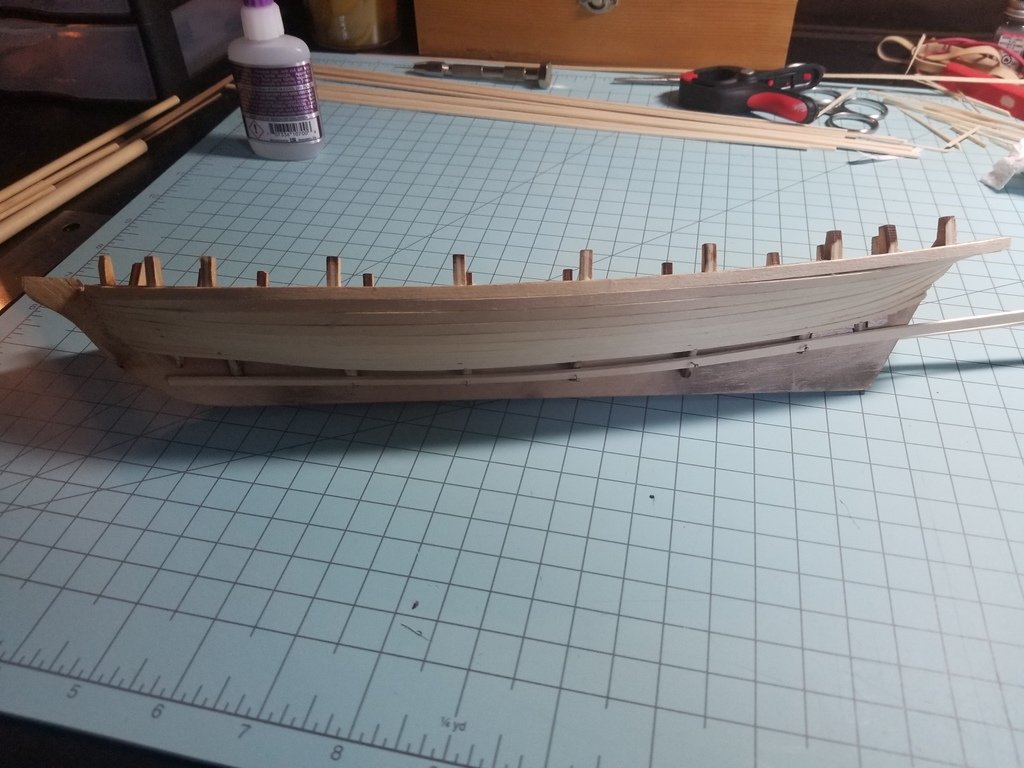
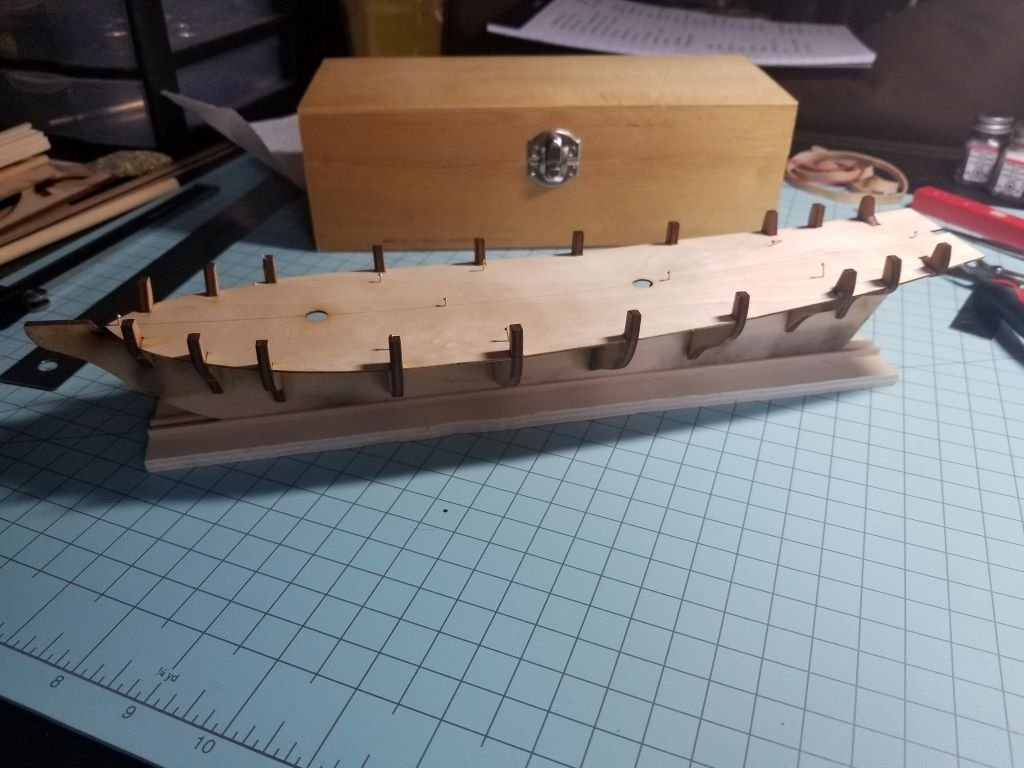
Progress is moving forward on the Newport. Nothing much to say here, so I'll let the pictures do the talking. First up was to remove the portions of the frames that were used to support the bulwarks. Easy enough process. Instead of cutting them with a knife, I found I could grab them with some needle-nose pliers and just twist them off, followed up with a bit of sanding to get them down to the false deck. This resulted in almost no risk to me accidentally cutting through the bulwarks and ruining the paint job on the outside. Next, I built a small jig for measuring and cutting the deck planks. I believe the kit supplied 0.5mm x 2mm planks are teak? I could be wrong. The short size is 40mm, and the big size is 80mm. I got the measurements from a ship modelling book I'm kind of following along with, where it's main focus is a schooner similar to the Newport. I wasn't terribly concerned with realism here, just something that looks nice. Sharpie run around the edges of each plank gives an excellent contrast to the planks. I alternated the 40mm and the 80mm planks starting at the center-line, touching the stern. This got me the required pattern. Getting closer. This is where I stopped for the evening. Not too much more to do before I start drilling treenail holes. The plan is to drills 2 holes at the end of every plank, then use 400g sandpaper to lightly fill those holes. I'm going to then run tung oil over the deck to get the holes to darken up slightly, and leave a nice finish across the top. Depending on how much spare decking material I have, I'll be creating a mock deck to test the plan out first. I'm not sure how the sharpie ink is going to react to the tung oil, and I'd hate to ruin the entire thing. We'll see how that goes!

-
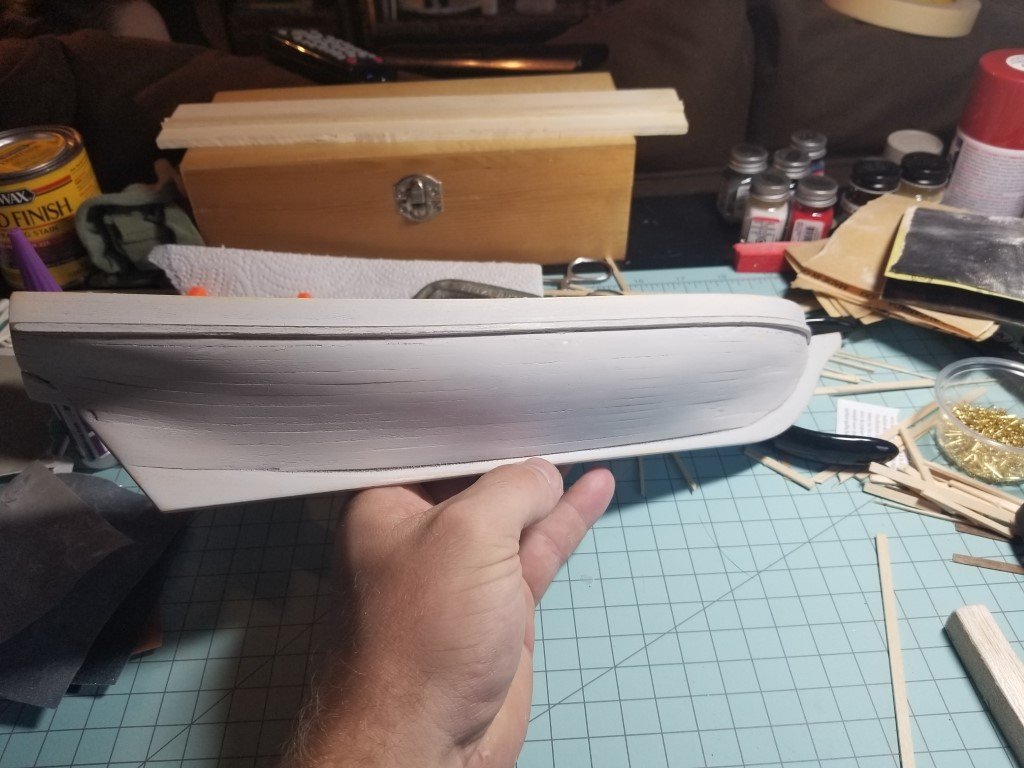
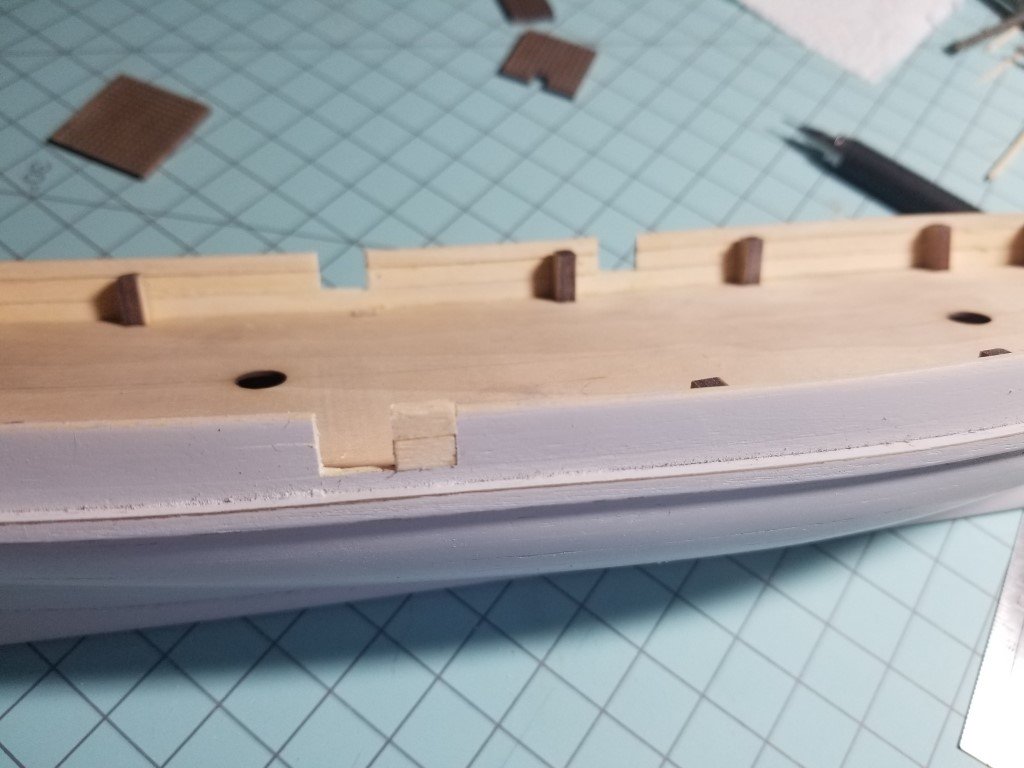
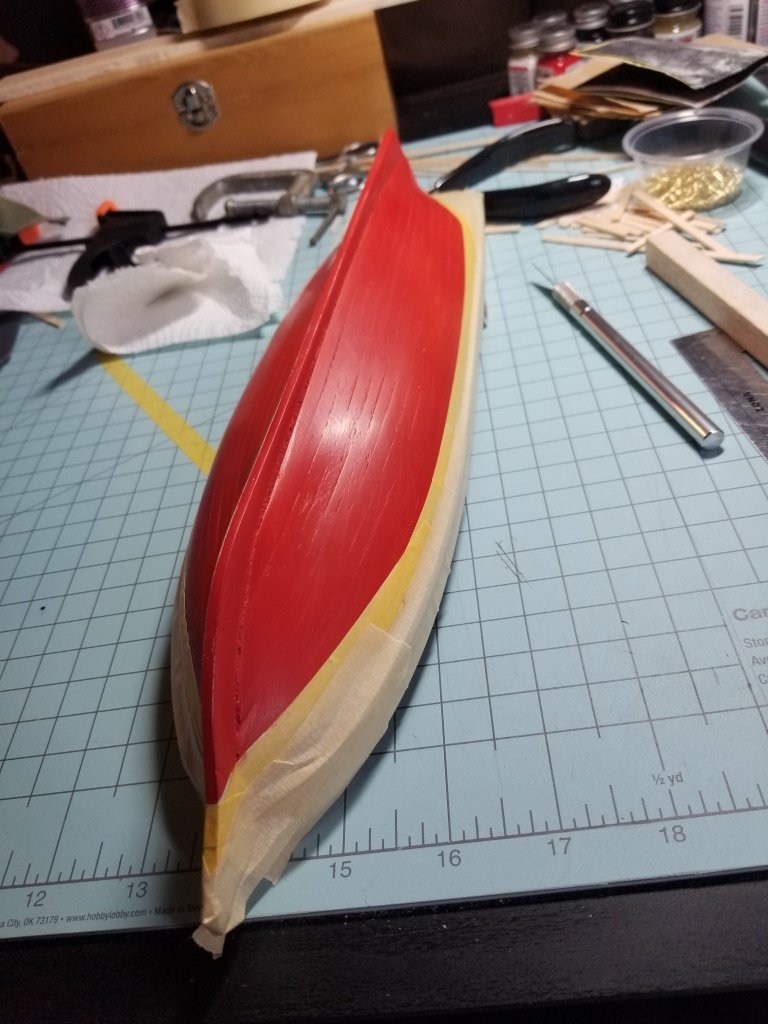
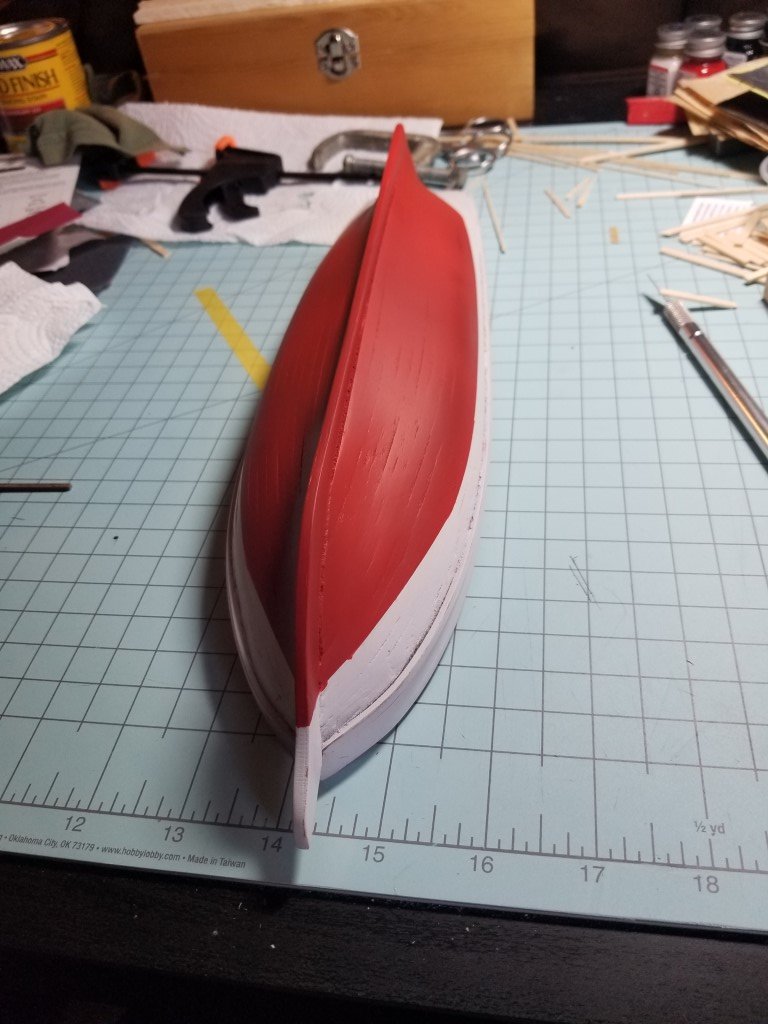
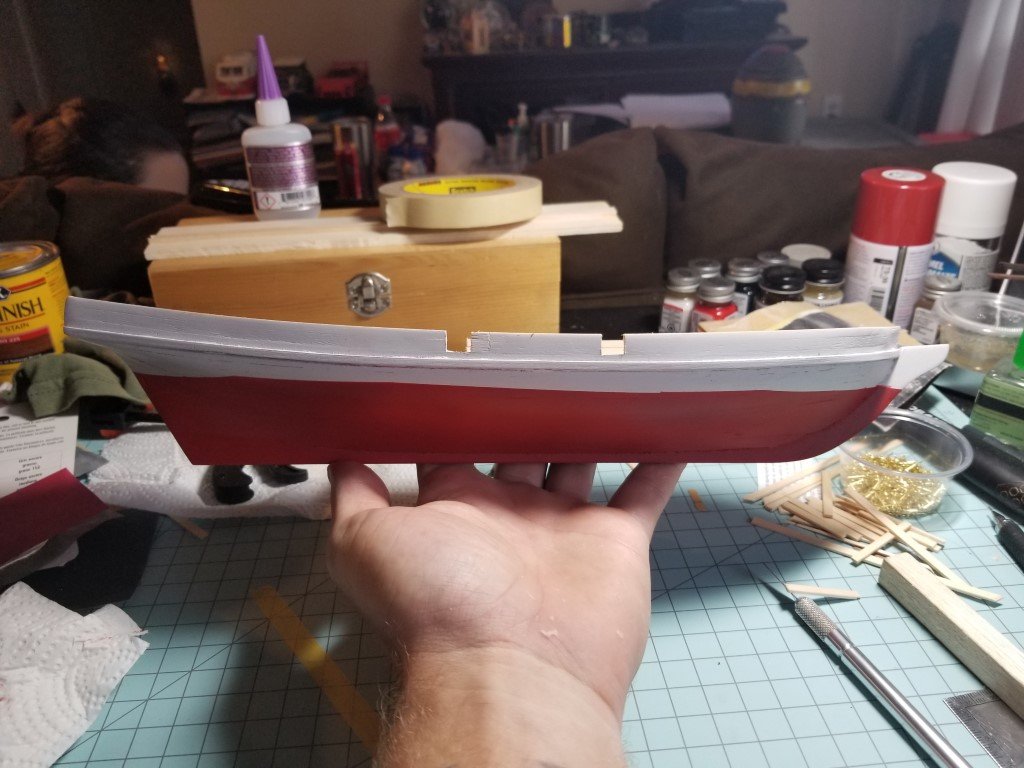
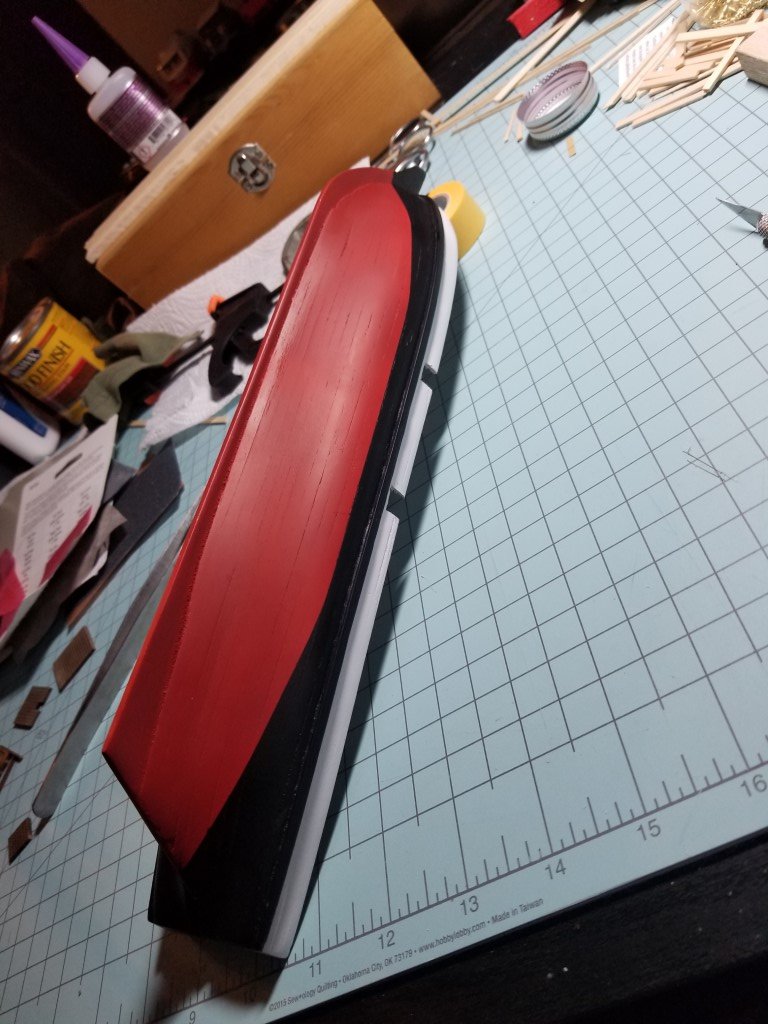
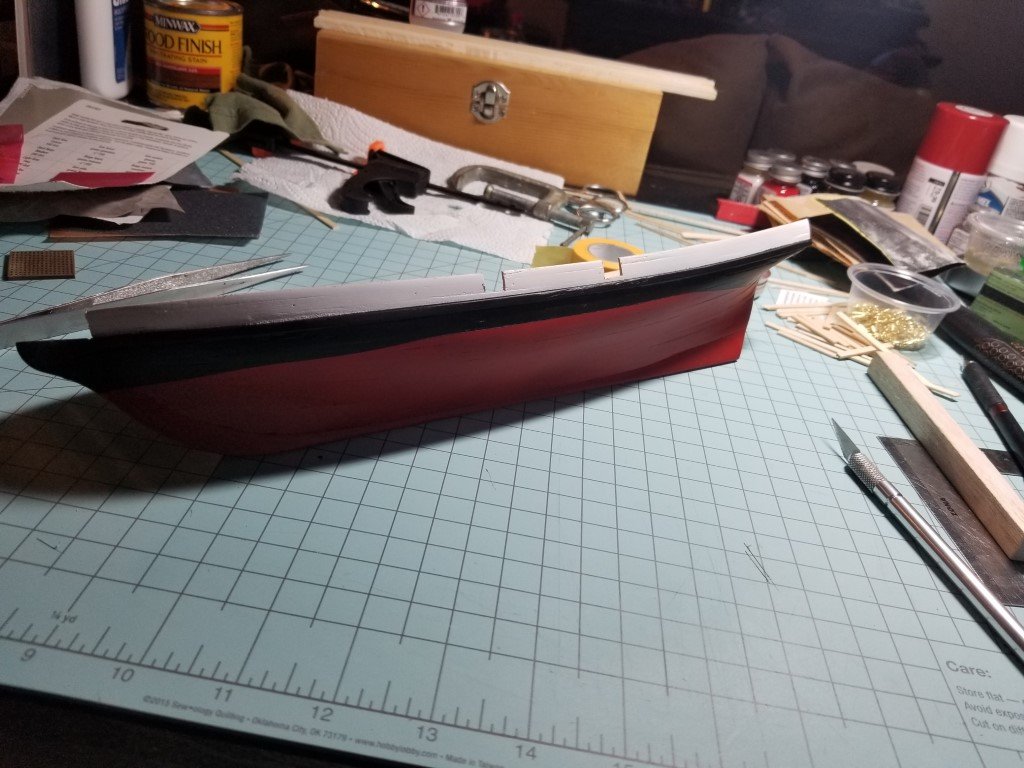
Hello All! I've been a bit behind in keeping the log updated. I've made a fair amount of progress with the hull, and also laying down some paint to make her pretty. Let's start with some pictures, and I'll explain along the way what's been going on. This is going to be a fairly heavy update! ** I'm putting the paint specifications up here, so no one has to search through the post to find every color used. 🙂 All paint is going to be Vallejo Model Air series, applied to the hull with an airbrush. Vallejo Airbrush Flow Improver 71.462 - I followed the instructions on the bottle (1-2 drops of this per 10 drops of color in the pot) Vallejo Surface Primer 74.601 Grey Vallejo Model Air Red 71.269 ** CAUTION: Use at your own risk! On the Vallejo website, the color swatch for this is exactly what I thought I needed. I sprayed on a coat and was furious to find out it was no where close to that swatch! I sanded it down a bit, added 2 drops of black to darken it a bit, and am in love with the color now! Please be careful with this red, and please test it on some spare wood if you need to. I didn't, and I had to sand it down to the prime coat to apply a darker version red. You can see this in the pictures further down in this post. Vallejo Model Air White 71.001 Vallejo Model Air Black 71.057 Vallejo Matt Varnish 70.520 ** First up is doing something different with the stand. It's made from laser cut plywood of some sort, so I decided to stain it with Red Mahogany from Minwax that I still had from the San Fran. I applied 1 layer of stain with a rag and let it dry over night, then sanded it down with 320g sand paper and applied another coat. After 24 hours, I applied some Tung Oil to lock in the colors and protect the finish. I like the way it turned out, along with the striations in the wood pattern showing through. Next up is sanding the hull down in preparation of the second layer of planking. Bow shot. More sanding was done after this to minimize the chine effect going on. A bit out of order, but that's okay. Bulwarks have been planked along with the rubbing strake installed. Bending that strake caused some issues, but with a little bit of sanding and clean up, it doesn't look bad at all. Now, here is where a major decision was made: I'm not moving forward with the second layer of planks. Gasp! I know. I installed 1 strip of walnut just below the strakes on either side, and had a terrible time getting them to 'twist' along with the shape of the hull. I had nasty bubbles forming, that I attempted to force down with CA glue. Wrong answer. It looks so terrible! And the CA wasn't doing any good either. So, I wanted to paint this thing from the very beginning, and I'm extremely happy with my first layer of planks. So I did some looking around, and realized I don't have to plank it again if I don't want to. Easy decision to make, and it saves me another few days so I can progress forward with something else. I sanded the hull down, and sanded some more, and more and more. I then airbrushed on some grey primer. I made sure to take my time on this step! I think I sprayed 4-5 coats of the grey primer, and sanded it down with incrementally higher grit sandpaper. 200, 320, 400, and 600 to finish with. Something like that, anyway. Started to cut out the 4 gun ports, and totally messed up the positioning of one of them. Easy enough fix...but it brings about the age-old mantra of: Measure twice, cut once. Whoopsie. Alright, here's the fire-engine red I'm talking about from the paint summary above. Dang, this stuff is super bright. I was pissed when I brought this out of the spray box and thought to myself "maybe it'll get darker once it dries." That was not the case. I ended up sanding this down, and mixing up 2 drops of black to around 50 drops of red or so. You can see the difference between the next two pictures. The waterline isn't necessarily award winning by any stretch of the imagination...however I'm happy with it, so it stayed that way. When I do this again on the next vessel, I'll be getting some smaller masking tape so I can create curves. The stuff I have is made by Tamiya (not the roll of manilla stuff in the back ground, I used that as a general mask) and is 3/4 of an inch I believe. To make that nice waterline curve, I should've used much smaller tape, then masked around that. Either way, I'm happy, so that's all I really care about! Lol. Also in the below image you can see the messed up gun port. I could've spent more time blending the wood in and making that mark disappear, but I lost patience at this point and went forward with it anyway. I still like it, so it's fine. Finally we have the last two images of the hull in her current state. I masked off the bulwarks first and sprayed a few coats of white. I didn't mind any bleeding joints from the mask because I was going to spray black last. Once the white was dry (by the time I clean a color out of the airbrush, the paint is dry and I can start masking the next section) I started on the black. So, I sprayed red first below the water line, then went up to the bulwarks, then sprayed black on top. All in all, I'm very happy with how this turned out. I've never used an airbrush before (I bought a cheap-o one from Harbor Freight that came with a compressor) and I'm really glad at how it looks. I'm also happy I didn't do the second planks. I now have extra strips of walnut I can use on other projects, and it doesn't quite matter because I do really like the planking I did on the first layer. Last night I sprayed on some matt varnish over the entire paint job, and realized that stuff definitely doesn't dry nearly as fast as the paint does. I put it down until tonight, where I'll sand it with 600g paper and spray on another coat of matt varnish. I'll probably leave it at two coats of the varnish, that way I can handle the hull without fear of the paint chipping off from cuts and stuff.

-
Hey RJ, thank's for stopping by! I can understand about taking breaks...it's been almost 10 years on my San Fran, and I'm still no where close to be done. I had an issue with the color scheme as well for the Newport, so I finally pulled the trigger on some paints and gave it a shot. I think it turned out really well, but that's just me. I'm not 100% interested in totally realistic colors, this is just something I want to look at for a long time to come. I'm a bit behind in updating this log, so, let me make an update post real quick and I'll be sure to list the exact colors and stuff I used to achieve the result I currently have. I hope it helps! Feel free to ask any questions you need to as well, and I'll be more than happy to help out!
-
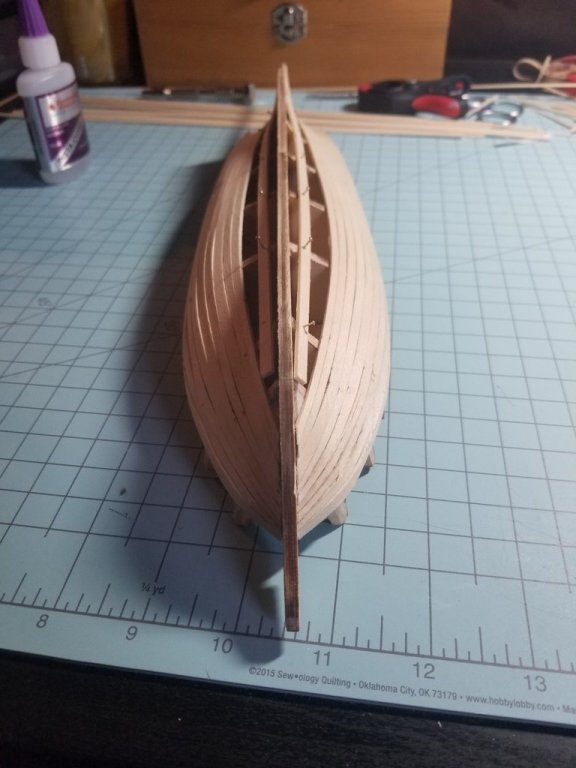
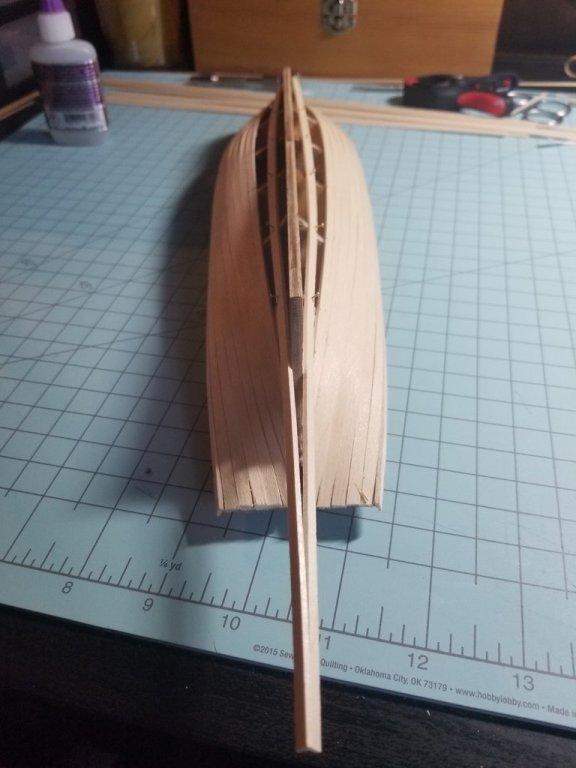
First layer of planking: Done! I always dislike planking, but after checking out Chuck's awesome videos and the planking tutorial PDF here, I didn't have too much trouble. I used a hair dryer to bend the planks as opposed to soaking them for an hour, and was able to speedily make it through this arduous process. The math wasn't too bad either, and the garbard planks went in just under 10 hours after laying the first plank. There's still plenty of clean up to do, and I need to sand down the hull and fill any low spots. But, after planking all day, I'm glad to say it's done and I'm happy with how it looks.

-
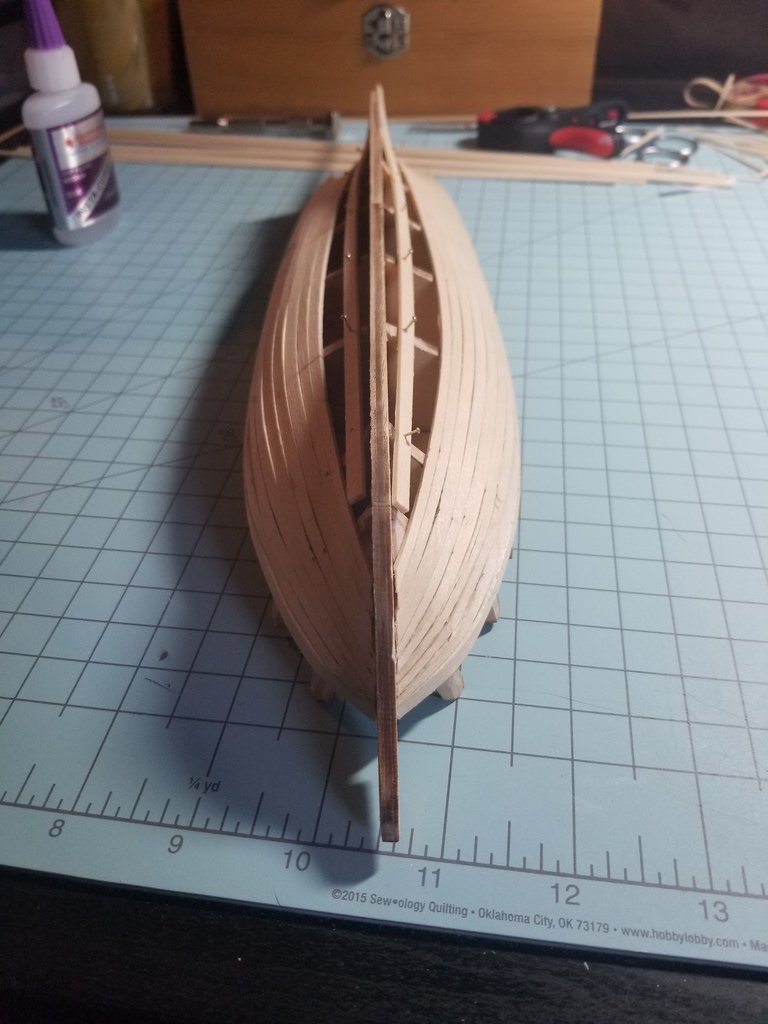
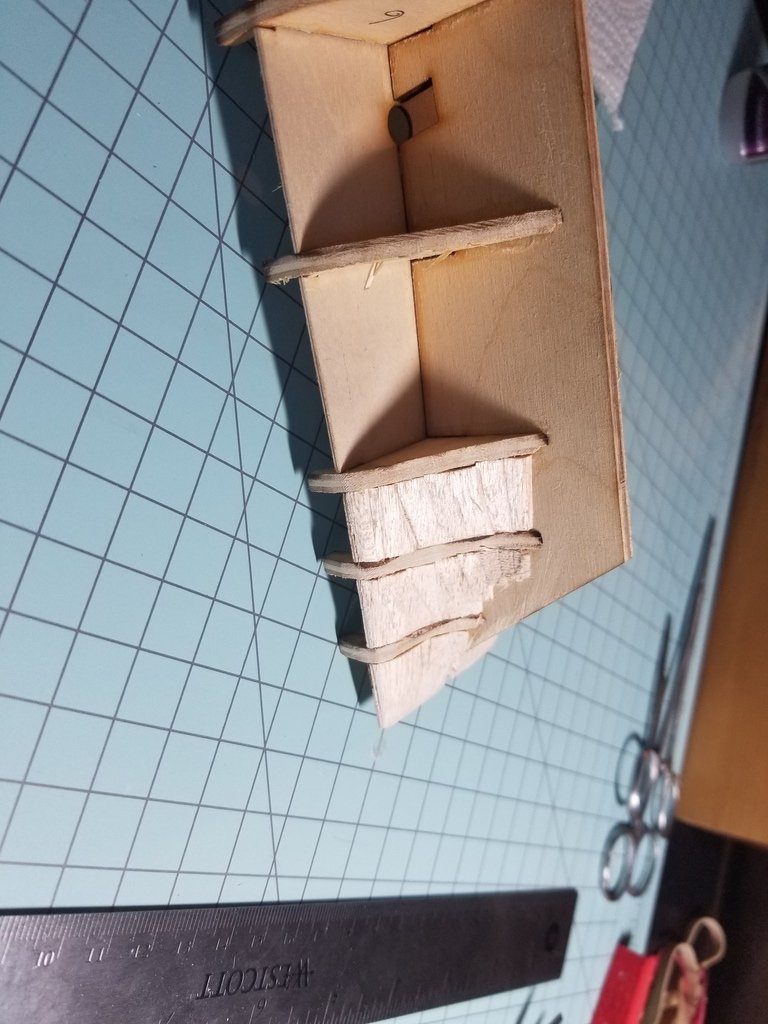
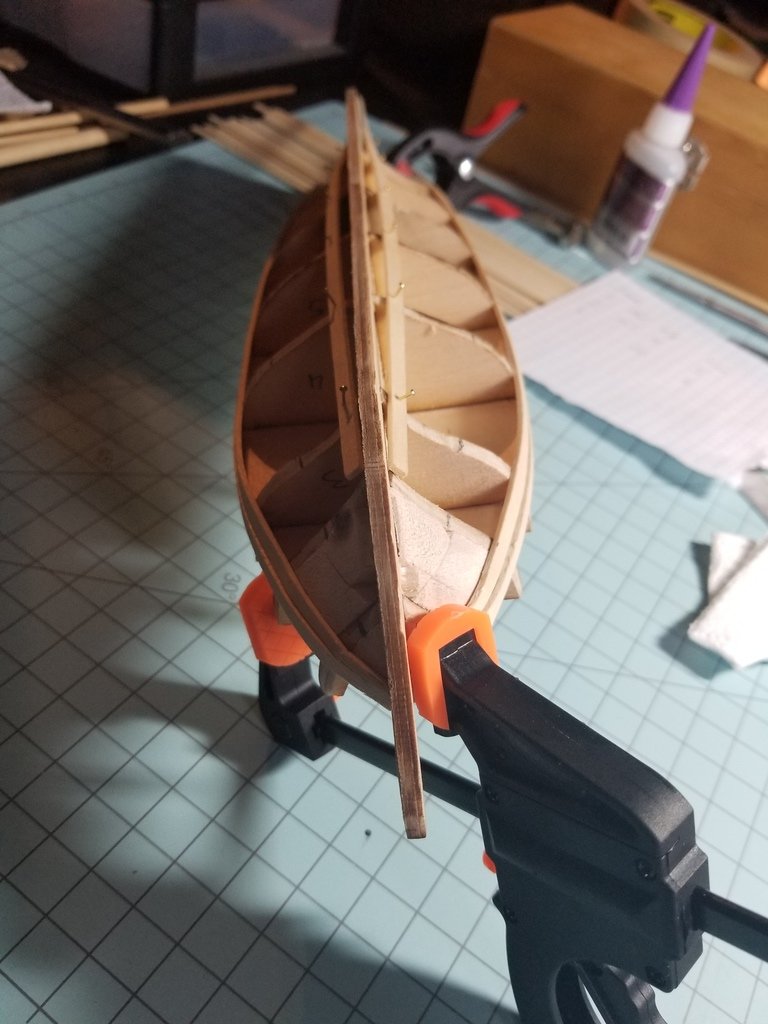
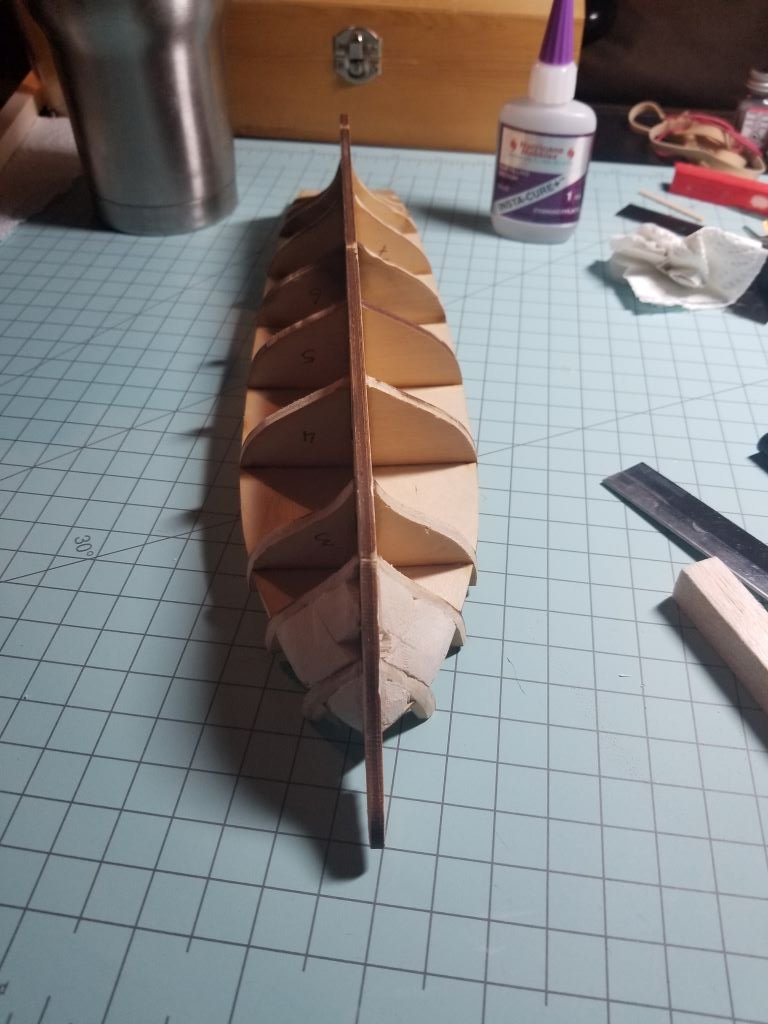
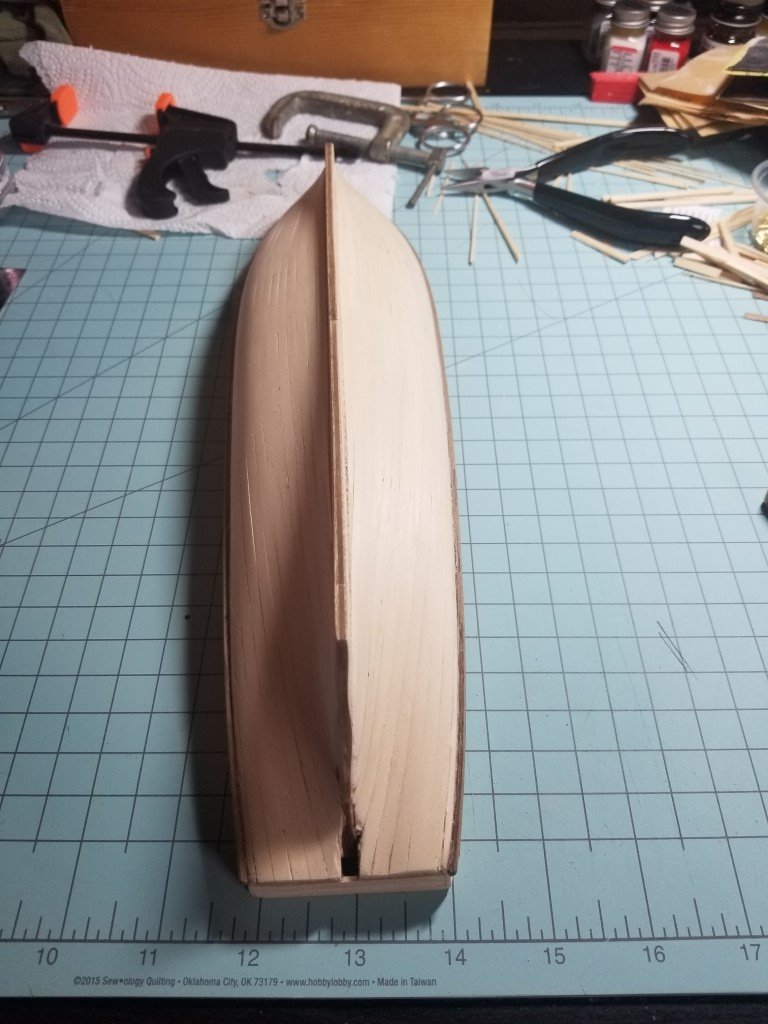
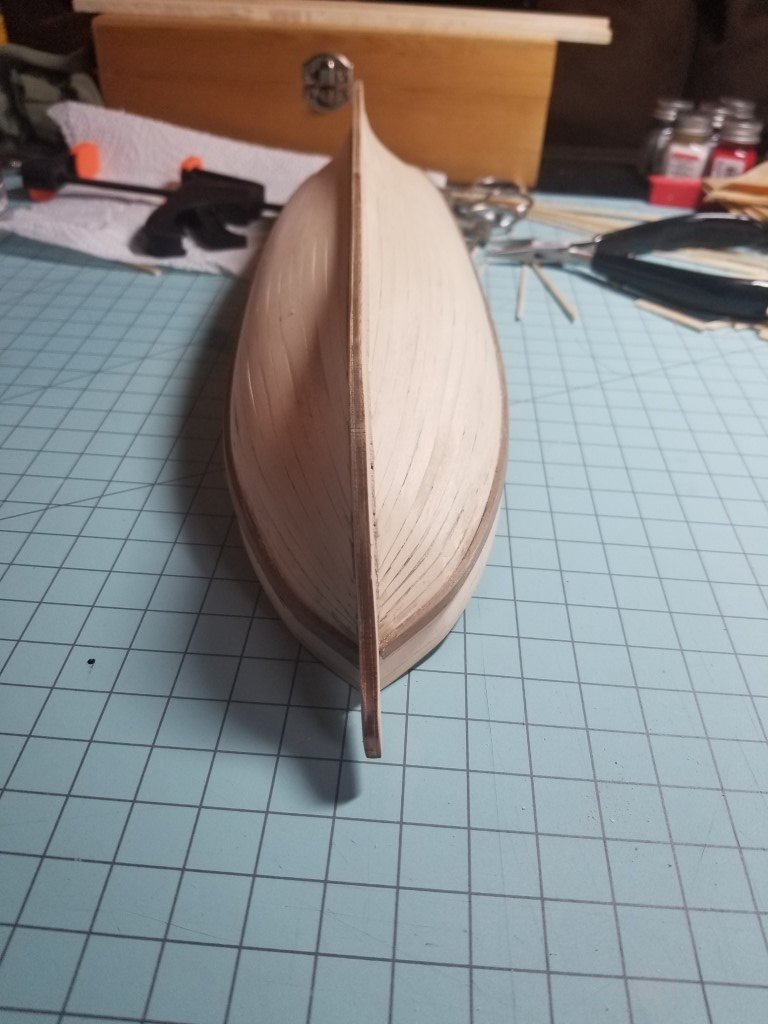
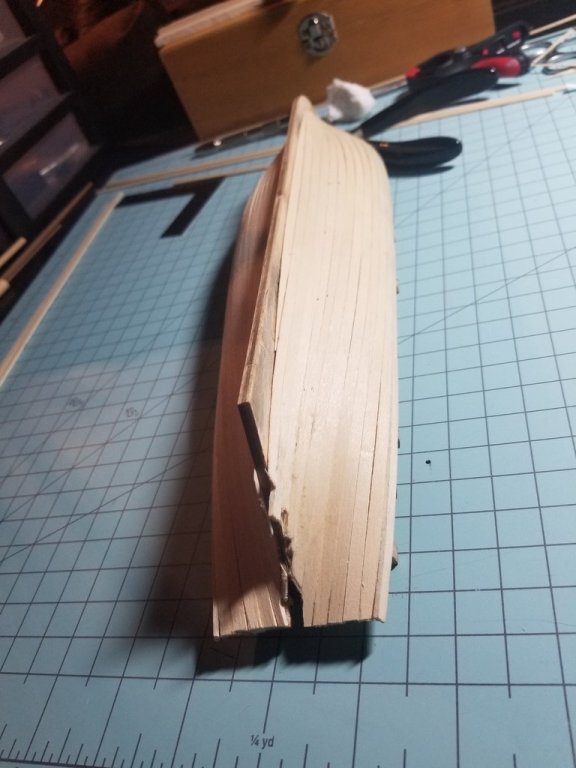
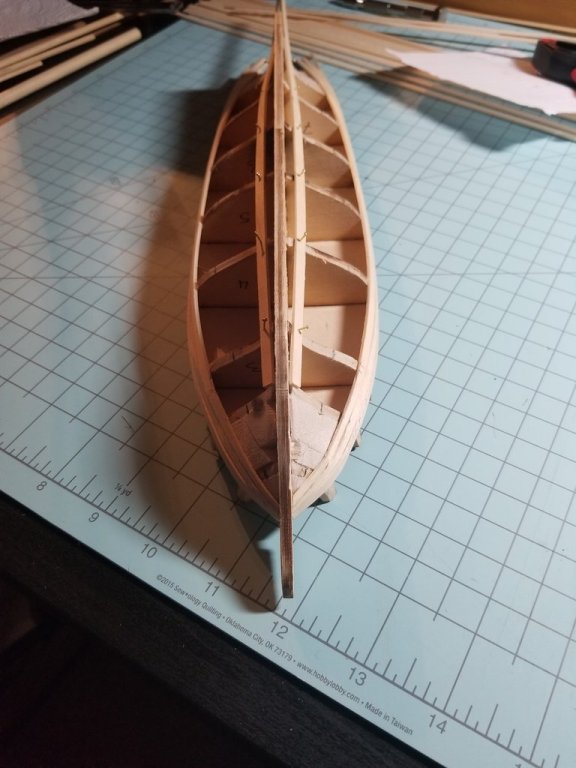
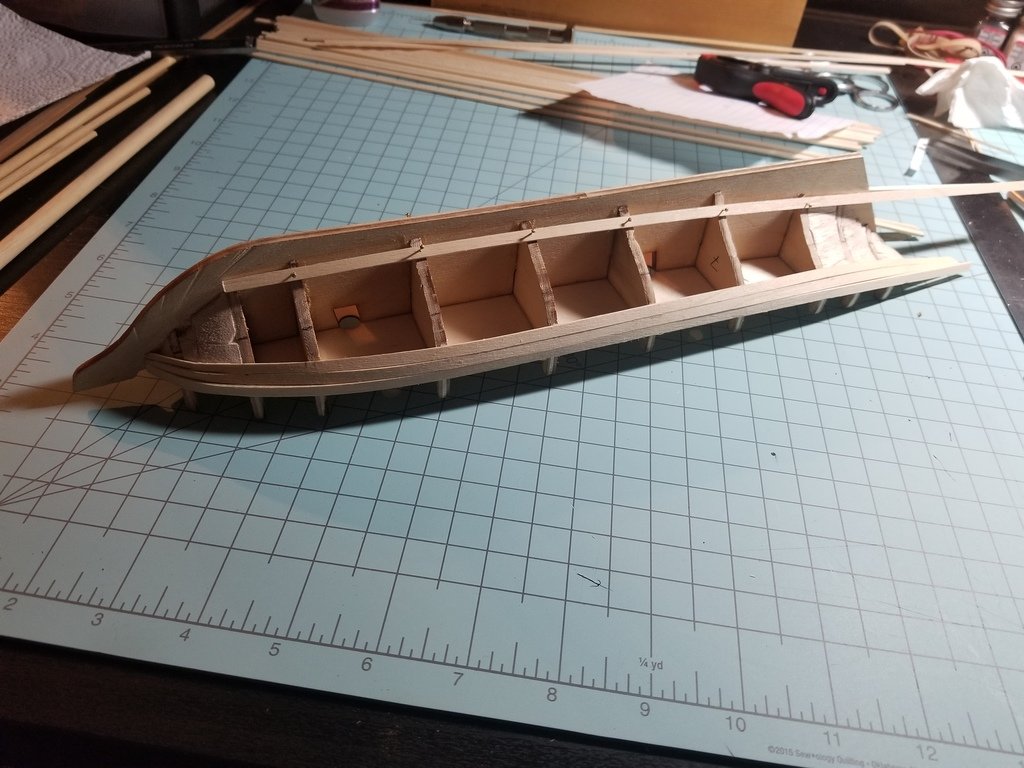
Spent some time with the Newport today. Finished the Stern filler blocks, and laid out some temporary battens to start mapping out the planking. I've consulted the captain, and she said I shouldn't really worry about a companionway, so I'm going to be bypassing that option and just doing the grates as normal. No worries, it'll still be a beautiful ship when she's done. Once the temp battens were in place I did some math and figured out what the taper needs to be at each bulkhead near the bow. The stern is bigger than the midship, so I can always add drop planks towards the stern if need be once I plank towards the keel. On with the pictures: Stern filler blocks. I know how ragged this looks, however, it has a smooth transition so that's all I was concerned with. Planking has begun. I've ended the sessions with 3 planks on each side. It's not pretty, as I'm not too concerned with the look at the moment because not only is it getting a second planking of Walnut, but it'll be painted as well. So I'm not too worried about the chines and the bumps right now. I'll be sanding her down in increments, and will fill in any low spots with filler.


-
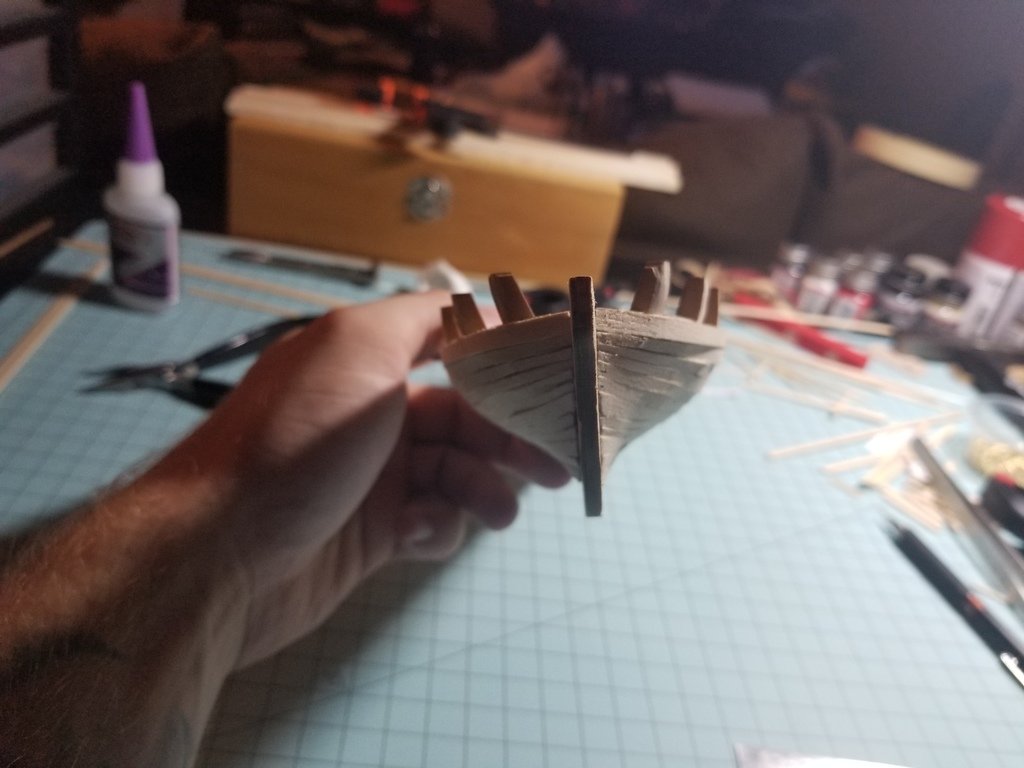
Hi everyone. I wasn't able to get the images posted last night, so I've attached them to this post. Spent a lot of time filing down the bulkheads to match the profile of the hull, then installed some bow filler blocks to prepare for planking. Not a huge update, but forward progress is forward progress! Before I plank the hull, I'm playing around with an idea to add a companionway where the rear grating is going to be installed. I have plenty of spare material from previous kits to accomplish this, but I think I need to spend some time researching where to position the second deck, how big the stairs need to be to maintain scale, was it planked, etc. If anyone has any ideas on how to accomplish that, I'm all ears!

-
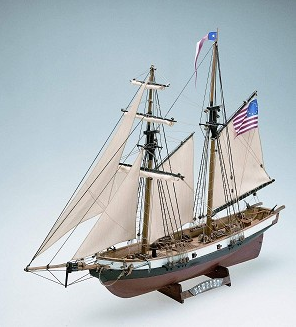
Hello MSW! Whew, it's been some time since I've ventured back to this site! Life finds a way of, well, getting in the way sometimes. Nevertheless, here we are! I got bit by the ship building bug again, and went for a smaller ship than the San Francisco that's still on my shelf. The goal is to finish this ship, and then bring the San Fran out of storage to complete that one. Maybe :-). So, the Newport?! What is it? I've attempted to research this particular ship, and there really isn't a lot of information. From the box, we have this description: "At the beginning of the 19th century in America numerous vessels with racy lines were built. They were very fast and easy to head: the famous schooners of Baltimore. They were either busy as coast-guards coping with illegal smugglers or real pirates, or used as escort vessels and troopships." I love the idea of these smaller schooners, so what I ended up doing was adding a bunch to my online shopping cart and had my wife decide which she liked the best. We arrived at the Newport. After a few days of patiently waiting for it to arrive, she came in and I started the un-boxing. My heart sank a little when I realized that the instructions leave a lot to be desired, but I'm confident with this log and the wonderful community here, I shouldn't have much of an issue. This will be my second wooden ship build ever, with my first one started around 10 years ago. You can see that one in my signature. My cat destroyed some rigging and took the wind out of my sails all those years ago, so it's been shelved since then. That's neither here nor there though. Last night began construction with dry fitting the false keel, bulkheads, and false deck. I spent around 4 hours fairing everything up, making things straight, tapping in nails to hold it together. Just before bed I glued it all up and allowed it to dry overnight. I'll have pictures of her current state once I get home later today. I'm really excited to get back to this hobby, and I'm equally excited to see there are only 2 other Newports on this website (unless I'm looking in the wrong spots.) So I'm hoping this log can be used as a learning resource not only for me, of course, but for those that come behind me looking for direction on this kit. As I said, the instructions are almost non-existent, and certainly compared to AL's building books, I need to get used to taking some creative liberties and coloring outside the lines a little. I'm happy to be back, and I appreciate anyone that can come in and say hello, and send some sound advice my way! Please, feel free to correct anything that you see as wrong! I want to make this as close to realistic as I can, and am already planning a few minor changes based on the other two logs I've read through as well. Thanks for stopping by!!
-
Barry, I used Red Mahogany. The wood on the hull is mahogany already, I just stained it the Red Mahogany and tung oil over the top of it, once it's completely dry.
-
Thanks for the replies, guys. JL, I haven't purchased aftermarket line, this is the line it came with. I've read other logs that said they had to order more line, and I can see why. I'm half way done with the lower mast shrouds, and already through half of my 0.5mm brown line. I still have top shrouds and all standing rigging... So I'll need to order more. I'll hit my local craft store up first and see what I can find, and if I have to order some online I'll go that route as well. My rigging book came in and I'm astounded at the level of details in the drawings. I've decided I'll go for a kind of half rigging plan, as I don't believe I have the room for more belaying pins. Thanks again for the tips guys! I'll look at the different colors as well, I didn't know about the greenish type color.
-
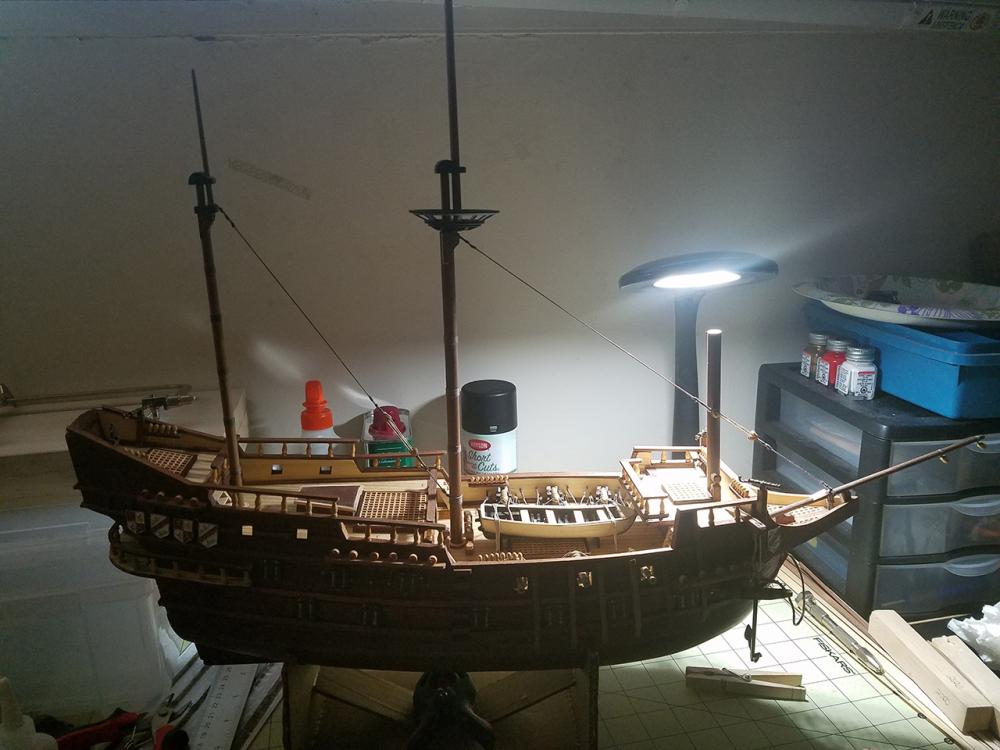
Small update this evening. Completed the Mizzen Shrouds, and I just had to hang in there and begin the Main Shrouds. Mizzen Shrouds complete. Main Mast Shrouds begun. Quick question for anyone that drops in: with my scale being 1:90, what size should my ratlines be? My shrouds are 0.5mm, any idea what my ratlines should be? My plans call for 0.25mm, but that seems way too big. Would just plain black thread (the same I'm using for seizings) be too small?

-
Thanks JL! And trust me, that message you sent will prove to be invaluable, especially your log pics and that rigging plan. I'm sure with those plus the book I should be on the right track. I'm hoping ratlines won't take that long! But of course we shall see. Thanks again for your kind words! I've got the starboard mizzen shrouds complete, and tonight I'll finish the port side shrouds and post a picture.
-
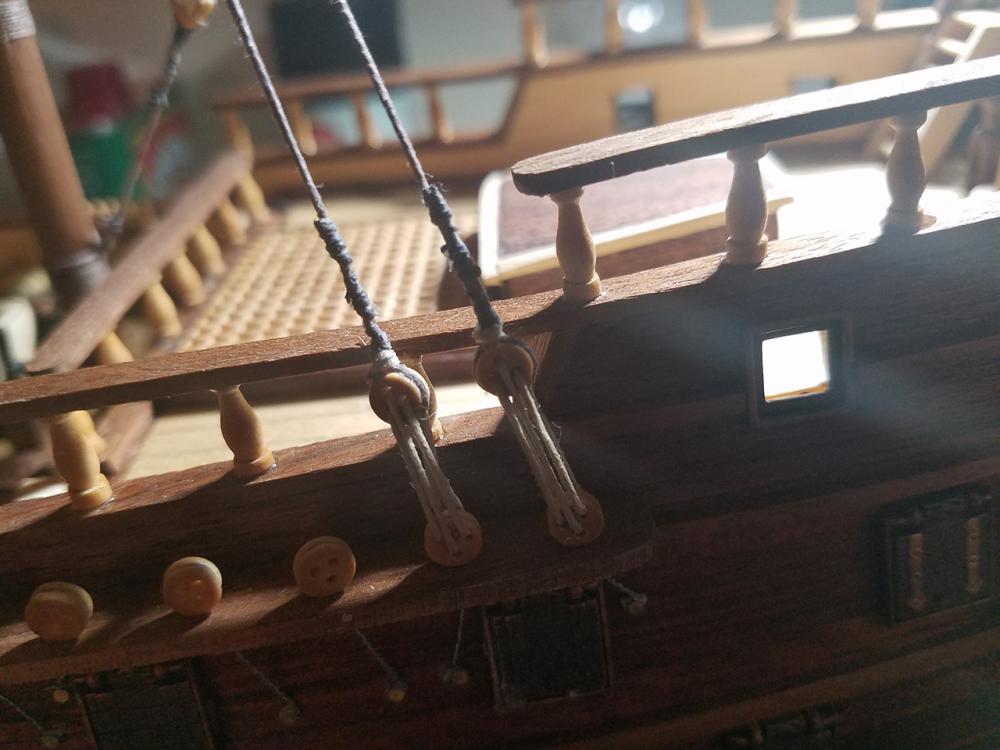
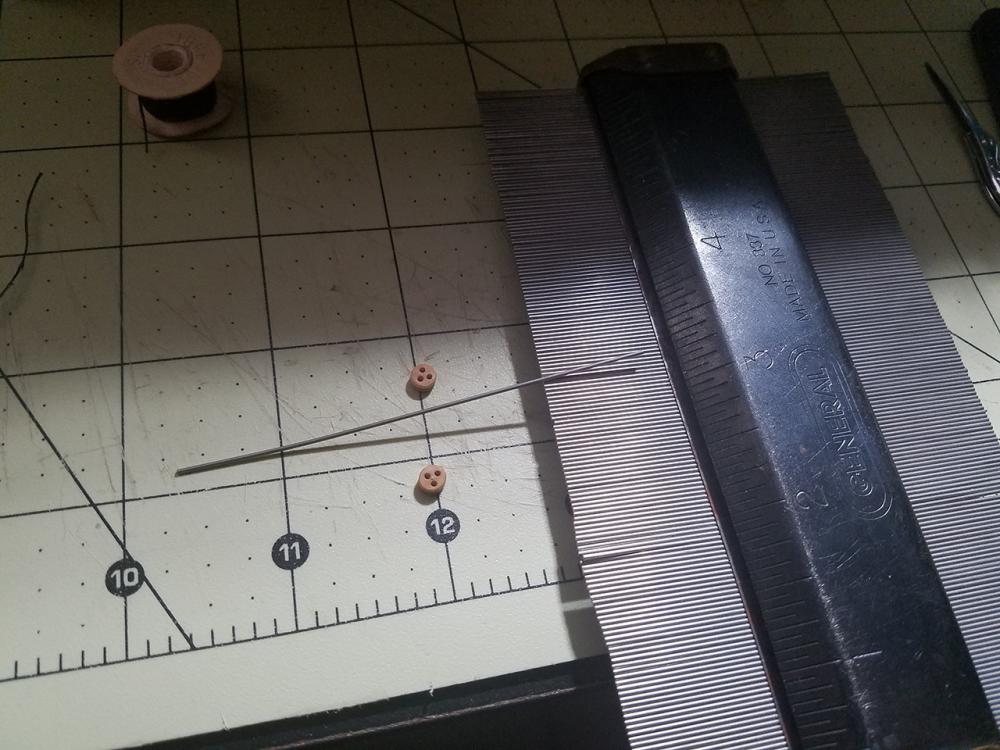
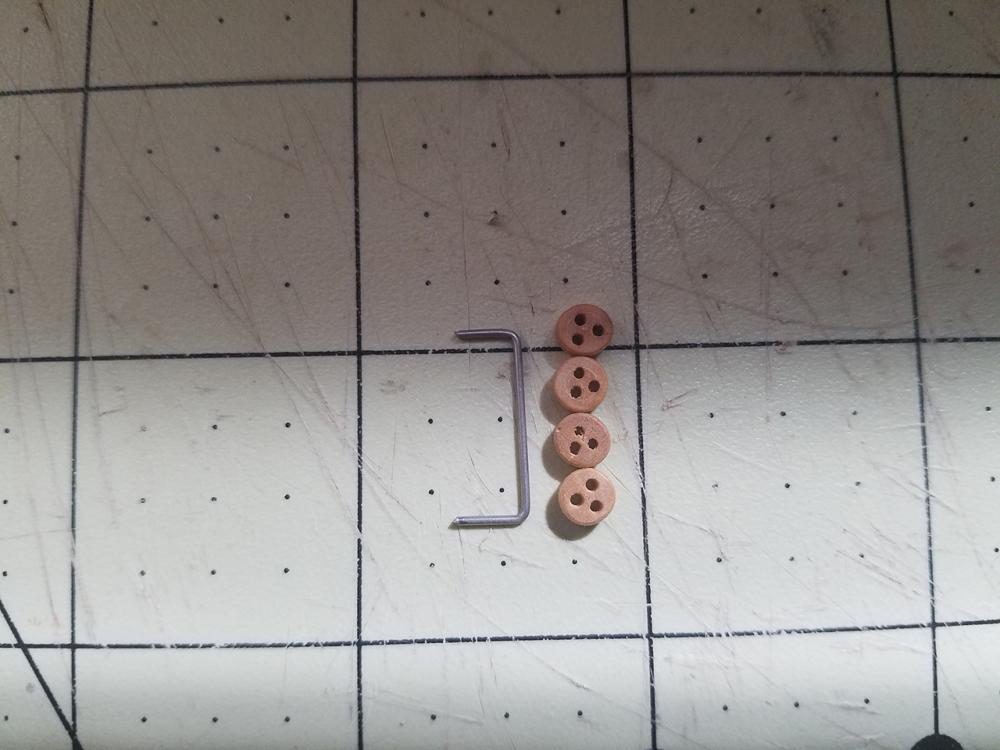
Not a big update, but an update none-the-less. Completed the Main mast stay, and began the shrouds on the mizzen mast. After the main mast stay, I needed a way to gauge the distance between dead eyes for the shrouds. I saw my contour gauge laying by the side, with a single bent tine. That'll work. Shaped it to be 3.5 deadeyes long. After seizing the top of the first shrouds, I line up my dead eyes. And seize those too. Lanyard reaved through the dead eyes. Following same process, second one is complete. Repeated on the port side. And finally an overall shot. Thanks for looking! Until next time.


-
No problem Gif! Here it is: https://www.youtube.com/watch?v=WUrRb66VSSE And I must say your San Juan is looking great! The darker stain on the railings and strakes is beautiful. Very well done! I don't have pictures of the process on shaping my masts, as I had already done that prior to boxing her up for a while. After much research I found a place in Australia that I can purchase an 8mm Mahogany dowel, so that's on its way. In the mean time, I've glued in the Main and Mizzen masts, and began the first bit of rigging. (The name escapes me, and my book is across the way...my cat won't get off me at the moment, ha!) Started seizing. Wasn't too bad to do, just time consuming. First side complete. Completed the longer side. And shorter side, attached to the main mast. And finally wove line to connect the two. I've ordered Rigging Period Ship Models by Lennarth Petersson, and will have that next week. I've read other build logs where they've said the rigging for this type of ship is completely wrong in the AL plans, so I want to do it the right way while following along with his book. If anyone has any other resources that I can look at to get the most accurate rigging plan for this ship, I'd much appreciate it! While I wait for the book and also a new dowel to arrive for my foremast, I'll be completing the mizzen and main shrouds and ratlines.

-
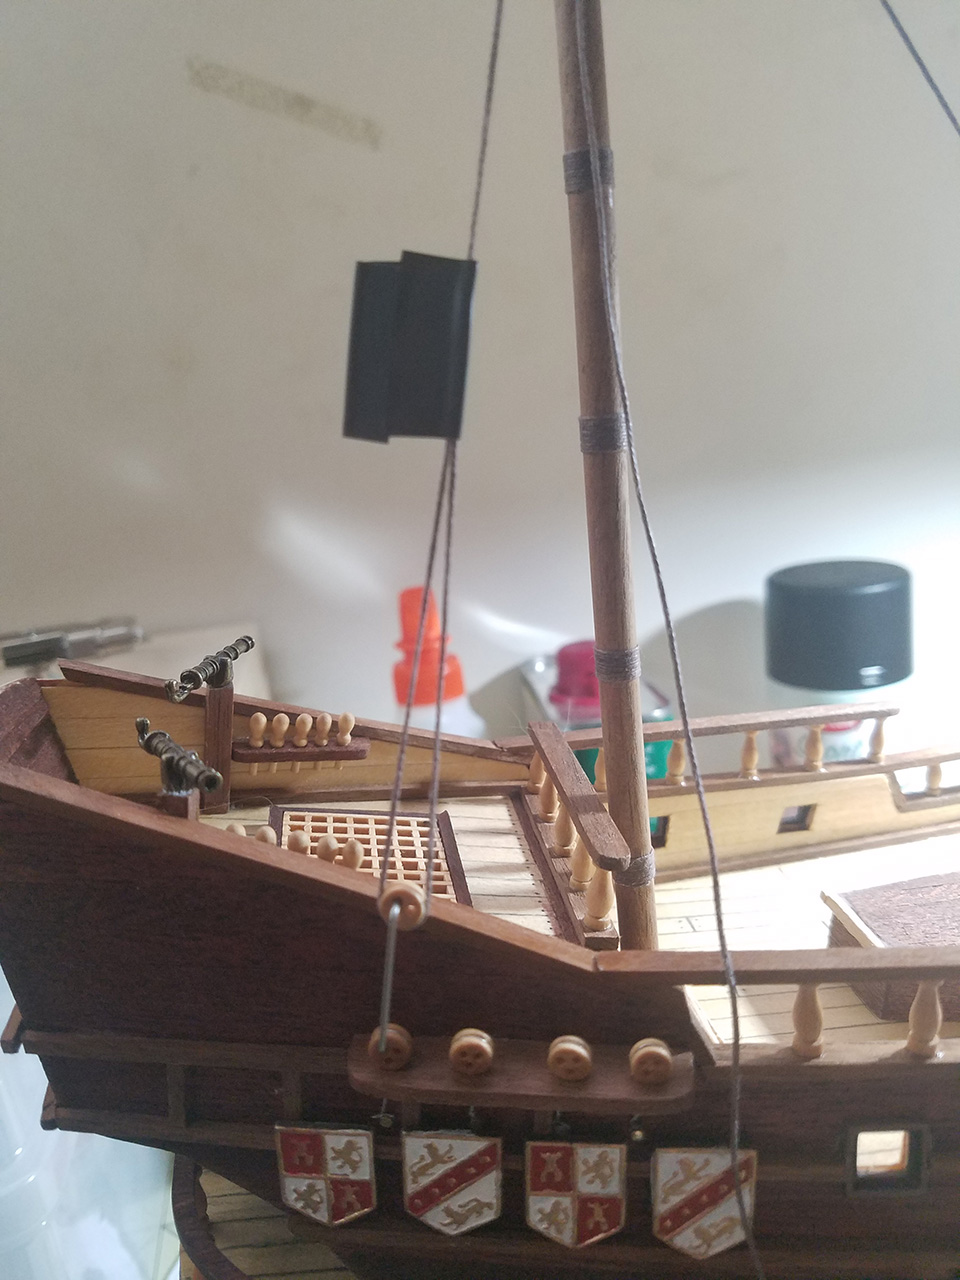
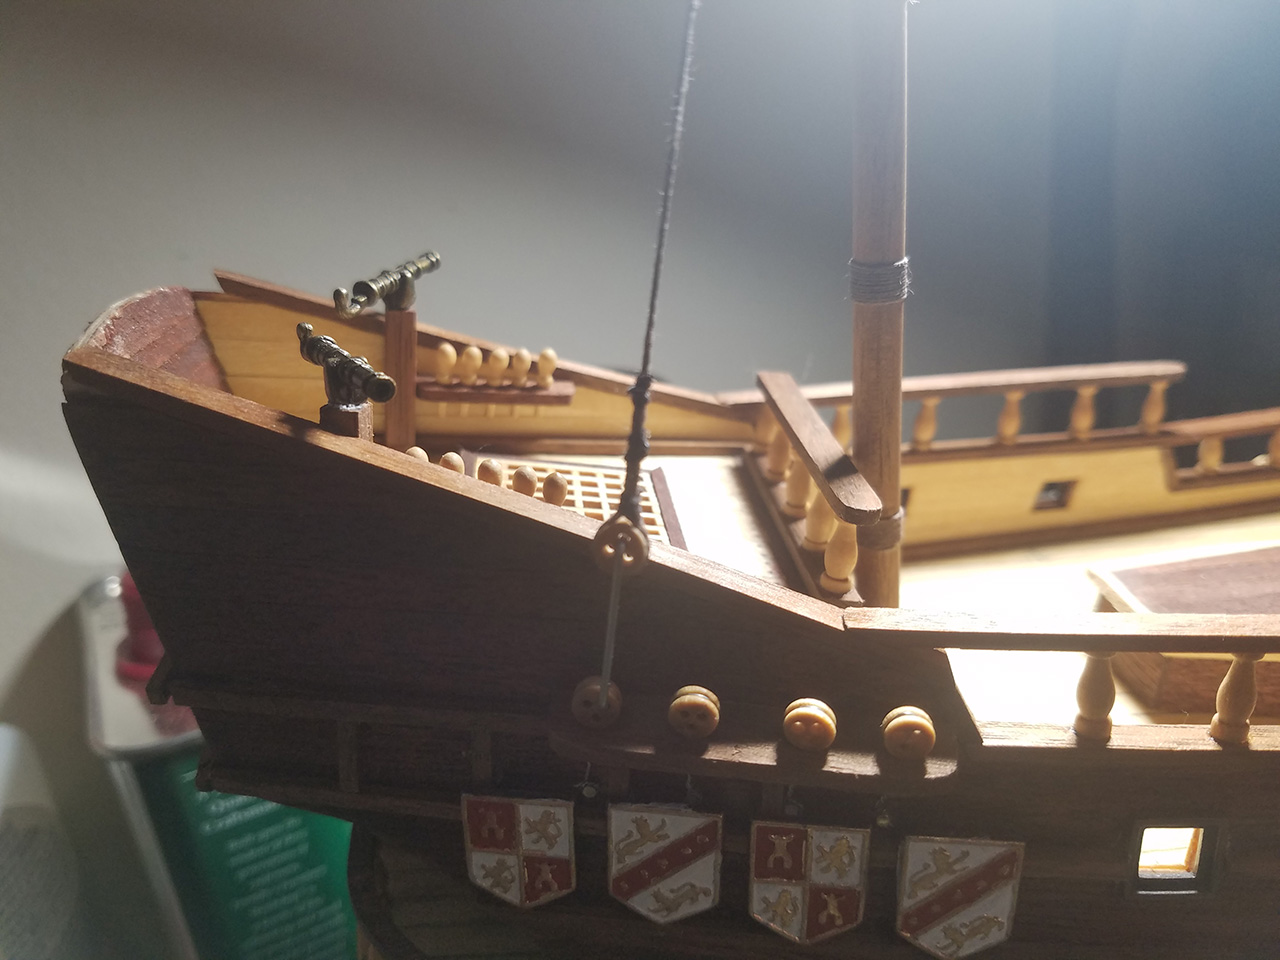
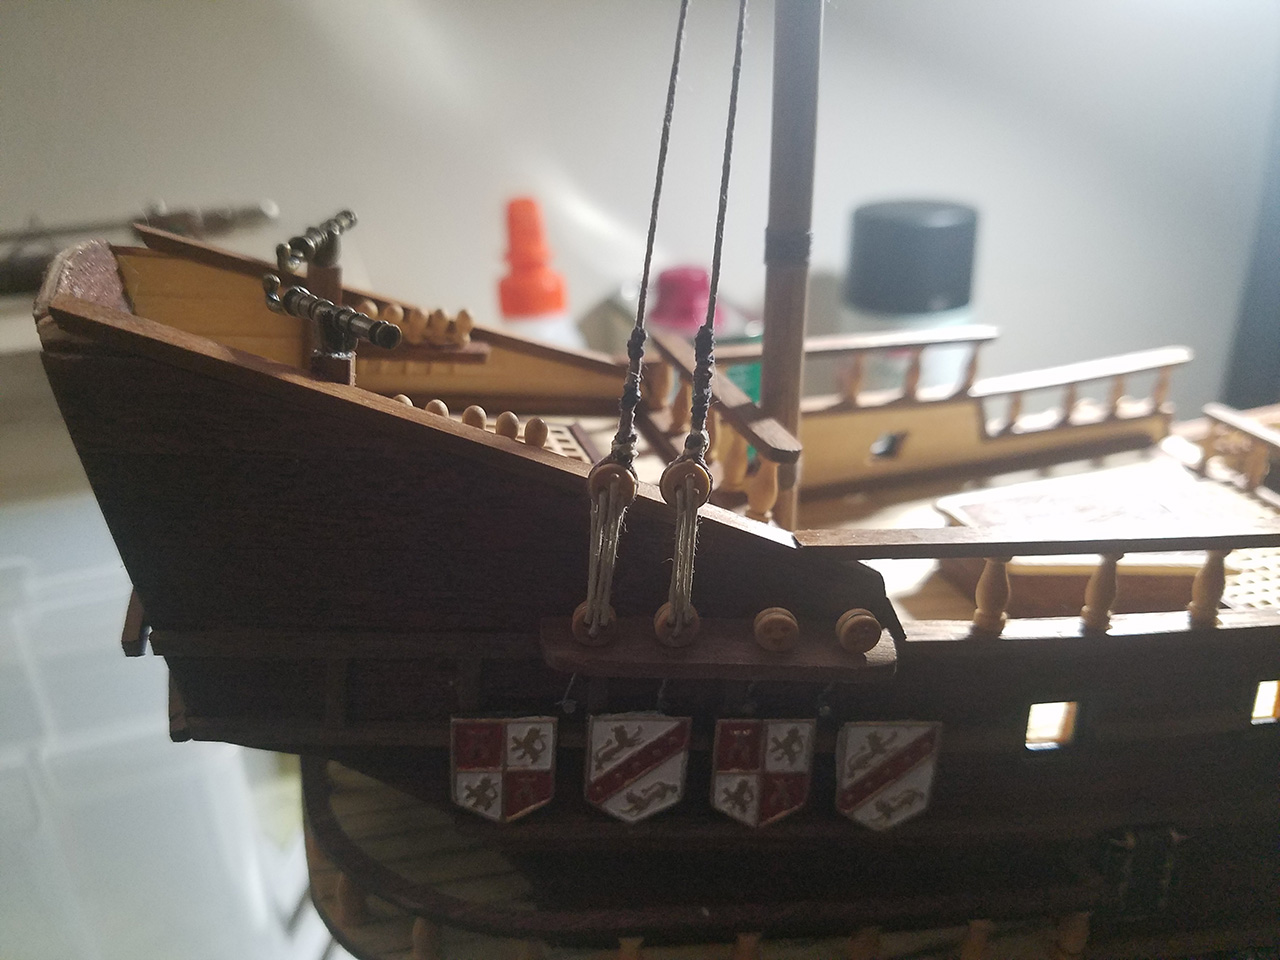
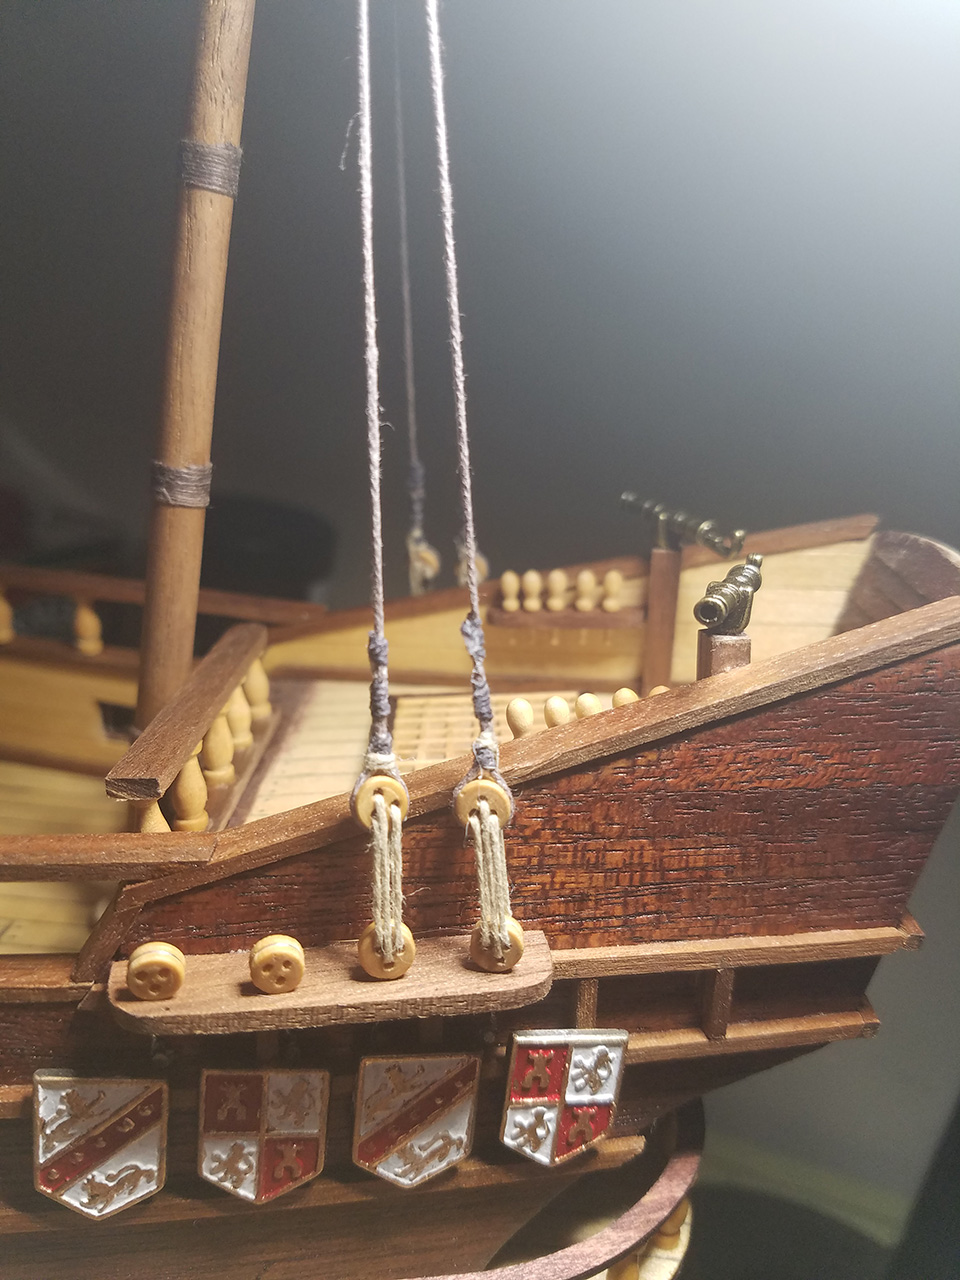
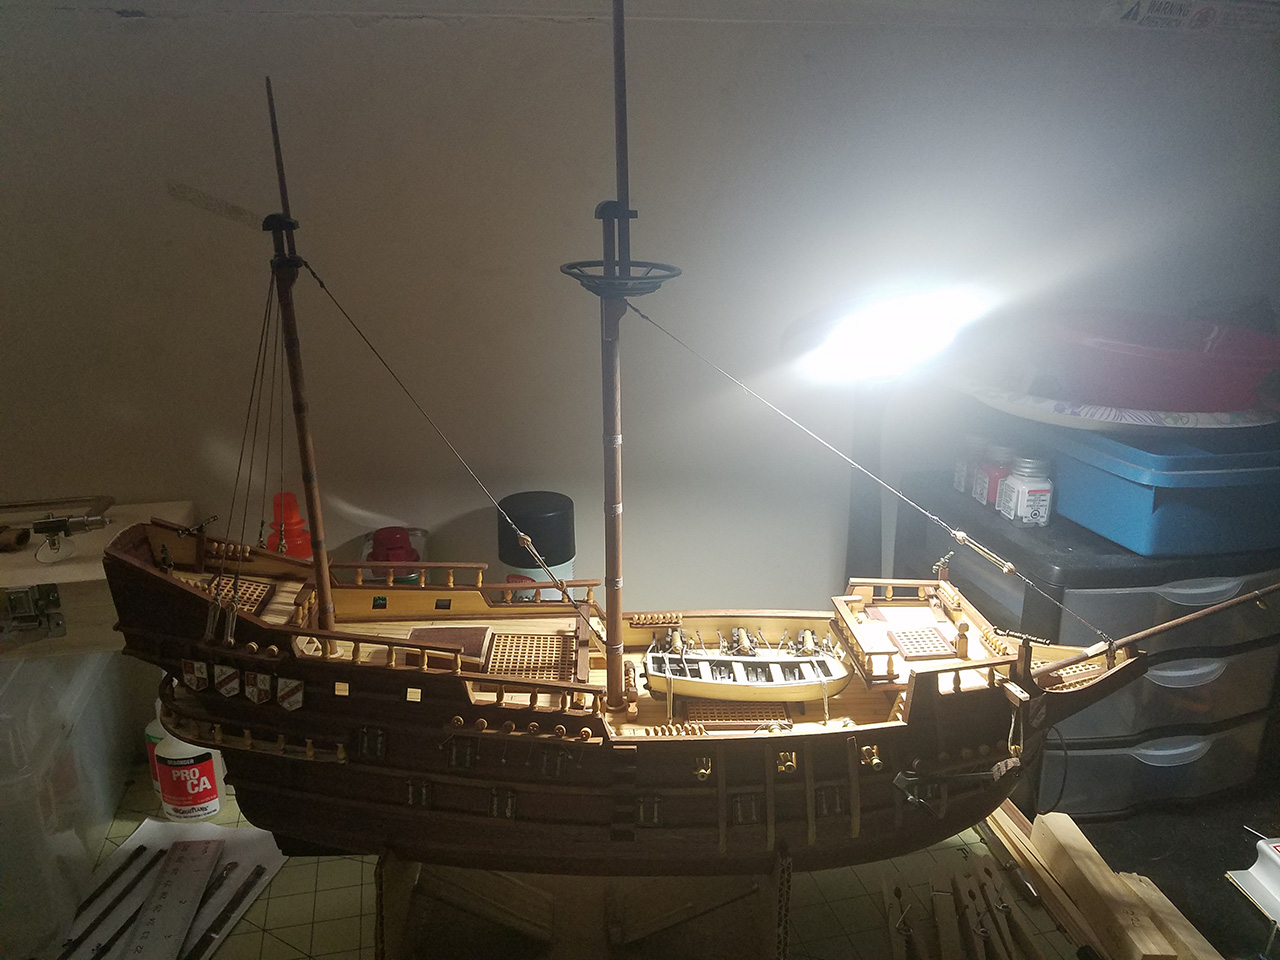
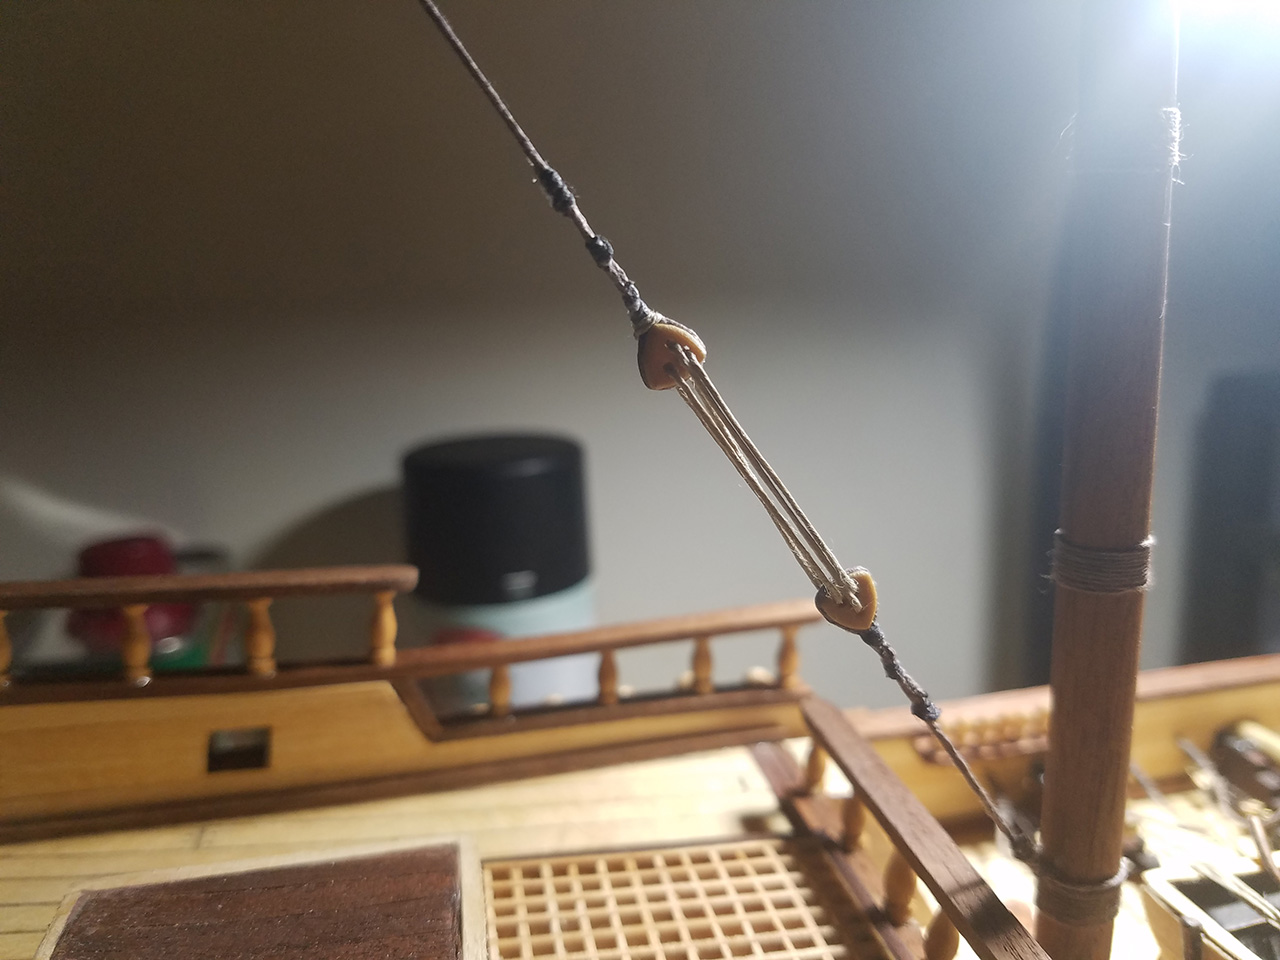
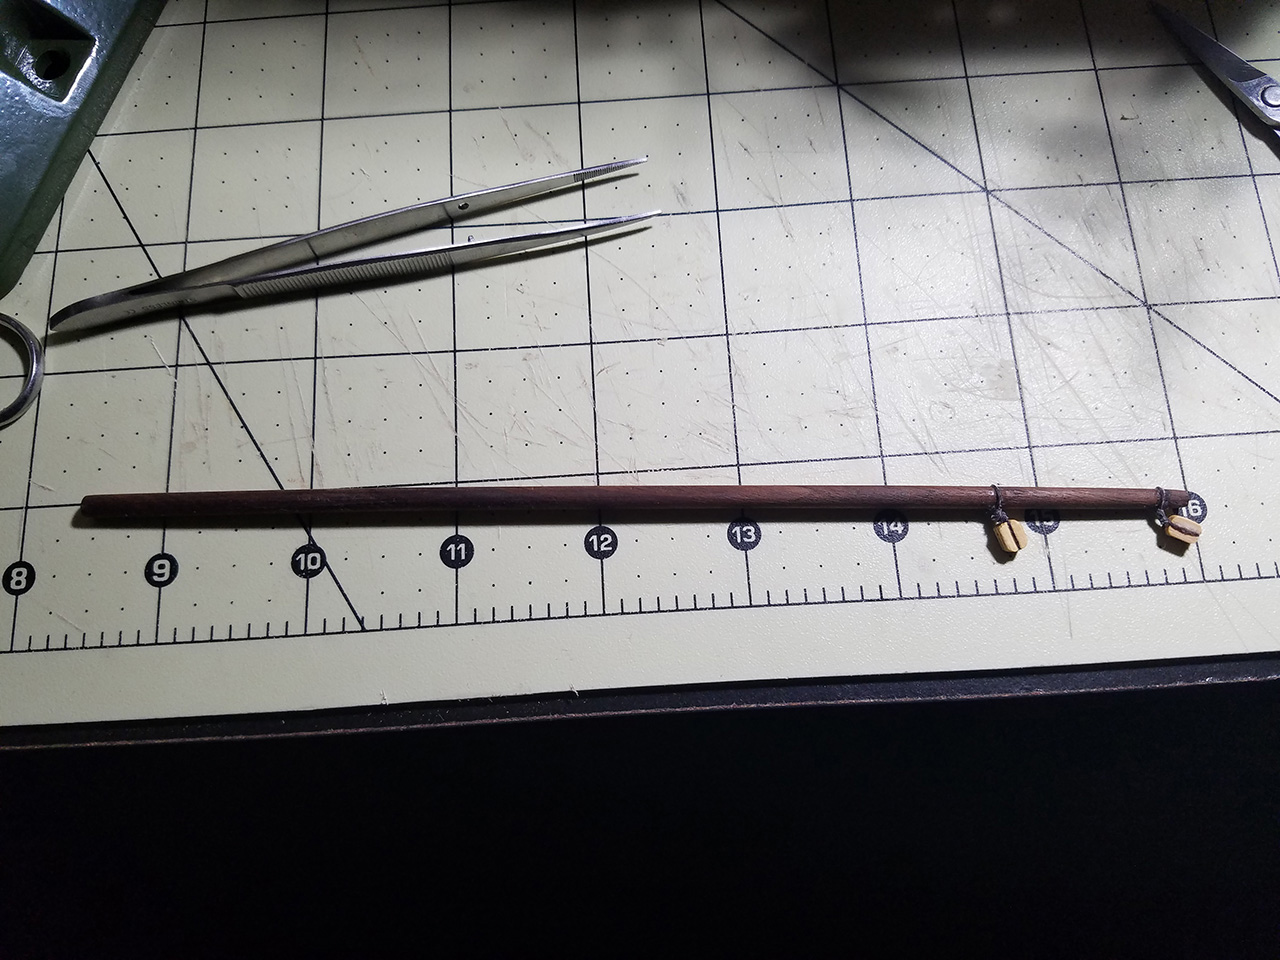
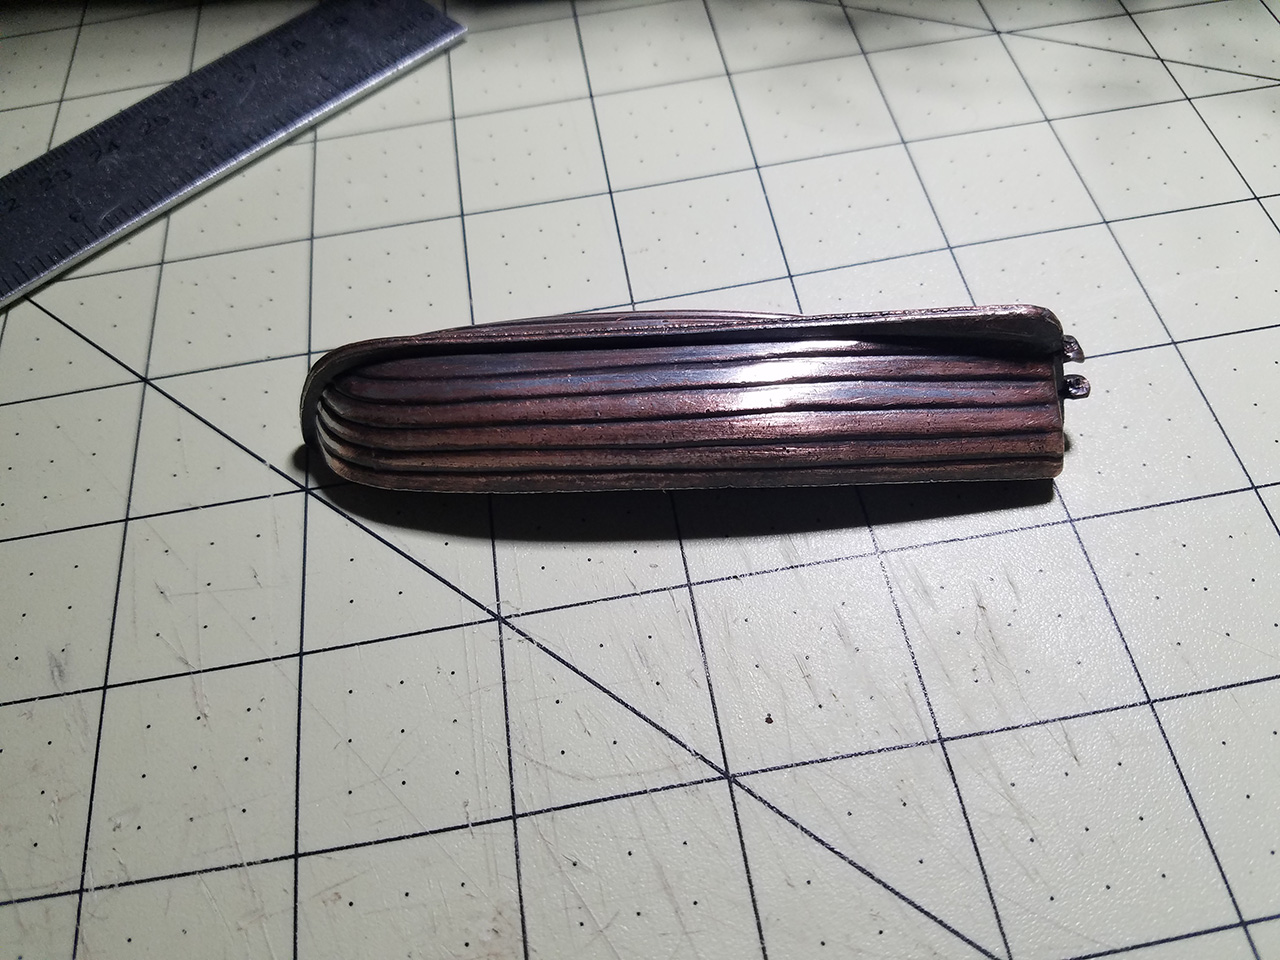
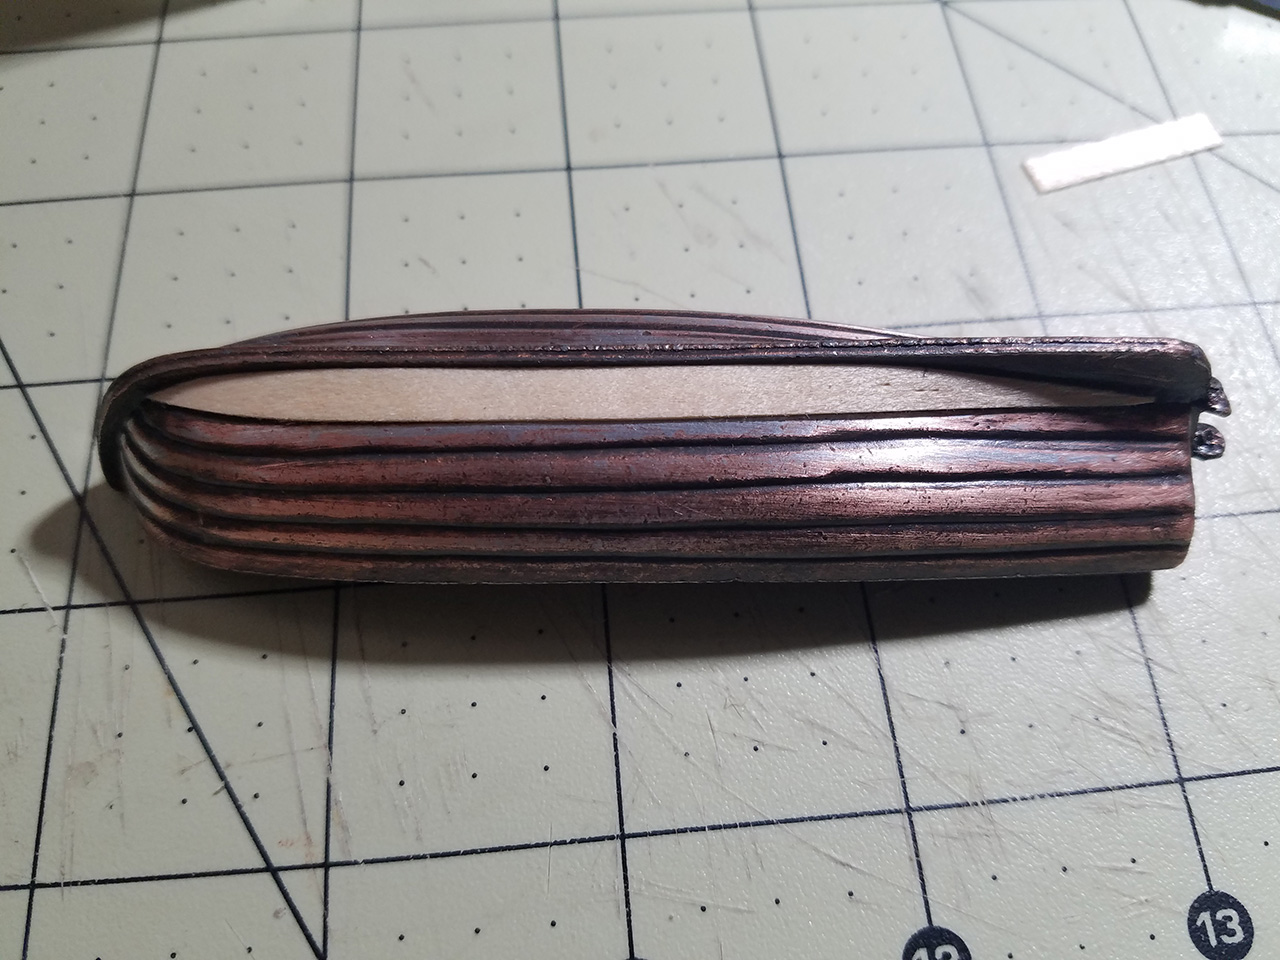
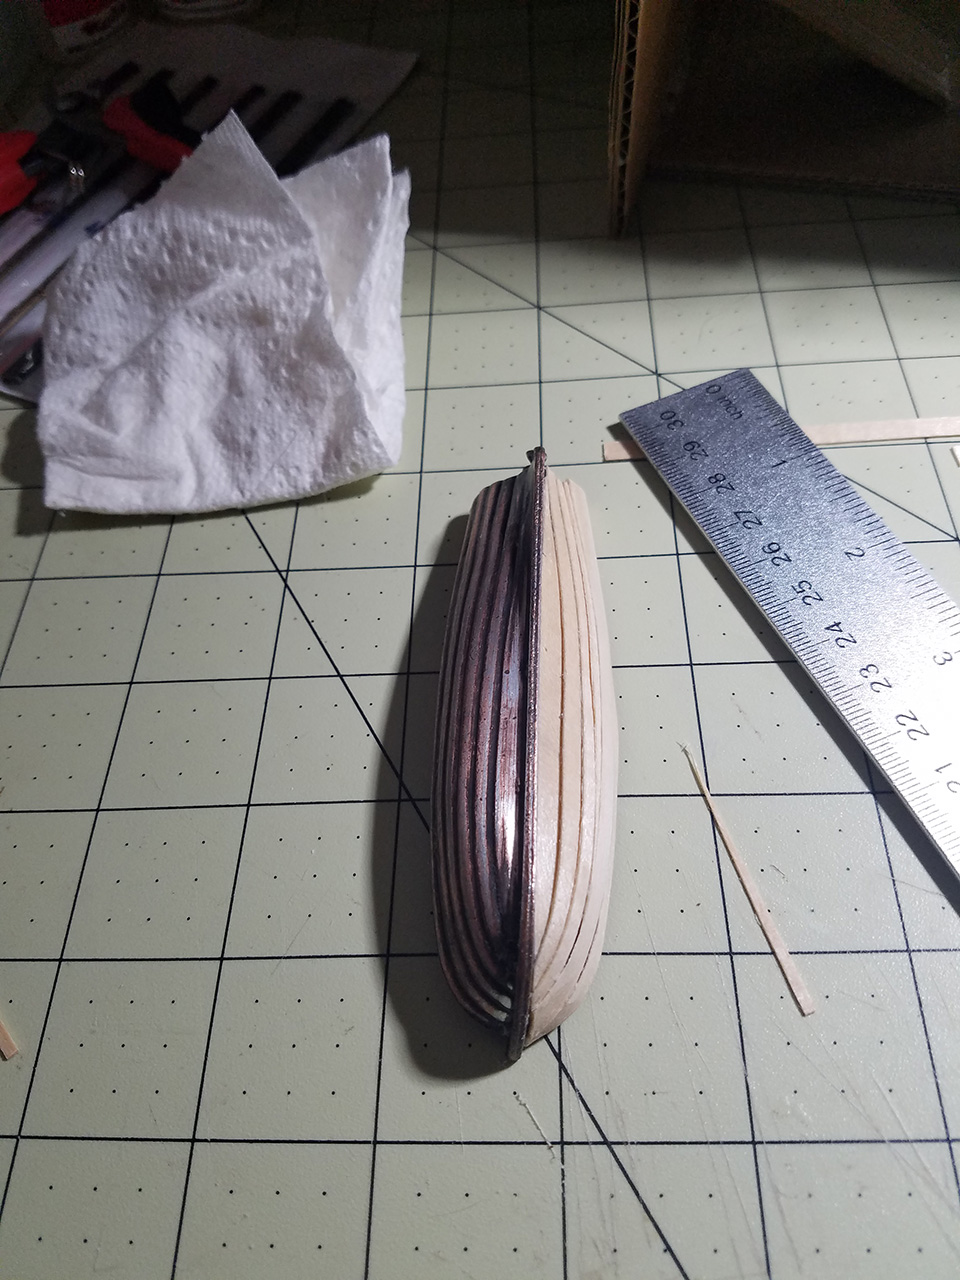
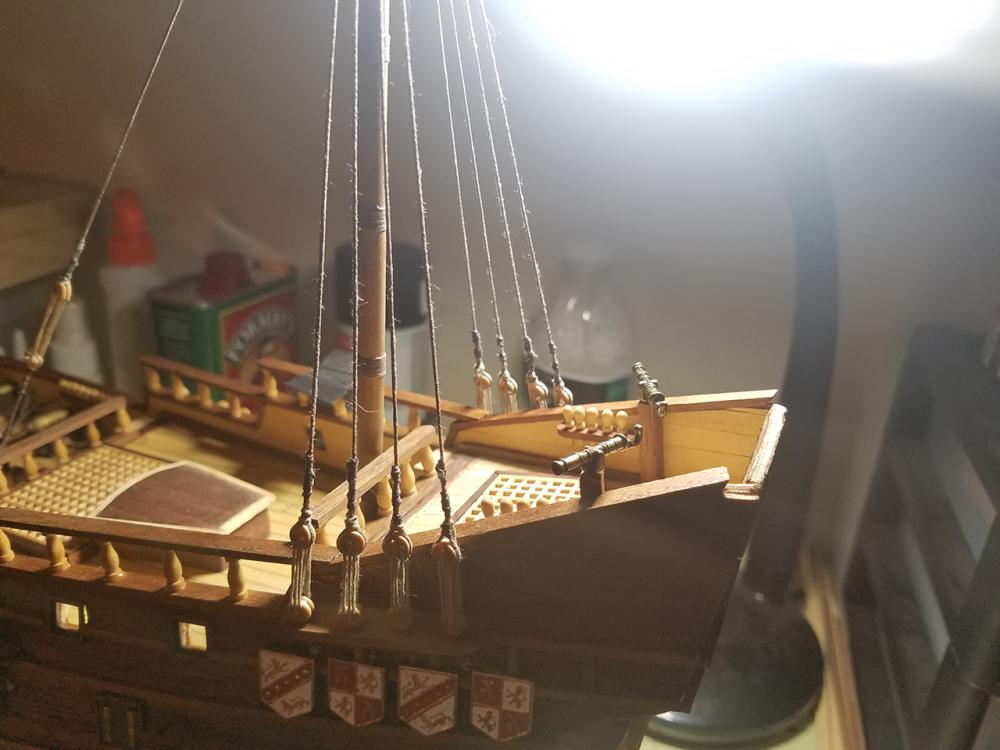
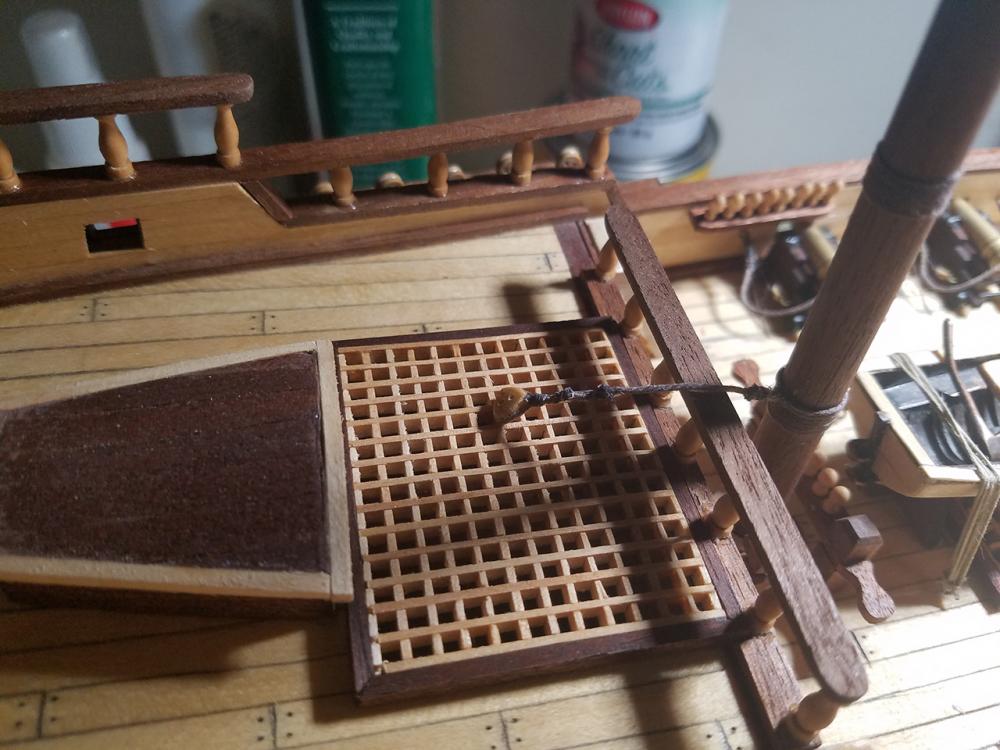
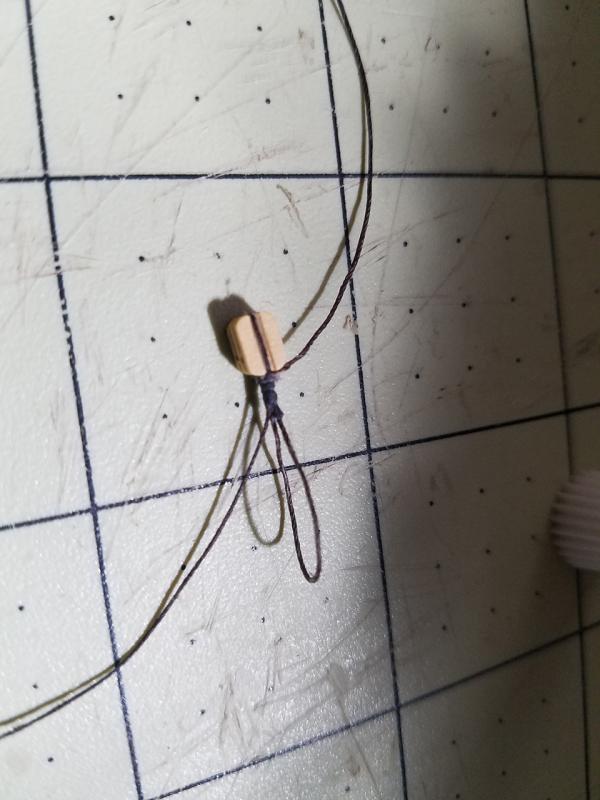
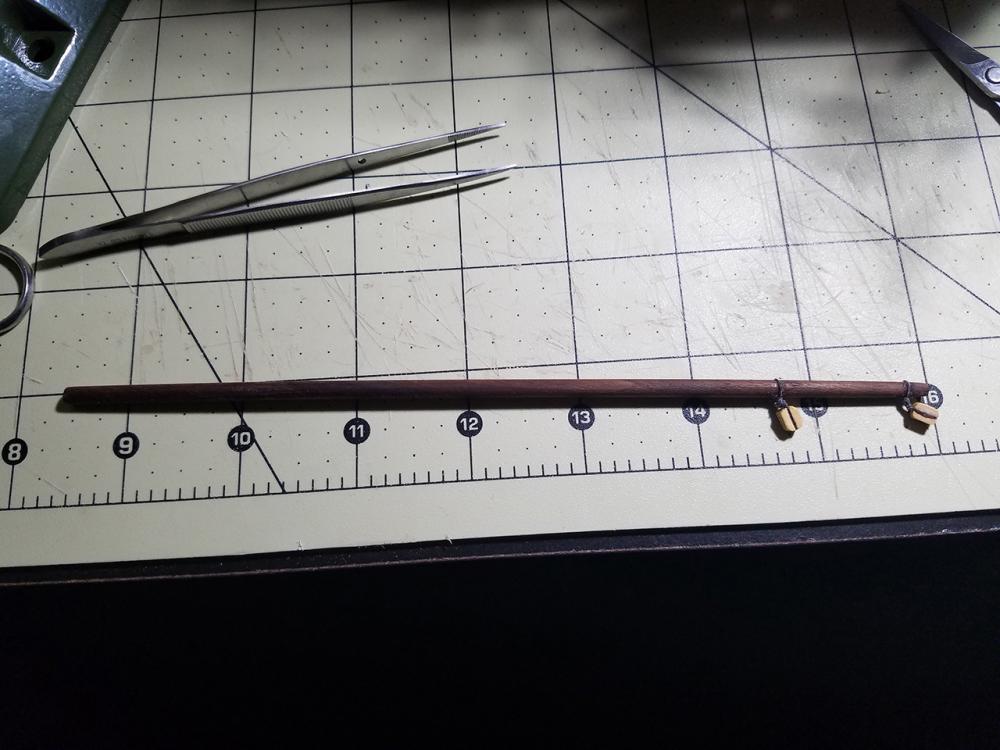
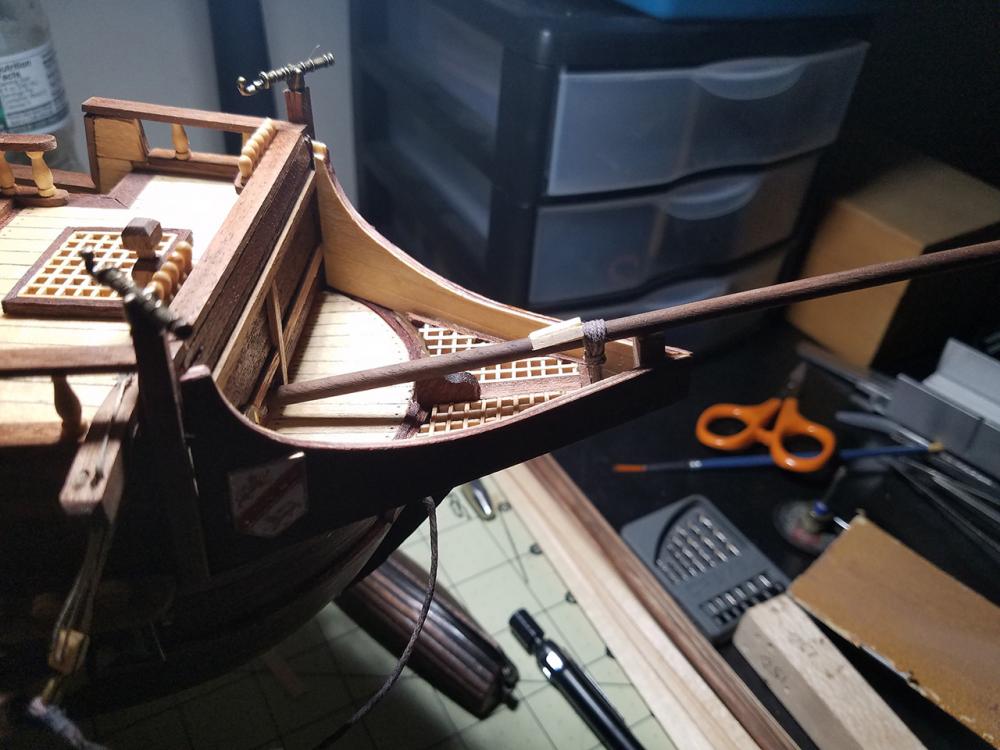
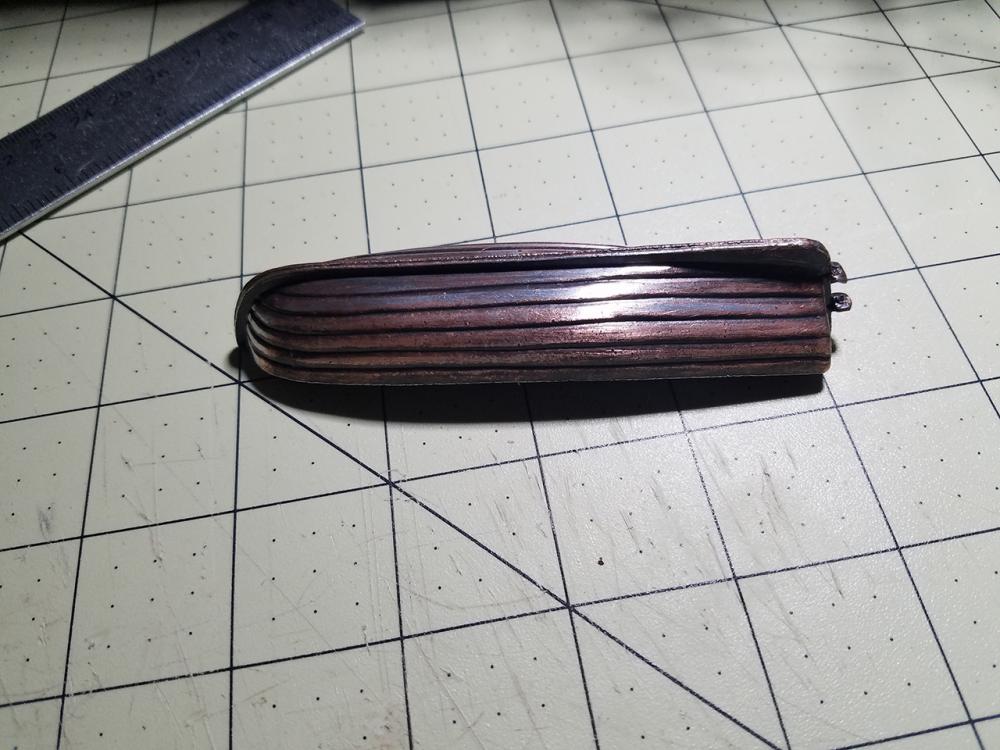
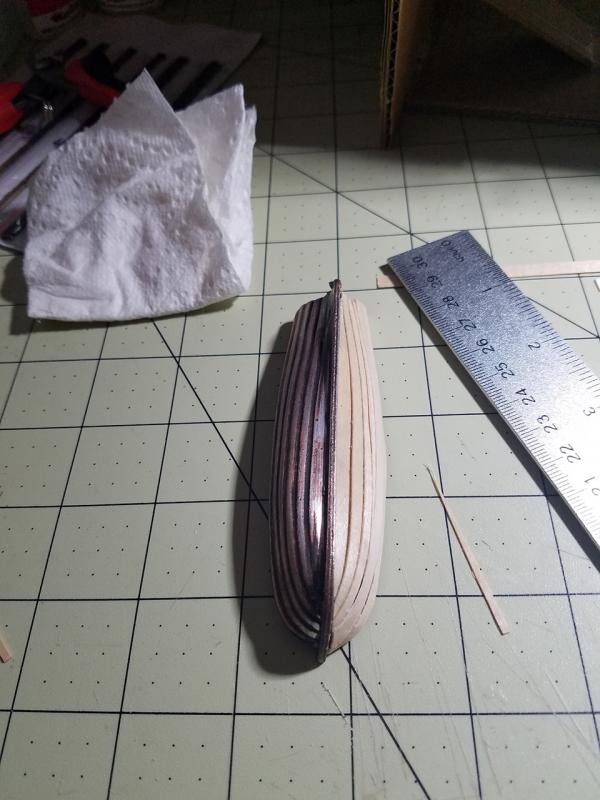
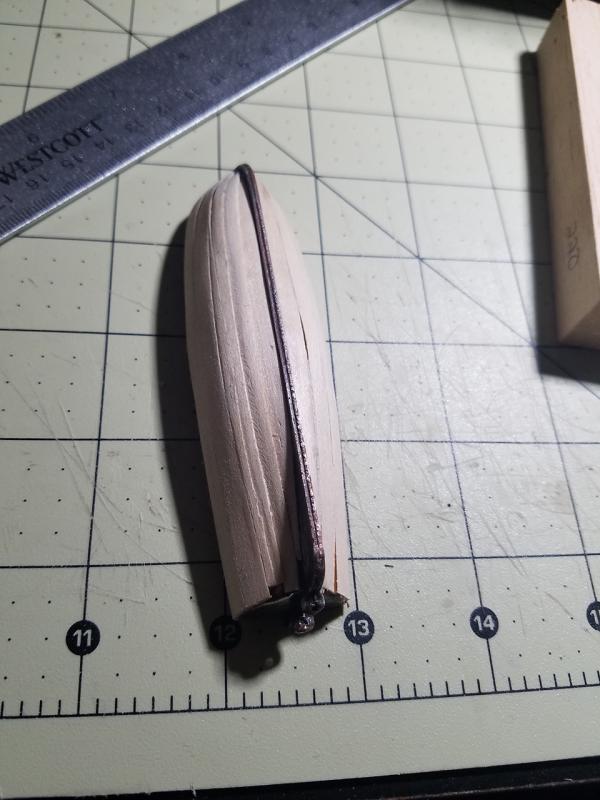
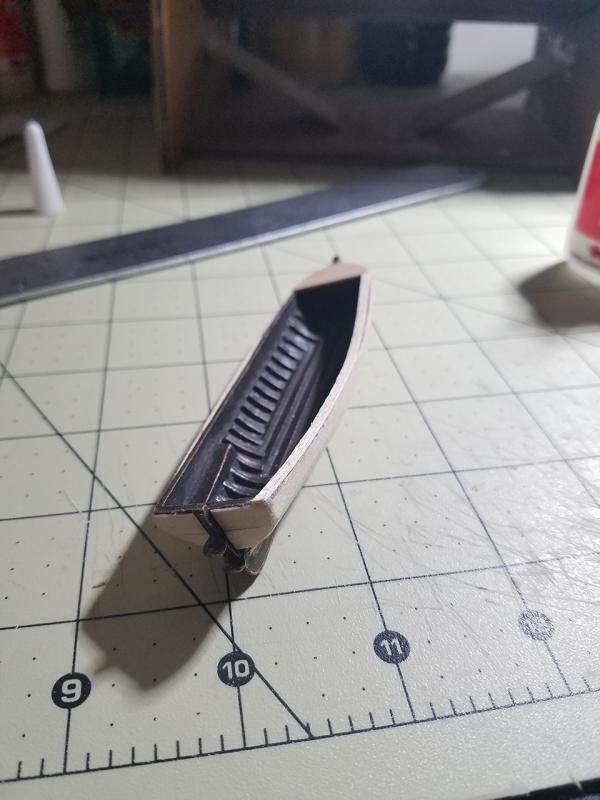
Thanks Dave! Yeah, I'm following yours as well. It's extremely nice to be able to get ideas from other people on this site, before moving on to the next major step. Your log, with others, has definitely helped me in the last week or so I've gotten back to working on it. Some updates, I'm just about ready to begin the rigging, and I'm so happy to do so. First up was the bowsprit. I shaped the dowel and varnished with Tung oil. Then began seizing the two blocks that go on it. I found a YouTube video that showed me exactly how to do that, with original credit going to Bender. Bowsprit with two blocks. I'm not confident in the correct placement/orientation of these blocks. I'm following the rigging plan that came in the kit, and that's where it said these need to go. However, looking at others' logs, they're in a different spot. Before I get too far into it, I need to research how exactly I'm going to rig this up. But for now, these will stay. Easy to remove if I change it. Next I added the line and the cleats. After that I couldn't put off the lifeboat any longer. I decided to plank directly on the die cast metal one, as I couldn't for the life of me figure out how I'd scratch build it. I didn't want to spend the time making bulkheads either, so perhaps a combination of my patience and lack of power tools convinced me to go this route. First step was sanding it down. Garboard plank added first. One side down. And both sides done, post-sanding. Another angle, with transom planked and first strake on the top in place. And here we have it complete. I didn't add in the oar spokes, haven't decided if I will or not. I also haven't painted the rudder yet, I'll get to that when I have the correct color model paint. (Or I may try acrylics, but that didn't work so well on the shields, so I don't know yet.) Last venture for the evening was 'planking' the cheeks for my masts. I had one strip of thin mahogany leftover so I'm using that to spice the cheeks up a bit. I've run into a pretty big problem however, the 8mm dowel that would have been my foremast has been snapped in two places. I'll either try and glue it back together, or order another one. I'll need to look into the minimum order amount though, as I don't need 5 dowel rods or whatever. I'll try and find a place I can just order one, and some blocks too...I know I don't have enough blocks to complete the model. Thanks for reading this far!


-
Great explanation Dave, thanks for the answer. I'll keep that in mind for sure for next time. I just got done planking over it before I hopped on here and saw your reply. It's a great technique tho and probably a lot easier than the route I went with.
- 114 replies
-
- 1
-

-
- san francisco ii
- artesania latina
- (and 1 more)
-
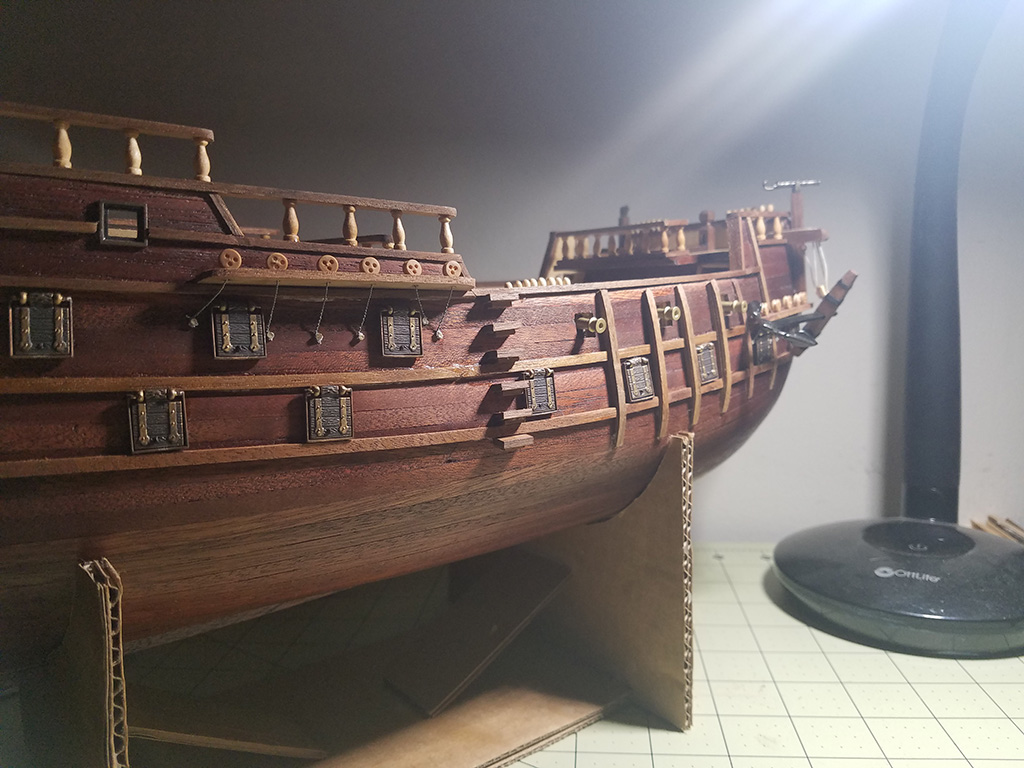
Hello all, Today was pretty productive. Biggest goal completed were the fore, main, and mizzen channels. My biggest complaint by far lately is the wire included in the kit was just so brittle, it broke about 40% of the time. Luckily it came with more than enough to get the job done. Close up of the progress of the main channel. Note I did the dead eyes a little differently, twisting the wire around the dead eye and leaving a long enough tail. I pre-drilled holes for the nails, stuck them in half way, and wrapped the tail around the nail one time before snipping off the excess. A dot of glue on the nail, and then I pushed it in all the way. Overall shot of all channels complete. Notice the rubbing strakes, channels, and handrails are a lighter color right now. Next task I chose to complete was the anchor rigging. Before I boxed the kit up and stopped working on it, I had made the decision to scratch-make the anchor stocks from planking material. I had completed one a long time ago, and it was easy to make up another one for the other side. I used black thread to emulate the iron clasps. Here I have one anchor complete. I'm leaving it loose until I can rig the shrouds; at that point I'll tie it down to the channel. Last but not least, I finally decided what I wanted to do for a varnish. I've been building this model without varnishing anything other than what needed to be stained. So the rubbing strakes, hand rails, channels, ladders, grates, etc have all been left their natural wood colors. I have been doing a lot of research and went with using Tung oil on all of those parts. So, with about an hours time and a cheap paint brush, I went over the entire model (whatever wasn't stained already) and applied the Tung oil. I must say, I should have been doing that from the beginning! What a difference it made, and I'm loving the look even more now. I don't have very good lighting, but before I start the rigging (here soon!) I'll try and get some good overall pics of the completed hull.


-
Looks great Dave, very impressive. Question on your jolly boat, did it come with a die cast version? And did you just paint it to make it look more realistic? I'm currently working on the same ship, and am at the stage where I need to start figuring out what to do with my die cast jolly boat...either plank over it, scratchbuild a whole new one, or just paint it.
-
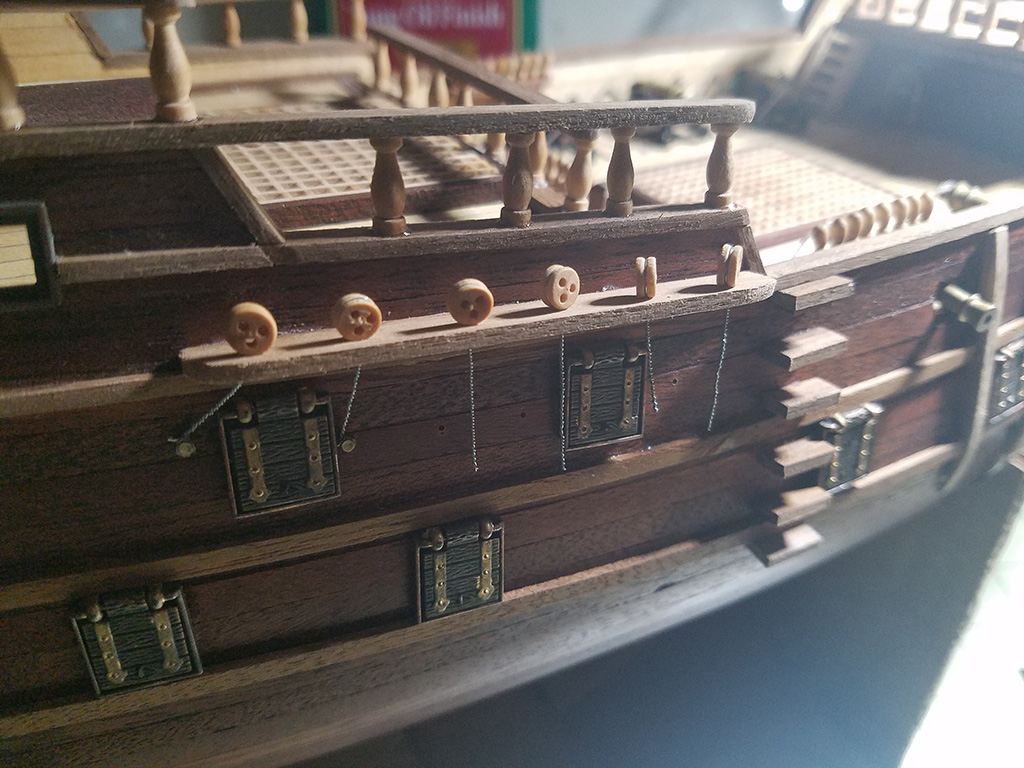
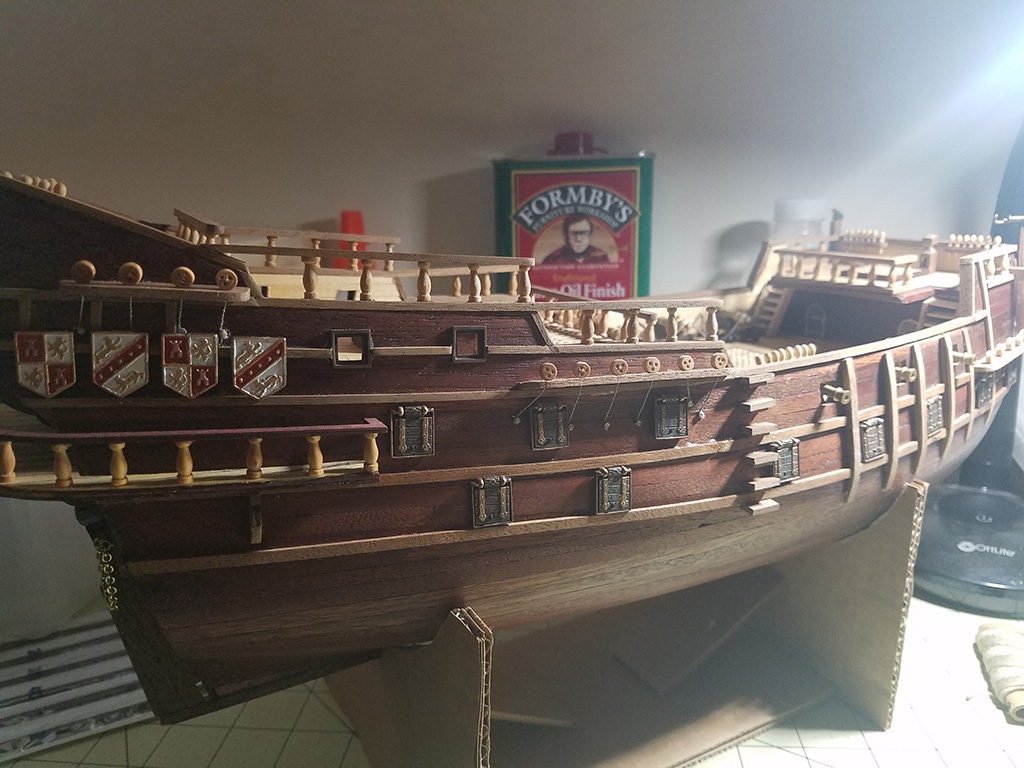
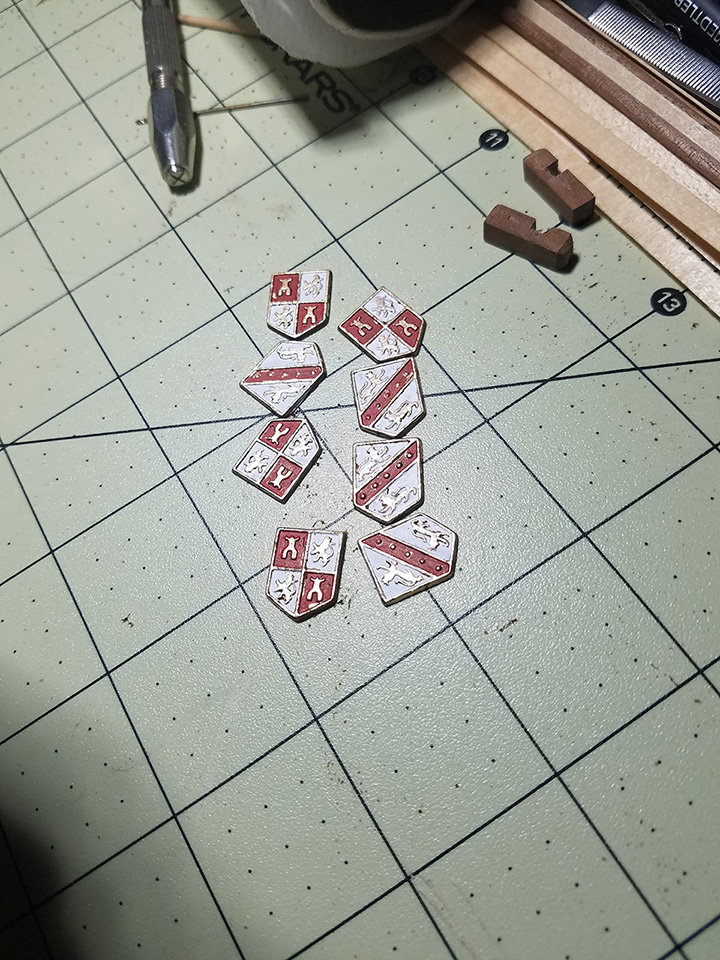
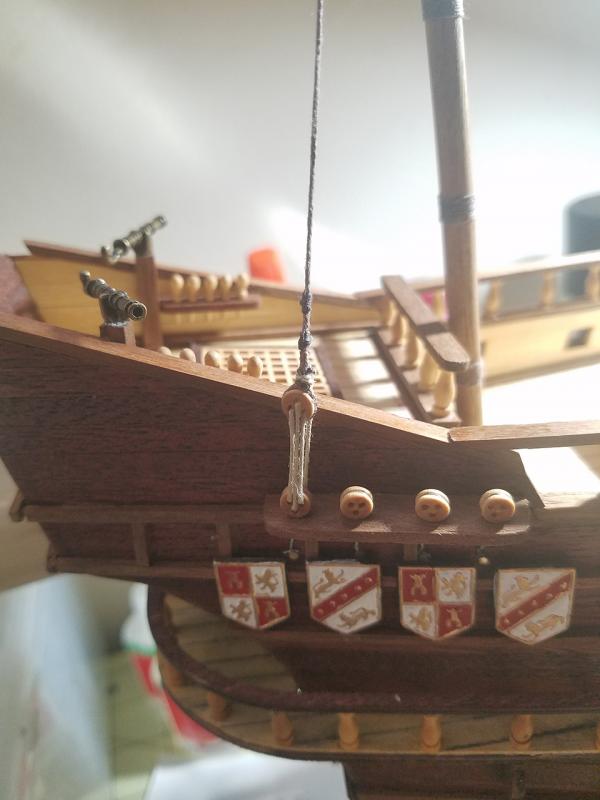
Thanks for the tip jl! I'll see what it looks like laying extra stock over the top of it. I'll take a look at your log (finally) and see how you did it as well. Jeeze where does the time go!?! I spent around 6 hours on it today, but it doesn't even seem like a whole lot got done, haha. Pin racks, mooring bitts, and falcon risers. Also painted the shields that go around the hull. I first started with regular acrylic paints, but that was ridiculously bad looking. So I got some Testors model paints and went back over it. I'm certainly not the steadiest of hands, but for how small the painting needed to be I'm alright with it. I won't be attaching them to the hull until I figure out what I want to do with the stern channels. Tomorrow I've got a full day of work planned, hopefully completing the channels, bow pin rack, and lifeboat. I spent around an hour on the central pin rack, only to break it, twice. I glued it back and THEN realized I didn't leave enough room between the posts for the 5 pin holes. I attempted to stagger the holes (Eh, why not?) to get them to fit only to have it break from lack of material. I made some new posts, and I'll make a longer piece to attach them to.

-
Thank you jl! I appreciate your kind words. The coil of ropes is a great idea! I'll play with that and see what I can come up with. I'll also gladly check your build log, it'll help me immensely for sure. One question I have for anyone out there though. Any suggestions on scratch building a lifeboat for the model? It comes with a metal one, which I find hideous. I've got extra planking strips, so I probably could build something. I'm just not sure where to start with that.
-
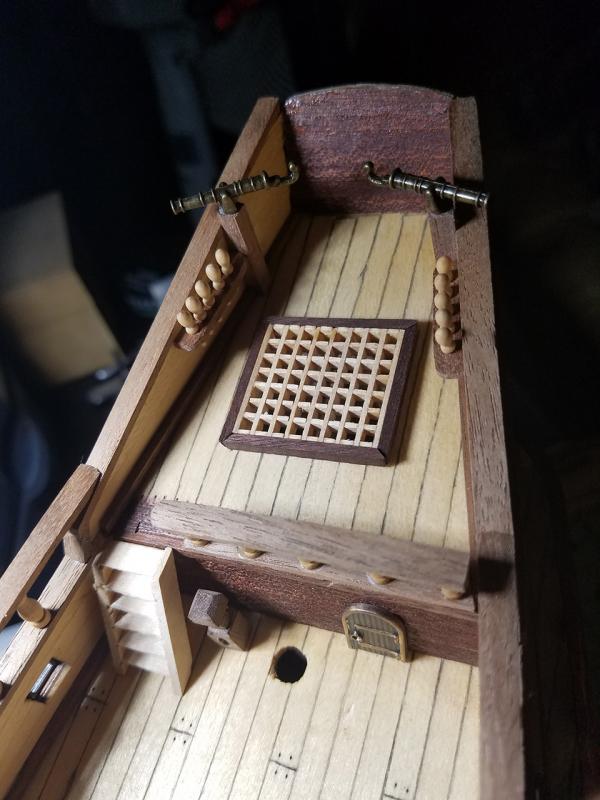
Greetings all! After a long, long time I'm finally able to begin working on my AL San Francisco II again. A little background: I started this kit about 6 years ago, and made it to the planking stage before I realized I had no idea what went into building wooden model ships. I took to the web, and came to this fine site. I halted all progress and opted to read instead, learning how to do things the right way, and clearly planning ahead my next steps. I began a build log and asked for some help, and before I knew it my hull was planked! I was so happy to be passed that stage, that's for sure. Shortly after, I went into the U.S. Army and time just flew right on by. Before I knew it, I hadn't worked on her in ages, so I broke her out and put some cannons on her. But I didn't like how AL wanted me to do it, so I did a bit of research and spent some extra time on actually rigging them up. Is it proper for the time period? No clue, but I like how it looks. Alas, I had to move again so back in her box she went along with all of my other supplies. I then moved 3 other times, never taking her out again. Fast forward to now, I'm out of the military and hold a decent job that I enjoy and am ecstatic I'm able to get her out and work on her again. I don't have any progress from before, I guess something happened with this forum, or it got purged due to inactivity? I also lost the pictures I had of the previous progress due to a hard drive failure. Nevertheless, I'm back to working on her, and would like to document my remaining journey on my first wooden ship. I know I still have lots and lots of questions, and if anyone has any tips / recommendations please feel free to reply and let me know! The last few days has been spent setting up my work area, and taking inventory of what pieces and parts I still had after moving around the country a few times. Getting her into a proper stand was first order of business, and combing through the instructions and cataloging my process to get me back up to speed. I decided my first step would be to finish the grates. The instructions said it came with metal grates, and to just glue them down. I don't remember if that were the case or not, but I had already made them I just needed to frame them out. (Except for the bowsprit grate, more on that later) Here the framing is ready for stain. Grates! The bowsprit grate was pretty intimidating, so I opted to go for the cat davits. This presented a unique issue, as the instructions would have me shape them one way, but I had to cut a channel in them to accommodate the lower railing. The pics describe it better. Wasn't too much of a challenge though, with my handy dandy dremel. My next step was to figure out the bowsprit grate. Gonna be a pretty interesting shape I had to make. I pretty much just gathered some scraps I had (I saved all my scraps from when I worked on it before) and started fitting things together until I got something I liked. Cutting the grate was interesting, as I lost the finer details due to me not taking my time on it. I'm 50/50 with this grate...I doubt I'll redo it (even though I probably should) however I'll be thinking of a way to cover up the bottom part that is closest to the bow of the hull. The last order of business for this session was to stain the rudder (not pictured) and cut the strips I needed for the ladders on both sides. And glued in place. Since this is my first wooden model ship, I've definitely made mistakes that show in those pictures. But I'm happy with the progress so far, and can't wait to finally get to complete her! It's been way too long, and I'm already looking forward to what I want to do next (also the clarity of instructions on some of the better kits compared to AL.) My goal is to spend an hour a day on her, but we'll see how that actually happens, hah. Thank you all for taking a look, and again please feel free to throw out some suggestions or corrections that you may see from the pictures.