HOLIDAY DONATION DRIVE - SUPPORT MSW - DO YOUR PART TO KEEP THIS GREAT FORUM GOING! (Only 24 donations so far out of 49,000 members - C'mon guys!)
×

CPS_skybolt
-
Posts
217 -
Joined
-
Last visited
Content Type
Profiles
Forums
Gallery
Events
Everything posted by CPS_skybolt
-
 Looks really nice. Looking forward to your progress. I thought about glassing my model but didn't, should have.
- 34 replies
-
- 2
-

-
- kearsarge
- first build
- (and 1 more)
-
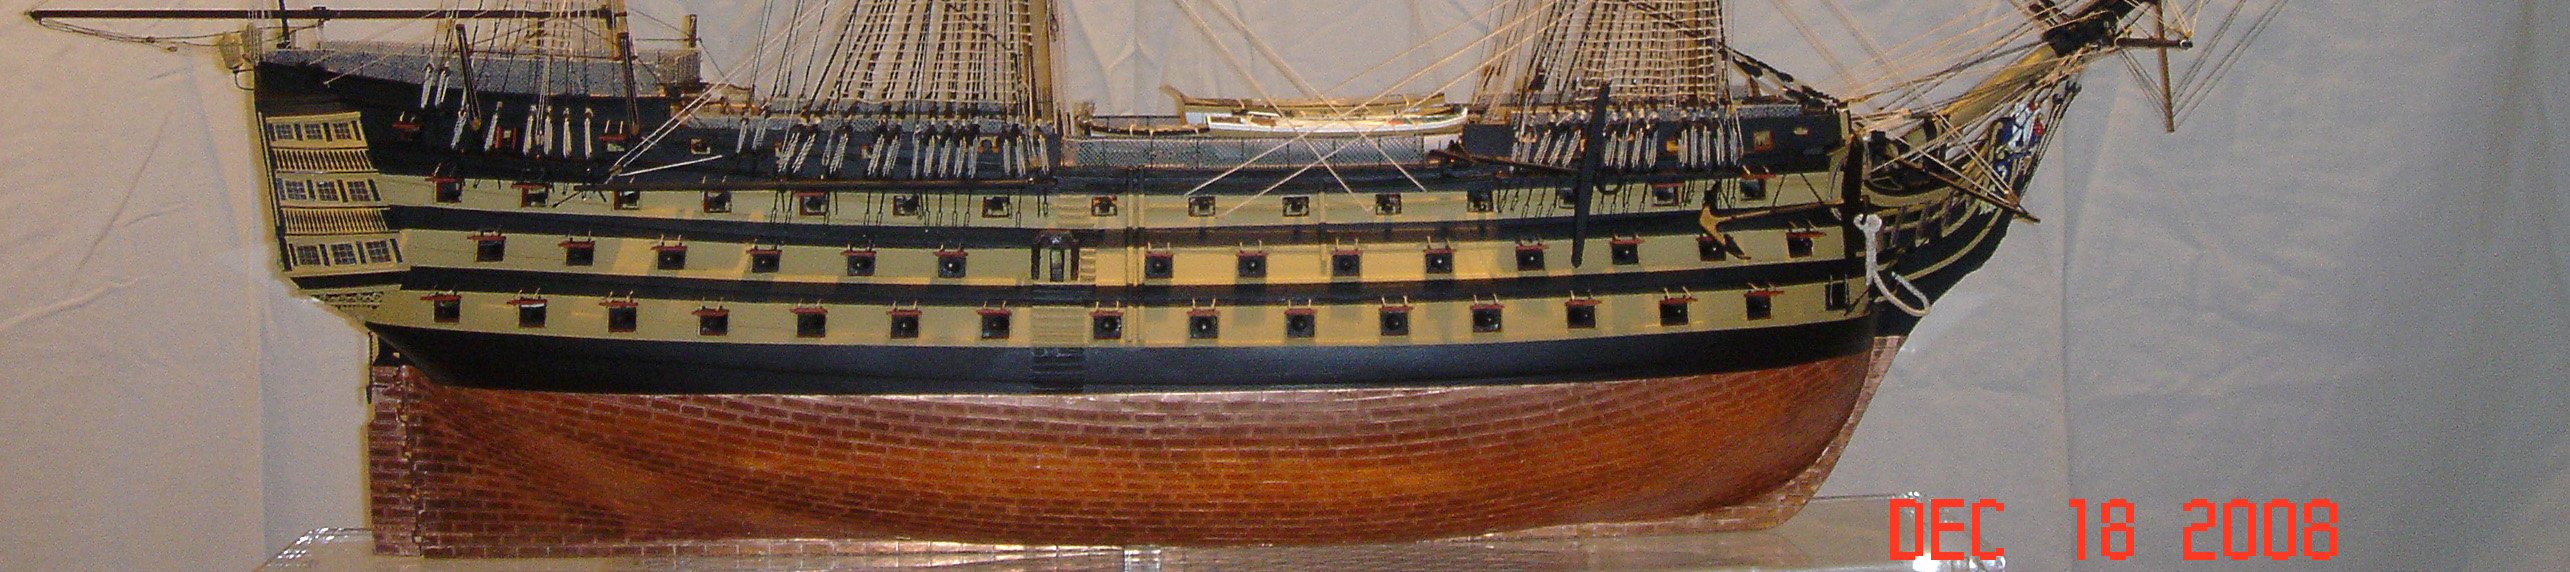
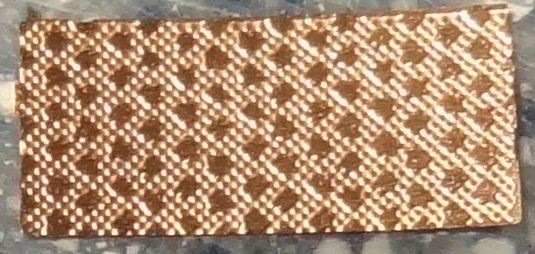
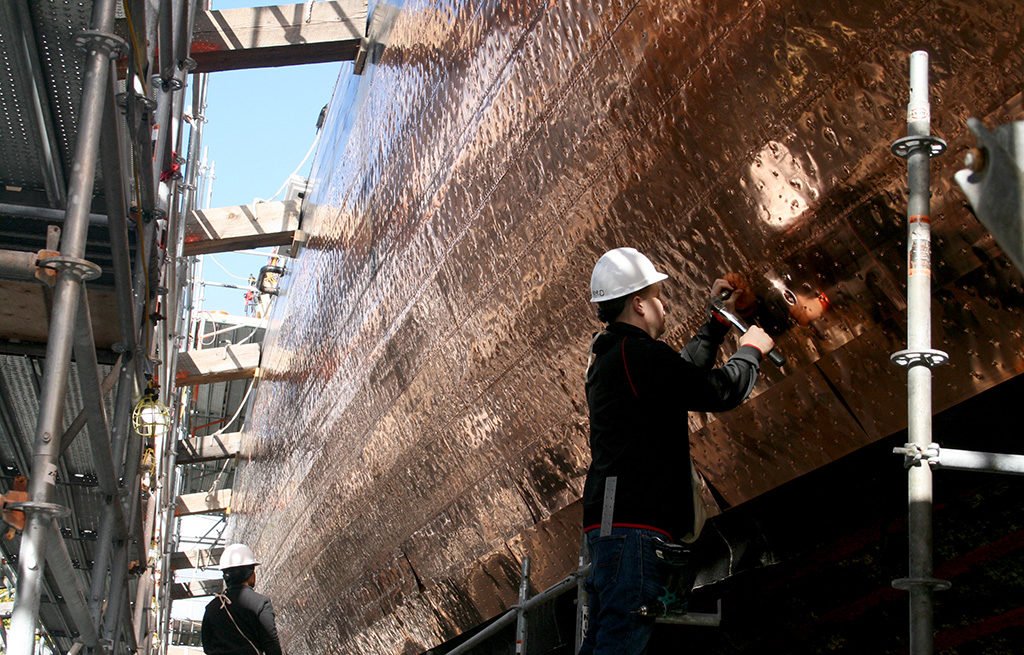
Thanks for your encouragement all. I am not very good at sheathing. I am now about 75% finished sheathing. Thomas, I do not know the scale of the plates. Original plates was 14" x 48" on the real USS Constitution. The BlueJacket USS Constitution model is also a 1/96 scale model as is thier Kearsarge model. BlueJacket only offers one size copper plate. The photo is of one of the plates offered. The bottom photo shows the USS Constitution being sheathed. I thought it was interesting. Bob
-
I have used 900 copper plates left over from building the BlueJacket USS Constitution to cover one side and the rudder of the Kearsarge. I have ordered 900 more plates from BlueJacket to finish the other side.

- 75 replies
-
- 10
-
-
Day three of copper sheathing. Slow going but I enjoy it. I am using CA medium glue. I make a small puddle of glue ( a drop or two ) and touch the copper plate to the puddle I can get three or four plates glued to the hull before needing to add another drop or two to the puddle. The time before this when I was copper sheathing the Constitution I placed a drop of glue to each plate. To much glue. I was getting glue on top of some of the plates. Also I was using kicker ( to accelerate the drying time of the glue ) which put a haze on top of the plates. I had to spray the finished bottom with copper paint. I want a shiny bottom on this ship. I used dividers to find the number of plate vertically for each section of the bottom. Then I made a curved pattern on the hull to allow me to have the last four rows straight. See the photo. Bob

-
Thanks s4usea. I have tried contact cement before. For the bent pieces I use CA medium glue for the quick hold. I prefer not to use CA because of the fumes. When I get to the straight I'll try rubber and silicone glue. Bob

-
Painted hull will install molding on hammocks and hull next. Need ideals on best glue for copper plates. Bob


-
Log date August 24 2018. I have been removing parts, redesigning parts, repositioning parts, painting, sanding etˈsedere . I removed the kit designed stern hammock I had built. I have opted for a solid stern hammock . Next, I will make the hammocks for the pivot gun ports, paint, sand and install the moldings on all the hammocks and side of the ship.

-
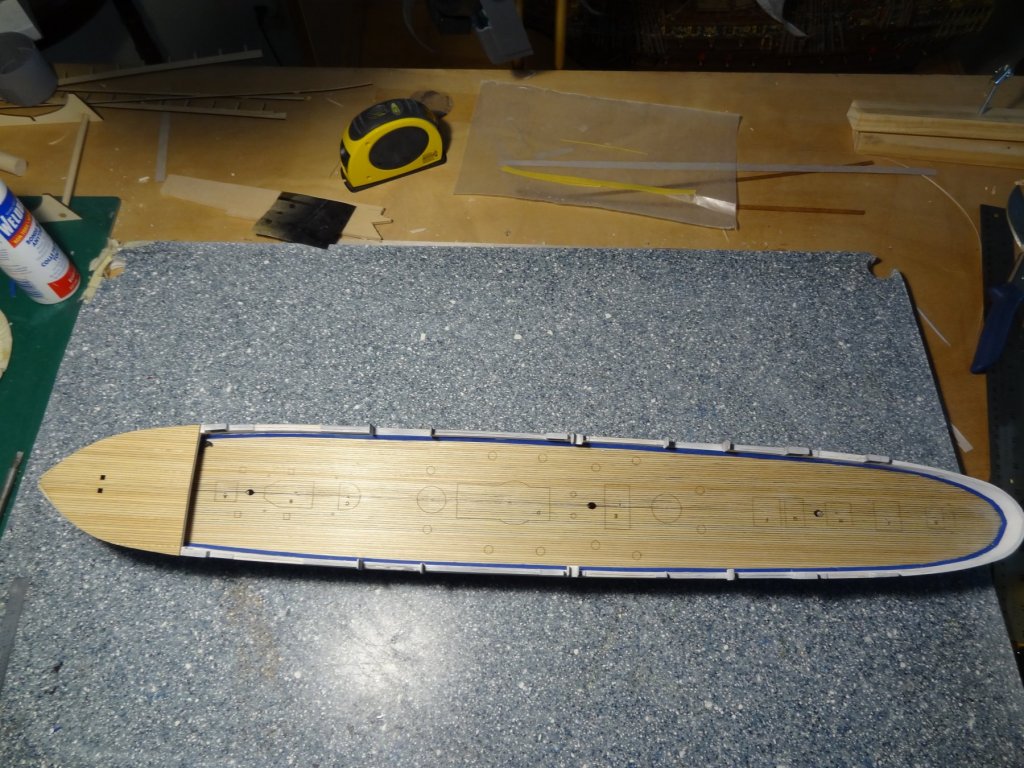
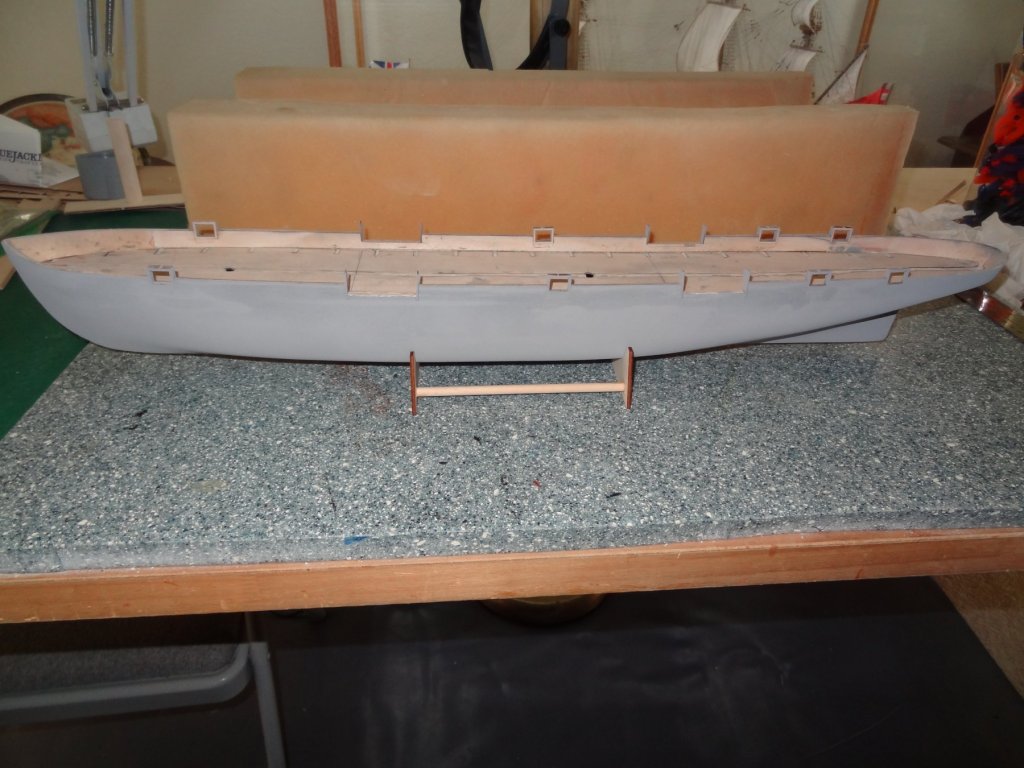
Past couple days I have worked on the waterways and forecastle deck. The forecastle deck was straight forward. Only problem was the deck not long enough. Maybe I made a mistake building the bow. However, there will be trim that should cover this. The waterways was not easy for me. The problem was the stern waterways. Very difficult to bend compound curves with stiff wood. Even after soaking in hot water and then ammonia I could not get the 45 degree angles ( that waterways are to the bulwarks ) and compound curves for the stern. The second day I ripped the stern waterways out and started over again. I did get that done with great reservations. So I will hide that ( untidy ) feature with hanging and coiled ropes. I'm no expert but it looks like the waterways are to large. Next I will start on the Hammock net boxes. Bob
-
Even with the storm damage I still like it. It is an interesting kit and You did a nice job. To bad about the break. I would keep trying to fix it. Bob
-
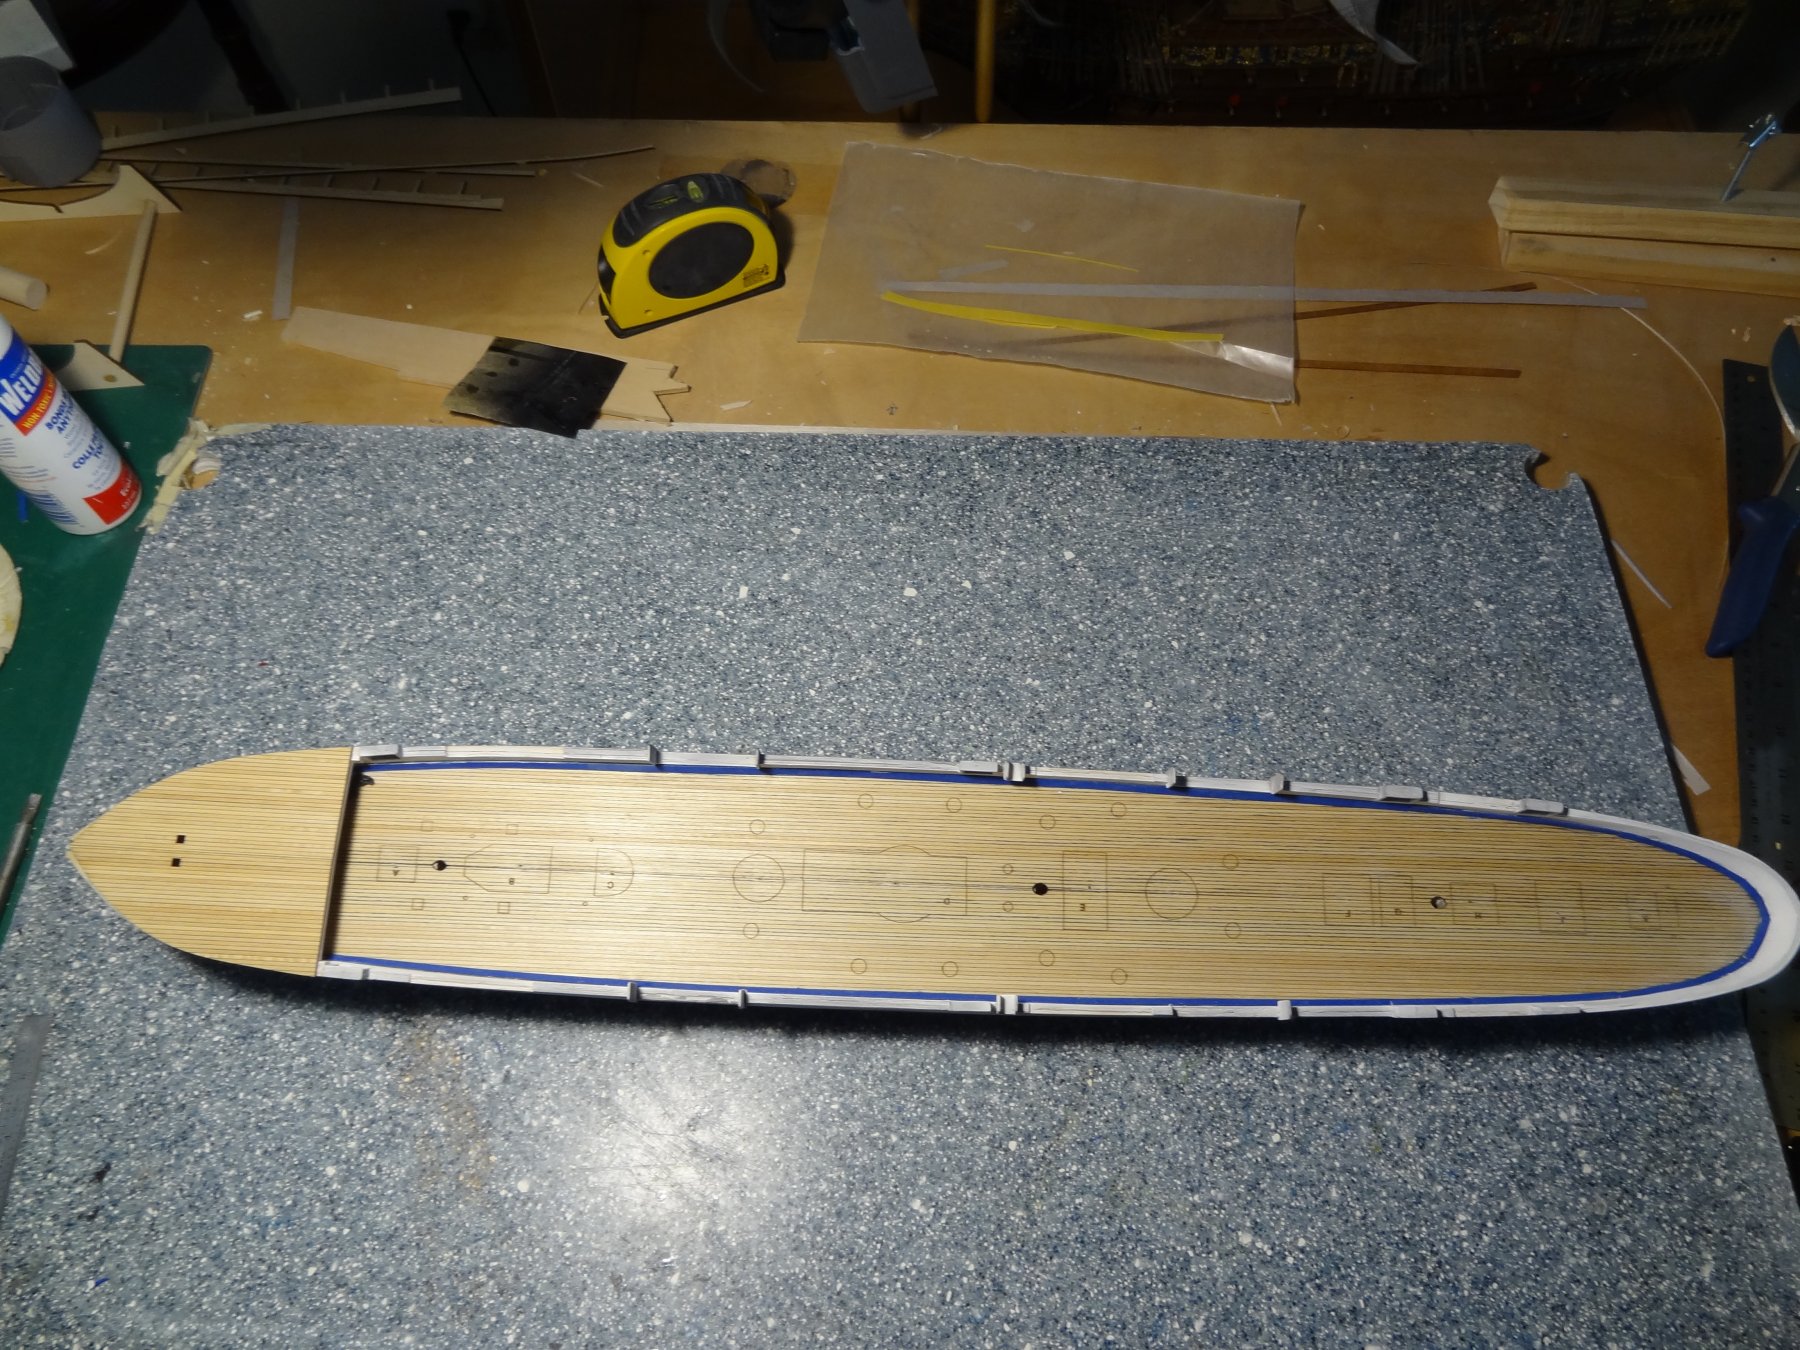
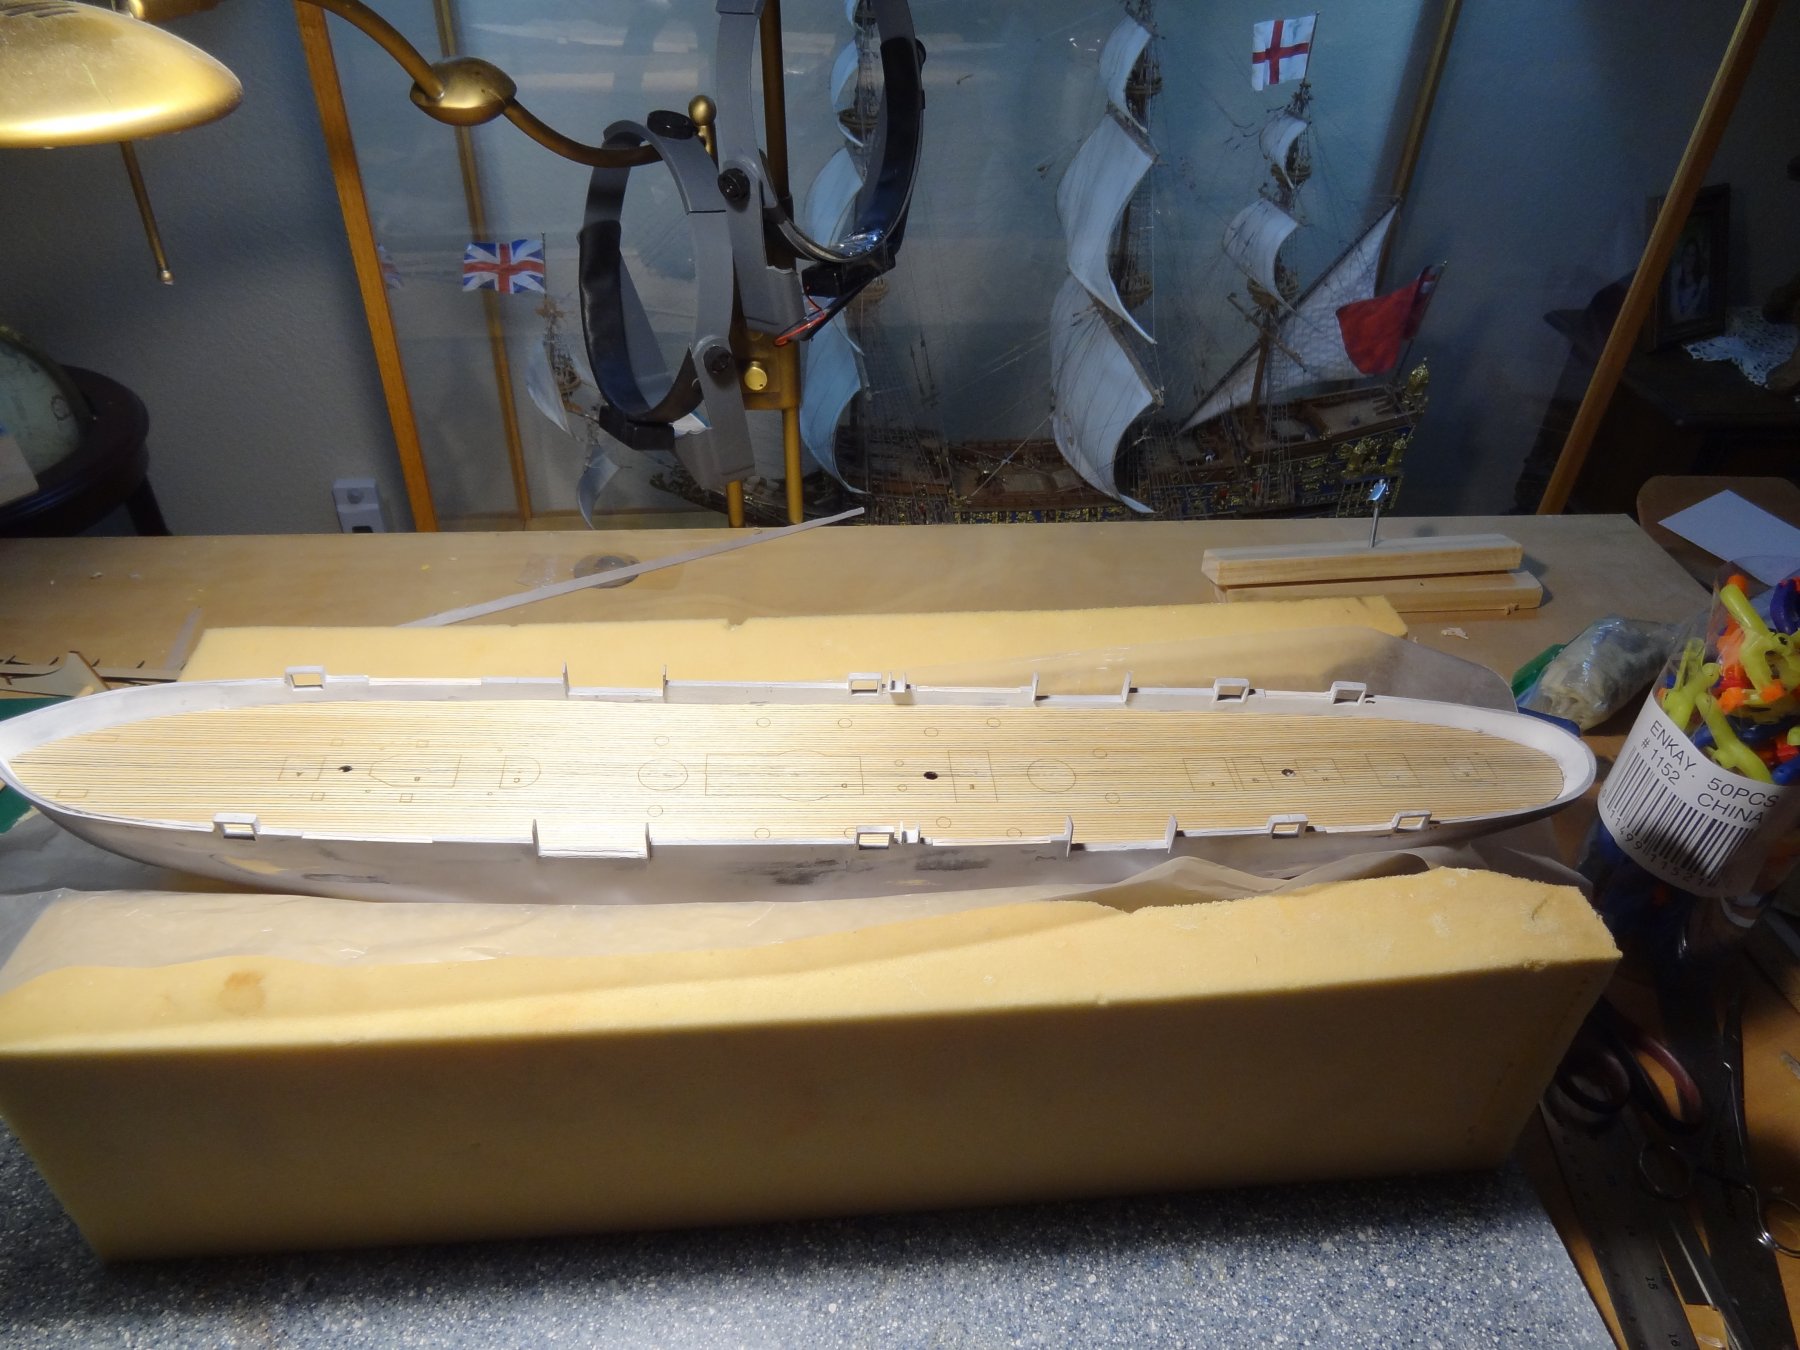
Yesterday I cut the channel slots and painted the channels and bulwarks white. After installing the main weather deck today I will repaint the bulwarks again tomorrow as I skinned them up in the install process. Today I clear lacquered the main weather deck, used 00 steel wool to buff it and installed it on the ship. It took a lot of sanding with my disk sander to make the decking fit. I would only do small increments of sanding at a time. Easy to take wood off but hard to put it back on. I used a lot of clamps to hold the deck while the glue dried. I am very happy with the screw clamps as well as all the other kinds of clamps I bought for this project. I should have done it years ago. I installed the main brace sheave ports and inserted small sheaves.

-
Ron, When you get to the " sally port " ( personnel passage way on and off the ship, one on each side of the ship ). The instructions call for LK28D. I can not find this part, it does not exist in my kit. The instructions and plans are confusing reference number wise. The reference photo is wrong and instructions are confusing as far as numbered parts. By looking at the plans I made the parts out of spare wood as they are simple to make. Bob
- 34 replies
-
- 3
-
-
- kearsarge
- first build
- (and 1 more)
-
Harvey, I sanded the black down to the primmer. The black revealed a number of flaws that I needed to fill in. I filled and sanded several times and then sprayed gray primmer. There are still a couple flaws I need to fill in. So I will be filling and sanding until I get a smooth finish. Then I will spray with flat black down to the water line. I am going to copper the bottom and paint a thin white line at the water line. Bob
-
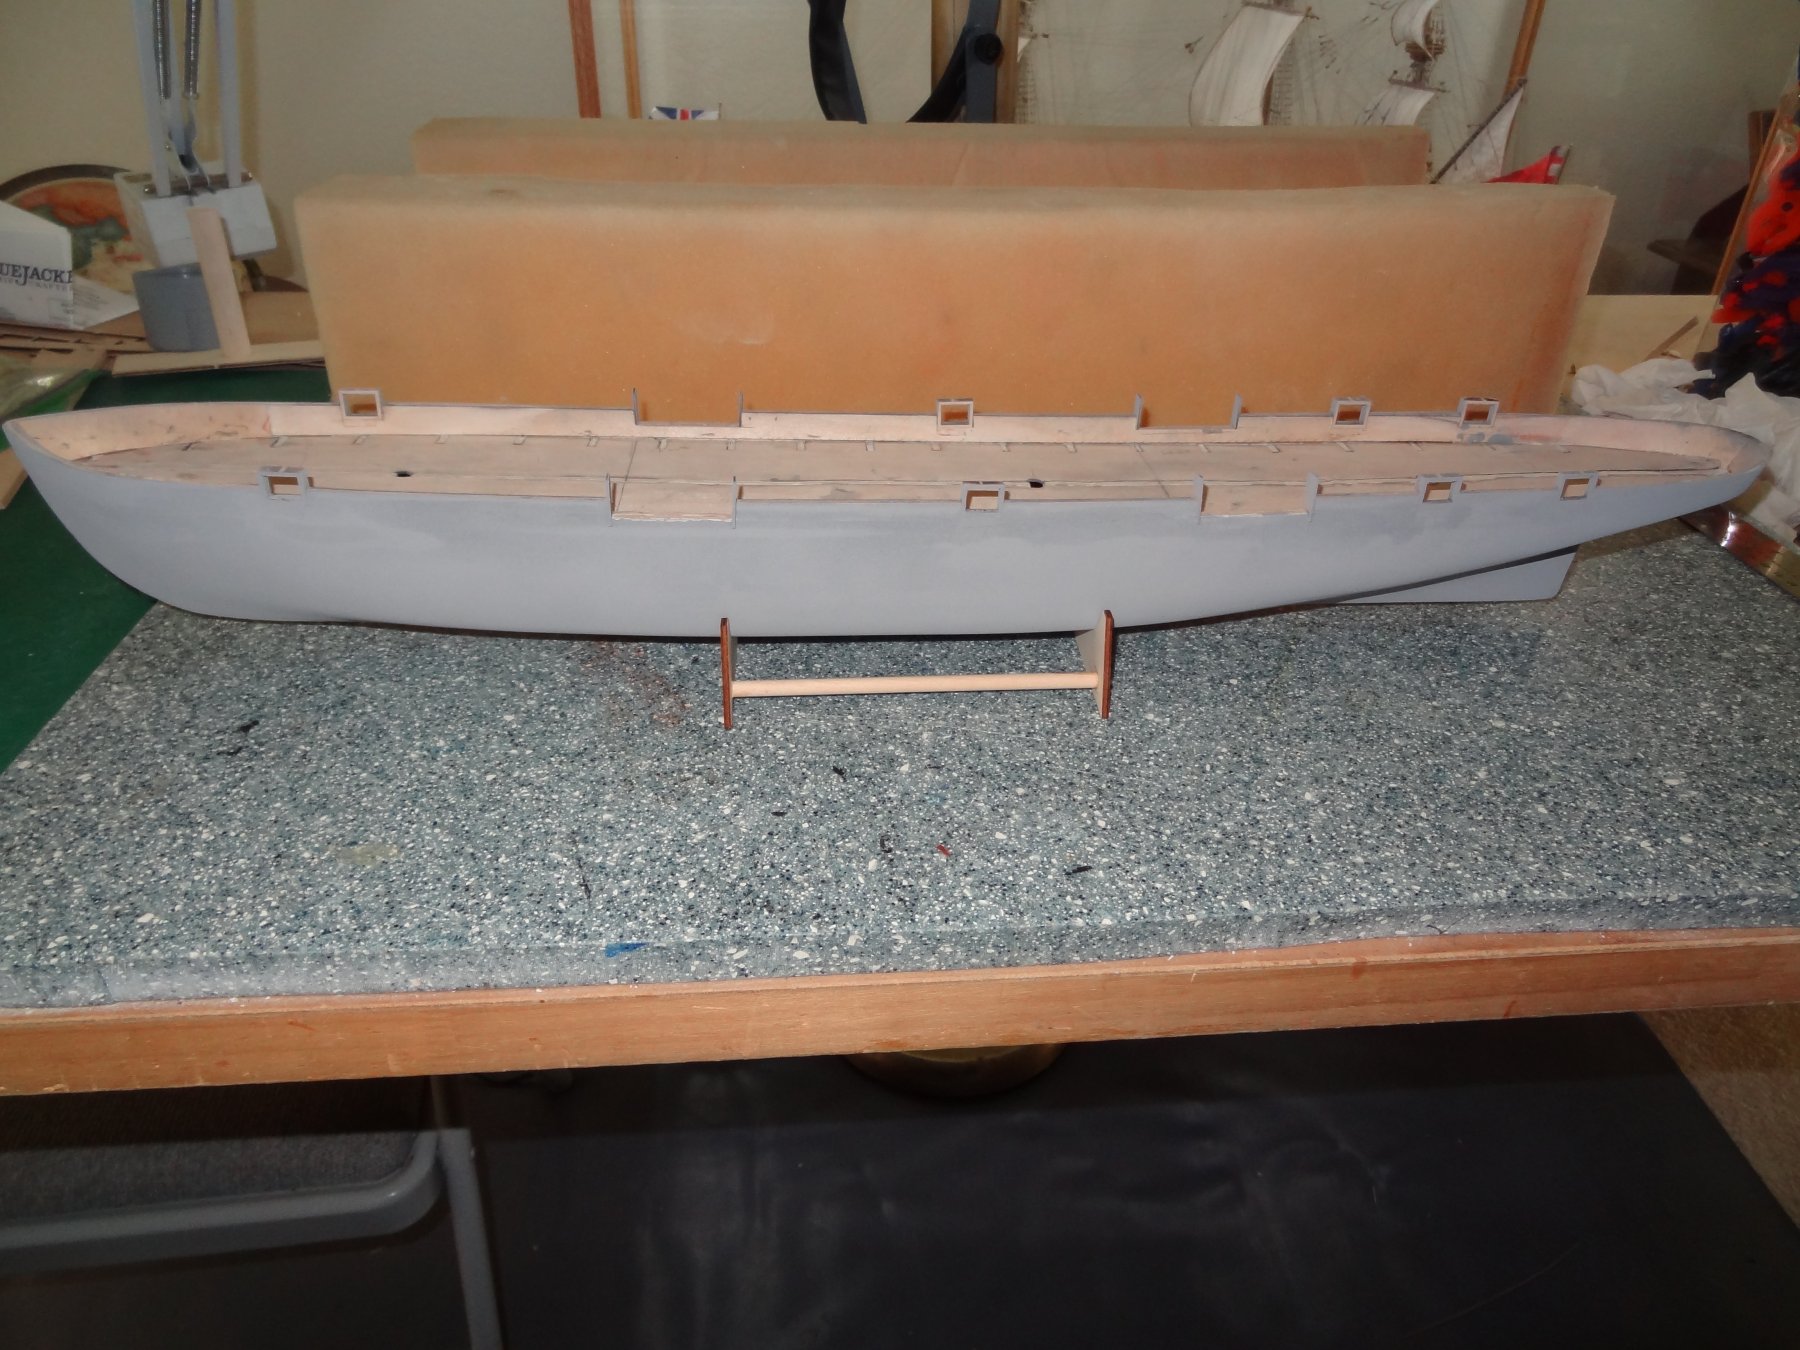
I sanded the ship with 220 then 400 wet sandpaper, filled low spots, repeated several times. Installed gun ports and the hammock ends on the pivot gun ports. Filled, sanded and primed hull. I used a filler primmer. I am supposed to make a sally port. I think it is a entry/exit for the ship. Instructions says to remove 1/32" from both ends of the sally port and glue the sally port hammock net ends LK28B. This reference LK28B is for the (aft of the ship ) aft hammock base. It refers you to photo 10 which a picture of a pivot gun port. Reference number and photo is wrong. The ship plans indicate LK28E for the sally port but the inventory does not show a Lk28E. I will make the parts out of spare wood. They are simple pieces to make.
-
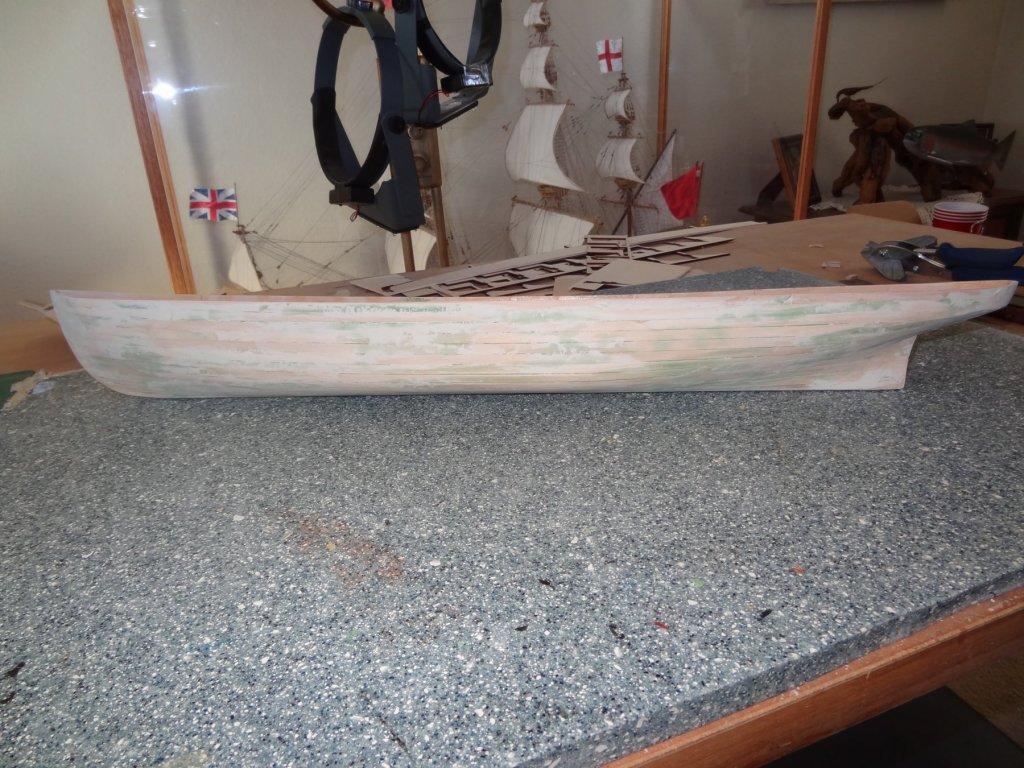
Moving on I lightly sanded the hull several times, filling holes with CA glue and putty and sanding. I went to Home Depot and bought filler primer. I primed the hull with two coats and sanded it when it was dry with 220 grit sandpaper. I filled some more holes and primed it again after sanding the putty patches and CA glue. I wiped it with a damp paper towel since I forgot to buy a sticky cloth. After drying I primed it again. Sanded with 220 sandpaper when primer was dry. Wiped the dust off with a damp paper towel and sprayed it with Model Master semi gloss black spray can. I may have to mix some flattener and black paint to get the level of flatness I want for the effect I want and spray it with my airbrush. Just like a black car it has already collected some dust. Bob
- 75 replies
-
- 11
-
-
MrBlueJacket, One of the things I have always tried I repeat tried to do is study the instructions from beginning to end. One day I will probably do that. But until then it is shoulder to the wheel, nose to the grindstone. It is hard to see to far ahead in this position. Bob
-
Yesterday I removed the hull from the build board. I sanded the hull( with 80 grit sandpaper ) , repaired and sanded and applied putty and sanded the hull .Today I sanded and applied second coat of putty to the hull. I removed the bulkhead extensions and the stem and stern extensions above the sub deck and sanded the sub deck . I sanded the second coat of putty on the outer hull. For todays work I used 150 grit sandpaper, Squadrons green putty, small electric hand sander , electric dremel tool, wood chisel and sandpaper over a piece of foam rubber. My next step is to apply a third coat of putty and sand the hull smooth. The hull is to be painted black above the water line and covered with copper plate below the water line.

-
Ron, You are right on . I didn't read far enough ahead in the instructions. I planked this like any other model I have made in the past. Instructions, instructions, instructions. I think I got it now. Bob
-
Ron, I know what you mean about the stern area. I didn't like it either and wondered if I didn't understand the instructions. But I have pressed on and figure since it is painted black that wood filler, sanding and paint will make it work. If not I can always start over. This is what I have done so far. The stern is rounded so I have work to do here. Bob

-
Most would have abandon ship literally. I would have bought a new kit. A restoration to behold. You are a true friend indeed.
-
rtibbs, I have been watching your build daily to see your excellent building style and what I need to do and look out for.
-
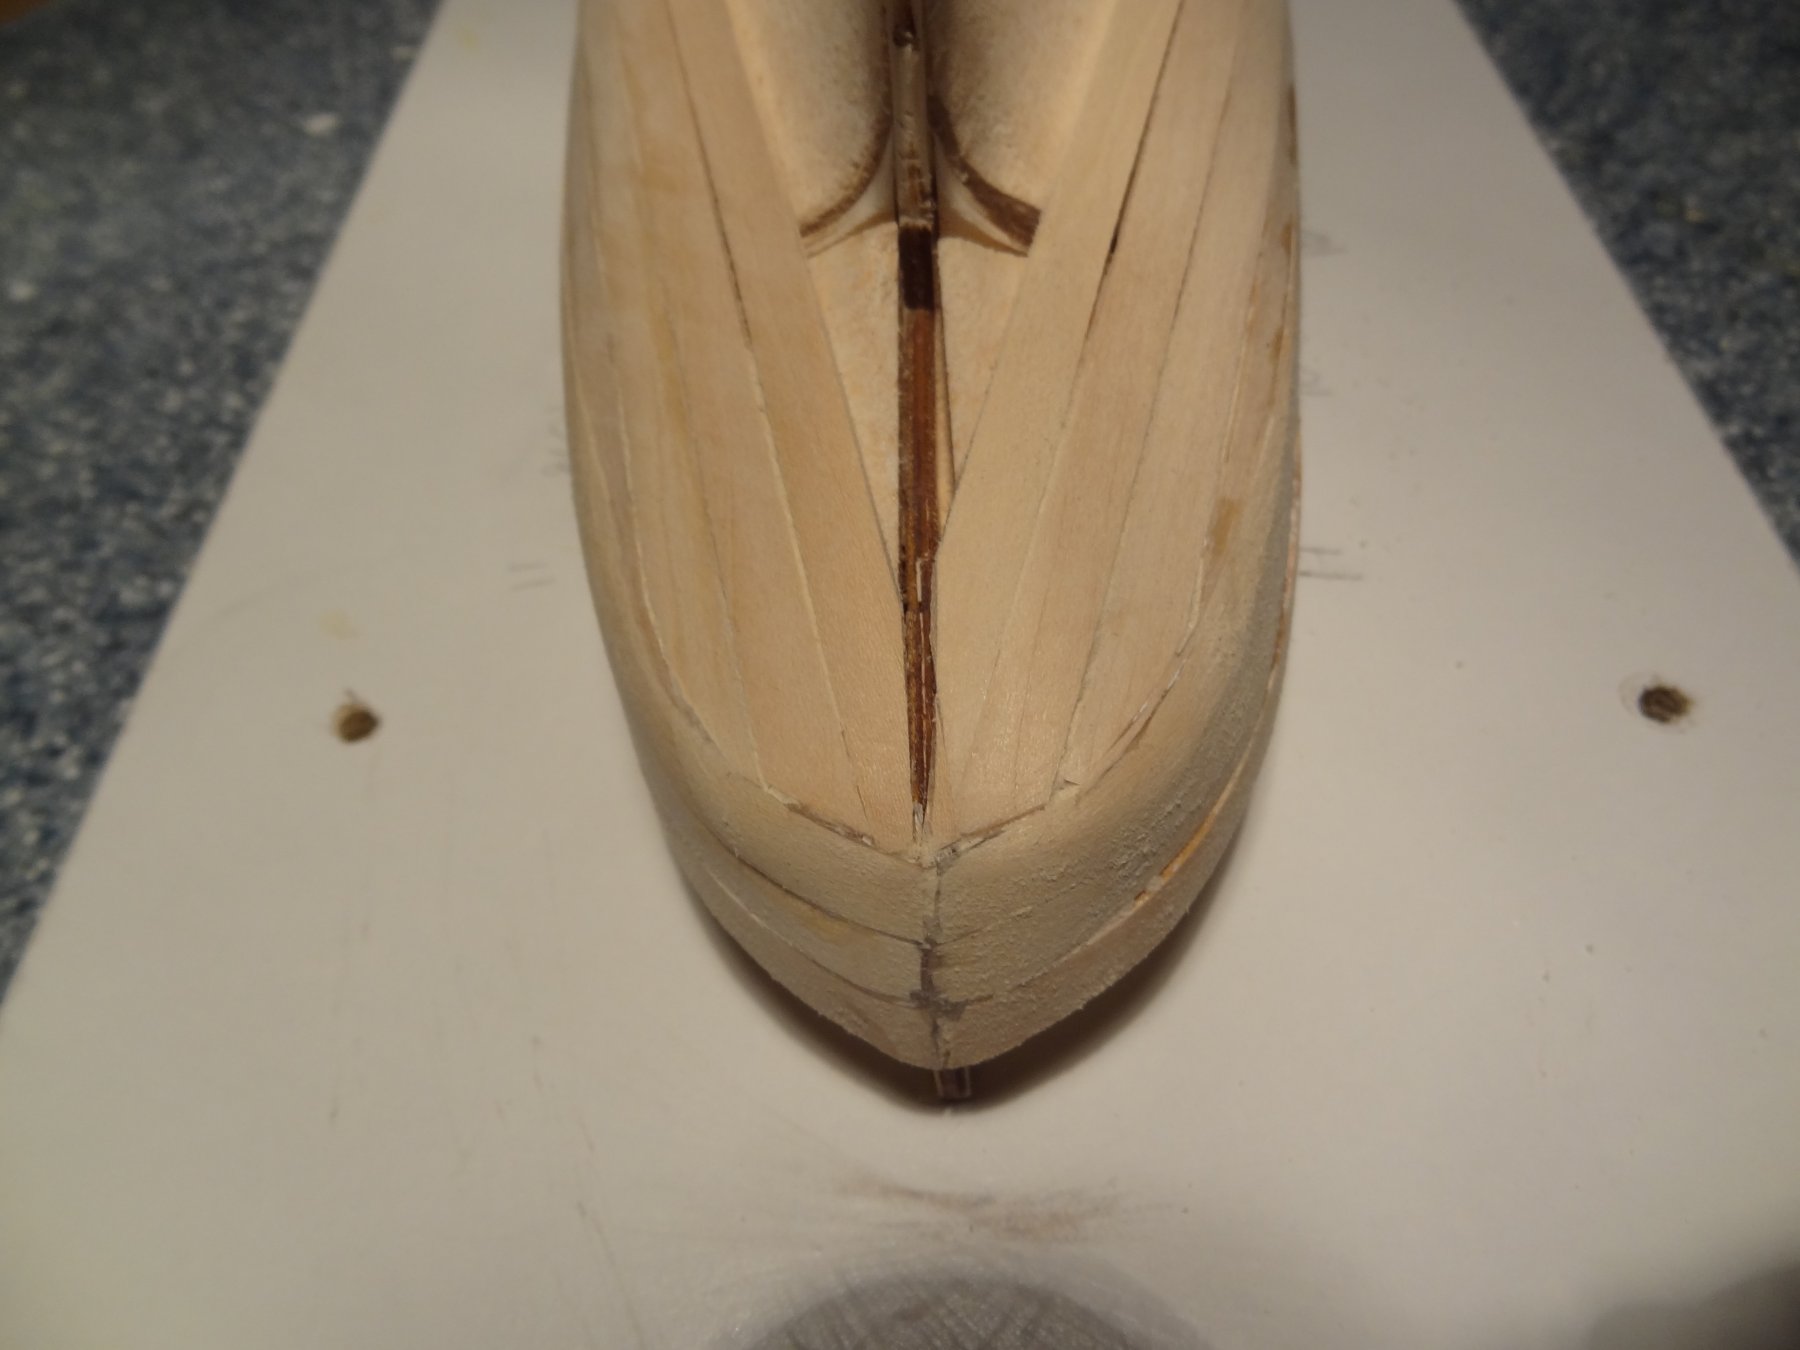
The shape of the stern didn't look right so I sanded it down. Think I got it. The way it was it would be very hard to plank it.