

nobotch
-
Posts
55 -
Joined
-
Last visited
Reputation Activity
-

(1).thumb.jpg.57c0e00bf78a9afe89f1982f1d25516c.jpg) nobotch got a reaction from Sasha131 in Can i live without a BYRNES TABLE SAW
nobotch got a reaction from Sasha131 in Can i live without a BYRNES TABLE SAW
I can feel with you Boyd.
Three weeks ago I asked myself the same question and my answer was "yes I can live without a Byrnes saw, but I don't want to".
The parcel tracking system says that it should arrive today - the door bell could ring at any moment now.
Of course there are other saws that can serve the same purpose, but in the end it comes down to what makes you feel good. My take on this issue is not so much if I probably would not use that saw so often that it would "pay off" but rather if my budget still will allow me to buy things that actually are more important but not so "sexy" like this nifty tool.
Cheers,
Markus
P.S.
Now, 57 minutes later: door bell rang, it's here!
-
 nobotch got a reaction from Archi in The Byrnes Saw "inside and around"
Maybe the following is more useful for most of you than precision measurments on a precision saw.
Of course, it is not confined to the Byrnes saw, hence a bit off-topic.
I usuallyy cut such tiny pieces using a chisel (a mirror sheen on its flat side makes cutting 90° and 45° angles really easy).
But when the Byrnes saw is already on the bench and in use it is very tempting doing such cuts with the new toy...
Hence, using "hinged chopsticks" instead of chopping off a fingertip may be a good idea (you may want to click on the pictures to enlarge).
Or simply use a chisel.
Cheers,
Markus
-
nobotch got a reaction from Archi in The Byrnes Saw "inside and around"
Hi Steve,
I am not trying to find a fault, but everything in mechanical industry is machined to tolerances, not to "perfection". This is because perfection is a term in relativity. Knowing the magnitude of the tolerances the Byrnes saw is made to may or may not be in your interest, but it is in mine, and probably in other's too.
Even if Jud's reply to your post (curiosity is part of my motivation to measure tolerances) is spot on with part of my answer. Inquiring minds want to know, and without this attitude (which is very typical to manhood) we most probably still would shave with a sharp stone which would be prefectly possible as an avid "youtuber" shows here.
But for me, there is more to it.
As Jeff from Hobbymill states here it is necessary to use a 0.040" blade for doing precise cuts on stock thicker than 4.5 mm. Now I want to cut 6.5 mm and I would love to use a 0.020" blade to cut evenly thin strips of 1.0 mm, one meter long. Yes, I want to push the limits. Needless to say that this is hardly achieveable by feeding the stock manually, but that will be a task which requires to know the variables, one of them being manufacturing tolerance of parallelism of the blade, another one being stock feed rate, and so on, you get the picture.
Now you may ask why I would want to cut such long strips to this accuracy, and you would be correct assuming that it will not be for planking, and maybe not even for ship modelling. I need this accuracy for making herringbone pattern strips used in musical instrument building (see attached picture). When making herringbone strips accuracy is critical for several reasons, one being that an error in thickness will double and a strip sitting in a groove that is 0.2 mm wider than the strip will be plain ugly hence unacceptable. If the saw blade can not constantly "eat away" the error as stock is fed there will be an error of 0.1 mm over the length of a guitar side and this strip would be ready to be binned. Up to now I have thicknessed the strips like it has been done ages ago, using a handplane. But this method takes a high toll regarding waste (shavings) produced. Using a precision saw (0.040" blade) instead of thicknessing strips with a handplane or a thickness sander reduces waste by about 50%. If I can use a 0.020" blade instead of a 0.040" blade I can reduce waste by another 50% (when cutting 1 mm strips for 2 mm herringbones) which would be great because the material to be cut is not just wood but rather a laborious glue-up of many veneers (similar to plywood, obliquely cut and again glued together). So waste is an issue.
I'm sorry that the driving force behind my tolerance measurments is not directly shipmodel related, but all this is really not a question about how many angels can dance on the head of of a pin.
-
nobotch got a reaction from Archi in The Byrnes Saw "inside and around"
It's nothing new that the Byrnes saw is ready to use out of the box, ready to do precision cuts. No doubt about that, and I honestly have to say that I was as impressed as many other before me were.
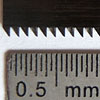
And yet, I wanted to know how precise it is. "Very precise" is one thing, and attaching some numbers that describe the precision is another one. So I thought I would use the classical approach for measuring parallelism between the blade and the miter slots (measure the distance of the same blade tooth at the same height above the table at the rear (rising) and front position, see first attached picture). Well, this is easier said than done because it turned out that the measuring device by itself interferes, so that I made as many measurements until a clear majority of the results coincided.
The numbers I got are approximately 0.0075 millimeters (that is 3/4 of 1/100 mm) deviation over a distance of 60 mm, which is the same as 0.125 mm (1.25 tenth) over 1 meter, which translates to an angle of 0.0072° off perfectly parallel. I find it pretty hard to imagine such a shallow angle, and I can't help thinking that this "error" has very few if any impact at all on real cutting action when using the saw. For example, any slightly uneven pressure from the push sticks will create an error that is easily about ten times bigger than the blade alignment tolerance I have measured.
In the following pictures you can further see my newest addition to the saw, which is a sandpaper lined wooden frame that pops into precise position over the miter extension, which helps to avoid that the work piece moves while (or before) being cut. Of course I could have glued the sandpaper directly onto the miter extension, but sometimes it may be necessary to lay a finished surface against the miter extension and in this case having the latter one lined with sandpaper would be less than ideal. Of course I also made a length stop which fits the "sandpaper-frame".
Thanks for reading and watching.
- Markus
-
nobotch got a reaction from Archi in The Byrnes Saw "inside and around"
Length stop for the miter gage.
The cam clamp mechanism in the second picture fixes it to the miter extension.
Cheers,
Markus
-
nobotch got a reaction from Archi in The Byrnes Saw "inside and around"
Well Tim, convincing one's wife of the eminent importance of a less than cheap tool we "need" is normally not a mission impossible, but certainly easier to achieve if embedded into a generic long-term endeavor regarding tool-and-toy acquisitions.
While getting familiar with THE saw, I noted that when adjusting blade height for non cut-through tasks it lowered by almost 1 mm when locking it in with the long Allen key. It turned out that the underside of the Allen screw head scratches and therefor catches the washer between the screw and the aluminum bar the blade (its axle and bearing, that is) is mounted on. So I added two thin washers with the smooth and burr-less faces against each other.
Even if this unwanted movement when tightening the screw is not completely eliminated, it is now at least limited to about 0.1 mm (0.004") after rising the blade (tightening the locking screw after lowering the blade will always add quite a bit due to the play of the adjusting threaded rod to this difference, which is normal).
I left the original thick washer in place because my smooth washers are somewhat too thin that I would feel sure they protect enough the aluminum part.
Then there is my latest small addition which makes it a bit easier to raise or lower the blade by more than just a bit. I added a brass crank to the adjusting knob. It is screwed into a threaded hole I tapped in the knob, and secured by a bit of epoxy on the threads and a counter nut. I really don't want to get it loose because the threads in the aluminum know would be shredded quickly I guess.
Cheers,
Markus
-
nobotch got a reaction from Archi in The Byrnes Saw "inside and around"
Baseplate and outfeed table:
-
nobotch got a reaction from Archi in The Byrnes Saw "inside and around"
Well, it took a bit longer than just some hours on last weekend. Short fence, high and low profile:
Switch from high to low, and to the left the dedicated push stick: The handle assembly screwed to the push stick has an protruding rear pin which prevents the handle from being run into the blade: The push stick (or maybe I'd better call it push board) has a squared front edge, and the piece of wood to be ripped is supposed to be narrower than the push board and to have a squared rear edge. With this, when sliding the push stick along the fence the tendency of the ripped pieces rotate once the lateral push stick is released (shortly before the cut is completed) gets minimized or even eliminated, so that also the las millimeters of the cut should be perfectly accurate. Here some details of the fence and push board, after a completed cut: The next item on my to-do list is an out-feed table. Thanks for watching. Cheers, Markus
-
nobotch got a reaction from Archi in The Byrnes Saw "inside and around"
My "Jim Saw" it arrived this week a mere 19 days after having placed the order!
Although this little beauty would work out of the box I have scheduled some task-specific add-ons of which I have completed three so far.
The first one is a provisional splitter (permanently integrated in a zero clearance insert) which in the first place served to figure out the dimensions of its parts but also is fully functional:
The splitter itself is made of "1 mm" birch plywood which in reality is 1.2 mm thick. This is the perfect thickness for the 36 teeth blade whose disk is a bit over 0.9 mm and which leaves a kerf of about 1.5 mm. As plywood is not really stiff I did not want to make it too big. I hope it will do its job until I'll have made a better one. Even if noise is on the low side with the Byrnes saw, the next modification I made reduces noise . The belt guard is made of a sheet of aluminium which acts as a resonator. So I lined it inside with some cardboard (glued on with epoxy). This was my standard procedure for silencing the tower case of all computers I ever owned. In the following pictures you also can see how the belt guard can be slid off and on after only loosening four screws through dedicated holes, without completely removing them - a feature I almost always missed on computer cases... You can further see that the more expensive of my two Phillips N°1 screwdrivers did not fit through the holes, I had to use the cheaper one which obviously complies better with international standards!
I don't like spinning parts that theoretically could be touched by accident, even if it is very unlikely to happen. This is why my third modification was covering the opend side of the belt guard, leaving open only a slot big enough to grab the axle with a wrench when changing the blade. The cover fits snugly but gets secured with a single screw which only has to be removed (3 full turns) when changing the belt - that is, almost never. I thought the following picture might be an interesting view for those technically inclined who are lusting for a Byrnes Saw
Well, I think that's it for today.
No, wait! I forgot to say that after having made a few cuts it really looks like this saw will meet my high expectations I had. A couple of long and thin rip cuts were all within half a tenth of a millimeter tolerance, without having used any more sophisticated add-ons than a to the "fence extension" clamped short fence, and the zero clearance insert with splitter.
Cheers,
Markus
-
 nobotch got a reaction from Ben752 in Saw Kick Back
Meanwhile I have found a very useful hint about the power of kick back on small table saw - by first conicidence a Byrnes saw, and be second coincidence posted on this forum, here:
So far so good. But there is more to kick back than just a piece of wood making its uncontrolled way through the shed. Kickback can even lead to make one's hand make contact with the blade.
I don't know if the following link to a "safety-video" already has been posted somewhere on modelshipworld.com, but as it may be an eye-opener to some I believe it would not hurt being posted more than once.
The guy who made the video missed a trip to the hospital only by a few millimeters, and admits unreservedly he was an idiot doing such an experiment:
All this makes me think that a riving knife is not only mandatory for full size table saws but also on small ones. Even if an custom addition carried out by a precision metal working shop will cost a grand it will still be cheaper than a chewed up or cut off digit. Hospital bills are expensive.
-
 nobotch got a reaction from jwcola in How would you improve your Byrnes tools?
It's the first picture in the first post in the thread I linked to.
No need to click back to that thread again just for the picture, here it is again:
The first one I made of solid mahogany for the plate and thin birch plywood for the splitter.
For the next ones (see attached picture) I used 3mm (1/8") birch plywood for the plate which helps to keep the edge near the holes intact.
Start by cutting the plate to size, bore and countersink the screw holes before thinning down these borders and before rounding over the corners.
As the recess in the table is too thin to receive a stable enough wooden zero clearance plate I used thicker wood (the 3mm ply) and thinned it down where it sits on the aluminium ledge in the table, using the Byrnes saw itself to do so: raise the blade by as much as you need to reduce the plate thickness - there are quite a few cuts to do, start with the innermost ones. Clean up the surfaces with a chisel, knife or scraper.
Once the plate fits the recess (it should be perfectly level and drop in nicely without applying any force at all, if it's a bit a loose fit that's fine too) you have to thin down the small zone where the flange would otherwise touch the insert when the blade is all up. Then screw the insert plate in place, align the rip fence over the right edge of the plate so that you will not cut into the fence while now rising the blade with the saw turned on.
Now, with the saw unplugged move the fence to the right, remove the four screws and lift the plate slightly with the blade still in the slot you just have cut, and move the fence to the left until it touches the right edge of the insert plate. Secure the fence in this position and replace the wooden insert with the one that came with the saw, then cut open the slot the rear side of the wooden insert.
Next, cut out the splitter to the shape it needs to be. Maybe you'd like to first make a cardboard or paper model/template of it to define its shape, it really helps. Don't make the splitter too high because these rather thin splitters would become too flexible over its height.
Sand, plane or scrape it to the exact thickness of the kerf your blade makes, screw the insert in place and tack glue the splitter into its correct position it the extended slot. 1mm from the completely raised blade is just fine, don't go too close. When the glue is dry place the insert upside-down into the recess in the table and build up an anchorage around the part of the splitter that will be inside the saw. Be aware of the position of the blade support.
When the glue has dried place the insert/splitter in its normal position using the 4 screws, and sand the splitter further down a little bit from each side using a small, square sanding block (240 grit is ok) and a square wooden block to hold against it from the opposite side. In the end the splitter should be about 0.1 - 0.15mm thinner than the saw kerf.
I hope I didn't forget anything essential. The whole thing sounds more complicated than it is, but it takes a bit time, patience and 3D imagination to do it.
-
nobotch reacted to Modeler12 in Byrnes Table Saw
One more addition. A splitter.
For my .035 inch thick blade, I used a piece of copper wire at .032 inch thickness. Then I drilled two #66 holes in the zero clearance insert as shown below. I had to make minor adjustments with a pair of pliers and now I am ready to add a couple drops of epoxy underneath to keep the wire in place.
The wire does not wrap around the top of the blade, but even so it worked well.
The hold-down ball bearing will be moved forward when in use, but for the picture I had it sitting well behind the splitter.
-
nobotch reacted to Modeler12 in Byrnes Table Saw
Here is my second addition. It is essentially a hold down fixture but uses a ball bearing mounted as shown.
The design came from seeing what another modeler had done to cut thin veneer.
Jim Byrnes also uses this idea for his clear blade guard.
I have cut several pieces this way and it really works very well.
-
nobotch reacted to Modeler12 in Byrnes Table Saw
I am sorry, but I rather have the dull look. It is less glare in my face
In fact I have adapted it to my Ryobi sander and it works great there also. That is a piece of 1/8 inch plywood on the table to give me zero clearance.
But that is not all.
I now have several featherboards that use a 1/2 x 1/8 inch aluminum bar and three 10-32 thumb screws. The one to the right is mounted in a 'tapered' threaded hole. As I tighten that screw it forces the bar against the sides of the slot to lock it in place.
The featherboards are made of 1/8 inch plywood.
I have used this for cutting narrow strips (not too cool when using your fingers). True, I have to readjust the featherboard as I progress cutting more strips from the same piece. But, se la guerre.
BTW magnetic featherboards don't work on aluminum tables, so the only practical way is to use the slots.
-
nobotch reacted to Geoff Matson in Mini Anvil
I am a retired Horseshoer/ Blacksmith and finally got tired of using my 100 LB. anvil to make my small metal parts.
I was at a flea market and picked up an old iron that they used before electricity. It looked perfect to use as a mini anvil to help make my small metal parts. I picked it up for $5.
I even constructed a small wooden box for it and it has worked quite well. You can even take it out of the box and use it as a weight when you glue to parts together.
Now all I need is a little smaller hammer.
-
nobotch reacted to Gregory in Speaking of Plank Benders - homemade plank bending jig
I thought I would share my little idea for plank bending.
I'm not sure how original it is, but I have never seen one just like it..
Basically, it is half the bottom of a large tin can, attached to a base board.
I place the end of my wet plank into the slot and use a clamp to adjust the amount
of bend .. ( I soak in plain water for a few of minutes, depending on the type of wood )
I direct a hot blow dryer onto the jig for about two minutes. This is usually enough to dry the wood.
This picture does not show the wood, but it is there when the dryer is on.
I wait at least 5 minutes before taking the wood out of the jig. It needs to cool before the bend is fully set.
-
 nobotch got a reaction from Howie in Can i live without a BYRNES TABLE SAW
I can feel with you Boyd.
Three weeks ago I asked myself the same question and my answer was "yes I can live without a Byrnes saw, but I don't want to".
The parcel tracking system says that it should arrive today - the door bell could ring at any moment now.
Of course there are other saws that can serve the same purpose, but in the end it comes down to what makes you feel good. My take on this issue is not so much if I probably would not use that saw so often that it would "pay off" but rather if my budget still will allow me to buy things that actually are more important but not so "sexy" like this nifty tool.
Cheers,
Markus
P.S.
Now, 57 minutes later: door bell rang, it's here!
-
 nobotch got a reaction from AntonyUK in The Byrnes Saw "inside and around"
Thank you Brian and Anthony for your encouraging comments!
Common safety recommendations say that the splitter or riving knife sould be thicker then the blade plate and thinner than the kerf. I'm inclined to think that, if the splitter is perfectly aligned it is better if its thickness is as close as possible to the kerf, but of course not even a hair thicker. For my taste, my splitter is a bit on the thin side, maybe I'll glue on a thin piece of paper on each of its sides.
I agree that theoretically it is not necessary if feeding the timber straight. Unfortunately reality has shown countless times that we (all of us) don't always feed it straight, sometimes with disastrous consequences. This is why I am convinced that a splitter, or much better a riving knife is an absolute must for a table saw. Of course, the teeth's linear speed of a 10 inch saw is much higher (assuming 3500 rpm it would be ca. 165 km/h or ca. 100 mph) than on the 4" Byrnes saw (110 V 60 Hz version 3450 rpm -> 65 km/h or 40 mph; 230 V 50 Hz version 2850 rpm -> 53 Km/h or 33 mph). But still, getting hit by a piece of wood at that speed can lead to more or less serious injuries, and I think it is a good idea to minimise the risk. It's a bit like wearing a helmet when riding a push bike.
-
 nobotch got a reaction from Mark P in How would you improve your Byrnes tools?
It's the first picture in the first post in the thread I linked to.
No need to click back to that thread again just for the picture, here it is again:
The first one I made of solid mahogany for the plate and thin birch plywood for the splitter.
For the next ones (see attached picture) I used 3mm (1/8") birch plywood for the plate which helps to keep the edge near the holes intact.
Start by cutting the plate to size, bore and countersink the screw holes before thinning down these borders and before rounding over the corners.
As the recess in the table is too thin to receive a stable enough wooden zero clearance plate I used thicker wood (the 3mm ply) and thinned it down where it sits on the aluminium ledge in the table, using the Byrnes saw itself to do so: raise the blade by as much as you need to reduce the plate thickness - there are quite a few cuts to do, start with the innermost ones. Clean up the surfaces with a chisel, knife or scraper.
Once the plate fits the recess (it should be perfectly level and drop in nicely without applying any force at all, if it's a bit a loose fit that's fine too) you have to thin down the small zone where the flange would otherwise touch the insert when the blade is all up. Then screw the insert plate in place, align the rip fence over the right edge of the plate so that you will not cut into the fence while now rising the blade with the saw turned on.
Now, with the saw unplugged move the fence to the right, remove the four screws and lift the plate slightly with the blade still in the slot you just have cut, and move the fence to the left until it touches the right edge of the insert plate. Secure the fence in this position and replace the wooden insert with the one that came with the saw, then cut open the slot the rear side of the wooden insert.
Next, cut out the splitter to the shape it needs to be. Maybe you'd like to first make a cardboard or paper model/template of it to define its shape, it really helps. Don't make the splitter too high because these rather thin splitters would become too flexible over its height.
Sand, plane or scrape it to the exact thickness of the kerf your blade makes, screw the insert in place and tack glue the splitter into its correct position it the extended slot. 1mm from the completely raised blade is just fine, don't go too close. When the glue is dry place the insert upside-down into the recess in the table and build up an anchorage around the part of the splitter that will be inside the saw. Be aware of the position of the blade support.
When the glue has dried place the insert/splitter in its normal position using the 4 screws, and sand the splitter further down a little bit from each side using a small, square sanding block (240 grit is ok) and a square wooden block to hold against it from the opposite side. In the end the splitter should be about 0.1 - 0.15mm thinner than the saw kerf.
I hope I didn't forget anything essential. The whole thing sounds more complicated than it is, but it takes a bit time, patience and 3D imagination to do it.
-
 nobotch got a reaction from CaptainSteve in How would you improve your Byrnes tools?
Some time ago I posted here my own additions and mods I immediately made to the saw after I bought it, and I find them useful, helpful or even necessary every time I use the saw.
It takes two screws to remove the fence, which is quick enough for me. What in the pictures may seem to be four other screws are just location pins.
A riving knife would be a great thing, but a good one that can quickly be exchanged according to the saw disk used surely would be an expensive solution. I overcame this issue by making my own zero-clearance plates which include a splitter (shown in the thread I linked to above), which works great. Making those plates/splitters involves some precision work but pays off.
For ripping I just use two push sticks, one with a notch cut out on one side of its tip so I can hold the work piece down and at the same time against the fence, and the other just plain square to shove the workpiece forward.
Edit 2: I use a "short fence" going to less than the middle of the blade, and of course the splitter.
This is a quick and easy solution which allowed me to cut dozens of literally meter-long 1mm and 2mm thin strips that turned out to vary considerably less than half a tenth of a millimetre in thickness from end to end.
It is important that the square push stick is broad enough to go at least to the blade. It also should be really square as should be the back of the workpiece too. Like this you will be able to shove your stuff straight through the blade without having to reach with a stick between the blade and the fence. For long pieces an outfeed table is essential (mine is also in the thread I linked to in the first line of this post).
Edit 1: link fixed
-
 nobotch got a reaction from allanyed in How would you improve your Byrnes tools?
It's the first picture in the first post in the thread I linked to.
No need to click back to that thread again just for the picture, here it is again:
The first one I made of solid mahogany for the plate and thin birch plywood for the splitter.
For the next ones (see attached picture) I used 3mm (1/8") birch plywood for the plate which helps to keep the edge near the holes intact.
Start by cutting the plate to size, bore and countersink the screw holes before thinning down these borders and before rounding over the corners.
As the recess in the table is too thin to receive a stable enough wooden zero clearance plate I used thicker wood (the 3mm ply) and thinned it down where it sits on the aluminium ledge in the table, using the Byrnes saw itself to do so: raise the blade by as much as you need to reduce the plate thickness - there are quite a few cuts to do, start with the innermost ones. Clean up the surfaces with a chisel, knife or scraper.
Once the plate fits the recess (it should be perfectly level and drop in nicely without applying any force at all, if it's a bit a loose fit that's fine too) you have to thin down the small zone where the flange would otherwise touch the insert when the blade is all up. Then screw the insert plate in place, align the rip fence over the right edge of the plate so that you will not cut into the fence while now rising the blade with the saw turned on.
Now, with the saw unplugged move the fence to the right, remove the four screws and lift the plate slightly with the blade still in the slot you just have cut, and move the fence to the left until it touches the right edge of the insert plate. Secure the fence in this position and replace the wooden insert with the one that came with the saw, then cut open the slot the rear side of the wooden insert.
Next, cut out the splitter to the shape it needs to be. Maybe you'd like to first make a cardboard or paper model/template of it to define its shape, it really helps. Don't make the splitter too high because these rather thin splitters would become too flexible over its height.
Sand, plane or scrape it to the exact thickness of the kerf your blade makes, screw the insert in place and tack glue the splitter into its correct position it the extended slot. 1mm from the completely raised blade is just fine, don't go too close. When the glue is dry place the insert upside-down into the recess in the table and build up an anchorage around the part of the splitter that will be inside the saw. Be aware of the position of the blade support.
When the glue has dried place the insert/splitter in its normal position using the 4 screws, and sand the splitter further down a little bit from each side using a small, square sanding block (240 grit is ok) and a square wooden block to hold against it from the opposite side. In the end the splitter should be about 0.1 - 0.15mm thinner than the saw kerf.
I hope I didn't forget anything essential. The whole thing sounds more complicated than it is, but it takes a bit time, patience and 3D imagination to do it.
-
nobotch got a reaction from Archi in How would you improve your Byrnes tools?
It's the first picture in the first post in the thread I linked to.
No need to click back to that thread again just for the picture, here it is again:
The first one I made of solid mahogany for the plate and thin birch plywood for the splitter.
For the next ones (see attached picture) I used 3mm (1/8") birch plywood for the plate which helps to keep the edge near the holes intact.
Start by cutting the plate to size, bore and countersink the screw holes before thinning down these borders and before rounding over the corners.
As the recess in the table is too thin to receive a stable enough wooden zero clearance plate I used thicker wood (the 3mm ply) and thinned it down where it sits on the aluminium ledge in the table, using the Byrnes saw itself to do so: raise the blade by as much as you need to reduce the plate thickness - there are quite a few cuts to do, start with the innermost ones. Clean up the surfaces with a chisel, knife or scraper.
Once the plate fits the recess (it should be perfectly level and drop in nicely without applying any force at all, if it's a bit a loose fit that's fine too) you have to thin down the small zone where the flange would otherwise touch the insert when the blade is all up. Then screw the insert plate in place, align the rip fence over the right edge of the plate so that you will not cut into the fence while now rising the blade with the saw turned on.
Now, with the saw unplugged move the fence to the right, remove the four screws and lift the plate slightly with the blade still in the slot you just have cut, and move the fence to the left until it touches the right edge of the insert plate. Secure the fence in this position and replace the wooden insert with the one that came with the saw, then cut open the slot the rear side of the wooden insert.
Next, cut out the splitter to the shape it needs to be. Maybe you'd like to first make a cardboard or paper model/template of it to define its shape, it really helps. Don't make the splitter too high because these rather thin splitters would become too flexible over its height.
Sand, plane or scrape it to the exact thickness of the kerf your blade makes, screw the insert in place and tack glue the splitter into its correct position it the extended slot. 1mm from the completely raised blade is just fine, don't go too close. When the glue is dry place the insert upside-down into the recess in the table and build up an anchorage around the part of the splitter that will be inside the saw. Be aware of the position of the blade support.
When the glue has dried place the insert/splitter in its normal position using the 4 screws, and sand the splitter further down a little bit from each side using a small, square sanding block (240 grit is ok) and a square wooden block to hold against it from the opposite side. In the end the splitter should be about 0.1 - 0.15mm thinner than the saw kerf.
I hope I didn't forget anything essential. The whole thing sounds more complicated than it is, but it takes a bit time, patience and 3D imagination to do it.
-
nobotch reacted to Thanasis in Proxxon Micro MBS 240/E Band Saw Review
Hi all. I join you in this thread of Proxxon band saw users and I would like to add my experience.
Noises can also being produced by the ball bearings on the blade guide.
The same can happen if for some reason the lower, inside the case, blade guide has moved-turned from his vertical position. At this case you might come even to a broken saw band.
Alexandru. I think you’re right guessing that the noise and the result of the broken saw blades might comes from the worn plastic on the wheels. In addition I consider the upper wheel (as adjustable) as the main responsible for the failure.
What I faced was that for the same reason of the worn plastic on the upper wheel, the band saw blade was stepping in and out of a formed by the use groove. That was causing me either broken bands or bands that frequently were slipping out of the wheel.
After some thinking I came to a simple solution which is still working…I placed a small piece of wood (it could be from plastic) in 3-4 mm (0.11811 inc) of thickness, at the bottom of the slider of the upper wheel. See photo.
This way and by screwing the back knob (tensioning the blade), the wheel comes to a position where it will be spinning with a small angle, towards to back of the case.…This angle “forces” the band saw to stay at the inner part of the plastic, preventing from stepping in and out of the formed groove… In a way it fixes an alignment…See whether it might work for you as well…
As another option you may try filling (or replace the entire plastic) the formed gap-groove by making-placing loops of insulating tape around the wheel. I have seen it in the web but I haven’t tried it (yet…).
Another tip to keep the drive belt in tension when it’s been loosened by the use, is to make some loops from paper tape on the motor pulley. With the drive belt in its position and by turning the motor pulley by the hand, you apply layers of tape on its surface and from the free side. After some loops there will be a "new" tension.
If you face the problem where the belt slips over the pulley, then you can extend the length of the pulley, so that the belt can rotates in a longer surface.
You can do this by using some cylinders (from plastic or rubber) at the same diameter of the pulley. These cylinders can be placed as extensions and stay in place by applying paper tape over them.
Although I have bought a new belt, I keep using the first one (from the factory) to see how long is going to last…I have been using it in this form over a year by now.
Last tip, you can replace a worn brush from the motor belt with an old toothbrush. Seen it in web...
Needless to say before anything else, unplug the band saw.
You may find my tips a bit of crudity but it isn't the right time to spend money in Greece.
And please don’t stay on my poor English…
Thx
-
nobotch reacted to toonewtoknow in Tilting Table on Byrnes Saw
REVIEW OF THE BYRNES TILT TABLE
Hi all!
I do own the tilt table. I see this is a bit dated but I will put in my 4 cents. First I want to be clear, the Byrnes saw is a real nice tool and I am not bashing it. If all you need to do is cut with the blade at 90* it is a dream. But.....many of us need to cut bevels, at least I do. Most of my cuts are bevels. I do not build ships, I make small craft items many octagonal or hexagonal shapes. So real clean mitre joints are required and if the bevels are not exact then the last piece will not fit and it will look like a bad apple. I needed a small saw and when I searched online only a few appeared and the Byrnes saw was the best looking and also the most expensive. I am not rich but I am too tired of bying import stuff that does not work so I sprang for the $800 for the saw and some accessories. Before I purcahsed it naturally I called and spoke to Donna who is very pleasant and knows the product very well. I explained to her that I needed to cut mainly bevels on small stock giving her the exact size 24" long by 2" wide by 3/8"- 1/2" thick with a bevel on both ends and a final part 2" long but I need other lengths as well and asked if their saw could do it well. She assured me that many saw owners do it and the results are amazing. She said I needed to buy the tilt table to do it. I asked why the arbor did not tilt and she told me they were looking for precision cuts so they did not use a tilt arbor.
She told me to find reviews online about the saw. I started out online to watch the reviews before I plunked down the $800. I wanted to see the tilt table in action. I looked for days and I could only find reviews of the saw but none of them had a tilt table. A few mentioned it as an add on but nowhere could I find one being used or reviewed. Being a little nervous I called and spoke to Donna again.
She again reinforced that the tilt table will work. So I ordered it.
I got the saw and it is a sight to see. It is truly well done. After staring with joy for a while I decided to try the tilt table. I needed 22.5* so I only had a protractor and quickly found that I needed something else to set an angle since the table had nothing on it to set the angle. My first thought would be cut a piece of wood to the desired degree using a mitre saw. I cut one, of course later figured out I could have used the protractor rip tool I bought with the saw but I failed to think about it. Having an angled wedge I proceeded to set it under the tilt table and set an angle. RIght off I found that because the tilt table is fastened to the flat table fence you have a problem setting a wedge under the table because the small end will sit on top of the fence which makes the angle skewed. It was easy enough to cut the pointed end off the wedge but if you want to use angle blocks (metal) you would need to add spacers to the block which makes it very hard to do because most angle blocks are thin making it hard to pile them up and keeping them from falling especially if you need a 22.5* angle because I already had 3 blocks under it just to get that angle. I also cut 30 + 45* angles as well. Of course you could always have blocks made without the point which would work. Since using a wedge turned out to be very poor, the angle was not precise I gave up on blocks. I went out and sprung for a digital angle gauge. Now this was better I thought. I put it on the tilt table and snugged the pivot bolts and slowly brought the table to 22.5*. When I got it I tried to tighten the bolts but it caused the angle to change. I fought with it for a while and finally was able to find a way to allow for the drift upon tighening to hit my mark. A real pain and certainly not going to work if you change setups often like I do. I also find that when using the tilt table the angle will drift during cutting. I really muscled it tight but I know this will eventually stretch the threads and finally strip them so the drifting is also an issue that is not well thought out. The tilt table is soo heavy and there are only two small allen heads that lock it down. The pivot surfaces are both very smooth only brute force will hold them so if you need to cut many parts at a time be ready for the table to drift. Remember only a 1/2 degree drift very slight will cause poor fitment when you are making 16 cuts on 8 parts. Add the error together and the final result is very poor fitment.
Now that I have the correct angle set it was time to cut a bevel. I took my 24" long stock and found that there is no way to cut it. Because of the design this task will never work. It was clear you first need to cut individual small pieces and then since you can only cut one edge and then have to spin the part around to cut the other end. This is a pain for me because its so difficult to set the angle I used my band saw to cut the long stock into small parts so they would work on the tilt table. This is nuts with a shiny Byrnes saw I should not have to use another saw but if you need many parts like I do it was much easier to use two saws. I use different length parts so it was easier to leave the tilt table setup and use the band saw too. For the money this saw costs I was becoming upset of the outcome so far. Just to note I design my own items so much of my work is prototype work which means I can't run a hundred parts at once, if I could I could cut the parts on the flat table then setup the tilt but my need is both, production and prototype so two saws are needed because of the flaws with the tilt table design.
The next problem I encountered when cutting smaller parts 2" or less I found that the slot for the mitre gauge on the tilt table allows the very thin edge of the beveled end to drop into the slot. This causes uneven cuts. If the table was flat this would be far less of an issue but because the table is angled up, you are fighting gravity trying to hold the part uphill against the fence but it is also very dangerous because your hands are an inch from the blade and the guard is not used on the tilt table. I finally cut a strip of wood to fill that slot and it seems to help.
By this time I was very upset because as much as I wanted this saw to work for me it will not. A saw with a tilting arbor is a must. I contacted Jim a few times and the first time I was told they knew nothing of these issues and I was the first to complain about them. As I read forums I found the issues that I have many people have. I let Jim know I read the forums and others have the same issues. He then told me to build a table on an angle to tilt the saw then the tilt table would be flat and it would be better. I looked into doing that and that too is flawed. I am right handed so I would need to tilt the saw to the right so the tilt table would be on the right of the blade but because of the vac port you have to tilt it to the left which will not work for me.
Conclusion.....This tilt table does not work for me and I have tried my best to make it work. For the price of this setup I should not have to work so hard to make it cut, it's a saw for goodness sake. I feel I was misled before I bought it since I told them exactly what I needed it to do even giving them the dimension of the wood I was using and what a finished part would need to be. I also told them I needed quantity of parts and time was a factor. I was told it would do it.
My suggestion if you really need to cut bevels more than one a month look elsewhere because you too will have the same issues I have. Many others have them too. If the saw was not sooo costly it might be easier to deal with but for this price it should be able to do the job, for me it falls way short.
Someone should do a video review of the tilt table. That would be very helpful for those that are thinking of buying a saw like this. It certainly would have made me keep looking for another saw that was better suited for my needs.
-
 nobotch got a reaction from Canute in Proxxon Micro MBS 240/E Band Saw Review
Cheers Mike. I don't know if it makes a difference, but I always have used plain cardboard, not corrugated. However, I'm glad you could achieve some noise reduction with the cardboard fix. I see that you damped the aluminium(?) housing, which certainly is not wrong (I guess you did the same with the door which I believe is made of some kind of plasic).
- Markus