DONATION DRIVE - SUPPORT MSW - DO YOUR PART TO KEEP THIS GREAT FORUM GOING!
×


Robert-J-M
-
Posts
31 -
Joined
-
Last visited


-
 JesseLee reacted to a post in a topic:
US Brig Syren by Robert-J-M - Model Shipways - 1:64 - 18 gun brig
JesseLee reacted to a post in a topic:
US Brig Syren by Robert-J-M - Model Shipways - 1:64 - 18 gun brig
-
GLakie reacted to a post in a topic:
US Brig Syren by Robert-J-M - Model Shipways - 1:64 - 18 gun brig
-
 Thanks for the support folks! It would take allot more closer pictures to see the areas which would mess up a stain job, including CA glue on the surface, and I haven't put the filler on yet. Nonetheless, I think it will look nice when painted so I am satisfied. Robert
 -
Gahm reacted to a post in a topic:
US Brig Syren by Robert-J-M - Model Shipways - 1:64 - 18 gun brig
-
Canute reacted to a post in a topic:
Syren by JesseLee - FINISHED - Model Shipways - scale: 1:64
-
GuntherMT reacted to a post in a topic:
US Brig Syren by Robert-J-M - Model Shipways - 1:64 - 18 gun brig
-
JesseLee reacted to a post in a topic:
Syren by JesseLee - FINISHED - Model Shipways - scale: 1:64
-
JesseLee reacted to a post in a topic:
US Brig Syren by Robert-J-M - Model Shipways - 1:64 - 18 gun brig
-
dgbot reacted to a post in a topic:
US Brig Syren by Robert-J-M - Model Shipways - 1:64 - 18 gun brig
-
GLakie reacted to a post in a topic:
Syren by JesseLee - FINISHED - Model Shipways - scale: 1:64
-
GLakie reacted to a post in a topic:
US Brig Syren by Robert-J-M - Model Shipways - 1:64 - 18 gun brig
-
Hiya Jesse: Now that you found me, I found you! Just finished a long post with my bulwark planking struggles, maybe you'll find something useful. After your comments and work on the counter, I'm going to take another look at that on mine Good Luck! Robert
- 1,306 replies
-
- 3
-
-
- syren
- model shipways
- (and 1 more)
-
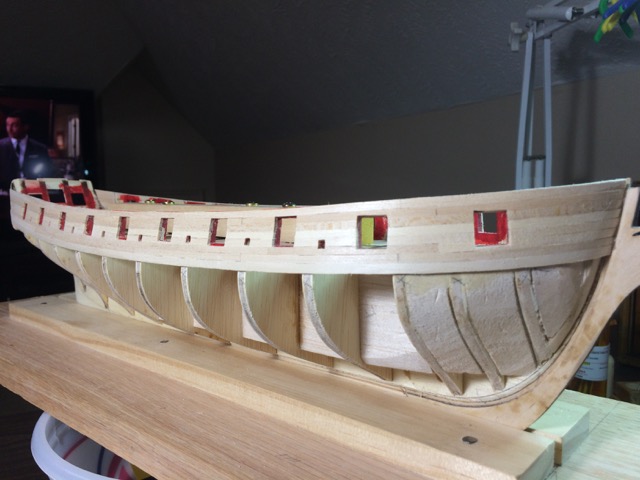
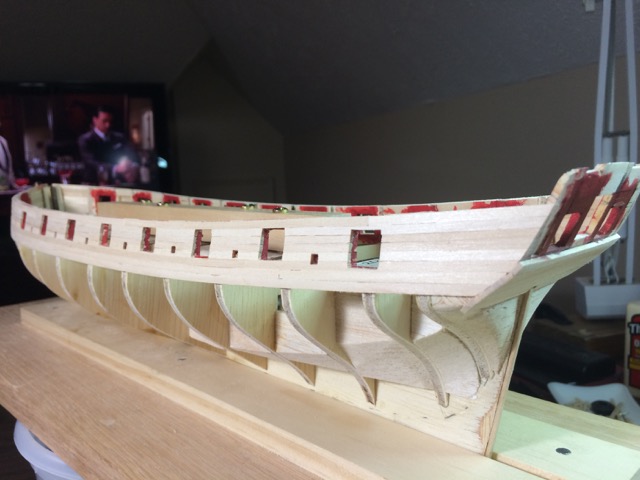
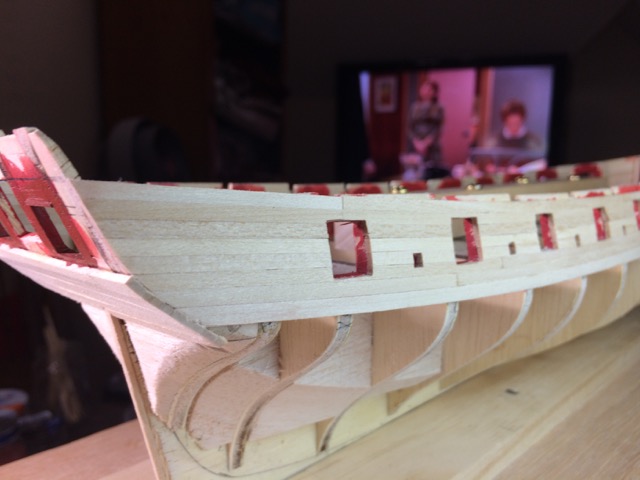
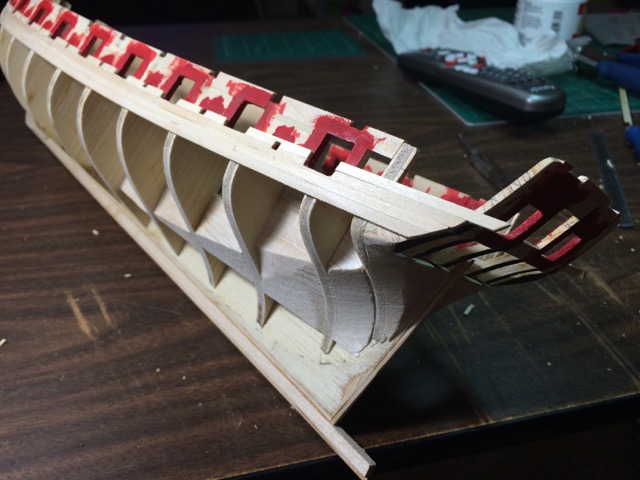
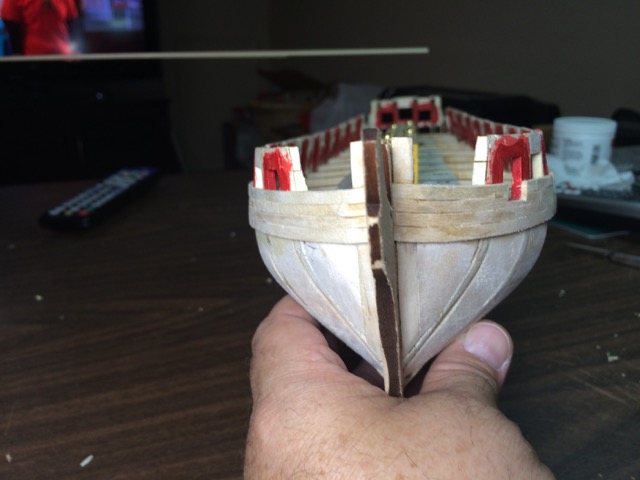
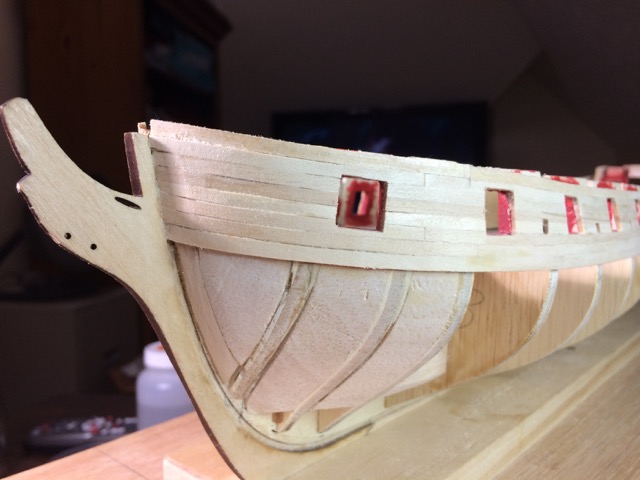
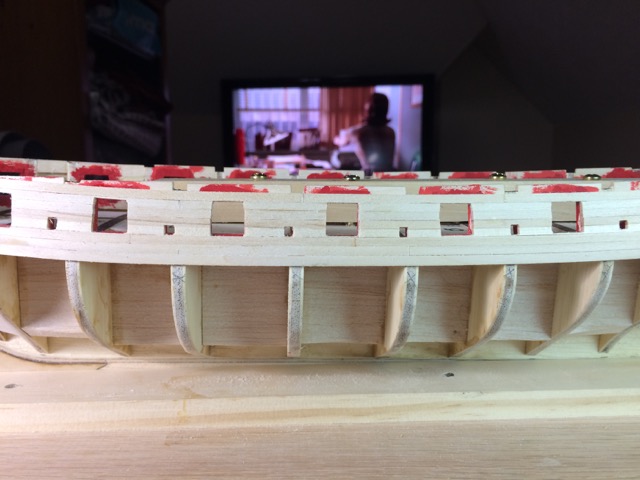
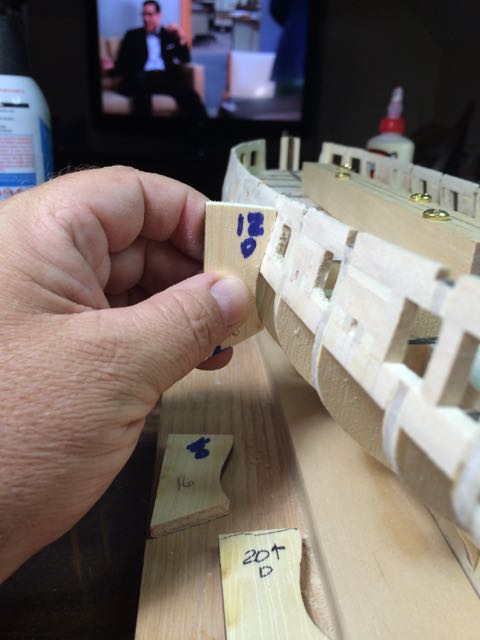
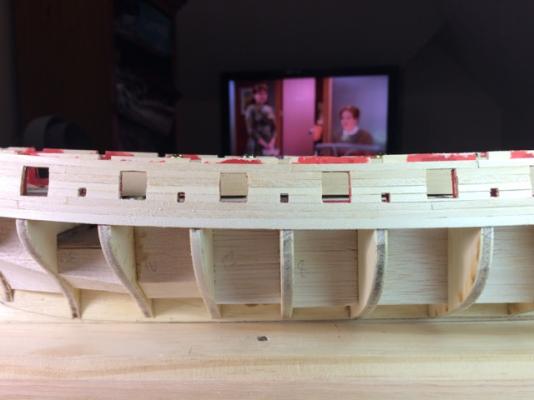
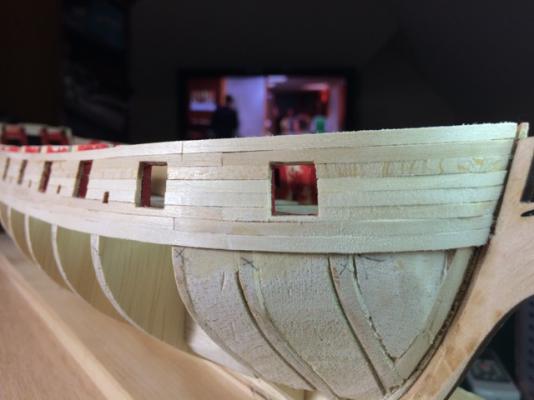
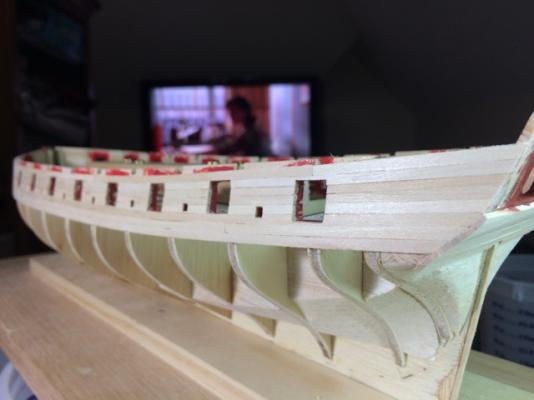
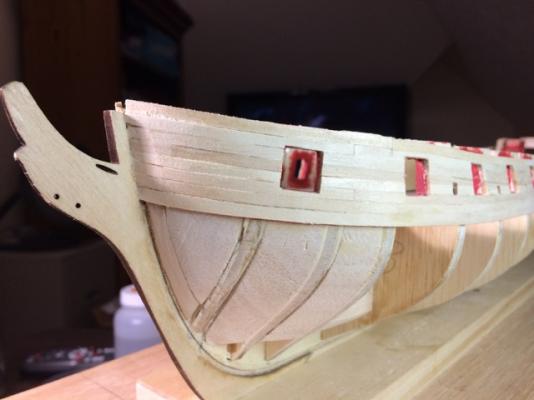
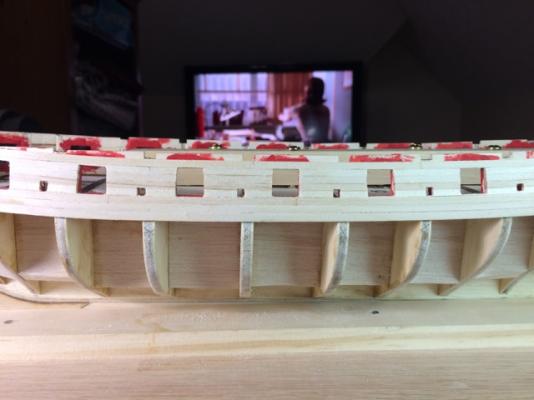
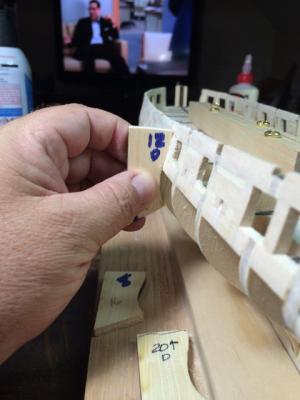
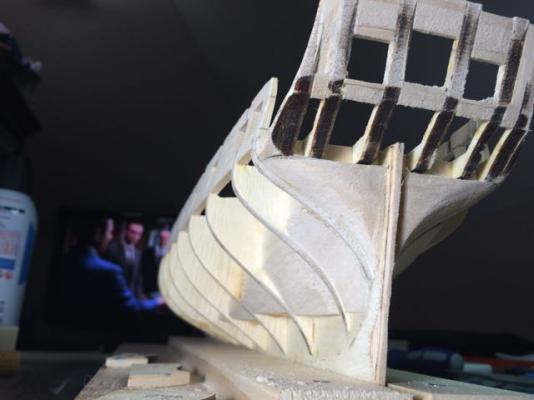
Fellow builders I share stories from the dark side…. Well not really the dark side but from where more impatient newbie builders like me struggle along. It can be rather intimidating reading the blogs and looking at pictures from Dirk an others with their beautiful planking so I found myself delaying, nervous about getting started. Then on the first few tries bending and installing the planks for the bow section of the bulwarks, I was redoing over and over, splitting them and otherwise making a hash of it all. I find I don’t enjoy the process maybe as much as I know I am supposed to, working every piece and part just right, so I just decided to forge ahead with my bucket bent planks, satisfied on my first wooden ship model to have a nice, if not perfect model, sooner rather than later. So I ordered some yellow ochre paint from Cornwall along with a few other bits (and some nice brass weapons) and grabbing planks, medium thick CA glue, paper towels and accelerator, I went to work. I squeezed the planks together and pressed them on with my fingers on one hand while wiping off excess glue and spraying accelerator with the other. I dry fit the planks and sanded and trimmed them some, but I still had to re-do a few planks several times right at the bow. I did manage to glue my fingers on a few times but fortunately didn’t lose any skin No matter how hard I tried I just wasn’t getting the bend at the bow right, I was still splitting planks (easier to see in the later photo). So about half way up I decided the bend was just too sharp and I shaved off a bit more of the bow fillers, knowing I could even everything up by sanding. After the shaving and bending the planks around the bow filler with the pin hammer on them, the splitting stopped and the last few laid down fairly nice. I got the rise mostly right, so it seems I got the wale mostly right, but on the 4th plank I noticed the port side at the bow was rising faster than stbd, so I shaved the already glued 3rd plank a bit and then used a 3/32 wide plank above that one that terminated at the first gunport. With a little more shaving and fitting of the next plank it came together nicely. I thought the port side stern rise was also high too because I was measuring across the stern comparing the plank height relative to the stern gunports, so I also used a 3/32” plank aft of the last port side gunport. Later laying in bead I though that was dumb should have used a 3/32” plank for the whole run. Wrong! Because it turns out… I should have been looking at the fall of the planks on the gunports more carefully. I was trimming the gunport openings after I glued each plank (just to the edges of the gunport, I still have to make the additional 1/32” cuts) so it would have been simple to measure from the top of each plank to the top of the gunport, but I was so focused on where the full length planks fell on the stern I just didn’t check at the gunports. When trimming the gunports after gluing the 6th plank on, I noticed that aft of the midships gunport, the top of the planking is 1/32” low as compared to starboard. If I had not put that 3/32” plank in near the stern, the last run meeting the transom would have been okay but it would still be low between the midships and aft gunports. Once I started looking at the stern counter planking I realized my stern chaser ports still weren’t quite right, which is what made me think the port side bulwark planking was higher, rather than lower than the stbd side, at the stern (I have fixed the bad stbd chaser port, again, so the transom cover will be ok). You can see, I ended up with the bulwark planking all in place, not nearly as nice as seen in the other build logs, but there it is, certainly not stain worthy as I expected. I have now sanded off my goofed up high port framing and sanded the planking and it’s looking ok. I have a few low spots and gaps to fill but I think it will look fine when painted. Looking at the plans and photos it appears the starboard planking is the correct height. I need to look at the plans more carefully to see if I can sand the starboard bulwark down 1/32” or maybe 3/64” and not create any problems. Otherwise, I need to put in a tapered 1/32” stealer at the top on the port side to bring it up. In either case once I paint the yellow stripe with the black above and below, I can make all look even. I guess I can conclude this really long posting with the lessons I’ve learned, which are, not surprisingly, reiterations of the instructions and other logs. - There has to be good tapering back on the bow filler toward the first bulkhead there’s just too big a gap and too sharp a bend otherwise to get the planking to lay nicely - I should have worked on my jig more to bend the planks at the bow into almost the exact shape, more bending while gluing just didn’t work, the plank splinters and I could not get the plank into the rabbet perpendicular to the stem. - If you are impatient, you can actually CA glue and put the bulwark planking together like I did, it is quicker I think, but it probably won’t be nice enough to stain, you will likely have to paint. - For staining, I think you really do have to take a good bit more time; select and sand the individual planks and have them bent and trimmed just right before gluing. - Watch the rise of the bulwark planks at the gunports as well as the bow and stern to make sure they are going to be even. Small changes to the height of the planks between the gunports won’t be noticeable and can fix a problem. - I am really going to try and be more patient with the hull planks. They have to be individually trimmed and sanded to fit anyway and I can make sure the bend is done properly right on the hull. -Learning my lesson with the bow filler and first bulkhead, I spent a good bit of time fairing the bulkheads below the wale waiting for planks to dry for the bulwarks so I should be able to bend the planks and get a good fit on the hull. So there you have my first ever planking tale, onto finish trimming the outside of the gun and sweep ports then to the hull planking!


-
Thanks for all the suggestions folks,the bucket has actually worked fine! I think I need something a little faster though... My work area is in a small room that is now getting hot here in the summer, I'm in Mississippi after all, I have a room AC in there but with the 55" TV on (I HAD to find a place to "store" it ). So I'm a little leery of adding a steam contraption, however the plank bender might be an option as it's small. rschissler says it works good for him, any other feedback on electric plank benders? I have heard some opposing remarks I think. Thanks, Robert
-
Thanks Augie, I thought about the pin diameter, 3/16" isn't much more bearing surface than the 1/8" dia. brass rod I cut up, so I didn't think it would help much. I also considered the concept of a bearing strip of wood or whatever, I can try that if needed with the plastic sign material. I believe the bucket will overbend it some looking at it's curve vs the bow curve but we'll see. I read that about planking, I bought that book, I really do understand now. If you think about it, each one had to be hand shaped in place when building a full size ship, fitting it just right such that the seams were just so for caulking, this is only smaller scale. Another question, does steam make the plank MORE pliable or just make it pliable FASTER. Robert
-
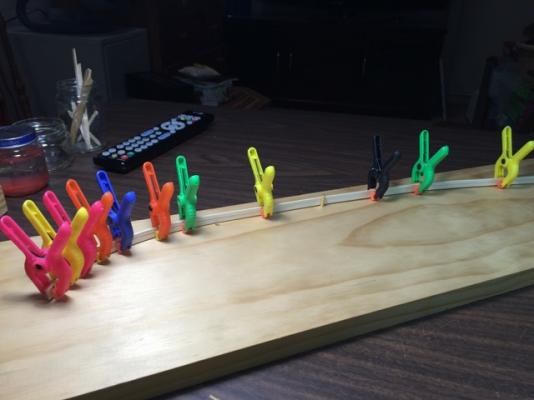
Thanks Augie! After my initial panic and even cutting a piece to remake it thats what I decided. Since you're around... I'm having a heck of a time with the forward most planks, it seems that plank is perpendicular to the CL of the boat were it meets the stem/rabbit. I made a jig: and I was barely able to bend the wale enough to get it mounted, but the first time I bent the short plank the forward most part wasn't rounded enough and I splintered it. The second one I turned the plank to the inside of the forward pin but it was thinking about to splintering again and the pin ended up making a sharp angled bend (and big indentation on the inboard side of he plank) and I got noticeable marks from the planks. I am soaking the piece in warm water for 10-15 minutes and letting it dry in the jig. The next thing I'm trying is... I bought an 6" diameter plastic bucket and a plastic yard sign which I cut out a strip of. I have bent the plank around the OD of the bucket and clamped it with the plastic strip on top to prevent clamp marks and for a more even bend. I did that last night but haven't tried putting it on yet, was waiting for it to dry. Is there something I'm missing here or is it just my inexperience with bending planks, as in I've never done it before. Thanks Robert
-
Fellow builders, no photos this time but I have started planking the bulwarks. As I looked at putting planks over the gunports, I noticed something odd, the forward gunport appears narrower than the the other ones on the template and plans. I looked at the instructions and several pictures and I don't think it is but that it's an artifact of a flat piece of paper wrapping a curved surface so the plans show it partially edge on. Is is narrower or same size as all the others. Thanks Robert
-
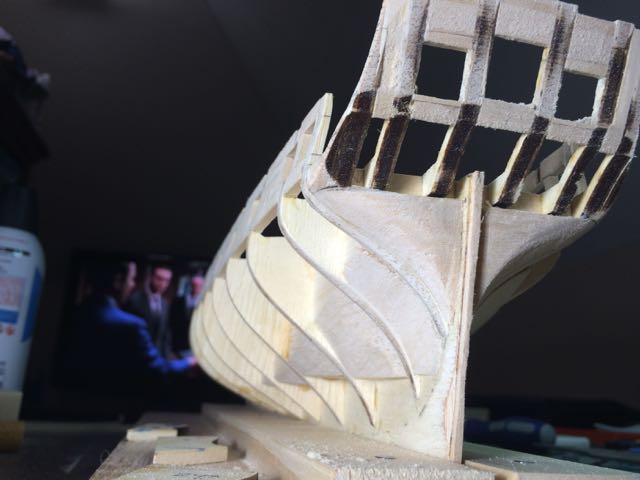
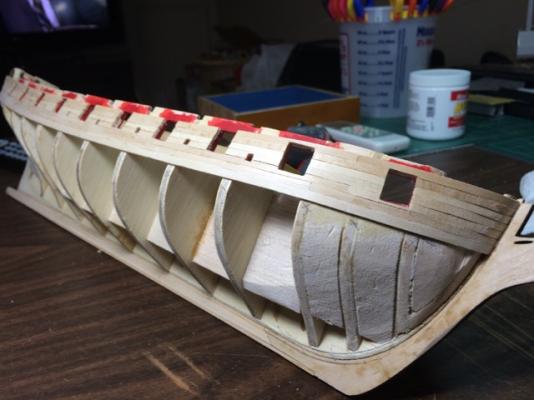
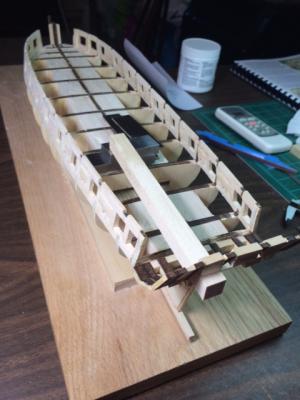
Faired the topsides using the sheets the bulkheads came out of. Once the bulkheads are removed, there are no markings on the sheets to know which one came out which hole so I emailed Model Shipways for a photo or drawing of sheets B & C. The reply was to use the drawings provided with the kit to match them up, oh well, just took a little longer. It took a few tries but finally I cut them right at the turn of the bilge so they would fit. It did help a bit getting that concave shape in the outboard topsides. I mostly used a 3" diameter paper roll center to fair the bulwarks. I decided to use single pieces of balsa to form the counter. I find it hard to know exactly how this should be shaped but I figure once I get to stern planking done and start the hull planking I'll get a better feel. Painting the gunport now and then on to planking the bulwarks, doing allot of reading first though. Robert
-
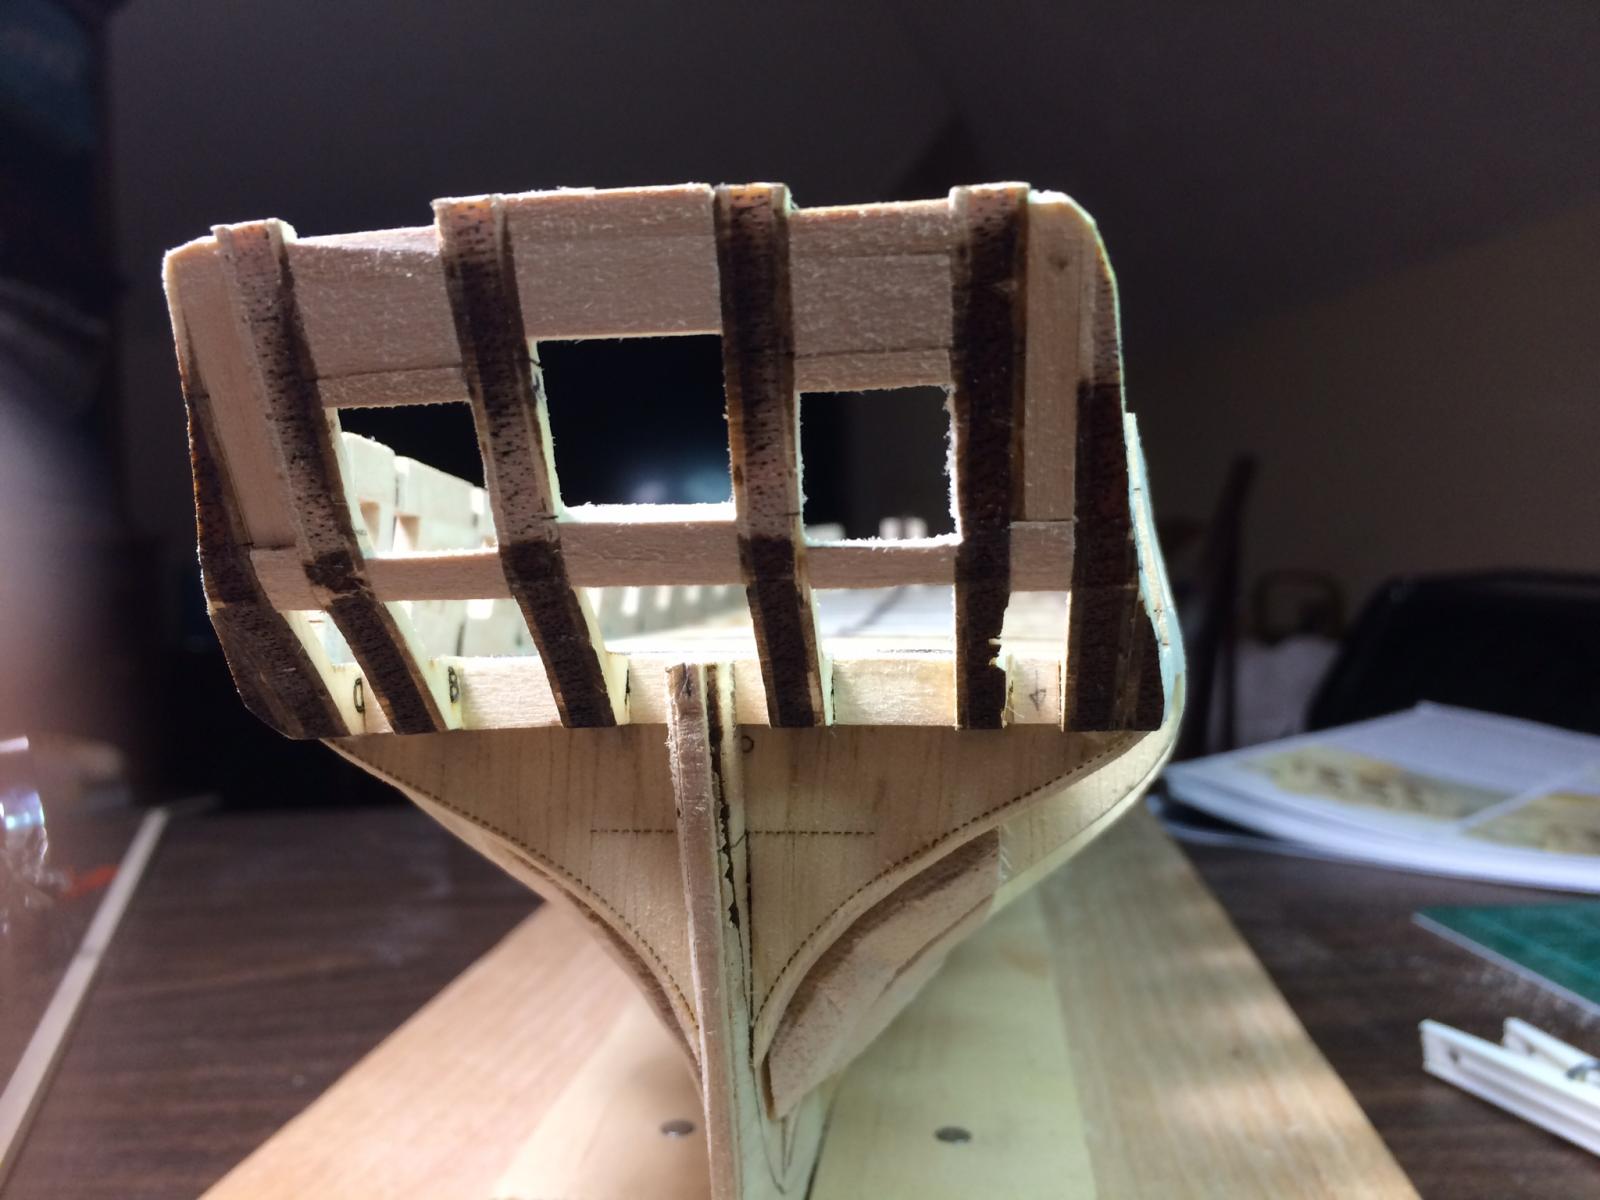
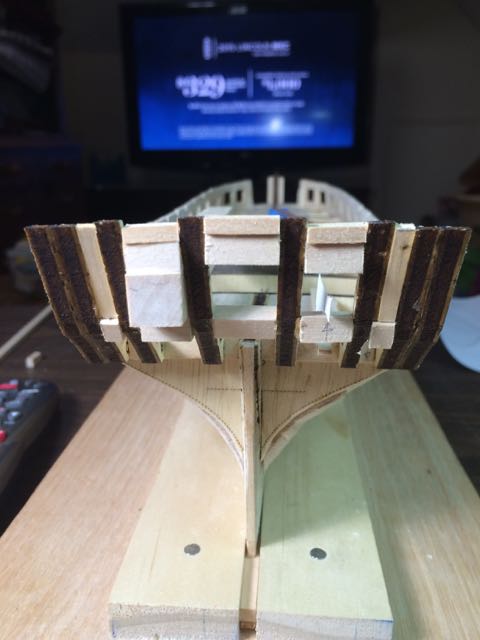
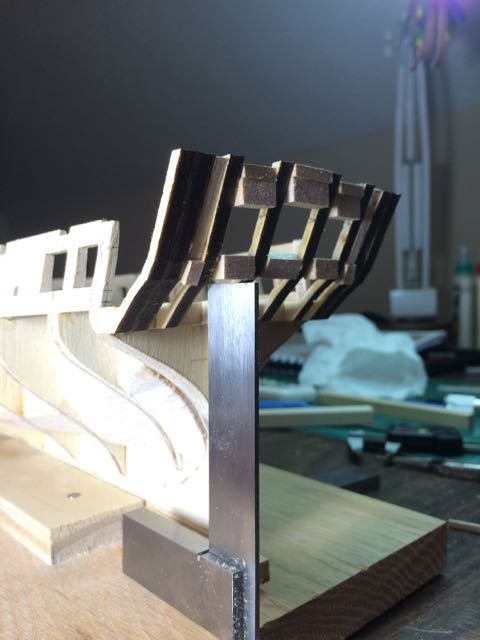
Got done fairing the sides of the transom. Started cautious with the Dremel leaving clearance to the outside of the plank edge but there's a good bit of material to remove so I ended up using the Dremel to a thick pencil line made on the inside of the plank. I had already realized it but the curve of the bulwark is not as pronounced on the port side as it is on the starboard. (Got to remember to move my finger out of the way on the iPhone) I made a mark on the stern post and measured up with calipers to matching plank run points on each side of the transom and the distances matched almost perfectly except at the slight inward turn on the port side. For that last fairing of the bulwarks prior to planking I am going to cut off the outside edges of each of the bulkheads from the sheet they were lasered out of. This should provide a nice template for getting that curve correct and for getting the final run of the planking. Despite my original bent bulkhead former everything seems to be symmetrical except... the stern gunports. The top of the port port is almost 1/8" further outboard then the starboard one. I believe any issues with these gun ports will be very noticeable from both inside and out so I will lay the template up and rework them as needed.. AGAIN.


-
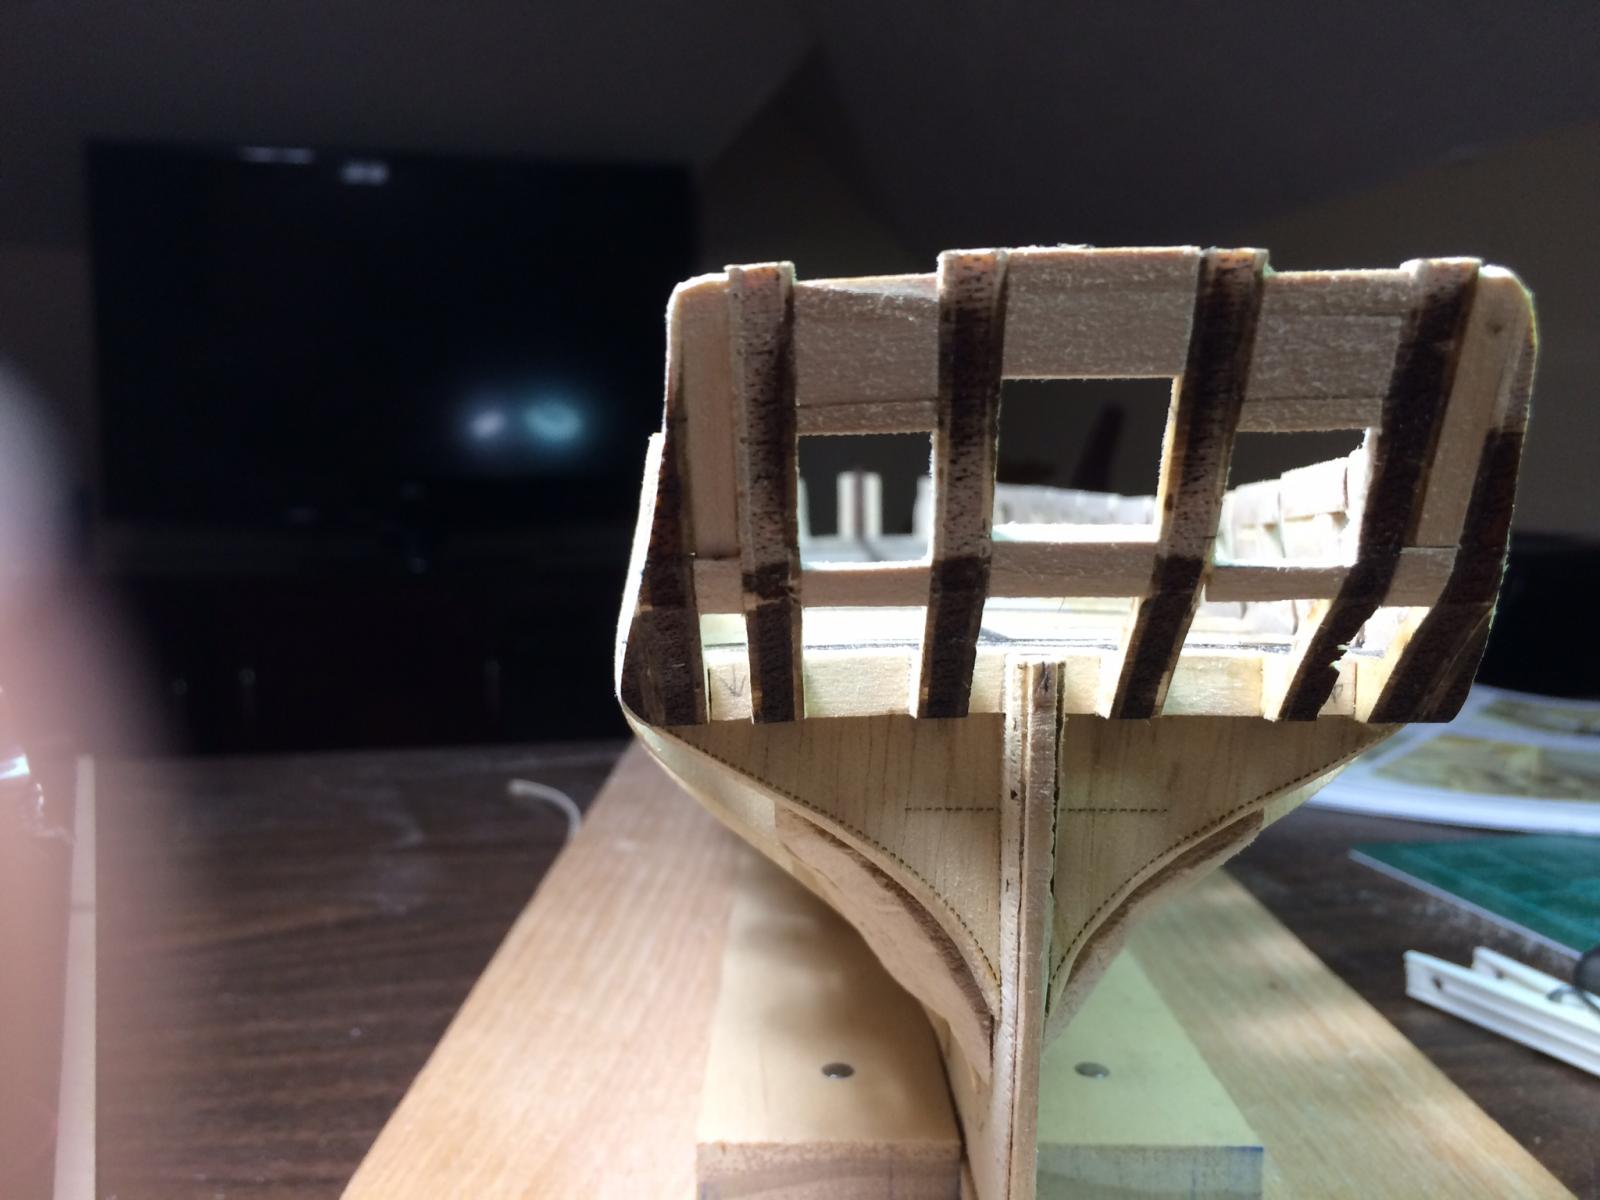
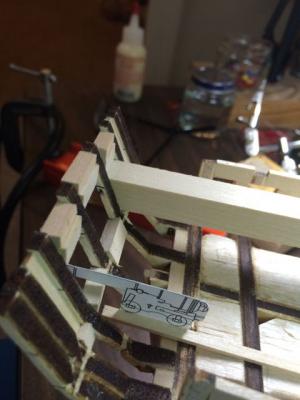
Thanks George, I ordered a Sand-It, in the mean time I am using the end of my ZONA mitre box, it's plastic so it wears as I sand but seems to be doing ok. Continuing on the transom... I carefully positioned the framing template aligning the frames getting everything looking good. I even used a caliper down to the keel to make sure the sill line was even across the transom. I decided to do the horizontal gunport frames first since I didn't want any other frames pushing the flimsy vertical frames in such a way for the gunport to be incorrect. In placing the sills, it took me a while to figure out how to make sure they were horizontal fore & aft. I ended up using a 3" square on the base board and visually aligning sill to the end of the square. I was able to get the end of the square very close to the sill so it was fairly easy to align. The base board is not perfectly square or flat but seems it was close enough. For the lintels I went back to the square pieces I used for the side gunports. I propped the forward end on various items until it rested flat on the sill which made gluing the lintels easy. Once I got the gunport done, I continued putting the other frames in. As usual I made a minor mistake, not doubling up the lintels, but a few pieces of 3/16"x 1/8" on top fixed that. I also discovered the narrow outboard frame gaps were very close to 5/32" so I lightly sanded some 5/32"x1/16" to fit and glued them in those gaps. It was at this point I decided to check the gunport with the gun template. As you can see the gun is very low in the port. Recalling positioning the template... I had tried to honor the burn marks for the gunport sills as best I could. As it turns out these marks are too high. I have since gone back and looked at various logs and (obviously now) the sills fall a good bit below these marks. I should have spent more time with the gun template and drawn an X in the port and used the center of it to align the template to the gun barrel, maybe even trimming the end of the barrel at an angle to match the angle of the template positioned on the transom. I will need to lower the sills as much as 3/32" to position the gun near the center of the port, it will be a bit tricky to sand and keep horizontal. I'll start out by measuring the thickness of the sill so after I get it low enough I can re-measure to get the distance to lower the lintels, then sand a piece that thickness on for the underside of the lintel to keep the 15/32" port height. First, I think I'll just try lowering the sill 1/16" it would make redoing the lintel easier using a 1/16" thick trim piece instead of sanding something else to an odd thickness.


-
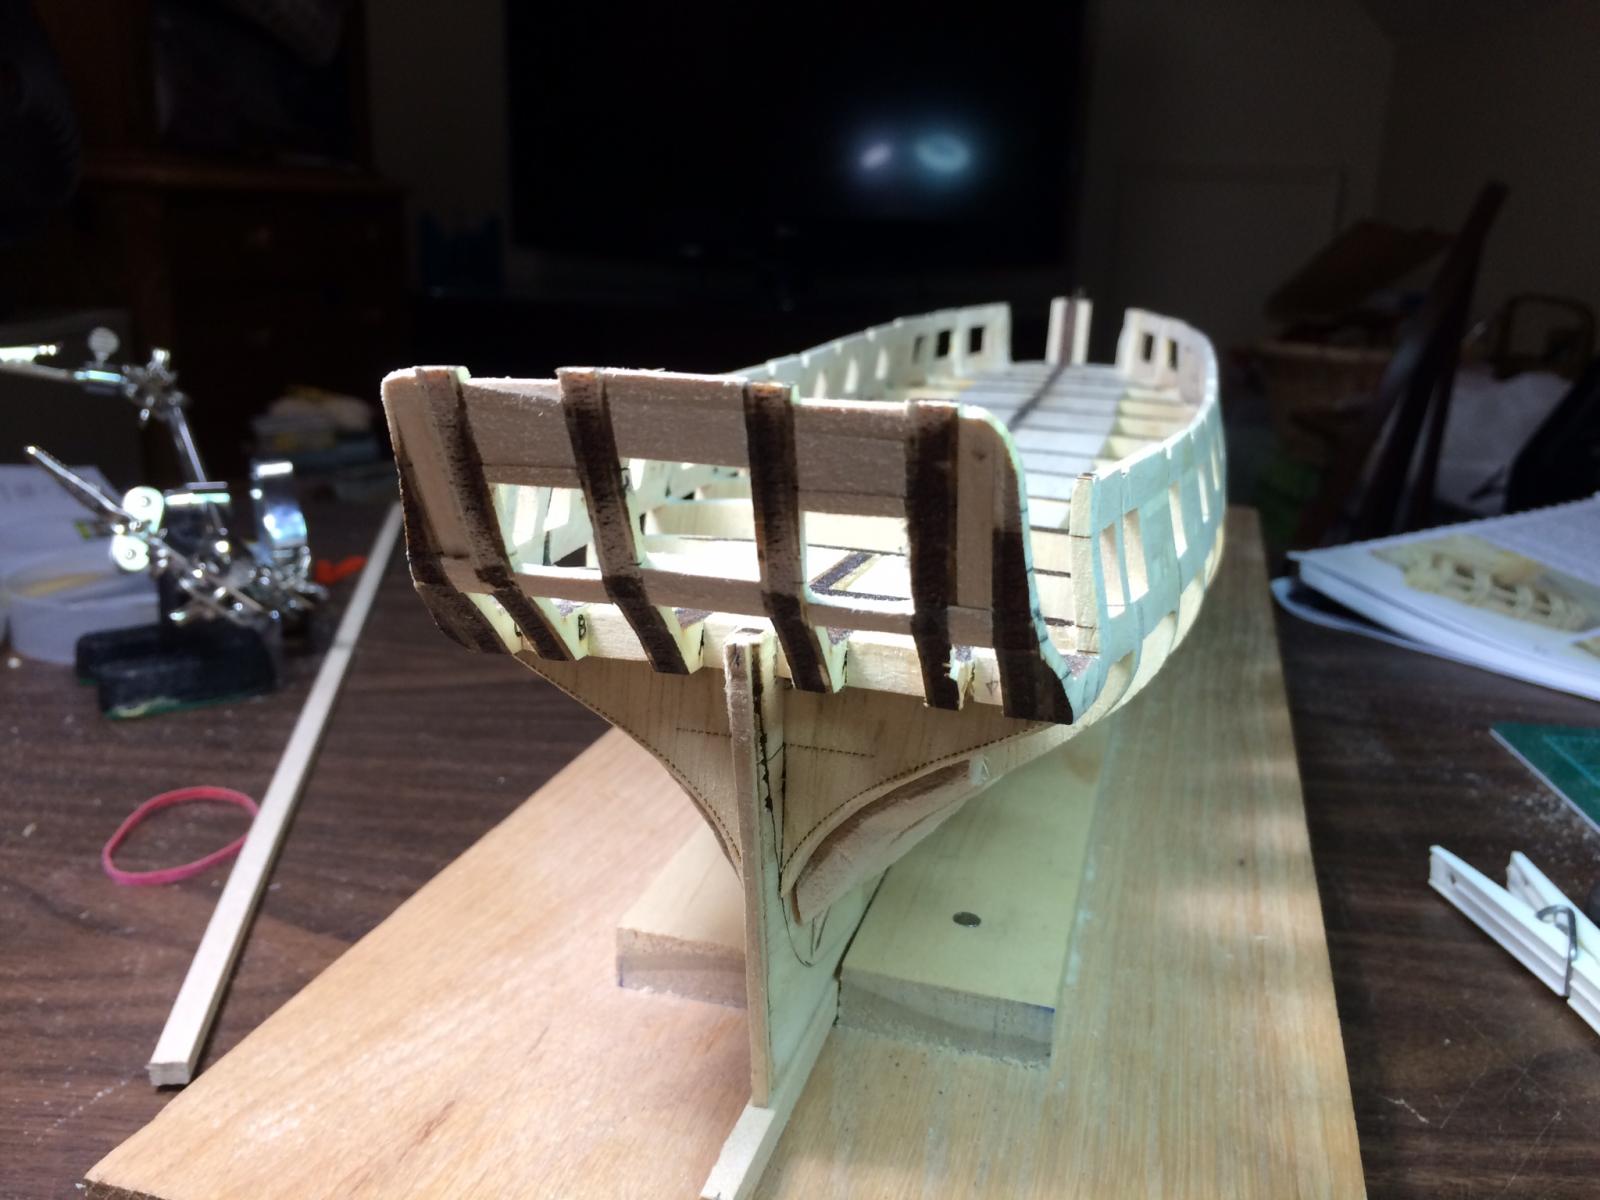
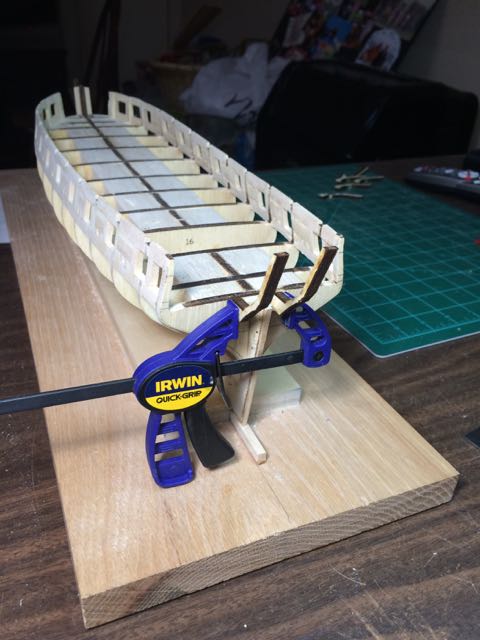
The regatta was successful and now that's done so now I'm back working on my Syren. I have sanded the bulwarks, not sure how well, they seem a bit rough but we'll see. Starting the next chapter and the transom, of course one frame had to be glued after cutting them free and another split but on the side so not a problem. I decided to put both the A frames on at the same time. It seemed easier to align with both in place and viewing from many angles. One of the things I continue to struggle with is sanding square the ends of the various pieces of 3/16"x1/4". I've tried sanding against the mitre box, a square and of course just holding it but I usually get it out of square in at lest one plane. Is there some method or trick to make it easier? Thanks, Robert

-
All this talk about balls.... guess I won't go there, this pleasant website could go south in a hurry! Looking good, I'm following along and using your ideas! Robert
-
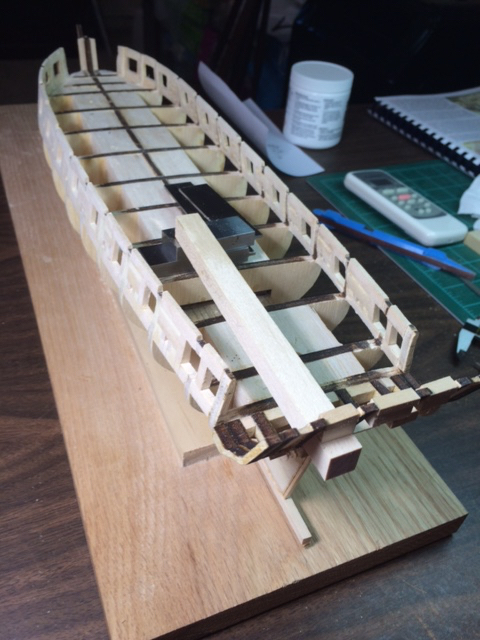
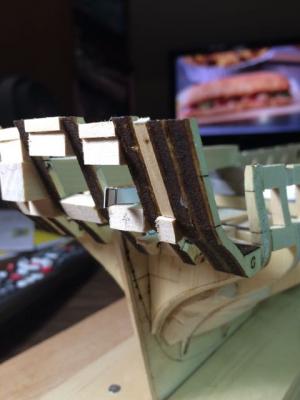
Almost done with the sweep ports. Using 3 spacer pieces allowed me to steadily work my way forward as the glue was drying. I had to notch several bulkhead frames to be large enough for the sweep ports. This can be seen if you look closely at the single sweep port spacer in the photo, there's a pencil line below it on the bulkhead frame and the next sweep port aft of that one. My pin holes in the bulkhead frames remained from my first placement of the port framing so I know I am going back to the same place every time. It also appears the ports are even to each side. Also, using spacer pieces across the width of the deck for the gun and sweep ports helped me make sure it was perpendicular to the keel/CL. All in all I THINK everything is going to look fine when all the planking is in place. I guess I got the template, and thus the ports, 1/16" or less aft as a result of slight squareness issues with the bulkheads and my bowed bulkhead former which still is a little wavy. Final shaping of the bulwarks will take me a while since I am going to have to use some filler pieces in a few places.

-
Thanks guys! I thought the instructions were a little odd. I got a few done last night and things went well. It's supposed to be rainy here this weekend and I have nothing else on my plate so hopefully I can get the rest of the sweep ports done. Robert
-
I have completed framing and sanding the gunports. I have found using 60 grit or other coarse grit hand sanding with my is the best way to get the framing pieces down to the bulwark frame and then 100-120- grit to shape more finely. I use various blocks, my cut-up old wood Warner 436 for the inboard side of the rails and actually found the same red sanding blocks used by Marsares and others here in the US, they come from a company called ZONA - Spring loaded sanding blocks, 20mm and 40mm width and can be bought from various Hobby Supply Companies. I bought just the 20 mm one and the replacement strips from hobbylinc.com I did get a bit carried away on one side, filler will be required. On to the sweep ports but I am confused about the sweep port framing. I planned to use 1/8" square strips laid across the sills (like I did with the gunports) to set the "red" pieces for the top of the sweep ports, the instructions say the ports are 1/8"x1/8" but then it says to use the same 1/4"x 3/16" strips used in all the other framing for the "blue" frames too. Am I supposed to sand each one from 3/16" down to 1/8"? Seems like it would make more sense to use 1/8" strip. What am I missing here... I have looked at other logs and don't see anyone else finding a problem. Thanks, Robert