


bryanc
-
Posts
218 -
Joined
-
Last visited
Content Type
Profiles
Forums
Gallery
Events
Posts posted by bryanc
-
-
Hi Paul,
I'm not entirely sure I understand your question, but; the instructions are really poor (they assume a vast amount of existing modelling knowledge and are abrupt to the point of being rude!), there are no plans per se, merely line drawings of each deck towards the back of the A4 manual and a second A3 sized booklet with all the parts printed life size for identification purposes, and three line drawings which, while good as far as they go, don't go very far.
Oh and there's the gun-port template which is wrong! I may be incompetent, but even I would struggle to build the kit 15mm shorter than the template seems to be designed for.
On the plus side the materials are generally of good quality, some are excellent. Although in no case are they over generous in the amount supplied.
* I've just noticed you're building the Panart Gun Deck. I'm strongly considering that for my next project so will watch with interest. If you can grant me permission to see your YouTube "unpacking" video I could better comment on the Victory Bow Cross Section manuals as I imagine they are on a par with the ones for the Gun Deck.
Thanks,
Bryan
-
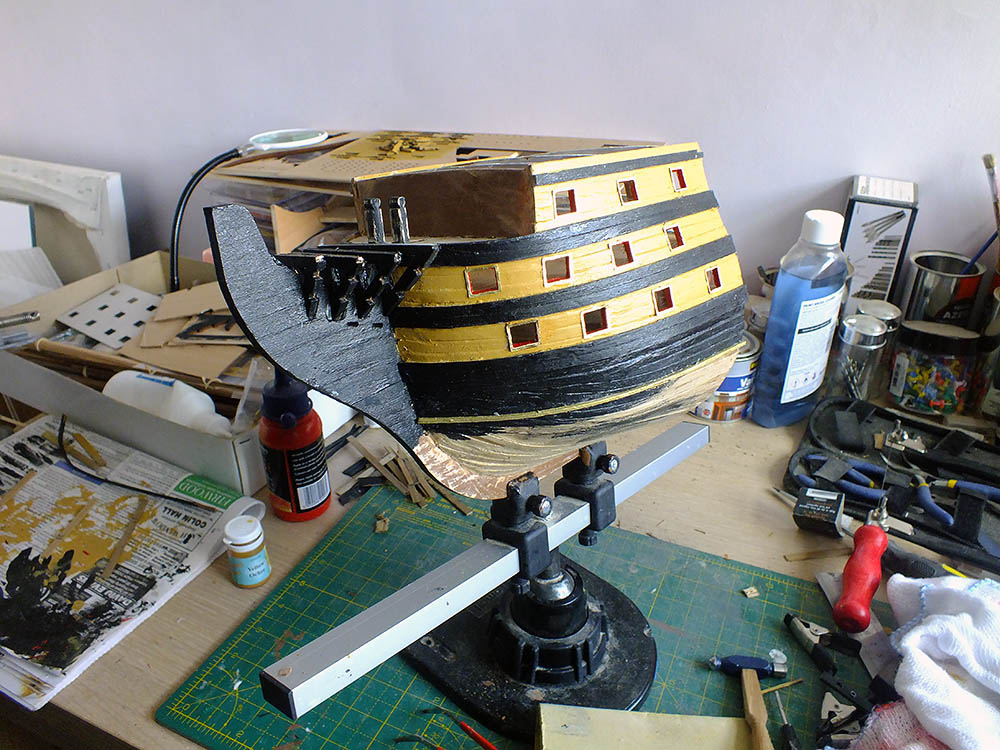
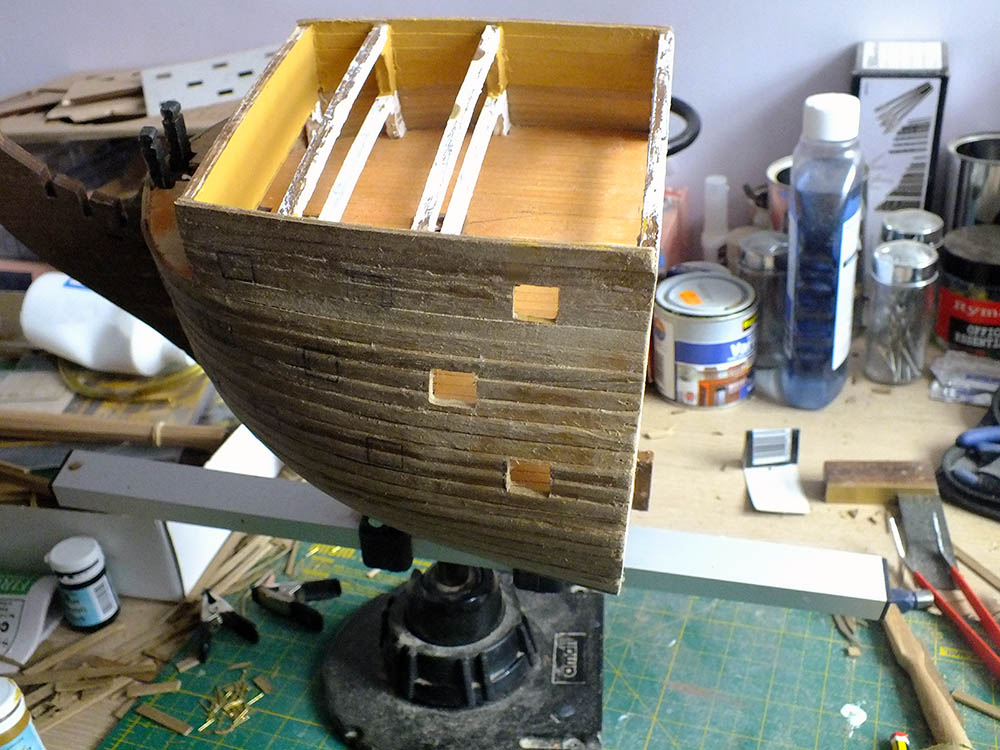
At last she begins to looks like a "Ship of the Line"
A mainly wet and miserable Easter has seen me confined to indoors, and quite a lot of work on the Victory has taken place. The fitting of the wales and of course that colour scheme and suddenly a proper ship of the line is taking shape.
I'm very unsure about the brass gun-port inserts, not the least because the real thing had nothing remotely resembling them. I'm not even sure they add anything, and as the starboard side of the ship has yet to have the gun-ports created, I think I'll tidy them up more precisely, paint the edging and compare the two sides. I think the brass inserts may well loose out.
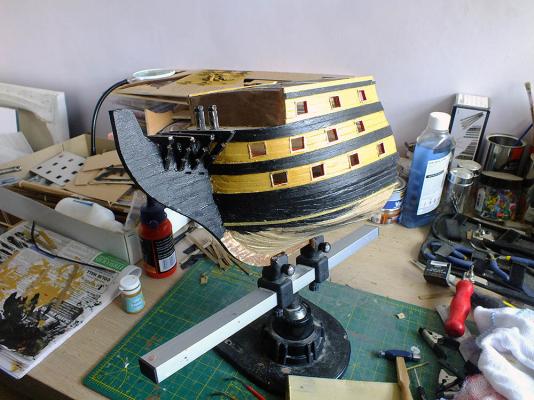
Despite the gun-port template being wrong (and I'm becoming more and more convinced I was supplied with the wrong one) the re-positioning of them doesn't look too bad. Of some concern is the keel deck cradle pieces; I don't know how, but the more forward ones have ended up a little too low. The keel deck will have a big dip in it if I position it as is. I think I'll have to build them up a tad.
But first to cut the starboard side gun-ports, and then of course, the dreaded hull copper plating. I'm convinced there is not enough plates in the kit to complete the task, lets hope I'm wrong!
Bryan
-
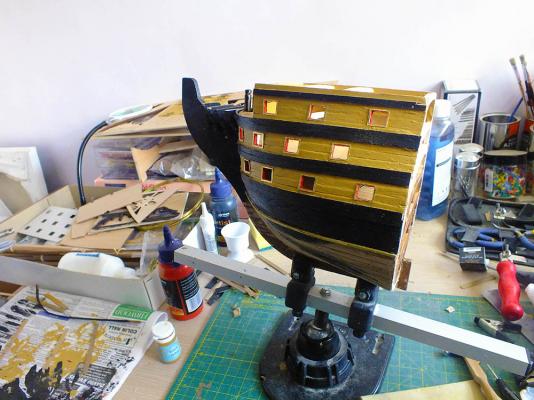
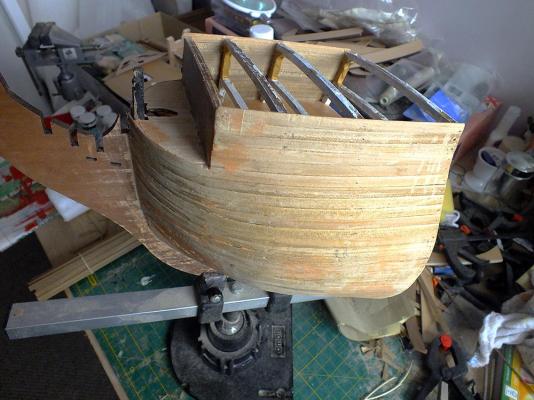
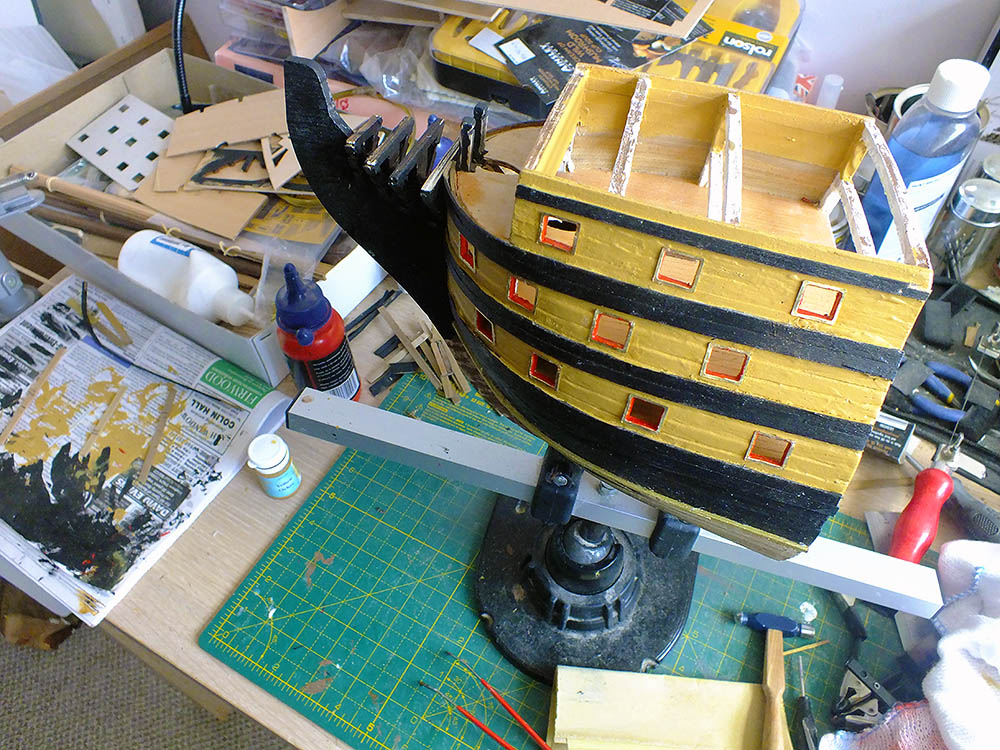
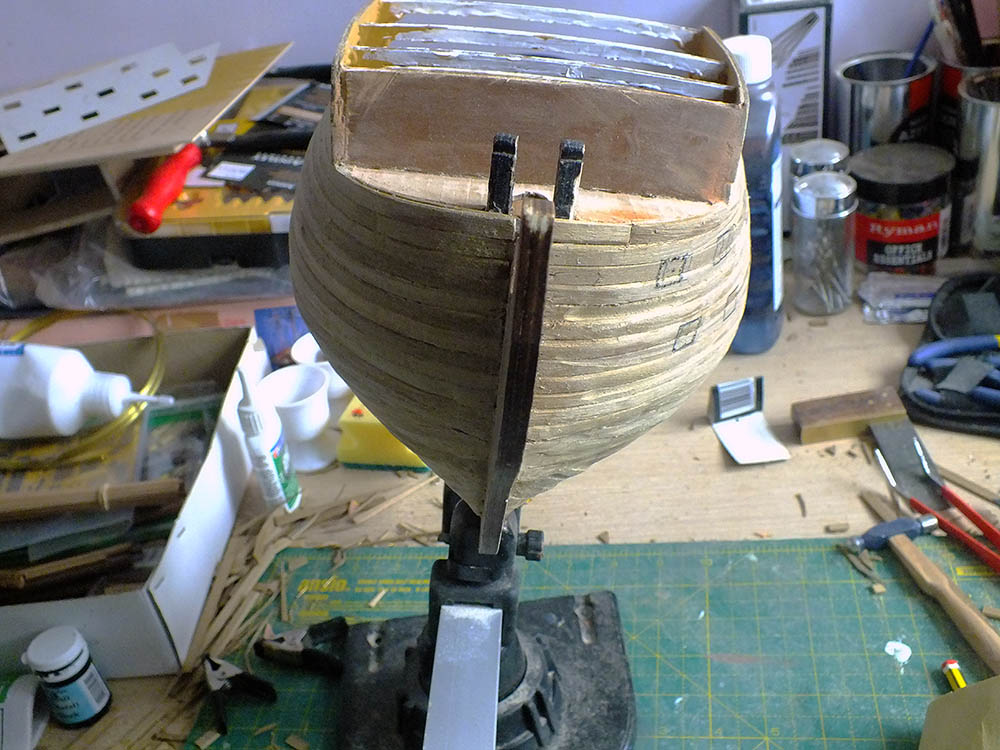
Hull Planking Complete!
I completed the second hull planking yesterday. It's far far from perfect as the photos reveal, however it's certainly the best I've ever done, so slow progress is being made in developing this modellers skills. No filling is required, which is remarkable, and as I intend painting it, some sanding has taken place, though very little. Instructions for painting and indeed for the wales which I imagine are fitted next, is very poor in the manual, so a lot of research is required. Also the copper plating will have to be completed before long, and that is going to be a challenge (I've never copper plated a hull before).
I'll prime the hull and paint as I see fit, first with the famous yellow ochre. Purists will say that the infamous yellow/black hull of the Victory was historically incorrect, and it was actually a sort of purple pink/black. I don't dispute it, but will go with the more celebrated livery.

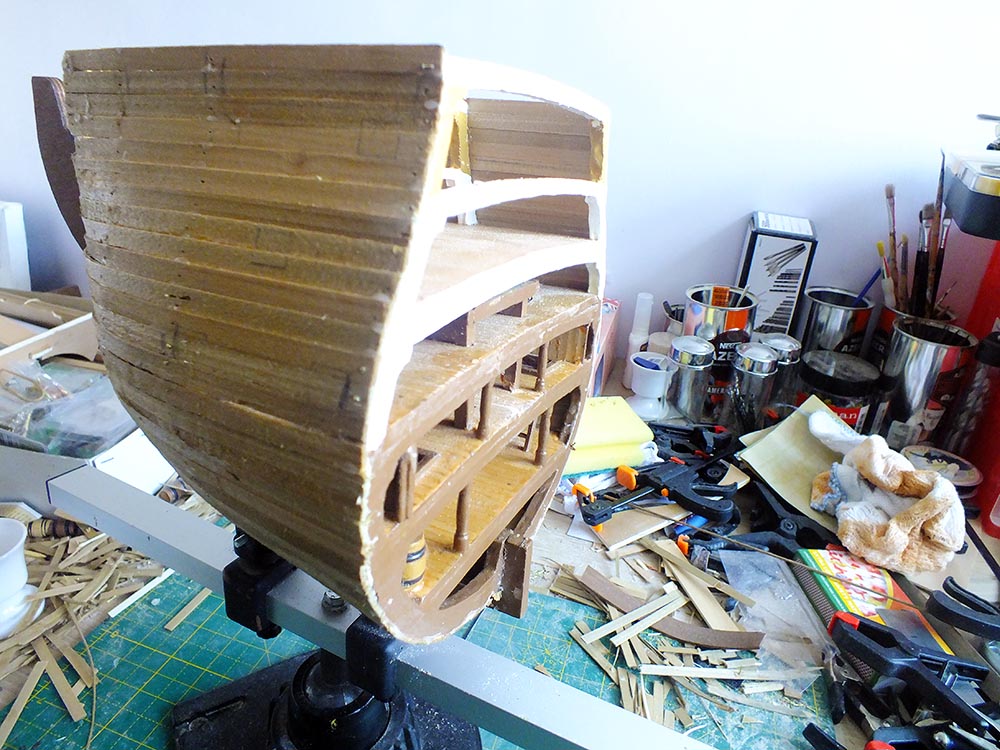
I am still perplexed by the gun-port templates inaccuracy (or mine) and further work has revealed hull ribs are going to foul gun-ports somewhere on the hull no matter how its placed. Therefore some "creative" placement of gun-ports is required. One place this will be is forward on the upper gun-deck; in the kit the entrance to the "roundhouse(s)" are shown as quite prominent structures. I intend cutting these back or even eliminating them so cannon can be placed without interference. I'm not greatly bothered by this as they will be barely discernible anyway when the decks are built, but more significantly my much referred to McKay reveals the interior roundhouses are in fact little more than a door in the forward deck wall.
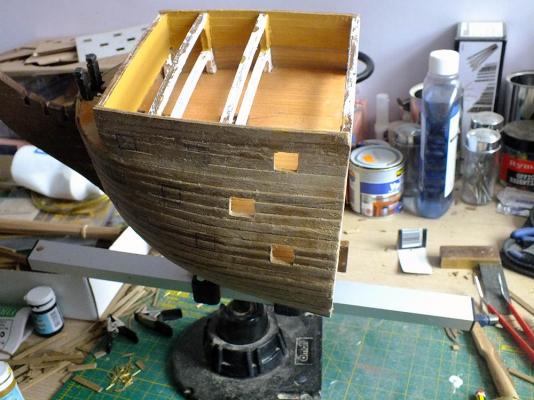
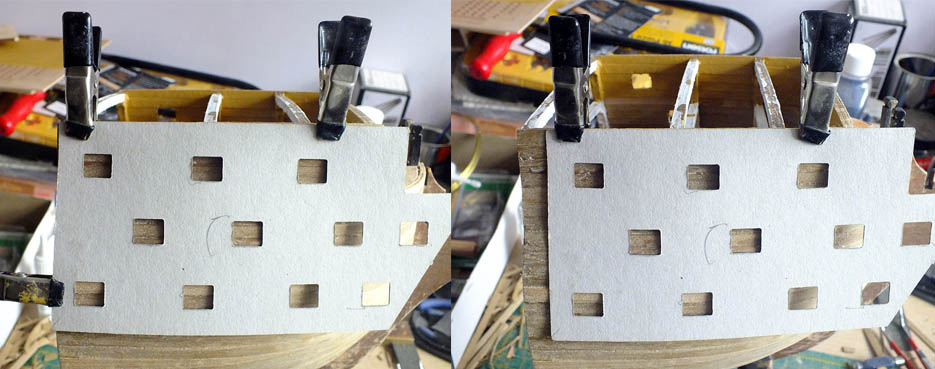
I'm attaching a photo of said template in position which will better explain my perplexity. (Then I'll await the more intelligent responses explaining my stupidity)!

Left. Showing the presumed intended template position, note the overhang to the right, and the gun-ports which will be fouled by the hull ribs.
Right. Showing the position I will use (subject to change). This is the minimum forward position whereby gun-ports will not be fouled by the hull ribs.
Now to paint!
Bryan
-
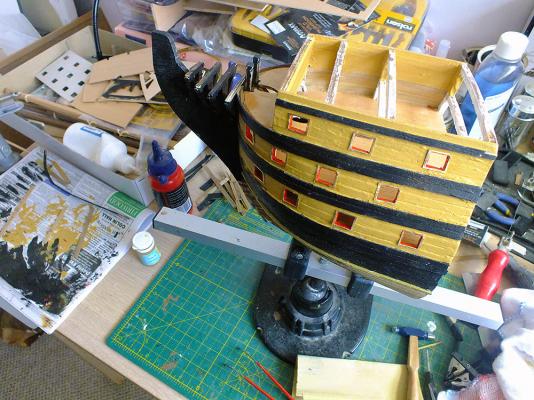
Gun Ports?
The second planking is proceeding OK, but then, the first part is relatively easy. Obviously the thicker wood means bending is more problematic, but in all honesty my Modelcraft plank bender copes easily - perhaps a better purchase than I'd given it credit for (just don't leave it plugged in!).
Two things did occur to me; the gun ports positioning, and creation thereof. I thought I'd better have a look. Then came a shock; on placing the gun port template against the keel I was shocked to see it was miles out! Several of the ports would be fouled by the ribs!! Whichever way I positioned the template, and on whichever side of the hull, it was the same, the only way I could position the template and ensure (as far as I could) that every port is free of an offending rib, was position the template a good 1/2 inch out of its intended position.
My first thought was I'd seriously screwed up somewhere, but that doesn't really make sense as everything else fits perfectly. If the ribs were somehow out, the pre-cut decks wouldn't remotely fit, but they do, perfectly. Is this an imponderable, or will the truth be revealed later on, probably the latter, but there is little I can do but persevere.
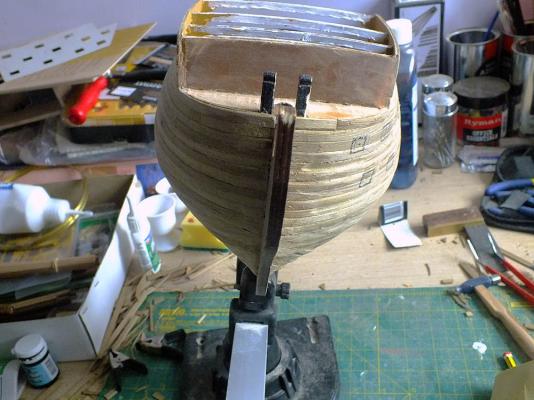
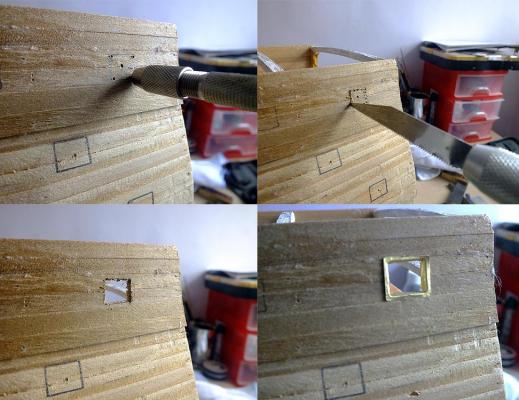
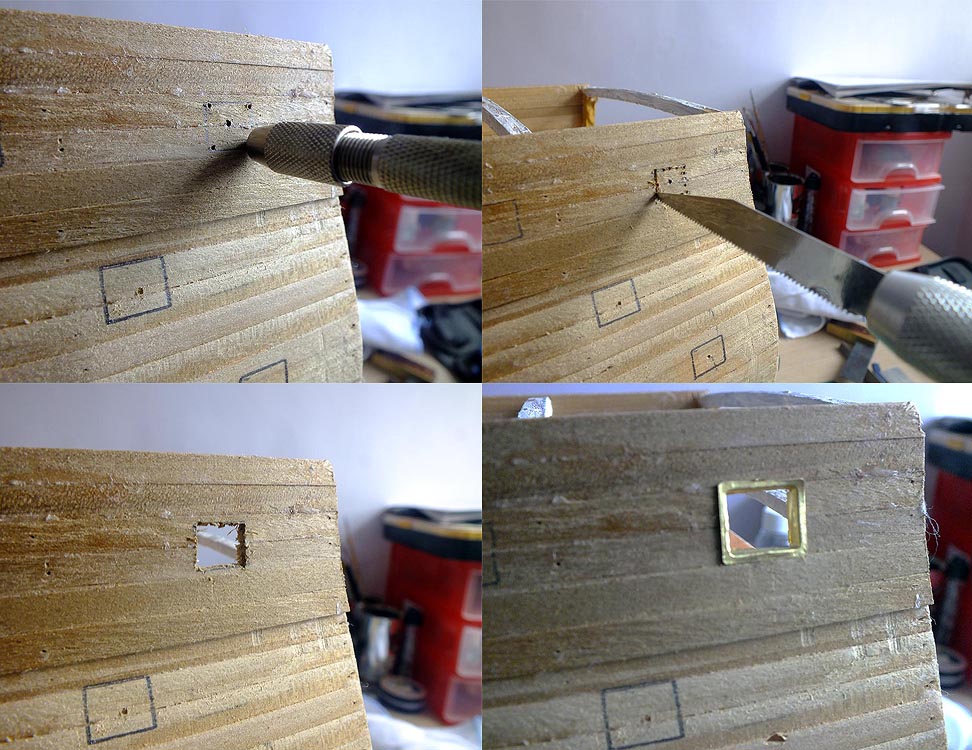
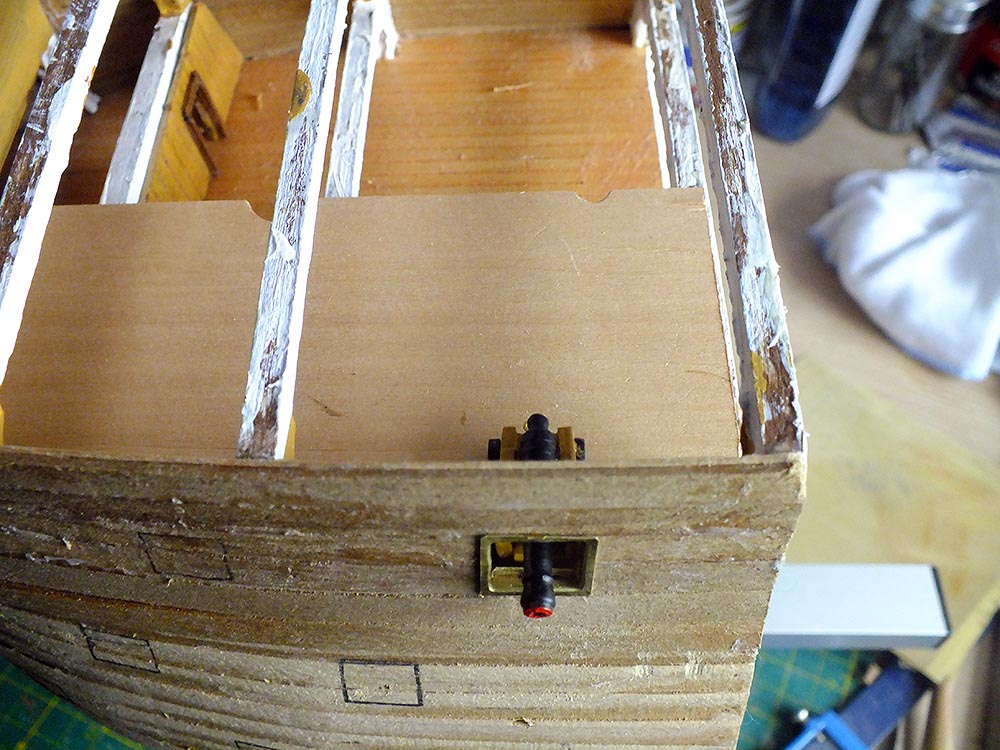
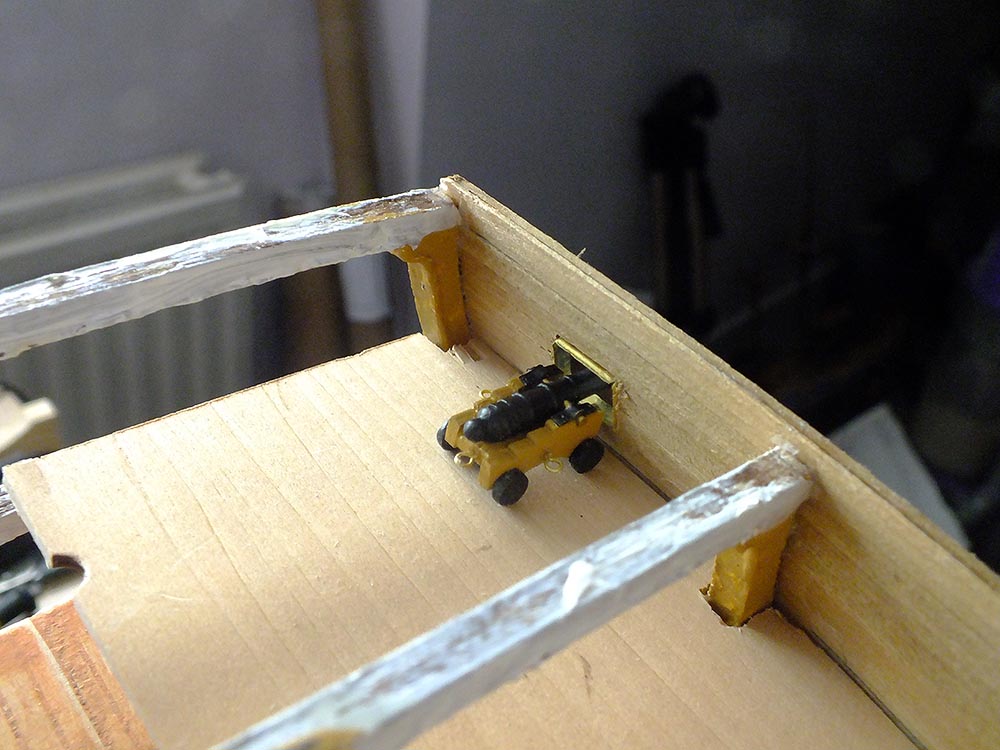
The creation of the gun-ports now niggled more than ever, so I proceeded to create one! I was pleasantly surprised to find it was relatively easy, and more importantly the height etc was just right; the brass port frame temporarily in position really sets it off. With the upper (incomplete) gun deck temporarily in place, a gun (I previously created two, one of each of the two sizes) positioned in situ looks well.


But now back to the planking...
Bryan
- UpstateNY, BLACK VIKING, Elijah and 2 others
-
 5
5
-
-
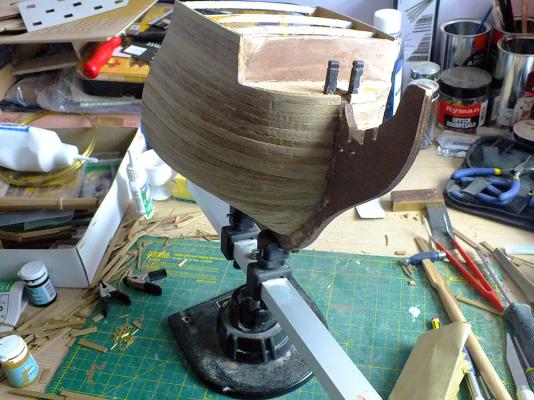
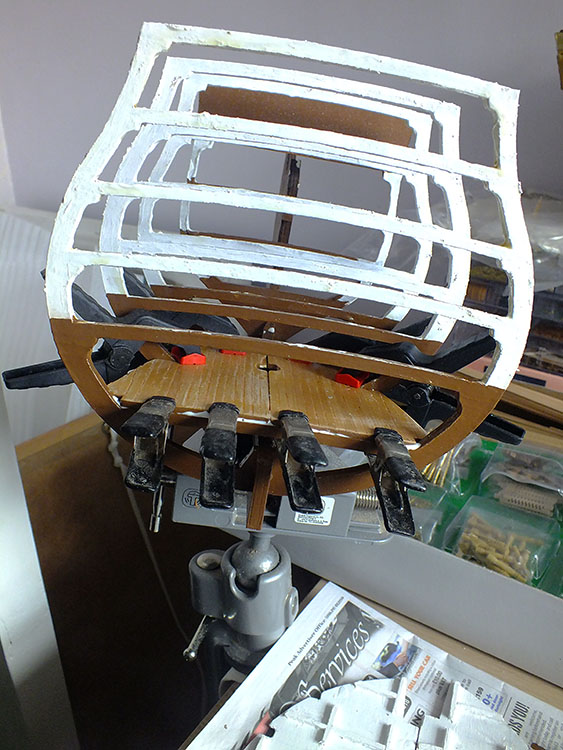
What a difference a sanding makes!
A little bit of filler and a lot of sanding and the hull is looking capable of taking the second planking!
But its only now I realise I've made a colossal error! It would appear I've done the first planking with the material intended for the second planking and obviously I've little choice but to do the final planking with the material intended for the first!
I don't accept I'm a total mug though, as I'm think I'm right in saying that normally the final planking is usually done with the superior, thicker walnut type wood, which is what I've got left, and the first planking with the .5mm thinner "lime strips".
Oh well, I just hope its not more difficult to work with!
-
1st planking done!
The first planking is complete, its far from perfect, especially the lower hull near the keel, but strange as it seems its probably the best I've ever done! (Which isn't saying much).

But it is only the first planking and with a bit of judicious filling and sanding (groan) I think it will do. However the second planking will have to be better!
-
-
-
Hull Planking
And so it begins. I always consider this such a major step, but always approach it with some trepidation. Initially at least this time I found it relatively easy and even enjoyable! I must confess for the first time I used a "proper" plank bender where appropriate, and it really does do a good job - the Modelcraft version, which employs a heated "head" to create the bend with. Over expensive for what it is, but it was an extra little Christmas present from my daughter.
Granted I have only done the easy bit of the planking up to now, and if I remain undisturbed, will progress on to the more complicated stuff later today.
That important first plank!

Bryan
-
-
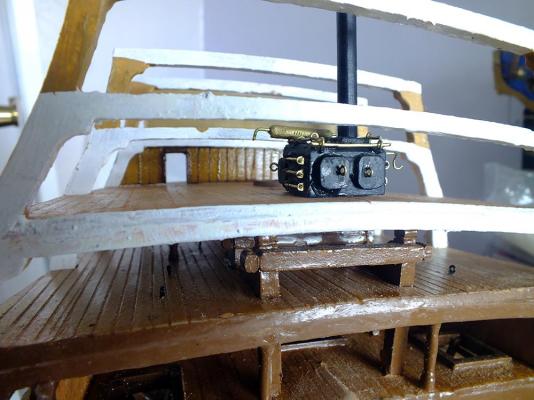
Cooking by...
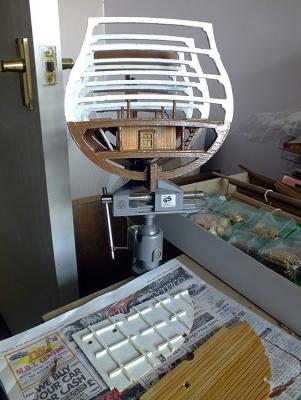
More a "putting off the inevitable" exercise than a real step forward, but I've completed my "over the top" stove. A hybrid development of the kit supplied one and the (probably not original) brute of a thing I've seen in photographs of the stove currently fitted in the galley of the real life Victory at Portsmouth. Mine has been photographed while temporarily sat on the middle gun-deck. Its "bed of bricks" is still under development, and in any event its probably best not to fix it in position until the next step is completed, this being the step I have been putting off somewhat - planking the hull.
One little aside; the second photograph shows the "bashed" sickbay "partition wall" temporarily in place. I'm unsure whether this will actually be used, because I feel I may just have made a rod for my own back; behind it two of the cannon are intended to sit, and they are going to be tricky to work with. I'll have to wait and see.
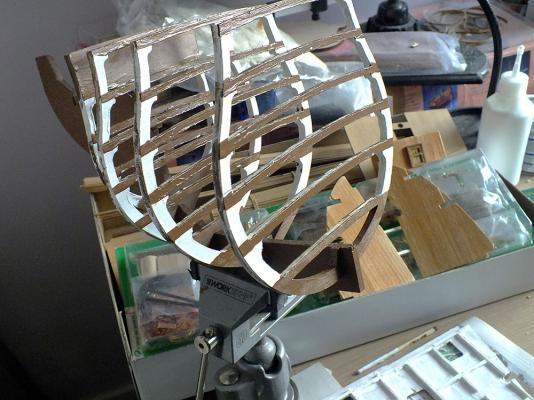
Hull planking, as those who have viewed my previous efforts will be aware, is definitely not my strong suite, I don't know whether working on a much shorter hull is going to make it easier of more difficult. Were it a mid-ship cross section I'd have said easier, but probably not in this case. Still, onward and upward, or in this case downward, as the intention is to start the first planking from the top and work downwards.
Bryan
-
Bryan, intriguing build you have started. I too would like to follow along. The detailing sounds like something I'd like to delve into. Lead on!

Welcome aboard Ken, you will find I am a lover of detail, however I should emphasise my modelling prowess doesn't match my keenness to actually do it - but there's plenty of enthusiasm!
Bryan
-
Looks good! From what I know, bashing adds to the look. Nice deck planking. What paint/finish are you using?
Thanks Elijah, I think some amount of bashing is always required. Primarily because of cost, no kit manufacturer ever provides enough of the detail which so makes a finished model. How much and how authentic depends on the builder. In this case I'm lucky enough to have a copy of McKay's Victory - Anatomy of a Ship, which is proving invaluable and informative. For instance it even details that on the deck I'm now working on, the middle gun-deck, is situated the galley, the stove of which is mounted on a bed of bricks (for obvious reasons) which, like another user on here, I intend to emulate. It also reveals the stove is fitted a different way round to the kit (lengthwise, not width-wise)! My McKay also shows there are cabins on this deck, but sadly towards the stern of the vessel, the bow has nothing else of note - apart from the cannon!
The deck is built and planked according to the manual, but then I heavily score down each plank join, next I rub in then wipe off wood filler (light/medium oak in this case). When completely dry it is lightly sanded and varnished with a clear (satin) varnish.
The paints are Admiralty Paints for the more specific colours; Wood (Walnut) Brown for instance has been used a lot so far. Admiralty Paints are good but expensive, and where the colour is less specific; whites and blacks for instance, I use artists acrylic paints, you get a lot more for your money!
Bryan
(Edit)
I'm editing this because further research (and my McKays read correctly!) indicates there was indeed some structures at the bow end of the middle gun-deck; the sickbay* was situated here, right at the prow, immediately 'behind' the stove, occupying the area also taken up with the most forward two cannon. There was a simple dividing wall spanning the whole width of the hull, with two simple doors.
So there may be some bashing after all!
*Note 'sickbay' not surgery. Two different things, the surgery was in fact on the orlop deck.
I've also come across some more detailed info on the 'stove'. It wasn't much like the neat little thing the kit presents, but a colossal iron brute, with pipes, handles, condensers, pumps and other fiddly bits all over it. Maybe even more bashing ;-)
-
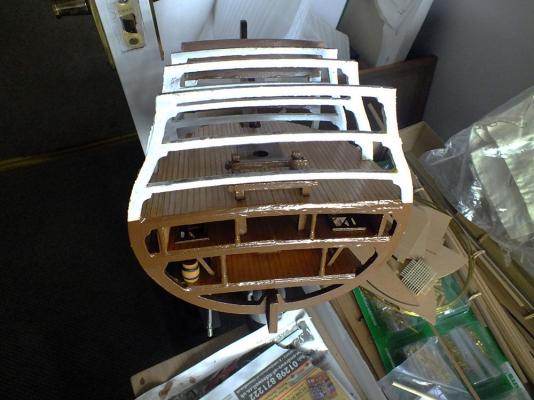
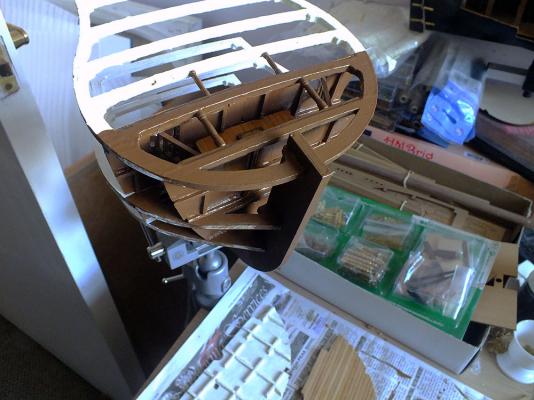
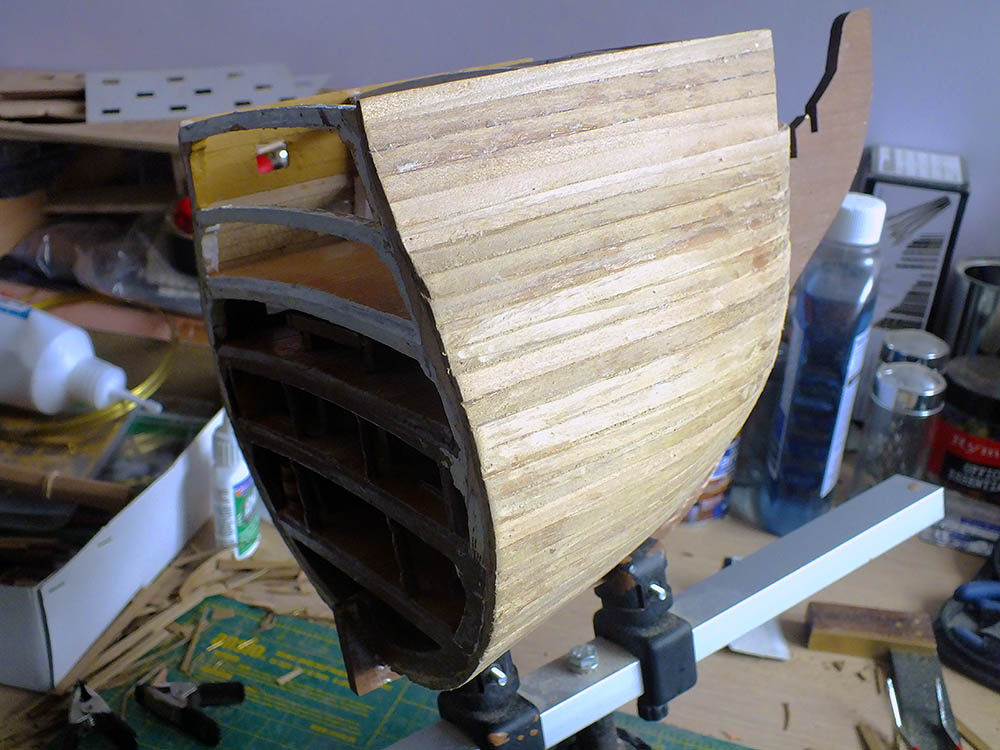
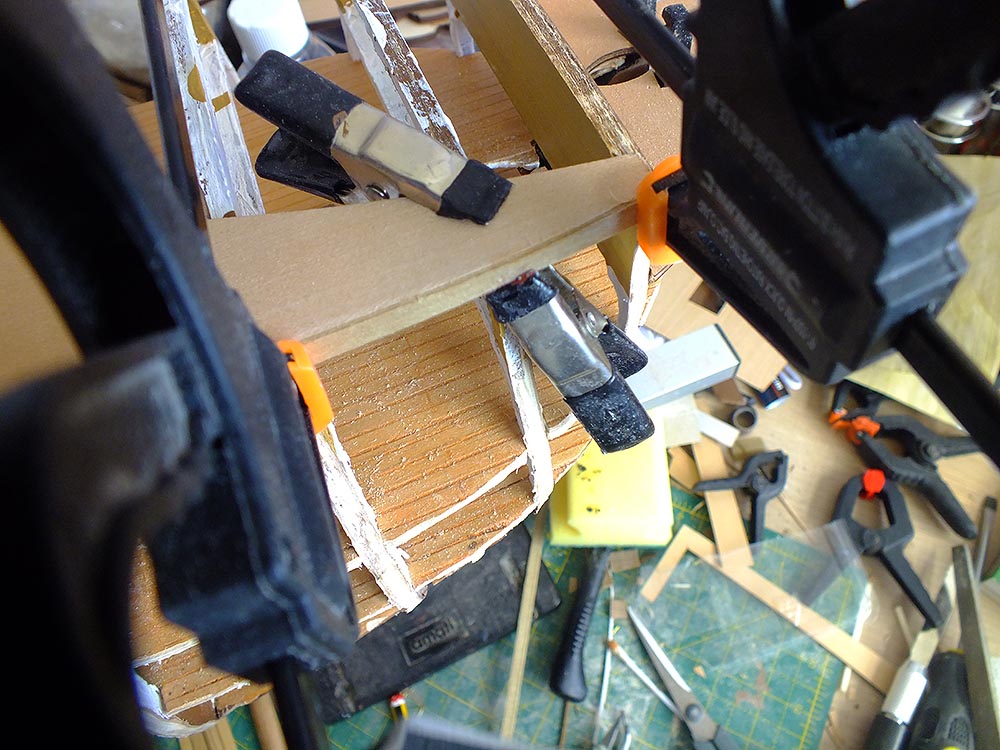
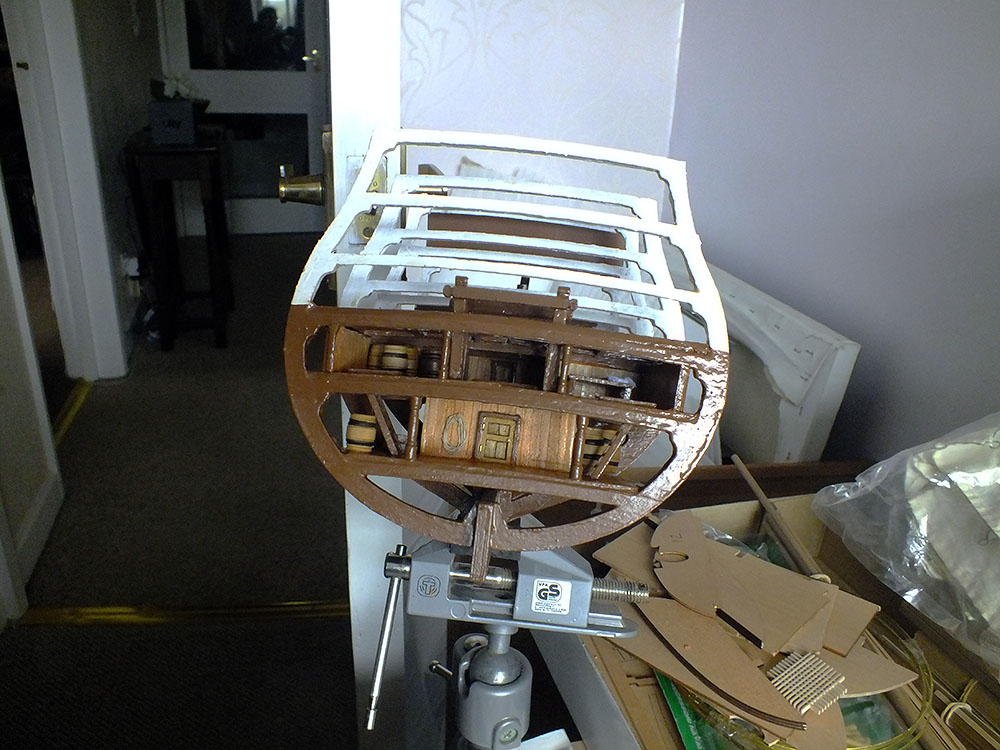
Upwards to the middle gun-deck
I finally worked out what the manual intends; that all decks are assembled with minimum 'furniture and fittings', but NOT the guns! Indeed it suggests hull planking and even the copper plating is done before the guns are finally fitted. OK, but only in part. I'm going to follow the wonderful example of Jeff-E (the build is on here), and assemble and fit the middle gun-deck, then move onto the hull planking - with other decks dry fitted as necessary to retain shape and structure. That way the middle and upper gun-decks can be fully fitted properly, one after the other, before the top deck goes on.
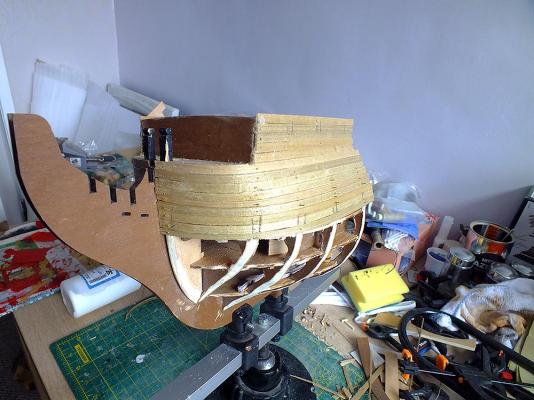
So the middle gun-deck is now fitted as the photos show (it also shows two lower gun-deck stanchions have gone AWOL, but I'll find and I'll refit them later). Incidentally my 'ceiling' beams and rafters 'bashing' is now becoming more obvious - see the 'ceiling' of the lower gun-deck - and I think are worth the trouble). I've also already rough shaped the hull ribs to more readily accept the planking.
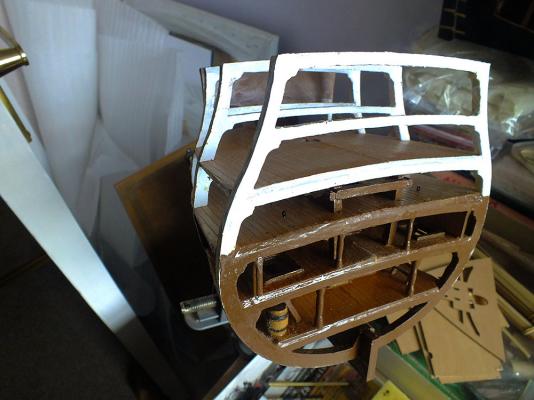

I've yet to fit the middle gun-deck stanchions, and may fit the stove and examine further mid-deck content 'bashing' before I can dry fit the other decks, and contemplate the hull planking (temporarily shown below).

-
Hi Bryanc.
You just could not help yourself.. He has gone and bashed it..
There will be no stoping you now.
I don't know if I could possabley build a kit without bashing it here and there..
But think of all the extra work you can add
I must say.. It's looking good.
Regards Antony.
Hi Anthony,
Thanks, and yes, I couldn't resist it, but as you say, its not really possible to build a kit without a little bashing! Now for the lower gun-deck, but sadly there's nothing to bash here, even my McKay deck plan shows this is the one deck with virtually nothing populating it but the guns. Mind you, given that in 1803 these are 30 of the huge 32 pounders I doubt the deck could support anything else!
Regards,
Bryan
-
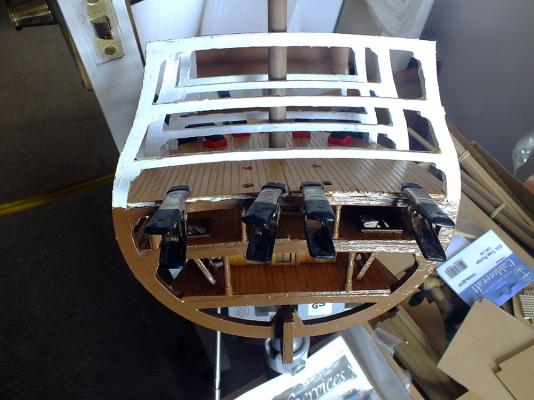
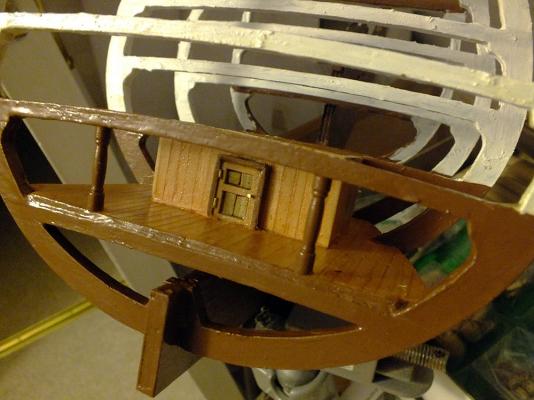
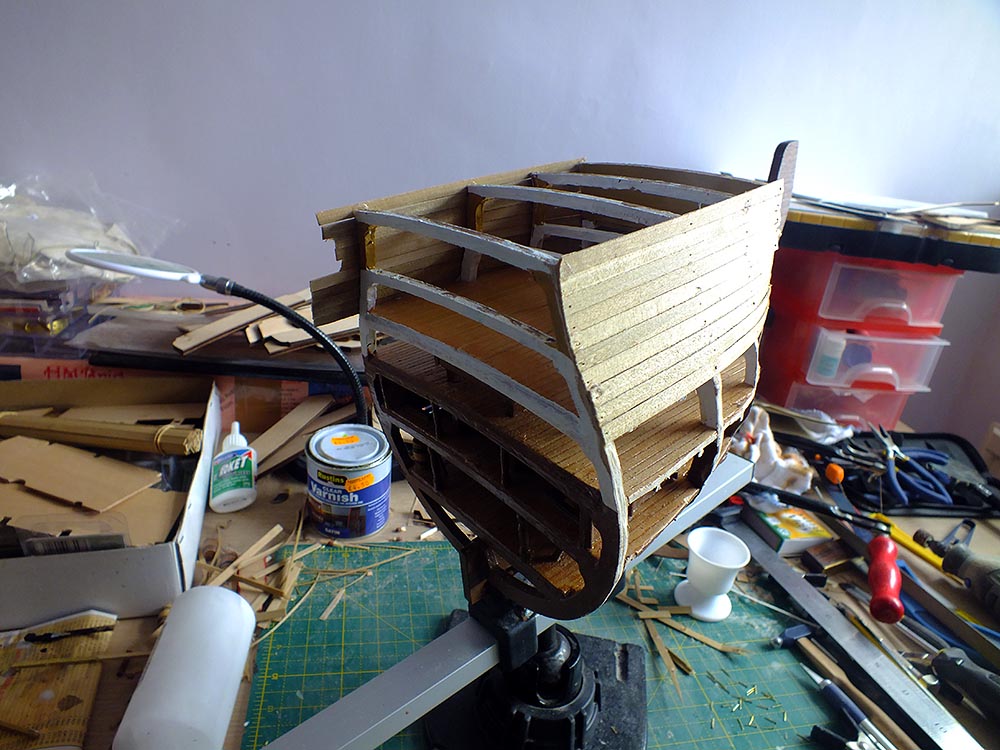
Orlop "bashed" and up to the lower gun-deck
A lot of work has gone into "bashing" the orlop deck furniture and fittings, including the port and starboard carpenters walk(s), cabins on both sides and a cabin forward completing the rooming arrangements. The sundry barrels, ropes and surgeons table additionally helped bulk out the detail, but there's more yet to come.
Not exactly like my McKay deck drawings, but inspired by them, and certainly more than the kit itself allowed for.
The lower gun-deck was fitted complete with some of its decking detail. But now I have another quandary; I will be putting further deck detail, but the primary items on this deck are of course the cannon. The manual seems to suggest completing all decks before positioning and fixing the guns, it occurs to me this will make rigging the guns and positioning them correctly very difficult. I'm going to have to study the manual closely, but I find it so difficult to read. I'll obviously have a look what other builders have done, but I seem to recall not many have got that far. Oh well, nil desperandum (just yet).

- AntonyUK, Stockholm tar, maddog33 and 4 others
-
7
-
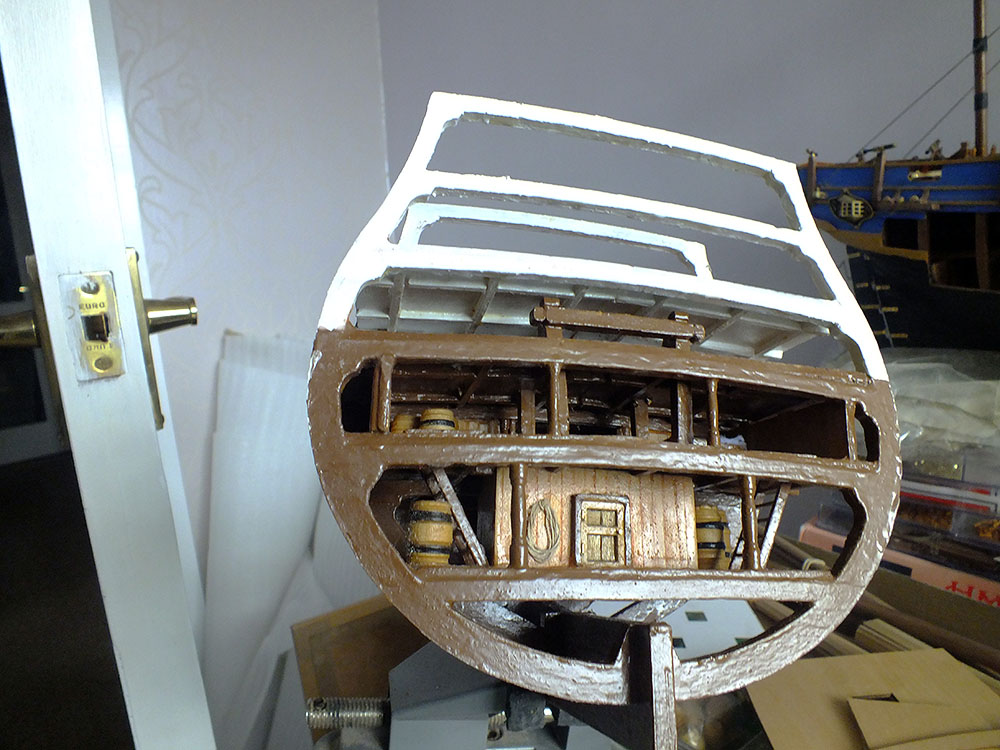
Defeated by my own logic a little I belatedly realised although I'd said the orlop was "painted" in natural wood colours, I had actually painted mine white. Here it is corrected.

The lower gun deck is now ready for positioning, but it occurs to me the orlop deck should first be "populated" with any furniture, stores and other items. Research indicates while the hold beneath was used for storing primarily the ropes as well as other stores, the orlop (which in reality was not a complete deck but "overhung" the hold), did actually have cabins, stores and workshops for the (busy) carpenters and other trades; pursers, stewards, gunners, midshipmen, boatswain etc. The grog store was situated here - under the watchful eye of one or two marines, not to mention the surgeons cabin and surgery (the orlop deck is in fact where Nelson died). Lastly the orlop was where the ubiquitous "carpenters walk" ran down both sides of the deck.
...I can feel some "bashing" coming on...
-
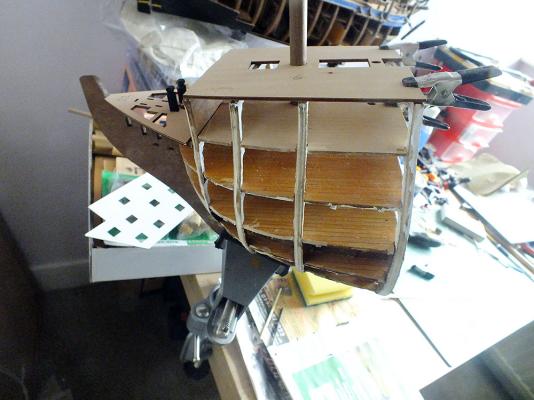
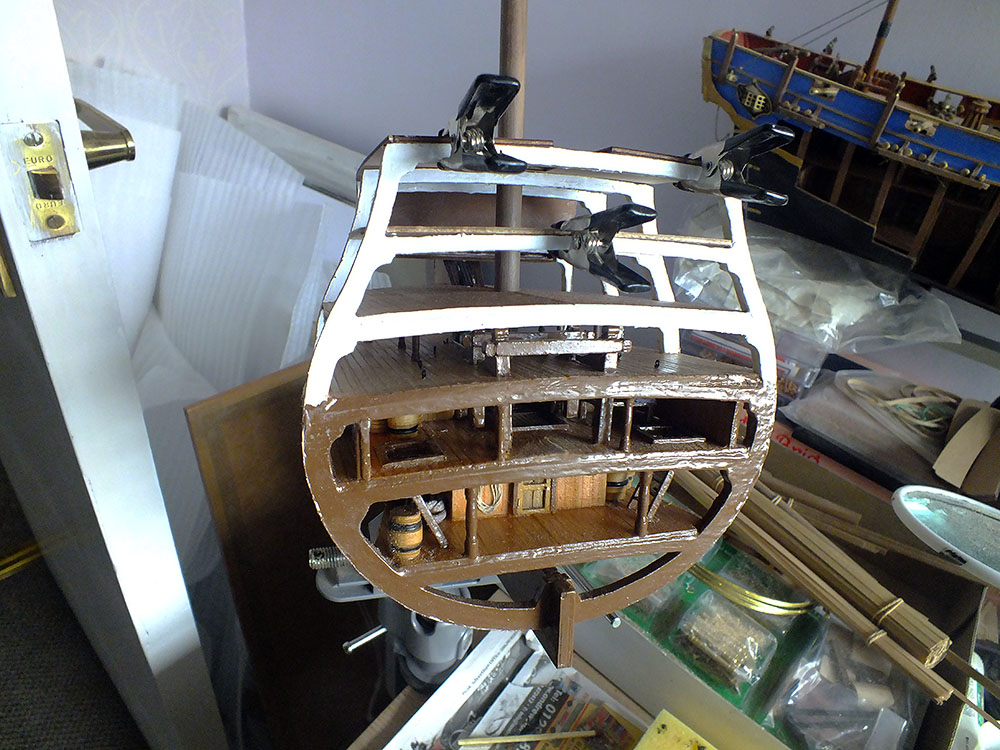
Onward and upward
Literally, as we move up the ship deck by deck!
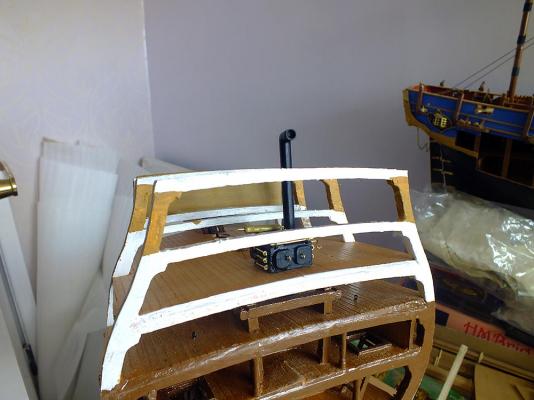
Wanting to get the colour scheme as accurate as possible (although finding the definitive information of how the ship appeared in or about 1805 is near impossible), I did a lot of research. The applicable photos in my McKay are alas in black and white, so little help, but most other authoritative sources indicate the hold and orlop deck were in "drab" or unpainted natural wood, whilst the lower and middle gun decks were painted white and the upper gun deck and above in yellow ochre. So this is how my Victory will be painted. I was incidentally quite sure in my own mind that the decks were painted red - to help disguise certain nastiness whilst in action. I could find no evidence of this, so didn't bother.
Originally I painted the frame structure in what I believed was the more obvious way (see photo below). As I'm sure will be agreed, this looked awful! So I painfully sanded her down and redid it to compliment the intended deck colours. This seems to be what most other builds decided upon also.

Once decided the build continued at quite a pace. I am quite pleased with the hold, complete with its stanchions, ladders and deck structure (powder room?). The ladders were tricky to construct and I had to employ "super glue", which I dislike using, during their fiddly construction. The manual in fact recommended it for these. The orlop followed without much trouble and this is where I am currently at.
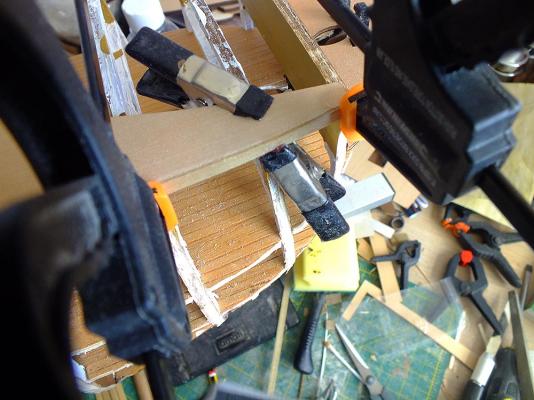
A bit of "bashing" did take place; in all deck photographs I perused, I observed in all cases the deck above had to have considerable support in the shape of beams. This is obvious when you consider the weight they support! The kit makes no provision for this, so I created my own, as is evident by the photos below. I actually used matches! I was a little concerned about the scale, but when you in fact scale them up, they measure between 10" and a foot square, which can't be far out!
It all makes little difference this far down the ship, as they can hardly be seen, but further up, I'm sure they will add a lot to the detail and interest to the model.
-
-
Hi Bryanc.
Nice to see you back on the forums.
And new model as well.
There are a few of the victory bow builds on the forum and well worth looking at to get the hints and tips.
I will be following this one.
Regards Antony.
Hi Anthony, nice to see you again, and good to be back. yes I noticed a couple doing this one and greedily looked at the build logs. Yes it seems an interesting kit and enjoyable thus far. But the manual...!
-
-
The build was actually well underway before I thought of photographs, sorry! But nothing too dramatic has occurred thus far.
The Kit
Broadly speaking I'm fairly impressed with the quality of the kit, the parts are well crafted and solid. As far as I've gone they fit together remarkably well. The box contains a build manual (for some reason I received two, so somewhere there is probably a kit without a build manual!) with colour photos and hand drawn illustrations, the quality and usefulness of which vary enormously. Also included is "booklet" with full scale numbered drawings of every piece of kit. This is well done and extremely useful. The last three pages of this are three detailed drawings, well done but with precious little nomenclature. No huge and detailed drawings as was with the Bounty.
After the Bounty manual, which was fairly good until it virtually stopped halfway through, I was hoping for more. I didn't get it. The manual is written in multiple languages, which, while understandable is always disconcerting, and its all too obvious that English wasn't the language it was originally written in as it is sometimes "creative" to say the least. Its also a bit hit and miss, and very vague. For instance one receives no guidance as to the placement of particular pieces and is left to work it out for oneself. Not good for someone as clueless as me! I really couldn't recommend this kit for a newcomer.
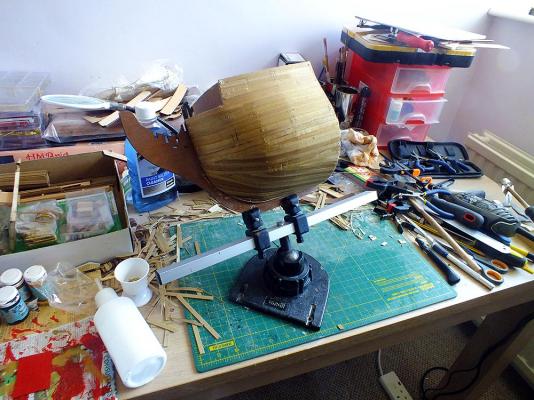
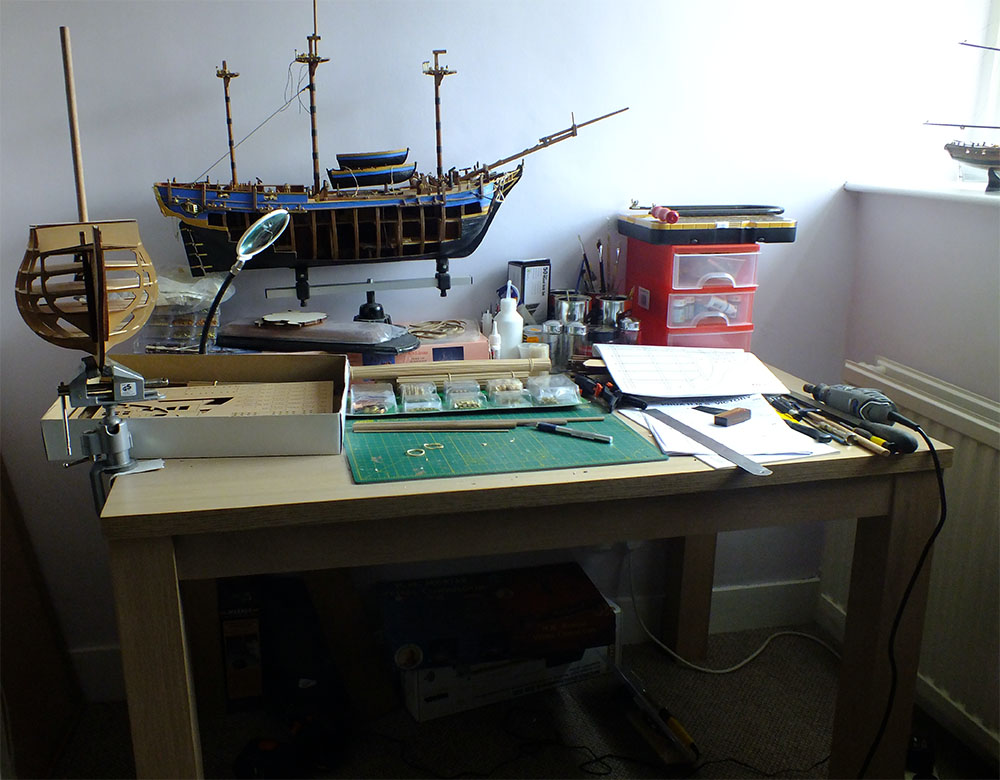
My belatedly taken photos show the keel and frames together with the decks dry fitted, partly done so I could work out the exact placement of the two "planking supports" - the pieces that terminate in the "posts" above deck.

This shows my new work area, still hardly big enough but infinitely better than my previous one. The dry docked Bounty is in the background.
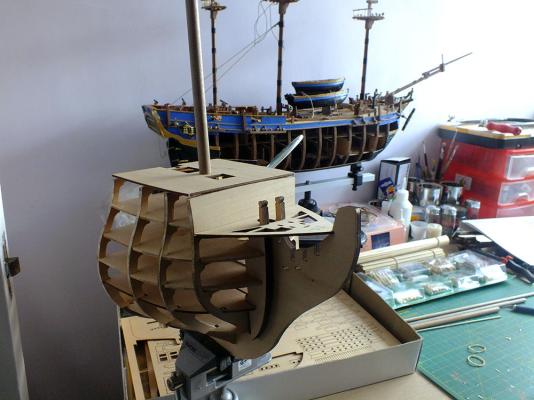
The keel with decks dry fitted

As above but more clearly showing the dry fitted mast which, to the kits credit, fits all the way down to the bilges perfectly
- michael mott, Elijah, Canute and 6 others
-
9
-
I'm back!
There may be one or two of you who wondered why my build log stopped so abruptly; no big mystery really, just a chain of events that meant a prolonged absence. I was obliged to move house, which took a lot longer than it should have, and then had to wait a ridiculous time for my broadband to be restored.However I cannot pretend that the delay ended there. I could have restarted the build but was stricken with a sort of ship-building "block". Maybe it was because the next obvious step was the shrouds :-( and I couldn't face it. Finding myself stuck in this malaise, I decided to take the easy and "quick gratification" option; I've started another build. A kit I was given by my son at Christmas, and that has been tempting me for some time; the HMS Victory Cross Section. There is a link to that build below.


HMS Victory Bow Cross-section by bryanc - FINISHED - Panart - 1:78 scale
in - Kit build logs for subjects built from 1751 - 1800
Posted
Hi Paul,
Thanks for unlocking the video. Bearing in mind I might be acquiring that kit myself, I found it well made and interesting.
The materials look to be of good quality and the manual and especially plans excellent, in layout at least. The manual like the Victory one would appear to be brief in written detail, but the photos better. The (huge) plans however look really good and detailed. Maybe in part this is down to the fact that the gun kit contains less parts, so is easier to explain? In answer to your original question, no, the instructions and plans for the Victory Cross-Section do compliment each other regarding materials provided, its just that neither are very good!
Returning to the high quality of your video, maybe an occasional video as the build continues? I for one would find that enormously interesting!
Thanks,
Bryan
PS It occurred to me some photos of the manual/plans might be of interest. Note that in the top left photo, only two of the paragraphs are in English, the top right photo is an enlargement of one of them. Also note that in those few words contain all the instructions for creating and fitting the wales, herpes(!), anchor rope fitting, drip moldings and preparation of the hull for painting!