-
Posts
239 -
Joined
-
Last visited
Content Type
Profiles
Forums
Gallery
Events
Everything posted by kostas_gr
-
- 70 replies
-
- san francisco ii
- artesania latina
-
(and 2 more)
Tagged with:
-
working with cannons first I had to create patina for the barrels, I had to create cariages from scratch, since Artesania Latina is providing them with metal cast
- 70 replies
-
- san francisco ii
- artesania latina
-
(and 2 more)
Tagged with:
-
- 70 replies
-
- san francisco ii
- artesania latina
-
(and 2 more)
Tagged with:
-
the balusters for the balcony outside captains quarters, in order to make them solid, i have inserted pins inside balusters and pinned them down the deck.
- 70 replies
-
- san francisco ii
- artesania latina
-
(and 2 more)
Tagged with:
-
- 70 replies
-
- san francisco ii
- artesania latina
-
(and 2 more)
Tagged with:
-
all wires and batteries are in place
- 70 replies
-
- san francisco ii
- artesania latina
-
(and 2 more)
Tagged with:
-
Not a bad idea, but to be honest I dont like the idea of painting balusters. I think I will keep this for all rails on the decks (I have to install them temporarily to check how it looks)
- 70 replies
-
- san francisco ii
- artesania latina
-
(and 2 more)
Tagged with:
-
Artesania's instructions indicates that I have to put a plank under rails i will not use those planks, as shown in the picture (not my build) I need to trim down the upper hull, to lower it a bit so rails can fit corectly
- 70 replies
-
- san francisco ii
- artesania latina
-
(and 2 more)
Tagged with:
-
I will let San Fran to rest for a couple of days and leave tung oil to create a nice patina, next step will be to open gunports, install wales and boat sliders etc during that time I will work with deck crates
- 70 replies
-
- san francisco ii
- artesania latina
-
(and 2 more)
Tagged with:
-
hull is finished applying tung oil..... during the fisrt coat, wood planks must be "wet" for 20 mins, if we see a spot that is getting dry we need to apply more tung oil. After 20 mins using a soft microfibers clothe we try to wipe out all oil and polish wood planks. we are leaving it out for a couple of hours and we apply a second layer the same way we did before. At all cases we dont let tung oil to dry.
- 70 replies
-
- san francisco ii
- artesania latina
-
(and 2 more)
Tagged with:
-
this is the result, cant wait to place wales and boat sliders (which are going to be painted blackish)
- 70 replies
-
- san francisco ii
- artesania latina
-
(and 2 more)
Tagged with:
-
kit's instructions point to assemble uper part of bow separate from hull (yellow line is the border). I have choose to make it part of the ship's hull, more like it was instructed in a previous release of San Francisco This is a sensitive part of the ship, in many San Fran builds shipmates pointed a "heads on" warning, i have ignored. Not a big deal, but in fact, I have damaged a lot of parts of this thin plywood part....
- 70 replies
-
- san francisco ii
- artesania latina
-
(and 2 more)
Tagged with:
-
- 70 replies
-
- san francisco ii
- artesania latina
-
(and 2 more)
Tagged with:
-
thank you very much don, is going to be natural, I have used tung oil for varnishing. I will paint the wales black (actually wales are finished, I will post pictures afterwards) Each time I was placing a plank, I was sanding it in order to check if it was fitted correctly, took me quite a time, I was doing 2 rows (each side) per day.
- 70 replies
-
- san francisco ii
- artesania latina
-
(and 2 more)
Tagged with:
-
- 70 replies
-
- san francisco ii
- artesania latina
-
(and 2 more)
Tagged with:
-
I am using full length planks from stern to bow, trimmering each plank a bit for stern, more trimming as I am reaching bow. As closer as I am getting to garboard, making calculations to figure out and pinpoint the start of sanding. The marked area represents the area that planks need no trimming, there is a difference between left/right, but as I am getting closer toward garboard the painted areas will be even.
- 70 replies
-
- san francisco ii
- artesania latina
-
(and 2 more)
Tagged with:
-
AL-San juan nepomuceno built AL- San francisco in progress Also I got a question I am thinking to paint ship's wales black, not sure what kind of color should I use, in order to keep wood grain, thinking to start tests, using enamel colors with high dillution
- 1,144 replies
-
- snake
- caldercraft
-
(and 1 more)
Tagged with:
-
stergios, amazing build log, I am going to use it as reference for my future builds. cheers
- 1,144 replies
-
- snake
- caldercraft
-
(and 1 more)
Tagged with:
-
- 70 replies
-
- san francisco ii
- artesania latina
-
(and 2 more)
Tagged with:
-
- 70 replies
-
- san francisco ii
- artesania latina
-
(and 2 more)
Tagged with:
-
stern planking is ready working on hull planking, I will try the other method of planking (different from the one I used on San Juan) am going to use planks with full length, from bow to stern
- 70 replies
-
- san francisco ii
- artesania latina
-
(and 2 more)
Tagged with:
-
Next step is to make some furnitures for captain's cabin. From the windows I have opened combined with LED lighting you could see inside cabin, not as much as I have planned, not only becouse of the scale, but becouse of the way that stern is designed. a closer one
- 70 replies
-
- san francisco ii
- artesania latina
-
(and 2 more)
Tagged with:
-
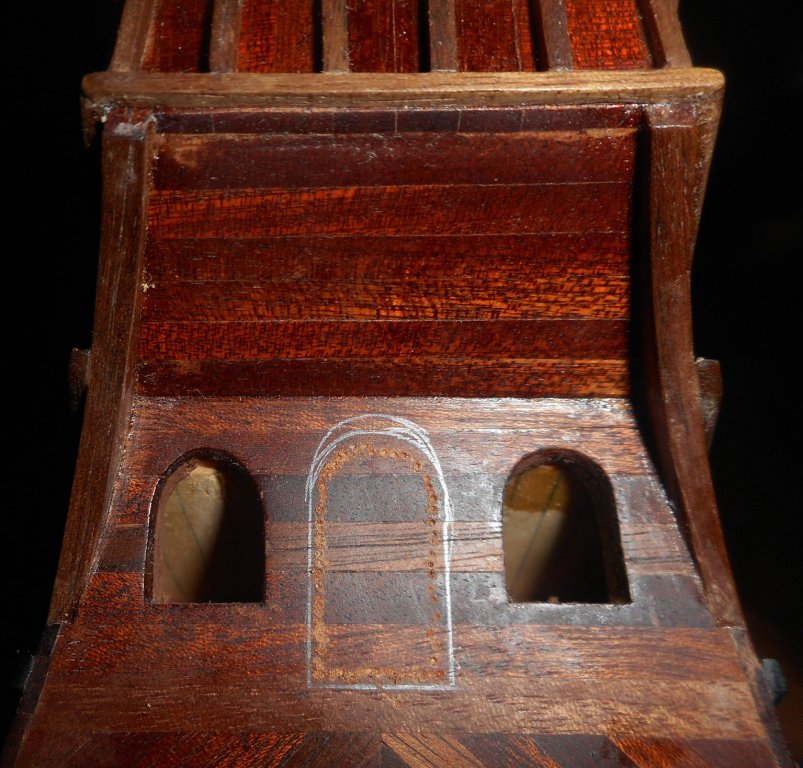
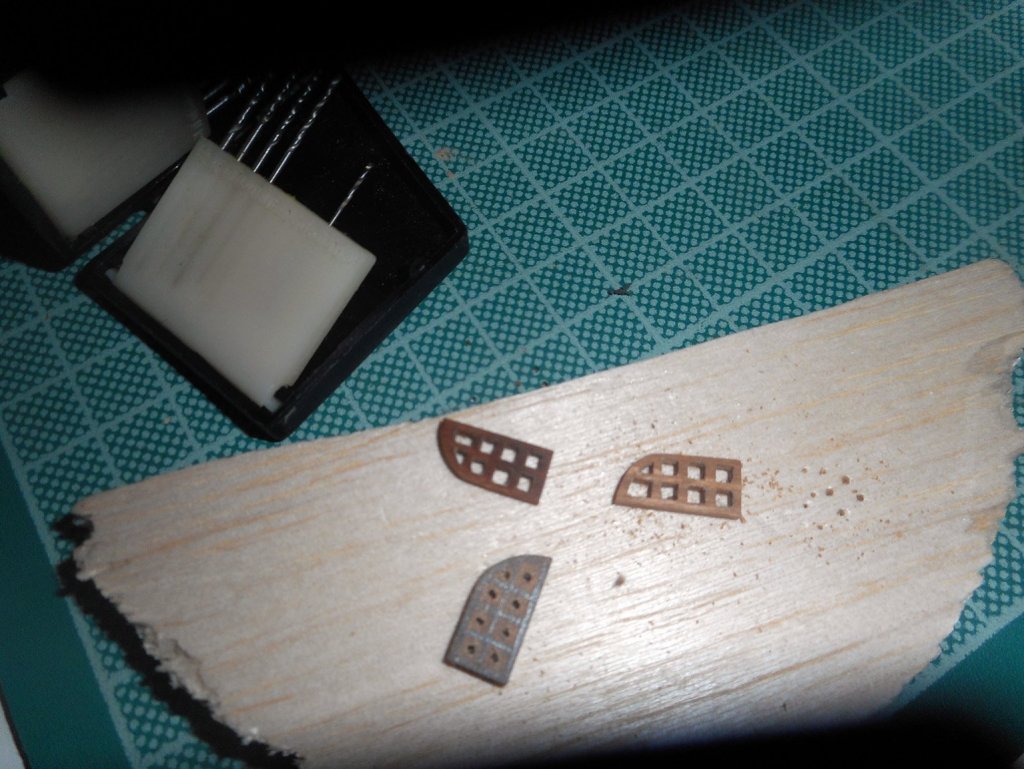
I have paint the sides of strips with black marker, before I glue them, to make doors look more realistic
- 70 replies
-
- san francisco ii
- artesania latina
-
(and 2 more)
Tagged with:
-
wiring is almost finished, batteries (AAA) will be placed into the hole, under the deck cabin and right behind I will install the DIP switch for LED controlling.
- 70 replies
-
- san francisco ii
- artesania latina
-
(and 2 more)
Tagged with:
-
When I finish this ship, It will be impossible to change Leds if they burn out or fail. So I will make 2 separate lines and use a small DIP switch to enable them. The deck is too thin and when i light the LEDs you can actually see a ball of light beneath it. I used planks to fill the ceiling of the cabins and paint them black all wires in place, there is a similar line of LEDs on the other side
- 70 replies
-
- san francisco ii
- artesania latina
-
(and 2 more)
Tagged with:
About us
Modelshipworld - Advancing Ship Modeling through Research
SSL Secured
Your security is important for us so this Website is SSL-Secured
NRG Mailing Address
Nautical Research Guild
237 South Lincoln Street
Westmont IL, 60559-1917
Model Ship World ® and the MSW logo are Registered Trademarks, and belong to the Nautical Research Guild (United States Patent and Trademark Office: No. 6,929,264 & No. 6,929,274, registered Dec. 20, 2022)
Helpful Links
About the NRG
If you enjoy building ship models that are historically accurate as well as beautiful, then The Nautical Research Guild (NRG) is just right for you.
The Guild is a non-profit educational organization whose mission is to “Advance Ship Modeling Through Research”. We provide support to our members in their efforts to raise the quality of their model ships.
The Nautical Research Guild has published our world-renowned quarterly magazine, The Nautical Research Journal, since 1955. The pages of the Journal are full of articles by accomplished ship modelers who show you how they create those exquisite details on their models, and by maritime historians who show you the correct details to build. The Journal is available in both print and digital editions. Go to the NRG web site (www.thenrg.org) to download a complimentary digital copy of the Journal. The NRG also publishes plan sets, books and compilations of back issues of the Journal and the former Ships in Scale and Model Ship Builder magazines.


