Richard Bradfield
-
Posts
79 -
Joined
-
Last visited
Content Type
Profiles
Forums
Gallery
Events
Everything posted by Richard Bradfield
-
 Wayne, good start on the Emma C. I have been thinking of this model for my next build after the Willie Bennett. I have been looking for some scale figurines so gain a better sense of scale on my build, also 1/32. Are your figurines to scale and if so where did you find them? Thanks.
 -
Dan, thanks for the kudo on the pump. Yes the decking wood came straight out of the box. I didn't have enough so the lighter outboard planks come from a local hobby store. I was disappointed about the color variation as well but used them anyway expecting to paint the deck. I think I will stain the deck and see how it looks, then decide to paint or not. The instructions say to paint the deck so maybe they didn't really care about the variations.
-
Thanks Bob. It was fun to build. Although I built it per the plan, I think its too tall and after looking at some real boat pics it is. I will shorten it a bit when its time.
-
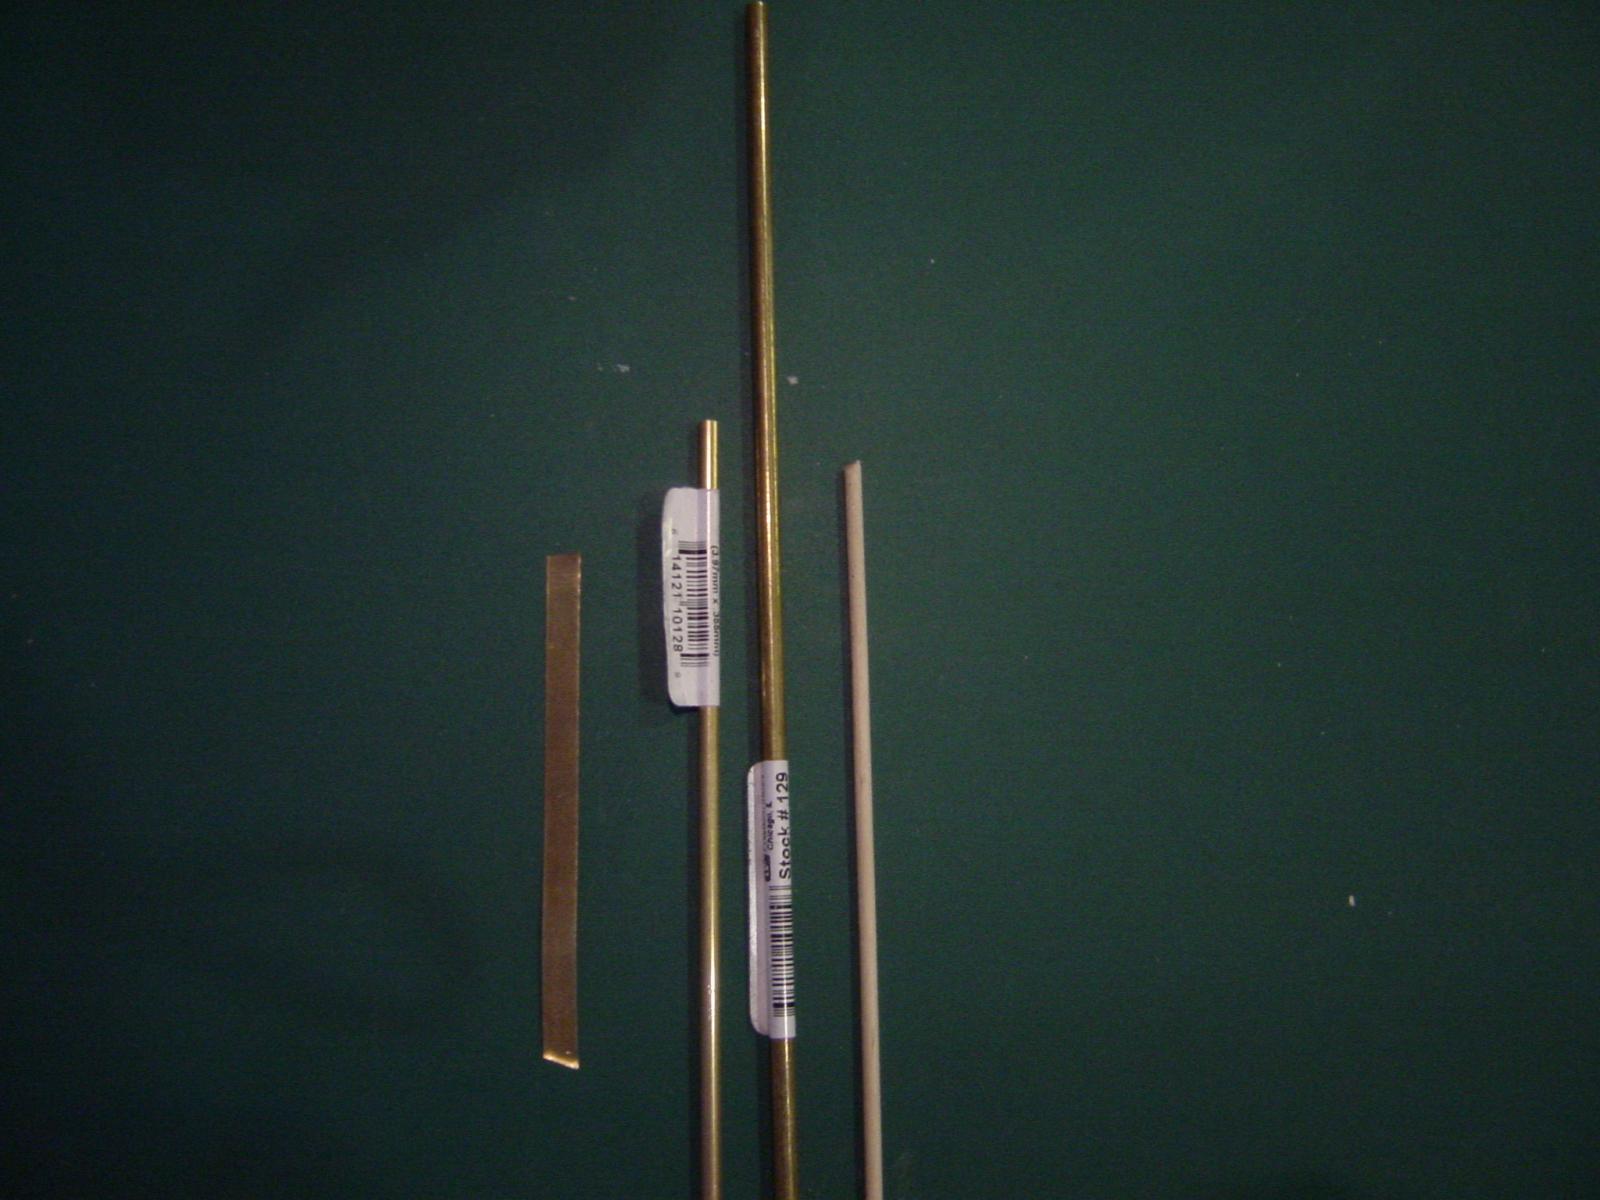
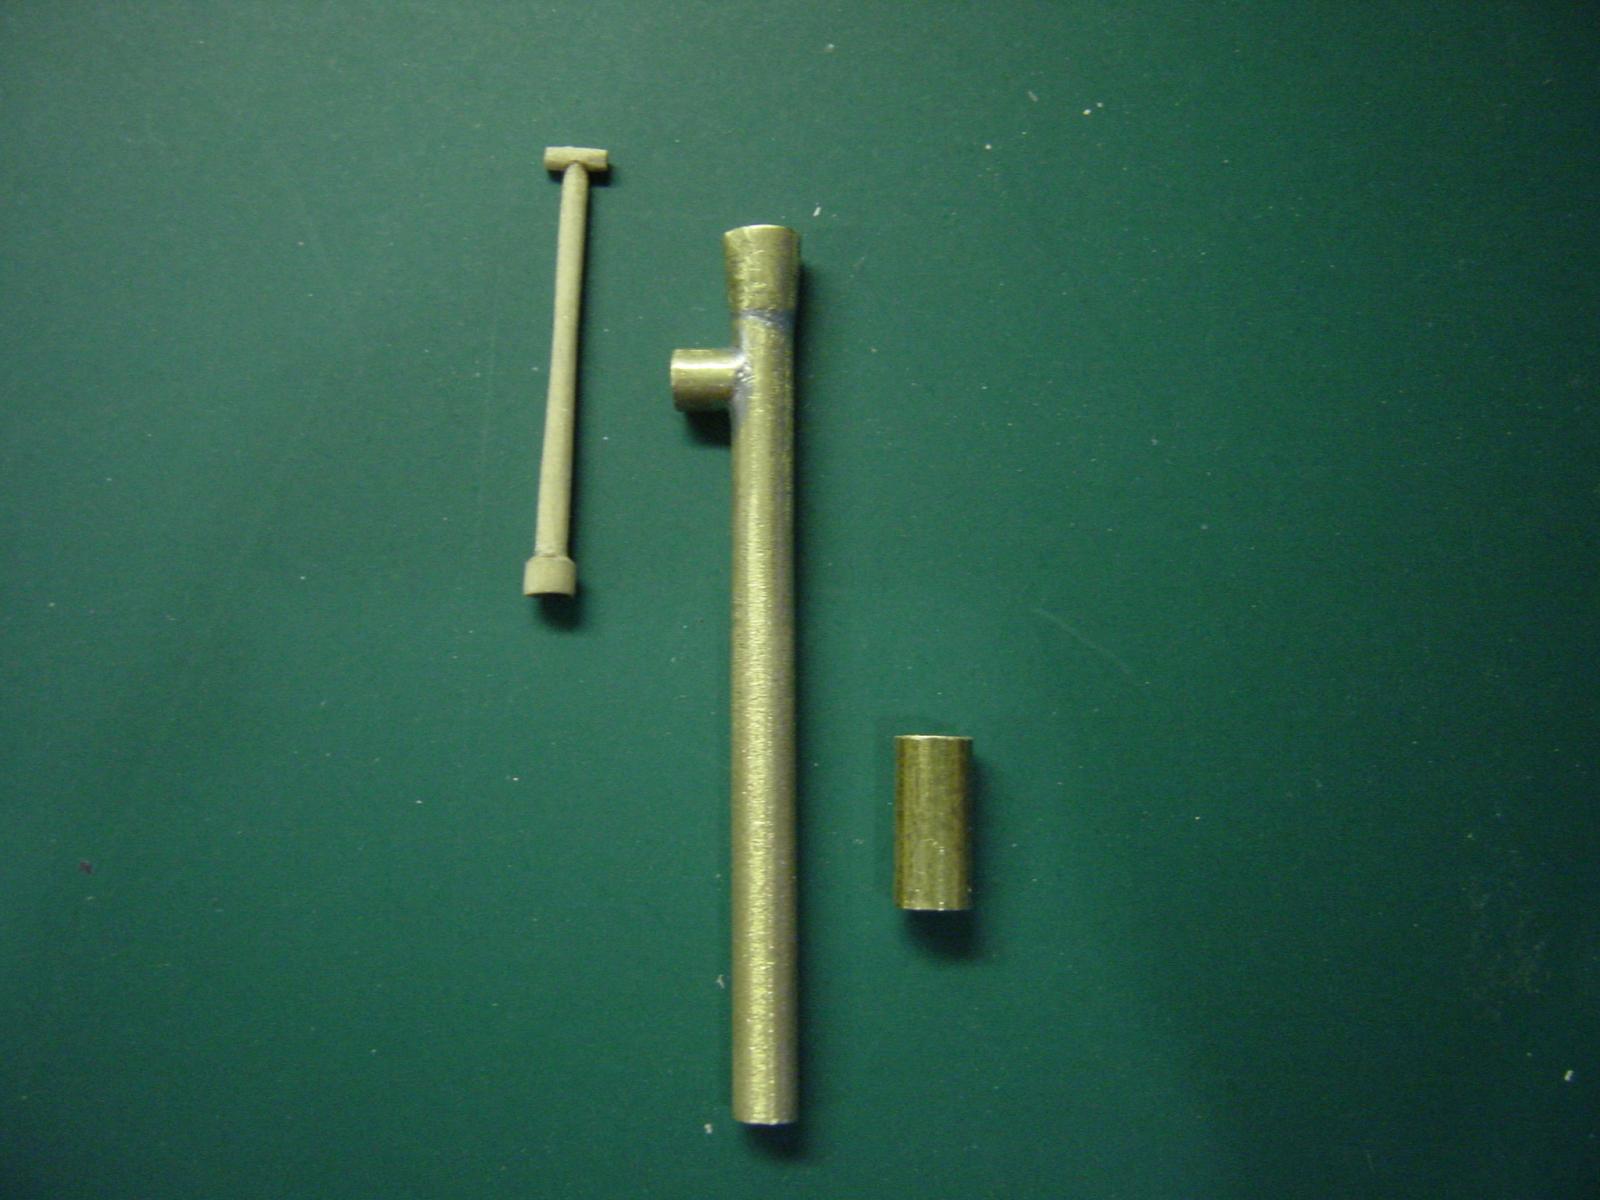
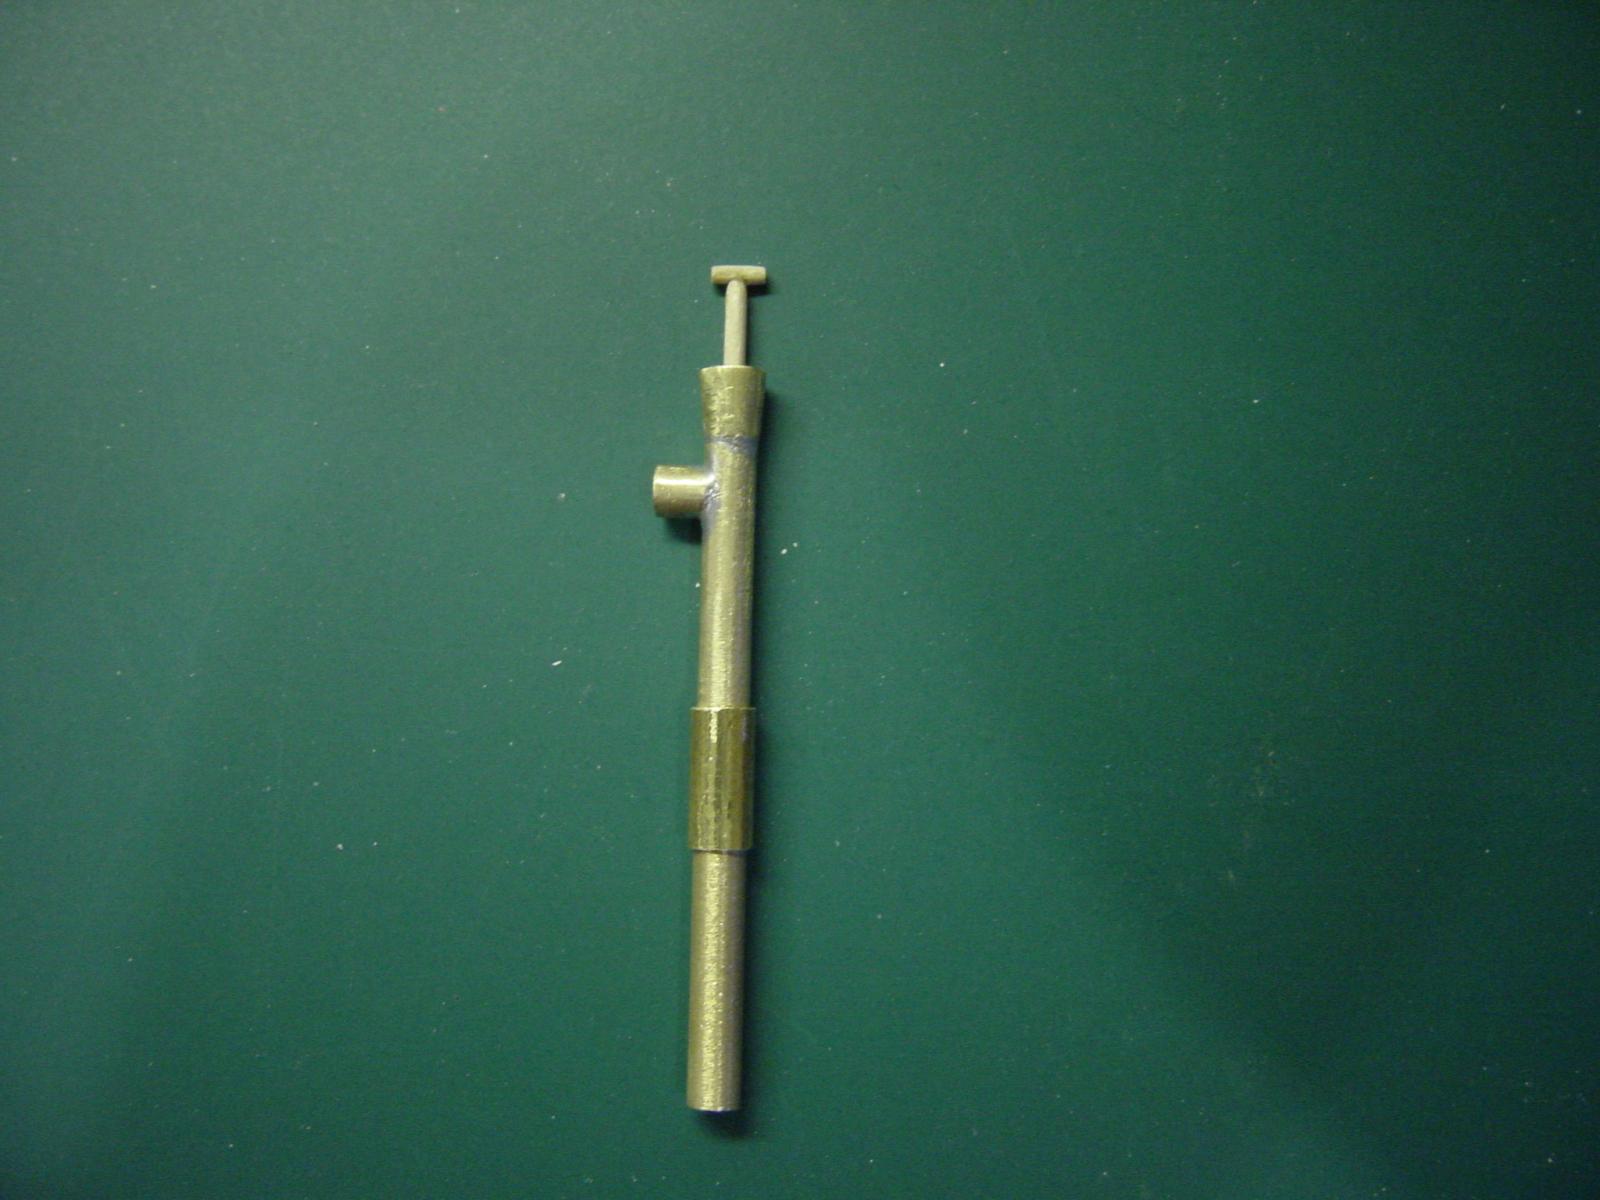
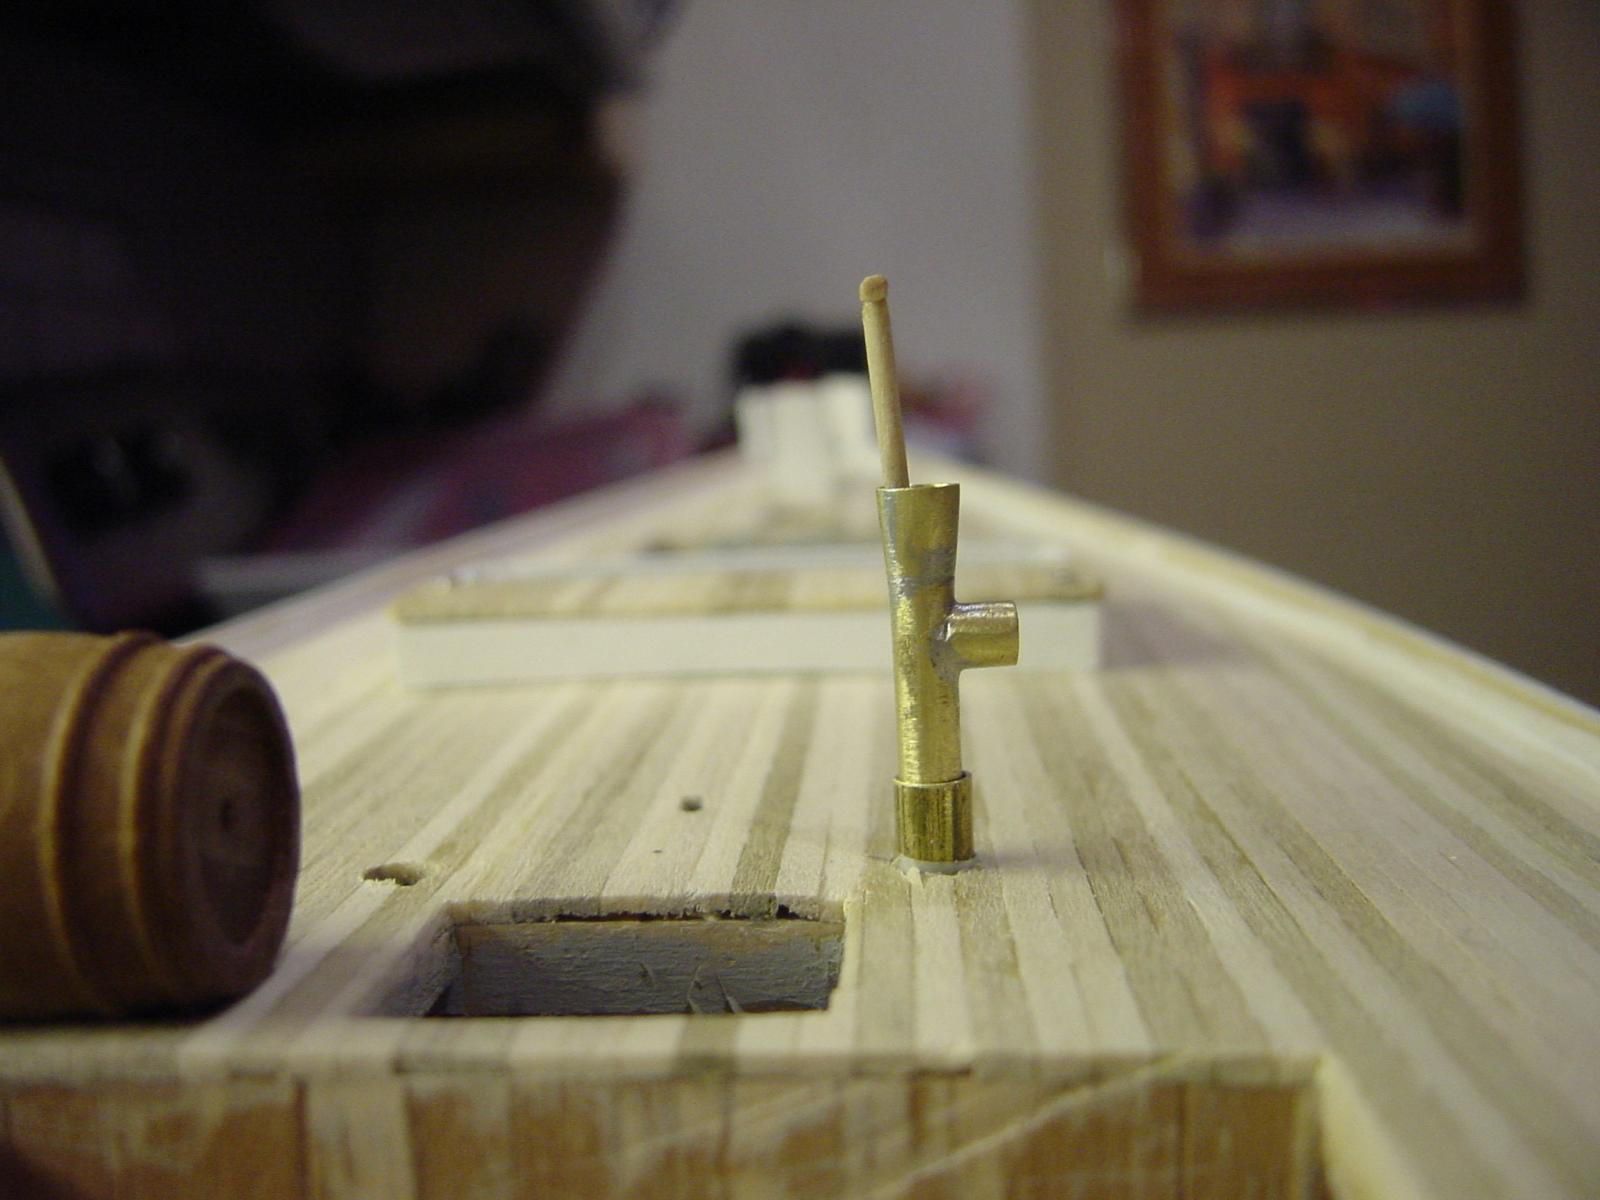
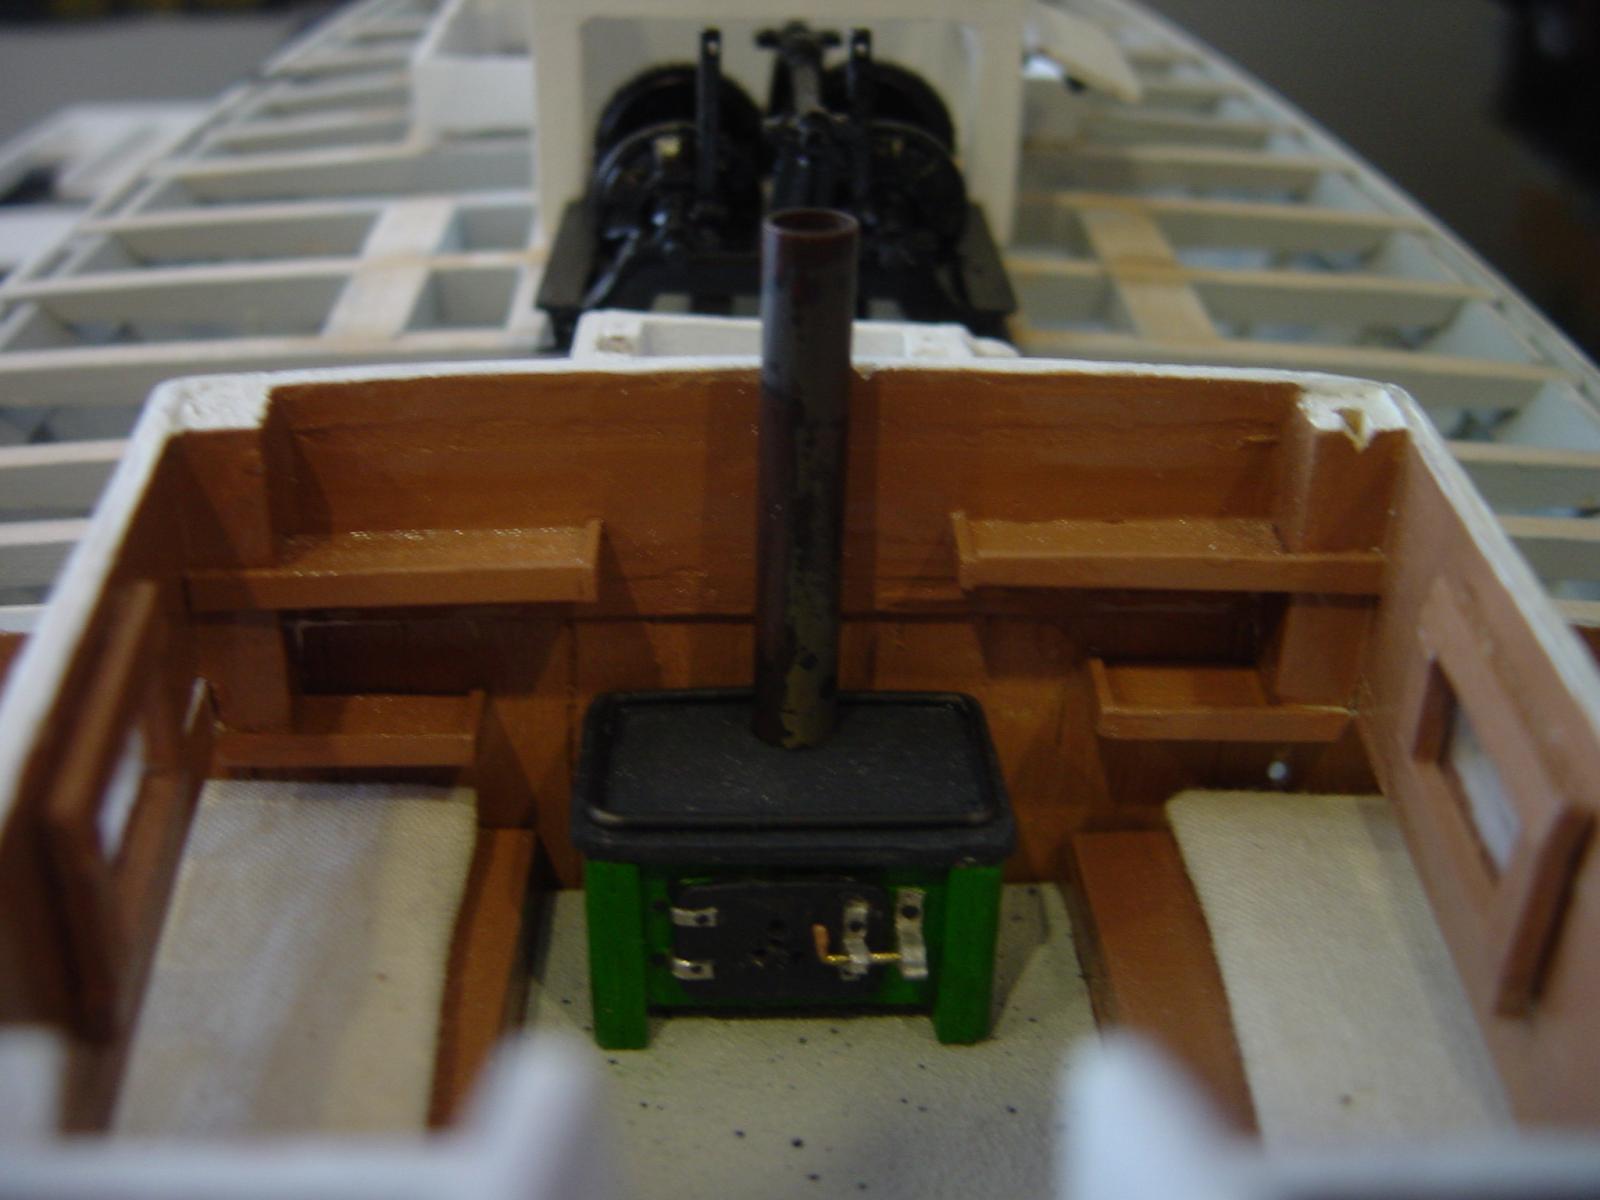
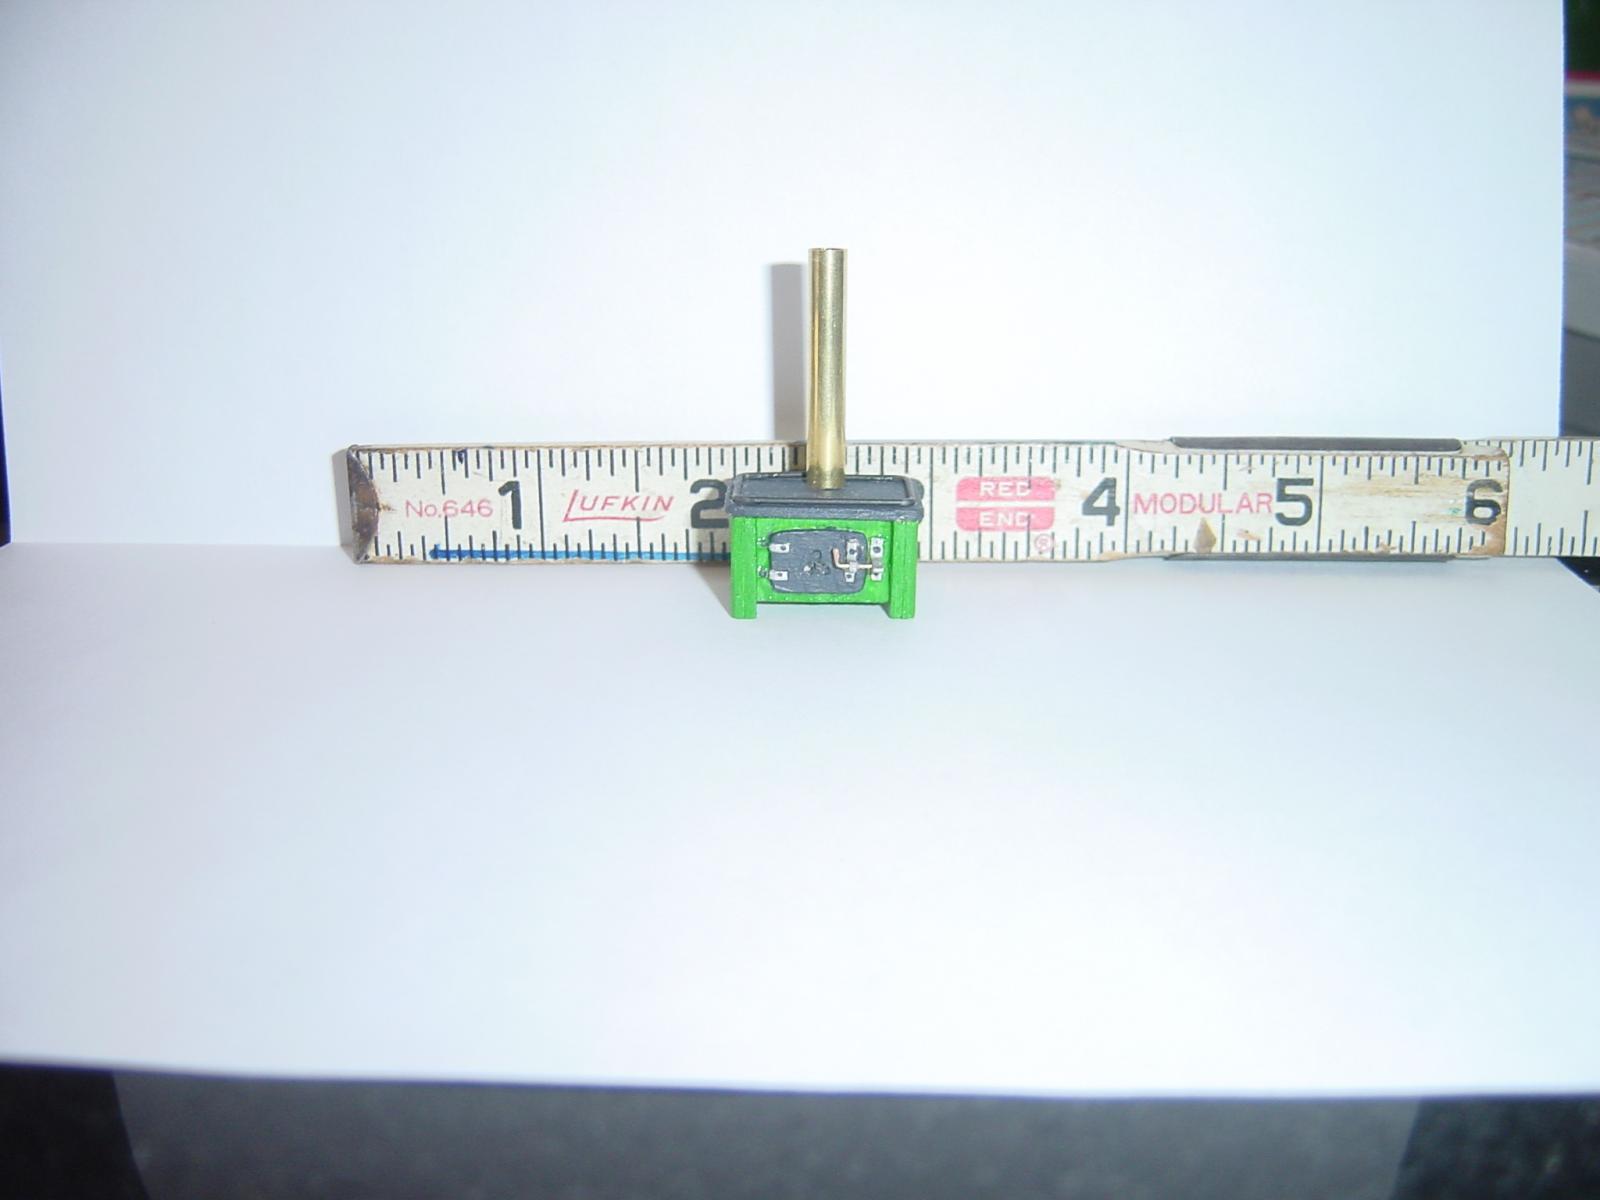
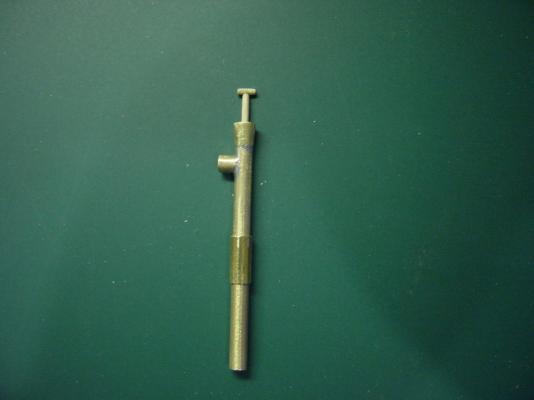
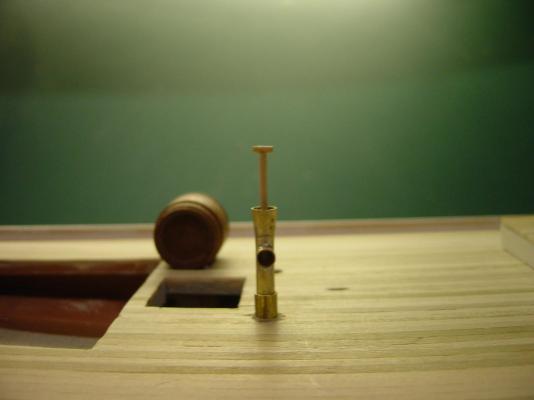
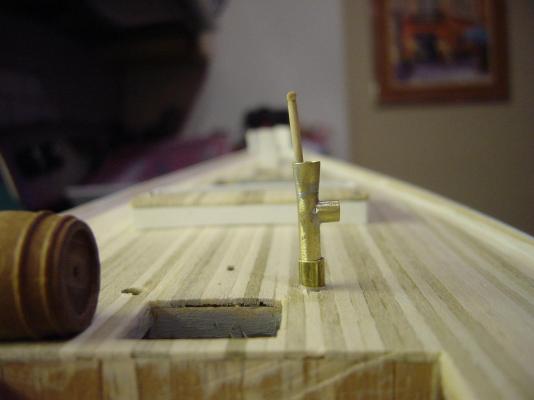
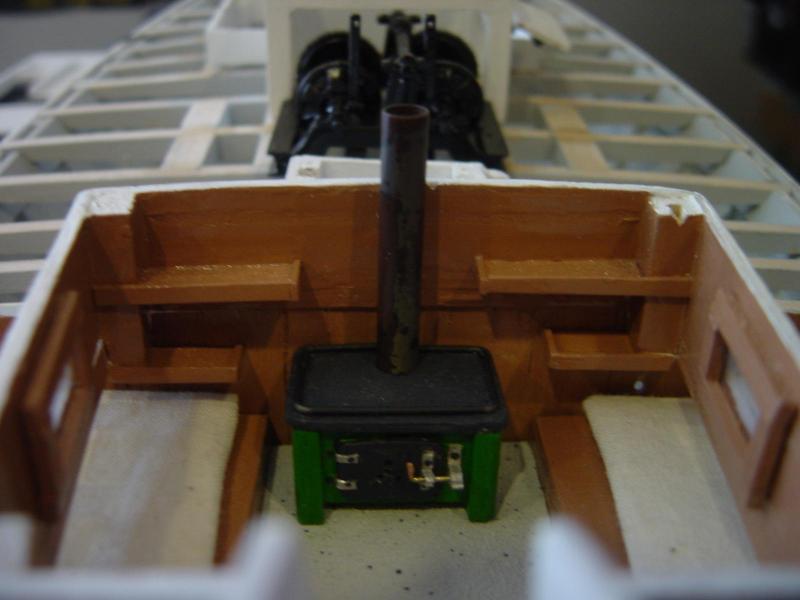
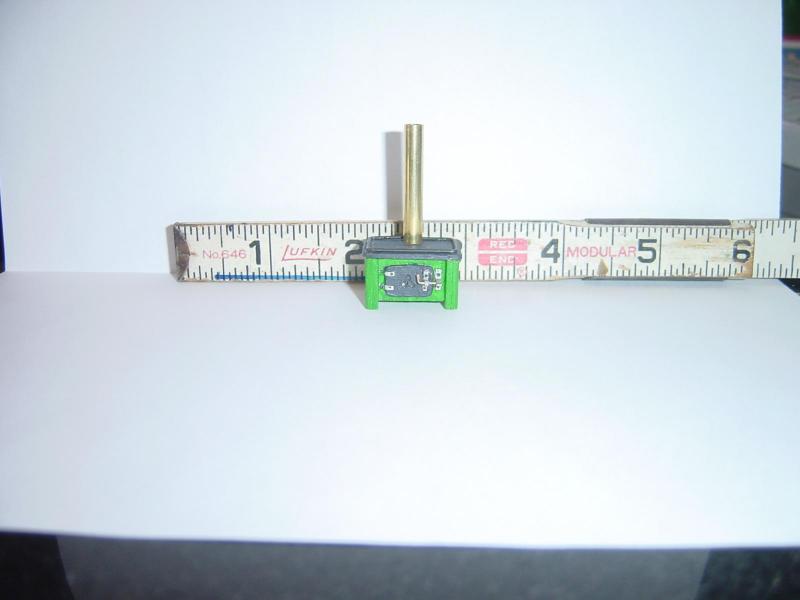
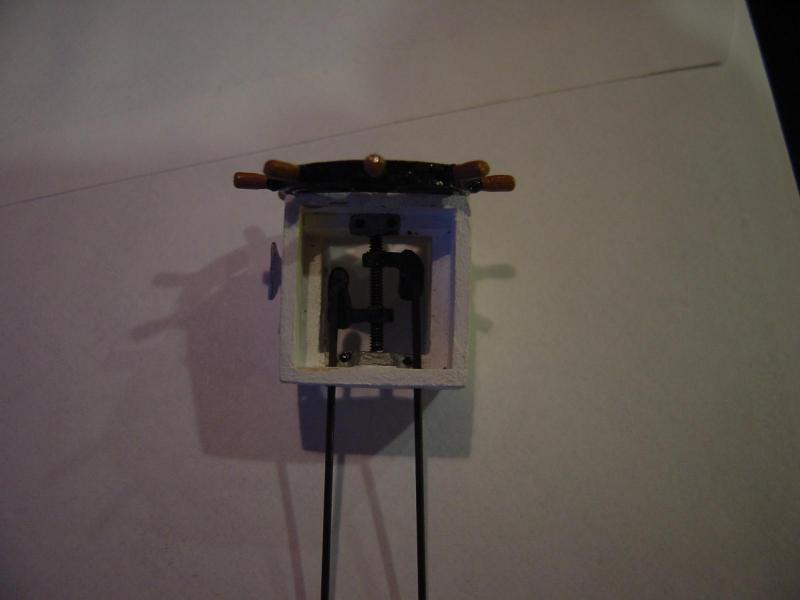
Thanks Russ and Gerty for the encouraging comments. I worked on a fun little project this afternoon, building the bilge pumps. Completed one today and will make the second one tomorrow. It turned out pretty well. I think it would probably even work. Ha, maybe I'll give it a try. The only real challenge was making the conical shaped upper piece and the wooden pump handle. Started with this basic material, Made these components, Here is the assembly, And mocked up on the boat. I will polish them up a bit and just paint them white.
- 135 replies
-
- 2
-

-
- willie l bennett
- model shipways
- (and 1 more)
-
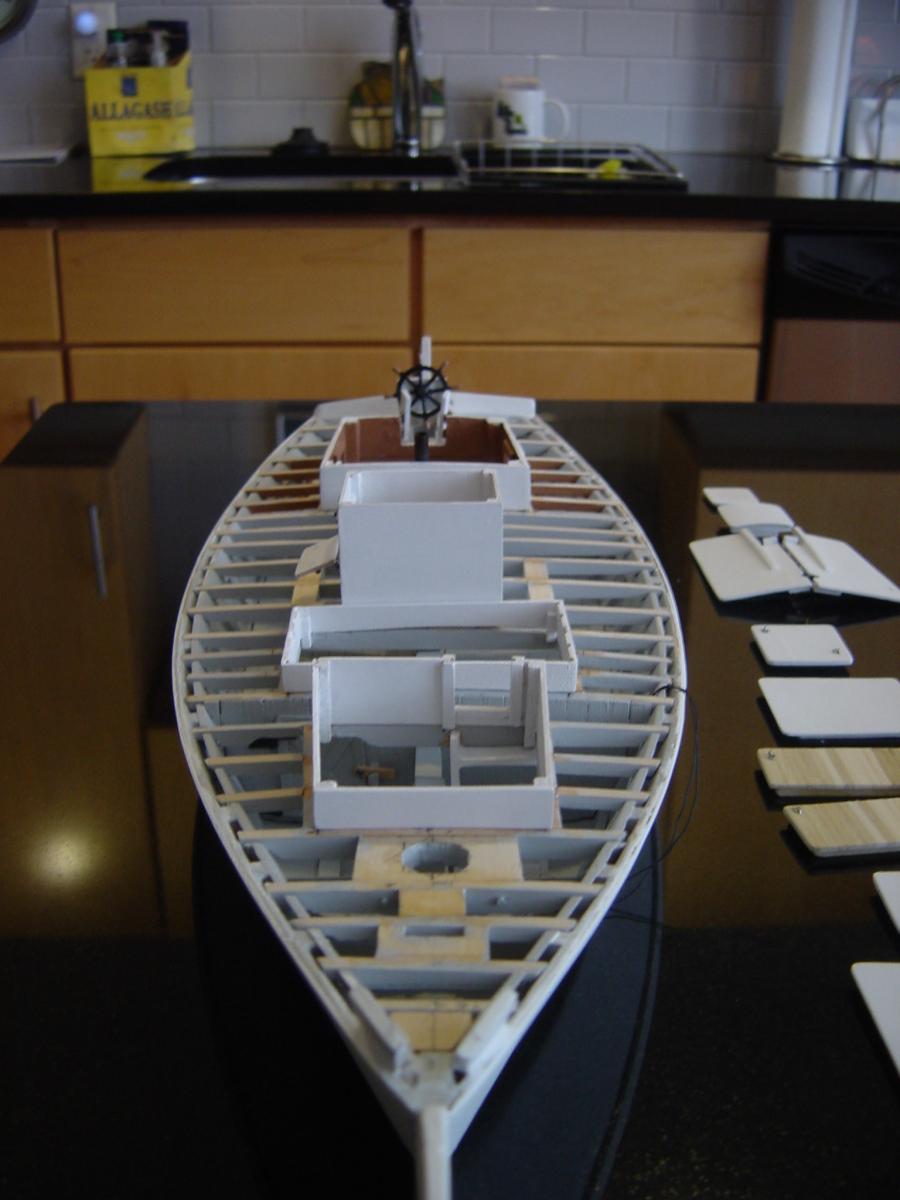
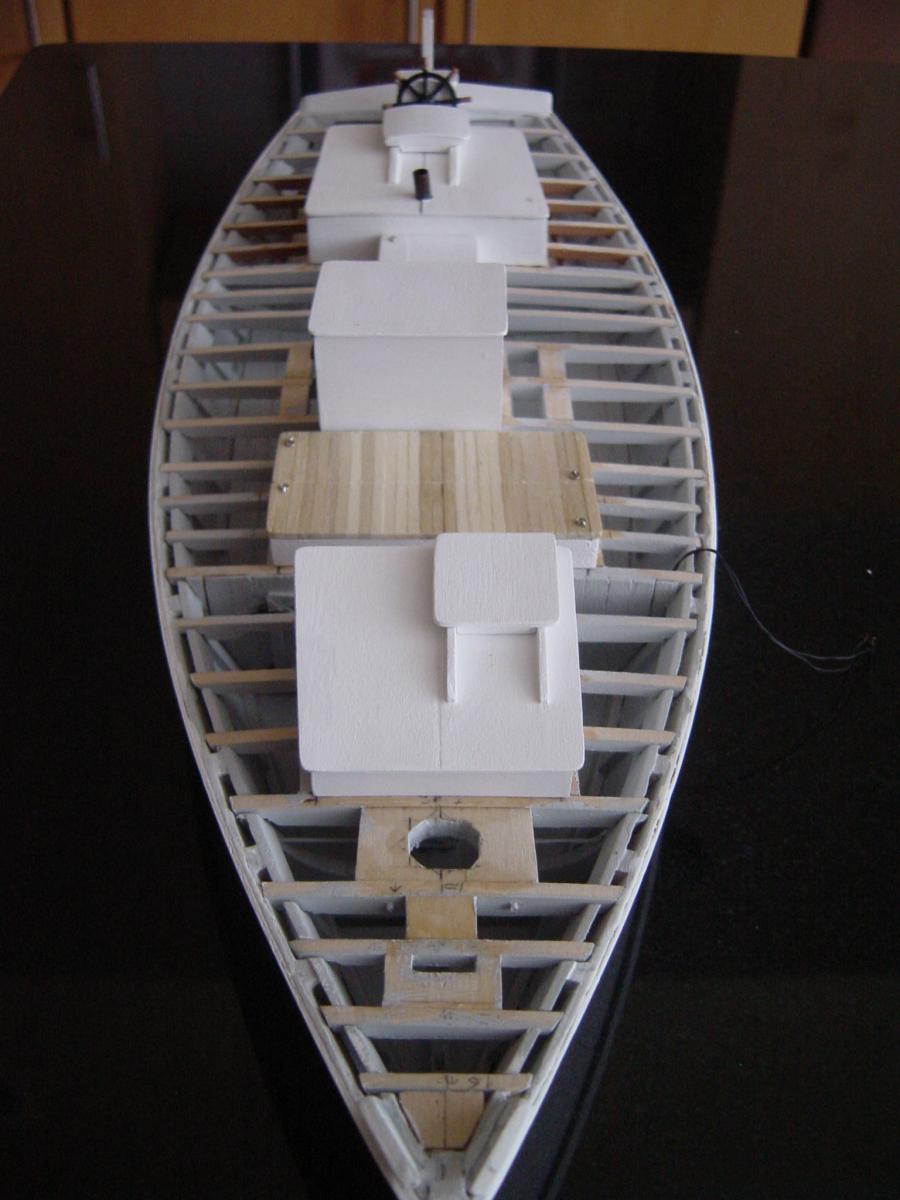
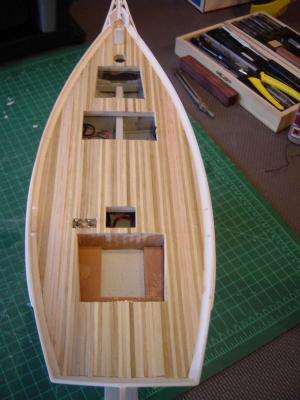
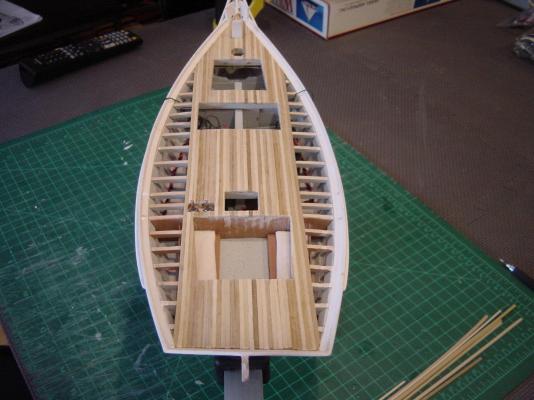
Finished planking and sanding the deck today. Turned out pretty well, just need to touch up a little bit with some filler. Still haven't convinced myself to paint the deck but will need to decide soon. Positioned the deck furniture to give myself a little taste of how it will look. The hard stuff is about to start like the dredging equipment, the bowsprit, the mast and the fiddly bits of hardware. I plan to do the mast and bowsprit the hard way i.e. square to eight sided to 16 sided to round and tapered. Progress pic are attached. Taking a break for a few hours to watch Drogba and Ronaldo duke it out on the pitch.


-
Thanks Russ and Gerty. Actually Russ there was so much color variation in the strips that it drove my decision to paint the deck, so I didn't try to distribute them evenly. Thanks for the positive reinforcement though.
-
Started the deck planking today but ran out of full length planks about 2/3 rds of the way through. Looking pretty good so far, I think. Progress pic below.
-
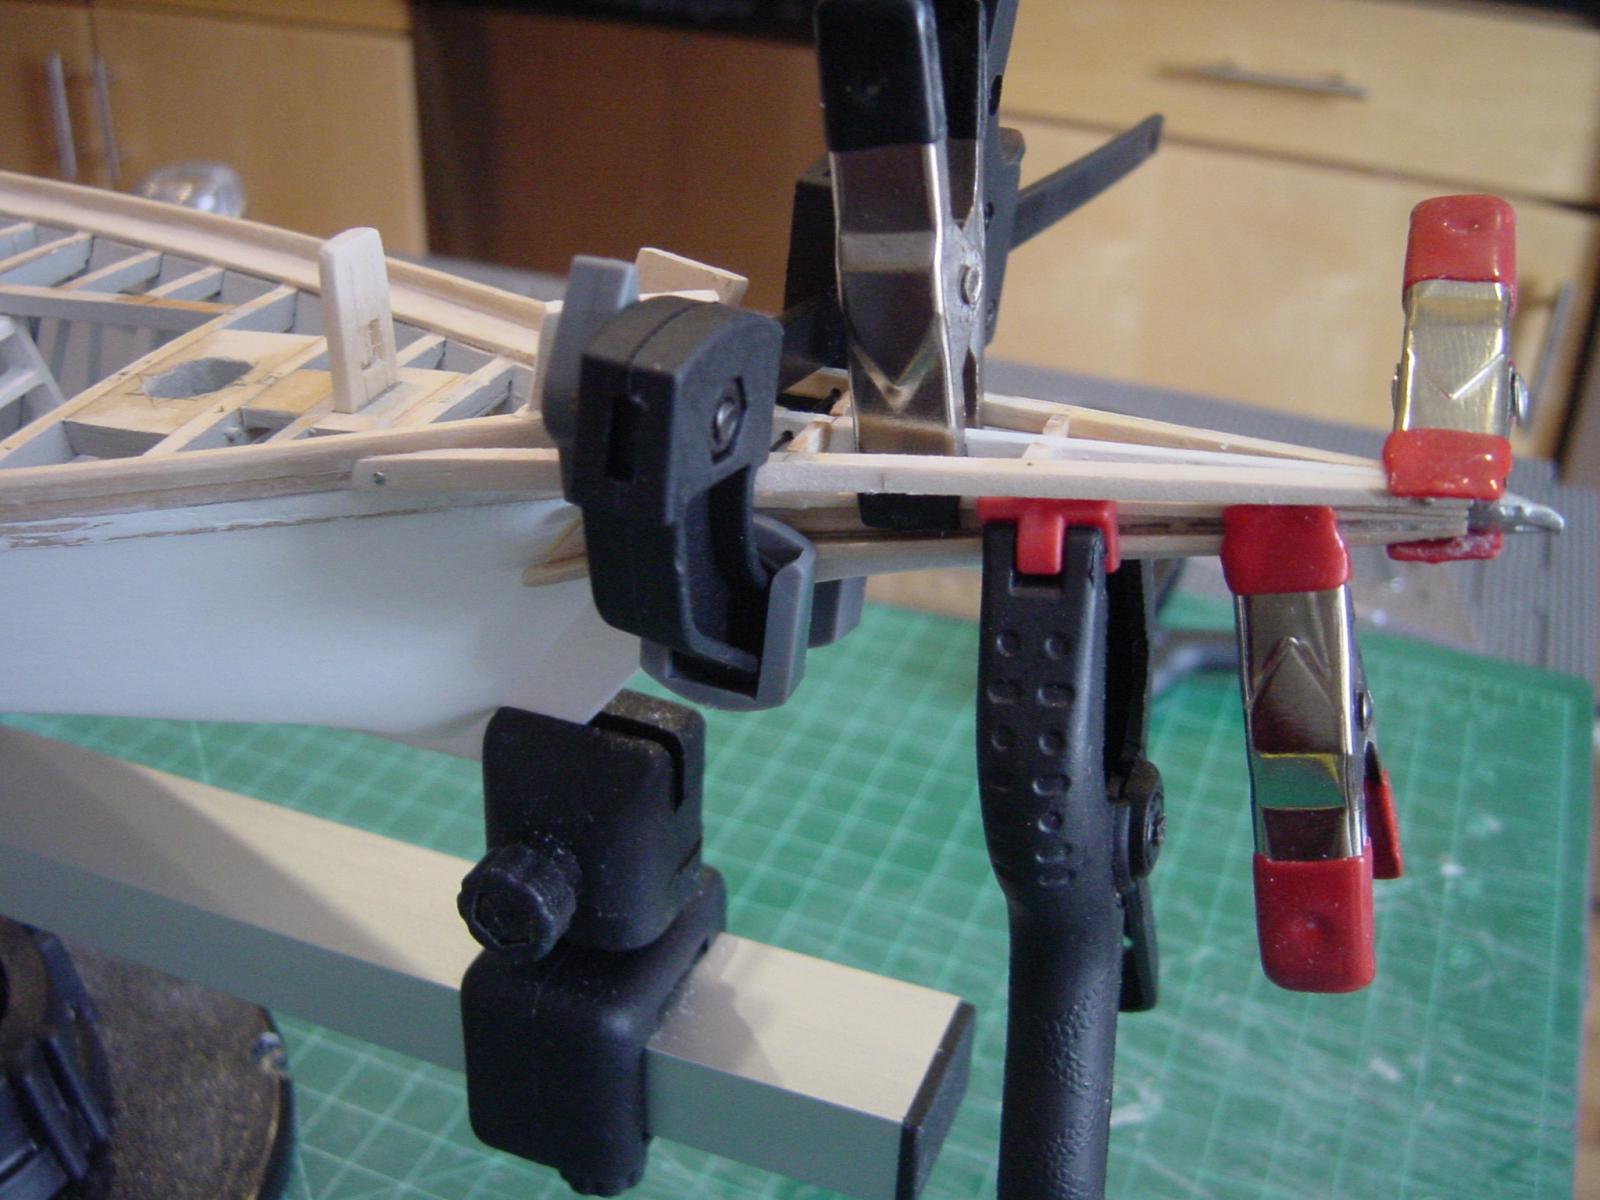
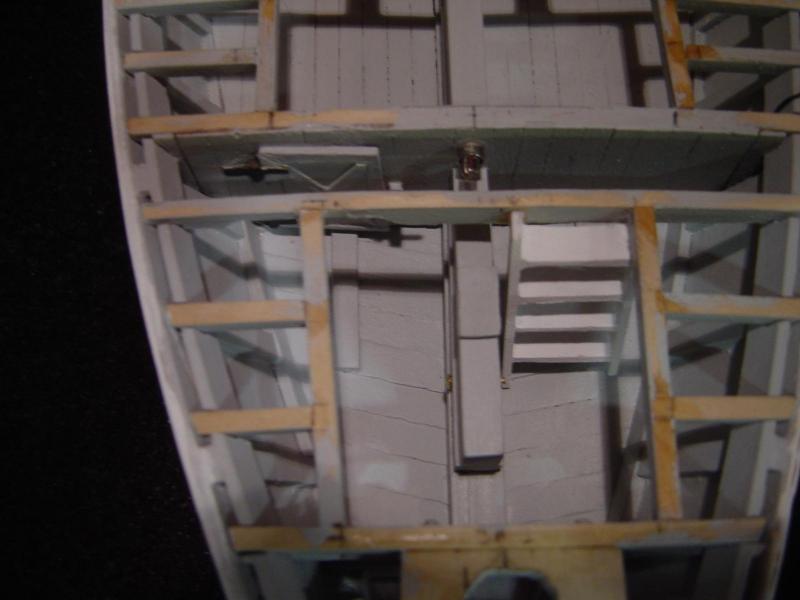
Bob, Russ, gerty and DanB, thanks for looking in on my build. Russ those clamps can sure dent the soft wood but what the heck its a working boat right? DanB, I refer to your completed build a bunch. I really like the tan color you used on the deck, hatches and cabin tops. I'm almost afraid to paint my whole topside white, so I still undecided on that. I'll give painting the trailboards a try. My lady is extremely good at that detail stuff, maybe I'll ask her to do it. There are three other skipjacks under construction and its fun to keep up with everyones progress. I had a near catastrophe in my shipyard yesterday, darn near set my boat on fire! Finished up my electrical light system and tested out one circuit. Worked great for about ten seconds then all the light fixtures started smoking, burned out the bulbs and melted the wires. Anyway I figured out my idiot mistake and repaired and replaced everything. Works great now. P.S., I used a 9v battery to power three 3v bulbs in parallel with no resistors. I am now using two AAA batteries.
-
Thanks David. I'd like to have a full scale version of this boat for sure. I believe I could build the real thing from the plans in this kit.
-
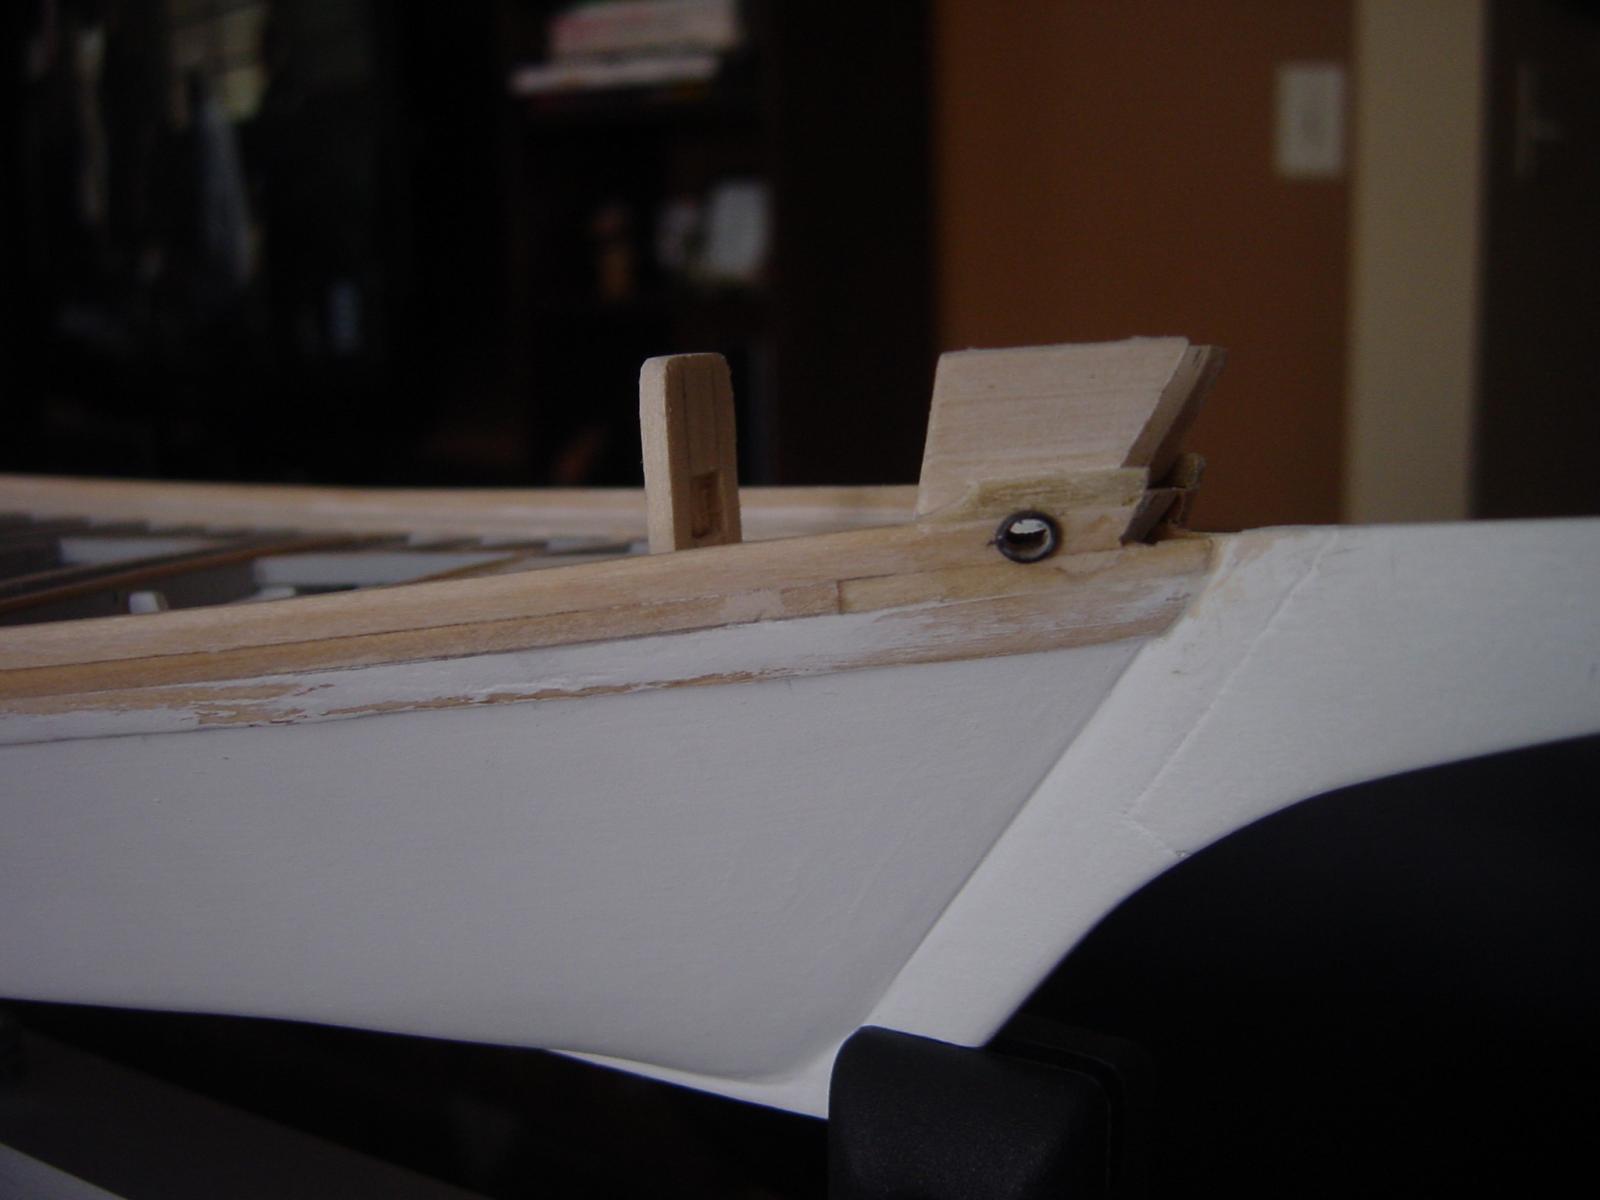
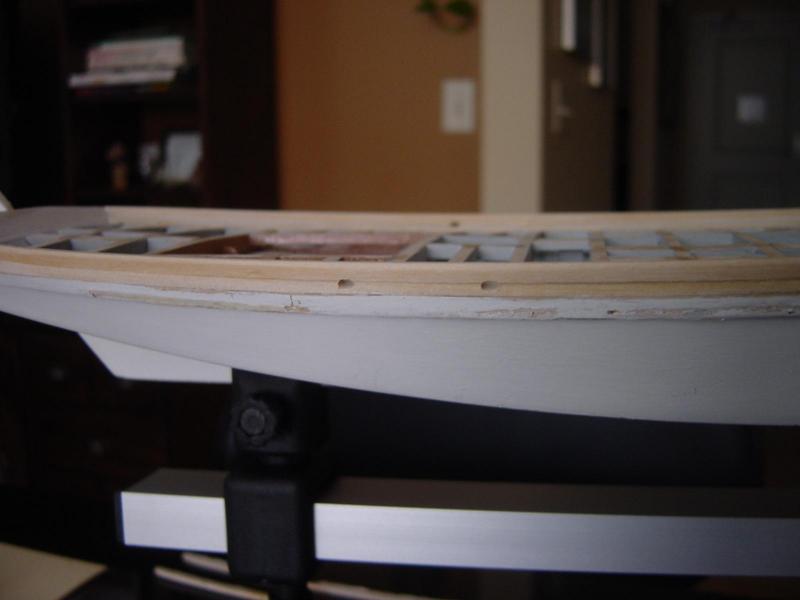
A short update. Spent the last two days installing the headrails and trailboards. I am not planning to torture myself by trying to paint the fancy trailboards so I went ahead and installed them. They were quite a challenge but I am satisfied with the results. Will put a primer coat on the new wood then start the deck planking next. Here are some progress pics.


- 135 replies
-
- 1
-
-
- willie l bennett
- model shipways
- (and 1 more)
-
Joshukr, I have already built all the cabins and hatches. Hope to start the decking this week.
-
Thanks Russ and Gerty. Hoping to start the deck planking next week . I first need to install my electrical system, but the toggle switches I bought have to hard of a throw so I need to replace them.
-
Oops, those first two pics are of the planksheers. Here are the log rails installed.

-
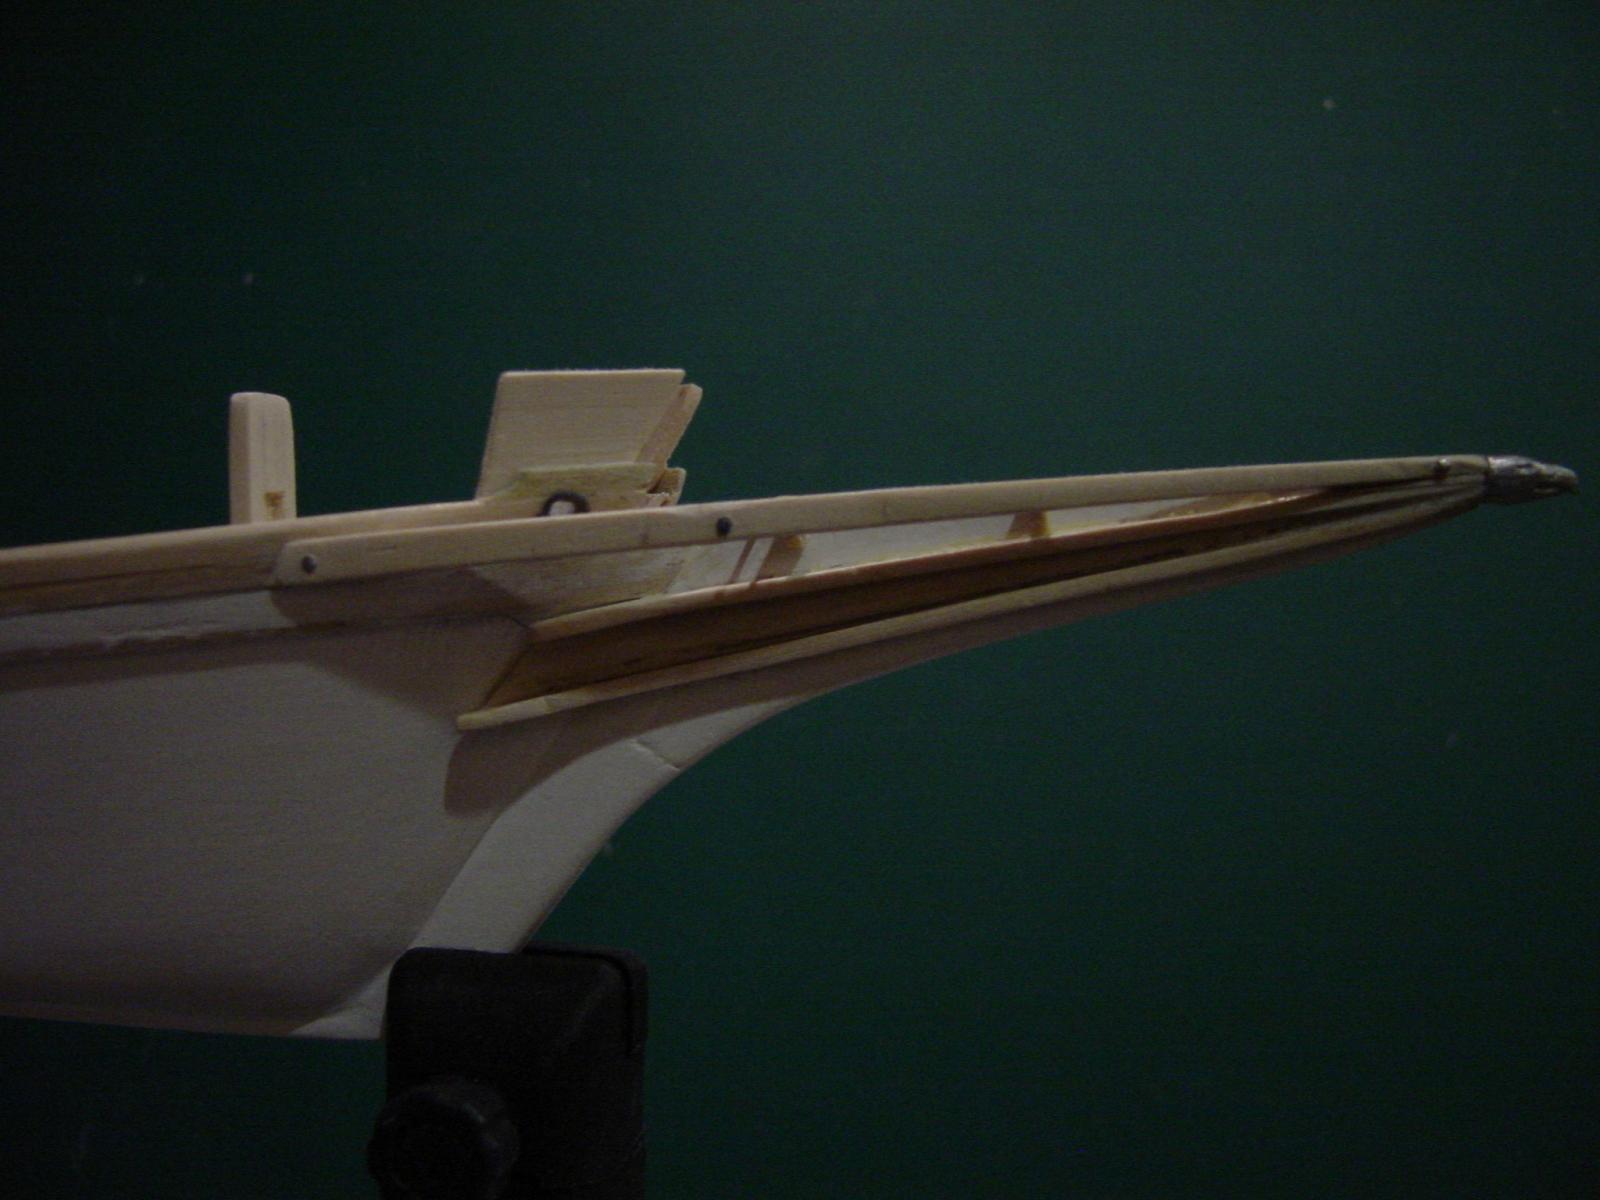
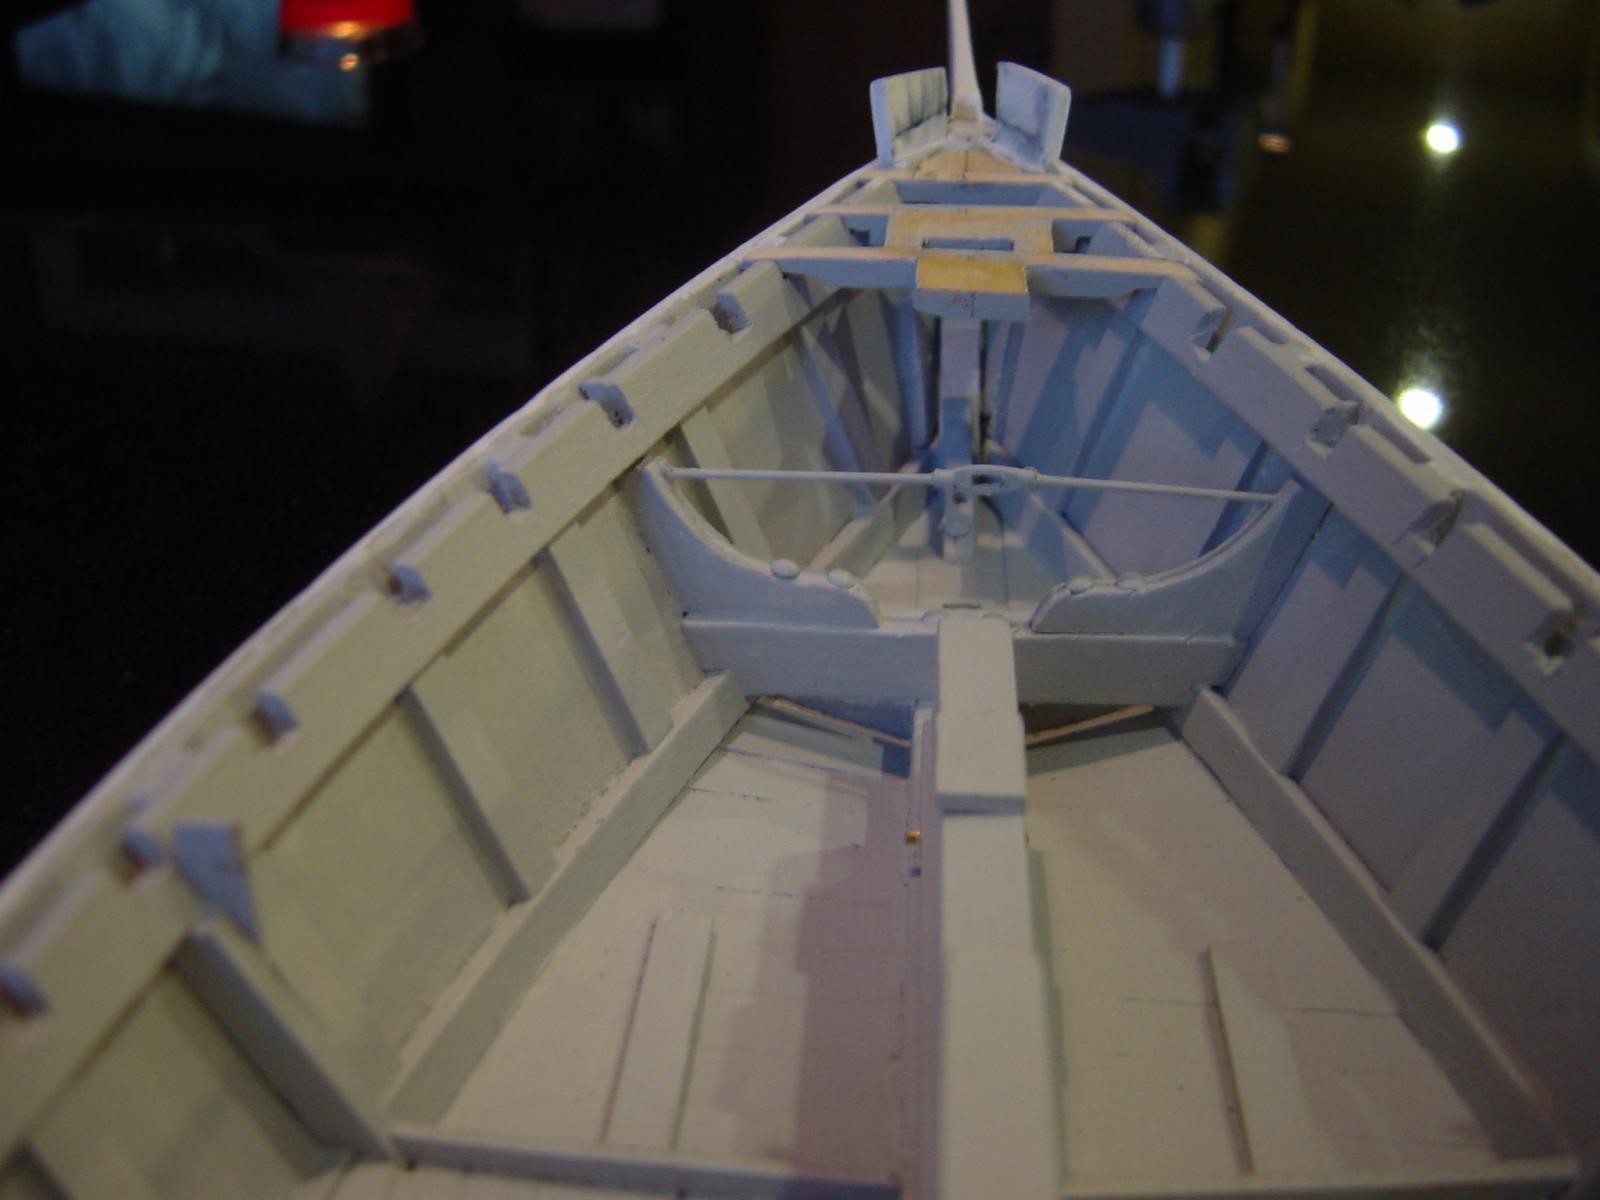
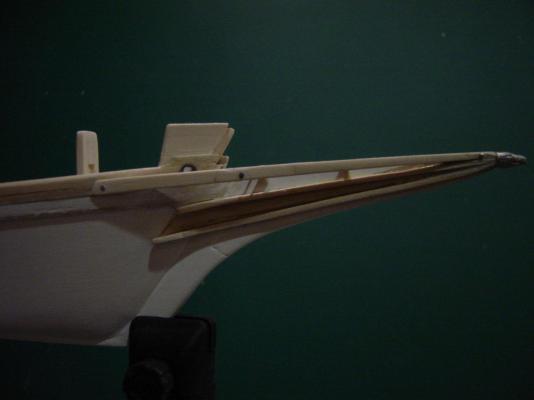
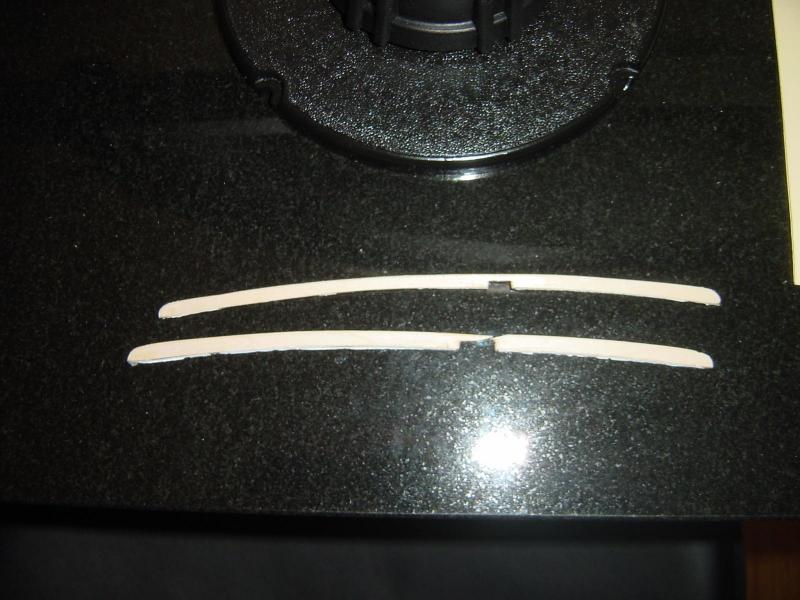
Found this interesting link for those of us building the skipjack. http://www.loc.gov/pictures/item/md1454/. Based on the drawing I found here, it confirmed my concern about how I attached the side guards on my boat. I had just glued them on the wale with a square edge which made them rest at a steep angle to the hull. They need to be tapered so they are horizontal to the water line/surface. I am now in the remove and replace mode. On the other hand, I have successfully installed the log rails, tapered them and carved the inboard portion of the planksheers to the deck height. I also cut out the scuppers, reworked my knightheads and installed the hawse pipes.

-
Wow! Very nice workmanship.
-
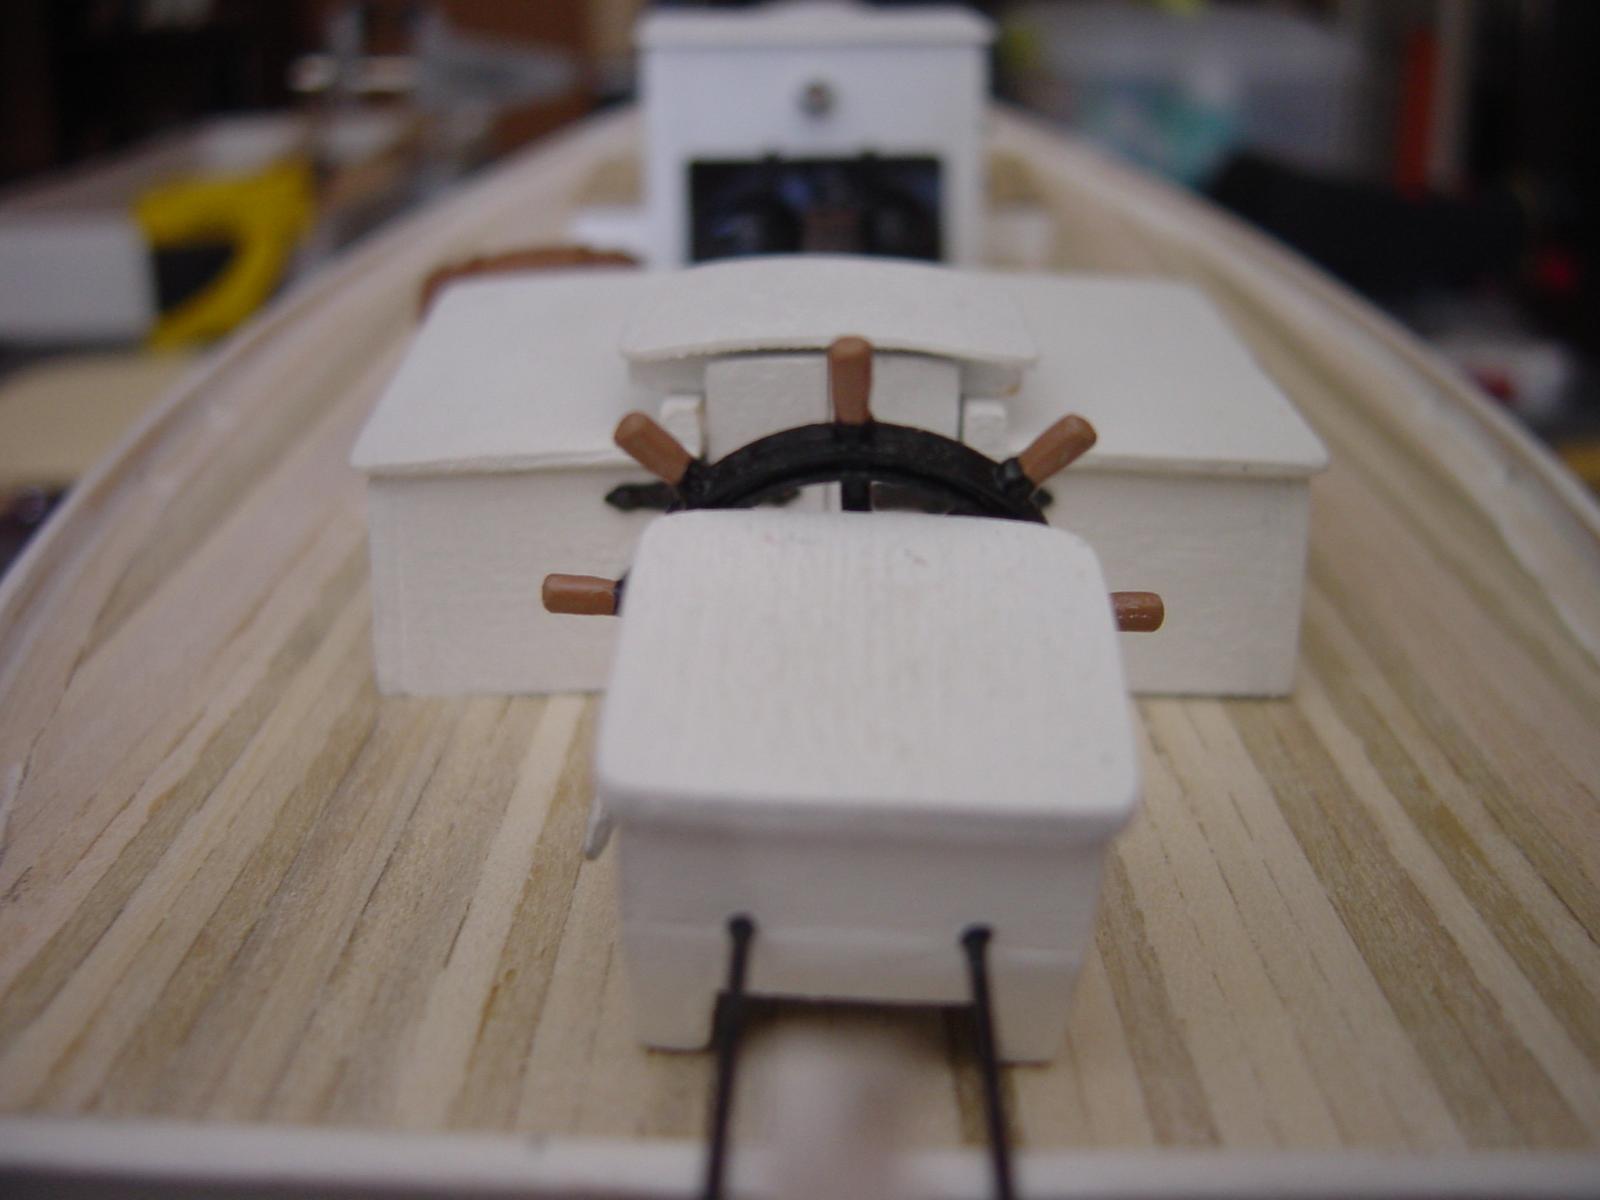
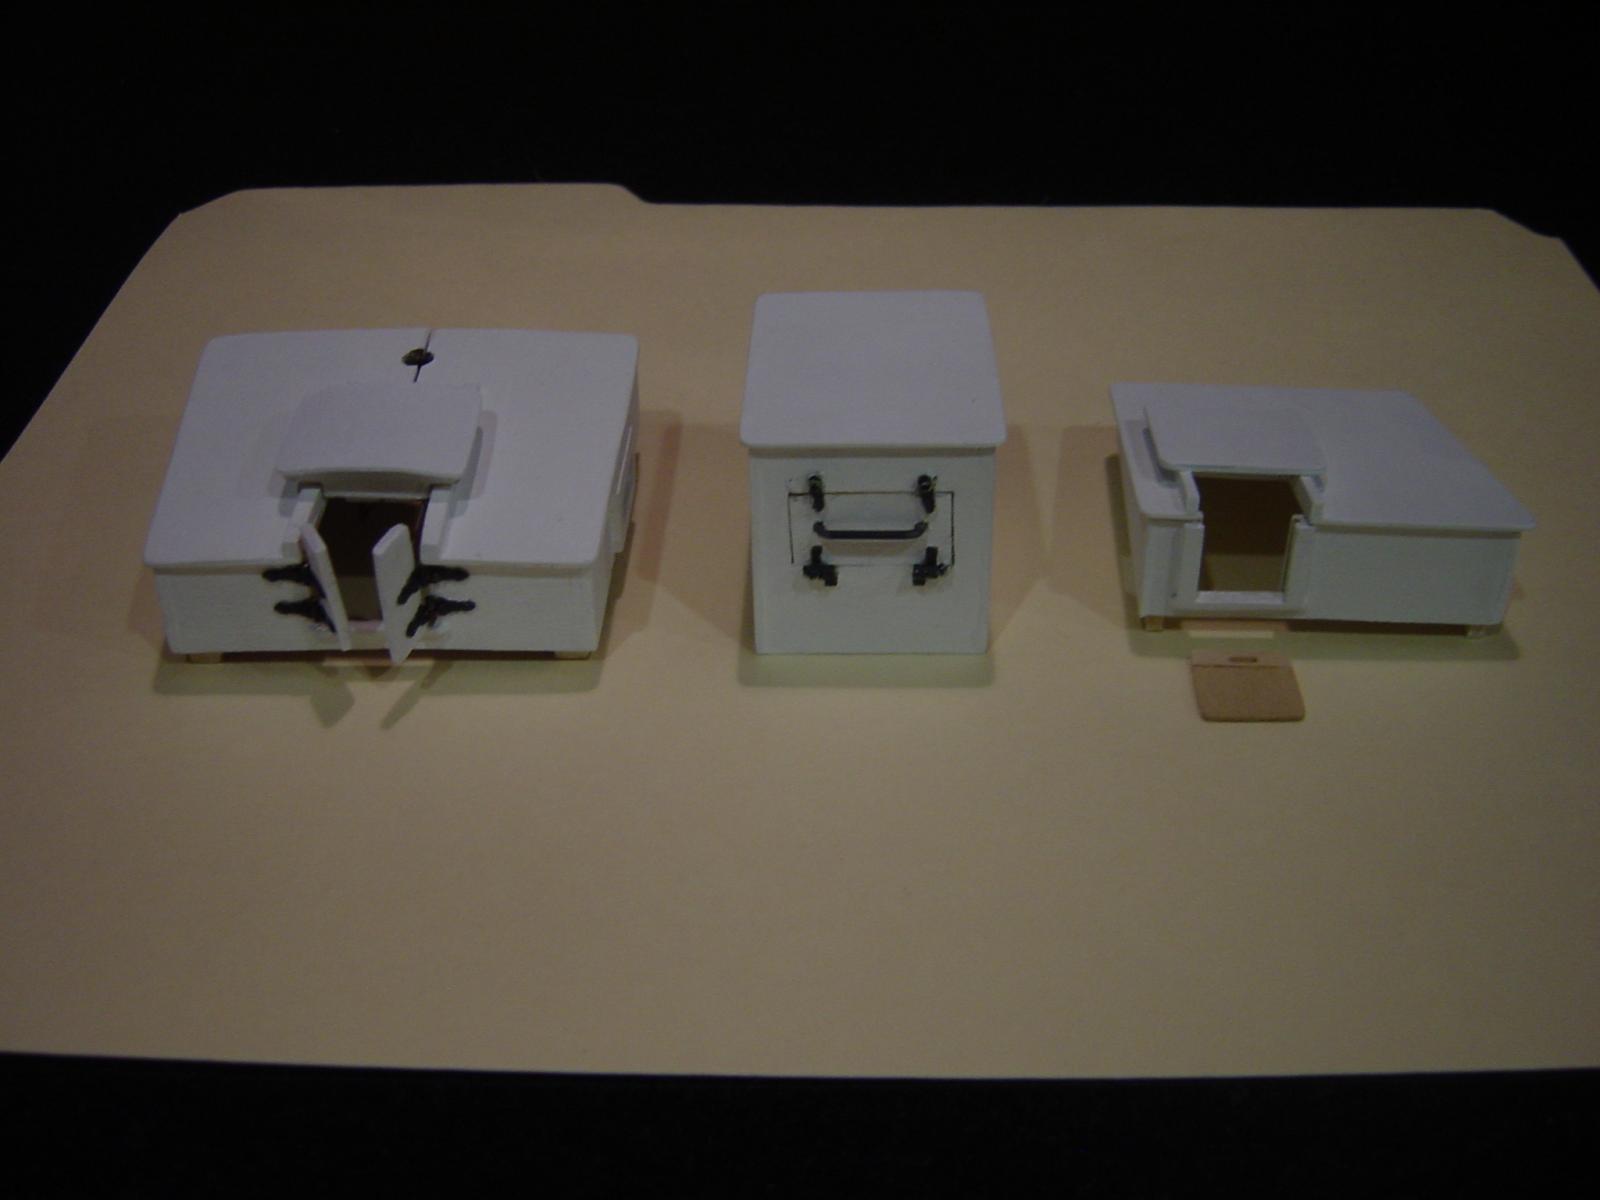
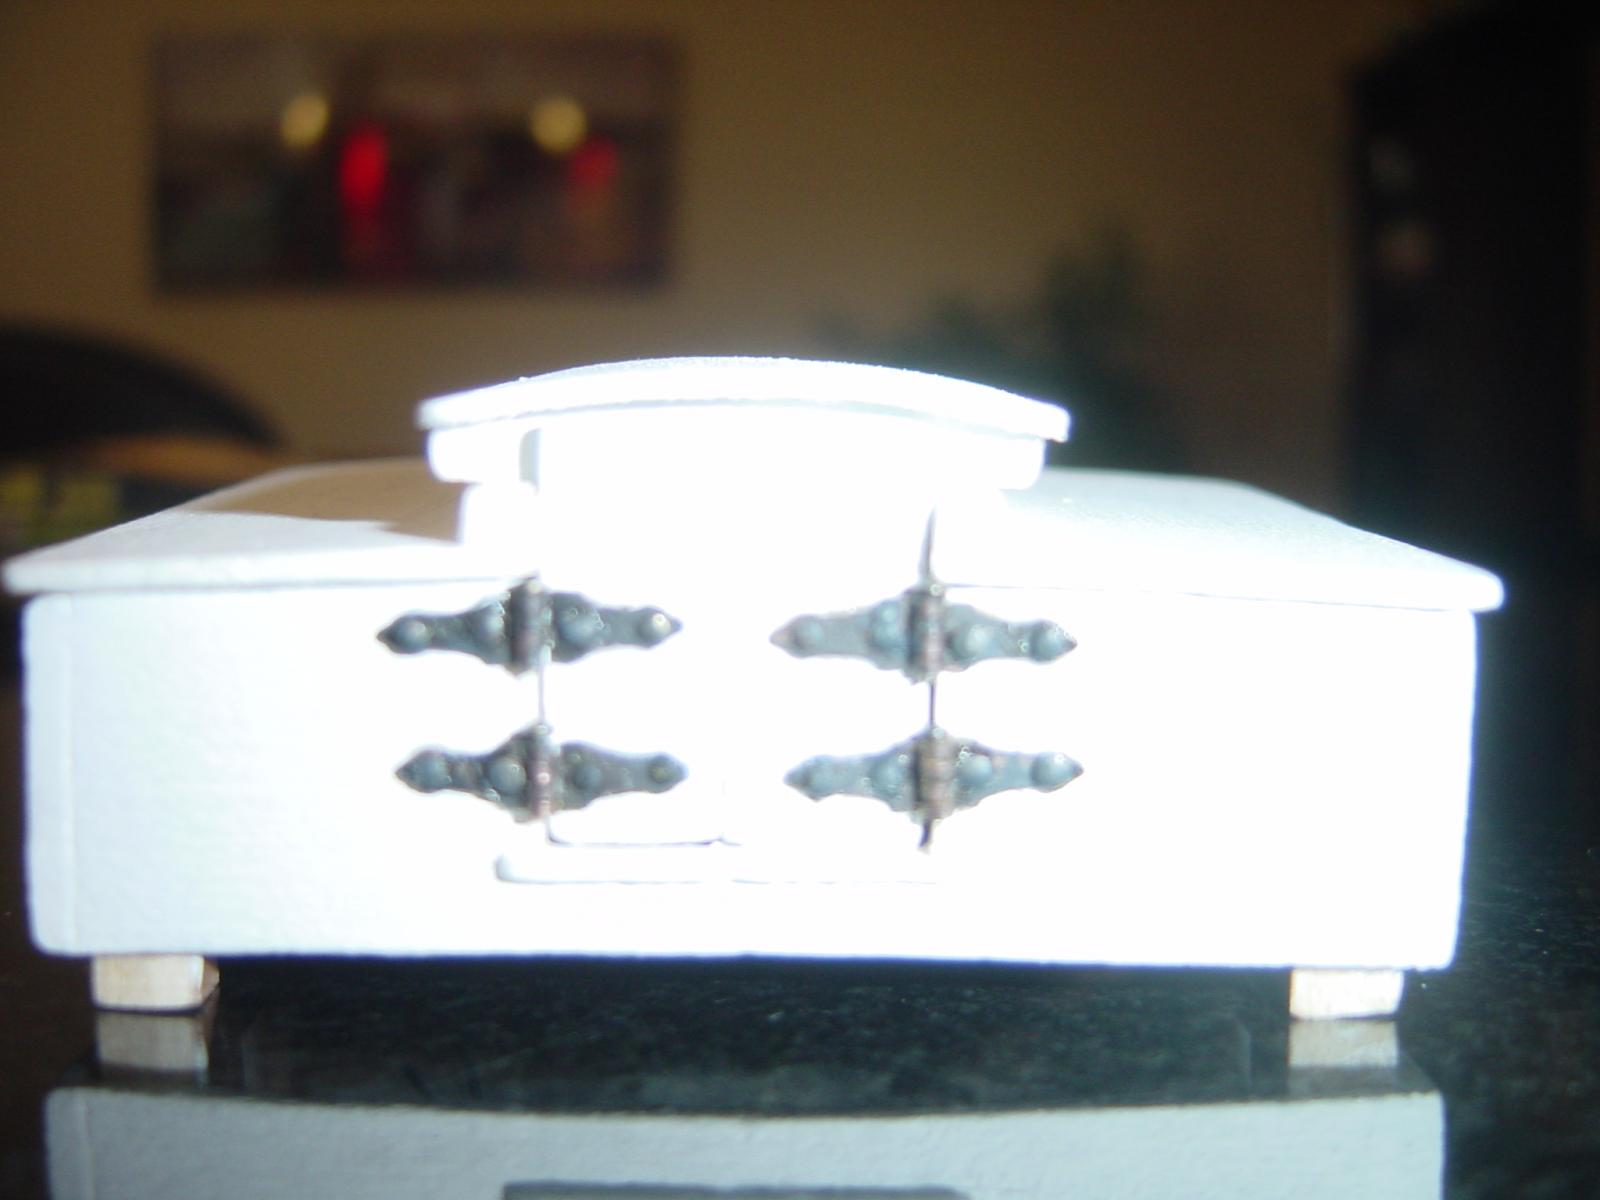
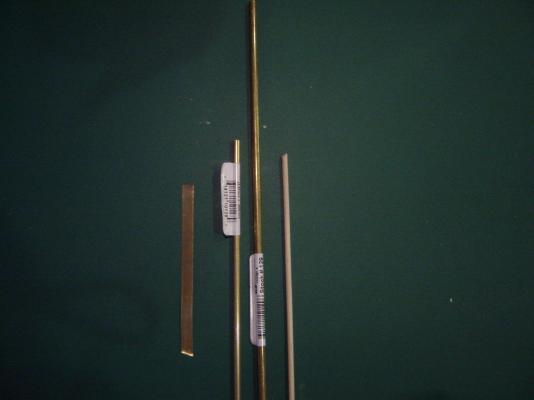
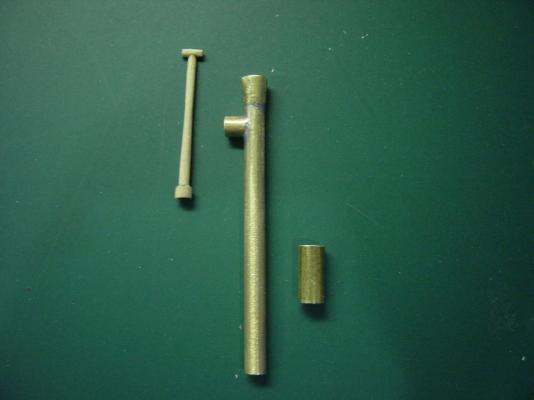
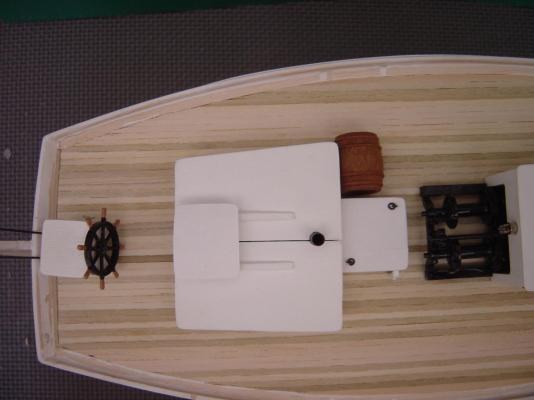
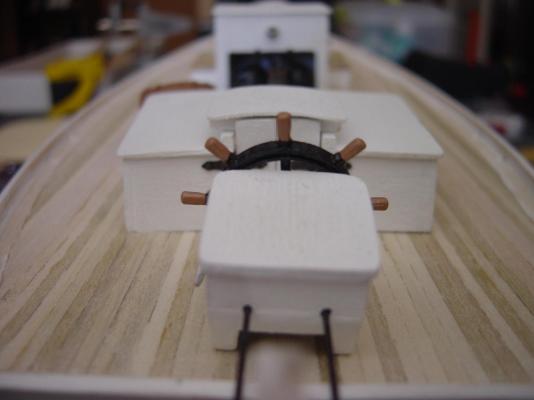
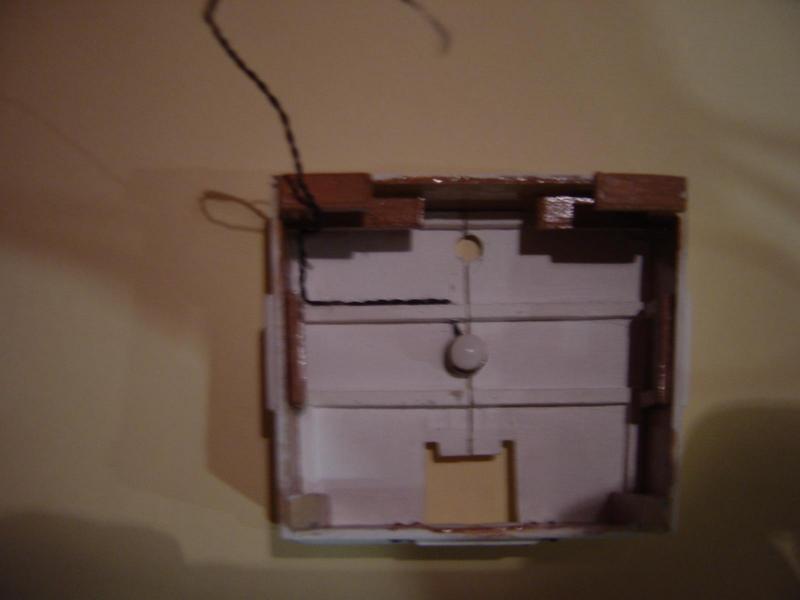
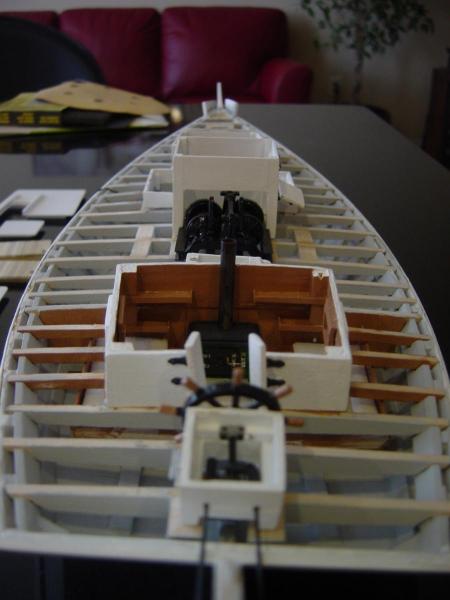
mbaryckyj, The hinges on the main cabin doors were purchased. They were photo etched but I still had to "make" them, that is to form the cylinder shape to accept the pins. The other hinges I made from scratch. Being new to this hobby, I tried a couple different ways to create them. The forward cargo area door hinges were made from medium sized solder wire that I hammered flat, cut to size and shaped around a small nail. The hinges on the engine cover access door were made from some of the strip brass in the kit and bent around a small nail. The pivot latches are made from solder and attached with pins so they operate. The handle is brass wire bent to shape. The wheel box dimensions have to be scaled from the drawings. The Ben Lankford modeling guide provided in the kit provides a general sketch of how it goes together (page 28). The guide also provides three sketches of different types of steering gear. I just picked the easiest design. I made the steering arms from a block of solder I melted into a rough mold. The steering shaft is just a screw I bought at a hobby store. My steering gear does not actually work because I would need the shaft to be half right hand threads and half left hand threads. If you want to see one that actually works search for a completed Willie Bennett by Dandyfunk. Let me know if you have any other questions.
-
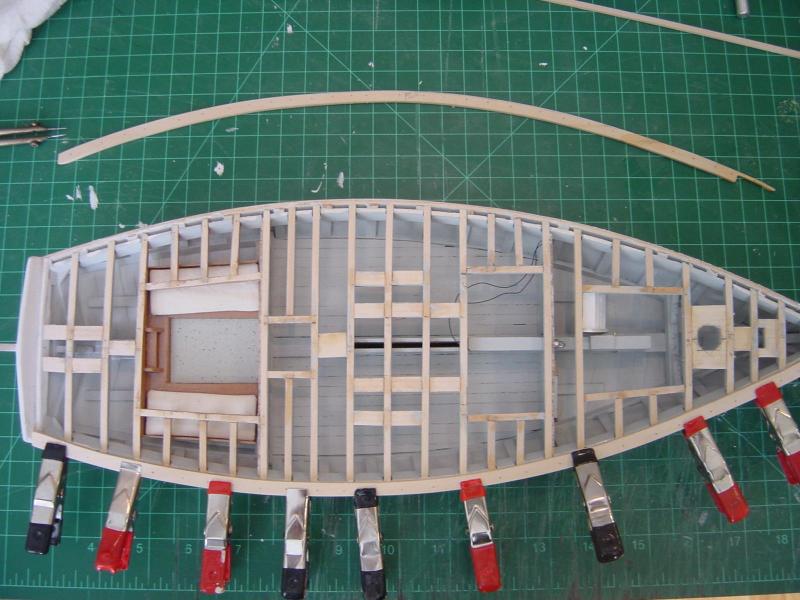
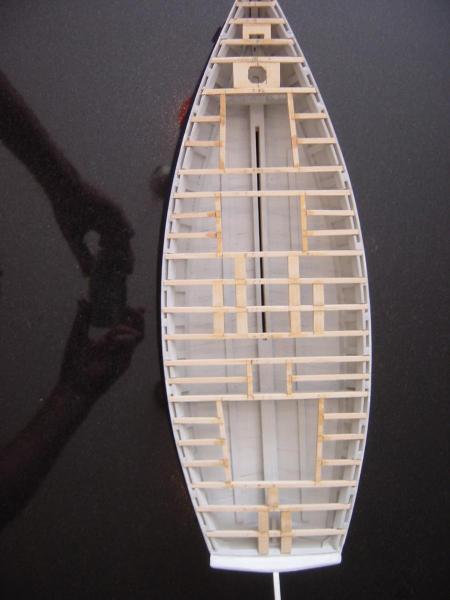
Adam and Bob, Thanks for the comments. I am having fun with it. Worked on it a bit today. Faired the deck frames, installed the planksheers and the side guards. I soaked the log rails in water a few minutes and am forming them to the hull. Only one pic to add today.

- 135 replies
-
- 2
-
-
- willie l bennett
- model shipways
- (and 1 more)
-
Josh, Wow, very nice job so far!
-
Tim and Ryland, Thanks for your kind comments. I will certainly check out the Hampton Roads Ship Model Society and possibly make a visit to one of your meetings.
-
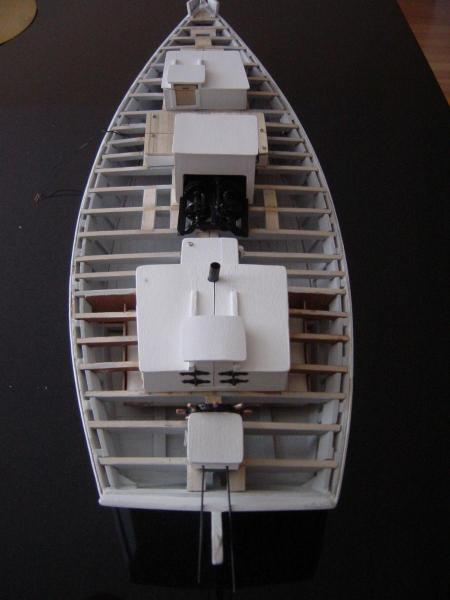
Thanks guys for your comments Buck, yes I will have working lights in the main cabin, the forward cargo area under the FOCSL cabin, the navigation lights and probably the winder engine cover.
-
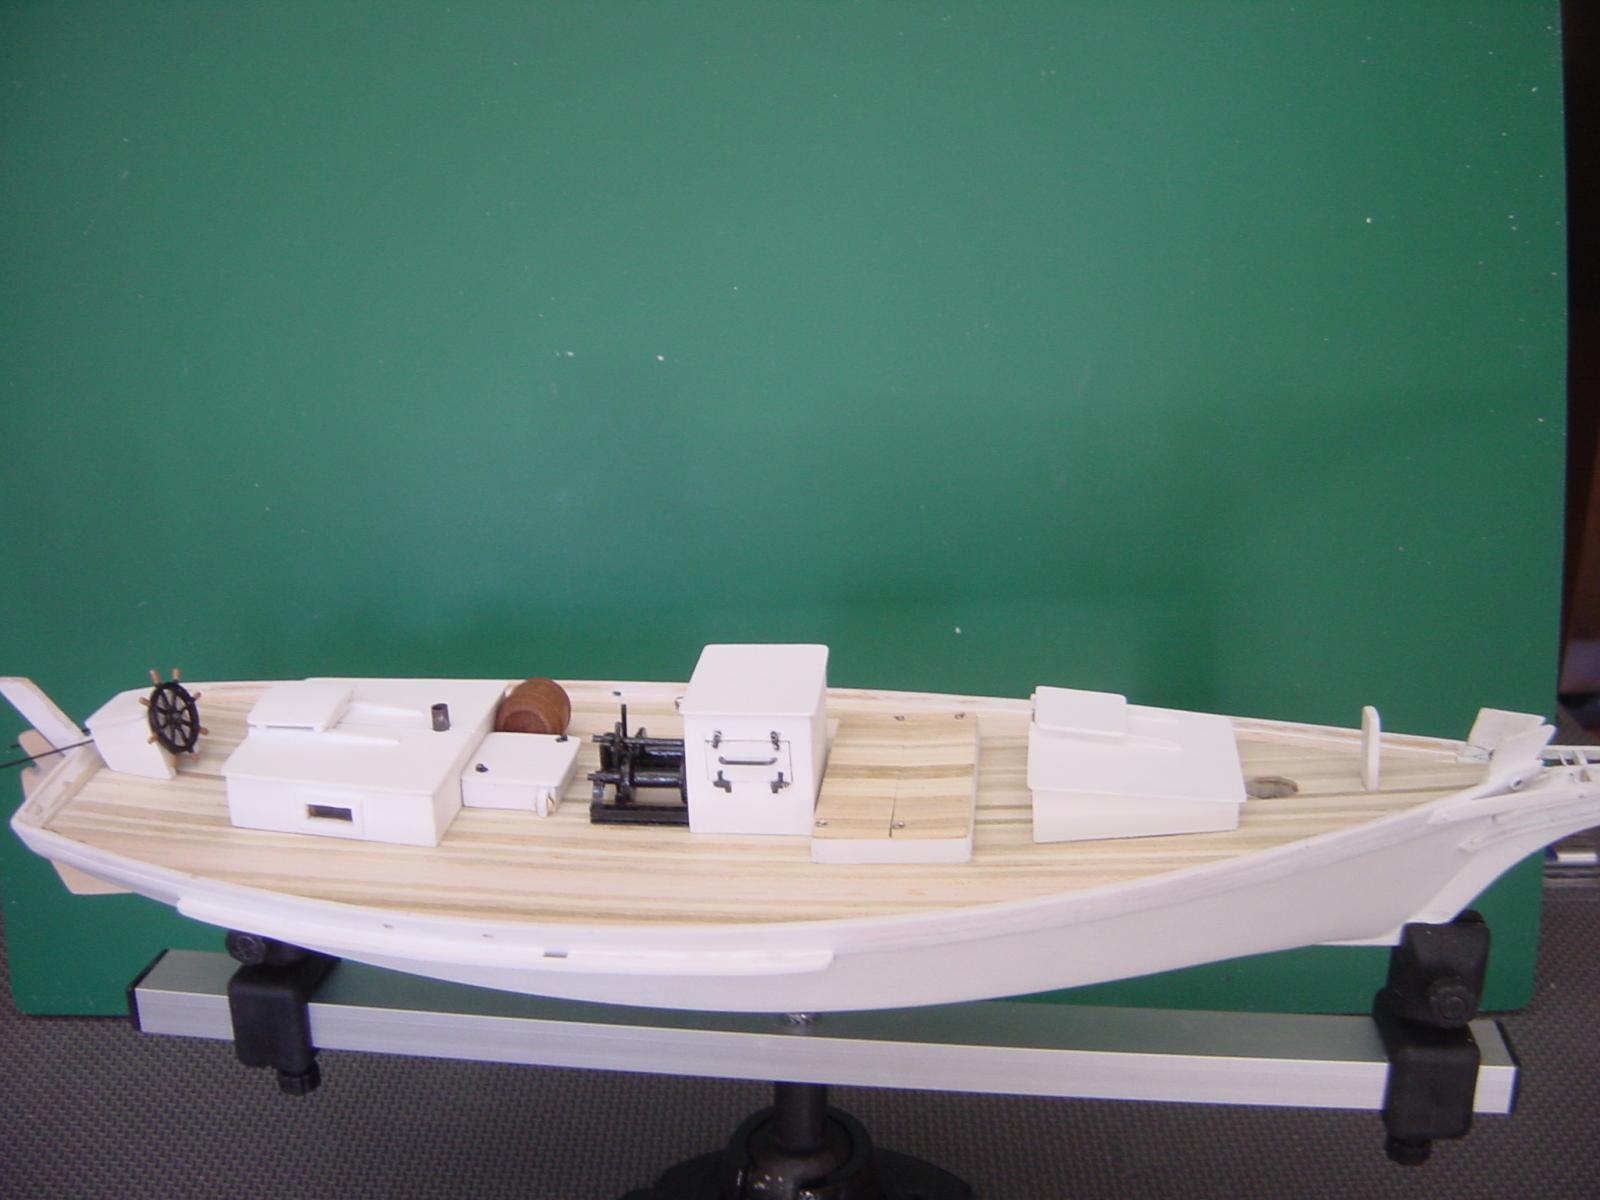
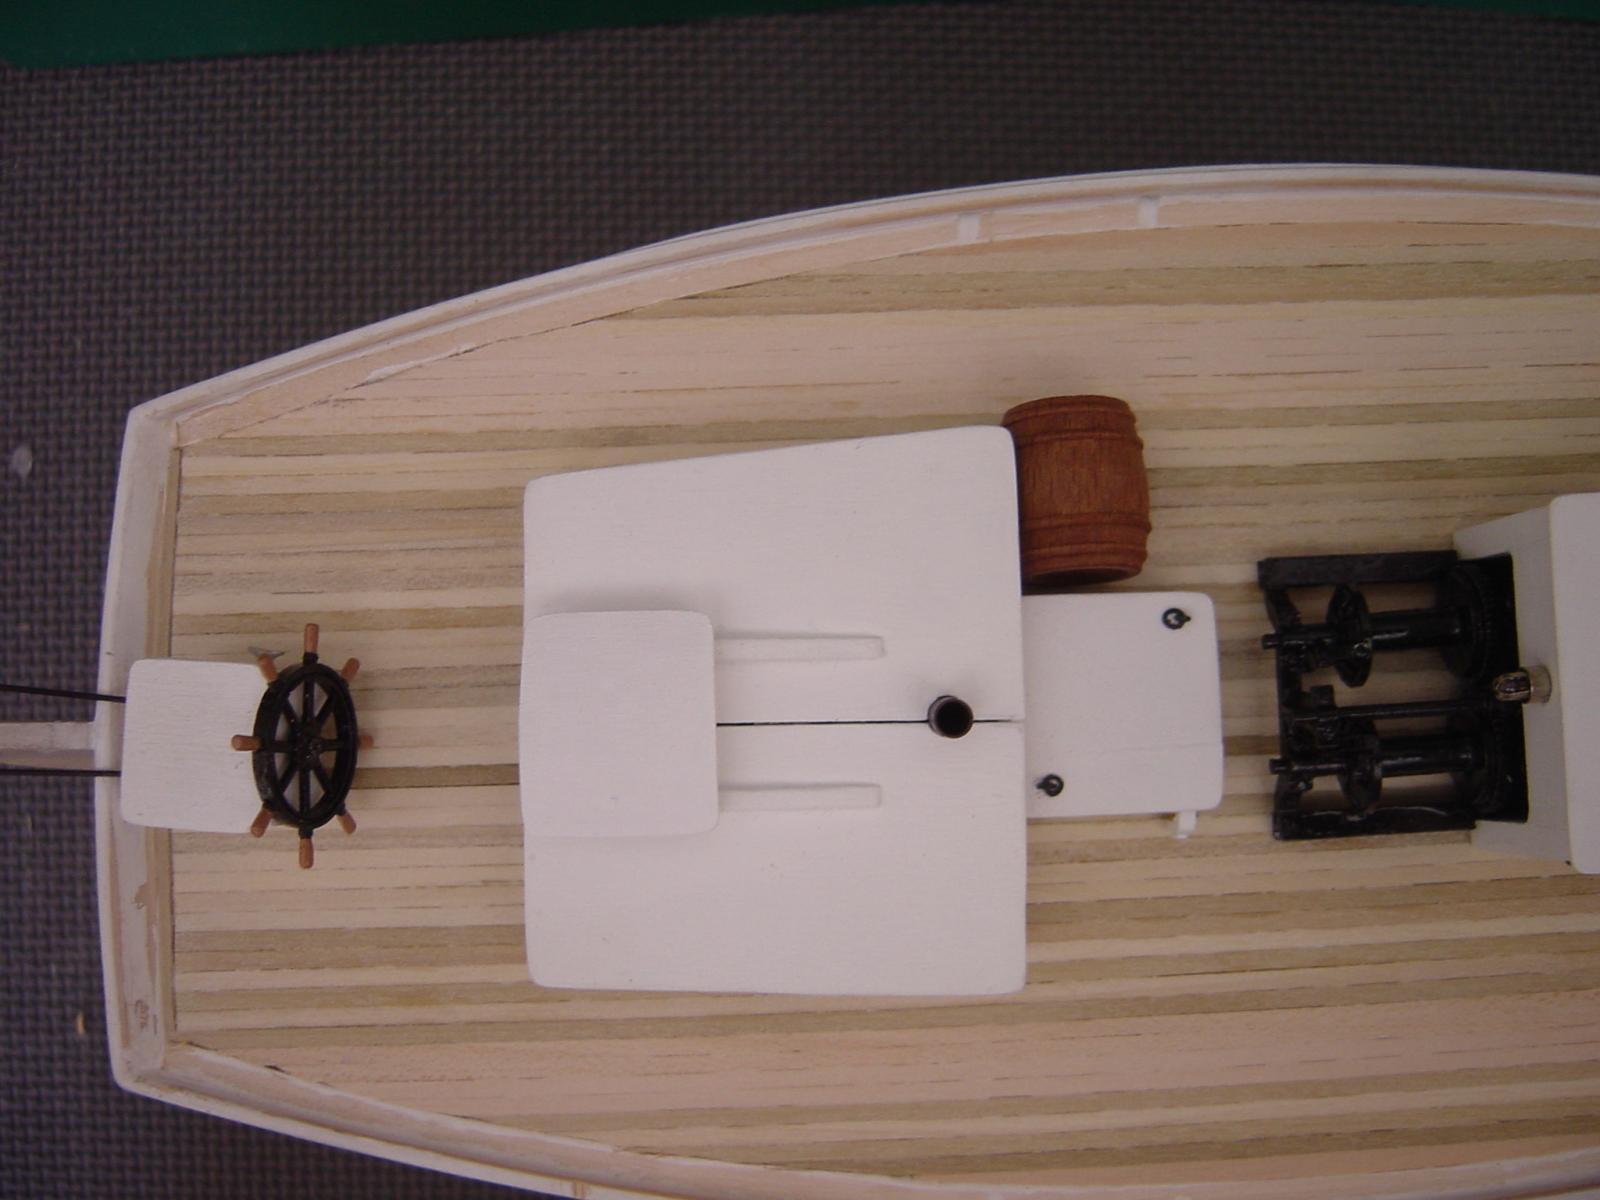
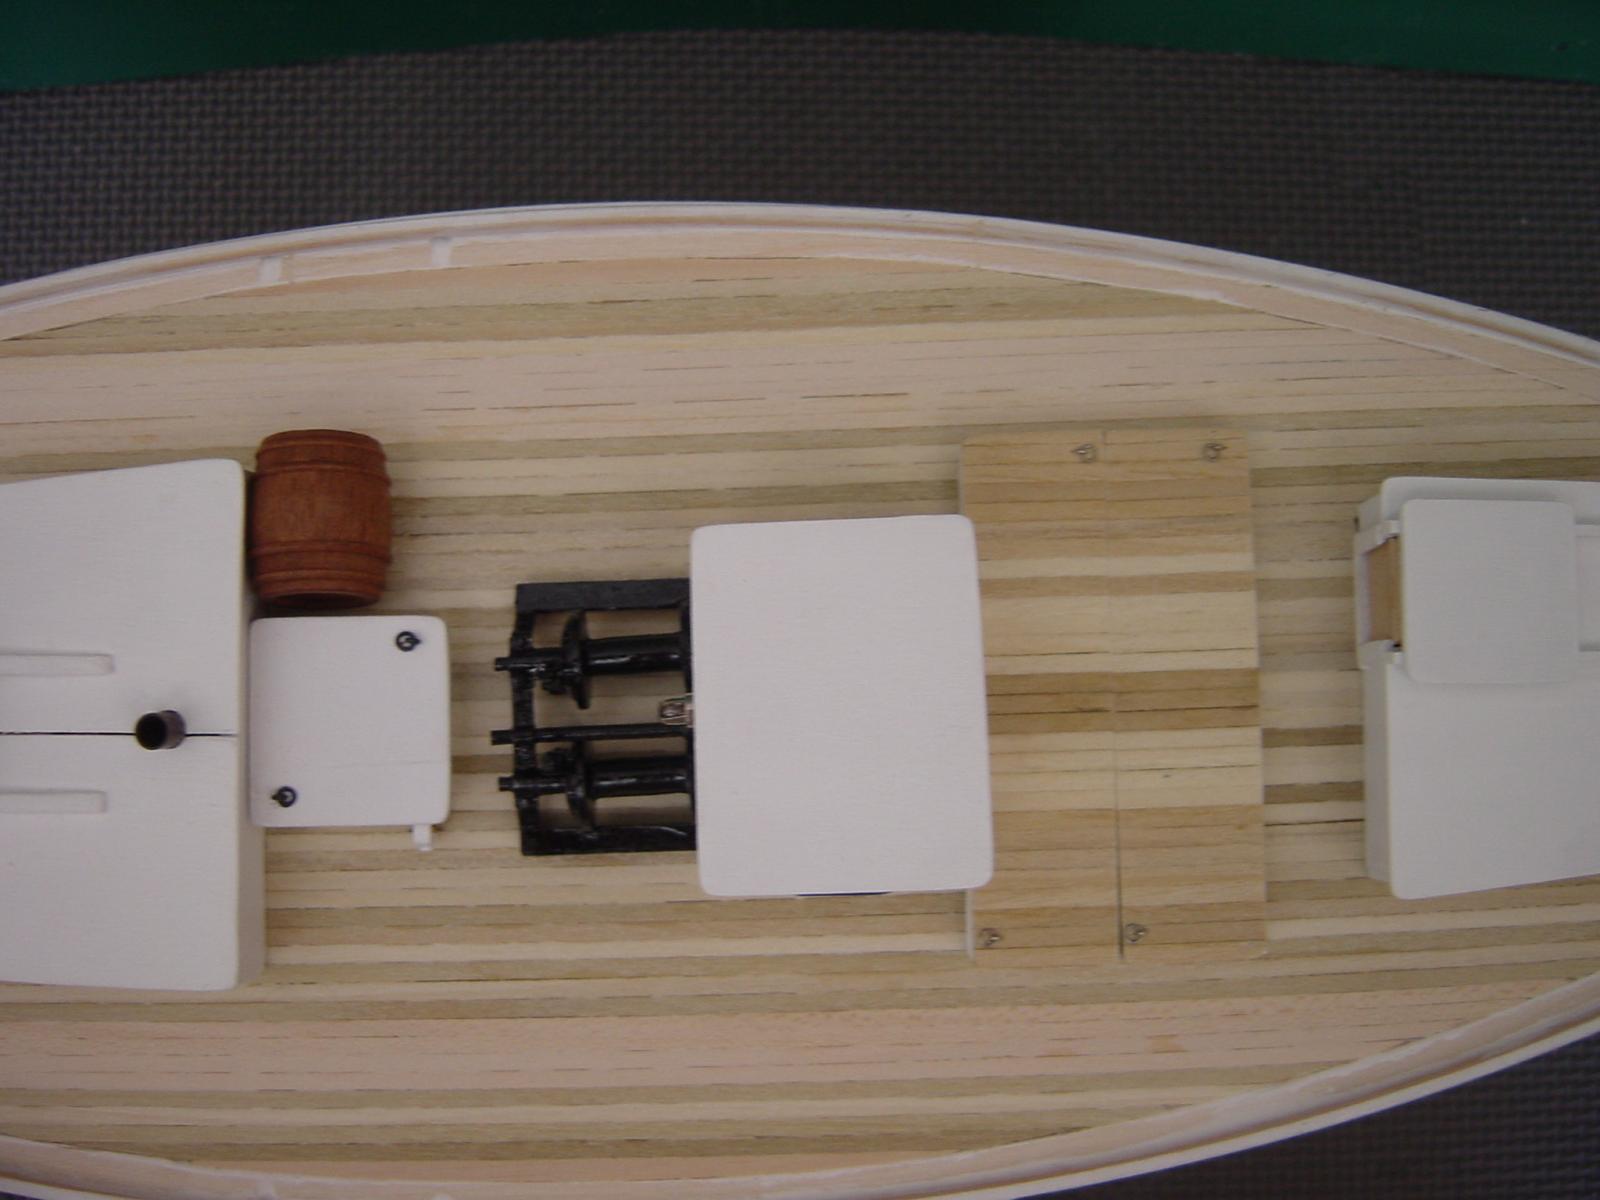
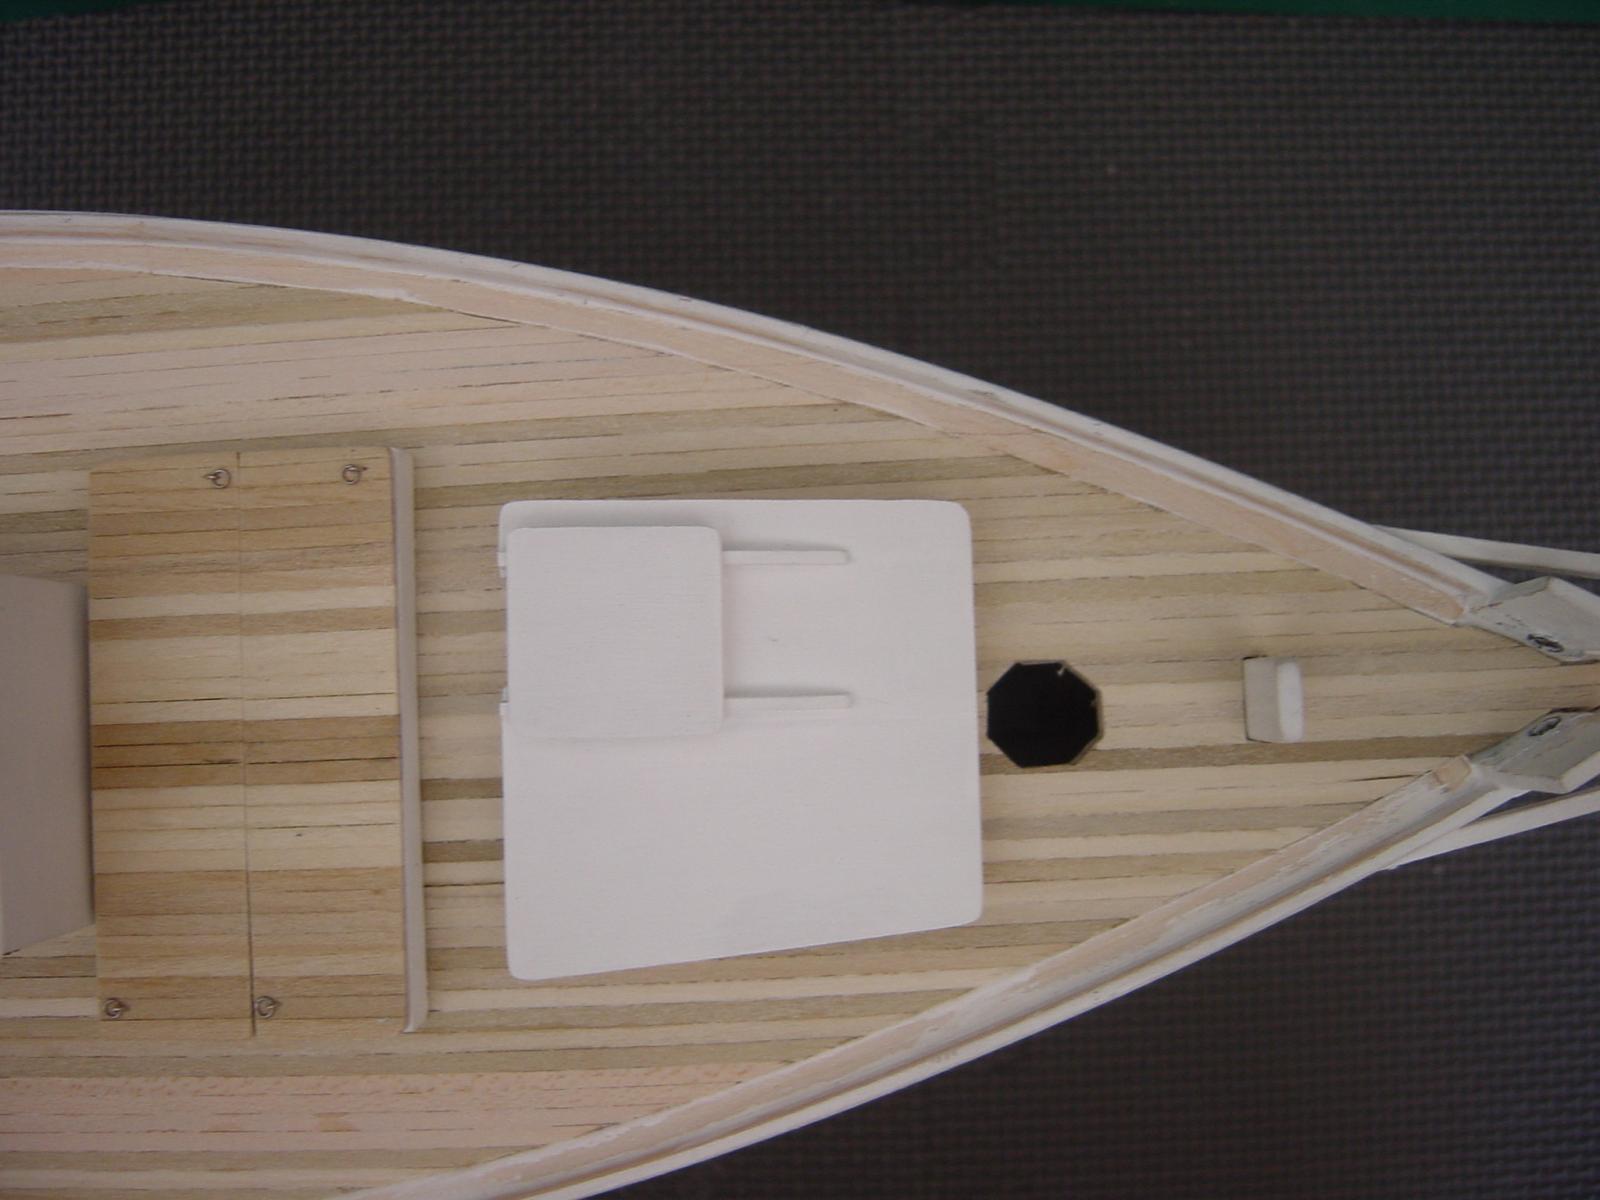
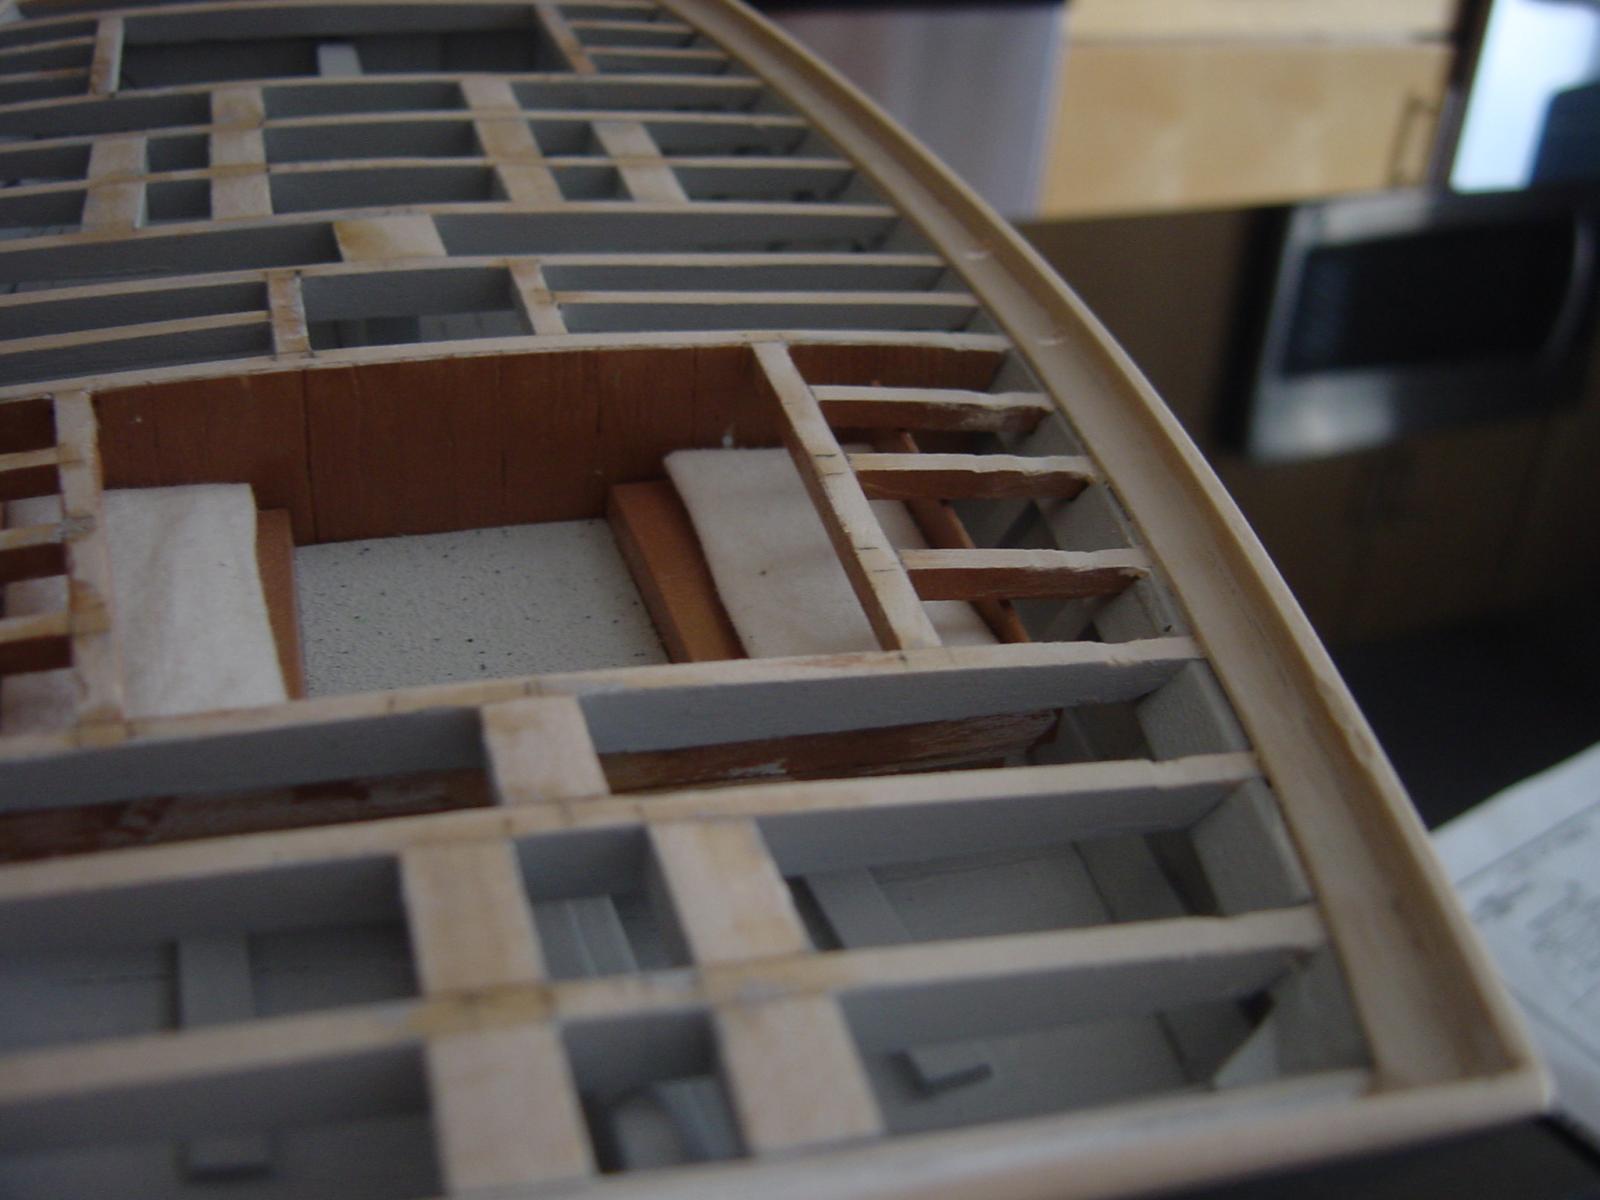
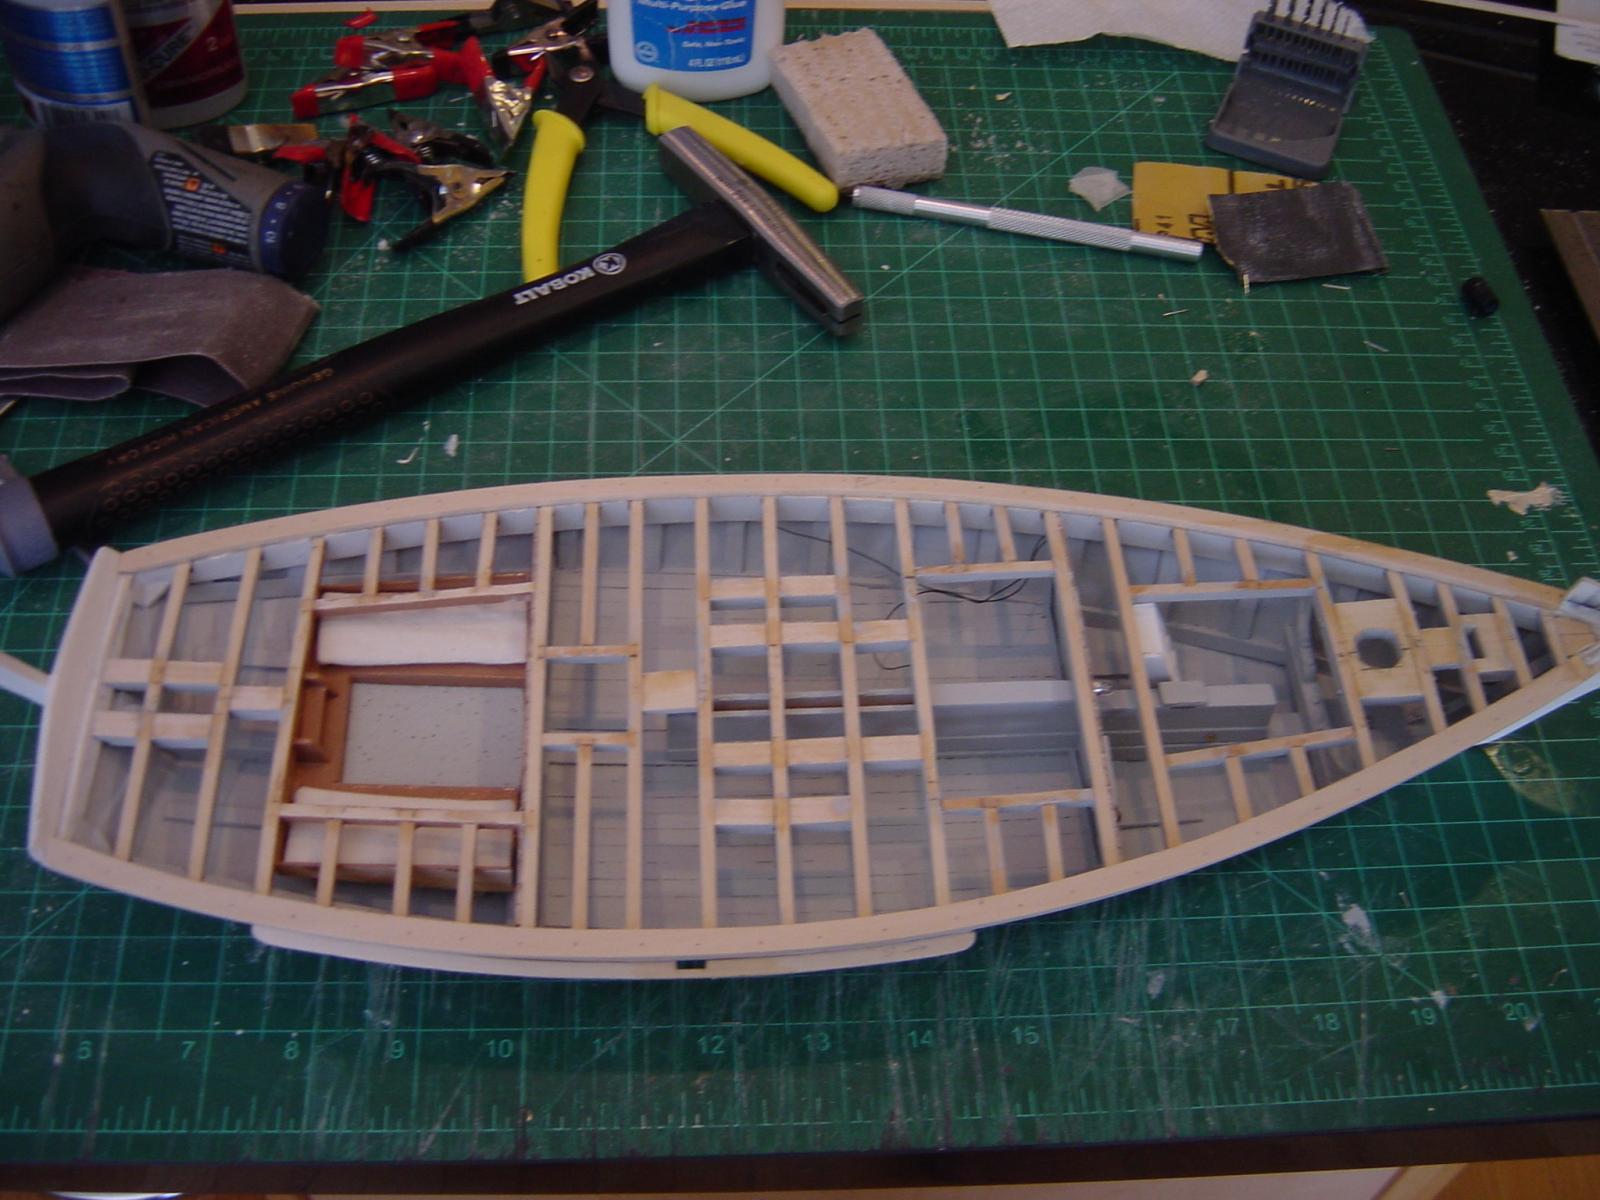
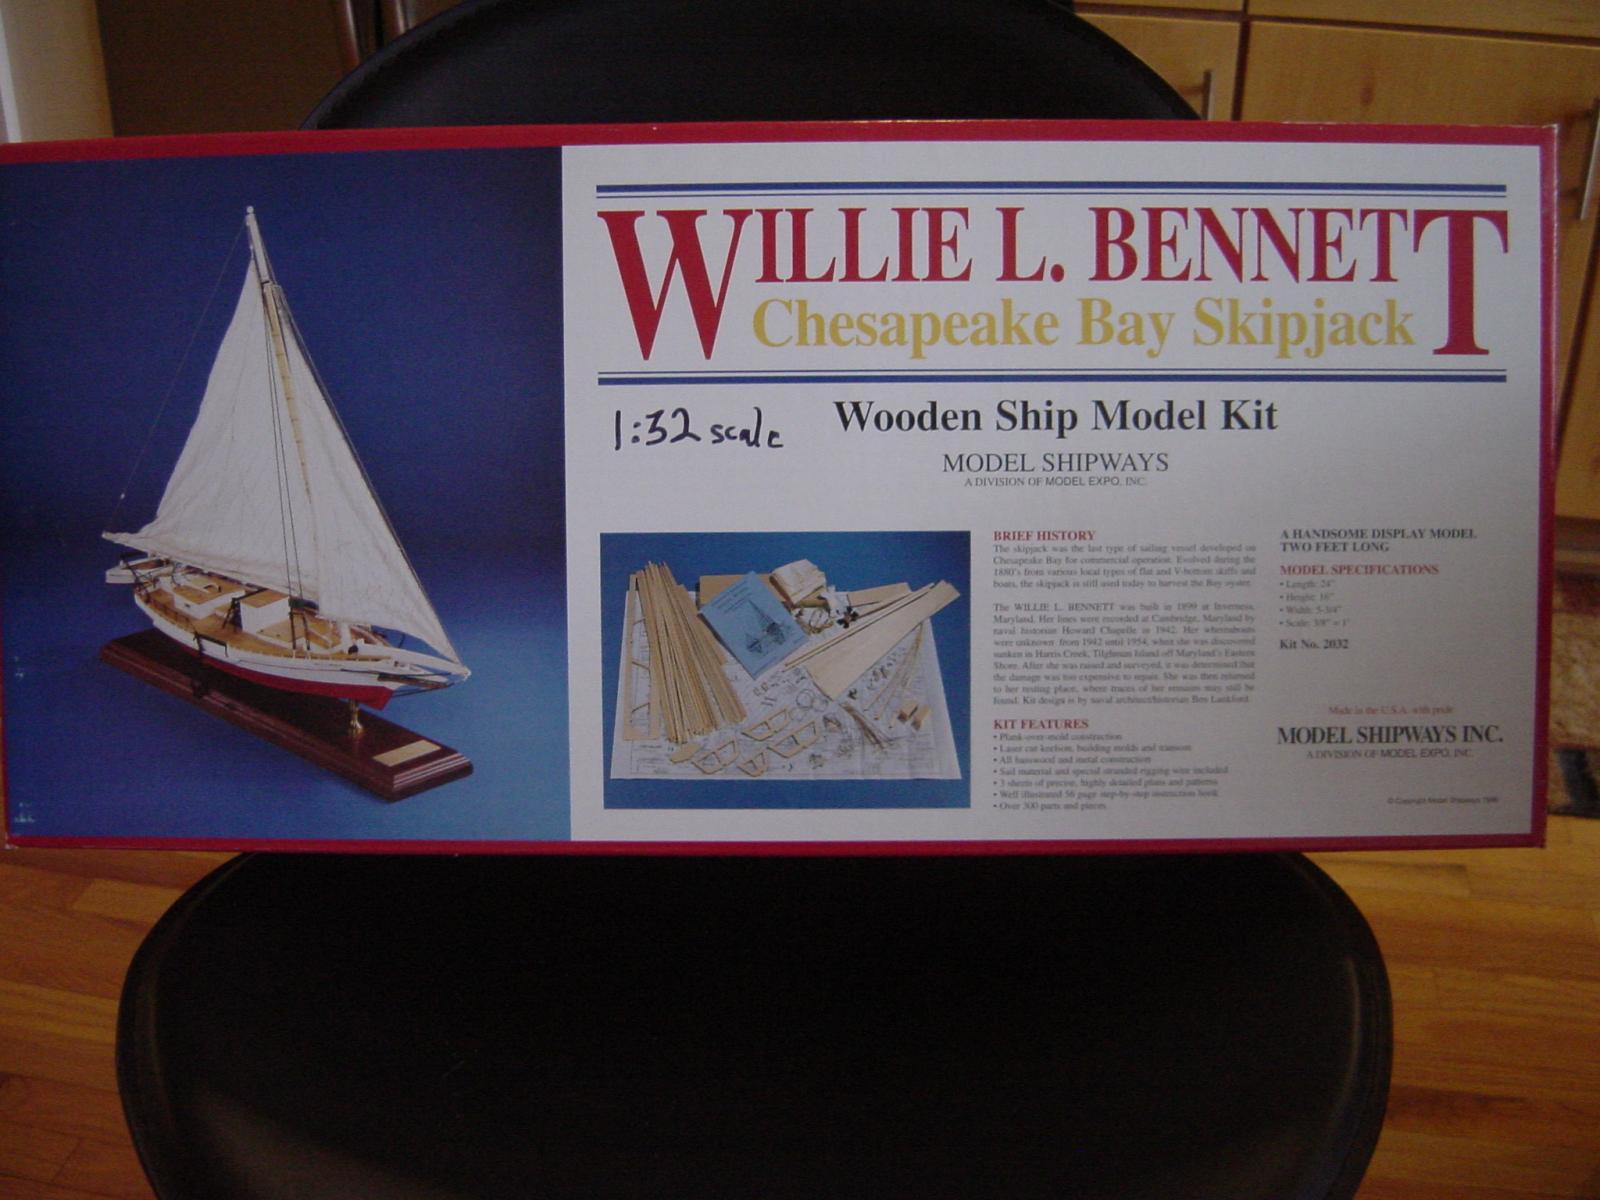
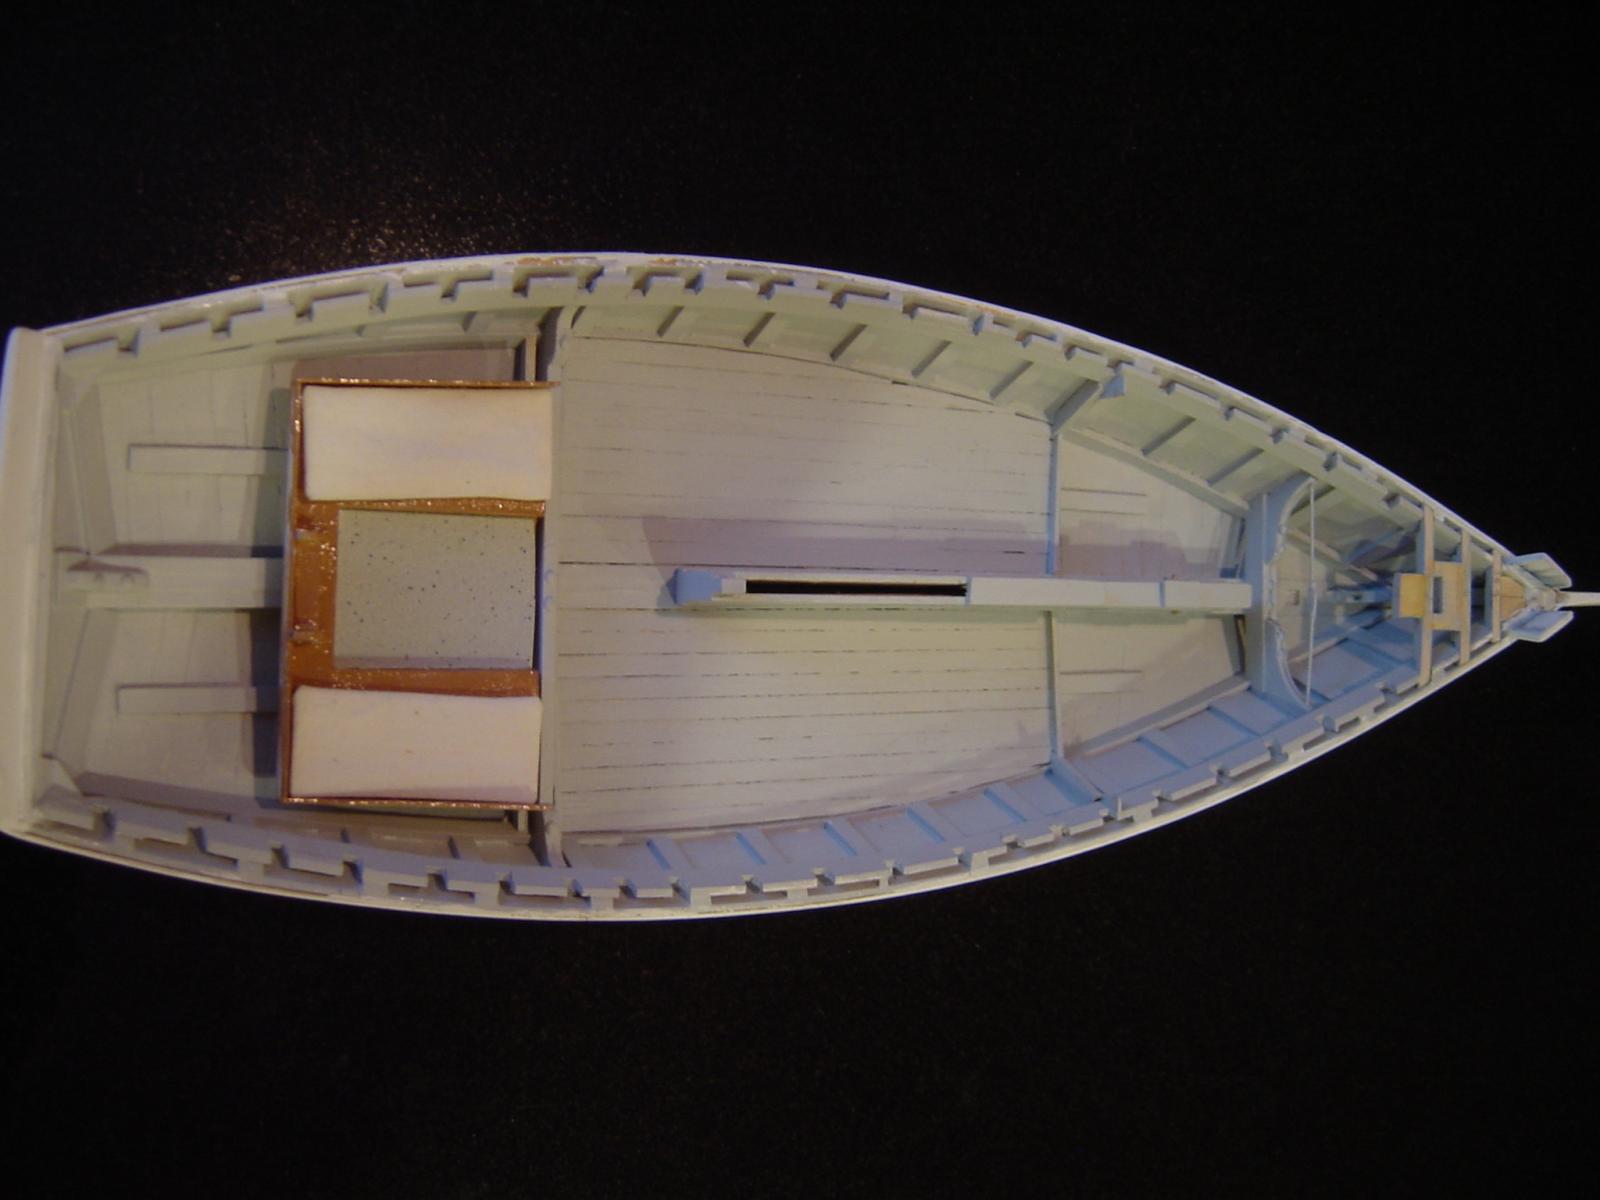
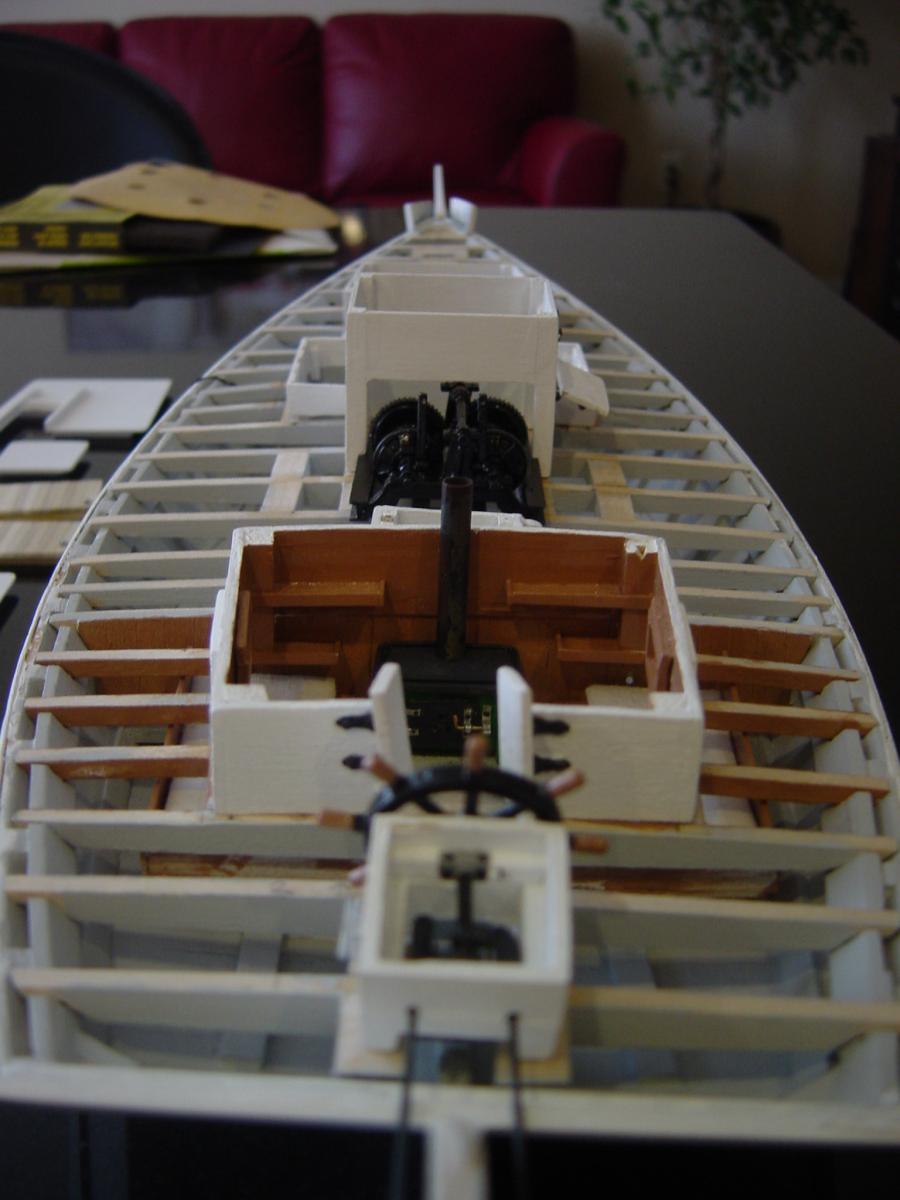
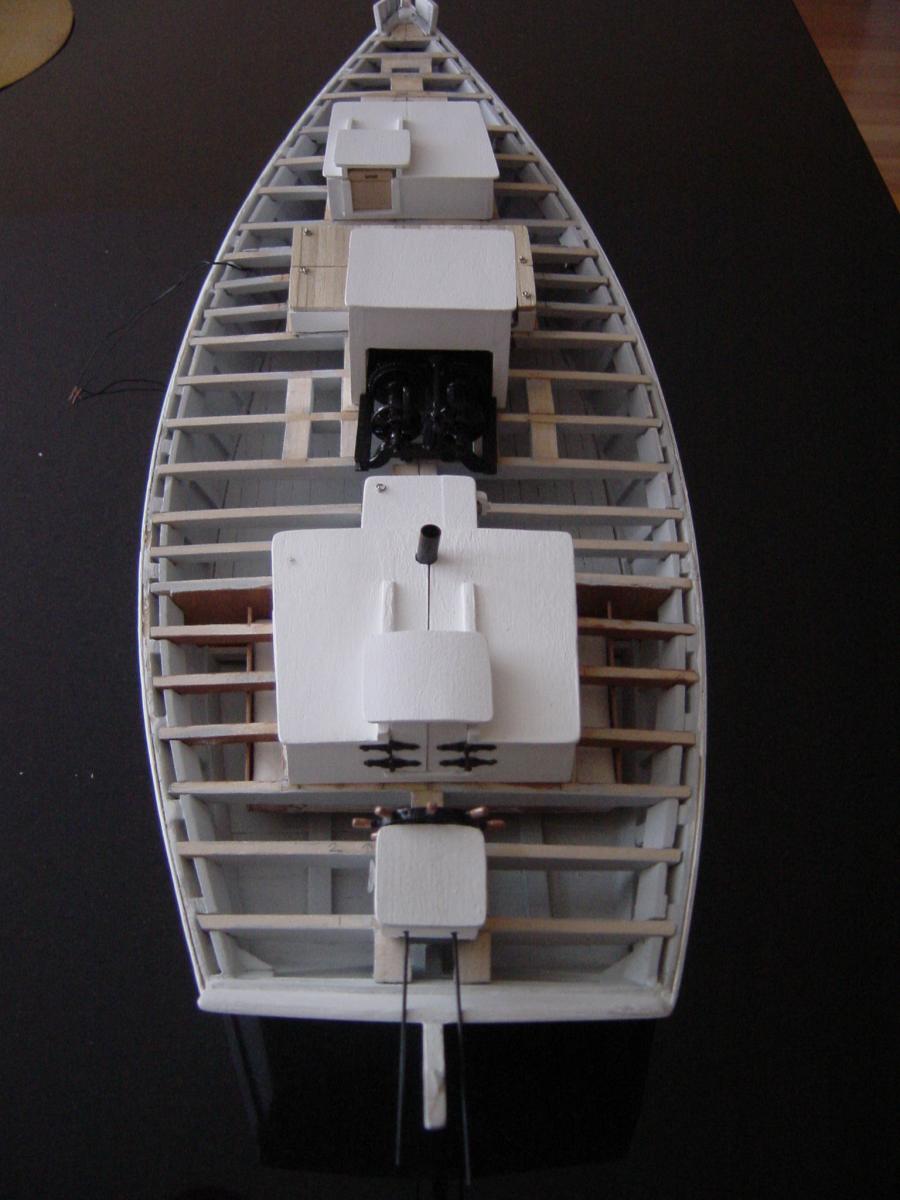
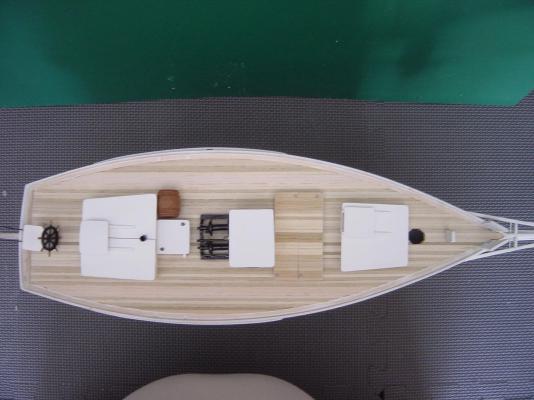
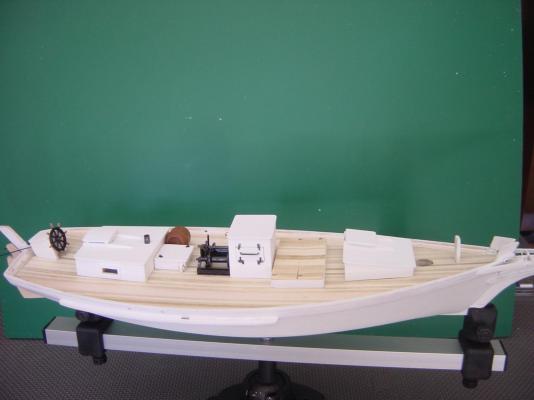
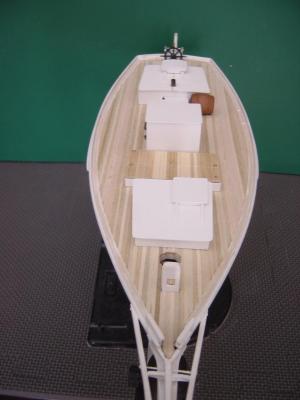
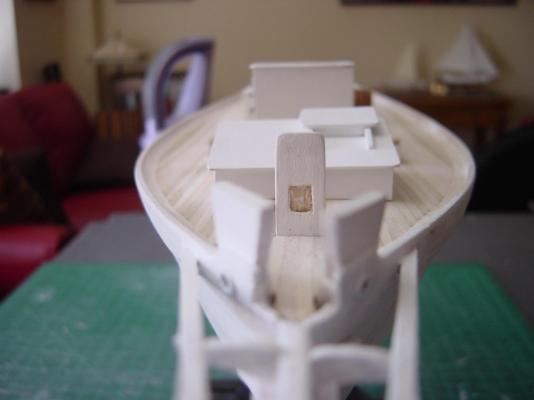
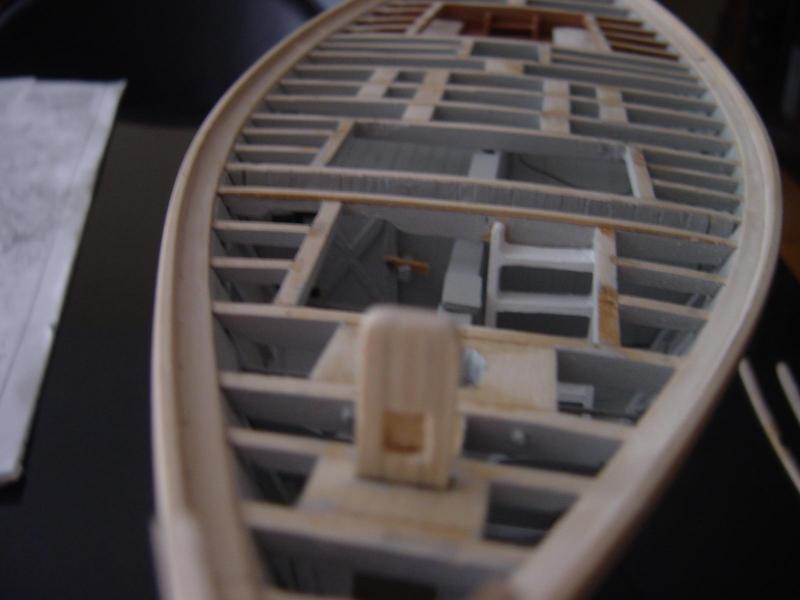
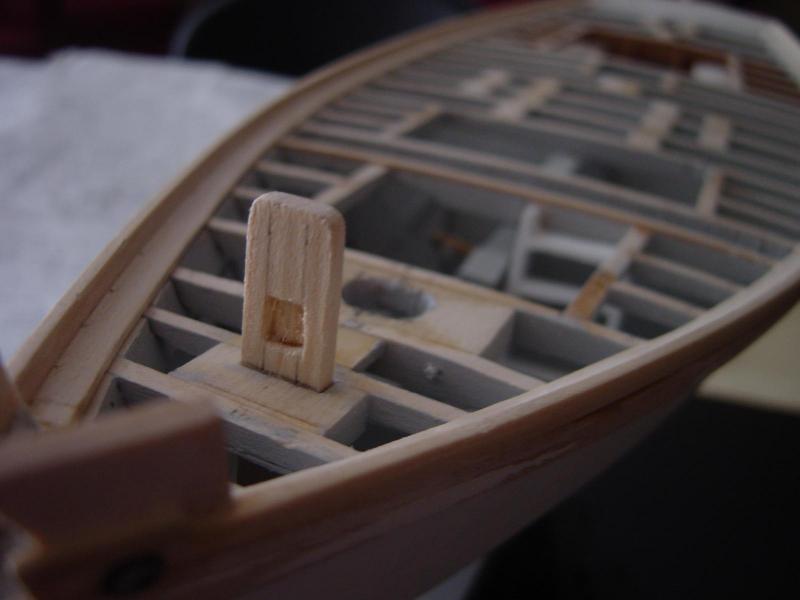
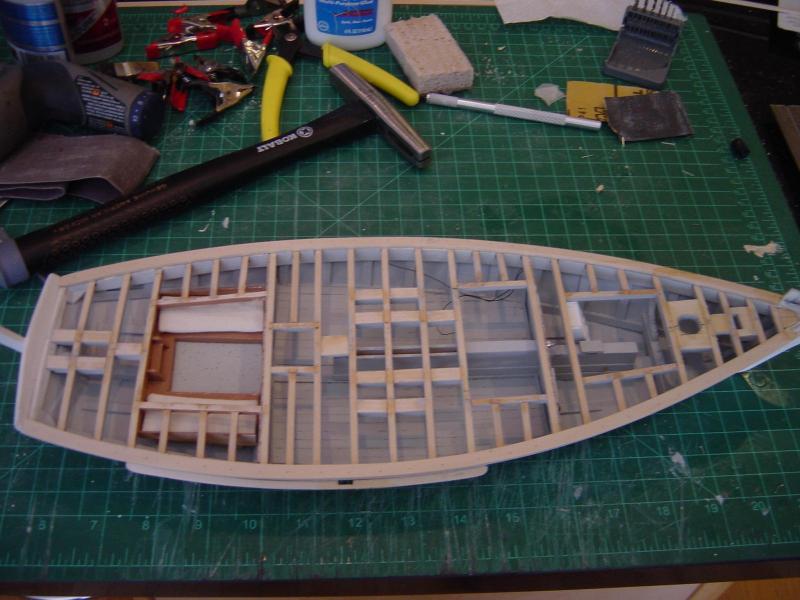
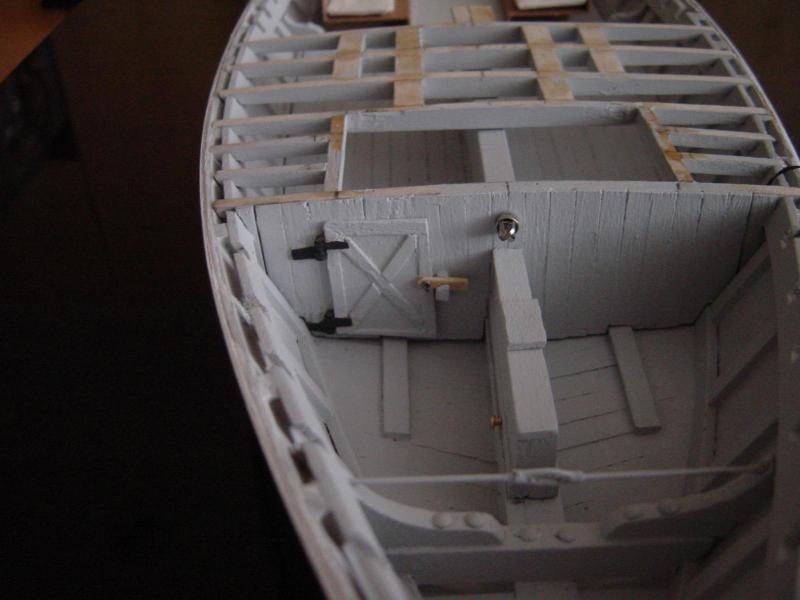
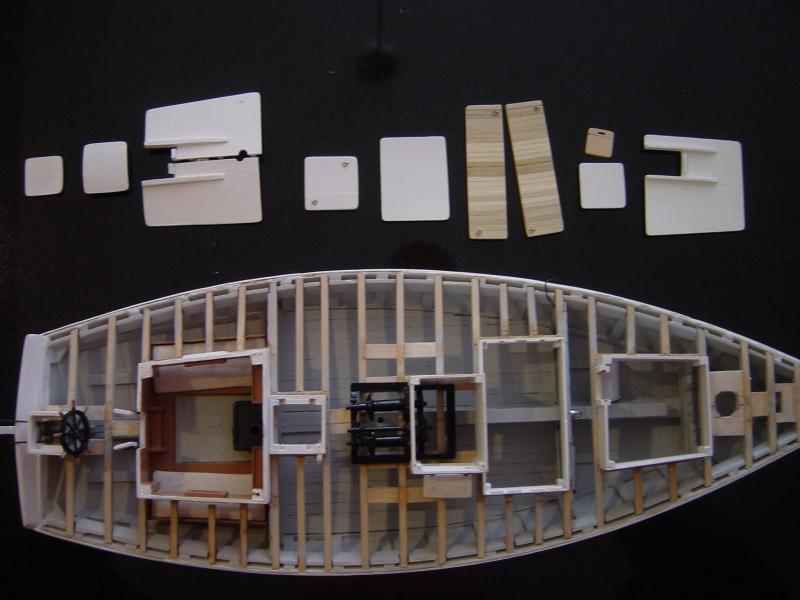
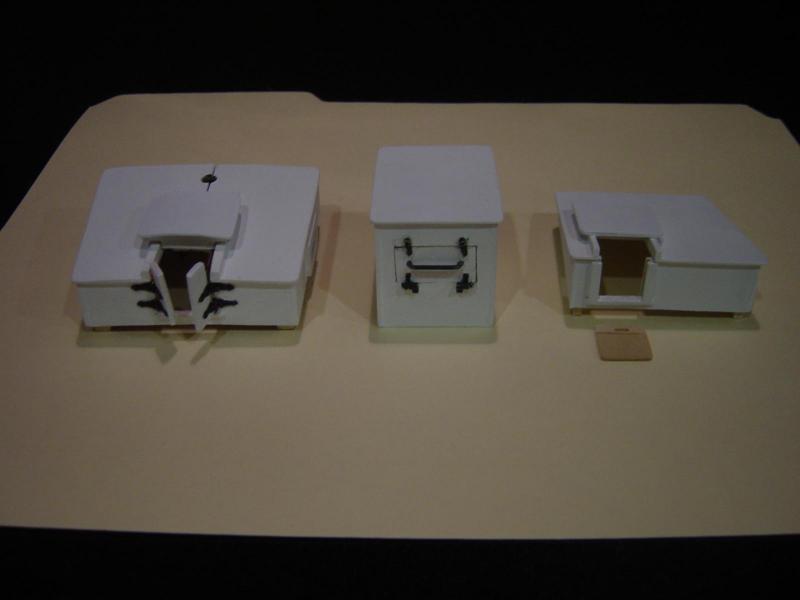
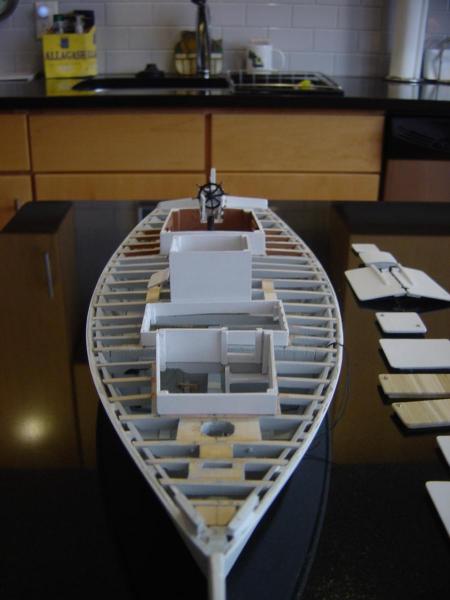
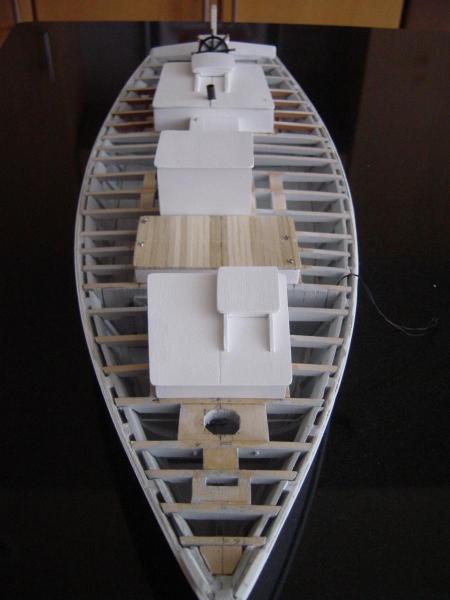
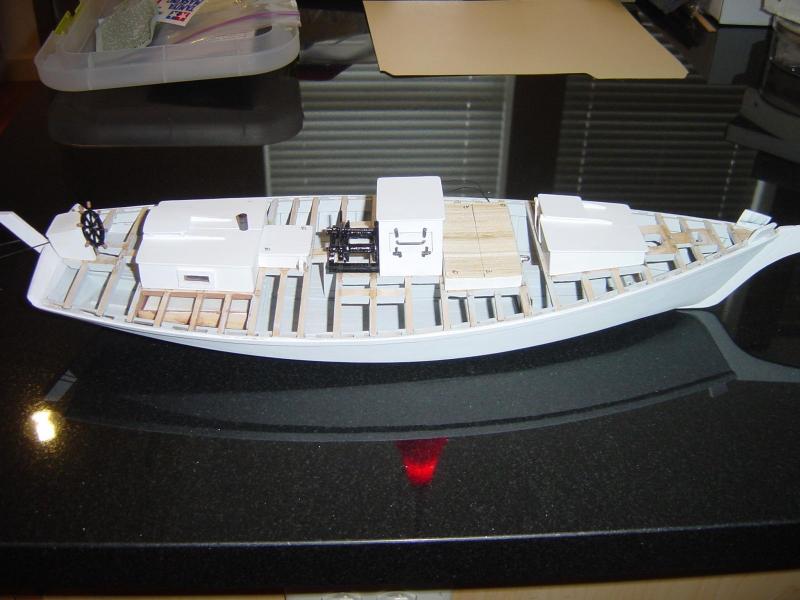
Hello all, This is my first build log and my first build of a somewhat detailed wooden model boat. I retired about 18 months ago and decided to get into building model boats. I am partial to work boats, especially those of the Chesapeake Bay, so I built a simple crabbing skiff and a smaller scale skipjack wood model to get into it a bit. This kit is far and away more difficult. I am having fun though and the hours just slip on by. I am sorry I did not start the build log properly by documenting the kit unboxing and early stages of my build so this log picks up after I finished the basic hull. I started this build on Jan 15, 2013. I am building the boat as close to the "real thing" as I can and adding as much extra detail as I am capable of. Comments or questions are welcome of course. The cabins and hatches are just temporarily placed on the deck. The main cabin roof was split in two so that I can remove half to see the detail. The cabin windows are clear plastic. The cabin mattresses are pieces of cardboard covered with old sail cloth. All doors are hinged and hatch covers are removable. Well that brings this build up to date. The next task is to cut and install the planksheers.


- 135 replies
-
- 4
-
-
- willie l bennett
- model shipways
- (and 1 more)