
Supplies of the Ship Modeler's Handbook are running out. Get your copy NOW before they are gone! Click on photo to order.
×

trippwj
-
Posts
3,152 -
Joined
-
Last visited
Reputation Activity
-

 trippwj reacted to captainbob in Lettie G Howard by captainbob - FINISHED - 1:48 - POB - schooner
Ah Keith, now you’re getting into the physics and design aspects of ships.
First, the placement of the masts and sails are a balancing act with the underwater shape of the ship. Let’s take the profile of the ship hull below the waterline, and let’s find the center of area of that shape. We will pretend that our ship is a wind vane and place the mounting post at this center of area point. Now it is time to place the sails. It becomes obvious that if the sails are too far forward the bow turns away from the wind and if the sails are too far astern the bow turns up into the wind. This same thing happens to a ship in the water. The locations of the sails have to be balanced with the underwater shape of the hull or the ship will turn into or away from the wind like the weather vane. It becomes a little more complicated than that when the sails have to be shortened in a storm and the captain needs to know which sails can be reefed and how much to maintain this balance.
“Was this a developmental stage of the pilot boats evolution into schooners, aside from the hulls reshaping?” Every new design of any type of boat is an evolutionary experiment in that the designer really doesn’t know if the new design is good or not until the boat is in the water and sailing.
Back again on sails, the wind pressure on a sail can be great. A breeze of 30 MPH produces a force of 3.5 lbs. per square foot on the sail. Concerning a jib sail this force is taken by the jib stay that tries to bend away from the wind. The force on the jib stay will lift the bowsprit right off the ship. So they tied the bow sprit down at the bow of the ship and placed the sampson post at the heal of the bowsprit to keep it from pushing down through the deck. The fore end of the bowsprit still lifted so they put chains under the jib stay location to hold the bowsprit down and also lines on the sides to stop the sideways motion.
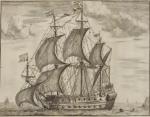
The sail plan you were looking at was the plan as the Lettie was when bought. I want to build it as it was originally. The diagram below shows the sails and rigging I will follow.
If you still have questions feel free to ask. I love discussing ship and boat design.
Bob
-
trippwj reacted to Sjors in HMS Agamemnon by Sjors - FINISHED - Caldercraft/Jotika - 1:64
Thank Patrick, Augie and Jim,
@ Patrick,
I just love building this ship.
I think that it has to do it with the excellent drawing and wood.
It's a pleasure to work with it !
@ Augie,
I think it is very difficult to place the Fonz at the deck of the Aggy
But I shall make a picture of the Fonz in the back and the Aggy in the front.( If I can found the space )
And thanks for the good word....
@ Jim,
Didn,t you know that NASA is following my idea to put one on the other ??????
-
trippwj reacted to Sjors in HMS Agamemnon by Sjors - FINISHED - Caldercraft/Jotika - 1:64
Yep, time for an update !
Hull is closed with the first planking
Filled and sanded.
You see two colours of filler and that's correct !
First I used wood filler and after that balsa filler.
Don't ask me why but it works just great !
Now she feels like a baby skin.
Still don't know how it feels and no, I don't want a baby to check it out !
To prove everything a lot of pictures !
Also the last two pictures is to show you the size.......
Now it is time to clean up the workroom and go back to the Fonz.
Making shrouds and the last ratlines for a while.
-
trippwj reacted to augie in HMS Agamemnon by Sjors - FINISHED - Caldercraft/Jotika - 1:64
Wait.....last thing I remember was Fonz atop Mirage. This ship-stacking looks like fun!
Aggy hull looks GREAT!
-
trippwj reacted to gjdale in HMS Agamemnon by Sjors - FINISHED - Caldercraft/Jotika - 1:64
Nice job Sjors. I'm just ducking over to the Fonz log - I heard Mark just opened a new keg over there!
-
trippwj reacted to Sjors in San Ildefonso by Sjors - FINISHED - OcCre - 1:70
Wow Sam,
It works !
The workroom is again dust free !!!!!!!!
So tomorrow I can go further with shrouds and ratlines........
-
trippwj reacted to augie in HMS Agamemnon by Sjors - FINISHED - Caldercraft/Jotika - 1:64
Copper has it's own charm. Of course, you're going to do individual tiles so we'll get ready to listen to you for weeks ----- like we did with the ratlines !!
-
trippwj reacted to Sjors in HMS Agamemnon by Sjors - FINISHED - Caldercraft/Jotika - 1:64
Robbyn,
You are woman at my heart !!!!!!!
I went upstairs to take a look and what do you think ????????
I still have to plank !!!!!
And I have made a few planks younger, is that counting ????
I was talking yesterday evening with Mobbsie and I show him what I have done and you know what he was telling me ??????
Don't show it to MSW otherwise you went kick of that forum ! Pffffffffff ( Dutch word )
Just kidding.....I have use some filler at some points and .....like a baby skin so soft....( I can't remember how that feels but I like the way how I wrote that down ! )
@ Augie,
Take my word for it.......It's gonna be an other layer of planks and after that there will be copper tiles !
I just want to make myself angry when it is not going as I want to !
Anja always told me that I have to do everything once at a life time so.....coppering is the answer
-
trippwj reacted to J Haines in Emma C Berry by J Haines - Model Shipways
Hi everyone.
slow progress on the Emma C...
I put tracing paper over frame 17 layout on sheet 1, then laminated strips of wood together to form the rough shape of the bulkhead. When this dried, I sanded down both sides to even out and remove what paper stuck. Now i can use the card template i made to fit the bulk head up to frame 17.
-
trippwj reacted to von stetina in Lightning by von stetina - 1/96 - extreme clipper
I've been busy on a customers RR project and am catching up a bit. I'm now ready to start putting on the jib boom rigging. As I've mentioned, I'm working stern to bow. This is giving me easy access to the areas I need to attach the stays to. Not sure why books recommend the other way like a real ship. I don't have real live 1/96 people to work for me on there.
I'm pretty bust on these RR projects right now, if you want to know anything about the photos let me know.
A can't figure out why I can't rotate the photos, I can't even find some that need it in the file!?!
By the way, this latest RR work has allowed mew to add a brass casting set up,[jewelery set up]. Once I get it figured out I'll be able to use it for my ship modeling. And heck, I'll make some freaky jewelery too.
Bruce
-
trippwj reacted to Sjors in HMS Agamemnon by mobbsie - FINISHED - Caldercraft / Jotika - 1/64
Great news Mobbsie !
When we are visiting you in June, we want to go to that museum and see it in real !!!!!
I shall take pictures and then I can tell anybody who wants to hear it, that I know a modeller who displayed his models into a museum !!!!!!!!!
And the artist is still alive !!!!!!!!
-
trippwj reacted to mobbsie in HMS Agamemnon by mobbsie - FINISHED - Caldercraft / Jotika - 1/64
Hi Guys,
Thank you all for your very kind comments and remarks, also for all whom hit the like button, it is really appreciated.
It's been a while since I last posted and progress has been very slow, whilst my other project has gathered a bit of pace but even that isn't going as quickly as I would have liked.
I do however have a bit of good news, I have had two of my builds accepted for display in our local Maritime Museum. They really just concentrate on local history so both builds fit in nicely.
They are the Bomb Vessel Granado which was build in Ipswich and then fitted out in Harwich, the other was the Thames Barge Edme, she was commissioned by the Malt Factory back in 1896 and build by a local yard in Harwich.
It's only a small museum, it's housed in a Lighthouse in old Harwich Town.
With regard to the progress on Aggy, the snaking is all complete and I have finished the Crowsfeet on all three masts. I have also redone the timberheads either side of the Bowsprit and fitted the seats of ease.
Pictures will follow soon.
Be Good
mobbsie
-
trippwj reacted to mtaylor in Why do hot guns jump violently?
I do agree Chris and Nigel. As I said, I'm reaching here. I'm still wondering about the double-shotting, double-charging or even just the double-shotting, if that would do it. And records do indicate that many times they double-shotted at close range. Recoil, as has been pointed out is a function of windage, gun weight, shot weight, etc....
Hmm... I wonder where I can find a naval 32 pounder and carriage that I could borrow for some "testing"....??? We'd need some balls, powder, and a gun crew also.
-
trippwj reacted to augie in USF Confederacy by Augie & Moonbug - FINISHED - Model Shipways - 1:64
Time for a small update. The moldings on the quarter galleries and stern have been added:
The myriad of photo etched details to be added to this area are being painted and prepared.
And now for the windows. The kit comes supplied with laser cut plywood window frames:
Clear acetate is also supplied. I don't care for this. It always looks like it's not there to my eye. So I decided to try this stuff:
In fact, it's a water soluble adhesive similar to the canopy glue we use for model airplanes. It is white when applied, takes a full day to dry and results in a semi-transparent glaze which you either like, or you don't. To apply it, you affix your frame down firmly to a plastic bag. Don't try wax paper or the glaze will stick to it. For 'windows' of this size (about 5/32"), fill the cavity with the liquid glaze. Once dry, you may spot some defects so plan on doing a second application (or third). Here's what it looks like in process (the frames have been stained):
Now here's what the finished product looks like. On the left is a frame backed with acetate. You can see it's completely clear. On the right, a frame glazed as above. It looks like 'bottle glass'. I prefer this appearance, realizing it won't be everyone's cup of tea:
All of the windows have now been installed. As for photos, well, we'll have to wait until all of the leaves, branches, animals and assorted Gods are put in place. And Spring is calling
-
trippwj reacted to Sjors in HMS Agamemnon by Sjors - FINISHED - Caldercraft/Jotika - 1:64
Thanks Sherry and Augie,
I know now what Sam means......
And Sam ?, I don't have them.
The first picture that I opened at that tutorial from Chuck gives me the warning in red...Avoid this !!!!!!!!!
So I'm not at the bow yet so....lucky me
I have to use drop planks........
Ok.
I go back to modelling school and see how I can do this.
To be continue !
-
trippwj reacted to Sjors in HMS Agamemnon by Sjors - FINISHED - Caldercraft/Jotika - 1:64
Thanks for the explanation Bindy,
I know what you mean.
When I take a look at your build, you will do a better job with the planking then I do.
It's a matter of sanding and filling !
Then even the worst planking looks amazing !
Even all the members on this forum are writing English, I will teach you one word of Dutch.
A lot of members are knowing that all ready.......
Pfffffffffffffff
Now you know one Dutch word !!!!!!
-
trippwj reacted to Sjors in HMS Agamemnon by Sjors - FINISHED - Caldercraft/Jotika - 1:64
Thank you all !!!!
@ Augie,
Can you keep your spiders for a while and don't send them yet to me....
Now you can feed them
When the time is there, I will ask for them !
@ Sam,
I was looking what you are talking about.....
I know that we are different in Holland but we DON'T use a socket as an I-pod !
@ Klaas,
In no time you will be further then me.
When the hull is closed and sanded, I go back to the Fonz.
@ Frank,
You can have the mouse any time that you want !
And I don't know what it is...she or he....maybe a it ?????
@ Sherry,
So far two trees and still have 5 left.....
-
trippwj reacted to gjdale in HMS Agamemnon by Sjors - FINISHED - Caldercraft/Jotika - 1:64
Getting real close to a close on the hull there Sjors. Go easy on the mouse - you might need him for the ratlines!
-
trippwj reacted to Sjors in HMS Agamemnon by Sjors - FINISHED - Caldercraft/Jotika - 1:64
3/4 of the planking is done.
On the port side I have used some filler to see how it's gonna be.
And it is smooth !
Nice layer for the next planking.
Now I can close her and then it is totally filling and sanding.
A few pictures to show you.
-
trippwj reacted to rafine in Frigate Essex by Rafine - FINISHED - Model Shipways - Kitbashed
Thanks so much Hamilton.
I've now completed the framing of the forecastle deck. This is a total departure from the kit construction which calls for only the beams to be installed. I went with beams, carlings, ledges and knees. All of the parts were made from boxwood, except the lodging knees which were cut from a sheet of cherry of the appropriate thickness, which I happened to have on hand (I had no boxwood sheet of that size).
Owing to the small size of the parts and the cuts needed to be made, I decided to build up the deck framing in sections off the model and then install the completed sections and connect them in place on the model. This was a method that I had tried successfully on my Triton cross-section and I am pleased with the results here, as well. I'm hoping that similar results can be obtained on the larger sections of deck framing for the quarter deck and midship areas. Wipe-on Poly was used to finish the framing.
Prior to installing the deck framing, I mounted the stove on its previously mounted base.
I still haven't decided how much deck planking will be used, although i'm sure that it will not totally cover the framing. Right now , I'm thinking of using very little planking, at least in this area. I can defer that choice until the rest of the gun deck fittings are done and the remaining upper deck framing is in place. The remainder of the gun carriages have arrived from the Lumberyard and I'm now working on the next batch of guns to be installed.
The last photo is a current full profile shot , since Nigel has pointed out that I haven't posted one in quite a while.
Bob
-
 trippwj got a reaction from Sjors in USF Confederacy by Augie & Moonbug - FINISHED - Model Shipways - 1:64
Golly - she looks great, Augie.
Grant - i know what he has up his sleeve - his arms!!!
Ok, will leave now. Sorry for the interuption.
Pfffff!
-
 trippwj got a reaction from samueljr in HMS Victory paint colours
While not directly related, you may want to take a look at the recent (August, 2013) report by Peter Goodwin in The Mariners Mirror - The Application and Scheme of Paintworks in British Men-of-War in the Late Eighteenth and Early Nineteenth Centuries (Volume 99:3, pages 287-300)
The abstract:
The question of the authenticity of the colour scheme for the preserved HMS Victory has been the subject of some debate. This article uses historical evidence and technical analysis of paint samples to draw conclusions about the external and internal appearance of HMS Victory and other ships of this time in both the British and French navies. An investigation of a carpenter's account book from 1805 has revealed some interesting evidence on the use of paint aboard ship. Finally the author makes recommendations for possible improvements in the paint scheme for HMS Victory that will be more historically accurate.
The article can be purchased at http://www.tandfonline.com/toc/rmir20/99/3#.UyhlCc4-dbQ
-
 trippwj got a reaction from augie in USF Confederacy by Augie & Moonbug - FINISHED - Model Shipways - 1:64
Golly - she looks great, Augie.
Grant - i know what he has up his sleeve - his arms!!!
Ok, will leave now. Sorry for the interuption.
Pfffff!
-
 trippwj got a reaction from gjdale in USF Confederacy by Augie & Moonbug - FINISHED - Model Shipways - 1:64
Golly - she looks great, Augie.
Grant - i know what he has up his sleeve - his arms!!!
Ok, will leave now. Sorry for the interuption.
Pfffff!
-
 trippwj got a reaction from coxswain in US Frigate Essex by trippwj - Aeropiccola - 1:70 Scale - POB
Well, I have certainly been remiss in updating this! Yes, the repairs were successful. You may recall that I had a problem with the bulkhead former being less than flat/straight.
Based on the advice provided, I widened the holes that the supporting dowels passed through, as well as slightly thinning the dowels. It isn't particularly attractive, but will be planked over fully so not visible. Important thing is the repair worked.
Next step was to clamp the keel thingy between two pieces of steel for about 3 days (arbitraty - had to go on a business trip so let it sit for the duration)
After removing the clamps and metal, the former is nearly flat.
While I haven't gotten a great deal done, have not been totally idle. In the above you can see the supports for the garboard plank have been installed and shaped. In addition, #1 son has started to work on preparing the stern and quarter galleys for painting and installation.
While he is working on that, I have been pondering the planking of this beastie and planning the approach.
It appears that the first plank will be about at the level of the deck and follow it toward the stern, with a slight rise in the bow.
First plank piece has been bent to shape, now getting ready to cross check between sides and take the plunge of putting glue to wood.
Until next time,