HOLIDAY DONATION DRIVE - SUPPORT MSW - DO YOUR PART TO KEEP THIS GREAT FORUM GOING! (Only 24 donations so far out of 49,000 members - C'mon guys!)
×


aydingocer
-
Posts
916 -
Joined
-
Last visited
Content Type
Profiles
Forums
Gallery
Events
Everything posted by aydingocer
-
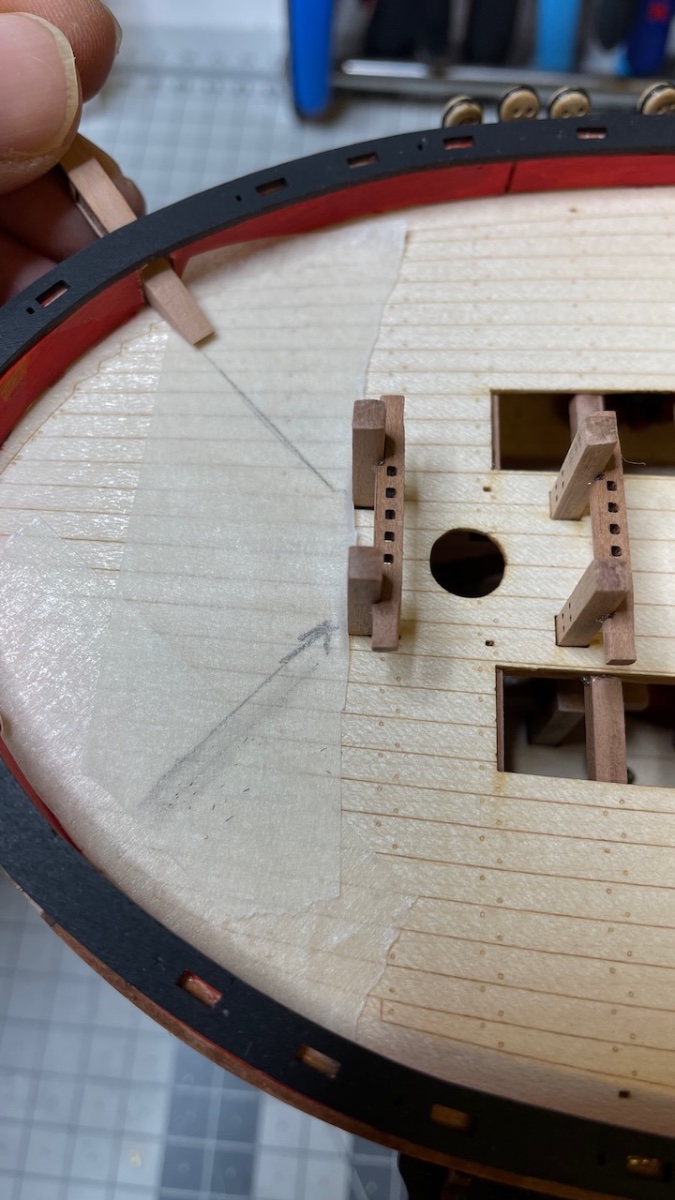
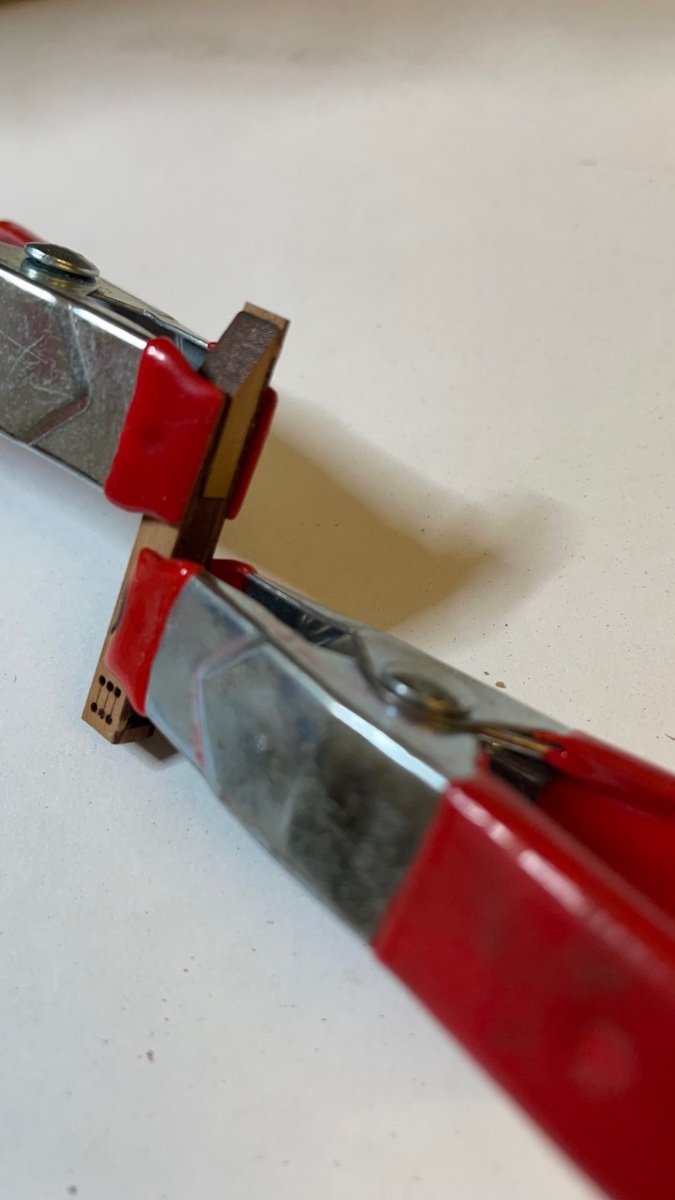
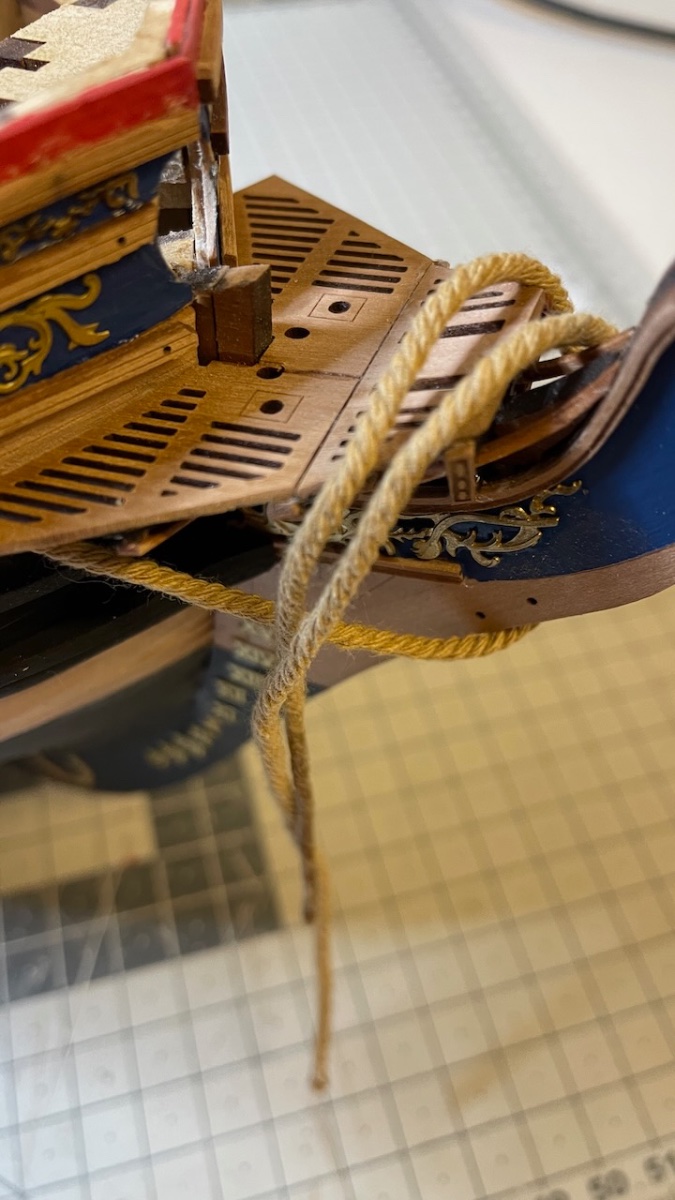
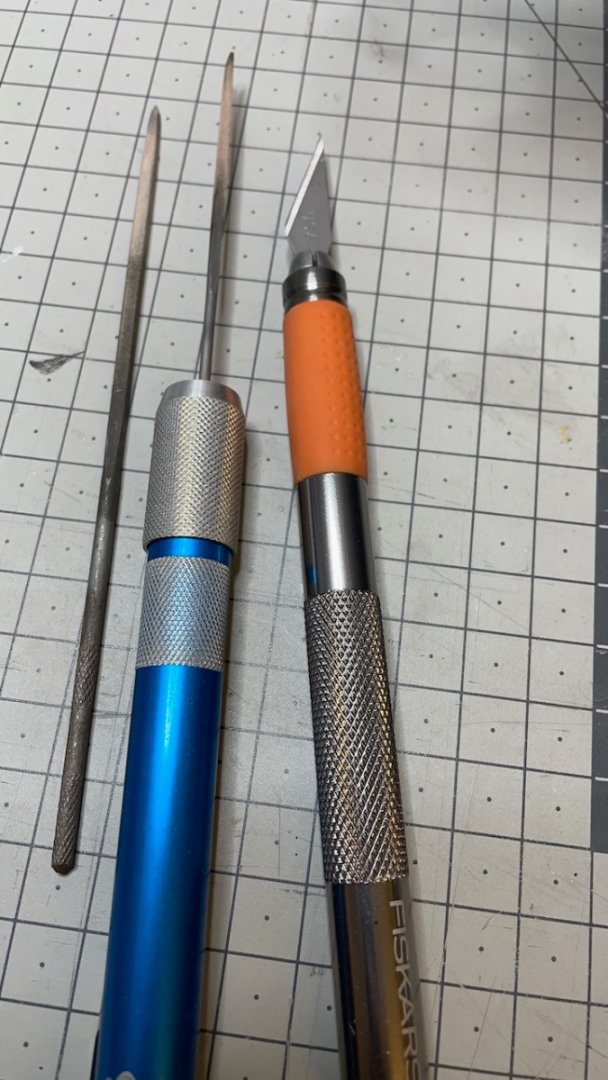
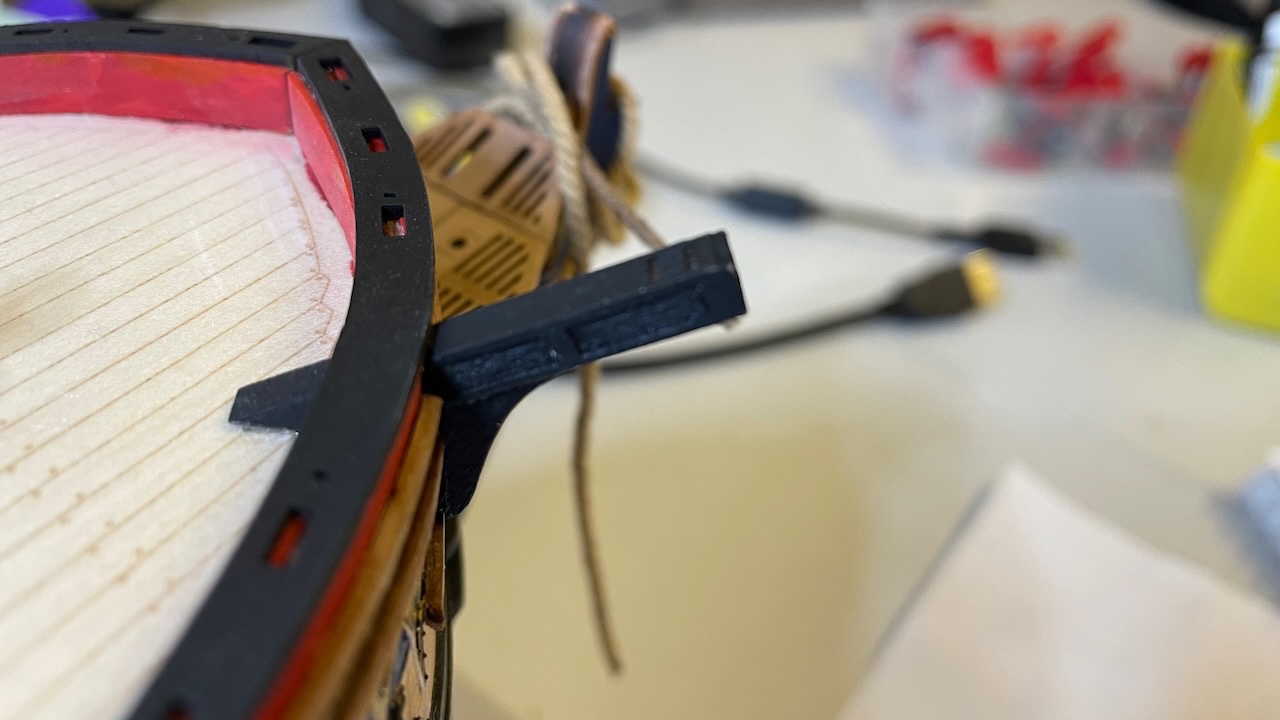
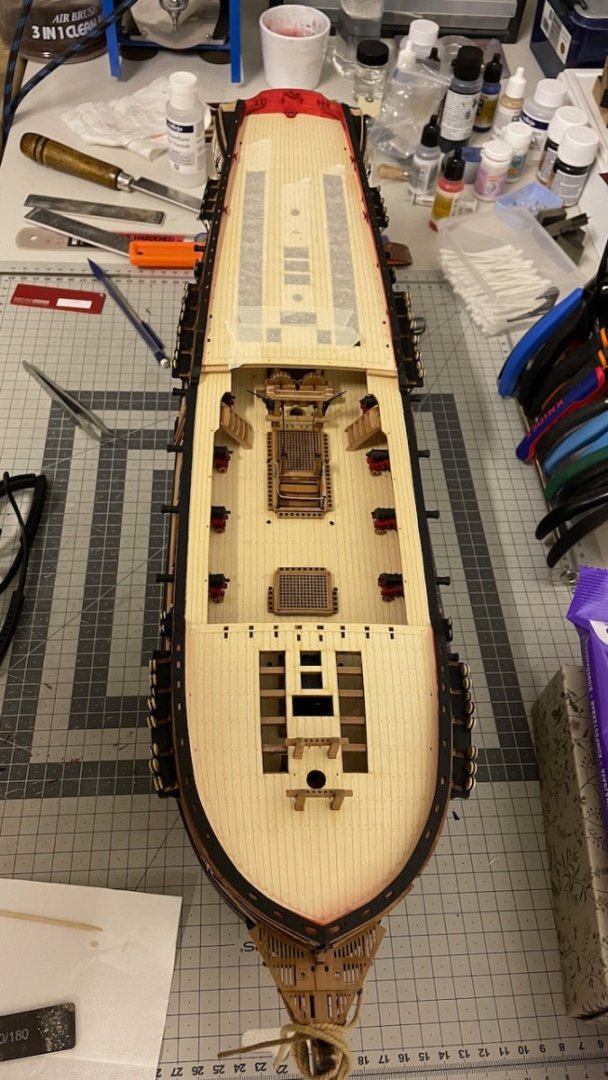
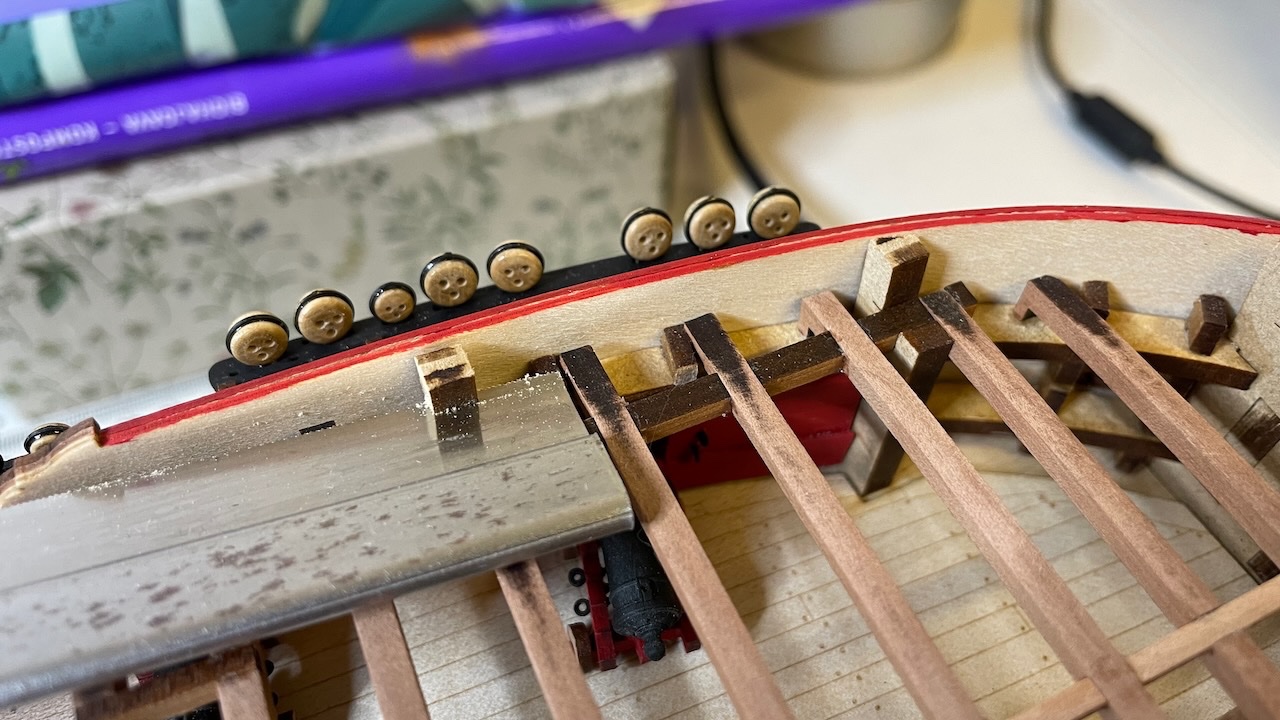
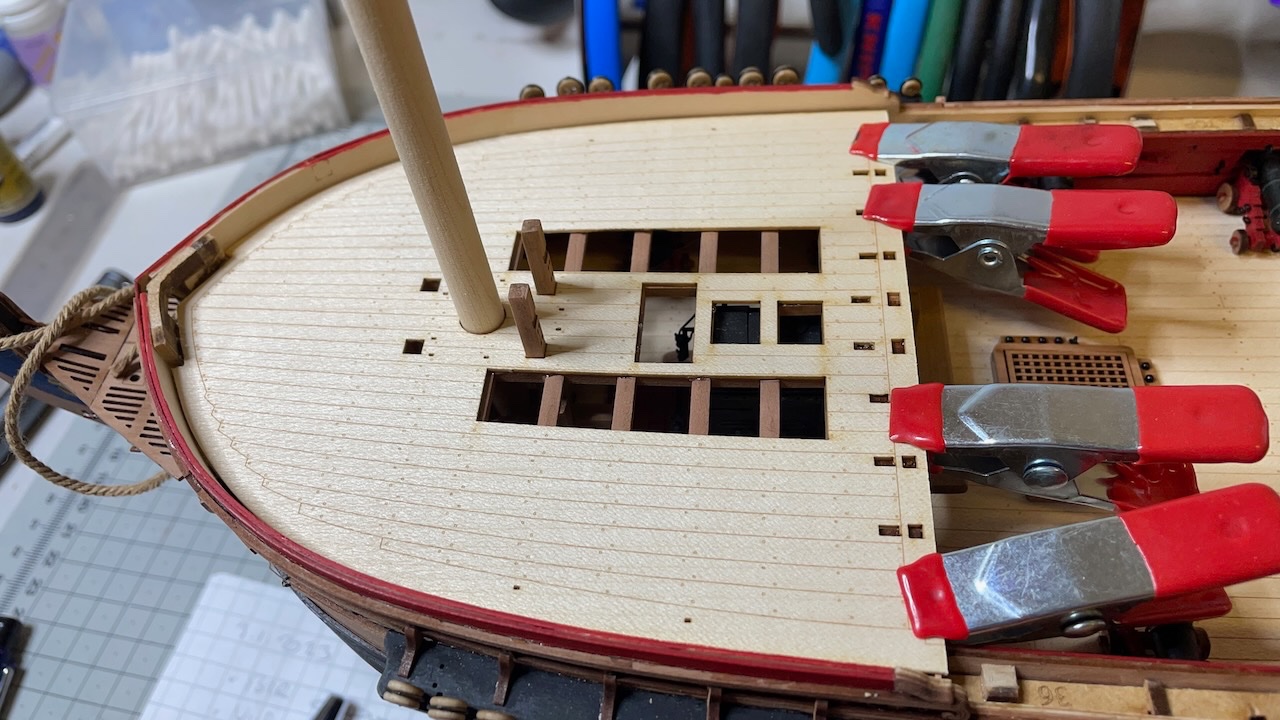
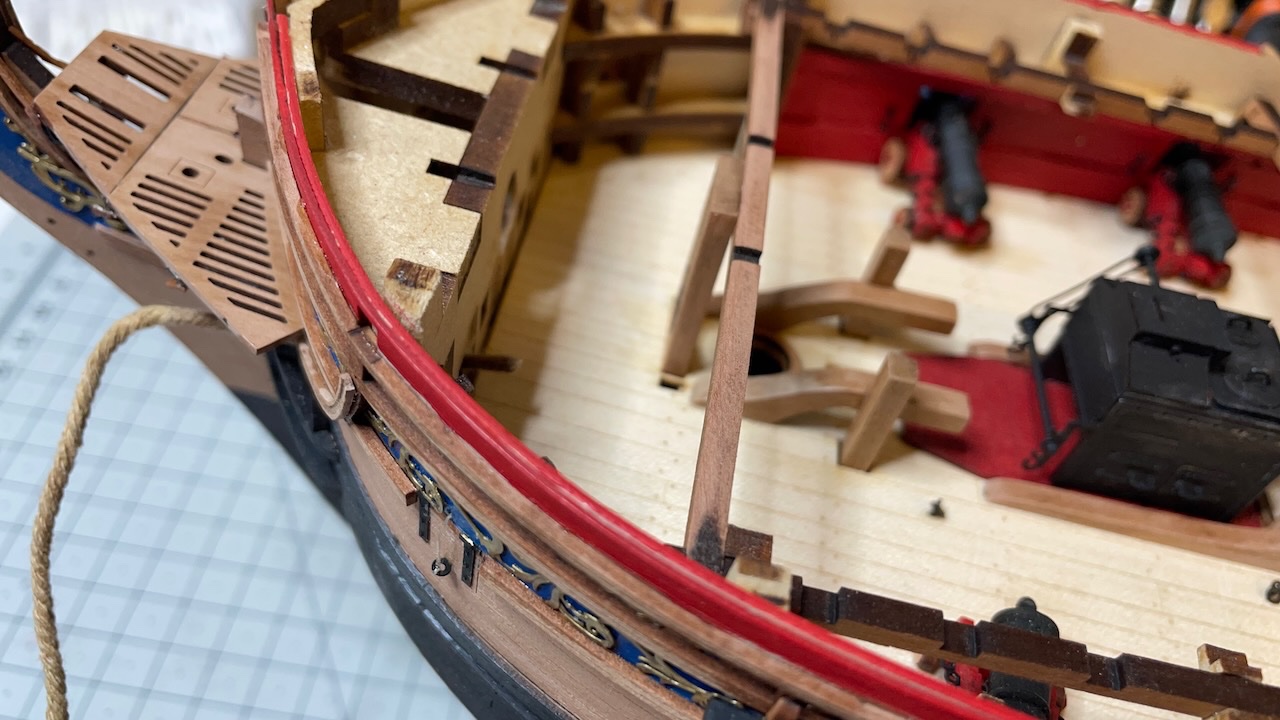
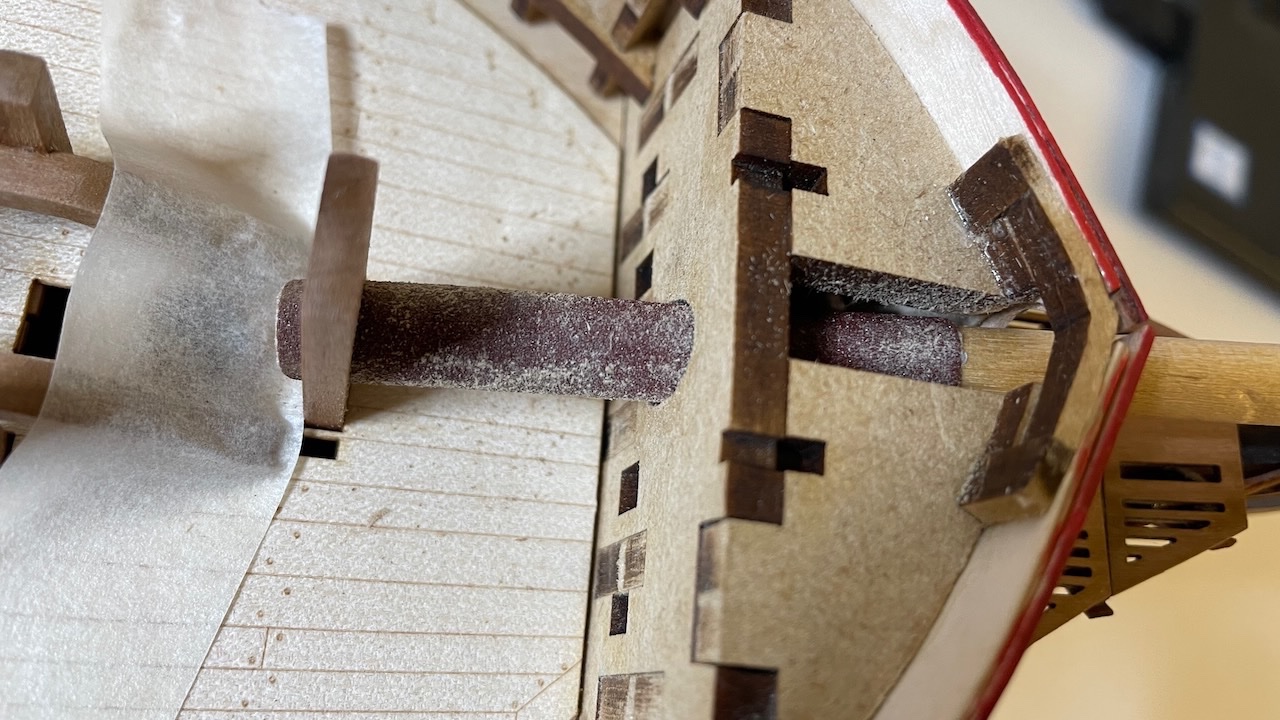
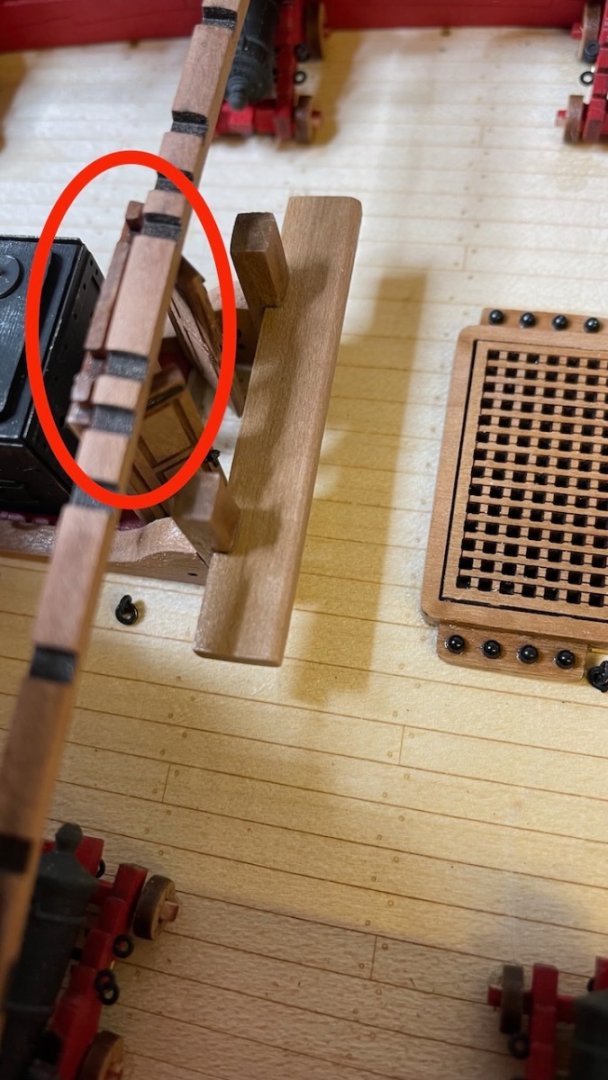
 Build Day 62: 1,5 hours / Total 145.5 hours I finished Catheads. In the last few minutes of my session I glued stove flue and Quarter deck gratings, all those I had prepared earlier, in place. Photo 633: Enlarging up the pre-opened holes for the catheads. Photo 634: Tools I use for this purpose. The blue file is a micro size file that easily fits the hole. After a few strokes I switch to the bigger square file, time to time scraping with the knife. Photo 635: I also used this trick of filing the catheads themselves at points where I did not want to mess with the opening. These sections will be hidden in the Gunwale. Photo 636: I drew reference lines on the masking tapes to help me while opening the holes to make sure that the Catheads align at correct angle. Photo 637: You'll need to trim some of the decoration for fitting the support knees. Photo 638: Parts painted... Photos 639-641: ... and glued in place.
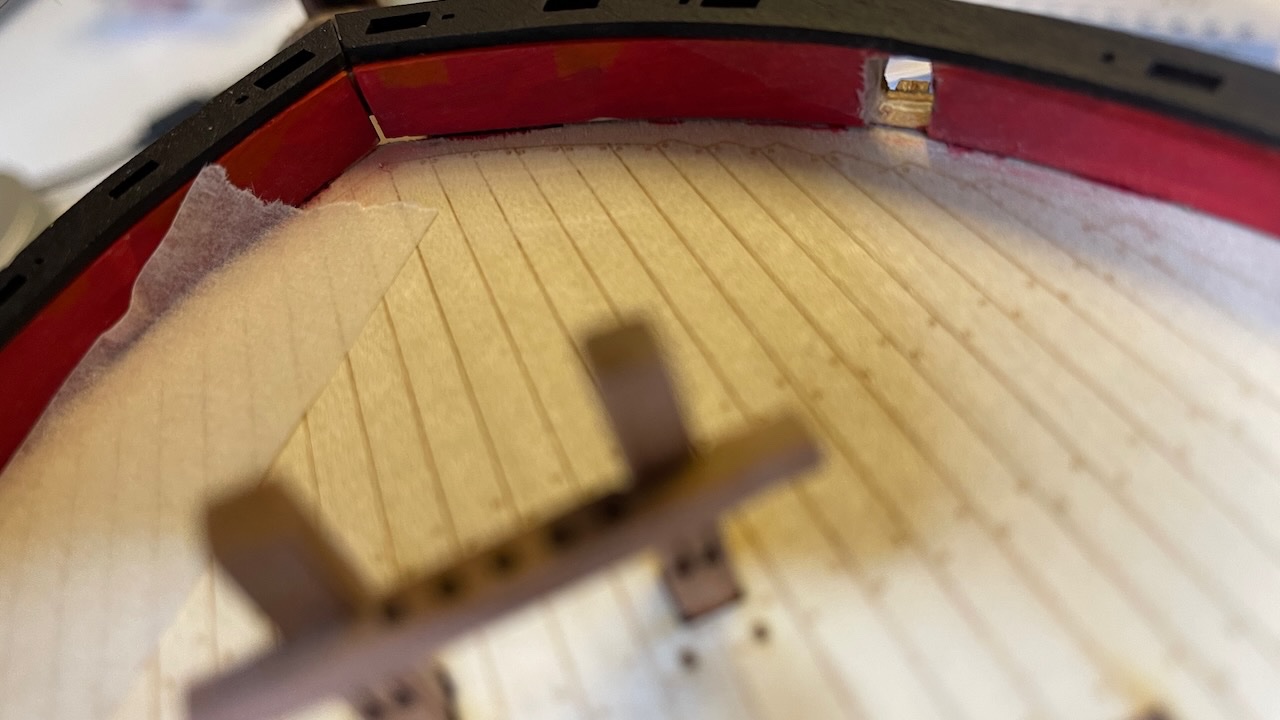


- 426 replies
-
- 4
-

-
- Vanguard Models
- Sphinx
- (and 1 more)
-
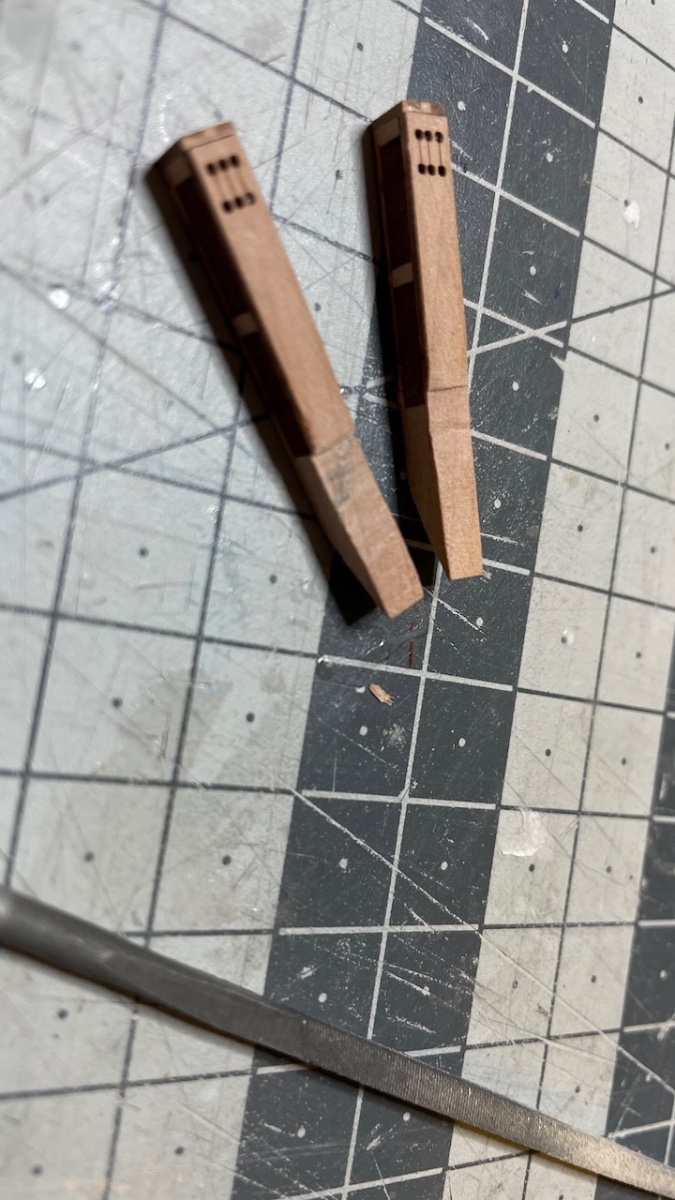
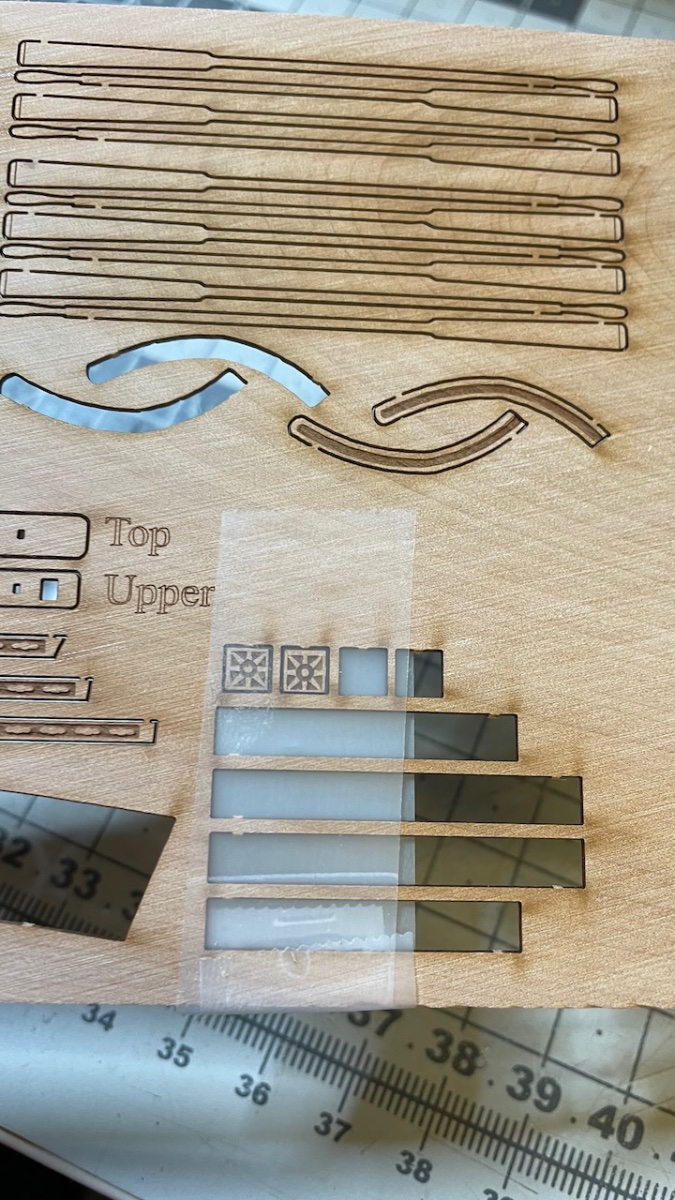
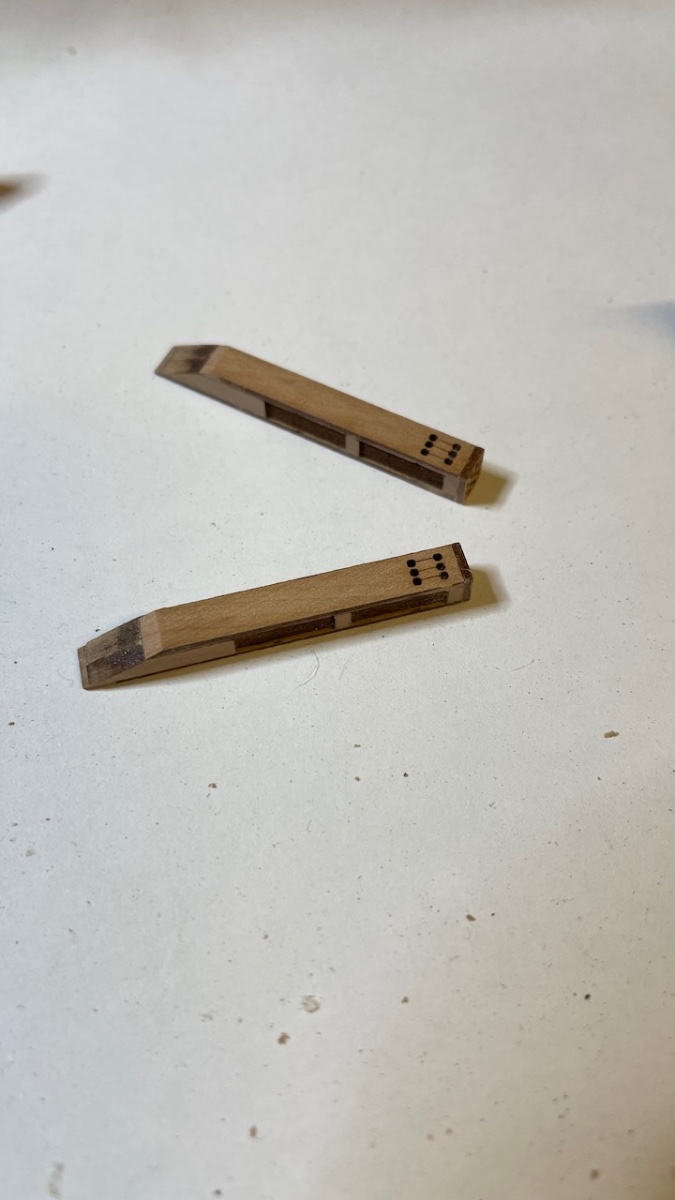
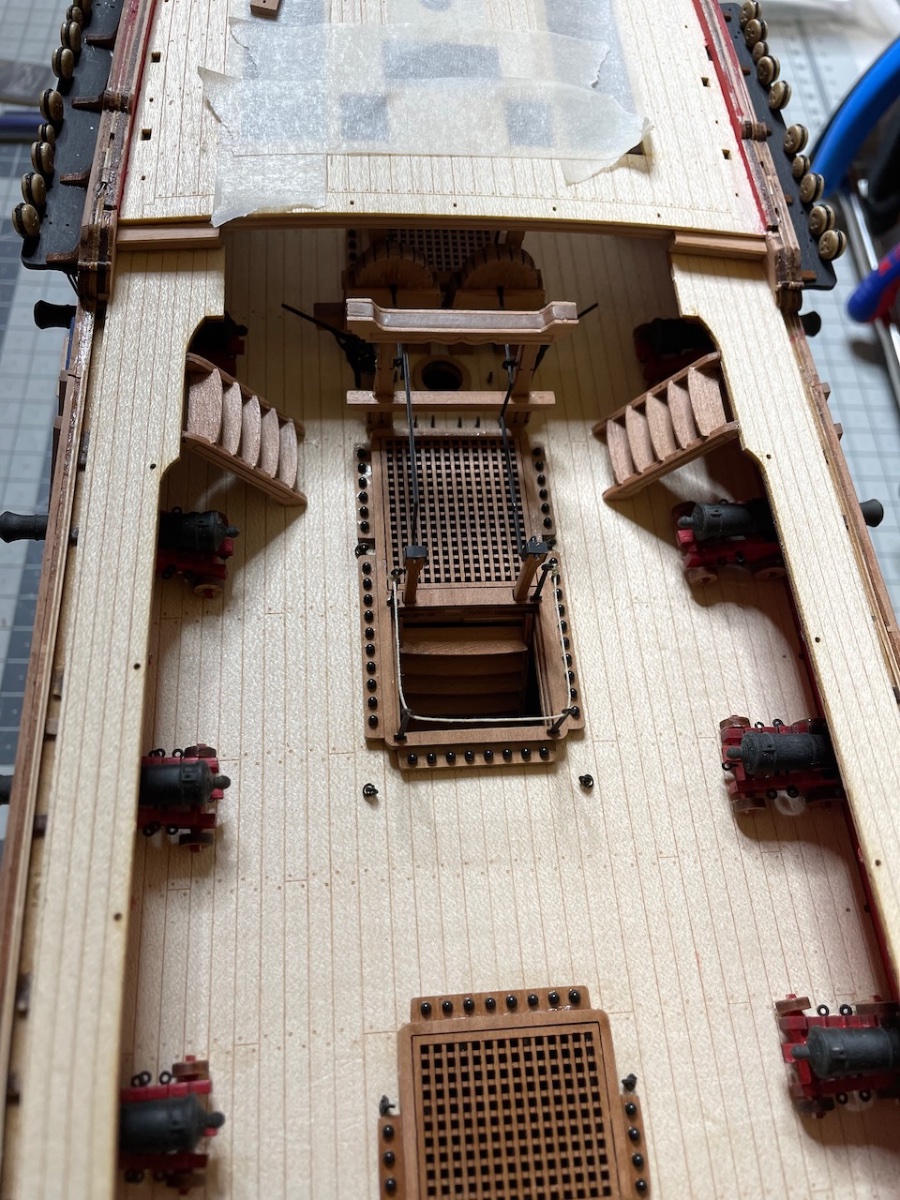
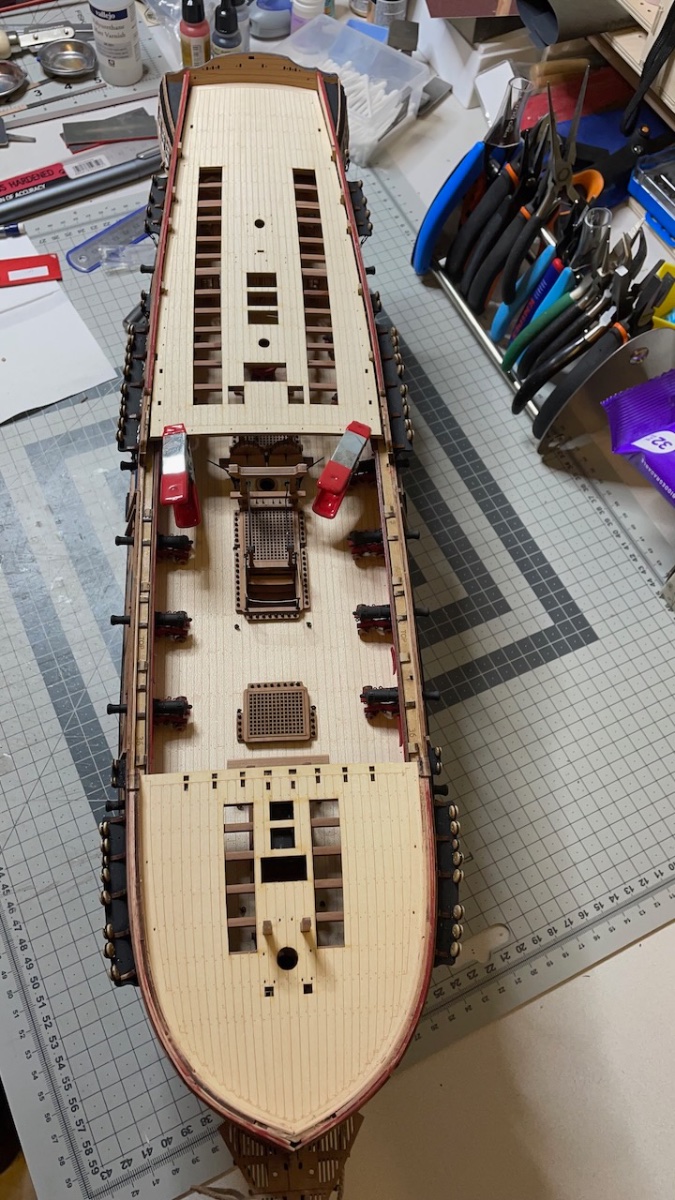
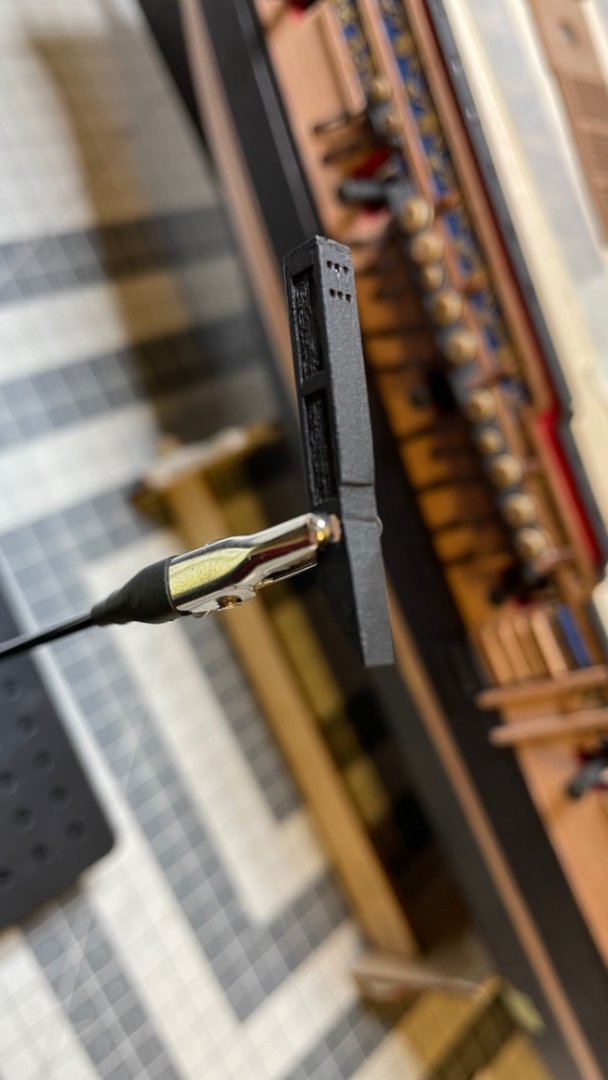
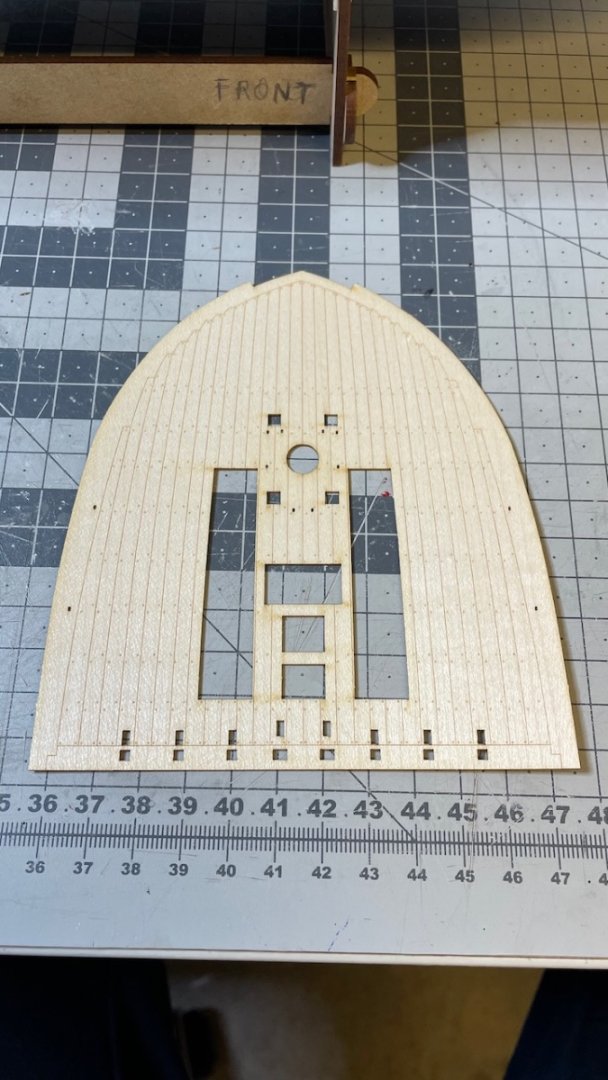
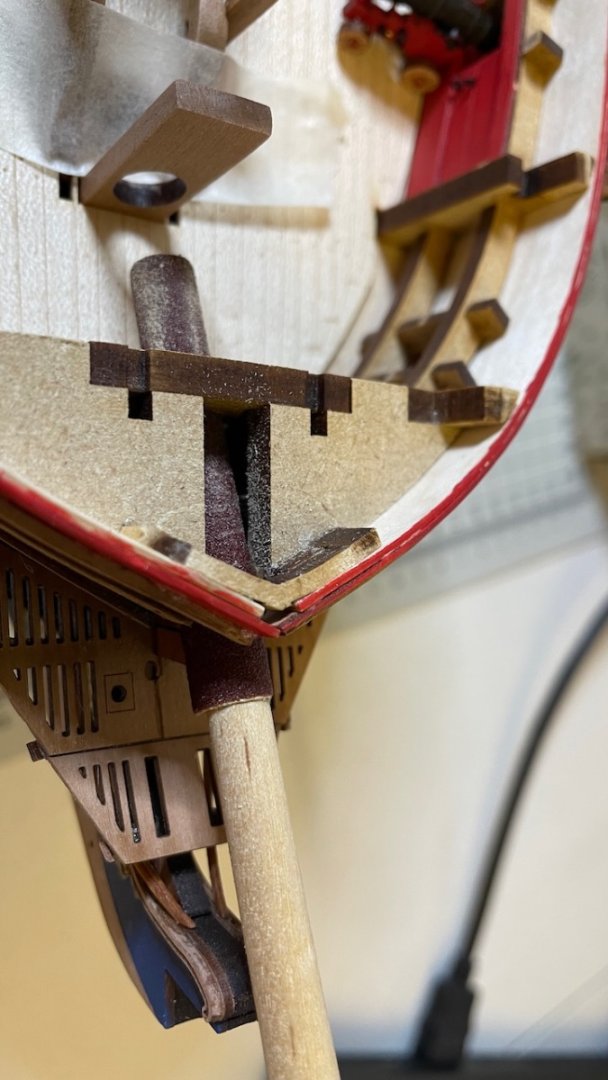
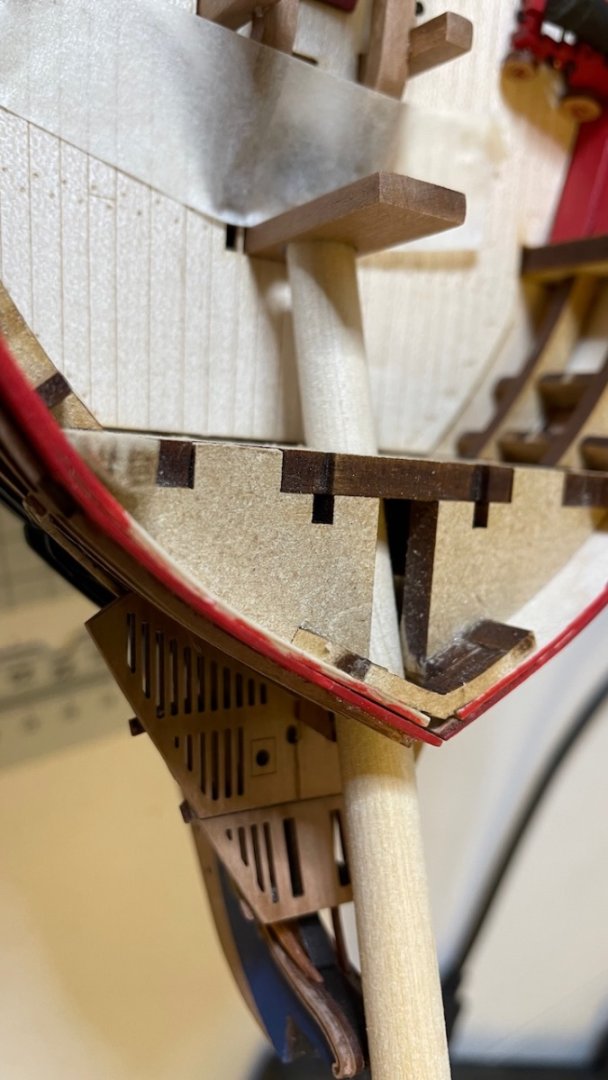
Catheads. Photo 627: Parts that form two Catheads... and some more (See next photo) Photo 628: I figured I removed two end mouldings too many (those square ends). I taped them back to the sheet so they won't get lost. I don't know yet if I need them later or if they are just spares. But they are just safely there in case. Photo 629: First you glue two parts back to back like this... Photo 630: ... then glue the short and long patterns on their respective matching sides... Photo 631: ... and glue the end mouldings. Photo 632: ... and sand the sides to level. That's all for today. Thanks for watching!


- 426 replies
-
- 7
-
-
- Vanguard Models
- Sphinx
- (and 1 more)
-
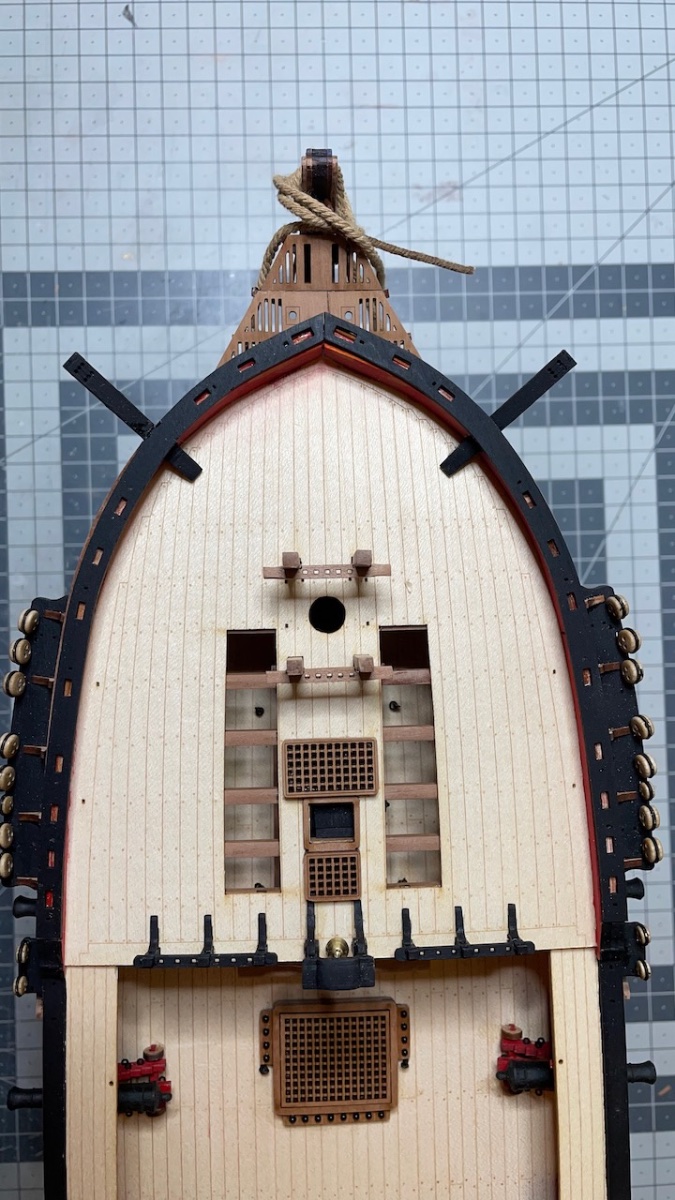
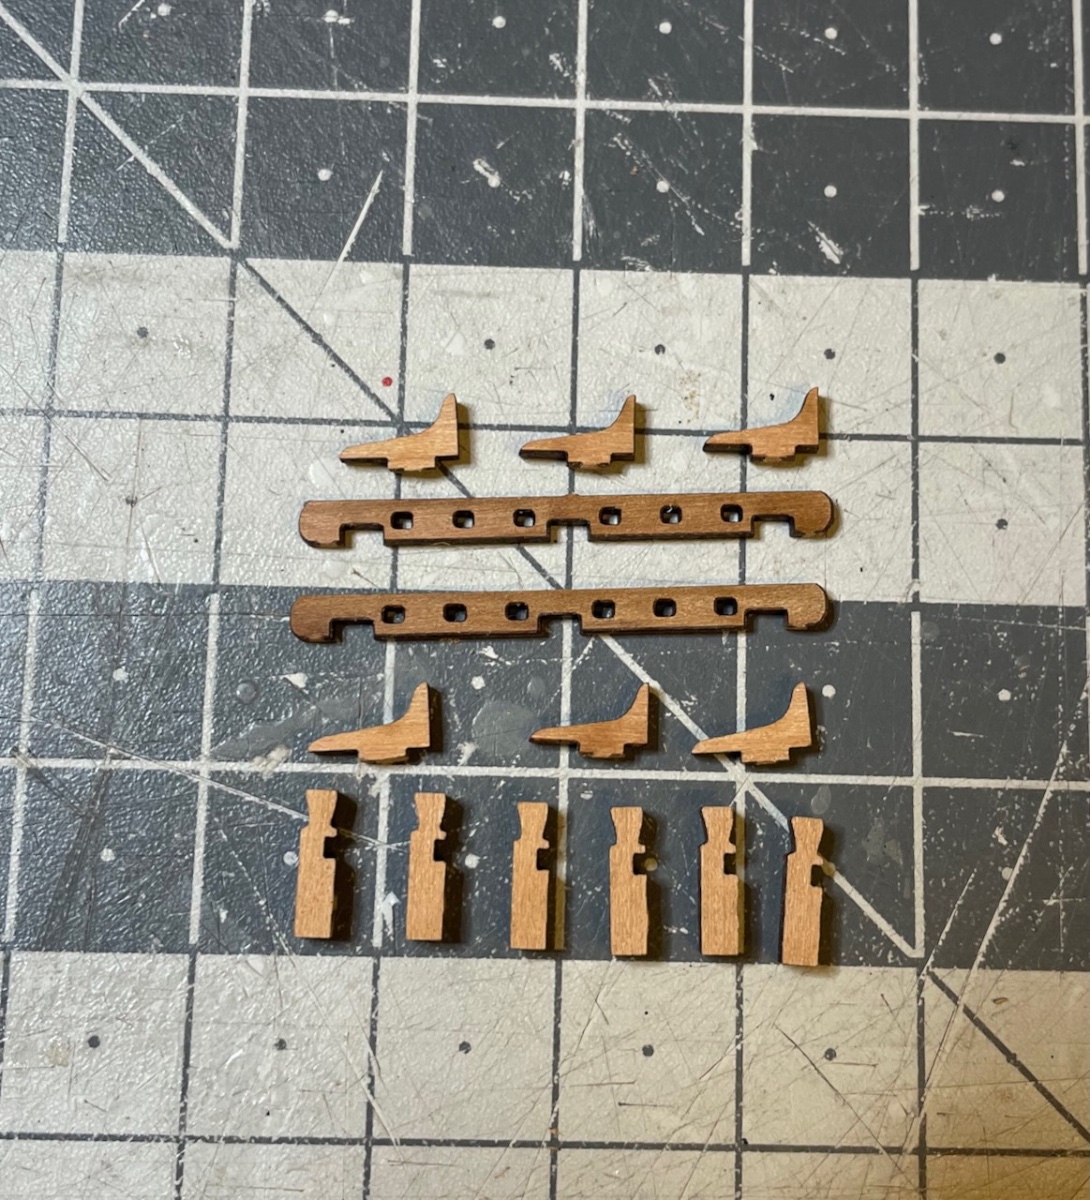
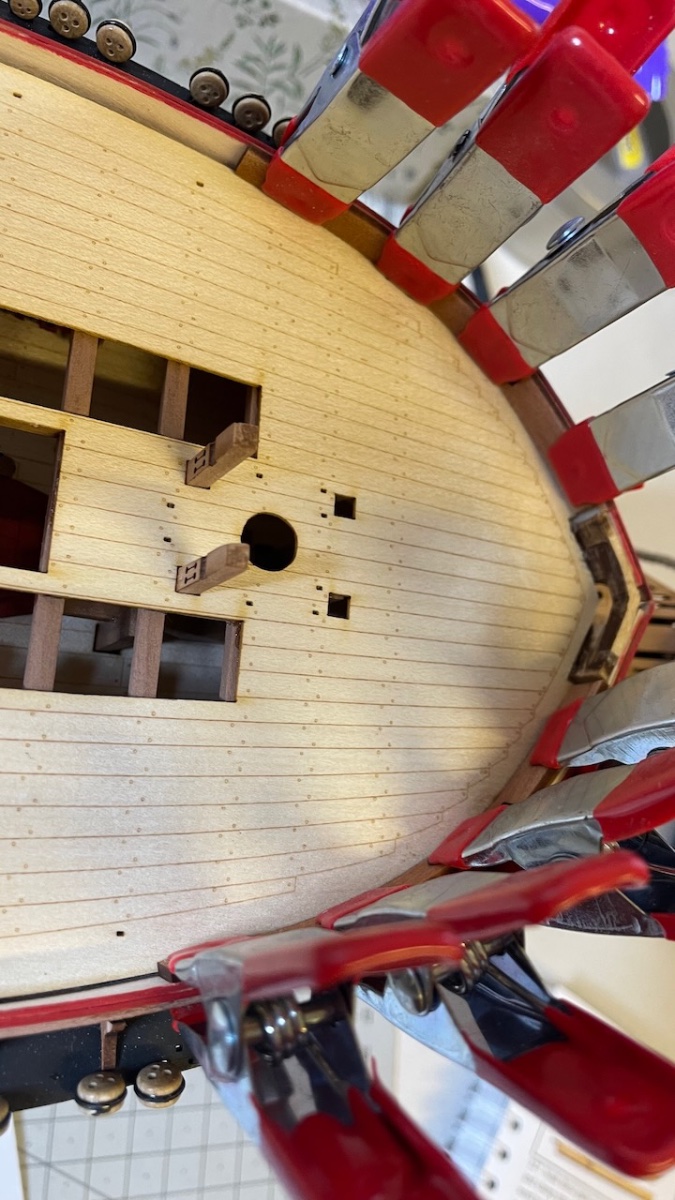
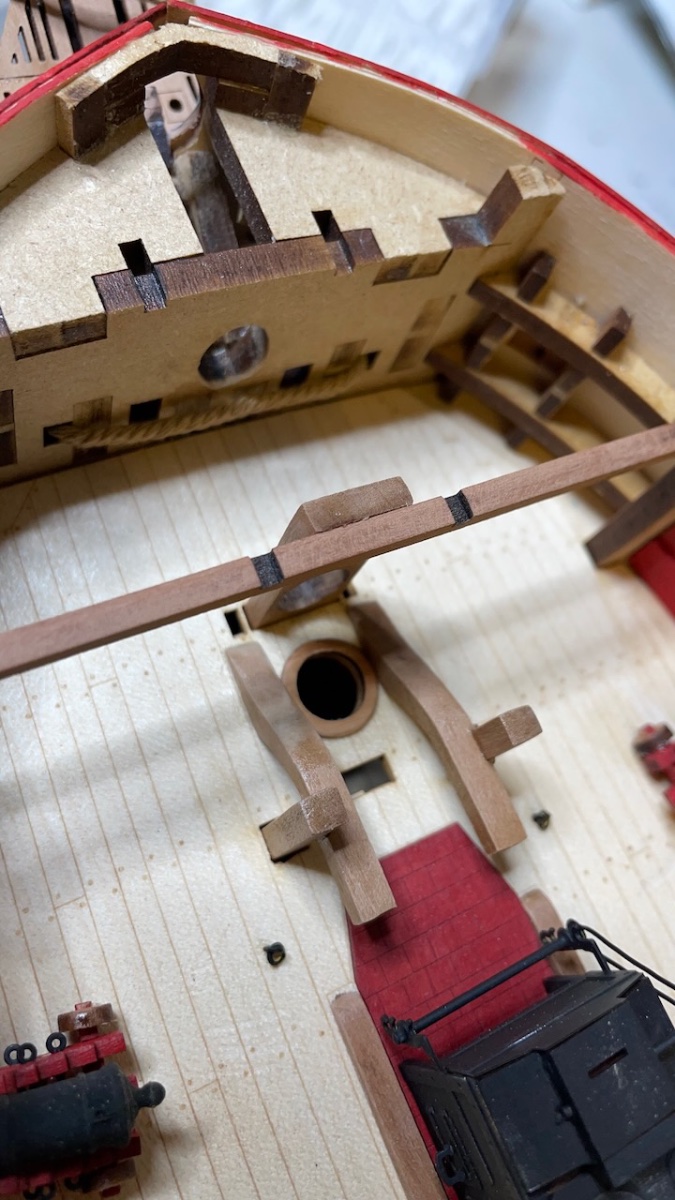
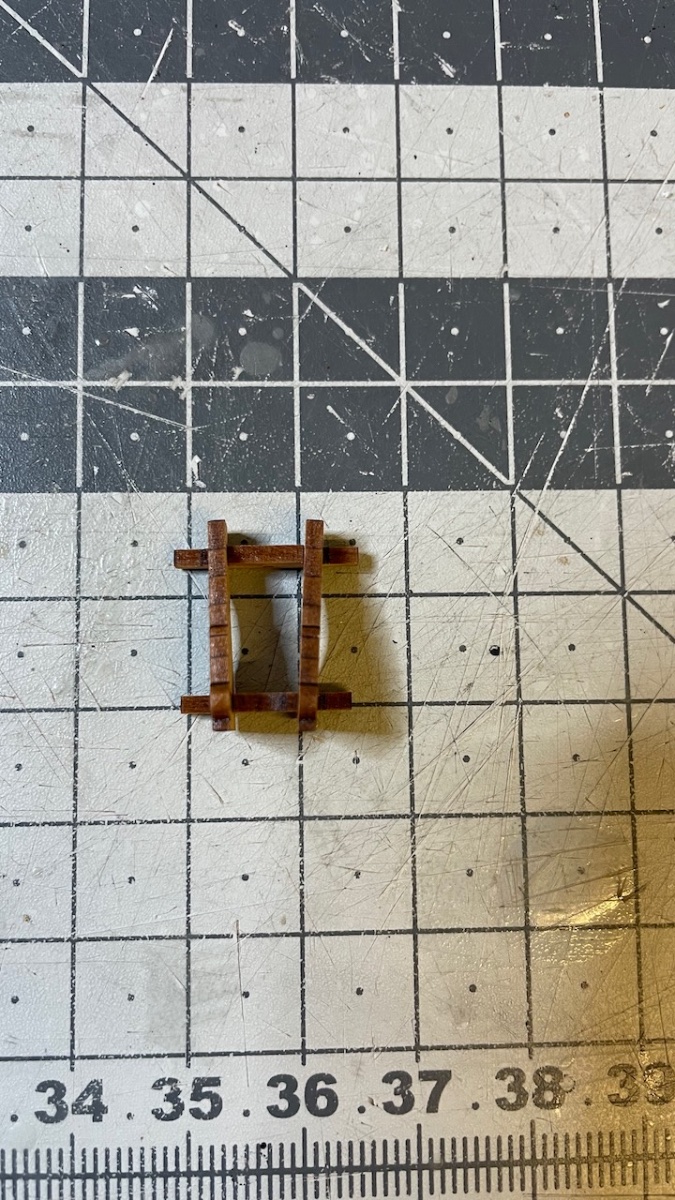
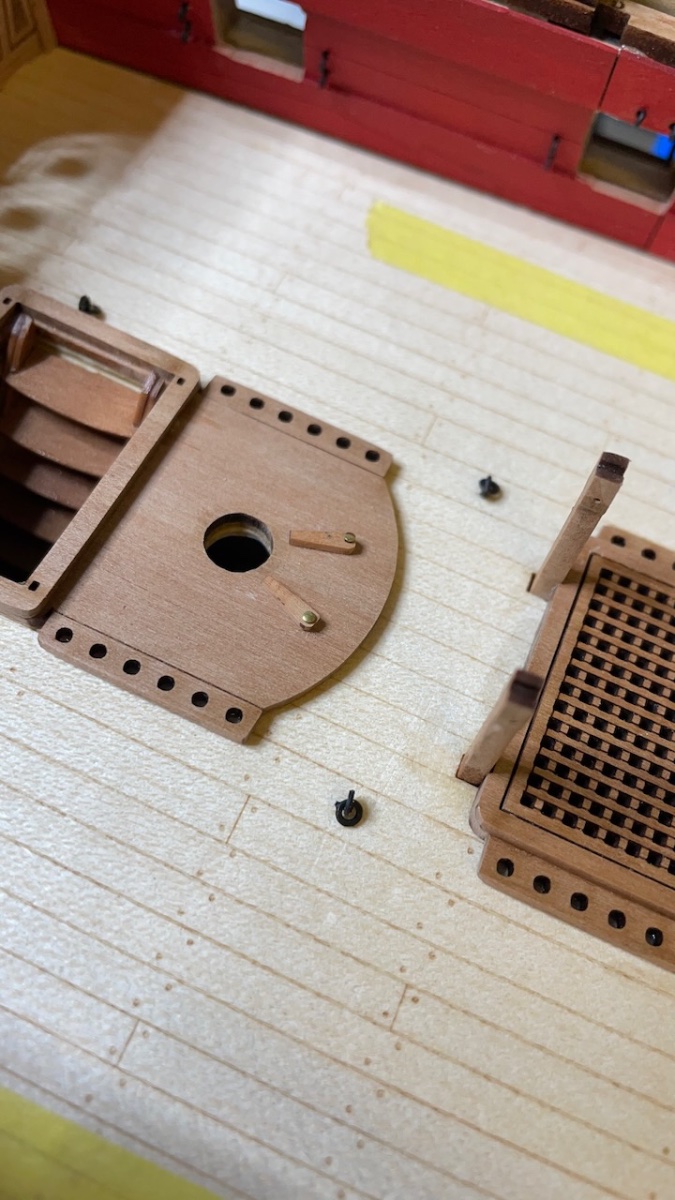
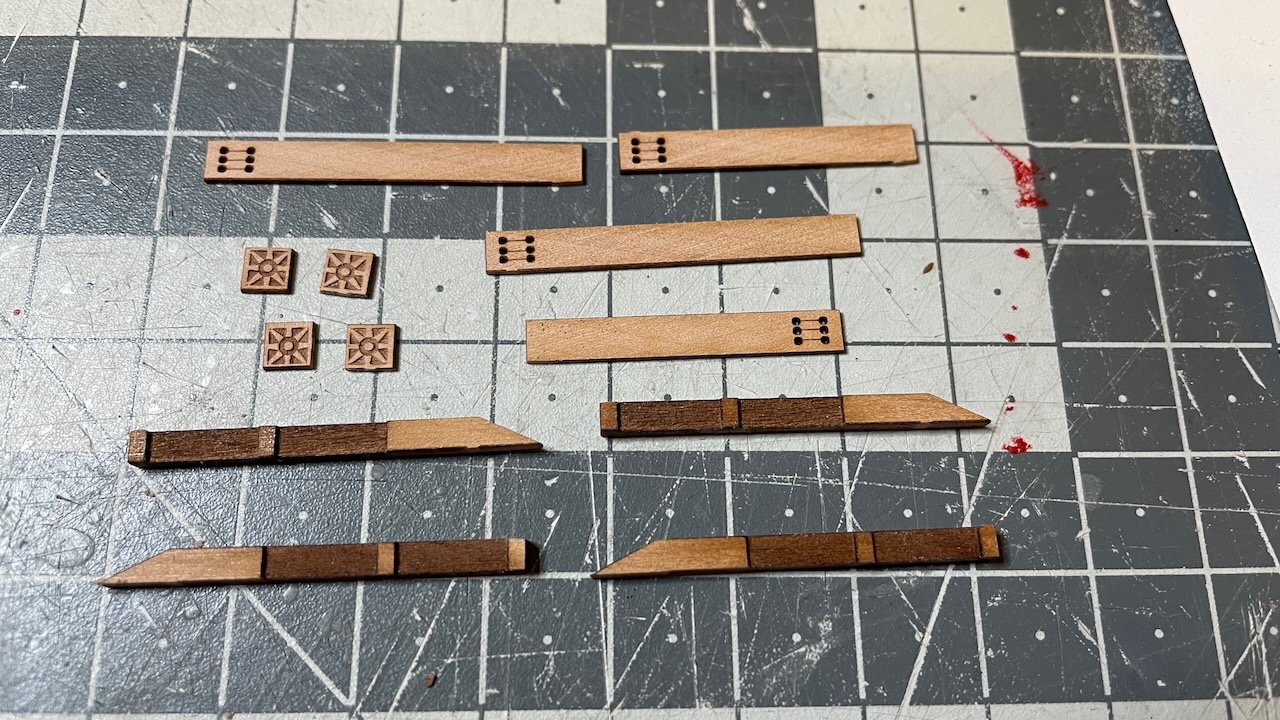
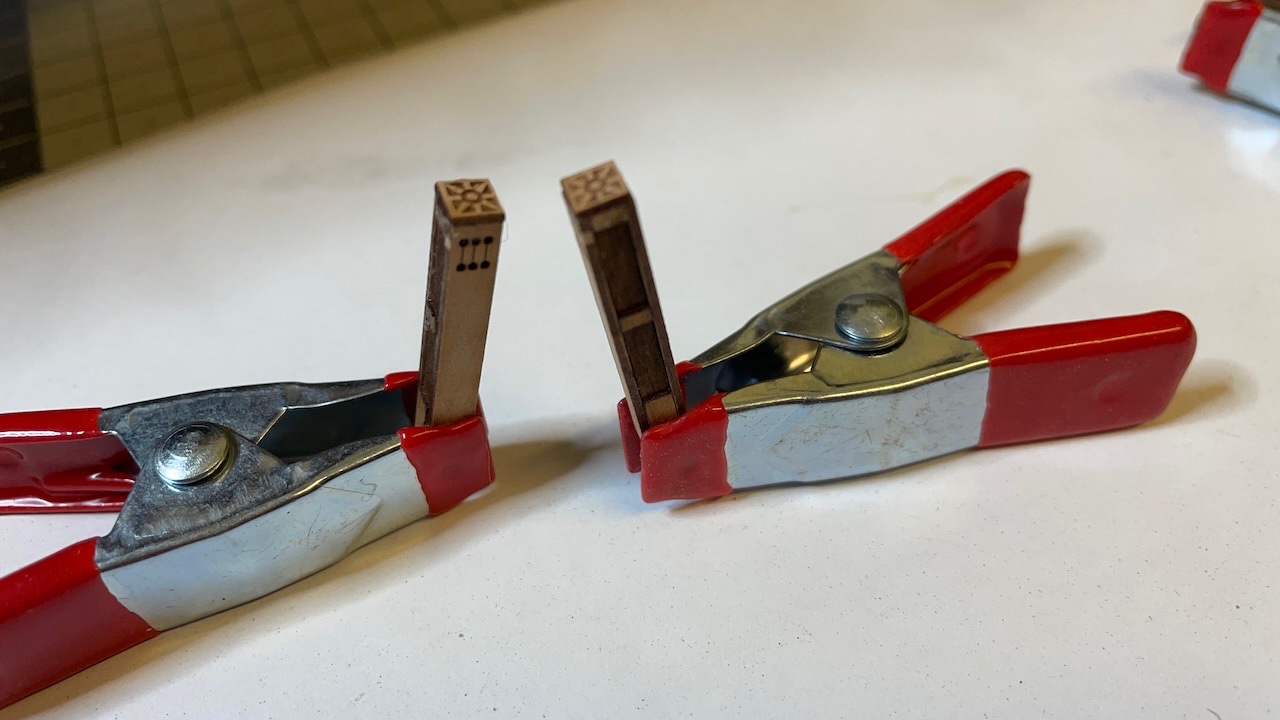
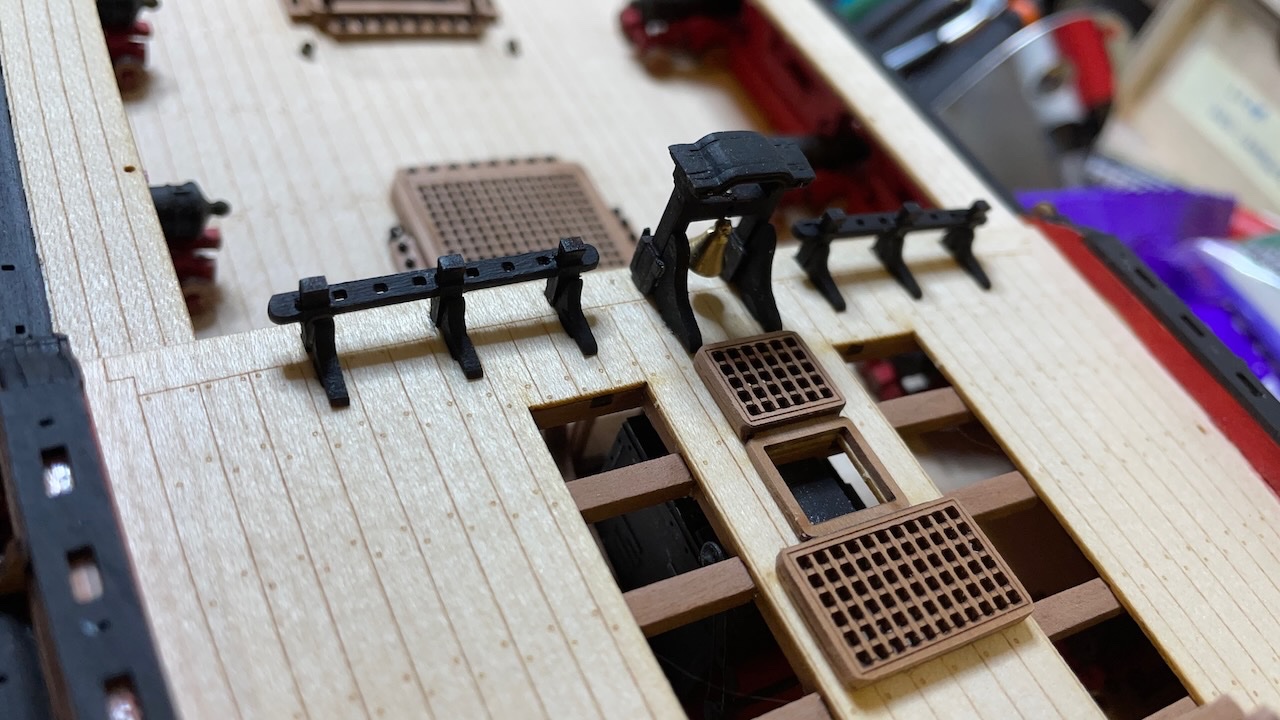
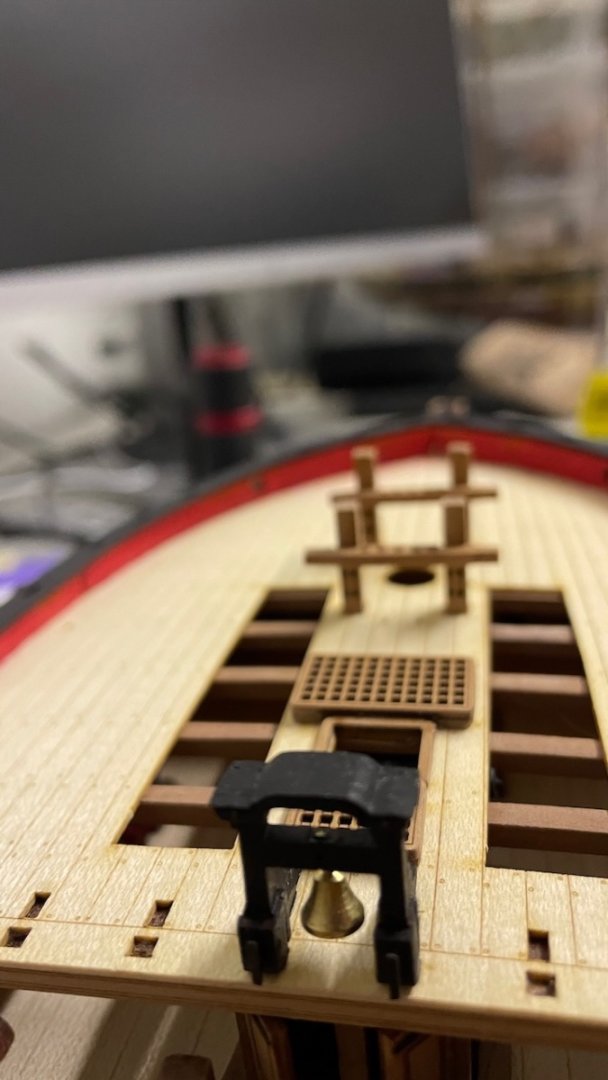
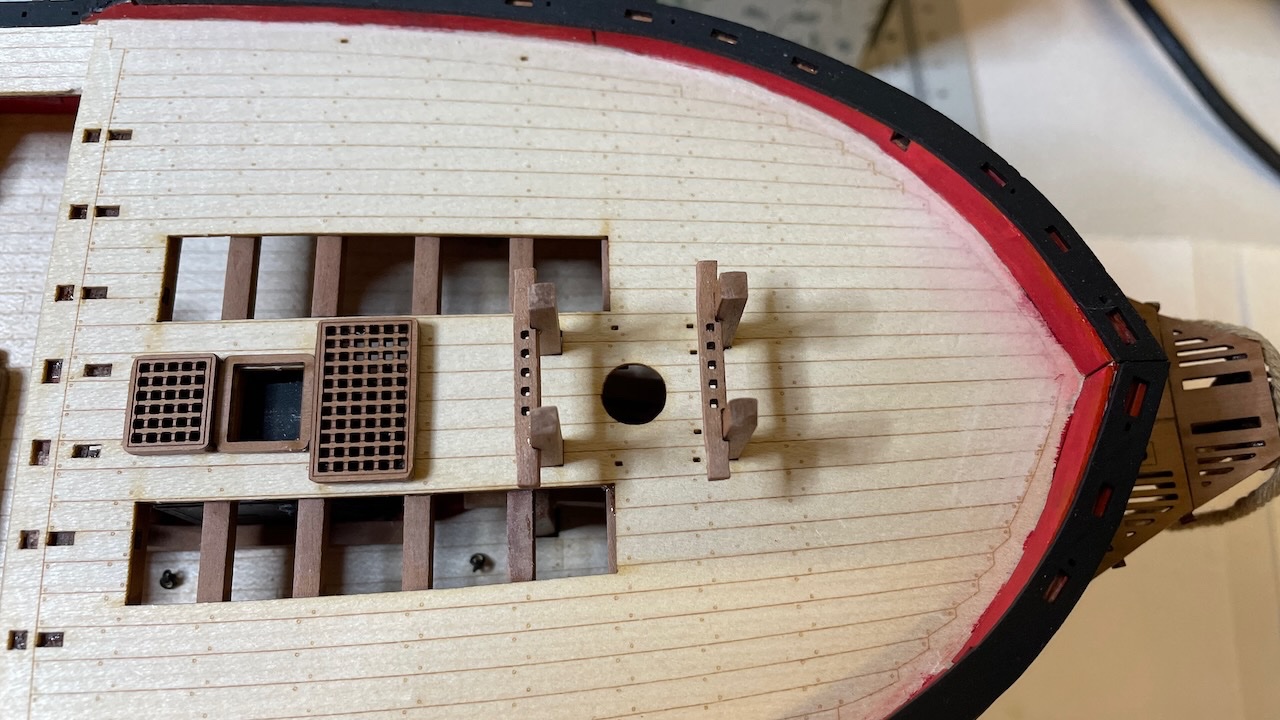
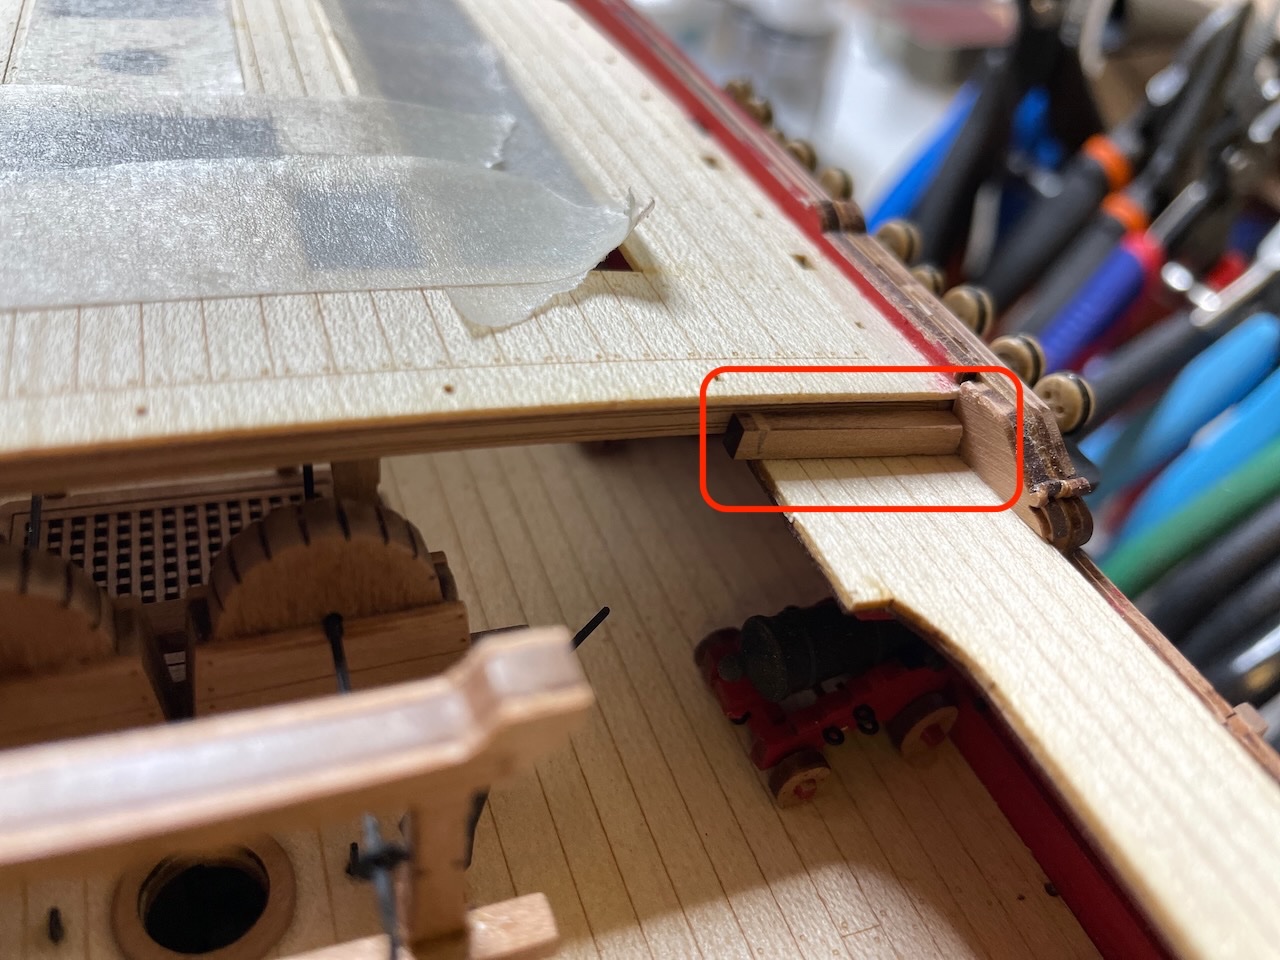
Build Day 61: 1,5 hours / Total 144 hours Today I spent 1,5 hours making the Forecastle rails at either side of the Belfry and started Catheads. Photo 624: Parts that make the Forecastle Rails. Photos 625-626: The stanchions sit on the rails with a slight angle to comply with the deck curve. I painted the rail+stanchions construction before installing in place. Same for the supporting knees.


- 426 replies
-
- 6
-
-
- Vanguard Models
- Sphinx
- (and 1 more)
-
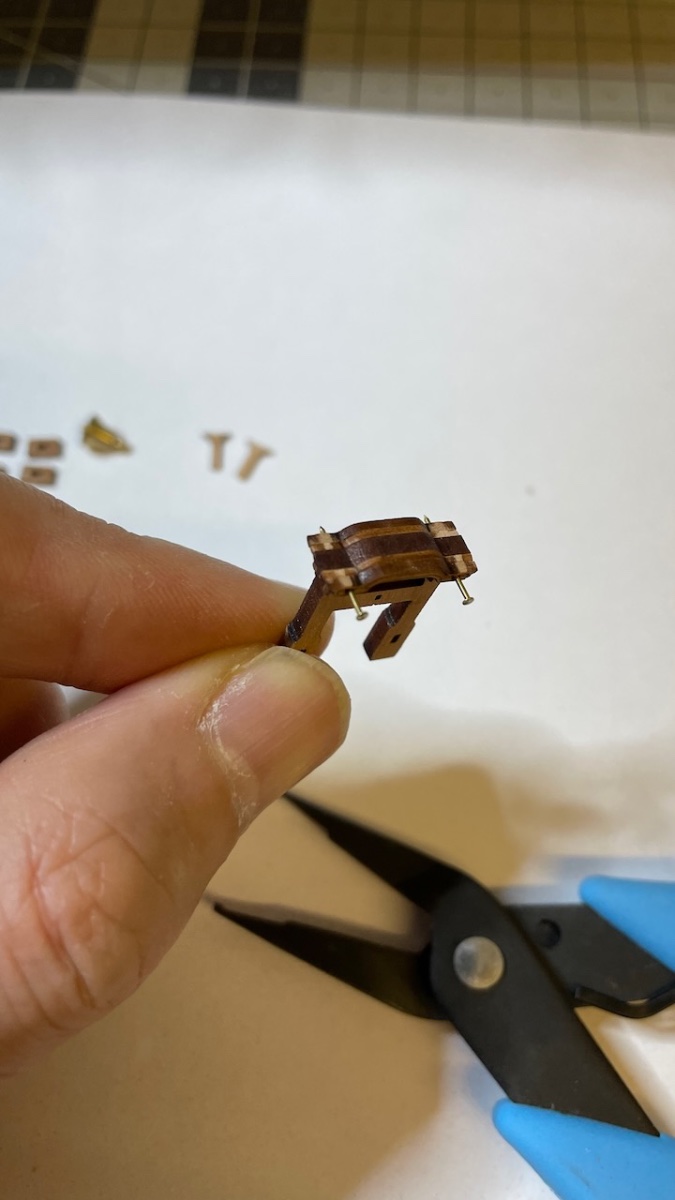
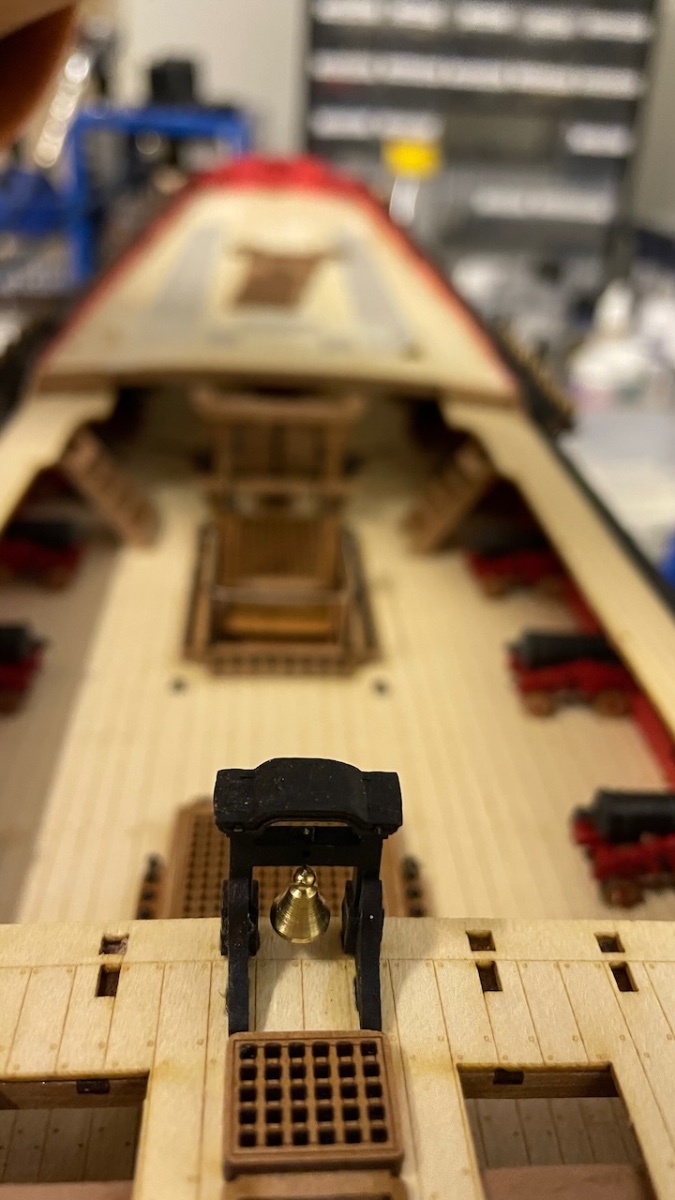
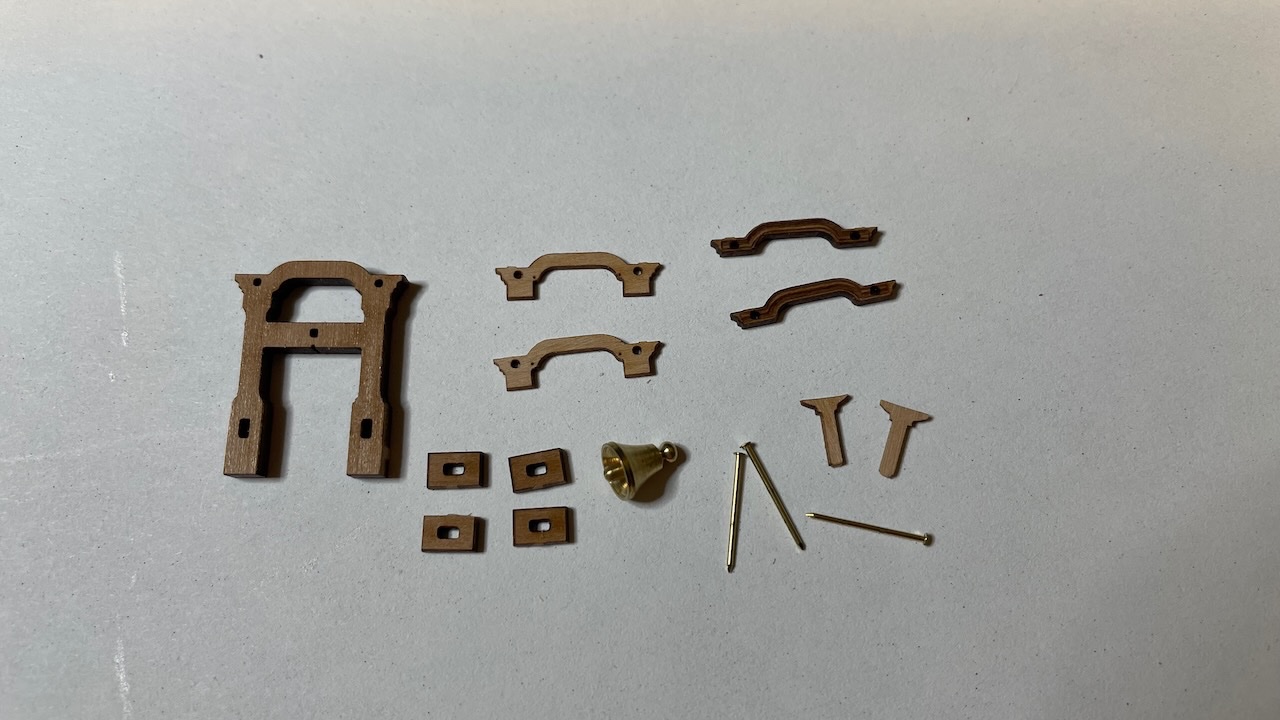
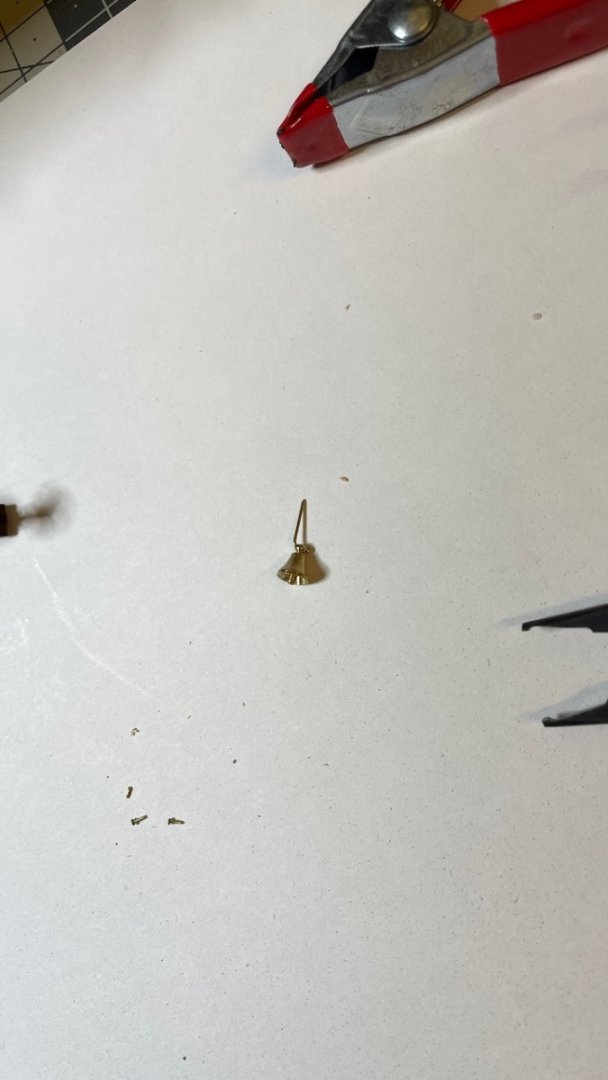
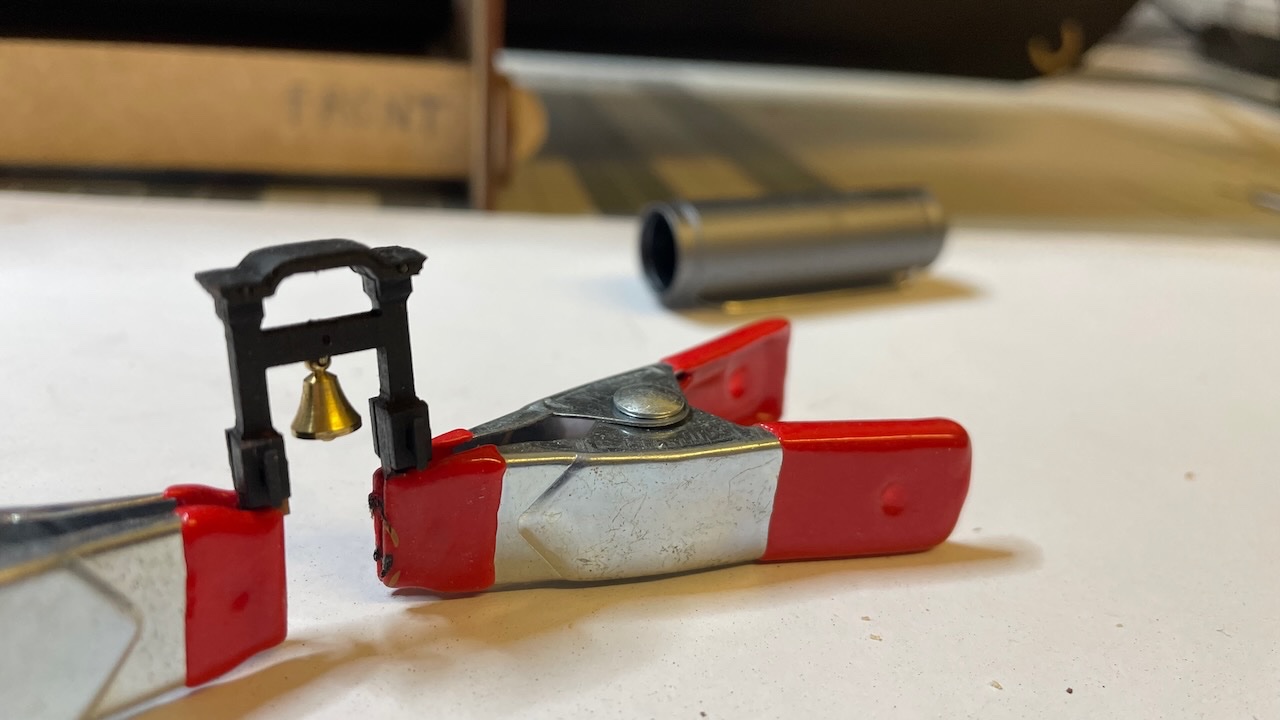
Belfry installation. Photo 617: Parts. Two nails will be used for alignment of the parts... Photos 618-619: .... like this. I just applied a drop of thin CA and left the nails in place and trimmed them flush with the surface. Photo 620: Bell is hanging by means of the third pin, bent 90 degrees Photo 621: I chose to paint it in black. Photos 622-623: Belfry in place together with support knees, also painted in black. That's all for today. Thanks for watching!


- 426 replies
-
- 11
-
-
- Vanguard Models
- Sphinx
- (and 1 more)
-
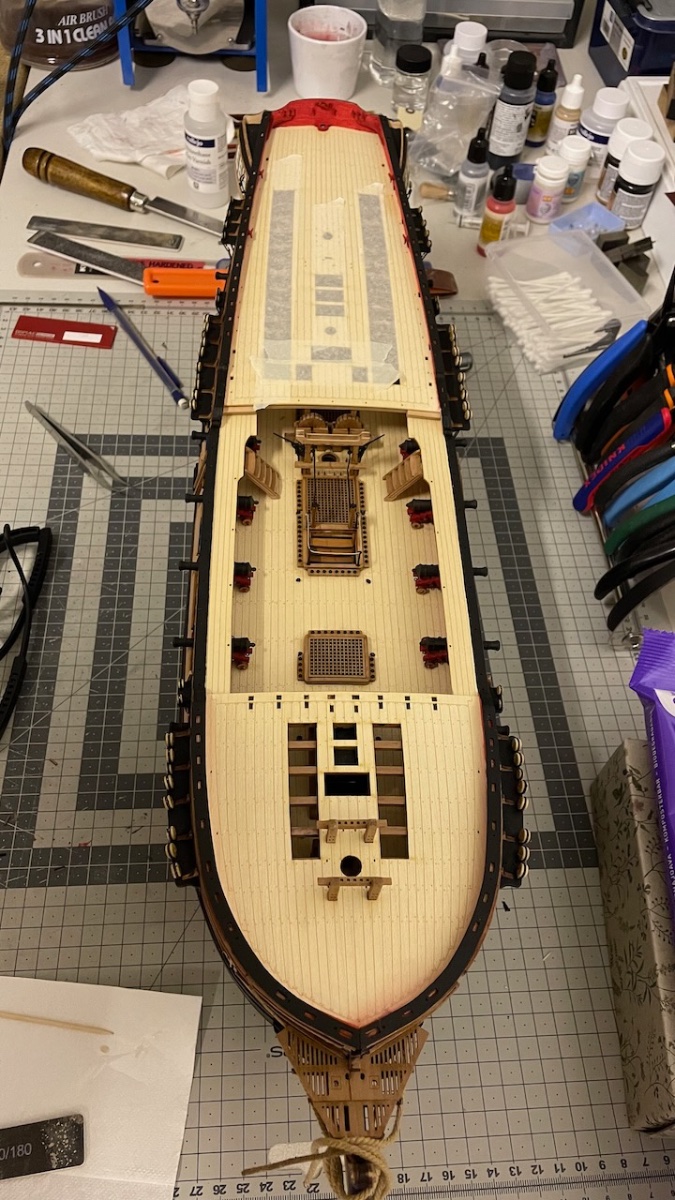
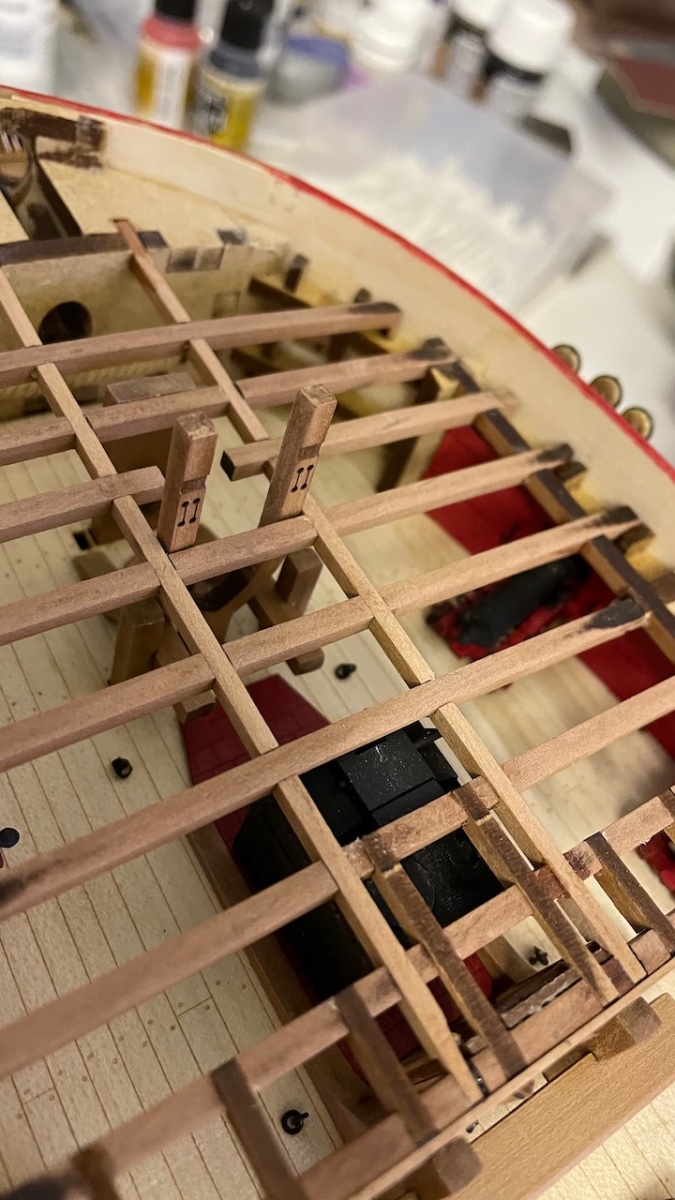
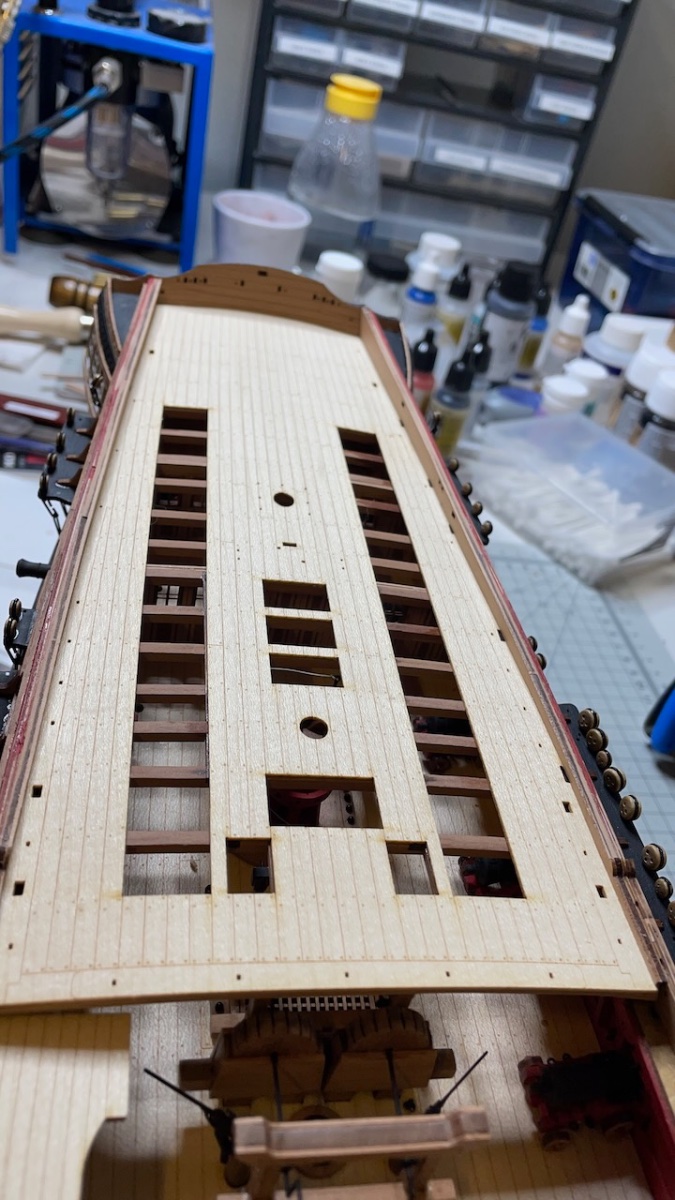
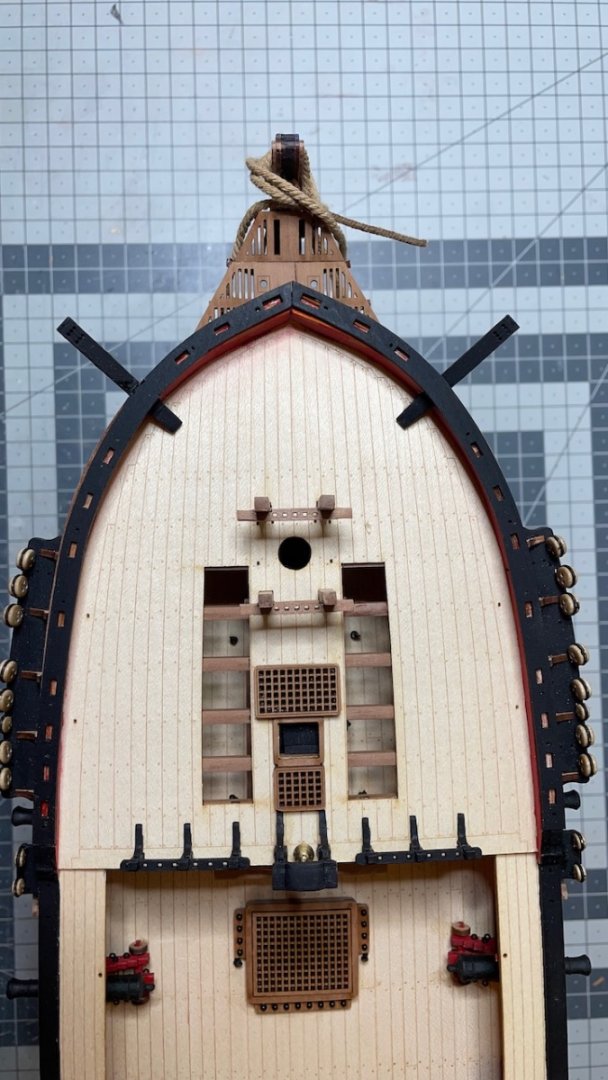
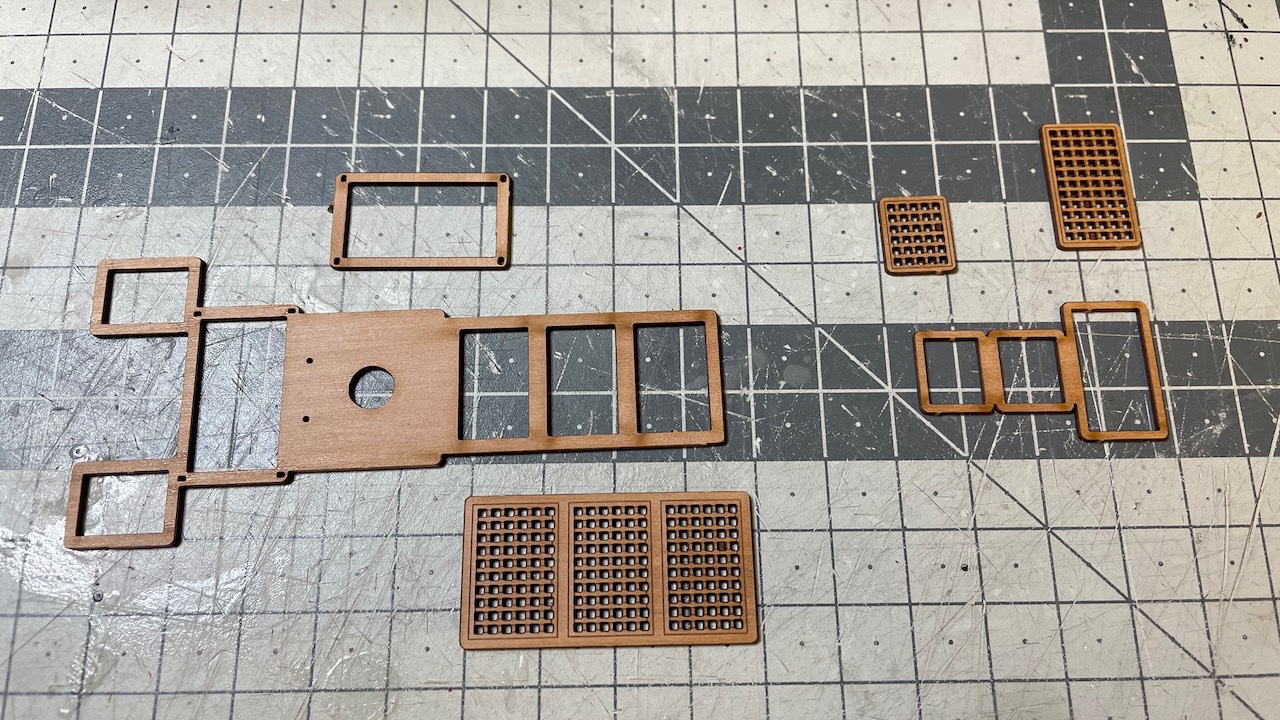
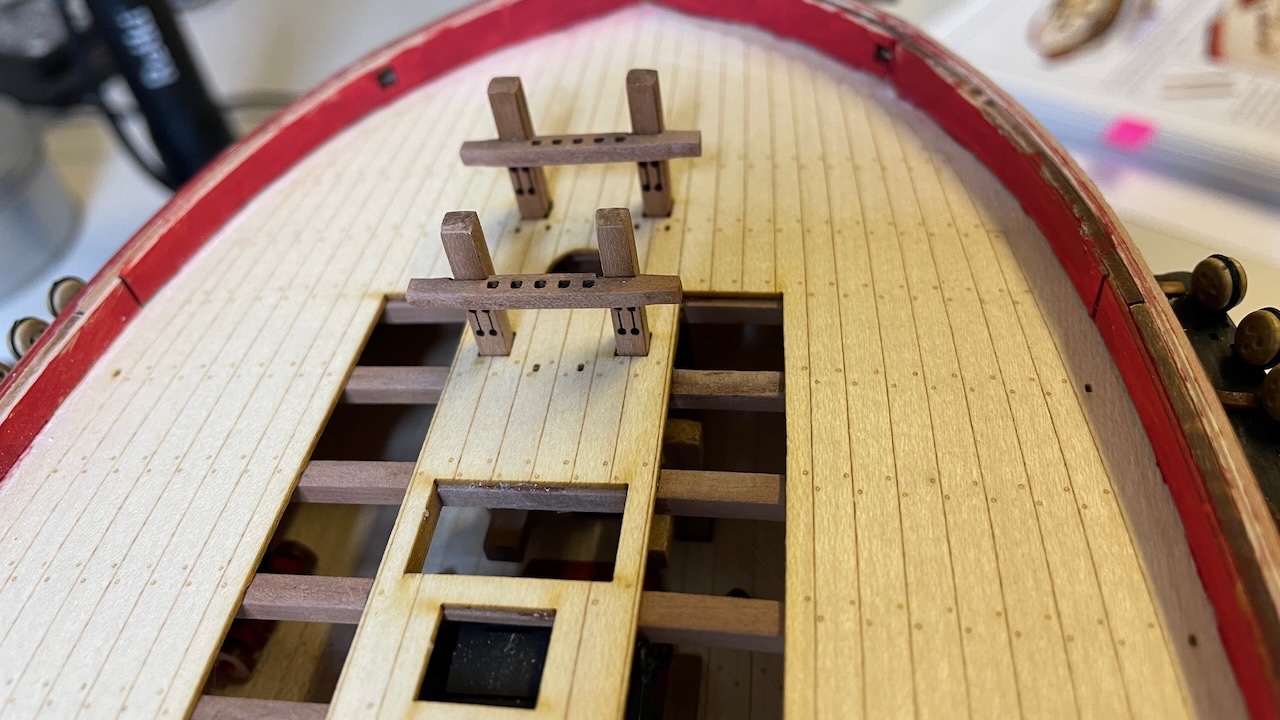
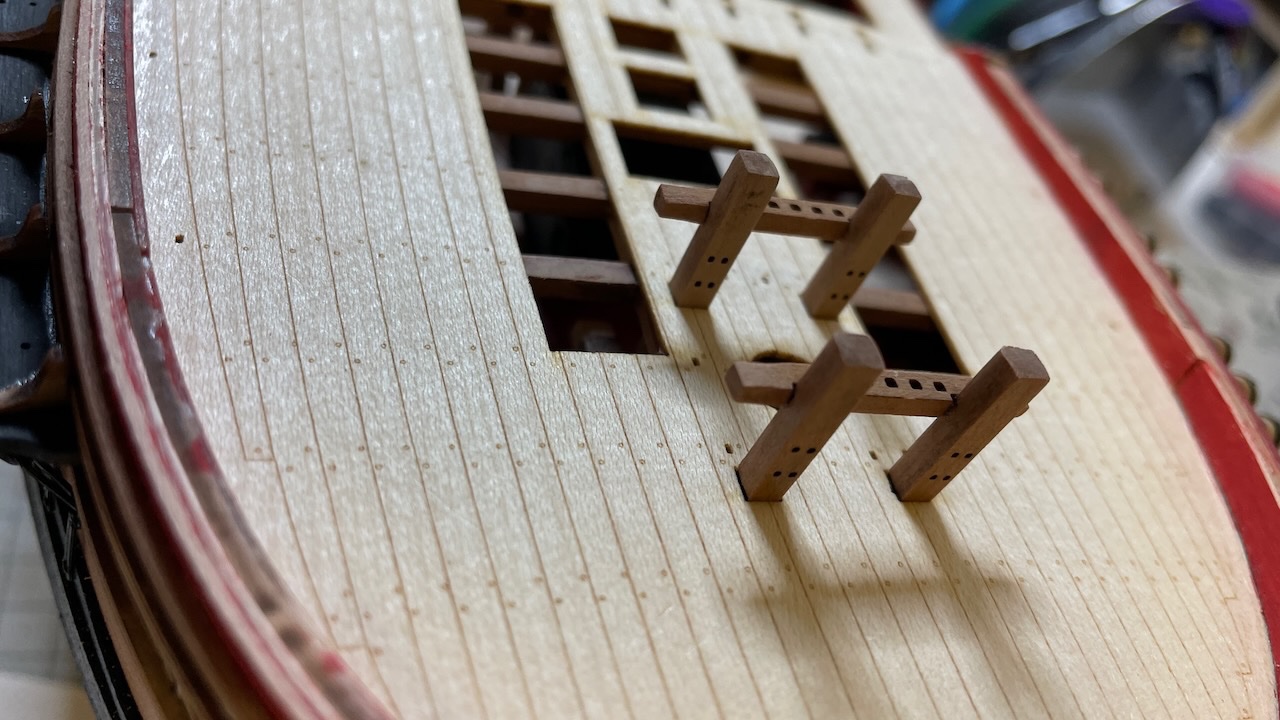
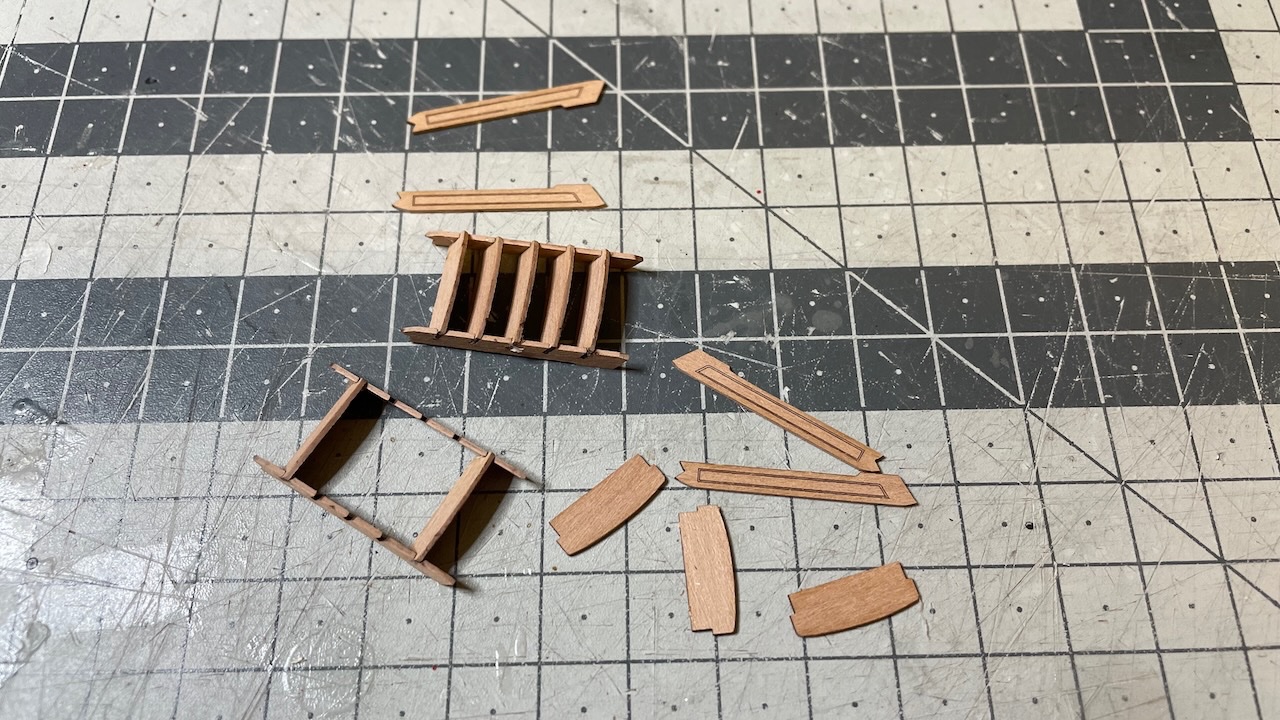
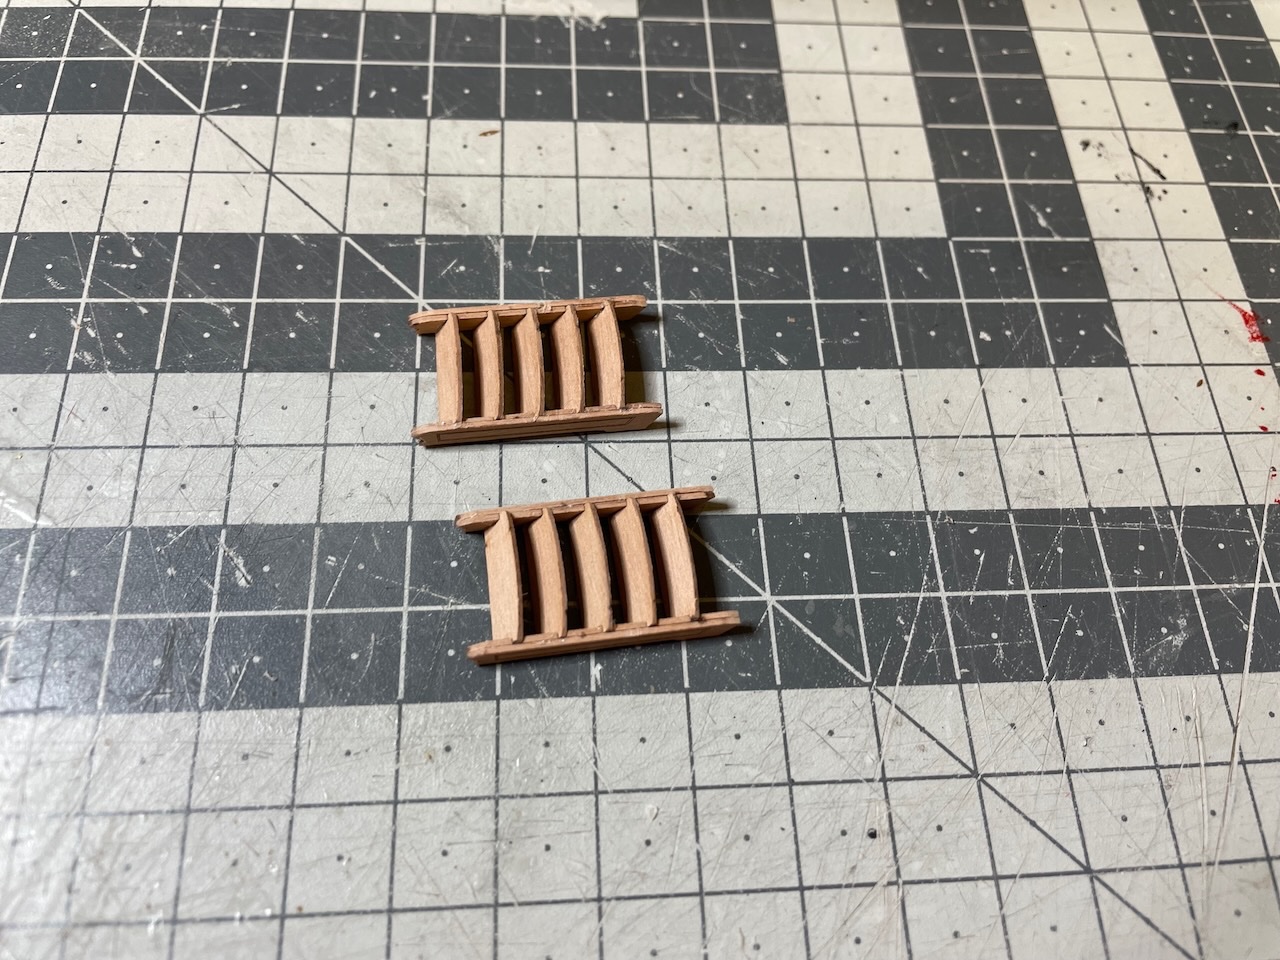
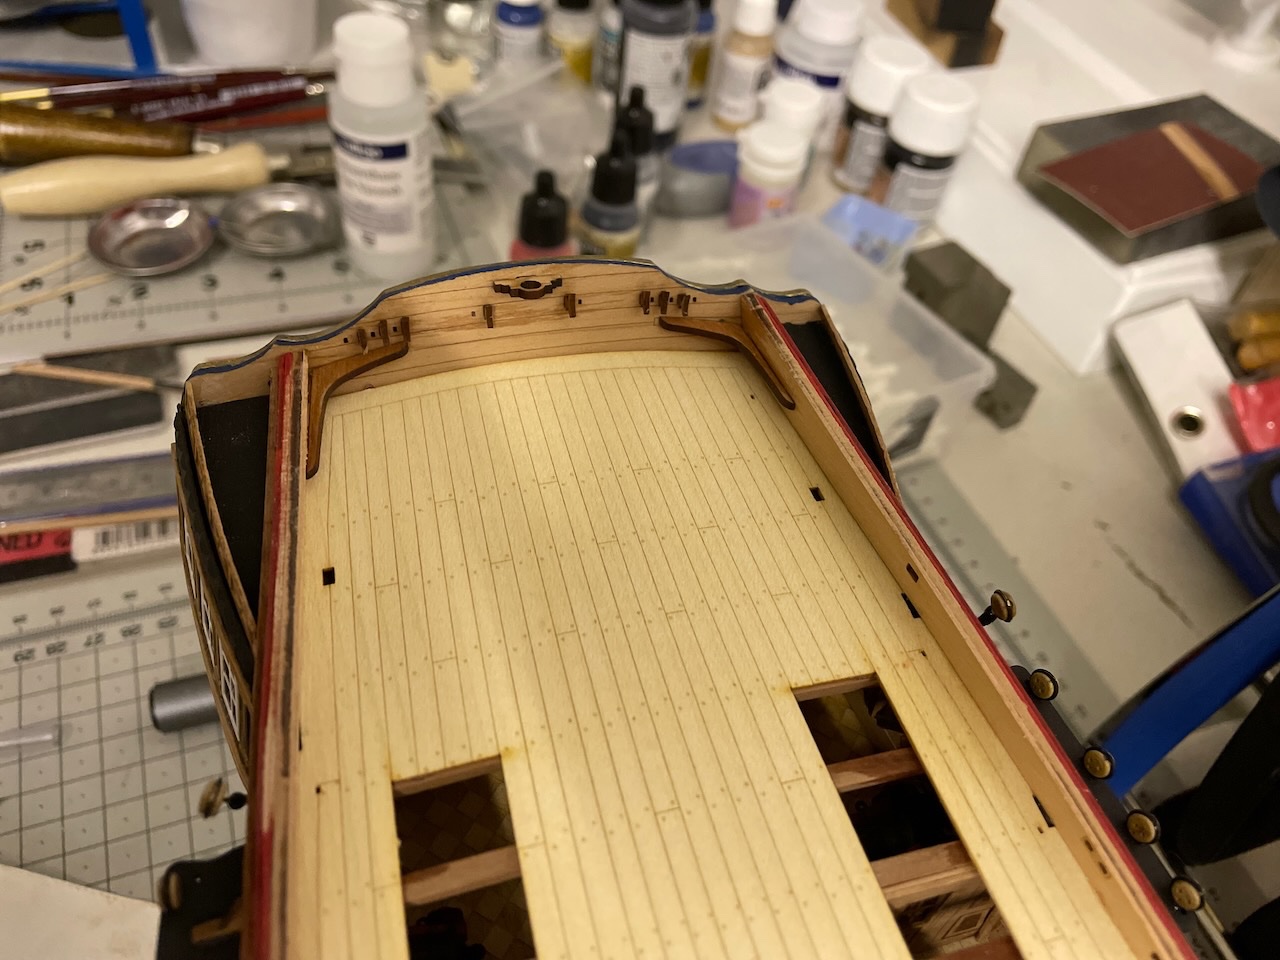
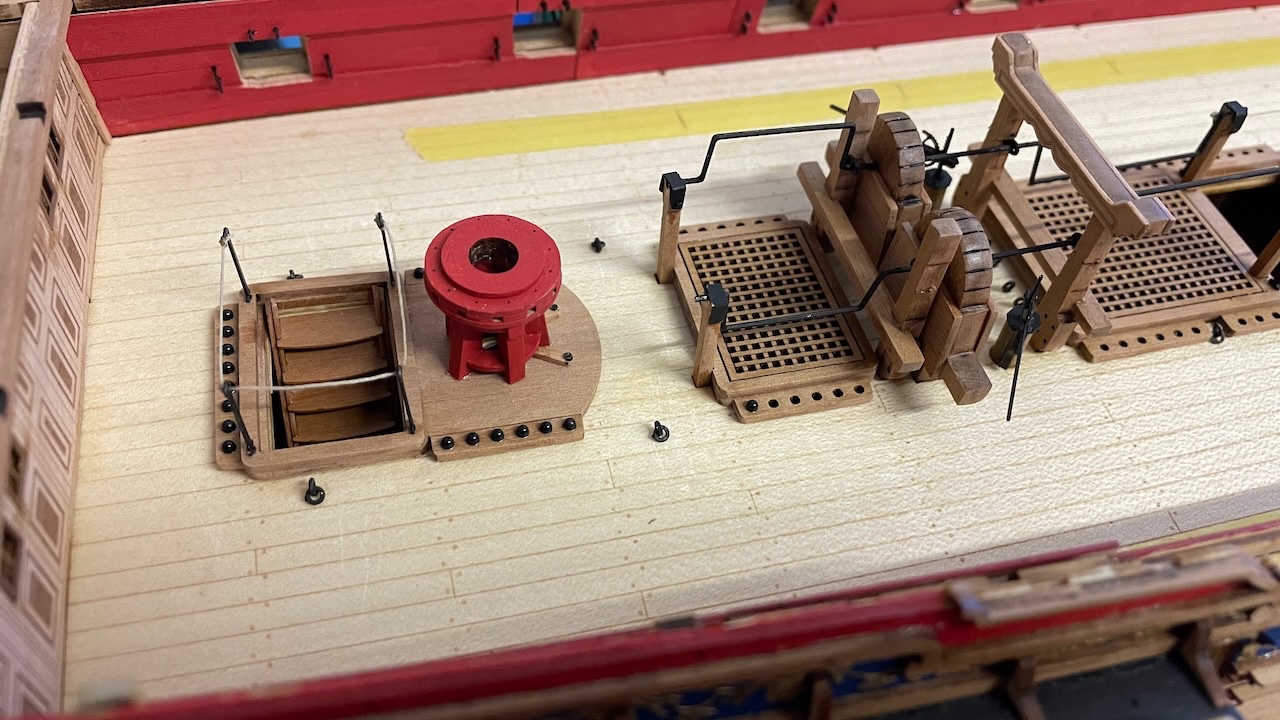
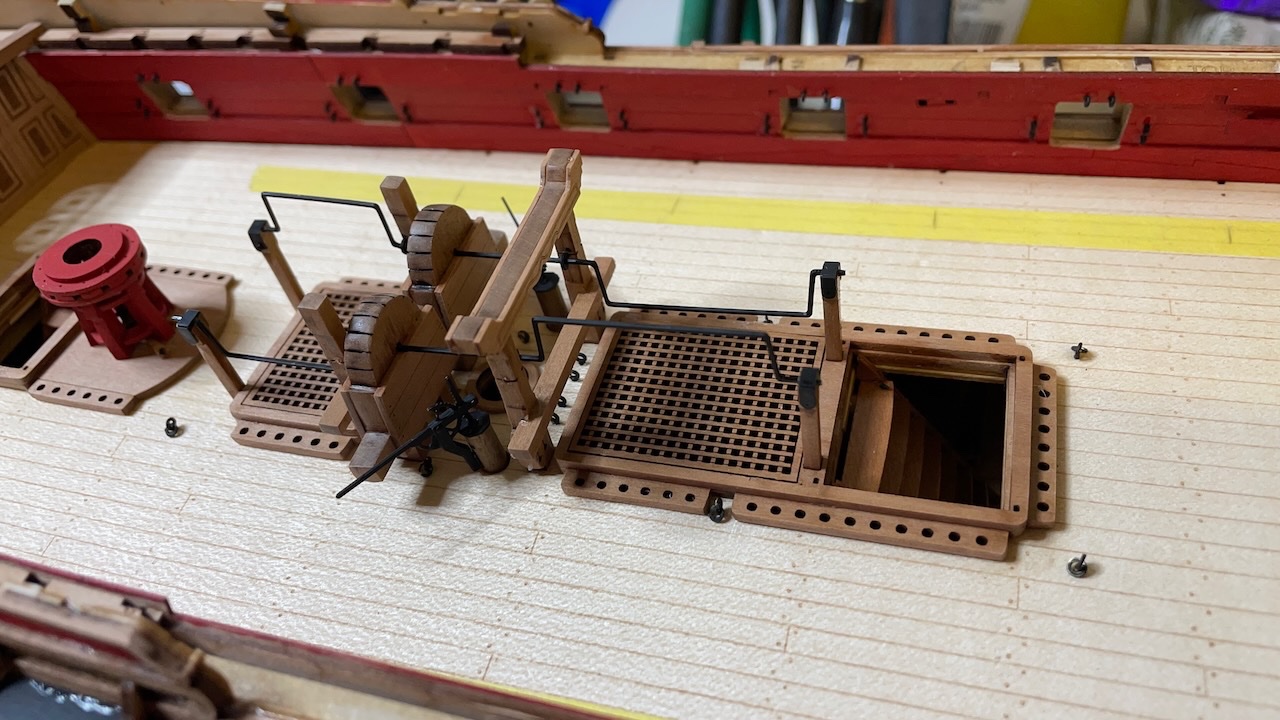
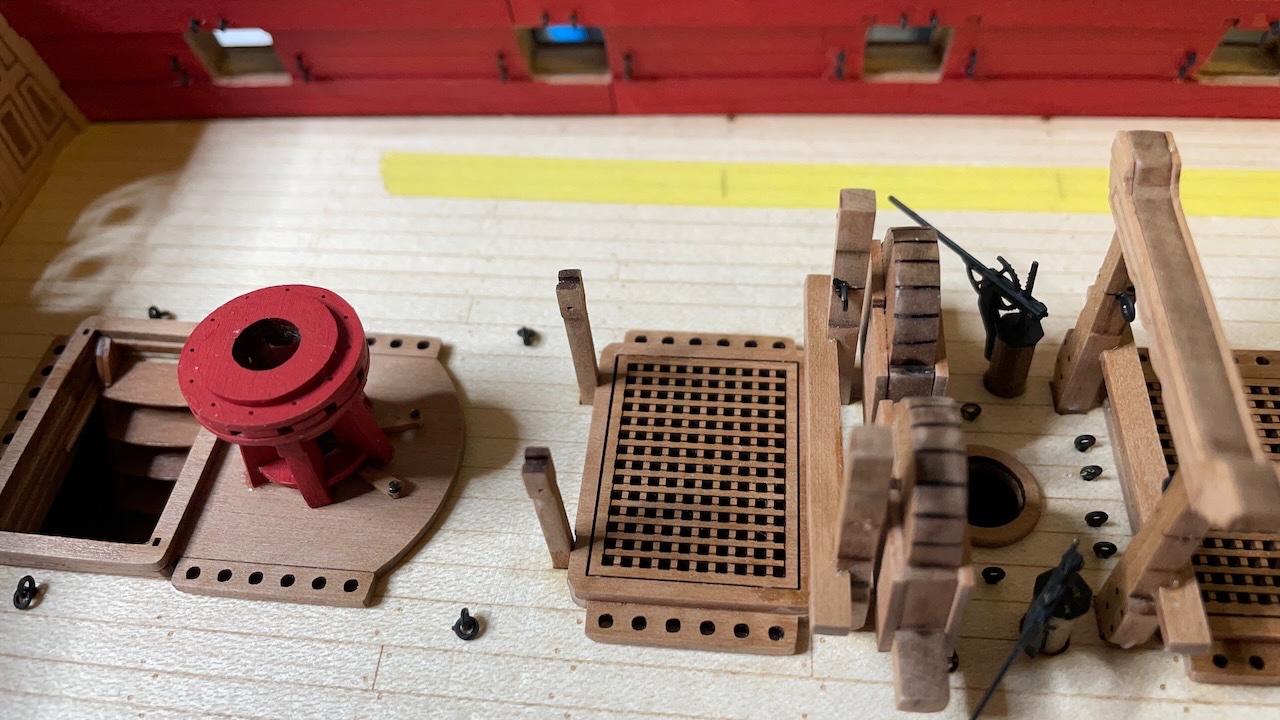
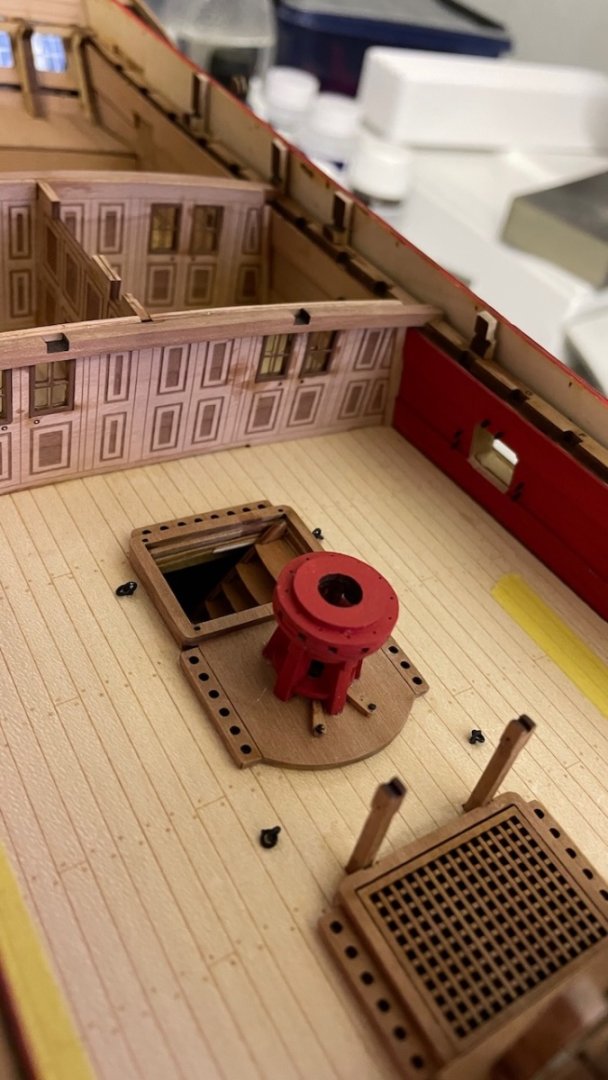
Photos 615-616: Forecastle and Quarterdeck gratings. Forecastle glued in place. According to the instructions the Quarterdeck gratings will be glued later, though I don't think it is critical to follow that order. Cleaning the laser char on the edges takes most of the time with these.
- 426 replies
-
- 4
-
-
- Vanguard Models
- Sphinx
- (and 1 more)
-
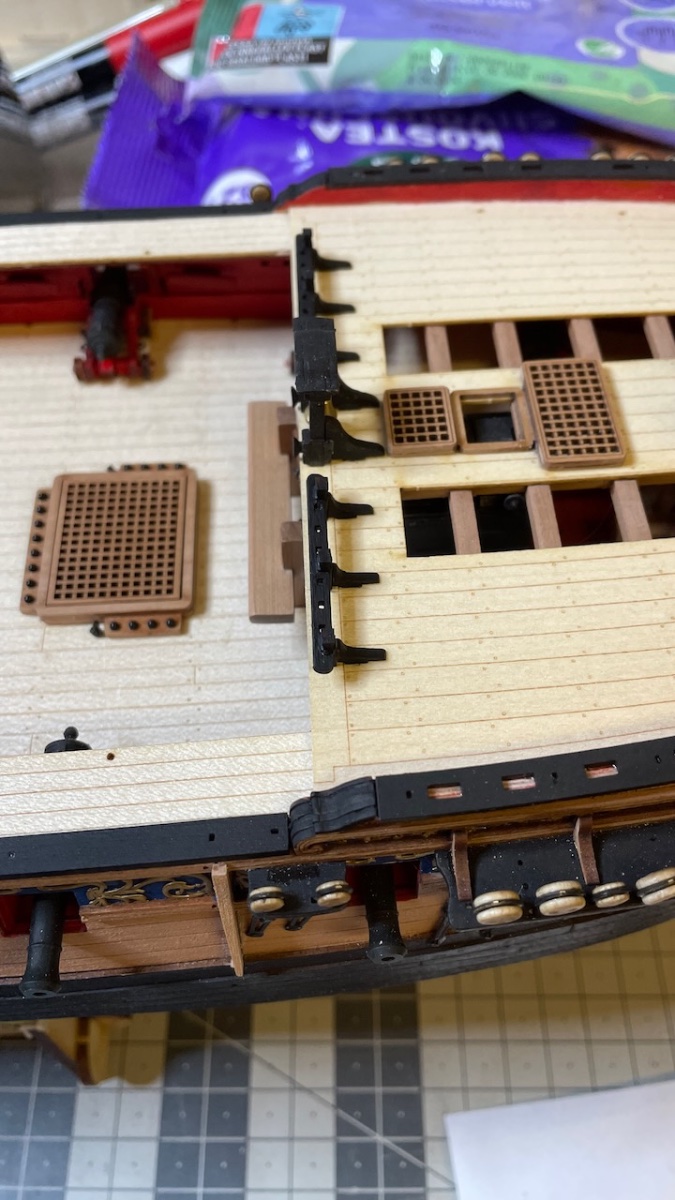
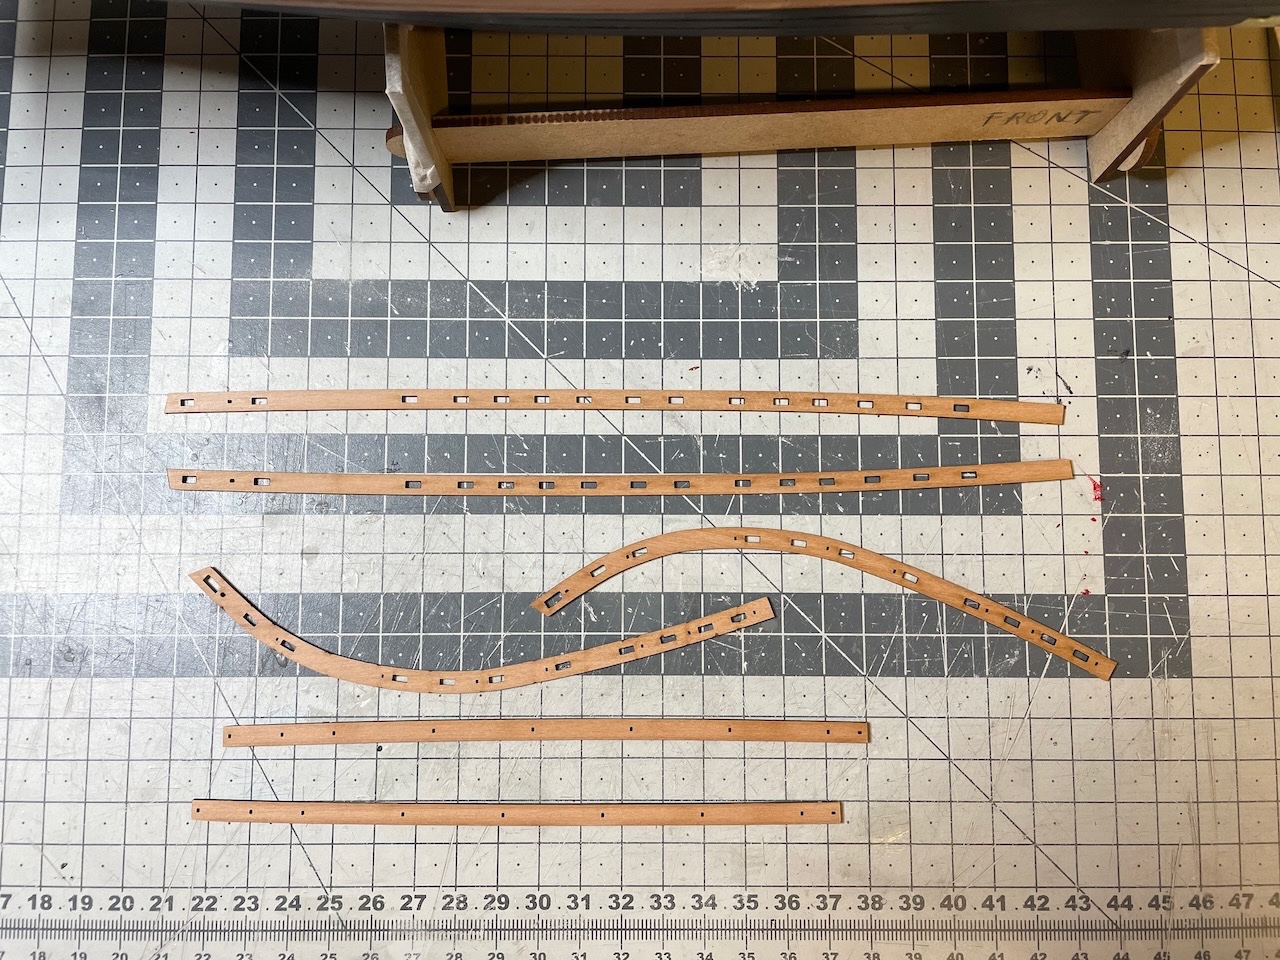
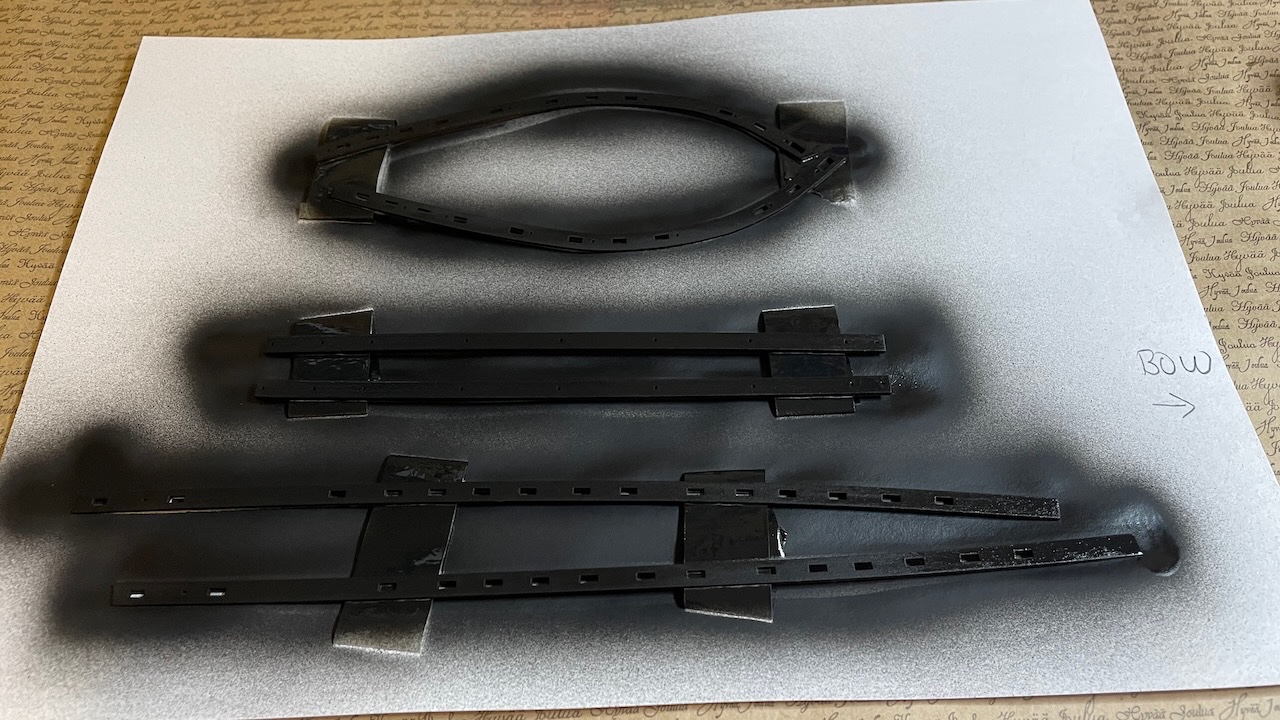
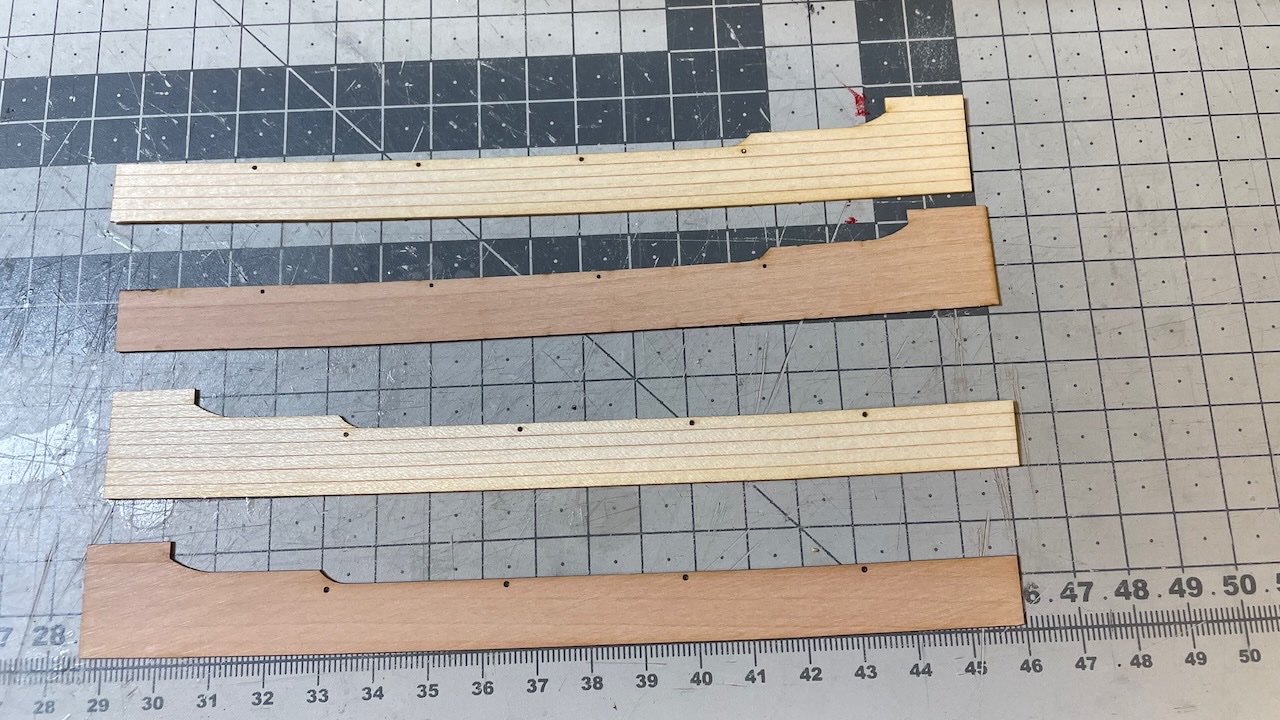
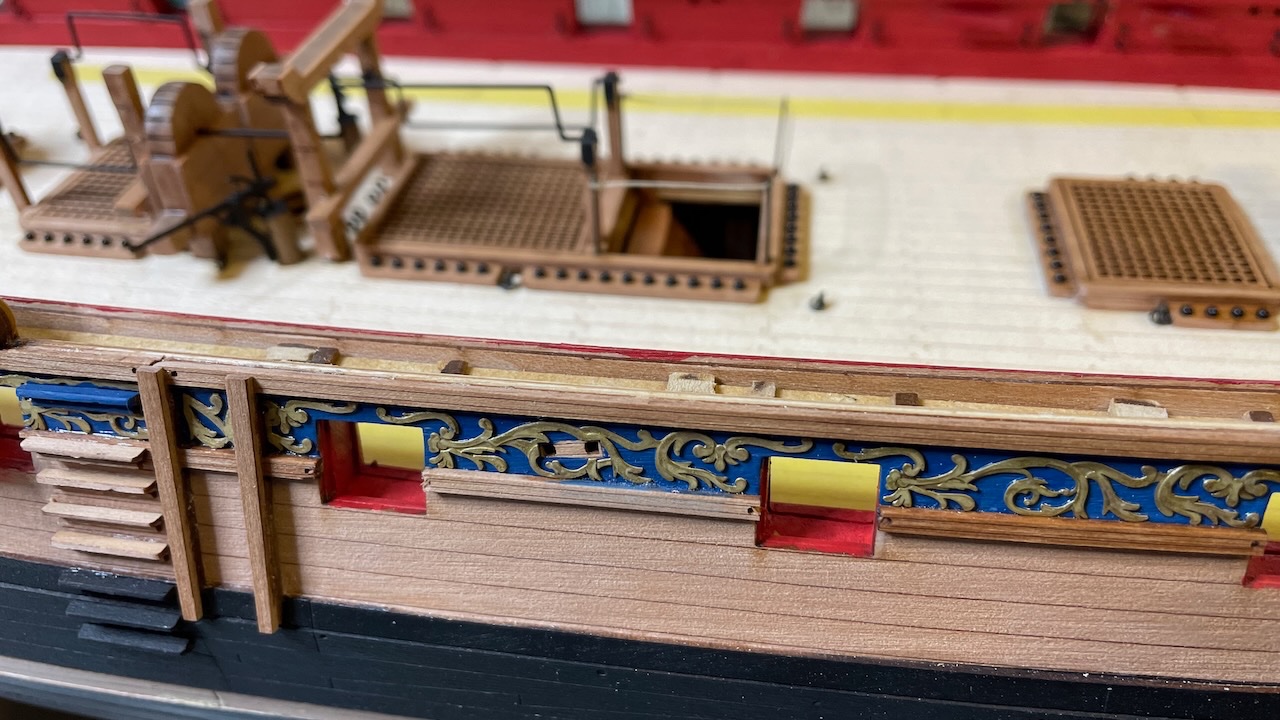
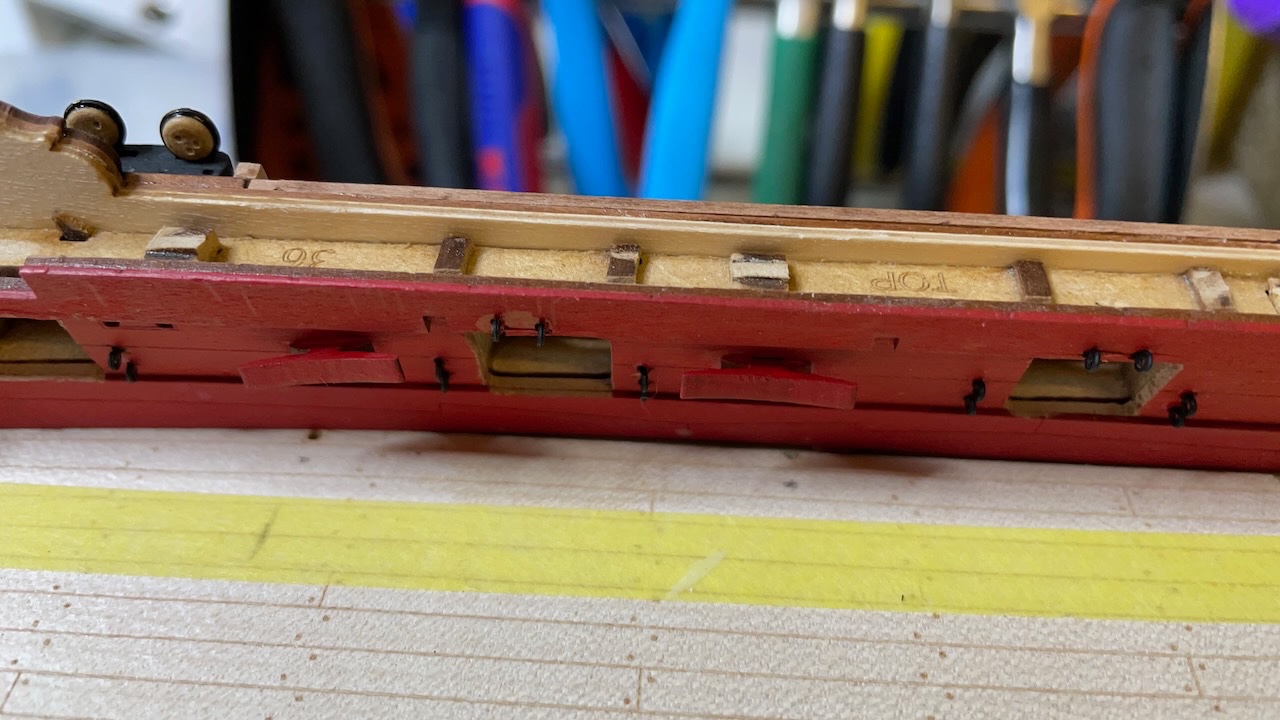
Forecastle, Quarterdeck and Waist gunwales. Photos 611-612: Parts, painted with airbrush. Photo 613: While the paint is drying, I smoothened the scrollwork on the bulwarks, using filler, file and sandblock. This area is to be painted in black, as continuation of the gunwales. Note there are two slots that need to stay, so no filling in them. Photo 614: Gunwales glued.
- 426 replies
-
- 6
-
-
- Vanguard Models
- Sphinx
- (and 1 more)
-
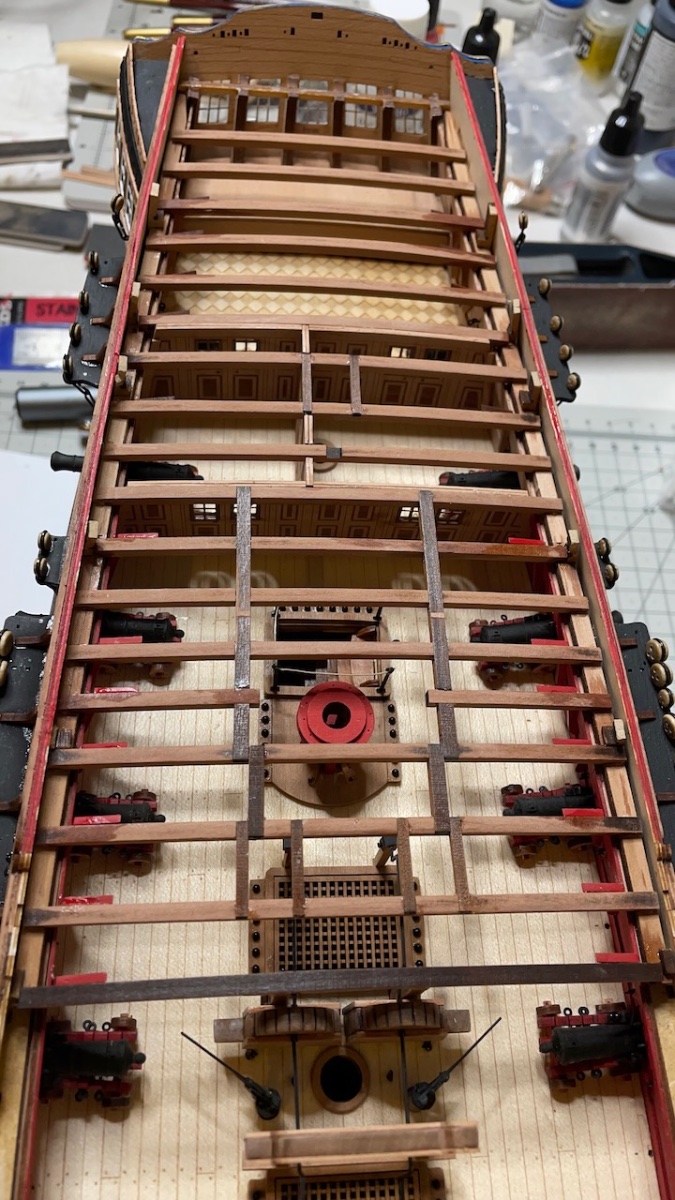
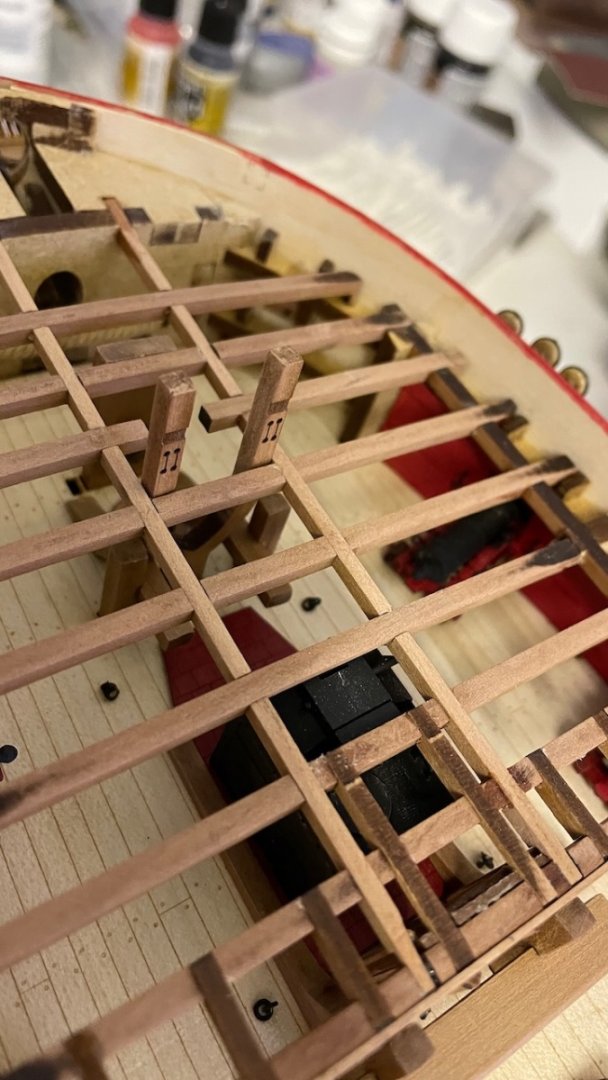
Build Day 60: 4 hours / Total 142,5 hours Thanks to the rainy Sunday (!), I managed to work quite a many hours today, completing: Fore Topsail sheet bitts with their cross beams, Forecastle, Quarterdeck and Waist gunwales installation, Forecastle and Quarterdeck gratings (only Forecastle grating glued in place at this stage), Belfry installation. Photos 609-610: Fore Topsail sheet bitts with their cross beams. They sit in their slots on the lower deck.
- 426 replies
-
- 2
-
-
- Vanguard Models
- Sphinx
- (and 1 more)
-
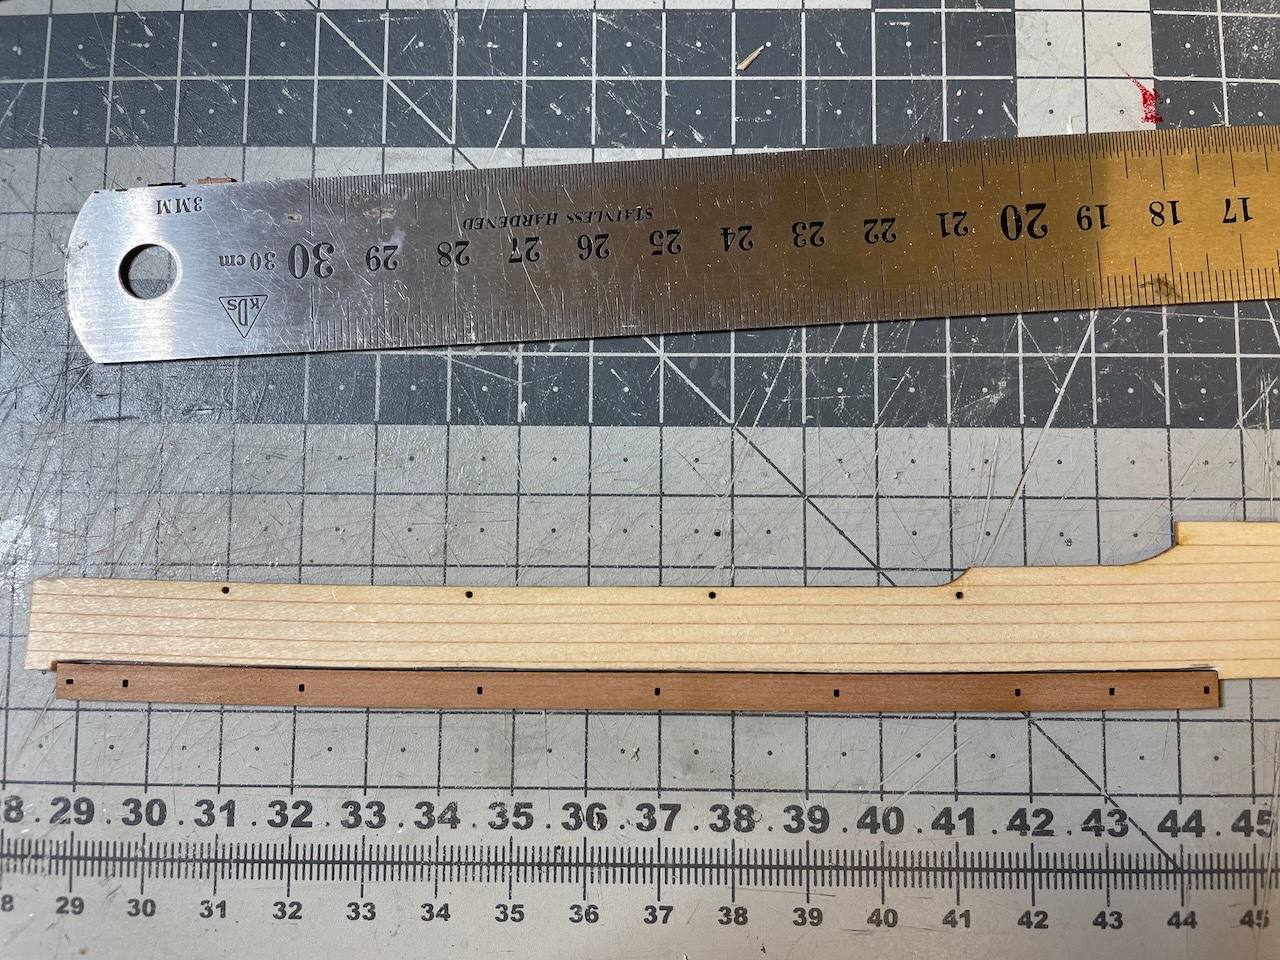
Build Day 59: 1,5 hours / Total 138,5 hours Gangway Stairs and Quarterdeck Gangway Steps construction. Photo 605-606: Construction of the stairs the same way as the previous ones. Photo 607: Taking measurements for trimming. I will glue the step on it later, after trimming it to same size with this one. The side resting against the bulwark will need some bewelling. Photo 608: Gangway Stairs and Quarterdeck Gangway Steps in place. That's all for today. Thanks for watching!

- 426 replies
-
- 8
-

-
-
- Vanguard Models
- Sphinx
- (and 1 more)
-
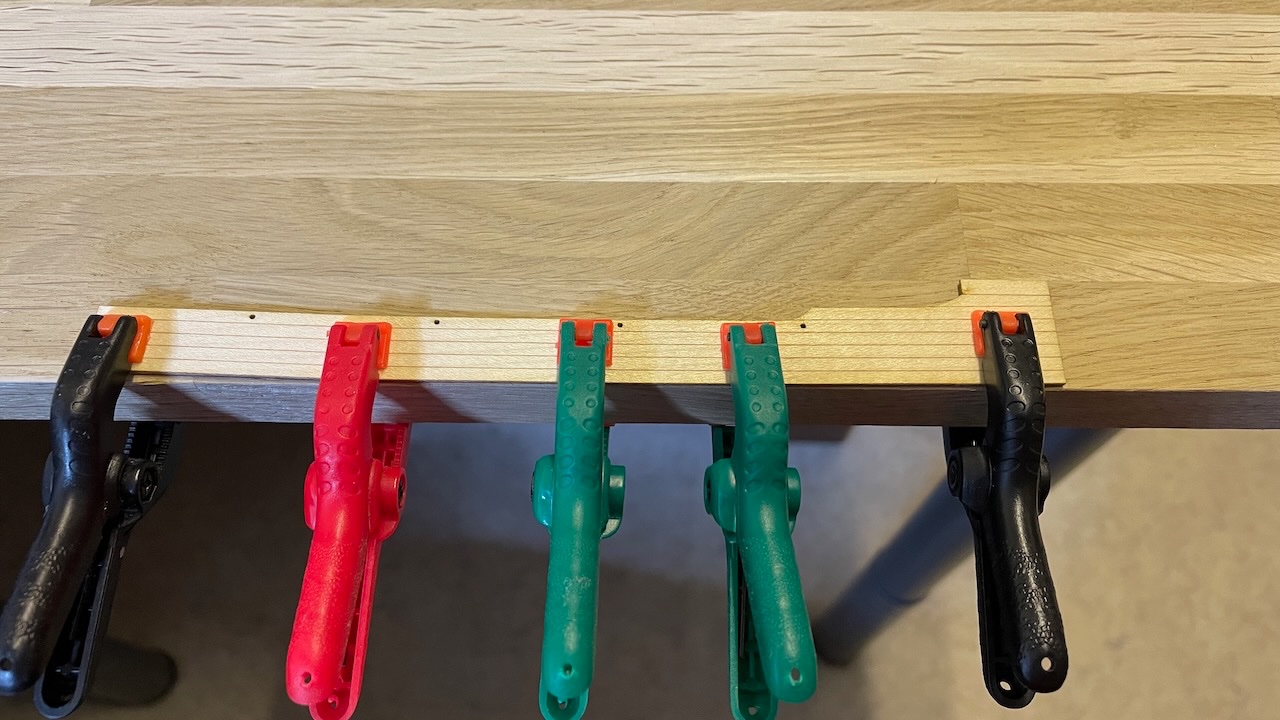
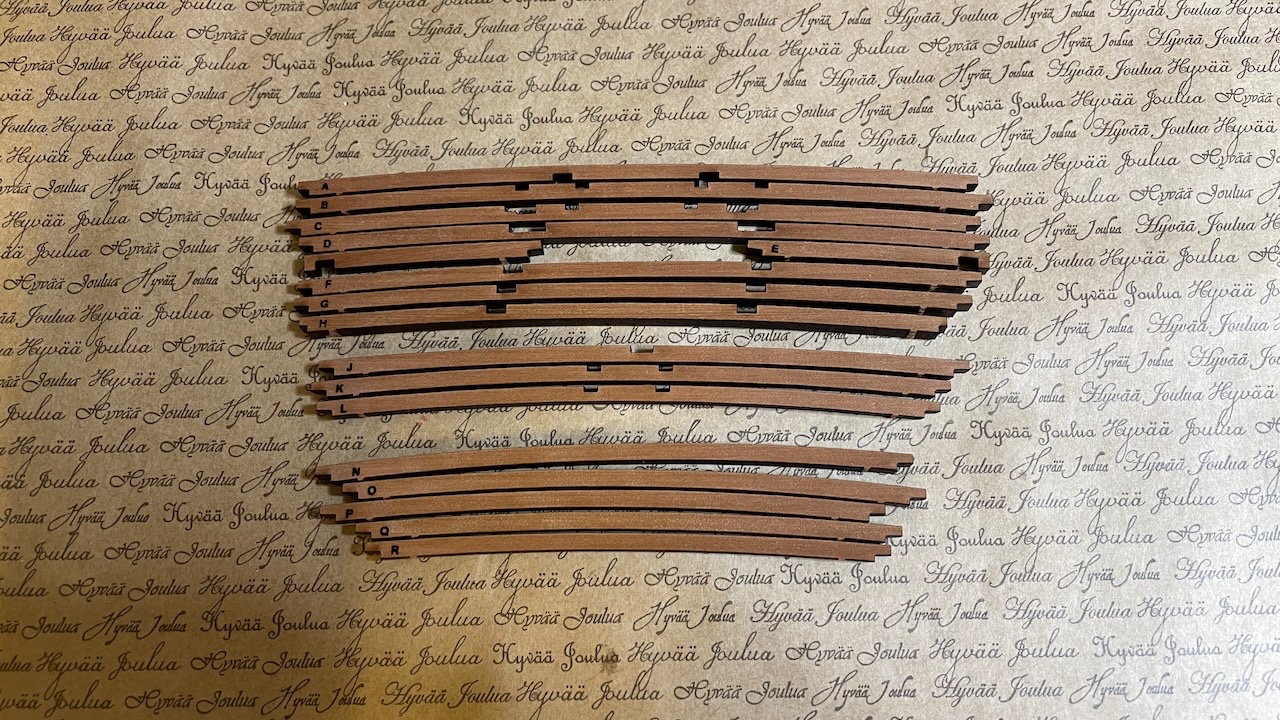
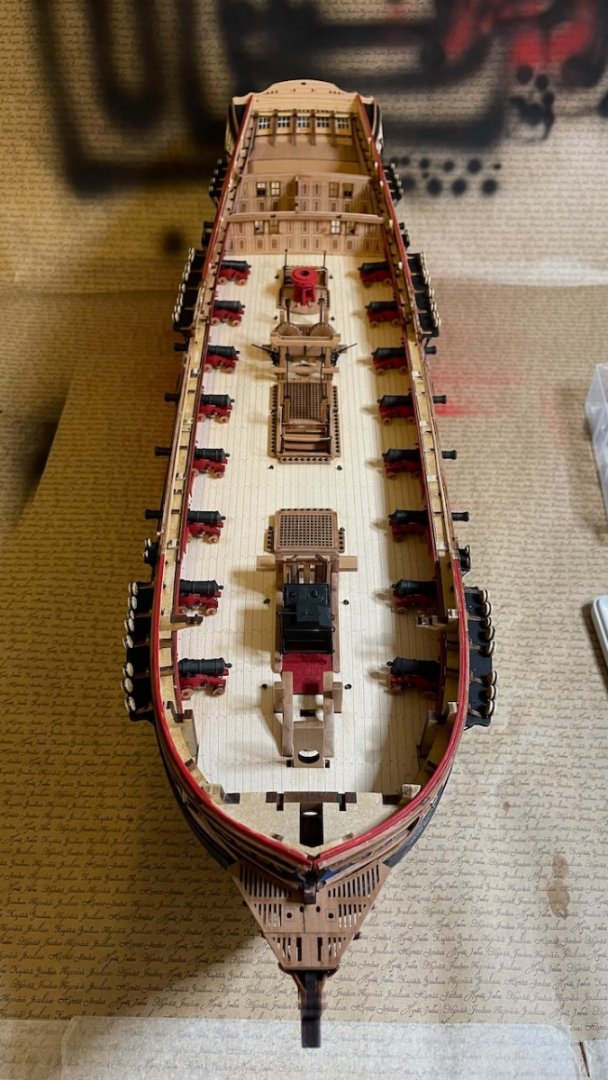
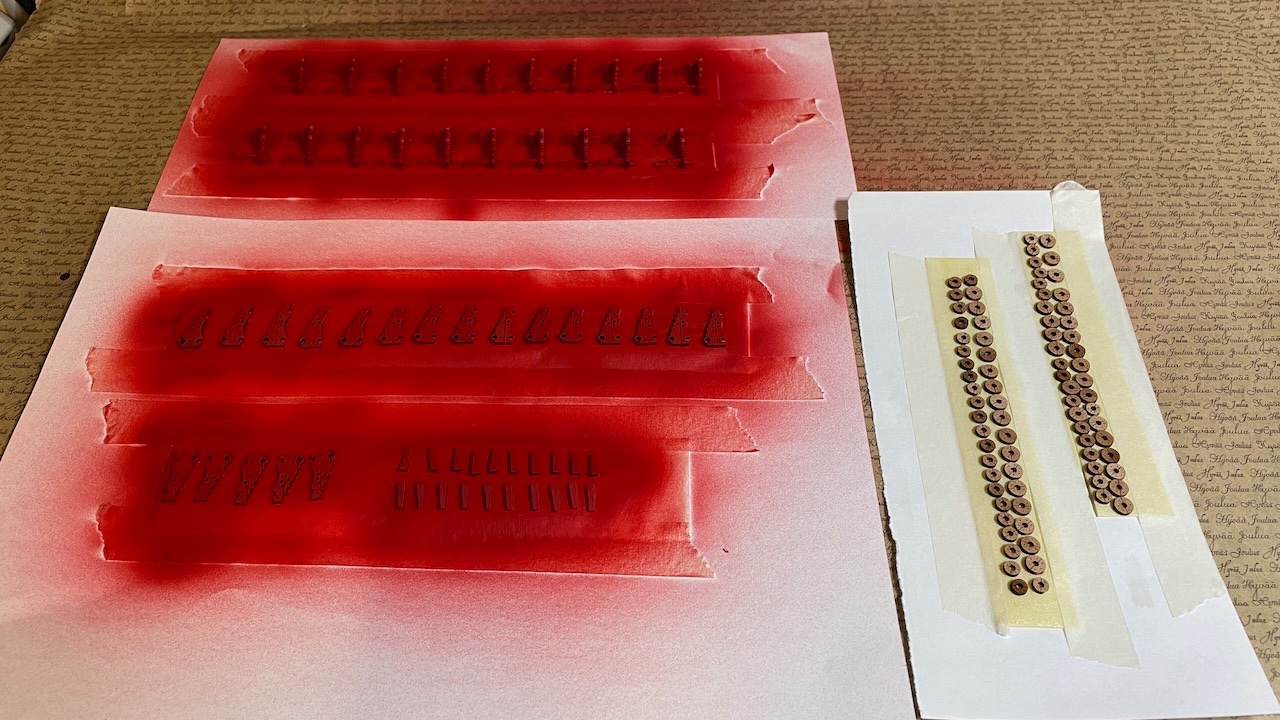
Build Day 58: 3,5 hrs / Total 137 hours Continued with the Forecastle, Quarter and Gangway deck installation. I am posting a bunch of photos here showing the progress and some details. Overall everything went without surprises and with only slight trims and adjustments. Gangway patterns are composed of two layers glued one on top of another. I clamped them on a piece of wood to prevent from bending while the glue dries. Their installation is a bit tricky to figure out from the photos in the instruction manual however you'll need to follow together with the plans. You'll need to take some measures and trim off parts where it will align with the with the gunwale. For that I would recommend to follow a slightly different order; first gluing the gangway support knees (those red parts) in place and then resting the gangway patterns on them to take the measurements. Photo 589-604: 16 photos showing the progress:


- 426 replies
-
- 9
-
-
-
- Vanguard Models
- Sphinx
- (and 1 more)
-
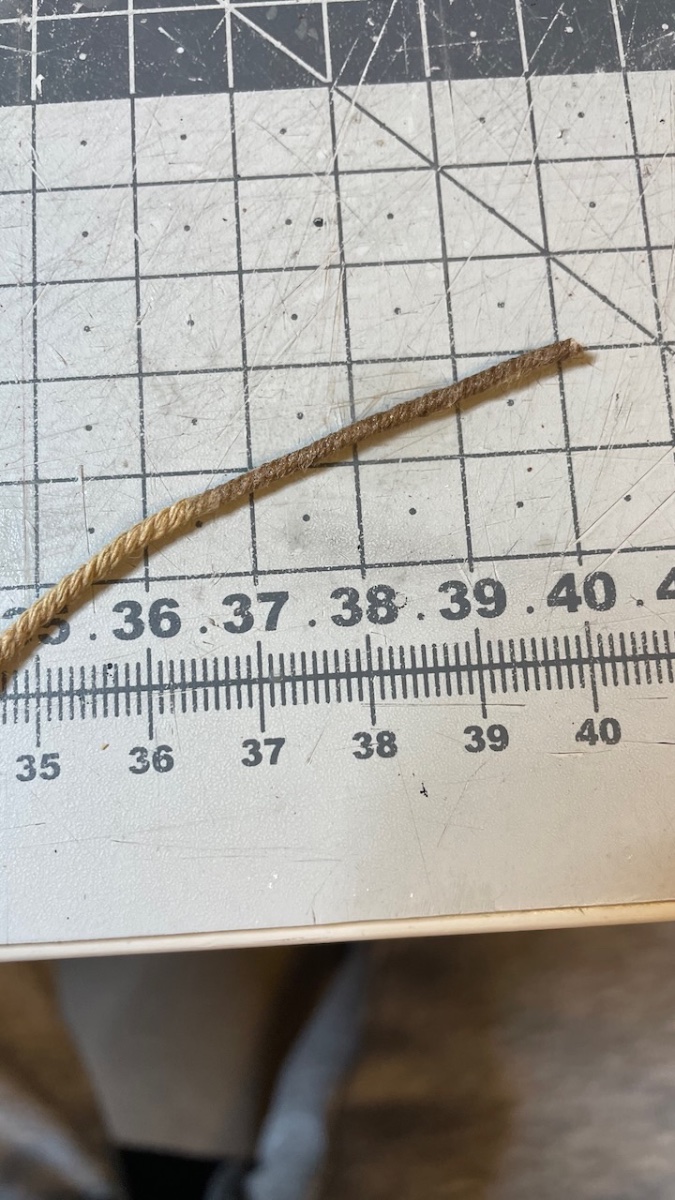
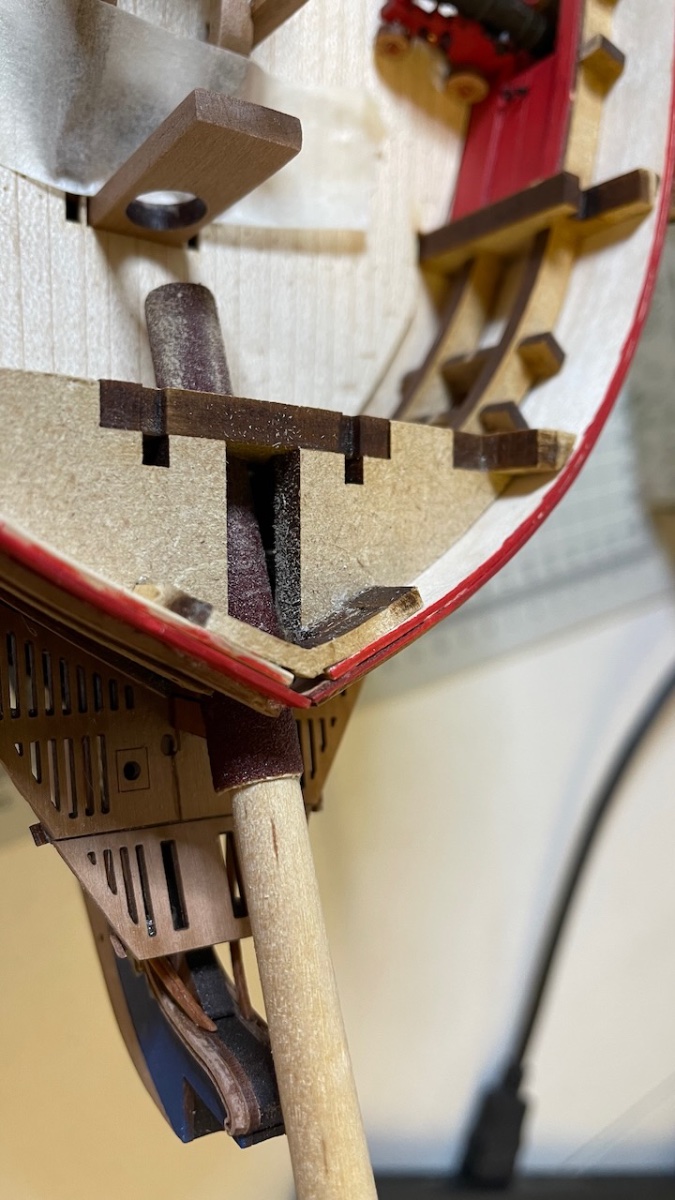
Photos 584-587: Anchor cable (i.e. the thick rope) installation. Hardened a few centimeters with CA glue on one edge help insert through holes easily. They should terminate with a knot behind the bulkhead but I may keep it in one piece just like in the photo. It won't be visible below the deck at all and it may help make adjustments while installing the anchors.


- 426 replies
-
- 4
-
-
- Vanguard Models
- Sphinx
- (and 1 more)
-
Photo 581-583: Bowsprit opening. I wrapped and glued a thick sandpaper (actually those you use on electric band sanders) around a 6mm dowel and sanded the opening as instructed, including the Bowsprit support on the deck, until my 8mm dowel fits nicely (3rd photo below. Note it is just another 8mm dowel from my stock, not the Sphinx bowel).
- 426 replies
-
- 6
-
-
- Vanguard Models
- Sphinx
- (and 1 more)
-
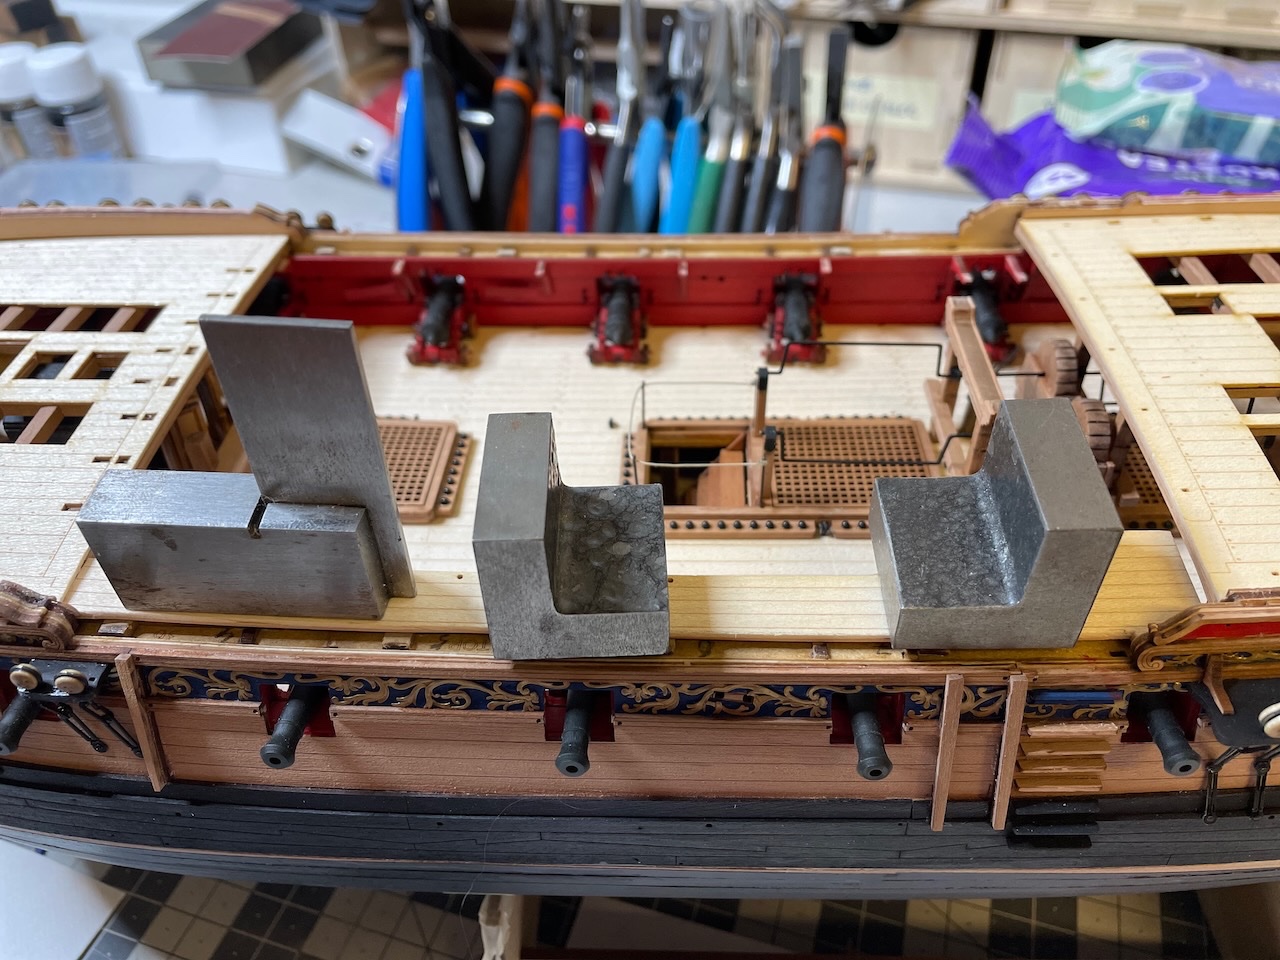
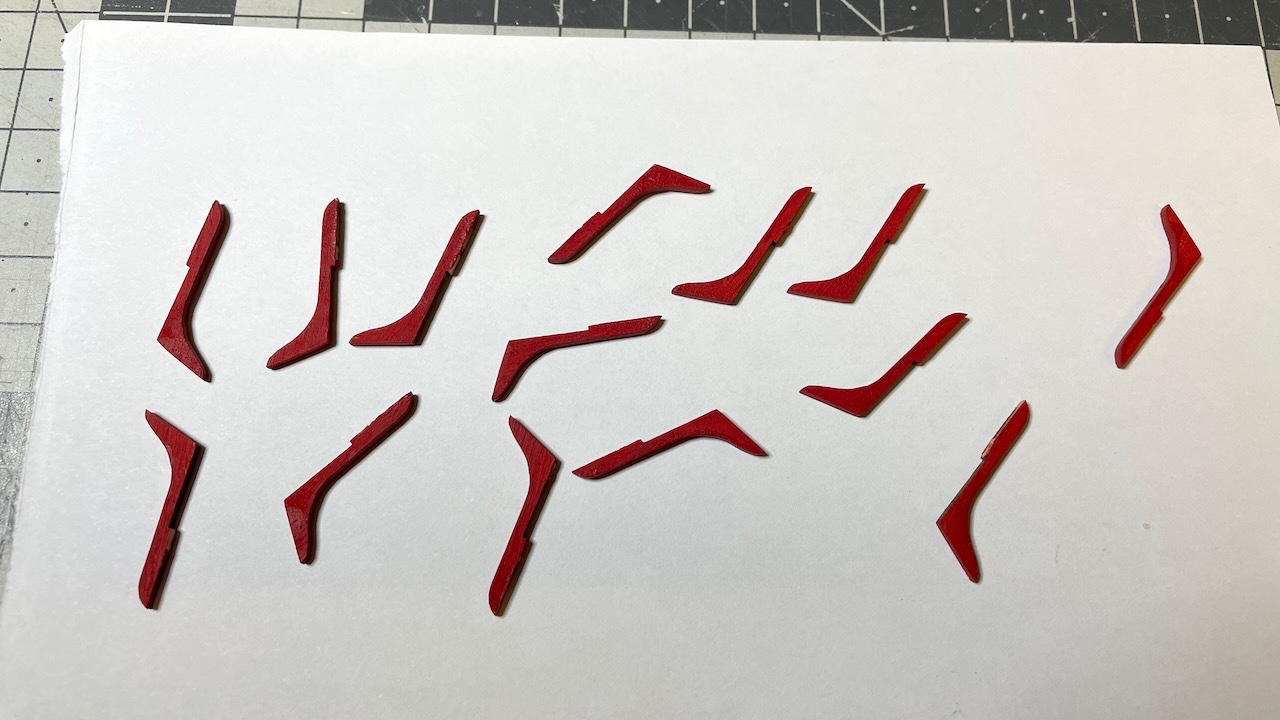
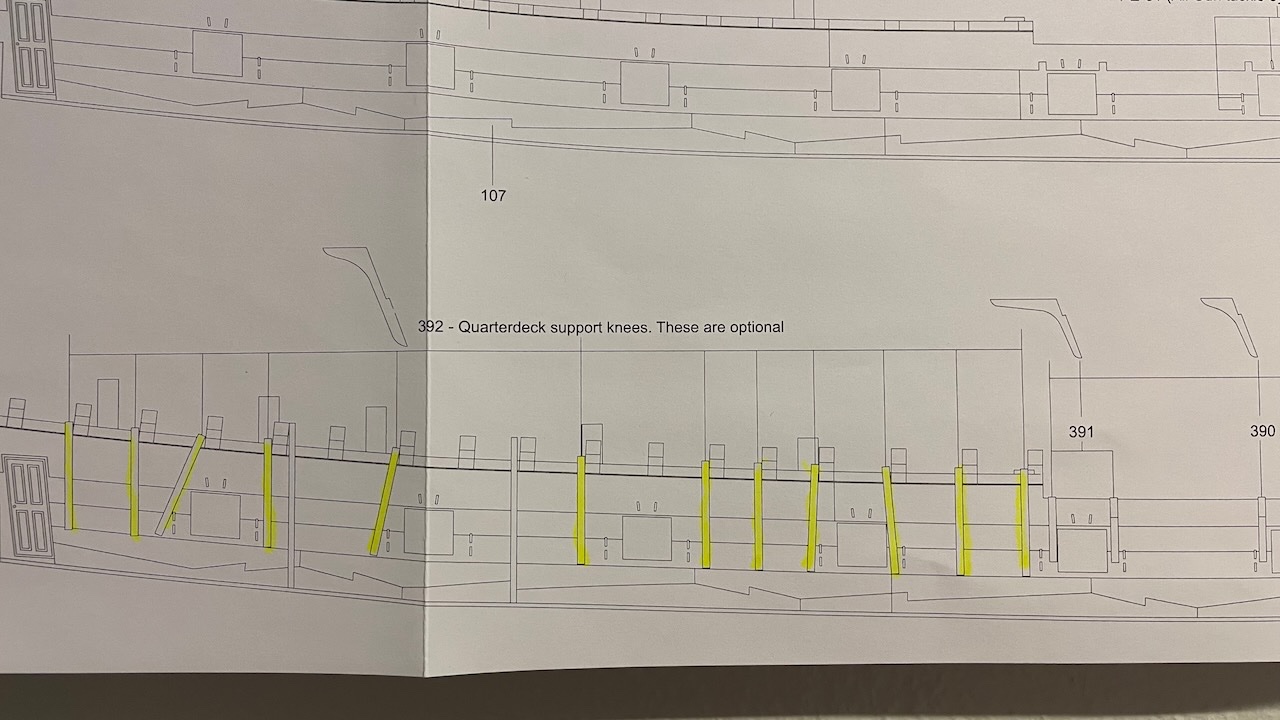
Photos 576-580: I decided to install the optional Quarter Deck Hanging Knees. After all they are included in price 😁. Follow the plan to correct positioning. Those resting on the red walls will be painted in red, the rest in natural.


- 426 replies
-
- 5
-
-
- Vanguard Models
- Sphinx
- (and 1 more)
-
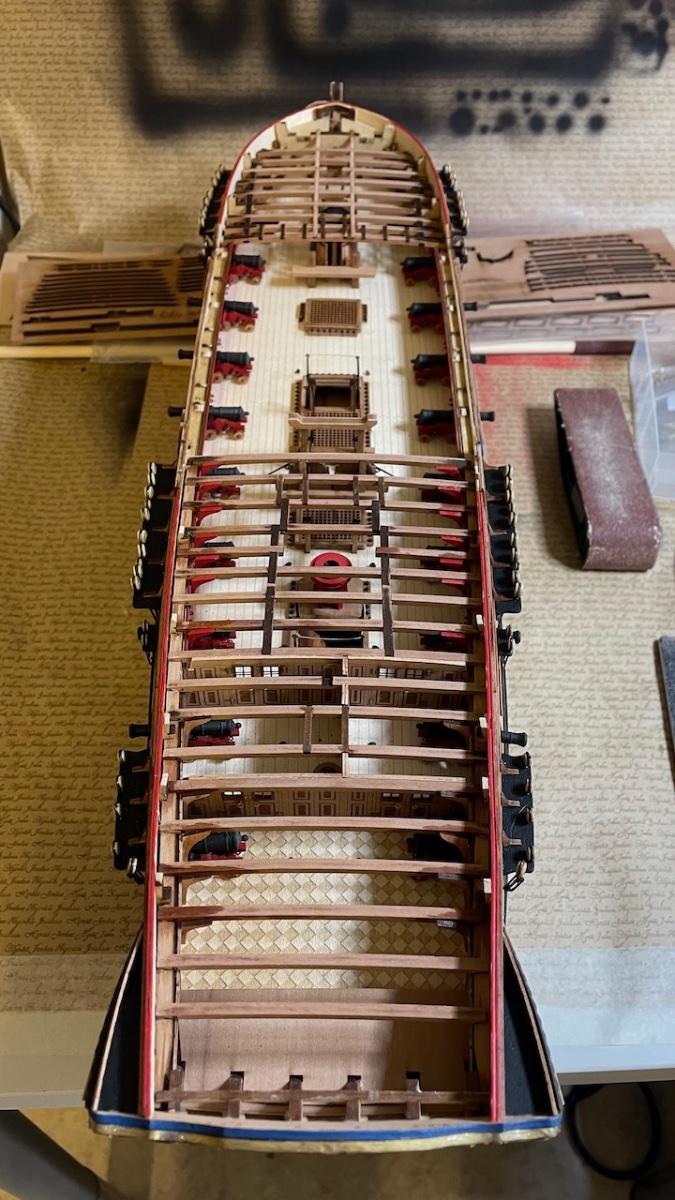
Build Day 57: 4 hrs / Total 133,5 hours Deck beams. Overall they went without any problems, just minimal sanding and corrections here and there. The way they are designed and is excellent, as in general with this kit. Photo 571: Below the Quarterdeck ones removed and cleaned: Photo 572: First one to glue sits on top of chain pump handle stanchions, hence it is important to make sure the stanchions have the correct height. I noticed after installing this beam when comparing with the other beams that mine were about 1mm too high, making this one too high to fit the deck sheet later, and I sanded off the beam until the height and curve is flush with rest of the beams. Photo 573: As stated in the instructions, the beams should follow a layout about parallel to the gun deck. It means they should have a slight downward slope towards aft. Without it, the last one won't sit on the bulwark shoulders, as seen in this dry fit photo: Photo 574: I sanded bulkhead beam slots on both sides as in the picture, in order to give the necessary slope. Photo 575: Now they sit properly.
- 426 replies
-
- 2
-
-
- Vanguard Models
- Sphinx
- (and 1 more)
-
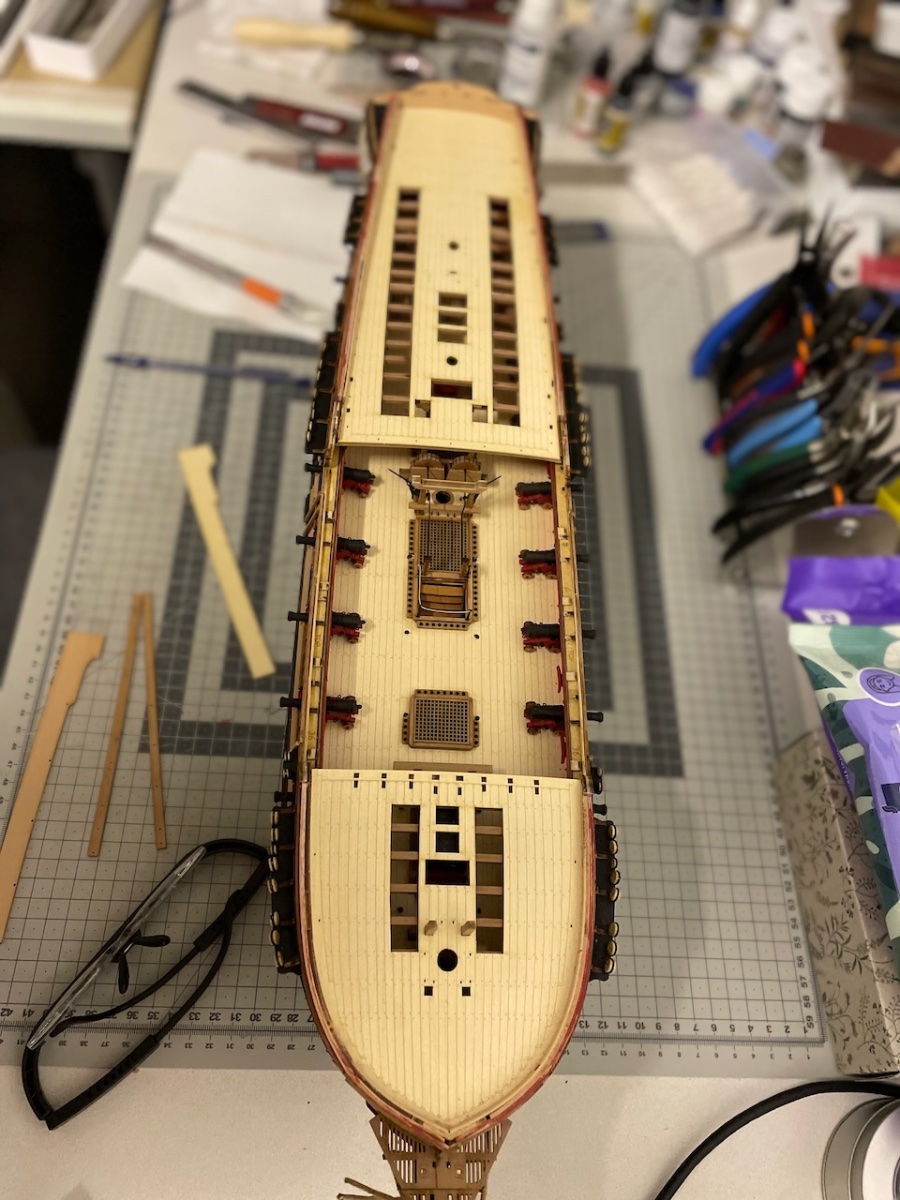
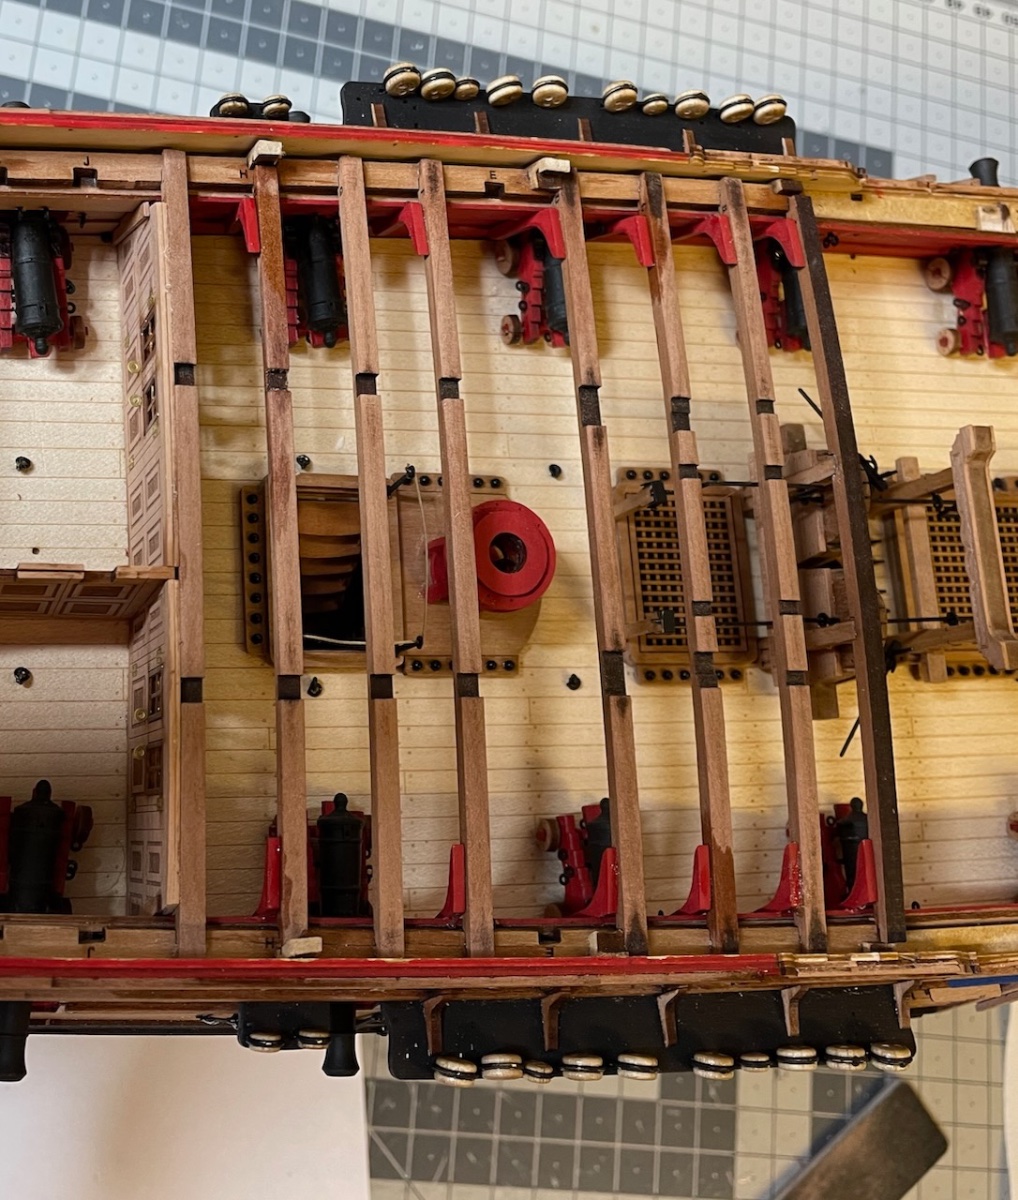
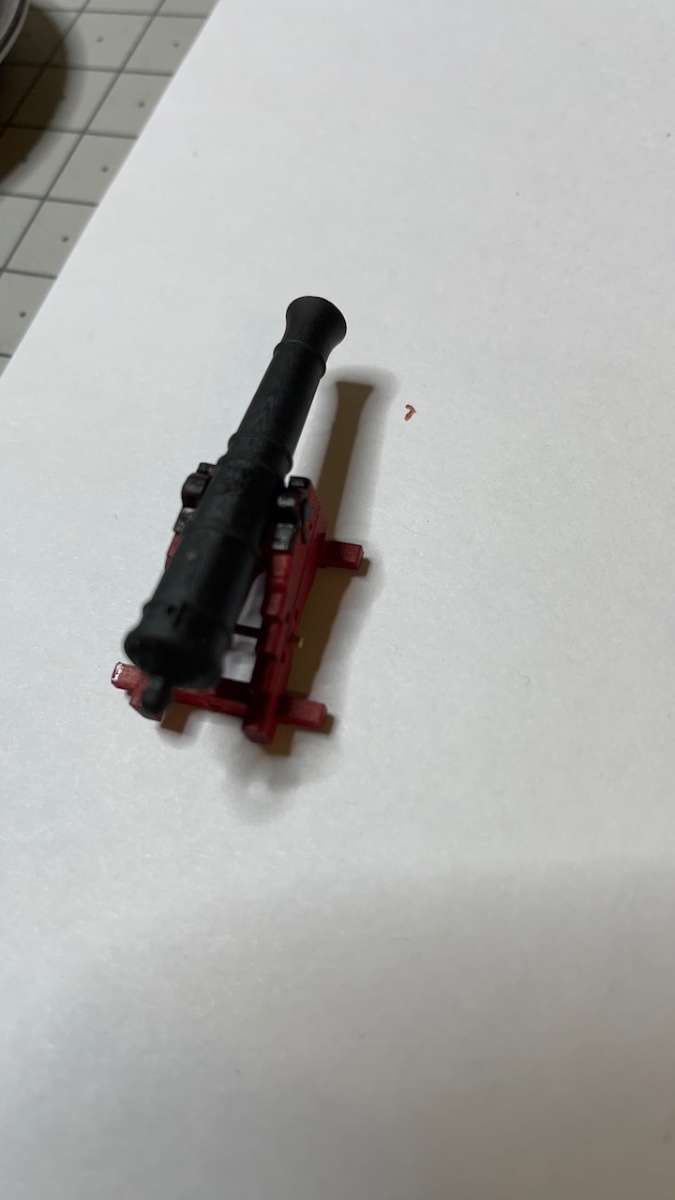
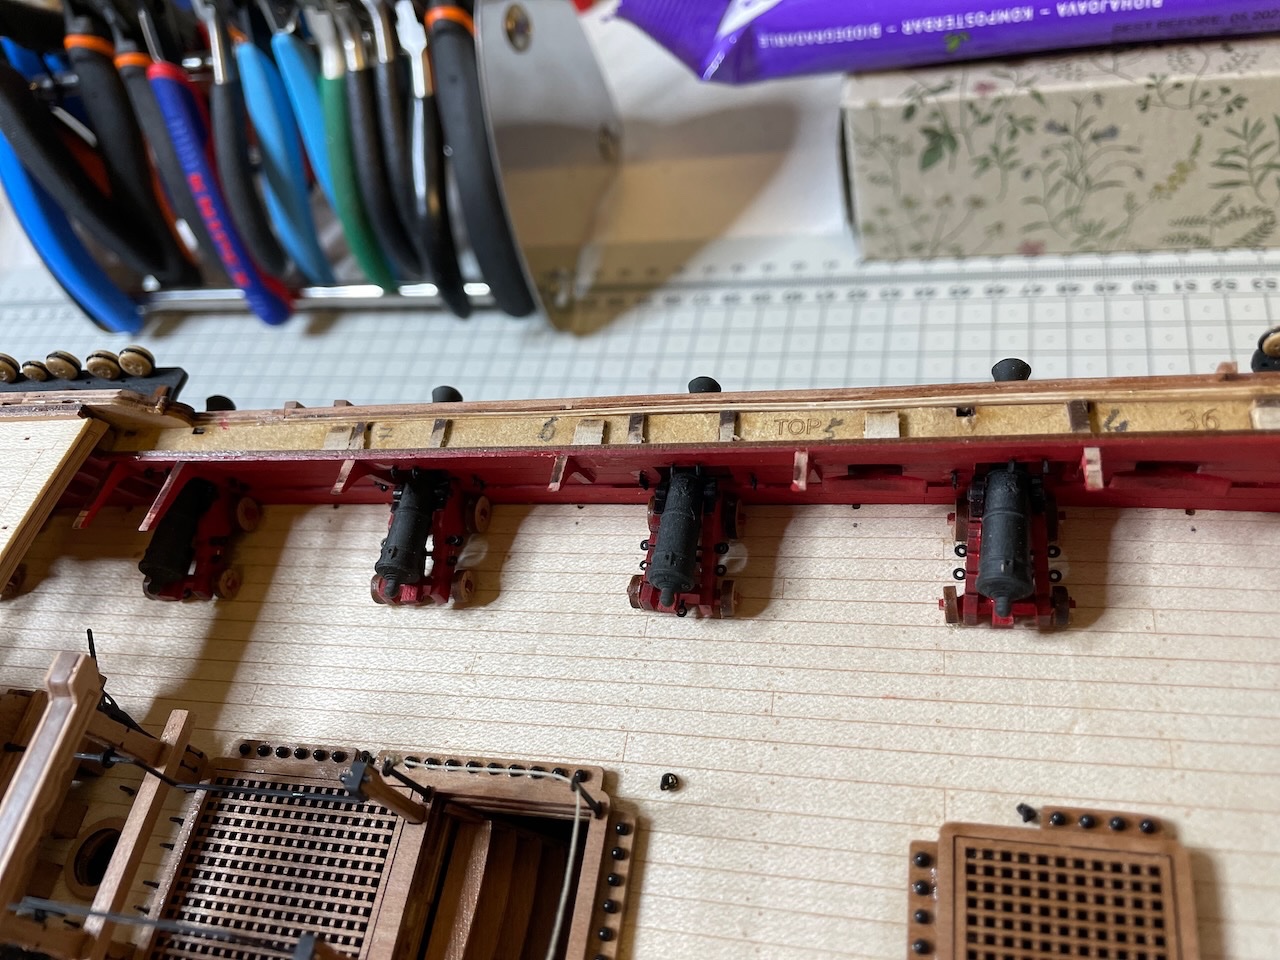
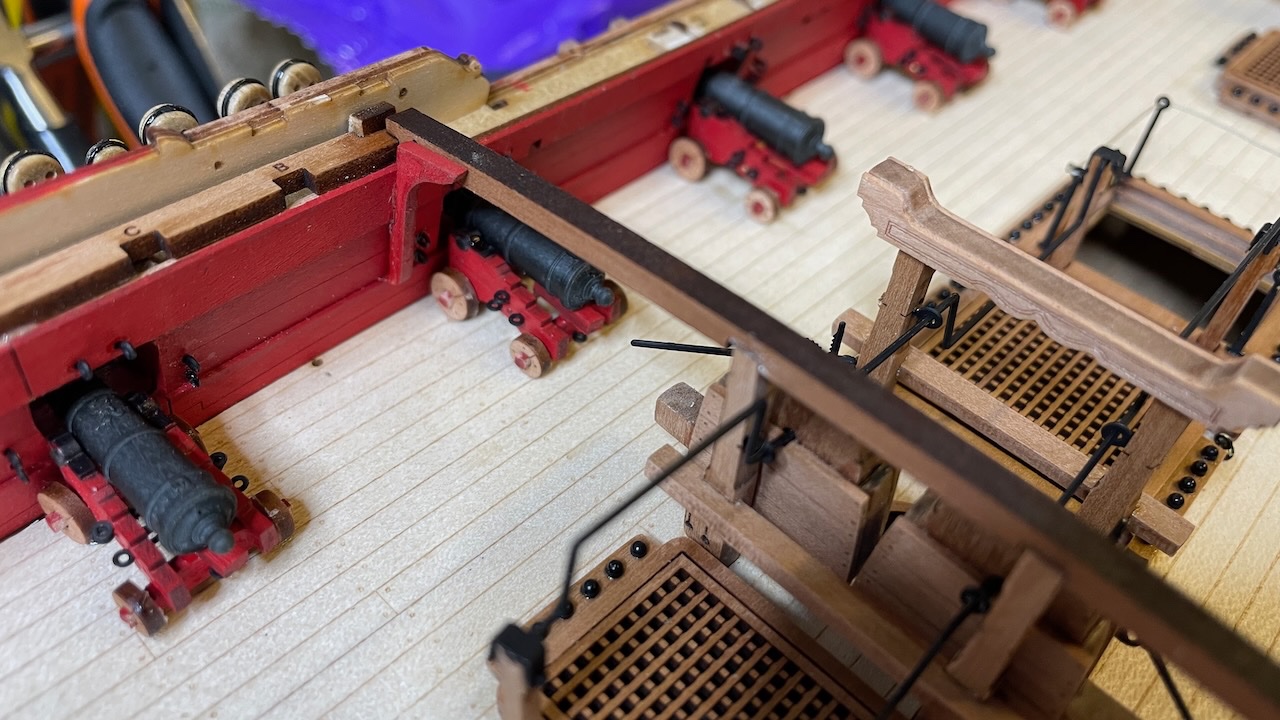
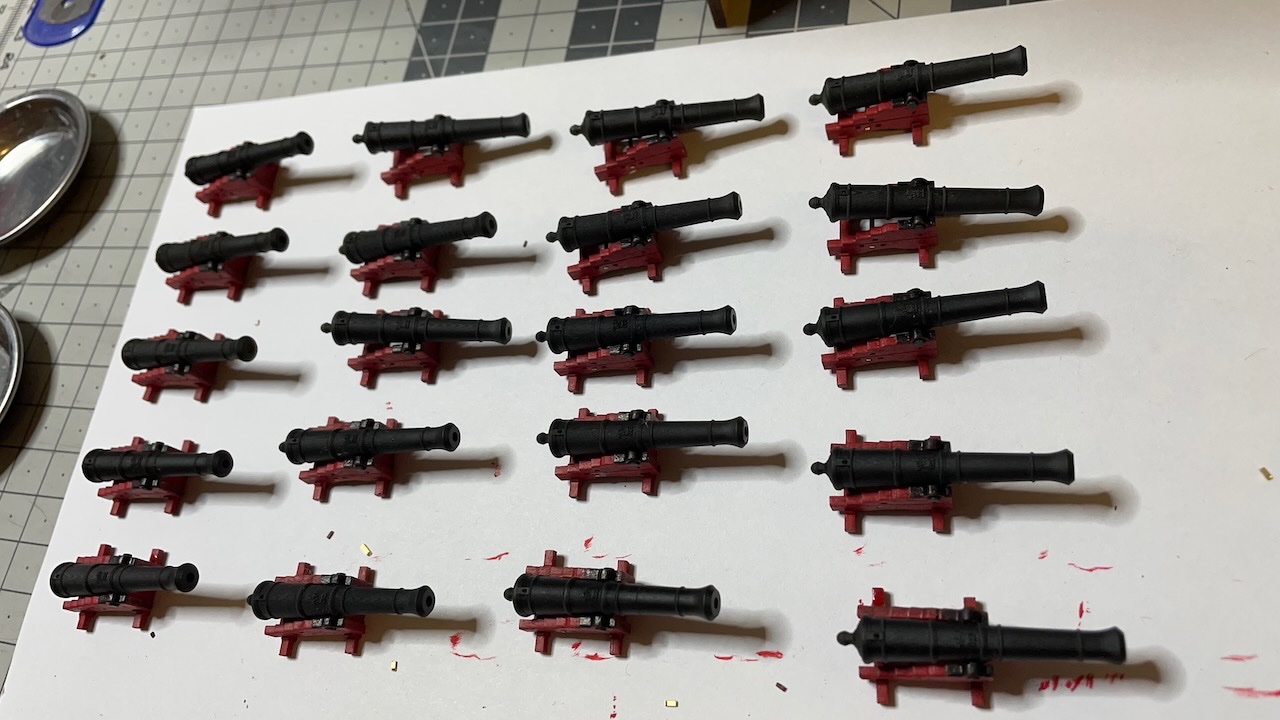
Build Day 56: 3 hrs / Total 129,5 hours 3 hours of work covering the completion of cannon carriages, including gun port painting, which I noticed I forgot to do, almost too late. Photo 569: Gun ports painted in red. I should have done it earlier and it was a bit tricky to reach some parts with brush after all the other details around, but I survived. Photo 570: All cannons in place. I decided not to rig them at all. They will be barely visible in the end.
- 426 replies
-
- 3
-
-
- Vanguard Models
- Sphinx
- (and 1 more)
-
Ah! Actually yes, when I zoom enough I see the door frame in the manual. Thanks for instant clarification!👍
- 426 replies
-
- 2
-
-
- Vanguard Models
- Sphinx
- (and 1 more)
-
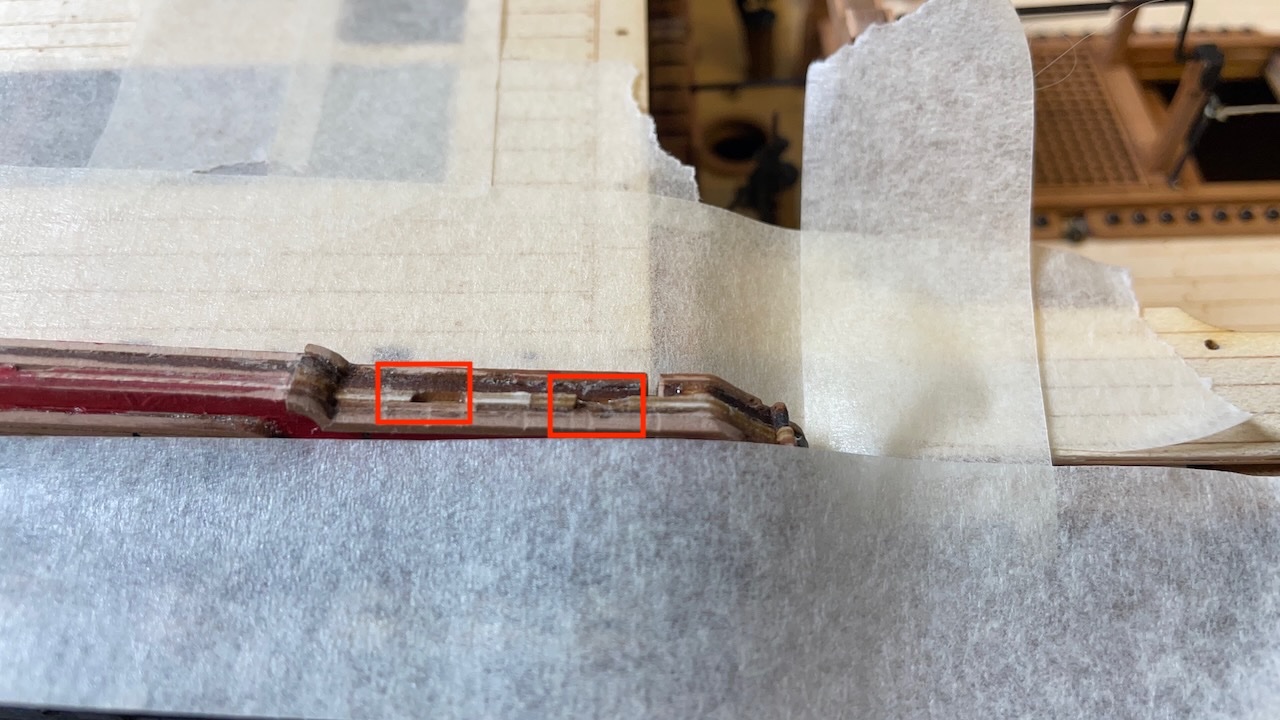
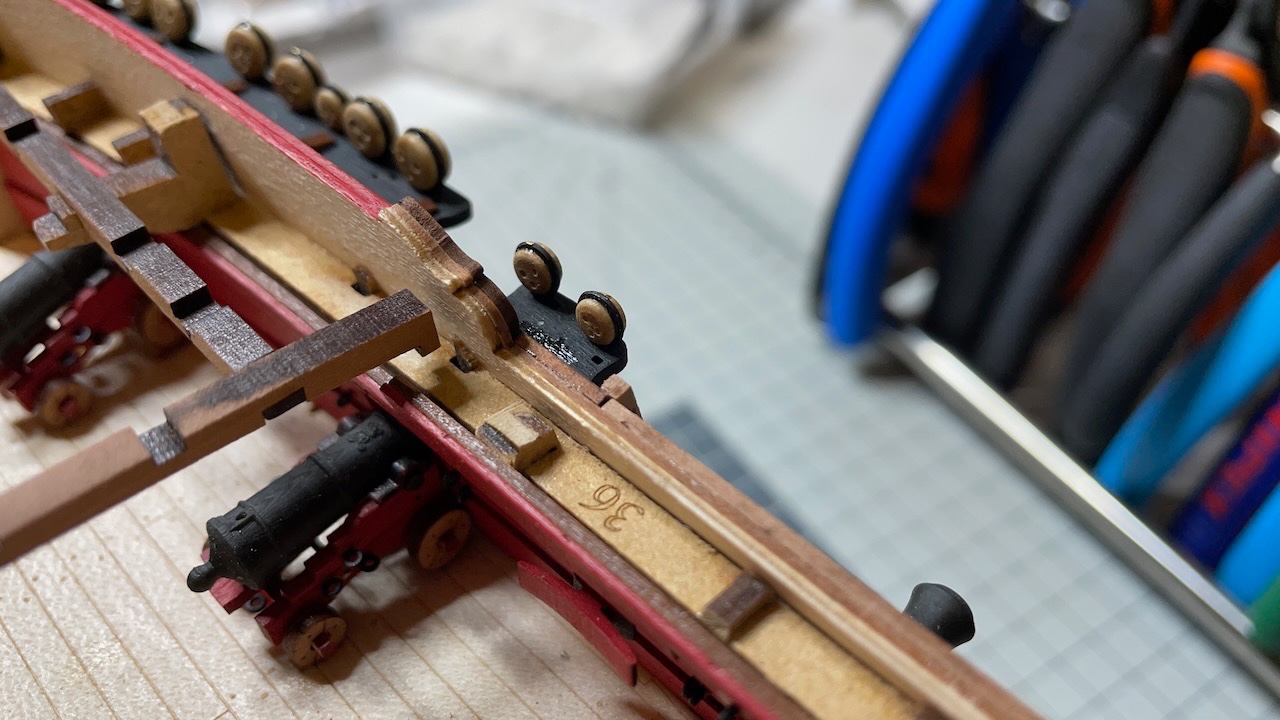
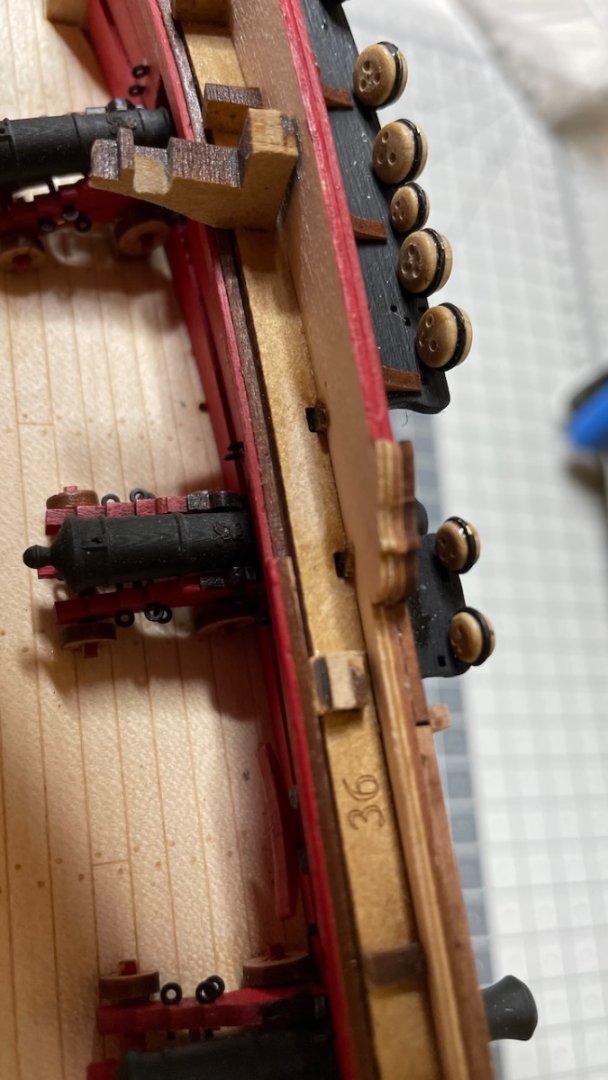
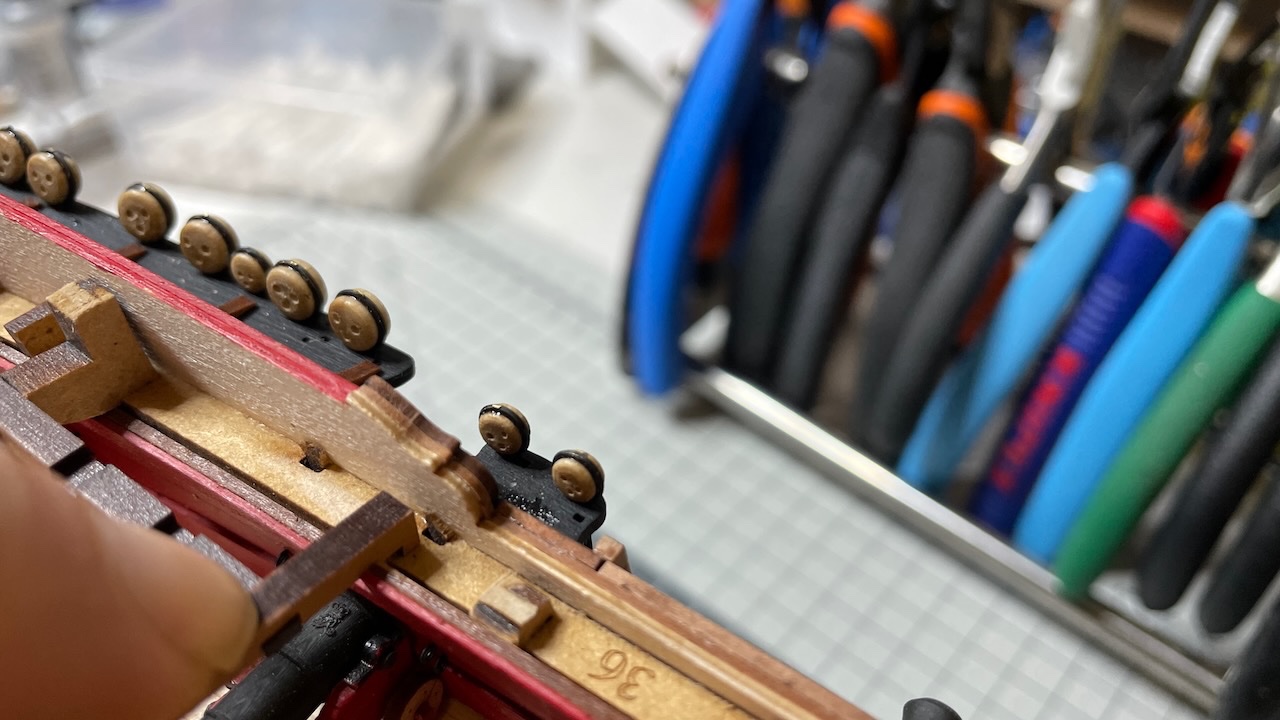
I have proceeded without having time to post my diary, but anyway, I have a question about the deck beam "Z" . In my model it fits right beside the door frame aligning with its grooves. In the manual it somehow looks like it goes over the door. Has it changed since the prototype or am I making a mistake? @James H can you comment? I haven't glued "Z" yet, it is dry fit in the photo. Photos 567-568 : The picture in the manual vs my build:
- 426 replies
-
- 2
-
-
- Vanguard Models
- Sphinx
- (and 1 more)
-
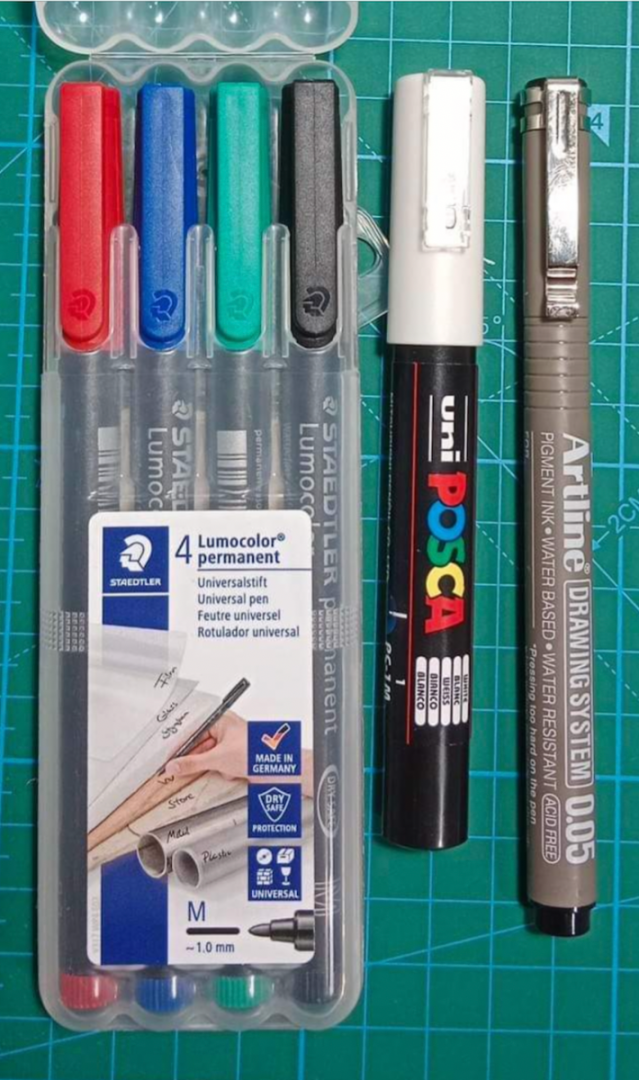
Got the hint from a childhood neighbour friend of mine, after seeing the excellent cockpit detail paintings of his helicopter model and asked him how he managed that. Also see Staedtler M size for color finishings and UniPosca 0.7mm for white: just touch the spot and that's it. .
- 426 replies
-
- 2
-
-
- Vanguard Models
- Sphinx
- (and 1 more)
-
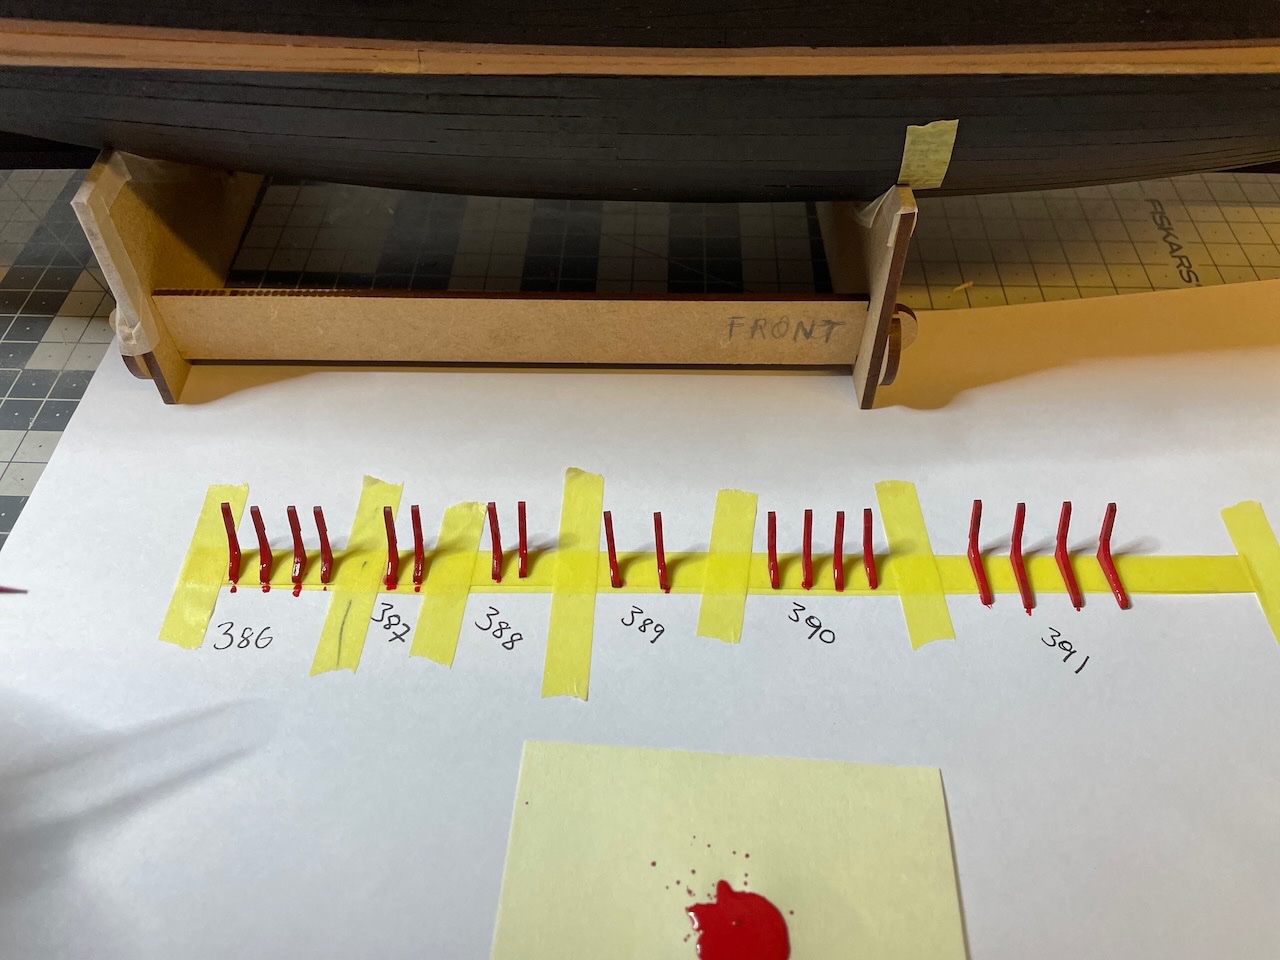
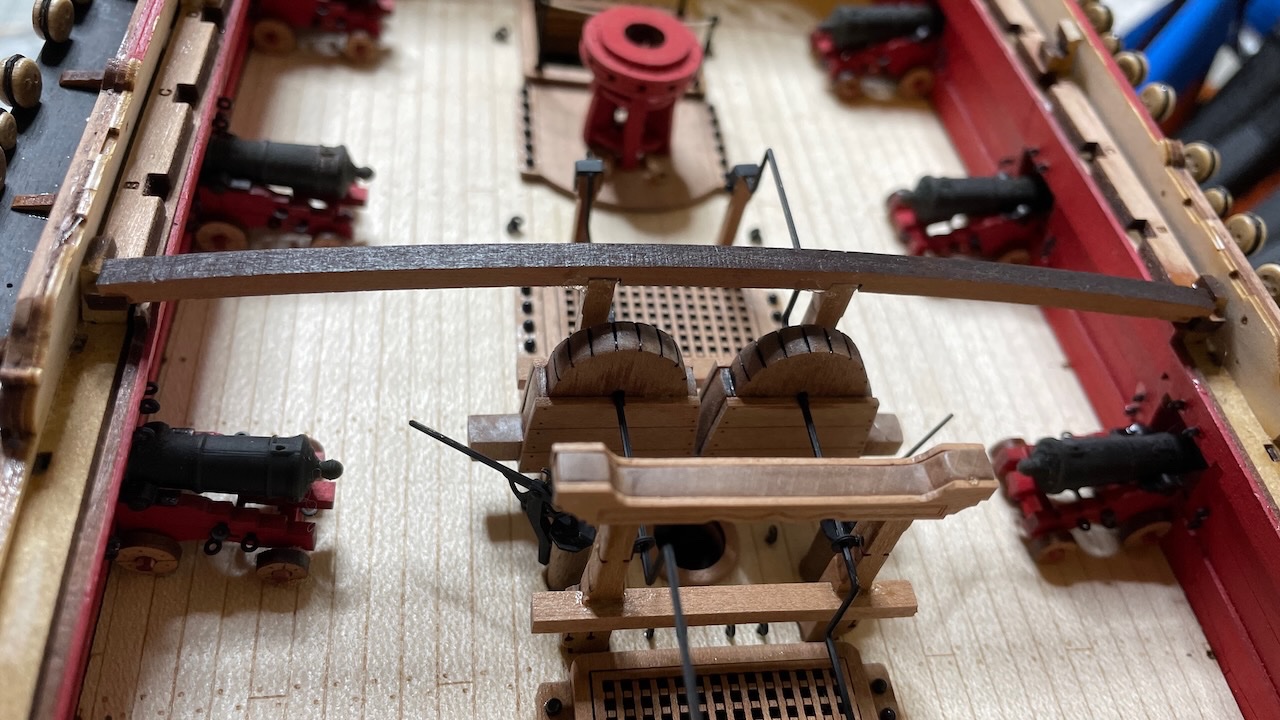
Photo 566: All 20 carriages before installing the wheels and eyebolts (and possible rigging).
- 426 replies
-
- 4
-
-
- Vanguard Models
- Sphinx
- (and 1 more)
-
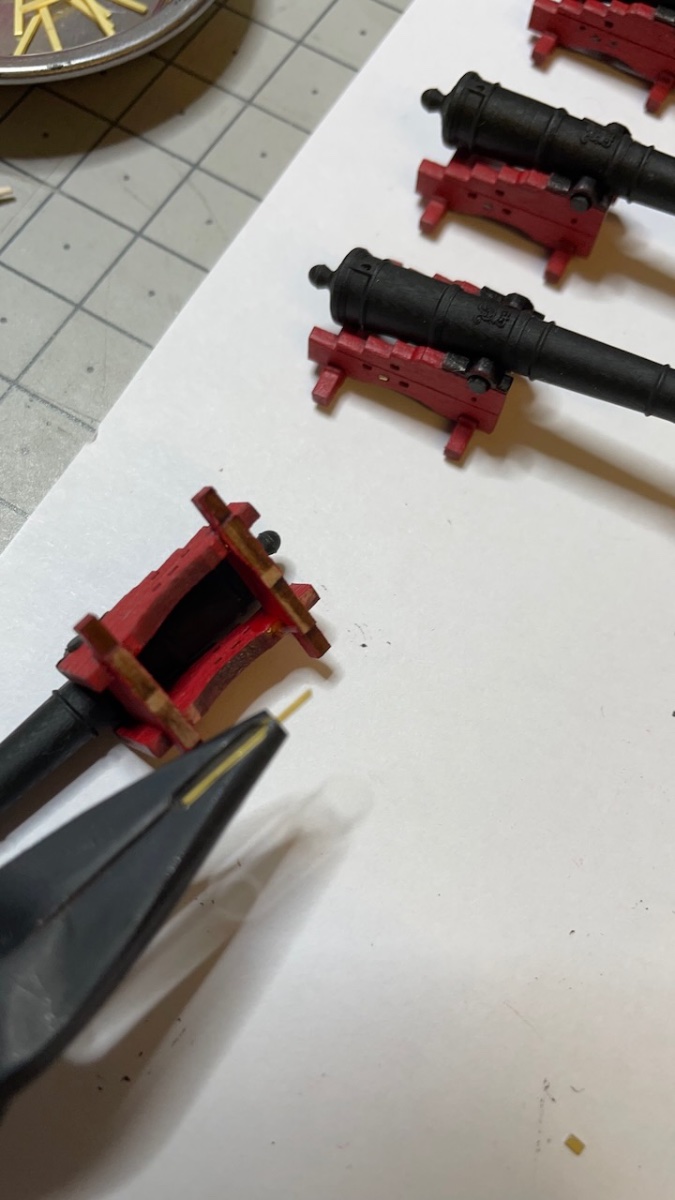
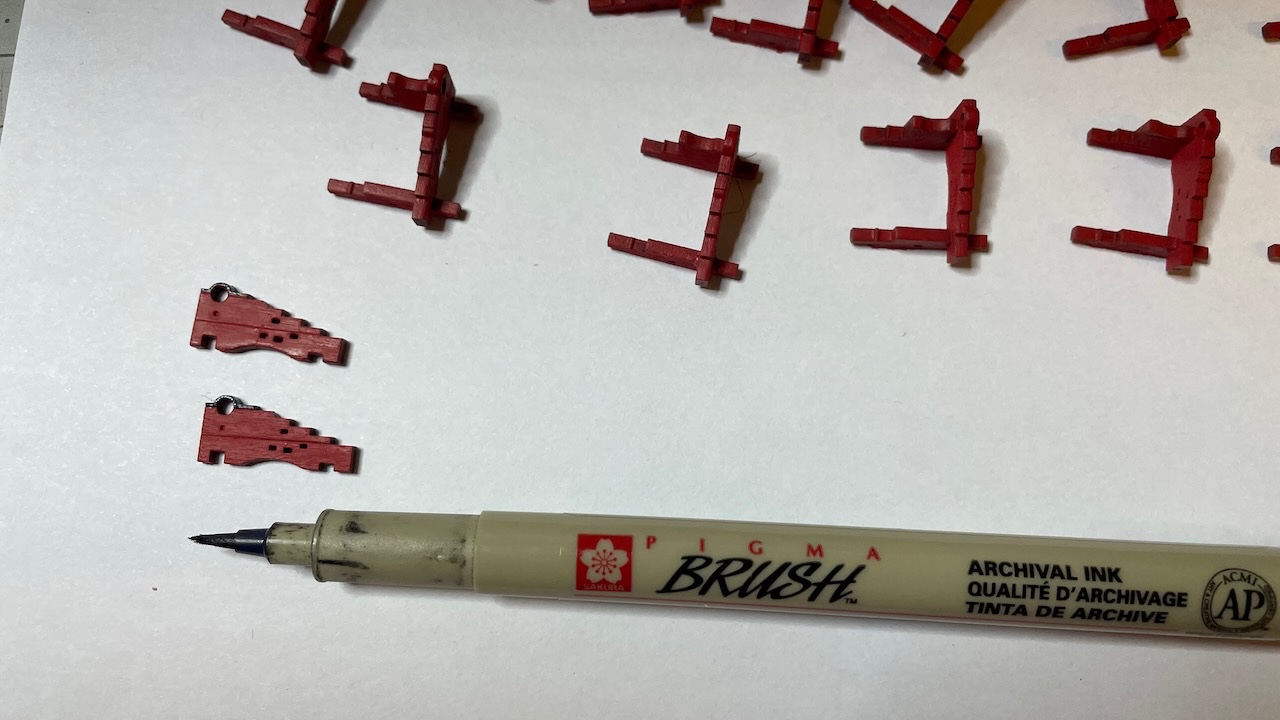
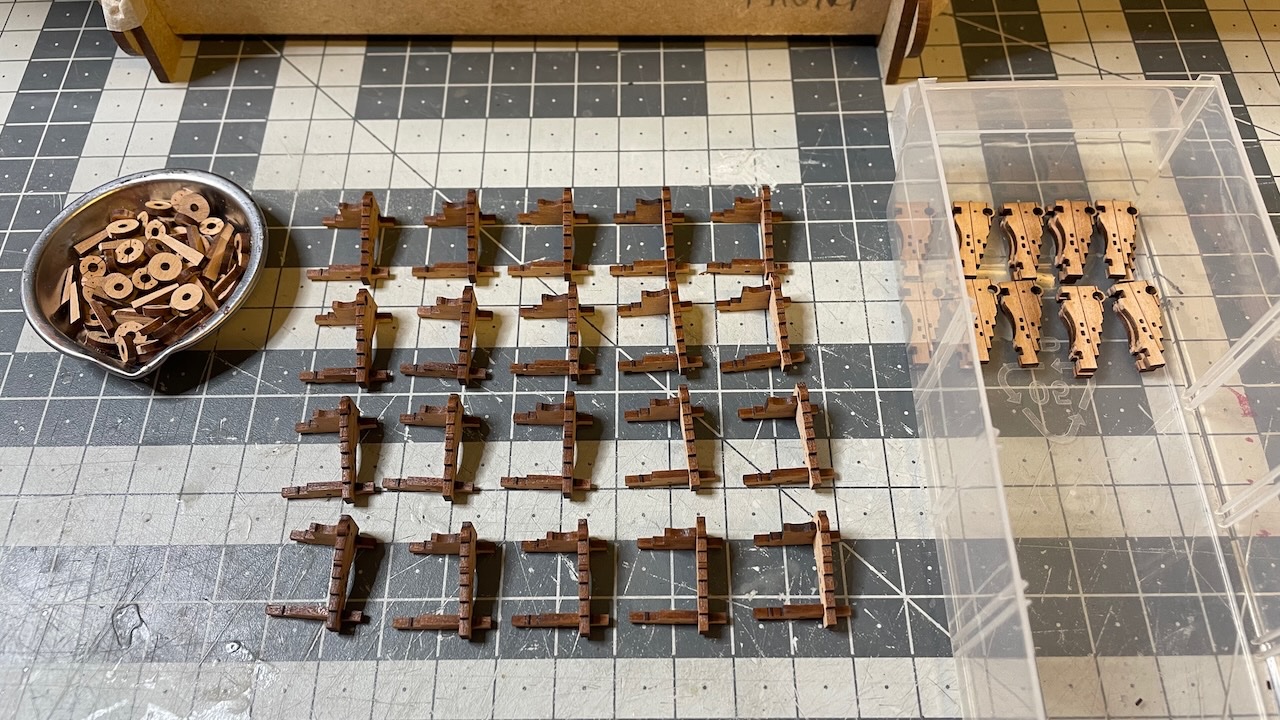
Photo 556: One of the carriage side piece will be glued after the gun has been inserted. However it is used now for correct alignment of the other 3 parts. Note the two sides are not parallel, they are a bit further apart at the back. Photo 557: 3-piece constructions are ready. Photos 558-562: Painting . Wheels will stay as they are. All parts are applied one layer of varnish before applying paint. Photo 563: Tip: For painting the cap square details I use this pen with permanent black ink. Works better than any paint brush. Photo 564: A detail showing the cannon carriage cross bar (going underneath the gun). Photo 565: My pin pusher comes in handy here, too. It allows to push it in small increments, making it possible to get the cross bar across the two holes without bending.


- 426 replies
-
- 6
-
-
- Vanguard Models
- Sphinx
- (and 1 more)
-
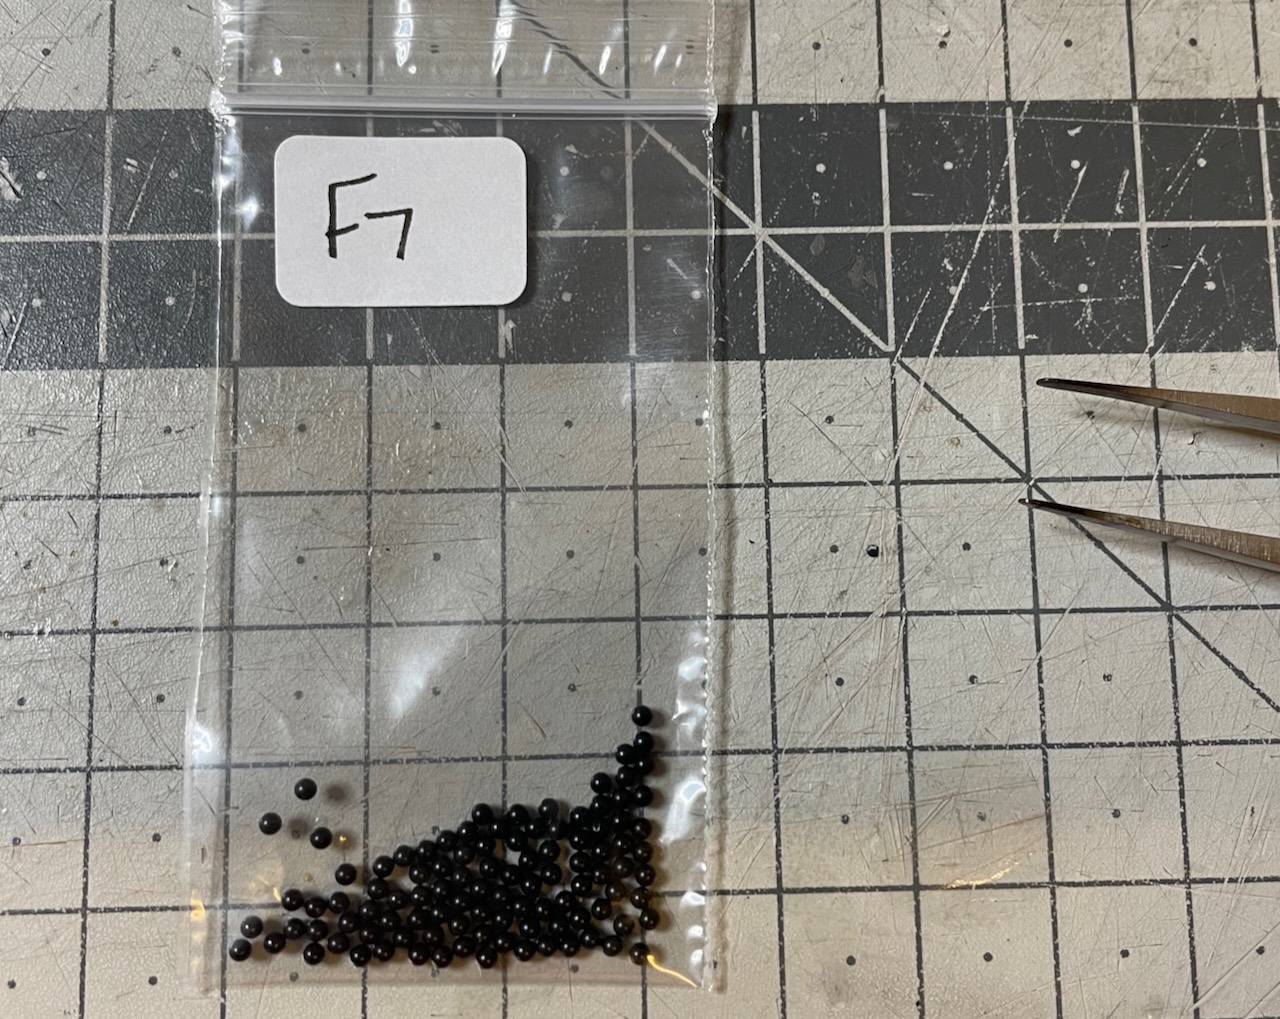
Build Day 55: 4 hrs / Total 126.5 hours Photos 554-555: Having been carried away with carriages I almost forgot to glue the cannon balls. Here they are.
- 426 replies
-
- 1
-
-
- Vanguard Models
- Sphinx
- (and 1 more)
-
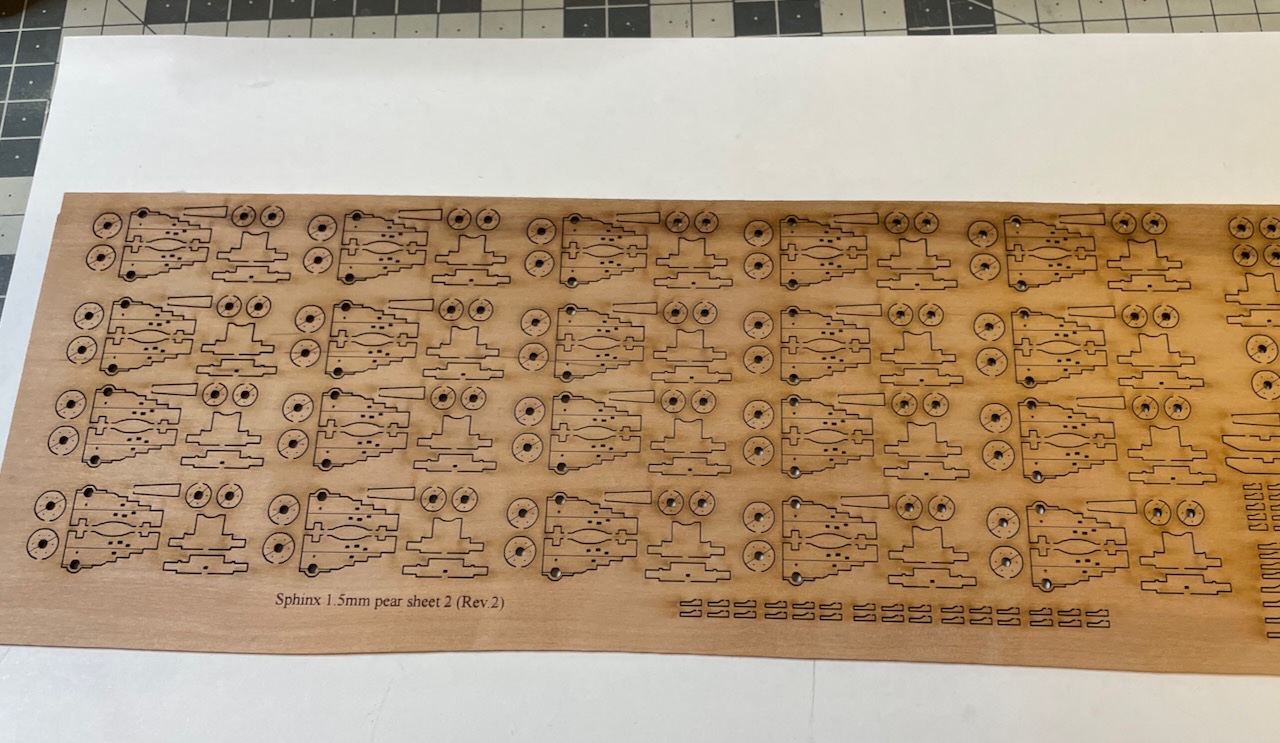
Now the cannon carriage build starts. There will be altogether 20 of them. Photos 552-553: It took me 1.5 hours to remove the 180 pieces and clean the sprues off them. I think this is where I stop for the Christmas.

- 426 replies
-
- 3
-
-
- Vanguard Models
- Sphinx
- (and 1 more)
-
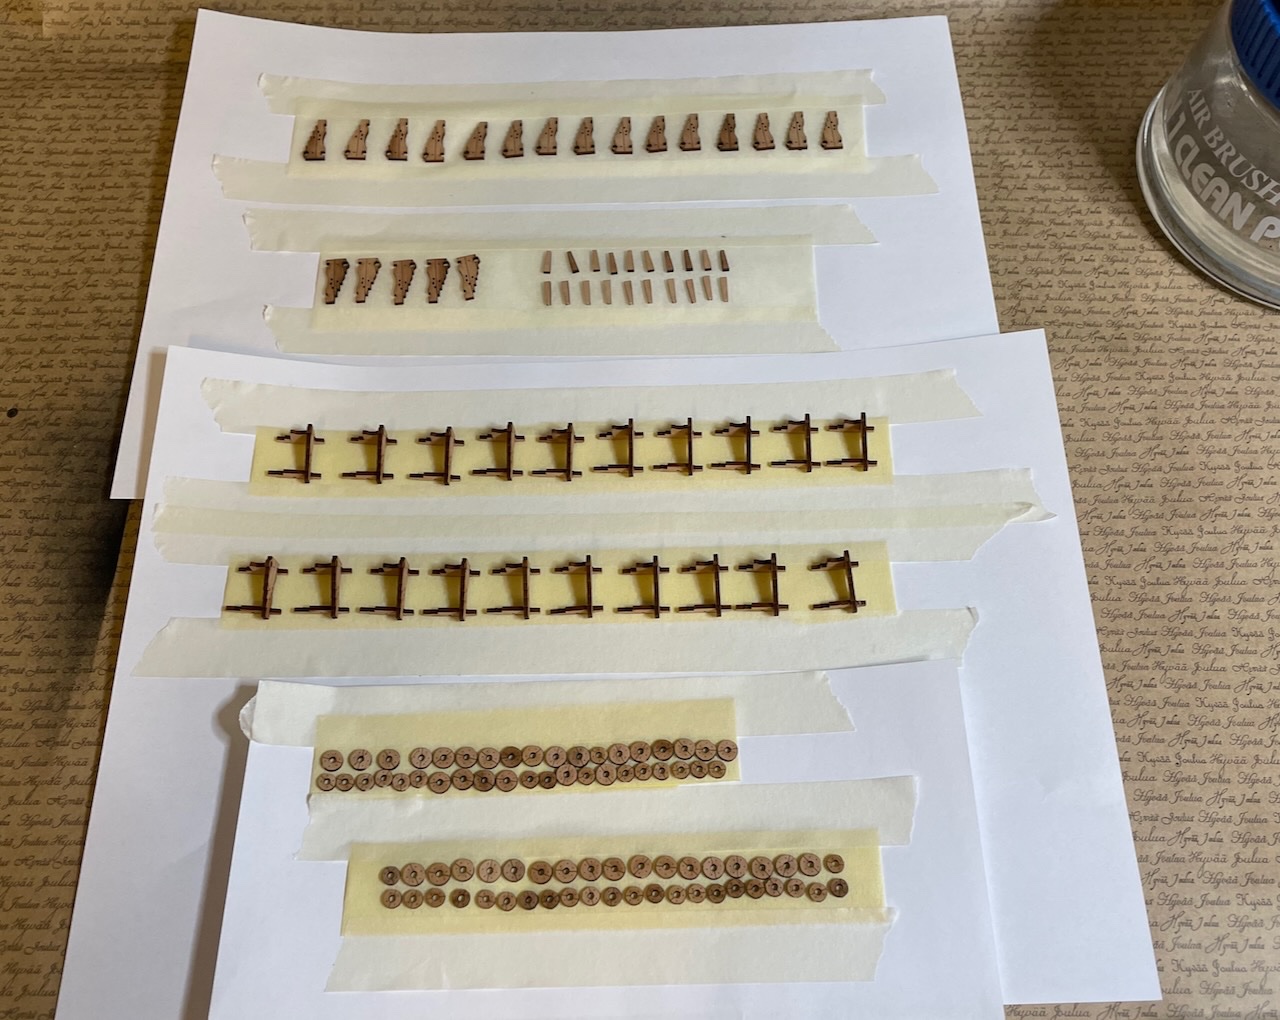
Build Day 54: 4 hrs / Total 125.5 hours Photo 549: 4 Gun Deck Bulwark Cleats (430) are painted and glued in place. Photos 550-551: Chain pump handle bars. I skipped inserting the nails across the brass pillar caps. Just glued them and painted in black.
- 426 replies
-
- 2
-
-
- Vanguard Models
- Sphinx
- (and 1 more)
-
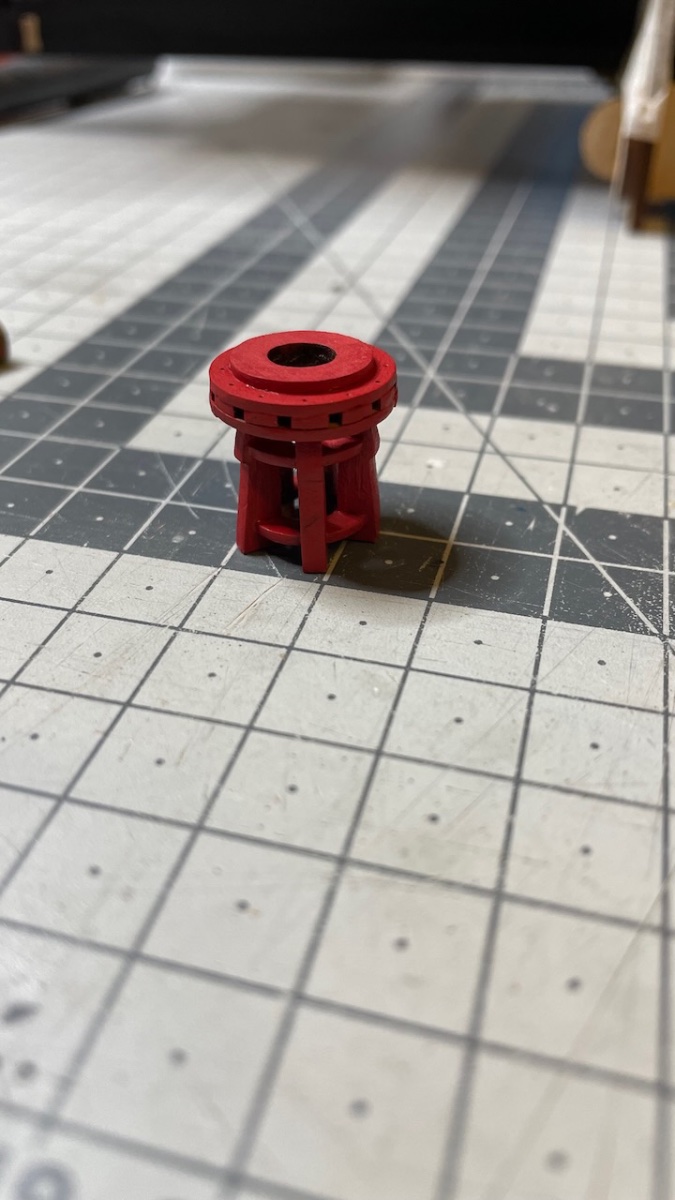
Photo 545: These two small parts in front of the capstan were omitted in the instructions but they are there in the next photos. It is good to be aware as it is easier to install them before gluing the capstan. Photos 546-548: Capstan painted in same red and glued in place.


- 426 replies
-
- 9
-
-
- Vanguard Models
- Sphinx
- (and 1 more)