goetzi73
-
Posts
78 -
Joined
Content Type
Profiles
Forums
Gallery
Events
Everything posted by goetzi73
-
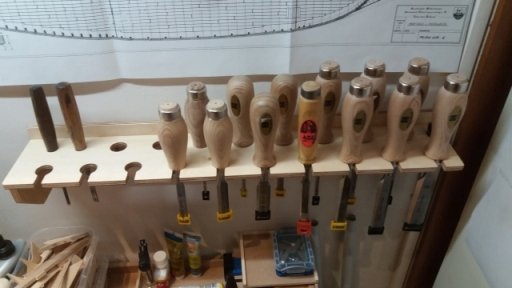
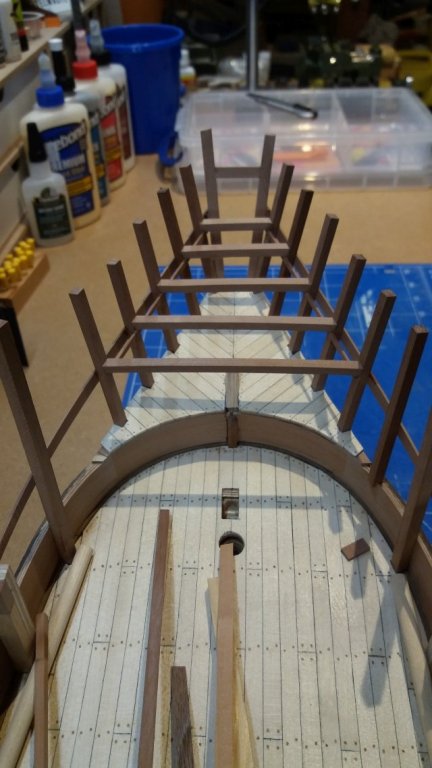
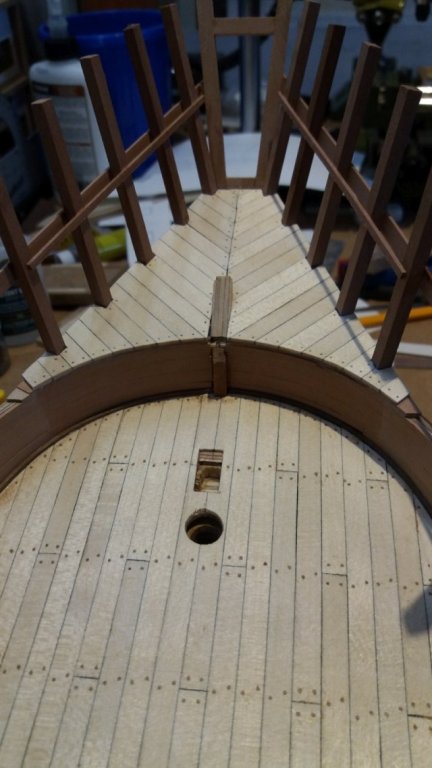
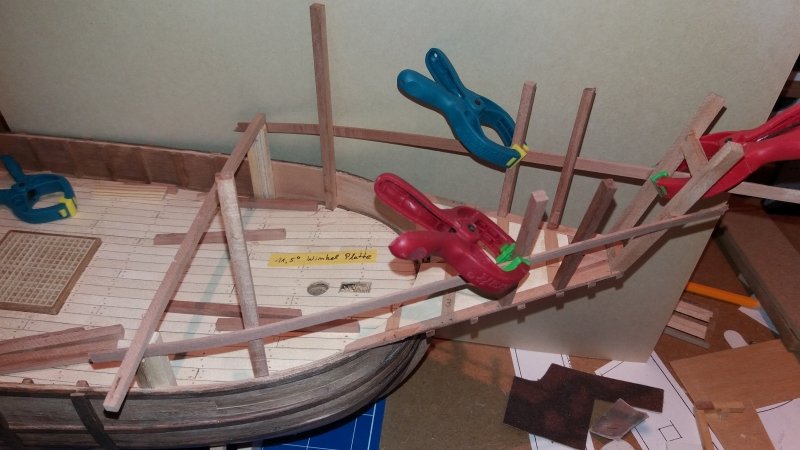
 being silent for a while, here's another view of the forecastle. Some further detailling and planking in progress. Installing the ropes for the anchors, the upper deck is ready for planking. During the last month I've made a board for my chisels and improved my workshop a little. Thus making working easier, it also reduced the time for ship modelling.
-
Very interesting. Your build log is also a lesson in history. If you make a workable design, it may be a little hard to explain to the fire investigator afterwards...
-
a short update. Small detail, but a great improvement (just my opinion).
-
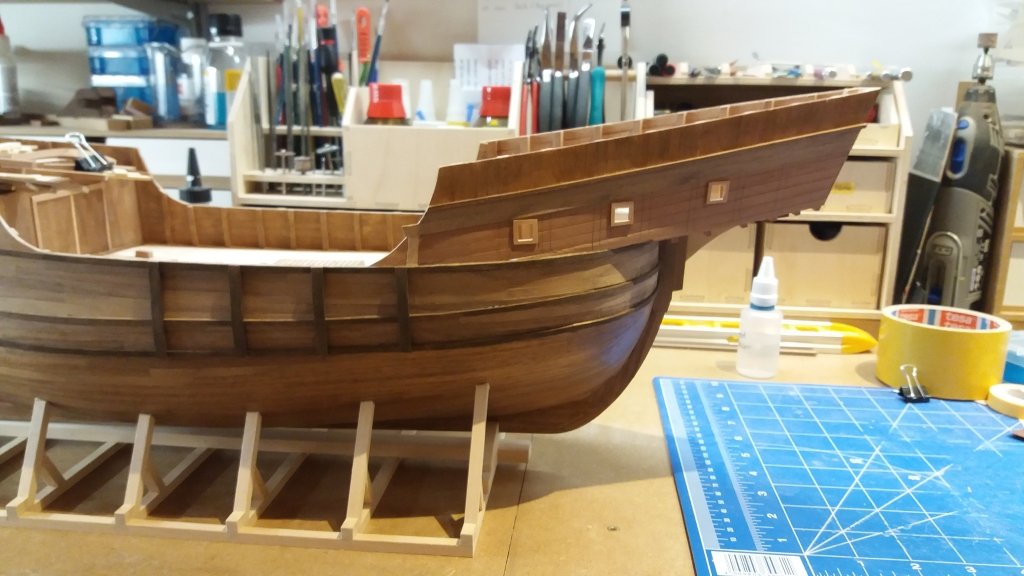
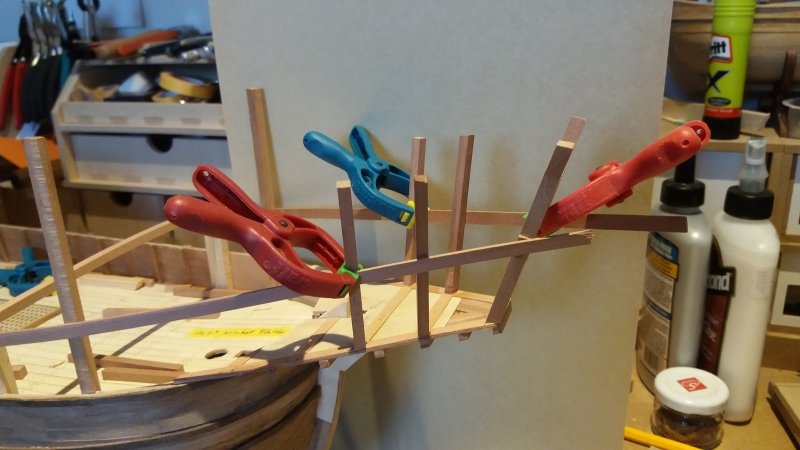
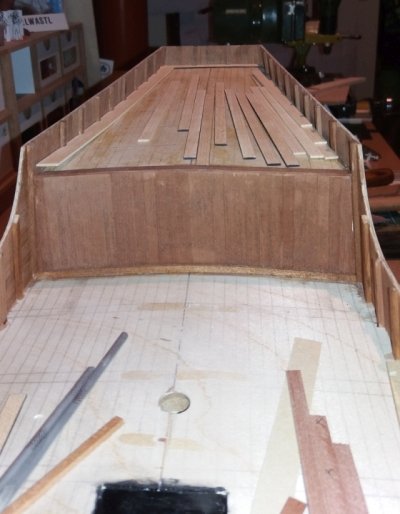
Next Update. Finished the first planking of the fore castle. Cut the deck frames to the desired length. I'am quite happy with the final shape. A second planking will follow on the outside walls. On the inside the planking looks o.k. for me.
-
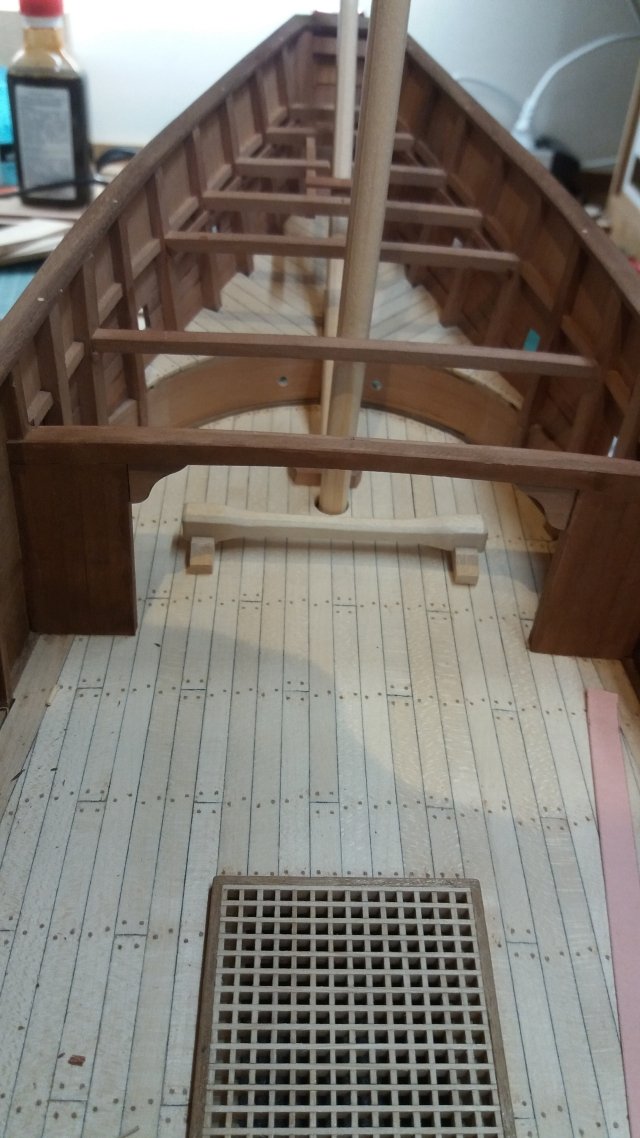
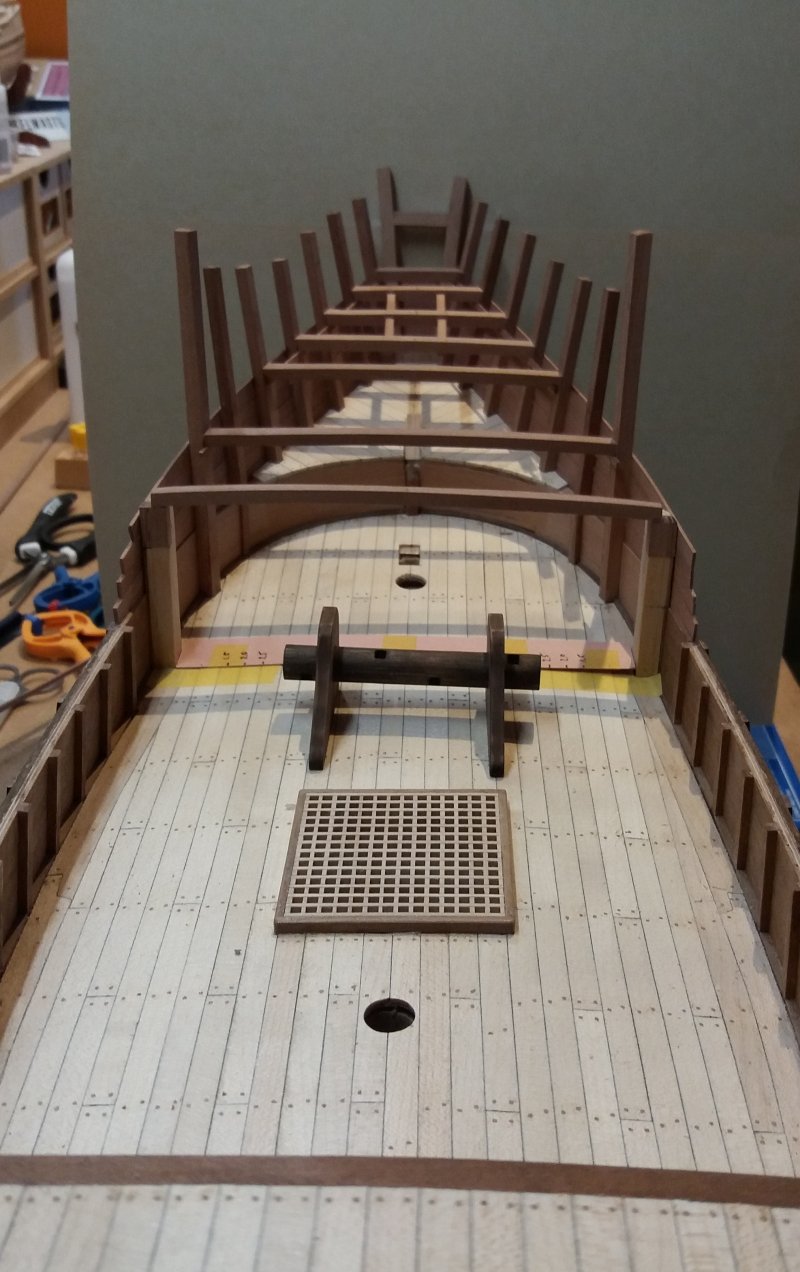
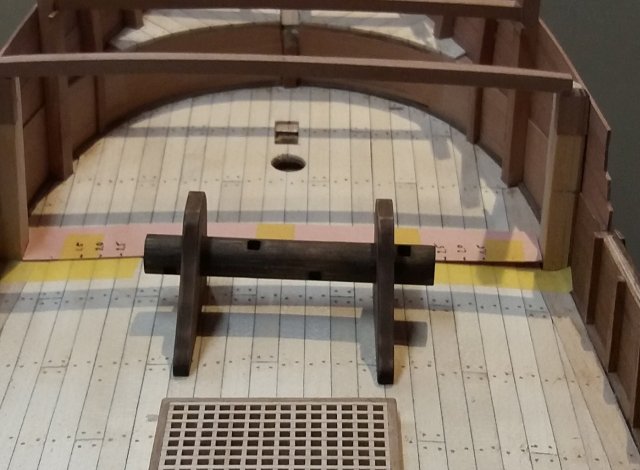
Hit the button to fast... Heres the view fromt the aft deck: Some deck beams are still missing. The windlass is not glued to the deck, but it will get it's final position somewhere in that area. I made it from some walnut pieces I had left in stock. On the picture it appears darker in colour than in real. I drilled holes into the dowel and squared them using a small file. That's it for today. Götz

-
Happy new year everyone. Spend some time in the shipyard, together with my son. He wanted to do some planking work on the ship. Giving him some advice, he managed to finish a part of the planking of the fore castle: front view: Not bad for a nine year old.

-
Thank's everyone for the "likes". A very small update for today. Started with the deck beams. Quite a lot of measuring, sanding and starting over again. At the moment I'am quite pleased with the result. Götz
-
It looks really good Steven. It's a pity that isoprop is that expensive over there. Should be really cheap, as it is standard stuff for desinfection. Looking forward to see the completed castle. Götz
-
Hello everyone, a small sunday afternoon update. Finished the planking on the lower deck of the forecastle. Next will be the deck beams.
-
Just amazing what you created. My wife just mentioned that "this would look nice between all this british warships". I like the way you worked over all the issues of the kit. Götz
- 331 replies
-
- 3
-

-
- nuestra senora del pilar
- occre
- (and 1 more)
-
Back again. My familiy granted a little time for modelling. Started with the construction of the forecastle. I glued two temporary planks in place, that will be removed later. After a lot of sanding and measuring over and over again, that's what I've achieved: Götz

-
Hi Steven, the pieces don't look that awful as you might think. Anyway you have to like it, that's all that counts. Some idea for further progress. Glue the pieces to a piece of wood, using SMALL amounts of CA. That should faciliate sanding them. Afterwards apply acetone to dissolve the CA. Götz
-
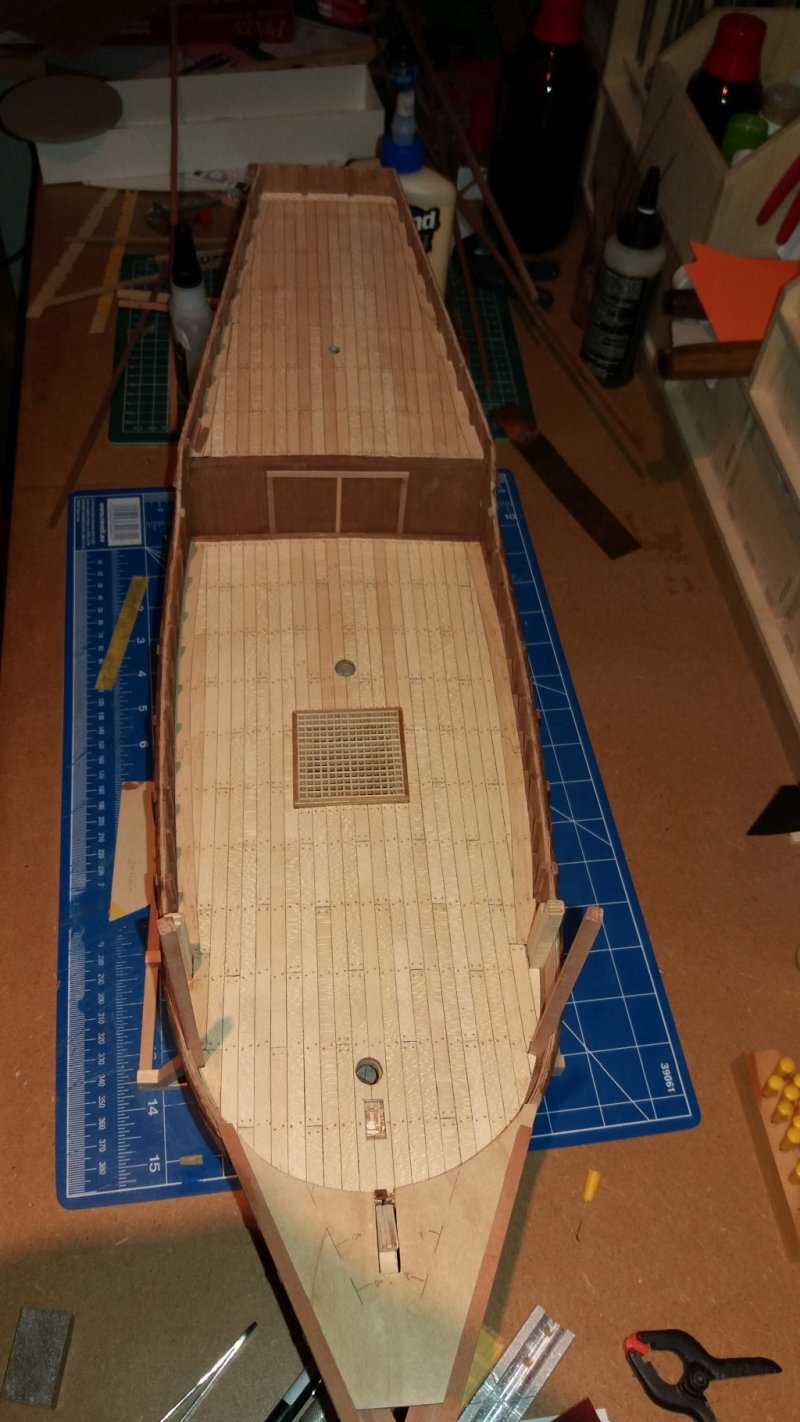
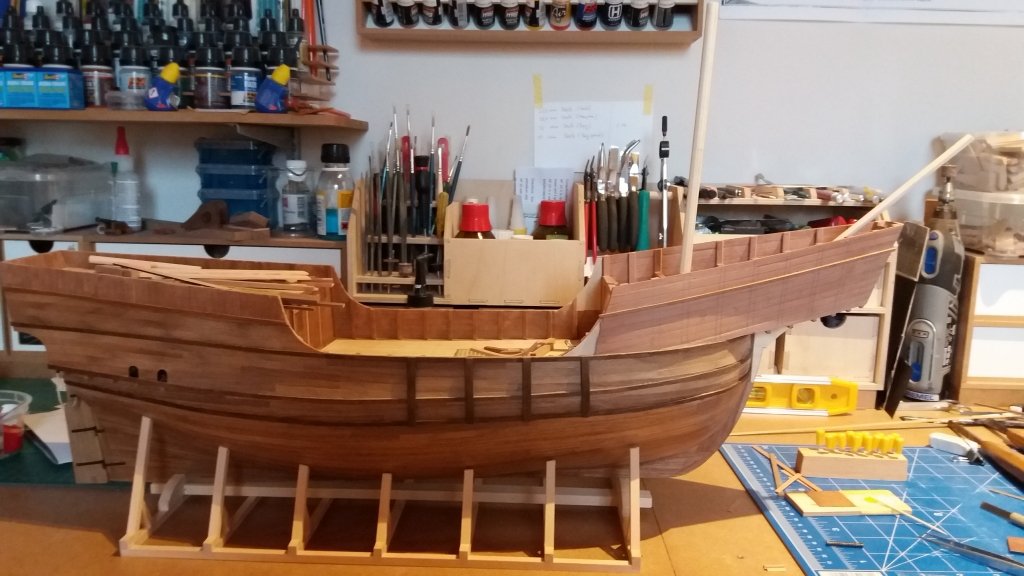
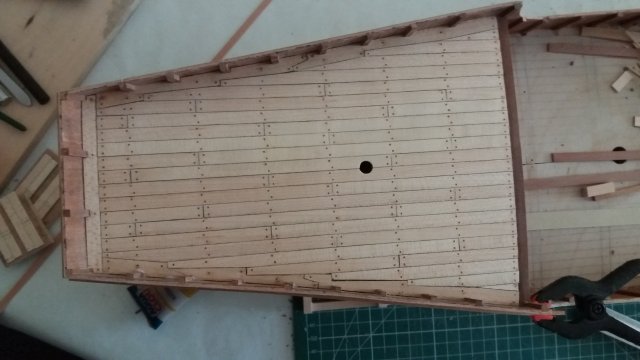
Finished planking of the main deck. Man, that was a tedious job to do. I think I have to retire to catch up the speed of other builders here on MSW. I hope i get the forecastle finished before begin of advent season. Now it's time for a glass of Orkneys best distillery product. slàinte mhath !

-
Thanks Patrick, and for the likes. Still a long way to go. But I have the feeling my working skills improve with every step finished of the list. Götz
-
Work keeps me quite busy, so only a little update today. Finished the deck planking of the aft castle: I've finished the second planking above the wales and glued the futtock riders. Not easy to make. I made them from swiss pear and remade it more than once. After staining, i'am quite pleased with the result: That's it for today.
-
Alclad Paint
goetzi73 replied to hof00's topic in Painting, finishing and weathering products and techniques
Hello HOF, I've been using Alclad Paints a few times for NMF on Aircraft models, mostly aluminium. I made the same experience. The problem seems to be the very small thickness of the metal pigment layer, compared to "normal" paint. To say in short, I've been using an acrylic laquer to protect the surface, especially before applying decals. I highly recommend to make some testing, which product works best for the metal finish. I have achieved good results using Alclads Aqua Gloss Clear oder Mission Models Gloss Clear Coat. Hope it helps. Regards, Götz -
Another update. My interpretation of partition walls: Also I have installed the rudder: That's for now. Götz
klein.jpg.14aa34c20fd82ebd5685f342b803e266.jpg)
-
Thanks Mark and Steven and all the "likes". Mark, it depends on the wood and what effect you wan't to achieve. A stupid answer, I know. In this case I used very diluted wood stain, and rubbed some areas with a piece of cotton cloth. This gave some uneven covering, to hightlight some areas, I first sealed the wood, and then applied a very diluted wash of Vallejo deck tan on a few spots. I let this dry for a minute and then remove exces material or unwanted covering with a brush damped in water. It's similar to weathering on plastic models, and needs some training. In any case, if you wan't to apply the washes, seal the wood first. All the purists may damn me, but the plastic modelers have very smart techniques too. Götz
-
Thanks Steven, you're probably right. Living in the box in a stormy sea might be a little uncomfortable, to say the least. Nevertheless one day shipbuilders decided to close this area. The main problems are, that there is not much information about the superstructure of the northern ships. Although the newport wreck gave much information about the structure of the hull, there are not much remaining from the superstructure. Anyway I have to cope with the problem, that it is not possible to open that area on the model, as this is an important structural element. Maybe a transposition of your idea with the shutters could be a possibility. Götz
-
Sorry for the late reply, I was not at home for a few days. Thanks a lot for the input. @Backer: I've seen the model on the german site, also I'am not sure if this is all correct. The dutch site is nice. It shows how large the area of the Hanse was. I've seen a model similar to that shown in the picture in a museum. But I can't remember if it was in netherlands or belgium. Maybe in Hellevoetsluis, Stadsmuseum? Could be time for a visit in NL again. @Steven: I cannot find the '"&%$§ picture. Maybe I have deleted it by accident. Anyway, the picutures you posted are again helpful, thanks. Sometimes I wish I would have more time for research, like "back in time" during my thesis. But what I've read about this time period, is that there where considerable changes during that century, due to the large network of trade routes including spain, and also venice. So the merchants brought many ideas and techniques to the northern cities. The plans of the reconstruction that where used for the replica show a closed half deck. So maybe it is correct. It would make sense, that the shipbuilders started to close this area, as the owner, travelled on their ships. The weather in the baltic sea, northsea and the atlantic is often very bad. Götz
-
A small update. I've planked the wall of the after castle. Did some weathering on the wood, cause it looked to uniform to me. Some thoughts about the door in the wall of the after castle. I've found only a few drawings, that are not very reliable in my opinion. I think the authors took some "artistic liberty" due to sparse informations. I took a drawing from a spanish carack ~ 1500 but I'am not sure yet, wether this is appropriate for a simple merchant ship or not.

-
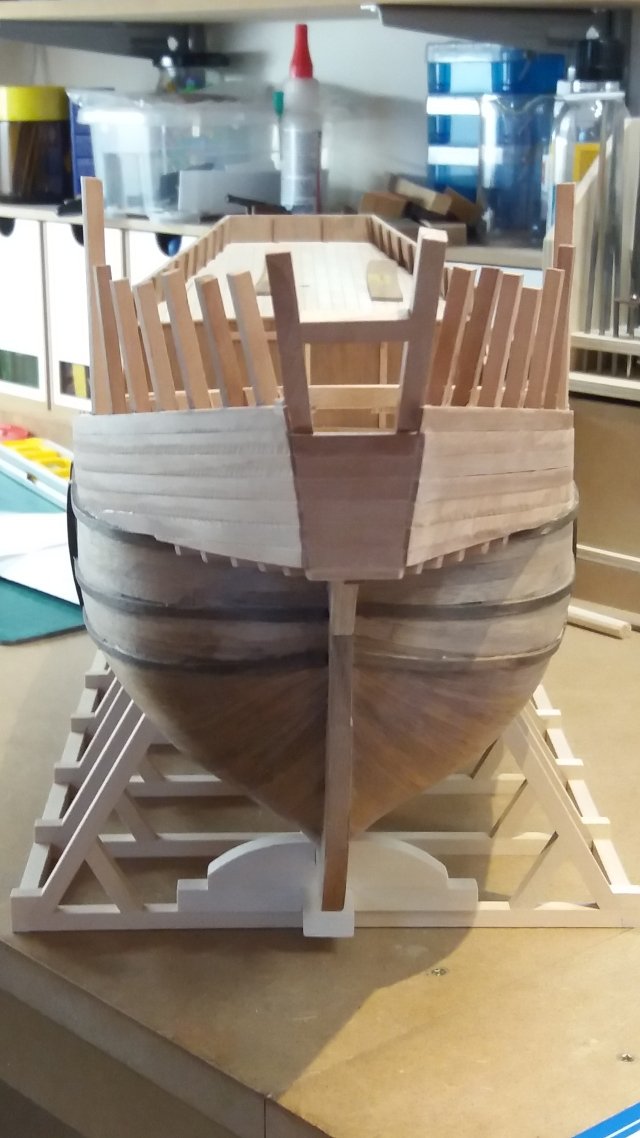
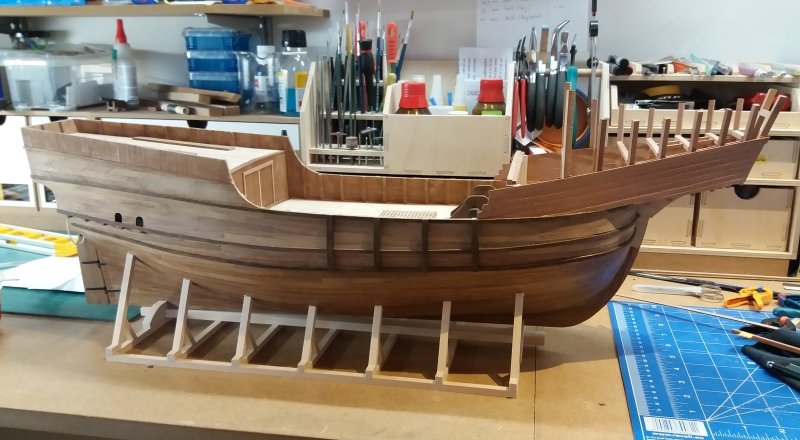
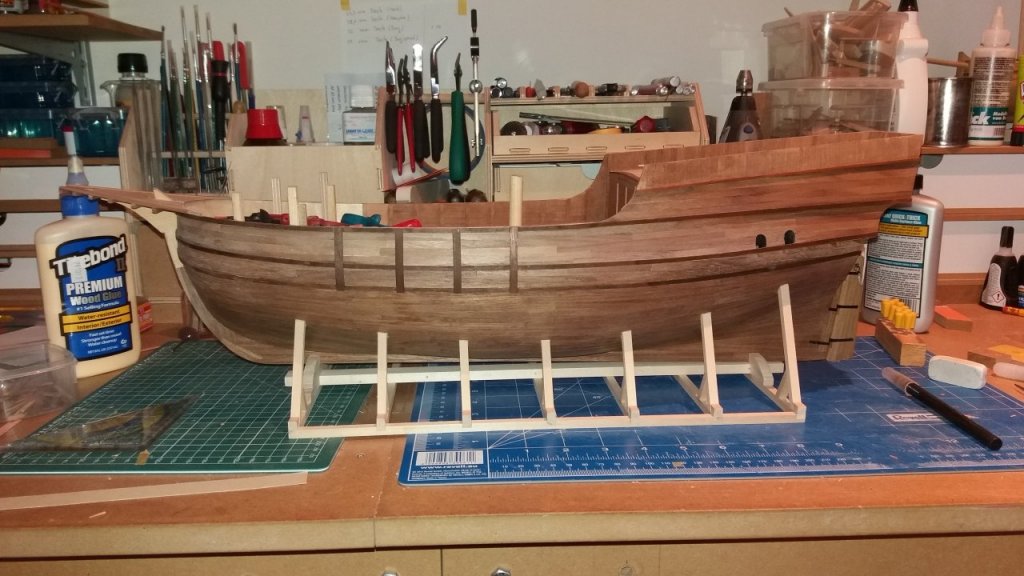
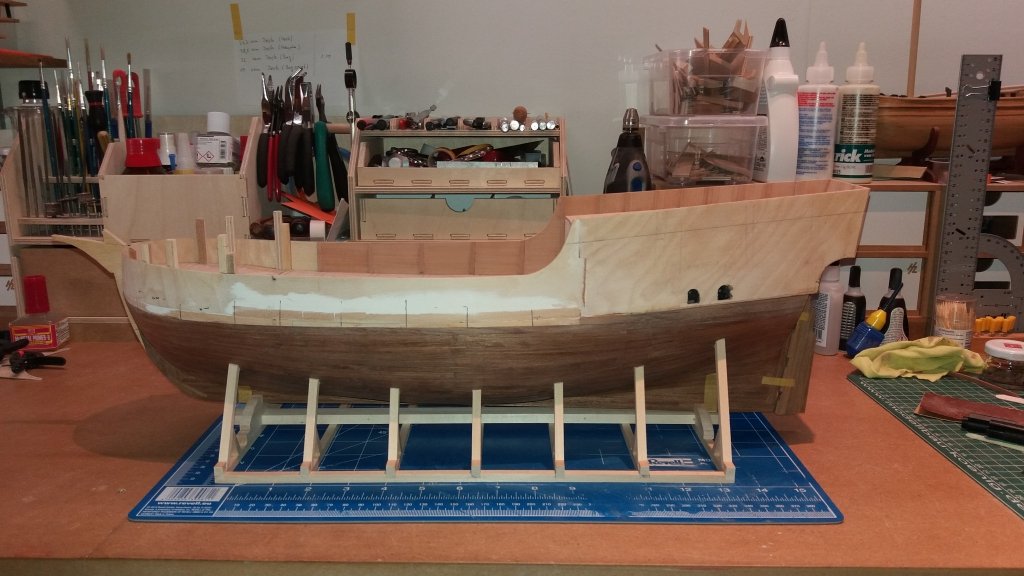
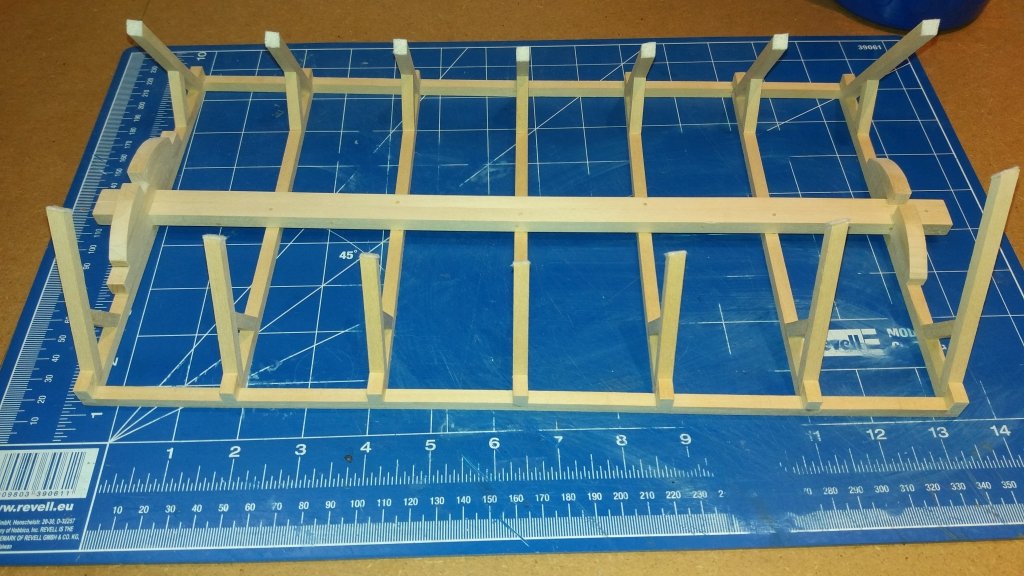
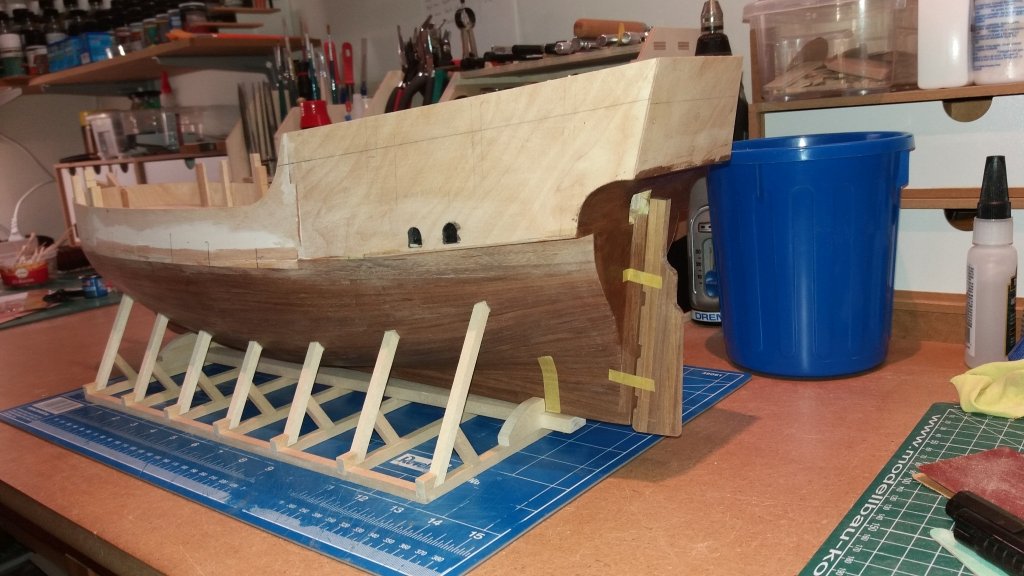
Finished the ships stand. There are quite a few nice ideas for this that inspired me. Thanks to this forum and their users. This is what it looks like: After months, in the upright position again: Stern view with the rudder taped in place. Not looking to bad in my opinion. I'am still thinking about the dimensions of the forecastle. I'am not sure about waht is shown in the plans. I agree to earlier comments, that it looks "to boxy".
-
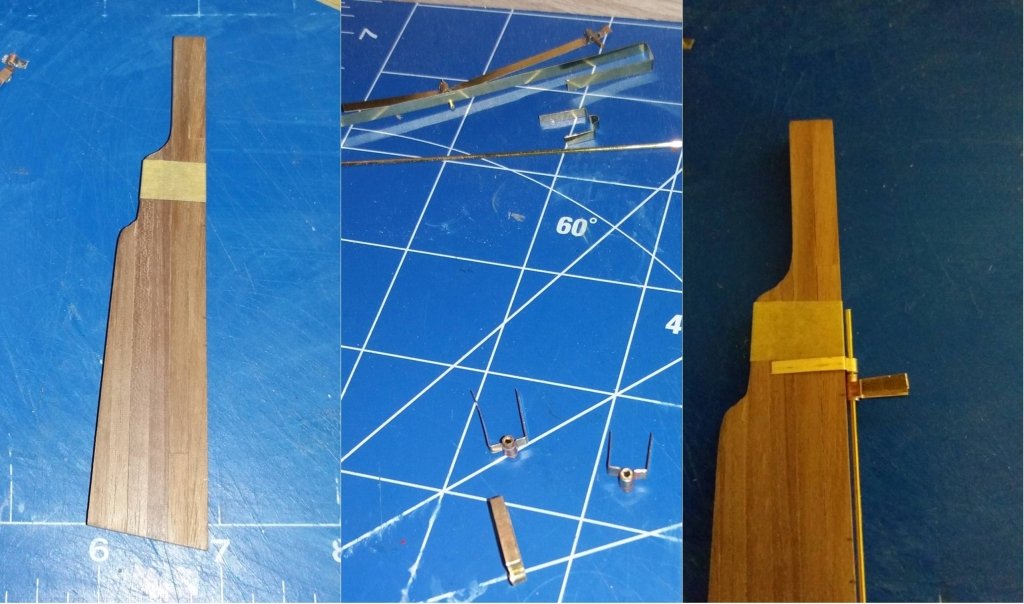
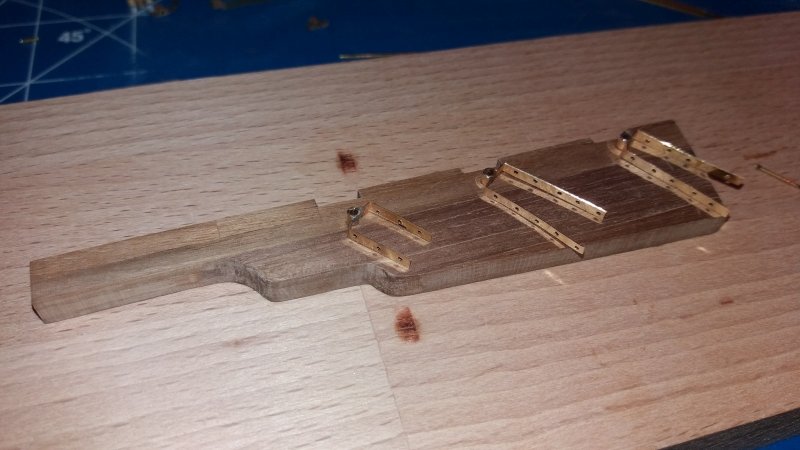
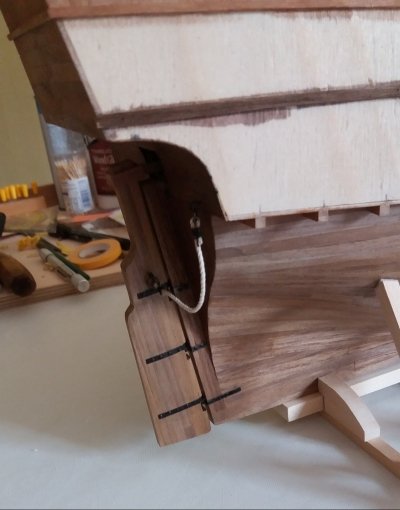
Da*#n, clicked the button to fast. Here comes the more interestining stuff: The rudder was roughly cut to shape (left picture). I started to make the rudder hinges from brass pipes and brass sheet (picture shown in the middle). The picture to the right shows what it may look like. Not bad, so I made some cuts on the rudder and prepared the hinges for a bath in blackening solution. Th-Th-That's all, folks! (for today)