HOLIDAY DONATION DRIVE - SUPPORT MSW - DO YOUR PART TO KEEP THIS GREAT FORUM GOING! (Only 13 donations so far - C'mon guys!)
×


Erik W
-
Posts
470 -
Joined
-
Last visited
Content Type
Profiles
Forums
Gallery
Events
Everything posted by Erik W
-
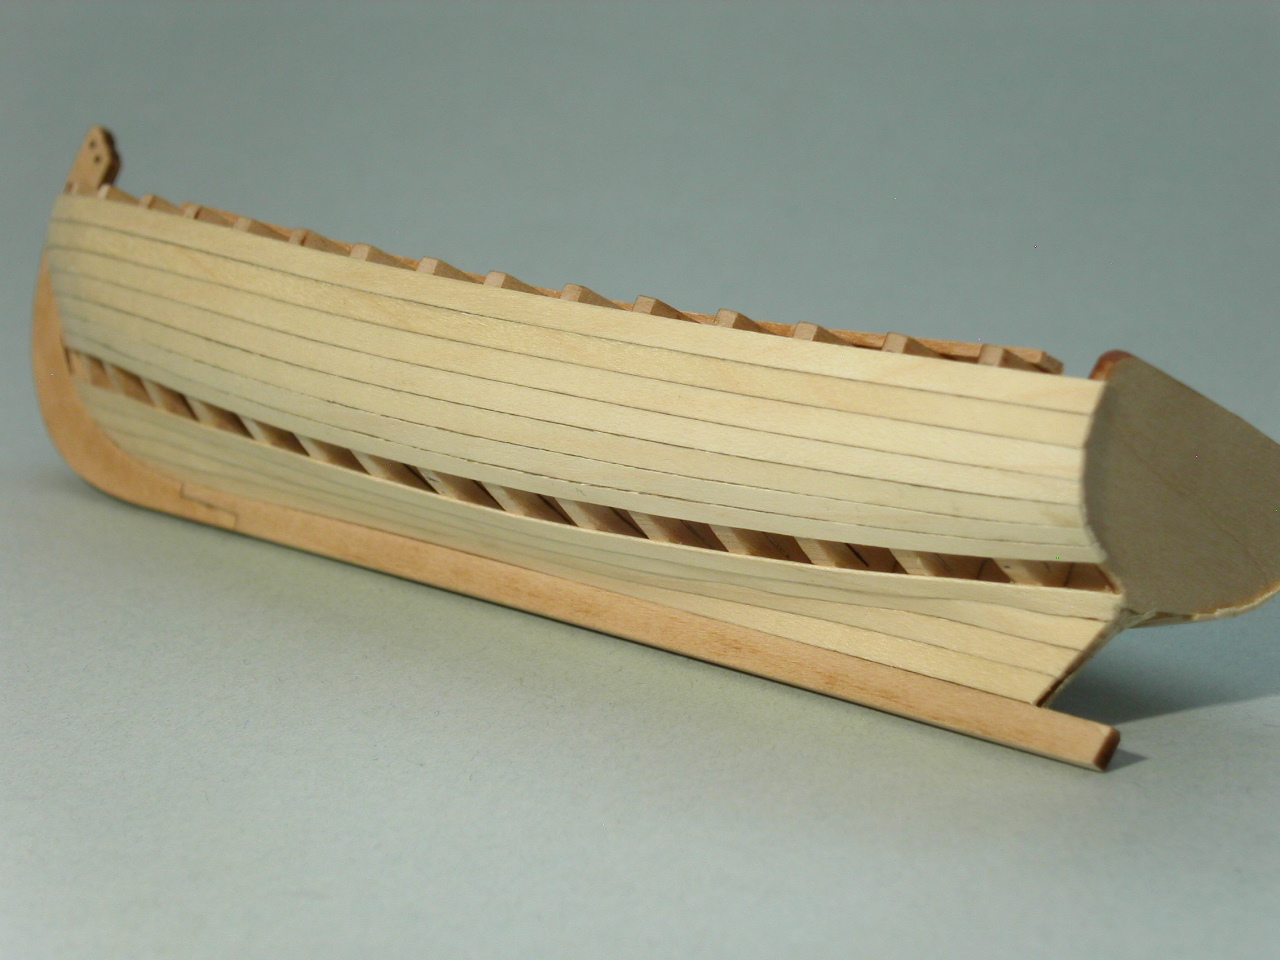
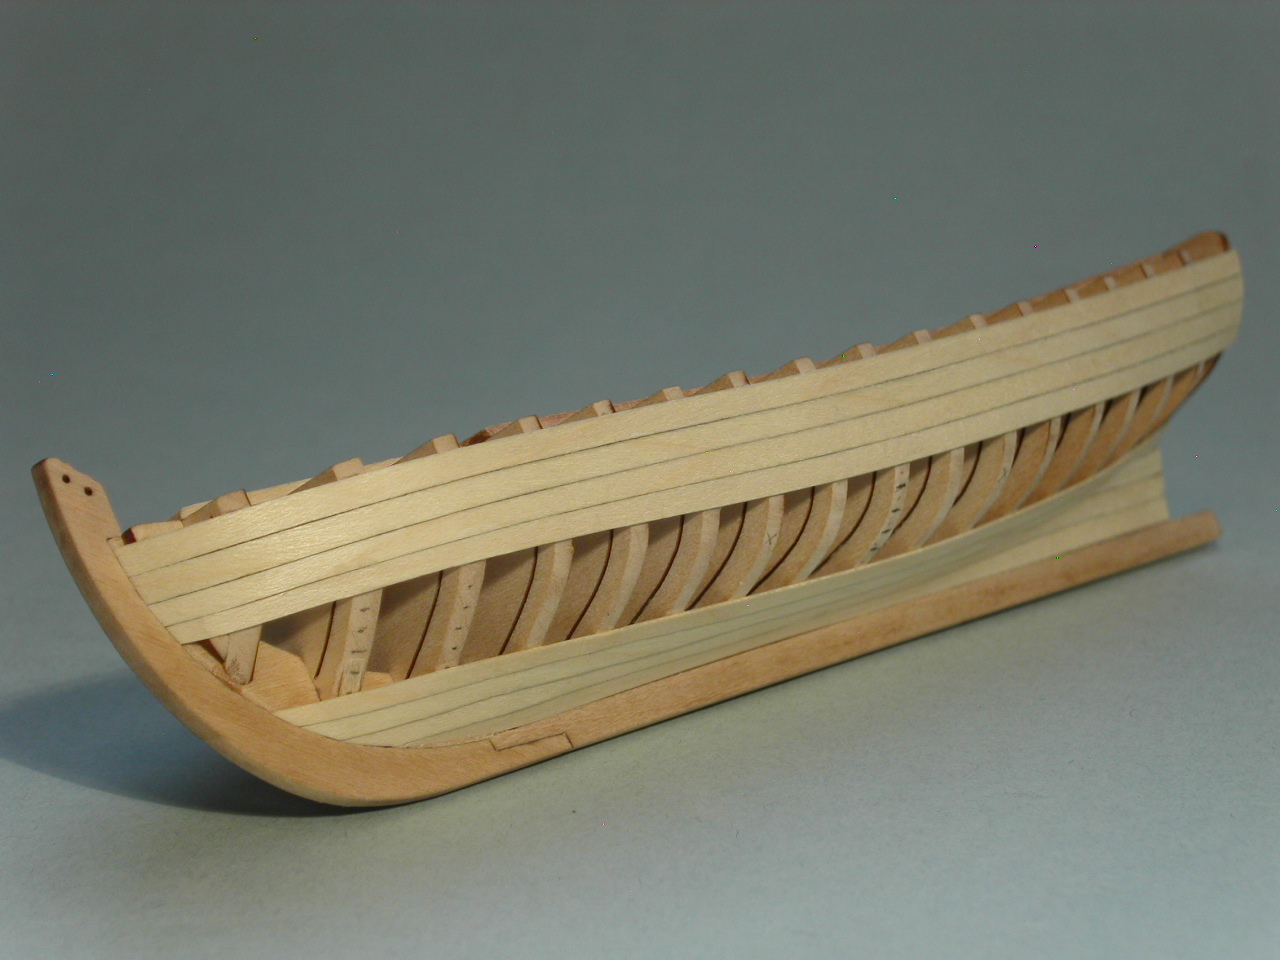
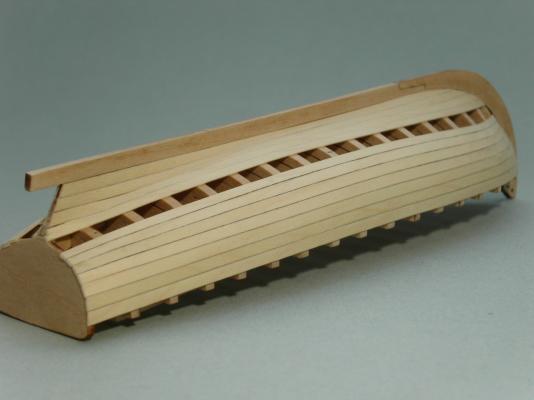
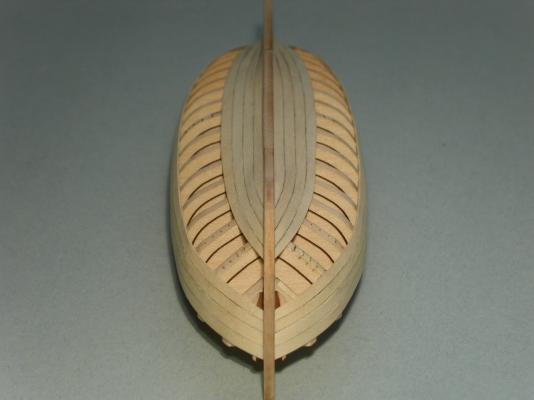
 Thanks Chuck and Danny. My average plank width has been around .011". When I got down to the gap for the last 3 on each side, the gap measures .030" at it's widest. So, starting with the most recent plank I attached, I reducing the plank width to .010", and then tapered the bow and stern. This should make it look like all the planks are the same width, rather than have the last plank be obviously narrow. Erik
- 222 replies
-
- 6
-

-
- 18th century longboat
- model shipways
- (and 2 more)
-
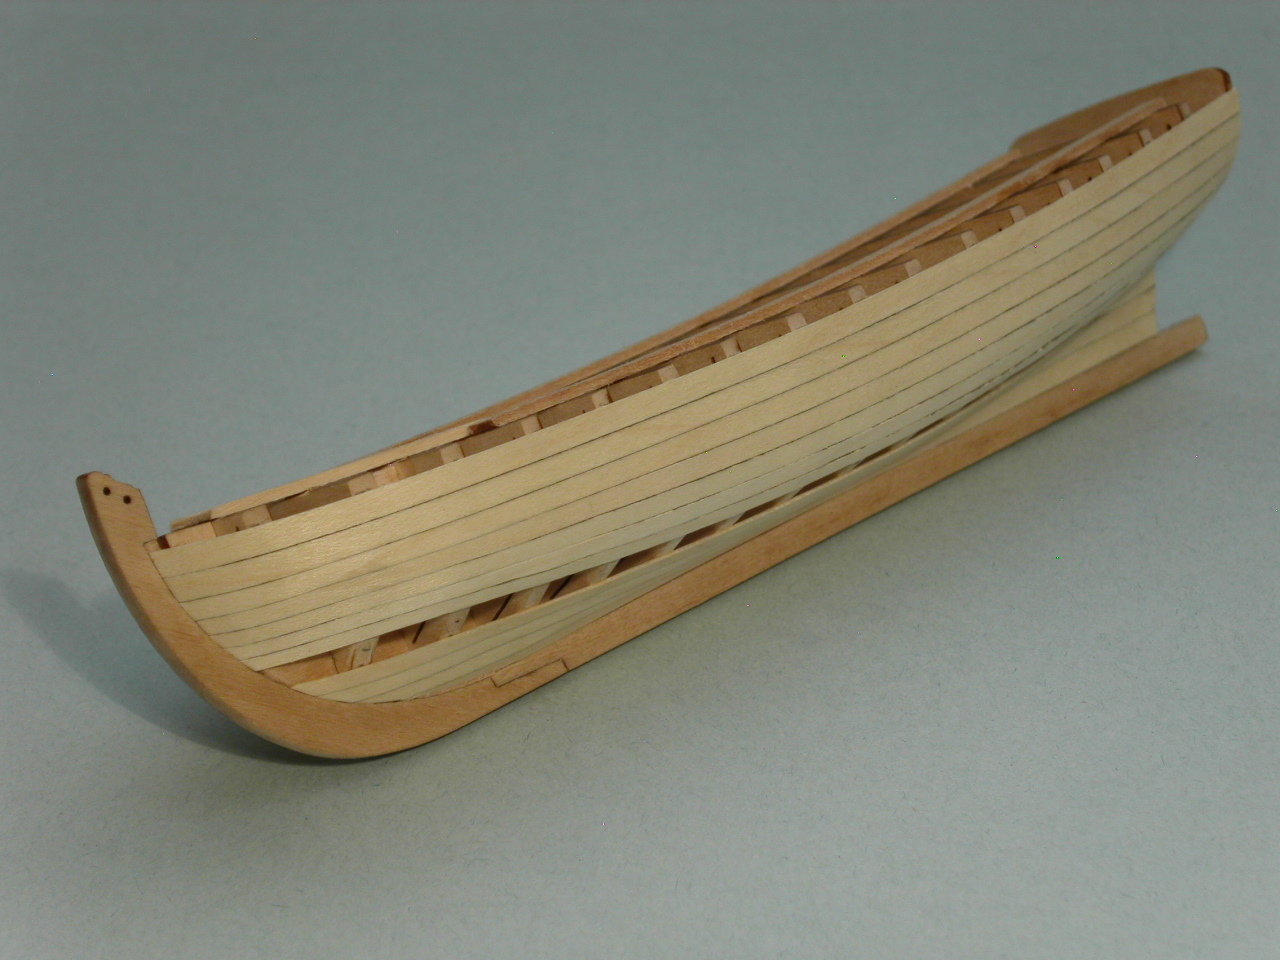
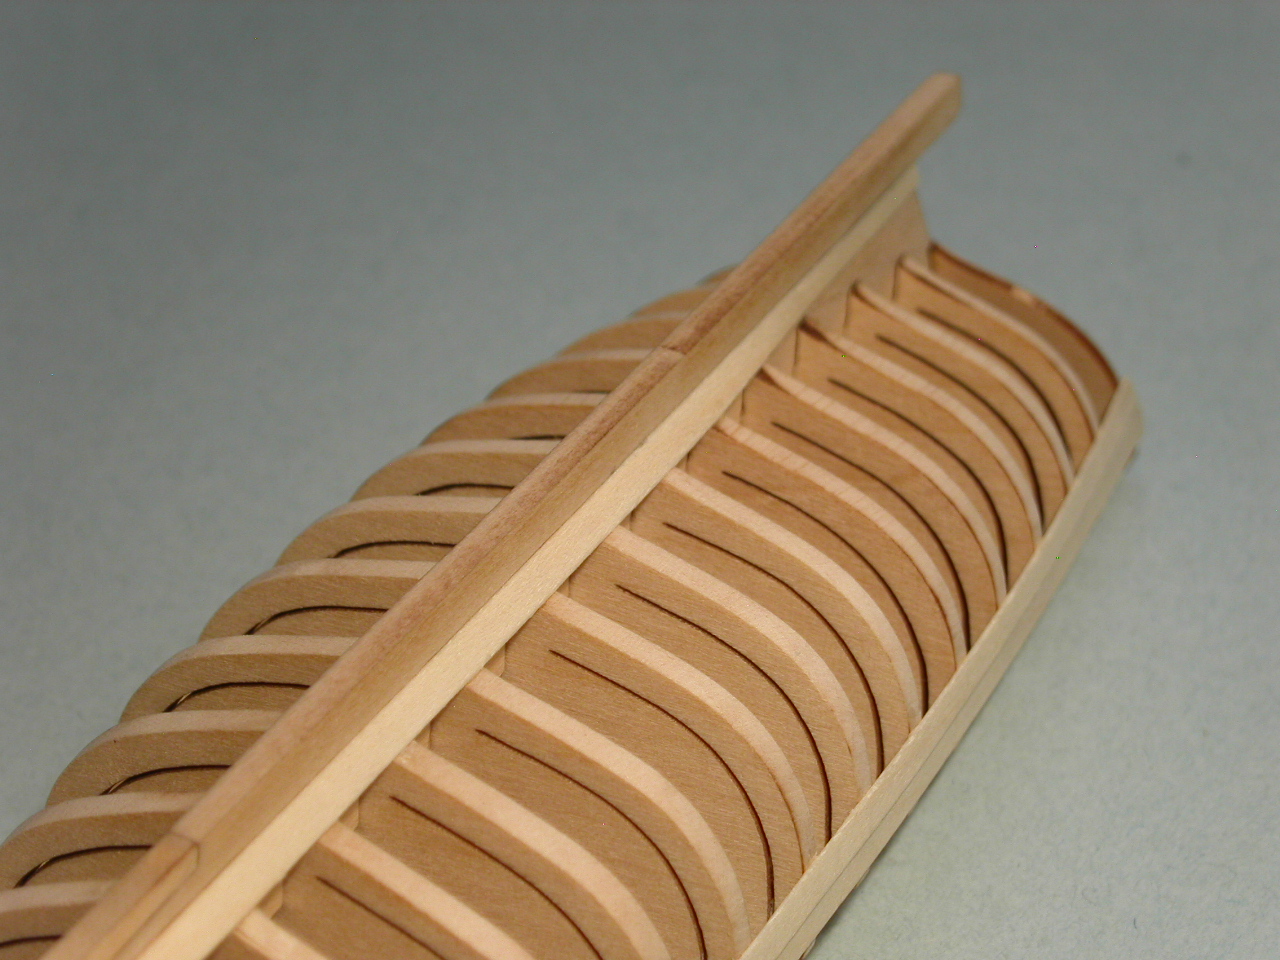
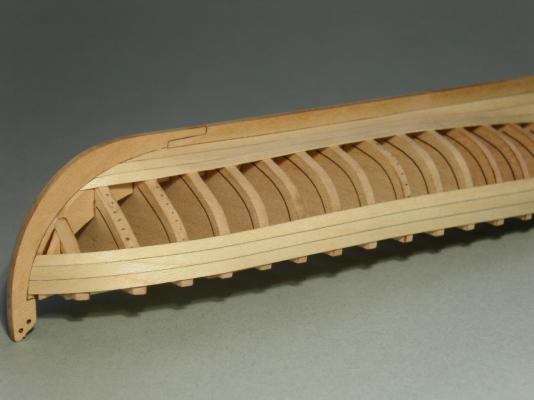
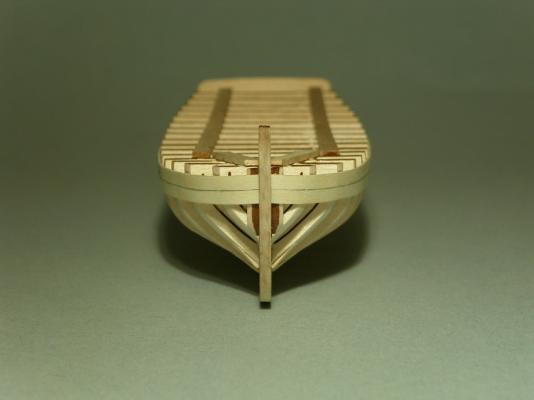
I'm on the home stretch with the planking. This being my first planking experience, I'm fairly pleased with my results. Most of the imperfections seen in the photos should be taken care of with the final sanding of the hull. I'm learning a lot in the process. Erik


- 222 replies
-
- 21
-
-
- 18th century longboat
- model shipways
- (and 2 more)
-
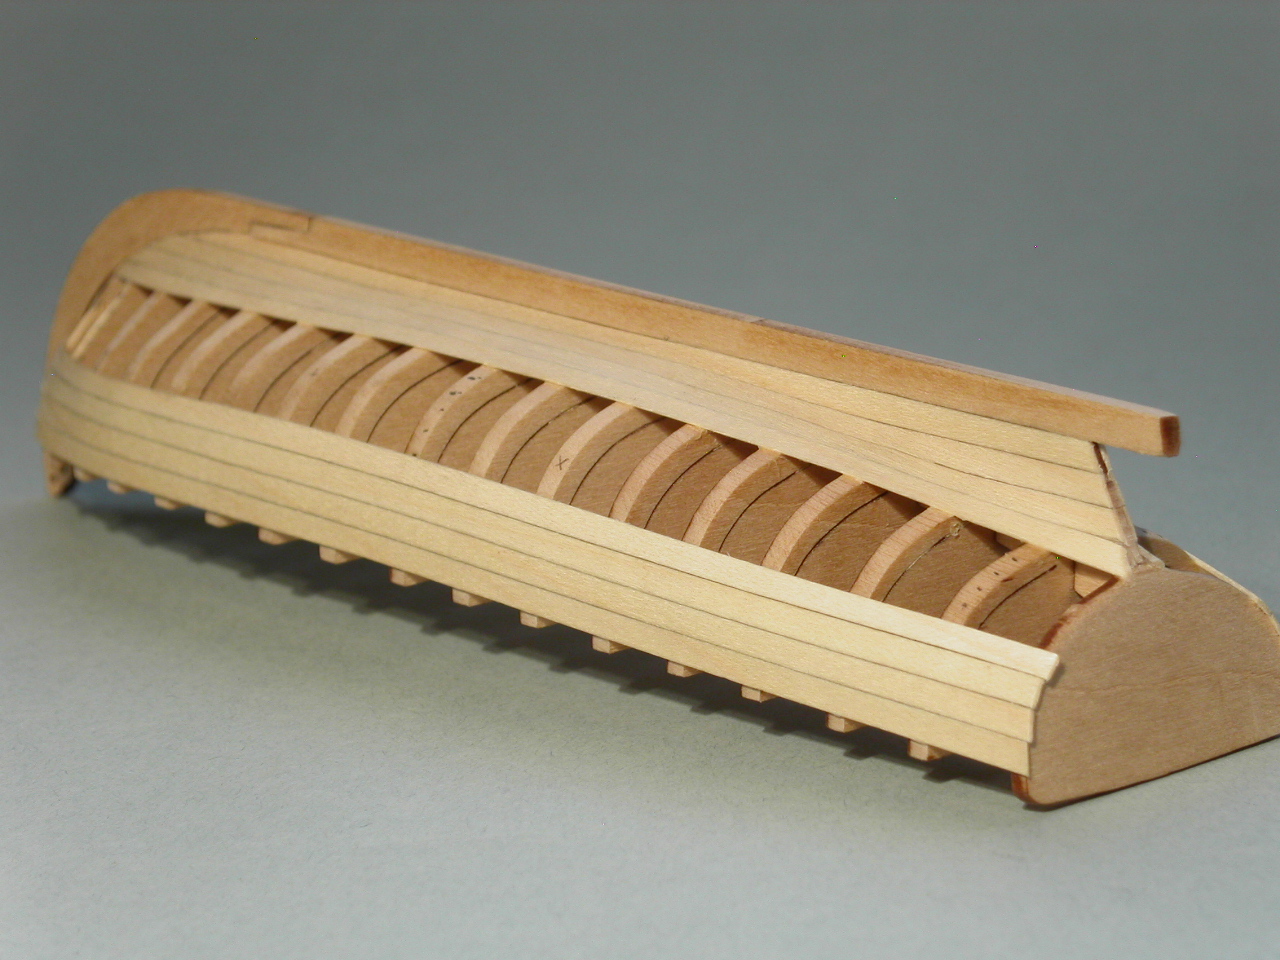
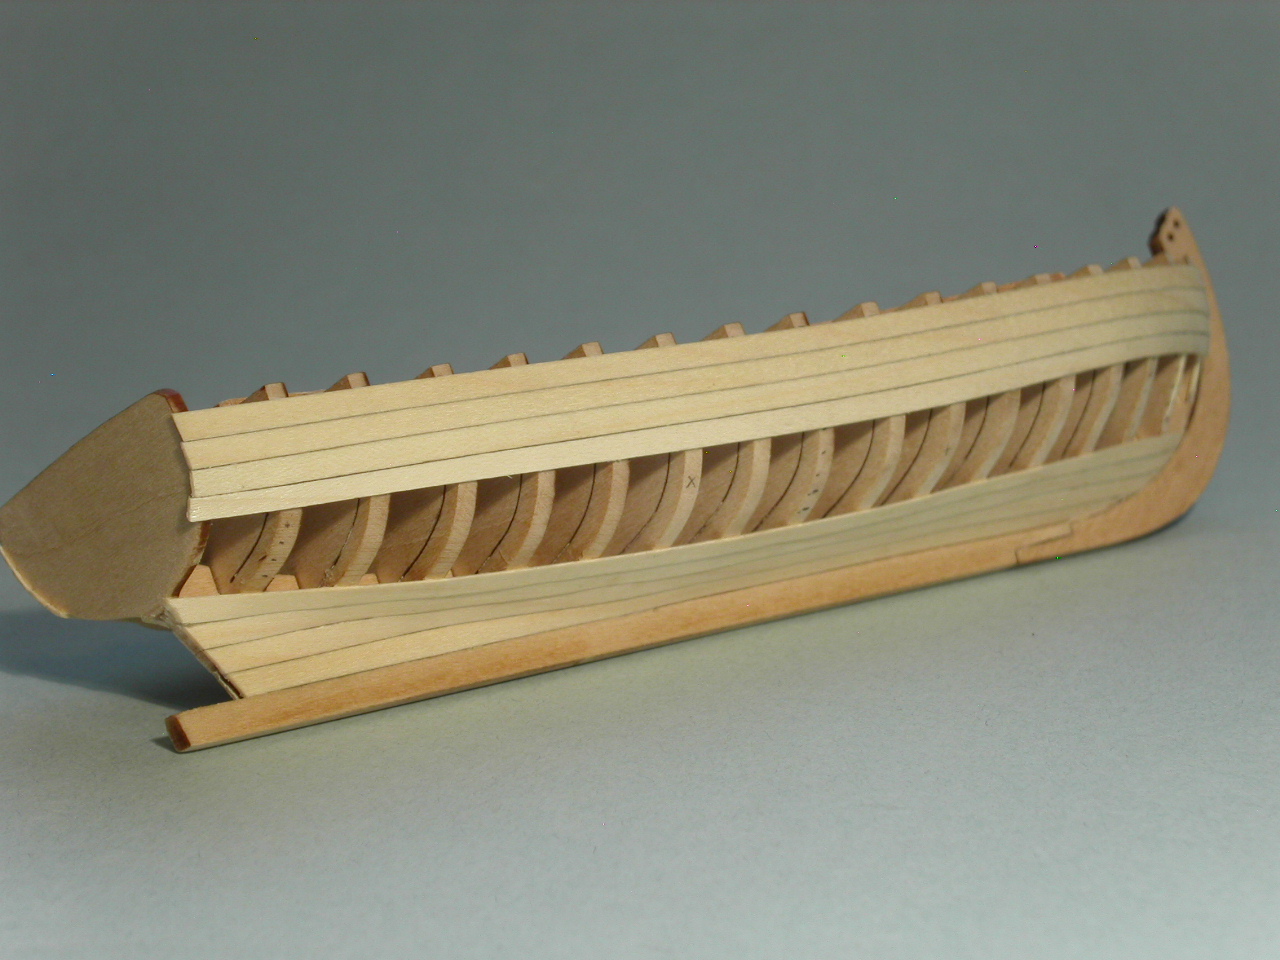
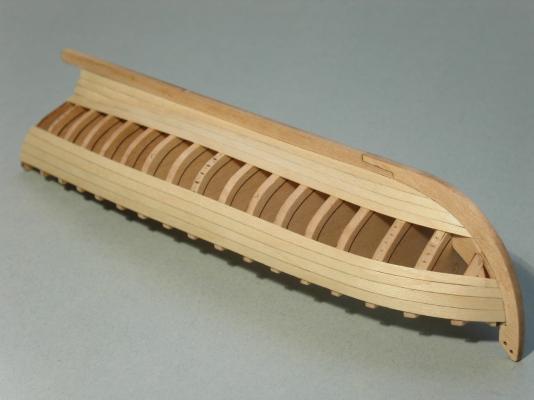
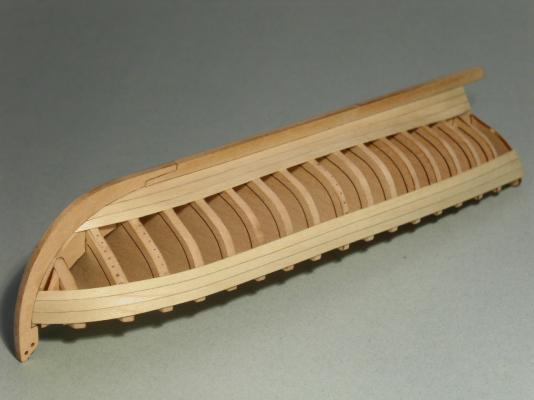
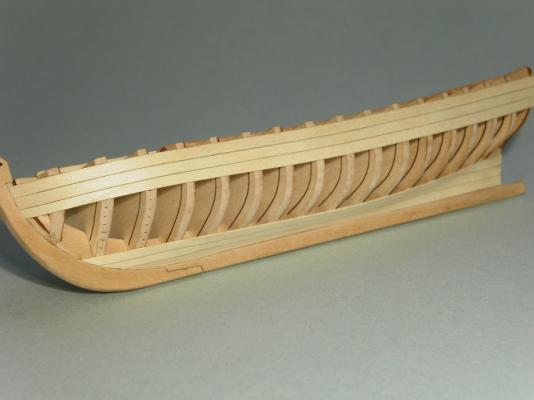
Hmm. She's staring to actually look like a boat! I added more planks. Seems like I've been planking forever. I've got my system down though as far as bending, shaping, and gluing on the planks. Once I think I have the bending figured out, I move further up/down the boat and then need to figure out the shape of the new bends I'll be working with! Son-of-a . . . I'm at the point on the hull I'll need to use the Magic Tape method, that I saw in another build log, as a way of figuring out my plank bends. It's getting hard to wing it! I'm already thinking ahead to hull sanding. Hoping it all turns out OK! Erik


- 222 replies
-
- 14
-
-
- 18th century longboat
- model shipways
- (and 2 more)
-
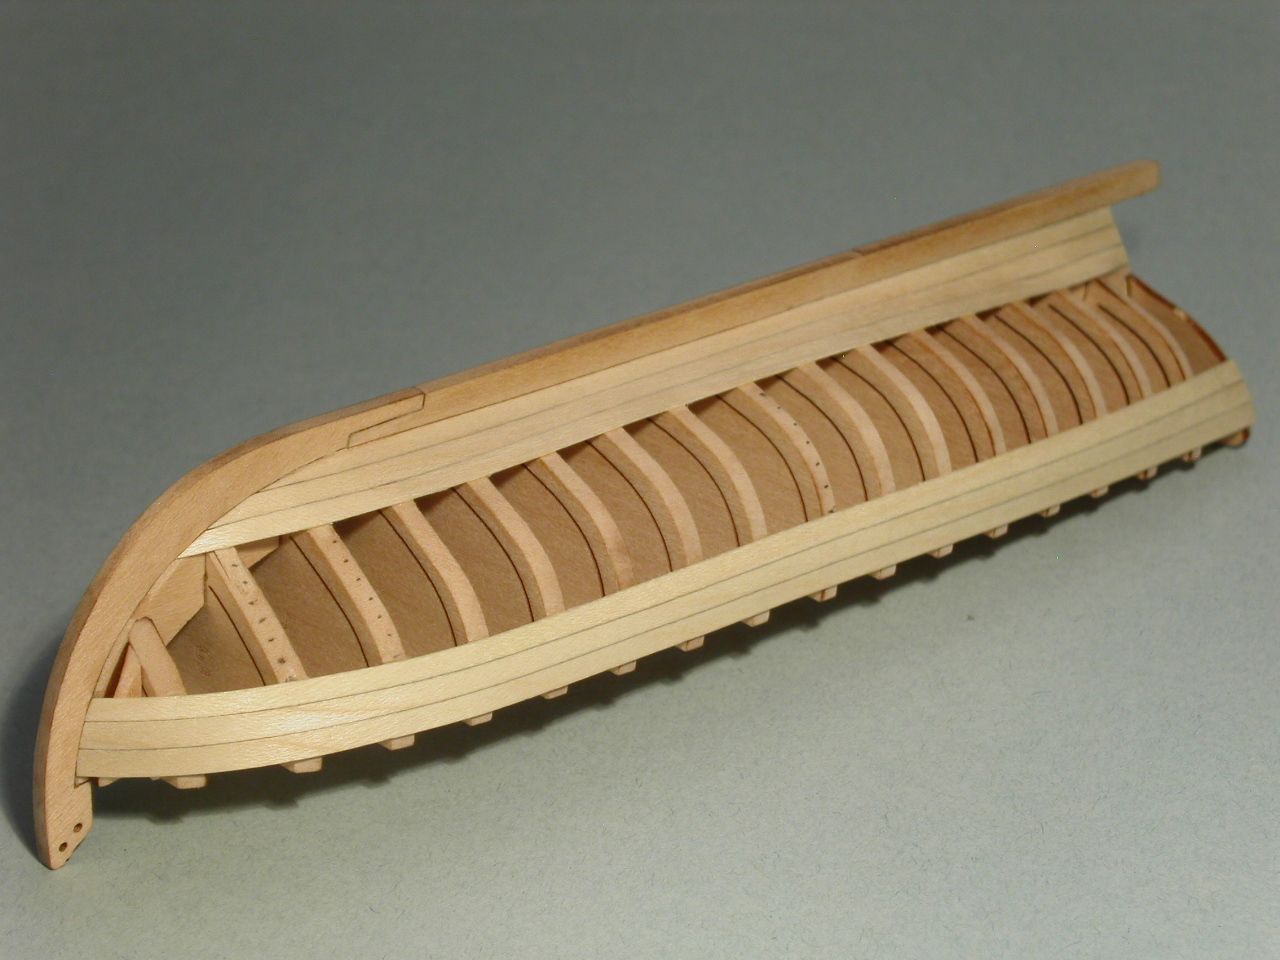
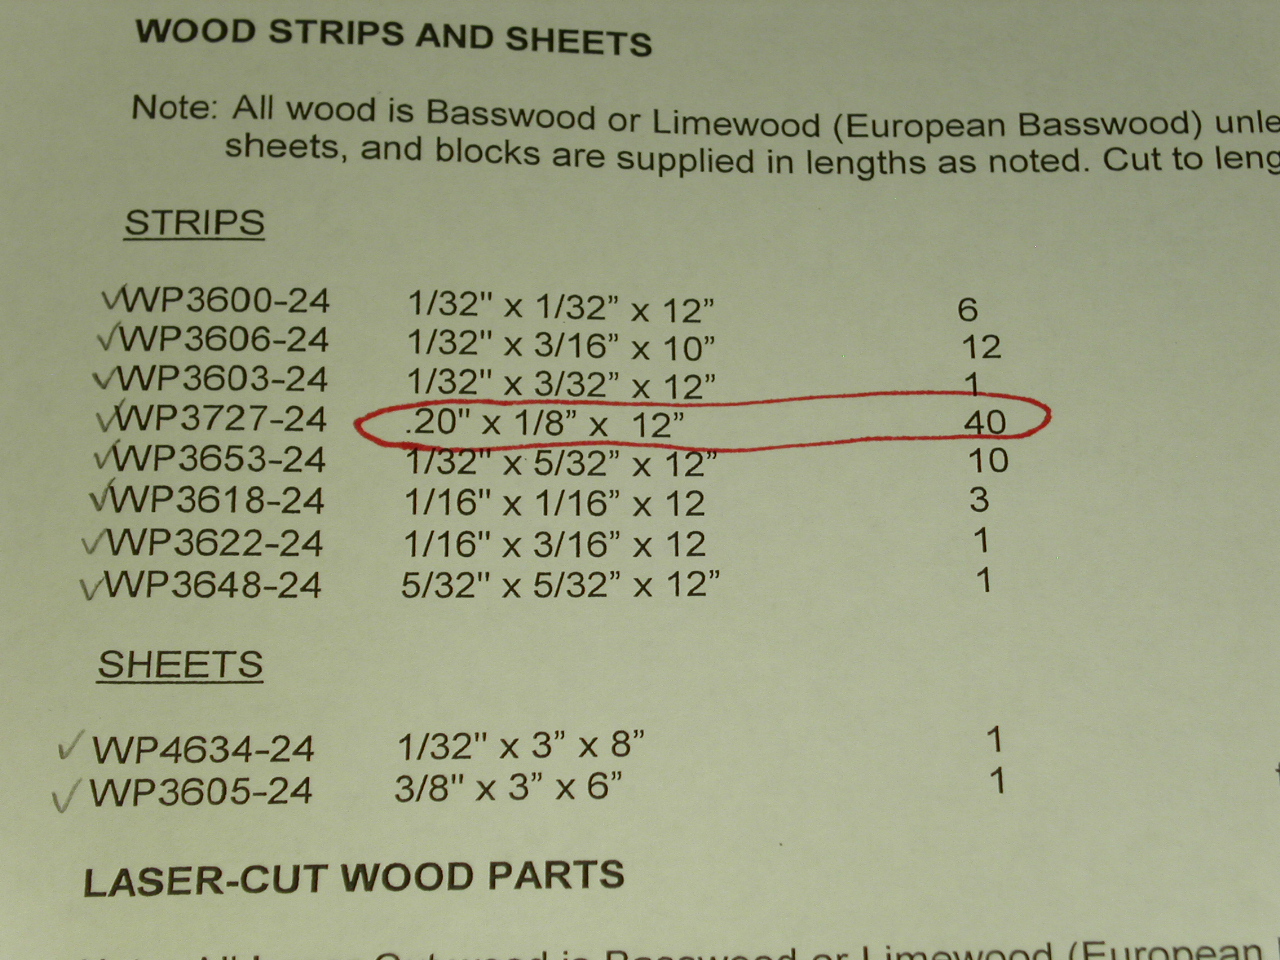
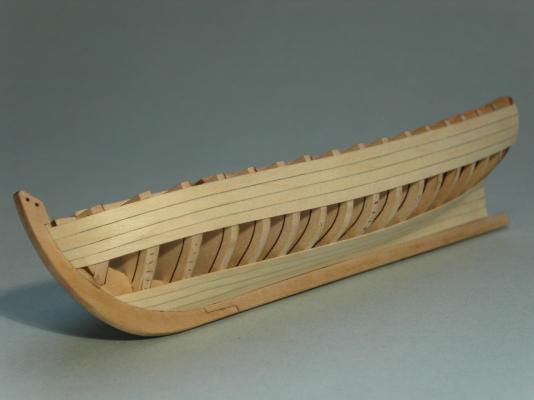
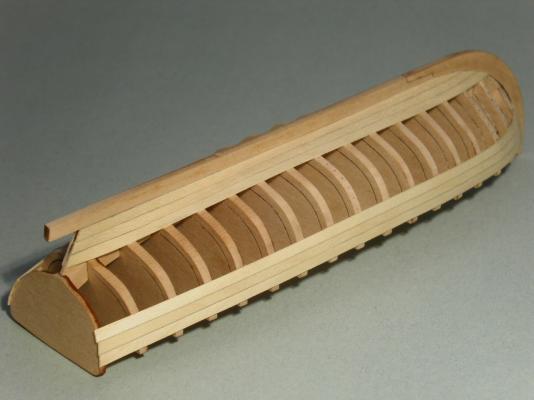
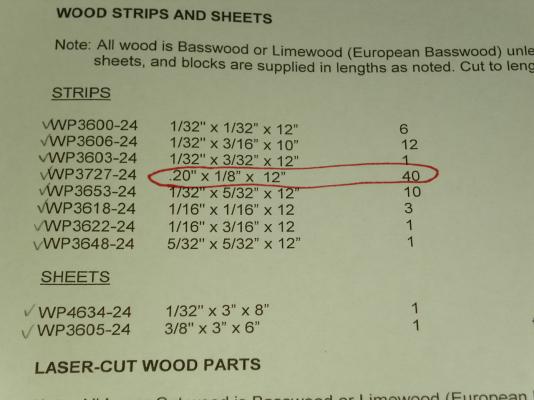
I'm plugging away with the planking . . . slooooowly. Since these newest kits come with .020" thick planks, rather than the 1/32 (.031") planks that came in the older kits, I'm trying to keep my planking as flawless as possible to avoid excessive sanding of the hull when the planking is complete. I don't want to take too much thickness off of these planks! I'm fairly pleased with my planking results so far. It's not perfect, but is acceptable for a first ship build. I'm looking forward to finishing the planking, so I can get things sanded and looking less rough. Erik
- 222 replies
-
- 17
-
-
- 18th century longboat
- model shipways
- (and 2 more)
-
Hi Tony, I recently bought the Longboat and also noticed the planks in the newer kits are .020". They are poor quality, so are a bit rough on the edges. After sanding the roughness off I've found that I'll need 13 planks per side of the boat, rather than 12 like others have been using. Also, Model Shipways didn't update the instructions to account for the thinner wood, so when thinning the false keel at the stern, less material should be taken off. I'm curious if anyone knows why Model Shipways changed the plank thickness? It seems odd to arbitrarily change the plank thickness if that's not what Chuck designed the kit to use. .020" thick planks are nearly paper thin as it is, so don't leave much margin for error when doing the final sanding of the hull. As the first person posting a build log on MSW of the Longboat using the new .020" planks, I would NOT recommend using them. Substitute 1/32" basswood planks can be purchased on various sites on the web for around $5 (I personally would not buy them from Model Shipways, since the purchasing of additional planking material is to correct their poor decision in the first place). Erik
-
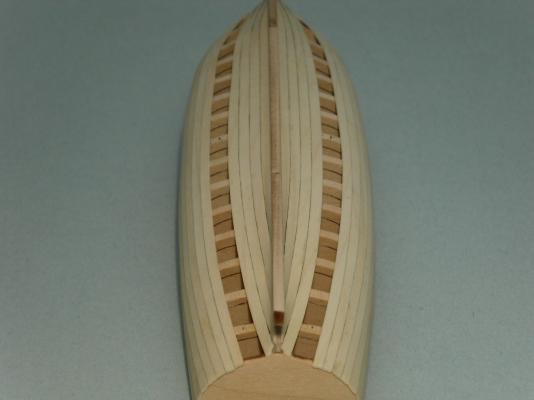
Toni, Thanks for the kind words. I actually patterned the garboard strake shape specifically after yours. From the side views you posted, I like how the run of your planks looked in the bow area. Mike, Thanks! I'm hoping to copy the look of your longboat build. I like the non-painted hull and the minimal use of paint on your interior as well. With the non-painted hull idea in mind, I'm trying to be extra careful with the planking. Erik
- 222 replies
-
- 2
-
-
- 18th century longboat
- model shipways
- (and 2 more)
-
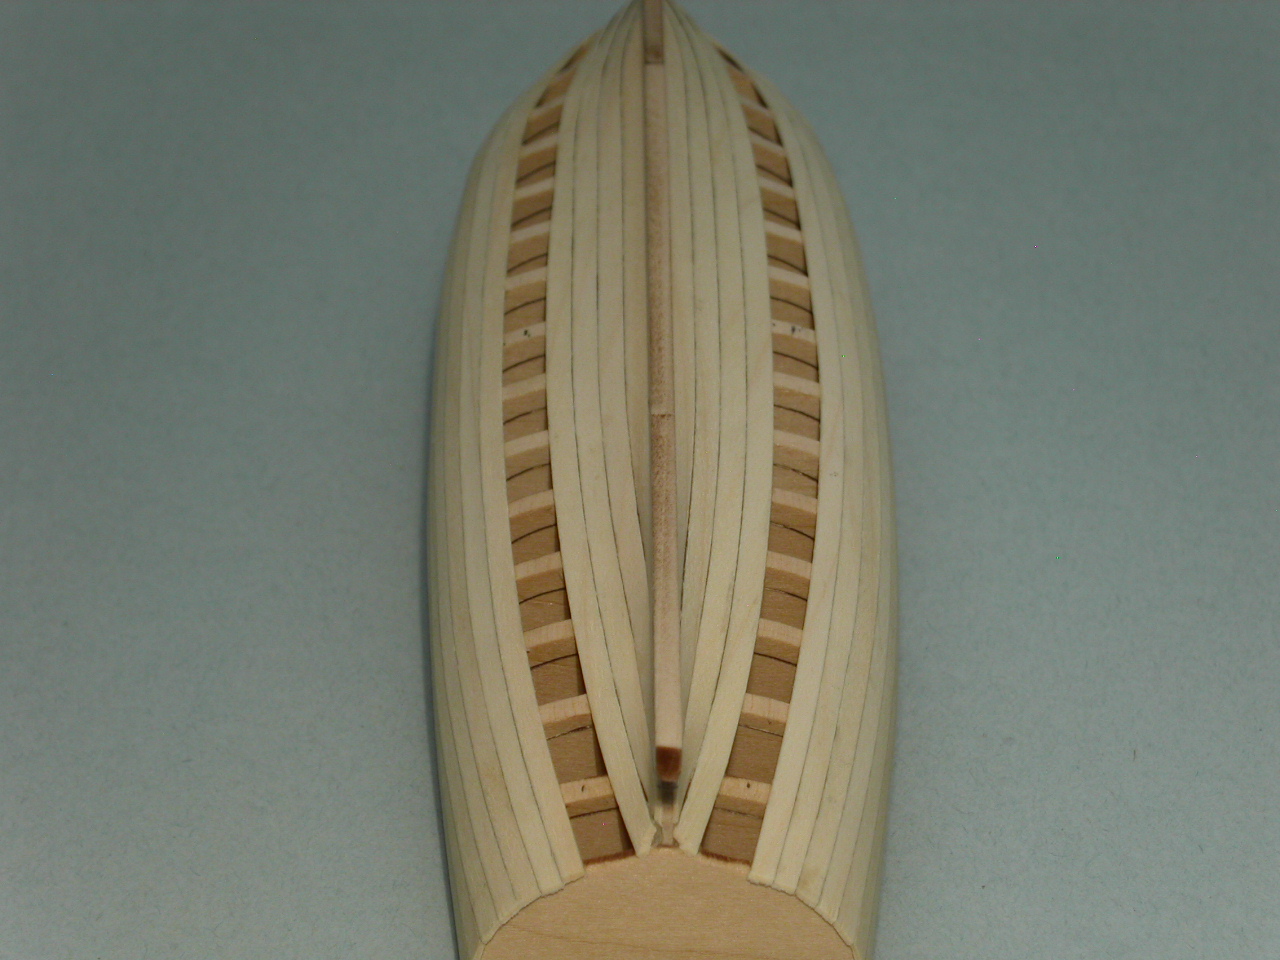
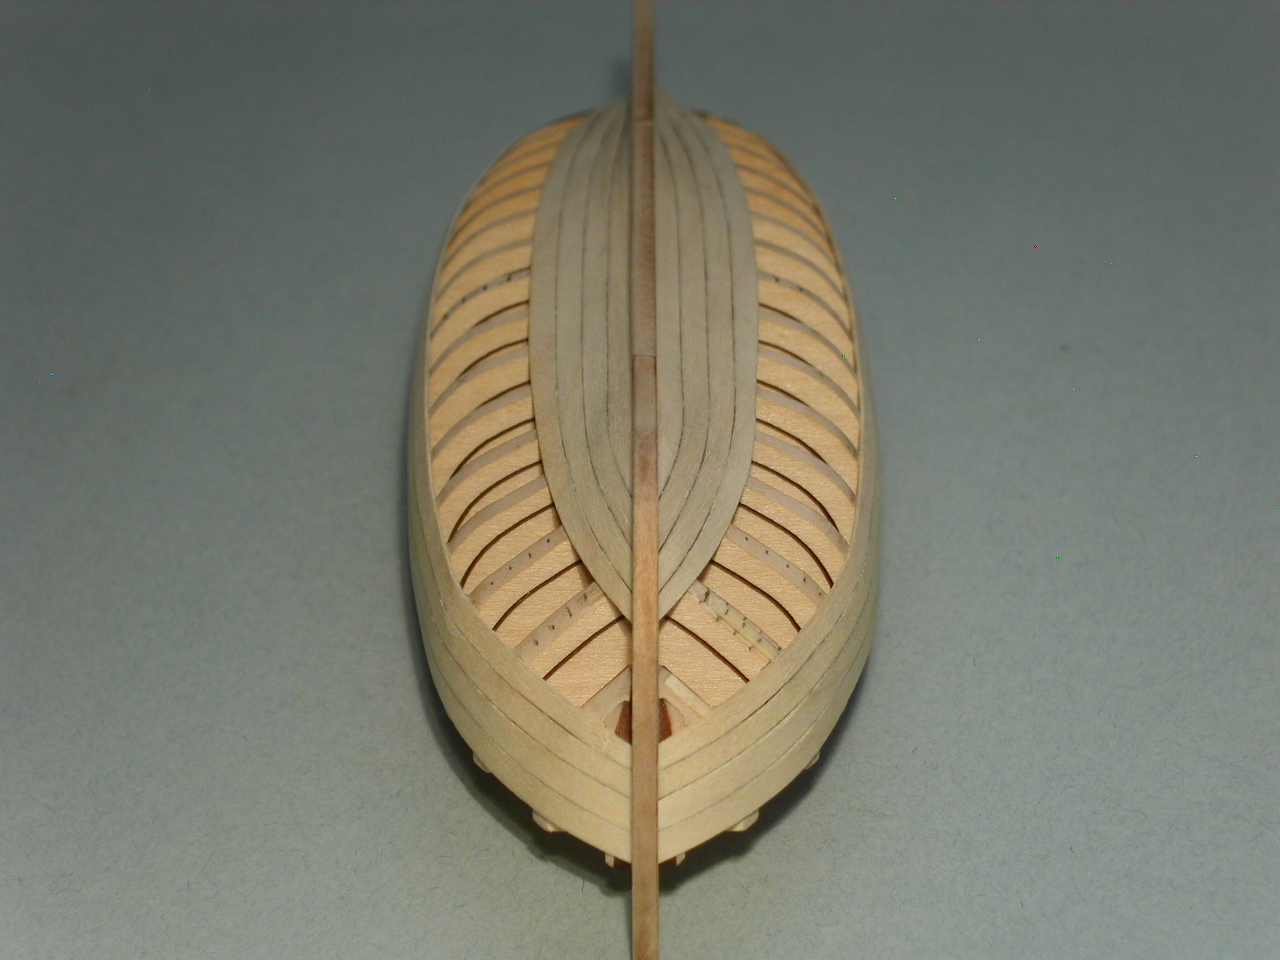
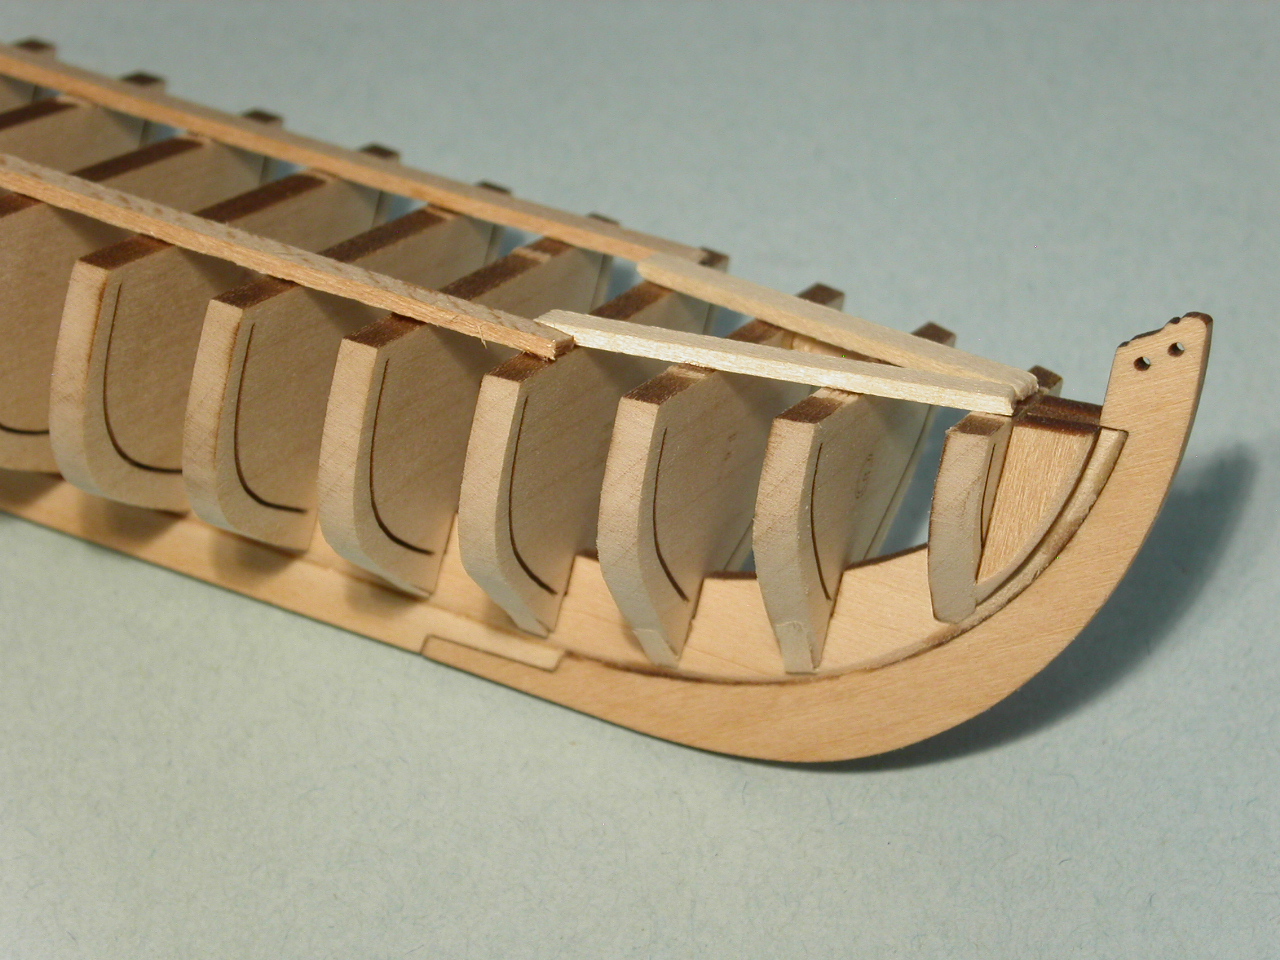
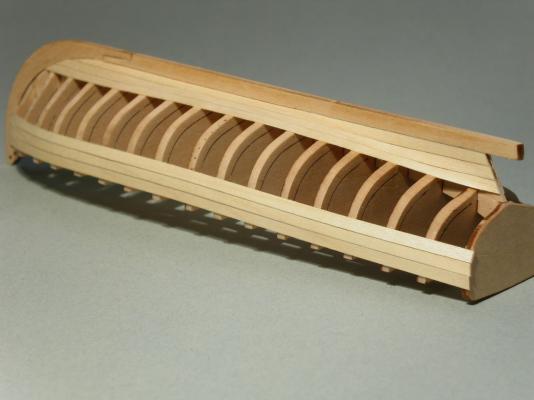
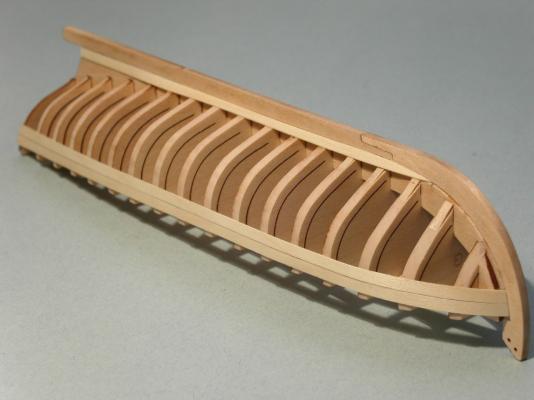
I have attached the garboard planks. If the speed at which I installed these was an indicator as to my speed on this build in general, I'd say if I work on it daily, I'll be done some time in 2019. I looked through every single Longboat build log at other modelers successes and mistakes when shaping, bending and gluing the garboard planks. I also printed Chuck's photo of the bottom of his Longboat showing a good view of the garboard plank. I feel I got the shape as good as I can get it, and I'm happy with the way it mounted cleanly into the rabbet. Erik

- 222 replies
-
- 15
-
-
- 18th century longboat
- model shipways
- (and 2 more)
-
Essex - Process and corrections to the new Model Expo Kit
Erik W replied to samueljr's topic in Wood ship model kits
It looks like the Essex kit is currently out of stock and back ordered at Model Shipways. I would assume then that anyone purchasing this kit directly from them from now on will receive the kits with the latest corrections/upgrades. It's a shame the execution of this kit didn't match what was designed. Erik -
Mike, thanks for the compliment! I'm going to stick with the "soft and fluffy" basswood. Since this is my first wooden boat build, I wanted to stick with the parts that came in the box. The basswood planks work fine after about 15 minutes of cleanup each with some fine sandpaper. Erik
- 222 replies
-
- 2
-
-
- 18th century longboat
- model shipways
- (and 2 more)
-
I attached the first 4 planks. They turned out fairly well. I know these were the easiest planks on the hull to do, but the experience should help with the more difficult planks . . . and it boosted my confidence a bit. Also, when comparing the parts list of the kit on the Model Shipways website with the parts list I receive with the kit (which is dated 2/25/15), I noticed the thickness of the planks had been reduced at some point. They were 1/32" (.31") before, but are now .20". Just out of curiosity, does anyone have any ideas why Model Shipways did this? The instructions have not been changed to account for the thinner planks. So builders choosing to use the .020" planks, rather than 1/32" planks as the kit was designed for, should make sure to take less material off of the false keel at the stern. Otherwise the planked area of the stern under the transom will be narrower than the 3/32" keel. Now, on to figuring out the garboard planks . . . Erik


- 222 replies
-
- 10
-
-
- 18th century longboat
- model shipways
- (and 2 more)
-
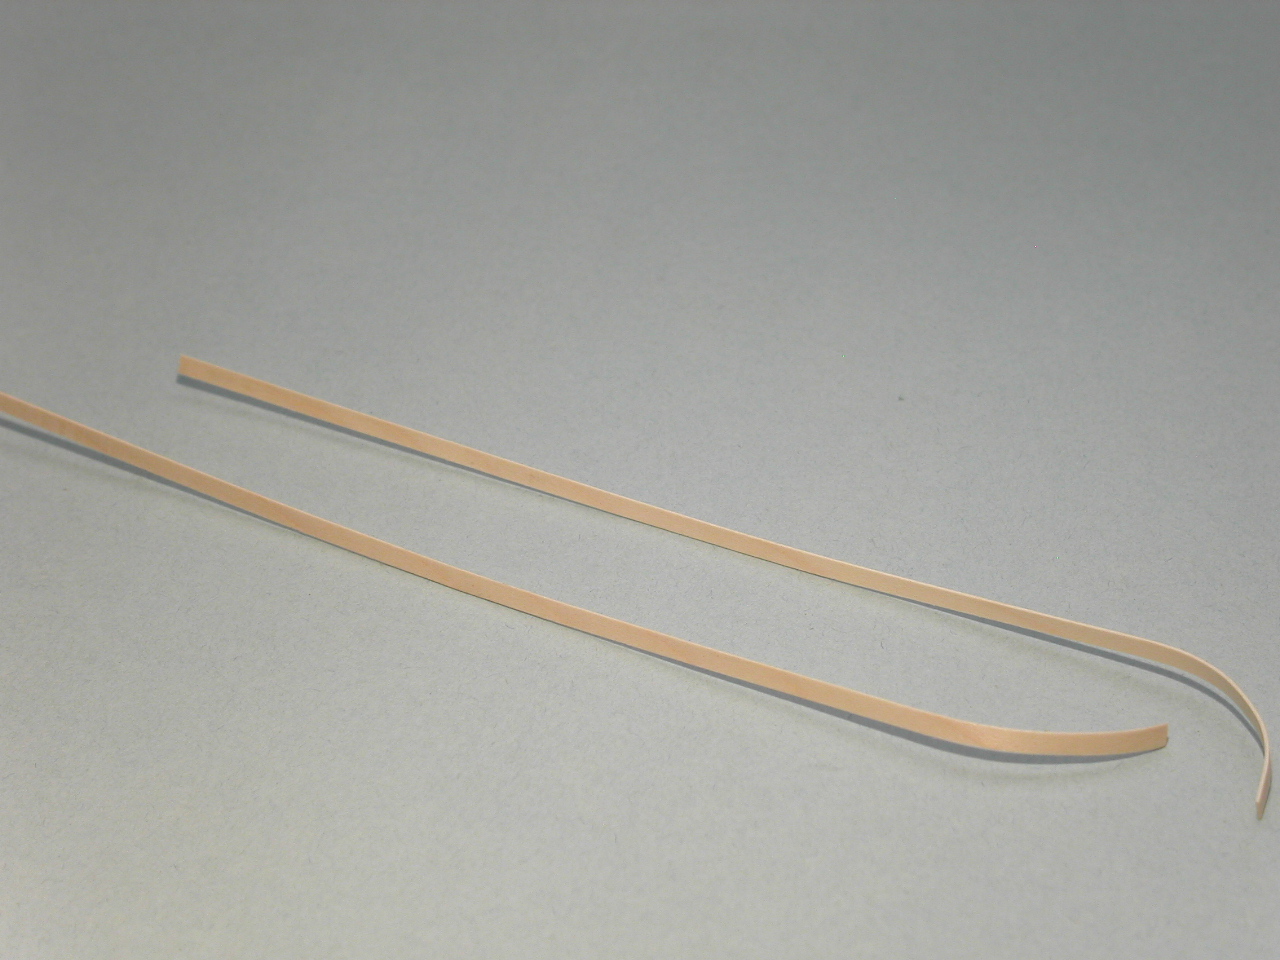
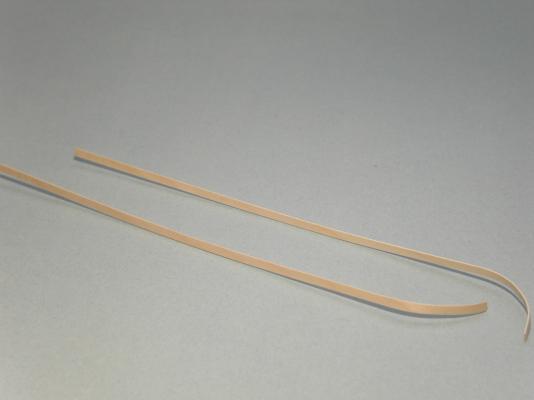
I managed to get the first two planks formed. There is definitely a learning curve. I think I have the process figured out though. I got both the edge bend and the bow curve correct. These two planks took 2 hours! The planks supplied with the kit are rough on one edge, so I lightly sanded them smooth (on all four surfaces). I'll have to do this with all the planks. Erik
- 222 replies
-
- 5
-
-
- 18th century longboat
- model shipways
- (and 2 more)
-
Questions: I'm following Chuck's instructions with the Longboat and adding the two topmost planks along the sheer first. To get both the bend of the plank around the bow and the edge bend, I first soaked the plank in hot water, formed the edge bend, then used the hair dryer to dry it. I then dipped the end that the curved bow bend will be on in hot water, clamped that part around a cap, and then used the hair dryer to dry it. Is this how you folks do planks with both a regular bend and edge bend? Also, I've seen that some folks glue the plank to a couple bulkheads at a time, and then move on to the next couple. Others glue the whole plank at once. Which do you do and why? Thanks in advance! Erik
-
I followed Danny's advice (thanks again!) and glued some scrap wood to the bottom of the forward bulkheads. I then re-faired that area. The test fitting of the Garboard plank had a much better angle/line than before. Nirvana, I'm taking it slow. In fact, I may set the record for the slowest build time one this, which is fine. I'll be happy if I finish with something worthy of the other builds around here. Erik P.S. - I have noticed some of my photos have a bit of an optical illusion caused by the angle of the lighting/angles I'm taking the photos.

- 222 replies
-
- 6
-
-
- 18th century longboat
- model shipways
- (and 2 more)
-
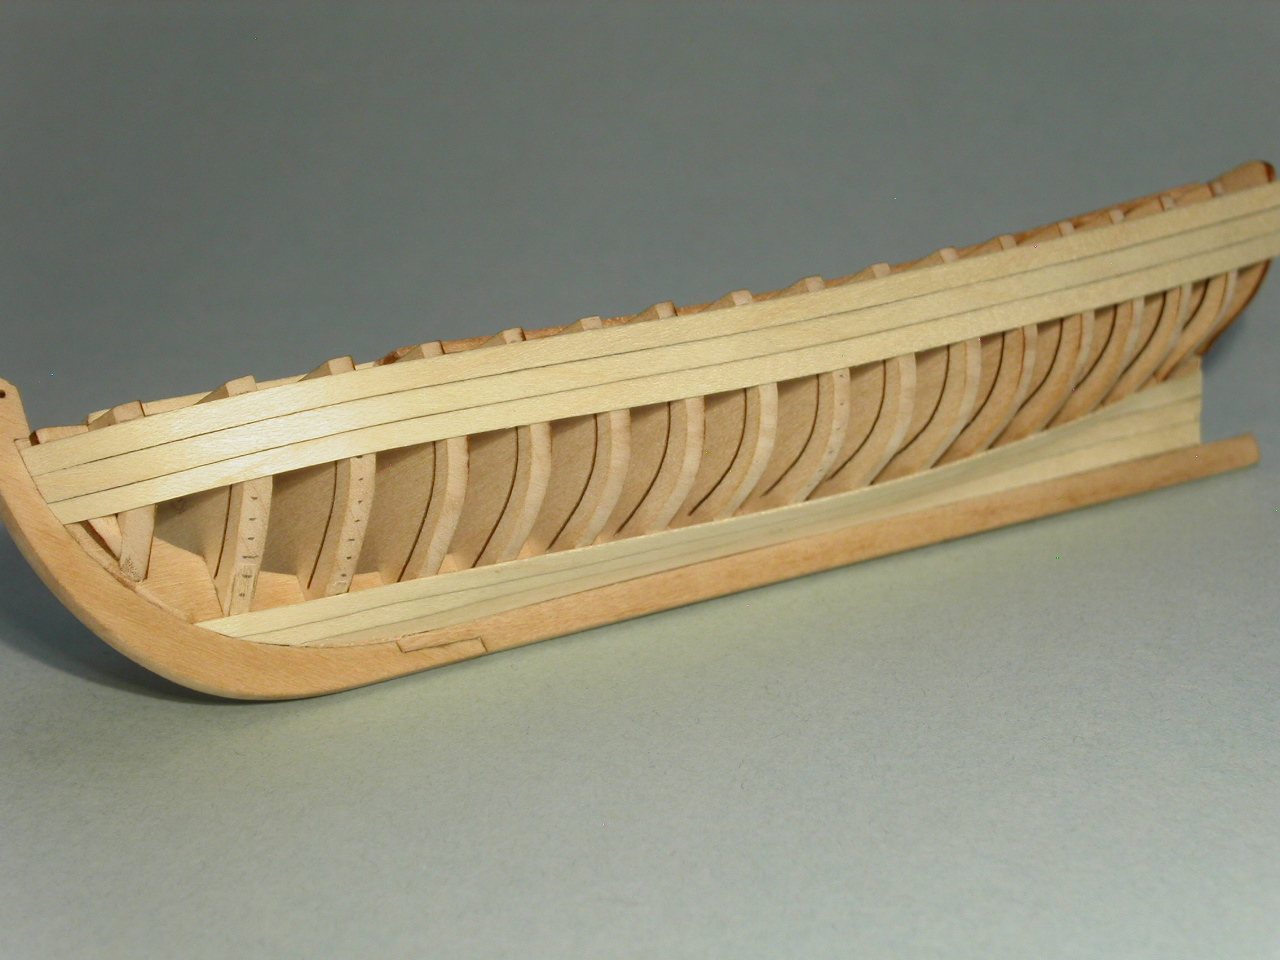
Danny, Thanks for the input! Yeah, I had thought that the bulkheads might be high when I attached them. Even though they were seated in the slot in the false keel, those few didn't seem like they were close enough down towards the keel. Here's a photo of the bulkheads before I faired them. I figured that gap might be OK because Chuck's photo showed the same thing! In his fourth photo of his second post.: http://modelshipworld.com/index.php/topic/629-18th-century-english-longboat-by-chuck-c1760/# That said, I'll follow your advice. Erik

- 222 replies
-
- 1
-
-
- 18th century longboat
- model shipways
- (and 2 more)
-
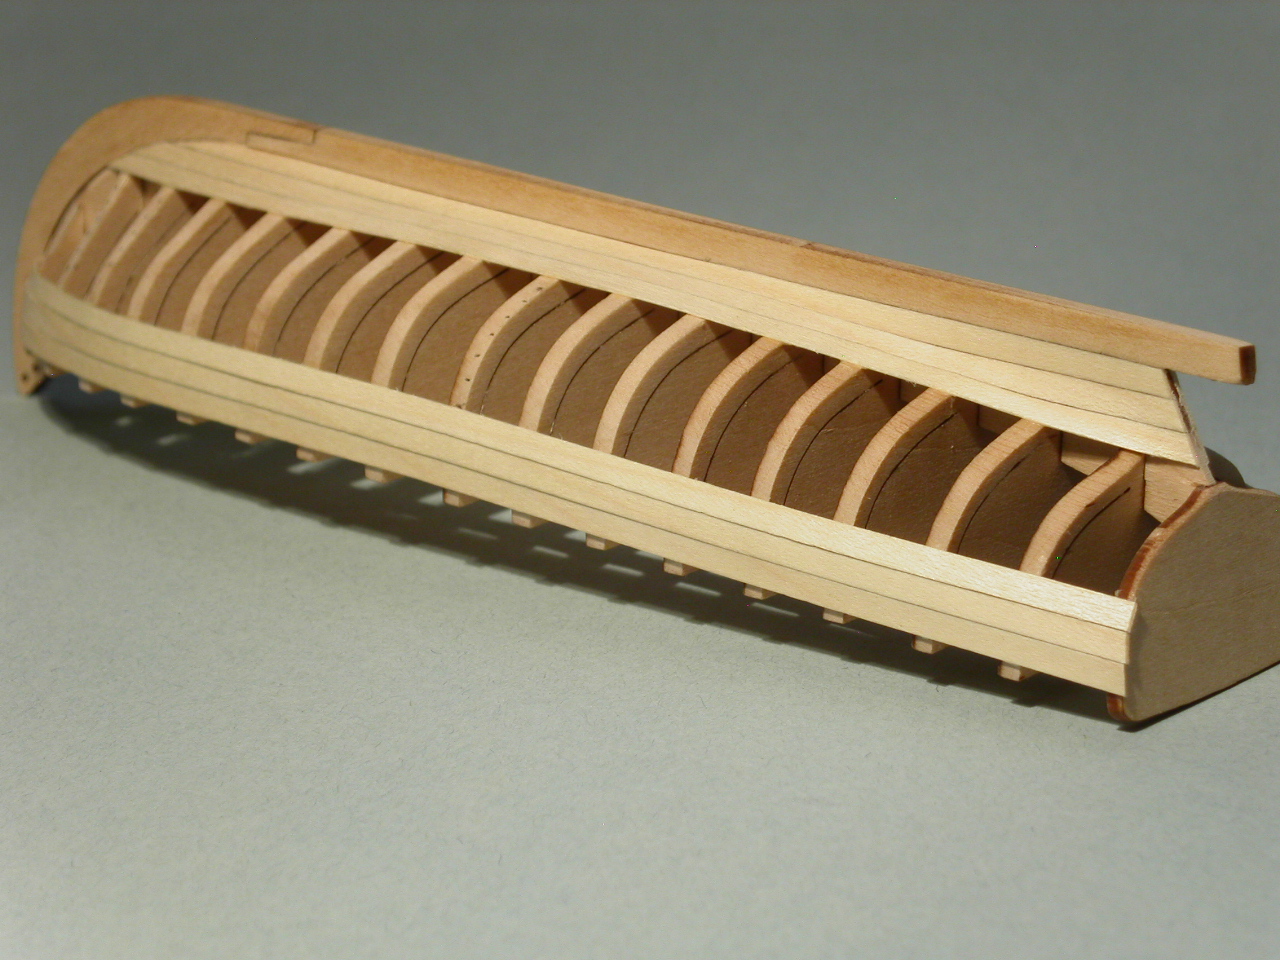
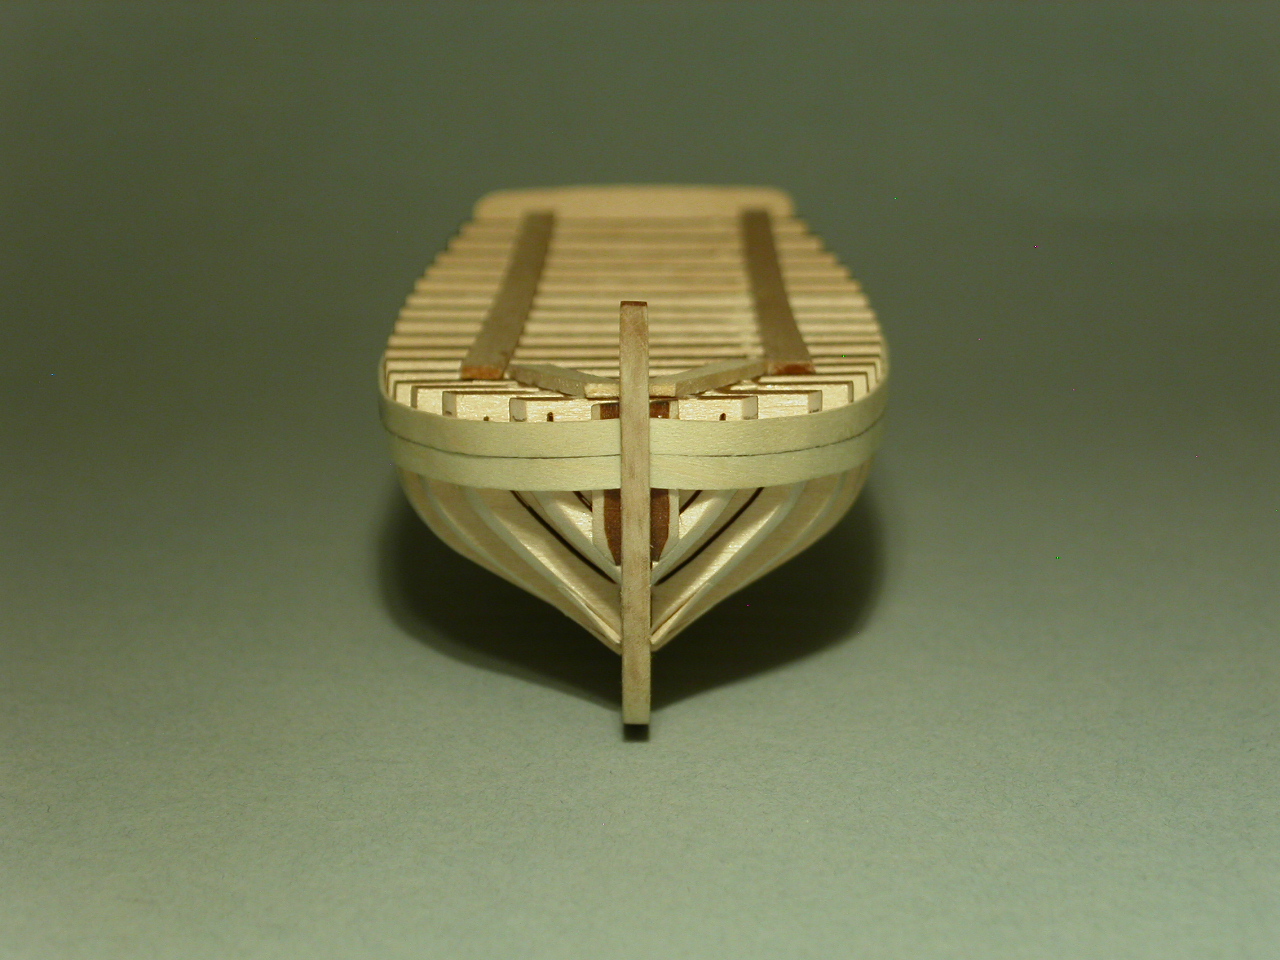
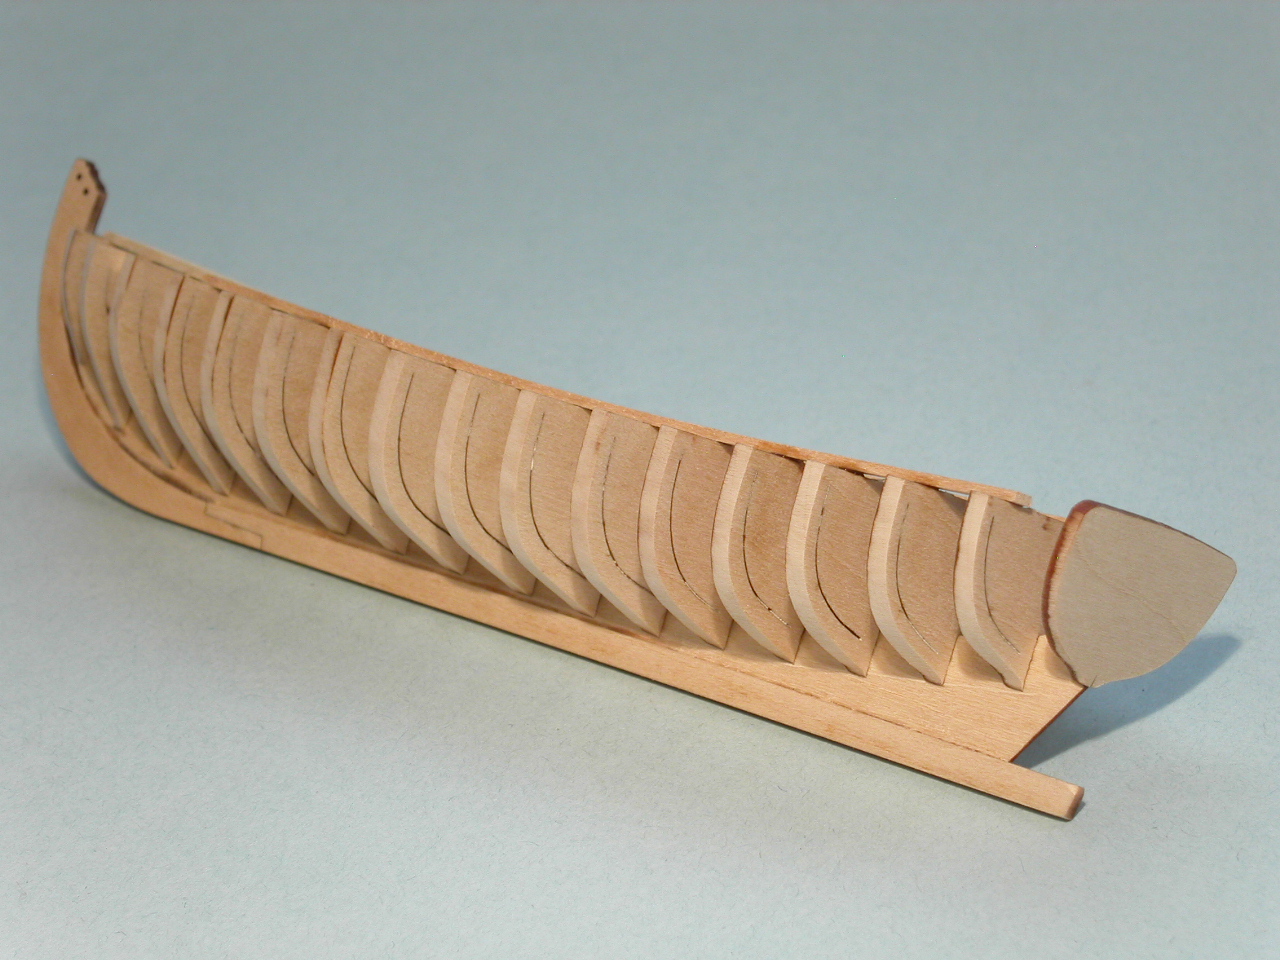
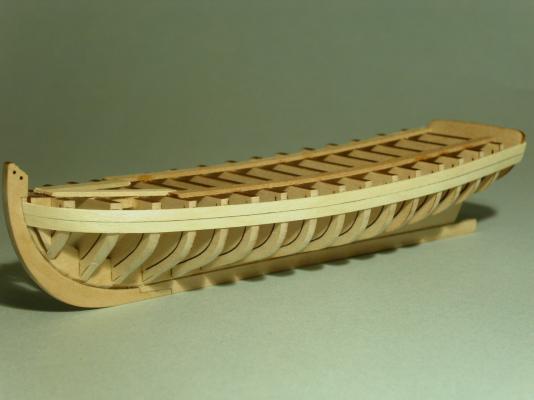
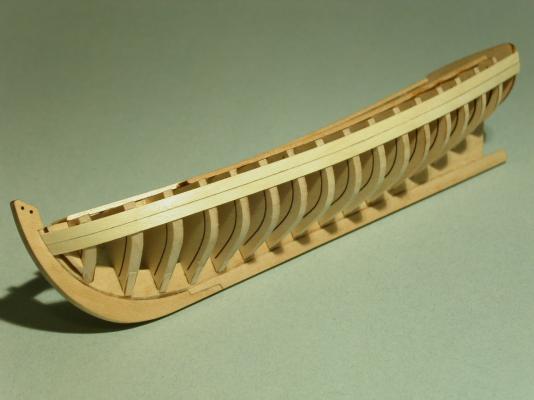
I glued on the transom and bow filler pieces. I then faired them. I took Canute's advice and laid one of the planks over various bulkheads to make sure I faired everything correctly. Now it's on to planking. Gulp. Erik


- 222 replies
-
- 9
-
-
- 18th century longboat
- model shipways
- (and 2 more)
-
Mike, This looks great. I'm a few steps behind you on my longboat build. I hope mine turns out as nice! Erik
- 100 replies
-
- 1
-
-
- model shipways
- 18th century longboat
- (and 1 more)
-
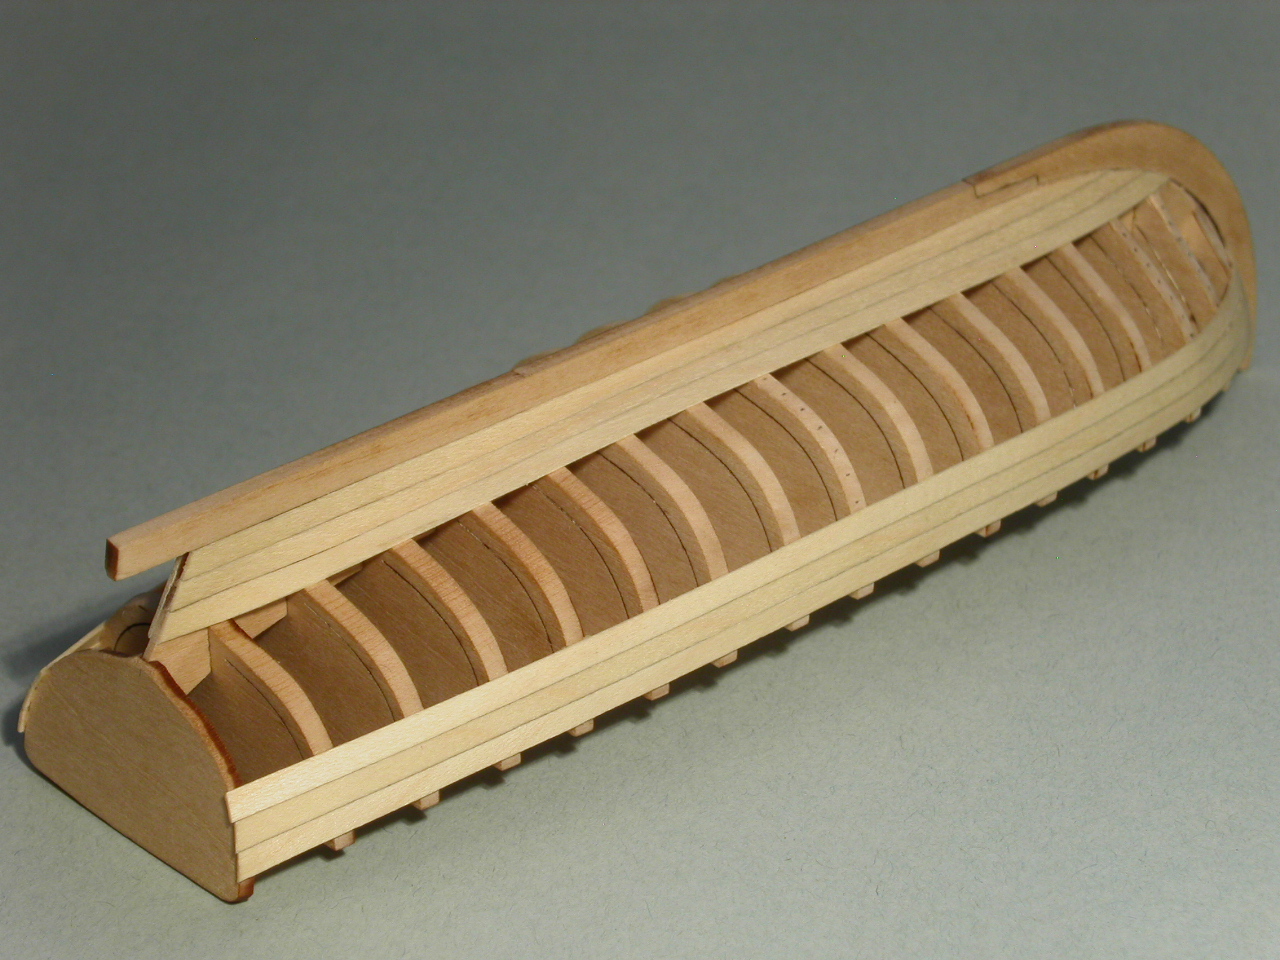
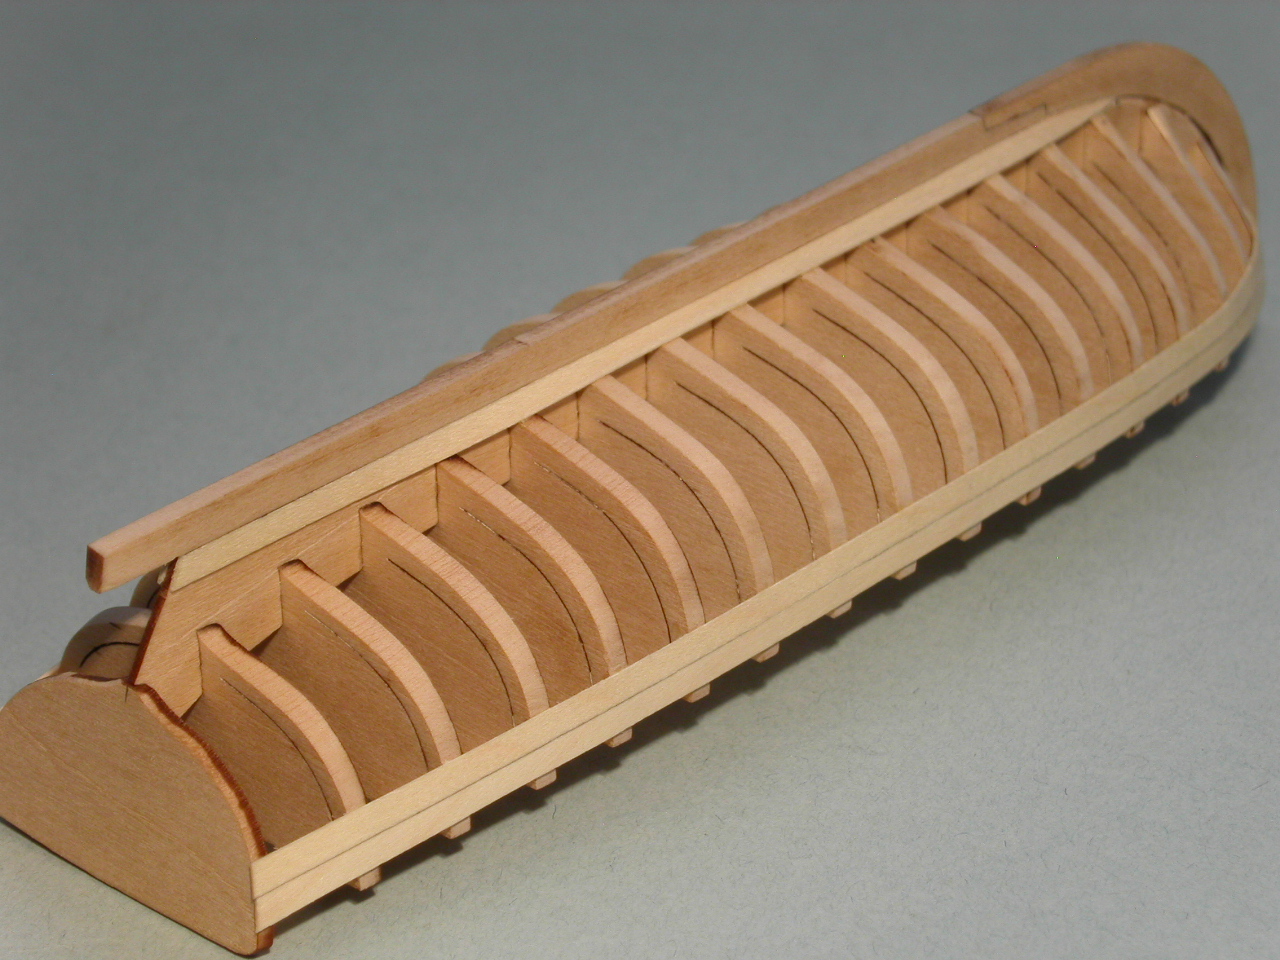
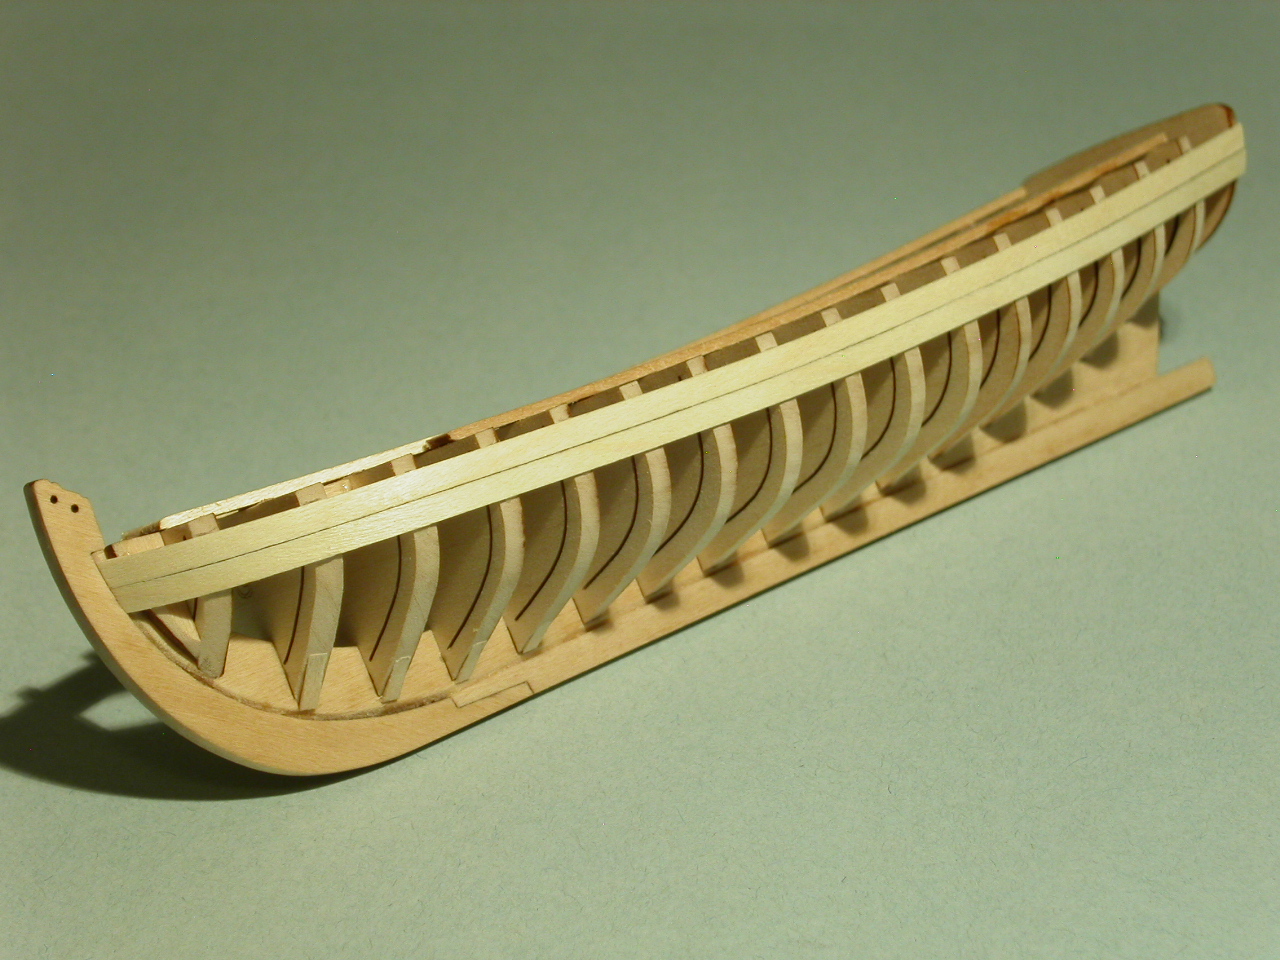
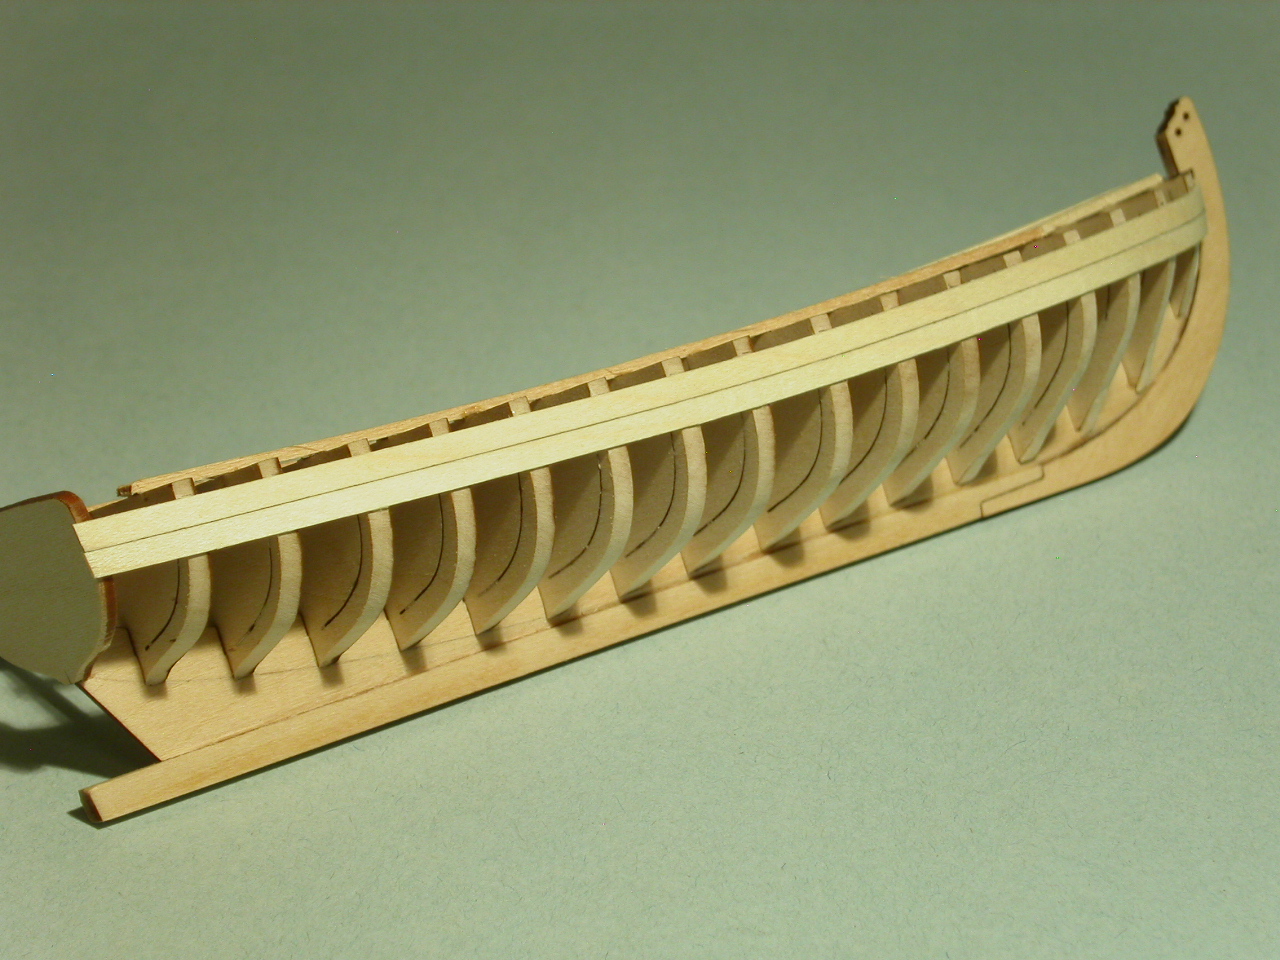
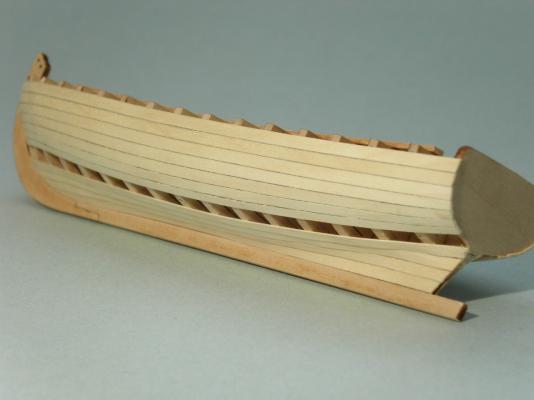
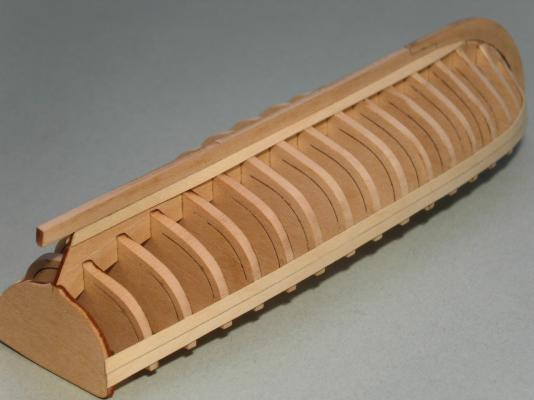
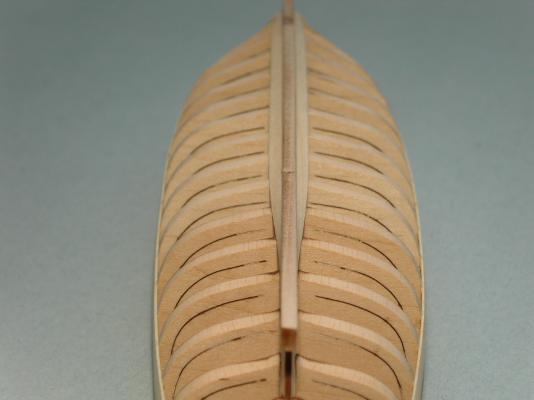
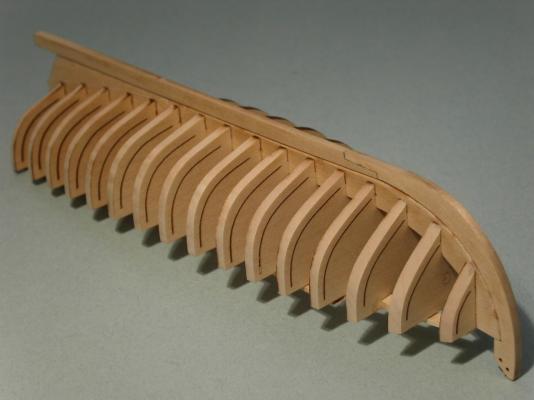
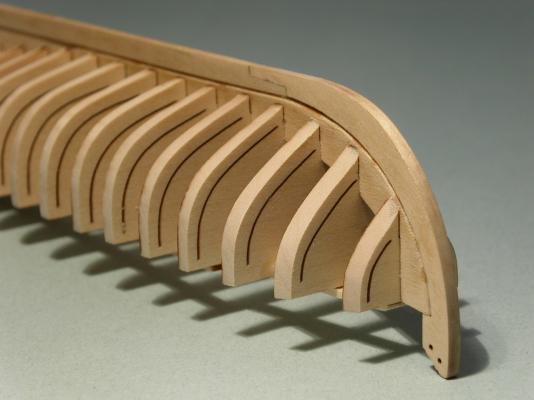
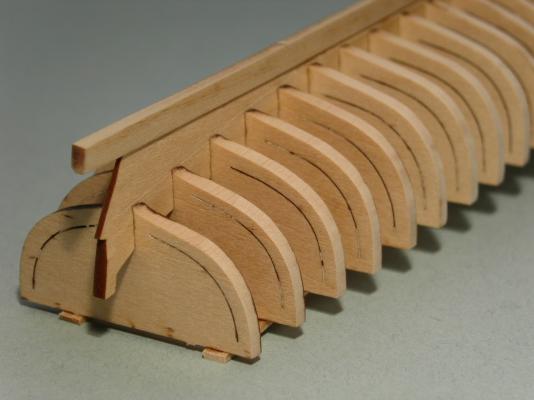
Question: I've attached temporary braces to the tops of the bulkheads. I've also faired the port side of the hull. For you experts out there, in looking at my photos below, does it look like I've faired the bulkheads correctly? Have I faired the bow enough? I want to make sure I have it right before I begin planking. Thanks in advance for your input! The starboard side still needs fairing, then I'll add the transom and bow fillers. Erik
- 222 replies
-
- 5
-
-
- 18th century longboat
- model shipways
- (and 2 more)
-
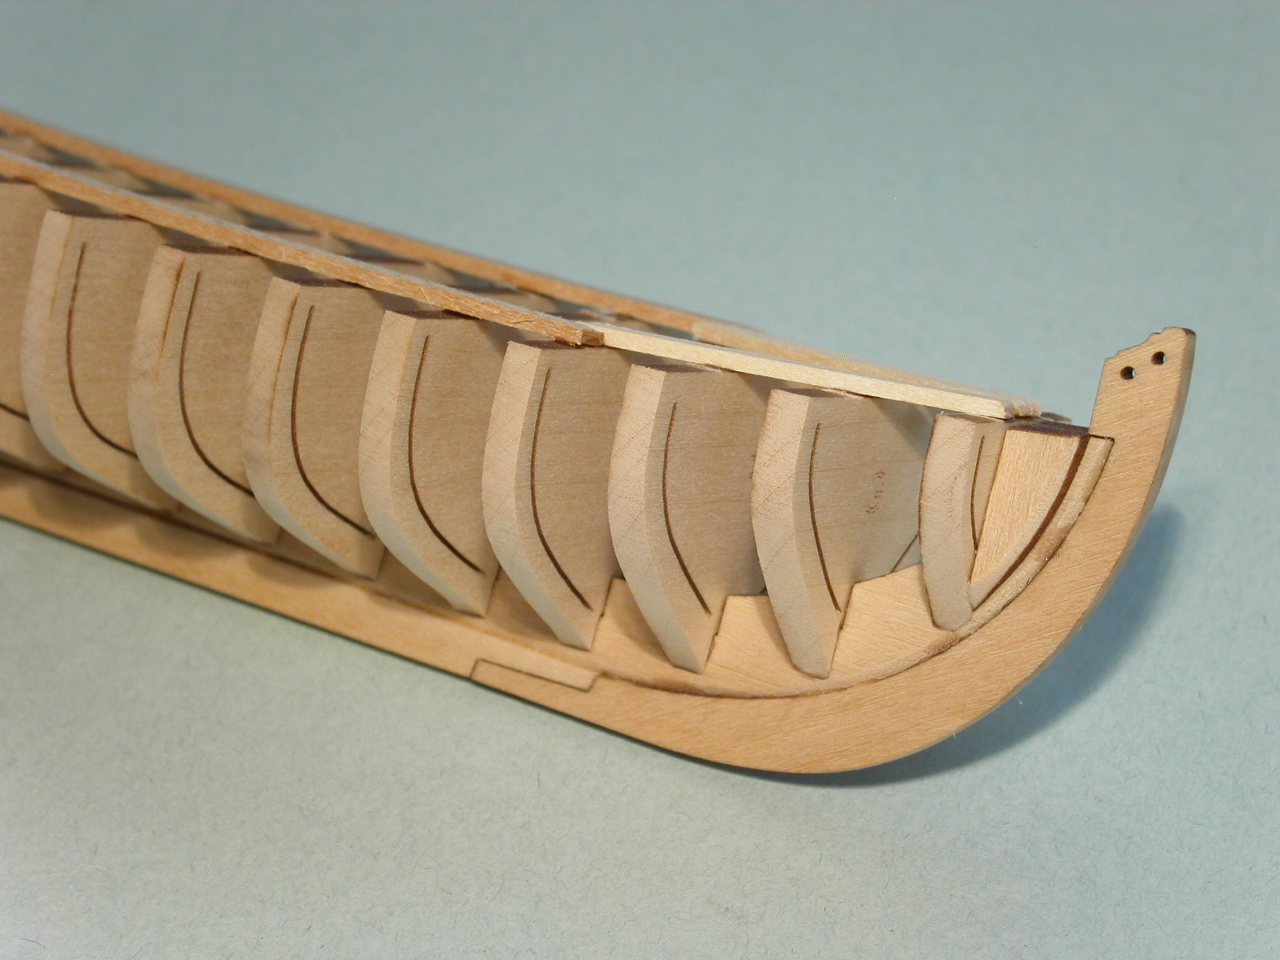
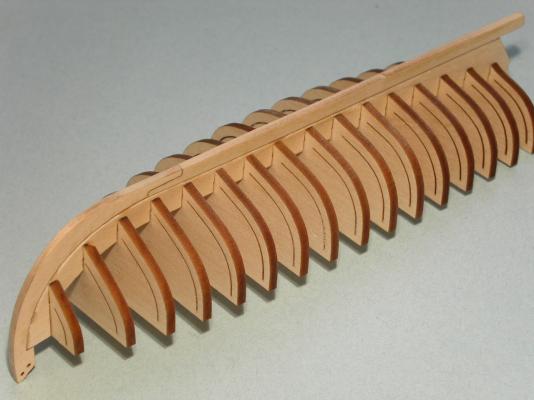
Thanks Matrim. That's good advice. All the bulkheads are now attached. They are as straight and true as I could get them. The first 6 or 7 required more sanding to get them to fit than the back 9 or 10. I'm going to glue some wood across the tops of the bulkheads for additional bracing, and then move onto sanding the bulkhead's edges to shape. I'm having fun! Erik

- 222 replies
-
- 9
-
-
- 18th century longboat
- model shipways
- (and 2 more)
-
Thanks Toni. I'm more likely to use PVA on the planking due to the slower set up time. I am using CA to attach the bulkheads though. I've got 12 of the 16 in without any problems. I had seen in one of Chuck's posts that he said he planks with a delicate touch. That stuck with me as far as the desirability of getting my planks formed accurately on the work bench, rather than needing to force them on the build itself. I'm both looking forward to, and am terrified of the planking stage! Erik
- 222 replies
-
- 1
-
-
- 18th century longboat
- model shipways
- (and 2 more)
-
Eamonn, Bob, Thanks for the tips. I figure planning on keeping the hull natural wood will cause me to be more careful while building the hull. Unpainted surfaces are not particularly forgiving! I've got half the bulkheads installed. I'll post photos once I get them all attached. Erik
- 222 replies
-
- 1
-
-
- 18th century longboat
- model shipways
- (and 2 more)
-
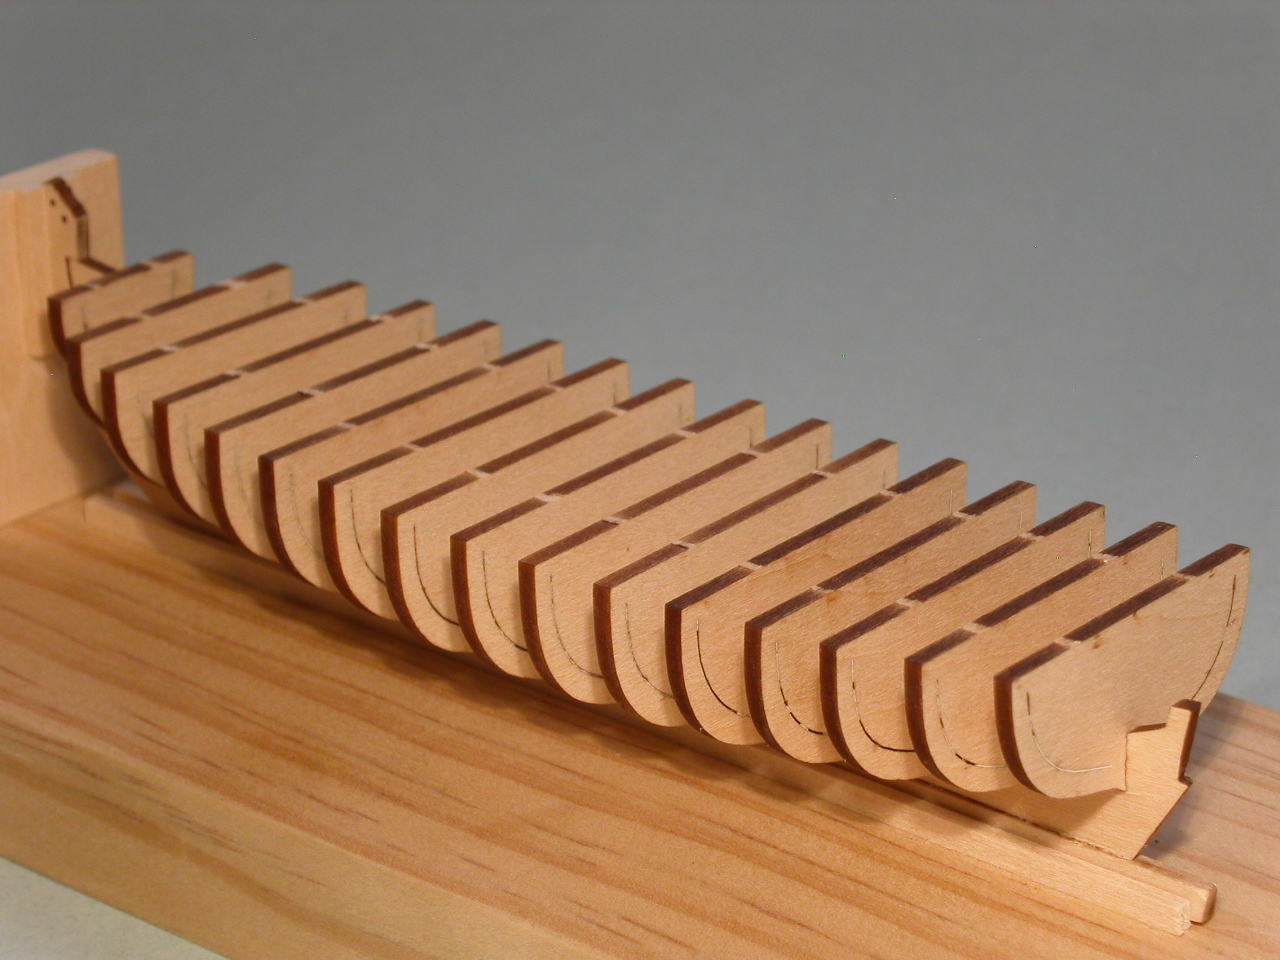
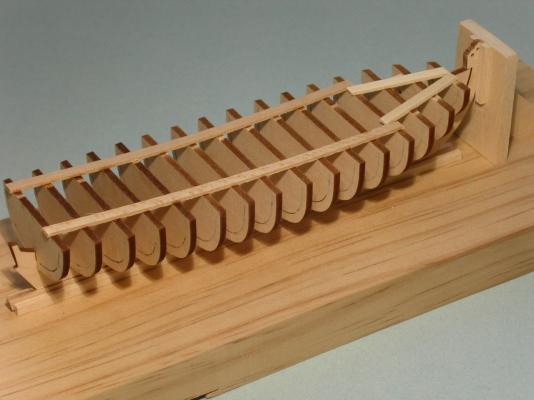
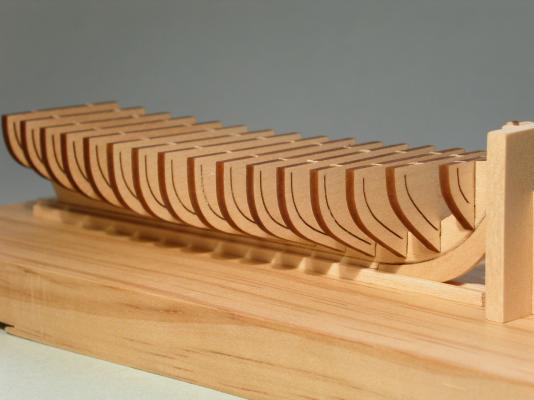
I've had a brief pause on my build. Rather than sprint into the build, I decided a more methodical approach will yield better results. So, I bought a bunch of supplies at the hobby shop yesterday, mostly various methods of sanding, sanding sticks, sand paper, etc, and some Maxi-cure extra thick CA. In preparation for attaching the bulkheads, I thoroughly sanded them on both sides with ever finer grades of sandpaper to get the burn marks off. My plan is to not paint the bottom of the hull, so I'm proceeding with the thought that it will just be varnished. I'm trying to keep the wood as pristine as possible. And . . . if I screw up the planking then I'll go ahead and paint the bottom. Might as well aim high though. Based on other build logs, I also figured building an assembly jig was a good idea. So, here's what I came up with. The keel is straight and plumb with the vertical being at a 90 degree angle. Next step: Bulkheads. Erik

- 222 replies
-
- 9
-
-
- 18th century longboat
- model shipways
- (and 2 more)
-
Thanks for the heads up Jason. Other people's build logs have been invaluable for figuring out those type of pitfalls beforehand. Erik
-
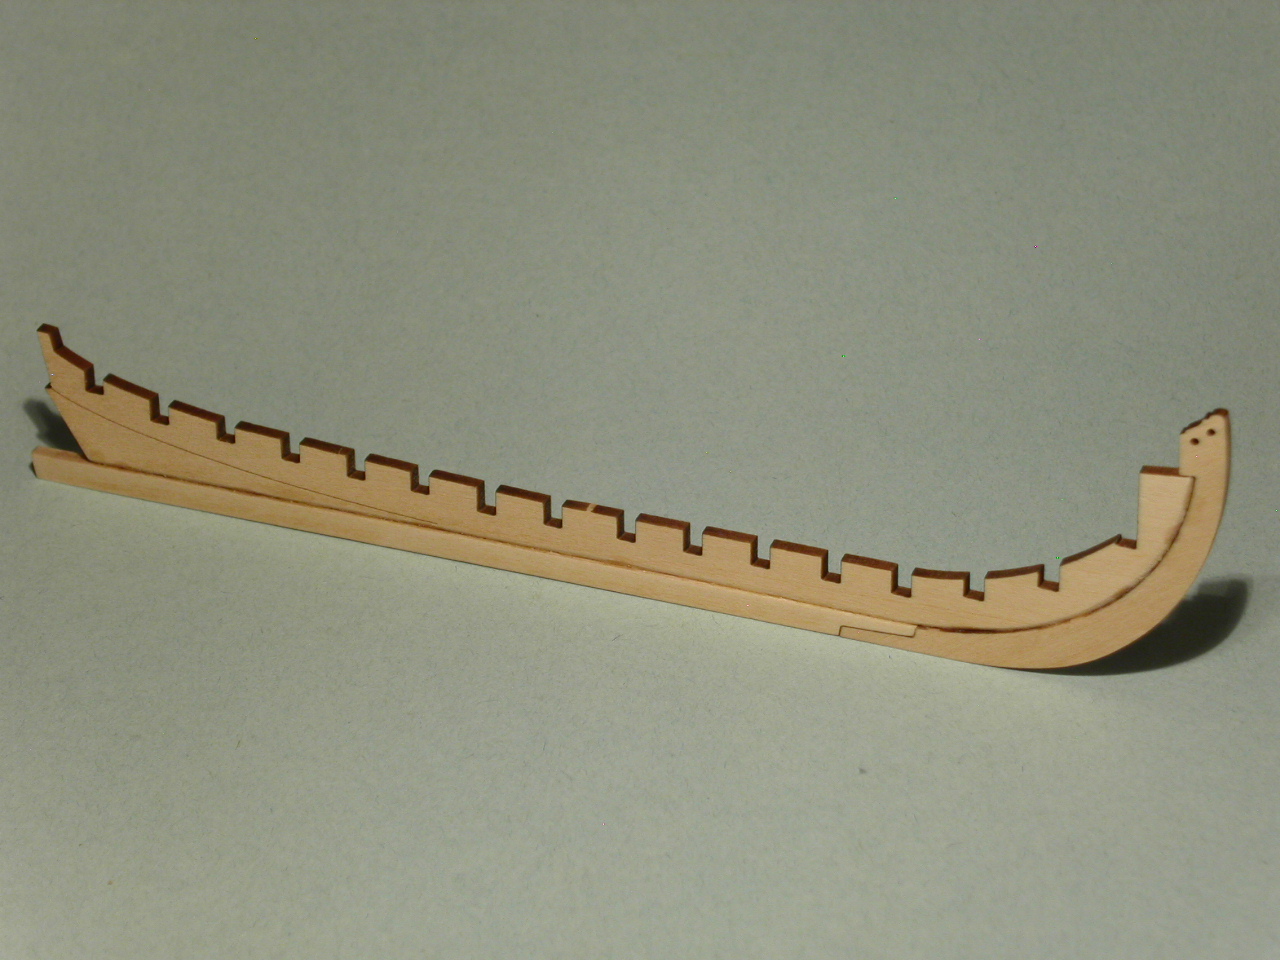
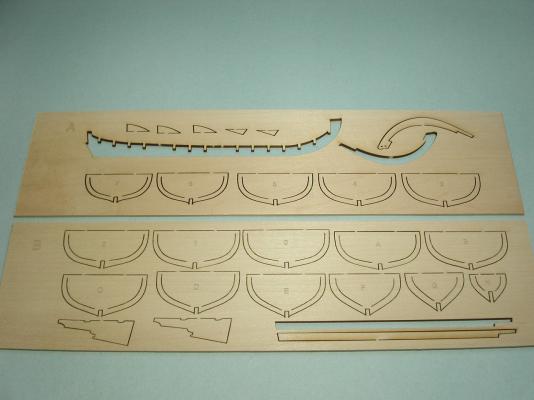
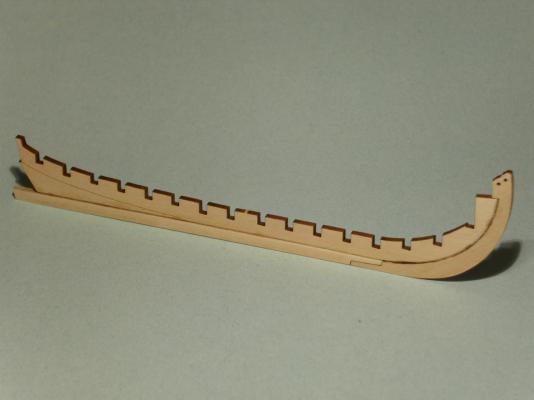
Humble beginnings. The keel and false keel glued together. Though there is glue evident on the false keel, the keel itself is sanded clean and blemish free. Erik
- 222 replies
-
- 8
-
-
- 18th century longboat
- model shipways
- (and 2 more)
-
Thanks for the quick answer! I'll probably be using both white glue and CA. I need to pick up some sand paper at the hobby shop, so I'll get some thick CA as well. I hope your flight to Sweden goes smoothly! Erik
-
Question: What glue are you folks using on your builds? I'm working on the first step of assembling the false keel and the keel. I tried to use medium viscosity CA, but it absorbed right into the wood of the keel. I wound up using Elmer's wood glue. I'd like to use CA when I do the planking. Am I using the wrong type of CA? Or do I just need to use more quantity? I'm a little leery about over gluing. I'll post photos once I have more than 2 pieces glued together! Thanks, Erik