HOLIDAY DONATION DRIVE - SUPPORT MSW - DO YOUR PART TO KEEP THIS GREAT FORUM GOING! (Only 13 donations so far - C'mon guys!)
×


Erik W
-
Posts
470 -
Joined
-
Last visited
Content Type
Profiles
Forums
Gallery
Events
Everything posted by Erik W
-
 Great info on the outhaul block. I love these types of tutorials. You've got to love the internet and helpful modelers! Erik
- 452 replies
-
- 4
-

-
- cheerful
- Syren Ship Model Company
- (and 1 more)
-
Wow! Thanks for all the kind words. As far as a next build, my plan is to throw my hat into the ring with all the other Cheerful builders. I'm working on getting my ducks in a row now with what I need from Chuck, and Jason at Crown Timberyard. Erik
- 222 replies
-
- 9
-
-
- 18th century longboat
- model shipways
- (and 2 more)
-
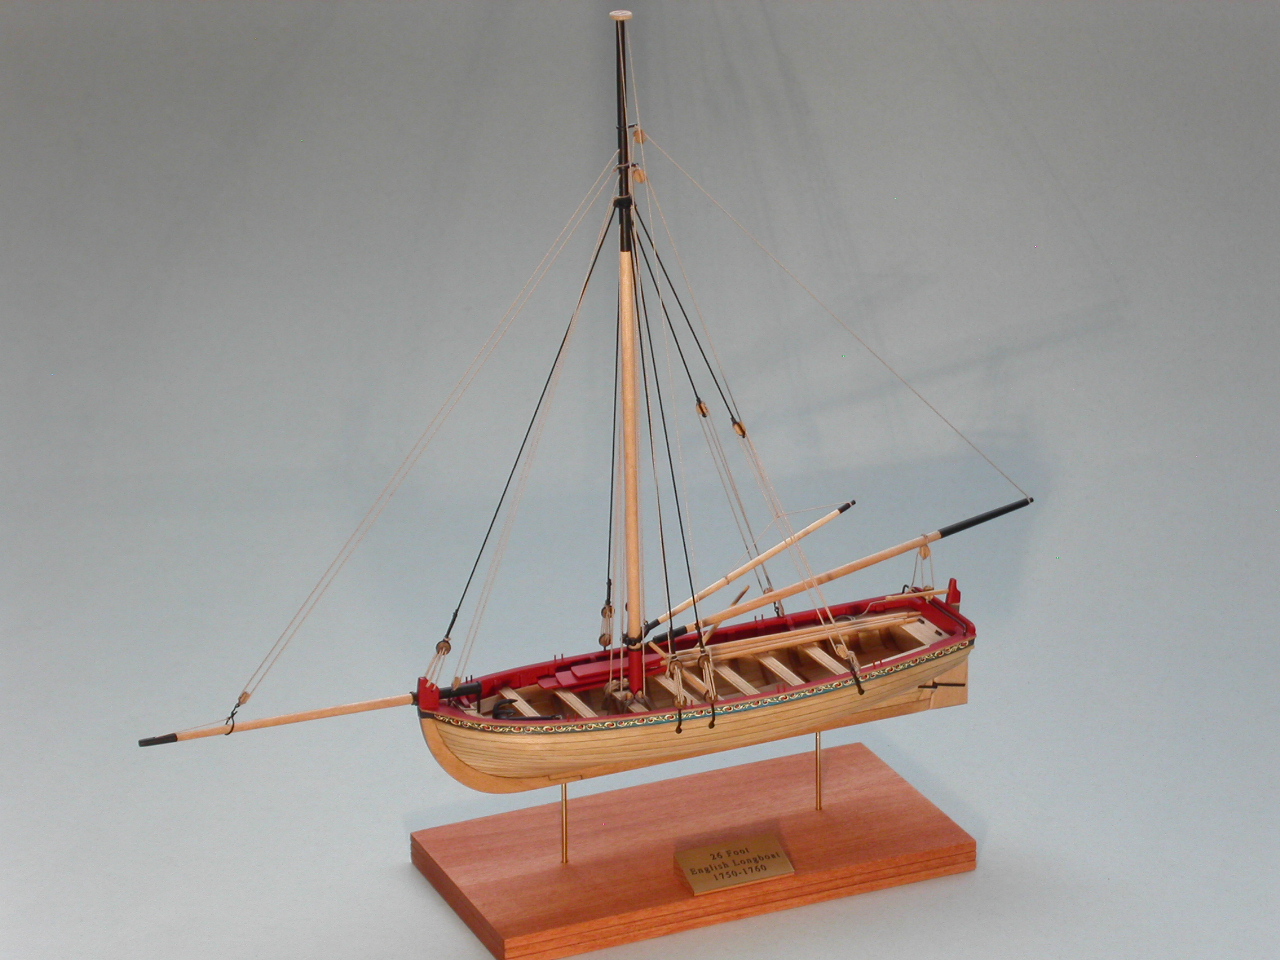
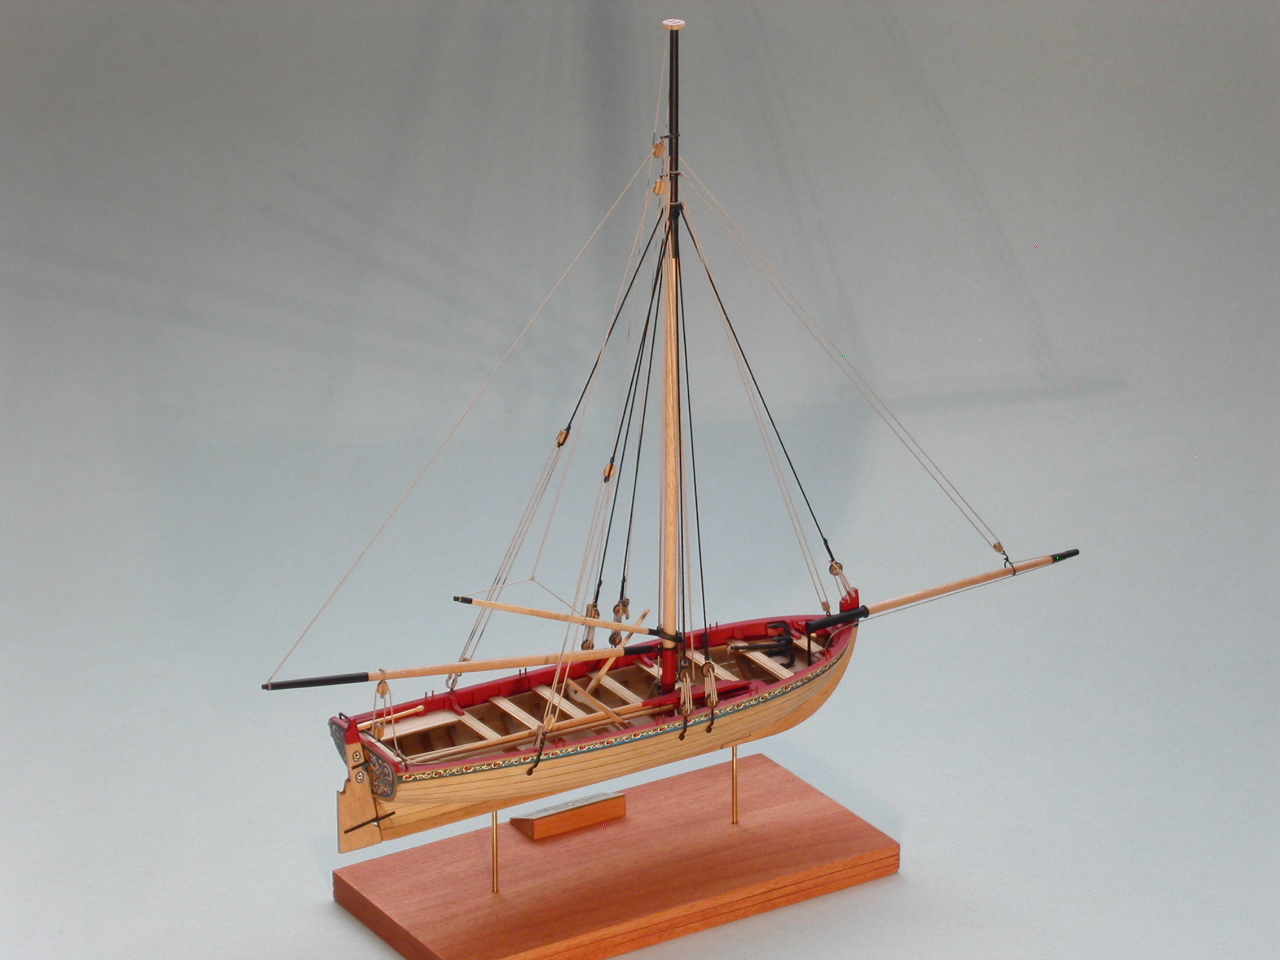
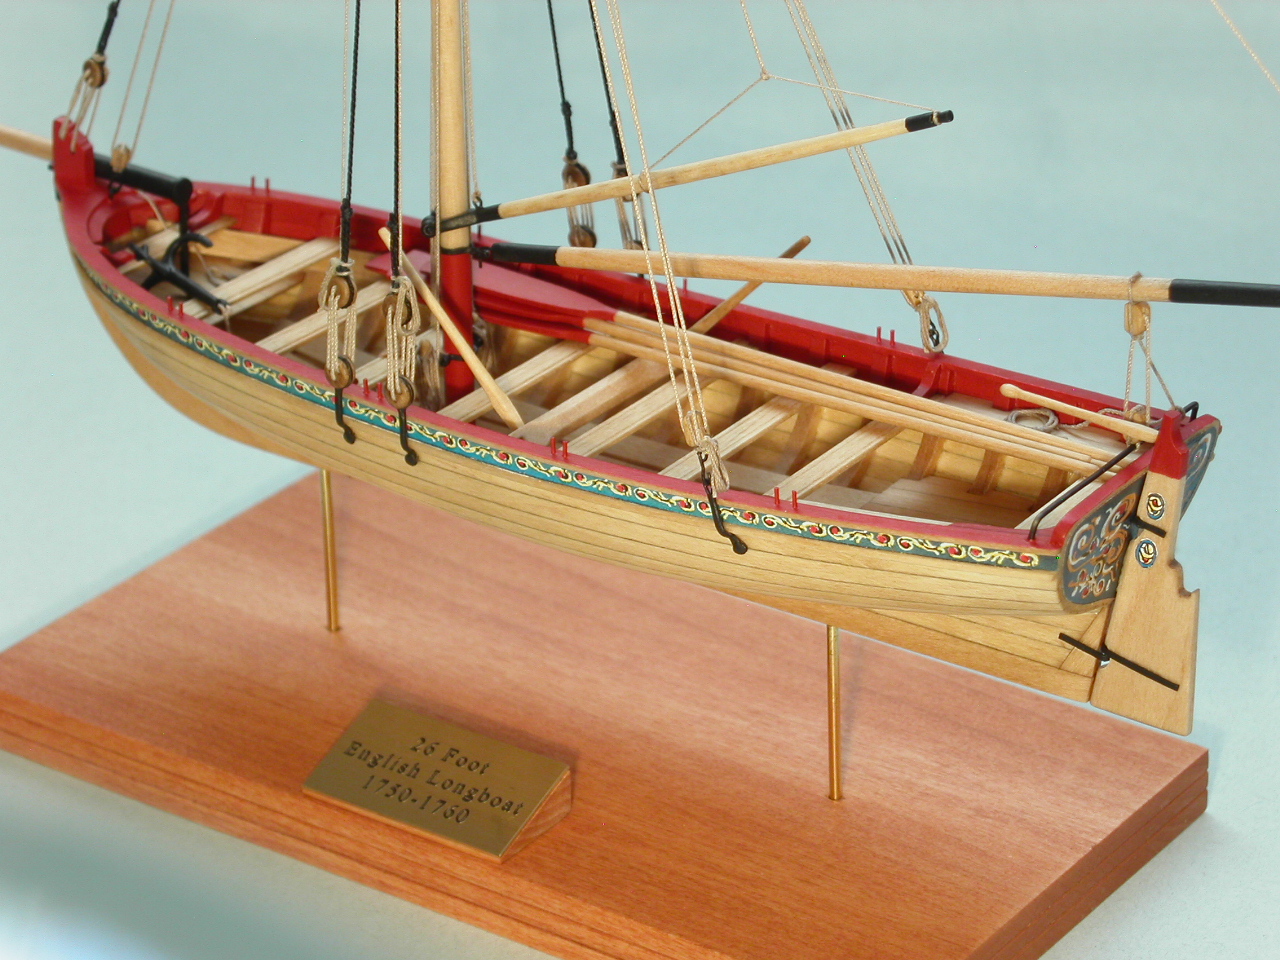
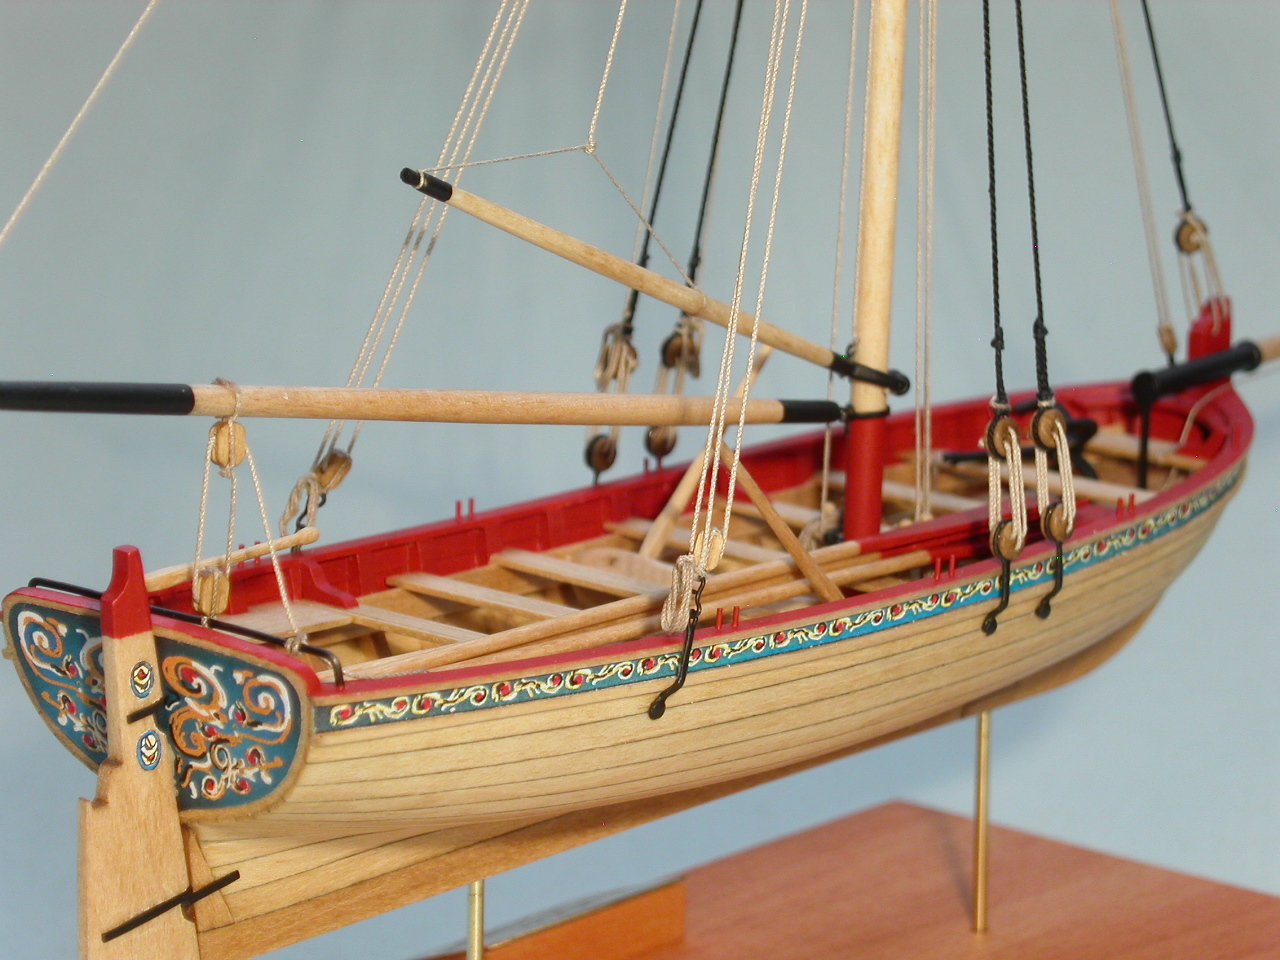
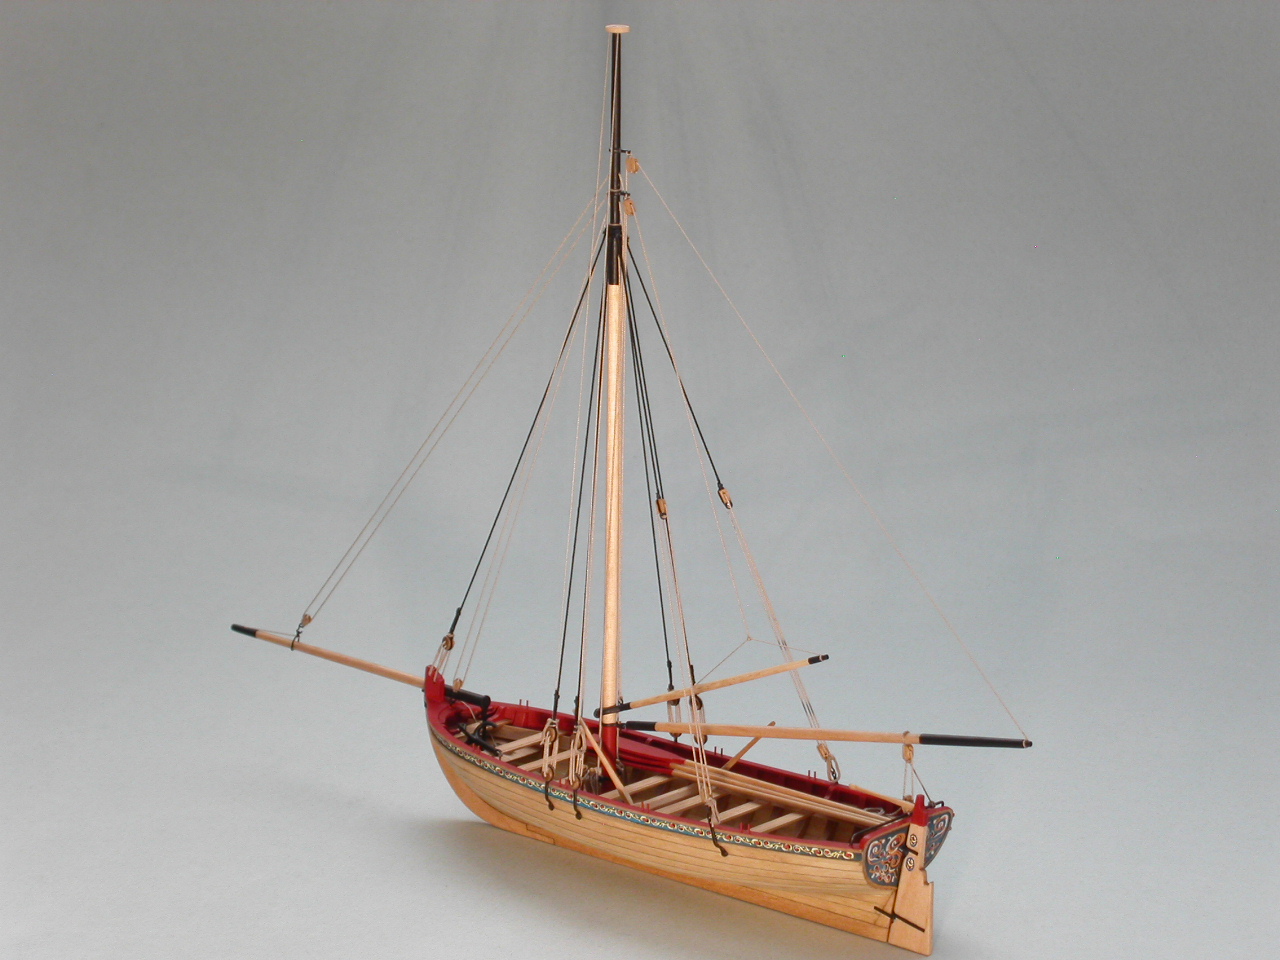
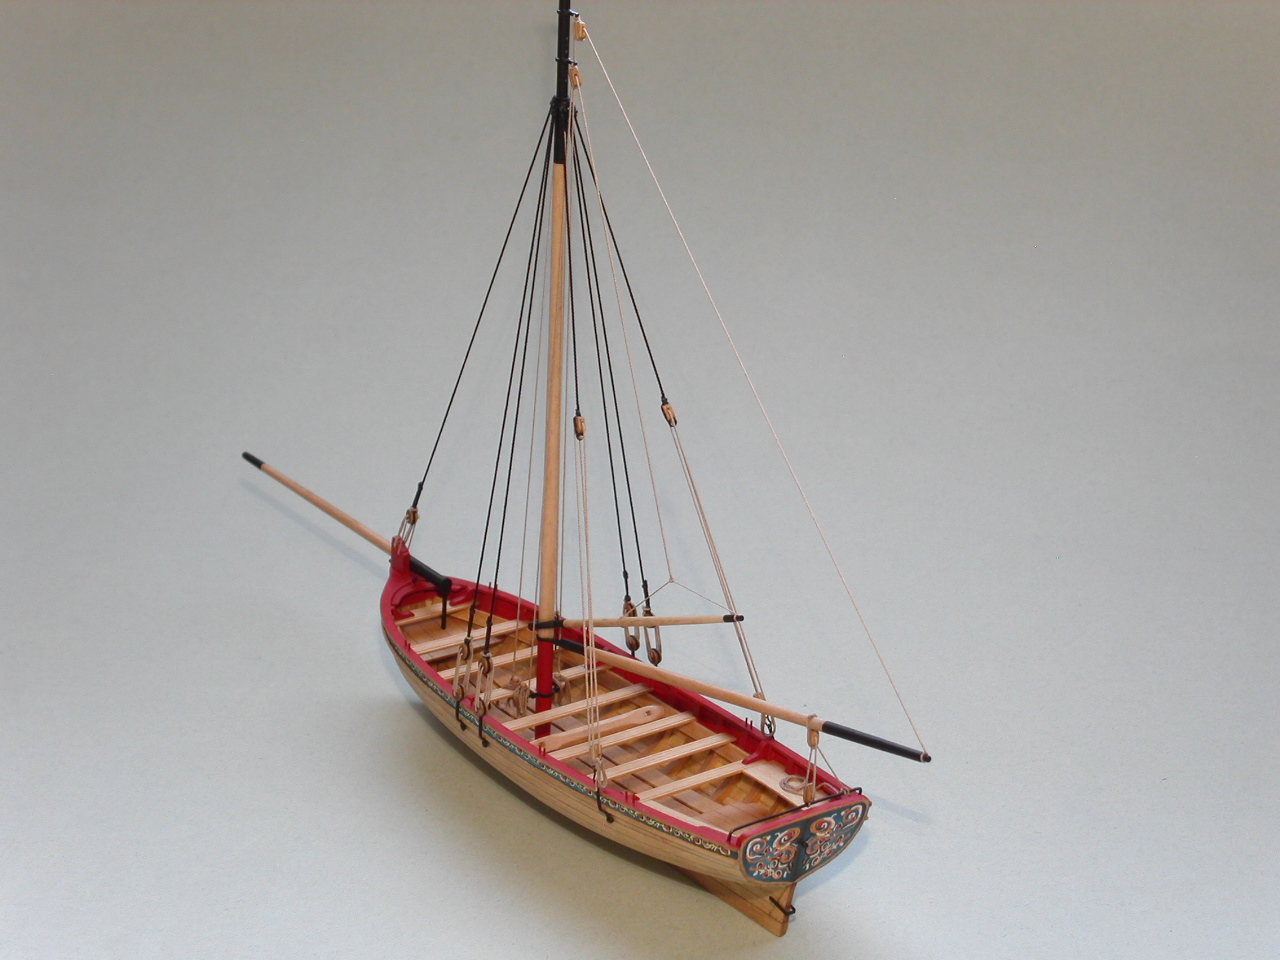
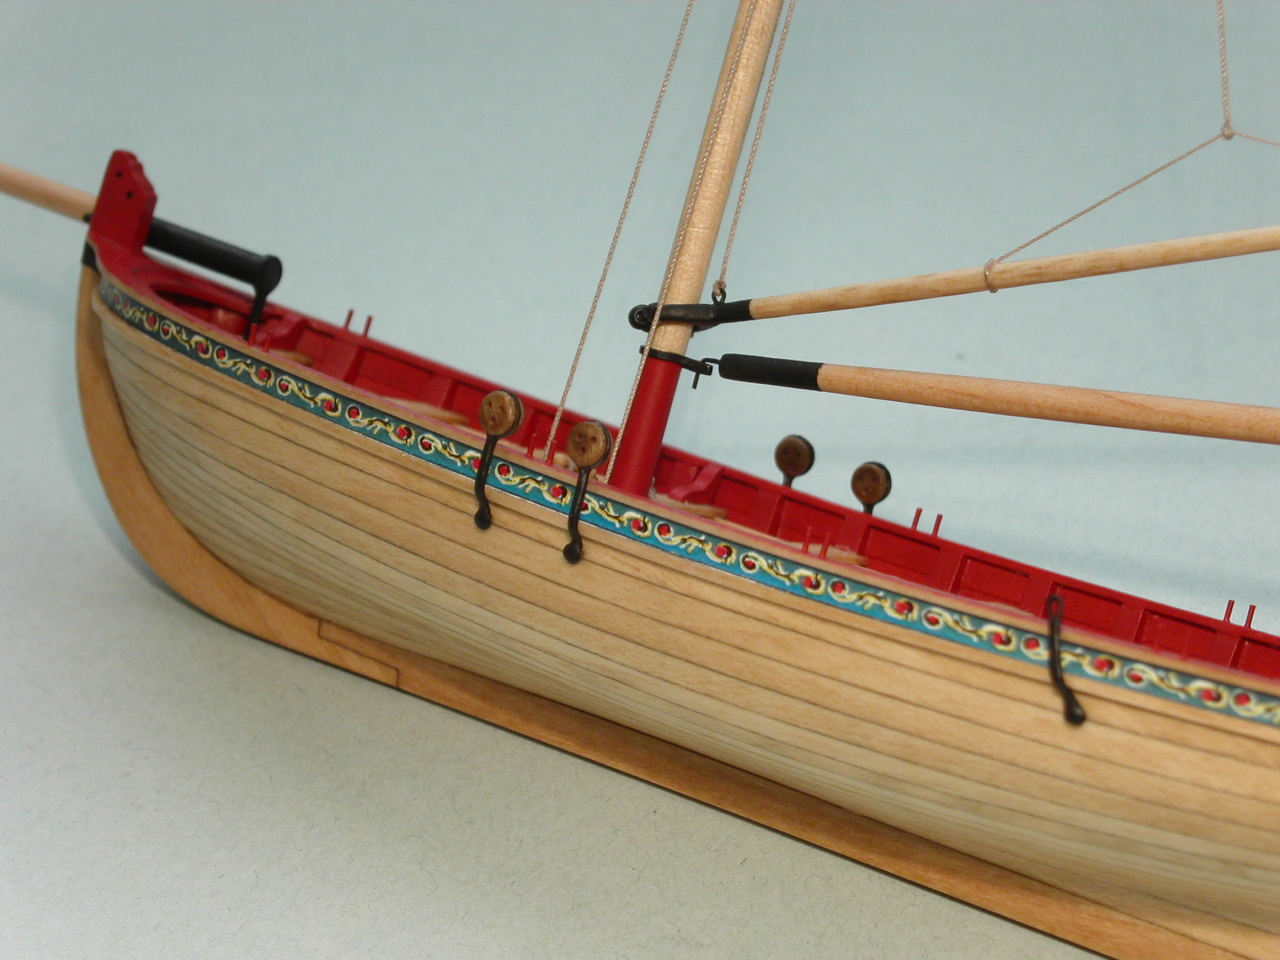
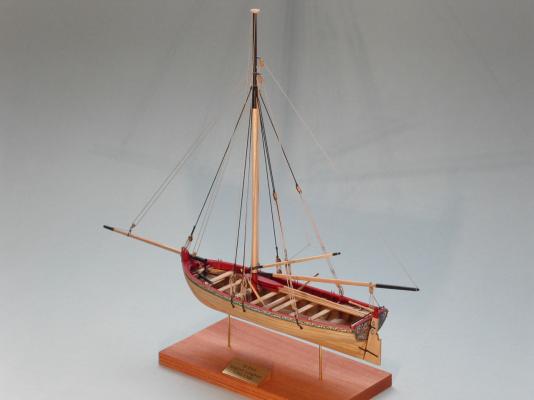
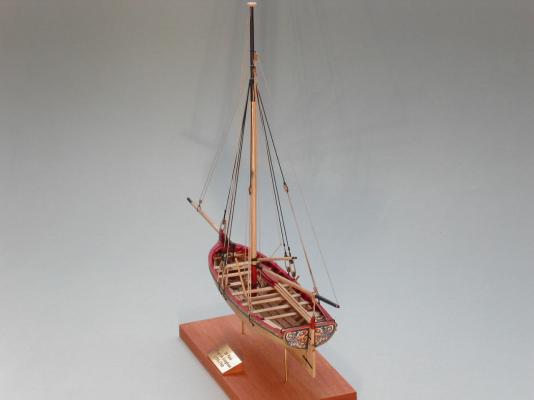
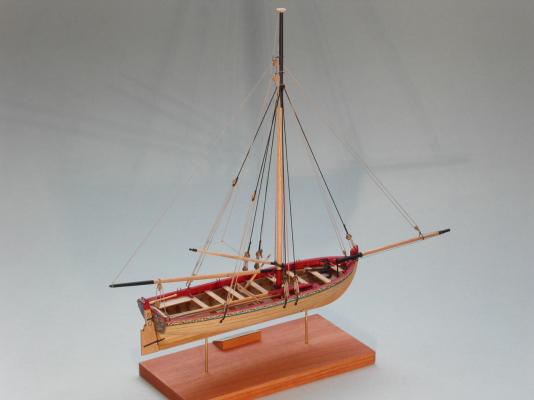
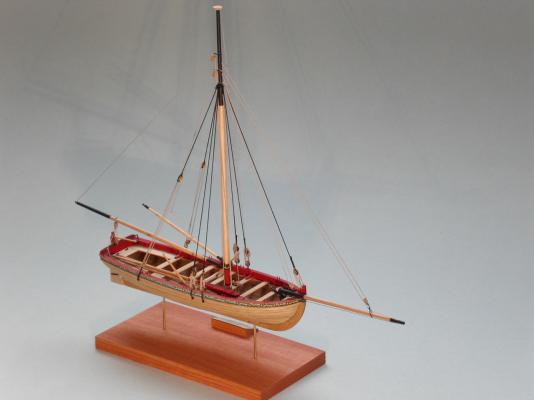
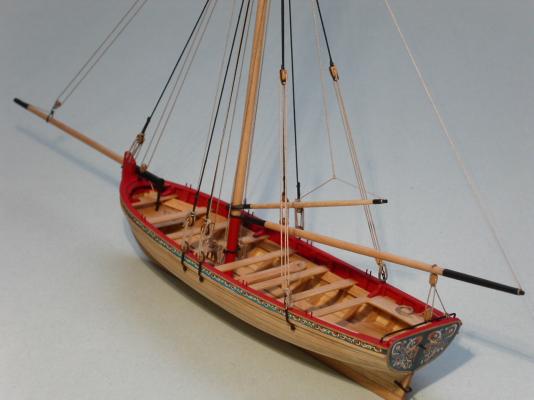
It’s been quite an enjoyable journey. I started this model as a practice build, the idea being to use the build to develop my skills before moving on to a larger, more involved project. The longboat has been a challenge every step of the way. Being a practice build, I was committed to using the kit supplied materials. I learned that though I’ve used basswood for years, the low quality wood supplied with this kit set new standards for poor quality . . . The one upgrade I made was using Chuck’s scale rope, rather than the nylon rope that came with the kit. While this project started as a bit of an experiment for me, I quickly grew rather fond of this little boat. I think my results are acceptable for a first build, and the finished boat actually turned out to be a credible model in its own right. Being a practice build, there were several instances where I skipped redoing things I wasn’t completely happy with in favor of just moving on to the next step. My next build will involve only high quality materials, and the will to put in my 100% and do things over until I get them to my liking. I’d like to thank everyone who has contributed to this build log with their comments, encouragement, and ‘likes’. They have really helped contribute to sustaining my motivation through the more difficult aspects of this build. I’d like to give a particular shout out to Brian (GuntherMT), Toni (tlavine), Mike (Stuntflyer), and of course Chuck, who were kind enough to answer my questions off-line when I messaged them at one time or another. Mike (Stuntflyer) has been a real mentor to me. His longboat was his first ship build, and in my mind it stands as a sterling example of what can be achieved on a first build when patience and persistence are applied. As they say, imitation is the sincerest form of flattery; it’s no accident that my longboat has nearly the same look as Mike’s. Lastly, I can’t thank Chuck enough. It’s your devotion to this hobby that has helped attract new members like myself. The Longboat is an exquisite kit, and just the model to whet the appetite for more. Your availability, not just to me, but to all members of this forum, is the type of attention that’ll ensure that this hobby continues to thrive. Erik


- 222 replies
-
- 22
-
-
- 18th century longboat
- model shipways
- (and 2 more)
-
Per, I admire your desire to scratch-build the lift rings. It's hard to get wire perfectly round! I was lazy and just used the pre-formed rings that came with the kit. Erik
- 335 replies
-
- 3
-
-
- 18th century longboat
- Finished
- (and 1 more)
-
Thanks for the kind words guys! Brian, the quality of the rigging on your Armed Sloop Virginia was what I aimed for on my longboat, so I'm sure when you tackle your longboat, it'll be gorgeous! Paul, ship-wise I'm leaning heavily towards the Cheerful as a next build. I'm going out of town for part of January, so can't order anything until I'm sure to be home for delivery. Erik
- 222 replies
-
- 6
-
-
- 18th century longboat
- model shipways
- (and 2 more)
-
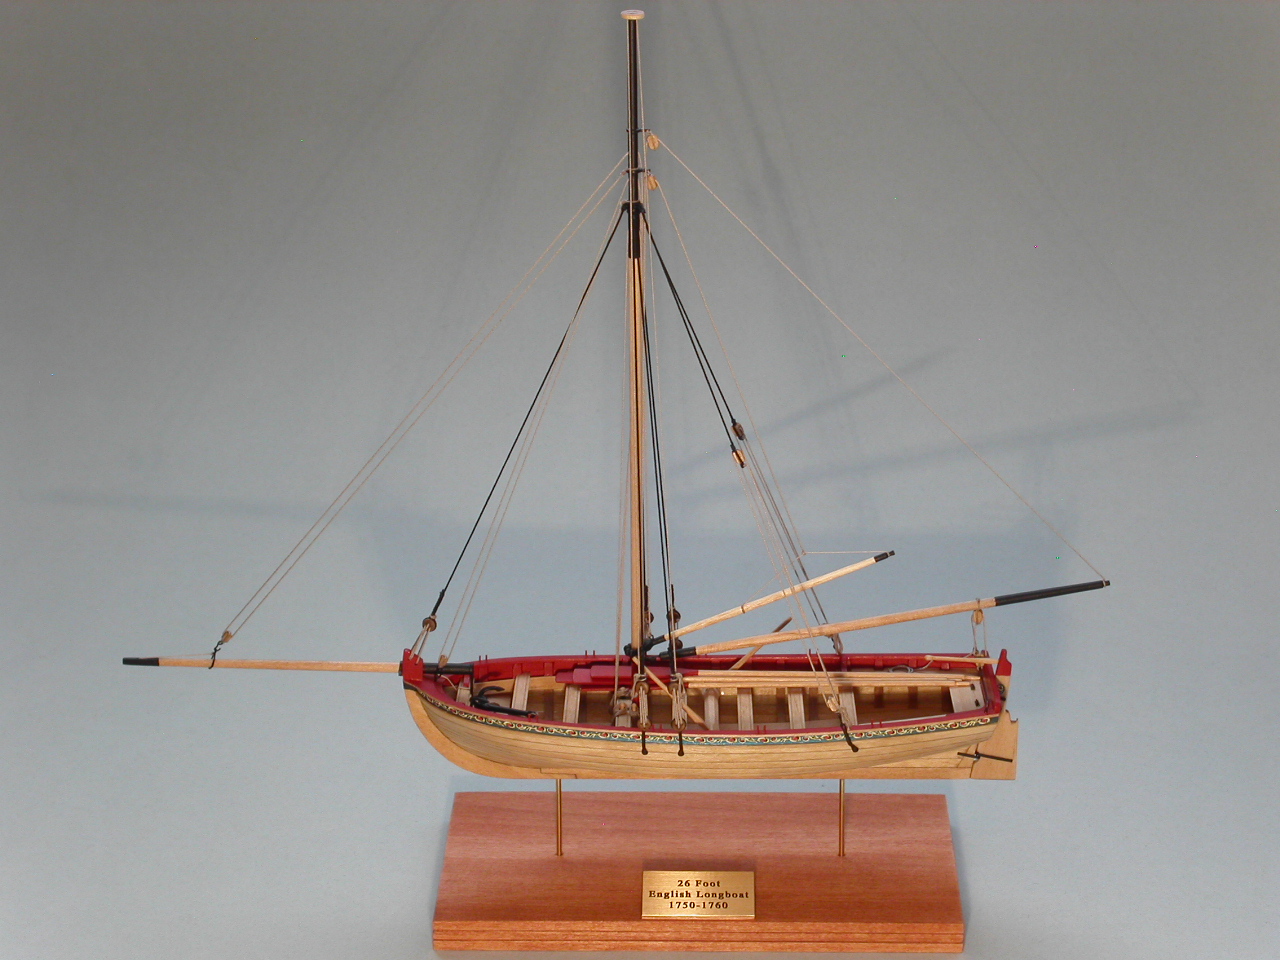
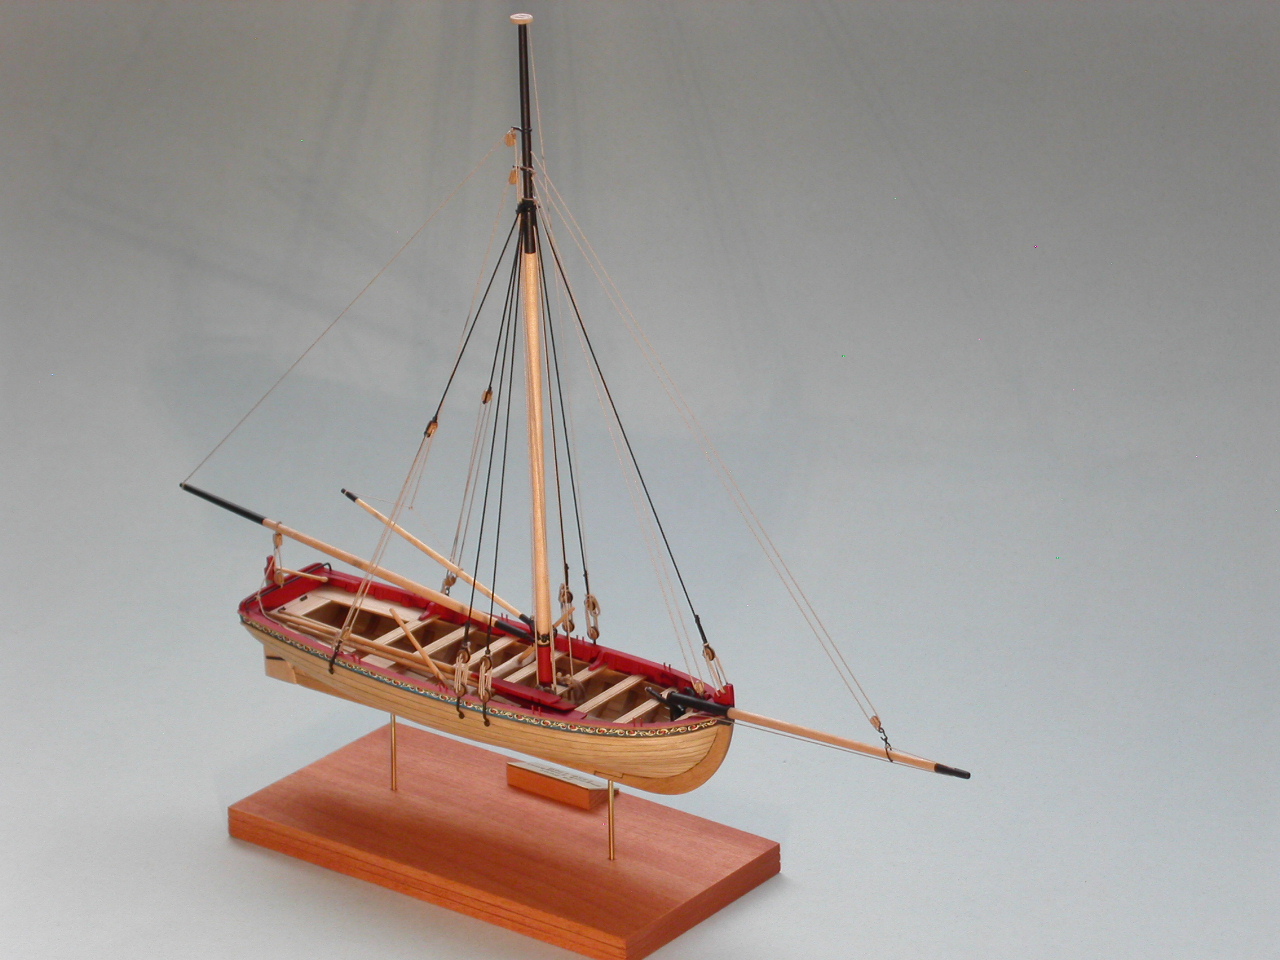
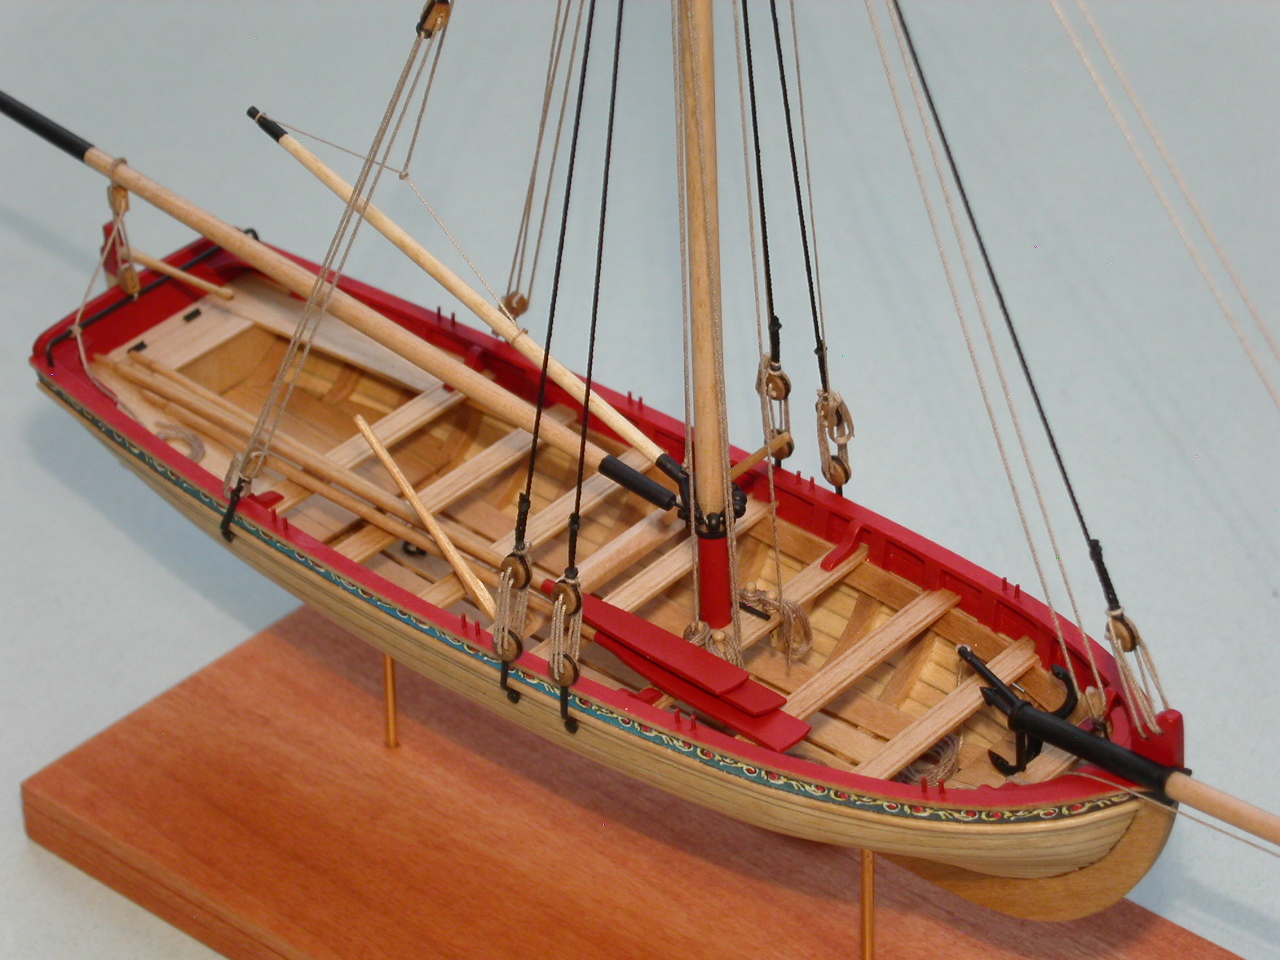
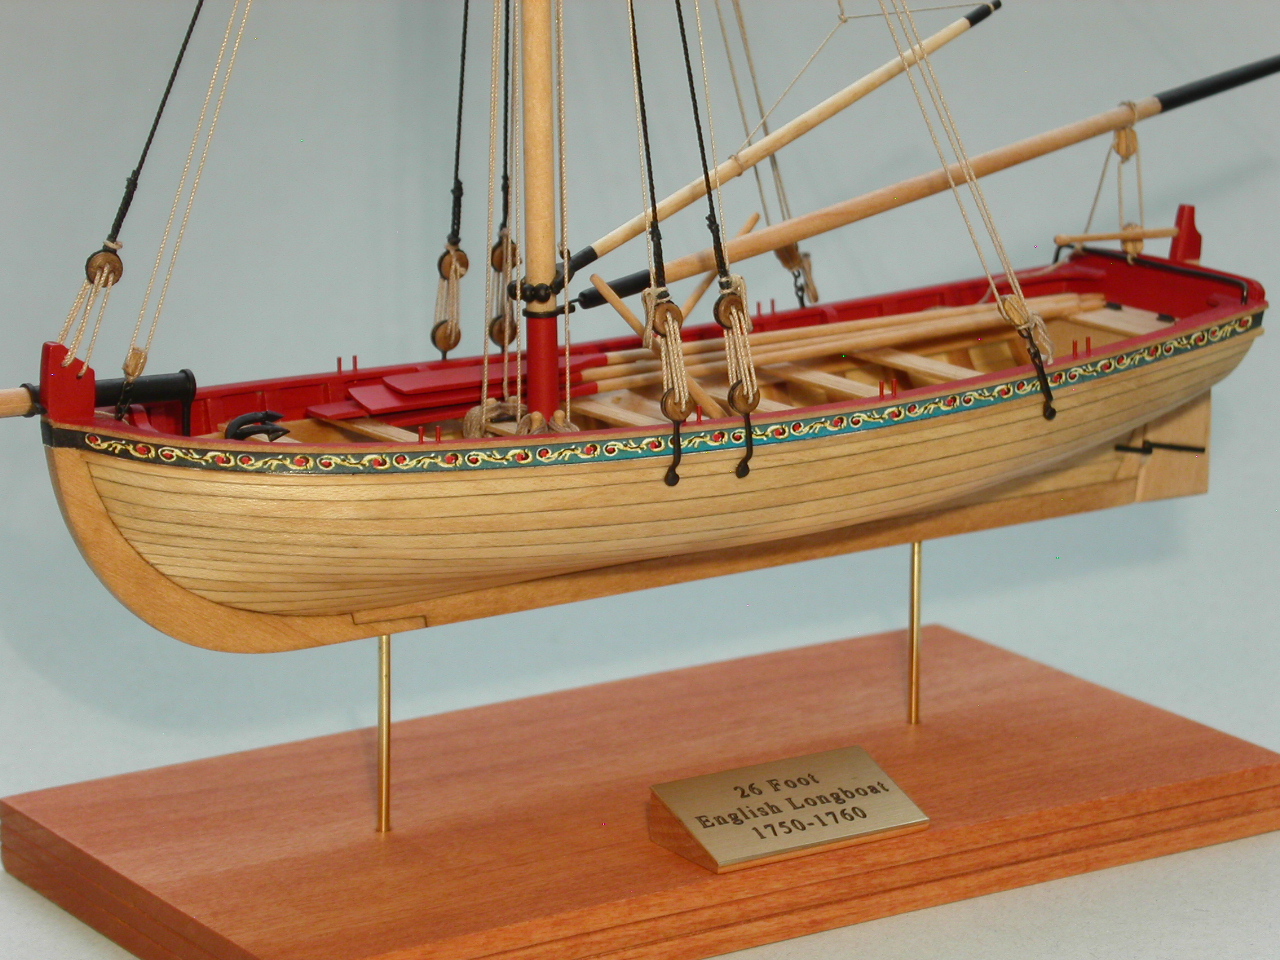
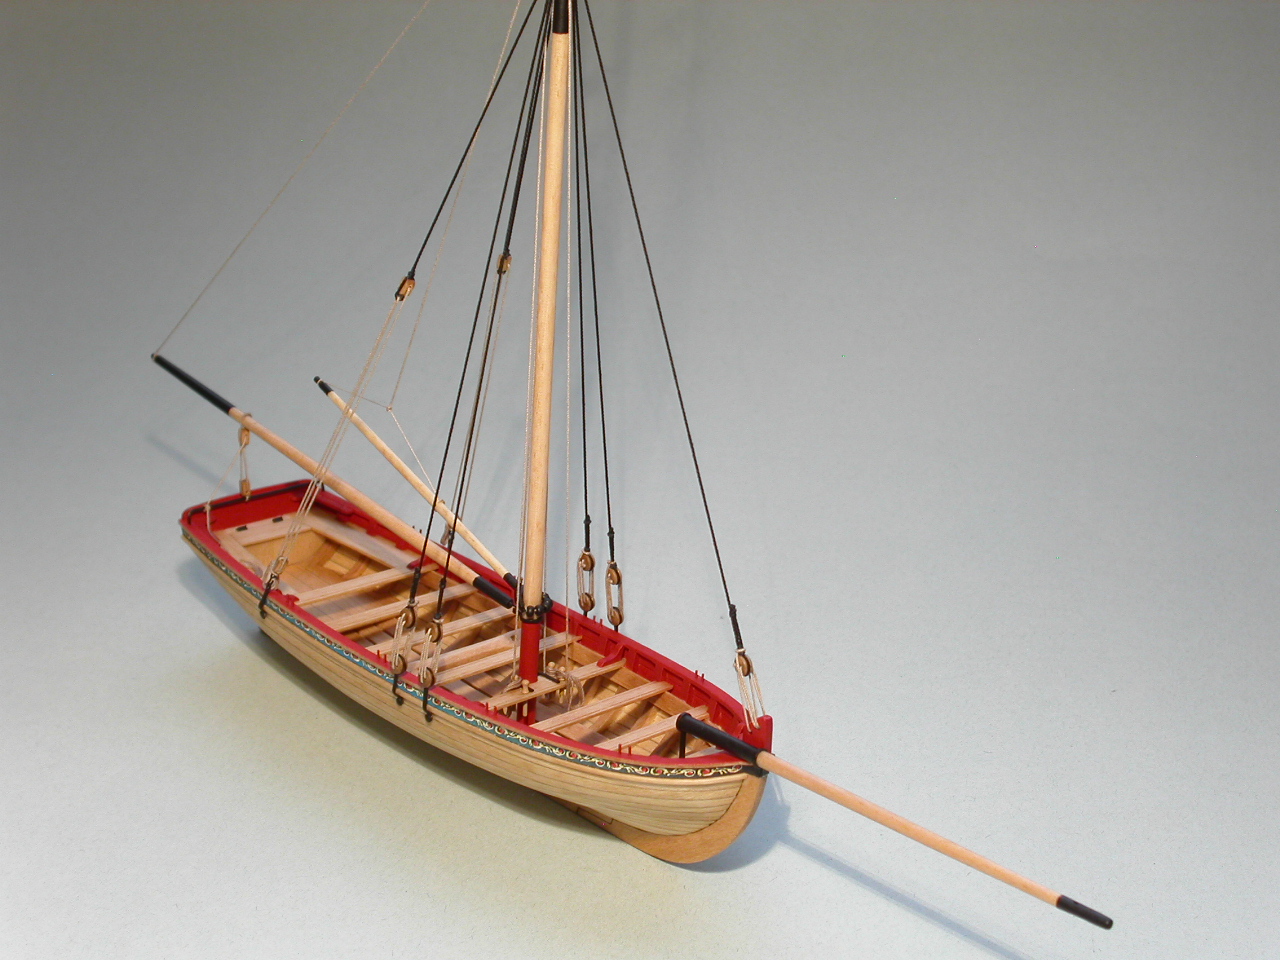
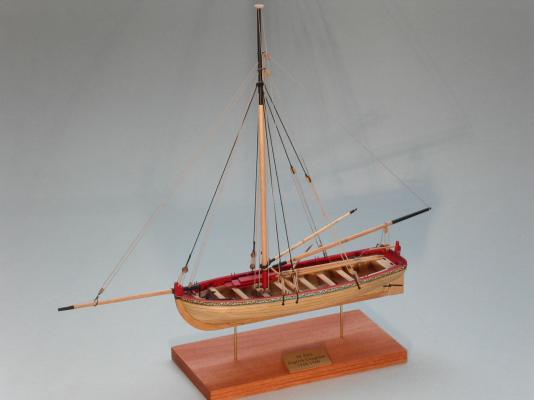
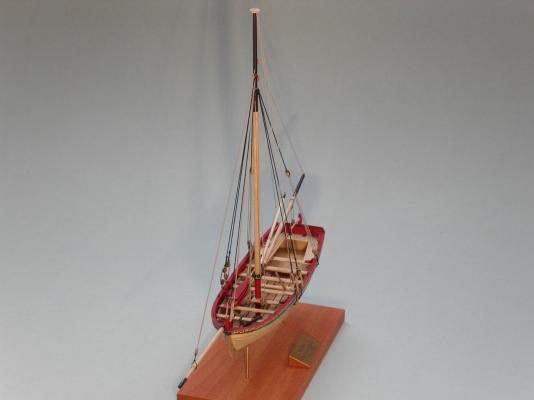
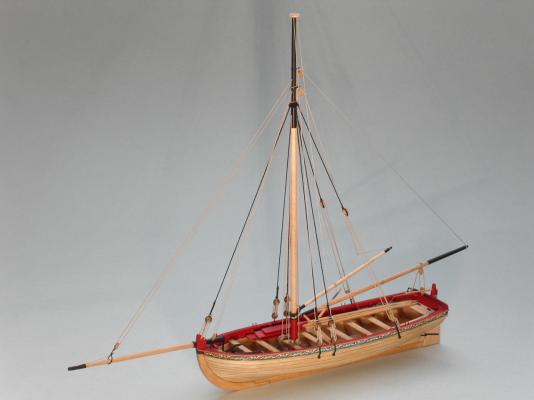
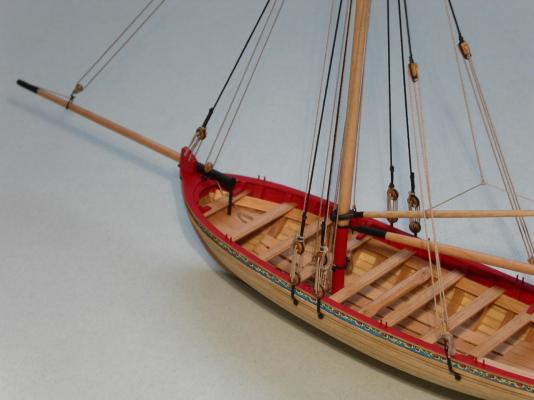
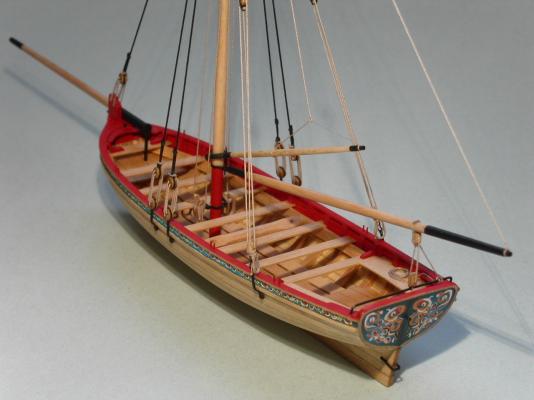
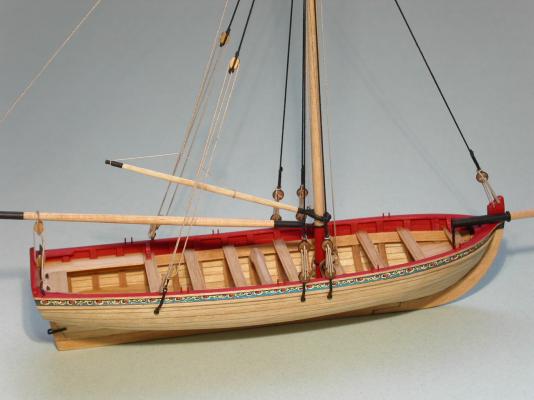
I added the oars, windlass handles, rudder, and grapnel (after reshaping, removing material, and cleaning it up). Now it's on to the base. Here are a couple preview photos. I'll post a bunch more when I get the base finished and the longboat mounted. Erik
- 222 replies
-
- 16
-
-
- 18th century longboat
- model shipways
- (and 2 more)
-
Wow. That's some delicate work! Your scarph joints also look great. Erik
- 452 replies
-
- 1
-
-
- cheerful
- Syren Ship Model Company
- (and 1 more)
-
Per, I made my own hooks out of the wire in the kit. I just measured them. They are 4mm. Erik
- 222 replies
-
- 3
-
-
- 18th century longboat
- model shipways
- (and 2 more)
-
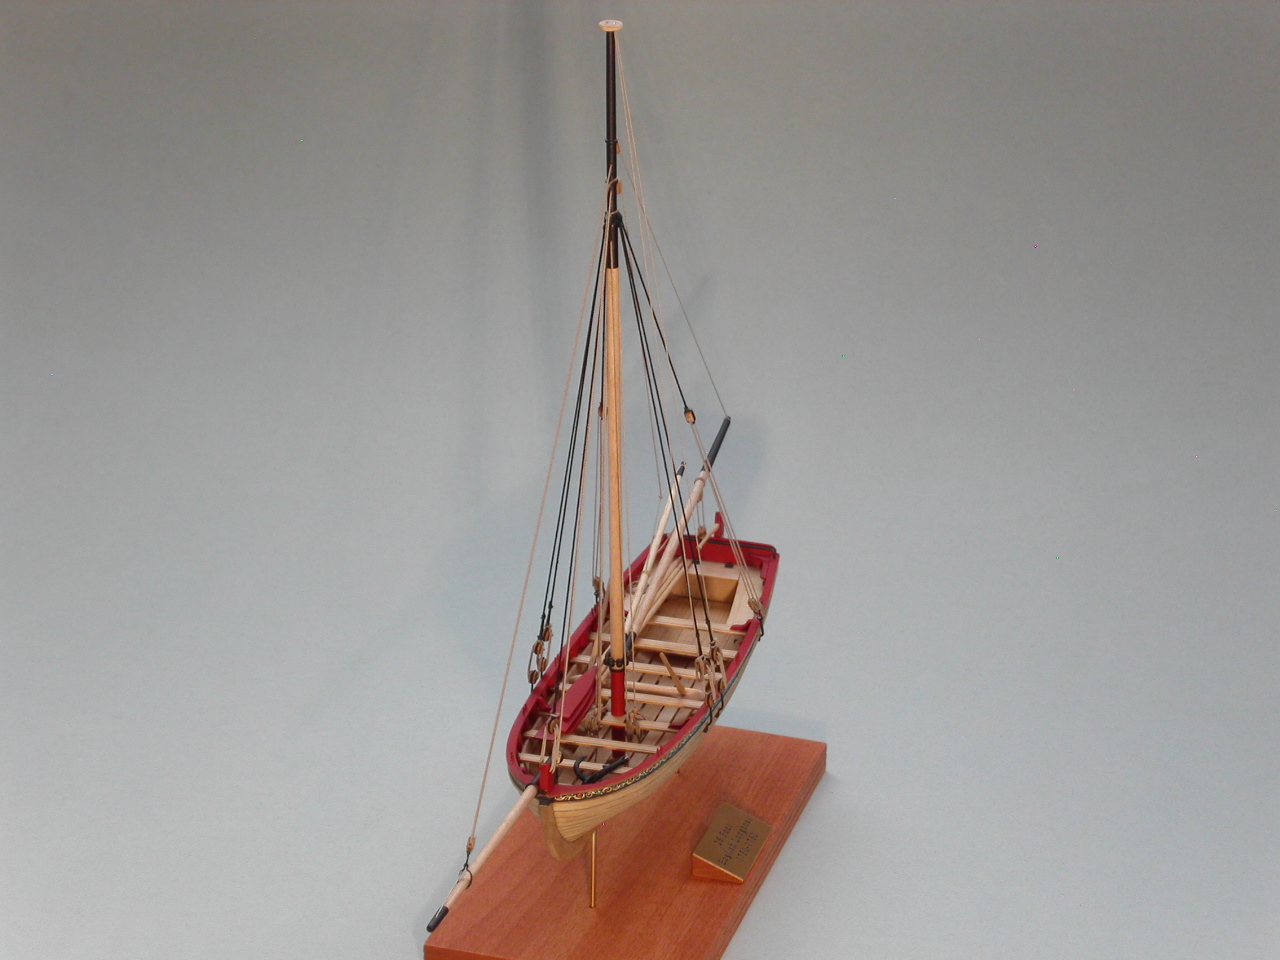
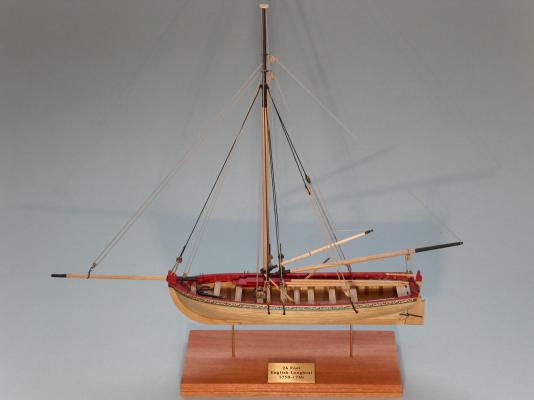
I should have everything finished in about a week or so. I'll post a bunch of photos with the boat on the display stand when it's finished. Erik
- 222 replies
-
- 4
-
-
- 18th century longboat
- model shipways
- (and 2 more)
-
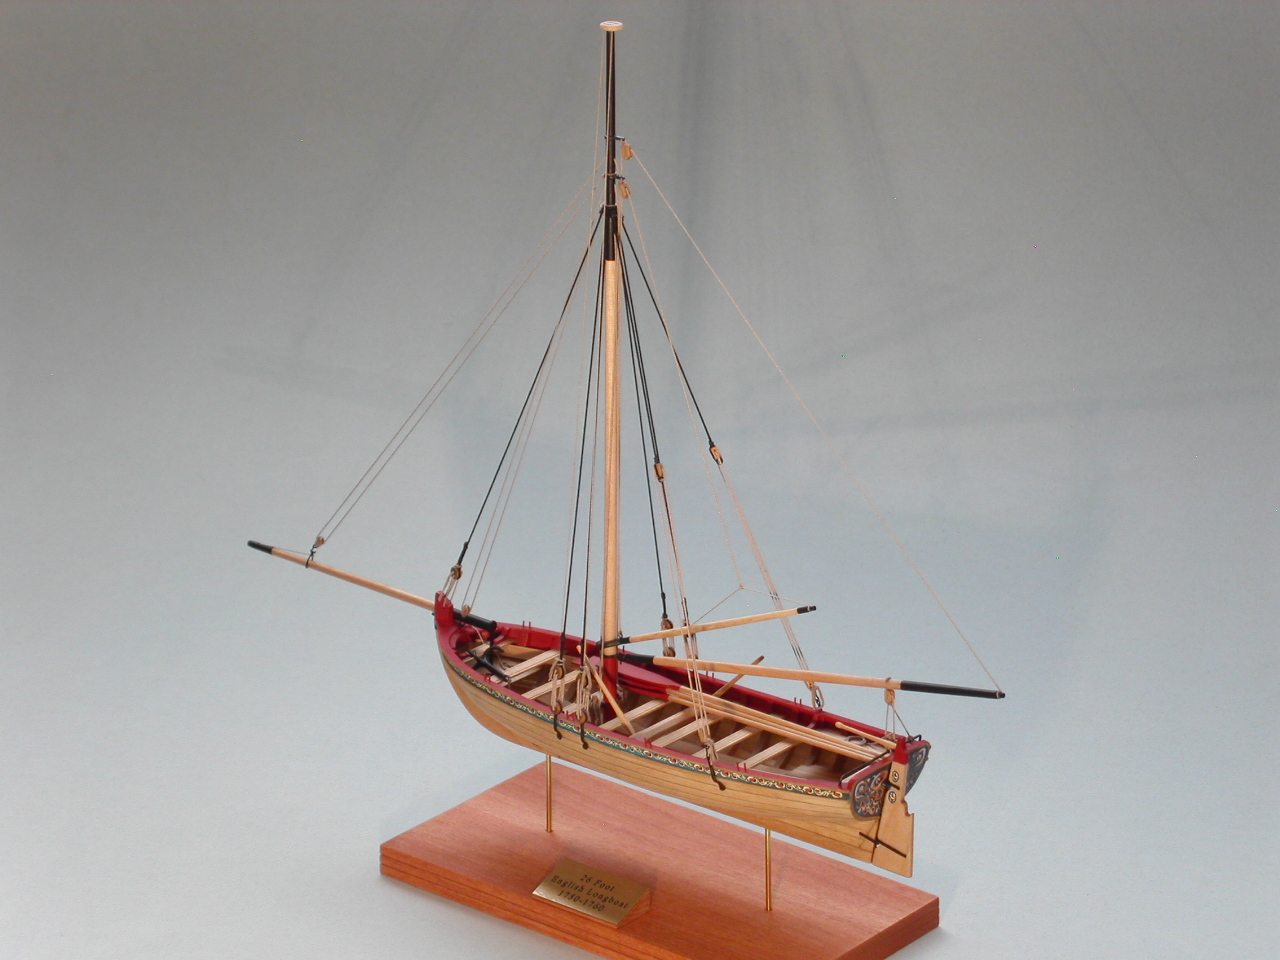
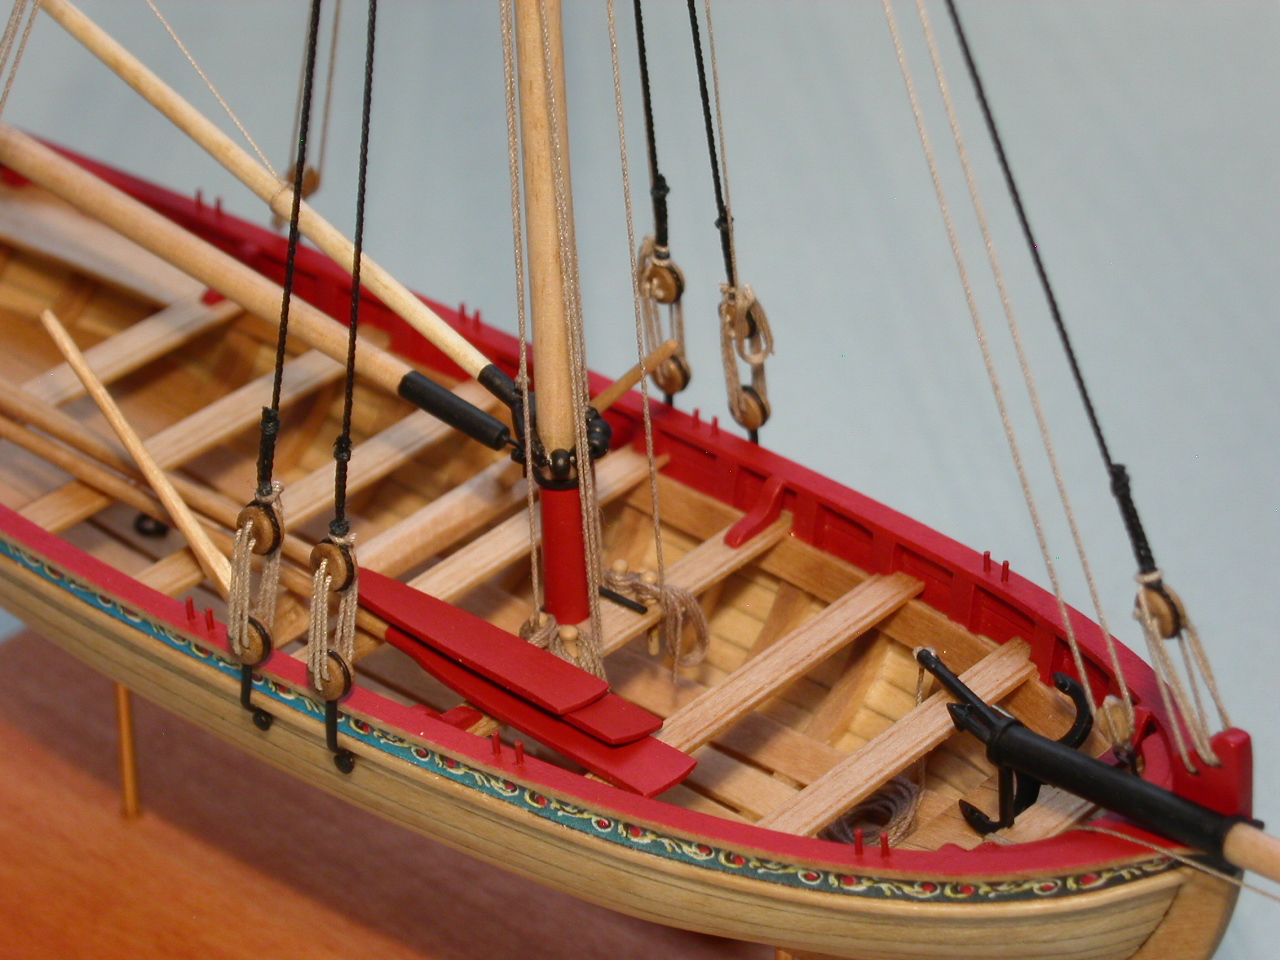
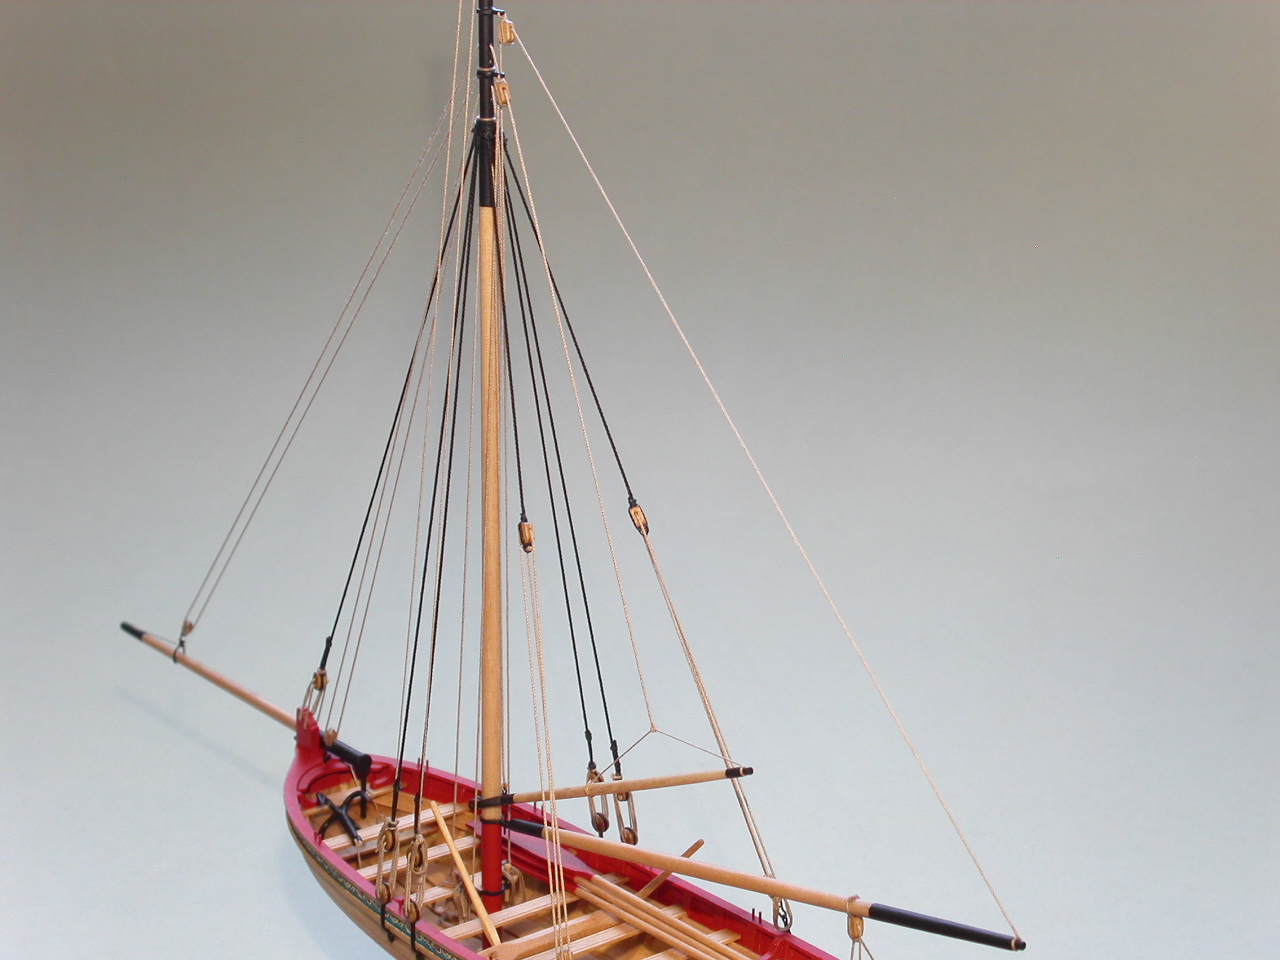
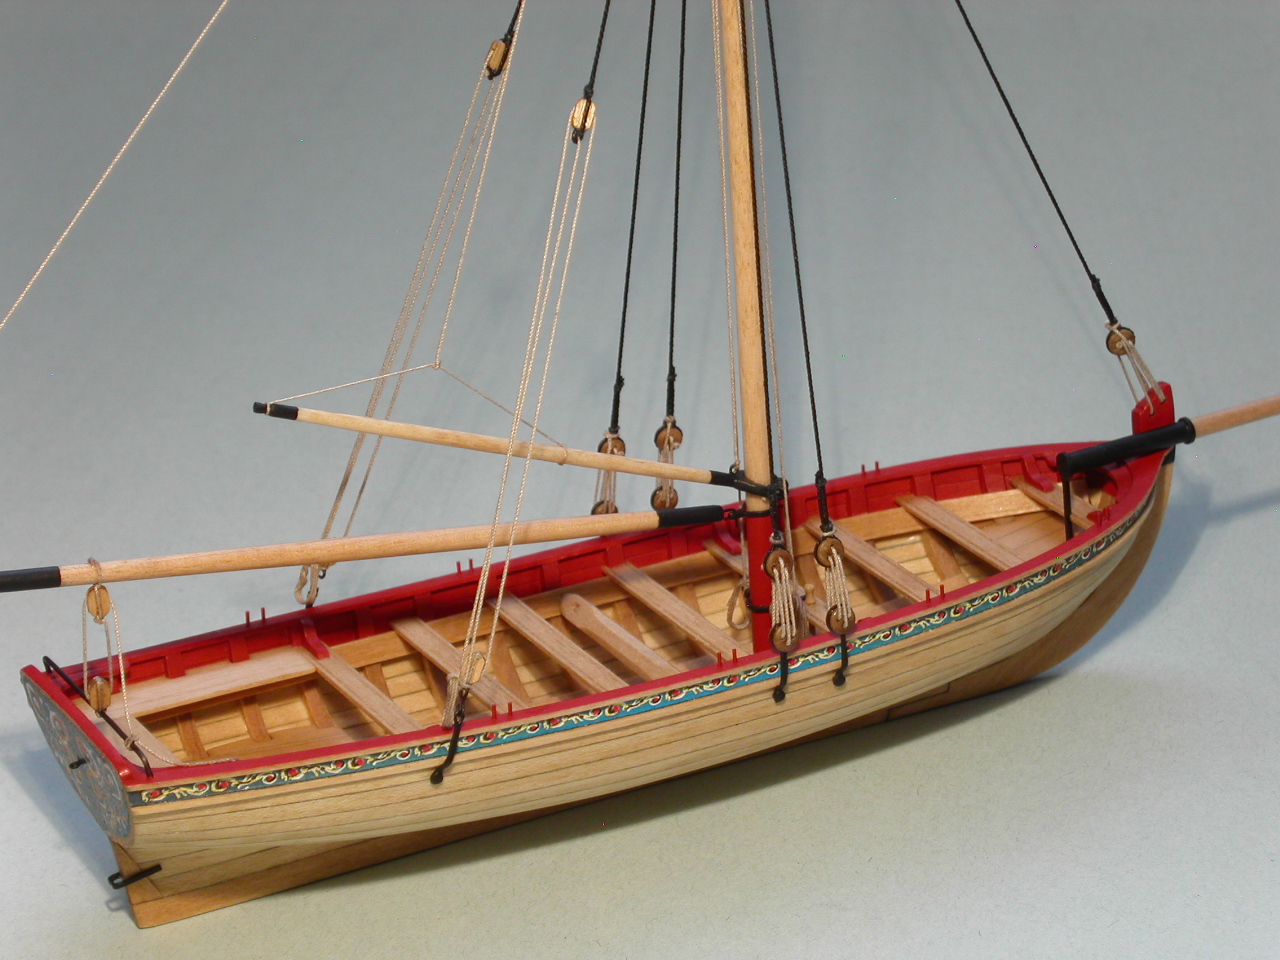
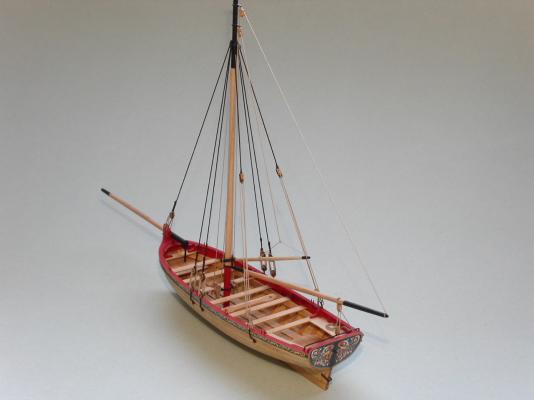
The rope is untreated. I used Syren Ship Model Company's rope as is. I used 50/50 diluted matt medium on the rope coils to get them to hold their shape, and also to secure my seizings and knots. Erik
- 222 replies
-
- 4
-
-
- 18th century longboat
- model shipways
- (and 2 more)
-
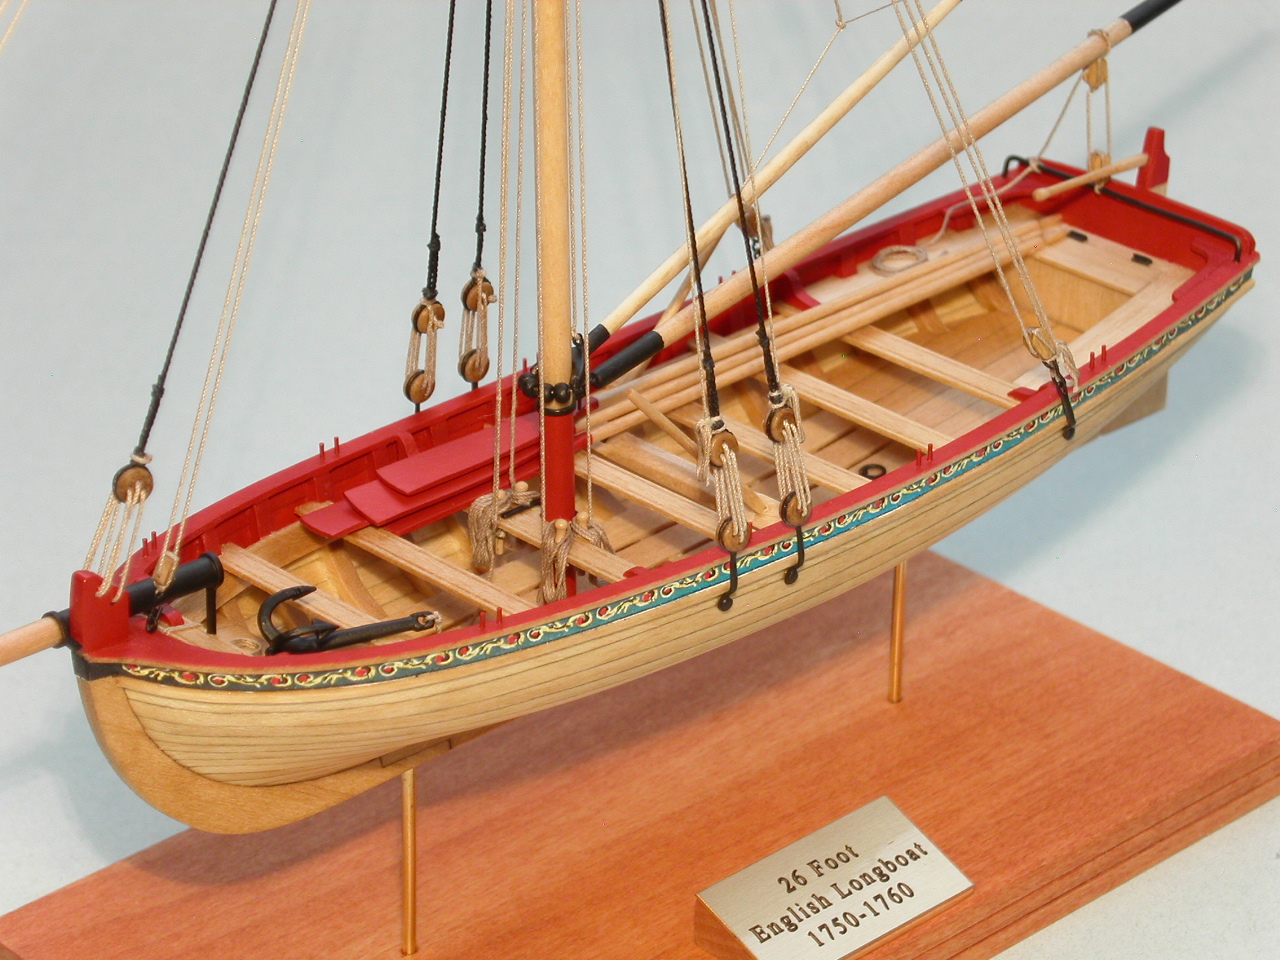
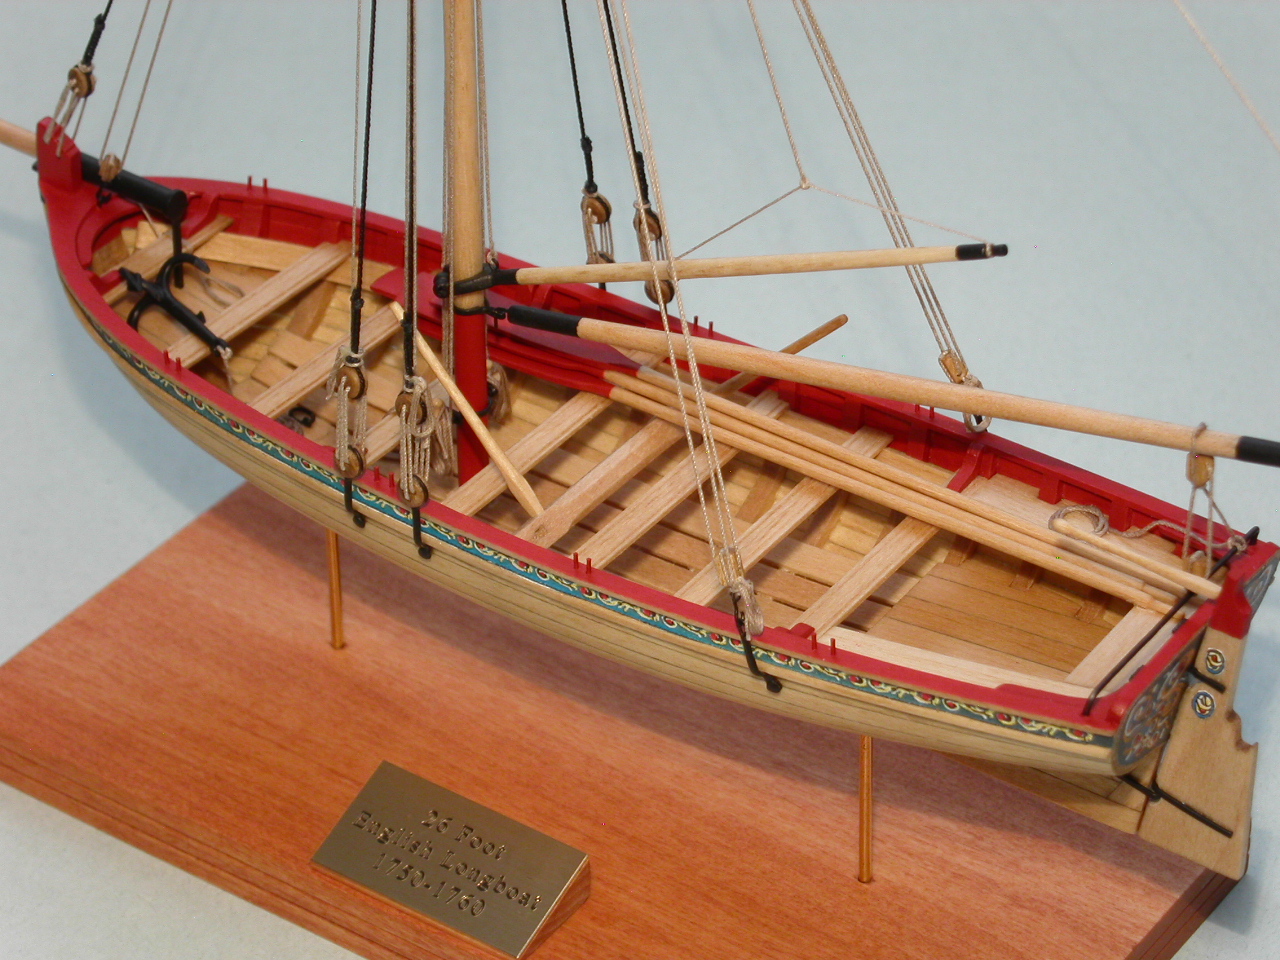
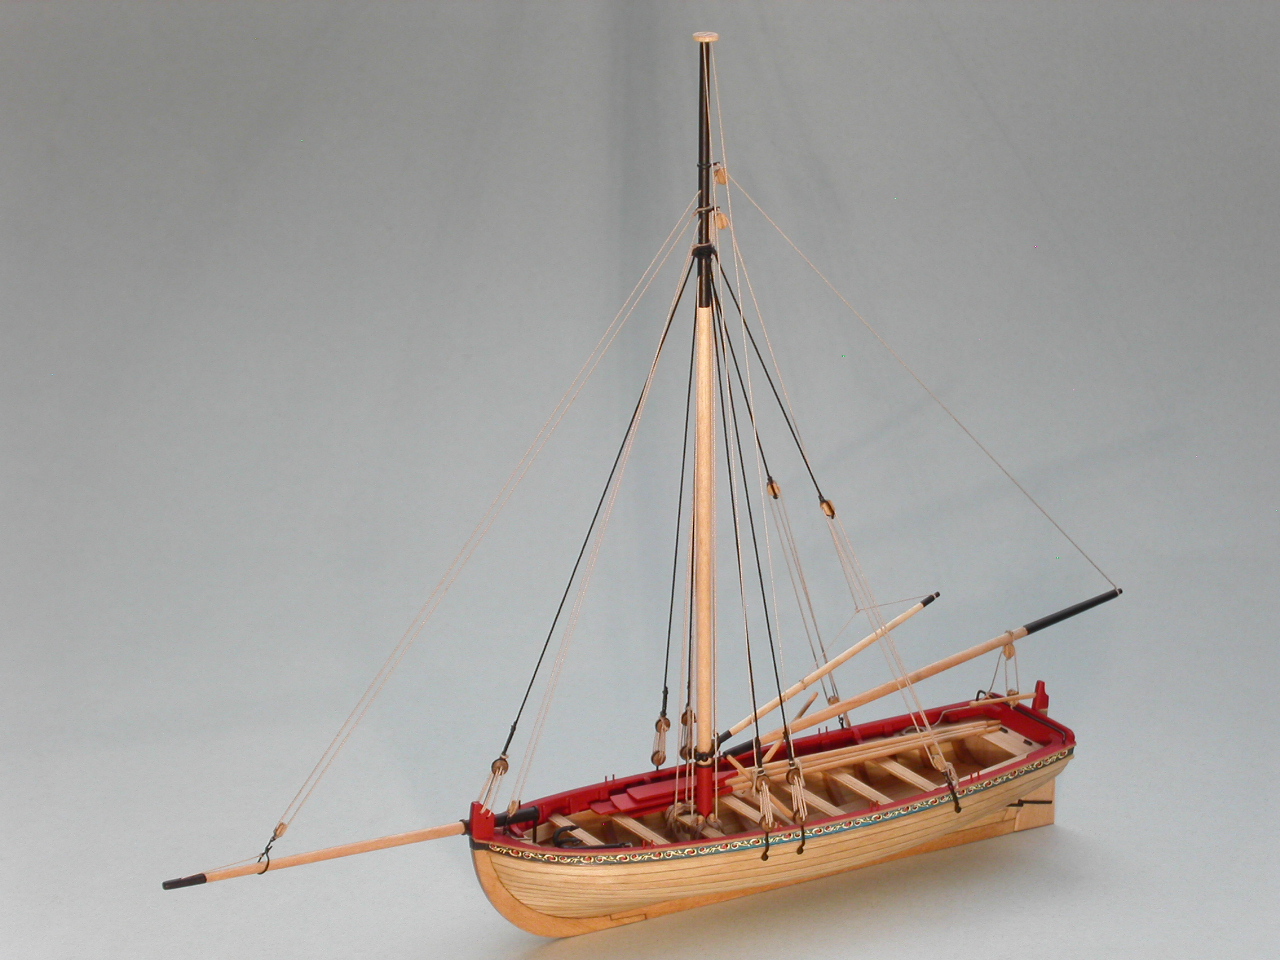
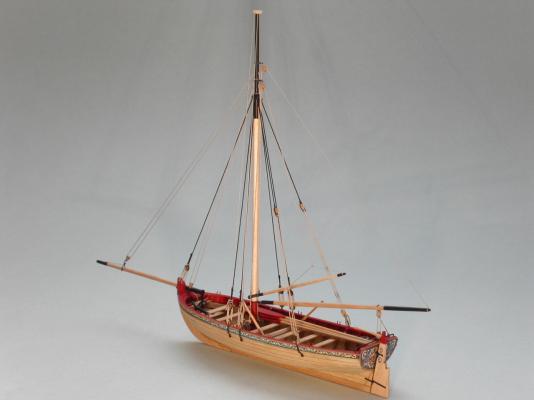
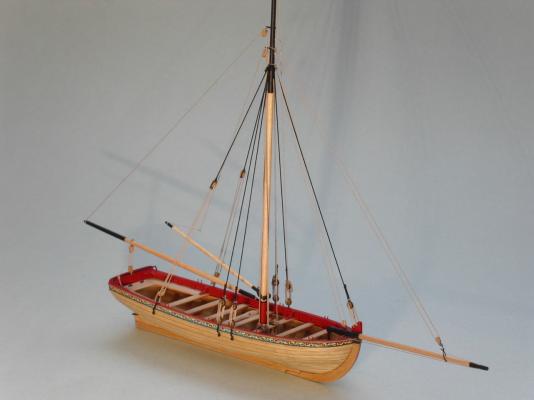
I finished the rigging and their associated rope coils. I'm working on the grapnel now, then it's just a matter of adding the oars, windlass handles, and rudder. I had a small brass plaque made at a local trophy/awards shop, so the final display base should look pretty sharp. Erik


- 222 replies
-
- 16
-
-
- 18th century longboat
- model shipways
- (and 2 more)
-
Thanks for the kind words guys! Mike, yeah I'm on the home stretch now. I ordered a small brass name plate from a trophy/award shop last week. I think the boat will really look nice when finished and displayed. Erik
- 222 replies
-
- 4
-
-
- 18th century longboat
- model shipways
- (and 2 more)
-
Looks good Mike! If you're like me, this rigging thing is a totally new experience. In my own case it's a rewarding process . . . but is giving me an ulcer at the same time! Like with the rest of the boat, take it slow. I've gained confidence as I've progressed with the rigging. I'm sure you will too. I'm looking forward to seeing your results! Erik
- 100 replies
-
- 4
-
-
- model shipways
- 18th century longboat
- (and 1 more)
-
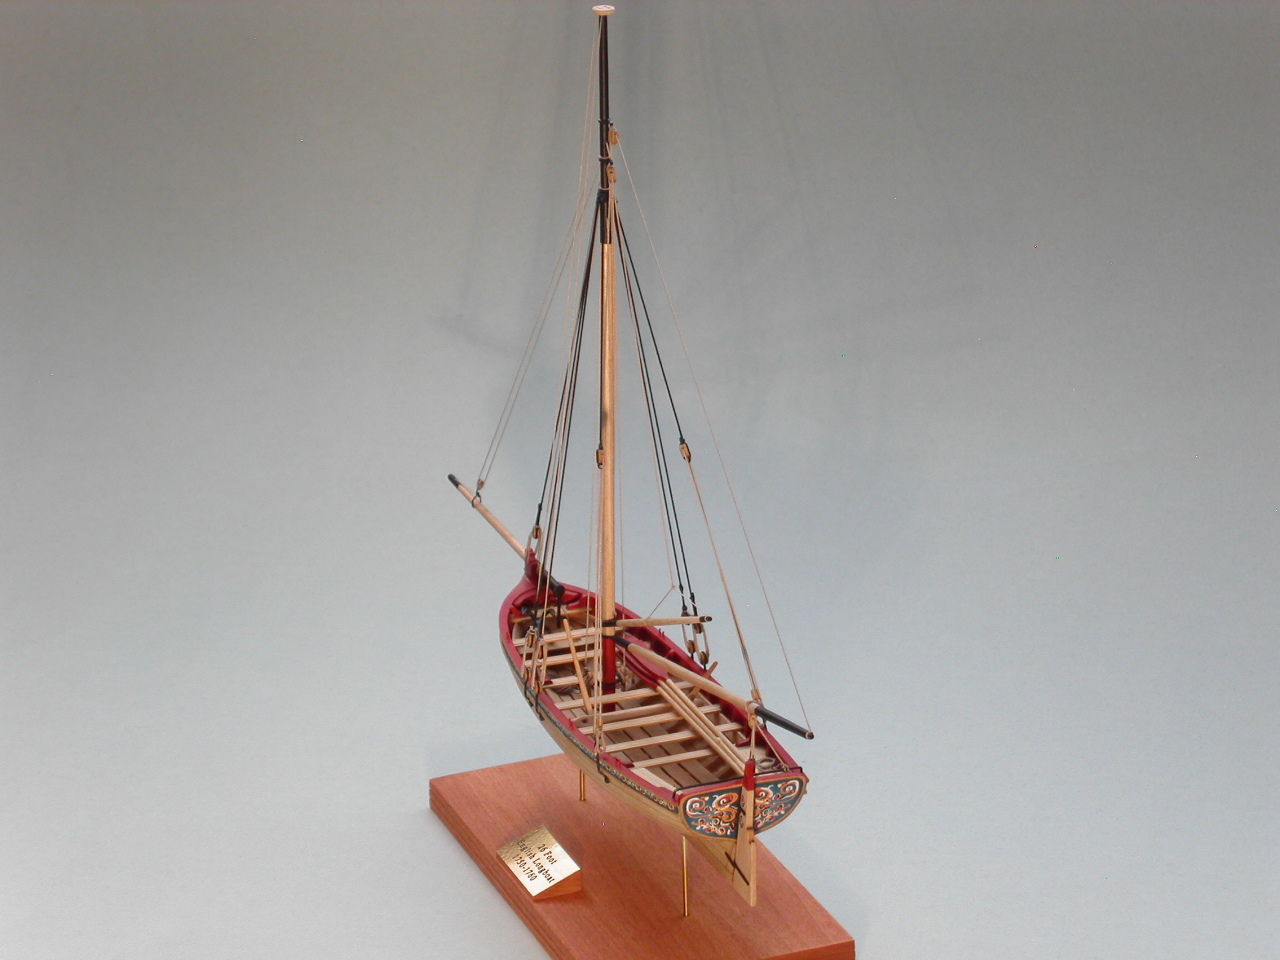
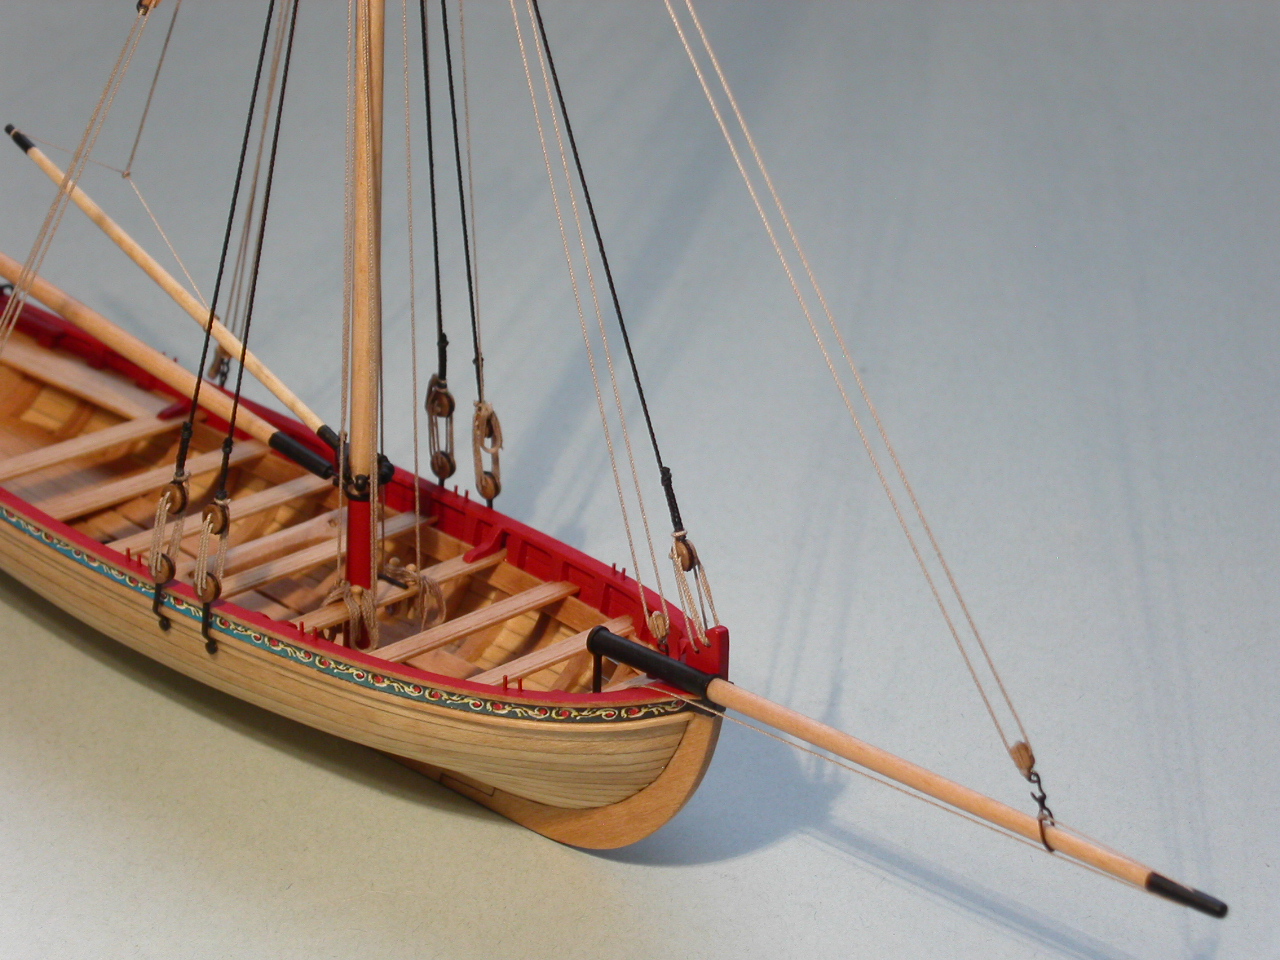
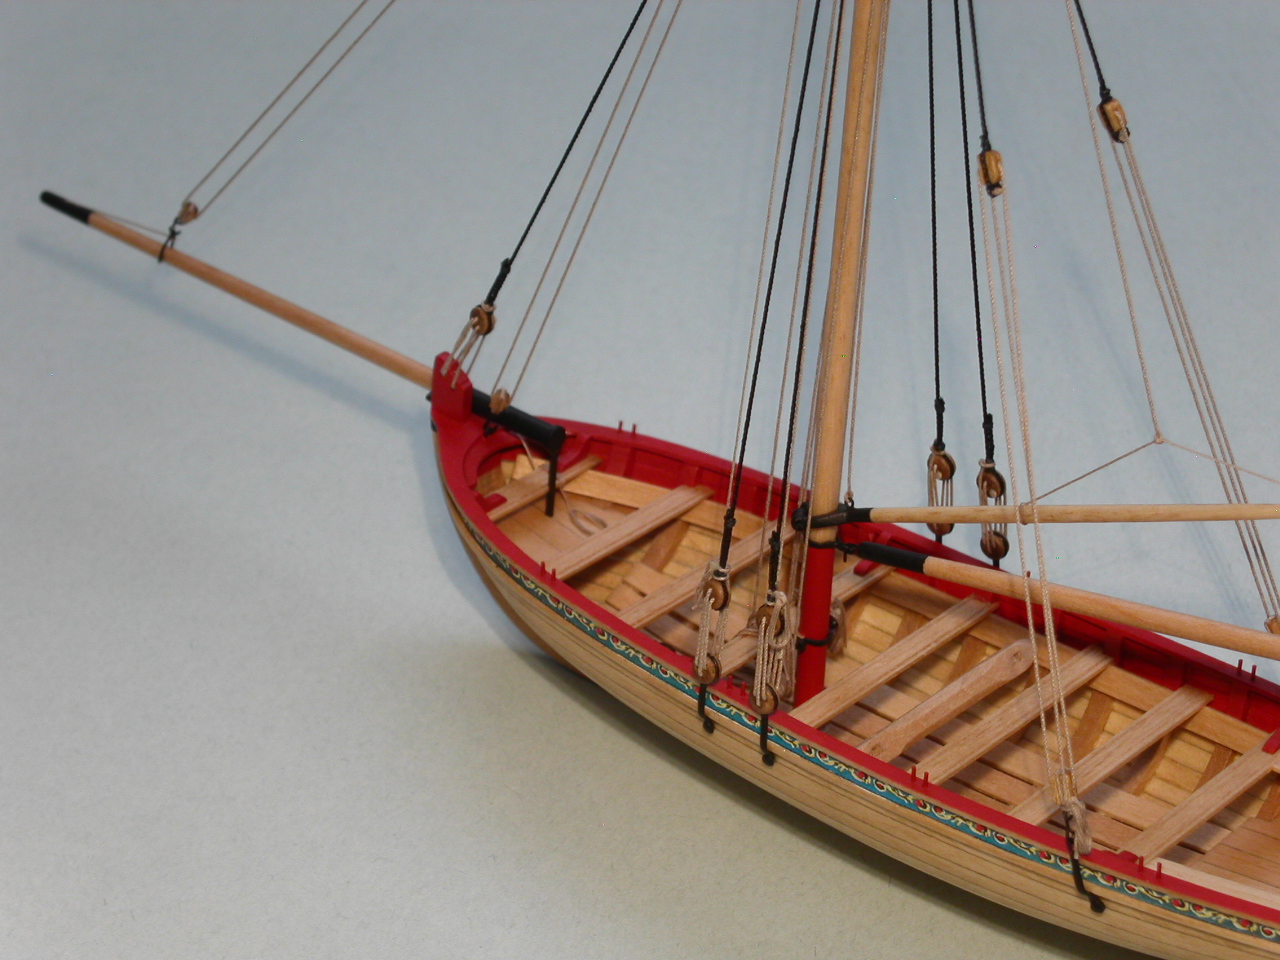
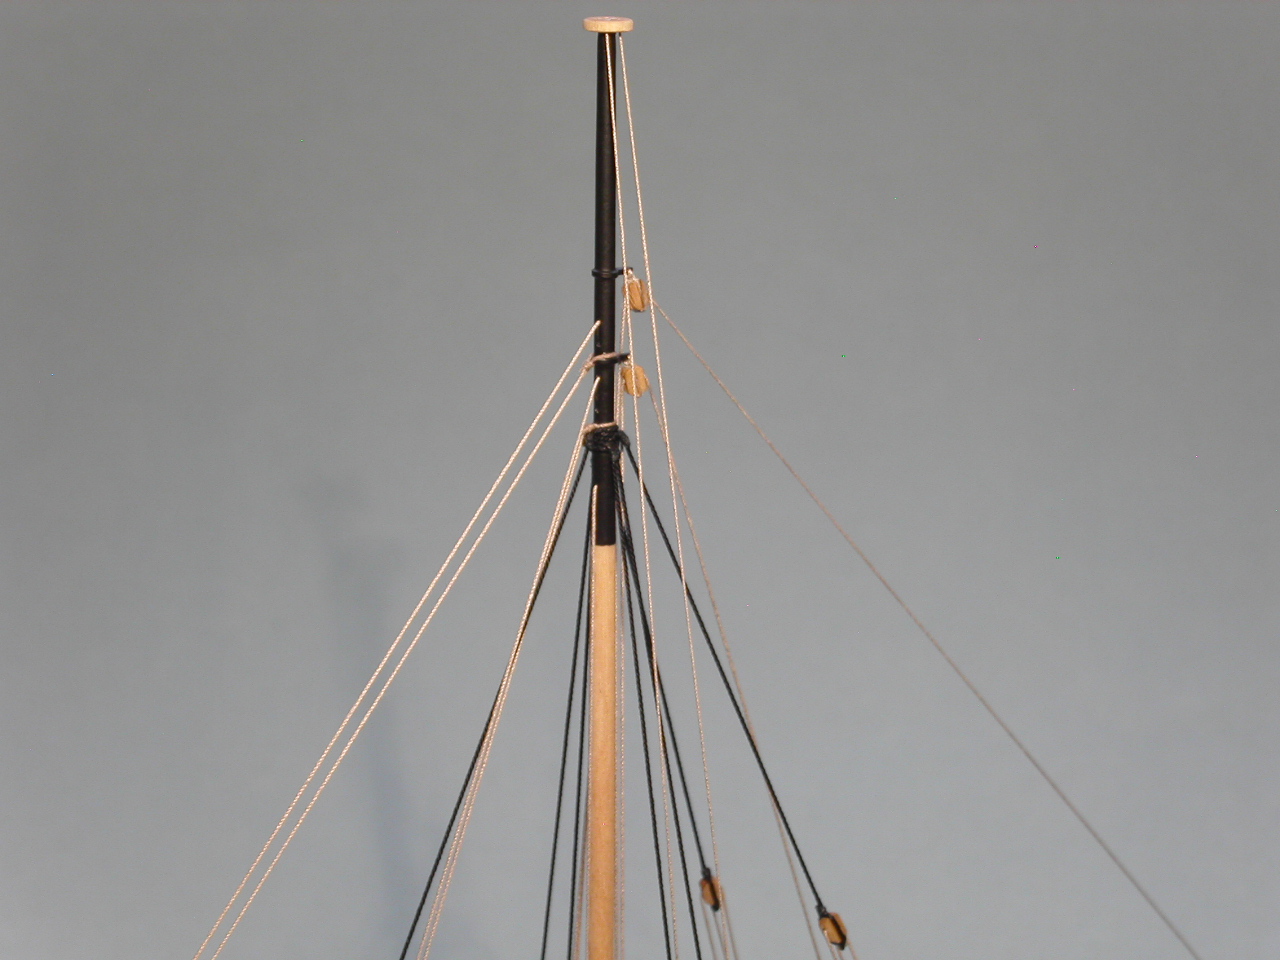
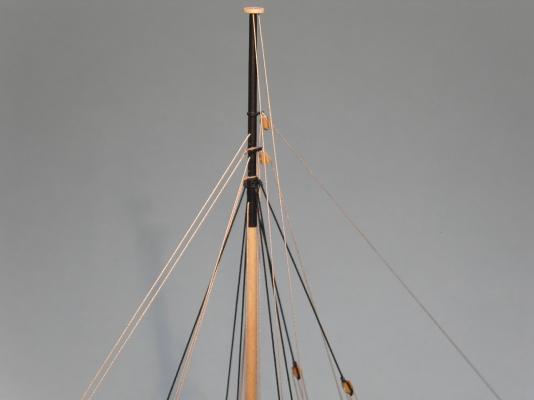
I attached the shrouds and stays. I'm enjoying the rigging, though there is a steep learning curve since I haven't done anything like it before. Erik


- 222 replies
-
- 16
-
-
- 18th century longboat
- model shipways
- (and 2 more)
-
Mike, It really looks great! I like how you've really gotten into the use of your airbrush on this build. I know you weren't entirely happy with the brush painting of your longboat. Seems like you've adapted to emphasize your strengths. Your perfectionism and the high standards you set for yourself are really paying off. Your build is incredibly clean and crisp. Being relatively new to this like you are, you are definitively a role model for those of us just getting started. While I'm at it, I've always admired your willingness (and this includes on your longboat) to pull things apart and start over when you're not satisfied. Your results show your high standards. Erik
- 452 replies
-
- 7
-
-
- cheerful
- Syren Ship Model Company
- (and 1 more)
-
Mark, I just stumbled onto your build log. Impressive!! The Hahn building method intrigues me. I'll be following your progress. Erik
-
Paul, Of the 4 models listed, I think you should go with the Armed Sloop Virginia as a second build. Like Brian said, the rigging is more complicated, which will get you prepared for the Constitution build. The Bounty launch is similar enough to the longboat that I don't now if it will really give you the opportunity to enhance your skills much beyond what you've already developed with the longboat. That said, anything you build at this point is just more practice for a bigger build down the road. Erik
- 37 replies
-
- 2
-
-
- model shipways
- 18th century longboat
- (and 1 more)
-
Paul, Well done! Your longboat looks great. I'm in the rigging stage of mine, so appreciate your advice on some of this stuff. Do you have any plans for a future boat/ship build? Erik
- 37 replies
-
- 2
-
-
- model shipways
- 18th century longboat
- (and 1 more)
-
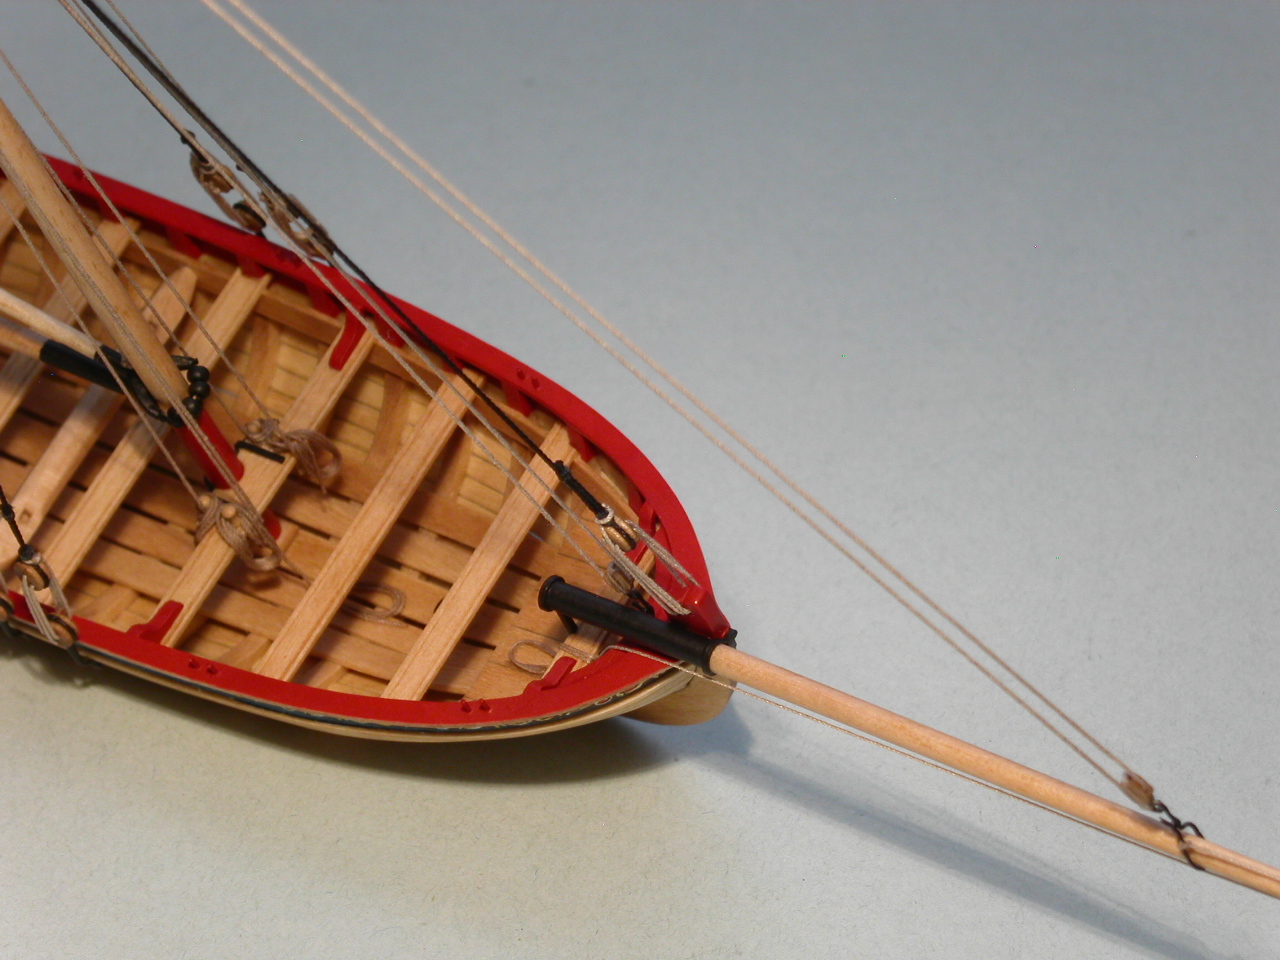
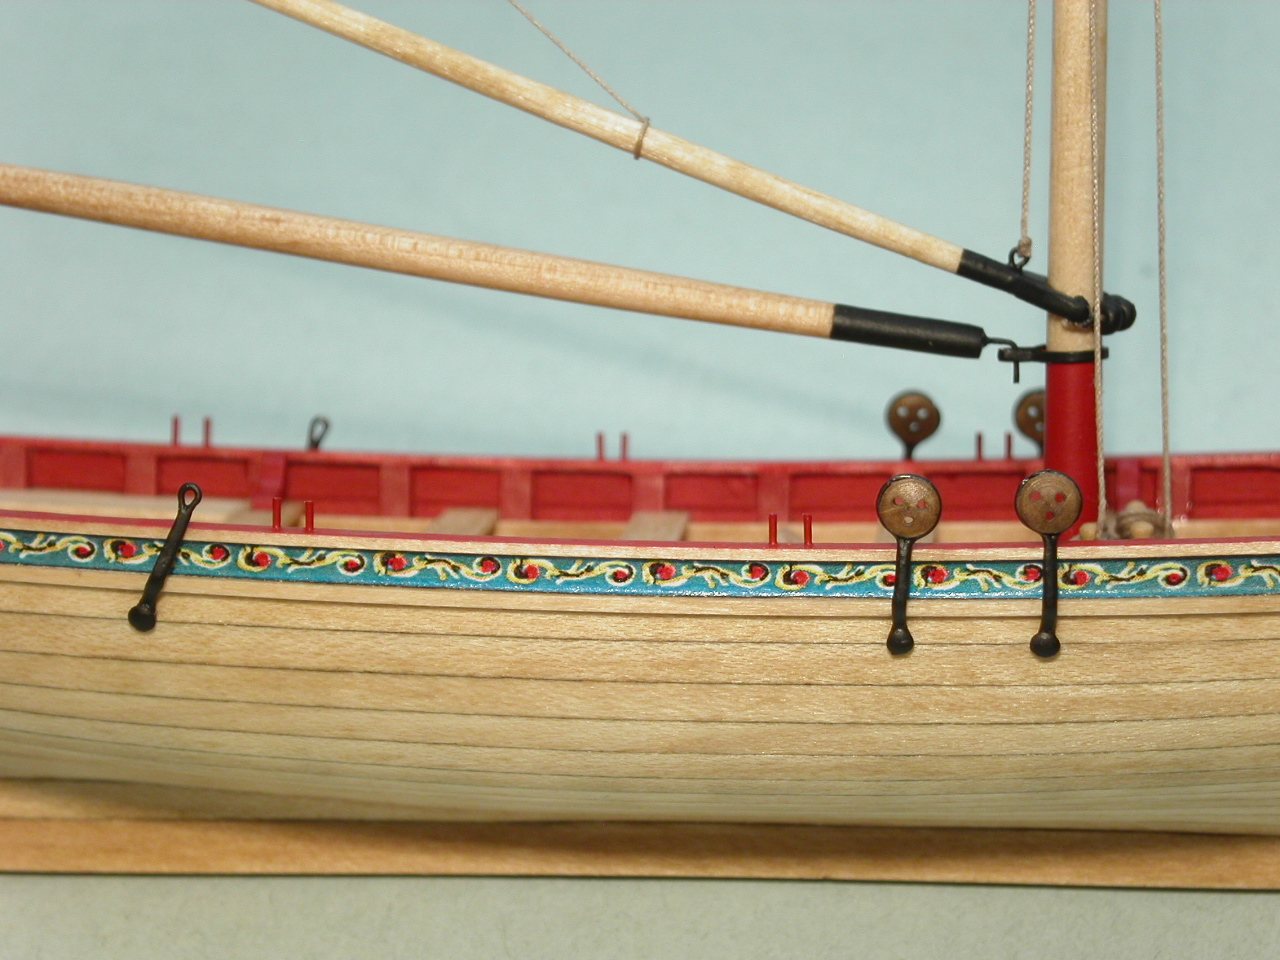
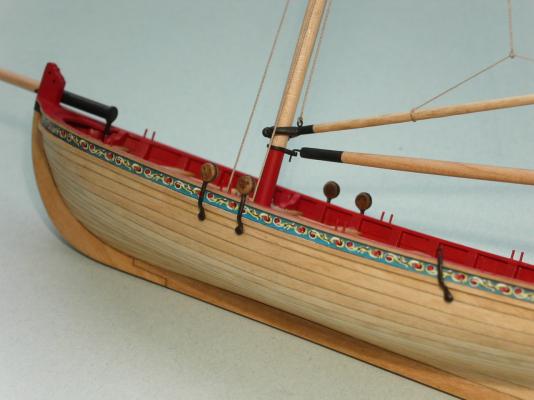
I attached the chainplates. I used a ruler held up against the side of the boat to figure out the correct angle each chain plate needed to be attached so as to have a straight line towards the area of the mast where the shrouds and backstays will be seized. Erik


- 222 replies
-
- 14
-
-
- 18th century longboat
- model shipways
- (and 2 more)
-
Mike, What brand paint are you using? Also, one thing I've done in the past to make a durable finish on brass with acrylic paint is to put the parts under a hot bright light bulb for 5 minute or so, this basically bakes the paint on and it's less likely to chip (be careful with glue or solder joints). If you're having adhesion problems though, it could be poor quality paint. In addition to the above brands, Testors Model Master acrylics are good. You may also try a non-acrylic paint. They are a bit more hazardous, but generally adhere better. Erik
- 222 replies
-
- 2
-
-
- 18th century longboat
- model shipways
- (and 2 more)
-
Mike, I never bother to clean the metal before I paint it, and haven't had a problem. I rarely have issues with chipping. If I do, I just touch it up when I'm finished with assembly. Erik
- 222 replies
-
- 3
-
-
- 18th century longboat
- model shipways
- (and 2 more)
-
Mike, I used Polly Scale Engine Black acrylic paint. It has been discontinued. With many years of model railroading under my belt, I have a lot of these railroad colors. I'm not sure what I'll do when they dry up/run out . . . If you're looking for a good black acrylic paint for brush painting, Vallejo paints are among the best out there. I've applied them with a brush and they leave an even coat with no brush marks. http://www.acrylicosvallejo.com/Also, Ryland Craze, in his build log, says these paints are good: http://modelshipworld.com/index.php/topic/850-18th-century-longboat-by-ryland-craze-model-shipways-148/?p=368056 I've also used Testors Model Master acrylic paint with good results. Erik
- 222 replies
-
- 2
-
-
- 18th century longboat
- model shipways
- (and 2 more)
-
Well done Dave! That's a really nice gesture for your doctor. Erik
- 209 replies
-
- 8
-
-
- cheerful
- Syren Ship Model Company
- (and 1 more)
-
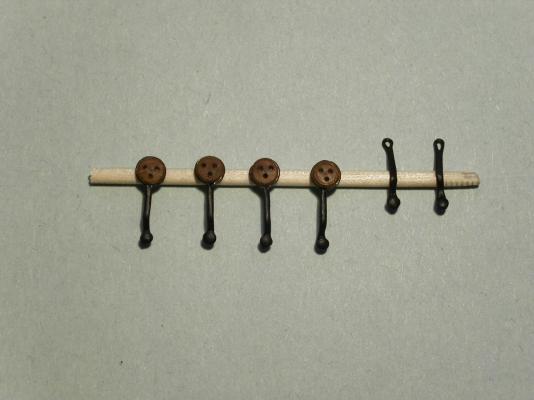
I made the chainplates. They were a total pain in the butt! I have many rejects. I figured soldering would be the way to go, but the wire doesn't solder. So, I went the super glue route. At any rate, in real life they look perfectly fine. Keep in mind in this photo they are about 350% their normal size! Erik
- 222 replies
-
- 11
-
-
- 18th century longboat
- model shipways
- (and 2 more)
-
As long as we're talking about Badger paint, what marine color red did you use? Erik