HOLIDAY DONATION DRIVE - SUPPORT MSW - DO YOUR PART TO KEEP THIS GREAT FORUM GOING! (Only 13 donations so far - C'mon guys!)
×


Erik W
-
Posts
470 -
Joined
-
Last visited
Content Type
Profiles
Forums
Gallery
Events
Everything posted by Erik W
-
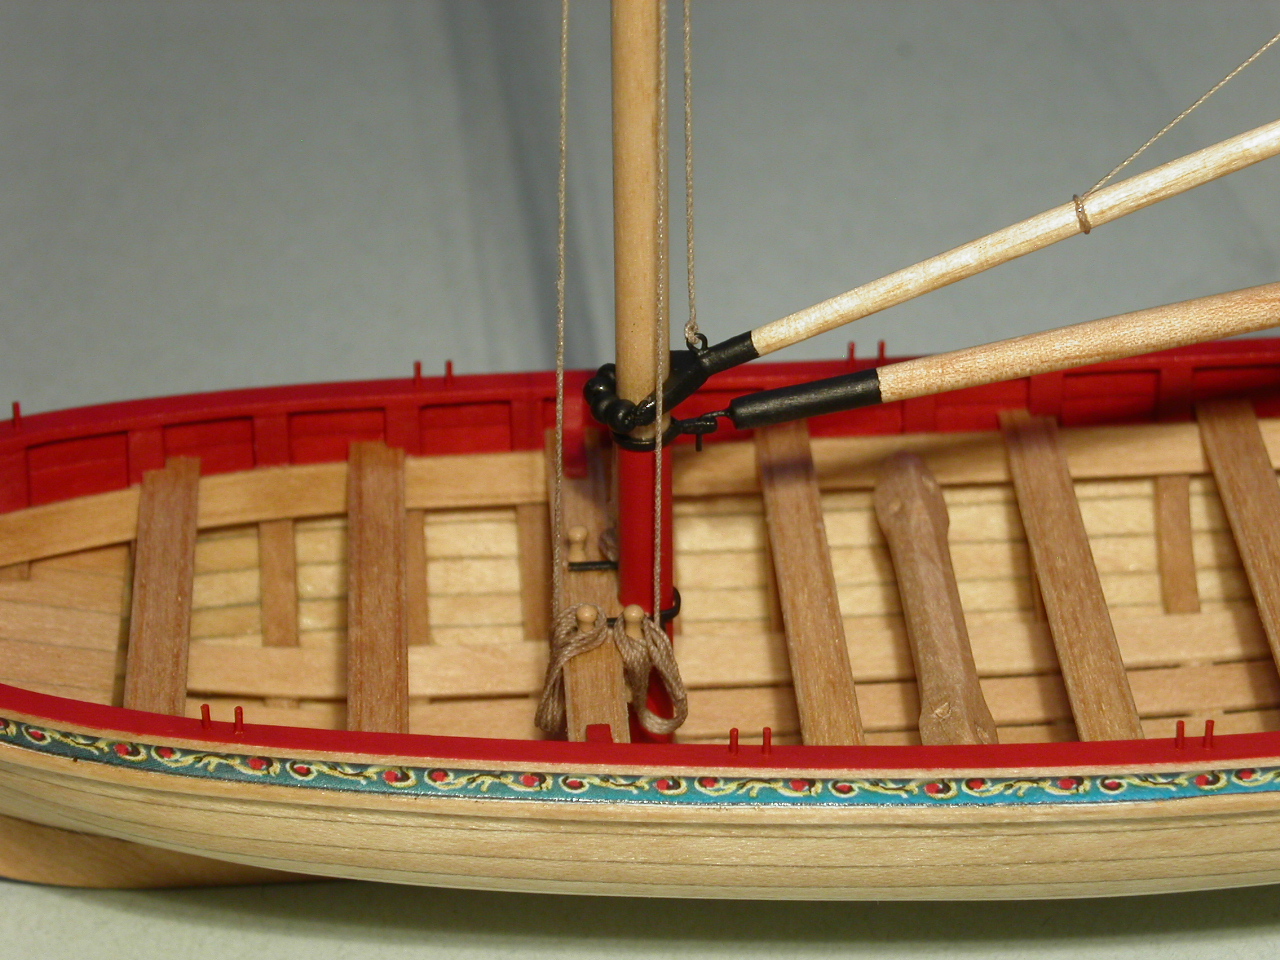
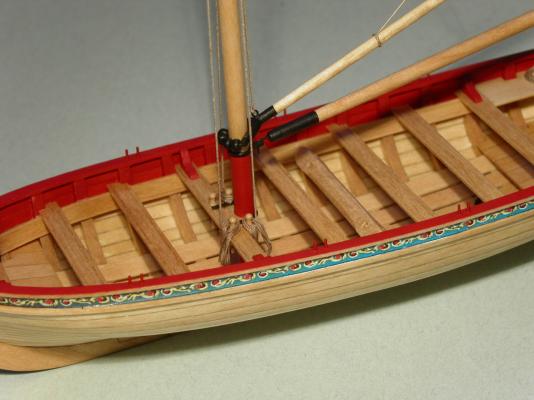
 I made the rope coils. I made a jig using two brass rods, with the smaller diameter rod at the top and a larger one at the bottom. The rods were put into a block of wood that was covered with clear packing tape (to keep the finished coils from sticking). In order to get the 90 degree bend of the rope, I attached one rod on the top of the block and one on the side. I looped the rope around the rods and saturated them with a 50/50 mix of matt medium and water. Once dry, I removed the rope coils from the jig and glued them in place by saturating them again with more diluted matt medium mix. This allowed me to tweak the coils in place. Erik
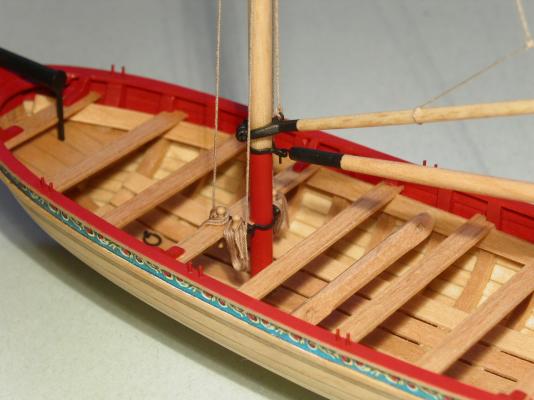

- 222 replies
-
- 14
-

-
- 18th century longboat
- model shipways
- (and 2 more)
-
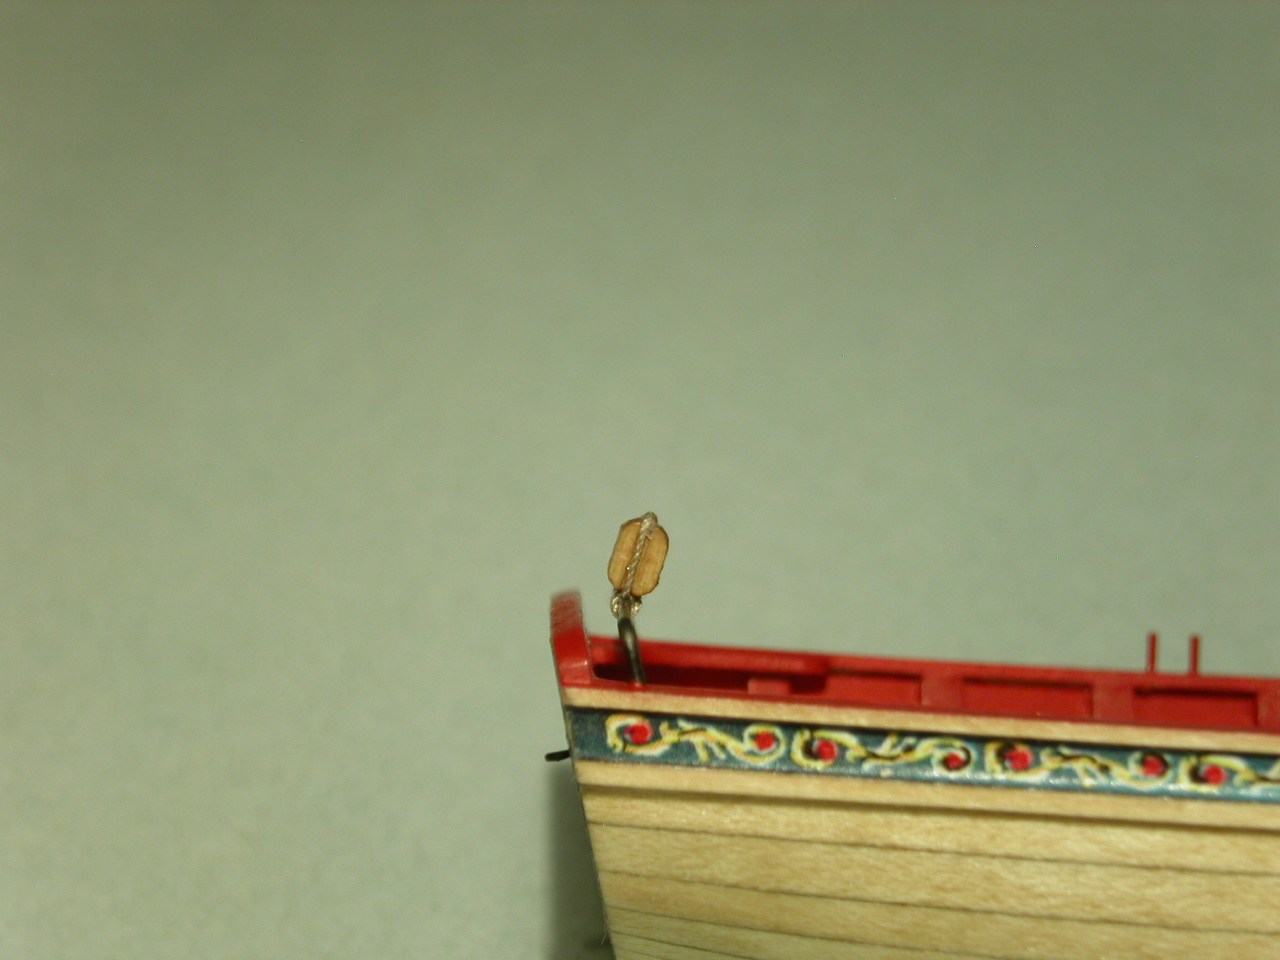
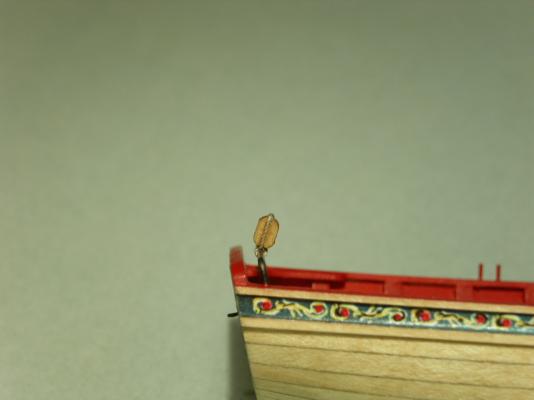
Mike, It looks great! I recently attached the mast on my longboat. While being careful to not break the mast, I snapped off the bowsprit! Luckily my mounting to the stem wasn't very solid, so it didn't break the stem. I've debated fastening the boat to the base now, knowing the boat willbe pretty hard to handle by the time it's fully rigged. Erik
- 100 replies
-
- 3
-
-
- model shipways
- 18th century longboat
- (and 1 more)
-
Brian, Thanks for the advice. My knot failures were my own fault. I had tied them, hit them with diluted matt medium, let that dry, and then trimmed the knot ends close to the knot. I got the great idea to dab a little more diluted matt medium on the knot and use tweezers to clean up the knots a bit . . . not realizing that by wetting the knot it would soften the original treatment. Lesson learned! Erik
- 222 replies
-
- 5
-
-
- 18th century longboat
- model shipways
- (and 2 more)
-
Dave, Good job!! It's hard to believe you've only been working on this for a little over two months! That's some quick building. I've been working on my longboat for 5 months, and still haven't finished. Make sure you post photos of the presentation to your doctor. Erik
- 209 replies
-
- 11
-
-
- cheerful
- Syren Ship Model Company
- (and 1 more)
-
Mike, Danny, Thanks for the kind words! Danny, Once I permanently attached the mast a few days ago, I've had some near misses with misjudging the new size of the boat. Also, I'm doing my build with the kit supplied basswood, though it does seem pretty strong at this point . . . it's the Wipe-on-Poly holding all together. Erik
- 222 replies
-
- 4
-
-
- 18th century longboat
- model shipways
- (and 2 more)
-
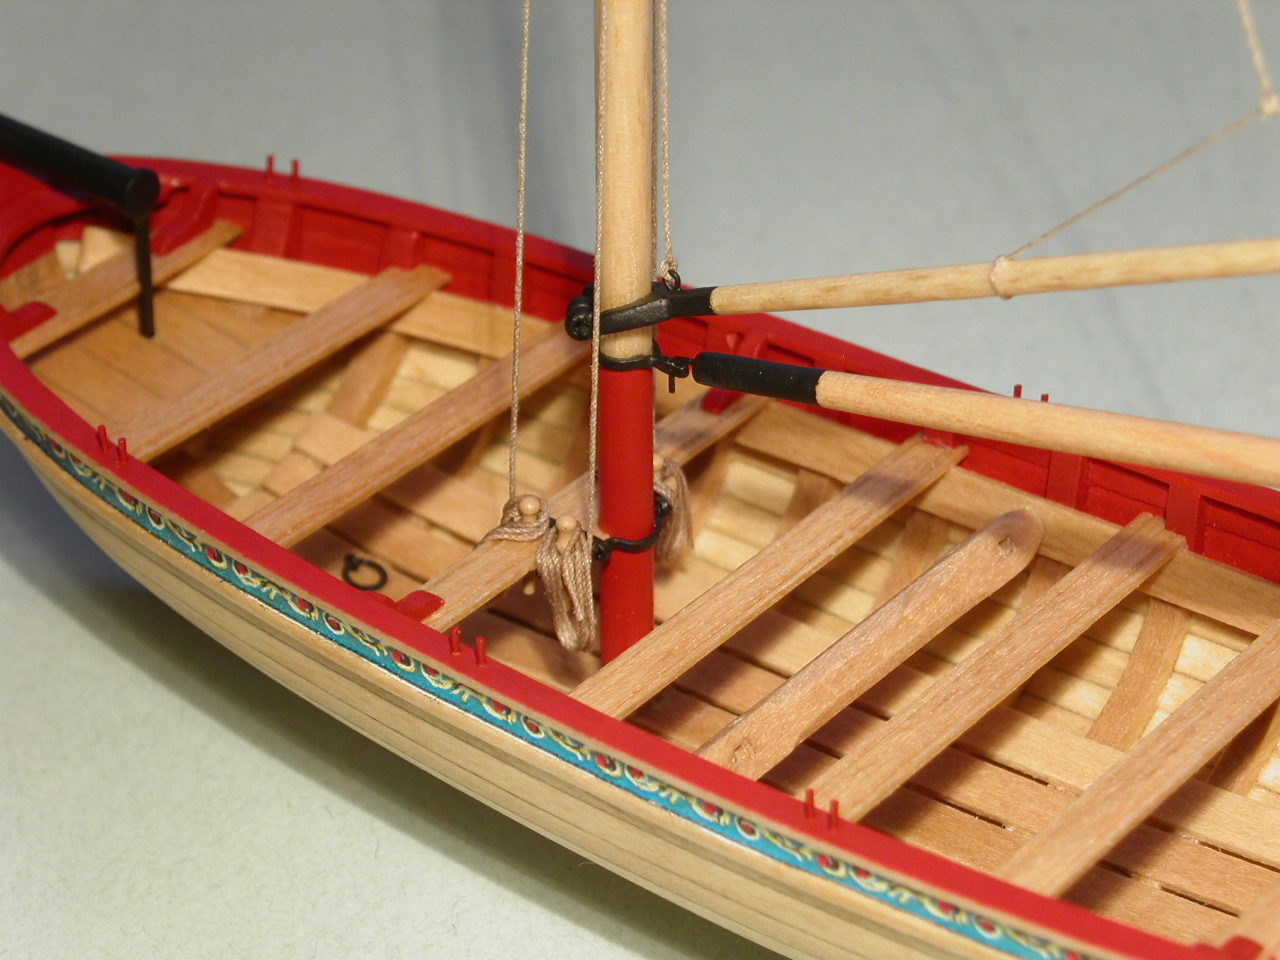
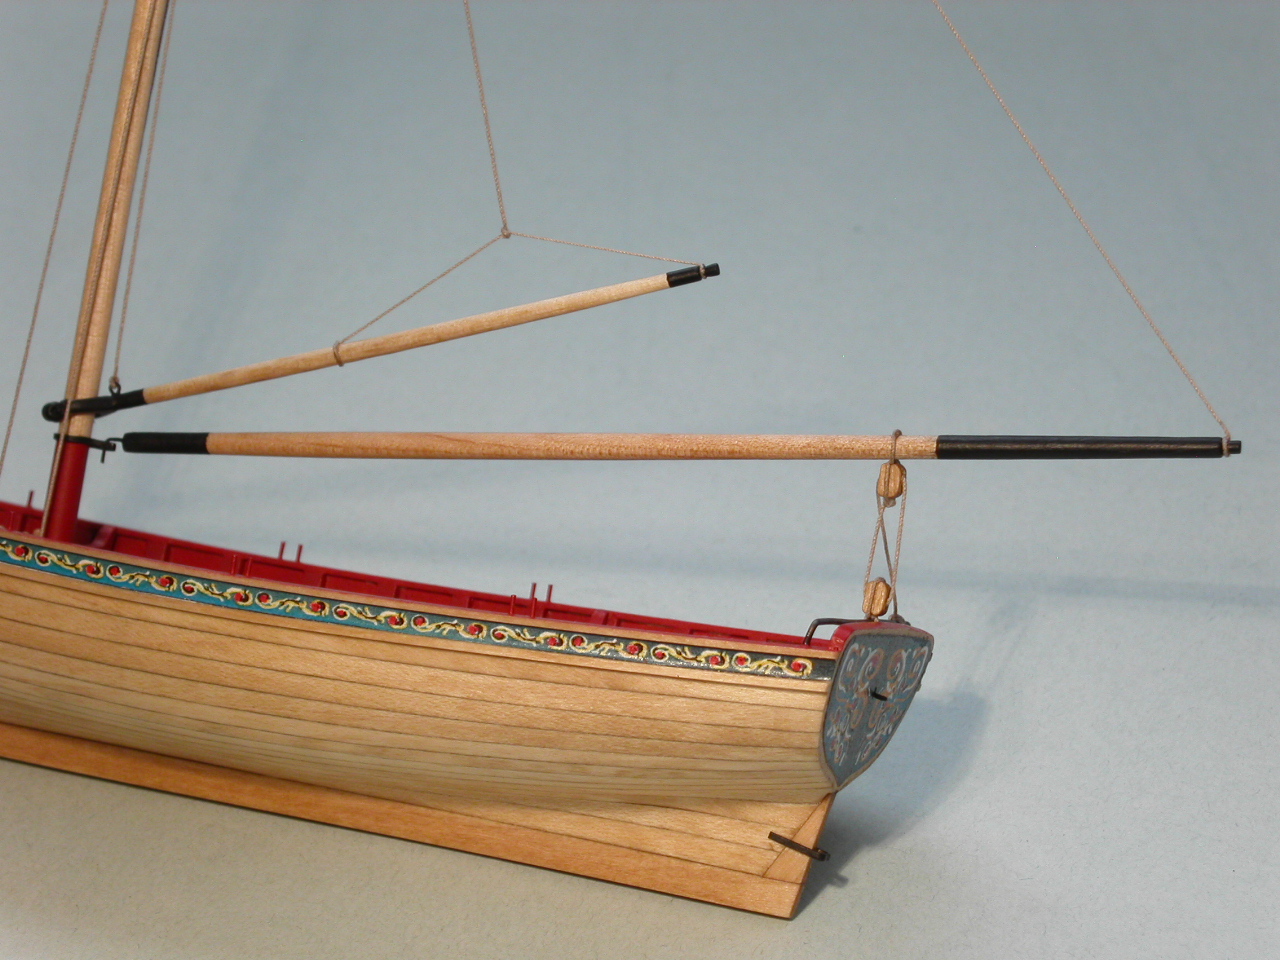
After a couple of false starts, I got the first part of the rigging compete. It's a bit stressful to work on . . . I feel like I'm going to break something! While trying to keep my knots small and unobtrusive, I had a couple of the them come out, and had to redo them and alter how I was gluing/handling them. I didn't like the parrel beads that came with the kit so I wound up, buying size 11 seed beads at a craft store and using those instead. They're 1.7mm long vs. the 2.3mm beads that came with the kit. One of the things that has attracted me to wooden ship modeling is how boats and ships look when fully rigged. I have high expectations of how this will turn out, tempered by being a complete novice though. I'm happy, more or less, with the results so far. There's room for improvement as I continue, but the results are in line with the quality of the rest of the build. Can't ask for too much more as a beginner! Erik


- 222 replies
-
- 12
-
-
- 18th century longboat
- model shipways
- (and 2 more)
-
Paul, It looks awesome! I particularly like the red painted trim below the painted frieze on the sides. That's a neat variation from what the rest of us have done. Erik
- 37 replies
-
- 2
-
-
- model shipways
- 18th century longboat
- (and 1 more)
-
I agree with Chuck. Your cockpit woodwork looks great. I think it would look nice unpainted. That said, your application of the red paint on your build so far has been flawless, so either way, you can't lose. Erik
-
Brian, I'm late in seeing your build log, but good job. This is the type of modeling I aspire to! And congrats on the award. That's pretty awesome. Erik
- 831 replies
-
- 4
-
-
- Armed Virginia Sloop
- Model Shipways
- (and 1 more)
-
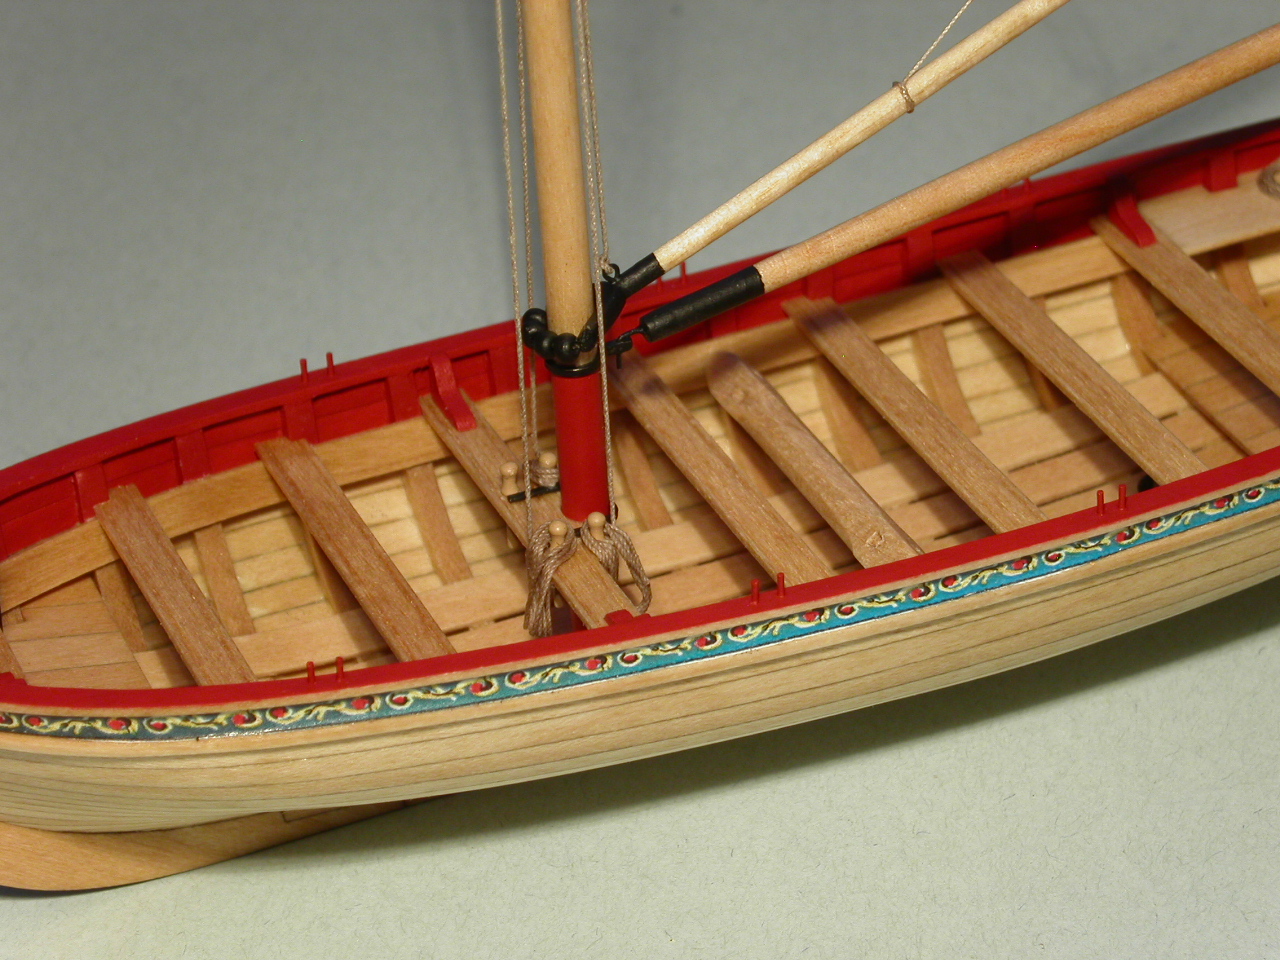
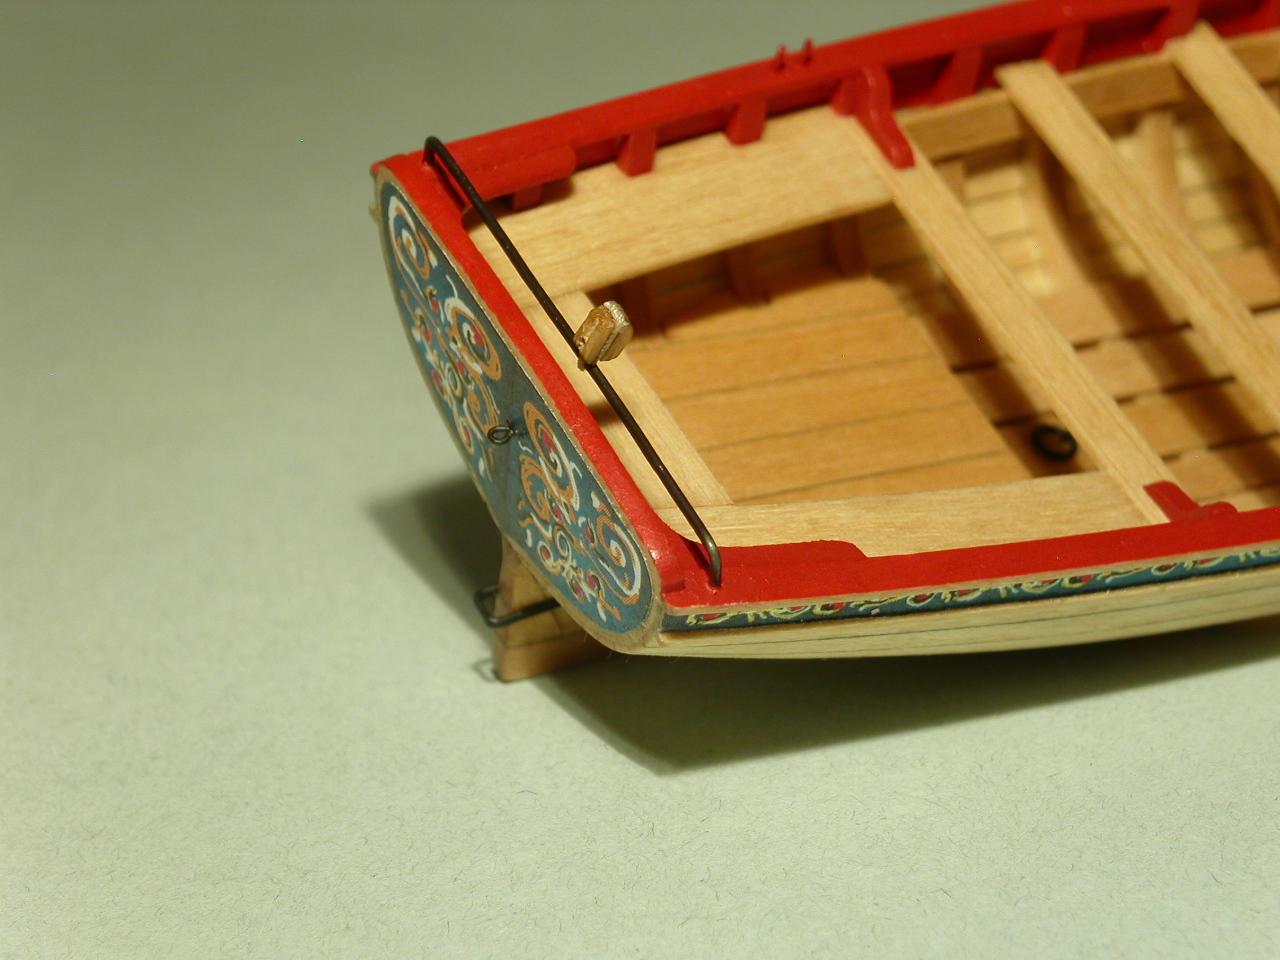
I added a few blocks to the boat. I followed Chuck's advice for the two blocks on the mast (see my last post). I did something similar for the block on the horse. I tied one overhand knot after looping the rope around the horse wire, fixed the block to the knot with a tiny dab of full strength PVA, then wrapped the rope around the block and secured it on the top with one overhand knot pulled flat along the line of the rope. I then added 50/50 diluted matt medium to the top and sides of the block. Once dry, I cut off the ends of the rope. I know others like a more elaborate arrangement, but because I'm a novice, I'm just trying to keep it simple and as clean looking as possible. Erik

- 222 replies
-
- 14
-
-
- 18th century longboat
- model shipways
- (and 2 more)
-
Hold on a second there buddy. You don't get off the hook with only 1 finished-boat-photo. We want to see more! Erik
- 33 replies
-
- 4
-
-
- model shipways
- 18th century longboat
- (and 1 more)
-
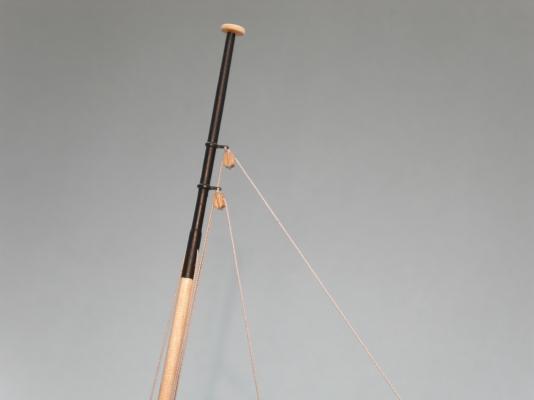
Mike, Here are the links Mike (Stuntflyer) sent me. He had said the top one was the most useful to him. That short video (in the top link) on seizing was very helpful in understanding that. http://modelshipworld.com/index.php?/topic/5295-rigging-blocks-how-to/ http://www.modelboatyard.com/stropping.html http://modelshipworld.com/index.php/topic/7277-stropping-and-seizing/ http://modelshipworld.com/index.php?/topic/3145-hooks-and-blocks/?hl=seize Also, I found some good advice on how to handle things here: http://modelshipworld.com/index.php/topic/9180-how-to-work-with-teeny-blocks/ The part of the rigging that was confounding me was fastening the two blocks to the top of the mast. I had sent Chuck a message and his response was: "Remember that the block must be oriented in the right direction. Meaning on those blocks the hole is on top if you are using the blocks that come with the kit. I basically took a length of rope and put it through the eye on the metal band first and tied a knot. The two tails were left extra long. Then I used the two tails to strop the block in position afterwards. You can use a drop of glue to fix the block against the original knot so it stays there. Then tie a simple knot with the tails around the block. Not a double knot.....just one time so you can trim the tails after applying some glue. This way you cant see its a big knot at the bottom of the block afterwards." Hope this helps you a bit. Erik
- 222 replies
-
- 9
-
-
- 18th century longboat
- model shipways
- (and 2 more)
-
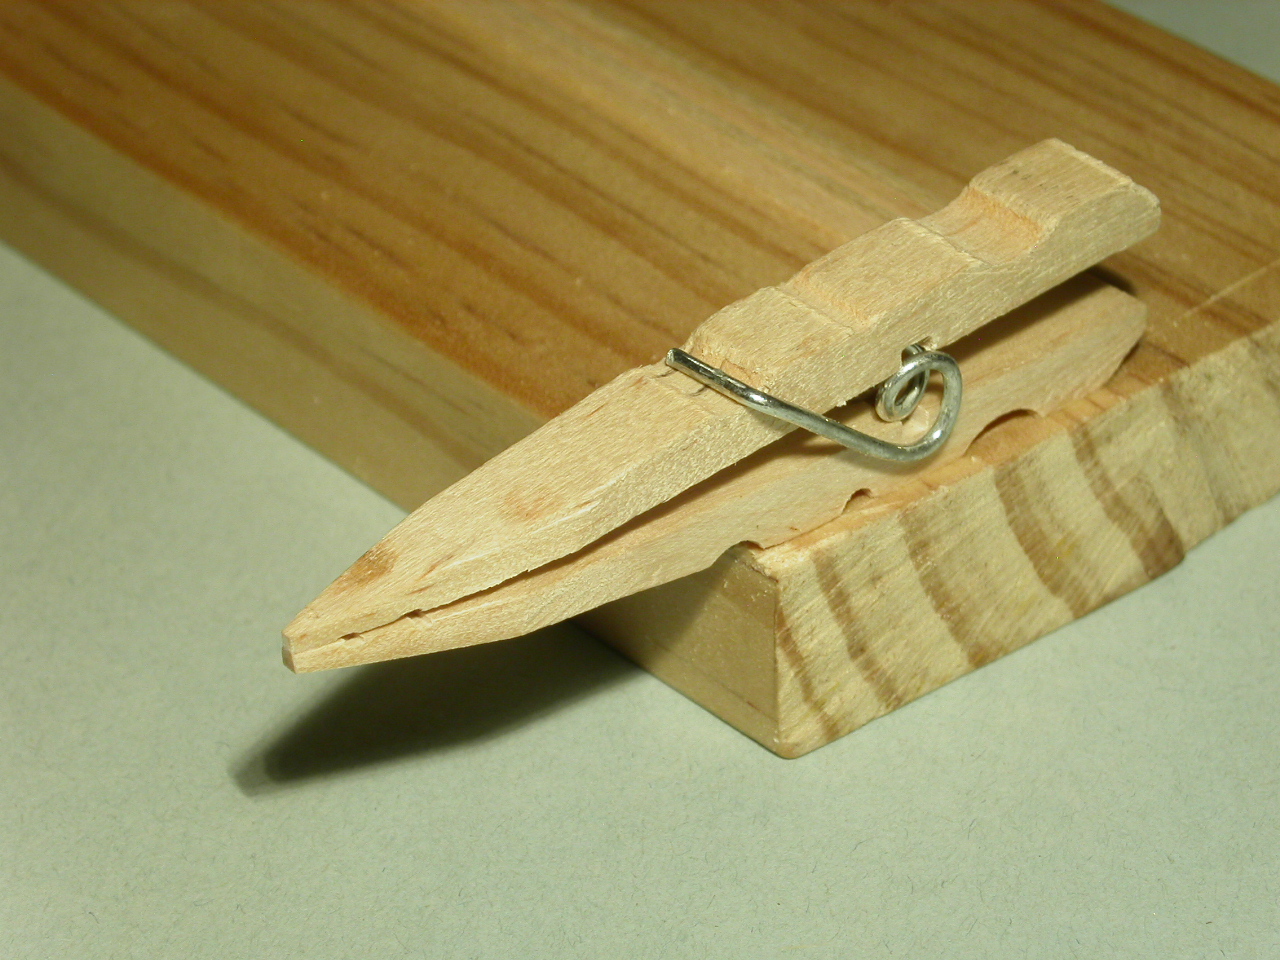
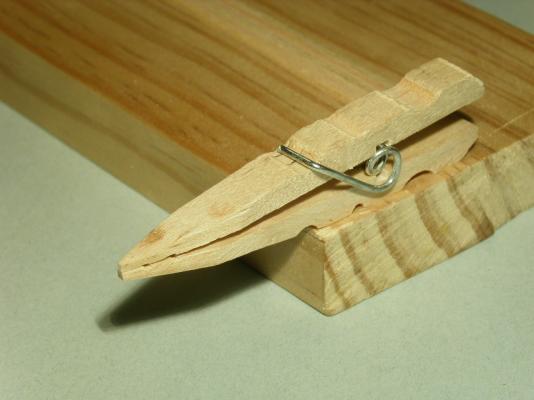
I had a pretty frustrating evening the other night. I dove right into the rigging thing . . . and wound up with pretty crappy results. The nylon rope that came with the kit was hard to work with, being inflexible, stiff, slippery, etc. That, and I hadn't researched enough what I was doing . . . so felt pretty defeated. But, thanks to Chuck answering a late night message, I placed an order with him for quality replacement rope, and Mike (Stuntflyer) was kind enough to point me towards some good links on basic rigging techniques. My hat is off to both Chuck and Mike for bringing me back to an even keel. And yet again . . . I've learned that patience is the name of the game. The other thing I needed was a workable 3rd hand system. I came up with this, since I don't own anything that would work otherwise. I flipped the wood around in two clothes pins and tapered the new front, and then glued them to my build board. One oriented on it's side, the other upright. Should work fine to hold blocks for seizing and stropping. Erik

- 222 replies
-
- 10
-
-
- 18th century longboat
- model shipways
- (and 2 more)
-
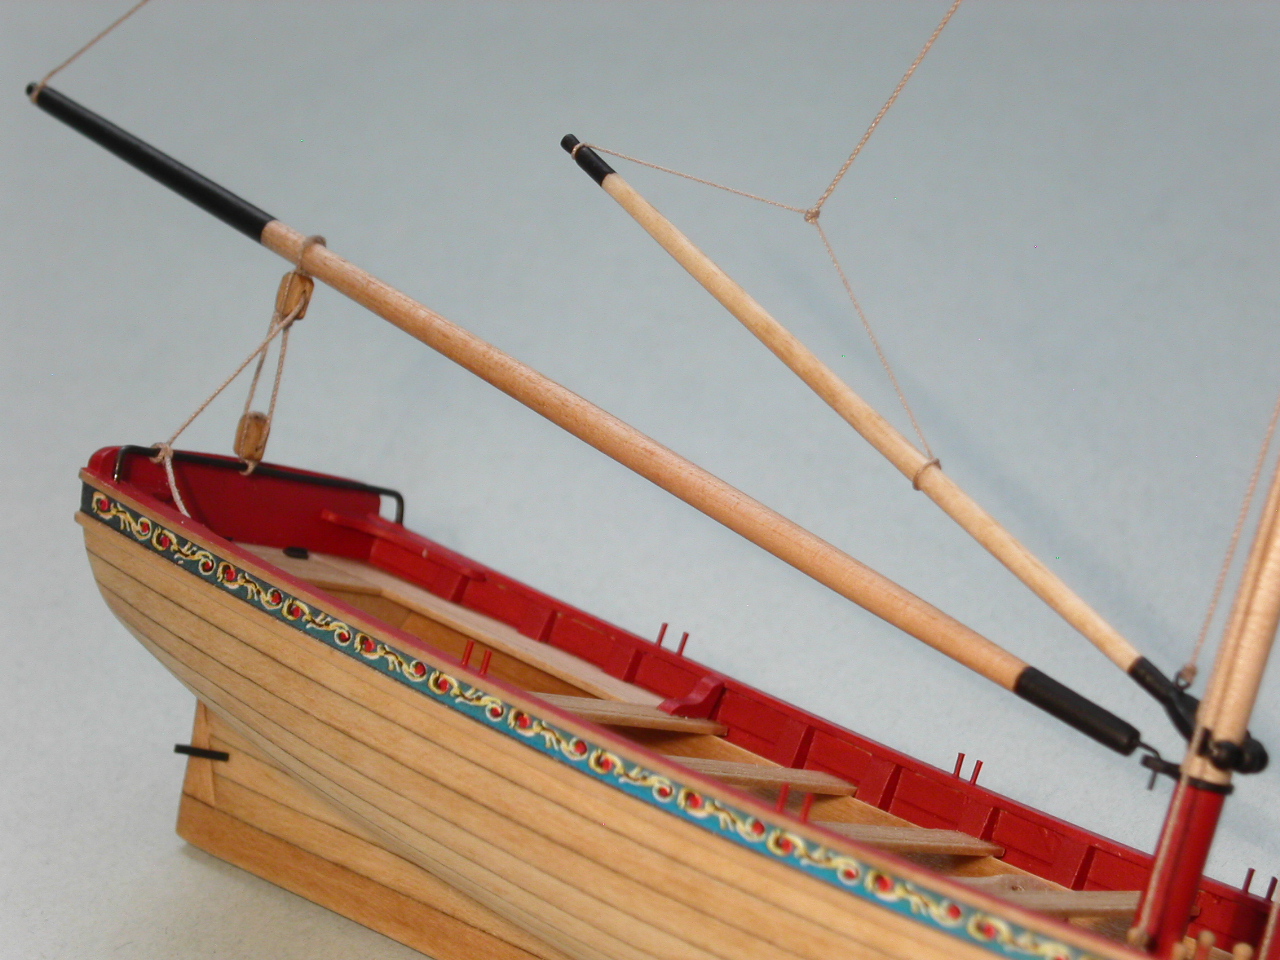
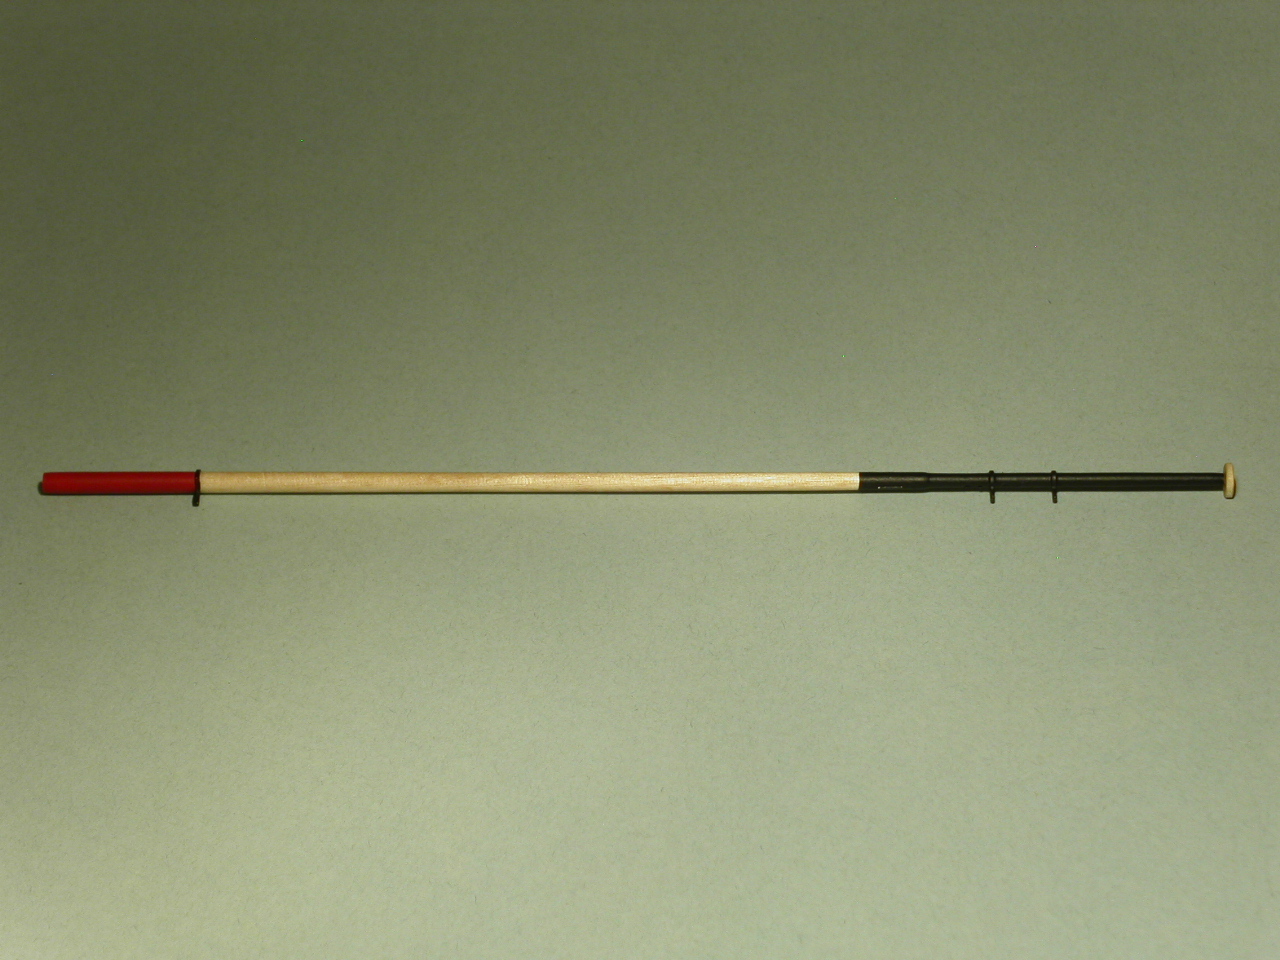
Danny, Thanks. I had seen how some oars (sweeps) even had squared off outer ends before the hand grip. The balance thing makes sense. I figured I'd pattern mine after the oars on Chuck's build, as well as the prototype longboat model photos on the National Maritime Museum website, which have uniform diameter handles on them. Erik
- 222 replies
-
- 3
-
-
- 18th century longboat
- model shipways
- (and 2 more)
-
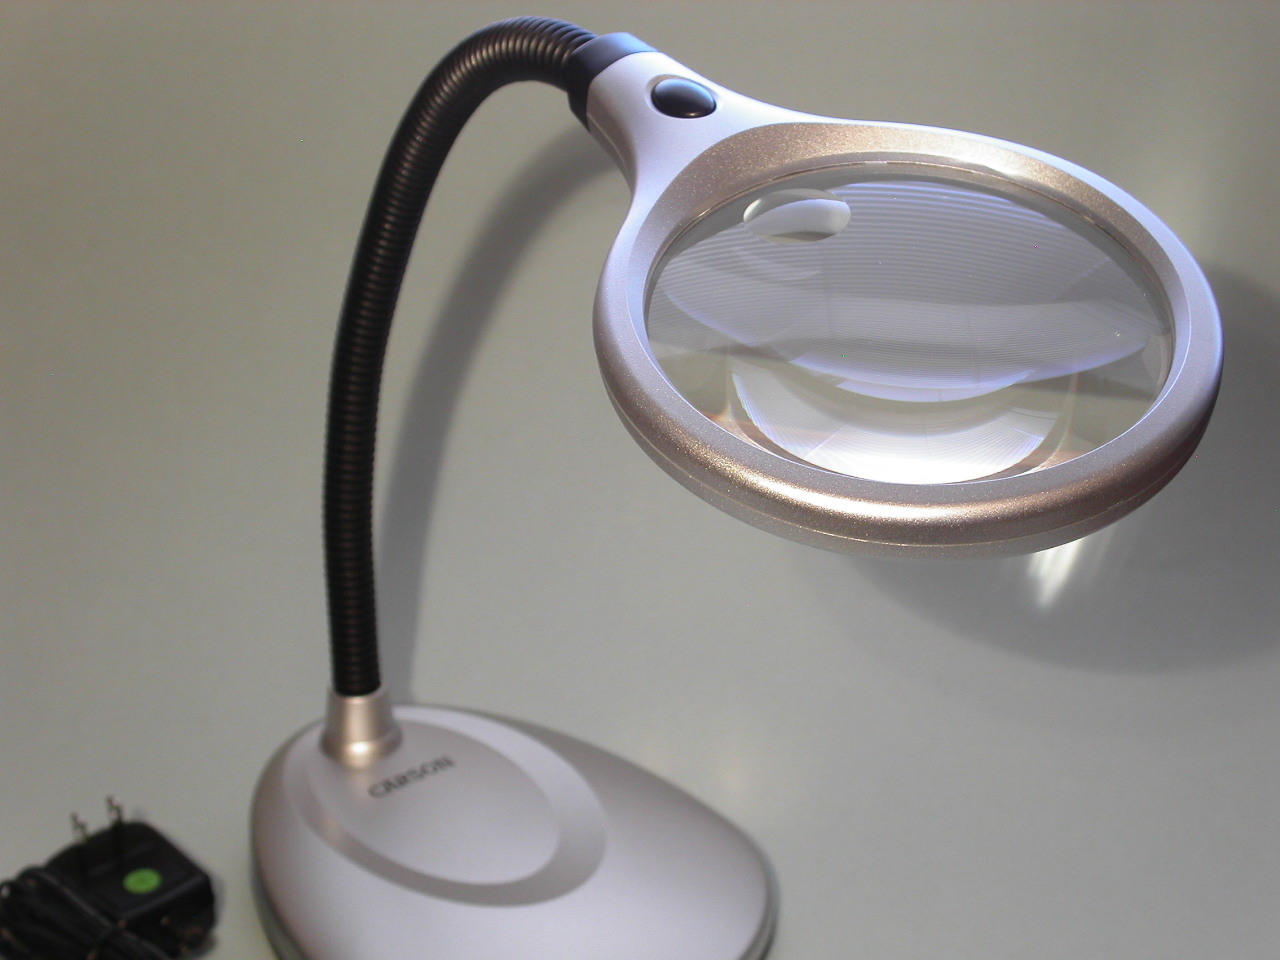
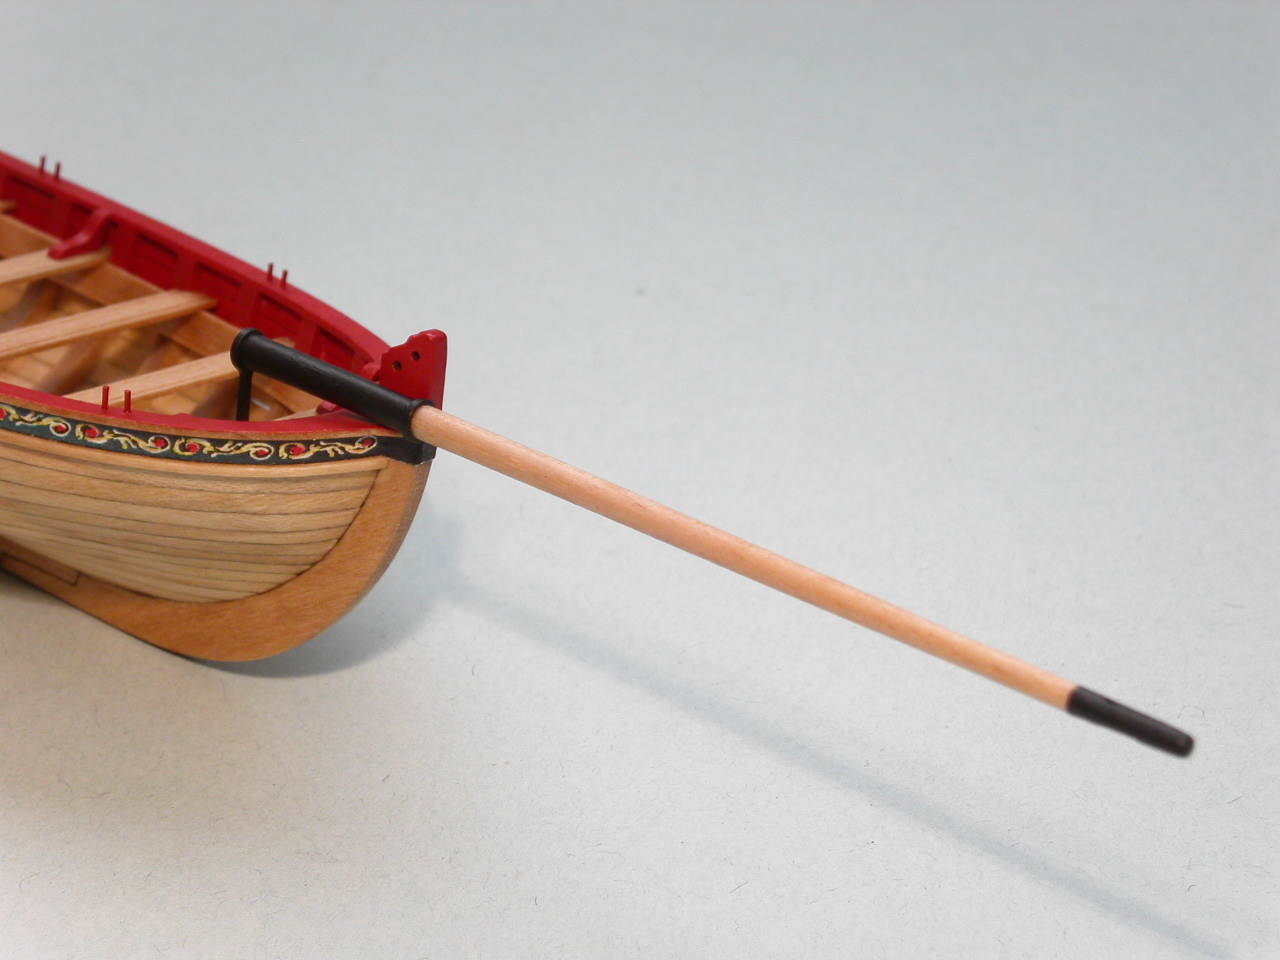
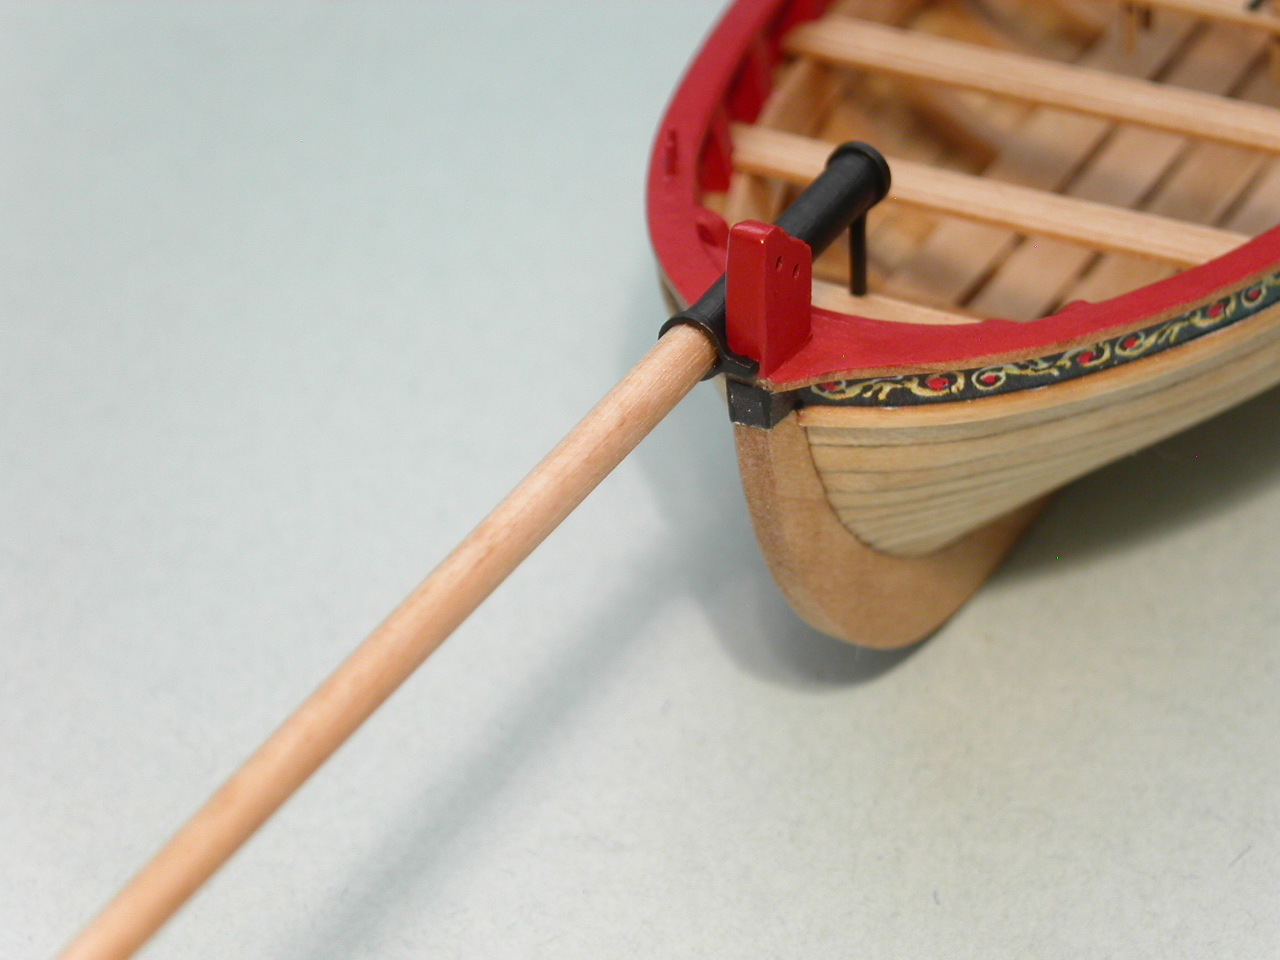
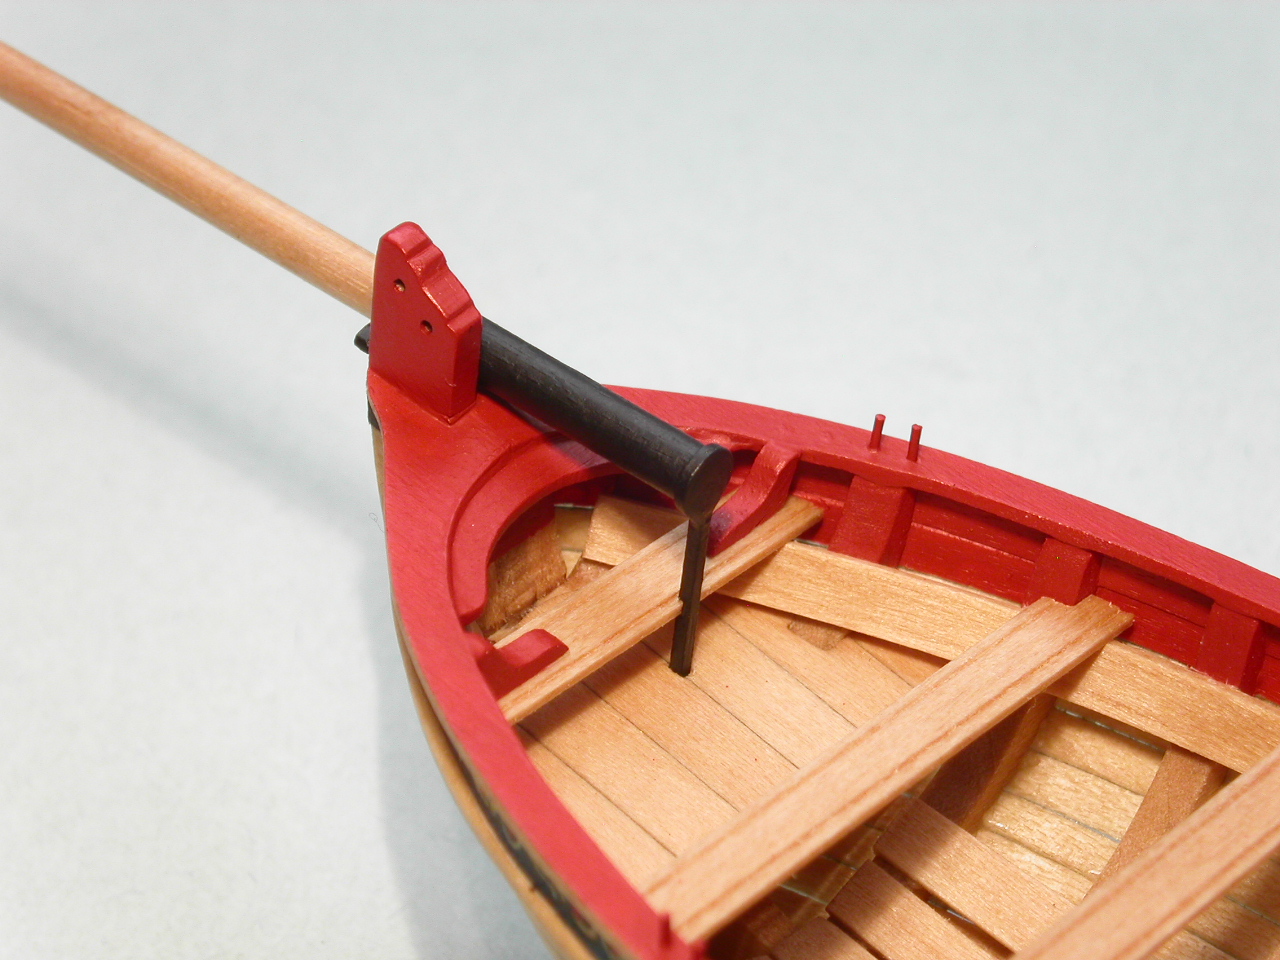
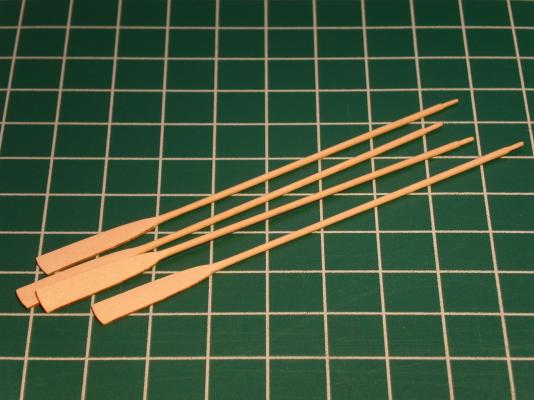
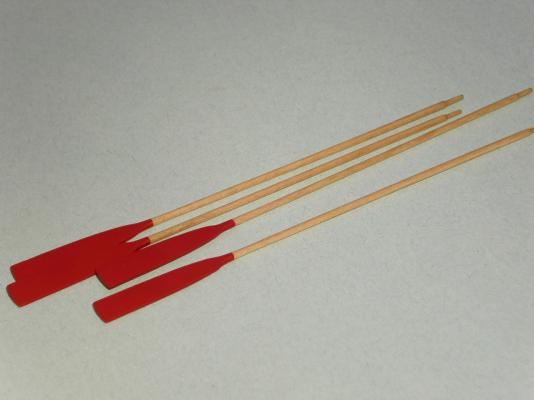
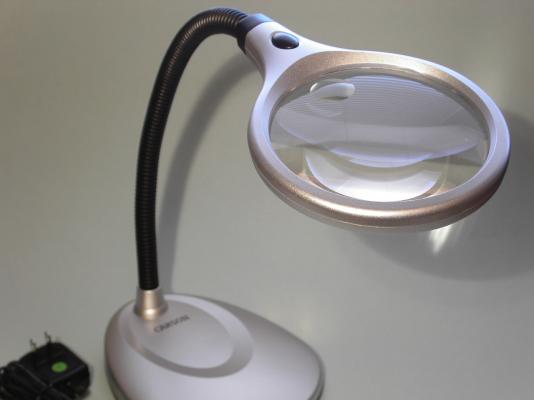
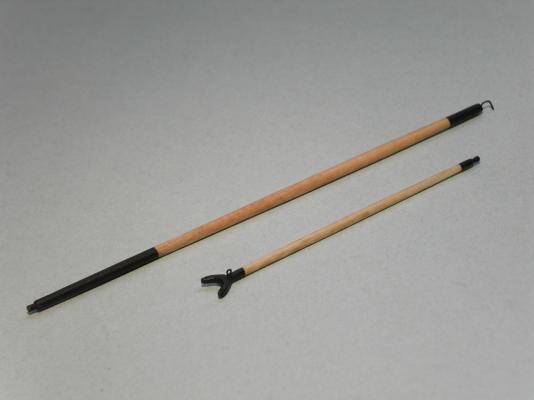
I finished the oars, the last of the wood work on the boat. Like others, I'll only display 4 of them in the boat. No one really mentions shaping the oars, but after struggling to get one shaped correctly, I figured out the trick. The laser cut oar handles are .064" (1.63mm) thick, by .090" (2.29mm) wide. If you file off the four edges so you have an octagon, it's not symmetrical. Your oar handle then will be oblong rather than round. I wound up sanding the .090" (2.29mm) side down to .064" (1.63mm) first. I then was able to sand the handle perfectly round. Using my digital calipers I was able to check all 4 handles several places along their length to make sure they were uniform .062" (1.57mm) diameter when finished. Also, when carefully comparing the photos in Chuck's original build log, these laser cut oars are 1/2" too long. So, I removed 1/2" off of the length so they won't overpower the boat interior when displayed. In preparation for rigging, and tying small knots, I bought a magnifying lamp. It is 2x with a spot that is 5x, and contains a bright LED light. Erik
- 222 replies
-
- 14
-
-
- 18th century longboat
- model shipways
- (and 2 more)
-
Mike, Glad to hear you're going to use the correct size rope. If the stuff you bought first is larger diameter, I think it would make the boat look clunky, which would be a shame this far along in your great build. I'll be keeping a close eye on your rigging progress. Like you, I have no experience whatsoever at this point in the build. Erik
- 100 replies
-
- 3
-
-
- model shipways
- 18th century longboat
- (and 1 more)
-
Julie, Here is a direct link : http://modelshipworld.com/index.php/topic/3869-so-where-do-you-do-yours-then-model-making-that-is/page-1 Erik
-
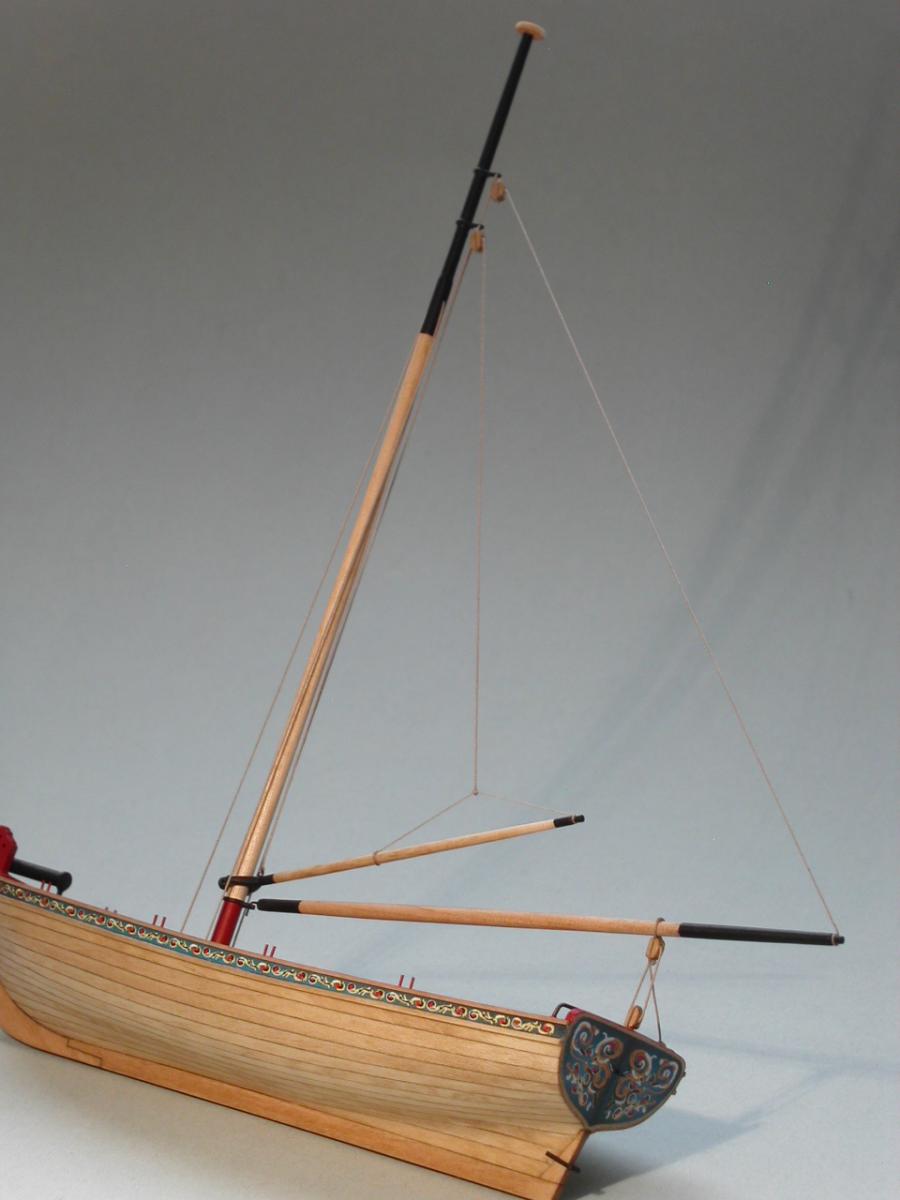
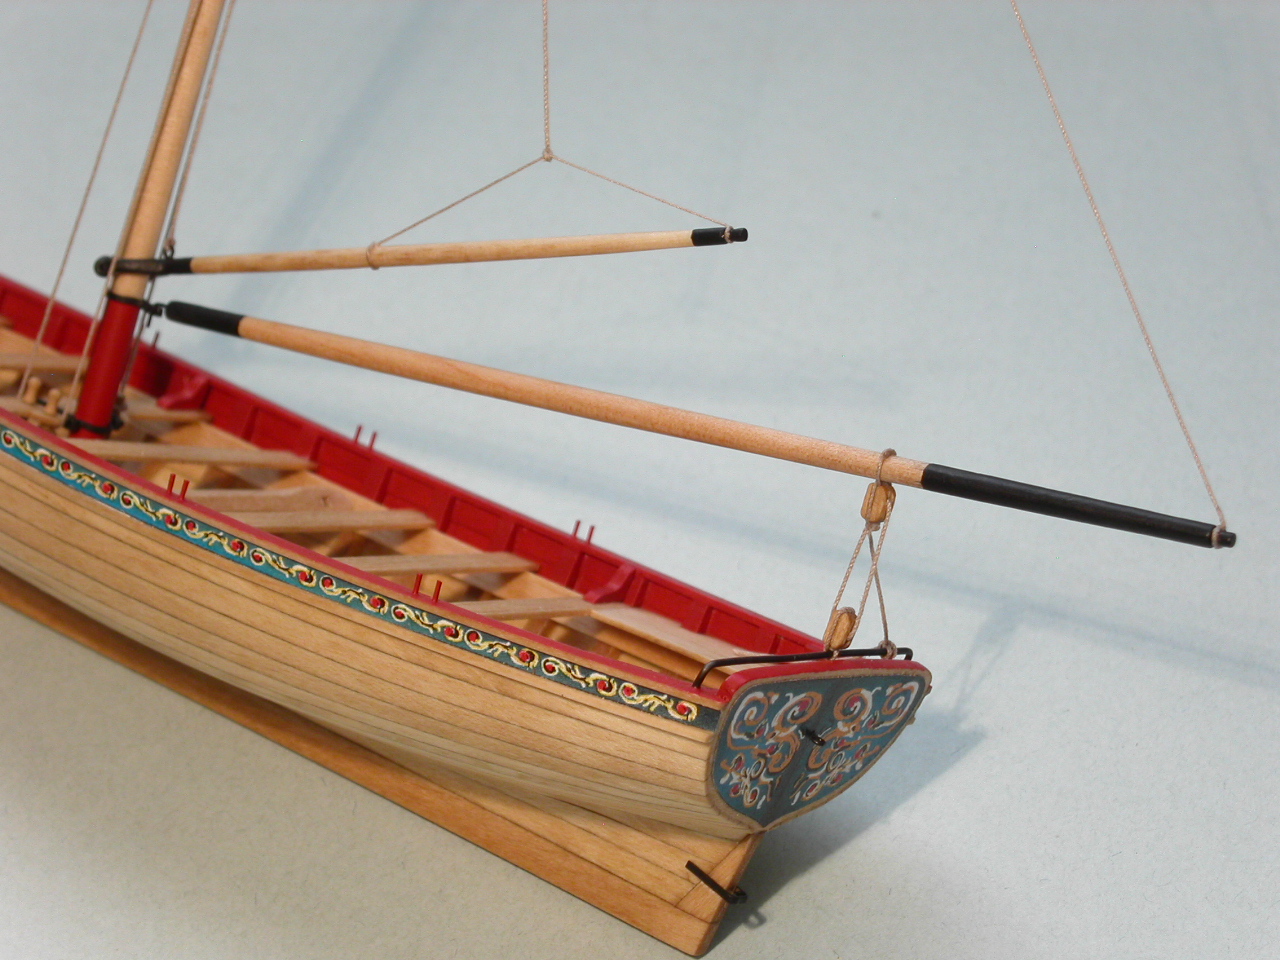
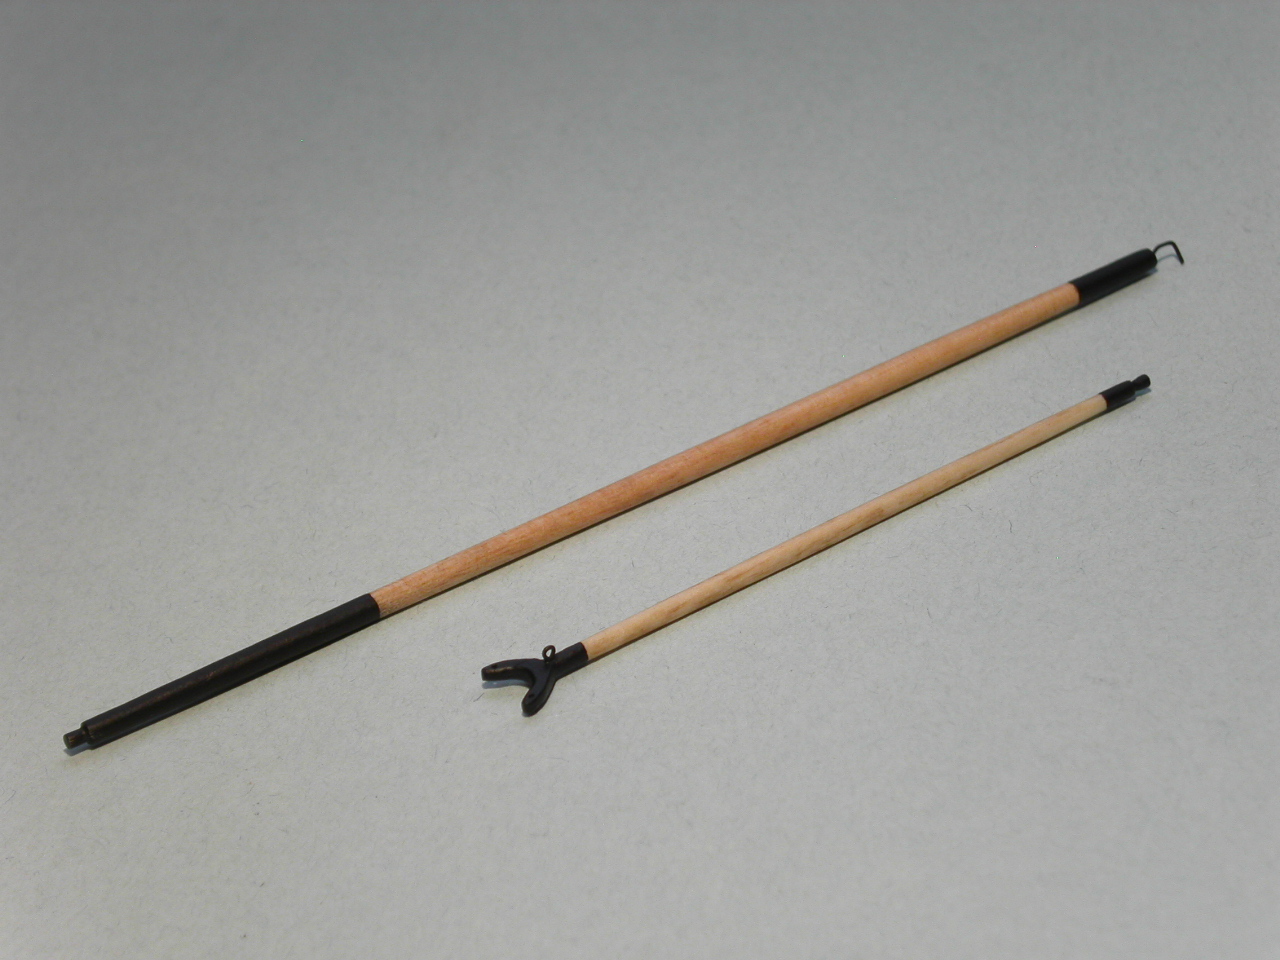
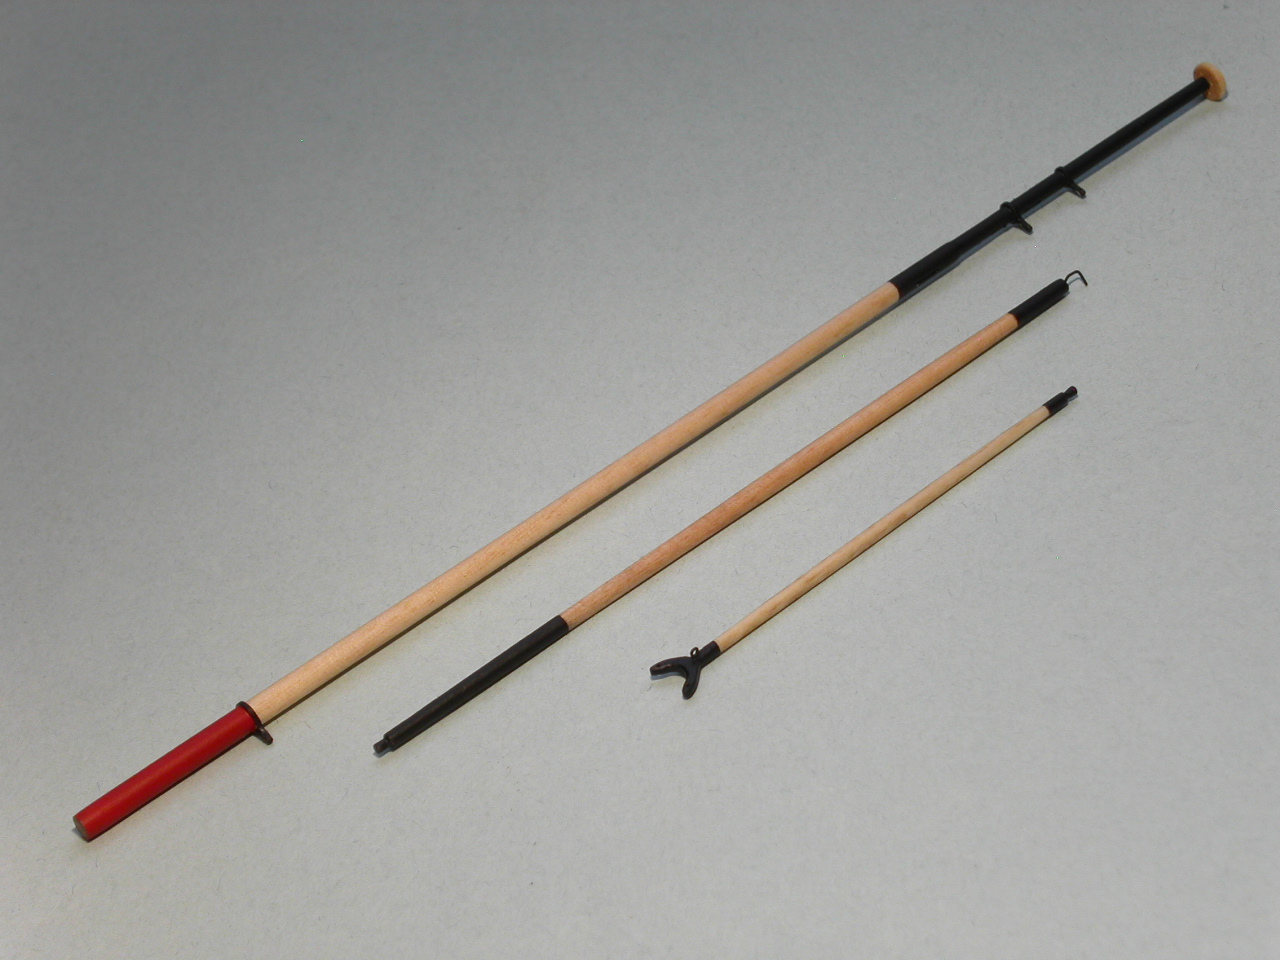
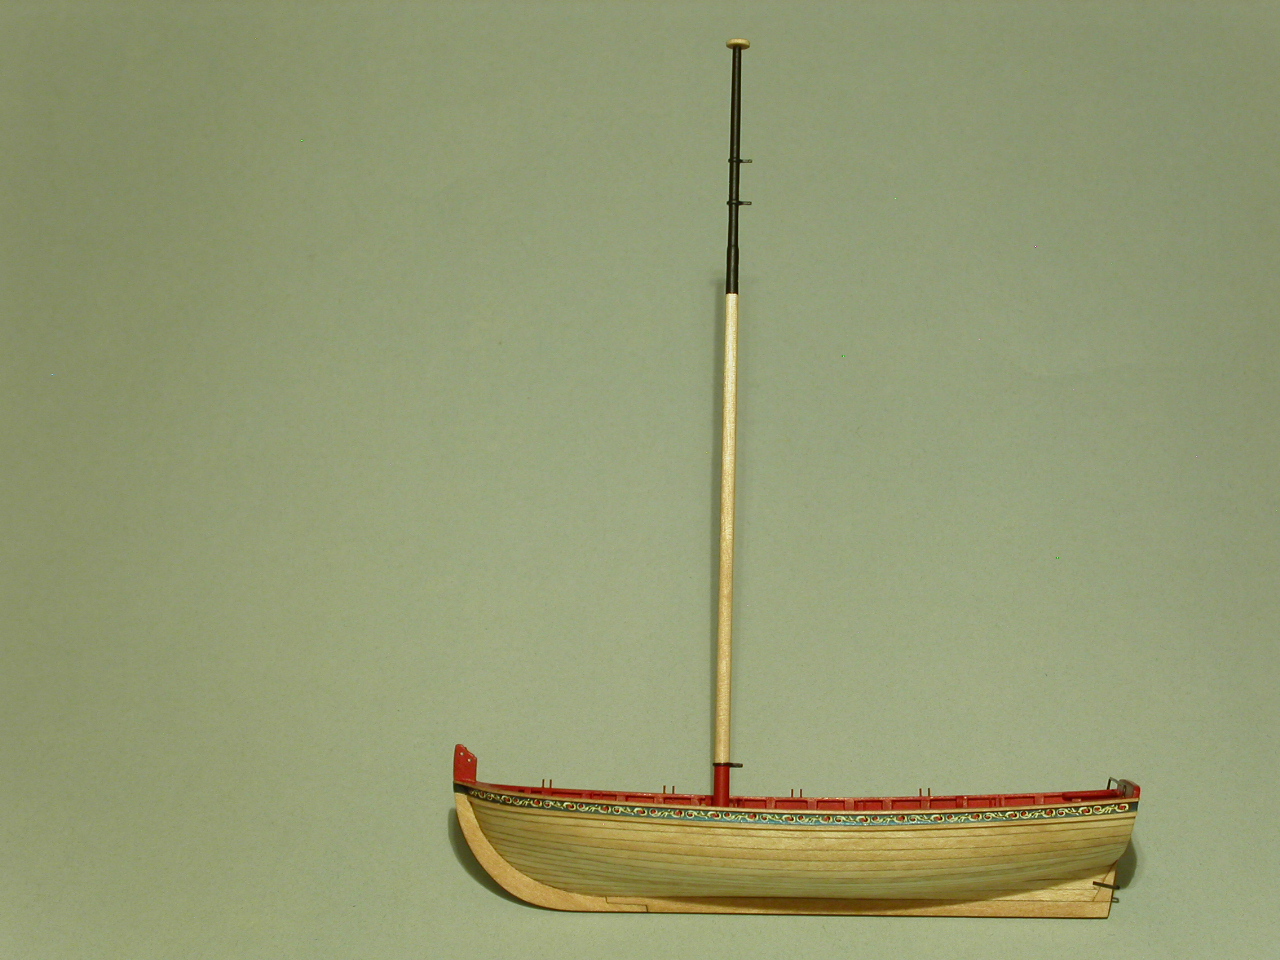
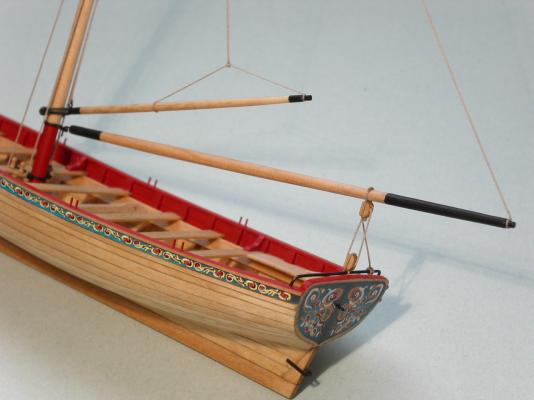
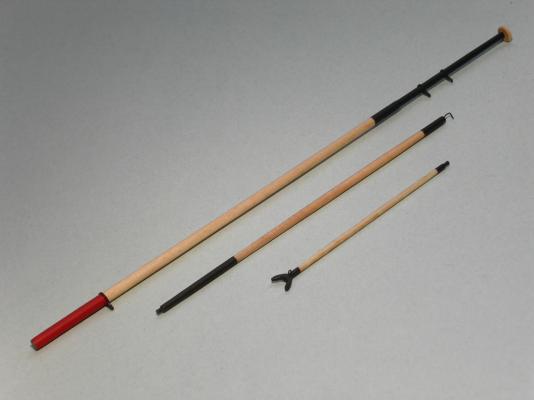
The mast, bowsprit, boom, and gaff are now complete. The couple inches of snow on the ground this morning here in Colorado is a reminder that it will soon be too cold to stain/poly in the garage, so I'm shaping the oars next, since they're the last wood, besides the base, that will get stain/poly. Erik
- 222 replies
-
- 15
-
-
- 18th century longboat
- model shipways
- (and 2 more)
-
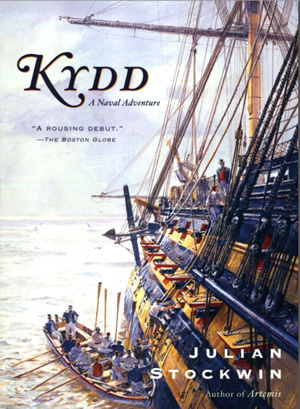
The relatively new Kydd series by Julian Stockwin is good. I'm on the second book now. Rather than the series starting with the main character being a midshipman, this series starts out with the main character being a young landsman. A wig maker. Kydd is grabbed by a press gang and brought to serve on a British man-of-war. Interesting to get the below-the-deck perspective for a change. Erik

-
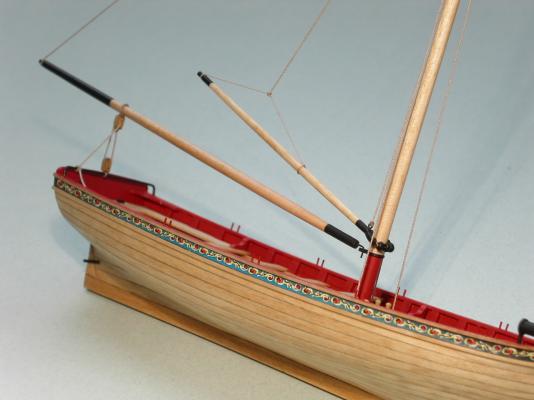
I shaped and attached the bowsprit. A couple of decades experience soldering in my model railroad hobby have made that element of the build easy. Also, I'm getting the hang of my poor man's lathe using a drill, so I'll shape the boom and gaff now. Erik


- 222 replies
-
- 17
-
-
- 18th century longboat
- model shipways
- (and 2 more)
-
Mike, Your mast looks great. You and I are pretty much at the same point in our builds. Unlike you though, I'm procrastinating the rigging (because I don't know what the hell I'm doing ), so am working on the bowsprit. Mike (Stuntflyer) had started a thread on some of his rigging issues when he built his longboat: http://modelshipworld.com/index.php/topic/7277-stropping-and-seizing/?p=214577 Click on the links in the thread. They've helped me to understand what to do . . . now I just need to screw up the courage to start! Erik
- 100 replies
-
- 3
-
-
- model shipways
- 18th century longboat
- (and 1 more)
-
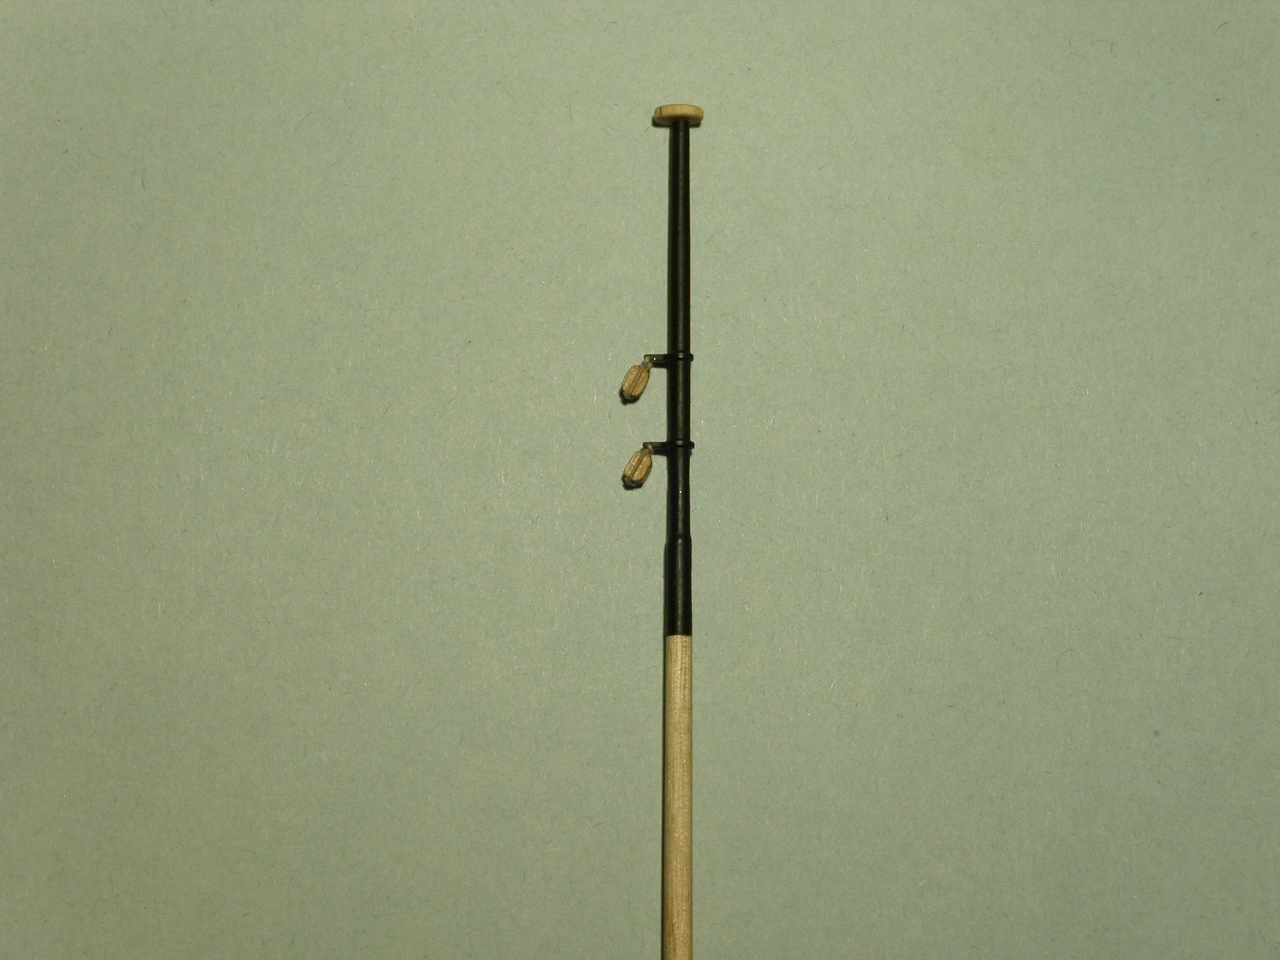
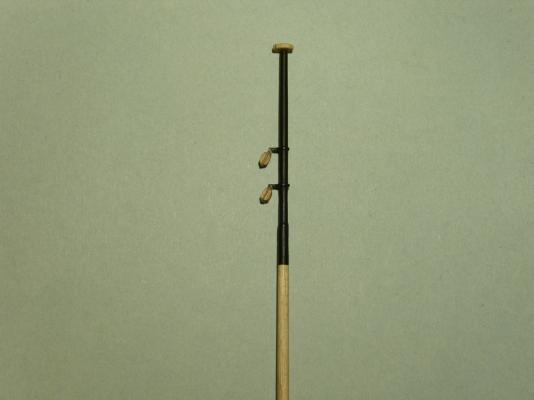
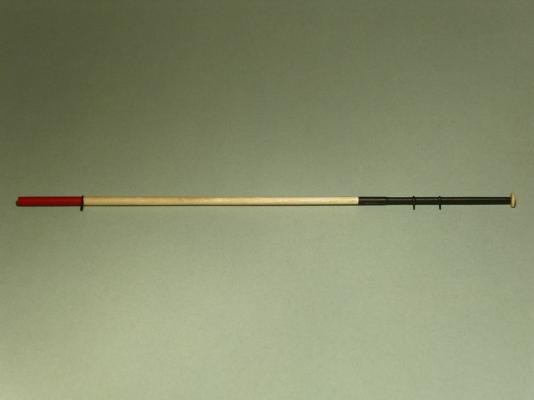
The mast is complete. I haven't permanently attached it to the boat yet. I'll do that after I get the bowsprit completed and attached. Erik

- 222 replies
-
- 15
-
-
- 18th century longboat
- model shipways
- (and 2 more)
-
Mike, If you're looking for high quality strong small diameter wire, I recommend Phosphor Bronze wire rather than brass wire. It's as easy to form/bend as brass, but is more durable, so if inadvertently bumped, it'll still keep it's shape. This is where I get my supply: https://www.tichytraingroup.com/Shop.aspx?SearchValue=wire Erik
- 452 replies
-
- 5
-
-
- cheerful
- Syren Ship Model Company
- (and 1 more)
-
Jonny, We're all looking forward to seeing photos of your build. In the meantime, MSW is awarding you the prestigious Made-it-to-the-Second-Page-of-His-Build-Log-Without-Posting-Any-Photos award! Haha! Kidding, of course. :P Erik
-
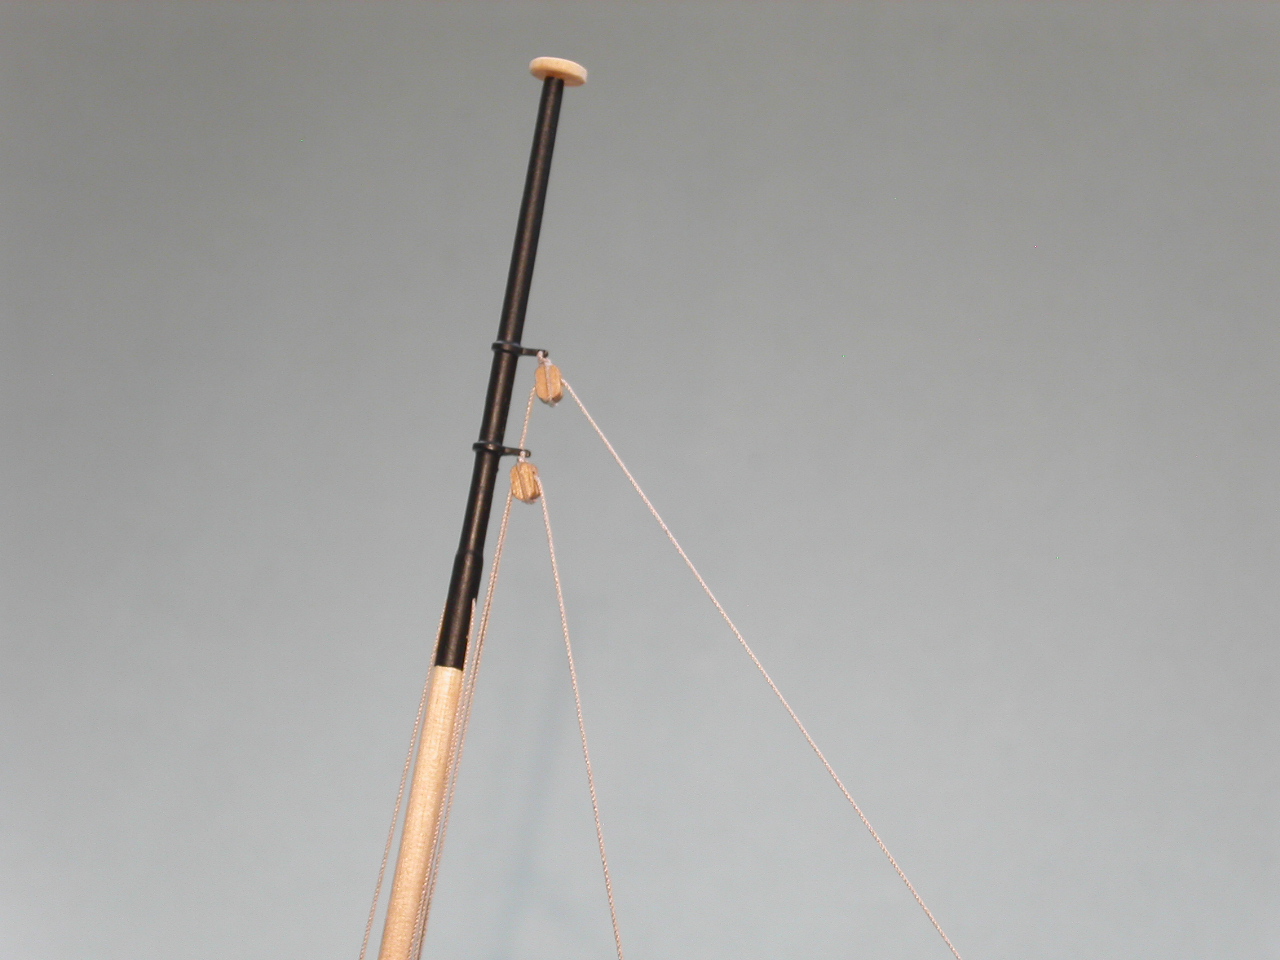
Mike, I figured the 2 upper sheaves in the thinnest part of the mast would be the weak spot. Since the line running through them will be .012", I figure I'll drill the holes at around .015" in diameter. Trying to minimize compromising the strength of that part of the mast. Erik
- 222 replies
-
- 4
-
-
- 18th century longboat
- model shipways
- (and 2 more)