HOLIDAY DONATION DRIVE - SUPPORT MSW - DO YOUR PART TO KEEP THIS GREAT FORUM GOING! (Only 13 donations so far - C'mon guys!)
×


Erik W
-
Posts
470 -
Joined
-
Last visited
Content Type
Profiles
Forums
Gallery
Events
Everything posted by Erik W
-
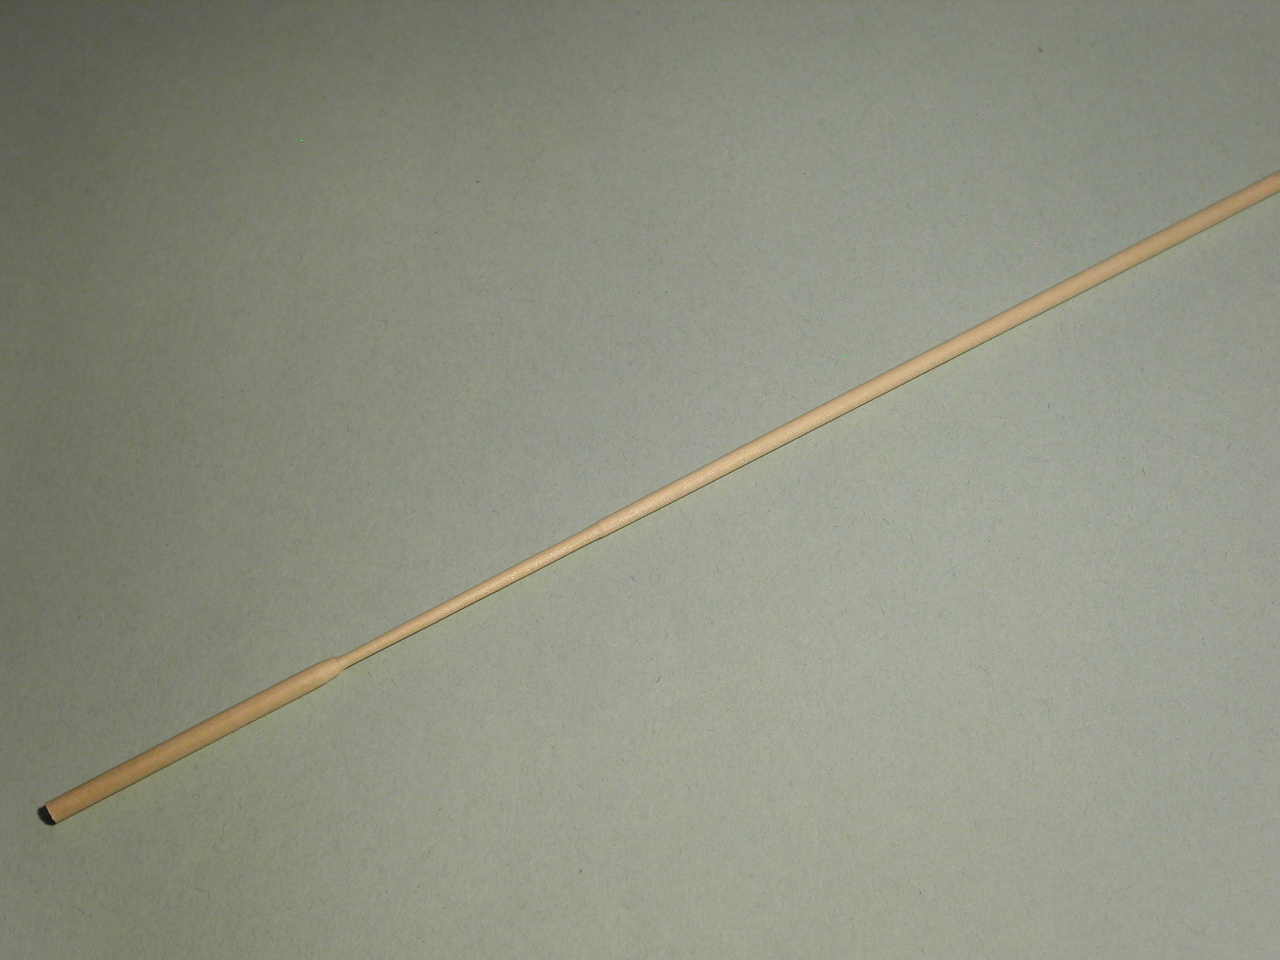
 A quick shot of the turned mast before I remove the ends. Erik
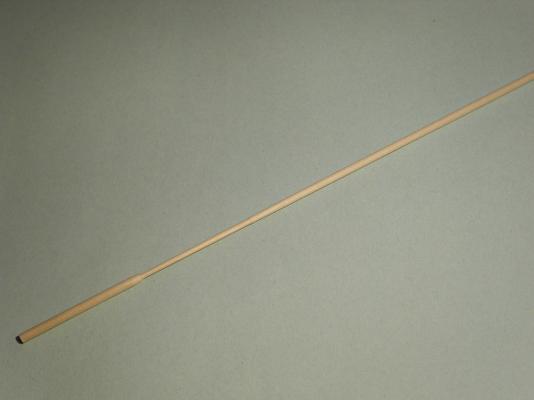
- 222 replies
-
- 4
-

-
- 18th century longboat
- model shipways
- (and 2 more)
-
Per, Tapering the mast using that method worked well (I'll post a photo tomorrow). I was concerned I would wind up taking off too much material by accident, but using medium grit sandpaper gave me the control I needed. I think the total time to get the mast down to the way I wanted it was about 2 hours. Take your time . . . measure frequently. Erik
- 222 replies
-
- 4
-
-
- 18th century longboat
- model shipways
- (and 2 more)
-
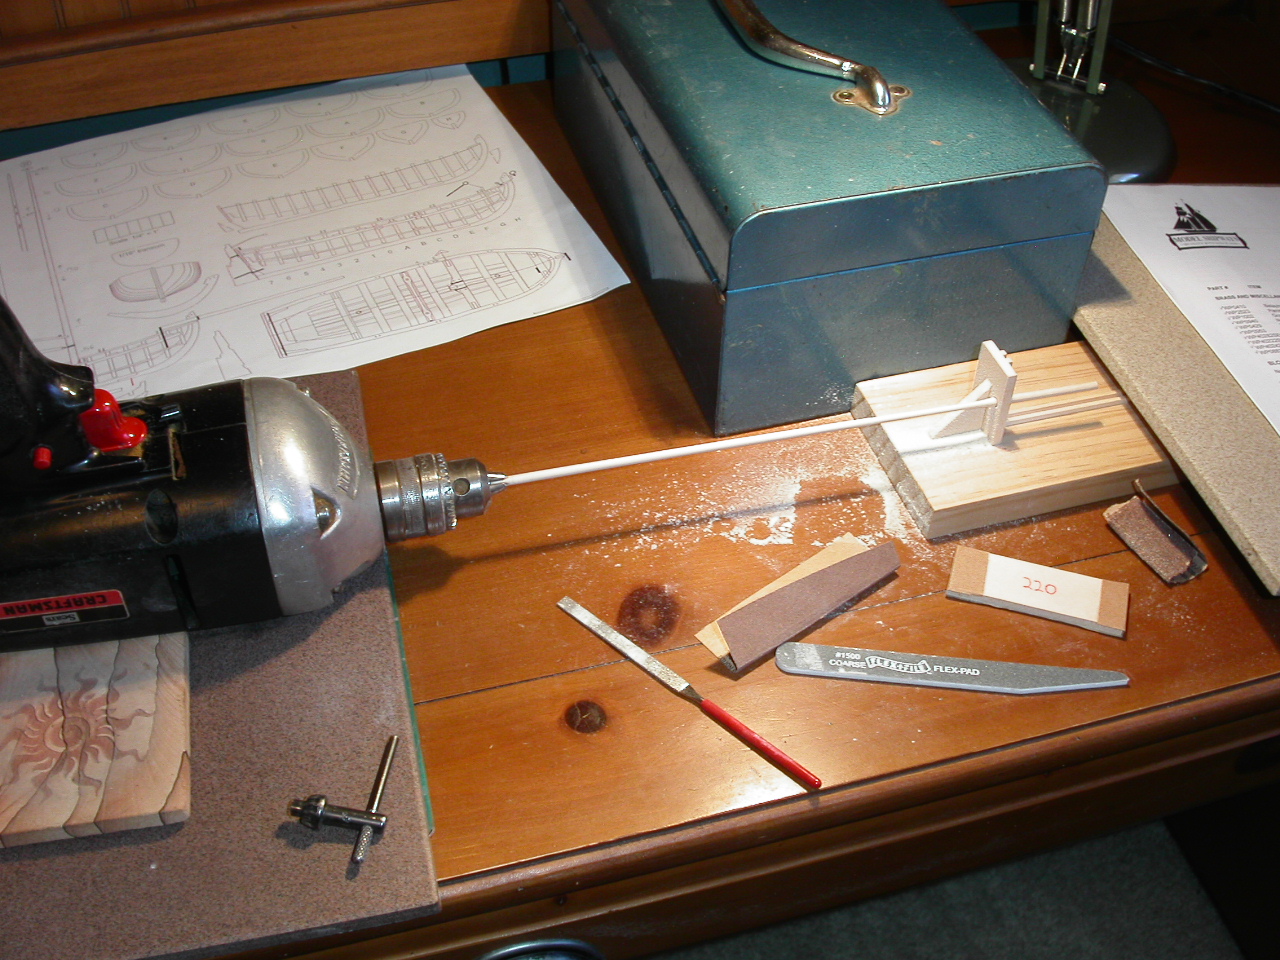
This is pretty funny. As they say . . . necessity is the mother of invention. Because I don't have any power tools, other than the basic tools most home owners have, I am forced to improvise. I'm tapering the dowel used for the mast. Pictured here you see my hand-me-down 30 year old drill holding one end of the dowel, while the other end is held by a hole drilled into my build-board. I left extra dowel length on both sides of the mast. I used my digital calipers to measure, and then mark, the diameter of the mast every few inches on the plans. I measure regularly as I removing material from the dowel at the places on the mast that correspond with the plans. I'm feeling kind of proud of my jury rig. It's sort of a poor man's lathe. Erik

- 222 replies
-
- 12
-
-
- 18th century longboat
- model shipways
- (and 2 more)
-
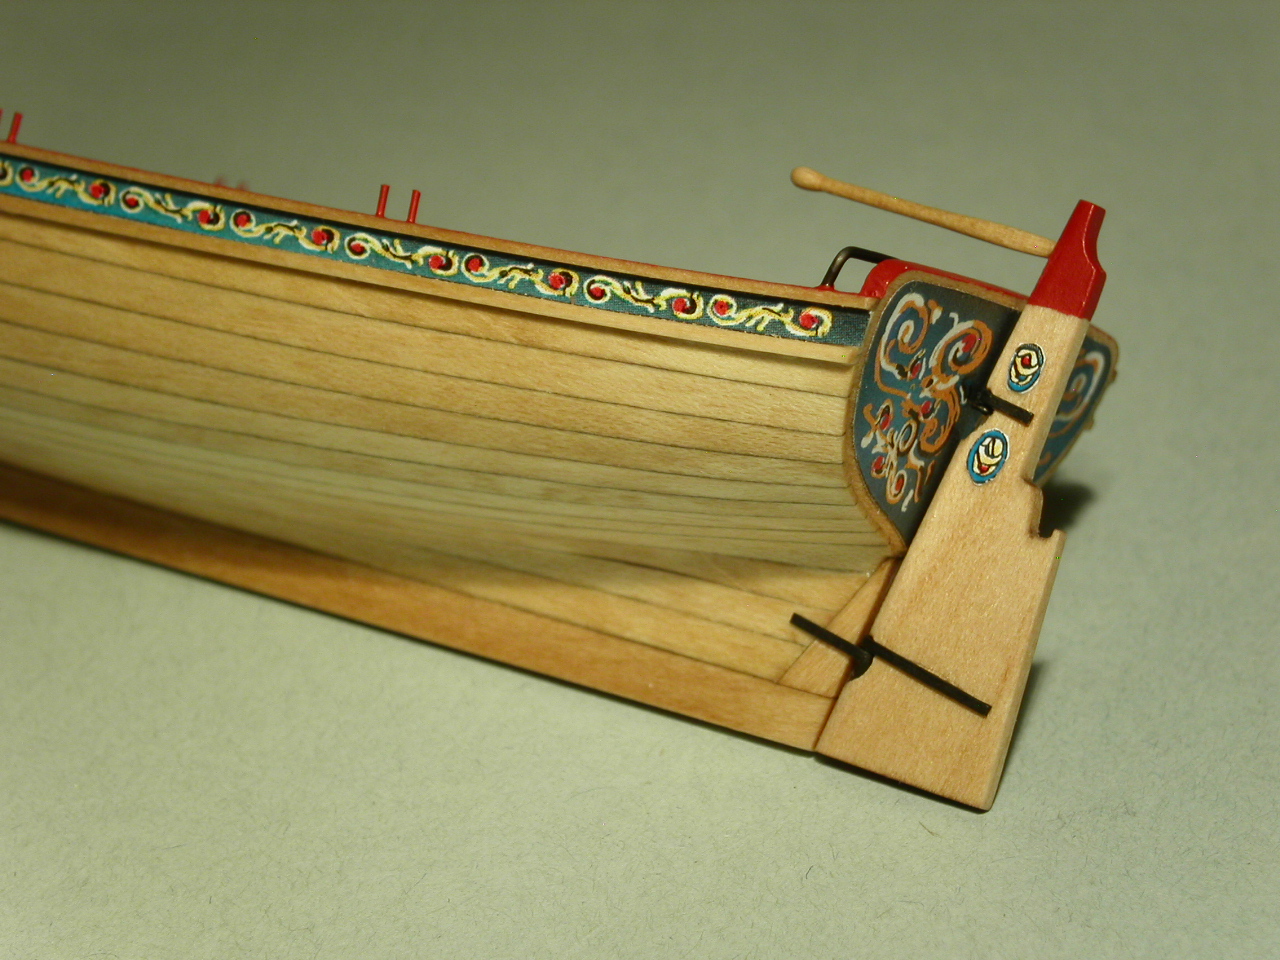
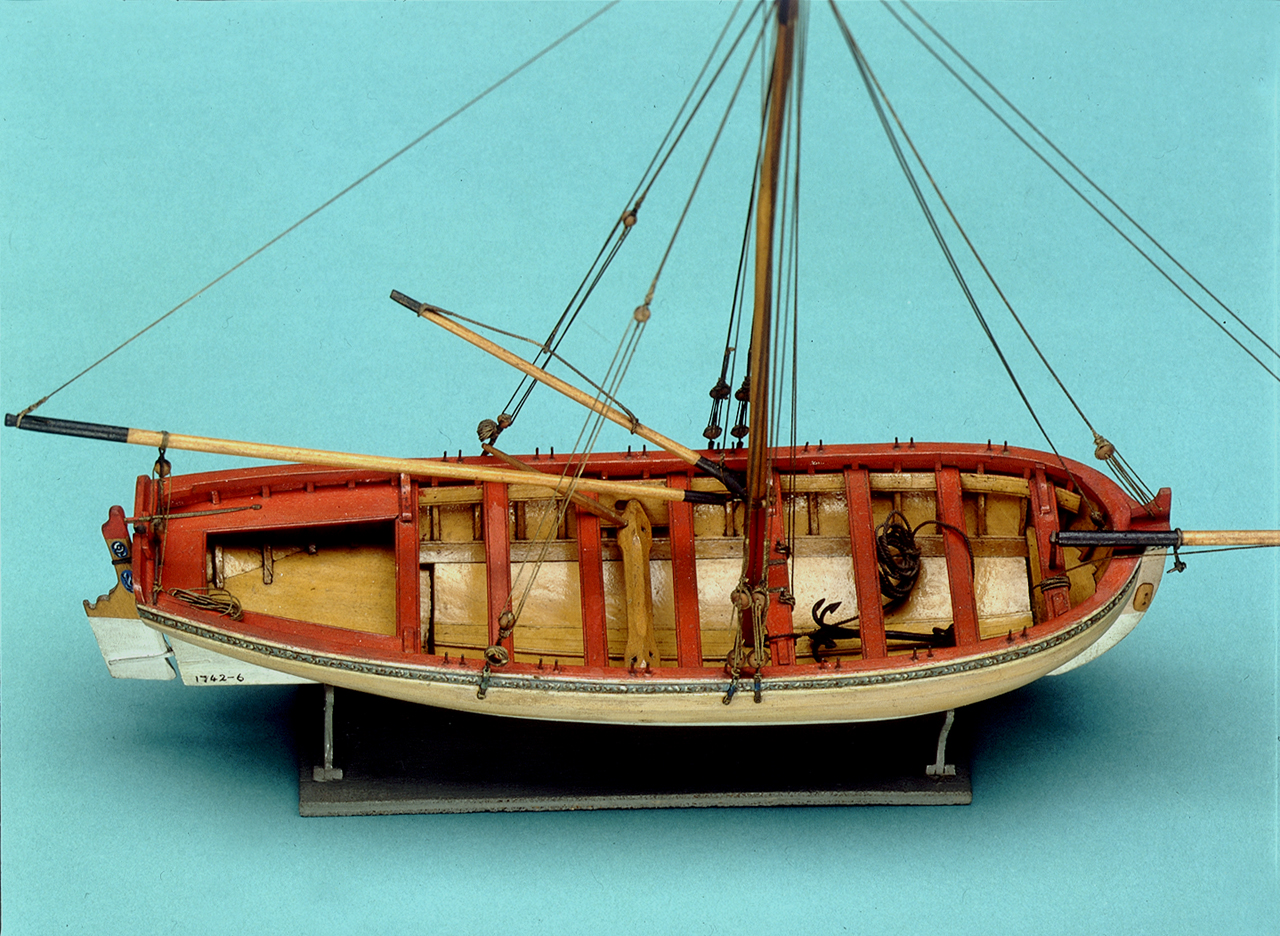
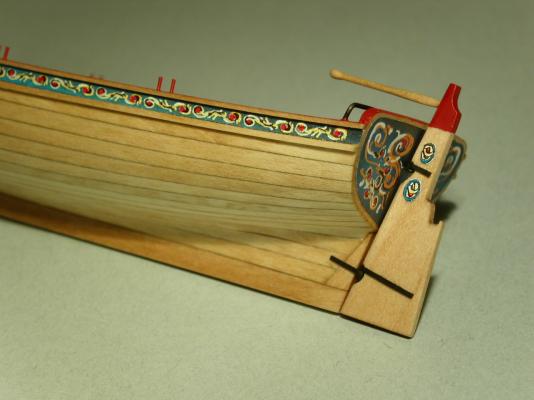
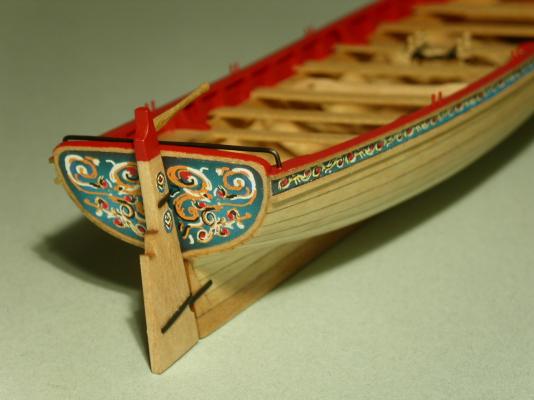
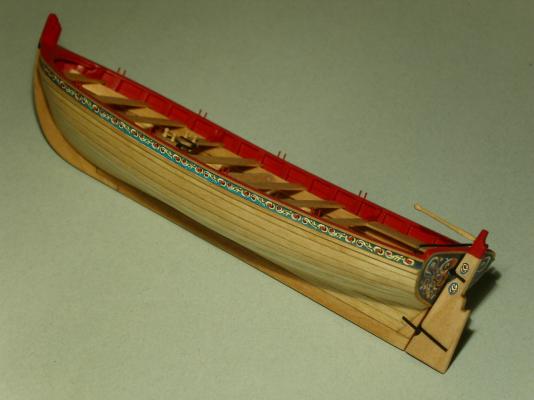
Got the rudder done. It's sitting a little weird in the photos. Once the masting and rigging are finished and I permanently attach it, it'll snug up to the hull better at the top. Erik
- 222 replies
-
- 18
-
-
- 18th century longboat
- model shipways
- (and 2 more)
-
Mike, The counter looks great. Air brushing is a good idea. The coat of paint is thin enough, you can still see the shape of the individual planks. Erik
- 452 replies
-
- 3
-
-
- cheerful
- Syren Ship Model Company
- (and 1 more)
-
Joss, The belaying pin part number is: WP0410 I look forward to seeing more progress on your longboat! Erik
- 33 replies
-
- 3
-
-
- model shipways
- 18th century longboat
- (and 1 more)
-
Per, It looks like others have answered your question. For reference though, here are a couple photos from the National Maritime Museum in Greenwich, England's website that show the detail of the windlass in longboats. Erik
-
David, I've looked at that New Bedford Whaleboat. It looks pretty cool, but I'm not really interested in doing another boat at his point. Also, there are enough low quality materials (basswood, etc.) in this longboat kit, that I don't think I'd build another ship from a kit. Mike, I haven't seriously thought about doing a fully framed model. I like my framing covered , so a POB build would be ideal. If I did built the Echo cross-section I'd leave half the model without planking though. What appeals to me about the both Cheerful and the Echo cross section are that they are basically scratch-builders-light builds, with plans, instructions, and wood available. They're a good intro into full scratch building. Erik
- 222 replies
-
- 8
-
-
- 18th century longboat
- model shipways
- (and 2 more)
-
I've been sharing my photos of the build with my dad. His reaction to the last set was that he couldn't see the detail of the windlass. Point taken. So here's a shot with the lighting at a low enough angle to show the shaped windlass to good effect. It's a bit dark, but you get the point. The holes for the handles are not centered because each side is offset, as seen in the photos of the longboat model at the NMM. The ends are also rounded, rather than 8 sided. David, I'm seriously considering Chuck's Cheerful as a second build, also the Echo cross section looks like a fun project. Though different, both look like they'd be the same commitment level as far as build time. My ultimate goal (3rd build?) is I'd like to build a fully rigged frigate (Chuck's Winchelsea maybe) or a ship-of-the-line (perhaps using Alex M's 64-Gun HMS Anson plans . . . or if Chuck does a 74-gun ship at some point . . . I see the background to this page is the HMS Cumberland. A hint Chuck? ). But I'm getting ahead of myself . . . Erik P.S. - I'm really looking forward to working with boxwood.
- 222 replies
-
- 11
-
-
- 18th century longboat
- model shipways
- (and 2 more)
-
Danny, I was committed to building this kit as-is when I started this project, knowing full well that upgrading the wood would produce better results. So, I also am happy with the results I'm getting with this type of wood. The main tests for me with this kit are the skill development aspects that are specific to ship modeling. Also, I wanted to see how deeply the ship modeling bug has bitten before I spend more money on this hobby That said, I'm happy to say this is a lot of fun and very fulfilling. So, there will be a second build . . . and it will most definitely involve using higher quality woods. Erik
- 222 replies
-
- 9
-
-
- 18th century longboat
- model shipways
- (and 2 more)
-
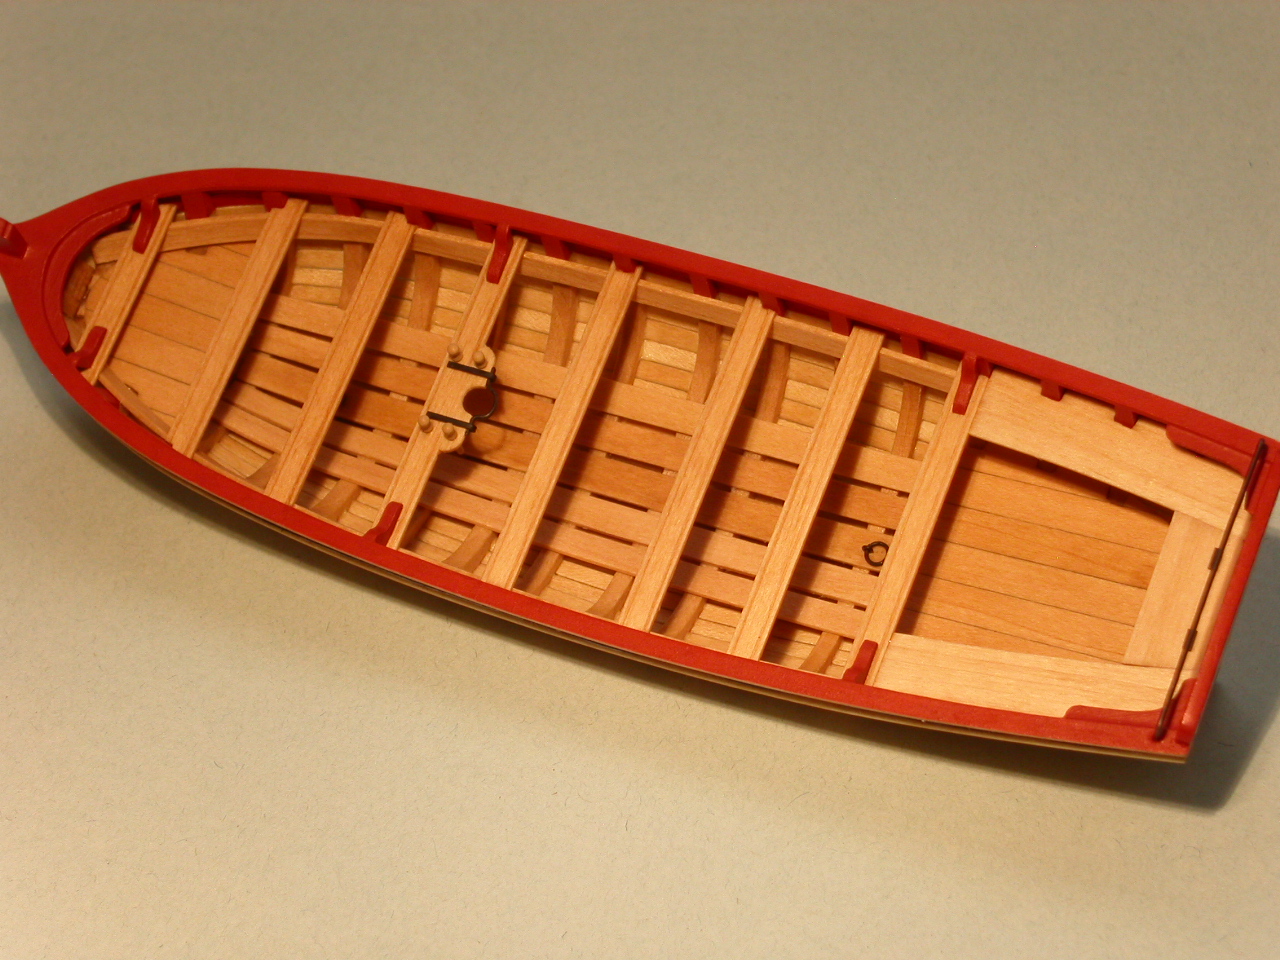
I finished the windlass and handles. I followed the prototype longboat model photos in the Greenwich Maritime Museum for inspiration. The windlass has rounded ends and the holes in the windlass for the handles are offset. Adds a bit of interest to that part of the boat. As I've found on other parts of the boat, the soft, "fluffy" basswood is hard to shape crisp details from . . . Erik

- 222 replies
-
- 13
-
-
- 18th century longboat
- model shipways
- (and 2 more)
-
Good job Mike. It looks great!! You and Chuck are really setting the bar high. Erik
- 452 replies
-
- 2
-
-
- cheerful
- Syren Ship Model Company
- (and 1 more)
-
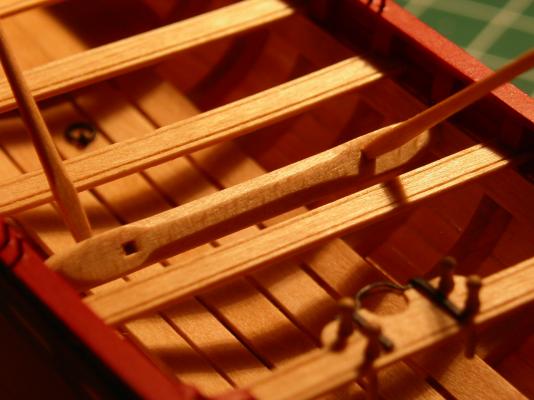
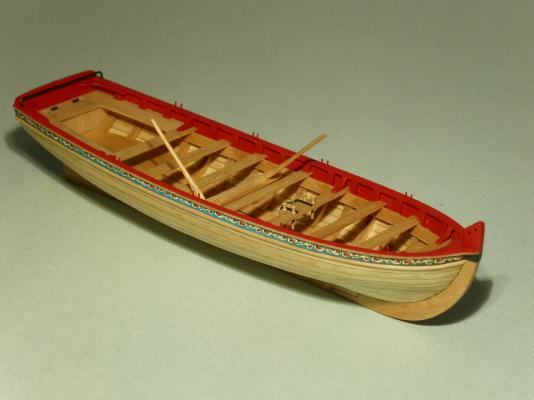
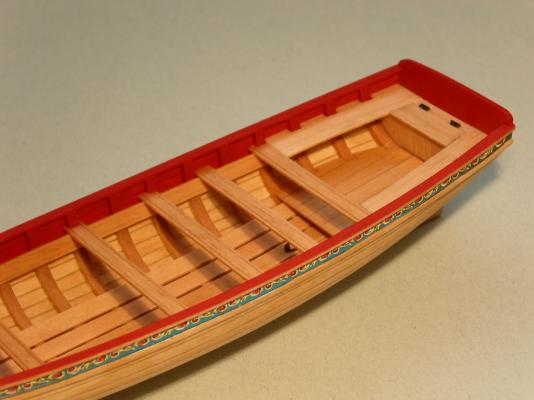
A quick shot of the oarlocks I added. I used .019" brass wire I had instead of the .023" wire included with the kit. Erik
- 222 replies
-
- 13
-
-
- 18th century longboat
- model shipways
- (and 2 more)
-
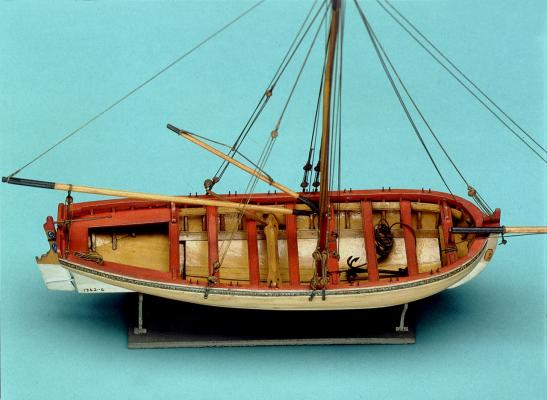
Danny, David, Thanks for the kind words! I think one thing I've learned as I've progressed through this build is to take it sloooowly. The results of slow, planned, methodical building seem to be bearing fruit. I'm looking forward to the masting and rigging aspects of the build. Erik
- 222 replies
-
- 6
-
-
- 18th century longboat
- model shipways
- (and 2 more)
-
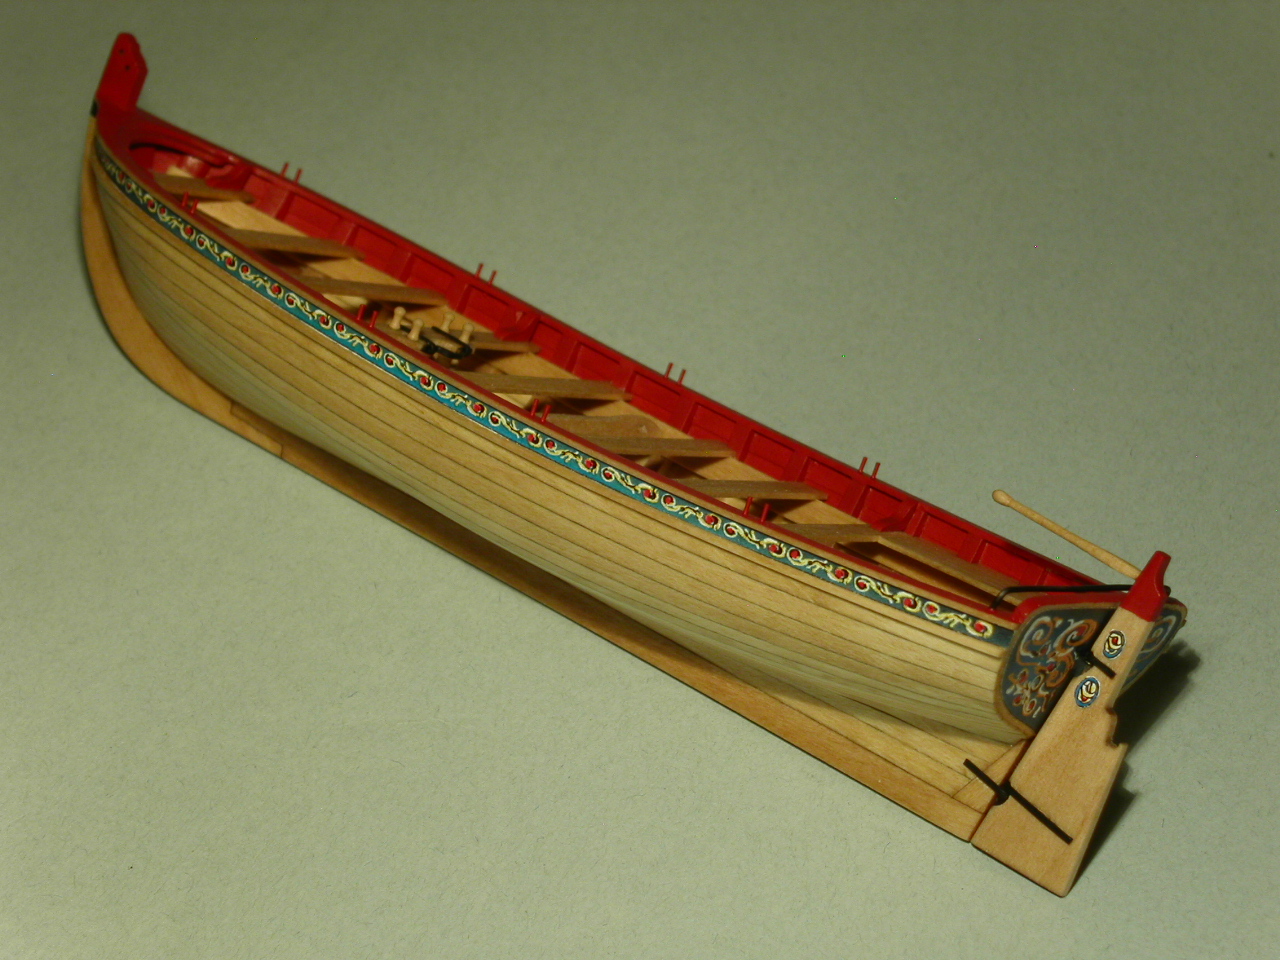
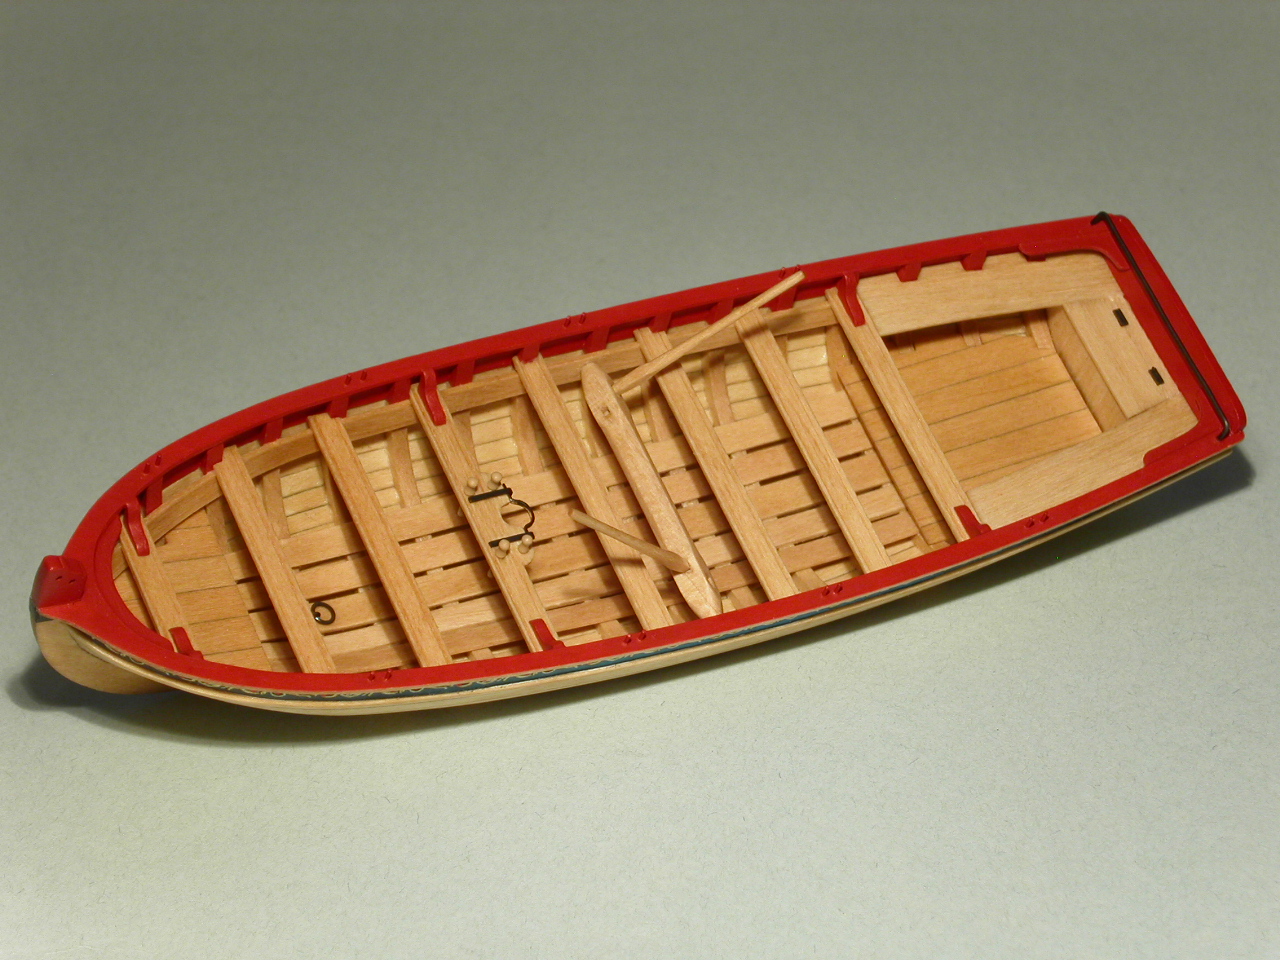
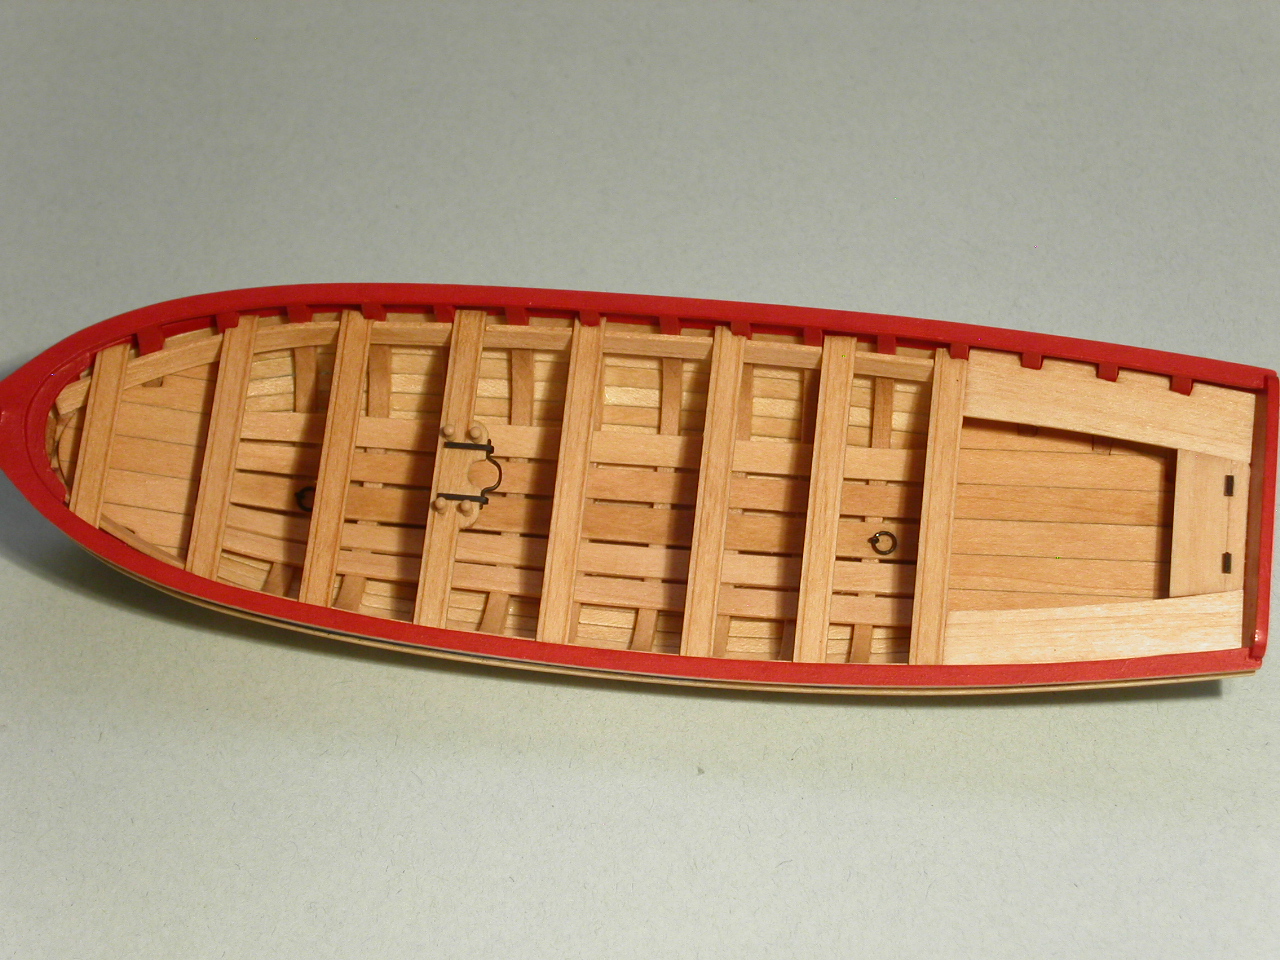
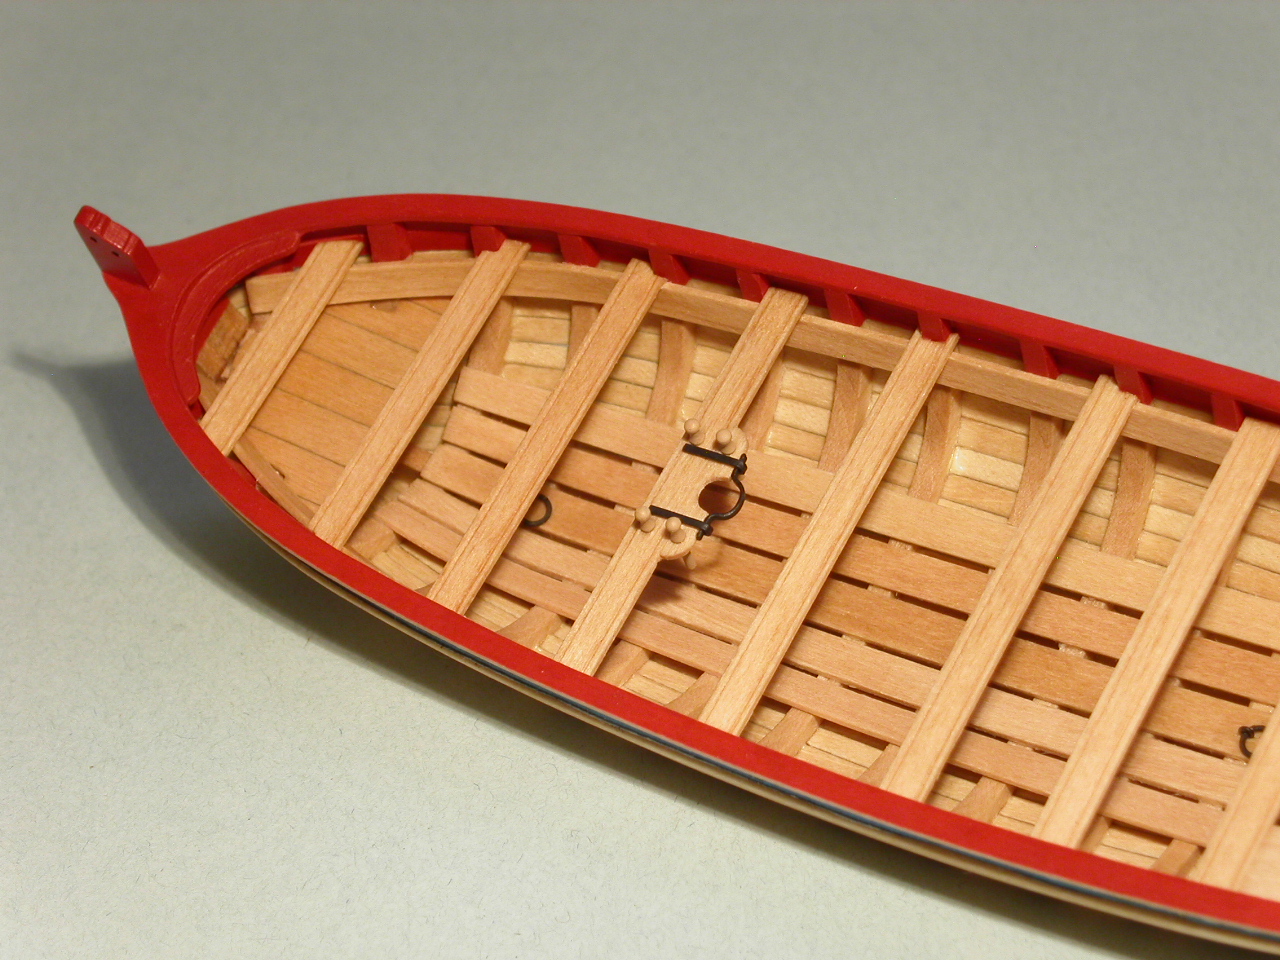
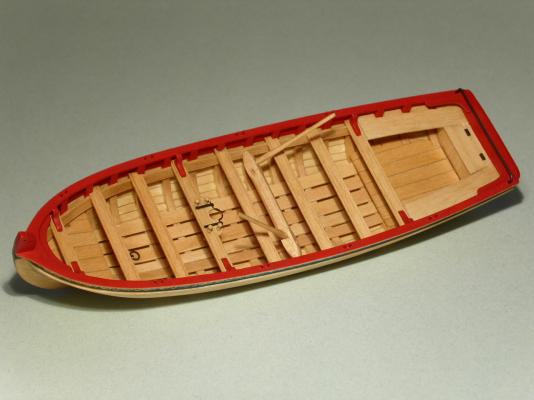
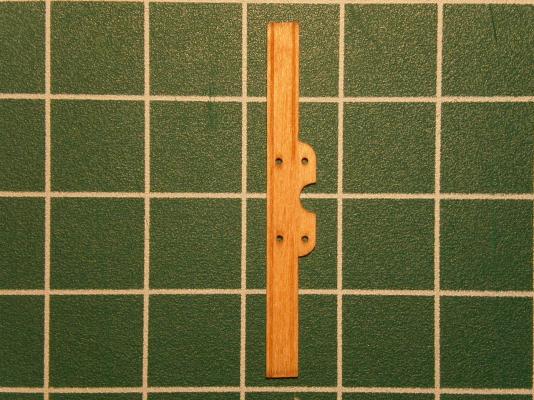
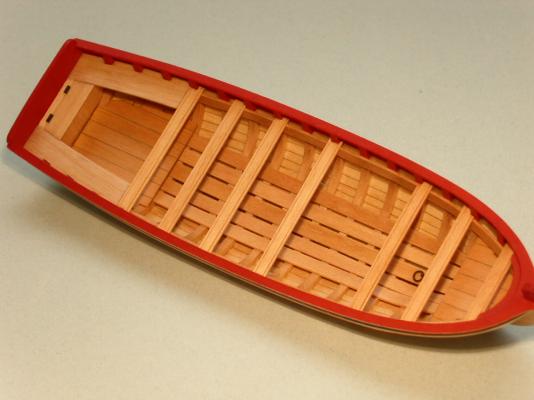
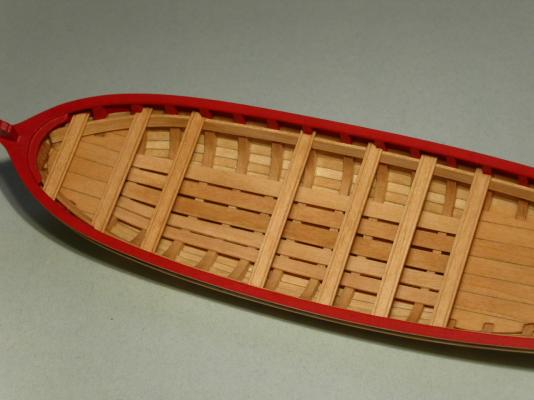
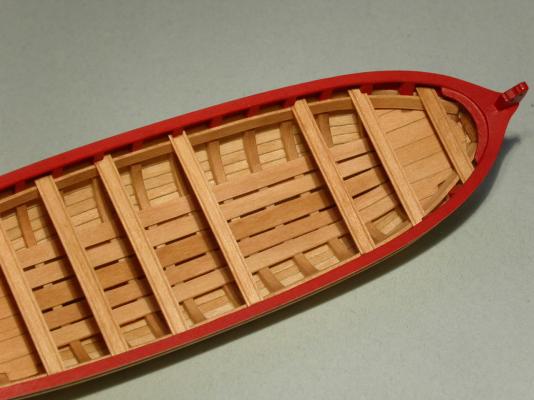
I attached all the knees, as well as the horse in front of the transom. I'll do the oarlocks next. After that . . . there's no more procrastinating doing the windlass. Erik

- 222 replies
-
- 11
-
-
- 18th century longboat
- model shipways
- (and 2 more)
-
Mike, I had lost track of this build for a while . It's looking great! You're making good progress. Erik
- 968 replies
-
- 4
-
-
- hahn
- oliver cromwell
- (and 1 more)
-
Looks awesome! I agree with you, this longboat build is a lot of fun. I find myself wishing I could leave work early to go home and work on it! Erik
- 335 replies
-
- 6
-
-
- 18th century longboat
- Finished
- (and 1 more)
-
Thanks for the kind words! I painted the brass black after I shaped it, but before I glued it on. I touched it up after the parts were attached. I had blackened the lift rings when I added them the other day. The blackening seemed easy to rub off, so I figure with the parts that will be handled more when attaching, I'll use black paint. Erik
- 222 replies
-
- 5
-
-
- 18th century longboat
- model shipways
- (and 2 more)
-
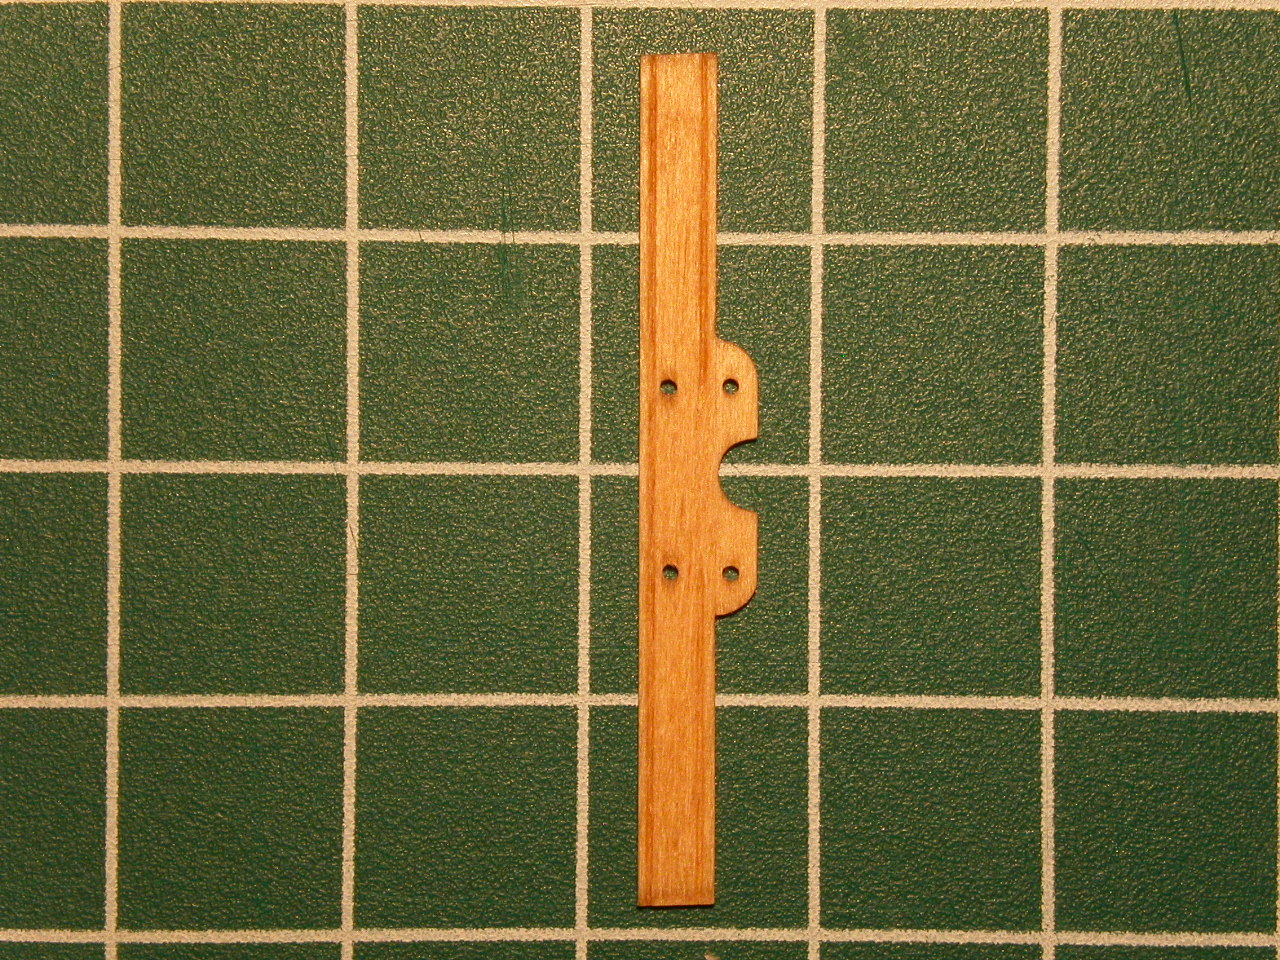
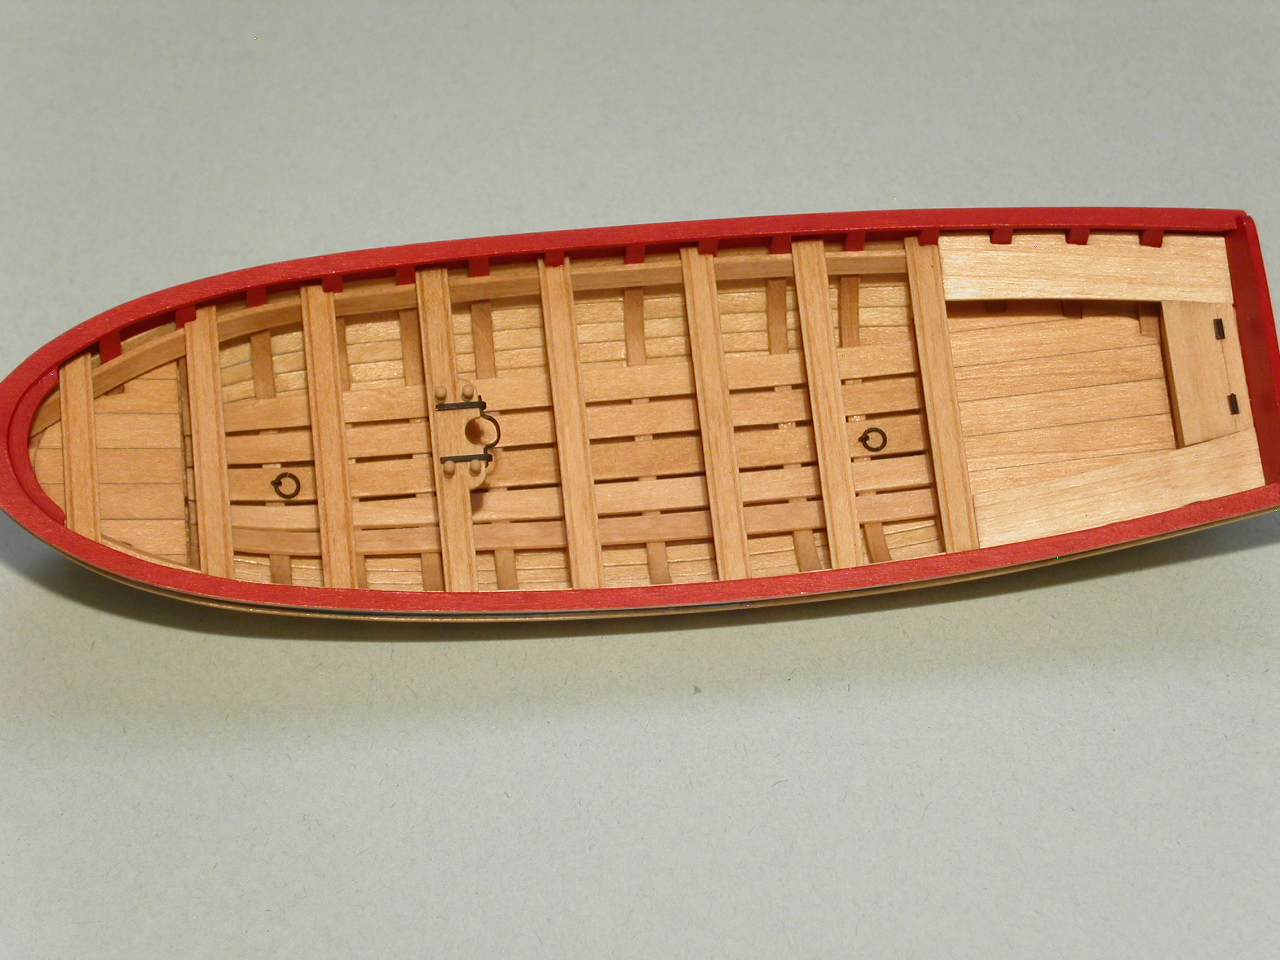
I finished the thwart that the mast will be attached to. The brass work was more difficult than I expected. The material is soft and noodley. At any rate, I think it came out well. I was able to match the paint on the belaying pins to the wood color pretty decently. Erik


- 222 replies
-
- 16
-
-
- 18th century longboat
- model shipways
- (and 2 more)
-
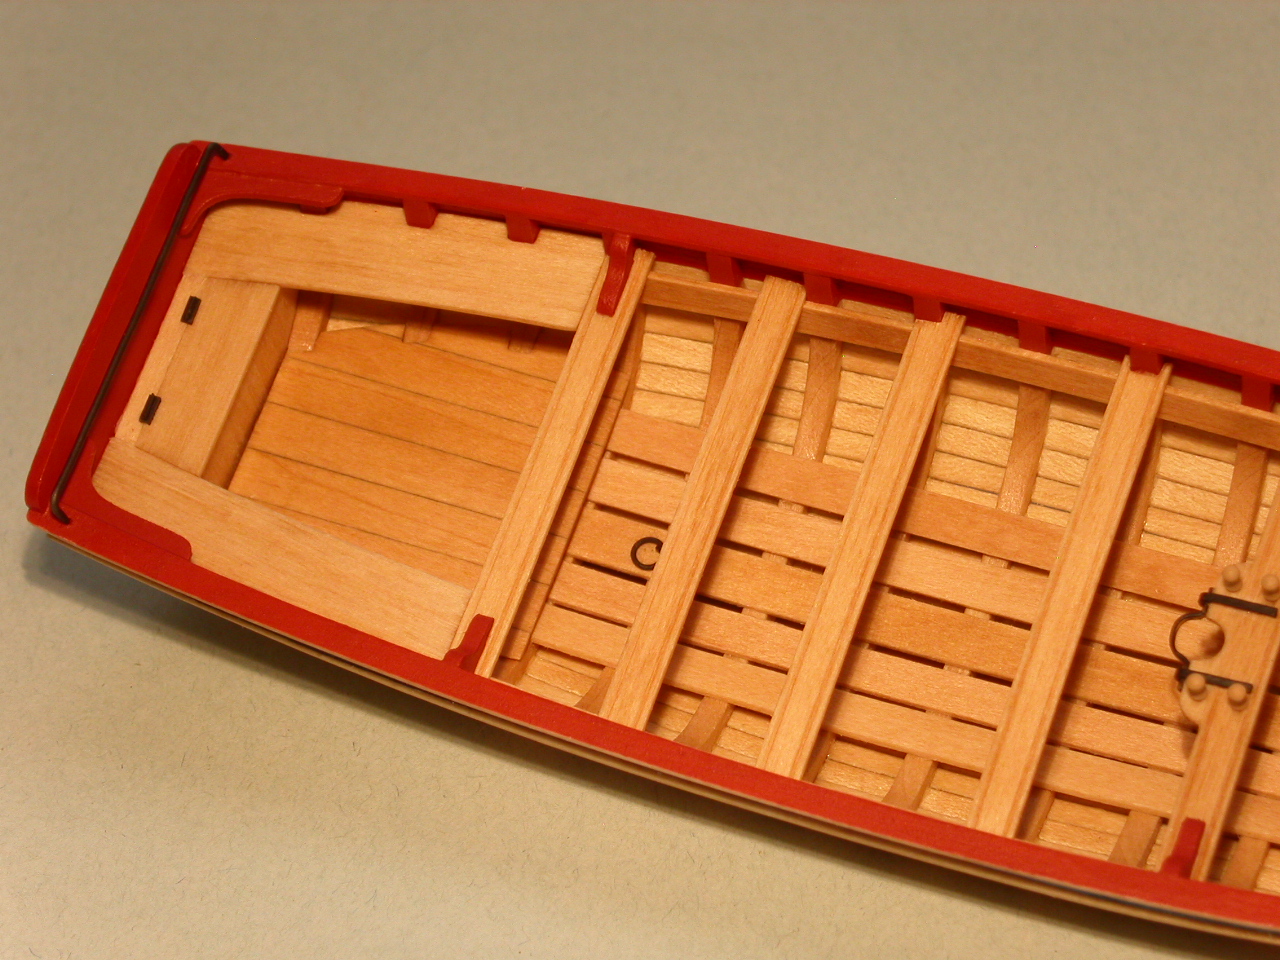
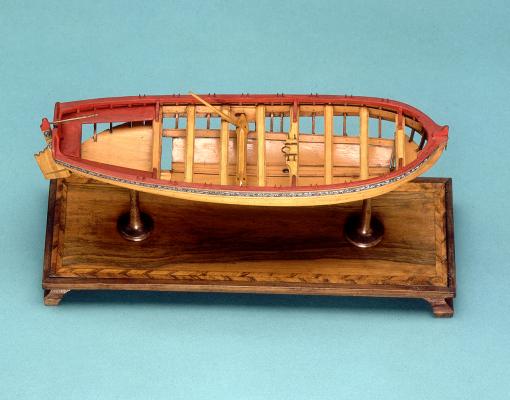
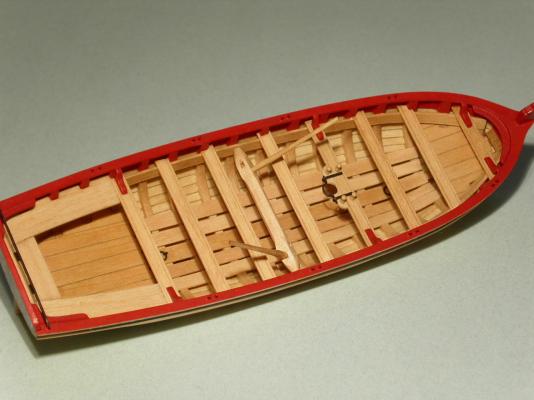
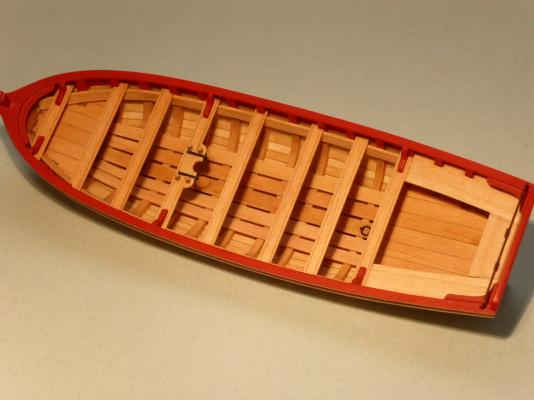
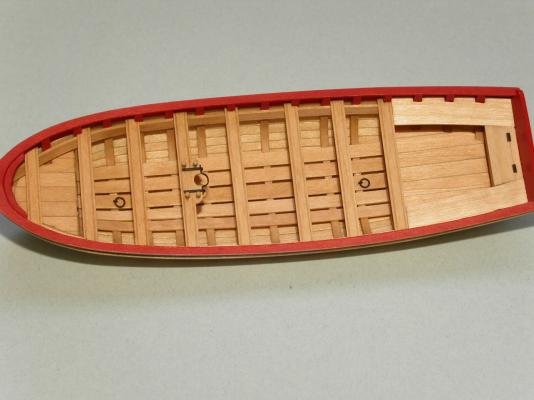
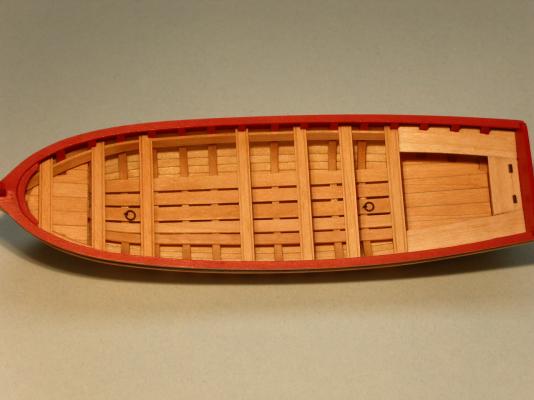
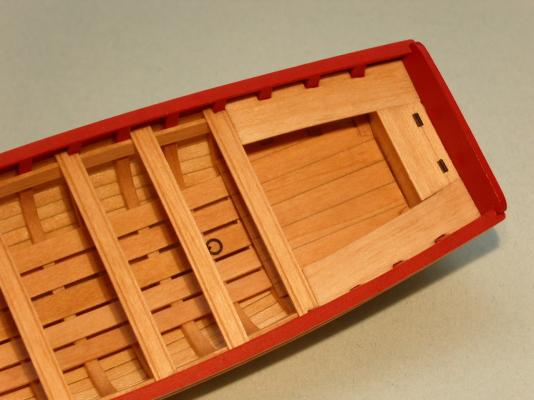
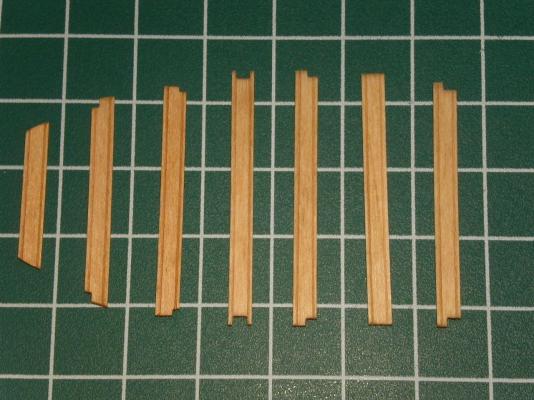
Here's what I've been working on this week. I built the cockpit. Since I was doing metal work, I also added the two lift rings on the center bottom plank. Erik
- 222 replies
-
- 15
-
-
- 18th century longboat
- model shipways
- (and 2 more)
-
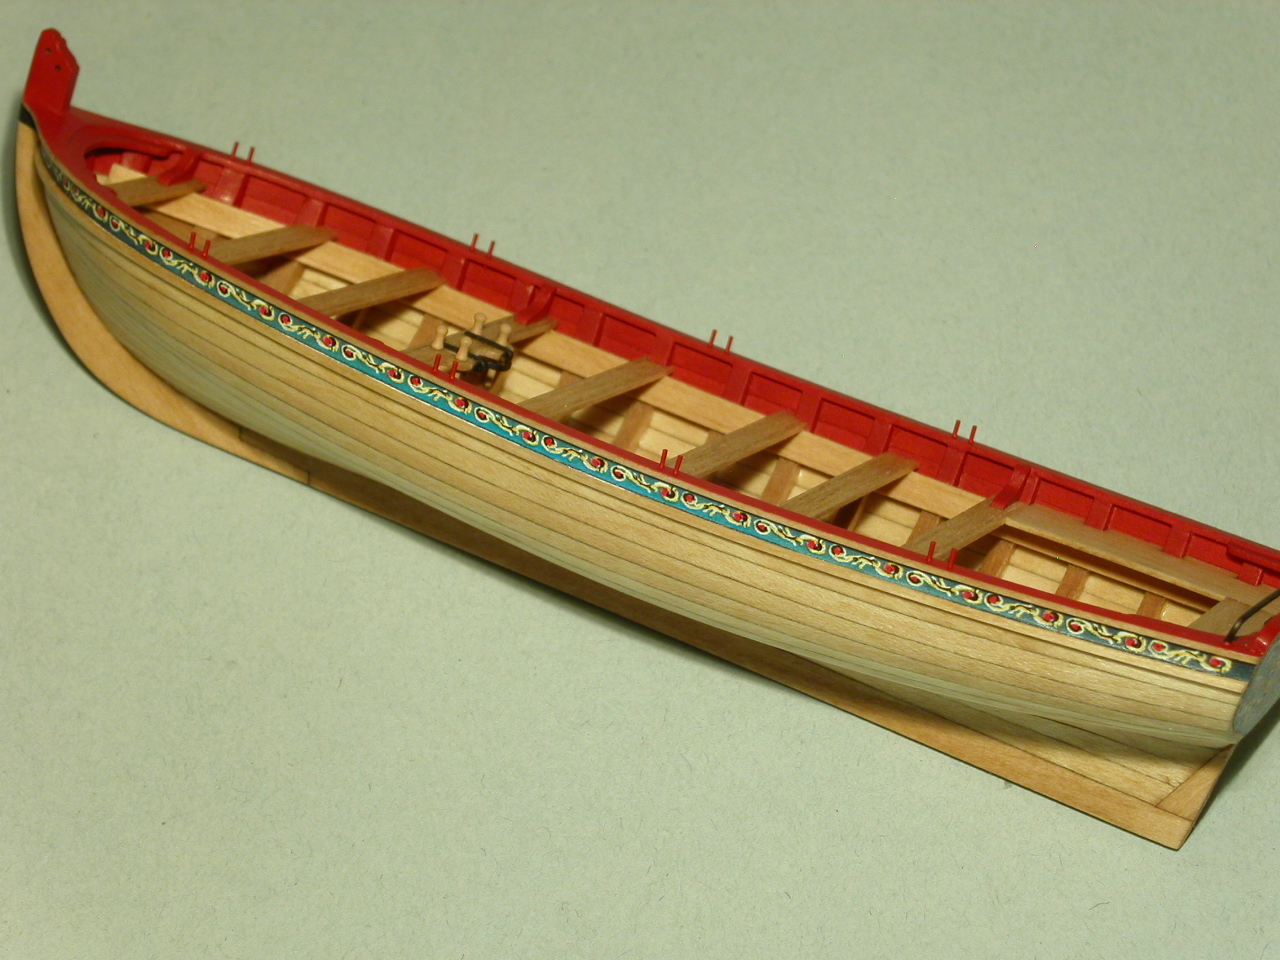
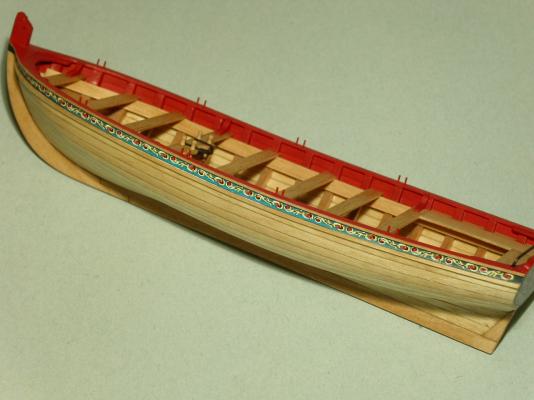
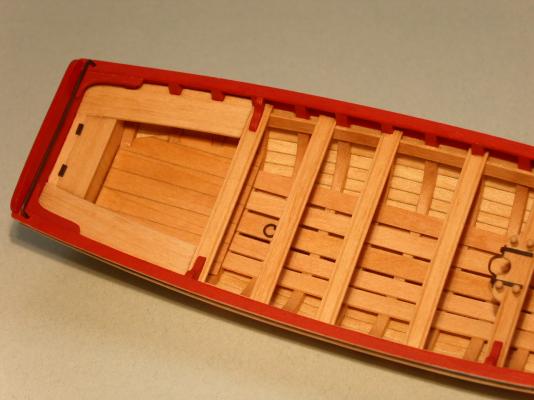
I'm back from my trip to Wales and England, and back working on the longboat. I've added the curved piece attached to the cap rail at the bow, the front part of the locker at the stern, and the thwarts (not including the one the mast will go in). Erik
- 222 replies
-
- 16
-
-
- 18th century longboat
- model shipways
- (and 2 more)
-
Paul, It's good to see another longboat build! The longboat is a fun kit, and it's perfect for developing the skills for larger, future projects. Erik
- 37 replies
-
- 3
-
-
- model shipways
- 18th century longboat
- (and 1 more)
-
Chuck, Just to clarify, were the curved deck planks shaped from wider wood strips, or were they edge bent? Erik
- 1,051 replies
-
- 2
-
-
- cheerful
- Syren Ship Model Company
- (and 1 more)
-
Mike, That looks great! I admire your desire for excellence in your builds. Also, I like that, though a pain in the butt, you don't mind tearing out stuff you've already done, and starting over. That's a good example for others who strive to kick it up a notch with their builds. Erik
- 452 replies
-
- 2
-
-
- cheerful
- Syren Ship Model Company
- (and 1 more)
-
Mike, Looks great. Did you use left over kit supplied wood for the tiller, or something of your own? Erik
- 100 replies
-
- 1
-
-
- model shipways
- 18th century longboat
- (and 1 more)